USER MANUAL V10V2 LA CROSSE TECHNOLOGY
LA CROSSE® TECHNOLOGY
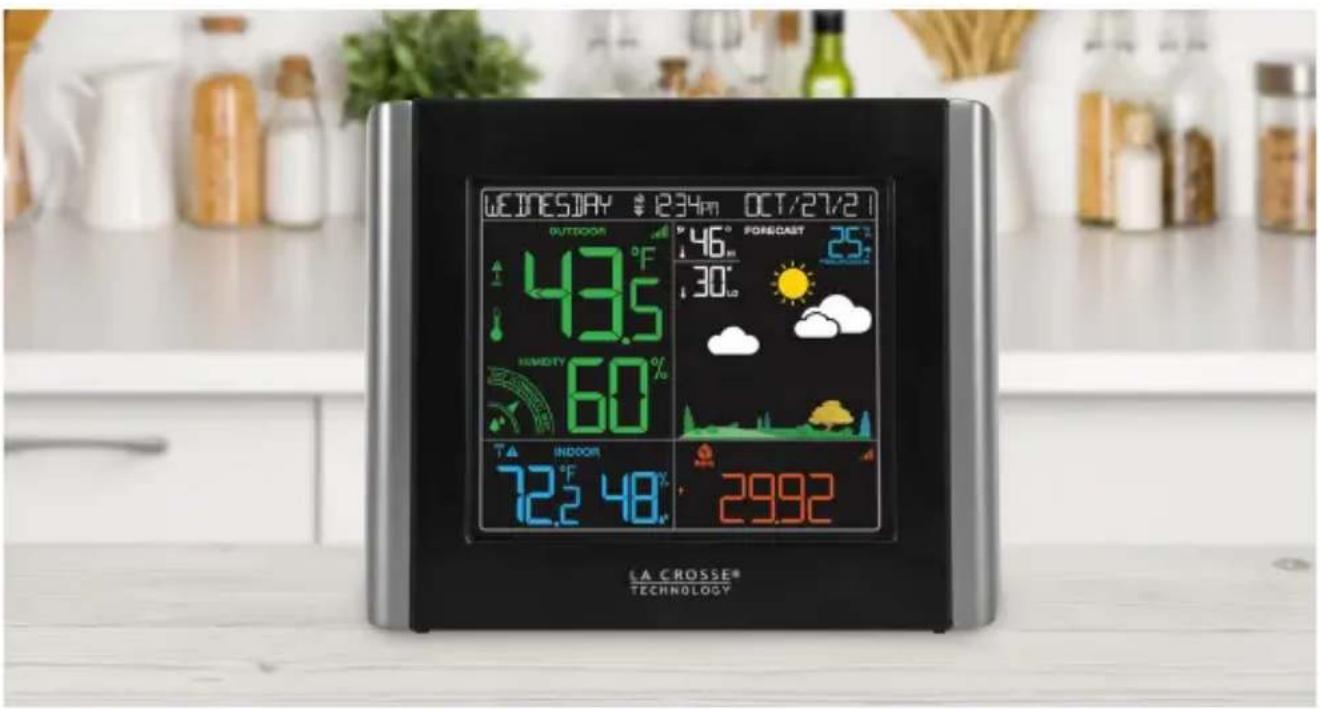
Wi-Fi COLOR FORECAST STATION
SET UP GUIDE
MODEL NUMBER V10v2
Table of Contents
| BASICS LA CROSSE VIEW | | TEMP. AND HUMIDITY |
| Initial Setup | 02 | Connecting to the App | 03 | Viewing Your TH Data | 09-11 |
| Station Settings | 06 | Connecting Your Station | 04 | Viewing TH Records | 11 |
| Buttons | 07 | Adding Your Sensor to the App | 05 | Outdoor Comfort Meter | 11 |
| LCD Display Brightness | 08 | Temp. & Humidity Alerts | 12 |
| Auto Dim Settings | 08 | Manually Add Sensor to the App | 06 | | |
| Viewing Time/Calendar | 09-10 | | |
| FORECAST PRESSURE | | SENSORS |
| Viewing Your Forecast Data | 13 | Relative Pressure | 16 | Placement & Mounting 16 |
| Seasonal Trees | 13 | | | Add-On Sensors 17 |
| Standalone Forecast Icons | 14 | | | Adding Extra Sensors 17 |
| Enhanced Forecast Data | 14 | | | |
| Daily/Hourly Forecast | 15 | | | |
| APPENDIX | APPENDIX | SUPPORT |
| Specifications | 18 | FCC Statement | 20 | We're Here to Help | 21 |
| Cautions/Statements | 18-21 | Canada Statement | 20 | Factory Reset | 21 |
| Warranty | 19 | | | Stay in Touch | 21 |
| Recycling & Disposal | 19 | | | | |
BASICS
Initial Setup
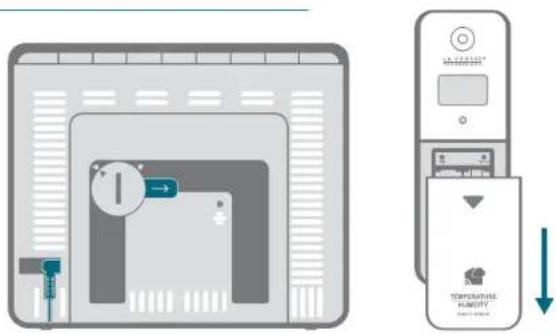
Weather Station (V10v2) Thermo-Hygro Sensor (LTV-TH2i)
Power Up
Weather Station
Insert the 5V Power Adapter into an outlet, and then plug it into the Power Jack on the back of the station. Next, remove the Insulation Tab from the Station's Battery Compartment.
Thermo-Hygro Sensor
Install 2 fresh "AA" batteries according to polarity and replace battery cover. The blue LED light will flash when transmitting.
LA CROSSE VIEW
Connecting to the App

La Crosse View®
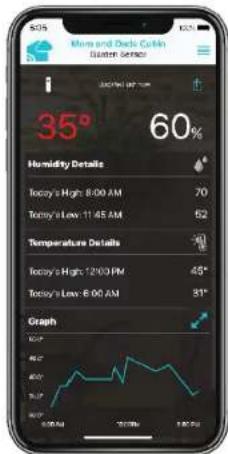
Stay connected to your home anytime, anywhere with the La Crosse View app.
Monitor your home environment and set custom alerts to notify you when conditions change.
Connecting your station is optional and the display will function as a standalone unit without the Wi-Fi connection. However, we recommend connecting during the initial setup, as it will save you time and allows access to some advanced features right away.
Download the La Crosse View App
Visit the App Store or Google Play Store to download the free La Crosse View app onto your mobile device.
Launch the App
Open the La Crosse View app. Follow the on-screen setup instructions to create an account, add new devices, and connect your station to your Wi-Fi network.
Connecting Your Station to the App
Now that you've created your La Crosse View account, it's time to add your station into your account and connect your station to your home router using the La Crosse View app.
NOTE: For the steps listed on the next page, you'll need your Wi-Fi network name (SSID) and password. Make sure your mobile device is connected to the same Wi-Fi network.

LA CROSSE VIEW
Adding & Connecting Your Station to Wi-Fi
- The La Crosse View app is required to connect the station to your Wi-Fi network. Download, install, and log into your La Crosse View account first.
Follow the initial app instructions or manually add the display into your account. 2.
New User Initial Setup: When first setting up your station, the app will lead you through a series of instructions to help get your station added into your account and connected to your home Wi-Fi network.
Manually Add & Connect Display: After the initial walk through, stations can be added and connected via the Devices tab in the app's main menu. Simply tap the Add Device or + button at the bottom of the Devices page in the app.
- Next, the app will prompt you to use your phone to scan the device ID barcode located on the back of the station. Please note, adding a device to your account and connecting it to Wi-Fi are two different steps. You can complete either step separately after if you have any trouble.
- When connected, the station will beep, and time and forecast information should populate on the display. The indicator will become solid.
Checking Your Station's Wi-Fi Status
Press the SET button on the top of the station to view your Wi-Fi Status.
ALL OK · 1234pm CONNECTED
ALL OK CONNECTED: Your station is connected to your Wi-Fi and its date should be available on the station and in the app.
SEE APP TO CONNECT
SEE APP TO CONNECT: Check the app for notifications.
NO WEATHER SERVICE
NO WEATHER SERVICE: Your Internet weather and time services are not connecting. These should resolve on their own, please be patient.
LOST WIFI
LOST WIFI: Check your router and network connections
Having Trouble Connecting to Wi-Fi?
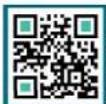
The app should guide you through the best method for your Wi-Fi network and router. However, if you have trouble connecting, please go to bitly.v10v2_wifi or scan the QR code. This will explain additional connectivity options, including connecting by WPS or contacting our technical support team for further assistance.

LA CROSSE VIEW
Adding Your Sensors to the App
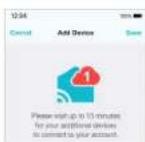
Upon getting the station connected to your Wi-Fi network, the app will explain how your connected sensor should be brought in. Within the next 15 minutes, you should receive an Add Device notification in your app. This is indicated by the Red Cloud and the numbers inside of it. Tap this icon to begin adding your sensors into the app.
Manually Add Sensors Into the App\*
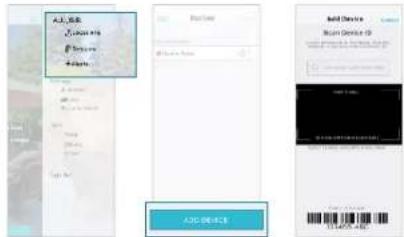
- Open your La Crosse View app. On the Main Menu, scroll to ADD/EDIT and select DEVICES.
- On the Devices page, select the ADD DEVICE or PLUS (+) button.
- Scan the Barcode on your Sensor or type in the Device ID manually.
- Confirm the sensor image and Device ID and add a Device Name and Location Name. Select DONE.
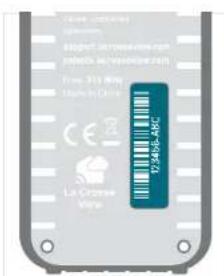
Back of Sensor
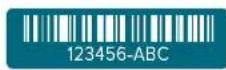
* This step is only required if you do not receive the Add Device notification within the app. Prior to recruiting/positioning your sensors, make sure your station is receiving sensor data.

BASICS
Station Settings
When the station is first powered on, it will begin searching for your sensors, which should connect within 10 minutes.
Navigating the Settings Menu

- To manually set language, time/date, and other settings, hold the SET button to enter the Settings Menu.

- Use the +/- buttons on the top of the station to adjust the values.

- Press the SET button to confirm your selection and move to the next setting.

- You may exit the Settings Menu at any time by pressing the LIGHT button.
- Greeting/HELLO
• Language (English/Spanish/French)
- Beep ON/OFF
• 12/24 Hour Time Format
• Hour | Minute | Year | Month | Date
• Calendar Order Month/Date or Date/Month
• Temperature Units (Fahrenheit/Celsius)
• Pressure Units (InHg/hPa)
- Pressure Number Setting
The default pressure reading is 29.91 NHg (1013 hPa). The station will acclimate on it's own if the pressure number is not set. Learn more on page 16
- THANK YOU
Important: Settings such as language and units of measure must be set manually within the station's Settings Menu. These are not controlled by the La Crosse View app.
- When a language is selected, the following instructions and weekday will be presented in that language.
- Weekday will set automatically after year, month, and date settings are adjusted.
- When in 24 hour time format, seconds will show in place of AM/FM markings.
- If you're connected to WI-1, the time-date will automatically update from the Internet. See pages 3-4 for more info.

flowchart
graph LR
    1["LIGHT"] --> 2["TEMP. INFO"]
    2 --> 3["EXTRA SENSOR"]
    3 --> 4["+"]
    4 --> 5["SET"]
    5 --> 6["—"]
    6 --> 7["ALERTS"]
    7 --> 8["HOURLY FORECAST"]
    8 --> 9["DAILY FORECAST"]
1. LIGHT
Press to adjust backlight. Hold to enter Auto-Dim settings.
4. SET
Press to view Wi-Fi status.
Hold to enter Settings Menu.
6. ALERTS
Hold to enter Alert Settings. While in Alert Settings, press to move to next Alert.
8. DAILY FORECAST
Press to see Daily Forecast
2. TEMP. INFO
Press to view Temperature and Humidity History. While viewing, hold MINUS button to delete the history reading.
5. PLUS/MINUS (+/-)
Use to adjust values. In Alert Settings, press to turn Alert(s) on/off. Hold both together to search for Wi-Fi signal.
7. HOURLY FORECAST
Press to see Hourly Forecast
9. WIFI
Press during initial setup for Wi-Fi Connection. Hold to re-enter Configuration Mode & clear previous Wi-Fi settings.
Press to toggle through extra sensors and pressure. Hold to add sensors. While viewing, hold the MINUS button to delete the sensor.
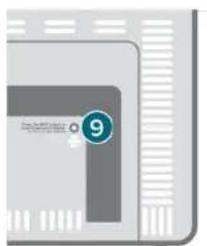
Back of Station
BASICSE
LCD Display Brightness
Adjusting the LCD Display Brightness
Press the LIGHT button on the top of the station to adjust the backlight intensity. There are 4 brightness levels, plus an off option.
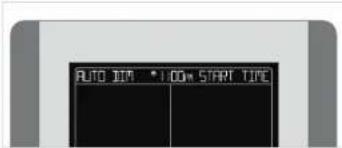
Auto-Dim Settings
Program your display to automatically dim during preselected times.
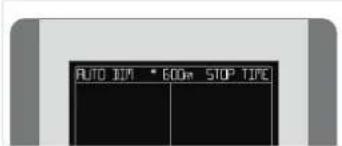
- Hold the LIGHT button to enter the Auto-Dim Settings Menu.
- Press the +/- buttons to turn the Auto-Dim feature on or off. Press LIGHT to confirm.
- Press the +/- buttons to adjust the starting hour. Press LIGHT to confirm.
- Press the +/- buttons to adjust the stopping hour. Press LIGHT to confirm and exit.
Please Note: Only the hour can be set.
BASICS
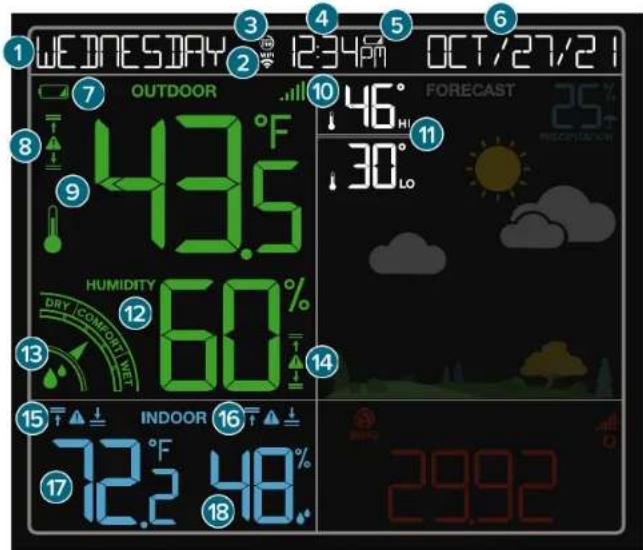
Viewing Time, Calendar, Temperature, & Humidity Viewing Time, Calendar, Temperature, & Humidity
09
TIME & CALENDAR
- DAY OF THE WEEK
Select from English, Spanish,
or French in the Settings Menu
- 12/24 HOUR TIME
Time will automatically update when connected to Wi-Fi
- LOW BATTERY ICON FOR SENSOR
Indicates sensor battery needs to be replaced
- SENSOR RECEPTION
INDICATOR
Indicates if the station is
receiving data from the sensor
- OUTDOOR
COMFORT METER
Represents current outdoor comfort level
- HIGH/LOW INDOOR
HUMIDITY ALERT ICONS
Appears if high ( T ) or low ( ± )
alert(s) are set and active
*Your display must be connected to Wi-Fi to receive AccuWeather forecast data.
- WI-FI ICON: Indicates active Wi-Fi connection*
-
LOW BATTERY ICON FOR STATION
Appears when station battery needs to be replaced
-
HIGH/LOW OUTDOOR
TEMP. ALERT ICONS:
Appears if high (T) or low (⊥)
alert(s) are set and active
- DAILY FORECASTED HIGH AND LOW TEMPERATURES
Forecasted high and low temperatures in the next 12 hours*
- DAILY FORECASTED HIGH AND LOW TEMPERATURES
Forecasted high and low temperatures in the next 12 hours*
- DAILY FORECASTED HIGH AND LOW TEMPERATURES
Forecasted high and low temperatures in the next 12 hours*
- DAILY FORECASTED HIGH AND LOW TEMPERATURES
Forecasted high and low temperatures in the next 12 hours*
- DAILY FORECASTED HIGH AND LOW TEMPERATURES
Forecasted high and low temperatures in the next 12 hours*
- DAILY FORECASTED HIGH AND LOW TEMPERATURES
Forecasted high and low temperatures in the next 12 hours*
- DAILY FORECASTED HIGH AND LOW TEMPERATURES
Forecasted high and low temperatures in the next 12 hours*
- DAILY FORECASTED HIGH AND LOW TEMPERATURES
Forecasted high and low temperatures in the next 12 hours*
- DAILY FORECASTED HIGH AND LOW TEMPERATURES
Forecasted high and low temperatures in the next 12 hours*
- DAILY FORECASTED HIGH AND LOW TEMPERATURES
Forecasted high and low temperatures in the next 12 hours*
- DAILY FORECASTED HIGH AND LOW TEMPERATURES
Forecasted high and low temperatures in the next 12 hours*
- DAILY FORECASTED HIGH AND LOW TEMPERATURES
Forecasted high and low temperatures in the next 12 hours*
- DAILY FORECASTED HIGH AND LOW TEMPERATURES
Forecasted high and low temperatures in the next '12 hours*
- DAILY FORECASTED HIGH AND LOW TEMPERATURES
Forecasted high and low temperatures in the next 12 hours*
- DAILY FORECASTED HIGH AND LOW TEMPERATURES
Forecasted high and low temperatures in the next 12 hours*
- DAILY FORECASTED HIGH AND LOW TEMPERATURES
Forecasted high and low temperatures in the next 12 hours*
- DAILY FORECASTED HIGH AND LOW TEMPERATURES
Forecasted high and low temperatures in the next 12 hours*
- DAILY FORECAST AND LOW TEMPERATURESTED HIGH TEMPERATURES IN 1 hour ^2
- DAILY FORECASTED HIGH AND LOW TEMPERATURES
Forecasted high and low temperatures in the next 12 hours*
- DAILY FORECASTED HIGH AND LOW TEMPERATURES
Forecasted high and low temperatures in the next 12 hours*
- DAILY FORECASTED HIGH AND LOW TEMPERATURES
Forecasted high and low temperatures in the next 12 hours*
-
DAILY FORECASTED HIGH AND LOW TEMPERATURES
Forecasted high and low temperatures in the next 12 hours*
-
AUTO-DIM ICON: Indicates active Auto-Dim setting
-
CALENDAR: Select order (Month/Date or Date/Month) in the Settings Menu
-
OUTDOOR TEMPERATURE
Current outdoor temperature
(°F/°C)
- OUTDOOR HUMIDITY
Current outdoor relative humidity (%RH)
- OUTDOOR HUMIDITY
Current outdoor relative humidity (%RH)
- OUTDOOR HUMIDITY
Current outdoor relative humidity (%RH)
- OUTDOOR HUMIDITY
Current outdoor relative humidity (%RH)
-
OUTDOOR HUMIDITY
Current outdoor relative humidity (%RH)
-
HIGH/LOW INDOOR
TEMP. ALERT ICONS
Appears if high ( ) or low ( ± )
alert(s) are set and active
-
HIGH/LOW INDOOR
TEMP. ALERT ICONS
Appears if high ( ) or low ( ± )
alert(s) are set and active
-
HIGH/LOW INDOOR
TEMP. ALERT ICONS
Appears if high ( ) or low ( ± )
alert(s) are set and active
-
HIGH/LOW INDOOR
TEMP. ALERT ICONS
Appears if high ( ) or low ( ± )
alert(s) are set and active
-
HIGH/LOW INDOOR
TEMP. ALERT ICONS
Appears if high ( ) or low ( ± )
alert(s) are set and active
-
HIGH/LOW INDOOR
TEMP. ALERT ICONS
Appears if high ( ) or low ( ± )
alert(s) are set and active
-
HIGH/LOW INDOOR
TEMP. ALERT ICONS
Appears if high ( ) or low ( ± )
alert(s) are set and active
-
HIGH/LOW INDOOR
TEMP. ALERT ICONS
Appears if high ( ) or low ( ± )
alert(s) are set and active
-
HIGH/LOW INDOOR
TEMP. ALERT ICONS
Appears if high ( ) or low ( ± )
alert(s) are set and active
-
HIGH/LOW INDOOR
TEMP. ALERT ICONS
Appears if high ( ) or low ( ± )
alert(s) are set and active
-
HIGH/LOW INDOOR
TEMP. ALERT ICONS
Appears if high ( ) or low ( ± )
alert(s) are set and active
-
HIGH/LOW INDOOR
TEMP. ALERT ICONS
Appears if high ( ) or low ( ± )
alert(s) are set and active
-
HIGH/LOW INDOOR
TEMP. ALERT ICONS
Appears if high ( ) or low ( ± )
alert(s) are set and active
-
HIGH/LOW INDOOR
TEMP. ALERT ICONS
Appears if high ( ) or to
alert(s) are set and active
-
HIGH/LOW INDOOR
TEMP. ALERT ICONS
Appears if high ( ) or to
alert(s) are set and active
-
HIGH/LOW INDOOR
TEMP. ALERT ICONS
Appears if high ( ) or to
alert(s) are set and active
-
HIGH/LOW INDOOR
TEMP. ALERT ICONS
Appears if high ( ) or to
alert(s) are set and active
-
HIGH/LOW INDOOR
TEMP. ALERT ICONS
Appears if high ( ) or to
alert(s) are set and active
-
*Your display must be connected to Wi-Fi to receive AccuWeather forecast data.
Viewing Your Temperature and Humidity Data
Records Viewing Order
• Outdoor High Temperature
• Outdoor Low Temperature
- Outdoor High Humidity
• Outdoor Low Humidity
- Indoor High Temperature
- Indoor Low Temperature
- Indoor High Humidity
- Indoor Low Humidity
- Heat Index
- Dew Point
Viewing Records
Press the TEMP. INFO button to toggle through indoor/outdoor temperature and humidity records with time and date stamps.
Resetting Individual Temperature and Humidity Records

Press the TEMP. INFO button to view the individual temperature & humidity values you'd like to reset.

Hold the MINUS (-) button until dashes appear. This will reset the value to your current temperature or humidity reading.
Outdoor Comfort Meter
The arrow indicates outdoor comfort level based on current relative humidity.
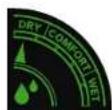
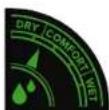
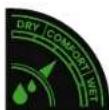
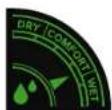
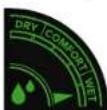
1%RH to 25%RH 26%RH to 39%RH 40%RH to 75%RH 76%RH to 83%RH 84%RH to 99%RH
Temperature and Humidity Alerts
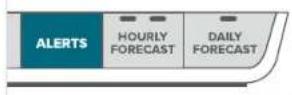
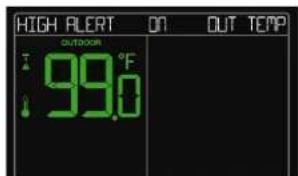
High Temperature Alert Example
Setting Temperature and Humidity Alerts
- Hold the ALERTS button to enter the Alert Settings Menu.
- Use the +/- buttons to activate/deactivate individual alerts, or press the ALERTS button to skip to the next alert option.
- Once activated, use the +/- buttons to adjust the alert value. Press the ALERTS button to confirm and move forward.
Active alerts are indicated by the ▲ and 7/1 icons in the respective sections on screen.
Note: The default setting for alerts is OFF.
Alerts Setting Order
Outdoor High Temp. • Outdoor Low Temp. • Outdoor High Humidity • Outdoor Low Humidity
Indoor High Temp. • Indoor Low Temp. • Indoor High Humidity • Indoor Low Humidity
Alert Sounds
- When an alert value is reached, the respective alert icon will flash and the station will beep 5 times each minute until the value moves out of the alert range.
- Press any button to stop the alert sound. The alert icon will continue to flash until out of the alert range.
Note: Alerts set on the station are separate from those created within the La Crosse View app.
FORECAST
Viewing Your Forecast Data
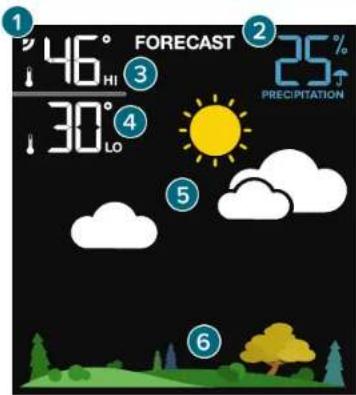
*Your display must be connected to Wi-Fi to receive AccuWeather forecast data.
**When connected, your station will display 6 additional forecast icons.

Spring (March 20th to June 20th)

Fall (Sept. 27 to Dec. 20)

Summer (June 21 to Sept. 20)

Winter (Dec. 27 to March 19)
Seasonal Trees
The foliage scene in the forecast section changes seasonally. The dates are pre-programmed.

FORECAST
Viewing Your Forecast Data
Forecast Icons
When using as a standalone station, the display will use changes in barometric pressure to predict your weather to come in the next 12 hours. This is represented by 6 forecast scenes (sunny, partly sunny, clouds, rain, l-storm, and snow).
Please Note: The Forecast Icons may not represent your current weather. They are a future prediction of the weather to come over the next 12 hours.
Sunny
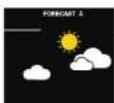
Partly Sunny
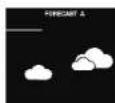
Clouds
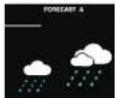
Rain
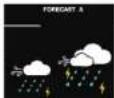
T-Storm
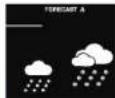
Snow

AccuWeather
When connected to Wi-Fi, the station will receive additional weather icons, chance of precipitation values, and future forecast information. These enhanced Internet features are powered by AccuWeather.
Additional forecast scenes include:
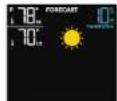
Sunny
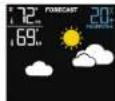
Partly Sunny
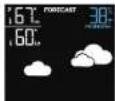
Clouds
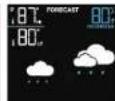
Light Rain
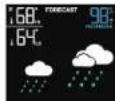
Rain
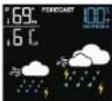
T-Storm
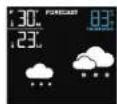
Light Snow
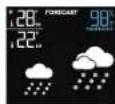
Snow
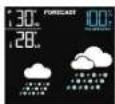
Wintry Mix
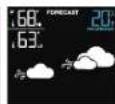
Windy
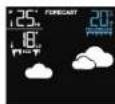
Ice
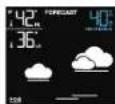
Fog
Tip: The 2 icon will appear in the top left corner of the forecast section when your display is connected and receiving AccuWeather forecasts.

FORECAST
Viewing Your Forecast Data
When connected to Wi-Fi, use the DAILY FORECAST and HOURLY FORECAST buttons on the top of the station to view future forecast information.
Daily Forecast
- Hold the DAILY FORECAST button to scroll through 7 days of future forecasts. When scrolling, press the DAILY FORECAST button to stop the scroll and return to main display.
- Press and release the DAILY FORECAST button to view each day individually.
Hourly Forecast
- Hold the HOURLY FORECAST button to scroll through 12 hours of future forecasts. When scrolling, press the HOURLY FORECAST button to stop the scroll and return to main display.
- Press and release the HOURLY FORECAST button to view each hour individually.
Day/Night Forecast
When connected to Wi-Fi, the sun icon appears in daylight hours and the moon icon appears during nighttime hours if the forecast is for sunny or partly sunny.
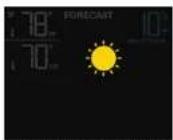
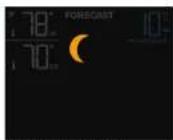
Sun (7:00am to 7:00pm) Moon (7:00pm to 7:00am)
- The times the sun and moon icons appear are pre-programmed and cannot be adjusted.
- The station must be connected Wi-Fi to activate the day/night forecast feature.

PRESSURE
Relative Pressure
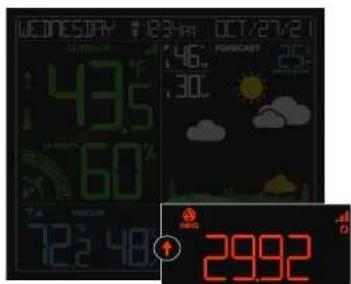
- Your Relative Pressure reading will come from your station's internal barometer.
- Please allow up to 10 days for automatic calibration, or program your local pressure value in the Settings Menu.
- The arrows located to the left of the values represents Pressure Tendency (↑/↓).
- Select your desired unit of measurement (hPa or InHg) in the Settings Menu. You can also set a specific pressure number setting if desired.
Note: The default pressure reading is 1013 nPa (28.91 InHg). The station will acclimate on it's own if the pressure number is not set.
SENSORS
Sensor Placement & Mounting
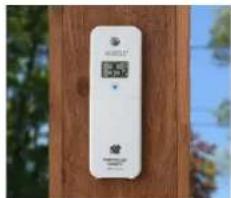
- Use the hole at the top to hang your sensor from the back using a nail. Or, insert one mounting screw through the front of your sensor.
- Mount your sensor on a north-facing wall or in any shaded area. Under an eave or deck rail is preferred to avoid inaccurate readings from the sun.
- The maximum wireless transmission range to the station is up to 400 feet (121 meters) in open air, not including walls or floors.
- Be sure your sensor is mounted vertically, to allow moisture to drain out properly.

SENSORS
Add-On Sensors
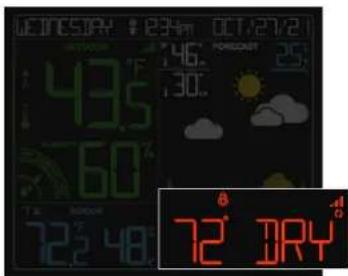
* Water Limit Sensor shown as example, sensor not included
Whether you choose to connect to the La Crosse View app or not, this station can display data for up to 4 extra sensors. This data will appear in the red section on the LCD and in your La Crosse View app if connected.


Find all of your add-on sensor options by scanning the QR code or visiting:
bit.ly/v10v2 parts
Note: When first powering up, or after a factory reset, extra sensors should automatically connect to your station.
Adding Sensors to Your Station

1. Hold the EXTRA SENSOR button until the Sensor Reception Indicator, all starts to animate.
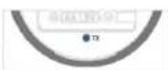
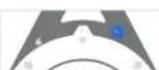
Inside of Water Leak Sensor® Top of Water Leak Sensor®
2. Install batteries into your sensor. If the sensor has a TX button, press it to force a transmission signal. This button is usually located in or near the sensor's battery compartment. The LED light on the sensor will flash once.
ID 524956
WATER LEAK
- Your sensor should connect within the next 3 minutes, briefly displaying its ID and type on the LCD. The Sensor Reception Indicator will show solid on the screen when a sensor is connected.
Viewing Add-On Sensor Data

If you have multiple add on sensors connected, press the EXTRA SENSOR button to cycle through the data you'd like displayed on the LCD. The Auto Scroll Icon (O) will appear if activated. This setting will also include relative pressure data in the cycle.
APPENDIX
Specifications
Wi-Fi NETWORK REQUIREMENTS
- Broadcast Frequency: 2.4GHz (802.1" b/g/n)
- Network Name/Password: Must Not Exceed 45 Characters
• Network Speed: Must Be Greater than 1 Mbps
Note: If you have multiple band router, this device will connect to the 2.4GHz band when connecting to Wi-Fi.
STATION SPECIFICATIONS (V10v2)
- Indoor Temperature Range: 32°F to 122°F (0°C to 50°C)
- Indoor Humidity Range: 10 to 99%RH
- Relative Pressure Range: 23.62 to 32.48 in Hg (800 to 1100 hPa)
• Power Requirements:
- Primary Power: 5.0V Adapter (included)
- Battery Backup: 1 "CR2037" Coin Cell Battery (included)
- Station Dimensions: 7.80 in. L x 1.23 in. W x 6.44 in. H (19.81 cm L x 3.12 cm W x 16.35 cm H)
- LCD Brightness: 4 Intensity Levels + OFF (Programmable Auto-Dim Backlight Option
• Language Options: English, Spanish, and French (Translation Available for Menus & Calendar)
SENSOR SPECIFICATIONS (LTV-TH2i)
- Outdoor Temperature Range: -40°F to 140°F (-40°C to 60°C)
- Outdoor Humidity Range: 10 to 99%RH
• Transmission Range: 400 feet (121 Meters) open air
• Power Requirements: 2 "AA" Batteries (not included)
- Sensor Dimensions: 1.97 in. L x 0.75 in. W x 5.73 in. H (5.0 cm L x 1.91 cm W x 14.55 cm H)
MOBILE REQUIREMENTS
- Apple phones require iOS with cellular or Wi-Fi service.
- Android phones require Android OS with cellular or Wi-Fi service.
Care & Maintenance
Battery Replacement Instructions
When batteries of different brand or type are used together, or new and old batteries are used together, some batteries may be over-discharged due to a difference of voltage or capacity. This can result in venting, leakage, and rupture and may cause personal injury.
• Always purchase the correct size and grade of battery most suitable for the intended use.
- Always replace the whole set of batteries at one time, taking care not to mix old and new ones, or batteries of different types.
- Clean the battery contacts and also those of the device prior to battery installation.
- Ensure the batteries are installed correctly with regard to polarity (+ and -).
- Remove batteries from product during periods of non-use. Battery leakage can cause corrosion and damage to this product.
- Remove used batteries promptly.
- For recycling and disposal of batteries, and to protect the environment, please check the internet or your local phone directory for local recycling comers and/or follow local government regulations.

APPENDIX
Warranty
La Crosse Technology, Ltd. provides a 1-year limited time warranty (from date of purchase) on this product, relating to manufacturing defects in materials and workmanship.
For full warranty details, visit: www.lacrossetechnology.com/support
La Crosse Technology, Ltd.
2830 S. 26 ^th Street, La Crosse, Wisconsin 54601
Recycling & Disposal
Please consider the environment when deciding to dispose of this product. Although household electronics are generally safe to use on a daily basis, incorrect disposal can cause negative and potentially irreversible impacts on our environment.
Check with local donation centers to see if your product can be donated for future use. If disposal is the only option, federal agencies, local governments, and certified retailers may have electronic recycling programs in place. Programs may vary based on location.

Please Recycle
California Residents
Caution!
The manufacturer is not responsible for any radio or TV interference caused by unauthorized changes or modifications to this equipment. Such changes or modifications could void the user authority to operate the equipment.
All rights reserved. This manual may not be reproduced in any form, even in part, or duplicated or processed using electronic, mechanical or chemical process without the written permission of the publisher.
This booklet may contain errors or misprints. The information it contains is regularly checked and corrections are included in subsequent editions. We disclaim any responsibility for any technical error or printing error, or their consequences. All trademarks and patents are recognized.

WARNING
- This product contains a cullor battery.
- I swallows, it could cause severe injury or death in just 2 hours
- Seek medical attention immediately.
WARNING: KEEP BATTERIES OUT OF REACH OF CHILDREN
- Swallowing may lead to serious injury in as little as 2 hours or death, due to chemical burns and potential perforation of the esophagus.
- If you suspect your child has swallowed or referred a button battery, immediately seek urgent medical assistance.
- Examine desaces and make sure the battery compartment is correctly secured, e.g. that the screw or other mechanical fastener is tightened
- Do not use if compartment is not secure
- Disperse of uses button batteries immediately and safely. For batteries can still be dangerous.
- Let others about the risk associated with button echteries and now to keep their children sale.

WARNING: This product can expose you to chemicals including styrene, which is known in the State of California to cause cancer. For more information, go to: www.P55Warnings.ca.gov

APPENDIX
FCC Statement
This equipment has been loaded and found at comply with the limits for a Class B digits device, pursuant to part 15 of the FCG Rules. These limits are designed to provide reasonable protection against harmful interference in a residential installation. This equipment generates, uses and can rotate radio frequency energy and, if not installed and used in accordance with the instructions, may cause harmful interference to radio communications. However, there is no guarantee that interference will not occur in a particular installation. If this equipment does cause harmful interference to radio or television on reception, which can be determined by turning the equipment off and on, the user is encouraged to try to correct the interference by one or more of the following measures:
- Reorient or relocate the receiving antenna.
- Connect the equipment into an bullet on a circuit different from that to which the receiver is connected.
FCC Radiation Exposure Statement
This device complies with FCC radio-ion exposure limits set forth for an uncontrolled environment and it also complies with Fair 15 of the FCC RF Rules. This equipment must be installed and operated in accordance with provided instructions and the antennae used for this transmitter must be installed to provide a separal on distance of at least 20 cm from all persons, and must not be co-located or operating in conjunction with any other antenna or transmitter. Enc-users and installers must be provided with antenna installation instructions and consider removing the no-allocation statement.
This device complies with Part 15 of the FCC Rules. Operation is subject to the following two conditions:
- Increase the separation between the equipment and receiver.
- Consult the closer or an experienced radio/TV technician for help.
(1) This device may not cause harmful interference, and
(2) This device must accept any interference received including interference that may cause undesired operation.
Caution: Any changes or modifications not expressly approved by the party responsible for compliance could void the user's authority to operate the equipment.
Canada Statement
This device contains licence-exempt transmitter(s) receivers(s) that comply with Innovation, Science and Economic Development Canada's licence-exempt RSS(s). Operation is subject to the following two conditions: (1) This device may not cause interference; and
(2) This device must accept any interference, including interference that may cause undesired operation of the device.
The device meets the exemption from the routine customization limits in section 2.5 of R3S-102 and compliance with R3S-102 RF exposure, users can obtain Canadian information on RF exposure and compliance. This transmit must not be co-located or operating in conjunction with any other antenna or transmitter. This equipment should be installed and operated with a minimum distance of 20 centimeters between the radiator and your body.

SUPPORT
Having Trouble? We're here to help.
To find answers to FAQs and additional self-help options, scan the QR code or go to: bit.ly_v10v2_support
If you need additional support, get in touch with our friendly customer support team:
Online: bit.ly/contact_techsupport
Phone Number: 1.844.200.8752
Representatives are available Monday-Friday, 8:00am to 6:00pm CST
La Crosse Technology® Patents
Visit www.lacrossetechnology.com/patents for patent information.
Factory Reset Stay in Touch

If you are experiencing issues, press and hold the LIGHT and DAILY FORECAST buttons down together until the display beeps. You do not need to remove the coin cell battery to restart the station.
Ask questions, watch setup videos, and provide feedback on our social media outlets.

natural_image
Four social media and video platform icons: Facebook, Instagram, YouTube, and Twitter (no text or symbols beyond logos)
Follow La Crosse Technology on Facebook, Instagram, YouTube, and Twitter.
Apple and the Apple logo are trademarks of Apple Inc., registered in the U.S. and other countries. App Store is a service mark of Apple Inc. Google Play and the Google Play logo are trademarks of Google Inc.
Designed in La Crosse, Wisconsin • Made in China • Printed in China • DC 072921