
Aura Plus NV-250 - Night Vision Goggles Carson - Free user manual and instructions
Find the device manual for free Aura Plus NV-250 Carson in PDF.

| Product Type | Digital Night Vision Monocular and Camcorder |
| Brand | Carson |
| Model | Aura Plus NV-250 |
| Objective Focal Length | 25.9 mm |
| Objective Aperture | F 1.52 |
| Field of View | 10° |
| Eyepiece Dioptric Compensation | -4.0 to +2.0 D |
| Infrared Range | Approximately 120 m |
| Sensor Type | CMOS |
| Maximum Video Resolution | 640 x 480 (VGA) |
| Magnification | 2x to 4x (2x optical, 2x digital) |
| Digital Zoom | 2x |
| Frame Rates | 30, 15, 8 fps |
| Infrared Intensity Levels | Low, Medium, High, Off |
| MicroSD Card Support | Up to 32 GB (8 GB included) |
| Battery Type | 3 x AAA alkaline |
| Battery Life (Continuous Operation) | Approximately 60 minutes |
| Weight (Without Batteries) | Approximately 5 oz |
| Power On/Off | Press and hold power button for 2 seconds |
| Sleep Mode | After 5 minutes of inactivity (except video recording) |
| Warranty | 1 year limited warranty |
Frequently Asked Questions - Aura Plus NV-250 Carson
User questions about Aura Plus NV-250 Carson
0 question about this device. Answer the ones you know or ask your own.
Ask a new question about this device
Download the instructions for your Night Vision Goggles in PDF format for free! Find your manual Aura Plus NV-250 - Carson and take your electronic device back in hand. On this page are published all the documents necessary for the use of your device. Aura Plus NV-250 by Carson.
USER MANUAL Aura Plus NV-250 Carson
natural_image
Line drawing of a portable electronic device with control buttons and lens (no text or symbols)CONTENTS
BEFORE USE 4
Care and maintenance 4
Warning 4
Introduction 5
PRODUCT AT A GLANCE 5
Package contents 5
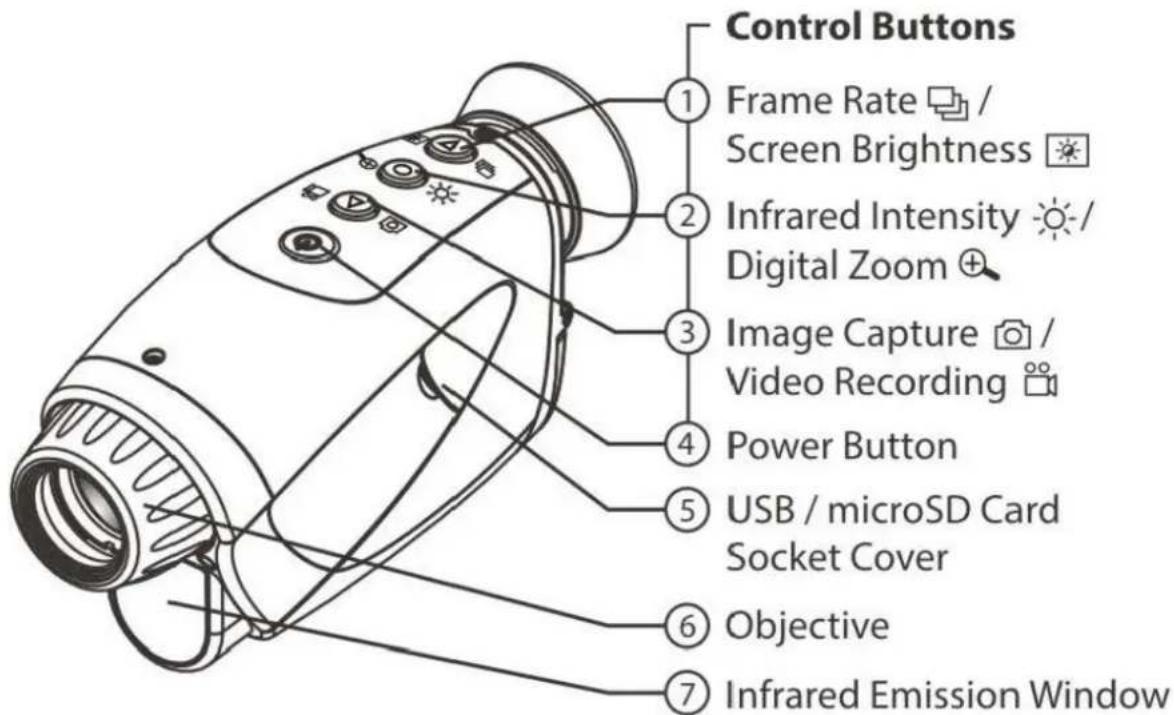
Product overview 6
Specifications 7
Status icon 8
Quick start guide 9
GETTING STARTED 11
Installing the batteries 11
Installing the microSD card 12
Removing the microSD card 12
Memory card and USB 13
connection
BASICS 14
Turning on the power 14
Focusing the eyepiece 14
Focusing the objective 14
Capturing images 15
Recording video 15
Adjusting the infrared intensity 16
Digital zoom 16
Frame rate 17
Screen brightness 17
Turning off the power 18
Infrared intensity and battery 18
consumption
PLAYBACK AND SYSTEM SETTINGS 19
Scrolling through the menu 19
Playing back images 20
Playing back video 21
Setting date and time 22
Selecting the display language 23
BEFORE USE
Please read this instruction manual carefully before using this device, and retain it for future reference.
Care and maintenance
■ Avoid shock and dropping the device.
- Keep the device dry and protect it from water or moisture.
■ Do not leave your device in a place with extreme high or low temperatures.
■ Do not expose or store the device in dusty, dirty areas. This may cause damage to its moving parts.
■ Do not use harsh chemicals, cleaning solvents or strong detergents to clean the device. Wipe it with a clean soft cloth.
■ Blow away any dust and particles on the lenses and window. Clean these only with moistened soft lint-free cloth.
Warning
■ Do not aim the device at the sun as this may damage the image sensor.
■ Do not leave batteries installed during extended periods of disuse.
■ Do not mix new and old batteries or different types of batteries.
It is normal for this device to get warm when using for a prolonged period of time.
■ Do not look directly at the sun or any bright light source using this device as it can cause permanent eye damage.
Introduction
■ The Digital Night Vision Monocular and Camcorder allows you to view objects and capture still and video images in the dark. The high intensity beam of infrared enables visibility as far as 120m in complete darkness. It can be used in day and at night delivering black and white images. The adjustable frame rate and infrared intensity features plus the 2x digital zoom maximize visibility in all lighting situations.
■ Familiarize yourself with the night vision monocular before using it. Read the manual and follow the steps and test it with a few shots in a dark room. After the image/video is captured, play it back and check whether it has been recorded properly.
PRODUCT AT A GLANCE
Package contents

Product overview

Specifications
| Objective | Focal length : f=25.9Aperture : F 1.52Field of view : 10^ |
| Eyepiece | Dioptric compensation : -4.0~+2.0D |
| Infrared range | Approximately 120m |
| microSD card | 8GB * included (support up to 32GB) |
| Sensor | CMOS |
| Maximum video capturing resolution | 640 x 480 pixels (VGA) |
| Magnification | 2x~4x |
| Zoom | 2x (Digital) |
| Battery | 3 x AAA |
| Weight | Approximately 5 ounces (without batteries) |
* 1GB=1,000,000,000 bytes. Actual capacity may vary. Some capacity is used for memory maintenance and other functions and is not available for storage.
Status icon

flowchart
graph TD
    A["Video recording"] --> B["Recording indicator"]
    B --> C["Frame rate 30 Frame rate 30 fps"]
    B --> D["Frame rate 15 Frame rate 15 fps"]
    B --> E["Frame rate 8 Frame rate 8 fps"]
    F["Infrared intensity"] --> G["High"]
    F --> H["Medium"]
    F --> I["Low"]
    F --> J["Off"]
    K["Image capture"] --> L["Digital zoom X1 Digital zoom off"]
    K --> M["X2 2x digital zoom"]
    N["Battery level"] --> O["Battery level-High"]
    N --> P["Battery level-Medium"]
    N --> Q["Battery level-Low"]
    N --> R["Replace battery"]
    S["REC time"] --> T["Time remaining"]
    U["SD card status"] --> V["Card installed"]
    U --> W["No card"]
    X["Remaining photos"] --> Y["REDACTED"]
Quick start guide
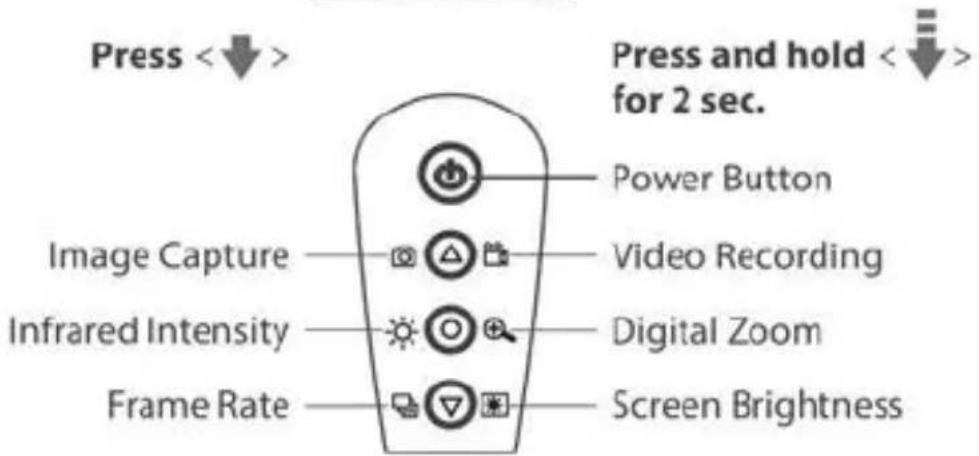
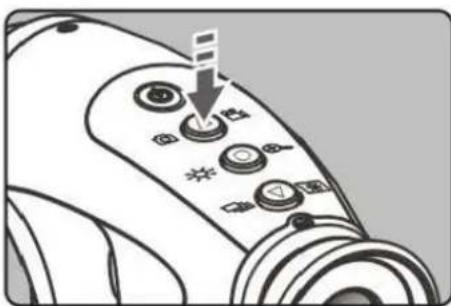
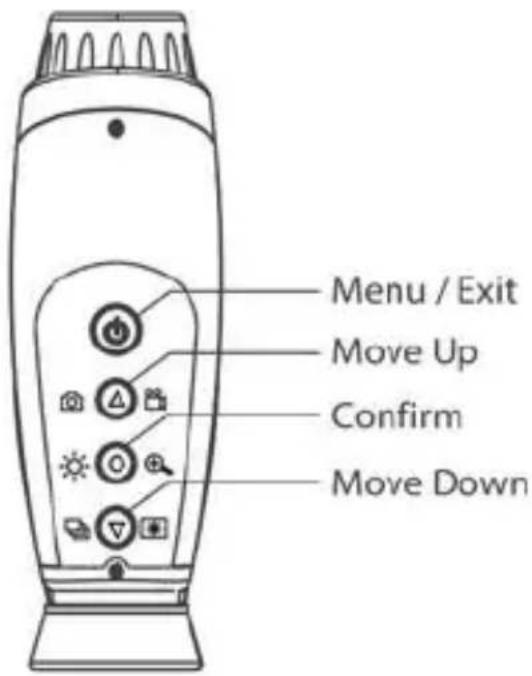
Control buttons
| Function | Control Button | Description | Display |
| On/Off |  | Press and hold < ⓐ> for 2 seconds to turn power on or off.The device will enter sleep mode after 5 minutes of non-operation (except on video recording mode). |  |
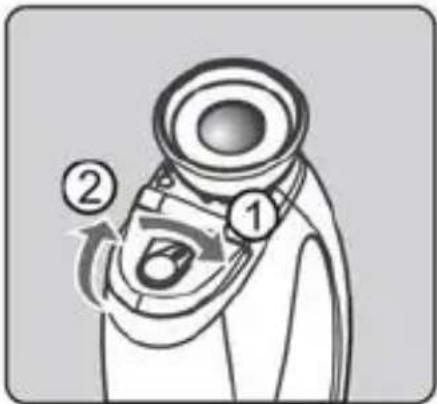
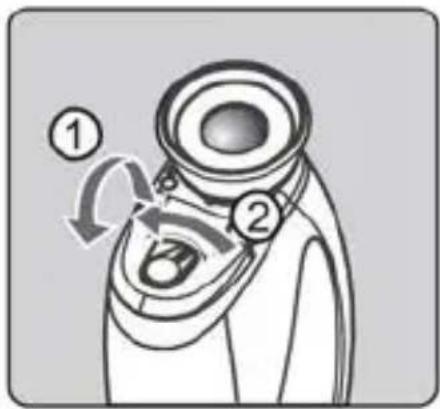
| Focusing | 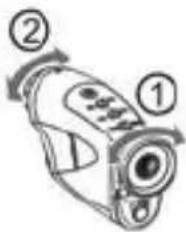 | Adjust the eyepiece 1 until the icons on the screen are clear, then adjust the objective 2 until your target is clear. |  |
| Image capture | 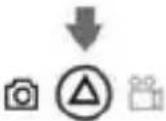 | Press < Ⓐ> to capture image. | 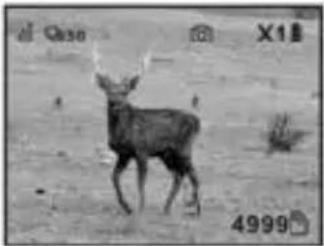 |
| Video recording | 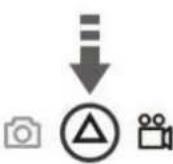 | Press and hold < > for 2 seconds to start recording. You will see [● ] on the screen.Press < > again to stop recording. The Night Vision Monocular will start a new file every 10 minutes. | 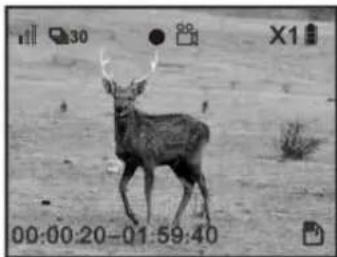 |
| Infrared intensity |  | Press < > to adjust the IR intensity. | Low Medium High Off |
| Digital zoom |  | Press and hold < > for 2 seconds to trigger 2x digital zoom. Press for 2 seconds to resume. | 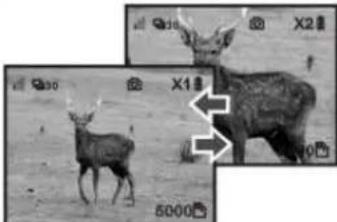 |
| Frame rate |  | Press < > to adjust frame rate. |  |
| Screen brightness | 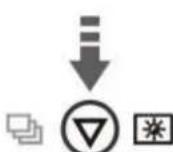 | Press and hold < > to switch between high or low brightness. Release to confirm. | 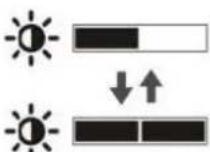 . . |
Before you start using the Night Vision Monocular and Camcorder, make sure the batteries and microSD card are installed properly.
GETTING STARTED
Installing the batteries
Open the battery door
Open the battery door by sliding the door lock in the direction as shown by the arrow.

natural_image
Line drawing of a spacecraft's internal components, possibly a spacecraft or spacecraft, with no visible text or symbols.Insert batteries
Insert 3 AAA alkaline batteries into the battery compartment in their correct polarity positions.
Close the battery door
Close the battery door and slide the door lock in the direction as shown by the arrow.
Installing the microSD card

natural_image
Diagram of a device with labeled ports and a curved arrow indicating rotation (no text or symbols present)Open the cover
Flip open the USB and memory card cover. Do not detach the cover.

natural_image
Line drawing of a mechanical device with control knobs and a handle (no text or symbols)Insert the card
Place a microSD card in the memory card slot, with the metal contacts facing down, then push the card until it clicks in place.

natural_image
Line drawing of a mechanical device with no visible text or symbolsClose the cover
Close the cover to its original position.
Removing the microSD card

natural_image
Line drawing of a handheld device with control buttons and a scroll wheel (no text or symbols)Remove the card
Push the microSD card in gently. It will then release itself from the slot.
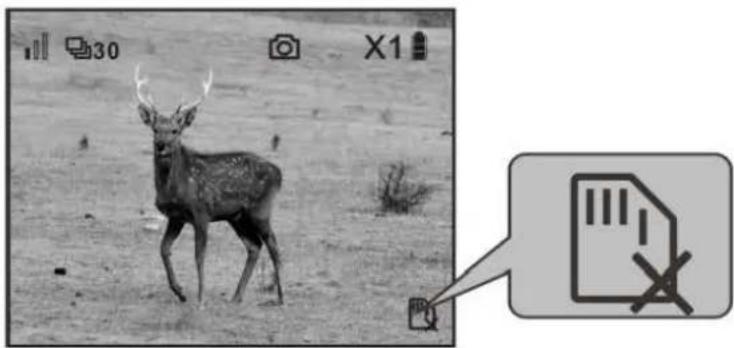
Without a microSD card in the device, the "no microSD card" icon [ ] will be displayed.
natural_image
Black-and-white photo of a deer in a grassy field, with an inset icon showing a document and crossed-out pen (no text or symbols on the main image)Memory card and USB connection
The saved images can be transferred to a computer by removing the memory card or via a USB cable.
Turn the device off and then connect the USB cable as shown below. When the device is turned on again, the computer will detect the microSD card automatically.
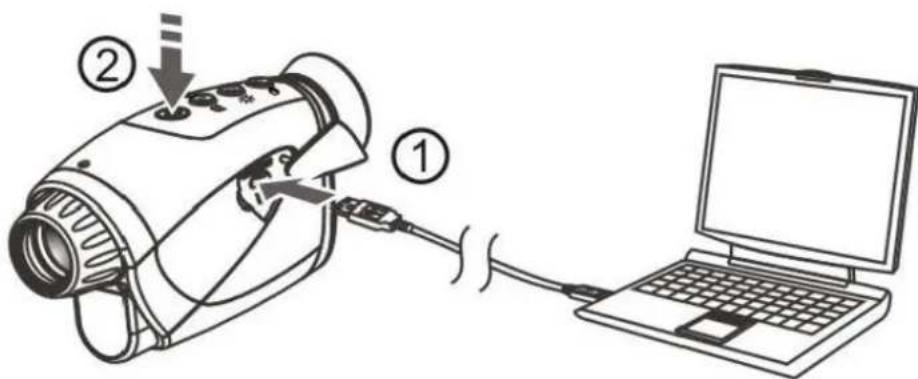
Do not remove the memory card while the device is transferring or accessing data. Doing so may cause losing the data, or damaging to the memory card or the device. The manufacturer or distributor shall not be liable for the losses caused by misuse or damaged memory card.
BASICS

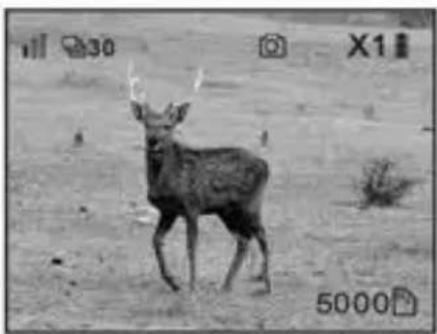
natural_image
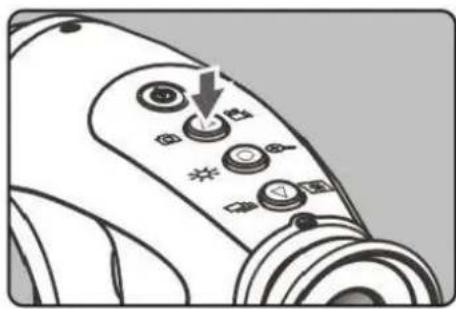
A deer standing on a grassy slope, no visible text or symbols.1. Turning on the power
Press and hold < Ⓞ> for 2 seconds to turn on/turn off the Night Vision Monocular and Camcorder.
natural_image
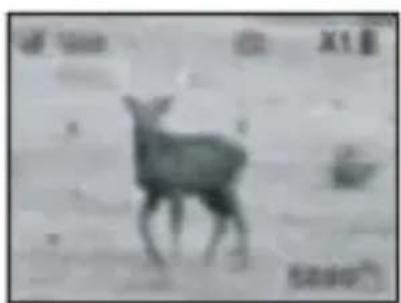
Grayscale photo of a deer in a natural setting, no visible text or symbols2. Focusing the eyepiece
Rotate the eyepiece until the icons on the screen are sharp and clear.
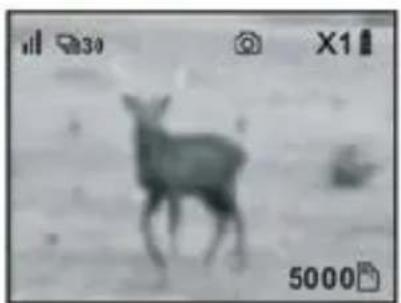
natural_image
Black-and-white photo of a deer standing on a dirt ground, no visible text or symbols3. Focusing the objective
Rotate the objective until a sharp image is seen on the screen.
Capturing image
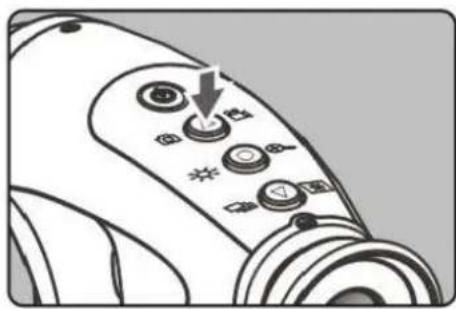
Press < Ⓐ> to capture image. The image will be saved on the microSD card.
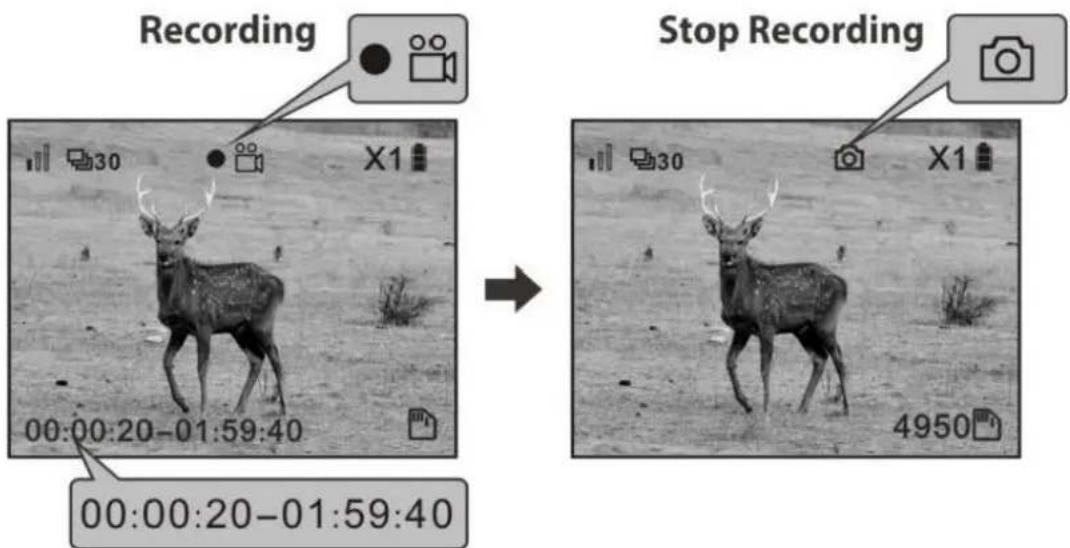
Recording video

Press and hold < Ⓐ> for 2 seconds to start video recording. The icon on the screen will change from [☐] to [●☐], and the timer on the bottom left corner will start.
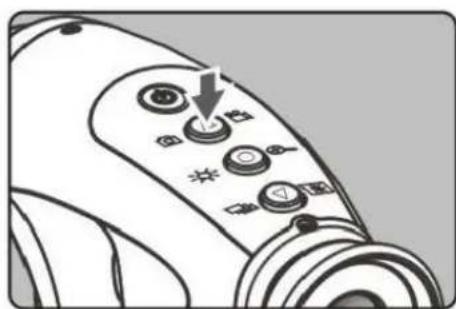
Press <> to stop recording.
The device will save a new file every 10 minutes.
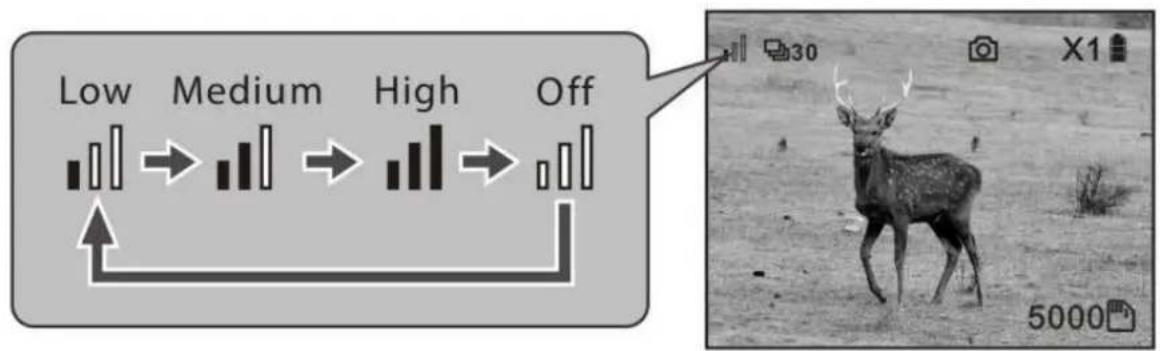
Adjusting the infrared intensity (IR intensity)

There are 4 IR modes available: low intensity, medium intensity, high intensity and IR off arranged in cyclic order.
Press <◎> once to change mode and cycle through to the next mode.
Tip: The further the object, the higher the IR intensity is required.
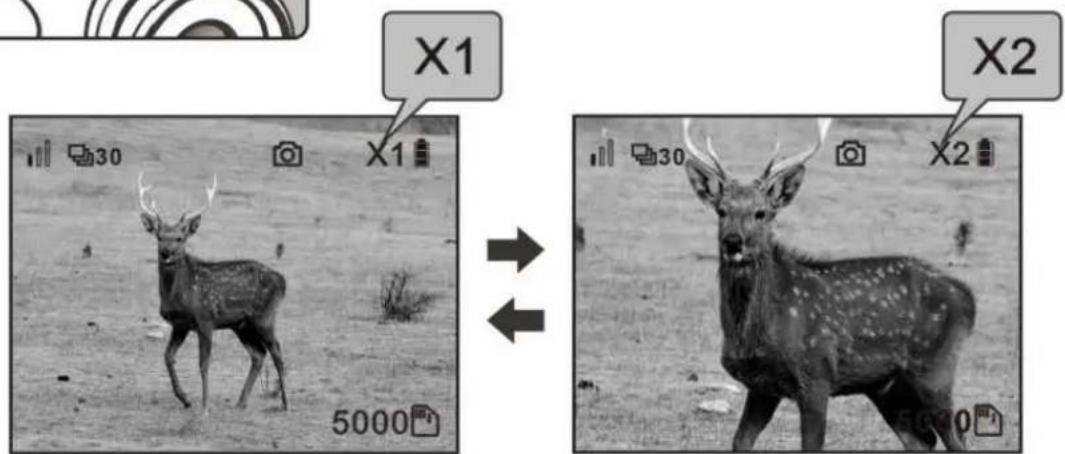
Digital zoom

Press and hold <◎> for 2 seconds to trigger the 2x digital zoom. Press and hold <◎> for 2 seconds to resume.
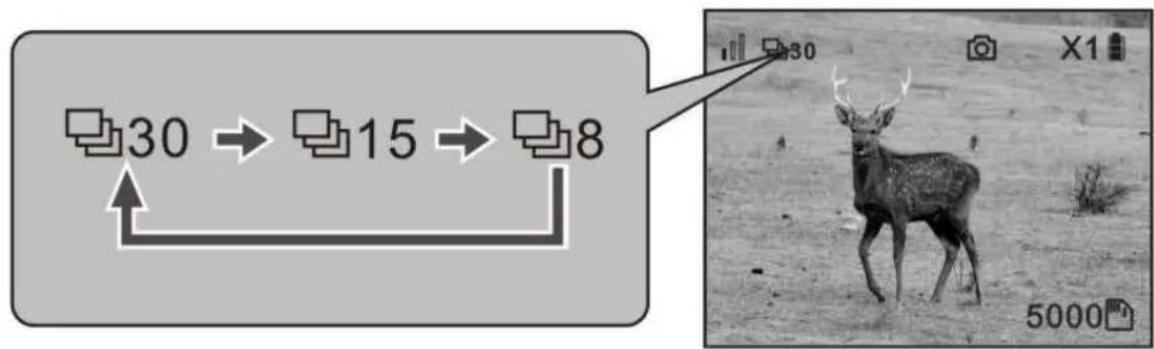
Frame rate (frames per second)
There are 3 frame-rate modes available: 30 fps, 15fps and 8 fps arranged in cyclic order.
Press < ▼> once to change frame rate and cycle through to the next.
Tip: Use lower frame rate for darker condition/further object.
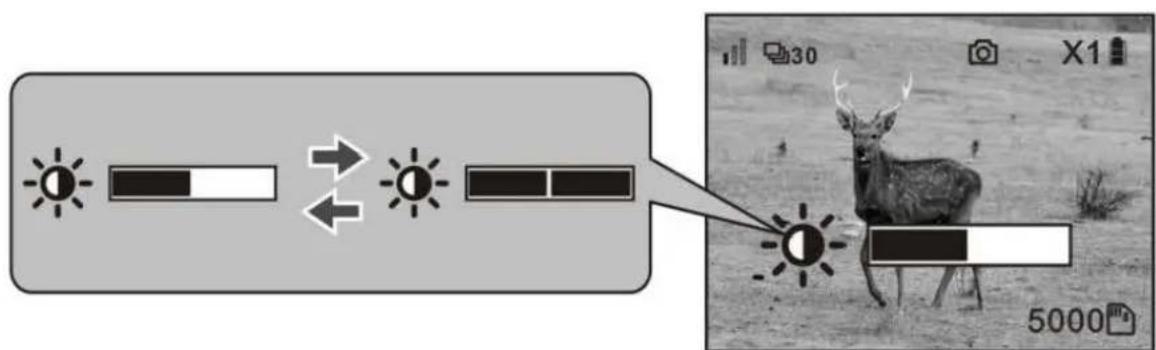
Screen brightness

Press and hold <▼> to toggle between dim and bright screen.
Turning off the power
Press and hold < ⏻> for 2 seconds to turn off the Night Vision Monocular and Camcorder.
The device will enter sleep mode when left idle for 5 minutes, press any button to resume operation. The device will turn off automatically after 5 minutes in sleep mode.
Infrared intensity and battery consumption
There are 3 levels of infrared (IR) intensity and an IR off mode. The default setting is low intensity when turning on the device. Press <◎> once to cycle through from low intensity, medium intensity, high intensity and IR off. It is suggested to start with the lowest level. A higher IR intensity is needed for viewing in darker environment or when viewing objects in further distance. More battery power is consumed for higher IR intensities. 3 brand new alkaline batteries can power continuous operation for approximately 60 minutes.
PLAYBACK AND SYSTEM SETTINGS
Scrolling through the menu
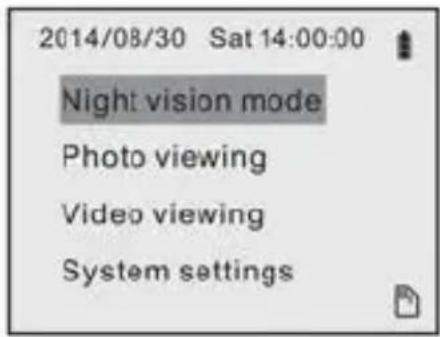
Select Item
Press < Ⓞ> to display menu screen. Select an item using the < Ⓔ / ▽> buttons. Press < Ⓞ> to confirm.
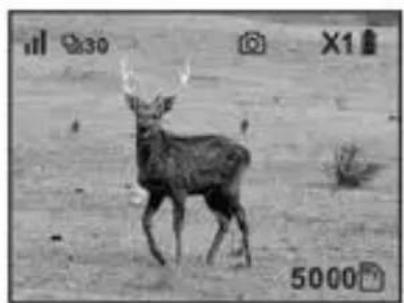
natural_image
Black-and-white photo of a deer standing in an open field, no visible text or symbolsReturn to Night vision mode
Press < ⏻> to return to the Night Vision mode.
Playing back images

Enter Photo viewing
Use <△ / ▽> to select the "Photo viewing" tab and press <○> to playback the first image.
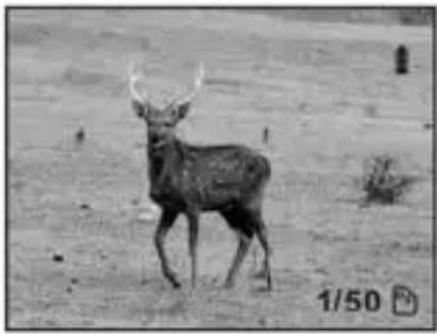
natural_image
Black-and-white photo of a deer standing in an open field, no visible text or symbolsSelect image
Use < Ⓔ / Ⓥ> to select an image.
The icon on the bottom right corner shows the image number being viewed and the total number of images stored.
Press < Ⓞ> to return the menu.
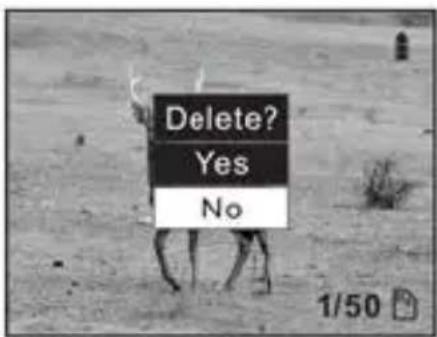
Deleting an image being viewed
Press and hold <◎> for 2 seconds. Press <◎> to confirm.
Playing back video

Enter video viewing
Use <△/▽> to select the "Video viewing" tab and press<○> to enter the video directory.

Select video viewing
Use <△/▽> to select the video file, press <○> to view.
Press <◎> to freeze a frame while viewing and press it again to resume.
Press < ⏻> to go back.
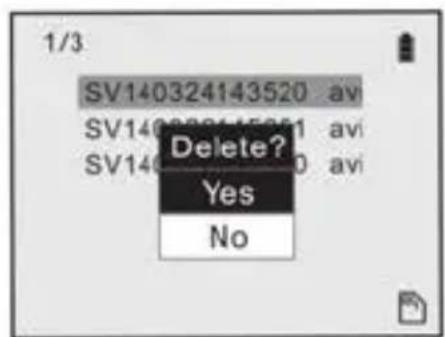
Deleting a video
At the video directory, select the video you want to delete, press and hold <◎> for 2 seconds.
Press <◎> to confirm deletion.
Setting date and time

Enter System settings
Use <△/▽> to select the "System settings" tab, then press <○>.

Enter Date/Time
Use <△/▽> to select the "Date/Time" tab, then press <○>.

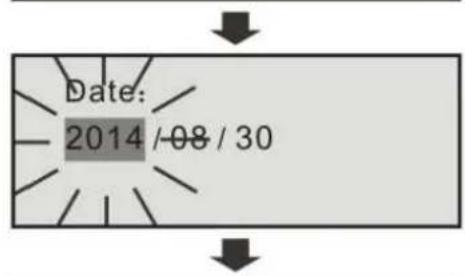
Set the date and time
Use <△/▽> to select an item, press <○> to confirm selection. The item will start flashing. Use <△/▽> to increase or decrease the number, press <○> to confirm.
Selecting the display language
2014/08/30 Sat 14:00:00
Night vision mode
Photo viewing
Video viewing
System settings


System settings
Date / Time
Language

Language
English
Française
Italiano
Deutsch
Español
日本語
简体中文 繁體中文
Enter System settings
Use <△/▽> to select the "System settings" tab, then press <○>.
Enter Language
Use <△/▽> to select the "Language" tab, then press <○>.
Select the interface language
English is set by default, use < Ⓐ / Ⓥ > to select the desired language, then press < Ⓞ >.
Carson One Year Limited Warranty
This Carson product is warranted to be free from defects in material and workmanship for a period of one year from date of purchase. During this period Carson will, at its option and without charge, either repair any part or assembly of parts found to be defective in material or workmanship, or replace this Carson product with a Carson product of comparable value and condition, subject to the limitations and exclusions noted herein.
This warranty extends to the original purchaser only and is not assignable or transferable. It shall not apply to any product that has been subject to misuse, abuse, negligence or accident, or to any defects or damage directly or indirectly caused by the use of unauthorized replacement parts and/or service performed by unauthorized personnel.
This warranty gives you specific legal rights, and you may also have other rights which could vary from state to state. Some states do not allow limitations on the life of an implied warranty and/or do not allow excluding or limiting incidental or consequential damages. If so, the above limitations or exclusions may not apply to you.
Warranty Procedure
Provide proof of purchase. A receipt or other dated proof of purchase must be included with merchandise being returned for a warranty claim to be processed.
Call or write for authorization. Before returning any product for a warranty claim, a Return Authorization (RA) number must be obtained. No merchandise will be accepted without an RA, and failure to obtain an RA will prevent or delay processing of the warranty claim. To obtain an RA call 631-963-5000, or write to Carson Warranty Service, 2070 5th Avenue, Ronkonkoma NY 11779 with a description of the problem. Include your name address and telephone number.
Package the return carefully. Shippers will not reimburse for damages due to insufficient packaging, even if the merchandise is insured. Print the RA number prominently on the top of the package.
Prepay shipping. Insure the package. Send it to Carson Warranty Service, 2070 5th Avenue, Ronkonkoma, NY 11779. Merchandise must be shipped prepaid. Carson will not accept merchandise C.O.D.
- CONTENTS
- BEFORE USE 4
- PRODUCT AT A GLANCE 5
- GETTING STARTED 11
- BASICS 14
- PLAYBACK AND SYSTEM SETTINGS 19
- BEFORE USE
- Care and maintenance
- Warning
- Introduction
- PRODUCT AT A GLANCE
- Package contents
- Product overview
- Status icon
- Quick start guide
- GETTING STARTED
- Installing the batteries
- Open the battery door
- Insert batteries
- Close the battery door
- Installing the microSD card
- Open the cover
- Insert the card
- Close the cover
- Removing the microSD card
- Remove the card
- Memory card and USB connection
- BASICS
- Turning on the power
- Focusing the eyepiece
- Focusing the objective
- Capturing image
- Recording video
- Adjusting the infrared intensity (IR intensity)
- Digital zoom
- Frame rate (frames per second)
- Screen brightness
- Turning off the power
- Infrared intensity and battery consumption
- PLAYBACK AND SYSTEM SETTINGS
- Scrolling through the menu
- Select Item
- Return to Night vision mode
- Playing back images
- Enter Photo viewing
- Select image
- Deleting an image being viewed
- Playing back video
- Enter video viewing
- Select video viewing
- Deleting a video
- Setting date and time
- Enter System settings
- Enter Date/Time
- Set the date and time
- Selecting the display language
- Enter Language
- Select the interface language
- Carson One Year Limited Warranty
- Warranty Procedure
Brand : Carson
Model : Aura Plus NV-250
Category : Night Vision Goggles