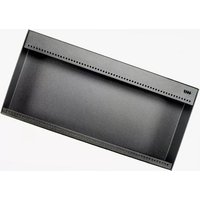
Pod 64X - Electronic enclosure 4ms - Free user manual and instructions
Find the device manual for free Pod 64X 4ms in PDF.


| Product Type | Compact Eurorack Enclosure |
| HP Size | 64HP |
| Number of Power Headers | 6 |
| +12V Max Current | 1.4 A |
| -12V Max Current | 0.67 A |
| +5V Max Current | 1.0 A |
| Power Input | 15-20 VDC, 2.1 mm positive tip barrel jack |
| Exterior Width | 329.7 mm (12.98") |
| Exterior Height | 159.5 mm (6.28") |
| Exterior Depth | 57 mm (2.24") |
| Interior Module Depth | 55 mm (2.16") |
| Weight (Powered) | 0.5 kg (17 oz) |
| Material | Black anodized aluminum |
| Included Accessories | M3 x 8mm screws (20), adhesive rubber feet (4) |
| Compatible Modules | Standard Eurorack modules with 10- or 16-pin power cables |
| Daisy-Chainable | Yes, via two barrel jacks on back |
| Unpowered Version Available | Yes (no power supply or headers) |
| Recommended Power Brick | 15 VDC, 2.1 mm positive tip, minimum 15 W |
Frequently Asked Questions - Pod 64X 4ms
User questions about Pod 64X 4ms
0 question about this device. Answer the ones you know or ask your own.
Ask a new question about this device
Download the instructions for your Electronic enclosure in PDF format for free! Find your manual Pod 64X - 4ms and take your electronic device back in hand. On this page are published all the documents necessary for the use of your device. Pod 64X by 4ms.
USER MANUAL Pod 64X 4ms
Compact Eurorack Enclosures from 4ms Company
Usage Guide 3.0 – October 7, 2019
natural_image
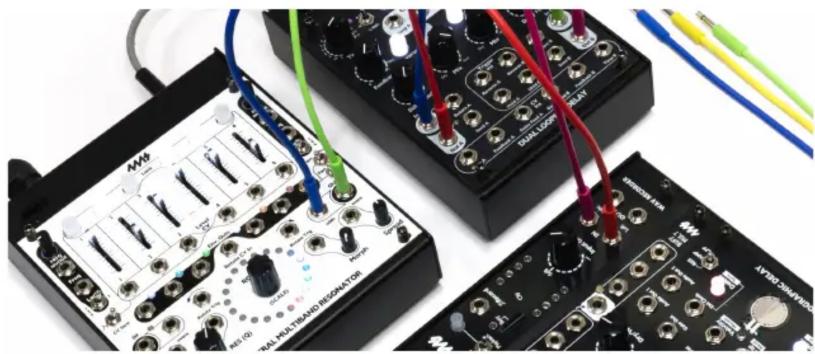
Close-up of electronic circuit boards with colored wires and components (no readable text or symbols)4ms Pods are low-cost, portable, compact enclosures that turn Eurorack modules into table-top instruments. Pods come with an integrated power supply which allows you to daisy-chain multiple units in different configurations using only a single power brick.
Overview

Available in 20HP, 26HP, 32HP, 34HP, 40HP, 48HP, 60HP, 64HP
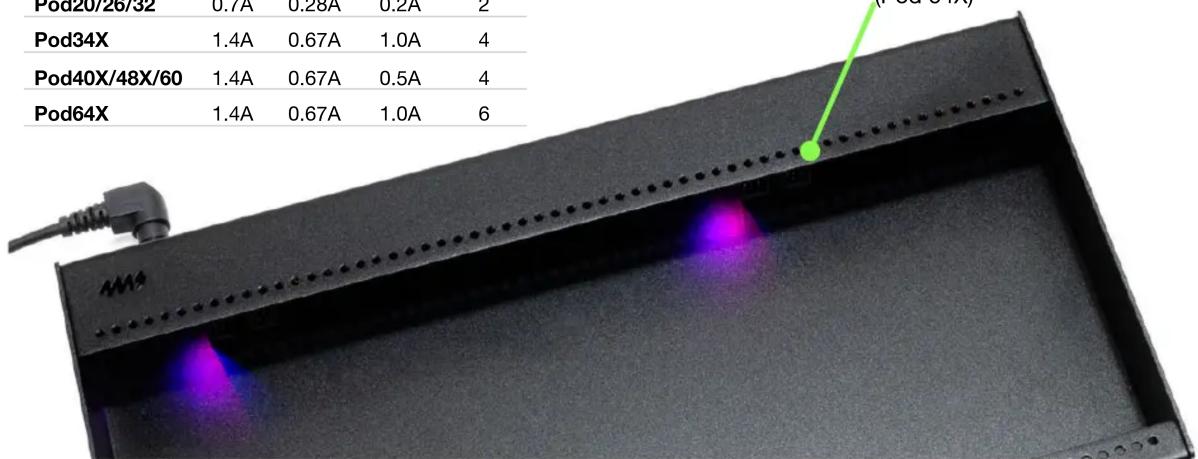
Four Eurorack power headers
(Pod34X, 40X, 48X, 60)
| +12V | -12V | +5V | Headers | |
| Pod20/26/32 | 0.7A | 0.28A | 0.2A | 2 |
| Pod34X | 1.4A | 0.67A | 1.0A | 4 |
| Pod40X/48X/60 | 1.4A | 0.67A | 0.5A | 4 |
| Pod64X | 1.4A | 0.67A | 1.0A | 6 |
Six Eurorack power headers
Installing a module
Congratulations on your purchase of a Pod! It's easy to install a standard Eurorack module in a Pod:
(1) Unplug all any barrel cables power brick cables from the Pod.
(2) Attach your module's power ribbon cable to a 16-pin power header on the Pod.
The Pod power header is keyed so that the cable cannot be inserted upside-down. The red stripe should be down, and should connect to the -12V on the module.
(3) Connect the other end of the ribbon cable to your Eurorack module (unless it's already be attached, of course!)
(4) Place the module into the Pod so that all screw holes on the module's faceplate line up with the screw holes on the Pod.
(5) Use M3 screws (included with Pod) to secure the module's faceplate to the Pod.
(6) Repeat steps 2-5 to install more modules. If you need to install more modules than there are power headers, you can use a Multi Power Cable.
(7) Power on the Pod by plugging a power brick into either one of the jacks on the back of the Pod.
Or, if you already have another Pod that's receiving power, you can daisy-chain the new Pod using a barrel cable.
(8) Optional: you may attach the included adhesive rubber feet to the bottom of your Pod. To use Pods on a pedalboard, you may attach Velcro or hook-and-loop fastener instead (not included)

natural_image
Close-up of a black electronic device with multiple ports and connectors, showing no visible text or symbols.Warning: If a screw seems to be unusually tight or pointing at an angle other than vertical, back it out and try again. The threads on the Pod's screw holes can b permanently damaged by forcing a screw that's the wrong size or installed at an angle.
Power
The Pod20, Pod26, and Pod32 have an integrated power supply with two standard Eurorack power headers; the Pod 34X, Pod40X, Pod48X, and Pod60 feature four power headers, and the Pod64X has size. All Pods work with all modules that use 10 and/or 16-pin power cables.
Power Bricks
To supply power to a single Pod, plug a Power Brick (sold separately) to either one of the jacks on the back of the Pod. Wherever Pods are sold, you can purchase a Power Brick that's compatible with the Pods. You also can use the Power Brick sold for use with the Row Power system (90W Brick). Or you can use your own power brick as long as it meets these specifications:
• Voltage: 15VDC to 20VDC (15VDC for best efficiency)
•Style: 2.1mm positive tip barrel plug (5.5mm outer diameter)
- Wattage or amperage: Most modern power bricks will be able to power 6 or more daisy-chained Pods, but anything under 15W (about 1A) will probably not be sufficient for powering more than one or two Pods.
Multi Power Cables

natural_image
Pure electrical circuit lines without any symbolsIf you need to install more modules than the number of power headers in your Pod, you can use a Multi Power Cable, available wherever Pods are sold. One end plugs into the power header on the Pod, and the other connectors plug directly to modules. Each Multi Power Cable can power three modules from one power header. Multi Power Cables come in two varieties: 10-pin, and 16-pin. Choose the one that matches the type of power cable on your modules.

natural_image
Two black rectangular electronic devices with connected cables and connectors, no visible text or symbols.Daisy-chaining
Pods are meant to be daisy-chained. When you plug a Power Brick into one of the jacks on the back of a Pod, the other jack can be used to power an additional Pod. Simply connect a Barrel Cable from one Pod to the next. You can continue to daisy-chain Pods to make long chains! With the 45W Power Brick sold for use with Pods, 8 or more Pods can be daisy-chained (depending on the total power consumption of all the modules).

Barrel Cables

natural_image
Close-up of a black flexible electronic component with two terminal connectors (no text or symbols visible)Barrel Cables are used to daisy-chain Pods. These same cables can be used in the Row Power system: You can even daisy-chain a Pod and a Row Power together!
Never plug more than one power brick into a Pod or a chain of Pods!
Unpowered Pods
Most Pods are sold with a power supply. Pods can also be sold “Unpowered”: essentially an empty metal box perfectly sized for Eurorack modules.
If you purchased an Unpowered Pod, you'll see there are no power headers or jacks on the back. You will need to provide your own power supply for your modules. If you have a Row Power module, it can be installed on the top of the Pod as a normal module. Additionally, there are two holes on the back of the Unpowered Pod which are plugged with a plastic insert: you can use these holes to mount a jack which connects to your own DIY power supply.
Tips
- Pods use M3 screws (which are included). You may use any other M3 screw, such as Befaco Knurlies, but do not use screws with other thread sizes to avoid permanently damaging the threads of the Pod.
- The Pod40X and Pod48X series have 1.97" (50mm) of depth on the inside; the Pod34X and 64X have 2.16" (55mm); and the thin Pods (Pod20/26/32/60) have 1.34" (34mm) of depth on the inside. The depth of your module, including the power header, must be less than or equal to this.
- Exceeding the maximum power draw for a Pod may cause modules to function poorly (or not at all). It's possible that exceeding the maximum ratings may damage your modules (this is true for any power supply).
Powered Pod Includes:
- Pod, black anodized aluminum
•Built-in power supply with two Eurorack power headers
•M3 x 8mm screws (10 for Pod48X and smaller; 20 for Pod60 and Pod64)
•Adhesive rubber feet (4) - Does not include barrel cable or power brick
| Power Specifications | +12V | -12V | +5V | Headers |
| Pod20, Pod26, Pod32 | 0.7A | 0.28A | 0.2A | 2 |
| Pod34X | 1.4A | 0.67A | 1.0A | 4 |
| Pod40X, Pod48X, Pod60 | 1.4A | 0.67A | 0.5A | 4 |
| Pod64X | 1.4A | 0.67A | 1.0A | 6 |
Note: Early Pod60s with two separate power PCBs have 0.4A max of +5V, and 0.56A max of -12V, and the power draw of any single module must not exceed half the maximum ratings.
Power input:
- Two barrel jacks for daisy-chaining, 2.1mm positive tip.
•Voltage: 15VDC recommended, 20VDC maximum
Exterior dimensions:
•Width:
- Pod20: 106.1mm (4.18")
• Pod26: 136.6mm (5.38")
• Pod32: 167.1mm (6.58")
• Pod34X: 177.3mm (6.98")
• Pod40X: 207.7mm (8.18")
• Pod48X: 248.3mm (9.78")
• Pod60: 309.3mm (12.18")
• Pod64X: 329.7mm (12.98")
•Height: 159.5mm (6.28")
•Depth:
• Pod20/26/32/60: 36mm (1.42")
• Pod40X/48X: 52mm (2.04")
• Pod34X/64X: 57mm (2.24")
Interior dimensions:
- Module depth:
• Pod20/26/32/60: 34mm (1.34")
• Pod40X/48X: 50mm (1.95")
- Pod34X/64X: 55mm (2.16")
- Module width:
• HP size * 5.08mm (0.2")
- Weight (powered):
• Pod20: 0.17 kg (6 oz)
• Pod26: 0.21 kg (7 oz)
• Pod32: 0.23 kg (8 oz)
• Pod34X: 0.3 kg (10 oz)
• Pod40X: 0.31 kg (11 oz)
• Pod48X: 0.35 kg (12 oz)
• Pod60: 0.40 kg (14 oz)
• Pod64X: 0.5 kg (17 oz)


Brand : 4ms
Model : Pod 64X
Category : Electronic enclosure