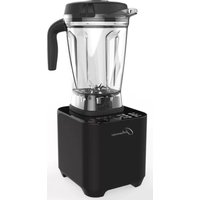
G2.6 Platinum Series - Blender Optimum - Free user manual and instructions
Find the device manual for free G2.6 Platinum Series Optimum in PDF.


| Product Type | High-Performance Blender |
| Model | G2.6 Platinum Series |
| Brand | Optimum |
| Dimensions (H x W x D) | Approx. 40 cm x 20 cm x 20 cm |
| Weight | Approx. 3.5 kg |
| Power Supply | 120 V / 60 Hz, 1200 W |
| Main Functions | Blending, Pureeing, Crushing Ice, Smoothies, Soups, Sauces |
| Speed Settings | Variable speed control with pulse option |
| Container Capacity | 1.5 L (approx.) |
| Container Material | BPA-Free Tritan or Glass (check manual) |
| Blade Material | Stainless Steel |
| Care and Cleaning | Hand wash recommended; removable parts dishwasher safe (top rack) |
| Safety Features | Safety lock mechanism, non-slip base, overload protection |
| Spare Parts | Replacement jar, blade assembly, lid, and gasket available |
| Repairability | Modular design for easy part replacement; service centers available |
| Warranty | 2 years (subject to registration) |
| Noise Level | Approx. 90 dB (typical for high-power blender) |
Frequently Asked Questions - G2.6 Platinum Series Optimum
User questions about G2.6 Platinum Series Optimum
0 question about this device. Answer the ones you know or ask your own.
Ask a new question about this device
Download the instructions for your Blender in PDF format for free! Find your manual G2.6 Platinum Series - Optimum and take your electronic device back in hand. On this page are published all the documents necessary for the use of your device. G2.6 Platinum Series by Optimum.
USER MANUAL G2.6 Platinum Series Optimum
natural_image
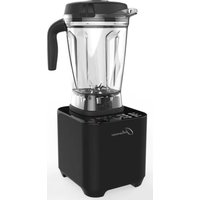
Black and white photo of a modern blender with a sleek glass top and black handle (no visible text or symbols)USER MANUAL
CONTENTS
SAFETY FIRST 1
GETTING TO KNOW YOUR OPTIMUM G2.6 PLATINUM SERIES BLENDER 3
CONTROL PANEL 4
OPERATING INSTRUCTIONS 5
HELPFUL REMINDERS 6
BLENDER CLEANING AND MAINTENANCE 7
TROUBLESHOOTING 8
PRODUCT SPECIFICATIONS 9
BLADE ASSEMBLY 10
WARRANTY TERMS & CONDITIONS (INTERNATIONAL) 11
CONTACT US 12

WHEN USING ELECTRICAL APPLIANCES, YOU SHOULD ALWAYS BE AWARE OF AND FOLLOW BASIC SAFETY PRECAUTIONS INCLUDING:
- Unplug the blender from the outlet when not in use, before putting on or taking off components, and before cleaning.
- To protect against the risk of injury due to electric shock, do not immerse the base of the blender in water or any other liquid.
- This appliance is NOT intended for use by children or people with reduced physical, sensory or mental capabilities, or lack of experience and knowledge, unless they are supervised or have been given instruction concerning the use of the appliance by a person responsible for their safety.
- DO NOT blend carbonated liquids. Blending carbonated liquids may result in injury.
- NEVER place hot ingredients (above 65irc C) into the blending.
- DO NOT blend liquids for more than 7 minutes.
- Avoid coming into contact with moving parts.
- DO NOT operate the blender if the power cord or plug are damaged, or if it malfunctions or is damaged in any way. Return the appliance to the nearest authorized service facility for inspection or repair.
- NEVER leave the blender unattended while it is operating.
- DO NOT blend liquids for more than 7 minutes. Content should not exceed 95irc C. The jug will melt over 95irc C.
- DO NOT let cord hang over edge of table or counter, or touch hot surfaces.
- Keep hands and utensils out of container while blending to prevent the possibility of severe personal injury and/or damage to the blender. A plastic scraper may be used, but must be used only when the blender is not running.
- Always handle the blades carefully as they are quite sharp.
- Always operate the blender with the lid in place.
- DO NOT clean the blender using a water jet machine. See Cleaning and Maintenance for proper cleaning instructions.
- Always operate the blender with the cup pad properly in place.
- To avoid overflowing, do not fill above the MAX FILL LINE. If the cup overflows remove enough liquid/ingredients until below the MAX FILL LINE, and continue blending. Do not operate if overflowing.
- DO NOT operate your appliance in an appliance garage. When storing in an appliance garage, always unplug the unit from the electrical outlet. Not doing so could create a risk of fire, especially if the appliance touches the walls of the garage or the door touches the unit as it closes.
- The use of ear protection is recommended during extended operating periods.
- Ensure the cup coupler and motor coupler are aligned and engaged before operating. If unable to engage, remove the cup and its content, and then try again.
Note: The G2.6 Blender requires a 5 minute cooling down period after being used at maximum power (e.g. if the soup function was used). After that, it can be used for a second cycle at maximum power. After two cycles, the blender needs to have an extended cooling down period until it returns to room temperature.
TO RESET THE UNIT
Your blender is equipped with a Resettable Heat Protector system to prevent overheating. If the motor shuts down, unplug the blender. Let the blender rest for approximately 15 minutes. Once the resting period has elapsed, plug the power cord back into the outlet and continue blending. If your blender does not function properly following this procedure, discontinue use and contact your distributor.
IMPORTANT UNPACKING INSTRUCTIONS
- Place the box containing the blender on a flat, sturdy surface before unpacking.
- Open the box and remove the instruction manual, and any other printed materials from the box.
- Remove any packing materials and all the components.
CAUTION: The blades of the blender are very sharp and are stored in the blending cup.
- Return all the packing materials to the box and save them in case you have to return the appliance in the future.
GETTING TO KNOW YOUR OPTIMUM G2.6 PLATINUM SERIES BLENDER

- Small lid and 100ml measuring cup.
- Tight-seal blending jug lid.
- Blending Jug: 2 litre BPA free jug made by Eastman Tritan. Includes Imperial and Metric graduation.
- Removable jug pad.
- Motor base, which houses the high performance motor.
- Tamper: using the tamper maintains circulation by preventing air pockets from forming during blending.

MANUAL MODES
POWER ON/OFF Press the Power switch at the side of the unit; the control panel will illuminate and the ON/OFF, SPEED and TIME buttons will appear. The unit is in energy conservation mode.
STANDBY MODE When in standby mode, the control panel will display all the functions.
SPEED You can adjust the speed while blending by simply pressing the SPEED up and down arrows from 1 to H (H is max level). Once speed is selected, press the ON/OFF and PULSE buttons to activate blending.
PULSE When the blender is running at speed 1-H, press and release the PULSE button to pulse ingredients
TIME Use the up and down arrows to set/adjust blending time. You can adjust the time in one-second intervals by pressing and releasing.
PRESET FUNCTIONS
The G2.6 Blender comes with six (6) preset functions (Vegetable, Sorbet, Soup, Grind, Smoothies, and Sauce) for quick results, in addition to Pulse.
To use one of the preset functions, simply choose the function by pressing on the corresponding button. The blender will stop automatically when the operation is completed. See below for each function's running time.
ICON FUNCTION DURATION
| Smoothie 45 seconds | |
| Vegetable 60 seconds | |
| Sorbet 80 seconds |
ICON FUNCTION DURATION
 | Grind 70 seconds | |
 | Soup | Seven minutes(Be sure not to exceed the MAX FILL LINE) |
 | Sauce 60 seconds | |
OPERATING INSTRUCTIONS
- Place the motor base on a flat, sturdy surface. Ensure the surface is clean and dry.
- Place the blending jug on the motor base.
- Once this is done, plug the power cord into an electrical outlet.
- Place all the necessary ingredients into blending jug and secure the lid.
- You can add more ingredients by removing the small lid/measuring cup and inserting the ingredients through the fill area. Replace the small lid after adding any ingredients.
- Press the power switch. This will cause LED lights to flash. This means the manual modes and preset functions are ready.
- The unit will start immediately once you make your choice of function by pressing the appropriate button.
REMEMBER: Do not place hands or any implements in the blending jug when the unit is plugged in or in operation.
▶ Always secure the lid when the unit is in operation.
▶ Always use the blender on a clean, sturdy, dry surface.
- Secure the small lid/measuring cup in the blending lid by twisting it clockwise.
▶ Once the lid is in position, additional ingredients can be added during blending by simply removing the measuring cap, adding ingredients, and replacing it, turning it to secure.
▶ Do not place the blender jug on the motor base while the motor is running or remove it before the blender has stopped running.
▶ Do not blend boiling liquids.
▶ When blending, place liquid ingredients into the jug first, followed by the softest ingredients. Ice or frozen fruit should be placed in the jug last.
▶ Use a plastic spatula if needed but only when the blender is turned off. Never use metal utensils, as damage may occur to the blending jug or blades.
▶ When the blender has been running for seven minutes, it will automatically shut off unless it is in Soup mode, which operates for seven minutes.
▶ Blending hard ingredients and spices may cause some clouding to appear on the inside of the blending jug, but will not affect the blender's performance.
▶ Use the Pulse function for maximum power to break up hard ingredients.
▶ Do not exceed the MAX FILL LINE when adding food or liquids to the blending jug.
▶ Make sure the blending jug is completely dry when chopping ice, fresh herbs, garlic, onion, zest, breadcrumbs or nuts and spices.
▶ Do not store food or liquids in your blending jug.
▶ Be careful not to over-process foods.
▶ Do not use any utensil inside the blender jug when the motor is on.
▶ Unplug the blender before reaching into the blending jug.
▶ Never use carbonated liquids in a blender jug. Using carbonated liquids in the blender may result in injury.
Always clean your Optimum G2.6 Platinum Series Blender after each use for hygiene purposes and to ensure its longevity. Leaving food in the blender is a health risk as bacteria can grow. It can also cause the blending jug to stain. Bacteria and residual food acids can also damage the seals and shaft of the blades.
TO CLEAN THE BASE:
- Switch off and unplug the blender from the power outlet.
- Using a soft, damp cloth, wipe the surface of the blender's base. You can use a mild detergent to remove dried food if required. Never immerse the motor base in water or other liquids.
- Use a dry soft cloth to thoroughly dry the blender.
TO CLEAN THE BLENDING JUG:
- After each use, rinse the blending jug thoroughly with warm soapy water (not hot).
- Place one or two drops of dish soap in the jug and fill it halfway with warm water.
- Secure the lid and mount on the base.
- Start the blender at LOW and slowly increase to HIGH speed.
- Run on HIGH for 10-60 seconds (depending on what was blended; thick contents take longer to clean).
- Pour the contents out and rinse thoroughly.
- Turn the blending jug upside down and let air dry.
Remember: The blending jug, blade assembly and lid assembly are all dishwasher safe.
FOR A DEEP CLEAN, PERFORM THE FOLLOWING STEPS MONTHLY OR AS NEEDED:
Place 2 cups of cool water and 2 cups of white vinegar into the blending jug and let them soak for between 12 and 24 hours. Pour the contents out and rinse thoroughly. Then follow the appropriate cleaning instructions above.
| PROBLEM SOLUTION | |
| It's not working! | Check that the blender is plugged into the outlet and that the power is on. |
| My blender stopped working half way through blending... | Your blender may have overheated. When blending thick ingredients (dates, nut butters, etc.) the appliance must be used at the highest speed. Allow the machine to cool down for 30-45 minutes before turning it back on. |
| During blending, the contents do not appear to be moving. | The blending jug may be over-loaded or there may be a trapped air bubble. You can carefully remove the lid and try adding more liquid or reducing the quantity of ingredients in the jug. |
| Why is my jug cloudy or stained? How can I clean it? | The minerals from fruits and vegetables, such as leafy greens, can cause a film to build up on the inside of the blending jug. Follow the instructions for a deep cleaning on Page 7. |
| My blender is emitting a strong electrical smell. | The smell will dissipate after a few uses and the lubricants will wear off after 20-50 cycles. |
Product G2.6 Platinum Series Blender
Model G2.6
Rated voltage 220-240V
Rated frequency 50-60Hz
Rated power 1500W
Max motor power 2400W
Weight 5kg
Dimension 190 x 210 x 485mm

Only for EU countries. Do not dispose of electric appliances with household waste material! As stipulated by European Directive 2002/96/EC on waste electrical and electronic equipment and in accordance with national laws, electric appliances that have reached the end of their life cycle must be collected separately and returned to an environmentally compatible recycling facility.
DOES MY BLADE ASSEMBLY NEED REPLACING?
Even the toughest blade assemblies eventually wear out and need replacing. Replacement frequency is based on use. We recommend that you inspect your blade assembly once a week, following the instructions below. If the inspection shows you need a replacement blade assembly contact us at www.internationalwarrantysupport.com.
▶ If any of the following are present, your assembly needs replacing: nicks, cracks or gouges in the outer surface.
▶ Inspect the gears of the blade assembly; the teeth that mesh with the motor unit should be deep and have continuous edges.
▶ Inspect the seal, on the bottom of the blade assembly below the gear; if it is missing, lifting or torn, replace the assembly.
▶ With the blade assembly in your hand, rotate the blade, checking that it moves smoothly with a constant and slight resistance.
▶ Check the blade assembly for vertical movement: holding the assembly in one hand, use the other to push up and down on the gears. If you feel any vertical movement, it's time to replace the blade.
As a general rule, the blade assembly should be replaced when:
▶ The seal is damaged and missing or bearings are visible
▶ The blades move vertically
▶ The blades move side-to-side
▶ There are noises from the blade assembly
▶ The blade spins without any resistance when testing by hand
▶ The blade is either difficult to spin or will not spin at all, when testing by hand
CAUSES FOR BLADE ASSEMBLY WEAR
While many factors can cause the blade assembly to wear out, the following are often to blame:
▶ Washing incorrectly, either in a dishwasher or by using a bleach sanitizer stronger than 100 ppm
▶ Blending abrasive products (sand, etc.)
▶ Using parts not approved by Optimum
▶ Operating the blender with foreign objects in the container
▶ Incorrect operation of the blender, including: removing or placing the container on the drive socket while it is spinning, forgoing the use of the centering pad, rocking or tilting the blender while in operation
▶ Worn drive sockets can also cause damage to the blade assembly
Effective as of 1st January 2014
This warranty as outlined below solely covers distributors of the Optimum range of products. Please contact your distributor for full product warranty.
- Optimum ® warranties this product against defects in materials and workmanship for a period of 2 years from the original date of purchase when used in accordance with the accompanying instruction manual.
- Any warranties exceeding this standard period are offered as extended terms by the selling distributor and claimable only through that provider.
- Defects that occur within this manufacturer's warranty period, under normal use and care will be repaired or replaced at our discretion only if the selling distributor is unable to do so. This is done solely at our option with no charge for parts. This warranty does not extend to accessories included or purchased separately. Replacements can be offered for major faults as determined by your distributor and at their own discretion.
- In the event that the goods requiring repair are under warranty, and this distributor is unable to provide the repairs; the customer is responsible for any freight charges to or from Optimum ® (or their approved service provider).
- Whilst in transit the goods are at the owner's risk and any further damage during this transportation is not covered under warranty.
- Customers should ensure that the product being returned is properly packaged so as to ensure that no damage occurs to the product during transit. To be able to process the warranty claim, ensure you have included an explanation of any problem. Optimum ® will not fault-find and will only repair described faults as covered under warranty.
- This full warranty is void if this product has been subject to abuse, negligence, accident, alteration, failure to follow operating instructions, or the product has been exposed to abnormal or extreme conditions.
- Cosmetic changes that do not affect performance, such as discolouration of parts of the product in the hands of the user or the effects of the use of abrasive cleaners will not be warranted or considered defects. The cleaning or removal of food products along with any damage caused by allowing them to build up is not covered by this full warranty.
- This warranty does not cover normal wear and tear of the product or parts.
- This warranty does not cover any defect caused by an accident, misuse, abuse, improper installation or operation, lack of reasonable care, loss of parts, tampering or attempted repair by a person not authorized by Optimum®.
- The warranty will not apply if damage, malfunction or failure resulting from alterations, accident, misuse, abuse, fire, liquid spillage, maladjustment of customer controls, use on an incorrect voltage, power surges and dips, thunderstorm activity, acts of God, voltage supply problems, tampering or unauthorized repairs by any persons, use of defective or incompatible accessories, exposure to abnormally corrosive conditions or entry by any insect, vermin or foreign object in the product.
- You must keep your purchase receipt as proof of purchase and as proof of the date on which the purchase was made. The purchase receipt must be presented when making a claim under this warranty.
- In the event the receipt of purchase is not presented, then this warranty is invalid. Consumer Law allows us to request reasonable proof of purchase to service a warranty claim.
- This warranty does not imply, intend to or detract from any consumer rights listed in and able to be enforced from Regulated Consumer Law. Only the condition, which is found to be in breach of the consumer law, shall be void and all other conditions will remain in place.
CONTACT US
Please contact the distributor located in the country where you made your original purchase for all Support, Servicing and Warranty.

- CONTENTS
- WHEN USING ELECTRICAL APPLIANCES, YOU SHOULD ALWAYS BE AWARE OF AND FOLLOW BASIC SAFETY PRECAUTIONS INCLUDING:
- TO RESET THE UNIT
- IMPORTANT UNPACKING INSTRUCTIONS
- GETTING TO KNOW YOUR OPTIMUM G2.6 PLATINUM SERIES BLENDER
- MANUAL MODES
- PRESET FUNCTIONS
- OPERATING INSTRUCTIONS
- TO CLEAN THE BASE:
- TO CLEAN THE BLENDING JUG:
- FOR A DEEP CLEAN, PERFORM THE FOLLOWING STEPS MONTHLY OR AS NEEDED:
- DOES MY BLADE ASSEMBLY NEED REPLACING?
- CAUSES FOR BLADE ASSEMBLY WEAR
- Effective as of 1st January 2014
- CONTACT US
Brand : Optimum
Model : G2.6 Platinum Series
Category : Blender