
Nibble - High chair InfaSecure - Free user manual and instructions
Find the device manual for free Nibble InfaSecure in PDF.

| Product Type | High Chair |
| Brand | InfaSecure |
| Model | Nibble |
| Models Covered | 527, 528, 529 |
| Maximum Child Weight | 17 kg (37.5 lbs) |
| Number of Recline Positions | 3 |
| Tray Positions | 3 |
| Height Adjustment | Yes, via red buttons on sliding sleeve |
| Castors | 4 locking castors |
| Harness Type | 5-point harness (2 shoulder, 2 lap, 1 crotch) |
| Included Parts | A-frame, seat, tray, footrest, footplate, basket, harness, axle rod, cross bar, screws, nuts, clips |
| Optional Accessory | #007 booster pad for smaller babies |
| Care and Cleaning | Warm soapy water; dry immediately; avoid bleach and abrasives |
| Safety Features | Harness must always be used; wheel locks; anti-tip design; warnings against leaving child unattended |
| Warranty | 12 months against manufacturing defects |
| Customer Service | 02 4728 8090 (Australia) |
| Country of Origin | Australia |
Frequently Asked Questions - Nibble InfaSecure
User questions about Nibble InfaSecure
0 question about this device. Answer the ones you know or ask your own.
Ask a new question about this device
Download the instructions for your High chair in PDF format for free! Find your manual Nibble - InfaSecure and take your electronic device back in hand. On this page are published all the documents necessary for the use of your device. Nibble by InfaSecure.
USER MANUAL Nibble InfaSecure
High/Low Chair Assembly Instructions
For models 527, 528 and 529
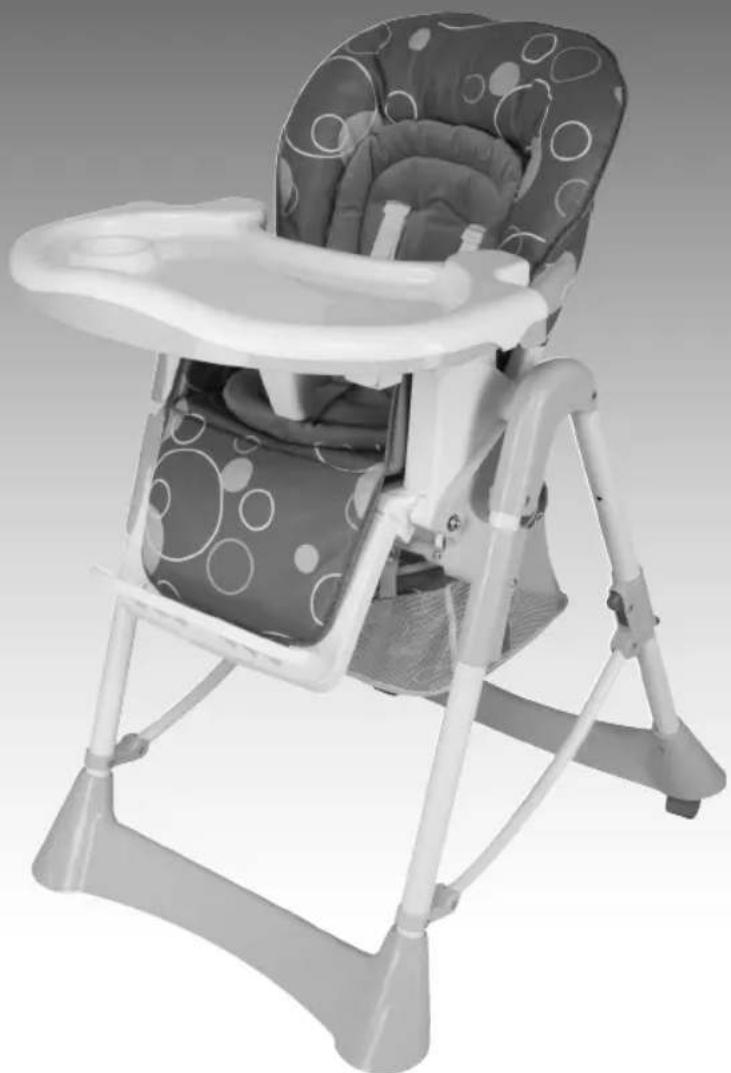
natural_image
Black and white photo of a baby boom chair with patterned backrest and seat tray (no text or symbols visible)
infasecure
caring for the wellbeing of infants
P.O. Box 487, Emu Plains NSW 2750
Service No: 02 4728 8090
High chair #527, 528, 529
Assembly Instructions
Before assembly study the diagrams and read the instructions thoroughly. Identify and check against the list below. If any parts are missing or appear to be faulty or damaged, please contact INFASECURE Service Department on (02) 4728 8090.
Parts List
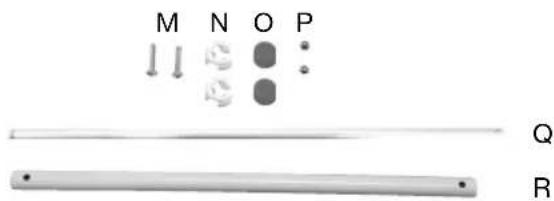
| A | 2x | Base | J | 1x | Tray | M | 2x | Screws |
| B | 4x | Castors | K | 1x | Inner Tray | N | 2x | Clip |
| C | 2x | A-Frame | L | 1x | Harness | O | 2x | Plastic Nut |
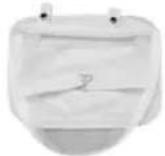
| D | 1x | Mesh Basket | (i) | RH Lap Strap | P | 2x | Small Nut | |
| E | 1x | Footrest | (ii) | RH Shoulder Strap | Q | 1x | Axle Rod | |
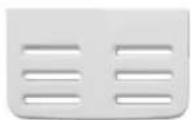
| F | 1x | Foot plate | (iii) | Crotch Strap | R | 1x | Cross Bar | |
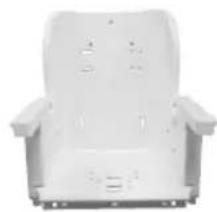
| G | 2x | Seat Body | (ix) | LH Shoulder Strap | ||||
| H | 2x | Seat Cover | (x) | LH Lap Strap | ||||
| I | 2x | Seat Insert |
A

natural_image
Two identical gray plastic handles with rounded ends, no text or symbols visibleB


natural_image
Mechanical tool with articulated arm and handle (no visible text or symbols)C

natural_image
Mechanical tool with articulated arm and handle (no visible text or symbols)D
E

G
natural_image
White industrial chair with ventilation slots and side legs (no visible text or symbols)|

natural_image
Close-up of a textured, oval-shaped object with internal cracks and a small circular feature (no text or symbols visible)J

natural_image
Illustration of a baby seat with a smiling face and raised arms (no text or symbols)
K

L
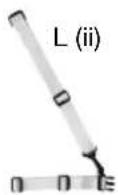
L (iii)
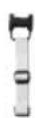
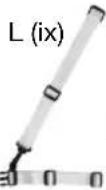
L(x)
IMPORTANT:
PLEASE READ INSTRUCTIONS CAREFULLY. KEEP FOR FUTURE REFERENCE.
⚠️ WARNINGS
• DO NOT LEAVE CHILDREN UNATTENDED.
- FOLLOW THE MANUFACTURER'S INSTRUCTIONS.
- THE HARNESS MUST ALWAYS BE USED AND CORRECTLY FITTED – MOST INJURIES FROM HIGH CHAIRS ARE CAUSED BY FALLS.
- POSITION THE HIGH CHAIR AWAY FROM SOLID STRUCTURES AND BENCHES TO AVOID INJURIES CAUSED BY FALLS AND BY ACCESS TO DANGEROUS ITEMS.
- Never allow this product to be used as a toy.
- Do not use for children weighing more than 17kg.
- Ensure the high chair is only used on safe level surfaces.
- When adjusting the chair always ensure that parts of your child's body are clear of any moving parts.
- Never carry or fold the high chair while the child is sitting in it.
- Do not elevate the highchair onto any structure or table.
- Check regularly for loose, worn, or torn parts and repair or replace as required with genuine INFA spare products.
• DO NOT USE UNTIL REPAIRED.
- Do not allow other children or animals to play near or walk under the chair when in use.
- To reduce the risk of injury, position the high chair away from furniture, walls, hot surfaces and liquids, window covering cords, and electrical cords and position the high chair away from furniture when the chair is not being used at a table with a tray removed.
- The high chair should only be used in an upright position once the child is capable of reliably and consistently sitting upright.
• Always apply wheel locks when not moving the high chair.
- Check that the harness is correctly fitted - use this harness at all times.
- Do not use the high chair unless all components are correctly fitted and adjusted.
- Be aware of the risk of open fire and other sources of strong heat, such as electric bar fires, gas fi res etc. in the vicinity of the high chair.
- Do not use the high chair until the child can sit up unaided.
- Do not use the high chair if any part is broken, torn or missing.
- Remove the 'A' frames from the packaging [Figure 1].

natural_image
Two identical robotic arms with articulated joints, labeled 'Figure 1' at bottom (no other text or symbols visible)-
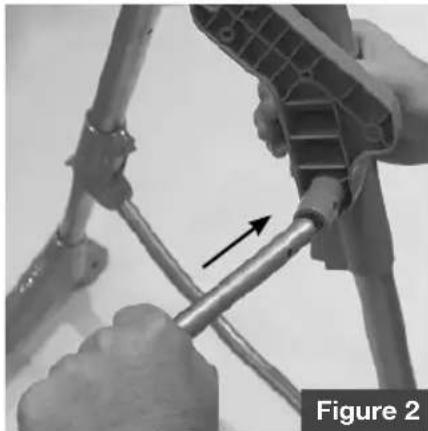
Insert cross bar into 'A' frames and align the holes to allow the bolts to pass through. Attach using nut and washer then fasten the nut with the appropriate tools [Figure 2]. (Tools not supplied).
-
Press both red buttons on the rear tubular legs and slide them down to open the frame as shown [Figure 3].
-
To insert the castors turn the frame upside down. Insert the four castors into the holes provided in the plastic bases [Figure 4].
-
Hook the seat onto the seat support located on the top of the frame. (Ensure that the two female slots of the seat support are aligned with the corresponding male slots located on seat) [Figure 5].
natural_image
Close-up of hands using a tool to adjust or install a mechanical component, labeled 'Figure 2' (no text on the diagram itself)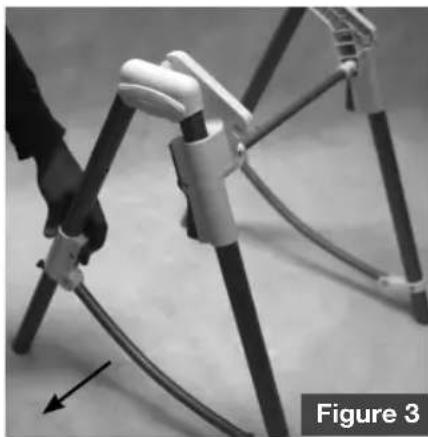
natural_image
Close-up of a person using a flexible cable device on a tripod stand, with no visible text or symbols.
natural_image
Close-up of hands holding a white plastic component with an arrow pointing to it, labeled 'Figure 4' (no text on the object itself)
natural_image
Close-up of a baby seat being held by a hand, with a black arrow indicating the motion (no text or symbols visible)-
Secure the seat to the 'A' frame by sliding the axle rod through the seat support and aligned seat [Figure 6]. Attach the clips and plastic nuts to both ends of the rod to hold it in place.
-
To attach the basket loop the clip straps over the seat locking bar located under the seat [Figure 7].
-
Hook the rear straps onto the knobs found at the rear of the seat [Figure 8].
-
To install the footrest (E) simply push it into position using the slots provided on the seat and the back of footrest [Figure 9].

natural_image
Close-up of hands using a tool to measure a mechanical component, labeled 'Figure 6' (no text or symbols on the object itself)
natural_image
Medical procedure image showing hands operating a patient seat with medical equipment (no visible text or symbols)
natural_image
Person washing dishes in a kitchen sink, no visible text or symbols
natural_image
Person holding a baby seat with arrows pointing to the seat area, labeled 'Figure 9' (no text on device or background)-
Position the footplate into the correct height slots for your child [Figure 10].
-
Position cover onto seat body and align so that holes are accessible [Figure 11].
-
Insert each harness part into the aligning holes, push through until the end plastic clip protrudes out the back of the seat [Figure 12].
-
Make sure harness is fully assembled. Check the hardware clicks together [Figure 13].

natural_image
Close-up of hands installing or adjusting a white ergonomic chair seat with ventilation grilles (no text or symbols visible)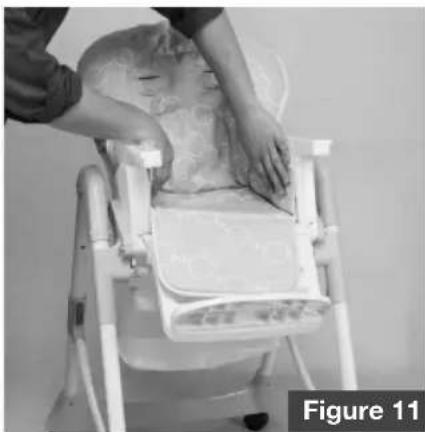
natural_image
Person adjusting a baby's seat on a baby's back table using a medical or laboratory instrument (no visible text or symbols)
natural_image
Person using a mobile phone on a chair, no visible text or symbols
natural_image
Medical procedure image showing hands performing a procedure on a patient's arm (no visible text or symbols)-
To install the tray pull the release handle located under the front of tray and slide it onto the arms of chair using guide provided on the underside of tray. The tray has a three-position adjustment mechanism and can therefore be adjusted to three different positions [Figure 14].
-
Tray can be hooked onto the back legs of highchair while not in use [Figure 15].
Recline Backrest
- To recline the backrest (three positions) pull the backrest lever upwards to release. Find the most suitable position and release the lever to secure the backrest into the required position [Figure 16].
High/Low Positions
- Press the two red buttons on sliding sleeve and adjust to required height. (Do not adjust whilst baby is seated) [Figure 17].

natural_image
Person using a handheld device to adjust a white object on a white chair (no text or symbols visible)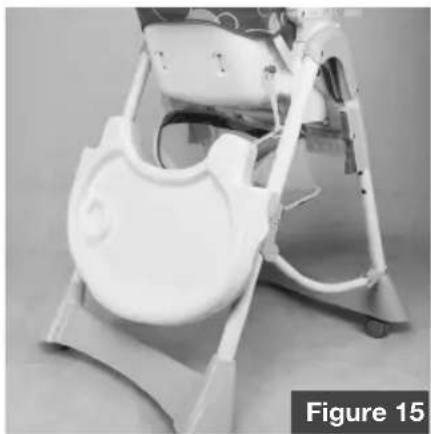
natural_image
Close-up of a white baby seat with a circular vent, no visible text or symbols
natural_image
Close-up of a baby's seat being held by a hand, showing fabric pattern and a black arrow indicating rotation (no text or symbols)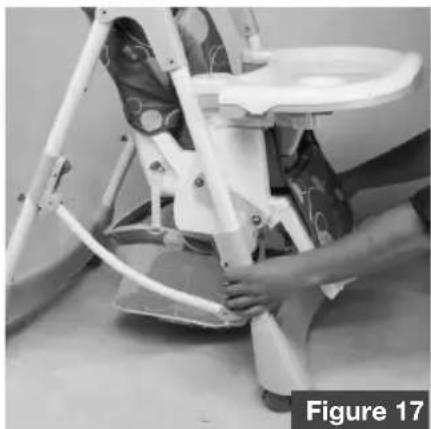
natural_image
Person using a baby care chair with a hand placing the seat (no visible text or symbols)Folding Legs
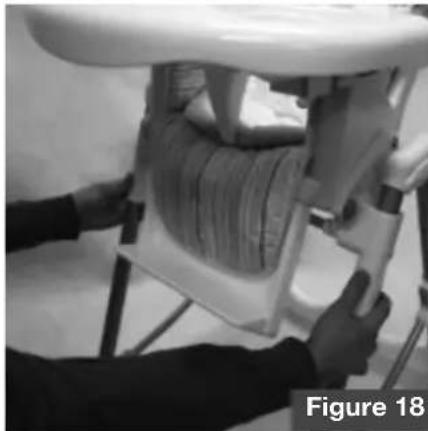
- Before folding the highchair, first remove the tray and store it on the tray hooks on the back legs of the highchair [see Figure 15]. To fold away press the red buttons located on the rear legs and slide upwards to fold legs together [Figure 18].
Folding Tray
- To fold the tray into storage position, press the buttons on the armrests [Figure 19]. The seat must be in highest position. (Do not fold the tray whilst baby is seated).
Locking Wheels
-
Press down on red locks on each castor to lock the wheels when in use. Lift red lock lever to unlock the wheels.
-
The highchair is now ready for storage or travel.
natural_image
Person assembling a car tire on a chair, no visible text or symbols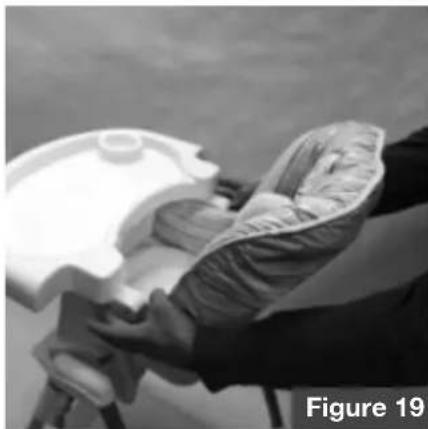
natural_image
Close-up of a hand holding a cloth or towel, with a white tray and circular object in the background (no visible text or symbols)
natural_image
Close-up of a mechanical component with a curved cylindrical part and a flat blade, labeled 'Figure 20' in the corner (no other text or symbols)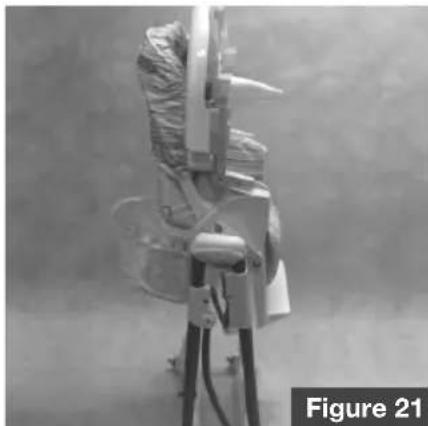
natural_image
Black-and-white photo of a tripod-mounted device with attached paper and metal components, labeled 'Figure 21' (no readable text or symbols on the device itself)Congratulations. You have completed the assembly instructions. Your highchair is now ready for use. Please read all the safety warnings on page 3 and store instructions in a safe place.

To secure your child in the harness push buckle tongues (A) into buckle housing (B) and adjust with waist strap adjuster so that the waist strap is firmly secured around child. Adjust crotch strap firmly using crotch strap adjuster. Place shoulder straps in position on buckle tongues (A) and adjust so that they are firm and comfortable on child.
CARE AND CLEANING
Only use warm soapy water for cleaning. Dry immediately after. Do not leave in direct sunlight for prolonged periods as fading may occur. Do not use abrasive cleaner or bleach. For further enquiries please contact the Infa Service Department on (02) 4728 8090.
TO USE FOR A SMALLER BABY
The optional #007 booster pad is available separately to add padding to the seat and reduce the seating area for the smaller child. This provides the child with extra security and comfort.
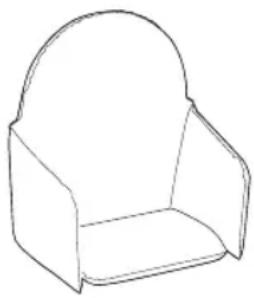
natural_image
Line drawing of a simple armchair with curved backrest (no text or symbols)WARRANTY DETAILS
We warrant this product for twelve months from the date of purchase against failure due to manufacturing faults or faulty materials. Misuse, accidental damages, normal wear and tear are not covered by this warranty. When used for commercial use the period is limited to six months. “Our goods come with guarantees that cannot be excluded under the Australian Consumer Law. You are entitled to a replacement or refund for a major failure and for compensation for any other reasonably foreseeable loss or damage. You are also entitled to have the goods repaired or replaced if the goods fail to be of acceptable quality and the failure does not amount to a major failure.”
|
| _
一
1
infasecure
caring for the wellbeing of infants
INFASECURE PTY LTD
Phone: 02 4728 8080
Fax: 02 4728 8040
Customer Service Phone: 02 4728 8090
ABN: 52 149 173 660
Head Office And Registered Address:
110-114 Old Bathurst Rd, Emu Plains, NSW, 2750
P.O Box 487, Emu Plains, NSW, 2750
www.infasecure.com.au
ISSUE B


Brand : InfaSecure
Model : Nibble
Category : High chair