
FoodSaver VS1300 - Vacuum Sealer SUNBEAM - Free user manual and instructions
Find the device manual for free FoodSaver VS1300 SUNBEAM in PDF.


| Product Type | Vacuum Sealer |
| Brand | Sunbeam (FoodSaver) |
| Model | FoodSaver VS1300 |
| Power Supply | 120V AC, 60 Hz (estimated) |
| Functions | Vacuum sealing with containers and zipper bags, quick marinate |
| Compatible Containers | FoodSaver Fresh Containers (3, 5, 10 cup) |
| Compatible Bags | FoodSaver Zipper Bags (950ml and others) |
| Automatic Operation | Automatic vacuum cycle with stop when sealed |
| Indicator Lights | Green ready light, red/green blinking for errors |
| Cool Down Time | 20 seconds between cycles |
| Safety Features | Automatic shut-off, RCD recommended (30mA), do not immerse |
| Cleaning | Removable reservoir, hand wash with warm soapy water; clean gaskets and valves |
| Warranty | 12 month replacement or repair (Australia/New Zealand) |
| Dimensions (Approx.) | 40 x 20 x 15 cm (estimated) |
| Weight (Approx.) | 2 kg (estimated) |
Frequently Asked Questions - FoodSaver VS1300 SUNBEAM
User questions about FoodSaver VS1300 SUNBEAM
0 question about this device. Answer the ones you know or ask your own.
Ask a new question about this device
Download the instructions for your Vacuum Sealer in PDF format for free! Find your manual FoodSaver VS1300 - SUNBEAM and take your electronic device back in hand. On this page are published all the documents necessary for the use of your device. FoodSaver VS1300 by SUNBEAM.
USER MANUAL FoodSaver VS1300 SUNBEAM
natural_image
Black and white photo of a modern hand washing machine with a green handle (no visible text or symbols)Contents
Important Safeguards. . . . . . . 1
Product Features ..... 2
How To Vacuum Seal with FoodSaver® Fresh Containers ..... 3
How To Vacuum Seal with FoodSaver®Zipper Bags. . . . . . 4
How To Marinate with your FoodSaver®Fresh Appliance ..... 5
Care and Cleaning of your Fresh Appliance. . . . . 6
FoodSaver® Fresh Containers & Zipper Bags ..... 7
Guidelines Food Preparation and Reheating Tips. 8
Guidelines for Successful Vacuum Sealing ..... 10
Troubleshooting ..... 11
Important Safeguards
Read the instructions carefully. For your own safety, always follow these precautions when using this FoodSaver® appliance.
Sunbeam is very safety conscious when designing and manufacturing consumer products, but it is essential that the product user also exercise care when using an electrical appliance. Listed below are precautions which are essential for the safe use of an electrical appliance:
- Read carefully and save all the instructions provided with an appliance.
- Always turn the power off at the power outlet before you insert or remove a plug. Remove by grasping the plug - do not pull on the cord.
- Turn the power off and remove the plug when the appliance is not in use and before cleaning.
- Do not use your appliance with an extension cord unless this cord has been checked and tested by a qualified technician or service person.
• Always use your appliance from a power outlet of the voltage (A.C. only) marked on the appliance. - This appliance is not intended for use by persons (including children) with reduced physical, sensory or mental capabilities, or lack of experience and knowledge, unless they have been given supervision or instruction concerning use of the appliance by a person responsible for their safety.
• Children should be supervised to ensure that they do not play with the appliance. - The temperature of accessible surfaces may be high when the appliance is operating.
- Never leave an appliance unattended while in use.
-
Do not use an appliance for any purpose other than its intended use.
-
Do not place an appliance on or near a hot gas flame, electric element or on a heated oven.
• Do not place on top of any other appliance. - Do not let the power cord of an appliance hang over the edge of a table or bench top or touch any hot surface.
- Do not operate any electrical appliance with a damaged cord or after the appliance has been damaged in any manner. If damage is suspected, return the appliance to the nearest Sunbeam Appointed Service Centre for examination, repair or adjustment.
- For additional protection, Sunbeam recommend the use of a residual current device (RCD) with a tripping current not exceeding 30mA in the electrical circuit supplying power to your appliances.
- Do not immerse the appliance in water or any other liquid unless recommended.
• Appliances are not intended to be operated by means of an external timer or separate remote control system. - This appliance is intended to be used in household and similar applications such as: staff kitchen areas in shops, offices and other working environments; farm houses; by clients in hotels, motels and other residential type environments; bed and breakfast type environments.
If you have any concerns regarding the performance and use of your appliance, please visit www.sunbeam.com.au or contact the Sunbeam Consumer Service Line.
Ensure the above safety precautions are understood.
Product Features
FoodSaver® Fresh VS1300
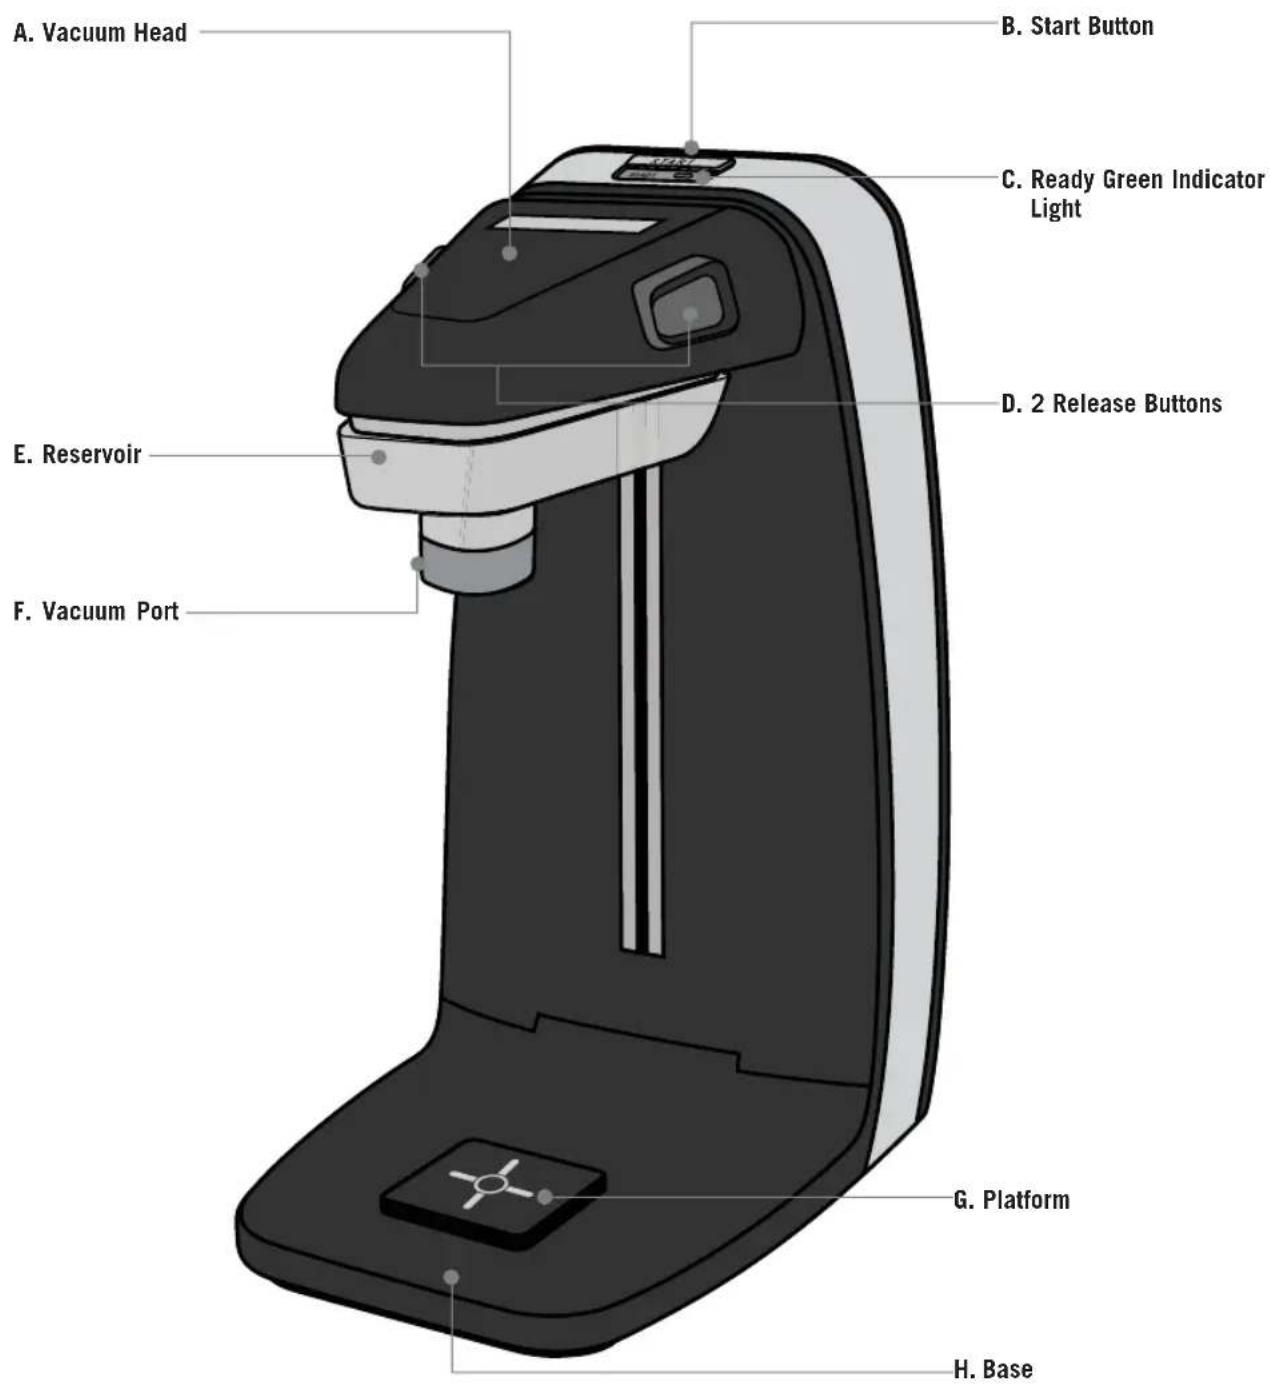
How to...
Vacuum Seal with FoodSaver® Fresh Containers
STEP 1
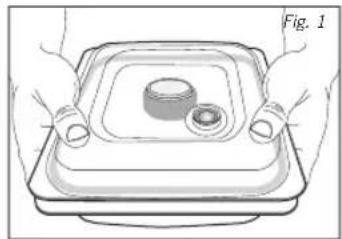
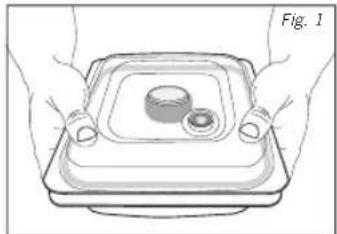
Place food or item to be vacuum sealed inside a FoodSaver® Fresh Container. Press firmly on all sides to ensure lid is properly closed (Fig. 1).
STEP 2
Place container on unit base using platform as a guide (Fig. 2).
STEP 3
Simultaneously press both release buttons at the vacuum head to adjust its height (Fig. 3). Press the vacuum head on the container until it clicks, the green ready indicator will turn on.
NOTE: The green light will only illuminate if the vacuum head has made secure contact with the top of the container.
STEP 4
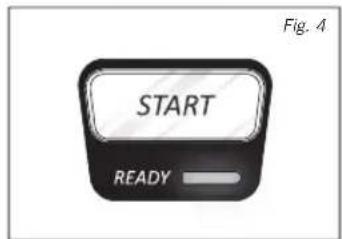
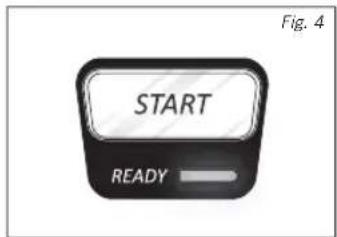
Push start button to initiate vacuum sealing process (Fig. 4).
STEP 5
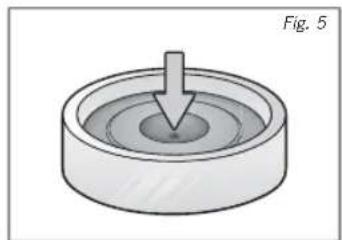
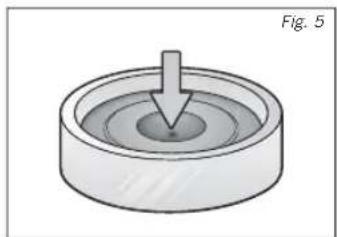
The vacuum indicator on the container “dimple” will form early during the vacuum sealing process. Do not stop the process. Allow the vacuum to complete the cycle before removing the container from the machine. The unit will stop automatically once the container is vacuum sealed (Fig. 5).
NOTE: If the food you are vacuum sealing flour, bread crumbs or other powdery foods, some may be sucked out of the container into the reservoir under the vacuum head. Please make sure to empty it out and clean after each use.
STEP 6
Simultaneously press both release buttons again to lift vacuum head up and remove fresh container (Fig. 6). Now you can store your fresh container in refrigerator, pantry or take on the go.
NOTE: Let appliance cool down for 20 seconds after each use.
Go to www.foodsaver.com for additional hints, tips, instructional videos and information.
natural_image
Illustration of a tray with a central cylindrical object and two handles, no text or symbols present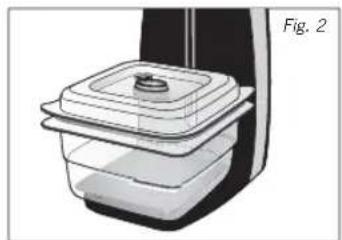
natural_image
Illustration of a multi-tiered food container with a lid, labeled Fig. 2 (no text or symbols on the diagram itself)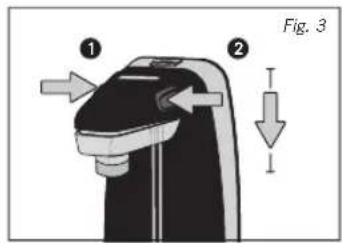
natural_image
Diagram of a mechanical component with a downward arrow indicating force or direction (no text or symbols)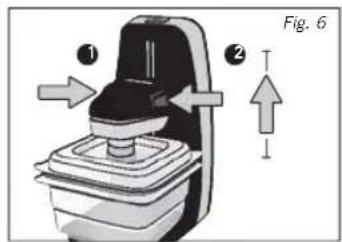
How to...
Vacuum Seal with FoodSaver® Zipper Bags
STEP 1
Place food or item to be vacuum sealed inside FoodSaveZipper Bag.
STEP 2
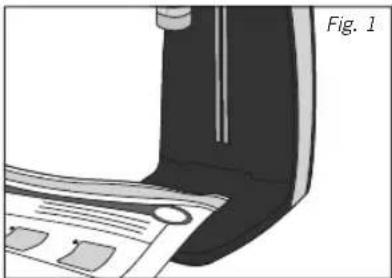
Place FoodSaver® Zipper Bag on unit base using platform of as a guide to place and align zipper bag valve (Fig. 1).
STEP 3
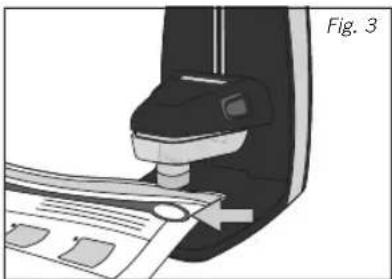
Simultaneously press both release buttons at the vacuum head to adjust its height (Fig. 2). Press the vacuum head on the FoodSaver® Zipper Bag (Fig. 3) until it clicks, the green ready indicator will turn on.
NOTE: The green light will only illuminate if the vacuum head has made secure contact with the top of the FoodSaver® Zipper Bag.
STEP 4
Push start button to initiate vacuum sealing process (Fig. 4). Push the Start Button again when you are done vacuum sealing the FoodSaver® Zipper Bag.
NOTE: You may need to cancel the vacuum sealing process when dealing with delicate foods. In order to do that just push the Start Button and the unit will stop vacuum sealing.
STEP 5
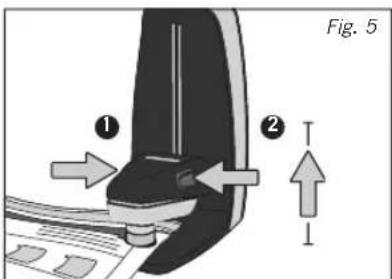
When you are done vacuum sealing press both release buttons simultaneously again to lift vacuum head up and remove fresh Zipper Bag (Fig. 5). Now you can store the Zipper Bag in refrigerator, pantry or take on the go.
NOTE: Let appliance cool down for 20 seconds after each use.
NOTE: The FoodSaver® Zipper Bags should not be used to vacuum seal liquids. If vacuuming moist foods, ensure that the liquid does not reach the Zipper Bag valve and check and clean the Fresh Appliance reservoir as needed.
Go to www.foodsaver.com for additional hints, tips, instructional videos and information.
natural_image
Illustration of a mechanical component with layered structure and labeled Fig. 1 (no text or symbols on the diagram itself)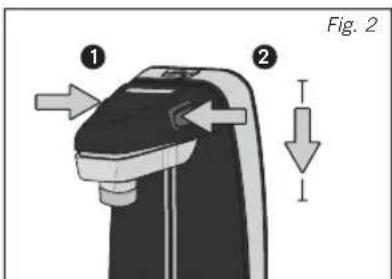
natural_image
Diagram of a medical device with a surgical tool inserted, showing a magnified view of the device's internal structure (no text or symbols present)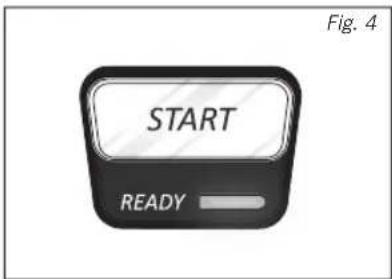
How to...
Marinate with your FoodSaver® Fresh Appliance
Your FoodSaver ^® Fresh Appliance allows you to quickly marinate foods. The FoodSaver ^® Fresh Containers are great to marinate foods.
STEP 1
Prepare enough of your favorite marinade to fully cover food inside the fresh container. Press firmly on all sides to ensure lid is properly closed (Fig. 1).
NOTE: Always leave at least 2.5cm of space between contents and top of rim.
NOTE: Make sure rubber gasket underneath lid as well as rim of container is free from food materials.
STEP 2
Place container on unit base using platform as a guide (Fig. 2).
STEP 3
Simultaneously press both release buttons at the vacuum head to adjust its height (Fig. 3). Guide the vacuum port until it clicks onto the container, the green ready indicator will turn on.
STEP 4
Push start button to initiate quick marinate process (Fig. 4).
STEP 5
The vacuum indicator on the container “dimple” will form early during the vacuum sealing process. Do not stop the process. Allow the vacuum to complete the cycle before removing the container from the machine. The unit will stop automatically once the container is vacuum sealed (Fig. 5).
STEP 6
Simultaneously press both release buttons again to lift vacuum head up and remove fresh container (Fig. 6). Leave the food vacuum sealed for 20 minutes to make sure the marinate penetrates the food.
NOTE: Let appliance cool down for 20 seconds after each use.
natural_image
Illustration of hands holding a tray with a small cylindrical object on top (no text or symbols)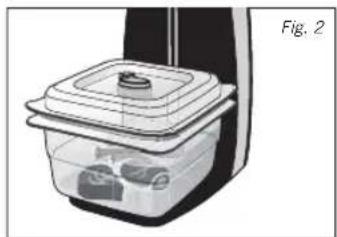
natural_image
Illustration of a food processor with a lid and internal compartments (no text or symbols)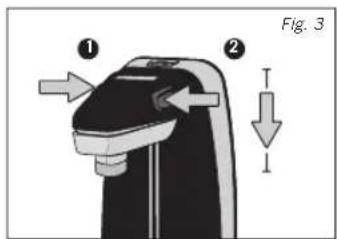
natural_image
Diagram of a mechanical component with a downward arrow indicating force or direction (no text or symbols)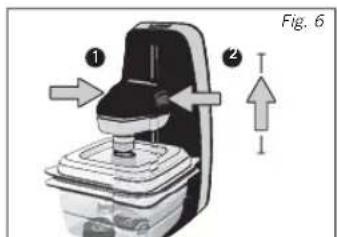
Care
and Cleaning of your Fresh Appliance
To Clean Appliance:
STEP 1
Remove Power Cord from electrical outlet.
IMPORTANT: Do not immerse in liquid.
STEP 2
Slide out reservoir after each use, when liquids or powder/crumbs are visible, to empty it out and clean it.
NOTE: To remove reservoir, hold it with two fingers and pull down. Gasket on reservoir may also be removed for cleaning. Check gasket to ensure it is free from food residues. Clean it with warm soapy water and let dry.
STEP 3
Wash in warm soapy water.
STEP 4
Air dry before replacing.
STEP 5
Check Vacuum Port and the Track to make sure it is free from food materials and wipe it clean.
To Clean the Container Vacuum Valve:
STEP 1
Remove the vacuum valve cover from the lid.
STEP 2
Remove both pieces of the vacuum valve.
STEP 3
Carefully wash the parts by hand with a soft sponge.
STEP 4
Rinse and dry all parts.
STEP 5
Replace vacuum valve pieces and valve cover on cleaned lid.
FoodSaver®
Fresh Containers & Zipper Bags
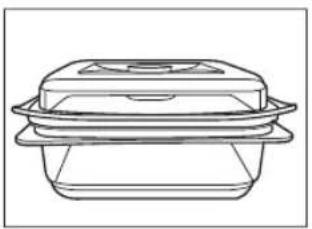
The following FoodSaver® Fresh containers are available for sale at electrical retailers or online.
3 CUP
(VS0640)
5 CUP
(VS0640)
10 CUP
(VS0645)
natural_image
Line drawing of a rectangular food container with lid and side plates (no text or symbols)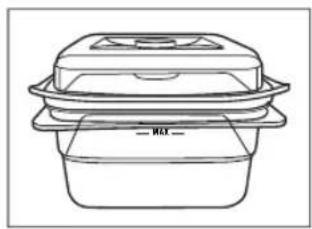
natural_image
Line drawing of a multi-tiered food container with lid and side compartments (no text or symbols)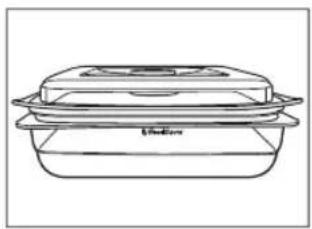
natural_image
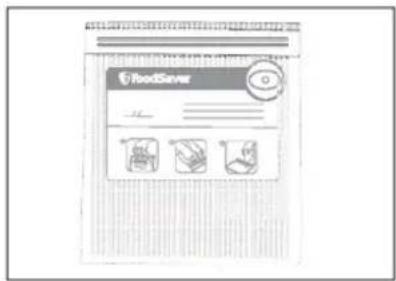
Line drawing of a food container with lid and side plates (no text or symbols)The following FoodSaver® Fresh zipper bags are available for sale at electrical retailers or online.
950ml
(VS0500)
Guidelines
Food Preparation and Reheating Tips

Thawing and Reheating
Vacuum-Sealed Foods
Always thaw foods in either refrigerator or microwave — do not thaw perishable foods at room temperature.
To reheat foods in a microwave in a FoodSaver® Fresh Container, release vacuum and you can keep the lid on. Zipper bags must be partially open/ unzipped on microwave.

Guidelines for Meat:
Note: Beef may appear darker after vacuum sealing due to the removal of oxygen. This is not an indication of spoilage.

Preparation Guidelines for Hard Cheeses:
To keep cheese fresh, vacuum seal it after each use. When you're ready to reseal the cheese, just place it back on the FoodSaver® Fresh Container or zipper bags and vacuum again.
IMPORTANT: Due to the risk of anaerobic bacteria, Soft cheeses should never be vacuum sealed.

Preparation Guidelines for Vegetables:
Vegetables need to be blanched before vacuum sealing. This process stops the enzyme action that could lead to loss of flavor, color and texture.
To blanch vegetables, place them in boiling water or in the microwave until they are cooked, but still crisp. Blanching times range from 1 to 2 minutes for leafy greens and peas; 3 to 4 minutes for snap peas, sliced zucchini or broccoli; 5 minutes for carrots; and 7 to 11 minutes for corn on the cob. After blanching, immerse vegetables in cold water to stop the cooking process. Finally, dry vegetables on a towel before vacuum sealing.
Note: Some foods (including broccoli, Brussels sprouts, cabbage, cauliflower, kale, turnips, onion, mushrooms, garlic and bananas) naturally emit gases during storage. Therefore, after blanching, they must be stored in freezer only.
IMPORTANT: Due to the risk of anaerobic bacteria, Fresh mushrooms, onions and garlic should never be vacuum sealed.
Food Preparation and Reheating Tips (cont.)

Preparation Guidelines for Leafy Vegetables:
First wash the vegetables, and then dry with a towel or salad spinner. After they are dried, put them in a FoodSaver® Fresh Container and vacuum seal as normal. Store in refrigerator.

Preparation Guidelines for Fruits:
You can vacuum seal portions for baking, or in your favorite combinations for easy fruit salad all year round. If storing in the refrigerator, we recommend using a FoodSaver® Fresh Container.

Preparation Guidelines for Baked Goods:
To vacuum seal soft or airy baked goods, we recommend using a FoodSaver® Fresh Container so they will hold their shape. To save time, make cookie dough, pie shells, whole pies, or mix dry ingredients in advance and vacuum seal for later use.

Preparation Guidelines for Coffee and Powdery Foods:
To prevent food particles from being drawn into vacuum pump, place a coffee filter or paper towel at top of bag or canister before vacuum sealing. You can also place the food in its original bag inside a FoodSaver® Zipper Bag, or use a FoodSaver® Fresh Container to vacuum seal.

Preparation Guidelines for Liquids:
Wait for hot liquids to cool to room temperature before vacuum sealing in a FoodSaver ^® Fresh Container, vacuum sealing hot liquids may result in loss of vacuum.
Guidelines
For Successful Vacuum Sealing
Vacuum Sealing and Food Safety
The vacuum sealing process extends the life of foods by removing most of the air from the sealed container, thereby reducing oxidation, which affects nutritional value, flavor and overall quality. Removing air can also inhibit growth of microorganisms, which can cause problems under certain conditions:
Mold - Easily identified by its fuzzy characteristic. Mold cannot grow in a low oxygen environment; therefore vacuum sealing can slow the growth of mold.
Yeast – Results in fermentation, which can be identified by smell and taste. Yeast needs water, sugar and a moderate temperature to grow. It can also survive with or without air. Slowing the growth of yeast requires refrigeration, while freezing stops it completely.
Bacteria – Results in an unpleasant odor, discoloration and/or soft or slimy texture. Under the right conditions, anaerobic bacteria such as Clostridium Botulinum (the organism that causes Botulism) can grow without air and sometimes cannot be detected by smell or taste. Although it is extremely rare, it can be very dangerous.
To preserve foods safely, it is critical that you maintain low temperatures. You can significantly reduce the growth of microorganisms at temperatures of 40^ F ( 4^ C) or below. Freezing at 0^ F (-17°C) does not kill microorganisms, but stops them from growing. For long-term storage, always freeze perishable foods that have been vacuum sealed, and keep refrigerated after thawing.
It is important to note that vacuum sealing is NOT a substitute for canning and it cannot reverse the deterioration of foods. It can only slow down the changes in quality. It is difficult to predict how long foods will retain their top-quality flavor, appearance or texture because it depends on age and condition of the food on the day it was vacuum sealed
IMPORTANT: Vacuum sealing is NOT a substitute for refrigeration or freezing. Any perishable foods that require refrigeration must still be refrigerated or frozen after vacuum sealing.
Troubleshooting
Problem Solution
| Fresh Appliance is not vacuuming air out of the Zipper Bag | ·Ensure zipper is firmly closed. Slide fingers across entire zipper.·Air valve is not on flat surface. Reposition bag so the air valve lies flat on appliance platform with no food under air valve. |
| Vacuum Nozzle and Air Valve are not making secure contact | ·Ensure Vacuum Nozzle is centered over the gray circle and placed flat on air valve. Apply moderate pressure. |
| Air was removed from the bag but now air has re-entered. | ·Examine zipper and valve of bag. Food debris in zipper or valve may cause leakage and allow air to enter.·Sometimes moisture or food material along seal edges of the zipper or beneath the valve prevents bag from sealing properly. Wipe the inside of bag around zipper and beneath valve and attempt to reseal.·If you are vacuum packaging sharp food items, bag may have been punctured. Use a new bag if there is a hole. Cover sharp food items with a soft cushioning material, such as a paper towel, and reseal. |
| The FoodSaver® Fresh Container will not vacuum | ·Make sure lid is closed securely on all 4 sides. Please refer to the “How to vacuum seal with containers” section on page 3.·Make sure rubber gasket on inside of lid is free from food materials. Make sure the gasket on the inside of the lid is secure in place.·Examine rim of container for cracks or scratches. Any gaps can prevent containers from vacuuming properly. Make sure container valve is clean. Please refer to the "Care" section on page 6.·Let appliance cool down for 20 seconds after each use. |
| LED light on unit blinks red | ·This indicates that the appliance did not reach full vacuum on time. Raise the head and make sure the container or zipper bag are closed correctly.·Make sure liquid reservoir is clean and clicked in place correctly so there are no air leaks.·Move head down and gently but fully press it on device to vacuum and press START button to initiate vacuum process. The vacuum process should not take longer than 1 minute. |
| Light on unit blinks green | ·This indicates the container or zipper bag are not engaged with the vacuum head before pressing the START button. Move head and gently but fully press it on device to vacuum and press START button to initiate vacuum process. |
Notes
12
Month
Replacement Guarantee
This Sunbeam product is covered by a 12 month replacement or repair warranty, which is in addition to your rights under the Australian Consumer Law (if your product was purchased in Australia) or New Zealand Consumer Guarantees Act (if your product was purchased in New Zealand).
Should you experience any difficulties with your product during the warranty period, please contact our customer service line for advice on 1300 881 861 in Australia, or 0800 786 232 in New Zealand.
Australia
www.sunbeam.com.au 1300 881 861
Units 5 & 6,
13 Lord Street,
Botany NSW 2019
Australia
New Zealand
www.sunbeam.com.nz 0800 786 232
Unit 3, Building D,
26 Vestey Drive,
Mt Wellington
Auckland
New Zealand
Upon receipt of your claim, Sunbeam will seek to resolve your difficulties or, if the product is defective, advise you on how to obtain a replacement or refund.
To assist us in managing warranty claims, we recommend you register your product as soon as practicable after purchase by creating a MySunbeam account on our website and uploading a copy of your original receipt.
In order to make a claim under our warranty, you must have the original proof of purchase documentation for the product and present it when requested (if not already uploaded to our website).
Should your product develop any defect within 12 months of purchase because of faulty materials or workmanship, we will replace or repair it, at our discretion, free of charge. A product presented for repair may be replaced by a refurbished product of the same type rather than being repaired. Refurbished parts may be used to repair the product.
Our replacement or repair warranty only applies where a defect arises as a result of faulty material or workmanship during the warranty period. Your warranty does not cover misuse or negligent handling (including damage caused by failing to use the product in accordance with this instruction booklet), accidental damage, or normal wear and tear.
Your warranty does not:
• cover freight or any other costs incurred in making a claim, consumable items, accessories that by their nature and limited lifespan require periodic renewal (such as filters and seals) or any consequential loss or damage; or
• cover damage caused by:
- power surges, power dips, voltage supply problems, or use of the product on incorrect voltage;
- servicing or modification of the product other than by Sunbeam or an authorised Sunbeam service centre;
- use of the product with other accessories, attachments, product supplies, parts or devices that do not conform to Sunbeam specifications; or
- exposure of the product to abnormally corrosive conditions; or
- extend beyond 3 months if the product is used in commercial, industrial, educational or rental applications.
The benefits given to you by our warranty are in addition to other rights and remedies under law in relation to the product.
In Australia our goods come with guarantees that cannot be excluded under the Australian Consumer Law. You are entitled to a replacement or refund for a major failure and for compensation for any other foreseeable loss or damage. You are also entitled to have the goods repaired or replaced if the goods fail to be of acceptable quality and the failure does not amount to a major failure.
Our goods also come with guarantees that cannot be excluded under the New Zealand Consumer Guarantees Act.
If your warranty claim is not accepted, we will inform you and if requested to do so by you, repair the product provided you pay the usual charges for such repair. You will also be responsible for all freight and other costs.
Should your product require repair or service after the warranty period, contact your nearest Sunbeam service centre. For a complete list of Sunbeam's service centres, visit our website or call our customer service line for advice on 1300 881 861 in Australia, or 0800 786 232 in New Zealand.
Need help with your appliance?
Contact our customer service team or visit our website for information and tips on getting the most from your appliance.
Australia | visit www.sunbeam.com.au
phone 1300 881 861
mail Units 5 & 6, 13 Lord Street,
Botany NSW 2019 Australia.
New Zealand | visit www.sunbeam.co.nz
phone 0800 786 232
mail Level 6, Building 5,
Central Park,
660–670 Great South Road,
Greenlane, Auckland.

- Contents
- Important Safeguards
- Product Features
- How to...
- Vacuum Seal with FoodSaver® Fresh Containers
- STEP 1
- STEP 2
- STEP 3
- STEP 4
- STEP 5
- STEP 6
- Vacuum Seal with FoodSaver® Zipper Bags
- Marinate with your FoodSaver® Fresh Appliance
- Care
- and Cleaning of your Fresh Appliance
- To Clean Appliance:
- To Clean the Container Vacuum Valve:
- FoodSaver®
- Fresh Containers & Zipper Bags
- Guidelines
- Food Preparation and Reheating Tips
- Thawing and Reheating
- Vacuum-Sealed Foods
- Guidelines for Meat:
- Preparation Guidelines for Hard Cheeses:
- Preparation Guidelines for Vegetables:
- Food Preparation and Reheating Tips (cont.)
- Preparation Guidelines for Leafy Vegetables:
- Preparation Guidelines for Fruits:
- Preparation Guidelines for Baked Goods:
- Preparation Guidelines for Coffee and Powdery Foods:
- Preparation Guidelines for Liquids:
- For Successful Vacuum Sealing
- Vacuum Sealing and Food Safety
- Troubleshooting
- Notes
- 12
- Month
- Replacement Guarantee
- Australia
- Need help with your appliance?
Brand : SUNBEAM
Model : FoodSaver VS1300
Category : Vacuum Sealer