
FX-82 - Whiteboard HITACHI - Free user manual and instructions
Find the device manual for free FX-82 HITACHI in PDF.


| Product Type | Whiteboard |
| Brand | Hitachi |
| Model | FX-82 |
| Surface Material | Porcelain-coated steel |
| Frame Material | Aluminum |
| Board Color | White |
| Dimensions (W x H) | 1800 mm x 1200 mm (71 x 47 inches) |
| Depth | 20 mm (0.8 inches) |
| Weight | 12 kg (26.5 lbs) |
| Mounting Type | Wall-mounted with included hardware |
| Writing Surface | Dry-erase, smooth |
| Magnetic | Yes, full surface magnetic |
| Included Accessories | Magnetic marker tray, mounting kit, 2 markers, 1 eraser |
| Warranty | 1 year limited |
| Certifications | CE, RoHS, TUV |
| Cleaning | Use dry-erase cleaner or isopropyl alcohol |
| Ghosting Resistance | High, easy to maintain |
| Usage | Office, classroom, home |
| Package Dimensions | 1850 x 1250 x 80 mm |
| Country of Origin | Japan |
Frequently Asked Questions - FX-82 HITACHI
User questions about FX-82 HITACHI
0 question about this device. Answer the ones you know or ask your own.
Ask a new question about this device
Download the instructions for your Whiteboard in PDF format for free! Find your manual FX-82 - HITACHI and take your electronic device back in hand. On this page are published all the documents necessary for the use of your device. FX-82 by HITACHI.
USER MANUAL FX-82 HITACHI
How to Request a User's Guide
When requesting a separate copy of this user's guide, specify FXEU-051101.
Read this user's guide and carefully retain it for future reference.
Before using this product, carefully read and fully understand the safety instructions.
Store this user's guide nearby for ease of reference.
Notices
Reproduction or reprinting, without permission, of this manual or any part thereof is prohibited.
The contents of this manual are subject to change without prior notice.
Every effort has been made to ensure that this manual is complete and correct. However, should any questionable points, mistakes, etc., come to your attention, please inform the vendor.
Please be advised in advance that this company will assume no responsibility for losses, etc., resulting from the operation of this product, regardless of the preceding clauses.
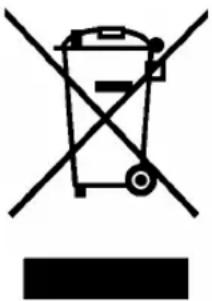
WEEE
"The mark (bin mark) is in compliance with the Waste Electrical and Electronic Equipment Directive 2002/96/EC (WEEE)."
"The mark indicates the requirement NOT to dispose the equipment as unsorted municipal waste, but use the return and collection systems available"
As for details, please verify the product home page.
natural_image
Symbol of a trash bin crossed with a diagonal line and a horizontal bar below (no text or numbers present)Disclaimers
Hitachi Software Engineering Co., Ltd. assumes no liability and makes no warranty, either express or implicit, regarding the contents of this user's guide.
Also, the company makes no warranty as to the product's suitability, merchantability or fitness for a particular intended use.
All products of Hitachi Software Engineering Co., Ltd., described in this user's guide are presently for sale or are site-licensed.
Users who purchased the aforesaid product(s) will bear the costs of all required services, repairs, and damages resulting from defects in this product, and will bear the costs of direct or indirect damages (including the loss of profits or required information) that resulted from the product defects.
Moreover, Hitachi Software Engineering Co., Ltd., retains the right to revise this user's guide and to modify the contents thereof, without any obligation to notify anyone.
Product Assurance Provisions
This product is limited to use in the European Union markets.
For warranty details, refer to Appendix B at the end of this user's guide.
This first edition of the user's guide (FXEU-051101) is for the following products:
AH00086: StarBoard FX-77 (Wired)
AH00087: StarBoard FX-77 (Wireless)
AH00088: StarBoard FX-63 (Wired)
AH00089: StarBoard FX-63 (Wireless)
AH00090: StarBoard FX-82W(Wired)
AH00091: StarBoard FX-82W(Wireless)
K-W033-021: Floor Stand
The StarBoard FX-77 and StarBoard FX-63 and StarBoard FX-82W incorporate eBeam technology licensed from Luidia, Inc. eBeam is a trademark of Luidia Inc.
Windows, Windows 98, Windows 98 SE, Windows 2000, Windows Me, and Windows XP are trademarks of Microsoft Corporation (U.S.) and in other countries.
Other trademarks and product names are trademarks and/or registered trademarks of their respective holders.
Manual Creation Dates
October 2005, 1st Edition FXEU-051101
All Rights Reserved. Copyright © 2003,2004,2005 Hitachi Software Engineering Co., Ltd.
Safe Handling
Markings and Symbols
Various markings and symbols are used in this user's guide and on this product, to ensure the safe and correct use of this product and to prevent personal injury and property damage. These symbols and their meanings are as explained below. Understand the information well before reading the body of the user's guide.

WARNING
This symbol indicates information that, if ignored or applied incorrectly, creates the possibility of death or serious personal injury.

CAUTION
This symbol indicates information that, if ignored or applied incorrectly, might result only in personal impairment or physical damage.
CAUTION
This symbol indicates information that, if ignored or applied incorrectly, might result in physical hazard or abnormal operation.

This symbol draws attention to cautions (including warnings).

This symbol indicates something prohibited.

This symbol indicates something that must be done.
Safety Precautions
Always comply with them.

WARNINGS
Securely insert the power plug into the mains.

If it is not plugged in securely, overheating will occur, possibly resulting in electric shock or fire.
Before moving this product, detach the power plug and the mains lead.

The mains lead might be damaged, possibly resulting in electric shock or fire.
Do not plug in the power plug with a wet hand.
Electric shock will result.
When plugging in or unplugging the power plug, hold the plug.

If the mains lead is pulled, it might be damaged, possibly resulting in electric shock or fire.
Before cleaning this product, unplug the power plug.

Electric shock sometimes results.
Periodically clean the power plug to remove dust.

If a dirty plug is plugged into a mains, fire or electric shock might result.
Do not use this product near water.

Electric shock will result.
Be careful about the locations of the mains lead, etc.

The mains lead might trip someone, possibly causing the product to fall, etc., thereby causing injury or product failure. Be careful with their locations.
Do not damage, break, process, or forcibly bend the mains lead.

The mains lead will be damaged, resulting in fire or electric shock.
Use the product at the indicated power supply voltage.

If the product is used at a power supply voltage other than the one indicated, it would fail, resulting in fire or electric shock.
Safety Precautions
Always comply with them.

WARNINGS
Do not use a mains lead other than the accessory mains lead.

If a mains lead other than the accessory mains lead is used, fire or electric shock might result.
Only place specified objects on this product.

If a liquid or a metal object enters this product, electric shock or fire might result. If either should enter, unplug the power plug from the mains and contact your dealer.
Do not use this product in a location with high temperature or high humidity.

This product's usage environment conditions: Temp.: 50^ to 95^ Humidity: 20% to 80% (But no condensation must be allowed to form.)
Do not open or alter the cabinet of this product.
The cabinet contains high-voltage areas, so electric shock or other injury will result.
Do not leave this product or any of its accessories on the floor.

Someone might step on it and break it, or might be injured by tripping on it.
This product must be disposed of as industrial waste, in accordance with the relevant laws and regulations.

Do not place a heavy object on the mains lead, heat or pull it.

The mains lead will be damaged, causing fire or electric shock.
Safety Precautions
Always comply with them.

WARNINGS
In the following cases, unplug the product from the mains and ask the dealer.
a. After the mains lead or power supply plug is damaged.
b. After a liquid is spilled onto the main unit.
c. After the main unit is exposed to rain or water.
d. After this product malfunctions, even when operated according to the instruction manual. Adjust this product within the ranges specified in the instruction manual. Do not make other adjustments. A qualified service representative is required to correct improper adjustments.
e. After this product falls or after its cabinet is damaged.
f. After the functionality of this product changes and repair by a service representative is considered necessary.

WARNINGS
This product contains chemicals, including lead, known to the State of California to cause cancer, and birth defects or other reproductive harm. Wash hands after handling.
Wireless models use 2.4GHz radio frequency and users must follow:
a. Keep away from medical devices such as heart pacer.
b. Keep away from licensed / non-licensed radio stations.
c. The device may cause slower performance or interference with IEEE802.11g/b wireless devices. Switch off other wireless devices when they are not used.
d. Change the location of the device if it does not work near other wireless devices.
e. Keep remove shielding objects between the StarBoard and the receiver.
f. Keep away from other electric devices. Microwave may cause the interference.
Careful thought was given to the cautions on this device and in this user's guide. However, unanticipated circumstances might occur. When operating this product, users themselves must exercise caution as well as follow instructions.
CAUTIONS
| Caution Details Page(s) | |
| Fasten the screws tightly.Otherwise, the stand might fall and cause injury or the impact of the falling board might cause damage. | P.1-5 |
| This work should be performed by at least two people.The board might fall and cause injury or its impact might cause damage. | P.1-6P.1-7P.1-9 |
| Fasten the screws tightly.The board might fall and cause injury or its impact might cause damage. | P.1-7 |
| Before installation, take the wall material into consideration.If it is installed by using a method inappropriate for the wall material, the board might fall.Also, installation might be impossible, depending on the wall selected. For details, consult your dealer. | P.1-8 |
| Before installation, take the wall strength into consideration.Before using the StarBoard, make sure that it has been fastened securely so that it will not fall. Also verify that the wall mounting bracket is strong enough to support a weight of approximately 88.2lb. /40 kg. | P.1-8 |
| Be sure to orient the battery correctly.Do not reverse the + and – terminals of the battery, and use only the specified type of battery. Otherwise, it will overheat and fail. | P.2-1 |
| Be sure to insulate the battery before discarding it.Before discarding the AA battery, be sure to insulate the + and – terminals with cellophane tape, or similar material. If batteries are discarded without insulation, they might short or overheat, rupture, and ignite, resulting in injury or fire. Also, dispose of them as instructed by the local authorities. | P.2-1 |
Contents
Notices....1
Disclaimers....1
Product Assurance Provisions....2
1. Introduction.... 1-1
1.1 Parts Check 1-1
1.1.1 StarBoard 1-1
1.1.2 Stand....1-2
1.2 Role of Each Part ...... 1-3
1.2.1 StarBoard 1-3
1.2.2 Function Area....1-4
1.2.3 Electronic Pen 1-4
1.3 Assembly and Setup.... 1-5
1.3.1 Stand Setup Method....1-5
1.3.2 Wall-Mounting Setup Method .... 1-8
1.3.3 How to Connect When Using Projection Mode 1-10
2. Usage 2-1
2.1 Basic Usage.... 2-1
2.1.1 Preparation 2-1
2.1.2 How to Use Electronic Pen....2-2
2.1.3 Basic operation of Electronic Pen....2-3
2.2 How to Use StarBoard in Projection Mode 2-4
2.2.1 Wired Connection ......2-4
2.2.2 Wireless Connection ....2-5
3. Appendix 3-1
A System Specifications 3-1
B Provisions of Product Warranty 3-3
1. Introduction
1.1 Parts Check
After unpacking, make sure that all of the following parts are present.
1.1.1 StarBoard
(1) Parts
| No. | Name Qty. | |
| (1) | Board 1 | |
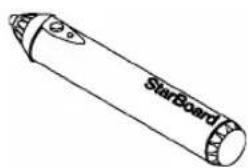
| (2) | Electronic pen 1 | |
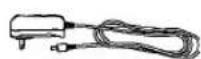
| (3) | AC Adaptor (*1) 1 | |
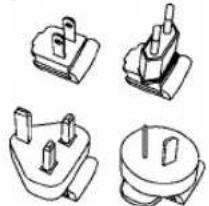
| (4) | AC Adaptor Plug (*1) 4 | |
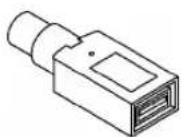
| (5) | Power Supply to USB Adaptor (*1) 1 | |
| (6) | Bluetooth Adaptor (*2) 1 | |
| (7) | Wall mounting bracket 2 | |
| (8) | AA alkaline Battery | |
| (9) | StarBoard Software x.x (CD-ROM) (*3) | 2 |
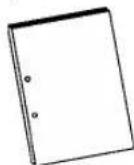
| (10) | User's Guide (this manual) | 1 |
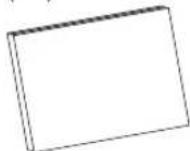
| (11) | StarBoard Software x.x User's guide (*3) | 1 |
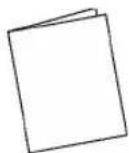
| (12) | Warranty Sheet | 1 |
2
(*1) (3),(4),(5) is bundled only if the StarBoard FX-77(Wireless) or StarBoard FX-63(Wireless) or StarBoard FX-82W(Wireless) is purchased.
(*2) (6) is bundled only if the Bluetooth Adapter is purchased.
(*3) The term “x.x.” as used in this manual denotes the same version as the software which is included with the accessories.
(1)
(2)
(3)
(4)
natural_image
Four technical line drawings of mechanical components or connectors, no text or symbols present(5)
(6)
(7)
(8)
(9)
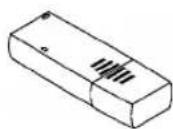
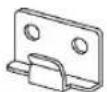
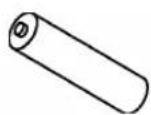
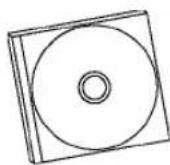
(10)
(11)
(12)
1.1.2 Stand
(1) Parts
| No. | Name Qty. | |
| (1) | Stand vertical support 2 | |
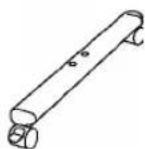
| (2) | Stand crossbar 2 | |
| (3) | Stand foot with casters 2 | |
| (4) | Board receiving bracket (left-hand version) 1 | |
| (5) | Board receiving bracket (right-hand version) 1 | |
| (6) | Board fixing bracket 2 | |
| (7) | Hex socket head cap screw, with collar 8 | |
| (8) | Hex socket head cap screw 4 | |
| (9) | Panhead screw 8 | |
| (10) | Triangular knob screw | 2 |
(1)

(2)

(3)
(6)

(9)

(4)

(7)

(10)

(5)

(2) Accessories
| No. | Name | Qty. |
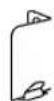
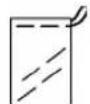
| (1) | Allen wrench | 1 |
| (2) | Allen wrench holder | 1 |
(2) is used to prevent the loss of the Allen wrench. Hang it in the appropriate place on the stand.
(1)

(2)
1.2 Role of Each Part
1.2.1 StarBoard
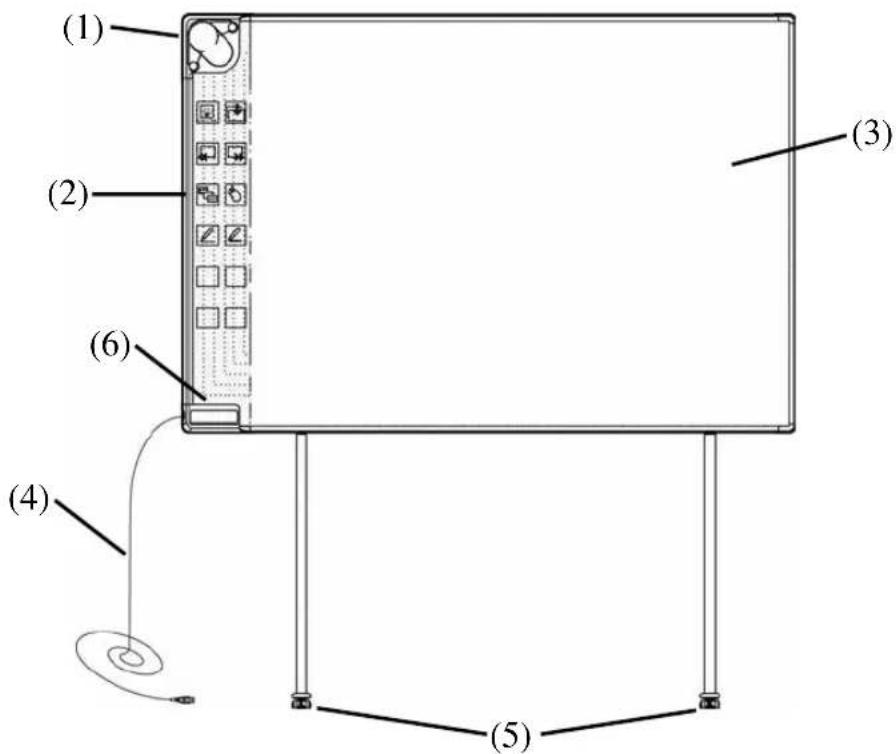
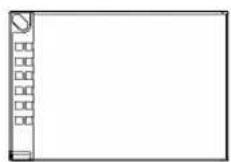
(1) Digitiser
Receives information regarding annotations and graphics drawn with the electronic pen, and transmits this data to the PC. Green light indicates a wired connection, and blue light indicates a wireless connection.
(2) Function Area
Buttons that shortcut the functions used frequently in applications are located here. Please refer to the next page for details.
(3) Pen Input Active Area
Annotations and graphics drawn in this area are stored into the PC. When using the StarBoard in the Projection Mode, confine to this area the images projected by the projector.
(4) USB Cable
Connect to the PC (for Wired Models) or connect to AC adaptor (for Wireless Models).
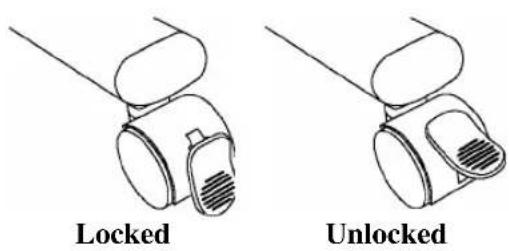
(5) Casters
After setting up the StarBoard, lock the casters. Lift up the tab to unlock a caster, and press down the tab to lock it.
(6) Pen Holder
1.2.2 Function Area
There are the shortcut buttons frequently used in applications (the default settings are shown below), and you can customise the buttons as desired. Please refer to the online help for details.
| Symbol Description Symbol Description | |||
 | Show/Hide the StarBoard Software toolbar. |  | Insert and show a blank page. |
 | Show previous page. |  | Show next page. |
 | Show/Hide Topic List. |  | Switch to PC Operation. |
 | Select Pen. |  | Select Highlighter. |
1.2.3 Electronic Pen
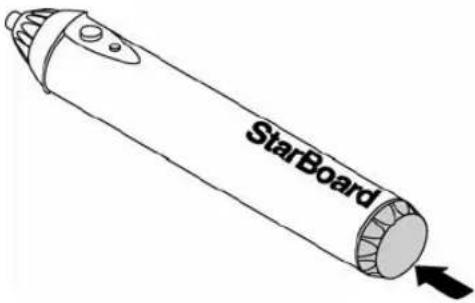
(1) Battery cover
When replacing the battery, open the lid and replace the battery.
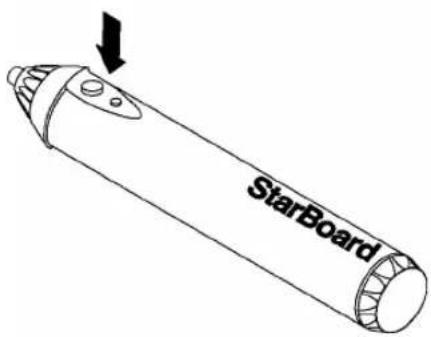
(2) Side buttons
Please see page 2-3.
1.3 Assembly and Setup
When setting up the StarBoard, keep the following in mind:
- Select a level and stable position.
- Do not set it up near equipment that might generate electromagnetic waves and radio frequencies (e.g. radio transmitter, television, copying machine, air conditioner).
- Avoid locations that are dusty, that are subject to extremely high or low temperature or humidity or that are exposed to direct sunlight.
1.3.1 Stand Setup Method
Reconfirm that all parts are present before assembling and setting up the stand.
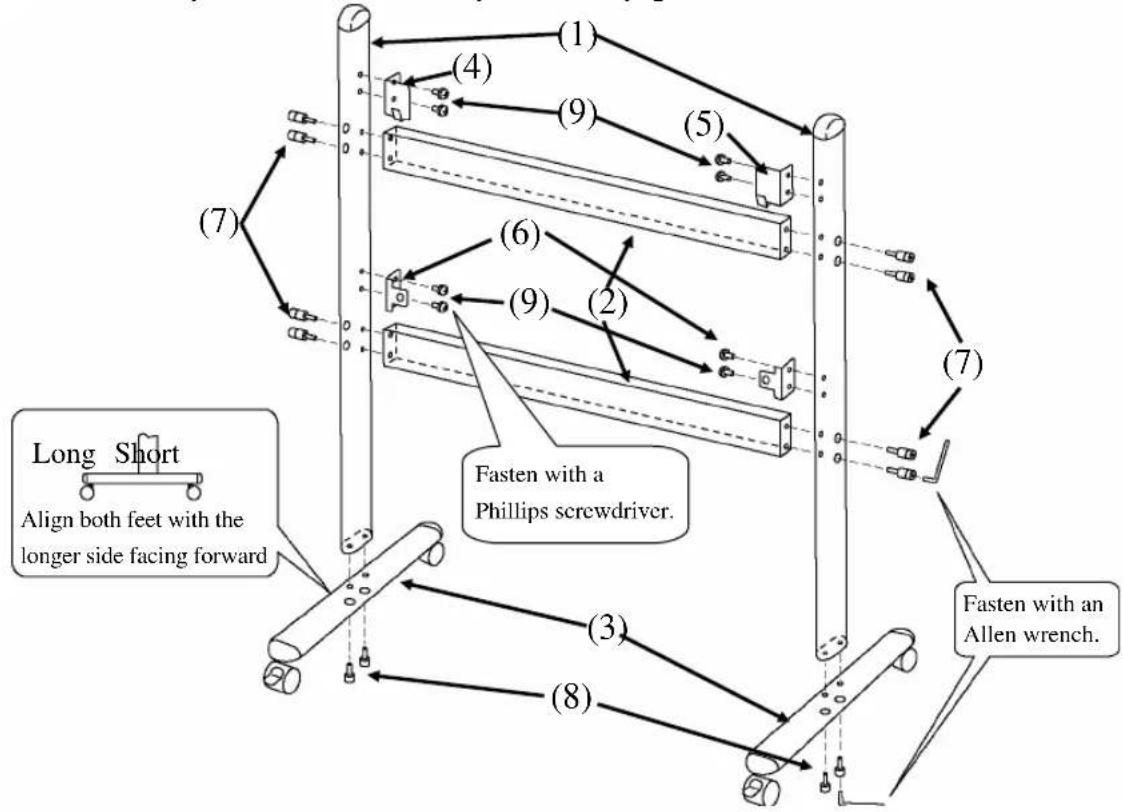
(1) Stand Assembly
Assemble the stand according to the following diagram. Numbers in the diagram correspond to numbers in the parts list on page 1-2.
flowchart
graph TD
    A["Long Short"] --> B["Align both feet with the longer side facing forward"]
    B --> C["(1)"]
    C --> D["(4)"]
    D --> E["(5)"]
    E --> F["(6)"]
    F --> G["(7)"]
    G --> H["(8)"]
    H --> I["(9)"]
    I --> J["(2)"]
    J --> K["(9)"]
    K --> L["(3)"]
    L --> M["(8)"]
    M --> N["(7)"]
    N --> O["Fasten with an Allen wrench."]
    O --> P["(3)"]
    P --> Q["(8)"]
    Q --> R["(9)"]
    R --> S["(2)"]
    S --> T["(6)"]
    T --> U["(7)"]

CAUTION
Fasten the screws tightly.
Otherwise, the stand might fall and cause injury or the impact of the falling board might cause damage.
(2) Board Installation
Install the board on the stand assembled in step (1). Install the board according to the following procedure. Furthermore, this step should be performed by at least two people. Numbers in the diagram correspond to numbers in the parts list on page 1-2.
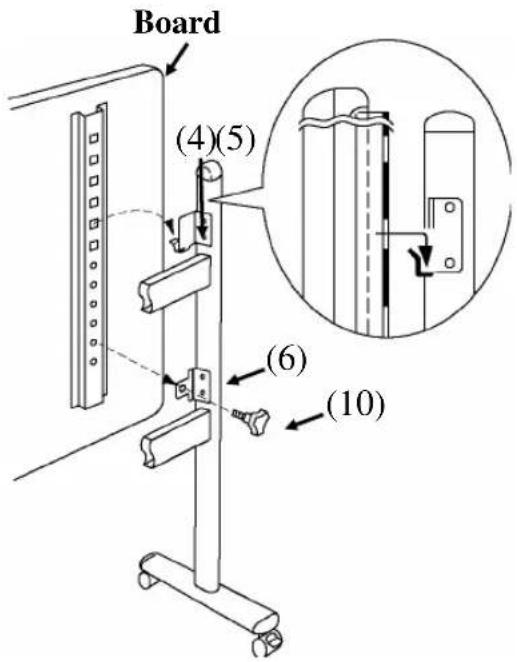
(a) Decide the level (out of six) at which the board will be installed, and use the square holes on the back of the board to hang it on the board receiving brackets.
(b) Verify that one of the board's square holes is attached securely to the board receiving bracket on each side.
(c) Tighten triangular knob screw to fasten the board to the board fixing bracket on each side.

CAUTION
This work should be performed by at least two people.
The board might fall and cause injury or its impact might cause damage.
Fasten the screws tightly.
The board might fall and cause injury or its impact might cause damage.
(3) Height Adjustment
The StarBoard can be positioned at six height levels. Adjust the height according to the following procedure. Furthermore, this work should be done by at least two people.
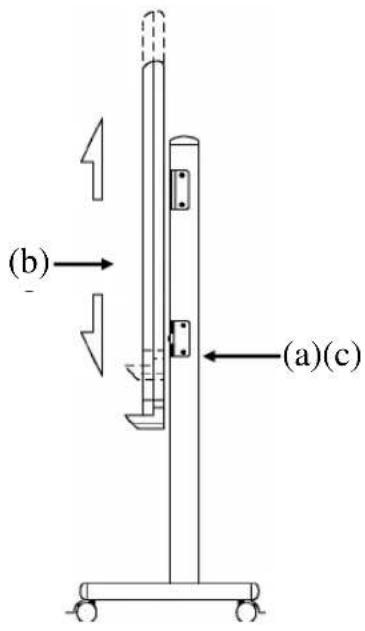
(a) Remove the triangular knob screw at the bottom of each side.
(b) Raise the board and re-hang it by attaching the square holes for the desired height to the receiving brackets.
(c) Fasten the triangular knob screw at the bottom of each side.

CAUTION
Fasten the screws tightly.
The board might fall and cause injury or its impact might cause damage.
This work should be performed by at least two people.
The board might fall and cause injury or its impact might cause damage.
1.3.2 Wall-Mounting Setup Method
(1) Install the mounting brackets.
Determine the height at which the board will be installed, and install the brackets at the positions shown in the following diagram.
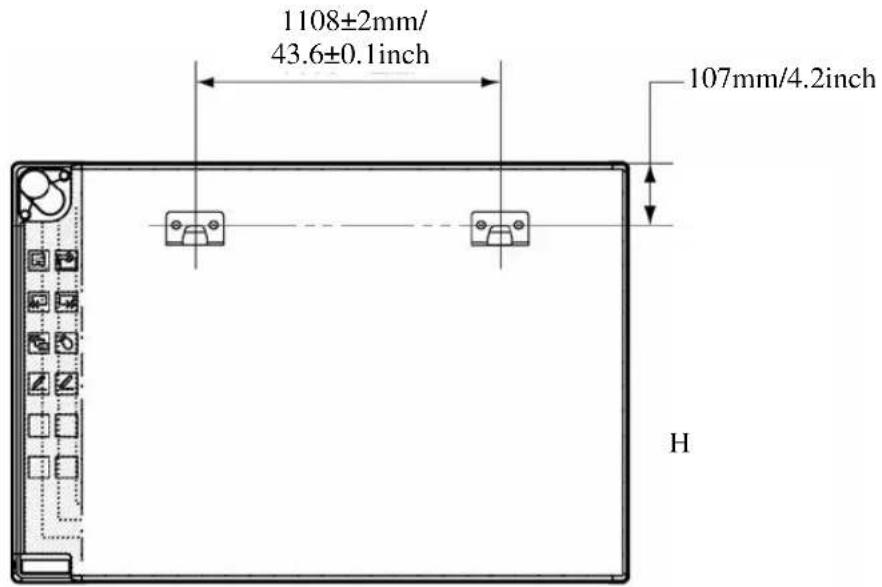
Floor

CAUTION
Before installation, take the wall material into consideration.
If it is installed by using a method inappropriate for the wall material, the board might fall.
Also, installation might be impossible, depending on the wall selected. For details, consult your dealer.
Before installation, take the wall strength into consideration.
Before using the StarBoard, make sure that it has been fastened securely so that it will not fall. Also verify that the wall mounting bracket is strong enough to support a weight of approximately 88.2lb. /40 kg.
(2) Board Installation
Connect each mounting bracket to the top square hole in the board receiving bracket located at the back of the board on both sides.
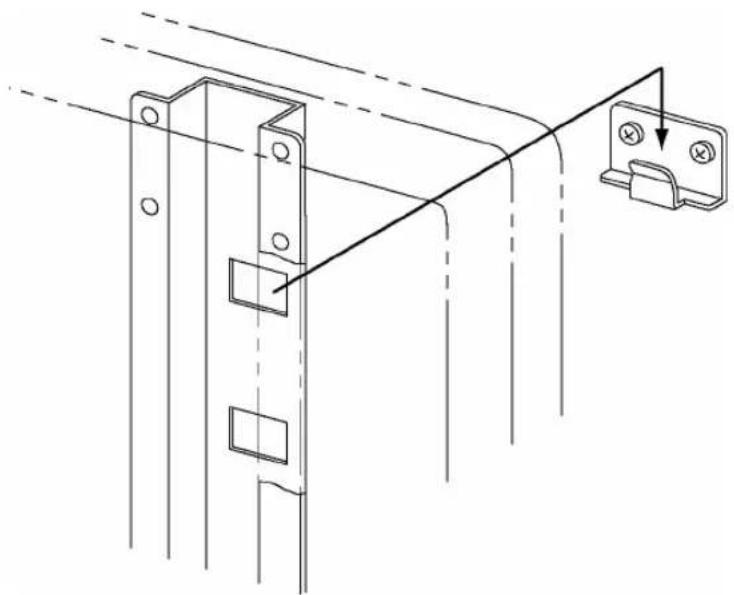
natural_image
Technical line drawing of a mechanical assembly with mounting holes and a hanging component (no text or symbols)
CAUTION
This work should be performed by at least two people.
The board might fall and cause injury or its impact might cause damage.
NOTE
- The equipment might malfunction if set up in an excessively bright location. If the ceiling lights are too bright, it will be necessary to adjust the brightness by turning off the lights, etc.
- Either avoid setting it up in a location exposed to direct sunlight or near a window, or use curtains, etc., to block the sunlight. Otherwise, the equipment might malfunction.
- If multiple systems are set up in the same room or adjacent to each other, they might malfunction. If necessary, contact the technical support in advance.
1.3.3 How to Connect When Using Projection Mode
(1) How to connect when using USB cable (i.e., Wired Mode)
Connect the PC, projector, and StarBoard according to the following procedure.
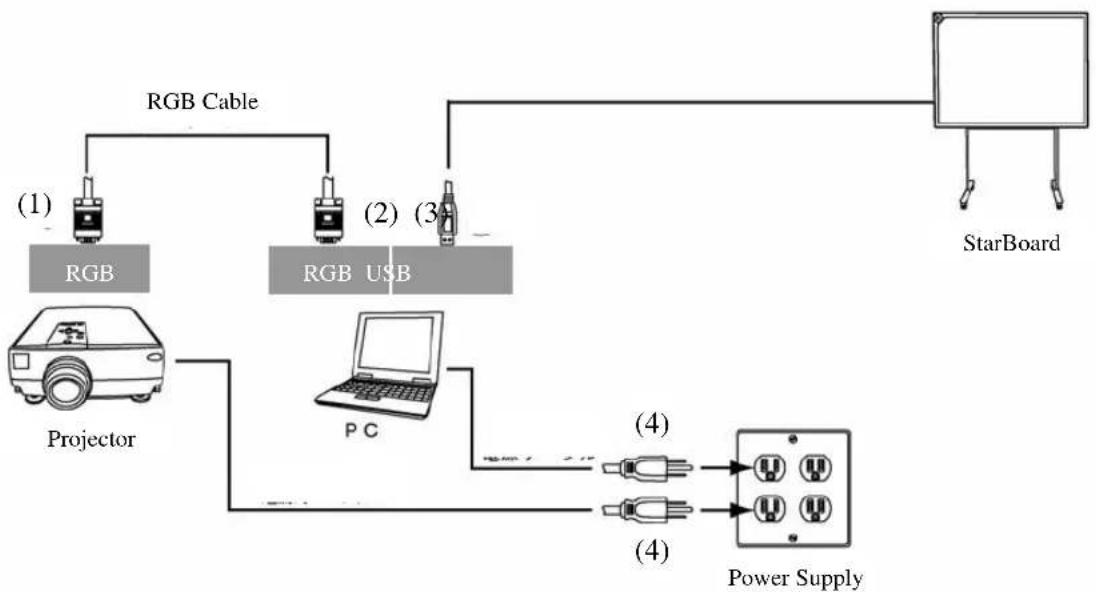
flowchart
graph TD
    A["RGB Cable"] --> B["RGB"]
    A --> C["RGB USB"]
    D["Projector"] --> E["PC"]
    E --> F["Power Supply"]
    G["StarBoard"] --> H["Power Supply"]
    I["Power Supply"] --> J["Power Supply"]
(1) Connect the RGB cable to the projector's RGB terminal, and fasten with the integral screws.
(2) Connect the opposite side of the RGB cable connected in step (1) to the PC's RGB terminal, and fasten with the integral screws.
(3) Connect the USB cable from StarBoard to the USB terminal of the PC.
(4) Connect the power supplies of the PC and the projector to the mains.
(2) How to connect when using the USB wireless receiver (i.e., Wireless Mode) Connect the PC, projector, and StarBoard according to the following procedure (only if the wireless unit is purchased with the StarBoard).
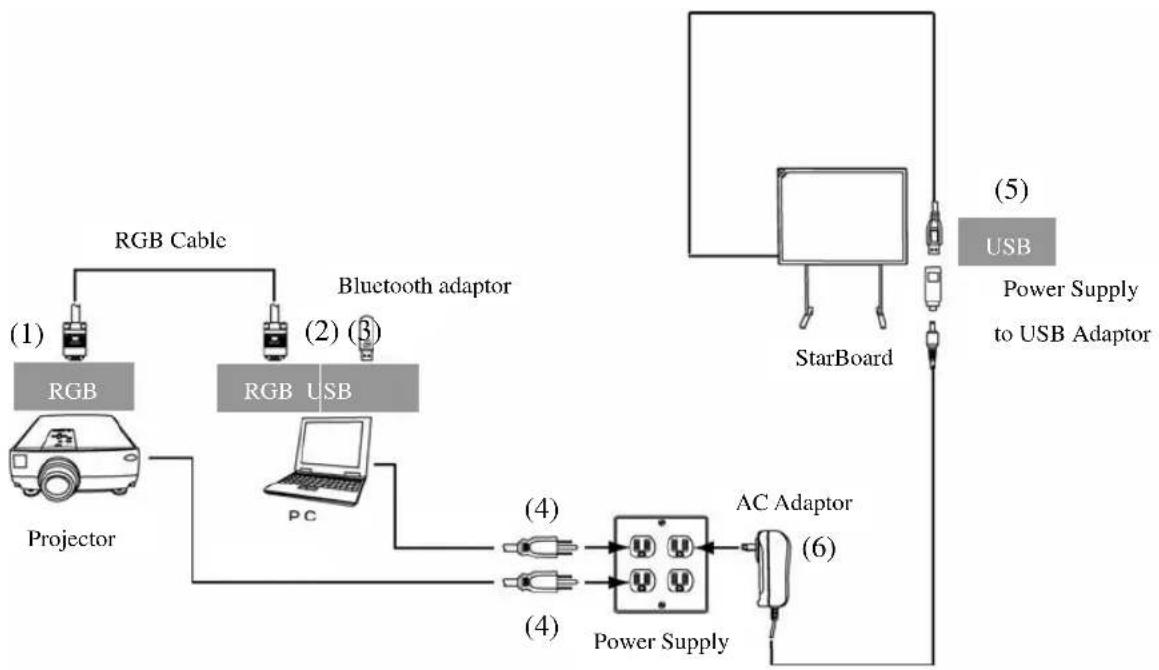
flowchart
graph TD
    A["RGB Cable"] --> B["Projector"]
    C["RGB USB"] --> D["PC"]
    E["Bluetooth adaptor"] --> F["StarBoard"]
    G["Power Supply to USB Adaptor"] --> H["AC Adaptor"]
    I["StarBoard"] --> J["Power Supply"]
    style A fill:#f9f,stroke:#333
    style C fill:#f9f,stroke:#333
    style E fill:#f9f,stroke:#333
    style G fill:#f9f,stroke:#333
    style I fill:#f9f,stroke:#333
    style J fill:#f9f,stroke:#333
(1) Connect the RGB cable to the projector's RGB terminal, and fasten with the integral screws.
(2) Connect the other end of the RGB cable connected in step (1) to the PC's RGB terminal, and fasten with the integral screws.
(3) Connect the Bluetooth adaptor (option) to the PC's USB terminal.
(4) Connect the power supplies of the PC and the projector to the mains.
(5) Connect Power Supply to USB Adaptor to the USB terminal of StarBoard.
(6) Connect AC Adaptor to the mains.
PC & StarBoard Installation
Please remove any shielding objects which may block off the radio wave between the PC and StarBoard, and the distance between must be within 10m.
2. Usage
2.1 Basic Usage
In this chapter, the basic usage of the StarBoard will be explained.
Read this section carefully to learn about the StarBoard functions.
2.1.1 Preparation
Prepare to use the StarBoard.
(1) Insert the battery into the electronic pen.
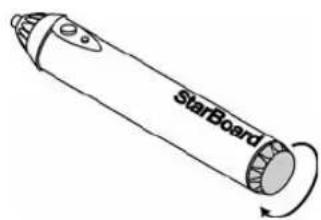
(1) Open the battery cover on the electronic pen by moving in the direction of the arrow.
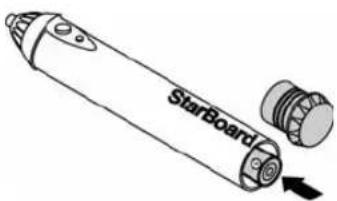
(2) As shown in the figure, insert the battery after verifying that the “+” side faces to the pen tip.
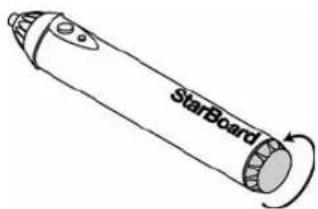
(3) Replace the battery cover and slide it in the direction of the arrow until it closes completely.

CAUTION
Be sure to orient the battery correctly.
Do not reverse the + and - terminals of the battery, and use only the specified type of battery. Otherwise, it will overheat and fail.
Be sure to insulate the battery before discarding it.
Before discarding the AA battery, be sure to insulate the + and - terminals with cellophane tape, or similar material. If batteries are discarded without insulation, they might short or overheat, rupture, and ignite, resulting in injury or fire. Also, dispose of them as instructed by the local authorities.
2.1.2 How to Use Electronic Pen
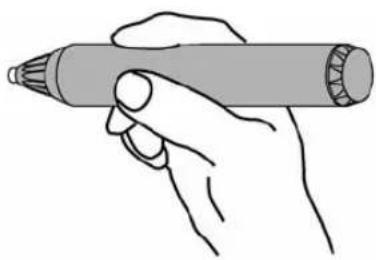
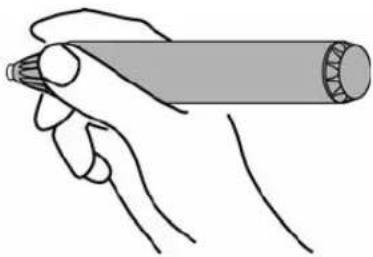
(1) When drawing with the electronic pen, apply force sufficient enough to cause the pen tip to sink completely into the electronic pen. When information from the pen is being transmitted normally, a slight buzzing sound is audible from the pen.
(2) A miniature transmitter is embedded in the tip of the electronic pen. When drawing annotations or graphics while holding the electronic pen below the colour ring, the drawing data from the electronic pen sometimes is not transmitted correctly. If the annotations and graphics drawn on the whiteboard are not stored correctly to the PC, change your grip on the electronic pen and then verify that they are displayed correctly.
natural_image
Line drawing of a hand holding a pen (no text or symbols)
natural_image
Line drawing of a hand holding a cylindrical object (no text or symbols)
Blocking of Infrared Beam
In the mechanism of this device, the pen coordinates are detected after the digitiser reads the infrared beam emitted by the pen and the ultrasonic signals. So, if the electronic pen or the digitiser is blocked, normal input becomes impossible. Avoid blocking them during use. Also, when it is used with the optional wireless unit, the digitiser also functions as a wireless transmitter, so avoid blocking the digitiser front and the wireless receiver.
2.1.3 Basic operation of Electronic Pen
In the default setting of the electronic pen, the pen tip is set to emulate the left click button of a mouse. While Windows is in operation, the following mouse operations can be performed using the pen tip button.
- Click
Push the pen tip onto the StarBoard with sufficient force and then release the pen away from the board. - DoubleClick
Perform the "Click" operation explained above twice in the same spot.
- Drag
Push the pen tip onto the starboard with sufficient force, and without releasing it away from the broad, move it from one point to another.
2.1.4 Electronic Pen Setting
The electronic pen has one pen tip button, and two side buttons. Mouse actions can be assigned to these three buttons. The default button settings are summarized in the following table.
| Button Name Function |
| Pen tip Left click of mouse |
| Side Button No.0 Hovering |
| Side Button No.1 Right click of mouse |
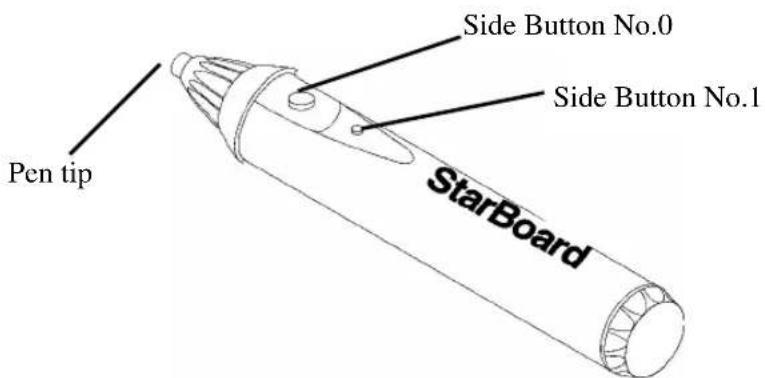
Use the StarBoard Software functions to change the button settings. For details, see the current indicator section of the StarBoard Software User's Guide.
2.2 How to Use StarBoard in Projection Mode
2.2.1 Wired Connection
(1) Connect devices following the page 1-10.
(2) Power up the projector.
(3) Power up PC to start up Windows.
(5) Install and launch the StarBoard Software.
(4) Adjust the position of the projector so that the Windows screen projected by the projector is within the pen input active area (see page 1-3).
Starting StarBoard Software manually
Select [Start] → [Programs] → [StarBoard Software] → [StarBoard Software], or double-click the StarBoard Software icon on the desktop. (A StarBoard Software icon will not be created on the desktop unless [Desktop] is checked in the shortcut creation step during the software installation process.)
If the board is not detected by the StarBoard Software, check whether the StarBoard power is on, and whether StarBoard and the PC are properly connected to each other.
You can perform the board detection using the StarBoard Software. Refer to the StarBoard Software User's Guide for details.
(6) Refer to the StarBoard Software User's Guide for information on using the StarBoard.
If the cursor location of the PC is different from the pen tip, launch the calibration programme. Please refer to the StarBoard Software User Guide for details.
2.2.2 Wireless Connection
(1) Connect devices following the page 1-11.
(2) Power up the projector.
(3) Power up PC to start up Windows.
(4) Adjust the position of the projector so that the Windows screen projected by the projector is within the pen input active area (see page 1-3).
For the driver installation, please refer to “USB Bluetooth Dongle Installation Manual” provided with the Bluetooth Dongle.
3. Appendix
A. System Specifications
| Item Specification | |||||
| Product name FX-77 (Wired) FX-77(Wireless) FX-63 (Wired) FX-63(Wireless) | |||||
| Model No AH00086 AH00087 AH00088 AH00089 | |||||
| Input methods Infrared and Ultrasonic methods | |||||
| Wired | USB | ||||
| Wireless | Bluetooth | ||||
| Effective screen size (mm) 77 inches, 1,573 (W) × 1,180 (H) 63 inches, 1,280 (W) × 960 (H) | |||||
| StarBoard dimensions (mm) | 1,793 (W) × 1,220 (H) × 77.5 (D) | 1,500 (W) × 1,000 (H) × 77.5 (D) | |||
| Overall dimensions (including stand)(mm) | 1,793 (W) × 1,700 –2,050 (H) × 620 (D) | 1,500 (W) × 1,700 –2,050 (H) × 620 (D) | |||
| IR wavelength | 880 nm | ||||
| Ultrasonic frequency | 40 KHz | ||||
| Sampling rate | Approximately 66 points/s | ||||
| Accuracy | ±1.5 mm | ||||
| Current / input voltage | 200mA (5V) | ||||
| AC adapter input voltage/power consumption | 100 – 240 V / 0.5A | ||||
| AD adaptor output voltage/power consumption | 5.0V/2.0A | ||||
| Weight of main unit/weight including stand | 17kg/34kg | 12kg/28kg | |||
| Bundled software StarBoard Software, 1 set | |||||
| Environmentalconditions | Ambienttemperature | 10 – 35°C | |||
| Humidity | 10 – 80% | ||||
| Battery life | Continuous operating time Approximately 90 hours*1 | ||||
| Compatible operating systems | Windows98SE, Me, 2000, XP | ||||
2.0
1.1
*1 The battery life varies according to the temperature and the usage environment.
| Item Specification | |||
| Product name FX-82W (Wired) FX-82W (Wireless) | |||
| Model No AH00090 AH00091 | |||
| Wired | USB | ||
| Wireless | Bluetooth | ||
| Effective screen size (mm) 82 inches Wide, 1,831 (W) × 1,030 (H) | |||
| StarBoard dimensions (mm) 2,051 (W) × 1,070 (H) × 77.5 (D) | |||
| Overall dimensions (including stand) (mm) | 2,051 (W) × 1,700 - 2,050 (H) × 620 (D) | ||
| IR wavelength 880 nm | |||
| Ultrasonic frequency 40 KHz | |||
| Sampling rate Approximately 66 points/s | |||
| Accuracy | ±1.5 | ||
| Current / input voltage | 200mA (5V) | ||
| AC adapter input voltage/ power consumption | 100 - 240 V / 0.5 W | ||
| Weight of main unit/ weight including stand | 18kg / 34kg | ||
| Bundled software | StarBoard Software, 1 set | ||
| Environmental conditions | Ambient temperature | 10 - 35°C | |
| Humidity | 10 - 80% | ||
| Battery life | Continuous operating time Approximately 90 hours*1 | ||
| Compatible operating systems | Windows98SE, Me, 2000, XP | ||
*1 The battery life varies according to the temperature and the usage environment.
B. Provisions of Product Warranty
-
During the free warranty service period, if a malfunction occurs during normal use, the malfunction will be corrected without charge, according to the provisions of the warranty. Furthermore, if the customer registration card accompanying the warranty is not returned to our company, the customer information will not be registered; so free repairs might be unavailable. After receiving this product, please immediately fill out and return this customer registration card.
-
The warranty coverage is as listed in the following table:
| Product Name Part Name Warranty | Coverage | |
| StarBoard | Digitiser (FX-77/FX-63/FX-82W) + | |
| Power supply + | ||
| Power Supply to USB Adaptor | + | |
| Electronic Pen Electronic Pen + | ||
| Stand - | ||
| Wall-mounting bracket - | ||
| AA alkaline battery - | ||
| Other parts and optional equipment - | ||
Legend: + → Covered by warranty (excluding wear and physical damage) - → Not covered by warranty
-
Please refer to the warranty sheet for this product's warranty service period.
-
Even during the warranty period, there will be a repair charge in the following cases:
(1) If the registration card accompanying the warranty is not returned to our company.
(2) If the warranty is not presented.
(3) If specified fields on the registration card accompanying the warranty are not completed, or if the wording has been changed without authorisation.
(4) The warranty applies only to the original purchasers. (It does not apply to a third party to whom the customer resold this product.)
(5) In the event of a malfunction or damage resulting from the customer's improper handling (e.g., a fall, impact, etc., caused by the customer during transportation or movement).
(6) In the event of problems resulting from handling contrary to the handling and precautions mentioned in this user's guide.
(7) In the event of failure or damage resulting from abnormal voltages, pollution or other natural disasters (e.g., fire, earthquake, and lightning).
(8) In the event of a malfunction in this product caused by the connection to this product of equipment other than the equipment specified by our company.
(9) In the event that there is no abnormality in this product, but a defect in a part other than this product was detected or remedied.
(10) In the event of ordinary wear and tear, wear, deterioration, etc., of consumables, even during normal use.
-
If this product malfunctions, review the contents of this user's guide. If the problems remain irreparable, contact the dealer. The dealer will determine whether or not the product must be repaired, so please contact them. If the customer sends the product to our company without RMA (Return Merchandise Authorisation) number, it might not be covered by warranty.
-
As a rule, the customer is responsible for shipping charges required to send all or part of the product for repair, etc. Our company will assume responsibility for the return shipping to the customer.
-
This warranty does not cover labour fees for repair-associated equipment assembly or disassembly.
-
Incidental damage caused by the failure of this product (e.g., loss of profit that should have resulted from the use of this product) is outside the scope of this warranty.
-
The aforementioned provisions define this warranty, and they supersede those of all express or implied warranties that include legal defect liability.
- Notices
- WEEE
- Disclaimers
- Product Assurance Provisions
- Manual Creation Dates
- Safe Handling
- Markings and Symbols
- WARNING
- CAUTION
- Safety Precautions
- WARNINGS
- In the following cases, unplug the product from the mains and ask the dealer.
- Contents
- Notices....1
- Disclaimers....1
- Product Assurance Provisions....2
- Introduction.... 1-1
- Usage 2-1
- Appendix 3-1
- Introduction
- Parts Check
- StarBoard
- Stand
- Role of Each Part
- Function Area
- Electronic Pen
- Assembly and Setup
- Stand Setup Method
- Stand Assembly
- Fasten the screws tightly.
- Board Installation
- This work should be performed by at least two people.
- Height Adjustment
- Wall-Mounting Setup Method
- Install the mounting brackets.
- Before installation, take the wall material into consideration.
- Before installation, take the wall strength into consideration.
- NOTE
- How to Connect When Using Projection Mode
- PC & StarBoard Installation
- Usage
- Basic Usage
- Preparation
- Be sure to orient the battery correctly.
- Be sure to insulate the battery before discarding it.
- How to Use Electronic Pen
- Blocking of Infrared Beam
- Basic operation of Electronic Pen
- Electronic Pen Setting
- How to Use StarBoard in Projection Mode
- Wired Connection
- Starting StarBoard Software manually
- Wireless Connection
- Appendix
- Provisions of Product Warranty
Brand : HITACHI
Model : FX-82
Category : Whiteboard