
DD-8040 - DVD player MITSUBISHI - Free user manual and instructions
Find the device manual for free DD-8040 MITSUBISHI in PDF.


| Product Type | DVD Player |
| Brand | Mitsubishi |
| Model | DD-8040 |
| Color System | NTSC |
| Disc Compatibility | DVD Video, DVD Audio, Audio CD, Video CD, Picture CD, MP3, JPEG, WMA, DVD-RW (VR mode) |
| Region Code | 1 or ALL |
| Progressive Scan | Yes (with DCDi by Faroudja) |
| Audio Decoders | Dolby Digital, DTS (digital output), Analog 5.1-channel |
| Video Outputs | Composite (RCA), S-Video (Mini DIN), Component (Y, Pb, Pr) |
| Audio Outputs | Analog stereo (RCA), 5.1-channel analog, Optical digital, Coaxial digital |
| Power Supply | 120 V AC, 60 Hz, 16 W (standby 3.9 W) |
| Dimensions (W x H x D) | 17-1/8" x 2-3/16" x 8-5/16" (435 x 55 x 211 mm) |
| Weight | 4.3 lbs (1.95 kg) |
| Remote Control | Included (requires 2 AA batteries) |
| Playback Features | Zoom (1.3x/2x/4x), Marker (10 points), Resume, Repeat (Chapter/Title/Track/Disc/Group/A-B), Random, Program, Slow Motion, Step Frame, Screen Saver, Auto Power-Off |
| On-Screen Display | Disc info, time, bitrate, repeat status, layer |
| Image Quality Adjustment | Noise Reduction (MNR/BNR/3DNR), Gamma, Sharpness, Color, Tint, Black Level |
| Parental Lock | 8 levels (1-8) with password |
| Safety | Laser Class 1, Polarized plug, Automatic shutdown after 30 min screen saver |
| Cleaning | Unplug and wipe exterior with damp cloth; do not use liquid cleaners |
| Spare Parts & Repairability | Use manufacturer-specified parts; servicing by authorized center only |
Frequently Asked Questions - DD-8040 MITSUBISHI
User questions about DD-8040 MITSUBISHI
0 question about this device. Answer the ones you know or ask your own.
Ask a new question about this device
Download the instructions for your DVD player in PDF format for free! Find your manual DD-8040 - MITSUBISHI and take your electronic device back in hand. On this page are published all the documents necessary for the use of your device. DD-8040 by MITSUBISHI.
USER MANUAL DD-8040 MITSUBISHI
DVD Player Owner's Guide

VIDEO/AUDIO

DIGITAL VIDEO

DIGITAL AUDIO

DIGITAL


DIGITAL OUT
Kodak Picture CD COMPATIBLE

by FAROUDJA
RW COMPATIBLE


CAUTION
RISK OF ELECTRIC SHOCK DO NOT OPEN

WARNING: TO REDUCE THE RISK OF ELECTRIC SHOCK, DO NOT REMOVE COVER (OR BACK). NO USER-SERVICEABLE PARTS INSIDE. REFER SERVICING TO QUALIFIED SERVICE PERSONNEL

The lightning flash with arrowhead symbol, within an equilateral triangle, is intended to alert the user to the presence of uninsulated "dangerous voltage" within the product's enclosure that may be of sufficient magnitude to constitute a risk of electric shock to persons.

The exclamation point within an equilateral triangle is intended to alert the user to the presence of important operating and maintenance (servicing) instructions in the literature accompanying the appliance.
WARNING:
TO PREVENT FIRE OR SHOCK HAZARD, DO NOT EXPOSE THIS APPLIANCE TO RAIN OR MOISTURE. For models having a power cord with a polarized plug.
CAUTION:
TO PREVENT ELECTRIC SHOCK, MATCH THE WIDE BLADE OF THE PLUG TO THE WIDE SLOT, FULLY INSERT.
DANGER:
VISIBLE AND INVISIBLE LASER RADIATION WHEN OPEN AND INTERLOCK DEFEATED. DO NOT STARE INTO BEAM.
CAUTION:
THIS PRODUCT UTILIZES A LASER. USE OF CONTROLS OR ADJUSTMENTS OR PERFORMANCE OF PROCEDURES OTHER THAN THOSE SPECIFIED HEREIN MAY RESULT IN HAZARDOUS RADIATION EXPOSURE.
PLEASE READ ALL THESE INSTRUCTIONS AND RETAIN FOR FUTURE REFERENCE. FOLLOW ALL WARNINGS AND INSTRUCTIONS MARKED ON THE DVD PLAYER.
1. Importance of Instructions
All the safety and operating instructions should be read before the appliance is operated. The safety and operating instructions should be retained for future reference.
All warnings on the appliance and in the operating instructions should be adhered to. All instructions should be followed.
2. Cleaning
Unplug this DVD Player from the wall outlet before cleaning. Do not use liquid or aerosol cleaners. Use a damp cloth for cleaning.
3. Attachment and Equipment
Never add any attachments and/or equipment without approval of the manufacturer, as such additions may result in the risk of fire, electric shock, or other personal injury.
4. Water and Moisture
Do not use this DVD Player where contact with or immersion in water is a possibility. Do not use near bath tubs, wash bowls, kitchen sinks, laundry tubs, swimming pools, etc.
5. Moisture Condensation
A drastic change in temperature, such as, moving your DVD player from a cold area to a warm area can cause moisture condensation on the optical pick-up lens. You must allow the player to evaporate any moisture before you play any discs. To do this, remove any discs that are in the player. Then turn the player on for two to three hours until it warms up. Using your DVD player before the moisture evaporates could seriously damage discs and internal parts.
6. Accessories
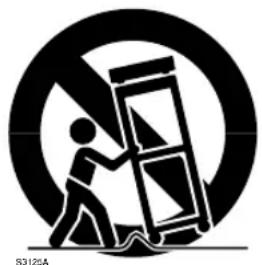
Do not place this DVD Player on an unstable cart, stand, tripod, bracket, or table. The DVD Player may fall, causing serious injury to a child or adult, and serious damage to the appliance. Use only with a cart, stand, tripod bracket, or table recommended by the manufacturer or sold with the DVD Player. Any mounting of the appliance should follow the manufacturer's instructions, and should use a mounting accessory recommended by the manufacturer.
natural_image
Silhouette of a person pushing a ladder inside a circular frame (no text or symbols)An appliance and cart combination should be moved with care. Quick stops, excessive force, and uneven surfaces may cause the appliance and cart combination to overturn.
7. Ventilation
Slots and openings in the cabinet are provided for ventilation and to ensure reliable operation of the DVD Player and to protect it from overheating. Do not block these openings or allow them to be blocked by placing the DVD Player on a bed, sofa, rug, or other similar surface, nor should it be placed over a radiator or heat register. If the DVD Player is to be placed in a rack or bookcase, ensure that there is adequate ventilation and that you adhere to the manufacturer's instructions.
8. Stacking
Do not place any heavy object(s) on top of your DVD player. The object(s) may fall, causing serious injury and/or damage to the product.
9. Power Sources
This DVD Player should be operated only from the type of power source indicated on the marking label. If you are not sure of the type of power supply to your home, consult your appliance dealer or local power company. Overloading wall outlets and extension cords, can result in a risk of fire or electric shock.
10. Grounding or Polarization
For your safety, this DVD Player is equipped with a polarized alternating current line plug having one blade wider than the other. This plug will fit into the power outlet only one way. If you are unable to insert the plug fully into the outlet, try reversing the plug. If the plug should still fail to fit, contact your electrician to replace your obsolete outlet. Do not defeat the safety purpose of the polarized plug.
11.Power-Cord Protection
Place the power-supply cord out of the way, where it will not be walked on, paying particular attention to cords at plugs, convenience receptacles, and the point where they exit from the appliance.
12.Lightning
Unplug your DVD Player from the wall outlet if it will not be used for a long time or if there is a lighting storm. This will prevent damage to the product due to lightning and power-line surges.
13. Object and Liquid Entry
Never push objects of any kind into this DVD Player through openings, as they may touch dangerous voltage points or short-out parts that could result in a fire or electric shock. Never spill any liquid on the DVD Player.
14. Servicing
Do not attempt to service this DVD Player yourself, as opening or removing covers may expose you to dangerous voltage or other hazards. Refer all servicing to qualified service personnel.
15. Damage Requiring Service
Unplug this DVD Player from the wall outlet and refer servicing to qualified service personnel under the following conditions:
(a) When the power-supply cord or plug is damaged.
(b) If liquid has been spilled, or objects have fallen into the DVD Player.
(c) If the DVD Player has been exposed to rain or water.
(d) If the DVD Player does not operate normally when you follow the operating instructions. Improper adjustment of other controls may result in damage and will often require extensive work by a qualified technician to restore the DVD Player to its normal operation.
(e) If the DVD Player has been dropped or the cabinet has been damaged.
(f) When the DVD Player exhibits a distinct change in performance.
16. Replacement Parts
When replacement parts are required, be sure the service technician has used replacement parts specified by the manufacturer, or having the same characteristics as the original part. Unauthorized substitutions may result in fire, electric shock, or other hazards.
17. Safety Check
Upon completion of any service or repairs to this DVD Player, ask the service technician to perform safety checks to determine that the DVD Player is in a safe operating condition.
18. Heat
The DVD Player should be situated away from heat sources, such as radiators, heat registers, stoves, or other products (including amplifiers) that produce heat.
19. Radiation Safety
The laser is covered by a housing which prevents exposure during operation or maintenance. This product is classified as a Laser Product by CDRH (Center for Devices and Radiological Health), a department of the Food and Drug Administration. According to their regulations, 21 CFR section 1002.30, all manufacturers who sell Laser Products must maintain records of written communications among the manufacturer, dealers, and customers concerning radiation safety. If you have any complaints about instructions or explanations affecting the use of this product, please write to us at the address on the back page of this manual. When writing, include the model number and serial number of your DVD Player.
- In compliance with Federal Regulations, the certification, identification, and period of manufacture are indicated on the rear panel.
21. FCC INFORMATION FOR USER
CAUTION:
Changes or modifications not expressly approved by the manufacturer for compliance could void the user's authority to operate the equipment.
IMPORTANT:
This equipment has been tested and found to comply with the limits for a Class B digital device, pursuant to Part 15 of the FCC Rules. These limits are designed to provide reasonable protection against harmful interference in a residential installation. This equipment generates, uses, and can radiate radio frequency energy and, if not installed and used in accordance with the instructions, may cause harmful interference to radio communications. However, there is no guarantee that interference will not occur in a particular installation. If this equipment does cause harmful interference to radio or television reception, which can be determined by turning the equipment off and on, the user can try to correct the interference by one of the following measures:
(a) Reorient or relocate the receiving antenna.
(b) Increase the separation between the equipment and the receiver.
(c) Connect the equipment into an outlet on a circuit different from that to which the receiver is connected.
(d) Consult the dealer or an experienced radio/TV technician for help.
A Note About Recycling
This product's packaging materials are recyclable and can be reused. Please dispose of any materials in accordance with your local recycling regulations. Batteries should never be thrown away or incinerated but disposed of in accordance with your local regulations concerning chemical wastes.
The serial number of this product may be found on the back of the DVD player. No others have the same serial number as yours. You should record the number and other vital information here and retain this book as a permanent record of your purchase to aid identification in case of theft. Serial numbers are not kept on file.
About Copyright
Unauthorized copying, broadcasting, public performance and lending of discs are prohibited.
This product incorporates copyright protection technology that is protected by method claims of certain U.S. patents and other intellectual property rights owned by Macrovision Corporation and other rights owners. Use of this copyright protection technology must be authorized by Macrovision Corporation, and is intended for home and other limited viewing uses only unless otherwise authorized by Macrovision Corporation. Reverse engineering or disassembly is prohibited.
Supplied Accessories

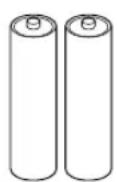
Two AA batteries

A/V cables

Owner's Guide
Registration Card
Symbols Used in This Manual
The following symbols appear below some headings and in some notes in this manual.
DVD-V :Refers to playback of DVD Video discs.
DVD-A :Refers to playback of DVD Audio discs.
CD :Refers to playback of audio CDs.
MP3 :Refers to playback of MP3 discs.
JPEG: JPEG video data recorded in the data CD (CD-R and CD-RW) can be displayed.
WMA :Windows Media Audio (WMA) can be played back.
VCD :Description refers to playback of Video CDs.
Picture CD: Picture CD of KODAK standard can be played back.
DVD-RW
Refers to playback of the Video Recording Format discs.
Video Recording Format is a recording mode to enjoy features unique to DVD recorder such as program editing and manual-mode recording with variable recording time using a DVD-RW disc.
RW
COMPATIBLE
This label indicates playback compatibility with DVD-RW discs recorded in VR mode (Video Recording Format).
■ IMPORTANT SAFEGUARDS .... 3
■ NOTES .... 5
■ FEATURES....7
■ ABOUT THE DISCS....8
PLAYABLE DISCS....8
DISC TYPES 8
■ OPERATING CONTROLS AND FUNCTIONS 9
DISPLAY 10
DISPLAYS DURING OPERATION 10
LOADING THE BATTERIES....10
■ HOOKUPS....11
CONNECTING TO A TV....11
CONNECTING TO A DOLBY DIGITAL DECODER OR DTS DECODER....12
CONNECTING TO A TV OR A STEREO TV THAT HAS COMPONENT VIDEO IN JACKS ..... 12
CONNECTING TO AN AMPLIFIER EQUIPPED WITH DIGITAL INPUT JACKS
SUCH AS MD DECK OR DAT DECK....13
■ PLAYING A DISC....14
PLAYING A DVD VIDEO OR AN AUDIO CD 14
USING THE DVD MENUS 14
PLAYING A DISC RECORDED IN THE VIDEO RECORDING FORMAT....15
USING THE TITLE MENU 15
PAUSING PLAYBACK OR DISPLAYING A STILL PICTURE. 15
RESUMING PLAYBACK FROM THE POINT WHERE PLAYBACK STOPPED 16
STEPPING THROUGH FRAMES 16
PAGE SELECTION 16
FAST FORWARD/REVERSE....16
SLOW MOTION....17
STARTING FROM A DESIRED TRACK....17
PLAYING FROM A DESIRED GROUP....17
TO PLAYBACK THE BONUS GROUP 17
PLAYING FROM A DESIRED TITLE OR CHAPTER. 17
STARTING FROM A DESIRED TIME COUNT 18
MARKER SETUP SCREEN....18
RANDOM....18
REPEAT 19
A-B REPEAT 19
PROGRAM....20
PLAYBACK OF ALL GROUPS 20
ZOOM PLAYBACK (enlargement on-screen) 20
PLAYING MP3 / JPEG IMAGE, WMA AND PICTURE CD 21
PLAYING MP3 DISC / JPEG DISC / WMA / PICTURE CD IN A PROGRAMMED WAY ..... 23
PLAYING AN MP3 DISC / JPEG DISC / WMA DISC FROM A DESIRED TRACK. 23
PLAYING AN MP3 DISC / JPEG DISC / WMA DISC / PICTURE CD AT RANDOM 23
■ SETTINGS 24
CHANGING THE AUDIO LANGUAGE OR SOUND MODE 24
CHANGING THE SUBTITLE LANGUAGE 25
CHANGING THE CAMERA ANGLE (Multi-Angle Pictures) 25
CHANGING THE ON-SCREEN DISPLAY 26
SETTING IMAGE QUALITY ADJUSTMENT....28
■ CHANGING THE SETUP ITEMS....29
LANGUAGE SETTINGS 29
LANGUAGE CODE LIST 30
DISPLAY SETTINGS....31
AUDIO SETTINGS 32
PARENTAL LOCK....35
■ TROUBLESHOOTING GUIDE .... 36
■ HANDLING PRECAUTIONS....37
■ SPECIFICATIONS....39
■MITSUBISHI DVD Player LIMITED WARRANTY....40
- Analog 6-Channel decoder
This player is equipped with an analog 6-Channel decoder for DVD Audio/Dolby Digital playback (does not support DTS sound).
- Progressive Scan system
Unlike conventional interlace scanning, the progressive scan system provides less flickering and images in higher resolution than that of traditional television signals.
• Dolby Digital sound
This player can handle Dolby Digital surround sound with 5.1 channels when connected to a Dolby Digital Decoder.
• DTS (Digital Theater System)
You can enjoy 5.1 channel surround system developed by Digital Theater System which reproduces the original sound as truthfully as possible.
- Still/fast/slow/step playback
Various playback modes are available including still pictures, fast forward/reverse, slow motion and step frames.
- Random playback for DVD Audio and audio CD / MP3 / JPEG / Picture CD /WMA
This player can shuffle the order of tracks to play them in random order.
- Program playback for DVD Audio and audio CD / MP3 / JPEG / Picture CD / WMA
You can program the order of tracks to play them in any desired order.
• DVD menus in a desired language
You can display DVD menus in a desired language, if available on a DVD.
- Screen saver/Auto power-off functions
The screen saver program starts when there is no input from the player for five minutes in the stop mode. When the screen saver program is activated for 30 minutes, the power is automatically turned off.
- Subtitles in a desired language
You can select a desired language for the display subtitles, if that language is available on a disc.
- Selecting a camera angle
You can select the desired camera angle, if a disc contains sequences recorded from different angles.
- Choices for audio language and sound mode
You can select the desired audio language and sound mode, if different languages and modes are available on a disc.
- Parental lock
You can set the control level to limit playback of discs which may not be suitable for children.
• Automatic detection of discs
This player automatically detects if a loaded disc is DVD Video, DVD Audio, audio CD, Video CD, MP3, JPEG, Picture CD, WMA on disc.
- Playing an MP3 disc
You can enjoy MP3 files which are recorded on CD-R/RW.
- Direct Search
You can search the desired title, chapter, and track with numeric button during playback or in stop mode.
- Marker
You can memorize your favorite places on a disc.
- Playing a DVD-RW disc
You can enjoy playbak compatibility with DVD-RW discs recorded in VR mode (Video Recording Format).
- On-screen display
Information about the current operation can be displayed on a TV screen, allowing you to confirm the currently active functions (such as program playback), on the TV screen using the remote control.
- Search
Chapter search: Search for the chapter designated by user is possible.
Title search: Search for the title designated by user is possible.
Group search: Search for the group designated by user is possible
Track search: Search for the track designated by user is possible.
Time search: Search for the time designated by user is possible.
- Repeat
Chapter: Repeated playback of the chapter of the disc being played is possible.
Title: Repeated playback of the title of the disc being played is possible.
Track (DVD Audio, audio CD): Repeated playback of the track of the disc being played is possible.
Disc (audio CD, Video CD, MP3/JPEG/WMA): Repeated playback of the entire disc being played is possible.
A-B: The part between A and B designated by user is possible.
Group (DVD Audio, MP3, JPEG, WMA): Repeated playback of the folder of the MP3/JPEG/WMA disc being played is possible.
- Zoom
1.3, 2-time and 4-time magnified screen can be displayed.
- Resume Play
User can resume to playback from the part at which the play was stopped even if the power is turned off.
- Component Video Out Jacks
Jacks located on the back of the DVD Player which are used to send high-quality video to a TV via Component Video In Jacks.
- Dimmer
Brightness of the display can be varied.
- Bit rate indication
• DRC (Dynamic range control)
You can control the range of sound volume.
• Audio output during fast forward (DVD)
Audio output is available during 2-time playback with DVD.
- Playing a disc in Video Recording Format
The product can run a disc recorded in the Video Recording Format.
- JPEG Photo Viewer
- Displaying a Picture CD playback
- WMA playback
- Adjusting image quality
The user can adjust the degree of noise reduction mode, image quality mode, gamma correction, sharpness, color depth and hue.
When you play the Video CD with PBC function, you cannot choose a specified track and set Repeat.
To play the Video CD without PBC function, refer to page 14.
PLAYABLE DISCS
The following discs can be played back on this DVD player.
| Logo | ContentsDis | Disk Size | Maximum Playback Time | |
| DVD Video |  | Sound and Pictures | 12 cm | Approx. 4 h (single-sided) |
| Approx. 8 h (double-sided) | ||||
 | 8 cm | Approx. 80 min (single-sided) | ||
| Approx. 160 min (double-sided) | ||||
| DVD Audio |  | Sound | 12 cm | Approx. 4 h (single-sided) |
| Approx. 8 h (double-sided) | ||||
| 8 cm | Approx. 80 min (single-sided) | |||
| Approx. 150 min (double-sided) | ||||
| Audio CD |  | Sound | 74 min12 cm | |
| 8 cm (singles) | 20 min | |||
| Video CD |  | Sound and Pictures | 12 cm | 74 min |
| 8 cm (singles) | 20 min | |||
| Picture CD |  | Digital photos | ||
| The following discs are also available.• CD-R/CD-RW discs of CD-DA formatSome of these discs may be incompatible because of "scratch and stain of disc", "Recording condition", and "Characteristic of Recorder". | ||||
This player conforms to the NTSC color system. You cannot play discs recorded in other color systems such as PAL or SECAM.
- Some discs include region codes as shown below.


- The number inside the symbol refers to a region of the world, and a disc encoded in a specific region format can only be played back on DVD players with the same region code.
The following discs cannot be played back on this DVD player.
• DVD with region codes other than 1 or ALL.
• DVD-ROM
• DVD-RAM (Never play back, otherwise malfunction may result.)
- CD-ROM
• VSD
• CDV (Only plays back the audio part.)
• CD-G (Only plays back the sound.)
- CD-R/CD-RW (Only plays back the discs which audio CD/MP3/JPEG/WMA is recorded.)
- CD-I (Never play back, otherwise malfunction may result.)
• SACD
- Photo CD (Never play back, otherwise malfunction may result.)
Any other discs without compatibility indications.
DISC TYPES
[DVD Video]
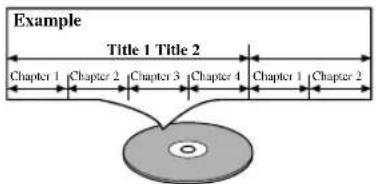
Data on a DVD is divided into sections called "titles," and then into subsections called "chapters," each of which is given a title or chapter number. Playback conditions are preset on some DVD Video discs, and these playback conditions take priority over user operations on this player. If a function you selected does not run as desired, refer to the manual accompanying the disc.
[DVD Audio]
[AUDIO CD] [VIDEO CD]
Data on an audio CD or a Video CD is divided into sections called "tracks," each of which is given a track number.
![MITSUBISHI DD-8040 - [AUDIO CD] [VIDEO CD] - 1](/content/2026/05/1052910/images/bd52370bdc9d9070c83bf20126cca51b76180220f5e978ba57f8f69fe3930d4d.jpg)
flowchart
graph TD
    A["CD"] --> B["Track 1"]
    A --> C["Track 2"]
    A --> D["Track 3"]
    A --> E["Track 4"]
    A --> F["Track 5"]
    A --> G["Track 6"]
    H["Example"] --> A
ABOUT THE PBC FUNCTION OF VIDEO CD
This unit conforms to ver 1.1 and ver 2.0 of Video CD standard with PBC function.
ver 1.1 (without PBC function): You can enjoy playback picture as well as audio CD.
ver 2.0 (with PBC function): While using a Video CD with PBC function, "PBC" appears on the screen and the display.
What is PBC? "PBC" stands for the Playback Control. You can play interactive software using menu screen. Refer to instructions in the Video CD.
Note:
When you play the Video CD with PBC function, you cannot choose a specified track and set Repeat.
To play the Video CD without PBC function, refer page 14.
[MP3, JPEG or WMA]
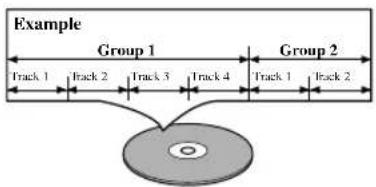
These files are divided into sections called "groups," and then into subsections called "tracks," each of which is given an album or track number.
![MITSUBISHI DD-8040 - [MP3, JPEG or WMA] - 1](/content/2026/05/1052910/images/255c35e12e04620fac2fd6d66d4f659bbd0f18310d76aa5ffe7b2cc448df4365.jpg)
flowchart
graph TD
    A["Example"] --> B["Group 1"]
    A --> C["Group 2"]
    B --> D["Track 1"]
    B --> E["Track 2"]
    B --> F["Track 3"]
    B --> G["Track 4"]
    C --> H["Track 1"]
    C --> I["Track 2"]
    D --> J["CD"]
    E --> J
    F --> J
    G --> J
    H --> J
    I --> J
FRONT PANEL

REMOTE CONTROL

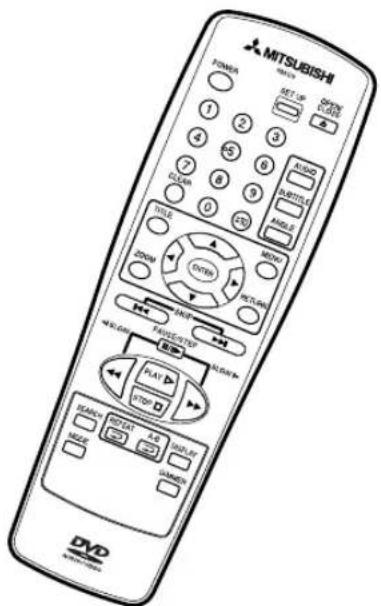
- POWER Button [page 14]
Press to turn the power on and off.
- PAUSE Button (main unit) [page 15]
Pauses the current disc operation.
PAUSE/STEP Button (remote control) [page 15]
Pauses the current disc operation. View the still picture frame by frame.
- STOP Button [page 14]
Stops operation of the disc.
- PLAY Button [page 14]
Starts playback of the disc contents.
- SKIP Buttons
▶▶: Plays back from the beginning of the next chapter or track.
|◀◀: Plays back from the beginning of the current chapter or track.
- OPEN/CLOSE Button [page 14]
Press to insert or remove discs from the tray.
-
Disc loading tray
-
Display, Remote Sensor Window
-
Numeric Buttons [page 14]
-
CLEAR Button [page 18]
Resets a setting.
- TITLE Button [page 15]
Displays the title menu.
- Arrow Buttons
Use to scroll and cycle through disc and player menus and settings.
- ENTER Button
Press to accept a setting.
- ZOOM Button [page 20]
Enlarges part of a DVD-reproduced image.
- REV Button [page 16]
Fast reverse playback to a desired point.
- SEARCH MODE Button [pages 17, 18]
Press to locate a desired point.
- REPEAT Button [page 19]
Repeats playback of the current disc, title, chapter or track.
- MODE Button [page 18]
Activates program playback or random playback mode when playing DVD-Audio, CD or MP3/JPEG/Picture CD/WMA. Also sets Black level, Image Quality mode, and Noise Reduction. It selects freeze-frame viewing of DVD-Audio.
- DIMMER Button [page 10]
Select the display panel brightness.
- A-B REPEAT Button [page 19]
Repeats playback of a selected section.
- DISPLAY Button [page 26]
Displays timer and bit-rate information on the TV screen.
- FWD Button [page 16]
Fast forwards playback to a desired point.
- RETURN Button
Returns to the previous operation.
- MENU Button [page 14]
Displays the disc menus.
- ANGLE Button [page 25]
Press to change the camera angle to see the sequence being played back from a different angle.
- SUBTITLE Button [page 25]
Press to select a desired subtitle language.
- AUDIO Button [page 24]
Press to select a desired audio language or sound mode.
- SETUP Button [page 29]
Press to enter the setup mode or to change setup items.
REAR VIEW

- Power Cord
- Left AUDIO OUT Jack
- OPTICAL DIGITAL AUDIO OUT Jack
- COAXIAL DIGITAL AUDIO OUT Jack
- Right AUDIO OUT Jack
DISPLAY
Lights-up when a DVD is inserted
"CD" lights up when an audio CD is inserted "VIDEO CD" lights up when a Video CD is inserted
Lights-up when the repeat mode or A-B repeat mode is set
Lights-up when playback control is activated
Displays a title number

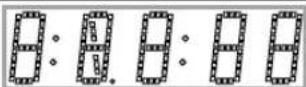

Displays how long a current title or track has been played back.
When a chapter or track has switched, the number of a new title, chapter or track is displayed.
Displays the disc status
Displays a chapter or track number
Lights-up when the multi-angle scene is taken
It is possible to change the brightness of display unit by pressing the DIMMER button of remote control.

flowchart
graph TD
    A["Bright"] --> B["1:23:45"]
    B --> C["Dark"]
    C --> D["1:23:45"]
    D --> E["OFF"]
- When the power supply is turned off, the display is returned to the setup status.
- VIDEO OUT Jack
- Component Video Out Jacks
- S-VIDEO OUT Jack
- SCAN MODE Switch
- ANALOG 5.1 CH AUDIO OUT Jacks
DISPLAYS DURING OPERATION
| ON (“ON” is lit.) | Power on | |
 | (“Disc icon” blinks.) | Tray open and closed |
 | (“Disc icon” rotates.) | LOAD |
 | (“Disc icon” rotates.) | During playback |
 | (A segment on “Disc icon” blinks.) | During pause |
 | (Two segments on “Disc icon” blink.) | Stop (Resume ON) |
 | (“Disc icon” is lit.) | Stop (Resume OFF) |
 |  | Power off |
 | No disc or error | |
 |   | ERROR |
LOADING THE BATTERIES
- Open the battery compartment cover.
- Insert two AA batteries, with each one oriented correctly.
- Close the cover.


Notes
- Do not mix alkaline and manganese batteries.
- Do not mix old and new batteries.
CONNECTING TO A TV

[Fig. 1]
FOR TVs WITH S-VIDEO INPUT JACK
Use an S-Video cable (commercially available) in place of the yellow video cable to enjoy pictures at higher quality.
![To AUDIO OUT jacks To Right (red) and Left (white) AUDIO INPUT jacks To S-VIDEO INPUT jack To S-VIDEO INPUT jack but not both To VIDEO INPUT jack To VIDEO OUT jack To S-VIDEO OUT jack Stereo system To Right (red) and Left (white) AUDIO OUT jacks To ANALOG AUDIO INPUT jacks [Fig. 2] [Fig. 3]](/content/2026/05/1052910/images/d6eb0b736d5a234074c969ca6a2ee4d4ad91c36d4265fb8c084dfbb598916f22.jpg)
Notes
- Connect the DVD player directly to a TV. If the A/V cables are connected to a VCR, pictures may be distorted due to the copy protection system.
- Be sure to turn off the power to all components in the system before connecting another component.
- Refer to the Owner's Manuals for your TV, stereo system and any other components to be connected to the DVD player.
- The analog output terminal does not supply DTS sound.
Selecting Progressive Scan (480p) or Interlaced (480i) Playback
- If your TV is compatible with progressive scanning (480p), connect the TV to the Component Video Output jacks of the DVD player and set the SCAN MODE switch on the back of the DVD player to "P" (PROGRESSIVE). Next, set your TV to the progressive scan mode.
If your TV is not compatible with progressive scan, keep the SCAN MODE switch to "I" (INTERLACE).
- Use a commercially available adaptor if the video input jacks of your TV or monitor are the BNC type.
- When SCAN MODE switch is set to "P" (PROGRESSIVE), DVD player outputs from Component Video Output Jack (not from VIDEO OUT or S-VIDEO OUT jack).
What is Progressive Scanning?
- Unlike conventional interlace scanning, the progressive scan system provides less flickering and images in higher resolution than that of traditional (480i) television signals.
- When P (PROGRESSIVE) is selected, no video signal will be output from the VIDEO OUT, or S-VIDEO OUT jack.
The DCDi (Directional Correlational De-interlacing) system of this DVD player produces smooth and natural video images, even if really dynamic, by eliminating the jagged edges. "DCDi" is a trademark of Faroudja, a division of Genesis Microchip Inc.
CONNECTING TO A DOLBY DIGITAL DECODER OR DTS DECODER
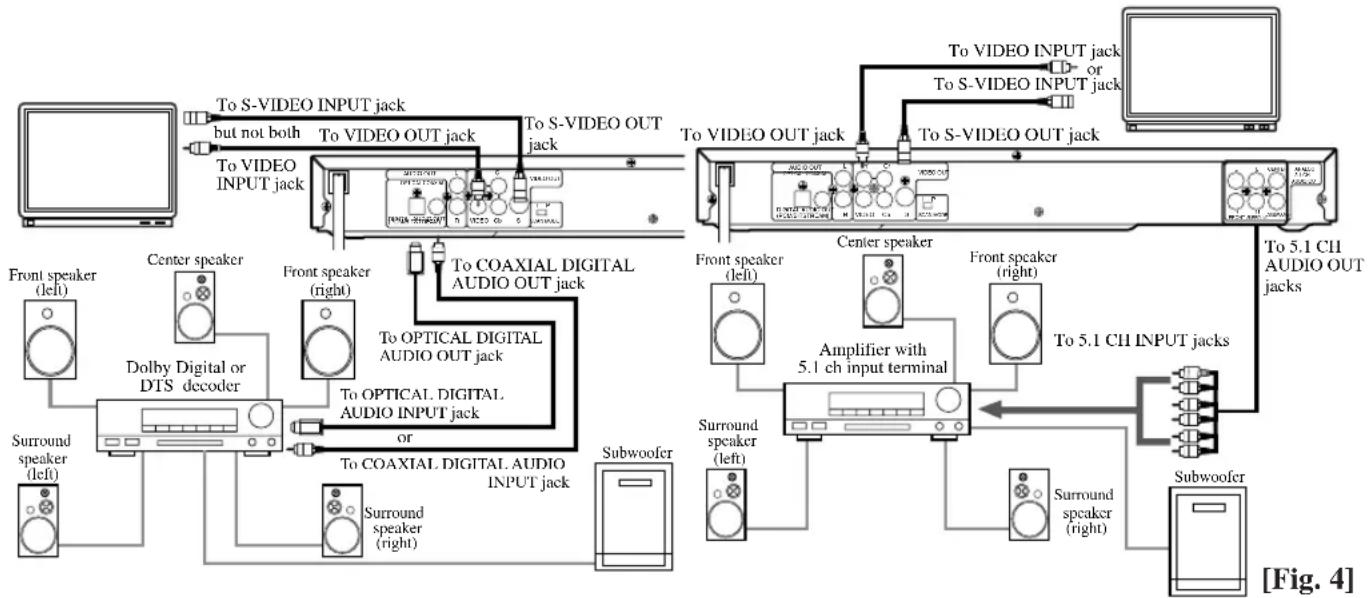
If using this DVD player to playback a DVD in a 5.1 channel Dolby Digital surround or DTS surround format, the DVD player outputs a Dolby Digital or DTS data stream from its OPTICAL or COAXIAL DIGITAL AUDIO OUT jacks. 5.1 channel Dolby Digital Surround sound can also be output from the 5.1 CH OUTPUT jacks. (They do not output the DTS sound.) By hooking the player up to a Dolby Digital or DTS decoder, you can enjoy a more convincing, realistic ambience with powerful and high-quality surround sound of a professional standard, which can be heard in movie theaters.
Use an audio coaxial or optical digital cable (not included) for the audio connections.
Use audio cables (commercially available) for the 5.1 CH audio connection.
flowchart
graph TD
    A["Computer"] -->|To S-VIDEO INPUT jack but not both| B["Video INPUT jack"]
    B --> C["Center speaker"]
    C --> D["Dolby Digital or DTS decoder"]
    D --> E["Front speaker (left)"]
    E --> F["Surround speaker (left)"]
    F --> G["Surround speaker (right)"]
    G --> H["To COAXIAL DIGITAL AUDIO OUT jack"]
    H --> I["To OPTICAL DIGITAL AUDIO OUT jack"]
    I --> J["Front speaker (right)"]
    J --> K["To S-VIDEO OUT jack"]
    K --> L["Center speaker"]
    L --> M["Amplifier with 5.1 ch input terminal"]
    M --> N["Front speaker (left)"]
    N --> O["To 5.1 CHI INPUT jacks"]
    O --> P["Subwoofer"]
    P --> Q["Surround speaker (right)"]
    Q --> R["To 5.1 CHI AUDIO OUT jacks"]
    R --> S["Subwoofer"]
    S --> T["To 5.1 CHI Audio jacks"]
    T --> U["To 5.1 CHI INPUT jack"]
    U --> V["To 5.1 CHI Audio jacks"]
    V --> W["To 5.1 CHI Audio jacks"]
    W --> X["To 5.1 CHI Audio jacks"]
Notes
- Be sure to turn off the power to all components in the system before connecting another component.
- Refer to the Owner's Manuals for the components to be connected to the DVD player.
- If output is Dolby Digital audio, connect to a Dolby Digital decoder and set Dolby Digital to ON for audio output in the setup mode.
- If you want to enjoy DTS audio, use a DIGITAL AUDIO OUT jack for the connection. (DTS can only be output through the DIGITAL AUDIO OUT jacks.)
- If output is DTS audio, connect to a DTS decoder and set DTS to ON for audio output in the setup mode.
- Unless connected to a Dolby Digital decoder or a DTS decoder, set Dolby Digital or DTS to OFF for audio output in the setup mode. Playing a DVD using incorrect settings may generate noise distortion and may also damage the speakers.
“DTS” and “DTS Digital Out” are trademarks of Digital Theater Systems, Inc.
Manufactured under license from Dolby Laboratories. "Dolby" and the double-D symbol are trademarks of Dolby Laboratories.
CONNECTING TO A TV OR A STEREO TV THAT HAS COMPONENT VIDEO IN JACKS
![To COMPONENT VIDEO INPUT jack (red, green, and blue) Stereo system To Right (red) and Left (white) AUDIO OUT jacks To ANALOG AUDIO INPUT jacks [Fig. 5]](/content/2026/05/1052910/images/02d59f2a9ba04aa06c156ccd464ba37648c66ead9c0f71ad6b3f132829899946.jpg)
CONNECTING TO AN AMPLIFIER EQUIPPED WITH DIGITAL INPUT JACKS SUCH AS MD DECK OR DAT DECK
Use an audio coaxial or optical digital cable (not included) for the audio connections.
Connecting to an amplifier equipped with digital input jacks such as MD Deck or Dat Deck:
![To S-VIDEO INPUT jack To VIDEO INPUT jack To S-VIDEO OUT jack To VIDEO OUT jack AUDIO OUT OPTICAL COAXIAL DIGITAL AUDIO OUT UPCOS TEST/SMO R VIDEO CL S COAX MODE To OPTICAL DIGITAL AUDIO OUT jack To COAXIAL DIGITAL AUDIO OUT jack Amplifier equipped with digital input jacks, MD deck, DAT deck, etc. To OPTICAL DIGITAL AUDIO INPUT jack or To COAXIAL DIGITAL AUDIO INPUT jack [Fig. 6]](/content/2026/05/1052910/images/cd3e14d99a7ee491deb784007a99059136432c62e53c8fd319e02d65907af9f1.jpg)
Notes
- The audio source on a disc in a 5.1 channel Dolby Digital surround format cannot be recorded as digital sound by an MD or DAT deck.
- Be sure to turn off the power to all components in the system before connecting another component.
- Refer to the Owner's Manuals for the components to be connected to the DVD player.
- Set Dolby Digital and DTS to OFF for audio output in the setup mode. Playing a DVD using incorrect settings may generate noise distortion, and may also damage the speakers (See page 32 to set ON for Dolby Digital and DTS).
HOW TO CONNECT TO A TV WITHOUT AUDIO/VIDEO INPUT JACKS
If your TV does not have RCA type audio and video input jacks, it is still possible to connect this DVD player to your TV's 75-ohm coaxial antenna terminal using a commercially available Stereo Audio/Video RF Modulator that is not included. Connect the audio and video outputs of the DVD player to the audio and video inputs on the RF Modulator, and then connect the coaxial output of the RF Modulator (usually marked "TO TV") to the 75 ohm coaxial antenna terminal on your TV. Follow the instruction supplied with the RF Modulator for more details.
If your TV's 75 ohm coaxial antenna terminal is already occupied by an antenna or cable box connection, remove that cable from your TV's antenna terminal and reconnect it to the coaxial antenna input terminal of the RF Modulator (usually marked "ANT IN"), then connect the RF modulator to your TV's antenna terminal as described above.
Note
- The picture quality from DVD discs will not be as good if the DVD player is connected to the TV's antenna terminal through an RF Modulator.
HINT FOR OPTICAL CABLE (NOT SUPPLIED)
- Optical cable (not supplied) may be damaged when bent at acute angles. Ensure cables are coiled in loops with a diameter of 6 inches or more when storing them.
- Use a cable which is 9.8 feet or shorter.
- Insert cable plugs firmly into the jacks when making connections.
- If a plug has minor scratches or is dirty, clean it with a soft cloth before inserting it into a jack.
- Replace the protective cap on the OPTICAL jack when it is not in use.
PLAYING A DVD VIDEO OR AN AUDIO CD
DVD-A


VCDO
Getting started
Turn on the power of the TV, amplifier and any other components which are connected to the DVD player. (Change the input system to suit the DVD player, and check that the sound volume is correct.)
1 Press the POWER button.
• The power will turn on.
2 Press the OPEN/CLOSE button.
- The disc loading tray will open.
3 Place a disc into the tray.
- Make sure the disc is sitting properly in the correct recess, with the label side up. Discs that are irregularly shaped, contain a scratch protection film, or have any type of sticker or adhesive label should not be inserted.

natural_image
Illustration of a hand using a pulley to lift a circular object on a wooden base (no text or symbols)4 Press the PLAY button.
- The tray will close automatically, and playback will then start from the first chapter or track of the disc. You need to press the PLAY button only when the tray has been closed by pressing the OPEN/CLOSE button.
- When you playback a DVD Video and DVD Audio or Video CD which a title menu is recorded, it may appear on the screen. In this case, refer to “USING THE TITLE MENU.”
5 Press the STOP button to stop play.
Notes
- A “prohibited icon” may appear at the top-right on the TV screen during operation, warning that a prohibited operation has been encountered by the DVD player or the disc.

- If a disc is dirty or has scratches, the pictures may appear distorted and the playback operation may stop. In such cases, clean the disc and unplug the
DDVD-RWDVD-V power cord and then plug it again before resuming playback. Never attempt to play a cracked or broken disc!
- With DVD Videos that use some titles for playback program signals, playback may start from the second title, or it may skip these titles.
- During the playback of a common two layered disc, pictures may stop for a moment. This happens when the 1st layer switches to the 2nd layer. This is not a malfunction, and is commonly found on pre-recorded discs.
- During the playback of DVD-RW recorded in VR mode, the sound or picture may freeze momentarily depending on the writing conditions of discs.
- Operation may vary when you playback DVDs with a disc menu or Video CDs with PBC. Refer to the manual accompanying the disc for details.
- When you playback Video CDs with PBC, the time counter does not appear on the display.
Cancelling PBC (for playback of a Video CD)
- Insert a Video CD (Playback will start automatically).
- Press the STOP button.
- Enter track number of your choice with the numeric buttons.
- PBC is now cancelled and the playback of the Video CD will start.
USING THE DVD MENUS
DVD-V
Some DVDs contain their own menus, such as a guidance menu which describes the contents of the disc or a selection menu for sound, language and other customized settings.
1 Press the MENU button.
• The DVD menu will appear.
2 Select the desired title.
- Press the arrow buttons ( /// ) to change the setting, and then press the ENTER button.
3 Playback will start from the selected title.
PLAYING A DISC RECORDED IN THE VIDEO RECORDING FORMAT
DVD-RW
The user can select either “Original” or “Play list” before playing the disc if a “Play list” has been set in the disk recorded in the Video Recording Format.
1 Press the MENU button when the system is at rest.
- The menu screen of the currently set state appears.
2 Using the arrow buttons (◀/▶) select "Original" or "Play list".
- The menu screen does not display any play list unless a play list has been created.
- When the setting state is switched, “resume” will be released.
- If the list contains eight or more titles, the user may turn the page using SKIP buttons |◀◀ or ▶▶.
3 Using the arrow buttons (▲/▼) select the desired title to play.
4 Press the ENTER button.
- The player starts playing the selected title.
Notes
- “Original” here means a title made by recording by DVD recorder.
- “Play list” here means titles made for compilation based on the originals.
USING THE TITLE MENU
DVD-A DVD-V
With a DVD containing a title menu, you can select desired titles from the menu.
1 Press the TITLE button.
- The title menu will appear.
2 Select the desired title.
- Press the arrow buttons ( /// ) to change the setting, and then press the ENTER button.
CALLING UP A MENU SCREEN DURING PLAYBACK
For DVDs
- Press the MENU button to call up the DVD menu.
- Press the TITLE button to call up the title menu.
Note
- Contents of menus and corresponding menu operations may vary between discs. Refer to the manual accompanying the disc for details.
VCD
With a Video CD containing a title menu, you can select desired titles from the menu.
- The title menu will appear.
- Press the numeric button to select the menu. Playback will start.
PAUSING PLAYBACK OR DISPLAYING A STILL PICTURE
DVD-A DVD-V DVD-RW CD
WMAMP3
1 Press the PAUSE/STEP button during playback.
- Playback will pause, with sound muted.

2 Press the PLAY button to resume playback.
RESUMING PLAYBACK FROM THE POINT WHERE PLAYBACK STOPPED
PAGE SELECTION
DVD-A
CDDVDSRWDVD2VDDA

VCD (without PBC function)
1 Press the STOP button during playback.
- Playback will stop, and then the resume message will appear at the center.
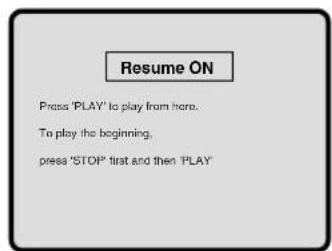
2 Press the PLAY button. Playback will start from the point where the previous playback session was stopped.

Note
- The resume function can be reset by pressing the STOP button twice or by opening the disc loading tray.
- Some Video CDs with PBC function resume playback from the beginning of the track.
- The “Resume” information stays in the memory even when the power is turned off.
STEPPING THROUGH FRAMES

VCDD
1 Press the PAUSE/STEP button while playback is paused.
- The next picture frame is displayed with sound muted each time the button is pressed.

2 Press the PLAY button to resume playback.

Note
- For DVD Audio discs, only the picture can be forwarded by a step.
1 Press the MODE button 4 times during playback. Present number of stati

2 Press the ENTER button.
- It is in the ready state for you to enter the page number.
3 Press the numeric button to select the image of your choice.
FAST FORWARD/REVERSE
DVD-A DVD-V CD VCD MP3
DVD-RWWMA
1 Press the FWD ▶▶ or REV ◀◀ button during playback.
- For DVD Videos, pressing the FWD ▶▶ or REV ◀◀ button cycles the playback speed in four steps. In case of DVD Videos, the sound will mute. Turning on the double-speed sound in SET UP enables output of sound.
- For DVD audios, the playback speed is ×2, ×8 ×50 and ×100.
In case of DVD Audio discs, the sound will not mute. - For audio CDs, the playback speed is ×16 fixed.
- RWDVD-YDVD-A
- For video CDs, the playback speed is ×2, ×8 and ×30.
- For WMA and MP3, the playback speed is ×8 fixed.

flowchart
graph TD
    A["REV ← button"] --> B["2"]
    B --> C["8"]
    C --> D["50"]
    D --> E["100"]
    F["FWD ➕ button"] --> G["2"]
    G --> H["8"]
    H --> I["50"]
    I --> J["100"]
2 Press the PLAY button to return to normal playback speed.
SLOW MOTION


VCDDVD-VDVD-RWDVD-A
PLAYING FROM A DESIRED GROUP
DVD-A
1 Press the FWD ▶▶ or REV ◀◀ button while playback is paused. (Sound remains muted.)
- Slow motion mode will be activated.
- Pressing the FWD ▶▶ or REV ◀◀ button cycles the playback speed in three steps. Select an appropriate speed while referring to the speed indication on the screen.
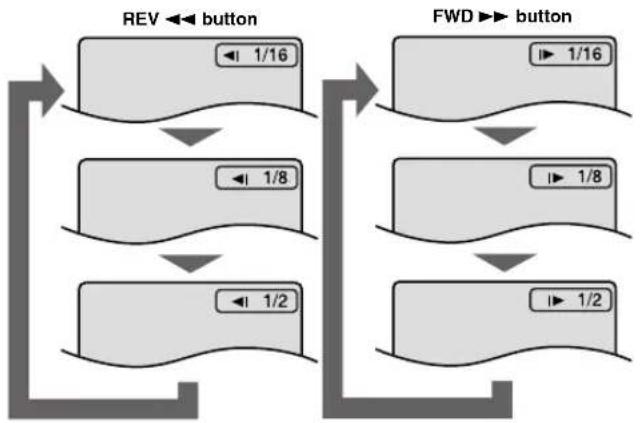
flowchart
graph TD
    A["REV ← button"] --> B["1/16"]
    A --> C["1/8"]
    A --> D["1/2"]
    E["FWD → button"] --> F["1/16"]
    E --> G["1/8"]
    E --> H["1/2"]
2 Press the PLAY button to return to normal playback speed.
Notes
- Slow playback is not available with audio CDs, MP3, WMA.
- Reverse slow motion is not available with Video CD.
- For DVD Audio discs, slow playback can be done only for pictures.
STARTING FROM A DESIRED TRACK


VCD (without PBC function
1 Press the numeric buttons to enter the desired track number.
- The selected track will be located, and playback will start. You can also press the SEARCH MODE button, by using the numeric buttons to enter the track number.
When the track number is entered in the entry box, playback of the desired track will start automatically.

TRICKS WITH THE SKIP BUTTONS (◀◀, ▶▶)
If the SKIP button ▶▶is pressed during playback or while playback is paused, the current track will be skipped and the next track will be played. When the SKIP button ◀◀ is pressed once, the top of the current track will be located for replaying. When the SKIP button ◀◀is pressed again within 2-seconds after playback begins, the previous track will be located.
1 Press the SEARCH MODE button twice and then press the numeric buttons to select a group. When playback is stopped, press the numeric
buttons to select a Group. The Group will be located and playback will start.

TO PLAYBACK THE BONUS GROUP
DVD-A
Some discs are recorded with Bonus Group that can be played back by entering a password. Please refer to disc jackets also.
1 Search the bonus group during stop mode to open the group search screen.
2 Press the bonus group number using numerical buttons.
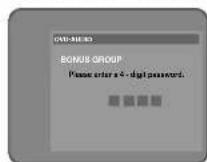
- The password popup window opens.
3 Enter the password (4 digits) using numerical buttons.
- If the password is correct, playback starts from the head of the bonus group.
Notes
- Press the RETURN button to cancel the bonus group searching.
- Once the password is entered, it can be played back repeatedly until the disc is taken out.
- If the password is not entered, the bonus group cannot be searched during playback.
PLAYING FROM A DESIRED TITLE OR CHAPTER
DVD-VDVD-RW
1 Press SEARCH MODE once for the Chapter Search, twice for the Title search during playback.
2 Enter the desired chapter/title number using the Number buttons.
- During playback, press the numeric buttons to select a Chapter. The Chapter will be located and playback will start.

- When playback is stopped, press the numeric buttons to select a Title. The Title will be located and playback will start.
Notes
- Playback from a desired title or chapter is not available with some DVDs.
- Some discs in which the chapter number isn't displayed, can not playback from a desired chapter.
TRICKS WITH THE SKIP BUTTONS (◀◀, ▶▶)
If the SKIP button ▶▶lis pressed during playback or while playback is paused, the current chapter will be skipped and the next chapter will be played. When the SKIP button ◀◀is pressed once, the top of the current chapter will be located for replaying. When the SKIP button ◀◀is pressed again within 2-seconds after playback begins, the previous chapter will be located.
STARTING FROM A DESIRED TIME COUNT

CDDVD-RWBVD.VBVD-A Press SEARCH MODE or RETURN to exit.
VCD (without PBC function)
1 Press the SEARCH MODE button twice during playback.
2 Press the numeric buttons to set the desired time count.
• Example: 1 hour, 23 minutes and 30 seconds


Notes
- In the case of DVD Video, Time Search in Title is effective, but Time Search in Chapter is ineffective.
- In the case of DVD Audio, CD and Video CD, Time Search in Track is effective, but Time Search in the entire disc is ineffective.
- Playback from a desired time count is not available with some discs or if the unit is in stop mode.
- If wrong numbers are entered, press the CLEAR button and re-enter the correct numbers.
MARKER SETUP SCREEN

CDDVD-RWDVD-VDVD-A
VCD (without PBC function)
Use markers to memorize your favorite places on a disc.
1 Press SEARCH MODE four times (CD: three times) during playback.
- The display screen and Markers will appear on the TV screen.
2 Press ◀ or ▶ to select 1, 2, 3, 4, 5, 6, 7, 8, 9 or 10 and ensure that “_: __: ____” appears in the display.
3 When reaches the desired point, press ENTER.
- The Title or Track and elapsed playing time will appear in the TV screen.
4 To return to the Marker later, press SEARCH MODE four times (CD: three times) during playback, and ◀ or ▶ to choose the desired marker, then press ENTER.
Notes
- Opening the disc tray, turning off the power, or selecting AC at step 2 and pressing ENTER will erase all Markers.
- To clear a marker, using ◀ or ▶, position the cursor on to the marker number to be cleared and press CLEAR.
- You can mark up to 10 points.
- In the case of DVD Audios, marker searching may start playback from the head of the marked TR, in some discs or groups.
RANDOM
CD
1 Press the MODE button in stop mode.
The program setting menu screen will appear.
2 Press the MODE button again.
![RANDOM CD [AUDIO] TOTAL 0:45:55 RANDOM PROGRAM -- no indication -- +1.67](/content/2026/05/1052910/images/a99ec1b1d3b9311e03869f801edcb64837234378c1972a08389b362fba287c0d.jpg)
3 Press the PLAY button. Random playback will then start.
Note
- Program playback is not available during random playback.
DVD-A
1 Press the MODE button three times in stop mode.

2 Press ▲/▼ buttons to select the group you wish to playback randomly, then press the ENTER button.
- Selecting “ALL” starts random playback of all groups.
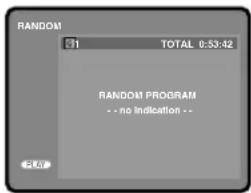
3 Press playback button, Random playback will then start.
Notes
- During random playback, TITLE, MENU, Arrow and ENTER buttons on the remote controller are disabled.
- When the designated random playback ends, it changes to stop mode.
REPEAT


1 Press the REPEAT button.
For DVD Videos
- A single title or chapter is played back repeatedly.
- Pressing the REPEAT button cycles the display on the screen as follows.
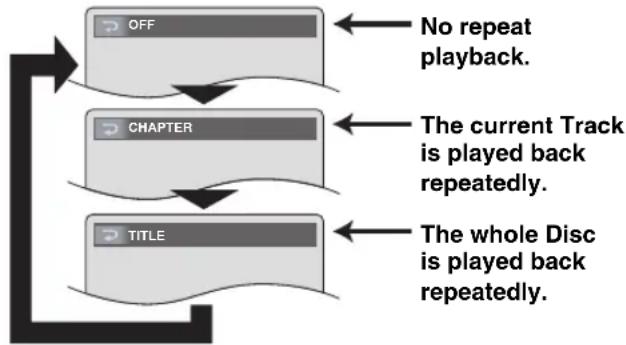
flowchart
graph TD
    A["OFF"] --> B["CHAPTER"]
    B --> C["TITLE"]
    style A fill:#f9f,stroke:#333
    style B fill:#ccf,stroke:#333
    style C fill:#cfc,stroke:#333
    note1["No repeat playback."] --> A
    note2["The current Track is played back repeatedly."] --> B
    note3["The whole Disc is played back repeatedly."] --> C
For audio CDs or Video CDs
- The whole disc or a single track is played back repeatedly.
- Pressing the REPEAT button cycles the display on the screen through Off, Track and All.
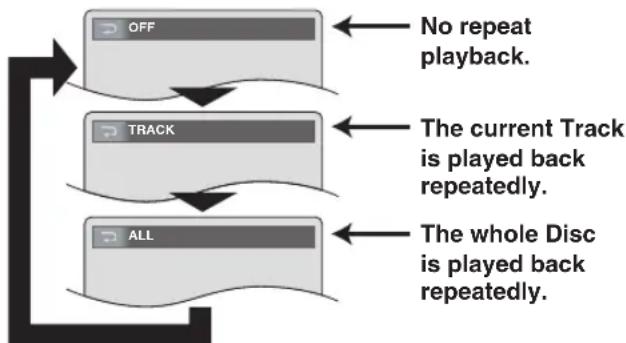
flowchart
graph TD
    A["OFF"] --> B["TRACK"]
    B --> C["ALL"]
    D["No repeat playback."] --> A
    E["The current Track is played back repeatedly."] --> B
    F["The whole Disc is played back repeatedly."] --> C
If the REPEAT button is pressed once during program/random playback, the current track is played back repeatedly. If the REPEAT button is pressed again, the program/random playback is performed repeatedly.
Notes
- Repeat playback is not available with some discs.
- The REPEAT setting will be cleared when moving to another title, chapter or track.
- Repeat playback does not function during A-B repeat playback.
- Repeat playback is not available when you play the Video CD with PBC function.
For DVD Audio

flowchart
graph TD
    A["OFF"] --> B["TRACK"]
    B --> C["GROUP"]
    C --> D["ALL"]
    style A fill:#f9f,stroke:#333
    style B fill:#ccf,stroke:#333
    style C fill:#cfc,stroke:#333
    style D fill:#fcc,stroke:#333
A-B REPEAT


You can define a section to be played back repeatedly.
1 Press the A-B REPEAT button during playback.
- The starting point (A) will then be selected.

2 Press the A-B REPEAT button again at the end point (B) of the desired section.
- The selected section will be played back repeatedly.

3 To exit A-B repeat playback, press the A-B REPEAT button and set it to OFF.

Notes
- With DVD Videos, the A-B repeat section can be set only within the current title.
- With DVD Audio and audio CDs, Video CDs, the A-B repeat section can be set within the current track.
- A-B repeat is not available with some scenes in certain DVDs.
- To cancel the A point which was set, press the CLEAR button.
- A-B repeat playback does not function during title, chapter, track or all repeat playback set.
PROGRAM
CD
1 Press the MODE button in stop mode.
● The program screen will appear.

2 Select a track using ▲/▼ buttons, then press the ENTER button.
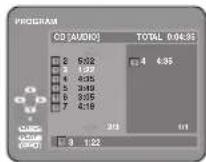
3 Press the PLAY button.
- Playback will start in the programmed order.
- While the program is being played back, the STOP button works as follows:
Press the STOP button once and then the PLAY button again, and playback will restart from the point where the STOP button was pressed (Program continued). Press the STOP button twice and then the PLAY button again, and playback will restart from the track in the usual way (Program cleared).
Notes
- Adding programs is not possible during program playback. You must stop the current playback before such operations can be carried out.
- Press the CLEAR button to cancel a program. The most recently entered program will then be deleted.
- Up to 99 programs can be entered.
- Playback from a desired track and random playback are not available during program playback.
- Program settings are cleared when the power is turned off or the disc loading tray is opened.
DVD-A
1 Press the MODE button in stop mode to display the program setting screen.

2 Select a group using ▲/▼ buttons, then press the ENTER button.
- The track select screen will be displayed.
- It takes approximately five seconds until a track selection screen appears.

3 Select a track using ▲/▼ buttons and press the ENTER button.
- To return to the group select screen from the track select screen, press the RETURN button.
4 Press the PLAY button.
Notes
- It may take time for all the respective track times to be displayed.
- The programmed content is retained until the power is turned off or the tray is opened.
- During program playback, TITLE, MENU, Arrow and ENTER buttons on the remote controller are disabled.
- When the designated program playback ends, it changes to stop mode.
PLAYBACK OF ALL GROUPS
DVD-A
1 Press the MODE button in stop mode to display the all group screen.

2 Press the PLAY button.
ZOOM PLAYBACK (enlargement on-screen)

VCDDVD-VD
Images can be enlarged on the screen to your taste.
1 Press the ZOOM button during playback.
- An image will be enlarged at the center of the screen.
- Pressing the ZOOM button cycles the zooming images in three steps.

1 When the cursor (▲/▼/◄/►) button is pressed during zoom play, the part to be zoomed moves.
- The zooming frame can be moved from the center 4 steps to the right, 4 steps to the left, 4 steps to the top, and 4 steps to the bottom when 2 time zooming. The frames will move 6 steps when 4 time zooming. (In the 1.3-time zoom display, just one step can be shifted up and down as well as right and left.)
- Current position will be displayed on the right bottom of the screen. Press the ENTER button, and the display disappears.

flowchart
graph TD
    A["Top Department"] --> B["Mid-Department"]
    B --> C["Bottom-Department"]
    C --> D["Top-Department"]
    style A fill:#f9f,stroke:#333
    style B fill:#ccf,stroke:#333
    style C fill:#cfc,stroke:#333
    style D fill:#fcc,stroke:#333
Notes
- Zooming function does not work while disc menu is shown.
- ×4 zoom is not available on some discs.
- For Video CDs, only 2 times zooming is available.
PLAYING MP3 / JPEG IMAGE, WMA AND PICTURE CD

Picture CDV
This machine can reproduce images and sounds from data recorded in MP3, JPEG and WMA formats on CD-ROM, CD-R and CD-RW discs.
The machine can also run Picture CD dealt by Kodak Inc. The user can enjoy picture images on their television set by reproducing Picture CDs.
* Picture CD is a service that converts photographs taken by conventional film camera into digital data and writes the data on a CD.
For details on Picture CD, contact a shop that deals with the developing service of Kodak Inc.
Information on MP3, JPEG and WMA discs
- A file with an extension of “.mp3 (MP3)” is called an “MP3 file”.
- A file with an extension of “.jpg (JPG)” or “.jpeg (JPEG)” is called a “JPEG file”.
The machine can run an image file conforming to the Exif* specification.
* This is a file format, Exchangeable Image File format established by Japanese Electronic Industry Development Association (JEIDA).
- A file with an extension of “.wma (WMA)” is called a “WMA file”.
- Files whose extension is other than “.mp3 (MP3)”, “.jpg (JPG)”, “.jpeg (JPEG)” and “.wma (WMA)” will not be listed in the MP3, JPEG, or WMA menu.
- If the file is not recorded in MP3, JPEG or WMA format, noise may be produced even if the file extension is either of “.mp3 (MP3)”, “.jpg (JPG)”, “.jpeg (JPEG)” and “.wma (WMA)”.
1 Insert a disc.
For discs on which MP3, JPEG or WMA tracks are recorded:
- An MP3, JPEG or WMA track menu screen appears.
- A symbol of “☐” is shown on the top of the group name.
- A symbol of “■” is shown on the top of MP3 files.
- A symbol of “☐” is shown on the top of JPEG files.
- A symbol of “■” is shown on the top of WMA files.
-
If the picture extends beyond the scope of screen, a down arrow “▼” appears, indicating that the user can view another part of the picture on the next page. If an up arrow “▲” appears, it indicates that the user can view another part on the previous page. The current page number and the number of total pages are shown on the right of the down arrow “▼”.
-
The system can recognize up to 255 groups (or folders) and up to 256 tracks. (This applies to the case where mixed MP3, JPEG and WMA files are recorded.)
AJPPEGMP3, JPEG or WMA files are found in the group, the group is not displayed. - The machine can reproduce data recorded as per ISO 9660 Level 1, Level 2 or Joliet on the disc.
- It can also run a disc on which data is recorded in a multi-session.
- For more details of recording systems, see the instruction manual for the CD-R / CD-RW drive or the writing software.
| Applicable MP3 file | Remarks | |
| Sampling frequency | 44.1kHz48kHz | It is prohibited to record MP3 sound on a digital device when connection is made digitally. |
| Type | MPEG1audio layer 3 | MP3 files recorded at constant bit rate of 128 kbps or higher are recommended. |
| Applicable JPEG file | Remarks | |
| Size of image | Upper limit:6300×5100 dotsLower limit:32×32 dots | A JPEG image that extends beyond the screen is reduced so that it will be displayed within the screen. |
| Applicable WMA file | Remarks | |
| Sampling frequency | 44.1kHz48kHz | Those frequencies are applicable to WMA version 8 only, not to WMA version 9.It is prohibited to record WMA sound on a digital device when connection is made digitally. |
| Bit rate | 48–192kbps128kbps recommended | Ensure that the copyright function is set to off when preparing a WMA disc. |
| Type | WMA version 8 | A prohibition “disable” symbol will appear if the user attempts to run a copyright-protected file. |
Slide show mode switching of JPEG Picture CD
This machine can switch the slide show modes.
1 Press the MODE button during JPEG or Picture CD playback.
- The slide show mode screen appears.
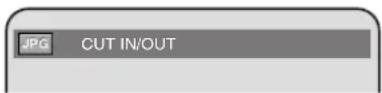
- The slide show mode cannot be switched when it is stopped, or from the file list screen or the Picture CD menu screen.
2 Press the ENTER button.
- The slide show mode will change. CUT IN/OUT: The entire image appears in one time. FADE IN/OUT: The image appears gradually and then disappears.
3 Press the MODE button to get out from mode.
For discs of Picture CD:
- A Picture CD menu appears.
- If all menu items cannot be displayed in the screen scope, a prompt symbol “▶▶l” appears at the right bottom of the screen, indicating that the user can view remaining items on the next page. If another prompt symbol “◀◀” appears, it indicates that the user can view other items on the previous page. The track number of the currently highlighted item and the total tracks are shown at the center bottom of the screen.

- If a prompt symbol “▶▶” is shown at the bottom right, use the ▶▶|button to view the next page. If another prompt symbol “◀◀◀” is shown at the bottom left, use the ◀◀◀ button to view the previous page.
- It may take some time until all menu items are displayed on the menu screen.
2 Using the ▲/▼ buttons, (for Picture CD, ◀/▶/▲/▼ buttons), select your desired track to be played, and press the PLAY or ENTER button.
[If an MP3 or WMA file is selected:]
Playback will start from the selected track and go to the next one in turn.
[If a JPEG or Picture CD file is selected:]
An image will be played back from the selected track and go to the next one in turn.
A track is displayed for five seconds and then the next track is displayed.
Every press on the ▶button will turn the image clockwise by 90 degrees when an image is displayed. A press on the ◀will turn the image counterclockwise by 90 degrees.
Zoom replay of JPEG, Picture CD
1 Press ZOOM button during replay.
- The screen is displayed at two magnifications with the pause state established.
2 Press the Arrow (▲/▼/◄/►) button to move the indication position.
3 For zoom mode resetting, press ZOOM button to turn it OFF.
- Reset Pause to regenerate the next screen.
Notes
- JPEG, Picture CD can not be zoomed at 4 magnifications.
- If any screen zoomed at 2 magnifications in JPEG is fully displayed in the screen, the indication position can not be moved with the Arrow (▲/▼/◄/►) button.
- The number of movable steps is different depending on the screen size. (Maximum: 4 steps up-/downward and left-/rightward)
- The zoomed screen can not be rotated for display. First rotate the screen for display, and then press ZOOM button.
Repeated replay of JPEG, Picture CD

flowchart
graph LR
    A["TRACK AGE OF GROUP* (current track repeat)"] --> B["(current folder repeat)"]
    B --> C["(entire disc repeat)"]
    C --> D["(repeat off)"]
    D --> E["* Except for Picture CD"]
[If Group is selected:]
Using the ▲/▼ buttons, select your desired group, and then press ▶, PLAY or ENTER button to select a track.
If you press the PLAY or ENTER button, playback of the picture will start.
Notes on MP3, JPEG and WMA
- Select “FIRST PLAY” and press the PLAY button, playback from the top of the disc in the order of tracks and groups.
- The ninth and deeper hierarchies cannot be played.
- The name of group and track can be displayed in up to 25 characters. Unrecognizable characters will be replaced with asterisks.
- Un-reproducible groups or tracks may be displayed depending on the recording conditions.
- If the TITLE button is pressed when a file list is displayed, "FIRST PLAY" will be highlighted.
3 To stop the play, press the STOP button.
Notes on Picture CD
- A press on the STOP button will highlight the previously displayed track on the menu screen. Press the STOP button again or press the TITLE button, and the menu screen displays Tracks 1 to 6, where Track 1 is highlighted.
PLAYING MP3 DISC/JPEG DISC/WMA/PICTURE CD IN A PROGRAMMED WAY

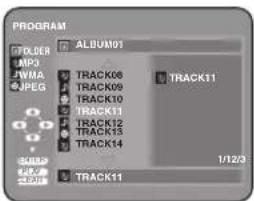
Picture CD
1 Press the MODE button in STOP mode.
• The program screen shows up.

2 Using the ▲/▼ buttons, select a group. Then press the ENTER button.
- A Track selection screen appears.
3 Using the ▲/▼ buttons, select a track. Then press the ENTER button to save it in a program.
- The programmed track is displayed in the right-hand screen.
- If the entire program cannot be displayed at once on the screen, “▼” appears to go to the next page.
- Pressing the ◀ button will show a list of folders that belong to the one-level upper hierarchy than the currently selected folder.
- Nothing will be displayed in the case of Picture CD.
4 When the disc has been programmed, press the PLAY button.
- Programmed play starts.

Notes
- Press the CLEAR button, and the last-programmed entry will be deleted.
- Press the RETURN button, and the STOP screen will show up with the program contents in memory.
- To stop programmed play, press the STOP button. Another press on the STOP button will reset the subsequent information.
- The program setting will be cancelled when the power is turned off or the disc tray is opened.
- Up to 99 tracks can be set in a program.
- If a disc in inserted that contains mixed MP3, JPEG and WMA files, program setting allows 99 tracks for combination of MP3, JPEG and WMA files.
- If eight or more tracks have been set in a program, IAJPEGMP3 the user can switch the right part of the screen with
|◀◀or ▶▶|.
PLAYING AN MP3 DISC/JPEG DISC/WMA DISC FROM A DESIRED TRACK

WMAJPEGM
1 Press the SEARCH MODE button.
• The SEARCH menu shows up.

2 Using the ▲/▼ buttons, select a track to be played. Then press the PLAY or ENTER button to start playing.
Notes
- During play, a desired track can be directly searched. Just type in the TRACK number with the numeric buttons.
- If the typed TRACK number is not available, the "disable" symbol appears and the direct search mode is cancelled.
- Playback cannot be started from a desired time count.
- Pressing the ▶▶| or ◀◀ button will play the next or previous file.
- The SEARCH button is not effective for Picture CD.
PLAYING AN MP3 DISC/JPEG DISC/WMA DISC /PICTURE CD AT RANDOM

Picture CDWMAJF
1 Press the MODE button twice in STOP mode.
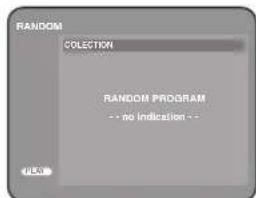
2 Press the PLAY button.
- Random play starts.
- For a disc containing mixed MP3, JPEG and WMA files, random play of those files will be performed.
CHANGING THE AUDIO LANGUAGE OR SOUND MODE

This DVD player has a function which allows you to select the desired audio language and sound mode.
For DVDs
Press the AUDIO button during playback, and then press the AUDIO button to select the desired audio language.
- The audio language can be changed if multiple languages are recorded on the DVD being played.
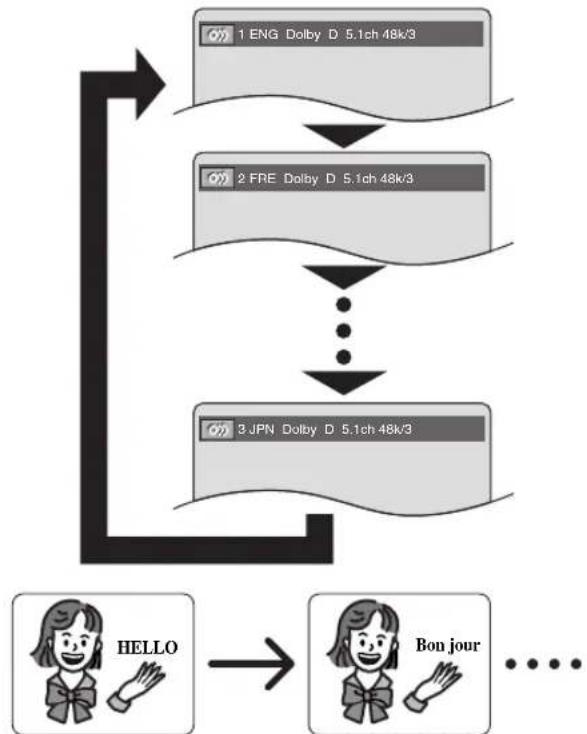
flowchart
graph TD
    A["1 ENG Dolby D 5.1ch 48k/3"] --> B["2 FRE Dolby D 5.1ch 48k/3"]
    B --> C["..."]
    C --> D["3 JPN Dolby D 5.1ch 48k/3"]
    D --> E["HELLO"]
    E --> F["Bon jour"]
For audio CDs
Press the AUDIO button during playback.
- Pressing the AUDIO button cycles the sound mode through STEREO, L-CH and R-CH.

flowchart
graph TD
    A["STEREO"] --> B["L-CH"]
    B --> C["R-CH"]
    C --> A
For DVD Audios
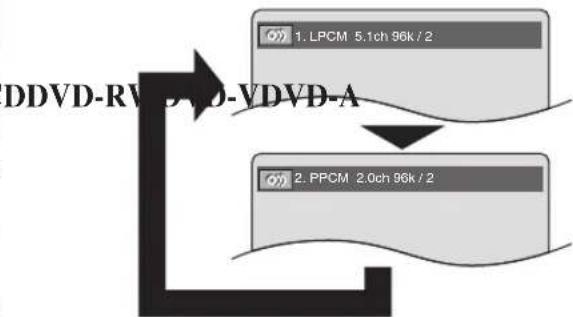
flowchart
graph TD
    A["DDVD-RV"] --> B["1. LPCM 5.1ch 96k/2"]
    A --> C["2. PPCM 2.0ch 96k/2"]
Notes
- Pressing the Audio button may not work on some DVDs with multiple audio languages (e.g. DVDs which allow audio language setting on the disc menu). Operation varies between discs, so refer to the manual accompanying the disc.
- Current audio language and sound mode will be displayed when you press the AUDIO button at first.
- If a desired language is not shown after pressing the Audio button several times, the disc does not have an audio source in that language.
- If you choose a Language that has a 3 letter language code, the code will be displayed every time you change the Audio language setting. If you choose any other languages, ‘---’ will be displayed instead. (Refer to page 30.)
- The audio language resets to the one which has been selected in the setup mode, every time the power is turned on or discs are replaced. If that language is not available on a disc, a language defined by the disc is selected.
- The screen display will disappear after about 5 seconds.
- DTS CD does not allow the user to switch the sound mode.
- The selected sound number is, in case of DVD Audio, displays to number 2 normally even if there is no second sound. (The sound number during playback remains as 1.)
For Video Recording Format
For discs of DVD-RW in which sound is recorded in dual sound (bilingual) mode, the user can switch the sound mode between the main and sub sound.
Press the AUDIO button during playback.
- Pressing the AUDIO button cycles the sound mode through MAIN, SUB, MAIN+SUB.
- The user cannot switch the sound mode when playing a disc in which sound was not recorded in dual sound mode.

flowchart
graph TD
    A["1. MAIN"] --> B["1. SUB"]
    B --> C["1. MAIN+SUB"]
    C --> A
CHANGING THE SUBTITLE LANGUAGE

DVD-VD DVD-RWD DVD-A
This DVD player has a function which allows you to select the desired language for subtitles.
1 Press the SUBTITLE button during playback, and then press the SUBTITLE button to select the desired subtitle language.
- The subtitle language can be changed if the subtitles are recorded in multiple languages on the DVD being played.
- The subtitle language cannot be changed if the subtitles are recorded in a single language on the DVD being played.

flowchart
graph TD
    A["OFF"] --> B["1.ENG/6"]
    B --> C["..."]
    C --> D["6.FRF/6"]
    style A fill:#f9f,stroke:#333
    style B fill:#ccf,stroke:#333
    style D fill:#cfc,stroke:#333
    note1["Subtitle 1"] --> B
    note2["Subtitle 6"] --> D
- Pressing the SUBTITLE button cycles the subtitle language from SUBTITLE 1, SUBTITLE 2 and all the languages recorded.
- Current subtitle mode will be displayed when you press the SUBTITLE button at first.
- Press the SUBTITLE button, and then press the cursor (◀/▶) button to set it to on or off.
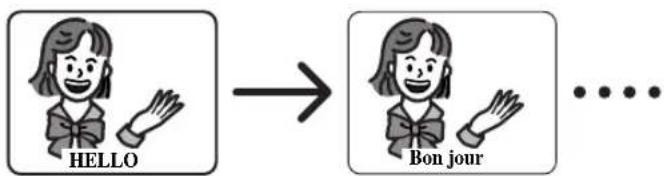
Notes
- Some discs allow subtitle language setting on the disc menu. (Operation varies between discs, so refer to the manual accompanying the disc.)
- If the desired language is not shown after pressing the SUBTITLE button several times, the disc does not have subtitles in that language.
-
If you choose a Language that has a 3 letter language code, the code will be displayed every time you change the Subtitle language setting. If you choose any other languages, ‘---’ will be displayed instead. (Refer to page 30.)
-
The subtitle language resets to the one which has been selected in the setup mode, every time the power is turned on or discs are replaced. If that language is not available on a disc, a language defined by the disc is selected.
- It may take time to display the subtitles in the selected language.
- The screen display will disappear after about 5 seconds.
- When "SUBTITLE NOT AVAILABLE" appears on-screen, it means no subtitle is recorded on the scene.
- For DVD-RWs recorded with subtitles, select subtitle ON or OFF.
CHANGING THE CAMERA ANGLE (Multi-Angle Pictures)
DVD-VDVD-A
This DVD player has a function which allows you to select the desired camera angle.
1 Press the ANGLE button during playback.
- If the disc contains sequences recorded from different camera angles, the angle icon (☐) will appear at the top-right of the screen. You can change the camera angle when the icon appears on the screen.
- The camera angle cannot be changed if the disc does not contain sequences recorded from different camera angles.
2 Press the ANGLE button while the angle number is shown on the screen.

flowchart
graph TD
    A["1/8"] --> B["2/8"]
    B --> C["..."]
    C --> D["8/8"]
    style A fill:#f9f,stroke:#333
    style B fill:#f9f,stroke:#333
    style C fill:#f9f,stroke:#333
    style D fill:#f9f,stroke:#333
    note1["Angle 1"] --> A
    note2["Angle 2"] --> B
    note3["..."] --> C
    note4["Angle 8"] --> D
Notes
- The screen display will disappear after about 5 seconds.
- Current camera angle will be displayed when you press the ANGLE button at first.
CHANGING THE ON-SCREEN DISPLAY
For audio CDs or Video CDs
(1)

You can check the information about the disc by pressing the DISPLAY button on the remote control.
1 Press the DISPLAY button during playback.
• The information screen will appear.
- Next information screen will appear by pressing the DISPLAY button repeatedly.
For DVDs
(1)

(2)
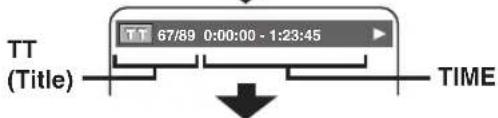
(3)
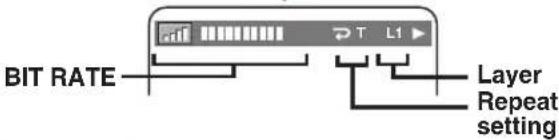
| (1) | CH | Current chapter number/the number of total chapter |
| TIME | Elapsed time of the current chapter and remaining time of the current chapter | |
| (2) | TT | Current title number/the number of total titles |
| TIME | Elapsed time of the current title and remaining time of the current title | |
| (3) | BIT RATE | Shows the quantity of information which is recorded in DVD Video. |
| Repeat | The repeat status of the currently played item is displayed(Not displayed if repeat has not been selected) | |
| Layer | Layer numberL0: Layer 0 is playing backL1: Layer 1 is playing back |
Either press the RETURN key or press the DISPLAY key until the display disappears.
For Video Recording Format
(3)

(3)
| BIT RATE | Shows the quantity of information which is recorded on DVD |
| Repeat | The repeat status of the currently played item is displayed(Not displayed if repeat has not been selected) |
| Layer | Layer numberORG: Playing the ORIGINALPL: Playing the PLAYLIST |
Program/Random Playback only (For audio CD)

| (1) | TR | Current track number/the number of total tracks |
| TIME | Elapsed time of the current track and remaining time of the current track | |
| (2) | ALL | Current track number/the number of total tracks |
| TIME | Elapsed time of the current disc and remaining time of the current disc |
Either press the RETURN key or press the DISPLAY key until the display disappears.
- Note that the time is not displayed during PBC playback.
For MP3s or WMAs
(1)

(2)

Program/Random Playback only

| (1) | File name | Name of currently played track |
| (2) | TR | Current track number/the number of total tracks |
| TIME | Elapsed time of the current track | |
| Repeat | The repeat status of the currently played item is displayed(Not displayed if repeat has not been selected)T: Track; G: Group; A: All |
The user can change the setting of repeat play by pressing the REPEAT button.
Either press the RETURN key or press the DISPLAY key until the display disappears.
For JPEGs or Picture CDs
(1)

flowchart
graph TD
    A["File name"] --> B["TR(Track)"]
    B --> C["G1/25"]
    C --> D["Repeat setting"]
(2)
Program/Random Playback only

| (1) | File name | Name of currently played track |
| (2) | TR | Current track number/the number of total tracks |
| Repeat | The repeat status of the currently played item is displayed(Not displayed if repeat has not been selected)T: Track; G: Group (only for JPEG); A: All |
For DVD Audio
(1)

(2)

※ Not displayed during program/random playback.
(3)

Program/Random/ALL GROUP Playback only

flowchart
graph LR
    A["PROGRAM RANDOM"] --> B["or"]
    B --> C["ALL GROUP"]
| (1) | TR | Current track number/the number of total tracks |
| TIME | Elapsed time of the current track and remaining time of the current track. | |
| (2) | G | Current group number /the number of total groups |
| TIME | Elapsed time of the current group and remaining time of the current group. | |
| (3) | BITRATE | Show the quality of information which is recorded in DVD Audio |
| Repeat | The repeat state of the currently played item is displayed (not displayed if repeat has not been selected) | |
| Layer | Layed numberL0: Layer 0 is playing backL1: Layer 1 is playing back |
Note
- The bit rate shows that of the “picture” and not the “sound”. It is not indicated for DVD audio discs for sound only.
SETTING IMAGE QUALITY ADJUSTMENT

DVD-VD
1 Press the MODE button during playback.
- The setup screen will appear.
2 Select from items - Every press on the MODE button switches setting screens in the following order:

flowchart
graph TD
    A[""Disc playback" screen"] --> B[""NR setting" screen"]
    B --> C[""Select image quality mode" screen"]
    C --> D[""Image quality setting" screen*"]
    D --> E[""Black level setting" screen"]
    E --> A
* The “Image quality setting” screen appears only when “User” has been selected in “Image quality adjustment” on the “Select image quality mode” screen.
NR setting
Press the ◀/▶ buttons to switch the setting items.

flowchart
graph TD
    A["Start"] --> B["Step 1: NR : SELECT MODE : NEXT MODE"]
    B --> C["Step 2: NR : Select MODE : NEXT MODE"]
    C --> D["Step 3: NR : Select MODE : NEXT MODE"]
    D --> E["Step 4: NR : Select MODE : NEXT MODE"]
    E --> F["End"]
Select image quality mode
Press the ◀/▶ buttons to switch the setting items.

flowchart
graph TD
    A["PICTURE CONTROL"] --> B["CINEMA"]
    B --> C["USER"]
    A -->|SELECT MODE : NEXT MODE| A
    B -->|SELECT MODE : NEXT MODE| B
    C -->|SELECT MODE : NEXT MODE| C
    A -->|STANDARD| A
STANDARD: A standard image quality mode
CINEMA: The image quality mode for movie pictures providing easy view of dark scenes.
USER: Image quality mode that can be adjusted freely by user setting.
Setting image quality
- The “Image quality setting” screen appears only when “User” has been selected in “Image quality adjustment” on “Select image quality modes” screen.
- Press the ◀/▶ buttons to change the value.
- Press the ▲/▼ buttons to switch items.

flowchart
graph TD
    A["GAMMA"] --> B["SHARPNESS"]
    B --> C["COLOR"]
    C --> D["TINT"]
    style A fill:#f9f,stroke:#333
    style B fill:#f9f,stroke:#333
    style C fill:#f9f,stroke:#333
    style D fill:#f9f,stroke:#333
- Press the RETURN button to save the change.

Displayed only when the value was changed.
Press the ◀/▶ buttons, and select "Yes" if you want to save the change, and "No" if not, and then press the ENTER button.
Select image quality mode
Press the ◀/▶ buttons to switch the setting items.

flowchart
graph TD
    A["BLACK LEVEL ON"] --> B[": SELECT MODE : NEXT MODE"]
    C["BLACK LEVEL OFF"] --> D[": SELECT MODE : EXIT"]
    B --> E
    D --> F
3 Press the MODE or RETURN button.
- This completes the setting, displaying the normal screen.
LANGUAGE SETTINGS
1 Press the SETUP button in STOP mode.
- The setup screen will appear.

2 Press the ◀/▶ buttons to select CUSTOM, and then press the ENTER button.
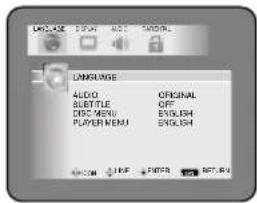
3 Press the ◀/▶ buttons to select Language, and then press the ENTER button.

4 Press the ▲/▼ buttons to select an item, and then press the ENTER button.
AUDIO:
(Voice is played back in selected language.)


SUBTITLE:
(Subtitles are shown in selected language.)


DISC MENU:
(The disc menu appears in selected language.)


PLAYER MENU (It can be also set by QUICK SETUP): (The on-screen display appears in selected language.)
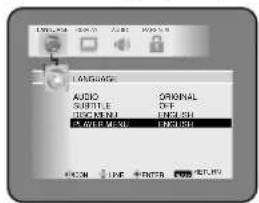
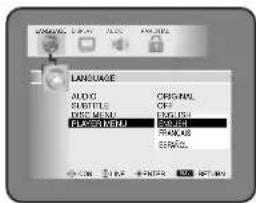
5 Press the ▲/▼ buttons to select a desired item, and then press the ENTER button.
- If "OTHER" is selected on the AUDIO, SUBTITLE or DISC MENU setting screen, the Language Code setting screen will appear. Press the numeric buttons to enter the desired language code while referring to the list on page 30.
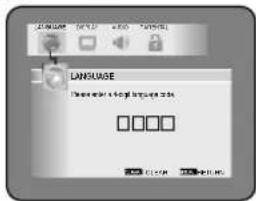
6 Press the SETUP button.
- The setup mode will be cancelled and the ordinary screen will appear.
Note
- Language Setting for Audio and Subtitle is not available with some discs. Use the Audio and Subtitle buttons. Details are on pages 24 and 25.
LANGUAGE CODE LIST
| Language | Country code |
| Afar | 4 7 4 7 |
| Abkhazian | 4 7 4 8 |
| Afrikaans | 4 7 5 2 |
| Amharic | 4 7 5 9 |
| Arabic | 4 7 6 4 |
| Assamese | 4 7 6 5 |
| Aymara | 4 7 7 1 |
| Azerbaijani | 4 7 7 2 |
| Bashkir | 4 8 4 7 |
| Byelorussian | 4 8 5 1 |
| Bulgarian | 4 8 5 3 |
| Bihari | 4 8 5 4 |
| Bislama | 4 8 5 5 |
| Bengali;Bangla | 4 8 6 0 |
| Tibetan | 4 8 6 1 |
| Breton | 4 8 6 4 |
| Catalan | 4 9 4 7 |
| Corsican | 4 9 6 1 |
| Czech | 4 9 6 5 |
| Welsh | 4 9 7 1 |
| Danish [DAN] | 5 0 4 7 |
| German [GER] | 5 0 5 1 |
| Bhutani | 5 0 7 2 |
| Greek [GRE] | 5 1 5 8 |
| English [ENG] | 5 1 6 0 |
| Esperanto | 5 1 6 1 |
| Spanish [SPA] | 5 1 6 5 |
| Estonian | 5 1 6 6 |
| Basque | 5 1 6 7 |
| Persian | 5 2 4 7 |
| Finnish [FIN] | 5 2 5 5 |
| Fiji | 5 2 5 6 |
| Faroese | 5 2 6 1 |
| French [FRE] | 5 2 6 4 |
| Frisian | 5 2 7 1 |
| Irish [IRI] | 5 3 4 7 |
| Scots Gaelic | 5 3 5 0 |
| Galician | 5 3 5 8 |
| Guarani | 5 3 6 0 |
| Gujarati | 5 3 6 7 |
| Hausa | 5 4 4 7 |
| Hindi | 5 4 5 5 |
| Croatian | 5 4 6 4 |
| Hungarian [HUN] | 5 4 6 7 |
| Armenian | 5 4 7 1 |
| Language | Country code |
| Interlingua | 5 5 4 7 |
| Interlingue | 5 5 5 1 |
| Inupiak | 5 5 5 7 |
| Indonesian | 5 5 6 0 |
| Icelandic [ICE] | 5 5 6 5 |
| Italian [ITA] | 5 5 6 6 |
| Hebrew | 5 5 6 9 |
| Japanese | 5 6 4 7 |
| Yiddish | 5 6 5 5 |
| Japanese [JPN] | 5 6 6 9 |
| Georgian | 5 7 4 7 |
| Kazakh | 5 7 5 7 |
| Greenlandic | 5 7 5 8 |
| Cambodian | 5 7 5 9 |
| Kannada | 5 7 6 0 |
| Korean [KOR] | 5 7 6 1 |
| Kashmiri | 5 7 6 5 |
| Kurdish | 5 7 6 7 |
| Kirghiz | 5 7 7 1 |
| Latin | 5 8 4 7 |
| Lingala | 5 8 6 0 |
| Laothian | 5 8 6 1 |
| Lithuanian | 5 8 6 6 |
| Latvian; Lettish | 5 8 6 8 |
| Malagasy | 5 9 5 3 |
| Maori | 5 9 5 5 |
| Macedonian | 5 9 5 7 |
| Malayalam | 5 9 5 8 |
| Mongolian | 5 9 6 0 |
| Moldavian | 5 9 6 1 |
| Marathi | 5 9 6 4 |
| Malay | 5 9 6 5 |
| Maltese | 5 9 6 6 |
| Burmese | 5 9 7 1 |
| Nauru | 6 0 4 7 |
| Nepali | 6 0 5 1 |
| Dutch [DUT] | 6 0 5 8 |
| Norwegian [NOR] | 6 0 6 1 |
| Occitan | 6 1 4 9 |
| (Afan)Oromo | 6 1 5 9 |
| Oriya | 6 1 6 4 |
| Panjabi | 6 2 4 7 |
| Polish | 6 2 5 8 |
| Pashto; Pushto | 6 2 6 5 |
| Portuguese [POR] | 6 2 6 6 |
| Language | Country code |
| Quechua | 6 3 6 7 |
| Rhaeto-Romance | 6 4 5 9 |
| Kirundi | 6 4 6 0 |
| Romanian [RUM] | 6 4 6 1 |
| Russian [RUS] | 6 4 6 7 |
| Kinyarwanda | 6 4 6 9 |
| Sanskrit | 6 5 4 7 |
| Sindhi | 6 5 5 0 |
| Sangho | 6 5 5 3 |
| Serbo-Croatian | 6 5 5 4 |
| Singhalese | 6 5 5 5 |
| Slovak | 6 5 5 7 |
| Slovenian | 6 5 5 8 |
| Samoan | 6 5 5 9 |
| Shona | 6 5 6 0 |
| Somali | 6 5 6 1 |
| Albanian | 6 5 6 3 |
| Serbian | 6 5 6 4 |
| Siswat | 6 5 6 5 |
| Sesotho | 6 5 6 6 |
| Sundanese | 6 5 6 7 |
| Swedish [SWE] | 6 5 6 8 |
| Swahili | 6 5 6 9 |
| Tamil | 6 6 4 7 |
| Telugu | 6 6 5 1 |
| Tajik | 6 6 5 3 |
| Thai | 6 6 5 4 |
| Tigrinya | 6 6 5 5 |
| Turkmen | 6 6 5 7 |
| Tagalog | 6 6 5 8 |
| Setswana | 6 6 6 0 |
| Tonga | 6 6 6 1 |
| Turkish [TUR] | 6 6 6 4 |
| Tsonga | 6 6 6 5 |
| Tatar | 6 6 6 6 |
| Twi | 6 6 6 9 |
| Ukrainian | 6 7 5 7 |
| Urdu | 6 7 6 4 |
| Uzbek | 6 7 7 2 |
| Vietnamese | 6 8 5 5 |
| Volapuk | 6 8 6 1 |
| Wolof | 6 9 6 1 |
| Xhosa | 7 0 5 4 |
| Yoruba | 7 1 6 1 |
| Chinese [CHI] | 7 2 5 4 |
| Zulu | 7 2 6 7 |
If you choose a Language that has a 3 letter language code, the code will be displayed every time you change the Audio or Subtitle language setting on pages 24 and 25. If you choose any other languages, ‘---’ will be displayed instead. (3 letter language code is written in bracket.)
DISPLAY SETTINGS
1 Press the SETUP button in STOP mode.
- The setup screen will appear.

2 Press the ◀▶ buttons to select CUSTOM, and then press the ENTER button.

3 Press the ◀/▶ buttons to select DISPLAY and then press the ENTER button.
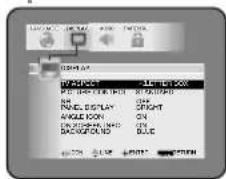
(It can be also set by QUICK SETUP)
4:3 LETTER BOX: Wide screen with black bars on top and bottom
4:3 PAN & SCAN: Full height picture, trimmed both sides 16:9 WIDE : If wide screen TV is connected
16:9 NORMAL : When the product is connected to a wide-screen television set, replay pictures are displayed in full screen without being expanded horizontally or without a black horizontal band appearing on the screen.


PICTURE CONTROL (Default: STANDARD)
Sets the image to display, to an easy-to-see status.


NR (noise reduction) (Default: OFF)
OFF: Plays back without compensation.
MNR: Reduces the mosquito noise (noise generated at profile of image during MPEG compression).
BNR: Reduces the block noise.
3DNR: Reduce the stirring and twinkling of the screen.


PANEL DISPLAY (Default : BRIGHT)
Adjust the brightness of the unit's display.
Auto: Stays dim only during playback.


ANGLE ICON (Default : ON)
Display the Angle icon on the screen.

Displays the play-back mark, etc. on the screen.


BACKGROUND COLOR (Default : BLUE)
Select blue or gray.
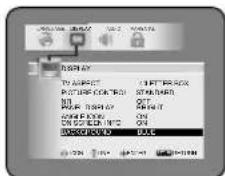

5 (If you selected TV ASPECT, PICTURE CONTROL, NR or PANEL DISPLAY or BACKGROUND COLOR)
Press the ▲/▼ buttons to select a desired item, and then press the ENTER button. (If you selected ANGLE ICON or ON SCREEN INFO)
Press the ENTER button.
6 Press the SETUP button.
- The setup mode will be cancelled and the ordinary screen will appear.
Note
- Selecting a different mode is only effective if it is available on the Disc.
AUDIO SETTINGS
1 Press the SETUP button in STOP mode.
- The setup screen will appear.

2 Press the <buttons to select CUSTOM, and then press the ENTER button.

3 Press the ◀/▶ buttons to select AUDIO and then press the ENTER button.

4 Press the ▲/▼ buttons to select an item, and then press the ENTER button.
DRC (Default : OFF)
ON : DRC (Dynamic Range Control)
- This function is for controlling the range of sound volume. By compressing the range of sound volume, it is possible not only to suppress the output of loud sound at night and but also to raise the volume of low sound.
- This function is effective only for the sound recorded by Dolby Digital recording.
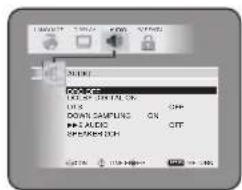

Dolby Digital (default: ON)
(It can be set by QUICK SETUP)
ON: Output by Dolby Digital
Set to On when the unit is connected to Dolby Digital Decoder.


DTS (Default: OFF)(It can be also set by QUICK SETUP)
ON : Selected when the DTS decoder is connected digitally to the amplifier installed.
OFF : Selected when the DTS decoder is connected to the amplifier incompatible to the DTS. In this case, the DTS track is not output.


Down Sampling (Default : ON)
Set the output for the DVD recorded in PCM 96kHz (96kHz or 48kHz)
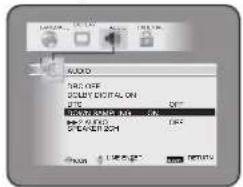

When playing a disc with copyright protection
- If you select ON, copyright protection will be activated and no sound will come out. If you select OFF, sound will be down sampled at 48kHz.
▶▶2 audio (Default : OFF)
Sets the output/non-output of sound when the playback speed is x2.


SPEAKER (Default:2ch)
This is to be set when it is connected to the 5.1 channel analog input terminal of AV amplifier.
- Press the ▲/▼ buttons to select an item, and then press the ENTER button.
2 ch: Select this when it is connected to the AUDIO OUT (L/R) terminal.
5.1 ch: Select this when it is connected to the 5.1 CH OUTPUT terminal


When 5.1 ch is selected
In order to attain a good surround effect, set the distance to the connected speaker.
- Press the ▲/▼ buttons to select an item, and then press the ENTER button.
SPEAKER SIZE: Set the size of the speaker to connect.
DELAY TIME: Set the delay time output from the listening position.
BALANCE: Set the output level of the connecting speaker.

Select the speaker to set by pressing ▲/▼ buttons, then press the ENTER button.

Select the size of the speaker by pressing ▲/▼ buttons, then press the ENTER button.
LARGE: Select this when the connected speaker is capable of playing back sounds of 100Hz or less.
SMALL: Select this when the connected speaker is not capable of playing back sounds of 100Hz or less.
OFF: Select this when it is not connected. (It cannot be set OFF on the FRONT speaker)
ON: Select this when SUB WOOFER is connected.

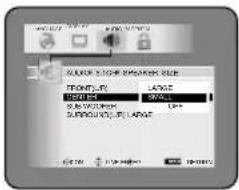


Note
- The speaker size of the FRONT speaker is determined automatically by setting the SUB WOOFER. When SUB WOOFER is not connected, it is recommended to connect a front speaker capable of playing back low tones of 100Hz or below.
- At playback of DVD Audio, the sound may not come out as set due to restrictions in the disc or the player.
DELAY TIME
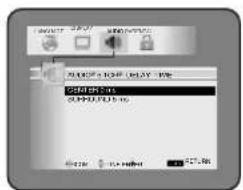
Select the speaker to set by pressing ▲/▼ buttons, then press the ENTER button.
Select the delay time by pressing ▲/▼ buttons, then press the ENTER button.
| CENTER | |
| Set value | Distance |
| 1ms | about 34cm |
| 2ms | about 69cm |
| 3ms | about 103cm |
| 4ms | about 137cm |
| 5ms | about 172cm |
| SURROUND | |
| Set value | Distance |
| 5ms | about 172cm |
| 10ms | about 343cm |
| 15ms | about 515cm |

- It is not possible to adjust this item if CENTER and SURROUND have been set to OFF in the SPEAKER SIZE setting.
BALANCE
When the volume level differs from each speaker, adjustment can be made in the unit of dB, from -12 dB to 0 dB.
Select the speaker to set by pressing ▲/▼ buttons, then press the ENTER button
Select the volume level by pressing ▲/▼ buttons, then press the ENTER button
- TEST: The test tone is output in clockwise from FRONT (L).

- Selecting respective speakers outputs the test tone at the volume presently set.

- When TEST is selected and the test tone is being output, balance adjustment cannot be made.
- When TEST is selected, no test tone will be output from SUBWOOFER.
- It is not possible to adjust this item for the speaker that has been set to OFF in SPEAKER SIZE setting.
5 Press the SETUP button.
- The setup mode will be cancelled and the ordinary screen will appear.
ABOUT A DELAY TIME
The delay effect is given to a voice output from a center speaker and a surround speaker, and the ideal viewing-and-listening position is discovered virtually.
As for a speaker, it is ideal to be arranged on a circle, as shown in the following figure.
However, such arrangement may not be able to be performed depending on your place.
It is possible to set up a delay time from the difference in the position of an ideal speaker and the position of an actual speaker.

flowchart
graph TD
    A["Center Speaker"] -->|Distance A| B["Surround (L) Surround(R)"]
    B -->|Distance C| C["The position to which it watches and listens"]
    C -->|Distance F| D["Sub-Woofer"]
    D -->|Distance B| E["The ideal position of the surround speaker"]
    style A fill:#f9f,stroke:#333
    style B fill:#ccf,stroke:#333
    style C fill:#cfc,stroke:#333
    style D fill:#fcc,stroke:#333
    style E fill:#cff,stroke:#333
Distance A = Distance F - Distance C Distance B = Distance F - Distance S
We are making the plan so that a user may set up Distance A and B.
PARENTAL LOCK
DVD-V
1 Press the SETUP button in STOP mode.
- The setup screen will appear.

2 Press the ◀/▶ buttons to select CUSTOM, and then press the ENTER button.
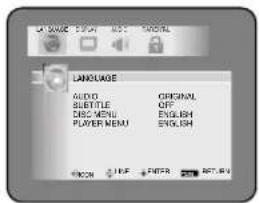
3 Press the ◀/▶ buttons to select PARENTAL, and then press the ENTER button.
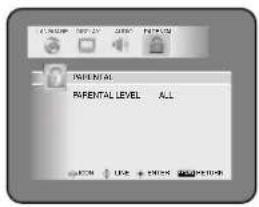
4 Press the numeric buttons to enter the 4-digit password, and then press the ENTER button.
- When doing this for the first time, enter any 4 digits. (except for 4737) That number will be used as the password from the second time onward.
- By entering the password, you can then change the control level and password settings.

5 Press the ▲/▼ buttons to select an item, and then press the ENTER button.

When "PARENTAL LEVEL" is selected
- Press the ▲/▼ buttons to select an item from "ALL" or 8 to 1 and then press the ENTER button.
ALL
All parental lock is cancelled.
Level 8
DVD software of any grade (adult/general/children) can be played back.
Levels 7 to 2
Only DVD software intended for general use and children can be played back.
Level 1
Only DVD software intended for children can be played back, with those intended for adult and general use prohibited.

When "CHANGE" is selected
- Press the numeric buttons to enter the 4 digits password. Then press the ENTER button.

6 Press the SETUP button.
- The setup mode will be cancelled and the ordinary screen will appear.
Notes
- With some DVDs, it may be difficult to find if they are compatible with parental lock. Be sure to check if the parental lock function operates in the way that you have set.
- Record the password in case you forget it.
1) Press the 4, 7, 3, 7 at step 4.
- Password will be cleared and parental level will be set to ALL.
2) Proceed the above steps 4-6 again.
If the DVD player does not perform properly when operated as instructed in this Owner's Manual, check the player, consulting the following checklist.
| Symptom | Cause | Remedy |
| No power | Loose power plug. | Insert the power plug firmly into the wall outlet. |
| The player does not respond to the remote control. | The remote control is not aimed at the sensor on the player.Obstacles present between the remote control and the sensor.The remote control is too far away from the player.Dead batteries. | Aim the remote control directly at the sensor on the player.Remove the obstacles from the signal path.Use the remote control within 23 feet of the player.Replace the batteries. |
| No picture | Loose video connection.Wrong disc.Progressive switching is not set correctly. | Connect the video cables firmly.Insert a correct video disc that plays on this player.Set the switch to the correct position according to the television settings. |
| Disc cannot be played | No disc.Dirty disc.Disc is placed upside down.Parental lock is active. | Insert a disc.Clean the disc.Place the disc correctly, with the label side up.Cancel the parental lock or change the control level. |
| No sound | Loose audio connection.The power of the connected audio component is off.Wrong audio output settings.Wrong input settings on the connected audio component.DTS sound is being output. | Connect the audio cables firmly.Turn the power of the audio component on.Correct the audio output settings.Correct the input settings on the audio component.The analog output terminal does not supply DTS sound. |
| Distorted picture | Copy protection is active.Immediately after playing, press fast forward or in reverse.The 1st layer is switching to the 2nd layer, when playing a two layered disc. | Connect the player directly to the TV.There are some cases where pictures may be slightly distorted, which are not a sign of a malfunction.Although Pictures may stop for a moment, this is not a malfunction and is quite common. |
| Audio or subtitle language does not match the setup. | The selected language is not available for audio or subtitles on the DVD. | No malfunction. |
| The camera angle cannot be changed. | The DVD does not contain audio source or subtitles in the selected language. | No malfunction. |
| Audio or subtitle language cannot be changed. | The DVD does not contain sequences recorded from different camera angles. | No malfunction. |
| “Prohibited icon” appears on the screen, prohibiting an operation. | That operation is prohibited by the player or disc. | No malfunction. |
| A sound different from the value set in SETUP is output. | Some discs in the DVD audio output sound different from the sound value previously set in SETUP. | No malfunction. |
| Replay cannot be conducted as a "COPYRIGHT LOCK" message displayed. | The copyright protection system is now at work. | No malfunction. |
Notes
Some functions are not available in specific modes, but this is not a malfunction. Read the description in this Owner's Manual for details on correct operations.
- Playback from a desired track and random playback are not available during program playback.
Servicing
Should your DVD player become inoperable, do not try to correct the problem by yourself. There are no user-serviceable parts inside. Turn the power off, unplug the power cord, and please call our help line at 1-800-332-2119 to locate an Authorized Service Center.
Cabinet Cleaning
- Wipe the front panel and other exterior surfaces of the DVD player with a soft cloth immersed in lukewarm water and wrung dry.
- Never use a solvent or alcohol. Do not spray any type of liquid near the DVD player. Certain chemicals may cause damage and discoloration to the exposed surfaces.
If the Laser Optical Pickup Unit is Dirty
- If the player still does not perform properly when it is operated and you have referred to the relevant sections and to the "Troubleshooting Guide" for help, the laser optical pickup unit may be dirty. Consult your dealer or an Authorized Service Center for inspection and cleaning of the laser optical pickup unit.
Adhesive labels
Discs that are irregularly shaped, contain a scratch protection film or have an adhesive paper label or sticker should not be inserted into this player.
Over time, the label or sticker may cause the disc to be stuck in the player, possibly causing damage to your player.
If you wish to play "homemade" discs in this player, it is recommended you use a permanent felt tip marker to identify the disc.
NEVER ATTEMPT TO PLAYBACK A DISC THAT IS CRACKED OR BROKEN!
Disc Handling
- Use discs which have the following logos on them.

VIDEO

VIO

AUDIO

DIGITAL AUDIO

DIGITAL VIDEO
Kodak
Picture CD
COMPATIBLE
- Handle the discs so that fingerprints and dust do not adhere to the surfaces of the discs.

natural_image
Line drawing of two hands holding a CD or DVD disc (no text or symbols)
natural_image
Line drawing of a hand holding a CD or DVD disc (no text or symbols)• Always store the disc in its protective case when it is not used.

natural_image
Illustration of a CD or DVD disc open with an open lid and a hand holding the disc (no text or symbols)• To clean-off, use a soft cloth.
- Do not use a hard cloth since this will mar the disc.
- Wipe the disc in a straight line from center to edge.
- Never wipe in a circular motion.

natural_image
Illustration of hands cleaning a bowl with a cloth (no text or symbols)- Do not use detergent or abrasive cleansing agents.

Product type : DVD Player
Discs : DVD Video
DVD Audio
Audio CD
Video CD
Output signal format : NTSC color
Frequency response : 20 Hz to 22 kHz (sample rate: 48 kHz)
20 Hz to 44 kHz (sample rate: 96 kHz)
20 Hz to 88 kHz (sample rate: 192 kHz)
Signal-to-noise ratio (S/N ratio)
CD: 120 dB (JEITA)
Dynamic range: DVD (linear sound): 102 dB, CD: 99 dB (JEITA)
Total harmonic distortion DVD: 0.0025%, CD: 0.003%
Wow and flutter : Below the measurement limitation (+/-0.001% W PEAK) (JEITA)
Connections
S-Video output : Mini DIN 4-pin jack (75 ohm)
Video output : One RCA connector, 1 Vpp (75 ohm)
Coaxial digital audio output : One pin jack, 500mVpp (75 ohm)
Analog audio output
(2CH surround): Two RCA connectors (one left channel, one right channel) 2Vrms (100kilo-ohm)
Analog audio output
(5.1CH surround): Six pin jacks, 2Vrms (100kilo-ohm)
Component video output : One pin jack (Y), 1 Vpp (75 ohm) Two pin jacks (Pb / Cb)(Pd / Cr) , 700mVpp (75 ohm)
Optical digital audio output : Optical connector
Power source : 120 V AC +/- 10%, 60 Hz +/- 0.5%
Power consumption : 16 W (standby: 3.9 W)
Operating temperature : 41irc F to 104irc F
Dimensions : W 17-1/8" (435mm)
H 2-3/16" (55mm)
D 8-5/16" (211mm)
Weight : 4.3 lbs (1.95kg)
- Designs and specifications are subject to change without notice.
MITSUBISHI DVD Player LIMITED WARRANTY
MITSUBISHI DIGITAL ELECTRONICS AMERICA, INC. ("MDEA") warrants to the original purchaser of this DVD player if purchased from an authorized MITSUBISHI Audio/Video Dealer that, should it prove defective by reason of improper workmanship and/or material:
a. Parts. For one year from the date of original purchase at retail, we will repair or replace, at our option, any defective part without charge for the part. All parts used for replacement are warranted for the remainder of the original warranty period.
b. Labor. For six months from the date of original purchase at retail, we will provide the labor for a warranty repair by an authorized MITSUBISHI service center without charge.
c. Notice. To obtain warranty service, you must notify an authorized MITSUBISHI service center of any defect within the applicable warranty time period.
- TO OBTAIN WARRANTY SERVICE DURING THE FIRST YEAR:
a. Contact your nearest authorized MITSUBISHI service center, whose name and address can be obtained from your MITSUBISHI dealer or by writing or calling MDEA at the address and telephone number provided below.
b. Warranty service will be provided at an authorized service shop, provided that your DVD player is located within the geographic territory customarily covered by an authorized MITSUBISHI service center. If not, you must either deliver your DVD player to an authorized service location at your own expense, or pay for any travel and/or transportation costs the service center may charge to and from your home. Actual service labor will be provided without charge.
c. Proof of purchase date from an authorized MITSUBISHI Dealer is required when requesting warranty service. Present your sales receipt or other document which establishes proof and date of purchase. THE RETURN OF THE OWNER REGISTRATION CARD IS NOT A CONDITION OF WARRANTY COVERAGE. However, please return the Owner Registration Card so that we can contact you should a question of safety arise which could affect you.
-
THIS WARRANTY DOES NOT COVER damage caused by: modification, alteration, repair or service of this product by anyone other than an authorized MITSUBISHI service center; physical abuse to, or misuse of, the product; operation in a manner contrary to the instructions which accompany the product; freight damage; or any damage caused by acts of God such as lightning or fluctuation in electrical power. This warranty also excludes all costs arising from installation, adjustment of user controls, external antenna systems, service of products purchased or serviced outside the U.S.A., initial technical adjustments (setup) and user-required maintenance. Consult the operating instructions furnished with the product for information regarding user controls.
-
ANY EXPRESS WARRANTY NOT PROVIDED HEREIN, AND ANY REMEDY WHICH, BUT FOR THIS PROVISION, MIGHT ARISE BY IMPLICATION OR OPERATION OF LAW, IS HEREBY EXCLUDED AND DISCLAIMED. THE IMPLIED WARRANTIES OF MERCHANTABILITY AND OF FITNESS FOR ANY PARTICULAR PURPOSE ARE EXPRESSLY LIMITED TO A TERM OF ONE YEAR.
-
UNDER NO CIRCUMSTANCES SHALL MDEA BE LIABLE TO PURCHASER OR ANY OTHER PERSON FOR ANY INCIDENTAL, SPECIAL OR CONSEQUENTIAL DAMAGES, WHETHER ARISING OUT OF BREACH OF WARRANTY, BREACH OF CONTRACT, OR OTHERWISE.
-
Some states do not allow limitations on how long an implied warranty lasts, or the exclusion or limitation of incidental, special, or consequential damages, so the above limitations or exclusions may not apply to you.
-
This warranty gives you specific legal rights and you may also have other rights which vary from state to state.
-
BEFORE REQUESTING SERVICE, please review the instruction booklet to ensure proper installation and correct customer control adjustment. If the problem persists, contact your nearest MITSUBISHI Dealer for name(s) of authorized MITSUBISHI Service Center(s). If you are unable to obtain this information, please call 1-800-332-2119, or write us at the address below.
MITSUBISHI DIGITAL ELECTRONICS AMERICA, INC.
9351 Jeronimo Road
Irvine, CA 92618-1904

MITSUBISHI ELECTRIC
DIGITAL TELEVISIONS™
RETAIN THIS PORTION FOR YOUR RECORDS
SERIAL NO.
CUSTOMER NAME
STREET ADDRESS
CITY STATE ZIP
PHONE ( ) PURCHASE DATE
/ /
MO DAY YR
PLACE OF PURCHASE
- DVD Player Owner's Guide
- CAUTION
- WARNING:
- CAUTION:
- DANGER:
- Importance of Instructions
- Cleaning
- Attachment and Equipment
- Water and Moisture
- Moisture Condensation
- Accessories
- Ventilation
- Stacking
- Power Sources
- Grounding or Polarization
- 11.Power-Cord Protection
- 12.Lightning
- Object and Liquid Entry
- Servicing
- Damage Requiring Service
- Replacement Parts
- Safety Check
- Heat
- Radiation Safety
- FCC INFORMATION FOR USER
- IMPORTANT:
- A Note About Recycling
- About Copyright
- Supplied Accessories
- Symbols Used in This Manual
- - Analog 6-Channel decoder
- - Progressive Scan system
- • Dolby Digital sound
- • DTS (Digital Theater System)
- - Still/fast/slow/step playback
- - Random playback for DVD Audio and audio CD / MP3 / JPEG / Picture CD /WMA
- - Program playback for DVD Audio and audio CD / MP3 / JPEG / Picture CD / WMA
- • DVD menus in a desired language
- - Screen saver/Auto power-off functions
- - Subtitles in a desired language
- - Selecting a camera angle
- - Choices for audio language and sound mode
- - Parental lock
- • Automatic detection of discs
- - Playing an MP3 disc
- - Direct Search
- - Marker
- - Playing a DVD-RW disc
- - On-screen display
- - Search
- - Repeat
- - Zoom
- - Resume Play
- - Component Video Out Jacks
- - Dimmer
- - Bit rate indication
- • DRC (Dynamic range control)
- • Audio output during fast forward (DVD)
- - Playing a disc in Video Recording Format
- - JPEG Photo Viewer
- - Displaying a Picture CD playback
- - WMA playback
- - Adjusting image quality
- PLAYABLE DISCS
- DISC TYPES
- [DVD Video]
- [AUDIO CD] [VIDEO CD]
- ABOUT THE PBC FUNCTION OF VIDEO CD
- Note:
- [MP3, JPEG or WMA]
- FRONT PANEL
- REMOTE CONTROL
- REAR VIEW
- DISPLAY
- DISPLAYS DURING OPERATION
- LOADING THE BATTERIES
- Notes
- CONNECTING TO A TV
- FOR TVs WITH S-VIDEO INPUT JACK
- Selecting Progressive Scan (480p) or Interlaced (480i) Playback
- What is Progressive Scanning?
- CONNECTING TO A DOLBY DIGITAL DECODER OR DTS DECODER
- CONNECTING TO A TV OR A STEREO TV THAT HAS COMPONENT VIDEO IN JACKS
- CONNECTING TO AN AMPLIFIER EQUIPPED WITH DIGITAL INPUT JACKS SUCH AS MD DECK OR DAT DECK
- HOW TO CONNECT TO A TV WITHOUT AUDIO/VIDEO INPUT JACKS
- Note
- HINT FOR OPTICAL CABLE (NOT SUPPLIED)
- PLAYING A DVD VIDEO OR AN AUDIO CD
- Getting started
- Press the POWER button.
- Press the OPEN/CLOSE button.
- Place a disc into the tray.
- Press the PLAY button.
- Press the STOP button to stop play.
- Cancelling PBC (for playback of a Video CD)
- USING THE DVD MENUS
- Press the MENU button.
- Select the desired title.
- Playback will start from the selected title.
- PLAYING A DISC RECORDED IN THE VIDEO RECORDING FORMAT
- USING THE TITLE MENU
- CALLING UP A MENU SCREEN DURING PLAYBACK
- For DVDs
- PAUSING PLAYBACK OR DISPLAYING A STILL PICTURE
- RESUMING PLAYBACK FROM THE POINT WHERE PLAYBACK STOPPED
- PAGE SELECTION
- Press the STOP button during playback.
- STEPPING THROUGH FRAMES
- Press the PAUSE/STEP button while playback is paused.
- Press the PLAY button to resume playback.
- Press the ENTER button.
- FAST FORWARD/REVERSE
- SLOW MOTION
- VCDDVD-VDVD-RWDVD-A
- PLAYING FROM A DESIRED GROUP
- DVD-A
- STARTING FROM A DESIRED TRACK
- TRICKS WITH THE SKIP BUTTONS (◀◀, ▶▶)
- TO PLAYBACK THE BONUS GROUP
- PLAYING FROM A DESIRED TITLE OR CHAPTER
- DVD-VDVD-RW
- STARTING FROM A DESIRED TIME COUNT
- MARKER SETUP SCREEN
- RANDOM
- REPEAT
- Press the REPEAT button.
- For DVD Videos
- For audio CDs or Video CDs
- A-B REPEAT
- PROGRAM
- Press the MODE button in stop mode.
- Press the PLAY button.
- Select a group using ▲/▼ buttons, then press the ENTER button.
- Select a track using ▲/▼ buttons and press the ENTER button.
- PLAYBACK OF ALL GROUPS
- ZOOM PLAYBACK (enlargement on-screen)
- Press the ZOOM button during playback.
- When the cursor (▲/▼/◄/►) button is pressed during zoom play, the part to be zoomed moves.
- PLAYING MP3 / JPEG IMAGE, WMA AND PICTURE CD
- Insert a disc.
- For discs on which MP3, JPEG or WMA tracks are recorded:
- Slide show mode switching of JPEG Picture CD
- Press the MODE button during JPEG or Picture CD playback.
- For discs of Picture CD:
- [If an MP3 or WMA file is selected:]
- [If a JPEG or Picture CD file is selected:]
- Zoom replay of JPEG, Picture CD
- Repeated replay of JPEG, Picture CD
- [If Group is selected:]
- Notes on MP3, JPEG and WMA
- To stop the play, press the STOP button.
- Notes on Picture CD
- PLAYING MP3 DISC/JPEG DISC/WMA/PICTURE CD IN A PROGRAMMED WAY
- PLAYING AN MP3 DISC/JPEG DISC/WMA DISC FROM A DESIRED TRACK
- PLAYING AN MP3 DISC/JPEG DISC/WMA DISC /PICTURE CD AT RANDOM
- CHANGING THE AUDIO LANGUAGE OR SOUND MODE
- For audio CDs
- For Video Recording Format
- CHANGING THE SUBTITLE LANGUAGE
- CHANGING THE CAMERA ANGLE (Multi-Angle Pictures)
- Press the ANGLE button during playback.
- CHANGING THE ON-SCREEN DISPLAY
- Press the DISPLAY button during playback.
- Program/Random Playback only (For audio CD)
- For MP3s or WMAs
- Program/Random Playback only
- For JPEGs or Picture CDs
- For DVD Audio
- SETTING IMAGE QUALITY ADJUSTMENT
- NR setting
- Select image quality mode
- Setting image quality
- Displayed only when the value was changed.
- LANGUAGE SETTINGS
- Press the SETUP button in STOP mode.
- AUDIO:
- SUBTITLE:
- DISC MENU:
- DISPLAY SETTINGS
- AUDIO SETTINGS
- DRC (Default : OFF)
- Dolby Digital (default: ON)
- DTS (Default: OFF)(It can be also set by QUICK SETUP)
- Down Sampling (Default : ON)
- When playing a disc with copyright protection
- SPEAKER (Default:2ch)
- When 5.1 ch is selected
- DELAY TIME
- BALANCE
- Press the SETUP button.
- ABOUT A DELAY TIME
- PARENTAL LOCK
- When "PARENTAL LEVEL" is selected
- ALL
- Level 8
- Levels 7 to 2
- Level 1
- When "CHANGE" is selected
- Press the SETUP button.
- Servicing
- Cabinet Cleaning
- If the Laser Optical Pickup Unit is Dirty
- Adhesive labels
- Disc Handling
- MITSUBISHI DVD Player LIMITED WARRANTY
Brand : MITSUBISHI
Model : DD-8040
Category : DVD player