
Trium Eclipse - Smartphone MITSUBISHI - Free user manual and instructions
Find the device manual for free Trium Eclipse MITSUBISHI in PDF.


| Product Type | Smartphone |
| Brand | Mitsubishi |
| Model | Trium Eclipse |
| Dimensions (H x W x D) | 105 x 48 x 22 mm |
| Weight | 95 g |
| Battery Type | Li-Ion 680 mAh |
| Standby Time | Up to 150 hours |
| Talk Time | Up to 3 hours |
| Display | 1.8-inch CSTN, 128x128 pixels |
| Network | GSM 900/1800 |
| Connectivity | IrDA, USB (via cable) |
| Main Functions | Calls, SMS, Phonebook, Calendar, Calculator |
| Camera | VGA (0.3 MP) |
| Memory | 32 MB internal, no expandable slot |
| Power Supply | AC charger 5V, 500 mA |
| Maintenance | Clean with soft dry cloth; avoid liquids |
| Safety | Keep away from water; use only approved chargers |
| Spare Parts | Battery, charger, housing (contact service center) |
| Repairability | Limited; authorized service recommended |
| General Information | Compatible with PC via Infrared; user manual included |
Frequently Asked Questions - Trium Eclipse MITSUBISHI
User questions about Trium Eclipse MITSUBISHI
0 question about this device. Answer the ones you know or ask your own.
Ask a new question about this device
Download the instructions for your Smartphone in PDF format for free! Find your manual Trium Eclipse - MITSUBISHI and take your electronic device back in hand. On this page are published all the documents necessary for the use of your device. Trium Eclipse by MITSUBISHI.
USER MANUAL Trium Eclipse MITSUBISHI
Trium® by MITSUBISHI ELECTRIC
THIS ECLIPSE PHONE MEETS THE EU REQUIREMENTS FOR EXPOSURE TO RADIO WAVES.
Before a phone model is available for sale to the public, compliance with the European R&TTE directive (1999/5/CE) must be shown. This directive includes as one essential requirement the protection of the health and the safety for the user and any other person.
Your mobile phone is a radio transmitter and receiver. It is designed and manufactured not to exceed the limits for exposure to radiofrequency (RF) energy recommended by The Council of the European Union. These limits are part of comprehensive guidelines and establish permitted levels of RF energy for the general population. The guidelines were developed by independent scientific organisations through periodic and thorough evaluation of scientific studies. The limits include a substantial safety margin designed to assure the safety of all persons, regardless of age and health.
The exposure standard for mobile phones (CENELEC standard EN 50360: 2000) employs a unit of measurement known as the Specific Absorption Rate, or SAR. The SAR limit recommended by The Council of the European Union is 2.0 W/kg. Tests for SAR have been conducted using standard operating positions (with reference to CENELEC standard EN 50361: 2000) with the phone transmitting at its highest certified power level in all tested frequency bands. Although the SAR is determined at the highest certified power level, the actual SAR level of the phone while operating can be well below the maximum value. This is because the phone is designed to operate at multiple power levels so as to use only the power required to reach the network. In general, the closer you are to a base station antenna, the lower the power output.
The highest SAR value for this Trium Aura, Mystral or Odyssey model when tested for compliance against the standard was 0.941 W/kg. While there may be differences between the SAR levels of various phones and at various positions, they all meet the EU requirements for RF exposure.
There are a number of independent sources of information available to users including:
Royal Society of Canada: www.rsc.ca
The International Commission on Non-Ionizing Radiation Protection (ICNIRP):
www.icnirp.de
The US Food and Drug Administration:
www.fda.gov/cdrh/ocd/mobilphone.html
The World Health Organization: www.who.int/emf
Mitsubishi Electric belongs to the MMF, an international association of radio equipment manufacturers.
The MMF produces information such as this in accordance with its purpose of developing and presenting industry positions to independent research organisations, government and other research bodies.
Mobile Manufacturers Forum
Diamant Building, 80 Blvd. A. Reyers
B-1030 Brussels
Belgium
www.mmfai.org
Introduction
Thank you for purchasing the Trium Eclipse dual band mobile telephone. The mobile telephone described in this guide is approved for use on both the GSM 900/1800 and GPRS networks. Services and display messages may be different dependant upon your operators implementation.
As with all types of radio transceivers this mobile telephone emits electromagnetic waves and conforms to international regulations in so far as it is used under normal conditions and in accordance with the safety and warning messages given below and on pages 11 to 13.
General safety
It is important to follow any special regulations regarding the use of radio equipment, due to the possibility of radio frequency, RF, interference.
Please follow the safety advice given below.

Switch off phone and remove the battery when in an aircraft. The use of mobile telephones in an aircraft may endanger the operation of the aircraft, disrupt the cellular mobile phone network and is illegal. Failure to observe this instruction may lead to suspension or denial of mobile telephone services to the offender, or legal action, or both.

Respect national regulations on the use of mobile telephones in vehicles. Do not use a handheld phone whilst driving. If you don't have a handsfree car kit, stop and park your vehicle safely before using your phone.

Switch off phone when at any refuelling point or near inflammable material.

Switch off phone in hospitals and any other place where medical equipment may be in use.

Respect restrictions on the use of radio equipment in fuel depots, chemical plants or where blasting operations are in progress.

There may be a hazard associated with the operation of phones close to inadequately protected personal medical devices such as hearing aids and pacemakers. Consult your doctor or the manufacturers of the medical device to determine if it is adequately protected.

Operation of phone close to other electronic equipment may also cause interference if the equipment is inadequately protected. Observe any warning signs and manufacturers recommendations.

Avoid prolonged contact between the antenna and your skin when the phone is switched on.
This apparatus is intended for use only when supplied with power from AC/DC adaptor chargers (FZ14130060, FZ14130070, FZ14130050, FZ14130090,
FZ14130080 and FZ14130100), desk top charger (FZ14150030 and FZ14150020), and vehicle kits (FZ14150050 and FZ14150140).
Use of any other charger or adaptors will invalidate any approval given to this apparatus and may be dangerous.
Table of contents
- Using this guide ...... 6
- Quick Start 8
Preparing the phone for operation 8
Basic Operations 8
- Safety information ...... 11
Vehicle safety 11
Care and maintenance ..... 11
Your responsibility 11
Security codes 12
Code supplied by the airtime service provider 12
Code supplied by the manufacturer 12
Emergency calls 13
Battery 13
Disposing of waste packaging 13
- Preparing the phone for operation 14
SIM card 14
Battery 14
- Basic operations ...... 17
Making and receiving calls .. 17
Time & Date setting 18
Unanswered call, voice mail, new SMS message, Inbox and Push indicators 19
Modify graphics themes ..... 20
Entering text 20
Messages (SMS) 23
Phonebook 24
Voice dialling 26
Last dialled numbers ...... 26
Speed dialling 27
Silent and vibrate alert modes 27
Hands free mode 28
Muting 28
Volume adjustment 28
Holding and retrieving a call 29
Call waiting, swapping and multi-party conference calls 29
Diverting incoming calls (network service) ...... 31
Language selection 32
Softkeys - programming the softkeys 32
Melodies download 32
Games 33
Voice Memo 34
WAP ^TM 34
GSM man machine interface codes 36
- The menu (MMI)
system 37
Access to the menus 37
Menu map 37
- Using the headset ...... 38
Connecting the headset ..... 38
Using the headset 38
Disconnecting the headset .. 38
Using this guide
Please take time to read this user guide. It contains a lot of useful information about your phone and the way that it operates on the network. The GSM network is now worldwide and allows you to make and receive calls to and from other countries (called roaming) as if you were in your home country. Some features included in this guide are called network features and are supplied by service providers. However before you can take advantage, or even activate many of the network features offered by the networks, you must subscribe to the services you require. For a full list and explanation of network features please consult with your service provider.
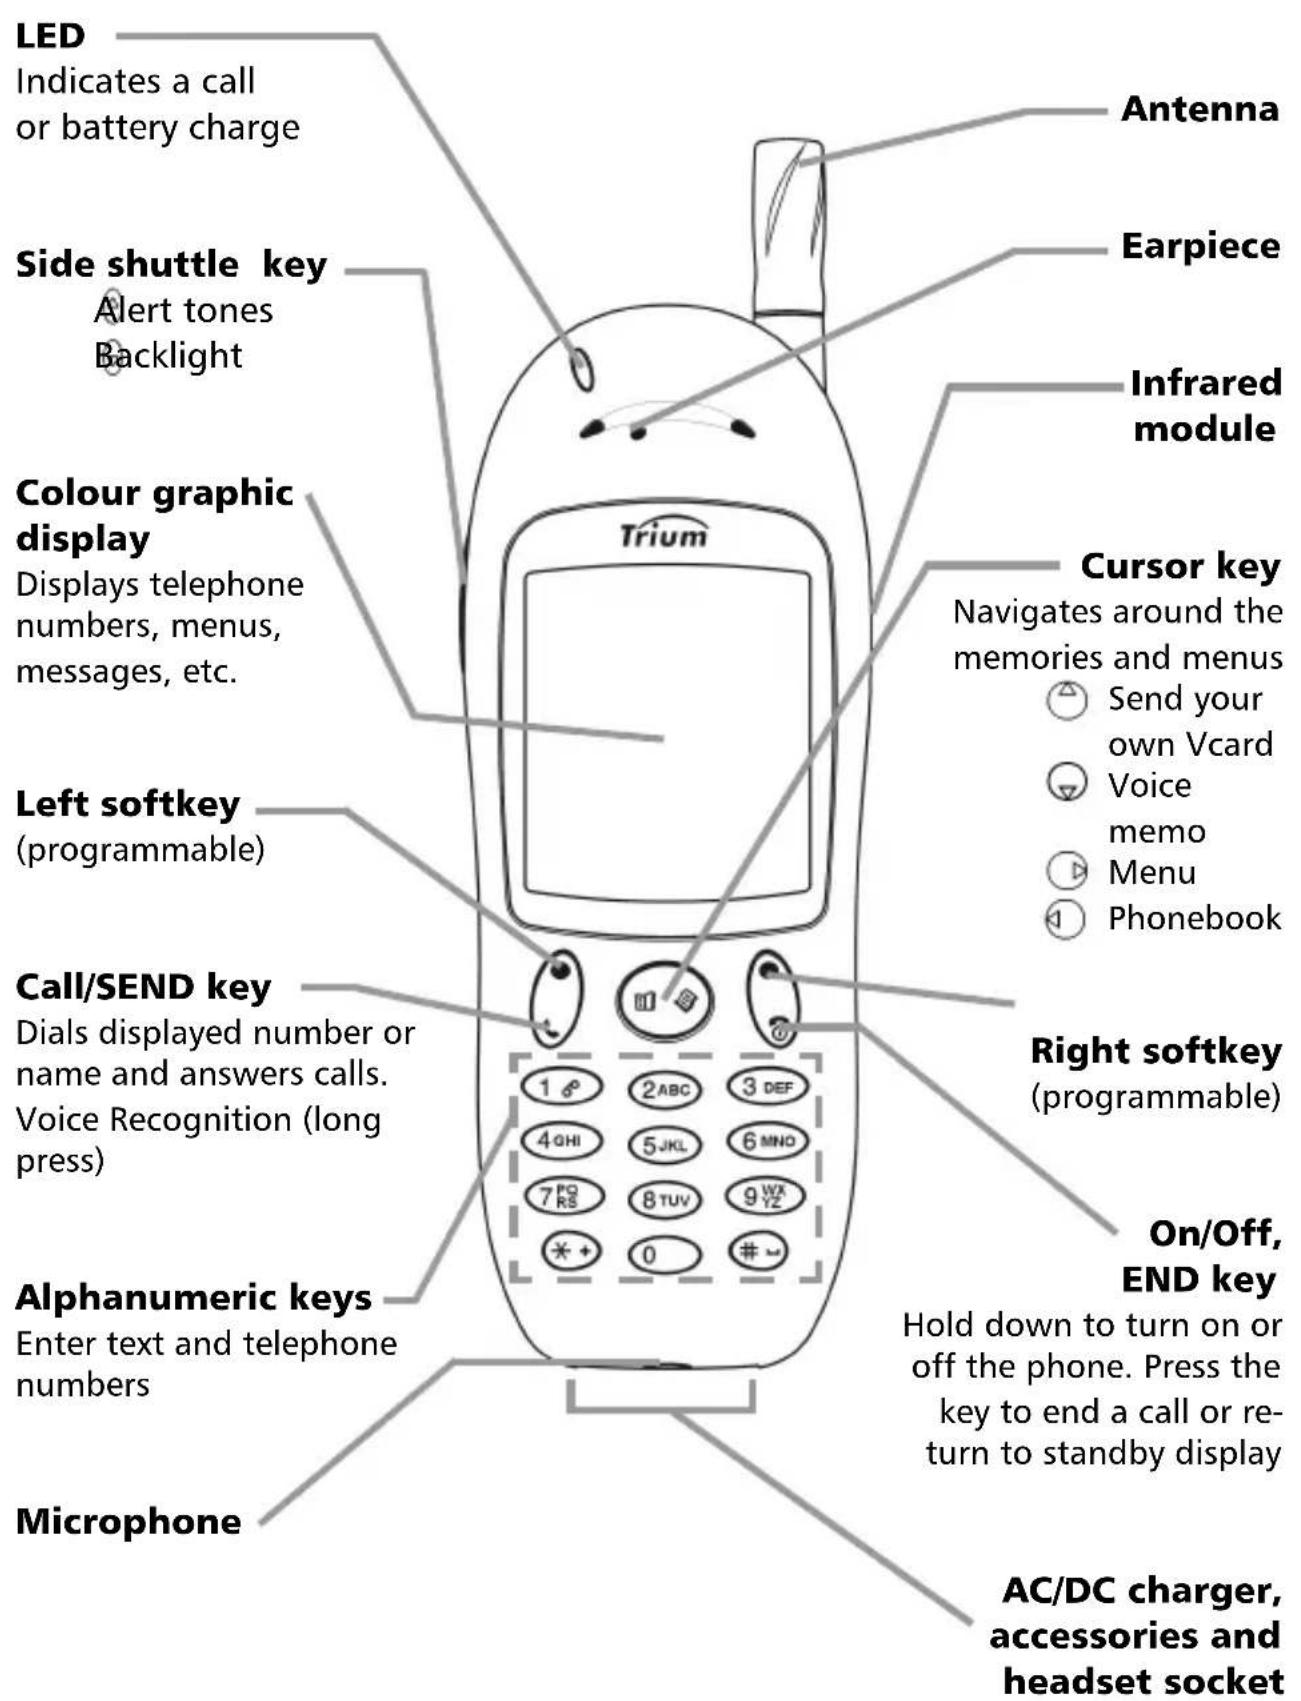
Using the keys to follow the actions described in this guide
To help you quickly understand your way around this manual we have used symbols and expressions that are present on the keys and in the display itself
means left softkey. means down arrow on round cursor.
means right softkey. means the SEND key.
means right arrow on round cursor. means the END key.
means left arrow on round cursor. means pushing side shuttle key upwards.
means up arrow on round cursor. means pushing side shuttle key downwards.
Function ⚙ means the softkey with the corresponding function name. For example, Internet ⚙ means press the softkey under the word Internet.
Messages words seen in this format are the actual words seen in the display. Select means use ⚠️ and ⚡️ on the round cursor key to scroll to the required item in the menu and validate by pressing ⚠️ For example, select Phone Book means scroll to the menu item Phone Book and validate by pressing ⚠️
Press means press the corresponding key. Press means press the SEND key.
Understanding the Graphic Display Indicators (Icons)
The graphic display has a main area capable of displaying up to four lines of characters plus one row of special display indicators or icons.
These icons are used to display the phone's operational condition during use.
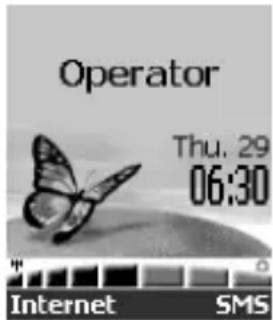
The display also displays alphabet characters and numbers as well as the phones menu list and instructions.
The special icons which appear in the display during operation have the following meaning:
SIM memory in use
Phone memory in use
Roaming. Is displayed when the phone is logged on to a network different from its home network.
Short message service (SMS). Is displayed when one or many short messages have been received and have not been read. It flashes when the SMS message bank is full and cannot store new messages. The availability of this feature is network dependent.
Voice mail. Is displayed when a voice mail message has been received and stored by the networks voice mail centre. The availability of this feature is network dependent.
Call diverting. Indicates whether incoming calls are permanently being diverted. The availability of this feature is network dependent.
Battery level indicator. Is permanently displayed to indicate the current charge level of the battery. Three levels are shown: full (three green bar), medium (two green bars), low (one green bar).
It is 📋 (one red bar), when the battery is almost empty.
Arrow keys. These icons are seen during menu operation to indicate that more items in the menu can be displayed if ⏻ or ⏱ are pressed. More than one arrow may show at any one time.
Line 2. Indicates the second line is in use. The availability of this feature is network and subscription dependent.
Unanswered call. Is displayed when an incoming call is unanswered.
Signal strength level. There are five levels. It indicates the strength of the received signal. The more bars the stronger the signal. If no network is available the display remains blank.
Keypad lock. It indicates whether keypad lock is on or off.
Alarm clock icon.
Vibrator alert icon.
Ring tone off icon.
Mute icon.
Tegic edit mode icon.
WAP™ 'live' connection icon.
WAP™ 'live' connection in security mode icon.
WAP™ connection with GPRS icon.
WAP™ connection with GPRS in security mode icon.
Infrared port icon, indicates the infrared port is active i.e. data can be received from or sent by the infrared port.
GPRS service icon. It indicates data packet services are available.
Inbox icon, indicates new messages in inbox.
Push Messages icon, indicates the reception of new push messages.
Outgoing Call icon.
Incoming Call icon.
Active Call icon.
Multiparty icon.
Quick Start
In order to become familiar with the phone straightaway follow these simple steps.
Preparing the phone for operation
Please refer to page 14.
Basic Operations
Turning on the phone
1 Press and hold down 2 The audible power tone is played.
When switching on for the first time, may appear for a few seconds. This is quite normal. The standard display will appear afterwards.
A switch on tone will be heard. When switching on for the first time, enter the date & time.
② If the mobile is locked, Enter lock code will be displayed.
Enter the 4 digit phonelock code and press OK
3 If your SIM is PIN protected, Enter PIN will be displayed.
Enter the PIN code and press OK
√ Please refer to page 12 for more details on your PIN and lock codes.
A display animation will be shown.
Standby display
This is followed by a registration tone after which the name or logo of the network and/or service provider will be displayed together with the time and date, signal and battery level indicators and the Internet and SMS softkey functions. This is the normal standby display:
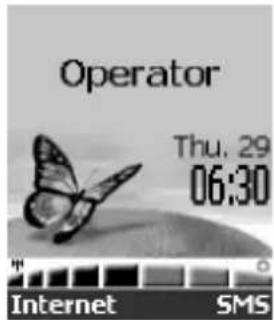
also appears in the standby display if your phone is connected to a GPRS network*.
If the Mode of operation value was set to Modem (see Getting more out of your Eclipse) and if the phone is attached to a GPRS network*, the standby display will be the following:
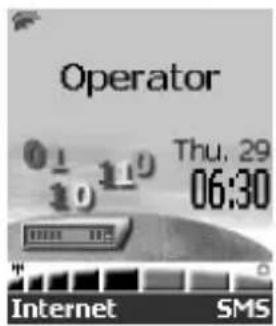
- Pressing Ⓜ allows you to beam "My card" through IrDA.
- Pressing 📋 gives access to Voice memo listening (short press) or recording (long press).
- Pressing gives access to the main menu.
- Pressing gives access to the Phone book.
Please refer to Getting more out of your Eclipse for more information.
Keypad lock
When activated (turned on) keypad lock prevents accidental calls or actions being made by user when the phone is carried in a pocket, briefcase or handbag. When on keypad lock does not prevent calls being received, which are answered in the normal way. On completion of a received call keypad lock is automatically reactivated.
To turn keypad lock on:
Press and hold down #. will be displayed.
To turn keypad lock off:
Press Unlock ⚙ and press #.
When the keypad is locked the backlight may be switched on by pressing the side shuttle key downwards.
Alert tones
Pressing Ⓐ gives access to the Alert tones control (Ring, Silent, Vibrate, Vibrate & ring, Vibrate then ring).
Internet
Pressing Internet ⬤ in the standby display allows you access to the internet main menu from which you can dial the home page offered by your network operator, or any WAP™ portal. Up to 10 WAP™ profiles and 20 bookmarks can be user configured.
Messages (SMS)
Pressing SMS ⬇ in the standby display allows you access to the Internet main menu. Please refer to page 19 for more information.
Making a call
① Enter the desired telephone number using the numerical keys (1 - ⑨ and ). A maximum of 47 digits can be entered. Correct any mistakes by pressing Clear ●. Holding down this key will clear the whole display.
To dial (send) the number press 🤨 Press and hold 🔒 to record the phone conversation. Please refer to page 34 for more information.
When the call is connected the conversation will be heard in the earpiece and a call timer will be displayed.
Receiving a call
When a call is received, the phone will ring. The LED on the top of the phone will flash green and the flashing 📁 will be shown. The backlight will also come on if the phone was set to do so or if in silent mode.
To accept (answer) the call:
Press
If the ring tone volume is set to zero (off) or if the phone has been set to 'Vibrate' mode, no audible sound will be heard.
To reject, or return the busy signal to the caller:
Press
Ending a call
Press
√ Waiting a few seconds or pressing the Exit softkey will return to the standby display.
Turning off the phone
Press and hold down 🔒.
A switch off tone will sound to confirm your action. During switch off a display animation will be shown. The mobile will then turn off.
Do not turn off the phone by removing the battery as data which may need to be saved in the SIM will be lost. Should this happen, the display may show a first-aid kit symbol for a few seconds at the next power on. This is quite normal. The standard display will show afterwards.
Safety information
Vehicle safety
- Respect national regulations on the use of mobile telephones in vehicles.
- Road safety always comes first! Always give your full attention to driving.
- If equipped with a correctly installed vehicle kit allowing "hands free" operation and you need to make or receive a call, ensure that it is done sensibly and safely. Use pre-programmed numbers where possible and keep calls short and routine.
- If incorrectly installed in a vehicle the operation of mobile telephones could interfere with the correct operation of the vehicle electronics, such as ABS anti-lock brakes or air bags. To avoid such problems ensure that only qualified personnel carry out the installation. Verification of the protection and operation of the vehicle electronics should form part of the installation. If in doubt consult with the manufacturer.
- Do not place the phone on the passenger seat or where it could break loose during sudden breaking or a collision. Always use the holder.
- The use of an alert device to operate a vehicle's lights or horn on public roads is not permitted.
Care and maintenance
This mobile telephone is the product of advanced engineering, design and craftsmanship and should be treated with care. The suggestions below will help you to enjoy this product for many years.
- Do not expose the phone to any extreme environment where the temperature or humidity is high.
- Do not attempt to disassemble the phone. There are no user serviceable parts inside.
- Do not expose the phone to water, rain or spilt beverages. It is not waterproof.
- Do not abuse this phone by dropping, knocking or violent shaking.
- Do not clean the phone with strong chemicals or solvents. Wipe it only with a soft, slightly dampened cloth.
- Do not place the telephone alongside computer discs, credit or travel cards or other magnetic media. The information contained on discs or cards may be affected by the phone.
Your responsibility
This GSM mobile telephone is under your responsibility. Please treat it with care respecting all local regulations. It is not a toy therefore keep it in a safe place at all times and out of the reach of children.
Try to remember the phonelock and PIN codes associated with the use of this phone.
Become familiar with and use the security features to block unauthorised use if your phone and/or SIM card are lost or stolen. Call your service provider immediately to prevent illegal use.
When not in use lock, turn off the phone and remove the battery.
Security codes
The phone and SIM card are delivered to you pre-programmed with codes that protect the phone and SIM card against unauthorised use.
When requested to enter any of the codes, key in the number (appears as * asterisks in the display) and press OK
Keying mistakes can be erased by pressing Clear ⚙.
If you enter the wrong code an appropriate message will be displayed.
Codes supplied with the SIM card are:
PIN and PIN2 codes (4-8 digits)
The PIN (Personal Identity Number) is supplied with all SIM cards and protects the card against unauthorised use.
The PIN2 code, supplied with some SIM cards, is required to gain access to some features in the phone (such as fixed dialling numbers) for which another level of security is required.
If Enter PIN appears in the display, enter the code and press OK ⬙.
Entering the wrong PIN code three times in succession will disable the SIM card and the message SIM Blocked. Enter PUK will appear in the display. To unblock the SIM you will need the PUK (PIN Unblock Key) code, obtainable only from your service provider.
PUK and PUK2 codes (8 digits)
The PUK code is supplied with the SIM card and is used to unblock a disabled SIM card.
When requested enter the PUK code and press OK Ⓞ. You will be requested to reset the PIN code. Follow the instruction in the display.
The PUK2 code is required to unblock the PIN2 code.
Code supplied by the airtime service provider
Call barring password (4 digits)
This password is used to bar various types of calls, made or received, from the phone. Refer to Getting More out of your Eclipse for more details.
Voice mail password
This password protects you against unauthorised access to your voice mail.
Code supplied by the manufacturer
Phonelock code (4 digits)
This code is set to all zeros on delivery and is user re-settable. Once changed it cannot be identified by the manufacturer over the phone.
Refer to Getting More out of your Eclipse for more details.
It is strongly recommended that you remember and make yourself familiar with the purpose and operation of these codes.
Emergency calls
In Europe, provided the phone has GSM service, emergency calls can be made using the European standard emergency number, 112. Emergency calls can even be made if the phone is PIN or electronically locked or call barred. In some countries local emergency numbers can still be used for emergency purposes but the phone may have to contain a valid SIM card.
When making an emergency call remember to give all the necessary information as accurately as possible. The phone may be the only means of communication at the scene of an emergency therefore do not cut off the call until told to do so.

Mobile phones rely on wireless and landline networks which cannot be guaranteed in all conditions.
Therefore you should never rely solely on wireless phones for essential emergency communications.
Battery
Battery use and safety information
A battery can be charged hundreds of times but will gradually wear out. When the operating time (standby and talk time) is noticeably shorter than normal it is time to buy a new battery.
- Do not leave batteries connected to a charger longer than necessary, overcharging will shorten battery life.
- Disconnect battery chargers from the power source when not in use.
- Do not expose batteries to high temperatures or humidity.
- Do not dispose of the batteries in fire. They may explode.
- Avoid putting the batteries into contact with metal objects which may short circuit the battery terminals (e.g. keys, paper clips, coins, chains etc).
- Do not drop or subject the batteries to strong physical shocks.
- Do not try to disassemble any of the battery packs.
- Use only the recommended battery chargers (see page 4).
- If the battery terminals become soiled, clean them with a soft cloth.
- It is normal for batteries to become warm during charging.
- Old batteries must be returned to the place of sale or to a place where used batteries are properly disposed of. Do not dispose of old batteries together with household waste.
Battery disposal
In compliance with European environmental protection directives, used batteries must be returned to the place of sale, where they will be collected free of charge.
Don't throw away your batteries in your household waste.
Disposing of waste packaging
The packaging used for this phone is made of recyclable materials and as such should be disposed of in accordance with your national legislation on the protection of the environment.
Please take care to separate the cardboard and plastic elements and to dispose of them in the correct manner.
Preparing the phone for operation
SIM card
Before you can use your phone a valid SIM card must be inserted into the SIM card holder.
Inserting the SIM card
Unpack the phone and insert the SIM card into the holder.
① Insert the SIM card gently as shown with the gold contacts facing down and the bevelled corner of the card at the top left.
② Press the SIM card down.
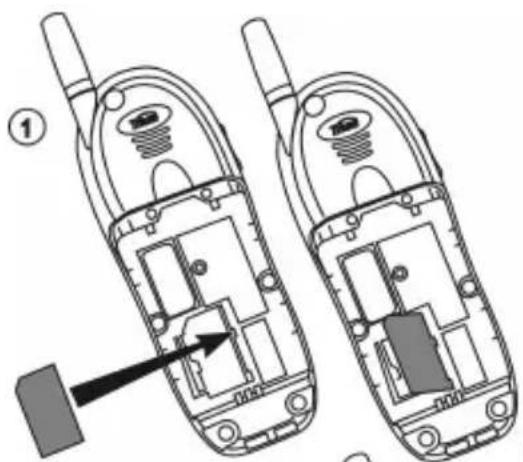
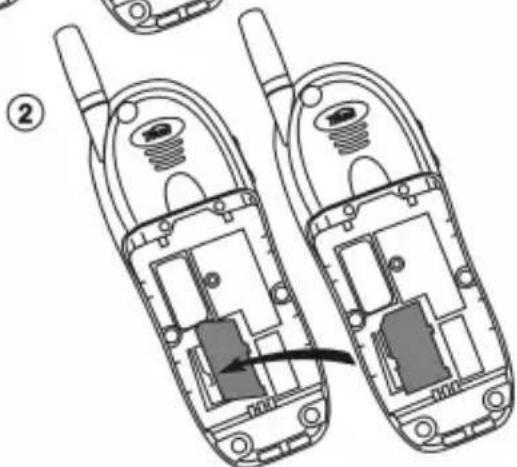
natural_image
Diagram of two foldable mobile phones with internal compartments and a directional arrow indicating movement (no text or symbols present)If the SIM card has been inserted the wrong way round or is damaged, Check SIM! will be displayed. Remove the SIM card, check that it is the right way round and re-insert it as described.
Battery
Fitting
Connect the battery as shown below.
1 Position the battery onto the phone as shown.
2 Push down the opposite end of the battery into the phone until the battery catches 'click' shut. Check the battery is securely in place.

Replace the battery cover.
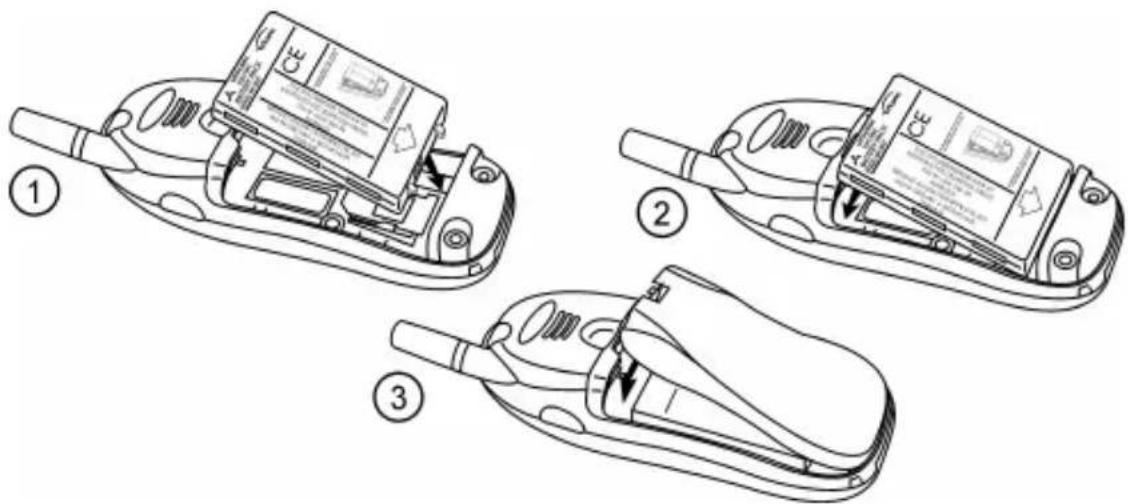
Low battery warning
When the battery becomes too low for the current operations, a temporised warning screen is displayed, and a low battery warning tone will sound (in the buzzer if no call, in the ear-piece during a call), in order to inform you.
If you are on a call terminate the call and turn off the phone by pressing and holding down 🔒
Recharge the battery as shown below or swap it for a charged one.
Do not turn off the phone by removing the battery. Data that needs to be saved by the SIM may be lost.

Should this happen, the display may show a first-aid kit symbol for a few seconds at the next power on. This is quite normal. The standard display will show afterwards.
Charging
To ensure a long life for your battery, re-charge it only when the warning screen is displayed and the low battery tone is heard. Connect the charger to the phone as shown.
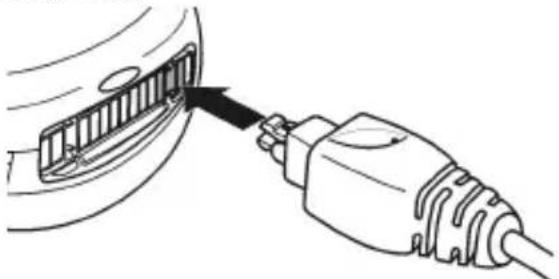
natural_image
Line drawing of a plug inserted into a connector (no text or symbols)
While inserting the AC/DC adaptor plug in the phone adaptor connector make sure the Trium logo ( ) appears on top.
Plug the charger into the wall socket and turn on the mains. The battery will start to charge.
The phone can be used whilst charging but it will increase the charging time.

Charging indicators when the mobile is off
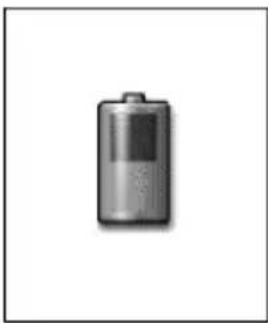
If the mobile is Off, the charging process is confirmed by a large animated display on the screen.
natural_image
Simple illustration of a cylindrical battery (no text or symbols)At end of charging, the screen indicates charge ended with a full battery icon. During the charging process, the LED is red. At the end of the process, the red becomes steady green.
Charging indicators when the mobile is on
During charging, the battery icon cycles:
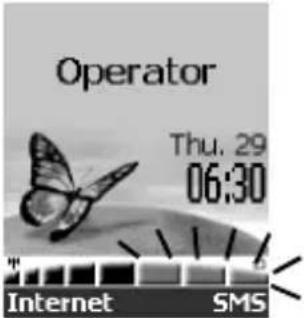
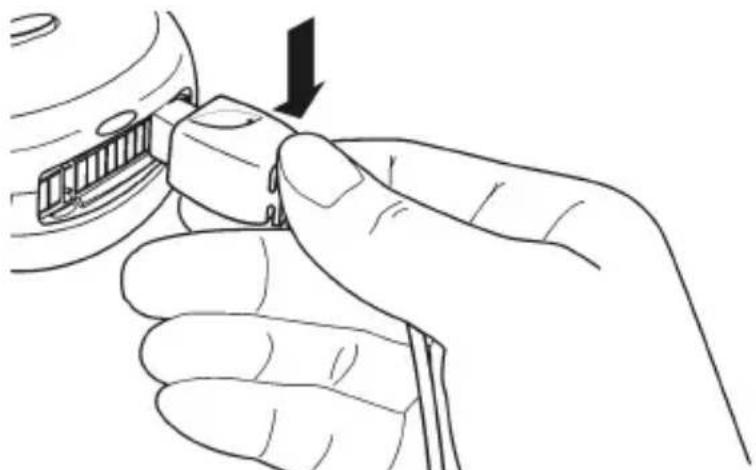
When charging is completed, the icon remains steady with all bars full. It is normal for the battery to warm up during charging. At the end of charging disconnect the charger from the phone (see below), switch off and remove the plug from the mains.
natural_image
Line drawing of a hand holding a small electronic component with an arrow indicating rotation (no text or symbols)Typical charging times using the AC/DC adaptors (FZ14130060, FZ14130070, FZ14130050, FZ14130090, FZ14130080 and FZ14130100)
| Battery type Typical charging time | |
| Standard battery (FZ14150060) 2 hrs |
Basic operations
Making and receiving calls
The phone can only make and receive calls when it is switched on, unlocked, has a valid SIM card inserted and is located in an area that has GSM network service coverage. If the phone cannot find a network the display remains blank.
Making calls
① Enter the desired telephone number using the numeric keys (① - ⑨ and ⑩).
International calls can be prefixed either with 00 or +. To enter the + symbol before a number press and hold down ☒
A maximum of 47 digits can be entered. Correct any mistakes by pressing Clear ⚙. Holding down this key will clear the whole display.
2 Press to dial (send) the number.
The dialled number together with the animated icon will be shown in the display. When the call is connected, a ringing tone will be heard in the earpiece. When answered, a call timer will be displayed. Proceed with the call in the normal way.
- Busy in the display indicates that the called party is engaged. If Auto Retry is on, the phone will attempt to call again.
- Not allowed (fixed dialling) in the display means that the number dialled is not authorised by the FDN list.
- No response in the display indicates that the network is not answering.
• Network busy in the display indicates that the network is in overload. - If the dialled number matches one stored in the phonebook then the associated name of the called person will appear in the display.
- The line 2 icon (☐) will appear once the call is established (if this service is active) indicating that the call was made using this line.
√ You can voice dial directly. Pre-stored spoken sentences allow voice dialling by pressing and holding ⏻. Refer to page 26 to learn more about the Voice dialling.
Speak-on ● activates the hands-free feature. Refer to page 28 to learn more about the Hands free mode.
Ending calls
To end a call:
Press
The call timer will stop and will disappear. Waiting a few seconds or pressing Exit ● will return to the standby display.
Receiving calls
When a call is received the phone will ring. The LED on the top of the
phone will flash green, the backlight will come on and the flashing will be shown. If the ring tone volume is set to zero (off) or 'Vibrate', no audible sound will be heard.
To accept (answer) the call:
Press
Pressing No ring ⚙ will stop the sound of the ring tone allowing you to silence the phone and go out of a room before pressing ⚡ If you wish to use the hands free mode in the same time, press Speak-on ⚡.
When accepted will be displayed. Proceed with the call in the normal way.
- If the callers number is not available Unknown number will be displayed during call presentation; then Call1 will be displayed during call connection.
- If the callers number is available but does not match one stored in your phonebook it will appear in the display. If it does match a stored number then the associated name will appear instead.
- If the caller has withheld their number Withheld number will be displayed during call presentation; then Call 1 will be displayed during connection.
• A call timer will also appear.
• Will appear if the call has been received on your line 2 number.
To reject or return the busy signal to the caller,
Press
To end the call,
Press
The caller's number, if available will be stored in the received calls log.
Time & Date setting
Two clocks are managed by the phone:
- The Origin clock: corresponding to the time and date used for all processing in the phone.
- A Secondary clock: indicates the time of another part of the world.
Three settings are managed for each clock:
• The time difference with GMT. - The daylight saving rule: two values are available, Winter time and Summer time (+1hr).
- A town to identify a place.
To set the time and/or date of the Origin clock:
1 Press ▶. Select Office Tools.
② Select World clock and press Options ●.
3 Select Edit Origin.
4 Select City, enter the name of your town and press OK to validate.
Select World Clock, enter the time zone (GMT) and press OK to validate.
5 Select Daylight saving rule, select Winter time or Summer time (+1 hr) and press Select ● to validate.
Then press End ⬆ to validate the time settings.
6 Select Date & time, enter the date in the format shown and press OK to validate. Enter the time and press OK to validate. (If required use and ).
7 Press Exit or to return to the standby display.
To set the secondary time,
1 Press ☑. Select Office Tools.
② Select World clock and press Options ●.
3 Select Edit Secondary.
4 Follow the instructions as point 4 above.
To switch between the two clocks:
1 Press ☑. Select Office Tools.
② Select World clock and press Options
3 Select Swap. The secondary clock becomes the Origin/mobile clock and the Origin clock becomes the secondary one. An information message is displayed after swapping.
4 Press Exit ● or ⚙ to return to the standby display.
Unanswered call, voice mail, new SMS message, Inbox and Push indicators
- If some received calls remain unanswered, ✗ will be displayed. Press Read ⚙ to view the callers' numbers if available and the date and time the call was received. Unanswered call numbers will be stored in the unanswered calls log.
- When you receive notification that a voice message has been deposited in your voice mail box an alert tone will sound and will appear in the display. Press Call or Read to view the message or press and hold ① to speed - dial your voice mail message centre. It is network dependent.
If more than one indicator is shown, pressing "Read" will display a menu allowing you to choose between different items.
- When a new SMS message is received, an alert tone will sound and 📋 will be displayed. Press Read 🔒 to view the new SMS inbox messages.
If is flashing you will have to delete at least one old received message to be able to receive new ones.
- When data (vCards or vCalendar) are received from the IrDA port, will be displayed. Press Read ⬆ to view the new inbox information.
- When a new Push message is received, 📋 will be displayed. Press Read ⬆ to view the new message. More detailed information are available on Getting more out of your Eclipse.
The display will show the quantity and type of messages:
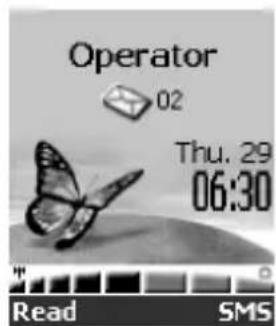
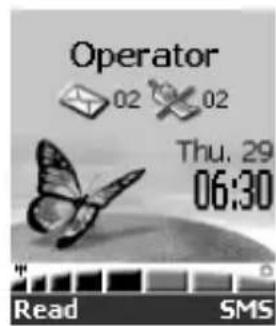
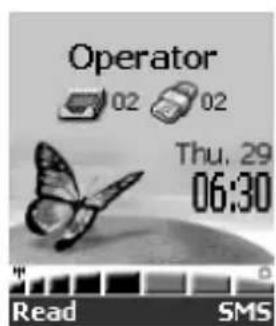
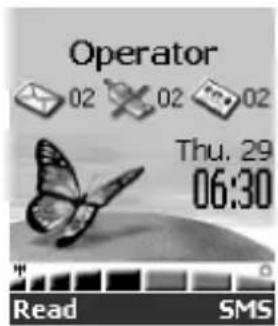
Press Read ⬆ to select the type of message to be read. Press Select ⬆ or ⬆ to view the message if more than one indicators are displayed.
Modify graphics themes
Several themes are available to change the idle display (standby display):
• A classical one, called Trium.
- Two funny ones, called Daisy and Woody.
• A Night & Day one, called Urban.
• A business one, called Lindbergh.
To select a new graphic theme for your standby display:
1 Press ▶ and select Settings.
② Select Graphics themes. The menu of the graphics themes is displayed.
3 Select your desired graphics theme and press Select ●. An information screen indicates that your choice is correctly registered. Briefly press 🔒 to display the new idle screen.
Night and day idle screen
The Urban theme changes twice a day. The night screen is set at 7 p.m. and the day screen is set at 7 a.m. (these parameters cannot be changed).
Business idle screen
The Lindbergh screen takes into account the world clock. The two defined clocks are always displayed in this idle screen.
Entering text
Some features and functions, e.g. storing names in memory or sending SMS text messages, require you to know how to enter and edit text in the display. In the display this will be indicated by 📄 in lower case mode and by ⚠ in upper case mode. Text and alphabet characters can then be entered or edited directly from the keypad.
There are two methods of entering text characters and numbers in the display. The Multitap or Multipress key method and the quicker intuitive method, called T9 text input, which involves fewer key presses than the multitap method.
T9 ( ) text entry
A press on Ⓤ will swap between T9 text entry and the Multitap method.
To enter text with T9:
1 Press the key with the required letter once only.
Do not be put off if the character you want is not immediately displayed.
② The "active" word changes as you type, so type to the end of the word.
3 If your word is not displayed, press for other matching words.
4 If your word is not recognised, press to swap to the multitap method to complete the word.
5 Use 🔍 or 🔍 to locate the cursor in the text to insert characters or make corrections.
Tips and Operation
| Key Action | |
| Long press Numbers | |
| * | Shift - upper/lower case |
| Clear (●) | Clear or backspace |
| # | Space |
| 0 | Another matching word |
| 1 | Smart punctuation |
| ▽ | Swap between T9 and Multitap method |
Example
To enter card in the display:
- Press ⬇ and select Messages.
- Select Write new.
- Press 📋 appears.
- Press ②, a appears.
- Press ②, ca appears.
- Press ⑦, car appears.
- Press ③, case appears.
If the displayed word is not the one you want, press @ as many times as necessary to view card.
- Press 🔒 to exit from this example and return to the standby display.
The Multitap/Multipress method
This is the default method for "free text".
A press on Ⓤ will swap between T9 text entry and the Multitap method.
A brief press on any key will display the first character associated with that key as well as show all the other available characters at the top of the display. The characters available, which are language dependent, are shown below:
| Key Character | |
| Lower case Upper case | |
| 1 | 1 . , - ' @ : ? |
| 2 | a b c 2 A B C 2 |
| 3 | d e f 3 D E F 3 |
| 4 | g h i 4 G H I 4 |
| 5 | j k l 5 J K L 5 |
| 6 | m n o 6 M N O 6 |
| 7 | p q r s 7 P Q R S 7 |
| 8 | t u v 8 T U V 8 |
| 9 | w x y z 9 W X Y Z 9 |
| 0 | 0 |
| * | Short press swaps next letter between upper or lower case.Long press swaps all next letters between upper or lower case. |
| # | Short press, enters space.Long press gives access to special characters.( ) % ! ; " _ @ § + # * / & = < > i ¥ $ £ € i |
| ∅ | Short press moves the cursor through the text one place to the left or to the right. |
| ∅ | Swap between Multitap/Multipress method and T9 text input |
To enter text, press the key with the required character repeatedly until it appears in the display. A long press will enter the figure corresponding to the key. If two characters are on the same key wait for the display at top of screen to clear or press ⏻ before pressing the same key again.
Correct mistakes by a short press on Clear ●. A long press on this key will delete all the text.
Use ⏻ or Ⓑ to locate the cursor in the text to insert characters or make corrections. A long press on # gives access to 23 special characters spread over one page. Display and selection of the characters is as follows:
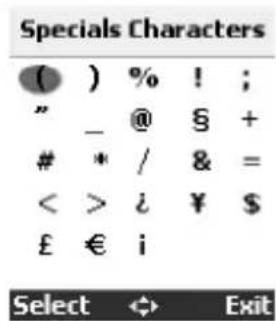
To select and insert a character into the text:
1 Move the cursor using the four directions keys and the two side ones and select the wanted character.

Press Select
Example
To enter Card in the display,
- Press 🏠 and select Messages.
- Select Write new.
- Press and hold Ⓞ until 📋 is displayed. Press ② briefly three times, C will appear in the display.
- Wait for the available characters to go from the display, press and hold * until 📋 is displayed. Press ② briefly once, a will appear.
- Press ⑦ briefly three times, r will appear.
- Press ③ briefly once, d will appear. The word Card will now be in the display.
- Press 📞 to exit from this example and return to the standby display.
Messages (SMS)
Reading a received SMS message while in standby display
Press Read ⬆ to read the new received messages (inbox).
Reading stored SMS messages
1 Press ☑. Select Messages.
② Select Inbox to display the first message header.
3 Press 📋 or select Options ⚙ / Read text to read the message text.
Managing received and stored SMS messages
After reading the SMS message, press Options ⚙ for the following menu:
| Item Function | |
| Read text Displays the remainder of the text. | |
| Delete Deletes the message. | |
| Reply Replies to the sender of the message. | |
| Reply (+text) | Replies to the sender of the message with the initial text. |
| Forward Forwards the message to another user. | |
| Forward to n | Forwards the current message to different addressees (5 maximum). |
| Numbers | Stores or calls the number(s) contained in the SMS header or text (between quotation marks). |
Sending a new SMS message to one addressee
1 Press ☑. Select Messages.
② Select Write new.
3 You can either choose a draft text or enter the message text and press OK
A press on ⏻ will swap between T9 (predictive) text entry and the Multitap (traditional) method.
4 Select Send.
5 Choose a message template and then enter the destination number or select Names ● to choose a number from a phone-book entry. Press ⬆ to validate your choice. Press OK ●. Sent confirmation will be given.
6 Select whether to store or send another message.
7 Press Exit or to return to the standby display.
Phonebook
Storing names and telephone numbers
There are several ways to store numbers in the various phonebooks:
- Directly from the standby display,
① Enter the number. Press Store
- Using the menu,
1 Press ▶. Select Phone Book. Select Add name.
② Select Phone names or SIM names.
For each data item, select Edit and enter the requested value. Confirm each entry by pressing OK. Repeat the operation for all the data to be created or modified.
4 Press End ●. Stored is displayed. Select Yes to store the new data and press Select ●
5 Press Exit ● or 📋 to return to the standby display.
• From other stored locations,
Numbers stored in the last dialled, received, unanswered, diary and SMS message locations can all be stored in the phonebook:
1 Display a number from one of the above, press Options Select Store.
② Follow the display instructions as for point 2 in the previous items.
During number and name entry a short press on Clear will clear the last character. A long press will clear the whole display.
Managing card and phonebook numbers
After selecting Phonebook press Options ⚙ for the following menu:
| Item Function | |
| Read To access | all the cards (SIM or Phone). |
| Add name To create a new entry. | |
| Voice dialling To assign a voice pattern to a phone number. | |
| Statistics To access storage status. | |
| Groups To manage all phone groups. | |
| My card To read | the personal card. |
| Own numbers To read the mobile station ISDN number (international number of the mobile subscriber). | |
| Fixed dialling To access the fixed dialling numbers. | |
Phonebook card options
After selecting a number from the phonebook press Options ⚙ for the following menu:
| Item Function | |
| View To modify the card content. | |
| Delete To delete the current card. | |
| Copy | To copy the current card to SIM FDN, SIM ADN, and phone. |
| Move | To move the current card to SIM FDN, SIM ADN, and phone. |
| Group selection | To show the FN display by filtering out only the cards in one group. |
| Send by IrDA To send the card content via an external port. | |
Dialling from memory
Any number stored in the SIM, or the phone memory, which can be recalled to the display can be dialled...
...from the phonebook
1 Press to enter the phonebook list.
② Use ⏻ or ⏱ to scroll to the number required; or
Press ②(ABC) for quick access to names beginning with letters
A, B or C;
Press ③(DEF) for quick access to names beginning with letters
D, E or F; etc. and then use ⏻ or ⏽ to scroll to the number required.
3 Press
...from the calls log memory list
The last 10 numbers dialled, the last 10 unanswered call numbers (if avail-
able) and the last 10 received answered numbers (if available) are stored by the phone in the calls log memory location menu:
1 Press ☑. Select Calls & Times.
② Select Calls log.
3 Select Last dial, Unanswered or Received.
4 Use △ or ▽ to scroll to the number required.
5 Press to dial the number.
Voice dialling
Phone numbers can also be recalled with your voice. Please refer to Getting More out of your Eclipse to learn how to create a voice pattern and link it to a stored phone number.
To assign a voice pattern to a phone number,
1 Press ⬆. Select Phonebook.
② Select Voice dialling.
Select New entry. The phonebook is displayed, select a card.
3 Select a Home, Work or Cellular number. A voice dialling screen is displayed.
4 After the beep, say the name or another voice pattern to be associated with the selected phone number.
5 A second and a third screen (optional, not present if a second screen is enough) are displayed successively to enter the voice dialling pattern again.
6 Should the voice patterns match, Stored will appear in the display.
7 Press Exit ⚙ to return to the voice dialling menu or ⏻ to return to the standby display.
A voice pattern cannot be created on card creation.
To call a phone number using a voice pattern,
1 Press and hold
② You will then be asked to say the name. Pronounce the name as clearly as possible.
When answered proceed with the call in the normal way.
Last dialled numbers
Quick access to the last 10 dialled numbers can also be obtained by pressing 🤨
In the standby mode pressing will display a list of the last dialled numbers.
2 Use ⏱ or Ⓗ to scroll to the number required.
3 Press to dial the number.
√ Last dialled numbers are stored in the phone, not in the SIM.
Phonebook numbers can be assigned to keys ② - ⑨ which when held down will dial those numbers.
To assign phonebook numbers to the speed dialling keys,
1 Press ☑. Select Settings.
② Select Phone settings. Select Keys.
3 Select Speed Dial.
4 Use ⏻ or ⏱ to scroll to the next key.
5 Select Names ⚙ to choose the phonebook entry and press ⏻ to validate your choice.
6 Press Exit ● or ⚙ to return to the standby display.
To dial a number assigned to a speed dialling key,
Press and hold down the key (1 - 9). The number will be recalled to the display and be dialled in the normal way.
By default, is always allocated to the voice mail number.
Silent and vibrate alert modes
To avoid disturbing others you can silence the incoming ringing and alert tones.
Turning on
1 Press 🎨. Select Settings.
② Select Tones. Select Alert tones.
3 Select Silent, Vibrate or Vibrate then ring.
✗ is shown in the display when the Silent alert mode feature is turned on.
C. is shown in the display when the Vibrate, Vibrate & ring or Vibrate then ring features are turned on.
Turning off
1 Press ☑. Select Settings.
② Select Tones. Select Alert tones.
3 Select Ring or Vibrate & ring.
If the ring tone volume is set to 0 a warning message will appear in the display.
Hands free mode
You can use the phone handsfree feature when you are attending a meeting (when you wish to share the conversation with the audience) or you are in your car.
Turning the handsfree feature on
During conversation,
Press Speak.on ● to turn the handsfree feature on during the calling process.
When receiving a call,
Press Speak.on 🔒 to accept the incoming call.
Turning the handsfree feature off
Press Speak.off
√ The headset, when connected, disables the built-in hands-free function. If the headset is connected during a call in hands-free operation, the hands-free mode is automatically disabled and remains disabled when the headset is unplugged.
Muting
During a call the microphone can be muted (turned off) to allow you to confer privately with people nearby without being heard by the other party.
Turning the microphone off
1 Press Options
② Select Mute. A warning message will appear soon after in the display. Will appear on top of the display.
Turning the microphone on
1 Press Options
② Select Unmute. A warning message will appear soon after in the display. <Will disappear.
√ The microphone is automatically restored on receiving a new call.
Volume adjustment
To adjust the audio level received during conversation:
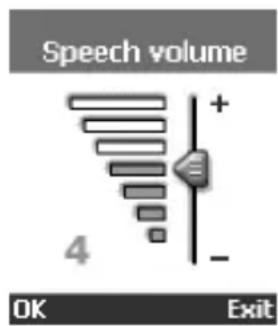
1 Use ⏻ or ⏻ to increase or decrease the volume through up to seven levels as shown on the display. Select OK ⏻ or wait for 2 seconds to confirm your choice.
2 Press Exit
To put a call on hold during conversation:
Press
To retrieve a call:
Press
To make a second call when one call is on hold:
① Enter a number in the display. Press to dial the number.
② After the second call has been established press to swap between the two calls.
To end either the current call or the held call select End active or End held in the Options menu. The remaining call is automatically retrieved.
4 Press to end all remaining calls.
The alternative way to hold, retrieve and make a second call during conversation is to use the Options feature to display a menu of the actions described above. Scroll to the required option and press Select or (see also Multi-party or conference calls, page 30).
Call waiting, swapping and multi-party conference calls
GSM Services
Select GSM Services on the Settings menu for the following menu:
| Option Description | |
| Call diverting To redirect an incoming call to another number. | |
| Call waiting To receive while engaged in a conversation. | |
| Sending my ID To send my identification to other parties. | |
| Receiving caller ID To receive identification from incoming calls. | |
| Network | To select networks in automatic or manual mode. |
| Call barring To bar outgoing or incoming calls. | |
| Mode of operation | To select the mobile phone mode (modem or standard mode). |
Call waiting
Call waiting is a network feature that allows you to receive a second incoming call when already engaged on a call. This means that you can put an existing call 'on hold' whilst you answer or make a second call.
To turn on or off the call waiting service:
1 Press ⬆. Select Settings. Select GSM Services.
2 Select Call waiting.
3 Select Activate or Cancel. After some time (your request is sent to the network) the display will confirm your request.
4 Press Exit ● or ⚙ to return to the standby display.
Action when receiving a second call
When a second incoming call is received you will hear a 'double beep'; an animated phone icon will be displayed as well as the phone number if available. Either press to answer the call and put the first call on hold or press Reject to reject the call and return a busy signal to the caller. Press to swap between the two connected calls.
During a two-call communication, select Options ⚙ for the following menu:
| Option Description | |
| Speaker on/off | Lets you to activate or desactivate the hands free ("off" if the hands free is active). |
| Auto DTMF | Allows a DTMF string to be entered in the active call only. |
| Swap Swaps | between active and call on hold. |
| Join | Joins active and call on hold to make a multi-party or conference call. |
| Mute/Unmute | Turns the microphone on or off. |
| End held Ends | the call on hold. |
| End active | Ends the active call and connects with the call on hold. |
| End all Ends | all calls. |
Multi-party or conference calls
This feature gives you the ability to make or receive from 2 to 5 calls at the same time with all parties being able to hear and talk with each other.
1 Make and establish a call in the normal way and press
② Enter another number in the display and press ⚙. The first call will be put on hold whilst the second call becomes active.
3 Press Options ● and select Join to active the multi-party or conference call.
4 Press Options ● for the following menu:
| Option Description | |
| Auto DTMF | Allows a DTMF string to be entered in the active call only. |
| Private with | Allows you to hold a private conversation with one of the conference participants |
| Hold | Retrieve | Holds or retrieves the conference call. |
| Speaker on/off | Allows you to activate or deactivate the hands free ("off" if the hands free is active). |
| Mute/Unmute | Turns the microphone on or off. |
| End_X | Allows to end a call with one of the participants. |
| End all Ends | all the calls. |
* These items in the Options menu will appear if more than 2 calls are brought into the conference call.
Throughout the conference call the display will confirm and show the actions you have selected from the options menu.
For alternate line service (ALS) subscribers conference calls cannot be made between Line 1 and Line 2.
Diverting incoming calls (network service)
Call diverting is a service which diverts incoming calls, whether voice, fax or data, to another number.
To turn on call diverting:
1 Press 🎯. Select Settings.
② Select GSM Services. Select Call diverting.
3 Use △ or ◎ to select the divert condition and validate by pressing Select or .
4 Select Activate.
5 Use 🔒 or 🔒 to choose between Voice Mail, Names or Number.
6 Press Select ● or Ⓧ to validate your selection. The display will confirm your request.
7 Press Exit or to return to the standby display.
To cancel all (multiple) diverts:
1 Press ☑. Select Settings.
② Select GSM Services. Select Call diverting.
3 Select Cancel all.
Confirmation will be displayed.
4 Press Exit ● or ⚙ to return to the standby display.
Language selection
To select the language of your choice:
1 Press ⬆. Select Settings.
② Select Phone settings. Select Language.
3 Use △ or ◇ to select a language from the displayed list. Press to validate.
4 Press Exit or to return to the standby display.
Softkeys - programming the softkeys
To program the softkeys:
1 Press ☑. Select Settings.
2 Select Phone settings. Select Keys.
3 Select Softkeys functions.
4 Select Left softkey or Right softkey.
5 Press Select on the softkey option of your choice.
6 Press Exit ● or ⚙ to return to the standby display.
Melodies download
Melodies are stored on a Web/WAP ^™ server, for mobile phones. In this server, melodies are available for phones other than Trium, as well as for Trium phones. This storage is Digiplug responsibility. You can access this site via Internet or WAP ^™ . All chosen melodies are compressed and downloaded via SMS, using one message. Once the melody is completely received, it is decompressed. For each received melody, a screen gives you reception information. He can then install, play, or discard the melody.
The Eclipse mobile allows polyphonic sounds.
Play a downloaded melody
① On receipt of a melody, press Options Select Play.
A certain amount of information is displayed on the screen, while playing.
2 Press either OK or Stop to stop playing.
Install a downloaded melody
On receipt of a melody, press Options ●. Then, select Install. If any space is left, the melody is automatically stored in the imported melodies directory.
If there is not enough space left, you are asked to choose which melody to replace, among the set of modifiable melodies on the mobile.
2 Press Exit ● to return to the standby display.
Once stored, a message is displayed. The melody can be played immediately and selected via the tones settings menu. Memory space is reserved for such downloads.
Games
The availability and appearance of the games described hereafter are dependent upon the services provided by your network operator.
There are two games in the phone, Rayman Bowling and Rayman Garden.
The Options item in the menu enables you to set the sound to on or off.
To select a game,
1 Press ☑. Select Games.
2 Choose the game you wish to play and press Select or ▶.
3 Select Instructions on how to play the game and the controls to be used.
4 Select Level to play the game at your skill level.
5 Select Play to start the game.
If a call is received whilst a game is being played the normal received call display will be shown and the call is answered in the normal way. When the call is finished the game will be resumed.
To exit the games menu, press Exit ⬤ or press ⬦ to return to the standby display.
Voice Memo
The Eclipse mobile lets you to record one or several memos of up to 120 seconds total. Each memo is a part of this stock of time, and may be of any duration, provided the global limit cannot exceed this limit of 120 seconds.
To record a voice memo or a phone conversation,
1 Press and hold
② A beep will sound and the display will show the recording time left. The recording will then start.
A second beep will sound if the end of the recording time has been reached.
3 Press Stop 🔒 or 📋 to end the recording.
√ If the memory is nearly full when starting a new recording you are asked to erase the previously recorded voice memo.
Select Yes to do so and proceed as for point 2 in the previous item.
Select No if you do not wish to delete the previously recorded memo.
When dealing with a phone conversation you can only record one person at a time.
To listen to the voice memo,
1 Press Ⓤ to play what has been recorded. The display will show the remaining recorded time.
A beep will sound at the end of the memo.
2 Press Stop or to return to the standby display.
√ You can stop the memo playback at any time by pressing Stop.
To erase a memo,
1 Press Erase during memo playback or recording.
② Select Yes to confirm your choice. Confirmation will be displayed.
3 Press Exit ● to return to the standby display.
WAP™
Either your phone is pre-programmed with the settings or you must enter them. See below to enter the settings. If you cannot access the settings, they are pre-programmed.
Storing/editing the connection settings
(obtainable from your network operator or any WAP ^™ portal)
To create a new profile (up to 10 profiles can be stored):
1 Press ☑. Select Internet.
2 Select Profile list. Choose an empty profile ( [...] ) and select New
3 Edit a profile name then press OK to validate. Stored will appear. After a while, the menu associated with the new profile name is displayed.
4 Select Gateway settings, and edit an IP address (mandatory)
for the WAP ^™ gateway then press OK to validate.
5 Select Home page and edit a URL address, then press OK to validate.
6 Select Activate security (Never, Automatic or Always requested for secure transactions such as mobile banking), then press Select to validate.
7 Select a Normal port corresponding to the connection or Secure port for a secure connection, then press OK to validate.
8 Select Send Characteristics to send or not the UA profile, to the remote server and press Select ● to validate. Press End ●. Select Yes. Stored will appear.
9 Select Circuit access, and edit a Phone number to dial up the WAP™, a Login name, used for identification (29 char. max.), a Login password used for access control (19 char. max.; each character will turn into a star (*) after a short while), a Speed (9600 or 14400 bps), a Mode for transmission (digital or analog) to the remote modem, an Auto-disconnect duration (0 to 60 minutes) for automatic disconnect after a defined time with no activity on the WAP™ connection. Validate each entry by pressing OK or Select. Press End. Select Yes. Stored will appear.
10 Select Packets access*, and edit an Access point name from the GPRS network (the name is picked from a list managed in the mobile) and an Auto-disconnect duration.
Press OK ☐, every time, to validate. Press End ☐. Select Yes. Stored will appear.
11 Select Connection mode and select the mode of connection: Circuit, Packet* or Circuit+packet. Press Select ⚙ to validate. Press End ⚙. Select Yes. Stored will appear.
12 Select Push parameters and edit a Push Proxy SMS centre, a Push Proxy SMS address or Push Proxy IP address by selecting from a predefined list (except IP address): press Names ● and select an entry from the list and press OK ● to validate.
13 Press End ●. Stored will appear. Select Yes to store the new data and press Select ●. The new profile appears in the profile list.
A WAP ^™ profile has to be selected for the preferred WAP ^™ access.
To select a WAP ^TM profile:
1 Press ⬇. Select Internet.
2 Select Profile list. Select the preferred profile and press Options
3 Select Select.
√ Up to 20 bookmarks can be stored for frequent access.
Going online
To gain access to the online services offered by your network operator:
1 Press ☑. Select Internet.
② Select Home page.
3 Connecting to followed by your proxy name will be displayed whilst access is taking place.
Once connected you will be presented with your internet provider's or operator's choice of menu options. The icon at the top of the display indicates a 'live' connection; the icon indicates a WAP™ connection with GPRS (operator dependent).
To end the internet connection:
Press
More detailed information on the mobile usage are available on Getting more out of your Eclipse.
GSM man machine interface codes
The phone supports the standard GSM key sequences using the * and # characters sent directly from the keypad to the network. These sequences are used to activate all the supplementary services provided by the network.
Consult your service provider for a complete list.
The menu (MMI) system
Use the round cursor key to access the menu system. Your menu options can vary. Some may not appear. This depends on your network operator and your subscription.
Access to the menus
Press ⬇ to view all stored telephone numbers.
Press to enter the main menu.
Hold down Exit ⬆ or ⏻, to exit the menus (if no call is in progress).
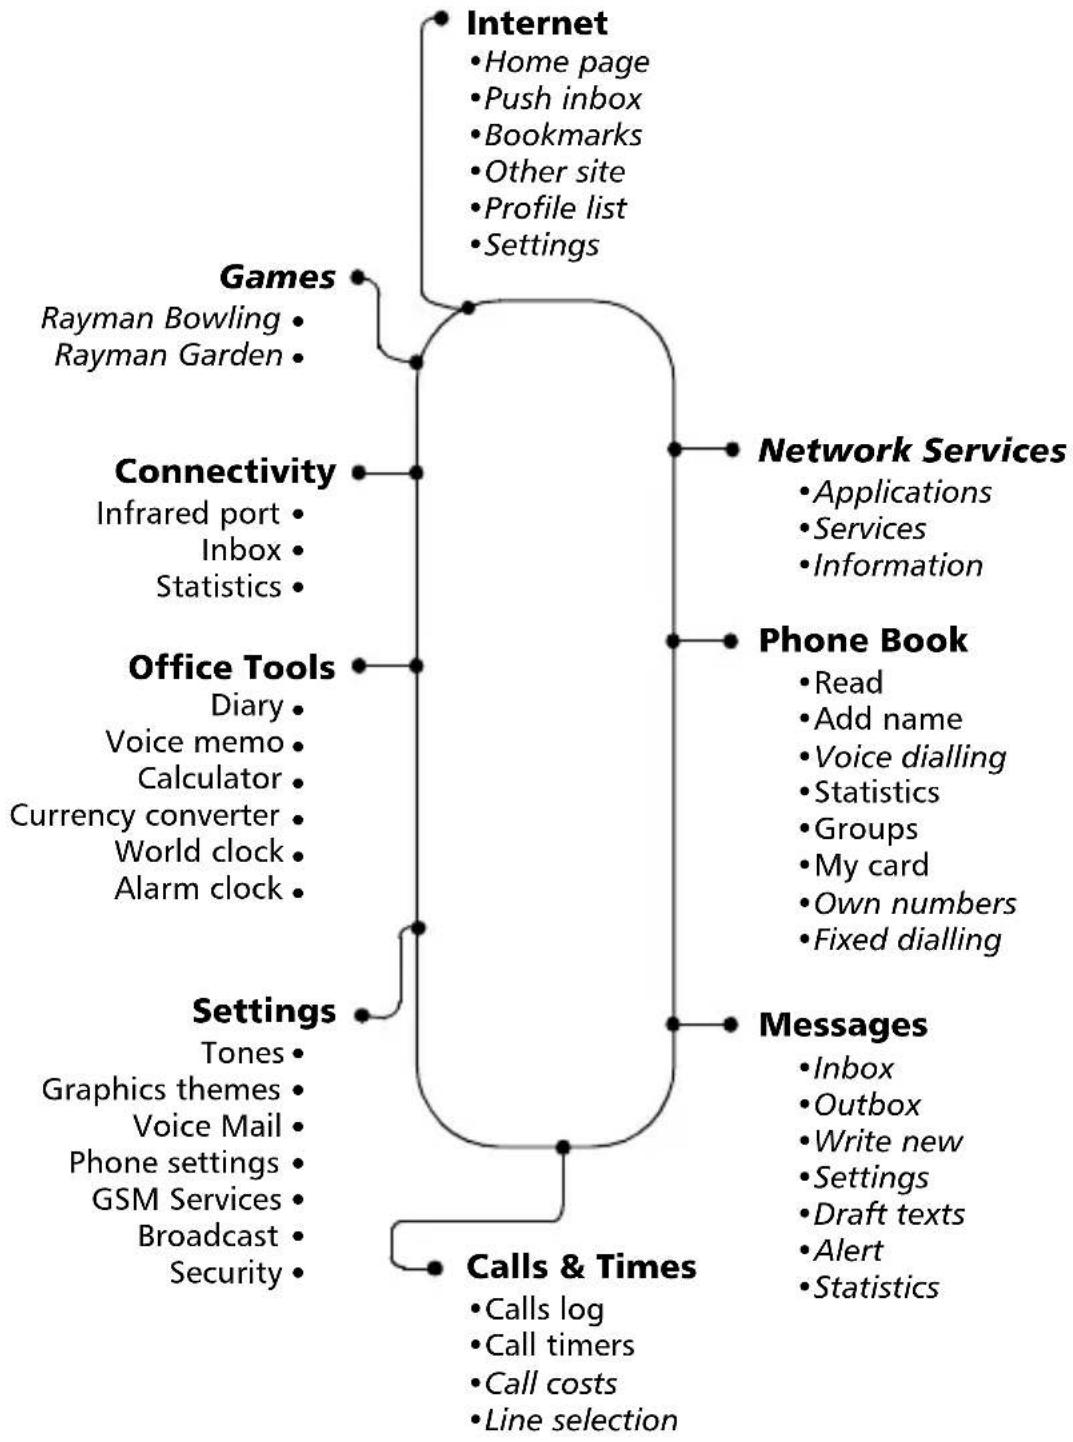
Menu map
Items in italics depend on your subscription and your network operator.
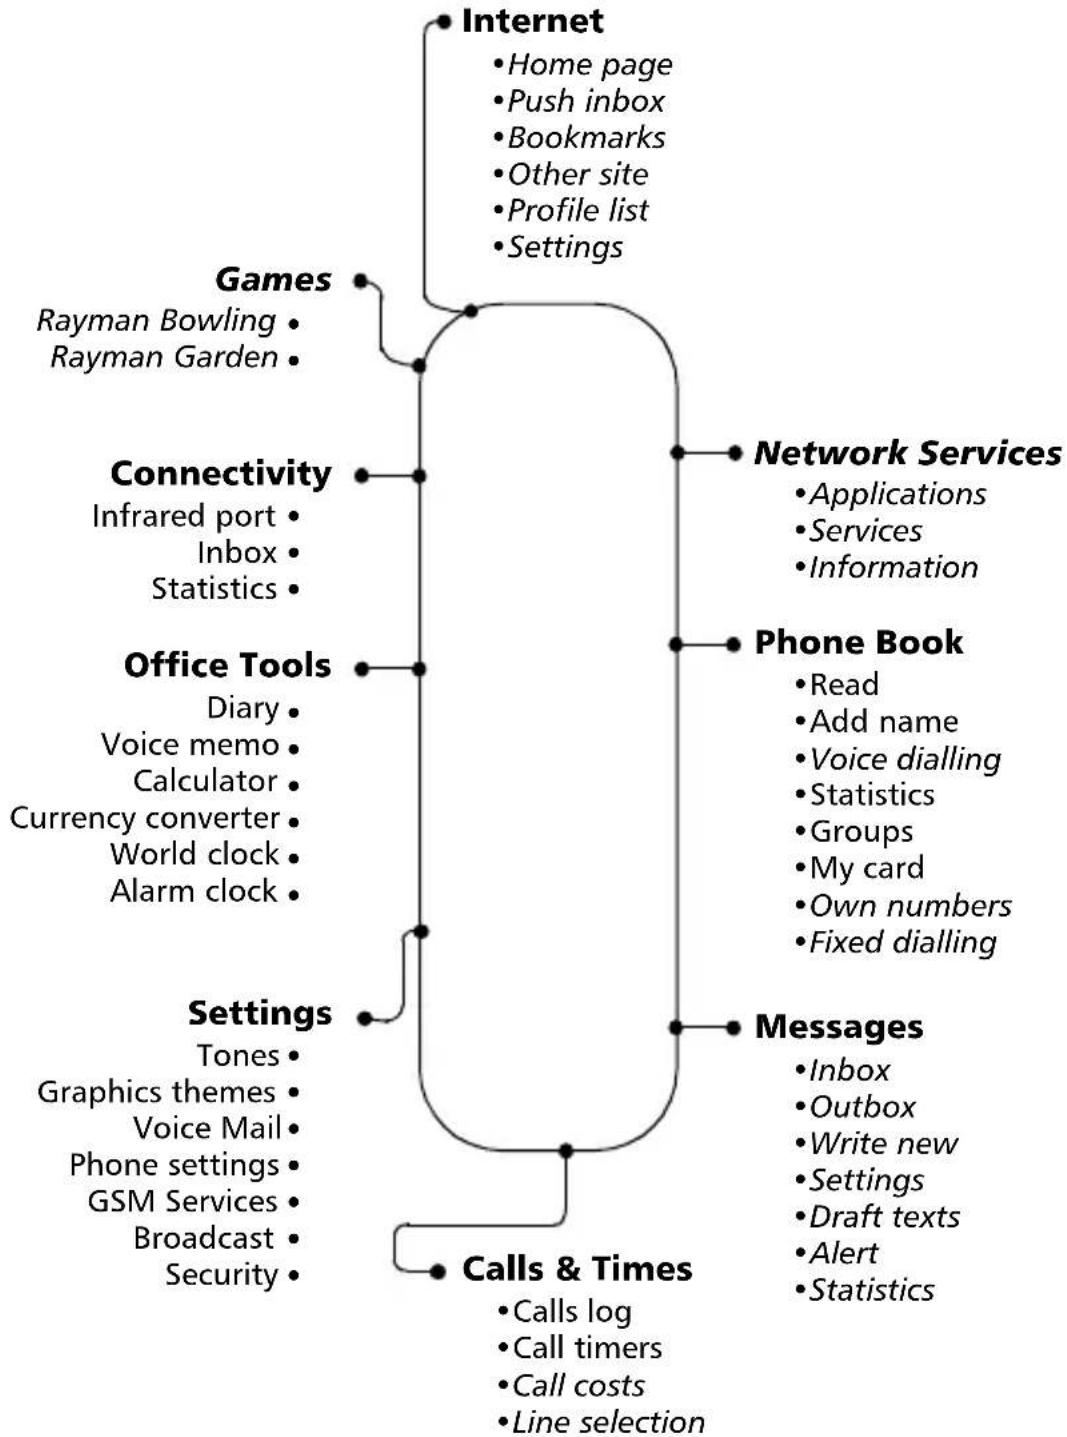
flowchart
graph TD
    A["Internet"] --> B["Home page"]
    A --> C["Push inbox"]
    A --> D["Bookmarks"]
    A --> E["Other site"]
    A --> F["Profile list"]
    A --> G["Settings"]
    H["Games"] --> I["Rayman Bowling"]
    H --> J["Rayman Garden"]
    K["Connectivity"] --> L["Infrared port"]
    K --> M["Inbox"]
    K --> N["Statistics"]
    O["Office Tools"] --> P["Diary"]
    O --> Q["Voice memo"]
    O --> R["Calculator"]
    O --> S["Currency converter"]
    O --> T["World clock"]
    O --> U["Alarm clock"]
    V["Settings"] --> W["Tones"]
    V --> X["Graphics themes"]
    V --> Y["Voice Mail"]
    V --> Z["Phone settings"]
    V --> AA["GSM Services"]
    V --> AB["Broadcast"]
    V --> AC["Security"]
    AD["Network Services"] --> AE["Applications"]
    AD --> AF["Services"]
    AD --> AG["Information"]
    AH["Phone Book"] --> AI["Read"]
    AH --> AJ["Add name"]
    AH --> AK["Voice dialling"]
    AH --> AL["Statistics"]
    AH --> AM["Groups"]
    AH --> AN["My card"]
    AH --> AO["Own numbers"]
    AH --> AP["Fixed dialling"]
    AQ["Messages"] --> AR["Inbox"]
    AQ --> AS["Outbox"]
    AQ --> AT["Write new"]
    AQ --> AU["Settings"]
    AQ --> AV["Draft texts"]
    AQ --> AW["Alert"]
    AQ --> AX["Statistics"]
    AY["Calls & Times"] --> AZ["Calls log"]
    AY --> BA["Call timers"]
    AY --> BB["Call costs"]
    AY --> BC }).-> AD
Using the headset
Connecting the headset
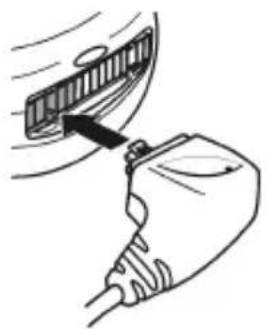
Insert the headset plug in the phone headset connector as shown below.
natural_image
Illustration of a hand holding an electric shaver with a cable, no text or symbols presentWhile inserting the headset plug in the phone headset connector make sure the Trium logo ( ) appears on top. Otherwise the headset will not work properly.
Using the headset
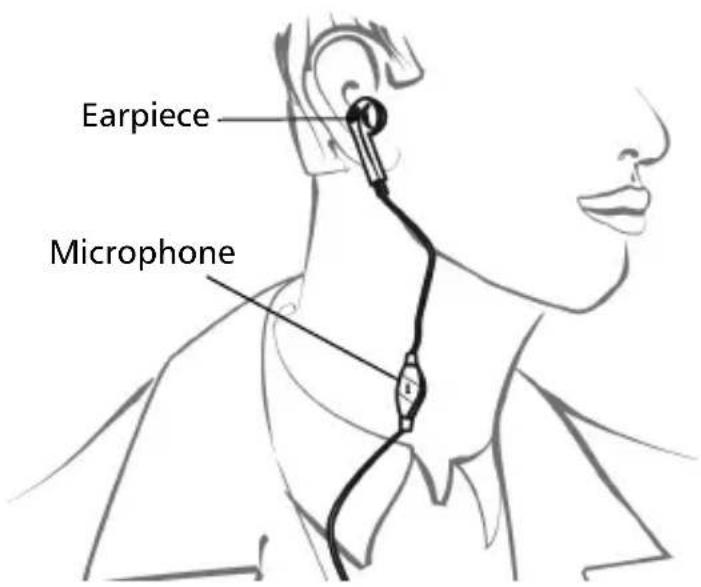
Place the headset earpiece in your ear.
The headset microphone is then at convenient level of operation.
You can answer, reject and end calls using or (see page 9).
Adjust the earpiece volume level using Ⓓ and . ⏰
Disconnecting the headset
Tilt the headset plug as shown below.
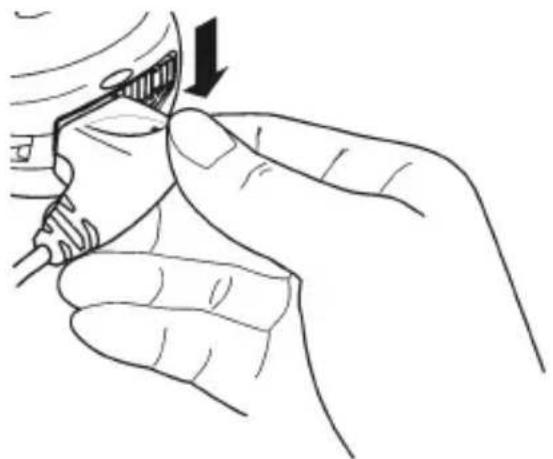
natural_image
Line drawing of a hand holding a connector with a black arrow indicating the process (no text or symbols present)Index
A
Alert tones 27
Auto-disconnect ..... 35
B
Basic operations ..... 14
Calling 17
Making a call ..... 17
Push 19
Receiving a call ... 17
SMS 19
Unanswered call . 19
Voice mail 19
Battery 13
Charging 15
Fitting 14
Low battery
warning 15
C
Call
Conference ...... 30
Holding 29
Multi-party ..... 30
Retrieving ...... 29
Waiting 29
Call barring
Password ...... 12
Calling 9,17
Voice dialling ..... 26
Calls & Times
Calls log 26
Card
Managing 25
Care and
maintenance ...... 11
Circuit access 35
Conference call ...... 30
Connection mode .... 35
D
Date setting 18
Dialling
Calls Log memory ...... 25
Phonebook ...... 25
Dialling from
memory 25
Display 8
Diverting 31
E
Emergency calls ..... 13
Ending a call ..... 10, 17
Entering text ...... 20
G
Games 33
Gateway settings ..... 34
General Safety 4
Getting started 8
GPRS 7,8,35
Graphic display icons .. 6
Graphics themes ..... 20
GSM man machine interface codes ..... 36
GSM Services ...... 29
Call diverting ..... 31
H
Headset Use 38
Holding a call 29
Home page 35
I
Icons 6
Incoming Calls Diverting .... 31
Internet 9
Auto-disconnect .. 35
Circuit access ..... 35
Connection mode 35
Gateway settings 34
Going online ..... 36
Home page ... 35, 36
IP address 34
Login name ...... 35
Login password ... 35
Mode 35
Normal port ..... 35
Packets access ..... 35
Phone number .... 35
Profile list ..... 34, 35
Push parameters . 35
Send Characteristics .. 35
Speed 35
IP address 34
K
Keypad lock 9
L
Language selection .. 32
Last dialled numbers 26
Login name 35
Login password ..... 35
M
Making a call ..... 9, 17
Managing SMS messages 23
Melodies download .. 32
Menu 37
Menu map 37
Messages . 9, 19, 20, 23
Inbox 19,23
Write new 24
Mode 35
Multi-party call ...... 30
Multipress text entry 21
Multitap text entry ... 21
Muting 28
N
Normal port 35
0
Office Tools World clock .. 18, 19
Online connection .... 36
P
Packets access ...... 35
Phone Book Store 24
Phone lock Code 12
Phone number 35
Phonebook ..... 24 Voice dialling ..... 26
Phonebook card options 25
Phonebook numbers Managing ...... 25
PIN/PIN2 codes ...... 12
Programmable Softkeys .... 32 Speed dialling .... 27
PUK/PUK2 Codes ..... 12
Push parameters ..... 35
R
Rayman Bowling ..... 33
Rayman Garden ..... 33
Reading an SMS message ...... 19, 23
Receiving a call ... 10, 17
Responsibility ...... 11
Retrieving a call ...... 29
Ring 27
S
Safety information ..... 4
Battery 13
Care and maintenance ... 11
Disposing of waste packaging ..... 13
Emergency calls . 13
Security codes .... 12
Vehicle safety ..... 11
Your responsibility ... 11
Second call 30
Security Codes ...... 12
Send Characteristics. 35
Sending an SMS message 24
Settings GSM Services 29, 31
Keys 27,32
Language 32
Phone settings ..... 27, 32
Tones 27
Silent 27
Silent alert mode ..... 27
SIM Card 8, 14
SMS ...... 9, 19, 20, 23
SMS messages Managing ...... 23
Reading ..... 19, 23
Sending 24
Softkey programming ...... 32
Speed 35
Speed dialling ..... 27
Standby display 8
Storing names and numbers 24
T
T9 text entry 21
Tegic (T9) 21
Text entry Multipress mode . 21
Multitap mode .... 21
T9 mode 21
Time & date 18
Time setting 18
Turning Off .... 10
On 8
V
Vehicle safety 11
Vibrate 27
Vibrate & ring 27
Vibrate alert modes .. 27
Vibrate then ring ..... 27
Voice dialling ..... 26 Calling ..... 26
Voice mail Password ...... 12
Volume adjustment .. 28
W
WAP ^TM 34
Waste packaging Disposing .... 13
Trium®
by MITSUBISHI ELECTRIC
flowchart
graph TD
    A["Internet"] --> B["Home page"]
    A --> C["Push inbox"]
    A --> D["Bookmarks"]
    A --> E["Other site"]
    A --> F["Profile list"]
    A --> G["Settings"]
    H["Games"] --> I["Rayman Bowling"]
    H --> J["Rayman Garden"]
    K["Connectivity"] --> L["Infrared port"]
    K --> M["Inbox"]
    K --> N["Statistics"]
    O["Office Tools"] --> P["Diary"]
    O --> Q["Voice memo"]
    O --> R["Calculator"]
    O --> S["Currency converter"]
    O --> T["World clock"]
    O --> U["Alarm clock"]
    V["Settings"] --> W["Tones"]
    V --> X["Graphics themes"]
    V --> Y["Voice Mail"]
    V --> Z["Phone settings"]
    V --> AA["GSM Services"]
    V --> AB["Broadcast"]
    V --> AC["Security"]
    AD["Network Services"] --> AE["Applications"]
    AD --> AF["Services"]
    AD --> AG["Information"]
    AH["Phone Book"] --> AI["Read"]
    AH --> AJ["Add name"]
    AH --> AK["Voice dialling"]
    AH --> AL["Statistics"]
    AH --> AM["Groups"]
    AH --> AN["My card"]
    AH --> AO["Own numbers"]
    AH --> AP["Fixed dialling"]
    AQ["Messages"] --> AR["Inbox"]
    AQ --> AS["Outbox"]
    AQ --> AT["Write new"]
    AQ --> AU["Settings"]
    AQ --> AV["Draft texts"]
    AQ --> AW["Alert"]
    AQ --> AX["Statistics"]
    AY["Calls & Times"] --> AZ["Calls log"]
    AY --> BA["Call timers"]
    AY --> BB["Call costs"]
    AY --> BC }).-> AD
Note: Items in italics depend on your subscription and your network operator.
Table of contents
1. Network Services...... 4
SIM application tool kit 4
SDN numbers stored in the SIM 4
Information numbers 4
2. Phone Book...... 5
Storing names and telephone numbers 5
Free space in the phonebooks .. 8
Viewing and calling numbers in the phonebook 8
Creating a group of cards ...... 9
My Card data set 9
Own number display 10
Fixed dialling numbers (FDN) 10
Calling phone numbers with your voice 11
3. Messages ...... 13
Reading a received SMS message (in the standby display) 13
Reading stored SMS messages 13
Managing received and stored SMS messages ...... 13
Turning on or off the message alert tone 14
Preparing the phone to send SMS messages 14
Creating a draft text 14
Editing a draft text 15
Sending a new SMS message to one addressee ... 15
Sending a new SMS message to several addressees 15
Storing a new SMS message ... 15
Messages in the outbox 16
Status request on outbox messages 16
Re-usable message templates 17
Storage consumption 17
4. Calls & Times...... 18
Calls log 18
Call times 18
5. Settings 23
Tones 23
Graphics themes 25
Voice mail 25
Phone settings 26
GSM Services 30
Broadcast - cell broadcast (CB) messages ..... 35
Security features 37
6. Office Tools ...... 41
Diary 41
Voice memo 46
Calculator 47
Currency-converter 48
World clock 48
Alarm clock 49
7. Connectivity...... 51
Infrared port 51
Inbox 52
Free space in the memory ..... 52
8. Games...... 53
9. Internet/Wireless Application Protocol (WAP™) 54
Creating and editing GPRS access point names for WAP™ connections .... 54
Storing/editing the connection settings (obtainable from your network operator) 55
Selecting a preferred bearer .... 56
Personalising your connection settings 56
10. Appendix 62
Glossary 62
Trouble shooting 63
Error messages 64
Guarantee 67
Network Services

Your network operator may provide value added services and contact phone numbers. These services and phone numbers will be stored in your SIM and if available will modify the menu of the phone to be included under the item Network serv. at the beginning of the menu (contact your service provider for details).
There will be three possible ways in which an operator may present these value added services and contact phone numbers:
SIM application tool kit
An automatic way to provide services related to your network and not to your phone. These services will be SIM dependent.
SDN numbers stored in the SIM
Up to 32 numbers may be stored in the SIM which cannot be changed by you.
Information numbers
A list or a menu to enable you to call network or information services offered by your network.
Some operators will be able to provide two of the above services on the same SIM in which case the Network serv. item in the main menu will provide two menu items, Applications and Services or Information.
Phone Book

The phone and the SIM have areas of memory used for storing data (names, telephone numbers...) known as the phonebook.
The phone has the capacity to store up to 255 "extended" cards (called "phone phonebook cards"). These cards may contain the following information: family name, first name, company name, job title, icon, home phone number, work phone number, cellular phone number, fax phone number, voice dialling, address, e-mail and groups.
The phone also supports SIM cards with up to 255 memories (called "SIM phone-book cards") but the actual number and capacity is dependent upon the SIM itself. These cards contain the following information: name, number and voice dialling for both too. The SIM phonebook cannot store "extended" cards.
The phone and SIM memory locations are interconnected.
Both the SIM and the phone memories are searched when the read function is used.
Storing names and telephone numbers
Names and numbers can be stored directly in the phonebook or copied from other stored areas such as from SMS messages, diary or last dialled number list, etc.
It is advisable to store numbers in international format using the '+' prefix before the country code followed by the telephone number. This will ensure that the number can be dialled from within your home country as well as abroad.
There are several ways to store numbers into the various phonebooks:
Phone phonebook
- Directly from the standby display,
① Enter the number. Press Store
② Select Phone names.
3 A list will be displayed. You have to select the item corresponding to the number you entered: Home, Work, Cellular or Fax.
- Using the menu,
1 Press ▶. Select Phone Book.
2 Select Add name.
3 Select Phone names.
4 The following fields will be displayed:
| Field Purpose | |
| Identity The identity of the card owner (obligatory) | |
| Numbers The phone numbers of the owner | |
| Address The address of the owner | |
| E-mail The e-mail address of the owner | |
| Group The groups assigned to the owner | |
5 Select the Identity field. The following fields will be displayed.
| Field Purpose | |
| Family name The family name of the card owner | |
| First name The given name of the card owner | |
| Company name The company name to which the card owner belongs | |
| Job title The job title associated with the card owner | |
| Icon The icon reference displayed when the owner card is displayed, when the owner receives a call or when the owner makes a call | |
⑥ Enter the requested data. Confirm each entry by pressing OK.
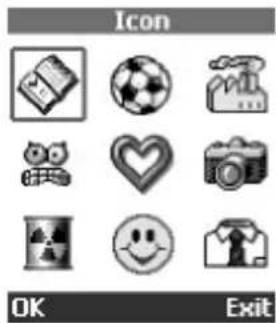
7 Select an icon among 9 predefined icons, using the direction keys and confirm by pressing OK ⚙, or directly press the key (✝) corresponding to the required icon.
In this example pressing would select . 😊
8 Press OK to validate.
9 Select the Numbers field. The following fields will be displayed:
| Field Purpose | |
| Home | The home phone number of the owner |
| Work The work phone number of the owner | |
| Cellular The cellular phone number of the owner | |
| Fax The fax phone number of the owner | |
10 Enter the requested data. Confirm each entry by pressing OK
11 Press OK to validate.
12 Select the Address field. The following fields will be displayed:
| Field Purpose | |
| Nr, Street | The street name |
| P-O box The Post Office box number | |
| Zip code The postal code | |
| Locality The locality name | |
| State The state or department name | |
| Country The country name | |
13 Enter the requested data. Confirm each entry by pressing OK
14 Press OK to validate.
15 Select the E-mail field.
16 Enter the e-mail address. Confirm the entry by OK
17 Select the Groups field (see "Creating a group of cards", p. 9).
18 Use ▽ or △ to scroll through the groups list.
19 Press Select ⚙ to associate the highlighted group to the card.
20 Press End Ⓞ, then select Yes to store the card with all its information in the phonebook. Stored will be briefly displayed.
21 When modifying the card, you should create a voice dialling pattern (for further details, see section Calling phone numbers with your voice, page 11):
Select the Voice dialling field, then the requested phone number attached to the card (Home, Work or Cellular).
Press New ● to start the voice dialling pattern recording.
You will then be asked to say the name at least twice. Pronounce the name as clearly as possible.
Should the voice patterns match Stored will appear in the display.
22 Press Exit or to return to the standby display.
• From other stored locations,
Numbers stored in the last dialled, received, unanswered and SMS message locations can all be stored into the phonebook:
1 Display a number from one of the above, press Options
② Follow the display instructions as for point 2 in the previous item.
During number and name entry a short press on Clear will clear the last character. A long press will clear the whole display.
SIM phonebook
- Directly from the standby display,
1 Enter the number. Press Store
2 Select SIM names.
- Using the menu,
1 Press ▶. Select Phone Book.
2 Select Add name. Select SIM names.
3 Enter the name (if required) and press OK
④ Enter (or confirm) the number and press OK
5 Press End ♏, then select Yes to store the card with all its information in the phonebook. Stored will be briefly displayed.
6 When modifying a card, you should create a voice pattern (for further details, see section Calling phone numbers with your voice, page 11):
Select the Voice dialling field.
Press New ⚙ to start the voice dialling pattern recording.
You will then be asked to say the name at least twice. Pronounce the name as clearly as possible.
Should the voice patterns match Stored will appear in the display.

Press Exit 🔒 or Ⓤ to return to the standby display.
• From other stored locations,
Numbers stored in the last dialled, received, unanswered and SMS message locations can all be stored into the phonebook:

Display a number from one of the above, press Options

Follow the display instructions as for point 2 in the previous item.
During number and name entry a short press on Clear will clear the last character. A long press will clear the whole display.
The characters *, +, P (pause), # and _ can be stored together with numbers. If the SIM or phone's memory is full a warning message will be displayed when selecting the phonebook.
Free space in the phonebooks
To see how many empty phonebook spaces remain in the SIM or the phone,
1 Press ⬆. Select Phone Book.
② Select Statistics and use ⚠ or ⏱ to display the remaining memories in the phone or SIM.
3 Press Exit ● or 🔍 to return to the standby display.
√ If available the free memories in the FDN list will also be shown.
Viewing and calling numbers in the phonebook
Phonebook entries can be recalled into the display to be edited, deleted, copied, moved or called to or from either the phone or SIM. There are two ways to view and call numbers in the phonebook:
- Directly from the standby display,
1 Press to display the phonebook list, then scroll to the desired number.
2 Press 📞.
- Using the menu,
1 Press ▶ and select Phone Book.
② Select Read to display the phonebook list, then scroll to the desired number.
3 To access the required name: - either use ⏻ or Ⓗ to navigate line by line,
- or press and hold ⏻ or ⏱ to navigate quickly line by line,
- or press a numeric key to access the different letters associated to the key. For example, a first name beginning with "B" is selected when pressing twice.
The list of phonebook entries will be displayed in alphabetical order and stored either in the SIM or the phone memory.
4 Press to dial the number.
If several numbers are defined for this card, another screen allows selecting which number to call (Home, Work, Cellular, Fax).
Pressing Options ⚙ will display the following menu choices:
| Item Function | |
| View Modifies the card content (any field) | |
| Delete Deletes the current card | |
| Copy Copies the current card to the SIMs or the phonebook | |
| Move Moves the current card to the SIMs or the phonebook | |
| Group selection | Only displays the cards that belong to one group |
| Send by IrDA Sends the card content via an external port: IrDA port | |
5 Press Exit ● or 🔺 to return to the standby display.
Creating a group of cards
Groups of cards can be defined for the phonebook. This feature allows to display only the cards that belong to a selected group.
To create a group:,
1 Press ☑. Select Phone Book.
2 Select Groups. The groups list will be displayed.
3 Choose any blank template [...] and press New ●. The following items will be displayed:
| Item Function | |
| Group name | The group name |
| Melody A | melody chosen in the mobile set of melodies |
④ Enter or selected the requested data. Confirm the entry by pressing OK
5 Press End ●, then select Yes to confirm data storage. Stored will be briefly displayed.
6 Press Exit ● or ⚙ to return to the standby display.
Once created a selected group can be modified or deleted via Options ●.
My Card data set
My Card is a specific storage where you can enter your personal data.
My Card contains all fields as a usual phone card, except the Groups and Voice dialling fields.
To enter My Card data set,
1 Press ⬆. Select Phone Book.
2 Select My Card. An empty phonebook card will be displayed.
③ Enter your personal data. (see section Storing names and telephone numbers, page 5).
This menu item allows displaying and updating My Card.
(My Card data set can also be sent by IrDA, from the standby display, by directly pressing Ⓐ).
Own number display
The phone can display your main 'Line 1' voice mobile number, the voice mobile number for Line 2 (Alternate Line Service) and your data and fax numbers (this is SIM dependent). The SIM stores these numbers. You can enter them manually and name them. Line 1 for example can be named 'Office' etc.
To view, name and edit your own number(s),
1 Press ⬆. Select Phone Book.
② Select Own numbers. The mobile number for Line 1 will be displayed.
3 Use ⚠ or ⏱ to view line 2, data and fax numbers.
4 To add or edit a name or number press Edit ☐, then enter the requested data and press OK ☐ to store.
5 Press Exit or to return to the standby display.
Fixed dialling numbers (FDN)
Fixed dialling is a feature that restricts outgoing calls to 'fixed' numbers or 'prefixes' contained in SIMs that support this feature. When turned on, dialling numbers not in the FDN list will not be allowed. The maximum number of FDN numbers that can be stored is dependent upon the capacity of the SIM. Call diverting and sending SMS messages to numbers not in the FDN list will be prevented. Turning on or entering numbers into the FDN list is PIN 2 protected.
To turn on or off FDN operation,
1 Press ⬆. Select Phone Book.
② Select Fixed dialling. Select Status.
3 Select On or Off. Enter the PIN2 number.
4 Press OK to validate and confirm the setting.
To view the numbers in the list,
1 Press ⬆. Select Phone Book.
② Select Fixed Dialling.
3 Select View and use 🔒 or 📋 to view all the entries. Pressing Options will allow you to edit, delete, copy or move numbers to the phone or SIM, as well as send by IrDA.
To enter, edit or delete numbers in the FDN list,
1 Press ⬆. Select Phone Book.
② Select Fixed dialling.
3 Select Add new. You will be prompted to enter the PIN2 number if it has not been entered yet. It is now possible to add new numbers as well as edit, delete, copy, move, as well as send by IrDA.
√ Wild card spaces can be used with the numbers stored in the FDN list. For example the number + 441707 278__9 will allow calls to all numbers between 278009 to 278999 to be dialled. The number can be edited and dialled in the standby display.
Calling phone numbers with your voice
Phone numbers can also be recalled with your voice. This only applies to phone numbers stored in the phone or SIM memory.
To create a voice pattern for a phone number,
1 Press ☑. Select Phone Book.
② Select Voice dialling.
3 Select New entry. All name entries are displayed.
4 Use ⚠ or ⚡ to choose the required card and press Select ⚙. If there are many phone numbers attached to the card you chose (e.g. Home, Work or Cellular) you will be asked to choose one by pressing Select ⚙
5 You will then be asked to say the name at least twice. Pronounce the name as clearly as possible.
Should the voice patterns match Stored will appear in the display.
6 Press Exit ● or ⏻ to return to the standby display.
If the second or a third voice pattern does not match the first one Failed will appear in the display. If so, start the whole voice pattern creation all over again.
To view the voice dialling phone numbers list,
1 Press ☑. Select Phone Book.
② Select Voice dialling.
3 Select List.
4 Use ⏻ or ⏱ to view the requested entry.
Pressing Options ● will allow you to listen to the voice pattern (Play back), to remove the phone number from the voice dial-ling list (Erase) or to create a new voice pattern (Record).
5 Press Exit ● or 📋 to return to the standby display.
To remove all phone numbers from the voice dialling list,
1 Press ⬆. Select Phone Book.
② Select Voice dialling.
3 Select Delete all.
4 Press Exit or to return to the standby display.
To call a phone number using a voice pattern,
1 Press and hold
② You will then be asked to say the name. Pronounce the name as clearly as possible.
3 The dialled number together with the animated icon will be shown in the display. When the call is connected a ringing tone will be heard in the earpiece. When answered proceed with the call in the normal manner, a call timer will be displayed during the call.
Messages

The SMS message service enables you to send or receive short text messages of up to 160 characters to or from other mobile phones provided with the same capability. The messages are not sent directly to the other mobile phone but go via a message centre provided by your network operator. You can also store, edit and forward messages as well as saving any of the numbers they may contain.
Reading a received SMS message (in the standby display)
When the phone receives an SMS message a new SMS alert tone will sound and 📋 will be displayed. The message is automatically stored in the SIM. If 📋 is flashing there is no more space in the SIM to store messages. Delete previous messages to make space for new ones.
Press Read ⬇ to read new messages (Inbox).
Reading stored SMS messages
1 Press ⬆. Select Messages.
② Select Inbox to display the first message header.
3 Press ▶ or select Options ●/Read text to read the message text.
It is now possible to read all stored messages. Use the arrow keys to scroll between pages or between messages. Unread messages are indicated by ☐, previously read messages are shown by 📄
Managing received and stored SMS messages
After reading the SMS message press Options ⚙ for the following menu:
| Item Function | |
| Read text Displays the remainder of the text | |
| Delete Deletes the message | |
| Reply Replies to the sender of the message | |
| Reply (+ text) | Replies to the sender of the message with the initial text |
| Forward Forwards the message to another user | |
| Forward to n | Forwards the current message to different addressees (5 maximum) |
| Numbers | Stores or calls the number(s) contained in the SMS header or text |
√ The items of this menu may vary and are dependent upon the type of message received.
Turning on or off the message alert tone
Each time a message is received a new SMS alert tone will sound. To turn on or off this tone,
1 Press ⬆. Select Messages.
② Select Alert. Select On or Off.
3 Press Exit or to return to the standby display.
Preparing the phone to send SMS messages
You can write and send text messages. Before doing so the networks message centre number (obtainable from your service provider) needs to be stored:
1 Press ▶. Select Messages.
② Select Settings.
3 Select Message centre.
If a number already appears it means that it was taken directly from the information stored in your SIM. If empty enter the number manually (in international format) or from a stored memory, then press OK Ⓞ.
4 Press Exit ● or 🔍 to return to the standby display.
If required you can also choose the validity period, format, paid reply request and request a Delivery report. Default settings are assumed if not set.
| Option Description Default | ||
| Validity Period | Time held at message centre. 12 hrs, 1 day, 2 days or Maximum (defined by operator) | Maximum |
| Format | Selects format of message, text, voice, fax or pager Text | |
| Reply requested Selects the requested of a reply Off | ||
| Delivery report | Selects the request of a delivery report | Off |
Creating a draft text
A set a 10 messages texts, to be defined by you and initially empty, may be used as text templates when entering messages text. Any of these texts can be of up to 50 characters, allowing common texts to be created. These messages texts are accessible when beginning writing a message. The draft texts are stored in the mobile memory.
To create a draft text,
1 Press ⬆. Select Messages.
② Select Draft texts.
3 Choose any blank template ( [...] ) and press Edit ●.
4 Enter the draft text and press OK
5 Press Exit or to return to the standby display.
Editing a draft text
1 Press ⬇. Select Messages.
② Select Draft texts.
3 Select the draft text to wish to modify and press Edit ●.
4 Edit the text and press OK
5 Press Exit or to return to the standby display.
Sending a new SMS message to one addressee
1 Press ☑. Select Messages.
② Select Write new.
3 You can either choose a draft text or enter the message text and press OK.
4 Select Send.
5 Choose a message template and then enter the destination number or select Names ● to choose a number from a phone-book entry.
Press 🎨 to validate your choice. Press OK 🔒.
Sent confirmation will be given.
6 Select whether to store or send the same message again.
7 Press Exit ● or 🔍 to return to the standby display.
Sending a new SMS message to several addressees
1 Press ☑. Select Messages.
② Select Write new.
3 You can either choose a draft text or enter the message text and press OK.
4 Select Multicast.
5 Choose a message template.
Enter up to 5 destination numbers or select Names ● to choose up to 5 numbers in the phonebook.
Press ⬆ to validate your choice. Press OK ⬆.
Sent confirmation will be given.
6 Select whether to store or send the same message again.
7 Press Exit or to return to the standby display.
Storing a new SMS message
1 Press ☑. Select Messages.
② Select Write new.
③ You can either choose a draft text or enter the message text and press OK
4 Select Store.
5 Press Exit ● or 🔍 to return to the standby display.
Messages in the outbox
The outbox contains unsent draft messages, stored sent messages as well as sent but undelivered messages, identified by their headers. These messages can be selected from the outbox menu and can be modified and resent as new SMS messages in the normal way.
To select an outbox message,
1 Press ⬆. Select Messages.
2 Select Outbox and use ⏻ or ⏱ to scroll to the desired message. Messages will either be "transmitted" (☐) or "to be sent" (☐).
3 Press Options ● to read, delete, send (or re-send) to one addressee, edit a sent message and send (or re-send) to several addressees (Multicast).
4 Follow the instructions displayed on the screen.
Status request on outbox messages
If the status is requested on a delivered message the date and time of delivery may be shown. If the status is requested on a sent message a status request will be sent to the network (must be network supported). The network will answer by sending a status report (SR) back to the phone which can be acknowledged by pressing OK
To action a status request on outbox messages,
1 Press Options. The following menu will be displayed:
| Item Action | |
| Read text Reads the message text. | |
| Delete Deletes the message from the SIM. | |
| Status | Gets the status of a sent message, if a status associated to the message is stored in the SIM. If no status is known, this one is directly requested to the network.Note: Even if a status is requested, the answer is not immediately sent by the network and will be received at any time. In some cases, this option is not supported by the network. |
| Send | Sends or re-sends a message sent with or without text modification.Note: The message parameters are requested if some are missing (templates or not). |
| Edit Modifies the current message. | |
| Multicast | Same at the Send option, but several destination numbers can be entered. |
② Select the action required.
Re-usable message templates
If your network operator provide SIMs that allow users to store pre-programmed message templates, then Msg templates will appear in the Messages - Settings menu. Templates are sets of pre-programmed settings to be used when sending messages. Each of these templates can be given a name for easy identification and can be selected and used whenever required.
To create a message template,
1 Press ▶. Select Messages. Select Settings.
2 Select Msg templates. Choose any blank template ( [...] ).
③ The display will prompt you to enter the template Name, Msg Centre number, Validity period and Format.
Default settings for pay reply and status are assumed 'off' unless set. If only one template is set it is automatically used by default. If more than one template is programmed any one can be selected for use when sending new messages.
Storage consumption
The storage usage for SMS messages can be consulted.
To know the number of messages stored and the total space available,
1 Press ⬆. Select Messages.
2 Select Statistics. Press More...
3 Use 🔒 or 🔒 to view all the SMS storage information (New, Read, Sent, To send).
4 Press Exit or to return to the standby display.
Calls & Times

Access the Calls & Times menu to check the details of individual incoming and outgoing calls, the duration of the last call or the total time for all previous calls.
Calls log
This feature stores details (identity, time and date and call duration) of the last 10 numbers dialled, the last 10 unanswered calls and the last 10 received calls. The call logs are common for both Line 1 and Line 2.
1 Press ⬆. Select Calls & Times.
2 Select Calls log.
3 Select Last dial, Unanswered or Received.
4 Use ⏻ or ⏱ to scroll through the call lists.
The last number dialled or received is displayed first. For unanswered and received calls if the calling parties number is known it will be shown. Otherwise Unknown number will be displayed.
Pressing 📊 on a highlighted number will call that number.
Pressing Options ⚙ will give access to the following menu:
| Item Action | |
| Store Stores the number into phonebook | |
| Delete Deletes the entry | |
| Delete all Deletes all the entries | |
| Edit Edits the displayed number | |
| Details | Views the details - name, number, time and date and call duration of the highlighted number |
| Call Makes a call to the number | |
| Send SMS | Sends an SMS message to the corresponding phone number |
Use 🔒 or ⬇ to select the required option and follow the display prompts. Press Exit 🔒 or ⬇ to return to the standby display.
In the standby display 'One Touch' access for the 10 last dialled calls is available by pressing 🚗.
Call times
Call timers-Show stores the duration of the last call, total accumulated time of all calls and total time for Line 1 and Line 2.
The Details ● sub-menu stores times for calls made and received through the subscription network and through other (national and international) networks.
1 Press ⬆. Select Calls & Times.
2 Select Call timers.
3 Select Show.
4 If the call timers have been reset (see Call timer - reset, page 20) the date of the last reset of the counters will briefly be displayed.
Use ⏻ or ⏱ to view all the timer information.
The call type and the accumulated times of outgoing and incoming calls will be displayed.
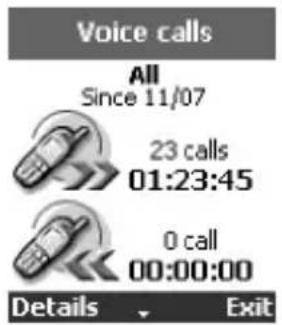
Pressing Details ● will display details of roaming and international calls etc.
Press 🔑 or Exit 🔒 to return to the previous display.
Press Exit 🔗 or Ⓤ to return to the standby display.
If Line 2 is subscribed too 'All Calls' for Line 1 and Line 2 will be displayed separately.
Balance information (subscription service only)
This is a subscription service provided by some networks and enables you to ask for your remaining airtime balance. This information is sent by the network.
Contact your service provider on availability and details.
1 Press ☑. Select Calls & Times.
② Select Call timers.
3 Select Balance information.
4 Select Call or Set number.
If Call is selected and the balance information number has already been entered a call will be made to the balance information centre. If a number has not been entered select Set number and enter the number. Press OK ⬙ to store the number. Select Call to call the information centre number.
5 Press when the call is completed.
Reminder - Call duration
A call duration reminder beeps to remind you of the duration of a call. It can be set in multiples of 1 minute (1 - 59 mins) intervals.
1 Press ☑. Select Calls & Times.
② Select Call timers.
3 Select Reminder.
4 Select On (or Off).
5 Select the period (between 1 and 59 mins).
6 Press OK ☐ to validate the entry. Press Exit ☐ or 📋 to return to the standby display.
Call timer - reset
This feature enables you to reset all the call timers. You will need the 4 digit lock code to operate this feature.
1 Press ⬆. Select Calls & Times.
2 Select Call timers.
3 Select Reset.
4 Select Yes or No.
⑤ Enter the phone lock code and press OK. The action will be confirmed.
6 Press Exit ● or 🔺 to return to the standby display.
Call costs - management (subscription service only)
Some networks offer an Advice of Charge (AoC) subscription service in which it is possible to see the cost of the last call made, the accumulated total cost of all calls and the remaining balance in units or currency of any 'cost limit' set by you.
To display these costs in the currency of your choice you must first select the currency and cost per unit otherwise call costs in units will be displayed.
To set currency and cost per unit,
1 Press ⬆. Select Calls & Times.
② Select Call costs.
3 Select Display cost type.
④ Select Currency. The present currency settings will be displayed.
5 Press Modify ●. Enter the PIN 2 code and press OK ●.
⑥ Enter the abbreviated letters of the currency. Press OK ⚙ to validate.
7 Enter the cost per unit in the selected currency.
Press OK to validate.
The display will confirm your selection.
8 Press Exit ● or 📋 to return to the standby display.
To set call cost type to units,
1 Press ⬆. Select Calls & Times.
② Select Call costs.
3 Select Display cost type.
4 Select Units.
5 Press Exit ● or 🔍 to return to the standby display.
√ When the cost type is set to units the credit limit and the remaining credit are shown in units.
Setting the credit limit - in units or currency
After setting the currency and cost per unit, if required and available on your subscription, you are also able to set a credit limit in units or an amount in the currency of your choice. When the credit limit is reached the phone will be prevented from making and receiving all chargeable calls. This will not prevent the phone from making emergency calls.
1 Press 🎯. Select Calls & Times.
② Select Call costs.
③ Select Credit Limit. The display will show the present credit limit setting.
4 Press Edit ●. Enter the PIN 2 code and press OK ●.
5 Enter the credit limit (use # to enter a decimal point). Press OK to validate.
6 Press Exit ● or 🔺 to return to the standby display.
√ When a credit limit is entered the selection from the 'Credit Limit' display will be Edit or Set No Limit.
Show costs
1 Press 🎨. Select Calls & Times.
② Select Call costs.
3 Select Show.
4 Use ⚙ or ⚙ to display the cost of the Last Call, All Calls and the Remaining credits.
5 Press Exit ● or 🔍 to return to the standby display.
√ The remaining credit is shown in either units or currency as set by Cost Type menu above.
Call costs - resetting all costs to zero
To reset all the call costs to zero,
1 Press 🎯. Select Calls & Times.
② Select Call costs.
3 Select Reset.
4 Select Yes to reset the costs or No to exit.
If Yes is selected, enter the PIN 2 number and press OK ●. All Costs Reset will briefly be displayed.
5 Press Exit ● or 🔒 to return to the standby display.
Alternate line service - selecting line 2 (subscription service)
Some GSM 1800 operators support the use of a second line for users. You can have two mobile phone numbers e.g. a business and a personal line. To select the line for outgoing calls,
1 Press ⬆. Select Calls & Times.
2 Select Line selection.
The current line selection will be displayed.
3 Use ⏻ or ⏱ to scroll to the line required and press Select ⚙ or ⓣ to validate your choice.
4 Press Exit or to return to the standby display.
☑ Names can be given to Line 1 (Office) and Line 2 (Home) for example. Refer to the Own Number menu (page 10) for details. Whichever line is selected to make outgoing calls, incoming calls are still able to be received on either line.
Alert mode
To avoid disturbing others you can turn off the audible incoming ring tone as well as all alert and alarm tones from the Alert tones menu.
If you choose the 'Vibrate' or 'Vibrate then ring' option, the vibrating option replaces all the alert and alarm tones.
To modify the alert mode,
1 Press ☑. Select Settings.
② Select Tones.
3 Select Alert tones.
4 Select Ring, Silent, Vibrate, Vibrate & ring or Vibrate then ring to validate your choice.
5 Press Exit or to return to the standby display.
√ You can access the Alert tones menu directly from the standby display, using Ⓗ.
If you select Ring but the ring tone volume is off the icon appears.
The ring tone volume off setting is saved when the phone is turned off.
When the phone is connected to either the Desk Top Charger, HF kit, CLA or AC adaptor the vibrator mode selection is temporarily inhibited and the phone will ring instead.
Ring tone selection
You can choose the sound of the incoming ring tone from a selection of 30 ring tone melodies stored in the phone and downloaded melodies which can be stored depends on the memory left.
To hear your chosen ring tone melody, wait several seconds before confirming your choice. The melody will be played.
Ring tone selection is made through the Settings menu:
1 Press ☑. Select Settings.
2 Select Tones.
3 Select Melodies.
4 To help you identify incoming calls you can give the Standard/Line 1 and Line 2 (network dependent) calls as well as the Alarm different ring tones.
Use Ⓗ or Ⓥ to highlight the required call type and press ⏻ to select it.
5 Use ⏻ or ⏱ to listen to the different ring tones. Press ⏽ to select the current tone.
6 Press Exit ● or 📋 to return to the standby display.
Downloaded melodies
You can download melodies from the internet using the procedure described page 61.
The present feature proposes to see the list of these melodies and the memory status about their storage. You can delete a selected melody after acknowledgement.
To consult the melodies list:
1 Press ▶. Select Settings.
2 Select Tones.
3 Select Download. Select List. The list of imported melodies is displayed.
4 Use ⏻ or ⏻ to select the melody of your choice. The melody is played after no user action during 2 seconds.
To remove the selected memory, press Delete ● then confirm the deletion by Yes.
5 Press Exit or to return to the standby display.
Volume adjustments
The volume levels of the ring tone, key tones, alarm tones (alarm clock and low battery alarm) and the incoming audio can all be individually adjusted in the Settings menu:
1 Press ⬆. Select Settings.
2 Select Tones.
3 Select Volume.
4 Select Ring, Keys, Conversation or Alarm.
The display will confirm the selection naming the volume to be adjusted.
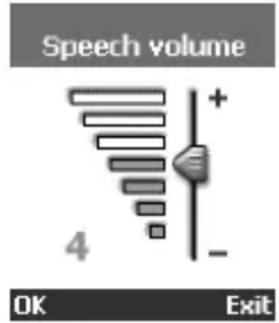
5 Use Ⓐ or Ⓥ to adjust the setting. You can also use numeric key corresponding to the requested step: press on ④ sets the volume to 4, presses on ⑦, ⑧ or ⑨ sets the volume to 7, press on ⑩ sets the volume to the minimal value (1 for the speech and 0 for all others).
6 Press OK to validate the setting. 7 Press Exit or to return to the standby display.
During a call, you can adjust the conversation volume by using the volume keys 📄 or . 🔒
If the ring tone volume level is set to Off the ✗ warning icon will appear in the display.
Ramping
Ramping is a feature that when turned on will cause the incoming ring tone to gradually increase to the maximum volume level if the call is not answered after the first ring.
1 Press ▶. Select Settings.
② Select Tones.
3 Select Volume.
4 Select Ramping.
5 Select On or Off.
6 Press Exit or to return to the standby display.
√ When turned on the volume of the incoming ring tone will start from the current ring volume and rise to the maximum volume until answered.
Graphics themes
Standby display themes can be selected in order to give your phone a personalised aspect.
To select a standby graphic theme.
1 Press ▶. Select Settings.
2 Select Graphics themes.
Five graphics themes are available:
- a classical one called Trium,
- two funny ones called Daisy and Woody,
• a Night & Day one called Urban, - a business one called Lindbergh.
The Urban theme changes twice a day. The night screen is set at 7 p.m. and the day screen is set at 7 a.m. (these parameters cannot be changed).
The Lindbergh theme is the only one which takes into account the world clock: it always displays two clocks.
3 Use △ or ◇ to highlight the required graphic themes.
4 Press Select ● to validate your choice.
5 Press Exit or to return to the standby display.
√ Graphics themes cannot be downloaded via WAP™.
Voice mail
Your network provider may offer a voice mail service which operates like an answering machine. Contact your service provider for details.
Storing a voice mail centre number
If your SIM does not automatically include the voice mail centre number it will have to be manually stored:
1 Press ▶. Select Settings.
2 Select Voice Mail.
3 Select Number. When prompted enter the number manually or from a stored memory.
4 Press OK to validate your entry.
5 Press Exit ● or 📋 to return to the standby display.
If you subscribe to the 'Line 2' service the voice mail centre number will need to be stored separately for that line. The voice mail number is automatically assigned to speed dial location number 1 (see Speed dialling on page 28).
Turning on/off the voice mail alert tone
If you wish a tone to sound alerting you of the receipt of a voice mail message,
1 Press ⬆. Select Settings.
2 Select Voice Mail.
3 Select Alert. Select On or Off.
4 Press Exit or to return to the standby display.
Calling the voice mail centre to check for messages
There are two ways:
- To dial the voice mail centre directly after the receipt of a message, Press and hold down ①
- Alternatively,
1 Press ☑. Select Settings.
2 Select Voice Mail.
3 Select Call.
Dialling will proceed as for a normal call.
If a voice mail number has not been stored when Call is selected you will be asked to enter the voice mail number. Proceed as described in Storing a voice mail centre number, page 25.
Phone settings
Keypad lock
When keypad lock is turned on it prevents accidental operation of the keys and access into the menus. The key tones are also silenced and the backlight is deactivated.
Keypad lock is suspended during incoming calls and resumed when the call is terminated. Emergency calls can still be made. If a key is pressed the display will give a reminder that keypad lock is on.
When the keypad is locked the backlight may be switched on by pressing the side shuttle key downwards.
To turn the keypad lock on and off,
1 Press ⬆. Select Settings.
2 Select Phone settings. Select Keypad lock to turn keypad lock on.
3 To unlock the keypad, press Unlock ● then the # key.
Language selection
All the display messages can be shown in several languages.
To select the language of your choice,
1 Press ▶. Select Settings.
② Select Phone settings. Select Language.
3 Use △ or ◇ to select a language from the displayed list. Press Select to validate.
4 Press Exit ● or 🔍 to return to the standby display.
To reset the phone to the language of the SIM enter *# 0000#.
To reset the phone language to English enter *# 0044# .
Backlight - setting
The backlight can be adjusted to suit the surrounding light conditions.
To modify the backlight,
1 Press ▶. Select Settings.
② Select Phone settings. Select Display.
3 Select Backlight.
4 Adjust the backlight using Ⓗ or Ⓥ.
5 Press OK to validate the setting.
6 Press Exit or to return to the standby display.
When the phone is connected to either the Desk Top Charger, HF Car Kit, CLA or the AC Adaptor the backlight is always on.
Display contrast
The contrast of the display can be adjusted to suit the surrounding light conditions.
To modify the display contrast,
1 Press ▶. Select Settings.
② Select Phone settings. Select Display.
3 Select Contrast.
4 Adjust the contrast using ⏱ or ⏱.
5 Press OK to validate the setting.
6 Press Exit or to return to the standby display.
Any key answer
This feature enables any key (except ) to be pressed to answer an incoming call.
1 Press ☑. Select Settings.
2 Select Phone settings. Select Keys.
3 Select Any key answer.
4 Select On or Off.
5 Press Exit ● or 🔍 to return to the standby display.
Softkeys - programming the softkeys (operator dependent)
The function of the softkeys can be changed to suit you. The available options are shown in the menu during selection.
To program a softkey,
1 Press ⬆. Select Settings.
② Select Phone settings. Select Keys.
3 Select Softkeys functions.
4 Select Left softkey or Right softkey.
5 Press Select on the softkey option of your choice.
6 Press Exit ● or 📞 to return to the standby display.
(……) in the display means that a previously SIM dependent or subscription service assigned to that softkey is no longer available. For example Line 2 selection.
Speed dialling
Phonebook numbers can be assigned to keys ② - ⑨ which when held down will dial those numbers. is reserved exclusively for the voice mail number and is assigned automatically when the voice mail number is stored (see Voice mail, page 25).
Numbers stored in the SIM and in the phone (fixed dialling numbers excepted) can be selected.
To assign phonebook numbers to the speed dialling keys,
1 Press ⬆. Select Settings.
② Select Phone settings. Select Keys.
3 Select Speed Dial.
4 Use ⏱ or ⏱ to scroll to the next key.
5 Select Names ⚙ to choose the phonebook entry and press ⏻ to validate your choice.
6 Press Exit ● or 📋 to return to the standby display.
If a number which has been assigned to a speed dial key is deleted from the phonebook the corresponding number is automatically deleted from the speed dial key.
Auto answer
This feature only works when the phone is connected to a handsfree car kit or headset and enables the phone to automatically answer an incoming call after approximately 5 seconds without having to press any keys.
1 Press ⬆. Select Settings.
2 Select Phone settings. Select Auto features.
3 Select Auto-answer.
4 Select On or Off.
5 Press Exit ● or 📋 to return to the standby display.
Auto retry
This feature enables the phone to automatically redial the number of a failed call, due to a system busy or unavailable signal from the network, for up to 10 times after which it will stop.
1 Press ⬆. Select Settings.
② Select Phone settings. Select Auto features.
3 Select Auto-retry.
4 Select On or Off.
5 Press Exit or to return to the standby display.
When activated, Auto-retry and a countdown timer to the next call attempt will appear in the display. An auto-retry warning tone will sound each time a new call attempt is made.
If the automatic redialling is successful proceed with the call as normal. Pressing Exit ⬙ or any key during the retrying process will cancel auto-retry and end the dialling process for that call.
Auto Switch On/Off
This feature enables you to automatically program the phone to switch On or Off at pre-determined times.
To set a Switch On or Off time,
1 Press ▶. Select Settings.
② Select Phone settings. Select Auto features.
3 Select Auto-switch-off or Auto-switch-on.
4 Select On or Off.
(If a previous time has been entered it will be displayed)
5 Enter a new time or accept the previous one. Press OK
Stored will briefly be displayed.
6 Press Exit or to return to the standby display.
At the switch-on time the phone comes on in the normal way. Enter the lock or PIN code if required.
If the phone is already on at the switch-on time no action occurs.
If the phone is set to switch-off, the display will show a warning message Switch-off in with a countdown timer showing the time to switch off.
Pressing Exit will cancel the switch off process.
If the mobile is already off at the switch-off time no action occurs.
The Auto Switch-off and Switch-on times cannot be the same. If a call is connected at the time of switch-off, the switch-off process is postponed until the call is terminated.
Caution - Remember to turn off the Switch-on alarm feature when boarding an aircraft where the use of mobile phones is not permitted and is illegal. Alternatively you can remove the battery after turning off the phone.
See the General safety warnings in First Steps with your Eclipse.
Default (factory) settings
Use the Settings menu to return the phone settings back to the factory settings. This has no effect on the phonebook entries or phone lock code.
1 Press 🎯. Select Settings.
② Select Phone settings. Select Default settings.
3 Select Yes or No.
4 Press Exit ● or 📋 to return to the standby display.
The following are the factory default settings:
| Feature Factory setting | |
| Alert Tones Ring | |
| Ring Tones | Trium 3 (line 1)Trium 3 (Alarm) |
| Volumes, Ring, Key, Speech and Alarm. | Mid values |
| Backlight and Contrast | Mid value |
| Any Key, Auto-Retry and Auto Answer features. | Off |
| Ramping Off | |
| Graphics Theme Trium | |
GSM Services
Diverting incoming calls (network service)
Call diverting is a service which diverts incoming calls, whether voice, fax or data, to another number.
To turn on a call divert,
1 Press ⬆. Select Settings.
② Select GSM Services. Select Call diverting for the following menu:
| Divert options Action | |
| Always Diverts all incoming voice calls unconditionally | |
| When not reachable | Diverts all voice calls when the phone cannot be reached, i.e. out of service |
| On no reply | Diverts all voice calls when the phone does not answer |
| When busy Diverts all voice calls when the phone is busy | |
| All conditions | Diverts all voice calls when Not Reachable, No Reply and When Busy |
| Cancel all Cancels all diverts | |
| All FAX calls Diverts unconditionally all incoming fax calls | |
| All DATA calls Diverts unconditionally all incoming data calls | |
3 Use ⚠ or ⚡ to select the divert condition and validate by pressing Select 📐.
4 Select Activate.
5 Use 🔒 or 🔒 to choose between Voice Mail, Names or Number.
6 Press Select ● or ▶ to validate your selection.
The display will confirm your request.
7 Press Exit or to return to the standby display.
- If the 'On no reply' option is selected you will be requested to enter a delay period of 5, 15 or 30 seconds (network dependent).
- Call diverts for both Line 1 and Line 2 must be set for each line. During call divert programming, only the line currently selected is affected by the call divert selected. To carry out a call divert on the other line you must select this other line first (menu Calls & Times - Line selection).
To turn off or check the status of call divert,
1 Press ▶. Select Settings.
② Select GSM Services. Select Call diverting.
3 Select from the divert options and press ⏻.
4 Select Cancel or Status.
Your selection will be confirmed.
5 Press Exit ● or ⏻ to return to the standby display.
To cancel all (multiple) diverts,
1 Press ☑. Select Settings.
② Select GSM Services. Select Call diverting.
3 Select Cancel all. Confirmation will be displayed.
4 Press Exit or to return to the standby display.
This action cancels all voice diverts (for voice, faxes and data calls) for the line currently in use. To cancel call diverts for the other line you must select this other line first (menu Calls & Times - Line selection).
Call waiting
This feature allows to receive new calls, while engaged in a conversation. To activate call waiting,
1 Press ☑. Select Settings.
② Select GSM Services. Select Call waiting.
3 Select Activate. The network will return either Activated or Check your request.
√ You can also cancel or check the service status.
Caller Line Identity - showing/hiding your mobile number (network dependent)
Most networks allow the Caller Line Identity feature (CLI) i.e. the feature which shows the incoming number (ID) while receiving a call. Selecting Receiving caller ID will allow you to check the availability of such a feature.
Receiving caller ID
This feature enables you to find out whether a network presents the ID of incoming calls.
1 Press ☑. Select Settings.
② Select GSM Services. Select Receiving caller ID.
The network will return either Presentation available or Presentation unavailable.
3 Press Exit or to return to the standby display.
Sending my ID
On networks which allow caller line identity you can disable the sending of your own number, on a call by call basis, by adding #31# before the number you are calling. Alternatively you can ask your service operator to always disable the sending of your mobile number. In this case if you wish to reveal your number, on a call by call basis, you can do so by adding *31# before the number you wish to call.
Standard network setting
To reset the standard network setting for sending your mobile ID,
1 Press ⬆. Select Settings.
② Select GSM Services. Select Sending my ID.
3 Select My settings.
4 Select Preset. The phone will reset to the network setting agreed with your service provider.
5 Press Exit or to return to the standby display.
Hiding or showing your number
1 Press ⬆. Select Settings.
② Select GSM Services. Select Sending my ID.
3 Select My settings.
4 Select Hide my ID or Show my ID.
5 Press Exit ● or 📋 to return to the standby display.
Finding out your current ID setting
1 Press ▶. Select Settings.
2 Select GSM Services. Select Sending my ID.
3 Select Status.
The phone will display your current setting taking into account both network and phone settings.
4 Press Exit ● or 📋 to return to the standby display.
Mode of operation (operator dependent)
This setting allows mobile operations to be the following: Standard or Modem.
- Standard mode
In this mode the mobile has the behaviour of a class B mobile: it tries to attach to GSM and GPRS networks. If the mobile succeeds attaching a GPRS network, will appear in the standby display. In this mode the mobile can send and receive voice calls and packet data calls.
To set the mode of operations to Standard,
1 Press ⬆. Select Settings.
② Select GSM Services. Select Mode of operation.
3 Select Standard.
4 Press Exit ● or 🔺 to return to the standby display.
- Modem mode
In this mode the mobile has the behaviour of a class C mobile: it tries to attach to GPRS networks only (and not to GSM networks).
It can only receive packets data calls and voice calls are barred. This behaviour is the same whatever are the network capabilities.
However if the GPRS services are lost, the mobile automatically returns to the Standard mode of operations.
To set the mode of operations to Modem,
1 Press ☑. Select Settings.
② Select GSM Services. Select Mode of operation.
3 Select Modem.
4 Press Exit ● or ⚙ to return to the standby display.
Network
When the phone is turned on, it automatically searches for the last network it was registered on (usually the home network). If this is not available, the phone will automatically search and select a network from the preferred network list contained in the SIM.
Editing the preferred list
The phone contains a list of networks which can be selected and transferred to the preferred networks list stored in the SIM.
This list can be changed to suit your travel arrangements.
The order and name of the networks in the preferred networks list can be changed and edited.
1 Press ☑. Select Settings.
② Select GSM Services. Select Network.
3 Select Preferred list. A list of networks will be displayed.
4 Use △ or ▽ to view the list.
5 Press Options ● to change it. The following items are displayed:
| Option Description | |
| Modify by list | Displays the general list of all known networks contained in the phone in alphabetical order |
| Modify by code | Edits or enters a network number (MCC MNC) if you know this information. |
| Delete | Deletes an entry |
6 Press Select to confirm the selection.
7 Press Exit or to return to the standby display.
Your SIM may contain a forbidden list of networks which cannot be used.
To view the forbidden list or show the home network,
1 Press ⬆. Select Settings.
② Select GSM Services. Select Network.
3 Select either Forbidden or Home network.
A list of the forbidden networks or the home network will be displayed.
4 Press Exit or to return to the standby display.
Selecting manual search
There may occasions when you wish to select a specific network, which has better coverage in your current location for example.
1 Press ▶. Select Settings.
② Select GSM Services. Select Network.
3 Select Search.
④ Select Manual. A confirmation screen and Scanning for networks... will be displayed.
5 Use Ⓜ or Ⓥ to select a network from the list shown.
6 Press to confirm the selection.
Requesting... followed by the name of the network will be shown after which the phone will return to the standby display.
√ You cannot delete a network from the forbidden list. This list will be automatically updated when the manual network selection is performed.
Selecting automatic search (normal default setting)
To perform an automatic search from the preferred list proceed as follows:
1 Press ⬆. Select Settings.
2 Select GSM Services. Select Network.
3 Select Search.
4 Select Automatic.
5 Press Exit or to return to the standby display.
Call barring (network service)
This is a network service which allows you to stop different types of calls being made and received on the phone.
It requires the use of a network barring password available only from your service provider.
To put on a call bar,
1 Press ⬆. Select Settings.
② Select GSM Services. Select Call barring.
3 Select Outgoing calls or Incoming calls. Choose from the following:
| Select Meaning | |
| Outgoing - All outgoing All outgoing calls will be barred | |
| - Int'nal calls All outgoing international calls only will be barred | |
| - Int'nal excl. home | All outgoing international calls except to other subscribers within your home network |
| Incoming - All incoming | All incoming calls will be barred |
| - Roaming only | All incoming calls when not on the home network |
4 Select the option using ⏻ or ⏱. Press Select ⚙.
5 Select Activate. Enter the password and press OK ⚙. The network will confirm the selection.
6 Press Exit ● or ⏻ to return to the standby display.
To take off or check the status of a call bar,
1 Press ▶. Select Settings.
② Select GSM Services. Select Call barring.
3 Use ⚠ or ⚡ to select the bar to be taken off (Cancel) or check the Status and press ⚠
If choosing to take off a call bar the password will be required.
4 Press Exit or to return to the standby display.
To change the password,
1 Press ☑. Select Settings.
② Select GSM Services. Select Call barring.
③ Select Change password.
The old password will be requested followed by two requests to enter the new password. Confirmation will be displayed.
4 Press Exit or to return to the standby display.
Broadcast - cell broadcast (CB) messages
These are messages broadcast by the networks to all GSM users and may provide general information about local area dialling codes, weather reports and traffic news etc. Each type of message is numbered enabling you to select the type of information you want to receive. Up to 5 different types of messages can be programmed into your selection list but only one can be displayed at any one time. There are 16 standard message types pre-programmed into the phone to select from. New message types can be programmed into the selection list using the 3 digit cell broadcast type number. Contact your service provider for details on the number and types of messages broadcast.
Before you can turn on the broadcast service you have to put at least one message type into the selection list.
To enter a message type in the selection list
Up to 5 message types can be entered into the selection list.
1 Press ⬆. Select Settings.
② Select Broadcast.
3 Select Message types. Press Options
4 Select Modify by list (or Modify by code if type number is known).
⑤ Scroll to the message type required. Press Select ⚙ to validate your selection. The display will confirm your choice.
6 Press Options ● again to select more message types from the list, enter a message type number if known or delete a message type.
7 Press Exit or to return to the standby display.
To turn on or off the broadcast service
1 Press ⬆. Select Settings.
2 Select Broadcast.
3 Select On/Off.
4 Select On or Off.
5 Press Exit or to return to the standby display.
Reading broadcast messages
Broadcast messages are shown in the standby display only and are suppressed during conversation or menu operation. A message can be up to 93 characters in length and cover several pages. Pages will automatically change approximately every five seconds or by a press on Ⓤ.
Options during message display
A press on Exit ⬙ will clear the CB currently displayed. Pressing ⬤ will dial the number shown in the display within the message.
Pressing Options will display the following menu:
| Option Action | |
| Delete Delete the current message | |
| Delete All Deletes all messages stored in the queue | |
| Numbers | Displays all phone numbers found in the message text and allows to dial or store them in the scratchpad if required |
| Broadcast Off Turns off cell broadcast | |
To turn on or off the alert tone
If required an alert tone can be turned on to 'beep' every time a new or updated broadcast message is received.
1 Press ⬆. Select Settings.
② Select Broadcast.
3 Select Alert.
4 Select On or Off.
5 Press Exit ● or ⚙ to return to the standby display.
To delete or edit a message from the list
Message types put into the selection list can be deleted and changed.
1 Press ☑. Select Settings.
2 Select Broadcast.
3 Select Message types. Press Options
4 Select Modify by list, Modify by code or Delete.
5 Press Exit or to return to the standby display.
Broadcast language
All the broadcast messages can be shown in several languages.
To select the language of your choice,
1 Press ☑. Select Settings.
② Select Broadcast.
3 Select Language.
4 Use △ or ◇ to select a language from the displayed list. Press ◆ to validate.
5 Press Exit ● or 🔍 to return to the standby display.
Security features
The security features described in this section protects your phone from unauthorised use.
When requested, enter the code, which appears as asterisks (*) and press OK ⚙. If you make a mistake press Clear ⚙ and enter the correct digit(s).
√ Avoid using codes similar to emergency numbers such as 999 or 112 to prevent accidental dial-ling of these numbers.
KEEP A RECORD OF YOUR CODES AND KEEP THEM IN A SAFE PLACE. FAILURE TO DO SO WILL CAUSE YOU CONSIDERABLE INCONVENIENCE.
Phone lock code
A phone lock code is supplied with the phone for security purposes. It prevents unauthorised access to the phone and to the WAP ^™ settings.
The factory setting is 0000. We suggest that you reset this code and keep it in a safe place, separate from the phone.
The phone lock code is also required to reset the call timers. When enabled the code will be asked for each time the phone is turned on.
To change the phone lock code,
1 Press ▶. Select Settings.
② Select Security.
3 Select Phone lock change and follow the display prompts.
4 Press OK to validate the new code.
5 Press Exit or to return to the standby display.
To turn on or off the phone lock code,
1 Press ⬆. Select Settings.
2 Select Security.
3 Select Phone lock enable or Phone lock disable.
4 The phone lock code will be requested to authorise your selection.
5 Press Exit or to return to the standby display.
√ When phone lock is on emergency calls can still be made.
PIN code
Your SIM is provided with a 4-8 digit PIN code to protect it from unauthorised usage. When enabled the PIN code will be asked for each time the phone is turned on. If you enter the wrong PIN code three times in succession your SIM card will be blocked and you will need the 8 digit PUK code from your service provider (see page 39).
To turn on and off the PIN,
1 Press ▶. Select Settings.
② Select Security.
If already off, PIN enable will be shown.
If already on, PIN disable and PIN change will be shown.
3 Press Select and follow the display prompts.
4 Press OK to validate your entry. PIN enabled or PIN disabled briefly displayed will confirm your action.
5 Press Exit 🔒 or 📋 to return to the standby display.
To change the PIN code (PIN must first be enabled),
1 Press ⬆. Select Settings.
2 Select Security.
3 Select PIN change and follow the display prompts.
4 Press OK to validate your new PIN. Confirmation will be displayed.
5 Press Exit or to return to the standby display.
PIN2 code
The PIN2 code prevents unauthorised access to some features of the phone such as turning on or off FDN operations, modifying the FDN phonebook, setting calls costs to zero, modifying the costs display features. It can be changed but not turned on or off.
To change the PIN2 code,
1 Press ⬆. Select Settings.
② Select Security.
3 Select PIN2 change and follow the display prompts.
4 Press OK to validate your new PIN2 code.
5 Press Exit or to return to the standby display.
PUK code
The PUK (PIN unblock key) is an 8 digit code supplied by your service provider. It is used to 'unblock' a PIN whose code has been entered incorrectly three times. A PUK code cannot be changed.
When requested enter the PUK code and press OK ⬙. You will then be asked to enter a new PIN code. Follow the display prompts to reset the PIN code.
If you enter the wrong PUK code 10 times in succession your SIM card cannot be used again. Contact your service provider for a new card.
PUK2 code
The PUK2 is an 8 digit code supplied by your service provider. It is used to unblock a PIN2 whose code has been entered incorrectly three times. A PUK2 code cannot be changed. When requested enter the PUK2 code. You will then be asked to enter a new PIN2 code. Follow the display prompts to reset the PIN2.
If you enter the wrong PUK2 code 10 times in succession you will be unable to use the features requiring the PIN2 code. Contact your service provider for a new card.
Call barring password
The call barring password is used to select the call barring levels outlined in the GSM Services - Call barring menu (see page 34). It is obtained from your service provider.
Refer to page 35 to change the password.
Summary of code/password entry chart
| Password Length | Number of tries allowed | If blocked or forgotten | |
| Unlock code 4 | digits Unlimited | Return phone to manufacturer | |
| PIN | 4-8 digits | 3 tries | Unblocked by use of PUK code |
| PIN2 | 4-8 digits | 3 tries | Unblocked by use of PUK2 |
| PUK 8 digits | 10 tries | Contact your service provider | |
| PUK2 8 digits | 10 tries | Contact your service provider | |
| Call barring password | 4 digits | Network determined | Contact your service provider |
Certificates
Certificates are used for network exchange/exchange security. To display a certificate,
1 Press .
2 Select Settings. Select Security.
3 Select Certificate. Enter the 4 digit lock code (default code 0000) and press OK
Select List. The list of certificate subjects is displayed.
4 Press Options ●, then select View.
The detail view is displayed and is composed as follows:
- A header which informs about the certificate's format and its storage location
• The certificate subject
• The certificate issuer - The certificate validity dates (beginning and ending date)
• The certificate fingerprint
5 Press Exit ● or 🔒 to return to the standby display.
Office Tools

The Office Tools menu contains a diary, a voice/phone recorder, a calculator and a currency-converter, a world clock and an alarm clock.
Diary
The Diary is divided into three parts:
- The calendar which manages all the events
- The task list, which manages all the tasks
- The statistic feature which provides information about the memory capacity for the whole diary.
An event can be compared to an appointment. Conflicts are possible. Example: a meeting.
A task to be done can be compared to a task with no direct user implication (background task). Example: organizing a journey occurring.
Calendar
The calendar enables you to store up to 100 timed calendar events to occur either once, daily, weekly or yearly. Entries can contain up to 50 characters, with or without a reminder alarm, set to the entry time or set to 15, 30, 60 minutes or any specific period before the entry time. Events can be viewed individually or on a scrolling weekly or monthly basis. Events can be sent through the IrDA port.
To enter an event,
1 Press ☑. Select Office Tools.
② Select Diary. Select Calendar. Monthly view or Today view is displayed according to event presence.
3 Press Options ●. Select New event.
An empty event card is displayed with the following fields:
• A title (up to 10 characters)
• A description (up to 50 characters)
• A starting date and time
• A ending date and time
- An audio alarm which can be activated
- A location
- A recurrence rule
4 Enter or select the requested data. Confirm each entry by pressing OK or Select.
5 Press End ●, then select Yes to confirm data storage.
6 Press Exit or to return to the standby display.
To view the current day's entries,
1 Press ⬆. Select Office Tools.
② Select Diary. Select Calendar.

Select Options ●. Select Today to display the events of the day.
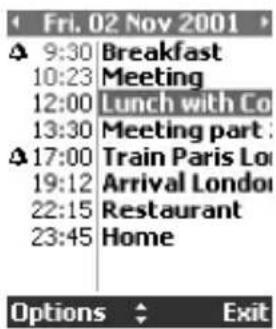
Each event is displayed on one line as follows :
• A graphic representation if an alarm has been set
• The event starting time
• The first part of the event title
The following actions are available:
| Actions Purpose | |
| Moves down to the next event or loops back to the first one | |
| Moves up to the previous event or loops to the last one | |
| (short press) | Moves to the previous day |
| (long press) | Scrolls to the previous day |
| (short press) | Moves to the next day |
| (long press) | Scrolls to the next day |
| Options + Today | Returns to 'Daily view' with today |
| Options + Week view | Displays the 'Week view' of the displayed day |
| Options + Month view | Displays the 'Month view' of the displayed day |
| Options + New event | Creates a new event entry in the calendar |
| Options + Modify event | Gives access to the event page to be read or edit the pointed event |
| Options + Send event by IrDA | Sends the selected event through IrDA |
| Options + Delete event | Deletes the selected event |
| Options + Delete all day | Deletes all the events associated with the displayed day |
| Options + View Tasks | Gives access to the displayed day tasks view |

Press Exit 🔒 or 📋 to return to the standby display.
To view weekly entries,
1 Press ☑. Select Office Tools.
② Select Diary. Select Calendar.
3 Select Options ●. Select Week view to display all the events scheduled for a selected week.
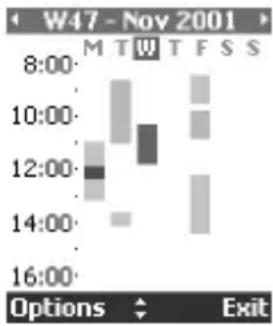
This screen displays an array containing the days of the week (horizontally) and the hours of the day (vertically).
It is divided into three parts, according to the time intervals: from midnight to 8 o'clock in the morning, from 8 o'clock in the morning to 4 o'clock in the afternoon and from 4 o'clock in the afternoon to midnight. Only one time interval is displayed. The two other parts are available on user request only.
All the events of the week are displayed in chronological order. Each event is displayed as a bar whose length is a representation of its duration, and whose colour depends on the activation of an alarm.
The following actions are available:
| Actions Purpose | |
| Moves down in the next time interval | |
| Moves up in the next time interval | |
| (short press) | Moves to the previous day |
| (long press) | Scrolls to the previous week |
| (short press) | Moves to the next day |
| (long press) | Scrolls to the next week |
| Options + Today | Returns to the 'Daily view' with today |
| Options + Day view | Displays the 'Daily view' of the pointed day |
| Options + Month view | Displays the 'Month view' of the displayed day |
| Options + New event | Creates a new event entry in the calendar |
| Options + Delete all week | Deletes all the events associated with the displayed week |
| Options + View Tasks | Gives access to the task view with the tasks associated with the displayed week |
4 Press Exit ● or ⚙ to return to the standby display.
To view monthly entries,
1 Press . Select Office Tools.
2 Select Diary. Select Calendar.
3 Select Options ●. Select Month view to display all the events scheduled for a selected month.
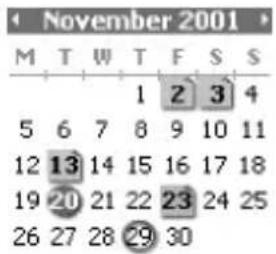
Options Exit
This screen displays the whole month in one array. The initials of the days are displayed horizontally, on top of the array.
If the selected month is the current one, today's number is rounded and coloured. If a day owns at least one event a graphical information is displayed. The graphic may be of two colours, depending on the presence of at least one event with an activated alarm.
The following actions are available:
| Actions Purpose | |
| Moves down in the month array | |
| Moves up in the month array | |
| (short press) | Moves to the previous day |
| (long press) | Scrolls to the previous month |
| (short press) | Moves to the next day |
| (long press) | Scrolls to the next month |
| Options + Today | Returns to the 'Daily view' with selected day equal to today |
| Options + Day view | Displays the 'Daily view' with the pointed day |
| Options + Week view | Displays the 'Weekly view' with the week of the pointed day |
| Options + New event | Creates a new event entry in the calendar |
| Options + Delete all month | Deletes all the events associated with the displayed month |
| Options + View Tasks | Gives access to the task view with the tasks associated with the displayed month |
4 Press Exit or to return to the standby display.
Tasks list
This feature enables you to store up to 100 tasks to be done (Todo), scheduled with a beginning and a due date and time, with or without a reminder alarm set on the due time.
Tasks can be sent through the IrDA port.
To enter a new task,
1 Press ▶. Select Office Tools.
2 Select Diary then select Tasks list. Select New task.
An empty task card is displayed with the following fields:
• A title (up to 10 characters)
• A description (up to 50 characters)
• A starting date and time
• A due date and time
- An audio alarm which can be activated on time
③ Enter or select the requested data. Confirm each entry by pressing OK
4 Press End ●, then select Yes to confirm data storage.
5 Press Exit or to return to standby display.
To display a tasks list,
1 Press ▶. Select Office Tools.
② Select Diary then select Tasks list. Select Current tasks. or Elapsed tasks (already done).
The tasks are displayed in a list, ordered according to their due date. If an alarm is activated for a task, 🔒 is displayed.
The following actions are available through the Options softkey.
| Actions Purpose | |
| Modify task | Reads or edits the pointed task |
| Delete task | Deletes the pointed task |
| Delete all tasks | Deletes all the tasks of the period (used to free the due tasks for example) |
| Send task by IrDA | Sends the selected task by IrDA |
| New task | Creates a new task entry in the diary |
3 Press Exit 🔒 or 📋 to return to the standby display.
Alarm notification
The alarm notification screen is displayed according to the alarm timer associated with an event or a task card. It displays information about the event or the task: the current date, the title, the starting date and time for the event. A ring is heard and the backlight is automatically switched on. If the user takes no action, the alarm is stopped after 60 seconds. It is automatically restarted, up to n times (n set by the operator) after a snooze time, until you acknowledge the alarm or up to the event/task ending time and date.
Press Valid ● to acknowledge the alarm or press Snooze ● to repeat the alarm after the snooze period.
Statistics
This feature displays the memory state, for the calendar. The current numbers of existing events and tasks are given and a chart is displayed for the events and for the tasks.
Up to 100 events and 100 tasks are allowed.
The following actions are available through the Options softkey:
| Actions Purpose | |
| Delete events | Deletes all the events included in one period |
| Delete tasks | Deletes all the tasks included in one period |
| Delete all events | Completely removes the file and creates a new empty one |
| Delete all tasks | Completely removes the file and creates a new empty one |
Caution - Remember to remove the battery after turning your phone off when boarding an aircraft where the use of mobile phones is not permitted and is illegal.
See the General safety warnings in First steps with your Eclipse.
Voice memo
This feature allows you to record up to 120 seconds of spoken notes or phone conversations.
To record a voice memo or a phone conversation,
1 Press 📋. Select Office Tools.
2 Select Voice memo. Select Record.
The display will show the recording time left. The recording will then start.
3 Press Stop to end the recording.
4 Press Exit or to return to the standby display.
To listen to the voice memo,
1 Press ☑. Select Office Tools.
2 Select Voice memo. Select Play back then press Read
The display will show the remaining recorded time.
3 Press Stop 🔒 to end the play back.
4 Press Exit or to return to the standby display.
Calculator
This feature enables you to perform simple calculations using + (plus), - (minus), * (multiplication), / (division) and % (percentage) functions.
An integrated currency converter facility is also proposed. If the currency converter is initialised, numbers can be converted during calculations.
To use the calculator,
Press ▶. Select Office Tools. Select Calculator.
The calculator icon ( [icon] ) and 0 will be shown in the display. The phone is now ready to perform simple calculations.
Numbers are entered by pressing ① to ⑨. The +, -, * and / symbols are entered using the multitap (for further details on the multitap text entry method please see First Steps with your Eclipse). Decimal points and the % symbol are entered using the multitap #
Press Clear (●) during a calculation to correct an entry. Press = (●) to obtain a result.
Example: 144 x 12 = 1728
| Key sequence Display | |
| 1 4 144 | |
| * * * * | |
| 1 12 | |
| = 1728 | |
Pressing = Ⓞ again after obtaining the first result will continue the calculation using the result and last operator (+, -, *, /) symbol.
In the example, pressing = Ⓞ again will calculate, 1728 x 12 = 20736
Pressing Clear ● will erase the result.

The % function can only be used (entered) as the last operator during a calculation.
For example 250 - 10% = 225
Example using the currency converter £-€: € 154 + € 3 = £ 97.1374
| Key sequence Display | |
| £ (€) € | |
| 1 5 4 | 95.2813 |
| * | + |
| 3 | 1.8561 |
| = | 97.1374 |
In the example, pressing = Ⓞ again will calculate £ 97.1374 + € 3 = £ 98.9935

This example was made on a basis of the following exchange rate: € 1 = £ 0.61871.
Enter another calculation, or press Exit ⚙ or ⚙ to return to the standby display. Calculations are kept if a call comes in during operation.
Currency-converter
This useful feature converts currencies. To use the converter however the currencies and the exchange rate first have to be set up. The conversion is calculated on the per unit exchange rate of the second currency selected.
To select the currencies and the exchange rate,
1 Press ⬆. Select Office Tools.
② Select Currency converter.
3 Select Settings.
4 Enter the first currency name (e.g. Dollar). Press OK ●. Enter the second currency name (e.g. Yen). Press OK ●.
5 Enter the exchange rate using ☑ to enter a comma.
Press OK ☑ to validate the entry. Press End ☑, then select Yes to confirm data storage.
6 Press Exit ● or ⚙ to return to the standby display.
If you want to use your Currency-converter as a Euro converter for participating currencies in the European Monetary Union ("Euroland currencies"), enter the complete Euro exchange rate with six significant figures. For example: € 1 = £ 0.61871.
To calculate the conversion between the chosen currencies,
1 Press ▶. Select Office Tools.
② Select Currency converter.
3 Select one of the first two options.
4 Enter the amount to be converted. Press ④to insert a comma, if needed.
Press OK ⚙. The converted amount will be displayed.
5 Press Exit ● or ⚙ to return to the standby display.
√ Conversion from one Euroland currency to another, or to non-Euroland currencies, should normally follow "triangulation" rules (i.e. conversion of local currency to Euros and then Euros to other local currencies). Your Currency-converter does not provide this possibility. The result you obtain will consequently be a close approximation.
World clock
This feature allows you to reference the mobile according to the world time zone map, based on Greenwich Mean Time. A secondary clock is also available.
This feature is useful for the Diary. In order to import or to export the calendar cards, events and task timetables have to be set according to Time zones.
Both clocks are displayed in the same screen. The date and time and the city name are displayed for both of clocks.
Clock setting
To set the origin clock,
1 Press ▶. Select Office Tools.
2 Select World clock.
3 Select Options ●. Select Edit origin or Edit secondary
The following fields are displayed:
• City: significant town associated with the time difference
- World clock: time difference with GMT (included in [-12:00; +14:00])
- Daylight saving rule. 2 values are available: Winter time and Summer time (+1hr)
The rule is one hour in advance during summer time. On each change the time is automatically updated for the origin and the secondary clocks
- Date and time: current date and time (only set in the origin clock)
④ Enter or select the requested data. Confirm each entry by pressing OK
5 Press End ⚙, then select Yes to confirm data storage.
6 Press Exit or to return to the standby display.
Swap between the two clocks
This feature is used when travelling: you always have the local clock and you can swap between the two clocks.
To swap the clock,
1 Press ☑. Select Office Tools.
2 Select World clock.
3 Select Options. Select Swap.
An information message is displayed. The secondary clock becomes the origin/mobile clock and the origin clock becomes the secondary one.
4 Press Exit ● or Ⓤ to return to the standby display.
Alarm clock
This feature enables you to set a daily 'Reminder Alarm'.
To set a time and turn on the alarm,
1 Press ☑. Select Office Tools.
② Select Alarm clock (If a previous alarm time has been entered this time will be displayed).
3 Select On and enter the alarm time (in 24 hour format) or press OK to accept the displayed time. Confirmation will be displayed.
4 Press Exit ● or ⚙ to return to the standby display. ⚠ will be displayed on top of the idle display.
When 'on' the alarm will operate at the same time every day until turned off.
When the alarm time is reached an audible alert sounds for up to 1 minute and the LED will flash red. Alarm clock and a vibrating bell symbol will appear in the display together with the current time and the softkeys,
Valid. ⚙ and No ring ⚙.
If the phone is off at the time of the alarm, the phone will automatically 'power on' and operate the audible and visual alerts described above.
To use as a Reminder or Snooze Alarm,
Press No ring ⬙, or any other key (except Valid. ⬙) to stop the alarm. The alarm icons remain in the display and the alarm will ring again 3 minutes later.
or
Press Valid. ⚙ to acknowledge and switch off the alarm.
If 'off' before the time of the alarm the phone remains 'on'. If the phone is locked or the PIN setting is on it remains in this locked condition until operated by you.
If the alarm is acknowledged but not validated the alarm indicators will remain in the display for up to 15 minutes after which time the phone will either turn off, or, if 'on' at the time of the alarm, will revert back to the normal standby display.

-
Until acknowledged the alarm will ring for 1 minute. Pressing any key (other than the Valid softkey) will stop the alarm sounding but not switch off the alarm, it will be repeated 3 minutes later. If the Valid softkey is not pressed after the 3rd (and final) time the alarm rings it will not be repeated but the phone remains on, in the alarm display mode, for up to 15 minutes after which it will revert back to the state it was in before the alarm time was reached.
-
If the phone is in a transitory state (during power off for example) at the time of an alarm it will be delayed until after the transitory state has finished.
- If the alarm time is reached during a call a special Call in process alert beep will sound and visual alerts will appear every 3 minutes. The alarm can be validated in the normal way.
- If the alarm time is reached during an outgoing, or incoming call setup sequence, the alarm is suspended until the call is established and the mobile behaves as in 3 above.
- If the battery is detached within 15 minutes of the alarm time the alarm will sound immediately. If later than 15 minutes only the visual indicators will be shown. Press the Valid softkey to validate and stop the alarm.
To turn off the alarm,
1 Press ⬆. Select Office Tools.
2 Select Alarm clock.
3 Select Off. Confirmation will be displayed.
4 Press Exit ● or 📞 to return to the standby display.
Caution - Remember to turn off the alarm feature when boarding an aircraft where the use of a mobile phone is not permitted and is illegal.
Alternatively you can remove the battery after turning off the phone.
See the General safety warnings in First steps with your Eclipse.
The infrared port allows you to exchange data between your mobile and other devices (provided they have an infrared port).
To initiate a transfer via the infrared port, your mobile must be placed facing another infrared port before port opening starts.
The two ports can then be opened and synchronised. The requested transfer can then be performed. Objects (vCards e.g.) are transferred one by one.
Opening the infrared port
Opening the infrared port allows you to receive information via this port. Once opened, the infrared port can be used for any kind of transfer. The infrared port is automatically disconnected after some time.
You have to open the infrared port if you want to receive data via your infrared port or if you want to transfer non-structured data via the infrared port (such as a fax or file transfer to the network for instance).
To open the infrared port,
1 Press ⬆. Select Connectivity.
② Select Infrared port.
3 Select Open. Confirmation will be displayed. → will be displayed on top of the standby display.
When the infrared port is open, objects can be received. When an object is received, the idle screen is masked by the new object reception status.
Closing the infrared port
Closing the infrared port closes all infrared sessions (OBEX and IrCOMM sessions).
To close the infrared port,
1 Press ▶. Select Connectivity.
② Select Infrared port.
3 Select Close. Confirmation will be displayed.
Transferring a phonebook card via the infrared port
You can transfer phonebook cards via the infrared port:
1 Place your mobile opposite the other device infrared port.
② Open the other device infrared port.
3 Select the card you wish to transfer as explained in section Viewing and calling numbers in the phonebook, page 8.
4 Press Options ●. Select Send by IrDA. The infrared port will first be opened. The transfer will then be performed.
⑤ When the transfer is complete the phone returns to the phone-book card display.
6 Press Exit or to return to the standby display.
Inbox
This feature allows the storing of data received from various entries: IrDA, WAP ^™ , SMS.
The objects are queued in the inbox and can be retrieved by object type: Task card, Event card, Business card, Root certificate, JAVA ^™ files and other “undefined” (not defined for the mobile) files.
Specific dedicated downloads are not inserted in this queue (for example, for WAP ^™ provisioning using dedicated SMS, information goes directly to the target application and does not go through the inbox).
To display the inbox contents,
1 Press ⬆. Select Connectivity.
2 Select Inbox.
The list of all the files is displayed, in anti chronological order (the last files received are displayed first), with their associated icon and their own file extension. Five icons are defined, one for each file type, and one for all the other files.
The following actions are available through Options ⚙.
| Actions Purpose | |
| Delete Deletes the pointed file | |
| Delete all Deletes all the files | |
| Store Stores the pointed file in its target application | |
| Details Displays the details of the pointed file | |
| Send by IrDA Sends by IrDA |
3 Press Exit ● or 📞 to return to the standby display.
Free space in the memory
To consult the free space in the memory,
1 Press ⬆. Select Connectivity.
② Select Statistics. A graphic displays the total size of the memory and the memory used.
3 Press Exit or to return to the standby display.
Games

The availability and appearance of the games described hereafter depend on the services provided by your network operator.
There are two games in the phone, Rayman Bowling and Rayman Garden. To play a game,
1 Press ▶. Select Games.
2 Choose the game you wish to play and press Select or ▶.
3 Select Level to choose the difficulty level.
Select High Scores to view the best and last scores.
Select Parameters to set if you wish sound effects or no sound and to select the volume level.
Select Instructions for instructions on how to play the game and the controls to be used.
4 Select Play to start the game.
If a call is received whilst a game is being played the normal received call display will be shown and the call is answered in the normal way. When the call is finished the game will be resumed.
To exit from the games menu,
5 Press 📞 to return to the standby display.
Internet/Wireless Application Protocol (WAP™)

The Eclipse has a WAP ^™ internet browser to access services, such as stock buying, news, sports, weather, TV listings etc., supplied by your operator and/or your internet provider. The types of services offered depend on the internet provider and network operator.
You must have a DATA subscription to access these services.
Also check with your network operator whether the connection settings have been pre-programmed into the phone prior to delivery or whether you have to manually enter and store the settings yourself.
In either case once the settings have been stored you can start using this feature as required and described below.
√ Access to the connection settings may depend upon whether the settings have been pre-programmed into the phone prior to shipment from the factory. In some cases and to avoid errors these settings may be 'Locked' and not be user programmable.
Creating and editing GPRS access point names for WAP™ connections\*
To create GPRS access point name dedicated to WAP ^™ connections (only possible if GPRS services are available in your part of the country and within your subscription),
1 Press ⬆. Select Internet.
2 Select Settings. Select Access point names.
3 The access points list appears. Select an empty entry ( [...] ) and press New
4 Enter the access point Alias and press OK
5 Enter the access point Full name and press OK
6 Enter the Login name for this access point and press OK
7 Enter the Login password for this access point (each character will turn into a star (*) after a short while) and press OK.
8 Press End, then select Yes to confirm data storage.
9 Press Exit ● or ⏻ to return to the standby display.
To modify GPRS access point dedicated to WAP ^™ connections,
1 Press ⬆. Select Internet.
2 Select Settings. Select Access point names.
3 The access points list appears. Select an entry and press Options ⚙/Edit.
④ Edit the Alias, the Full name, the Login name and/or the Login password. Confirm each entry by pressing OK
5 Press End, then select Yes to confirm data storage.
6 Press Exit ● or ⏻ to return to the standby display.
Storing/editing the connection settings (obtainable from your network operator)
Before proceeding and if you have not already done so please enter the current time and date as described on page 48.
The profile list can contain up to 10 profiles.
To enter and store the profile details,
1 Press ▶. Select Internet.
② Select Profile list.
3 Select an empty profile ( [...] ) and press New ●.
4 Enter the Proxy name and press OK
5 Select the Gateway settings.
Enter the IP address and press OK
Enter the Home page address and press OK
Select the Activate security settings for the connection (Never, Automatic or Always) and press Select ●.
Validate the Normal port address and press OK
Validate the Secure port address and press OK
Select the Send characteristics settings (On or Off) and press
Press End ⚙, then select Yes to confirm data storage.
6 Select the Circuit access settings.
Enter the Phone number and press OK
Enter the Login name and press OK
Enter the Login password. Each character will turn into a star (*) after a short while. Press OK
Select the transmission Speed (9600 or 14400) - if required - and press Select
Select the transmission Mode (Numeric or Analog) and press Select ●.
Enter the Automatic disconnection time and press OK
Press End ⚙, then select Yes to confirm data storage.
7 Select the Packets settings *.
Choose a GPRS Access point names and press Select ●.
Enter the Automatic disconnection time and press OK
Press End ⚙, then select Yes to confirm data storage.
⑧ Select the Connection mode (Circuits, Packets * or Circuits + packets) and press Select ●
9 Select the Push Parameters settings.
Enter the Push Proxy SMS centre phone number and press OK
Enter the Push Proxy SMS address and Push Proxy IP
address phone numbers and press OK
10 Press End, then select Yes to confirm data storage.
11 Press Exit or to return to the standby display.
Select
- You can also access the Internet menu directly by pressing the Internet softkey from the standby display (provided you haven't personalised the left softkey).
- If the PPP access phone number, login names and password, Home page http address and IP address are not predefined, these are obtainable from your network operator and/or internet provider.
- Selecting PPP Access or Proxy again will allow you to change and/or modify any of your settings.
Selecting a preferred bearer\*
When defining mixed (Circuit+Packets) based profiles, you have to select the first bearer to use when starting a connection.
To select a preferred bearer,
1 Press ⬆. Select Internet.
2 Select Settings. Select User Preferences.
B Select Preferred bearer (Circuit or Packets). Press End and select Yes.
4 Press Exit or to return to the standby display.
√ This setting applies to all mixed profiles.
Personalising your connection settings
The following user settings are available enabling you to optimise the behaviour of your phone whilst connected to the internet.
1 Press ⬆. Select Internet. Select Settings.
② Scroll to the following items and turn On or Off as required:
| Option Action | |
| Clear cache | During a live Internet session some of the information and services you have accessed have been 'stored' in an area of memory called the cache. This memory can be cleared |
| Clear address list | Selecting this item will clear the last five addresses entered in the URL list |
| User preferences + Full screen | Used to configure the browser to display pages in full screen mode or not |
| User preferences + Zoom +/- | Used to configure the browser to display pages in larger, medium or smaller font |
| User preferences + Scripting | Used to allow or forbid the use of scripts execution of scripts including in WAPTM pages |
| User preferences + Preferred bearer * | Used to select the bearer to use when making WAPTM sessions (Circuit or Packet) |
| User preferences + Accept provisioning | Used to define the incoming of Push messages (Never, Current profile, All profiles or Al-ways) |
3 Press Exit ● or ⏻ to return to the standby display.
You can also access the Internet menu directly by pressing the Internet softkey from the standby display (provided you haven't personalised the left softkey).
Going online and onto the Net
To gain access to the online services offered by your network operator,
1 Press ☑. Select Internet.
② Select Home page.
3 Connecting to followed by your proxy name will be displayed whilst access is taking place followed by the word Loading... (of the home page).
√ You can also access the Internet menu directly by pressing the Internet softkey from the standby display (provided you haven't personalised the left softkey).
Once connected you will be presented with your internet or operator's choice of menu options. The icon at the top of the display indicates a 'live' connection. The icon will appear if your phone is connected to a GPRS network* during the WAP™ session.
During card browsing, the security can be activated via the “Security setting” (see page 55). This closes the current non-secure session and lets you continue local browsing (via the cards in the cache). When a connection to the network is needed again, a secured connection will be requested to the same profile. This may not function properly, due to flush preceding connection parameters by the server. In this case, the browsing may have to be restarted from the beginning.
When the secured connection is established, the 📧 icon at the top of the display indicates a 'live' connection in secure mode. The ⚫ icon will appear if your phone is connected to a GPRS network during the WAP™ session in secure mode.
Use ⓐ / ⏻ and/or the softkeys to move up and down the menu, to make selections as well as move backwards and forwards through the menu. Use the left and the right softkeys when selected topics in a menu are highlighted.
Use of whilst online
In the absence of Options ⚙ whilst online pressing ⚙ during a live connection will present an options menu as follows:
| Item Action | |
| Home page Goes | to and reloads the home page. |
| Bookmarks | Provides immediate access to the bookmark list as when not connected. You can add a new bookmark as an empty entry or go to a bookmark, chosen in the list. |
| Other site + Reload | Reloads the current WAPTM page. |
| Other site + New address | Provides access to a specific URL, based on the corresponding menu item. |
| Other site + New address Bango | Provides a quick access to a specific input URL |
| Other site + Address List | Provides access to one of the last five entered URL addresses |
| Push Messages + Push inbox | Provides access to the list of all the push messages stored in Inbox.If no message is available, an information message "Push messages - Empty" is displayed. |
| Settings Same | as in offline case |
| Save pictures | Downloads all pictures displayed in current page, in Inbox.This item is only displayed if some pictures are present in the page |
| Disconnect | Disconnects the browser from the network, but the browser remains active locally with the current page displayed. |
| Close session | Disconnects the browser from the network. The current page is lost and the WAPTM menu is displayed again. |
The appearance of these items in the above options menu may be operator dependent and/or the settings in the Settings menu.
Ending the online connection
To end the internet connection,
Press
√ You can also select Close session item under the options menu.
Creating bookmarks
You may want to revisit or return to some services more frequently than others. These services (or pages) can be stored as bookmarks which then provide direct access links into the internet. They can only be used if available on the current connection settings of your network operator and/or internet provider.
There are two ways to add up to 20 bookmarks:
- Directly from the standby display,
1 Press ⬇. Select Internet.
② Select Bookmarks. The list of bookmarks is displayed in alphabetical order.
3 Select an empty entry ( [... ] ). Press New ⚙ and enter the following:
Option Action
Alias Name you want to give to your bookmark
Address Home page address (if known)
4 Press End ●, then select Yes to confirm data storage.
5 Press Exit ● or 📋 to return to the standby display.
√ You can also access the Internet menu directly by pressing the Internet softkey from the standby display (provided you haven't personalised the left softkey).
- During a live connection whilst viewing a page,
1 Press
② Select Bookmarks, then follow the same procedure as when not connected.
√ Bookmarks can be Edited or Deleted from the Bookmarks item under the Internet menu options whilst offline or online.
Using bookmarks
Bookmarks can be used:
• directly from standby display,
1 Press ▶. Select Internet.
2 Select Bookmarks.
3 Select the bookmark name you require.
√ You can also access the Internet menu directly by pressing the Internet softkey from the standby display (provided you haven't personalised the left softkey).
- whilst you are browsing the internet:
1 Press to display the options menu.
2 Select Bookmarks.
3 Select the bookmark name you require.
Other site
When this option is selected in the Internet menu you can enter a known internet address or Bango address site and to go to this site directly from dial up. However unlike the Bookmark feature addresses are not stored and must be entered each time this feature is used.
Receiving push messages
A push message may be:
- a message indicating that a service is available on the network, or
- a service information message.
To retrieve the information, you will have to connect to a server in the network.
On Push messages reception, a WAP ^™ session is started and messages are
immediately displayed or stored in the Push Inbox, according to the Push settings. At the end of the transmission the push reception session is ended.
The Push Inbox lets you consult and delete the messages stored and allows a connection to a server, to retrieve the associated information.
When the Push Inbox contains new message(s), an information message is displayed in the standby display with a direct access to the inbox.
To set the push reception parameters,
1 Press ⬆. Select Internet.
2 Select Settings.
3 Select Push preferences.
Select the Accept Push Information setting which indicates whether no push messages will be received (Never), or only push messages initialised by the entity which have the current profile will be accepted (Current profile), or only push messages initialised by an entity which have one of the defined profiles will be accepted (All Profiles), or all push messages will be accepted (Always).
Select the Push auto-connection setting which indicates whether a user acknowledgement is needed to establish the connection (On) or not (Off).
Select the Push Quiet Mode setting which indicates whether the downloaded messages will be automatically stored in the Push Inbox (On) or directly displayed on the screen (Off).
Select the WAP ^™ SMS filter setting which activates (On) or deactivates (Off) a filtering on incoming SMS containing SIA.
4 Press End , then select Yes to confirm data storage.
5 Press Exit ● or ⏻ to return to the standby display.
To consult a push message in the Push inbox,
1 Press ⬆. Select Internet.
② Select Push inbox. Summaries of all push messages are displayed according to their reception date and time.
3 Press Options then select Read text to display the selected message text in full screen mode.
4 Press Exit or to return to the standby display.
The following options are also available:
| Options Purpose | |
| Read text | Provides access to the message text (possibly on several pages) |
| Summary | Returns to the summary display |
| Preview | Connects to the service, but keeps the message in the inbox allowing another access to the same service later |
| Retrieve | Connects to the service, and deletes the message from the inbox when the connection to the service is made. |
| Delete | Deletes the item |
| Delete all | Deletes all inbox push messages |
| Details | Provides the expiry date for this item (if an expiry date exists) |
Melodies download
This feature makes use of the 'Digiplug' or the Nokia Smart Messaging system usage, for Trium phones. The principles are as follows:
- Melodies are stored on a Web/WAP™ server, for mobile phones. In this server, melodies are available for phones other than Trium, as well as for Trium phones. This storage is Digiplug responsibility.
- You can access this site by the Internet or WAP™.
- When your phone type is selected, you can see a choice of melodies for download.
- You can choose one or more melodies to download to your phone.
- All chosen melodies are downloaded via SMS, using one message and compressed.
- Once the melody is completely received, it is uncompressed. For each received melody, a screen gives you reception information. You can then install, play or discard the melody.
To play a donwload melody,
1 Select Options ●. Select Play. Some information is displayed on the screen, while playing.
② Press either OK or Exit to stop playing.
To install a donwload melody,
1 Select Options ⚙. Select Install. If there is enough place, the melody is automatically stored in the imported melodies directory. If there is not enough space left, you are asked to choose which melody to replace, from the set of downloaded melodies on the mobile (melodies that are associated with a ring feature cannot be deleted). Once stored, a message is displayed. The melody can be played immediately and selected via the tones settings menu. A subset of melodies from all melodies is reserved for such downloads. 2 Press Exit ⚙ or ⚙ to return to the standby display.
When accessing by WAP™, the procedure is similar.
Appendix
Glossary
| Expression | Meaning |
| AC/DC charger | Alternating Current/Direct Current charger |
| Active call The | call currently in conversation |
| ALS Alternate | Line (Line 2) Service |
| AoC Advise of | Charge - subscription service |
| APN Access Point Name | |
| CB Cell Broadcast | |
| CLA Cigarette | Lighter Adaptor |
| CLI Caller Line | Identity - displays callers telephone number |
| Conversation mode | When the phone is making or receiving a call |
| CSD Circuit Switched Data | |
| DES Data Encryption standard | |
| Diverting Diverts incoming calls to the phone to another number | |
| DN Dialling Number | |
| DTC Desk Top Charger | |
| DTMF Dual Tone Multifrequency Tones | |
| FDN Fixed Dialling Number | |
| GPRS General | Packet Radio Service |
| GSM Global System for Mobile communications | |
| HF Handsfree Car Kit | |
| http HyperText Transfer Protocol | |
| IN Information Numbers of your operator or service provider | |
| IP Internet Protocol | |
| LCD Liquid Crystal Display | |
| LED Light Emitting Diode | |
| MMI Man machine Interface | |
| PIN/PIN2 | Personal Identification Number. Supplied by your network/service provider |
| PPP | Point to Point Protocol |
| PUK/PUK2 PIN | Unblocking Key. Used to unlock PIN and PIN2. Supplied by your network/service provider |
| Roaming (Rm) | The ability to use your telephone on networks other than your home network at home or abroad. |
| SDN Service Dialling Number of your operator or service provider | |
| SIM Subscriber | Identity Module. Supplied by your network/service provider |
| SMS Short Message Service | |
| SPN Service Provider Name | |
| SR Status Report - relates to SMS messages | |
| Standby mode | When the phone is on, registered onto a network but not making or receiving a call |
| URL Uniform Resource Locator | |
| WAE Wireless | Application Environment |
| WAP^TM Wireless | Application Protocol |
| WDP Wireless | Datagram Protocol |
| WML Wireless | Mark-up Language |
| WMLS Wireless | Markup Language Script |
| WSP Wireless | Session Protocol |
| WTAI Wireless | Telephony Application Interface |
| WTP Wireless | Transport Protocol |
Trouble shooting
| Problem Possible cause and solution | |
| Phone will not switch on | Check that the battery is fully charged and correctly connected to the phone. |
| Charging LED not lit red and no flashing battery Icon | There may be no mains supply. Check mains supply.The AC/DC charger may be faulty. Return to your dealer and try substitution with another Mitsubishi adaptor. If faulty contact your dealer. |
| Short standby and talk times | Cell broadcast is permanently on, using more battery power.Phone is in a poor signal area and therefore always on full power.Incorrect charging and discharging. Always charge and discharge your battery fully.The battery is wearing out. Replace the battery |
| Calls cannot be made or received | Check that you have at least one signal strength bar. Try in a stronger signal strength area.If the name of a network is not displayed, check your SIM is all right, check registration with your network/service provider.Call barring option is turned on. Turn it off (see page 34).Call cost limit is reached (see page 20). |
| Stored telephone numbers cannot be recalled | Fixed Dialled Number or Call Barring features are turned on.Check features and turn them off (see pages 10 and 34). |
| Numbers cannot be entered in the display | Keypad lock is on (is displayed). Press and hold to turn off. |
| Phone switches on but there is no display | Display contrast is turned down too low. Reset contrast (see page 27). |
| Battery icon () not flashing 1-2-3 during charging | Indicates a charging or battery problem. Turn off and disconnect the charger. Reconnect and try again. If the problem remains contact your dealer. |
| Flashing There is not enough memory to store another SMS message. You must delete one or more of the existing stored messages (see page 13). | |
| (......) softkey | Function no longer available in the SIM or was subscription dependent. Reprogram the softkey (see page 27). |
Error messages
| Problem Possible | cause and solution |
| Allowed credit reached! | You are trying to place an outgoing call and the allowed credit is already reached.The allowed credit limit is reached during an outgoing call (the call is then aborted). |
| Busy | You are trying to make a call and the call fails because the destination number is already engaged in conversation. |
| Call failed The user is unreachable.The outgoing call fails due to:the network cannot take the call because the system busy or the number is out of order or the number is unreachable or the network does not answer or the option to hide your phone number when calling is not supported by the networkControl the ability to hide your ID when making a call (service availability in network). | |
| Cancelled. No type selected | Cell broadcast activation has been requested but no message type has been selected. |
| Cannot execute command | You have made a request which cannot be performed in the current call situation. |
| Can't display message | The short message text cannot be displayed (characters not recognised, incorrect format etc...) |
| Check SIM! There is | no SIM present or the SIM is incorrectly inserted.See First Steps with your Eclipse for more details. |
| Check your password | You changed the call barring password or You changed the call barring service status. The entered password seems to be wrong or incorrect. |
| Check your request | You made a request for a service that seems to be impossible to fulfil. |
| Check your subscription | You tried to activate a GSM service. You are requested to check your subscription regarding the related service rights of use/access. |
| Connection failure | The connection cannot be established. |
| Error! The network can | cannot perform your request and generates an error result. |
| Execution error The | current object/script has an execution problem. |
| Failed An SMS sending process failed (the short message cannot be sent). | |
| Incorrect entry You | entered a character string with a syntax error. |
| Invalid number You | tried to make a call and the call is rejected by the network because the network does not recognise the phone number structure or you tried to store a phone number that is too long to be stored in the selected location or you tried to move a phone entry to a location that is unable to receive the phone number (phone number too long) |
| Keypad locked Press "unlock" and to unlock | A press on any key is made with keypad locked. Keypad lock is on (is displayed). Press and hold to turn off. |
| Low battery! This text is displayed when the battery becomes too low and the mobile will soon be switched off automatically. | |
| Malformed content | The WML could not be compiled or was misinterpreted. |
| Network busy You tried to make a call. The call is rejected by the network due to congestion problems. | |
| Network not allowed | When selecting network manual search, you have selected a network that rejects the connection. |
| New PIN incorrect. Try again | Changing PIN: the new PIN code values differ (value control). |
| New PIN2 incorrect. Try again | Changing PIN2: the new PIN2 code values differ (value control). |
| No action performed | When a copy/move operation is made on memories but no conditions have been changed (same memory, number and name). |
| No response | You made a call to a remote user and no response has been received. |
| Not allowed Your number/character entry is not allowed. | |
| Not allowed (fixed dialling) | A call is tried, but cancelled due to fixed dialling control (the number dialled does not match with one of the fixed dialling numbers in memory). |
| Not Available There | is no more SIM storage. |
| Number changed The | the called number has changed. |
| PIN blocked A wrong PIN code has been entered 3 times. | |
| PIN2 blocked A wrong PIN2 code has been entered 3 times. | |
| PUK2 blocked A wrong PUK2 code has been entered 10 times.The SIM services protected by the PIN2 code have now been permanently disabled. | |
| Reaching allowed credit! | The cost limit is about to be reached. The connected call will end automatically when the limit is reached. |
| Ring volume Off The ring volume is set to 0 (no volume). | |
| Service not available | Activating some GSM services that are not available on the network |
| SIM blocked.Contact provider | A wrong PUK has been entered 10 times.The SIM card has been permanently disabled and needs to be replaced by a new one. |
| SIM blocked.Enter PUK: | A wrong PIN code has been entered 3 times.Enter the PUK code to unblock the SIM card. |
| SIM fixed full SIM names full Phone names full | The corresponding memory is full. |
| SMS memory locations are full | The storage of new messages (when writing a new SMS) is impossible. |
| Wrong code. Try again | A wrong phone lock code has been entered. |
| Wrong new code.Try again | The new phone lock codes do not match (value control). |
| Wrong PIN, try againWrong PIN2, try againWrong PUK, try againWrong PUK2, try again | A wrong code has been entered. |
Pan European Service
If you require service, then in the first instance, you should contact your supplier.
Should you experience any difficulty then please contact your nearest MITSUBISHI location listed below for information on other service centres.
UNITED KINGDOM
Tel: (0800) 912 00 20
FRANCE
Tel: (0825) 86 82 83
DEUTSCHLAND
Tel: (01803) 33 71 84
ESPAÑA
Tel: (902) 11 68 58
ITALIA
Tel: (800) 27 59 02
IRELAND
Tel: (1800) 92 70 12
BELGIUM
Tel: (0800) 775733
SWITZERLAND
Tel: 032 843 65 11
THE NETHERLANDS
Tel: (0800) 0223825
To obtain Warranty Service, you will require your original equipment purchase invoice or irrefutable proof of purchase.
Please see warranty terms and conditions for in warranty service.
Pan-european GSM End-user Guarantee Conditions
-
You can benefit from this guarantee only if you are the original end-user purchaser.
-
MITSUBISHI guarantees that for a period of twelve (12) months from the date of purchase from your dealer, the Product shall be free from defects in materials and workmanship. Subject to the conditions below, Mitsubishi will indemnify you against all cost of parts and labour for repairs to or replacement of the product or parts (which may include equipment of similar type) where conducted by an authorised MITSUBISHI GSM service centre. MITSUBISHI shall be entitled to retain product which has been replaced.
-
Any claims must be made to an authorised MITSUBISHI GSM service centre in the countries mentioned in the service card enclosed with the product. In case of difficulty you can contact the Mitsubishi companies listed in the service card to obtain details of your nearest authorised MITSUBISHI GSM service centre. As a condition of this guarantee, the date of your purchase must be confirmed by producing your original invoice from your supplier or your sales receipt, showing the serial number, together with the service card. Final determination of guarantee claim eligibility shall be made by MITSUBISHI. MITSUBISHI shall not be liable for shipment costs to and from an authorised GSM MITSUBISHI service centre; the product travels at your risk.
-
This guarantee does not cover:
a) battery defects of any nature;
b) non-compliance with directions for use;
c) installation or removal charges where the product is installed in a vehicle;
d) defects or failures caused by accident, misuse, improper installation or improper repair by an unauthorized repairer, alteration or modification, neglect, failure to use for normal purpose, Acts of God, water ingress, use in adverse environmental conditions (humidity or temperature);
e) cost of or performance of modifications to product to adapt or adjust to conform to national or local safety laws, where such safety laws go beyond harmonised European Union standards;
f) loss of use of the product or consequential loss of any nature;
g) loss of use of air-time, loss of use of any loaned equipment or ancillary equipment;
h) provision of incorrect or insufficient signal on air-time network, upgrading of product software to changes in network operating parameters, mains supply voltage fluctuations, incorrect SIM card (memory card) parameters for connection to airtime retailer; i) damage caused by non-MITSUBISHI accessories.
-
Any guarantee claim or service does not extend the original guarantee period unless so required by prevailing national law.
-
This guarantee is valid only if the product is purchased and used in the European Union, Norway, Iceland or Switzerland.
THIS GUARANTEE DOES NOT AFFECT YOUR STATUTORY RIGHTS.
DECLARATION OF COMPLIANCE
Name : Mitsubishi Electric Telecom Europe S.A. RCS Nanterre B 307 593 129
Identification of the product
Nature : Mobile Cell Telephone
Type : Dual band GSM 900/DCS 1800
Sales reference : MT-450
Other information :
Identification of the notified organization
Procedure followed : Annex III of the directive 1999/5/CE
Declares under its entire responsibility that the product described above complies with the following basic applicable requirements (and in particular those in the 1999/5/CE directive):
Article 3.1a: (health protection and user safety) 73/23/CEE, ES 59005
Article 3.1b: (protection requirements concerning electromagnetic compatibility) 89/336/CEE, ETS 300 342-1
Article 3.2: (proper use of the radio-electric spectrum so as to avoid damaging interference) EN 301 511
To this effect, declares that all the radio test series have been carried out.
1st of June 2001,

Viet Mailam Managing Director
Index
A
Access point names 54
Alarm
Reminder 50
Alarm clock 49
Alert mode 23
Alert tone
Turning on/off 14
Alert tones 23
Any key answer 27
Auto
Answer 28
Retry 28
Auto Switch Off 29
Auto Switch On 29
Automatic search 34
B
Backlight 27
Balance information 19
Barring password
Call 39
Bookmarks
Creating 58
Using 59
Broadcast
Alert 36
Language 37
Message types ...... 36, 37
On/Off 36
C
Cache memory Clearing 56
Ca
Duration 19
Reminder 19
Times 18
Call barring 34
Call costs
Reset 21
Call timer
Reset 20
Caller line identity 31
Calls & Times 18
Call costs ...... 20, 21
Call timers ..... 18, 19, 20
Calls log 18
Costs 20
Line selection 22
Calls Log 18
CB 35
CB messages
Deleting 37
Editing 37
Reading 36
Cell broadcast 35
CLI 31
Connection profile 55
Connectivity 51
Inbox 52
Infrared port 51
Statistics 52
Cost management 20
Creating a draft text 14
Credit limit 21
Currency-converter 48
D
Diary Calendar .... 41, 43, 44 Tasks list .... 45
Display contrast 27
Diverting incoming calls ..... 30
Downloaded melodies ...... 23
Draft text
Creating 14
Editing 15
E
Editing a draft text 15
Error messages 64
F
FDN 10
Fixed dialling numbers ..... 10
G
Games 53
Glossary 62
GPRS access point names 54, 55
Graphics themes 25
GSM Services 30
Call barring 34, 35
Call diverting 30, 31
Call waiting 31
Mode of operation ..... 33
Network 33, 34
Receiving caller ID 32
Sending my ID 32
Guarantee 67
H
Home page 55
|
Inbox 52
Incoming Calls
Diverting 30
Information numbers 4
Infrared port 51
Close 51
Open 51
Internet 54
Bookmarks 58, 59
Going online 57
GPRS access point names 55
GPRS access points ..... 54
Home page 55, 57
IP address 55
Login name 55
Login password 55
Normal port 55
Other site 59
Personalising 56
Phone number 55
Preferred bearer 56
Profile list 55
Proxy name 55
Receiving push messages 59
Secure port 55
Settings 54, 55, 56
IP address 55
K
Keypad lock 26
Keys
Setting 27,28
L
Language selection 26
Line 1 ...... 10, 18, 19, 22, 31
Line 2 ...... 10, 18, 19, 22
26, 28, 31
Login name 55
Login password 55
M
Managing SMS messages ..... 13
Melodies 23,61
Melodies download 61
Menu map 2
Message templates 17
Messages 13
Alert 14
Broadcast 35
Draft texts 14, 15
Inbox 13
Msg Templates 17
Outbox 16
Settings 14, 17
Statistics 17
Write new 15
Mobile number
Hiding 31
Showing 31
Mode of operation
Modem 33
Standard 32
Modem 33
N
Network 33
Network serv. 4
Normal port 55
0
Office Tools
Alarm clock 49, 50
Currency converter 48
Diary ...... 41, 43, 44, 45
World clock 48, 49
Office tools 41
Calculator 47
Voice memo 46
Online connection 57
Bookmarks .... 58, 59
Ending 58
Personalising 56
Outbox 16
Own number 10
P
Phone Customising 23
Phone Book 5
Add name 5,7
Calling numbers 8
Fixed dialling ..... 10, 11
Free space 8
Own numbers 10
Read 8
Statistics 8
Viewing numbers 8
Voice dialling 11, 12
Phone lock 37
Code 37
Phone number 55
Phonebook
Voice dialling 11
PIN code 38
PIN2 code 38
Problems 64
Programmable
Softkeys 27
Proxy name 55
PUK code 39
PUK2 code 39
Push messages 59
R
Ramping 25
Rayman Bowling 53
Rayman Garden 53
Reading an SMS message ..... 13
Reminder - call time 19
Ring 23
Ring tone 23
S
Scripting 56
SDN numbers 4
Secure port 55
Security 37
Features 37
Sending an SMS message ..... 15
Settings 23
Auto features ...... 28, 29
Broadcast ...... 35, 36, 37
Default settings 29
Display 27
Graphics themes ...... 25
GSM Services ..... 30, 31, 32
33, 34, 35
Internet 55
Keypad lock 26
Keys 27, 28
Language 27
Phone settings ...... 26, 27
28, 29
Security 37, 38
Tones 23, 24, 25
Voice Mail 25, 26
Show costs 21
Silent 23
SIM
Application tool kit ...... 4
SMS 13
SMS messages
Managing 13
Preparing your phone .... 14
Reading 13
Sending 15
Storing 15
Softkey programming ..... 27
Solutions 63, 64
Speed dialling 28
Standard 32, 33
Storage consumption ..... 17
Storing an SMS message ..... 15
Storing names and numbers ... 5
T
Tones 23
Trouble shooting 63
V
Vibrate 23
& ring 23
then ring 23
Voice dialling
Creating a voice pattern 11
Making a call 12
Voice Mail
Alert 26
Call 26
Number 25
Voice mail 25
Voice memo 46
Volume
Alarm 24
alert mode 23
Conversation 24
Key tones 24
Ring 24
W
WAP ^TM 54
World clock 48
- Trium® by MITSUBISHI ELECTRIC
- Introduction
- General safety
- Table of contents
- Using this guide
- Using the keys to follow the actions described in this guide
- Understanding the Graphic Display Indicators (Icons)
- Quick Start
- Preparing the phone for operation
- Basic Operations
- Turning on the phone
- Standby display
- Keypad lock
- Alert tones
- Internet
- Messages (SMS)
- Making a call
- Receiving a call
- Press
- Ending a call
- Turning off the phone
- Safety information
- Vehicle safety
- Care and maintenance
- Your responsibility
- Security codes
- PIN and PIN2 codes (4-8 digits)
- PUK and PUK2 codes (8 digits)
- Code supplied by the airtime service provider
- Call barring password (4 digits)
- Voice mail password
- Code supplied by the manufacturer
- Phonelock code (4 digits)
- Emergency calls
- Battery
- Battery use and safety information
- Battery disposal
- Disposing of waste packaging
- SIM card
- Inserting the SIM card
- Fitting
- Replace the battery cover.
- Low battery warning
- Charging
- Charging indicators when the mobile is off
- Charging indicators when the mobile is on
- Making and receiving calls
- Making calls
- Ending calls
- Receiving calls
- Time & Date setting
- Unanswered call, voice mail, new SMS message, Inbox and Push indicators
- Modify graphics themes
- Night and day idle screen
- Business idle screen
- Entering text
- T9 ( ) text entry
- Example
- The Multitap/Multipress method
- * / & =
- Press Select
- Sending a new SMS message to one addressee
- Phonebook
- Storing names and telephone numbers
- Managing card and phonebook numbers
- Phonebook card options
- Dialling from memory
- Voice dialling
- Last dialled numbers
- Silent and vibrate alert modes
- Turning on
- Turning off
- Hands free mode
- Muting
- Volume adjustment
- Call waiting, swapping and multi-party conference calls
- GSM Services
- Call waiting
- Action when receiving a second call
- Multi-party or conference calls
- Diverting incoming calls (network service)
- Language selection
- Softkeys - programming the softkeys
- Melodies download
- Install a downloaded melody
- Games
- Voice Memo
- WAP™
- Storing/editing the connection settings
- Going online
- GSM man machine interface codes
- The menu (MMI) system
- Access to the menus
- Menu map
- Using the headset
- Connecting the headset
- Disconnecting the headset
- Index
- A
- B
- C
- D
- E
- G
- H
- I
- K
- L
- M
- N
- 0
- P
- R
- S
- T
- V
- W
- Trium®
- by MITSUBISHI ELECTRIC
- Network Services...... 4
- Phone Book...... 5
- Messages ...... 13
- Calls & Times...... 18
- Settings 23
- Office Tools ...... 41
- Connectivity...... 51
- Games...... 53
- Internet/Wireless Application Protocol (WAP™) 54
- Appendix 62
- Network Services
- SIM application tool kit
- SDN numbers stored in the SIM
- Information numbers
- Phone Book
- Phone phonebook
- SIM phonebook
- Free space in the phonebooks
- Viewing and calling numbers in the phonebook
- Creating a group of cards
- My Card data set
- Own number display
- Fixed dialling numbers (FDN)
- Calling phone numbers with your voice
- Messages
- Reading a received SMS message (in the standby display)
- Reading stored SMS messages
- Managing received and stored SMS messages
- Turning on or off the message alert tone
- Preparing the phone to send SMS messages
- Creating a draft text
- Editing a draft text
- Sending a new SMS message to several addressees
- Storing a new SMS message
- Messages in the outbox
- Status request on outbox messages
- Re-usable message templates
- Storage consumption
- Calls & Times
- Calls log
- Call times
- Balance information (subscription service only)
- Reminder - Call duration
- Call timer - reset
- Call costs - management (subscription service only)
- Setting the credit limit - in units or currency
- Show costs
- Call costs - resetting all costs to zero
- Alternate line service - selecting line 2 (subscription service)
- Alert mode
- Ring tone selection
- Downloaded melodies
- Volume adjustments
- Ramping
- Graphics themes
- Voice mail
- Turning on/off the voice mail alert tone
- Calling the voice mail centre to check for messages
- Phone settings
- Backlight - setting
- Display contrast
- Any key answer
- Softkeys - programming the softkeys (operator dependent)
- Speed dialling
- Auto answer
- Auto retry
- Auto Switch On/Off
- Default (factory) settings
- Caller Line Identity - showing/hiding your mobile number (network dependent)
- Receiving caller ID
- Sending my ID
- Standard network setting
- Hiding or showing your number
- Finding out your current ID setting
- Mode of operation (operator dependent)
- Network
- Editing the preferred list
- Selecting manual search
- Selecting automatic search (normal default setting)
- Call barring (network service)
- Broadcast - cell broadcast (CB) messages
- To enter a message type in the selection list
- To turn on or off the broadcast service
- Reading broadcast messages
- Options during message display
- To turn on or off the alert tone
- To delete or edit a message from the list
- Broadcast language
- Security features
- Phone lock code
- PIN code
- PIN2 code
- PUK code
- PUK2 code
- Call barring password
- Certificates
- Office Tools
- Diary
- Calendar
- Options Exit
- Tasks list
- Alarm notification
- Statistics
- Calculator
- Currency-converter
- World clock
- Clock setting
- Select Options ●. Select Edit origin or Edit secondary
- Swap between the two clocks
- Alarm clock
- Valid. ⚙ and No ring ⚙.
- Opening the infrared port
- Closing the infrared port
- Transferring a phonebook card via the infrared port
- Inbox
- Free space in the memory
- Internet/Wireless Application Protocol (WAP™)
- Creating and editing GPRS access point names for WAP™ connections\*
- Storing/editing the connection settings (obtainable from your network operator)
- Select
- Selecting a preferred bearer\*
- Personalising your connection settings
- Going online and onto the Net
- Use of whilst online
- Ending the online connection
- Creating bookmarks
- Option Action
- Using bookmarks
- Other site
- Receiving push messages
- Appendix
- Glossary
- Trouble shooting
- Pan European Service
- Pan-european GSM End-user Guarantee Conditions
- DECLARATION OF COMPLIANCE
- Identification of the product
- Identification of the notified organization
- F
- |
- SIM
Brand : MITSUBISHI
Model : Trium Eclipse
Category : Smartphone