
RealSense D410 - Camera INTEL - Free user manual and instructions
Find the device manual for free RealSense D410 INTEL in PDF.


| Product Type | Depth Camera |
| Brand | Intel |
| Model | RealSense D410 |
| Depth Sensor Technology | Active Stereo IR |
| RGB Resolution | 1920 x 1080 at 30 fps |
| Depth Resolution | 1280 x 720 at 90 fps |
| Depth Field of View | 85° x 58° |
| Minimum Depth Distance | 0.16 m |
| Maximum Depth Range | ~10 m |
| Dimensions | 90 mm x 25 mm x 25 mm |
| Weight | 80 g |
| Connection | USB 3.0 Type-C |
| Power Consumption | ~1.5 W |
| Operating System Support | Windows 10, Linux |
| Main Functions | Depth and RGB streaming, object tracking, gesture recognition |
| Cleaning | Use a soft, dry cloth; avoid liquids |
| Safety | Do not look directly into IR emitters; avoid physical shock |
| Spare Parts | Not available; device is not user-serviceable |
| Repairability | Not repairable by user; contact support |
| General Information | Suitable for robotics, AR/VR, 3D scanning |
Frequently Asked Questions - RealSense D410 INTEL
User questions about RealSense D410 INTEL
0 question about this device. Answer the ones you know or ask your own.
Ask a new question about this device
Download the instructions for your Camera in PDF format for free! Find your manual RealSense D410 - INTEL and take your electronic device back in hand. On this page are published all the documents necessary for the use of your device. RealSense D410 by INTEL.
USER MANUAL RealSense D410 INTEL
Intel® RealSense™ D400 Series/ SR300 Viewer
User Guide
Revision 002
May 2018
You may not use or facilitate the use of this document in connection with any infringement or other legal analysis concerning Intel products described herein. You agree to grant Intel a non-exclusive, royalty-free license to any patent claim thereafter drafted which includes subject matter disclosed herein.
No license (express or implied, by estoppel or otherwise) to any intellectual property rights is granted by this document.
Intel technologies' features and benefits depend on system configuration and may require enabled hardware, software or service activation. Performance varies depending on system configuration. No computer system can be absolutely secure. Check with your system manufacturer or retailer or learn more at intel.com.
Intel technologies may require enabled hardware, specific software, or services activation. Check with your system manufacturer or retailer.
The products described may contain design defects or errors known as errata which may cause the product to deviate from published specifications. Current characterized errata are available on request.
Intel disclaims all express and implied warranties, including without limitation, the implied warranties of merchantability, fitness for a particular purpose, and non-infringement, as well as any warranty arising from course of performance, course of dealing, or usage in trade.
All information provided here is subject to change without notice. Contact your Intel representative to obtain the latest Intel product specifications and roadmaps.
Copies of documents which have an order number and are referenced in this document may be obtained by calling 1-800-548-4725 or visit www.intel.com/design/literature.htm.
Intel, Intel ^® RealSense ^™ and the Intel logo are trademarks of Intel Corporation in the U.S. and/or other countries.
*Other names and brands may be claimed as the property of others.
Copyright © 2018, Intel Corporation. All Rights Reserved.
Contents
1 Introduction....6
1.1 Purpose and Scope of this Document....6
1.2 Reference Documents 6
2 RealSense™ Viewer Overview 7
2.1 Intended Users 7
2.2 Features 7
2.3 Description....7
2.4 Implementation 7
3 RealSense™ Viewer Usage 8
3.1 Streaming 8
3.1.1 Preset....9
3.1.2 Resolution 9
3.1.3 Frame Rate 10
3.1.4 Available Streams 10
3.1.5 Stream Formats 10
3.2 Device Information 11
3.3 Visualization....11
3.3.1 Visual Preset 11
3.3.2 Color Scheme 13
3.3.3 Min Distance.... 14
3.3.4 Max Distance....14
3.4 Recording.... 14
3.5 Playback 15
3.6 3D Point Cloud Viewer....15
4 Preset 17
4.1 Overview 17
4.2 Preset Table 17
4.3 Example Pictures.... 18
4.3.1 RGB Images 18
4.3.2 Corresponding Depth Image Using Presets.... 19
4.3.3 High Accuracy Preset 20
4.3.4 High Density Preset 21
4.3.5 Medium Density Preset.... 22
4.3.6 Hand Gesture Preset 23
5 Post Processing 26
5.1 Overview 26
5.2 Design and Implementation 26
5.3 Filters Description 26
5.3.1 Decimation Filter 26
5.3.2 Spatial Filter 27
intel® REALSENSE™ TECHNOLOGY
5.3.3 Temporal Filter 27
5.3.4 Holes Filling Filter 28
5.4 Using Filters in Application Code 28
6 Advanced Control.... 31
6.1 Overview 31
7 Additional Reference.... 32
Revision History
| Document Number | Revision Number | Description | Revision Date |
| 337495 001 | Initial Release | May 2018 | |
| 337495 002 | Added Post Processing Segment | May 2018 |
1 Introduction
1.1 Purpose and Scope of this Document
This document is the user guide for the Intel® RealSense™ Viewer for Intel® RealSense™ D400 series/SR300 depth modules and cameras. The Intel® RealSense™ Viewer includes support for Windows* and Linux*.
1.2 Reference Documents
| Documents |
| Intel® RealSenseTM D400 Series (DS5) Product Family/SR300 Datasheethttps://www.intel.com/content/www/us/en/support/articles/000026827.htmlhttps://www.intel.com/content/dam/support/us/en/documents/emerging-technologies/intel-realsense-technology/realsense-sr300-datasheet1-0.pdfIntel® RealSenseTM Camera Depth Testing Methodology |
2 RealSense™ Viewer Overview
2.1 Intended Users
RealSense™ Viewer Tool is designed for end users/developers to test or evaluate the D400 series/SR300 cameras.
2.2 Features
- Tools works for all Intel ^ RealSense ^TM D400 series/SR300 cameras
• Tool supports Windows* 10 and Linux*
2.3 Description
RealSense™ Viewer is a sample tool allowing a user access to most camera functionality through a simple, cross-platform UI. The tool offers the ability to:
- Stream from multiple RealSense™ devices at the same time
• Explore point cloud data in real time or by exporting to file
• Record RealSense™ data, or playback of recorded data - Access to most camera specific controls, including 3D-generation ASIC registers when available
2.4 Implementation
RealSense™ Viewer is provided in a binary form on Windows* and Linux*, or it can be built from source along with the rest of the libRealSense library. The viewer is designed to be lightweight, requiring only a handful of embedded dependencies. Cross-platform UI is a combination of raw OpenGL calls, GLFW for cross-platform window and event management, and IMGUI for the interface elements.
3 RealSense™ Viewer Usage
3.1 Streaming
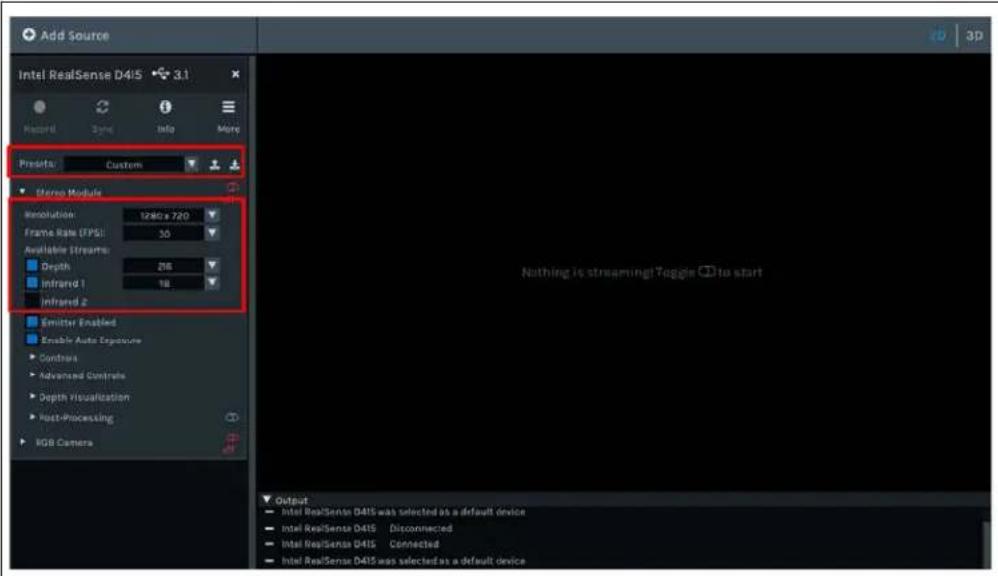
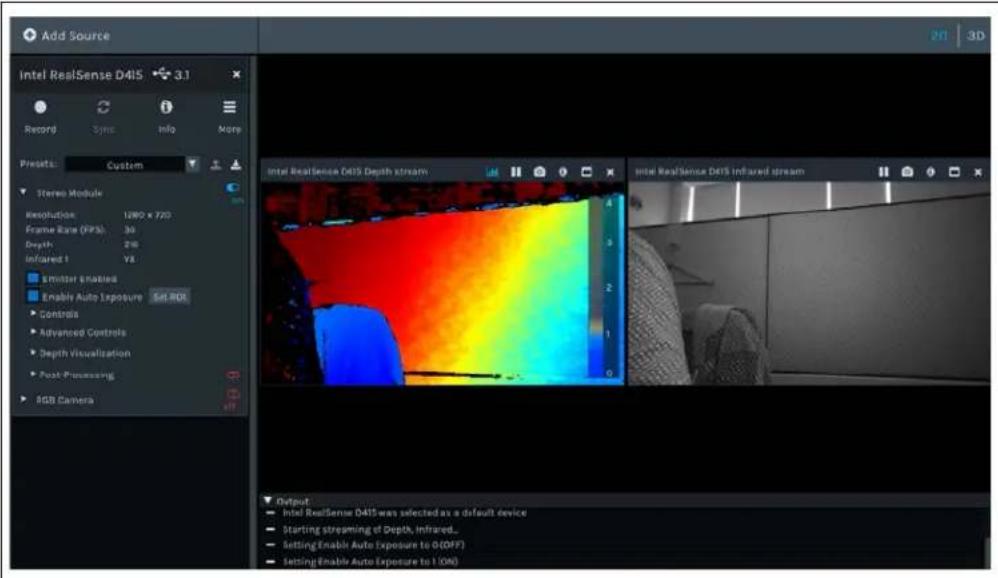
RealSense™ viewer allows the user to select and configure streams for depth, infrared and RGB. This section provides an overview of the parameters that are customizable by the user in the tool. After the user has completed the configuration, they must click

button to start streaming. The viewer supports both USB2.0 and USB3.0, so the lable configuration parameter will be different due to USB2.0/USB3.0 capability.
3.1.1 Preset
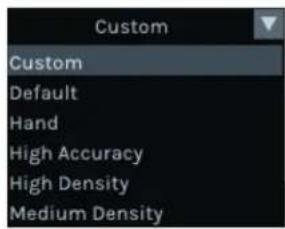
To assist users Intel has created a series of predefined presets that can be selected according to user's usage. The initial Preset is "Custom", which may be the default or a user modified preset. Only when the user actively selects a preset, or loads JSON file, it will be updated in the Preset menu accordingly. A detailed description of the presets are covered in Chapter 4.
3.1.2 Resolution
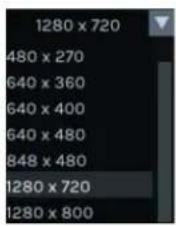
The D400 series camera provides the end user with a wide range of resolutions to choose from to meet their solution needs. For example the D415 can support resolutions from 424x240 \~ 1920x1080; the D435, can support resolutions ranging from 424x240 \~ 1280x800. The user should select the resolution that best suits the usage. Note higher resolution has higher accuracy but results in an increase the min-Z and computational intensity. Refer to the D400 Series datasheet https://www.intel.com/content/dam/support/us/en/documents/emerging-technologies/intel-realsense-technology/Intel-RealSense-D400-Series-Datasheet.pdf, for further details on frame rate, resolution and format combinations.
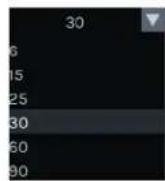
3.1.3 Frame Rate
The D400 series camera provides the end user with multiple frame rates to choose from to meet their solution needs. Ranging from 6 to 90 FPS, the supported frame rate will differ depending on the resolution selected. Refer to the D400 Series datasheet, https://www.intel.com/content/dam/support/us/en/documents/emerging-technologies/intel-realsense-technology/Intel-RealSense-D400-Series-Datasheet.pdf, for further details on frame rate, resolution and format combinations.
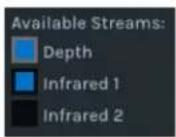
3.1.4 Available Streams
The RealSense™ viewer allows the user to select a combination of streams for depth, infrared and RGB. The user can select a stream by checking/unchecking from the list of available streams to enable/disable the stream.
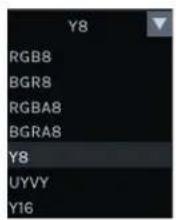
3.1.5 Stream Formats
Format for specific stream, available formats for each stream might different, the picture below shows format of D400 IR channel.
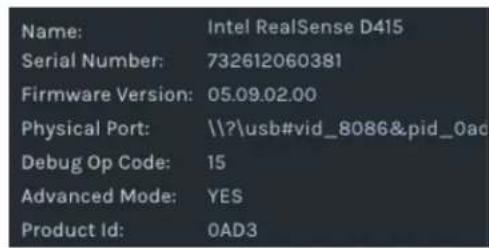
3.2 Device Information
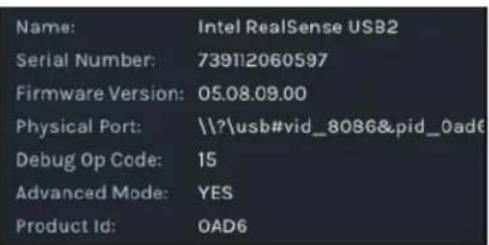
RealSense™ viewer contains simple device information, such as Serial number, firmware version and Product id etc. To display/hide the device information section, click the info button at the top of the configuration panel. The information will be different when connect to different USB type.

USB 3.0 USB 2.0
3.3 Visualization
Within Depth Visualization segment, the RealSense™ viewer provides multiple settings to provide for better visual feedback.
3.3.1 Visual Preset
The RealSense™ viewer provides four available preset to better visualize with different environment.
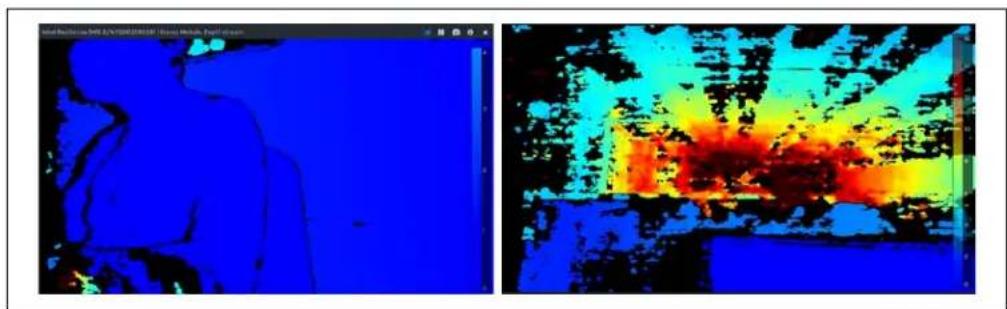
3.3.1.1 Dynamic
The color will be changed dynamically based on the valid depth pixel value range. For example, if within the image the valid depth pixel value range from 45cm\~120cm, then the 45cm pixel is colored in blue color and 120cm pixel is colored in red color. But if
valid depth pixel range from 45cm \~ 4m+, then the 45cm pixel is colored in blue and 4m+ pixels is colored in red.
natural_image
Two thermal imaging panels showing a person's silhouette and a landscape with red, yellow, and blue color gradients (no text or symbols)3.3.1.2 Fixed
The color change is proportional to the distance between device min-z to 6m.
natural_image
Two-panel image showing a blue and red abstract color scheme with no visible text or symbols.3.3.1.3 Near
The color changes proportionally only in short range within around 1.5m, distance further than 1.5m will be in similar color.
natural_image
Two-panel image showing a blue and magenta abstract background with no visible text or symbols.3.3.1.4 Far
The color changes proportionally starting from 6m to as far as camera can see.
natural_image
Two thermal imaging panels showing heat signatures over a building, one in blue and one in yellow-orange (no text or symbols)3.3.2 Color Scheme
Different color representation.

3.3.2.1 Histogram Equalization
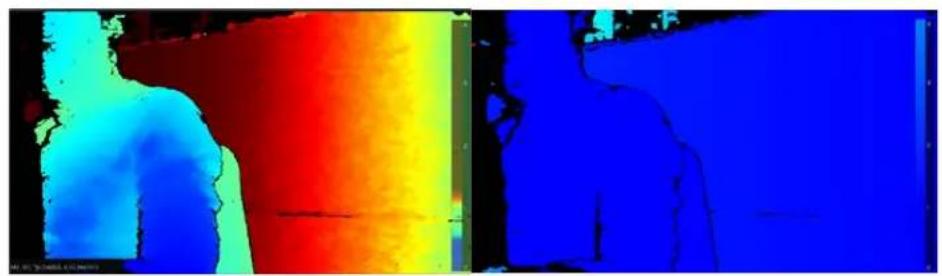
Histogram equalization makes the color changes proportionally within the available valid pixel value range, just like the Dynamic preset.
Disabling the feature will cause the color representation changes based on the min/max distance configuration. For example, if the depth image contains valid depth pixels value ranging from 45cm \~ 3m, the color will spread proportionally within the range. When disabled, the color will spread base on min/max distance settings.
Enabled
natural_image
Thermal imaging view of a human silhouette with color gradient from red to blue (no text or symbols)Disabled
3.3.3 Min Distance
The minimum distance for color visualization.
3.3.4 Max Distance
The maximum distance for color visualization.
3.4 Recording
Video recording can be used as input resource for issue reduplication and debug. To
record the video, click the Record button. To stop recording, click the Stop button and the recording will be saved. You can check the output panel to view where it is being saved to.
- Saved recording to: C:\Users\cpai\Documents\20180425_142709.bag
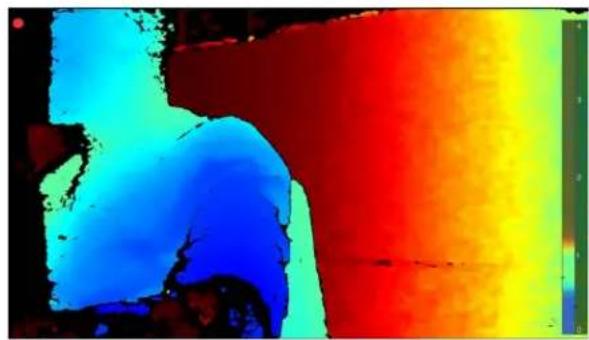
When recording starts, the display area will have splashing red dot on top of the streaming.

natural_image
Thermal imaging view of a human head with color gradient from blue to red (no text or symbols)3.5 Playback
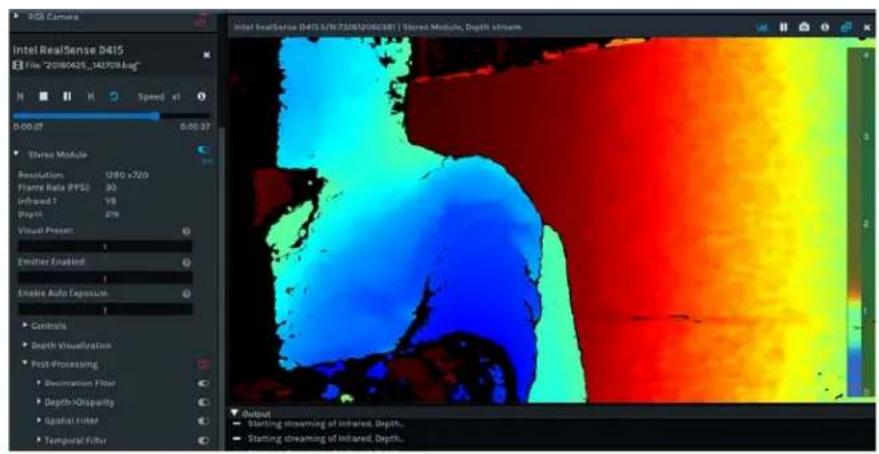
Select the recorded .bag file as input source by clicking Add Source button at left-top corner, the playback contains the configuration of stream when recording was being made, such as preset, exposure, laser power etc. The playback can then be treated the as streaming from camera to apply any post processing and change the visualization.
3.6 3D Point Cloud Viewer
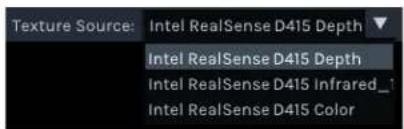
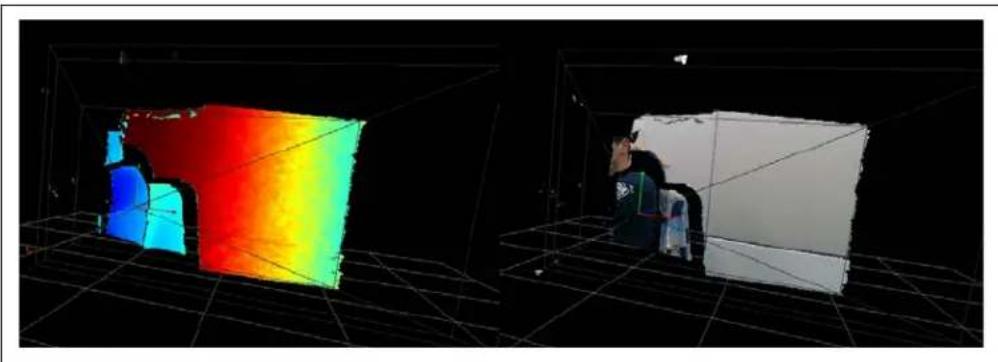
Click 2D 3D to switch to 3D point cloud view, inside the viewer, you can change the texture source to different stream by selecting from the drop box.
natural_image
3D visualization of a person seated in a white room with a color gradient heatmap overlay, shown in two different angles (no text or symbols)§ §
4 Preset
4.1 Overview
The Intel® RealSense™ Viewer tool supports several predefined depth presets that can be selected according to the user's requirements. The predefined presets are listed in the table below. The table explains some of the recommended use cases for each predefined preset. There are also examples of images with each preset and a corresponding JSON file.
4.2 Preset Table
Note: Some of the presets are different based on the resolution and some are the same for all resolutions. The resolution range is:
• High Res - 1280x720 or 848x480
• Med Res - 640x480 or 640x360
• Low Res - 480x270 or 424x240
| Resolution \ Preset | Use Cases Recommended for Usage | Resolution Based? | JSON Files |
| High Density | Higher Fill factor, views more objects. (Ex. BGS and 3D Enhanced Photography, Object recognition) | Yes | HighResHighDensityPreset.json, MedResHighDensityPreset.json, LowResHighDensityPreset.json |
| Medium Density | Balance between Fill factor and accuracy. | Yes | HighResMedDensityPreset.json, MedResMedDensityPreset.json, LowResMedDensityPreset.json |
| High Accuracy | High confidence threshold value of depth, lower fill factor. (Ex. Object Scanning, Collision Avoidance, Robots) | Yes | HighResHighAccuracyPreset.json, MedResHighAccuracyPreset.json, LowResHighAccuracyPreset.json |
| Hand | Good for Hand Tracking, Gesture recognition, good edges | No HandGesturePreset.json | |
| Default | Best Visual appeal, Clean edges, Reduced PointCloud Spraying | No | DefaultPreset_D415.json, DefaultPreset_D435.json |
Additional Presets not in the Viewer:
| Preset Use Case | JSON File |
| Vacuum Cleaner | ShortRangePreset.json |
| Body Scan BodyScanPreset.json | ____ |
| Remove IR pattern D415_RemoveIR.json |
4.3 Example Pictures
Refer to the example pictures below captured with the various presets. The depth presets are evaluated and compared based on:
- Depth quality based on a 3D scene configured to include a variety of object types, textures, and distances.
• A flat target depth metric test
All pictures were taken with these settings/conditions:
• Resolution: 1280 x 720
- Frame Rate: 30
• Auto Exposure: On
• Ambient fluorescent lighting (\~100 - 200 lx)
4.3.1 RGB Images
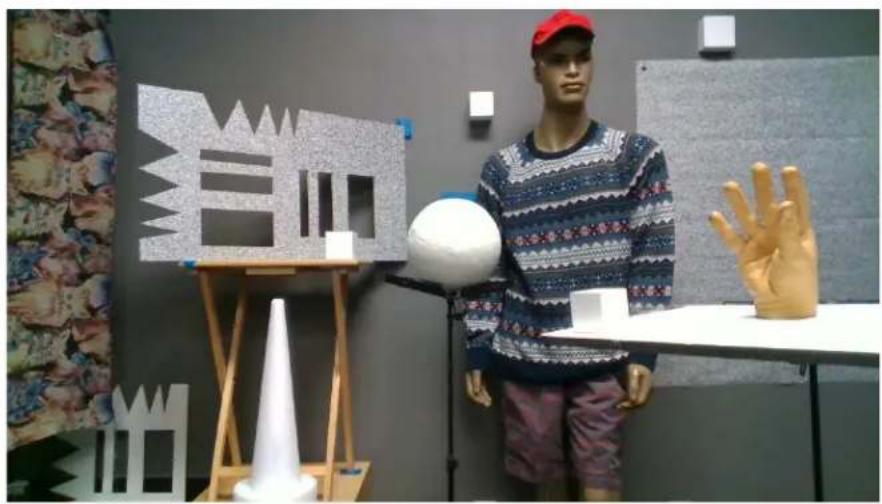
The following RGB images captured as a test scene with objects ranging from 0.6m (foreground cube and hand) to 2m (back wall) from camera.
4.3.1.1 D415 Camera
natural_image
Mannequin dressed in a patterned sweater and cap standing beside white geometric sculptures and a large wooden hand gesture, displayed indoors (no visible text or symbols)4.3.1.2 D435 Camera
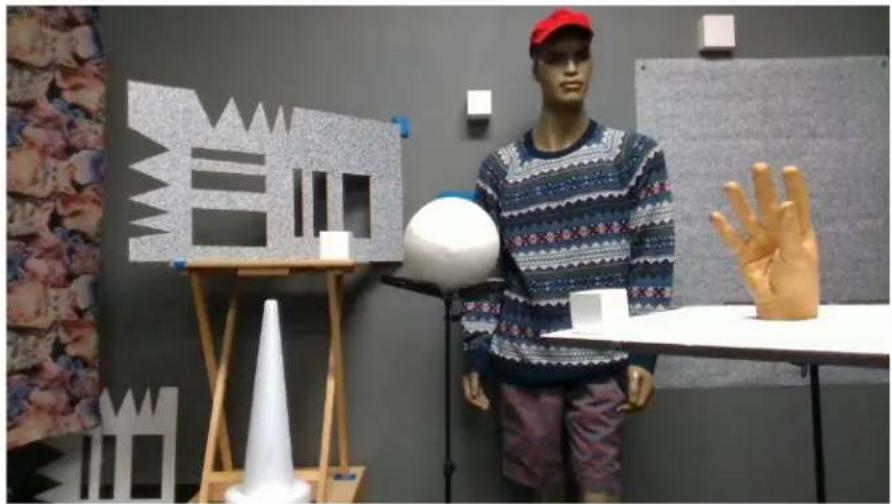
natural_image
Mannequin in patterned sweater standing beside white geometric sculpture and wooden gloves on a display table (no text or symbols visible)4.3.2 Corresponding Depth Image Using Presets
- Default Preset
Best visual appeal, clean edges and reduced Point Cloud spraying.
4.3.2.1 D415 Camera
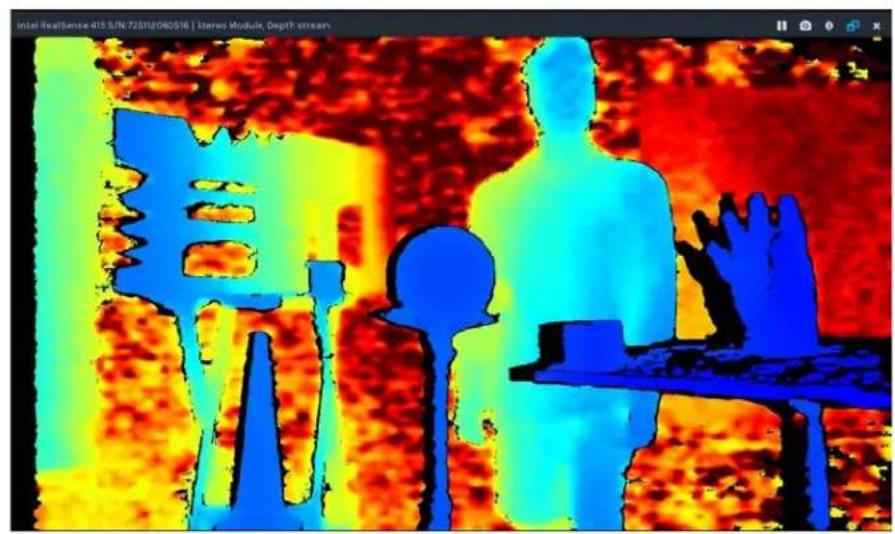
natural_image
Thermal imaging of a person holding a currency symbol, with abstract color gradients and no readable text or symbols4.3.2.2 D435 Camera
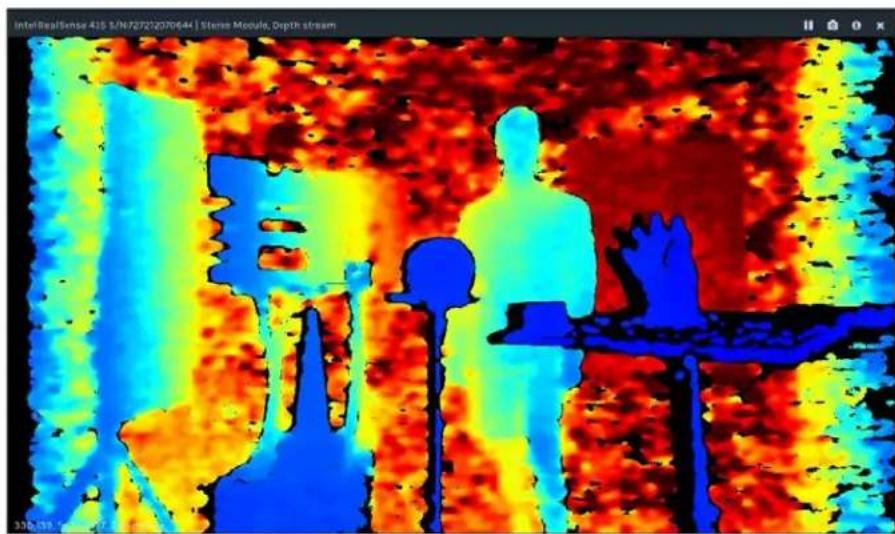
natural_image
Thermal imaging scan showing human silhouette against a heat map background (no text or symbols)4.3.3 High Accuracy Preset
High confidence threshold value of depth, lower fill factor.
4.3.3.1 D415 Camera
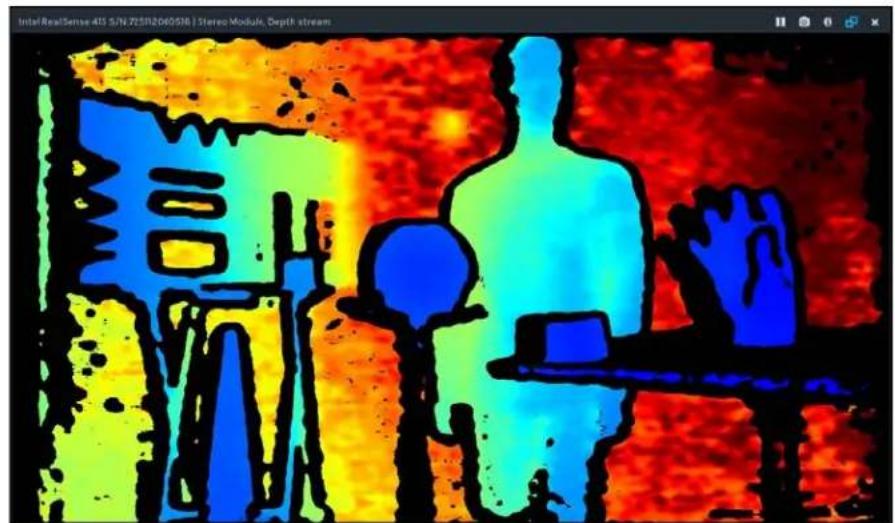
natural_image
Thermal imaging scan showing heat distribution over a 3D scene with blue, yellow, and red color gradients (no text or symbols)4.3.3.2 D435 Camera
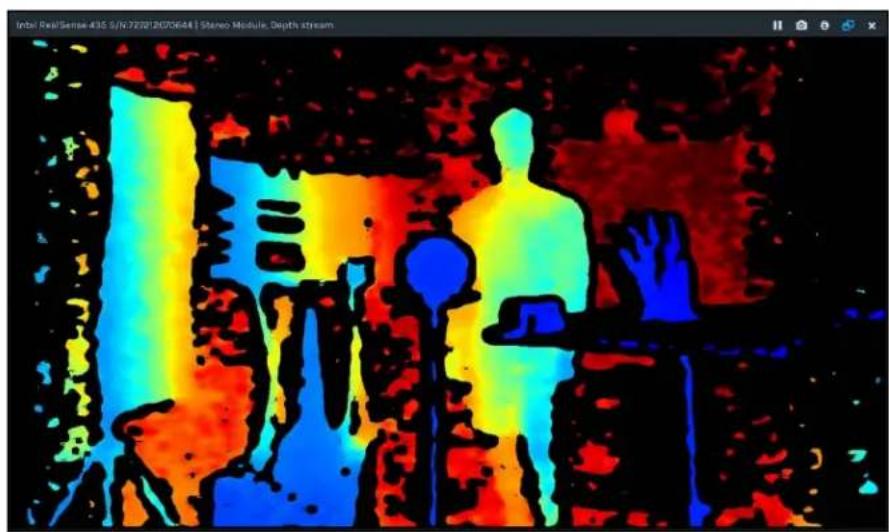
natural_image
Thermal imaging view of a person silhouette against a dark background, showing heat distribution (no text or symbols)4.3.4 High Density Preset
Higher fill factor which views more objects.
4.3.4.1 D415 Camera
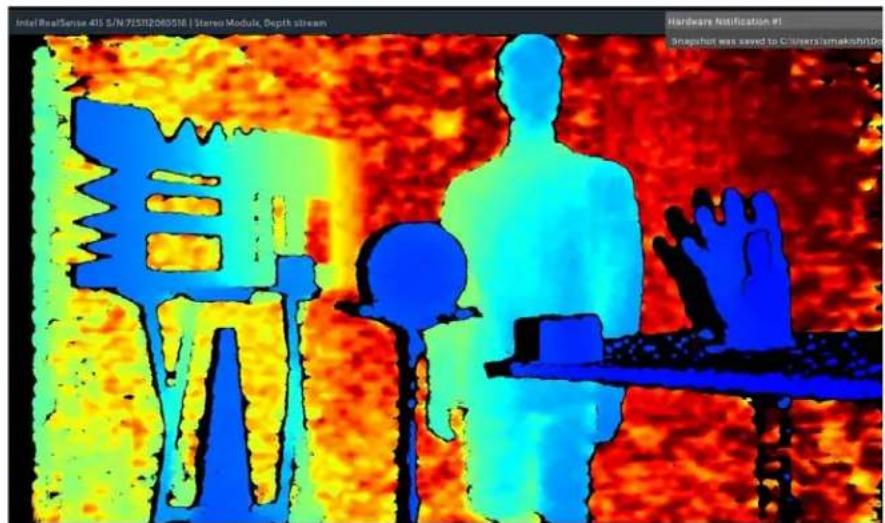
4.3.4.2 D435 Camera
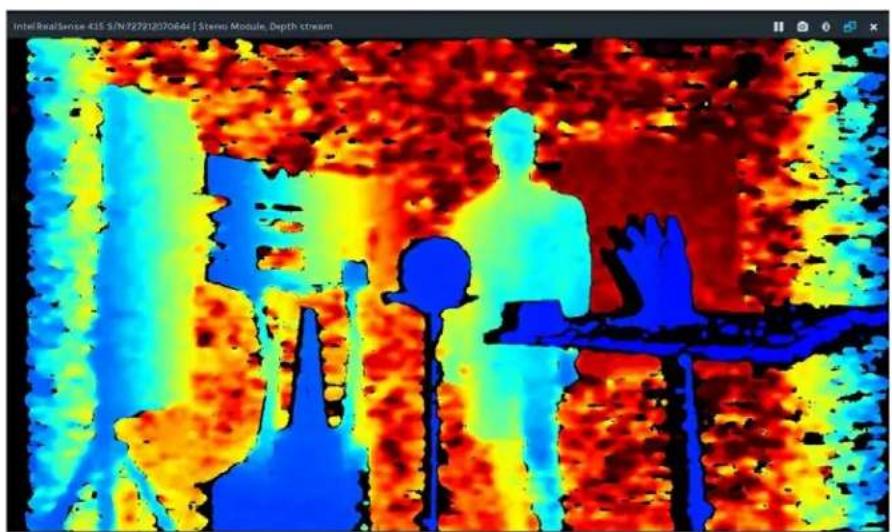
natural_image
Thermal or heat map visualization of a human silhouette and hand, showing color intensity from blue to red (no text or symbols)4.3.5 Medium Density Preset
Balance between fill factor and accuracy.
4.3.5.1 D415 Camera
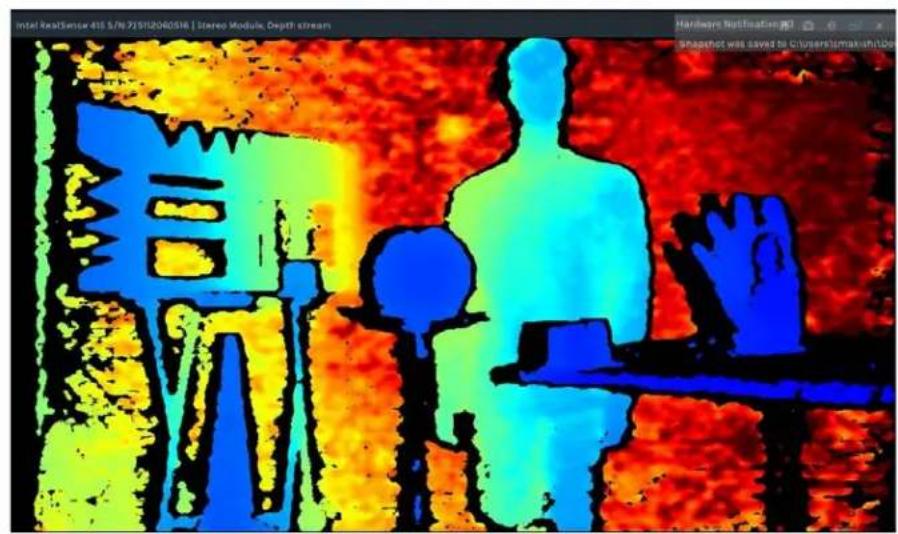
4.3.5.2 D435 Camera
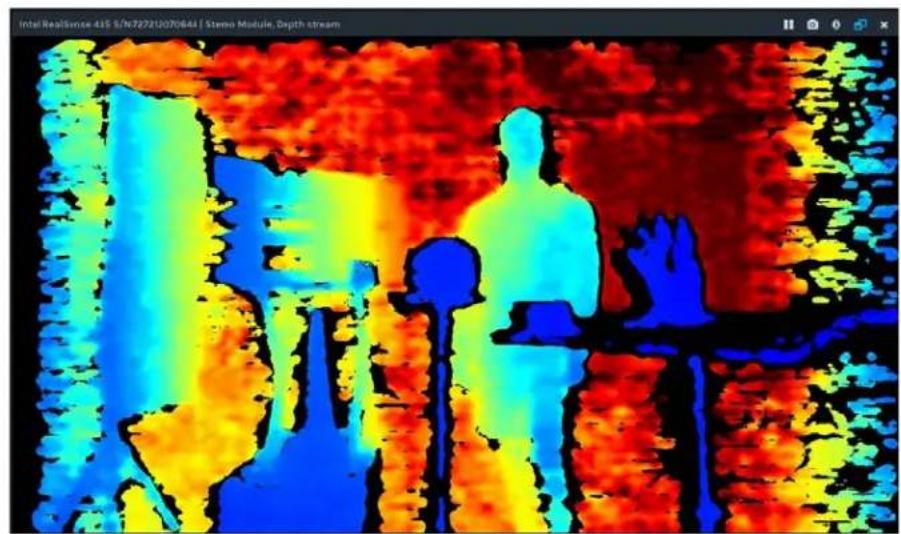
natural_image
Thermal imaging scan showing heat distribution with blue, yellow, and red gradients over a dark background (no text or symbols)4.3.6 Hand Gesture Preset
Hand tracking and gesture recognition.
4.3.6.1 D415 Camera
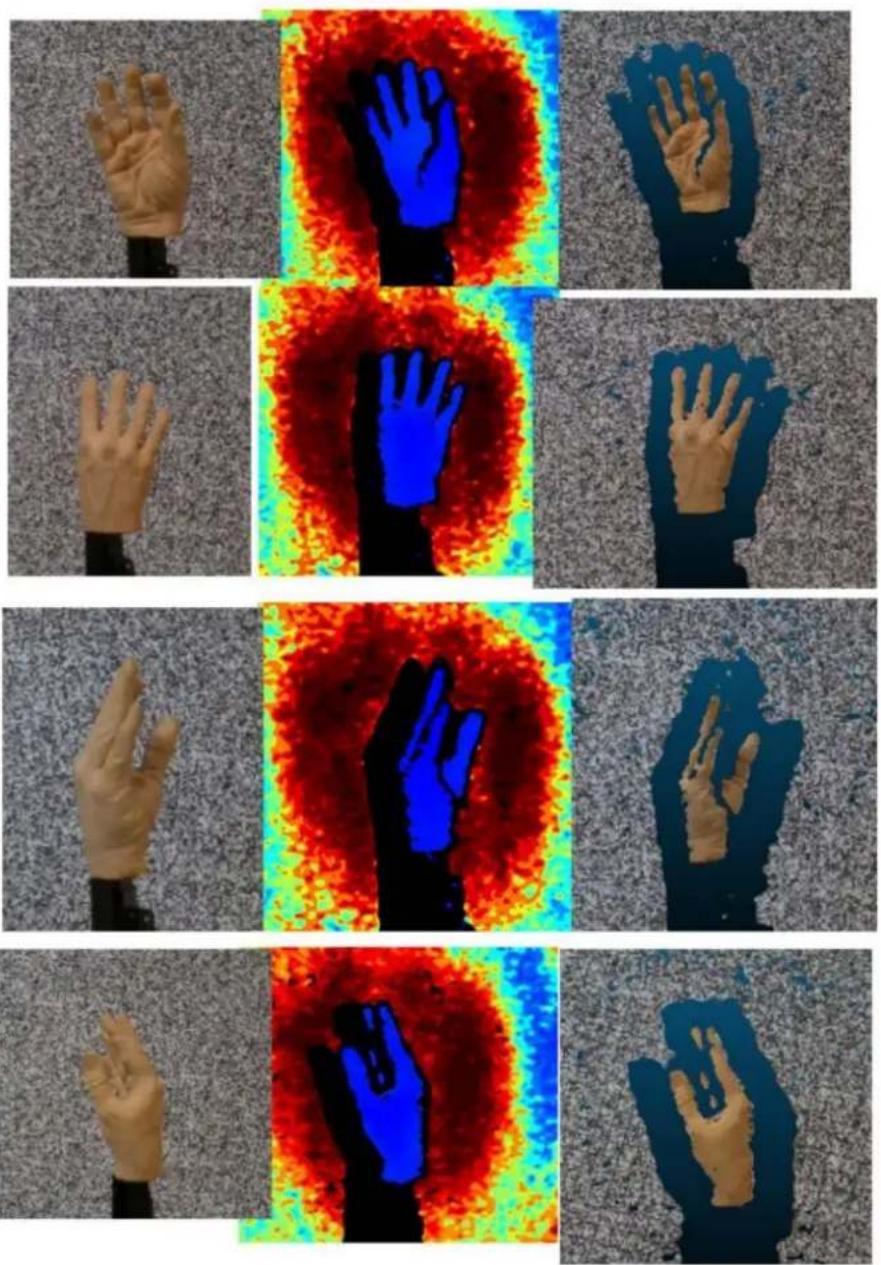
4.3.6.2 D435 Camera
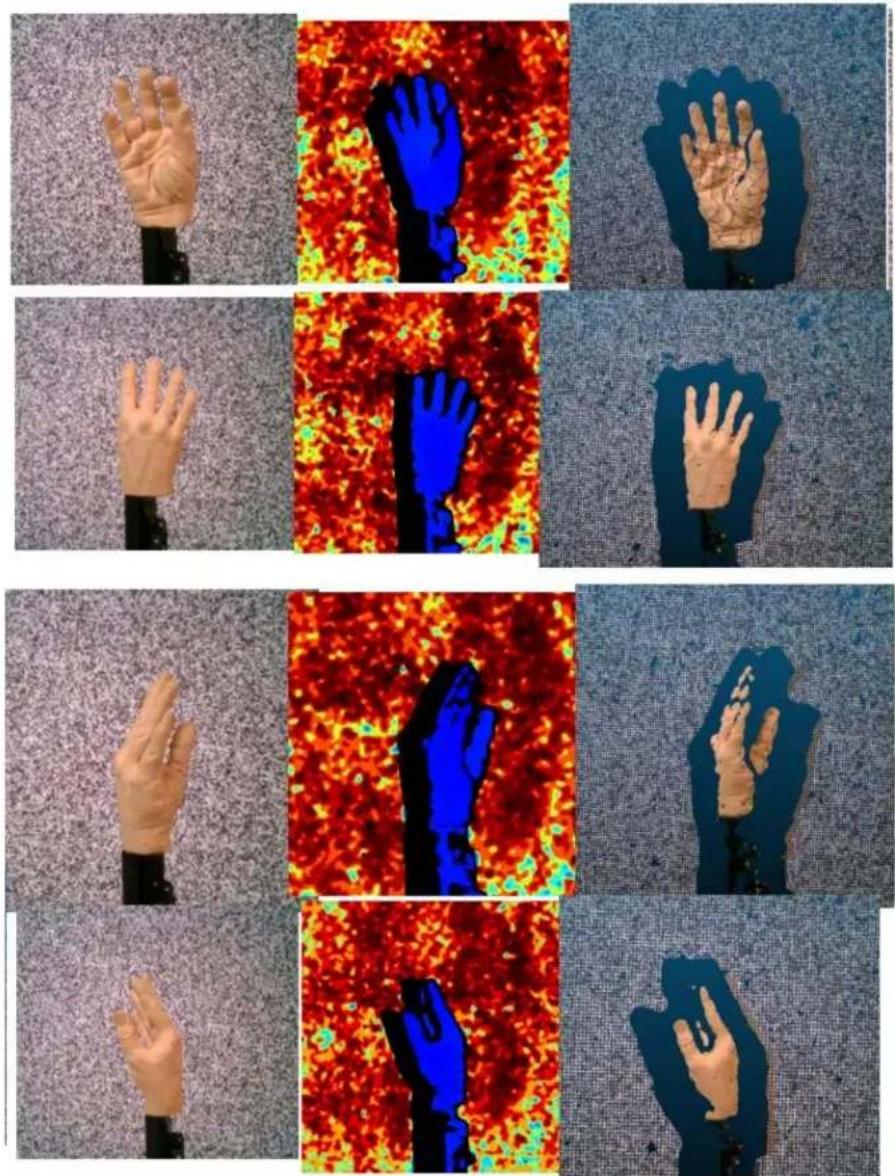
5 Post Processing
5.1 Overview
Librealsense implementation includes post-processing filters to enhance the quality of depth data and reduce noise levels. All the filters are implemented in the library core as independent blocks to be used in the customer code
5.2 Design and Implementation
Post-processing modules are encapsulated into self-contained processing blocks, which provide for the following key requirements:
- Synchronous/Asynchronous invocation
- Internal frames memory/lifetime management
The filters are capable to receive frames from different sources, though performance-wise, maintaining filter pipe per camera source is recommended. Internally, the filters preserve the original data and generate a new (filtered) frame to pass on. The regeneration of new frames allows to share frame among different consumers (thread) without the risk of the data being overwritten by another user.
All filters support discreet as well as floating point input data formats. The floating point inputs are utilized by D400 stereo-based Depth cameras that support Disparity data representation. The discreet version of the filters is primarily used with SR300 camera, but also can be applied to D400 devices (though not recommended).
5.3 Filters Description
5.3.1 Decimation Filter
Effectively reduces the depth scene complexity. The filter operates on patches of [2×2] to [8×8] pixels using median filter as pass-criteria. The image size is scaled down proportionally in both dimensions to preserve the original aspect ratio. Internally, the filter imposes 4-pixel block alignment for the output frame size width and height. E.g. for input size (1280X720) and scale factor 3 the output size calculation is:
[1280,720]/3 -> [426.6666667, 240] -> [428,240] * The padded rows/columns are zero-filled.
After the resulted frame is produced, the frame intrinsic parameters are recalculated to compensate for the resolution changes.
The filter also provides some hole filling capability, as the median filter uses valid (non-zero) pixels only.
5.3.1.1 Filter Controls
| Controls | Operation | Range | Default |
| Filter Magnitude | The decimation linear scale factor | Discrete steps in [2-8] range | 2 |
5.3.2 Spatial Filter
* The implementation is based on paper by Eduardo S. L. Gastal and Manuel M. Oliveira.
Key characteristics:
• 1D edge-preserving spatial filter using high-order domain transform.
• Linear-time compute, not affected by the choice of parameters.
The filter performs a series of 1D horizontal and vertical passes or iterations, to enhance the smoothness of the reconstructed data.
5.3.2.1 Filter Controls
| Controls | Operation | Range | Default |
| Filter Magnitude | Number of filter iterations | [1-5] | 2 |
| Smooth Alpha | The Alpha factor in an exponential moving average with Alpha=1 - no filter. Alpha = 0 - infinite filter | [0.25-1] | 0.5 |
| Smooth Delta | Step-size boundary. Establishes the threshold used to preserve "edges" | Discrete [1-50] | 20 |
| Hole Filling | An in-place heuristic symmetric hole-filling mode applied horizontally during the filter passes. Intended to rectify minor artefacts with minimal performance impact | [0-5] range mapped to enumerated [none,2,4,8,16,unlimited] pixels. | 0 (none) |
5.3.3 Temporal Filter
The temporal filter is intended to improve the depth data persistency by manipulating per-pixel values based on previous frames. The filter performs a single pass on the data, adjusting the depth values while also updating the tracking history. In cases where the pixel data is missing or invalid the filter uses a user-defined persistency mode to decide whether the missing value should be rectified with stored data. Note that due to its reliance on historic data the filter may introduce visible blurring/smearing artefacts, and therefore is best-suited for static scenes.
5.3.3.1 Filter Controls
| Controls | Operation | Range | Default |
| Smooth Alpha | The Alpha factor in an exponential moving average with Alpha=1 - no filter. Alpha = 0 - infinite filter | [0-1] | 0.4 |
| Smooth Delta | Step-size boundary. Establishes the threshold used to preserve surfaces (edges) | Discrete [1-100] | 20 |
| Persistence index | A set of predefined rules (masks) that govern when missing pixels will be replace with the last valid value so that the data will remain persistent over time:Disabled - Persistency filter is not activated and no hole filling occurs.Valid in 8/8 - Persistency activated if the pixel was valid in 8 out of the last 8 framesValid in 2/last 3 - Activated if the pixel was valid in two out of the last 3 framesValid in 2/last 4 - Activated if the pixel was valid in two out of the last 4 framesValid in 2/8 - Activated if the pixel was valid in two out of the last 8 framesValid in 1/last 2 - Activated if the pixel was valid in one of the last two framesValid in 1/last 5 - Activated if the pixel was valid in one out of the last 5 framesValid in 1/last 8 - Activated if the pixel was valid in one out of the last 8 framesPersist Indefinitely - Persistency will be imposed regardless of the stored history (most aggressive filtering) | [0-8]enumerated | 3(Valid in 2/last 4) |
5.3.4 Holes Filling Filter
The filter implements several methods to rectify missing data in the resulting image. The filter obtains the four immediate pixel "neighbors" (up, down, left, right), and selects one of them according to a user-defined rule.
5.3.4.1 Filter Controls
| Controls | Operation | Range | Default |
| Hole Filling | Control the data that will be used to fill the invalid pixels | [0-2] enumerated:fill_from_left - Use the value from the left neighbor pixel to fill the holefarest_from_around - Use the value from the neighboring pixel which is furthest away from the sensornearest_from_around - - Use the value from the neighboring pixel closest to the sensor | 1 (Farest from around) |
5.4 Using Filters in Application Code
The post-processing blocks are designed and built for concatenation into processing pipes. There are no software-imposed constrains that mandate the order in which the filters shall be applied. At the same time the recommended scheme used in librealsense tools and demos is elaborated below:
Depth Frame >> Decimation Filter >> Depth2Disparity Transform** -> Spatial Filter >> Temporal Filter >> Disparity2Depth Transform** >> Hole Filling Filter >> Filtered Depth.
** Applicable for stereo-based depth cameras (D4XX).
Note: Even though the filters order in the demos is predefined, each filter is controlled individually and can be toggled on/off at run-time.
Demos and tools that have the post-processing code blocks:
- RealSense-Viewer
- Depth Quality Tool
- Post-Processing
Filter initialization and activation flows:
// Establishing a frame_queue object for each processing block that will receive the processed frames
rs2_frame_queue* decimated_queue = rs2_create_frame_queue(1, NULL);
rs2_frame_queue* spatial_queue = rs2_create_frame_queue(1, NULL);

// Creating processing blocks/ filters
rs2_processing_block* decimation_filter =
rs2_create_decimation_filter_block(NULL);
rs2_processing_block* spatial_filter =
rs2_create_spatial_filter_block(NULL);

// Direct the output of the filters to a dedicated queue
rs2_start_processing_queue(decimation_filter, decimated_queue, NULL);
rs2_start_processing_queue(spatial_filter, spatial_queue, NULL);

// Get depth frame from the device
rs2_frame* depth_frame = ...

// Apply decimation filter
rs2_process_frame(decimation_filter, depth_frame, NULL);
rs2_frame* decimated_frame = rs2_wait_for_frame(decimated_queue, 5000, NULL);

// Inject the decimated frame to spatial filter
rs2_process_frame(spatial_filter, decimated_frame, NULL);

// Get the filtered frame
rs2_frame* spatial_filter_frame = rs2_wait_for_frame(spatial_queue, 5000, NULL);

// Use the filtered data

...

// Control filter options
rs2_set_option((rs2_options*)decimation_filter,
RS2_OPTION_FILTER_MAGNITUDE, 3, NULL);
rs2_set_option((rs2_options*)spatial_filter,
RS2_OPTION_FILTER_SMOOTH_ALPHA, 0.5f, NULL);
Using C++ API
// Streaming initialization
rs2::pipeline pipe;
...
// Declare filters
rs2::decimation_filter dec_filter;
rs2::spatial_filter spat_filter;

// Configure filter parameters
decimation_filter.set_option(RS2_OPTION_FILTER_MAGNITUDE, 3);
...
spatial_filter.set_option(RS2_OPTION_FILTER_SMOOTH_ALPHA, 0.55f);
...

// Main Loop
while (true) {
    rs2::frameset data = pipe.wait_for_frames();
    rs2::frame depth_frame = data.get_depth_frame();
    ...
    rs2::frame filtered = depth_frame;
    // Note the concatenation of output/input frame to build up a chain
    filtered = dec_filter.process(filtered);
    filtered = spatial_filter.process(filtered);
}
6 Advanced Control
6.1 Overview
The user can modify the settings via the Advanced Mode menu and save a customized user preset. All the settings can be saved and loaded via the tool's menu. Intel® use machine learning algorithms and capture of ground truth datasets to optimize preset for certain conditions, and we may add more presets in the future. The developers can do this too, or just start adjusting the parameters by hand, but Intel® does not provide guidance on this. The key to good depth is to start from our recommended defaults:
- D435: Use 848x480 resolution @30fps, with auto-exposure. Use post processing with downsample 2.
- D415: Use 1280x720 resolution @30fps, with auto-exposure. Use post processing with downsample 3.
If you have bad depth, first try to use manual exposure and adjust exposure. Keep gain as low as possible (preferably 16).
For further information, refer to:
BKMs-For-Tuning-RealSense D4xx Cameras WP
7 Additional Reference
• RealSense Website:
https://realsense.intel.com/
• RealSense White Paper:
https://realsense.intel.com/intel-realsense-downloads/#whitepaper

- Intel® RealSense™ D400 Series/ SR300 Viewer
- Contents
- Introduction....6
- RealSense™ Viewer Overview 7
- RealSense™ Viewer Usage 8
- Preset 17
- Post Processing 26
- intel® REALSENSE™ TECHNOLOGY
- Introduction
- Purpose and Scope of this Document
- Reference Documents
- RealSense™ Viewer Overview
- Intended Users
- Features
- Description
- Implementation
- RealSense™ Viewer Usage
- Streaming
- Preset
- Resolution
- Frame Rate
- Available Streams
- Stream Formats
- Device Information
- Visualization
- Visual Preset
- Dynamic
- Fixed
- Near
- Far
- Color Scheme
- Histogram Equalization
- Min Distance
- Max Distance
- Recording
- Playback
- 3D Point Cloud Viewer
- Preset
- Overview
- Preset Table
- Example Pictures
- RGB Images
- D415 Camera
- D435 Camera
- Corresponding Depth Image Using Presets
- D415 Camera
- D435 Camera
- High Accuracy Preset
- D415 Camera
- D435 Camera
- High Density Preset
- D415 Camera
- D435 Camera
- Medium Density Preset
- D415 Camera
- D435 Camera
- Hand Gesture Preset
- D415 Camera
- D435 Camera
- Post Processing
- Overview
- Design and Implementation
- Filters Description
- Decimation Filter
- Filter Controls
- Spatial Filter
- Filter Controls
- Temporal Filter
- Filter Controls
- Holes Filling Filter
- Filter Controls
- Using Filters in Application Code
- Advanced Control
- Overview
- Additional Reference
Brand : INTEL
Model : RealSense D410
Category : Camera