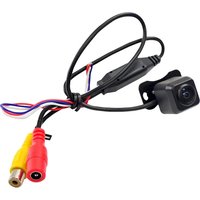
PLCM37FRV - Camera Pyle - Free user manual and instructions
Find the device manual for free PLCM37FRV Pyle in PDF.


| Product Type | Trail Camera |
| Brand | Pyle |
| Model | PLCM37FRV |
| Image Resolution | 37 MP (interpolated) |
| Video Resolution | 1080p Full HD |
| Night Vision | Up to 65 ft (20 m) with invisible infrared LEDs |
| Motion Detection | Yes, with adjustable sensitivity and trigger speed |
| Field of View | 120 degrees |
| Storage Support | SD card up to 32 GB (not included) |
| Power Source | 8 x AA batteries (not included) |
| Battery Life | Up to 6 months in standby mode |
| Connectivity | USB port for file transfer |
| Weather Resistance | IP65 water-resistant and dustproof |
| Dimensions | 5.5 x 3.9 x 3.1 inches (140 x 99 x 79 mm) |
| Weight | 0.85 lbs (386 g) without batteries |
| Operating Temperature | -4°F to 140°F (-20°C to 60°C) |
| Mounting Type | Strap or tree mount |
| LED Indicator | Yes, for power and IR operation |
| Colour | Camouflage/Green |
| Material | High-impact ABS plastic |
| Warranty | 1 Year Limited |
Frequently Asked Questions - PLCM37FRV Pyle
User questions about PLCM37FRV Pyle
0 question about this device. Answer the ones you know or ask your own.
Ask a new question about this device
Download the instructions for your Camera in PDF format for free! Find your manual PLCM37FRV - Pyle and take your electronic device back in hand. On this page are published all the documents necessary for the use of your device. PLCM37FRV by Pyle.
USER MANUAL PLCM37FRV Pyle
natural_image
Black PYLE camera lens mounted on a black metal bracket (no text or symbols visible)
natural_image
Six black star and checkmark symbols on white background, no text or labels present
natural_image
Row of red decorative symbols including stars, flowers, and circles (no text or labels)Waterproof Parking/Reverse Cam with Distance Scale Lines, Night Vision, Angle Adjustable (Front/Rear Vehicle Mountable)
Please read all installation instructions carefully before installing the product. Improper installation will void manufacturer's warranty. The installation instructions do not apply to all types of vehicles, and are written as guidelines to assist in installing the system. Please consult an experienced technician if you are not comfortable installing the product. Prior to using and installing the Backup Camera System, please read the safety information provided in this user manual. Be sure to use the product as outlined in this user manual. Altercation or modifications carried out without appropriate authorization may invalidate the user's right to operate the equipment.
WARNING: Failure to read and follow these warnings and instructions may result in serious injury, including damaged property, so please pay close attention and exhibit the utmost care.
- The Rearview Backup Camera is designed as an aid to the driver in detecting potentially hazardous driving conditions, obstructions, and large stationary objects. You, the driver, must also remember to drive safely and properly. Use of the Digital Backup Camera is not a substitute for safe, proper and legal driving practices.
- Never back up while looking only at your connected monitor display screen. You should always check behind and around the vehicle when backing up just as you would if the vehicle did not have the Digital Backup Camera. Always make sure your driving area is clear. Always back up slowly and with caution.
- Never depend on the Backup Camera entirely when backing up. The image on the monitor display screen may be slightly different from actual and real time conditions. Objects viewed in the rear view monitor differ from actual distances because a wide-angle lens is used. So use the camera as an aid and always follow intended driving practices to properly judge distances from objects.
- The Backup Camera's assisted low lux lighting performance feature is also an aid to a driver. Always use your own eyes to confirm the vehicle's surroundings, as the displayed image may be not well lit or not entirely visible. Always proceed with caution and perform double checks before proceeding.
- The area displayed by the Backup Camera is limited. It does not display objects that are close to or just below the bumper, underneath the vehicle, or objects out of the camera's view.
The camera's view can change according to your vehicle's orientation on the road or changing road conditions.
- Be sure to check the camera is properly functioning, is properly positioned and securely mounted, every time you operate your vehicle.
• Make sure your trunk or hatch operates correctly, as intended, before and after installation.
- Proceed with caution when cleaning your vehicle around the camera. Avoid excess water exposure around the camera especially with spraying or a power washer.
- Please make sure to keep the camera clean and unobstructed from any debris
- Follow all traffic laws and motor vehicle regulations.
- Consult local laws and regulations for any restrictions on installation or use.
- Using a Backup Camera System is not adequate enough to completely eliminate a vehicle's blind spot. Always remember to drive with caution, following all traffic laws.
System Installation and Wiring
Note: Camera System installation on diesel vehicles may require a slightly different wiring install.
Caution: Connecting to other types of electrical systems will cause damage to your vehicle. Please contact the manufacturer if you are unaware of the system type in your vehicle. Refer to the model's power requirements prior to connection and installation.
Quick Installation:
This rearview backup camera system comes with camera and installation wiring. When installing, the camera is preferably to be mounted in the rear of your vehicle (just above the license plate).
This kit includes necessary wiring and cable connector accessories sufficient for typical connections. However, additional accessory cables and installation materials may be necessary for completely secure and operational backup camera performance.
1. Wire connection
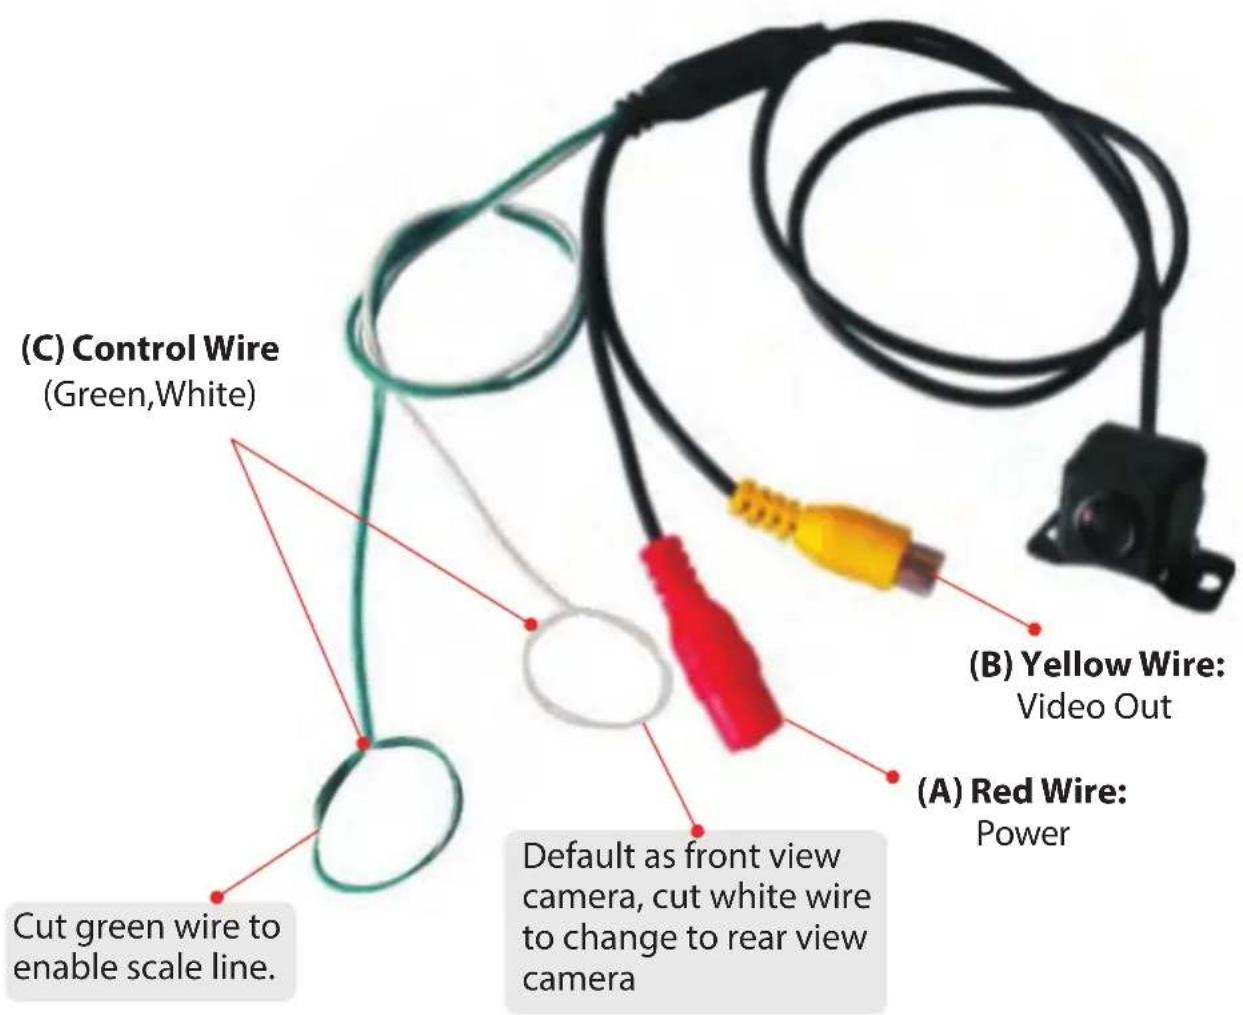
Connect the 12V power to the red wire (A) using the included 1.2m cable. Use the included 5m cable to connect the yellow wire (B) to your video monitor.
For further control, use the control wires c, cut green wire to enable scale line; cut white wire to change the camera from front view camera to rear view camera
2. Installation
The camera can be installed in the following ways:
A. Bracket-mount (see diagram 1)
B. Flush-mount (see diagram 2)
C. License plate screw-hole mount (see diagram 3)

Diagram 1
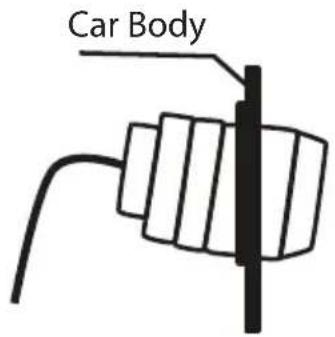
Diagram 2

natural_image
Simple line drawing of a rectangular frame with rounded corners and a central logo (no text or symbols)Diagram 3
2.1: Bracket-mount: Install in the rear bumper or on the license plate. Affix with screws.
2.2: Flush-mount: Install by drilling a hole on the rear bumper.
2.3: License plate camera: Mount in the screw hole on the license plate, then affix with a nut.
Attention: The camera switch is controlled by the reverse gear shift.
★★★☆√×\*\*
flowchart
graph TD
    A["Camera"] --> B["Video"]
    B --> C["Power Cable"]
    C --> D["Car"]
    style A fill:#f9f,stroke:#333
    style D fill:#bbf,stroke:#333
    note right of B: "Video to Display Monitor"
    note right of C: "Power Cable ...to vehicle's Reverse Lights"
PLCM38FRV
Rear-View Backup Camera
Waterproof Parking/Reverse Cam with Distance Scale Lines, Night Vision, Angle Adjustable (Front/Rear Vehicle Mountable)
Features:
• Universal Mount Backup Camera
- Compact Mini Cam Style
- Optional Installation: Front / Rear Vehicle Mountable
• Waterproof & Weather-Resistant
• Hanging Mountable Camera Housing
• Distance Scale Line Display Output
• Angle Adjustable Camera
• Night Vision Illumination
• Auto Image Adjustment
• Color Camera Output Display
What's in the Box:
- Backup Camera
• RCA Video Cable, 20' ft.
• DC Power Cable, 3' ft.
Technical Specs:
• Image Sensors 1.3" Color CMD
- Resolution: 580 x 540 Pixels
• Waterproof Marine Grade Rating: IP-68
• PAL/NTSC Compatible
- Wide Viewing Angle Lens: 170 Degree
• Video Output 1.0 Vpp-7S Ohm
• Power Supply: DC 12V
- Camera Housing Size (L x W x H): 1.0" x 0.8" x 0.8"-inches
- Sold as: Unit
PYLE
PyleUSA.com

natural_image
Illustration of a laptop with a red checkmark on screen (no text or symbols)VISIT US ONLINE:
Have a question?
Need service or repair?
Want to leave a comment?
PyleUSA.com/ContactUs
PYLE
Brand : Pyle
Model : PLCM37FRV
Category : Camera