
HBB101 - Bread maker HITACHI - Free user manual and instructions
Find the device manual for free HBB101 HITACHI in PDF.


| Product Type | Bread Maker |
| Brand | Hitachi |
| Model | HBB101 |
| Dimensions (approx) | 30 x 25 x 35 cm |
| Weight | 5.5 kg |
| Power Consumption | 600 W |
| Loaf Capacity | Up to 1 lb (500 g) |
| Baking Programs | 12 programs including Basic, Whole Wheat, Gluten-Free, Dough, Jam, Cake, etc. |
| Crust Control | Light, Medium, Dark |
| Delay Timer | Up to 13 hours |
| Keep Warm Function | Yes, up to 1 hour after baking |
| Display | LCD with backlight |
| Baking Pan | Non-stick coated, removable |
| Viewing Window | Yes, in lid |
| Safety Features | Auto shut-off, overheat protection |
| Cleaning | Wipe exterior; removable pan and lid washable in warm soapy water |
| Included Accessories | Kneading paddle, measuring cup, measuring spoon, recipe book |
| Spare Parts Availability | Replacement paddle and pan available from Hitachi service centers |
| Material | Plastic body with stainless steel accents |
Frequently Asked Questions - HBB101 HITACHI
User questions about HBB101 HITACHI
0 question about this device. Answer the ones you know or ask your own.
Ask a new question about this device
Download the instructions for your Bread maker in PDF format for free! Find your manual HBB101 - HITACHI and take your electronic device back in hand. On this page are published all the documents necessary for the use of your device. HBB101 by HITACHI.
USER MANUAL HBB101 HITACHI
SAVE THIS INSTRUCTION MANUAL
natural_image
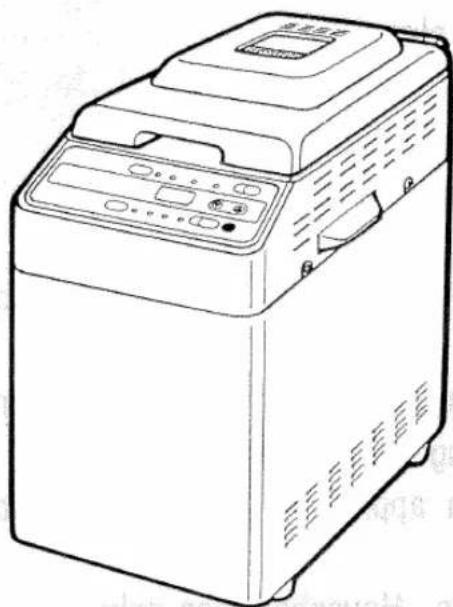
Line drawing of a standard loaf of grain maker with control panel and buttons (no text or symbols)CONTENTS
IMPORTANT SAFEGUARDS.... 1
FEATURES 4
BEFORE STARTING TO BAKE 5
DESCRIPTION 7
CONTROL PANEL AND FUNCTION 8
HOW TO USE [BREAD] 9
[BREAD RAPID]....14
[MIX BREAD] 15
[DOUGH]....16
HINTS FOR MAKING DELICIOUS HOMEMADE BREAD .....17
DISPLAY INDICATIONS....18
MAINTENANCE 19
Q & A FOR HOME BAKERY 21
BEFORE CALLING FOR SERVICE....25
SPECIFICATIONS 27
AFTER SERVICE....27
Read all instructions. Do not use this product except as illustrated in this manual.
WARNING
-
Serious burns can result from contact with hot exterior or heated contents. Therefore: Closely supervise any children in the area of this appliance.
-
Electrical shock may result from contact with water or other liquids.
Accordingly:
a. Do not use on a wet floor or in places that can be splashed with water;
b. Do not immerse cords, plugs or main body of home bakery;
c. Do not place in dishwasher;
d. Do not operate with damaged electrical cord, or after appliance malfunctions or is damaged in any way.
Return appliance to the nearest authorized service facility for examination, repair, or adjustment.
-
To prevent fire, do not use on a vinyl tablecloth, carpet or other surface not resistant to heat.
-
Injuries may result from the use of accessory attachments not recommended by manufacturer for this appliance.
CAUTION
-
Use handles or knobs if movement is required while appliance or contents are hot.
-
Unplug from outlet when not in use and before cleaning.
Allow to cool before cleaning or installing or removing parts;
-
Do not use out of doors. Damage to appliance may result.
-
Cord may be damaged if allowed to touch hot surfaces or if allowed to hang over the edge of table or counter.
-
Appliance will be damaged if placed on or near hot gas burner or hot electrical element or in a heated oven.
-
Plug cord into the wall outlet. To disconnect, turn control to "off", then remove plug from wall outlet by pulling on the wall plug itself.
-
Extreme caution must be used when moving an appliance containing hot oil or other liquids.
-
Do not use appliance for other than intended use. Household use only.
-
Preheating of the appliance is not necessary.
WARNING
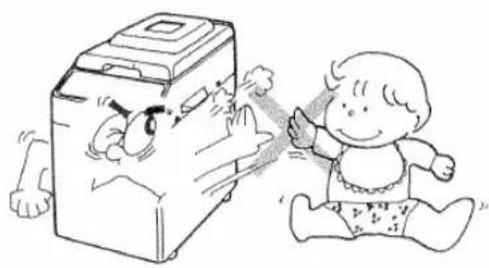
- Keep the bread maker away from babies and children; they may touch control buttons, and the bread maker will be hot during operation.
natural_image
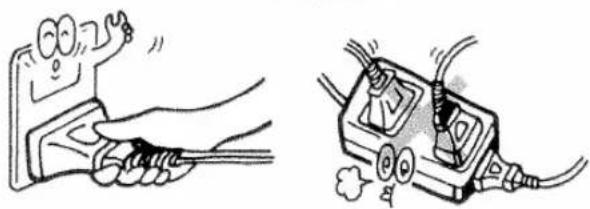
Cartoon illustration of a child reacting to a washing machine with a surprised face (no text or symbols)- Plug it into a properly wired wall outlet.
A.C. 120 only
Never use an extension-cord receptacle placed on a table, nor connect it to a two-way receptacle.
natural_image
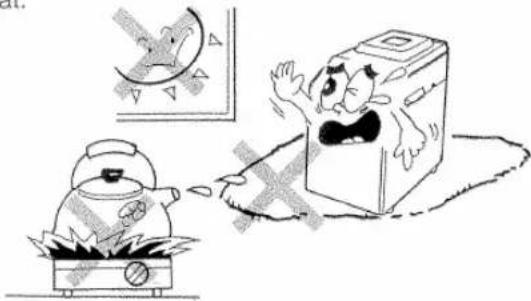
Illustration showing a hand using a tool to clean or inspect the device (no text or symbols present)- Do not use the bread maker on a covering not resistant to heat, where it is exposed to the direct sunlight, or where it is exposed to a source of heat.
natural_image
Cartoon illustration of a kettle and a washing machine with a surprised face, no text or symbols present- Do not open the lid or remove the bread pan during operation.
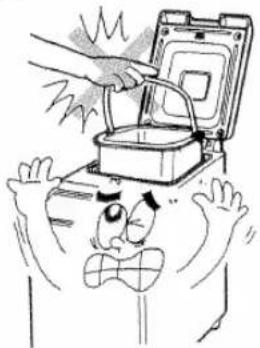
natural_image
Cartoon illustration of a person reacting to a device with a hand holding a tray (no text or symbols present)- Do not immerse the bread maker in water. It will cause electric shock or malfunction.
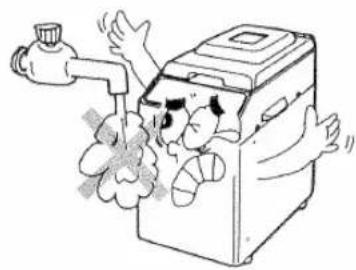
natural_image
Illustration of a washing machine with steam rising from its side, surrounded by steam and exhaust (no text or symbols)- Do not use the bread maker where it is unstable.
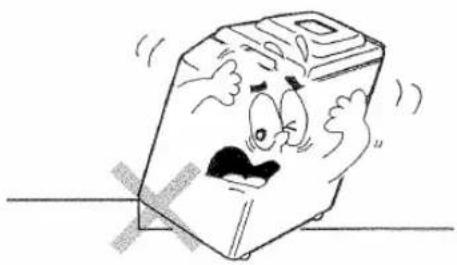
natural_image
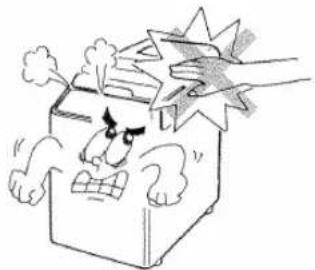
Cartoon illustration of a distressed cube with arms and legs, showing a sad face and expressive eyes (no text or symbols)● During baking:
The bread maker will be hot.
Do not place your face or hands near the bread maker.
natural_image
Cartoon illustration of a distressed box with steam and a starburst above it, no text or symbols present- When baking is finished:
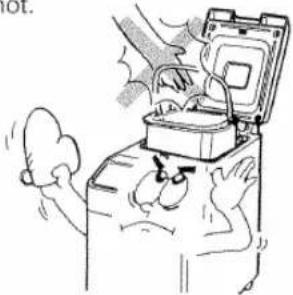
Remove the bread pan using mittens or dishcloth, as the bread pan, oven area, mixing blade, lid, etc. are hot.
natural_image
Cartoon illustration of a person reacting with frustration or stress, holding a cloud and gesturing toward an open computer (no text or symbols)CAUTION
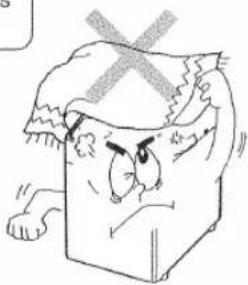
- Do not place a dishcloth over the bread maker, as it may cause deformation or discoloration of the lid.
The bread maker will be very hot. Do not place your face or hands near the bread maker.
natural_image
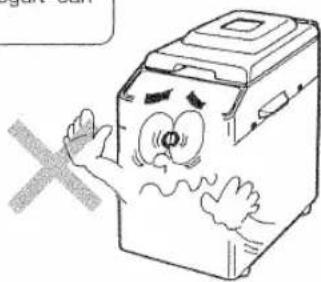
Cartoon illustration of a sad, anthropomorphic object with a cross mark on its head (no text or symbols)- Use only for bread making.
Rice cake or sweet drink made from fermented rice or yogurt can not be made.
natural_image
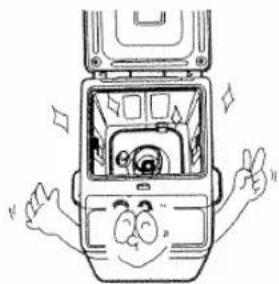
Cartoon illustration of a distressed air purifier with a large eye and steam, no text or symbols present- Be sure that the oven area is always kept clean. If you do not, crumbs may be burnt.
natural_image
Cartoon illustration of a smiling open mobile phone with hands gesturing and making peace signs (no text or symbols)- Do not immerse the bread pan in water and create oder. It may cause malfunction of the shaft.
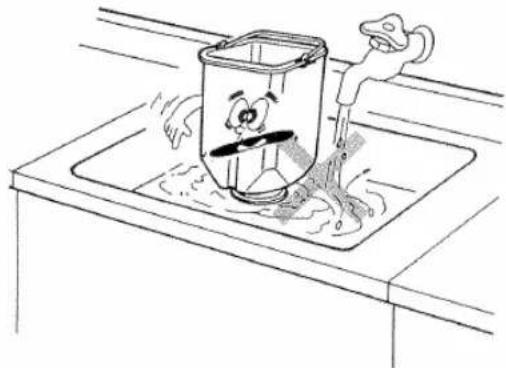
natural_image
Cartoon illustration of a water can with a face inside, spraying water from a faucet (no text or symbols)- Place the bread maker allowing at least 4 inches (10 cm) of clearance on counter (etc).
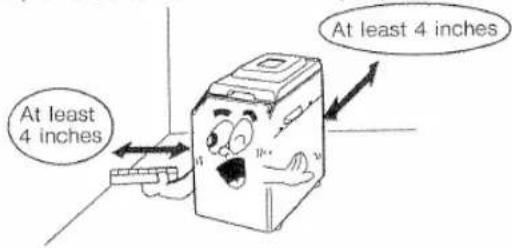
If you do not, surrounding walls may become discolored, because hot air belows from the openings of the unit.
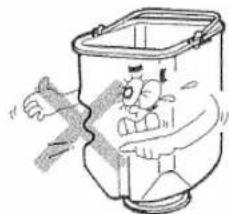
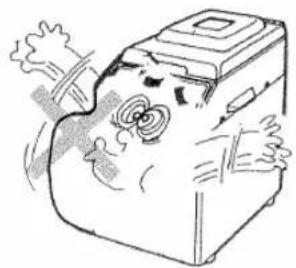
- Do not deform the bread pan.
The bread maker can not make a good loaf of bread, as accurate temperature sensing can not be done.
natural_image
Cartoon illustration of a person inside a container with a fist, no text or symbols present- Be sure that the bread maker is always kept clean, and especially that there is no foreign objects in the bread pan.
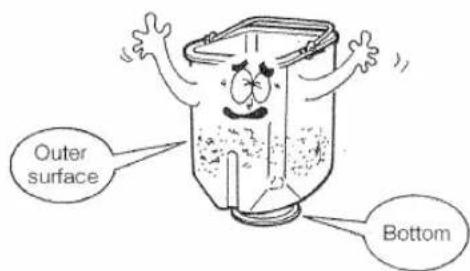
- Do not use the ingredients exceeding prescribed amount or beneath it.
It may cause some changes in the quality of bread, and bread may stick to inside of the lid or viewing window.
natural_image
Illustration of a damaged refrigerator with visible exhaust and spray (no text or symbols)Home bakery size for small (7oz/200g of loaf bread), medium (14oz/
395g of loaf bread) and large loaves (1.3 lb/590g of loaf bread).
You can bake loaves to suit the size of your family. A small loaf is what you need? No problem!
You can choose the size that suits you best.
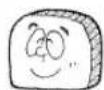
Small
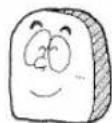
Medium
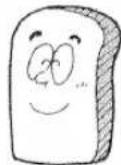
Large
TIMER
Just set it in the evening......
and it's ready in the morning!
The digital timer allows you to choose the time you want the bread to be ready (BREAD-basic loaf bread recipe only).
Delay time from 4 hours and 20 minutes up to 13 hours.
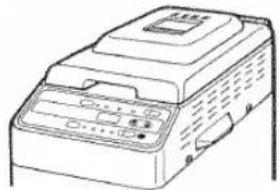
natural_image
Line drawing of a portable electronic device with control panel and buttons (no text or symbols)You can choose from 4 recipes:
BREAD (basic loaf bread)
- Start off with basic loaf bread, and you can soon look forward to adding other ingredients such as whole grain flour and sprouted seeds.
Preset the program depending on your ingredients, and your home bakery does the rest; you can also set the delay timer.
MIX BREAD
- For the preparation of raisin or nut loaf or other breads.
A beeper tells you when it's time to add additional ingredients.
The timer's delay feature cannot be used.
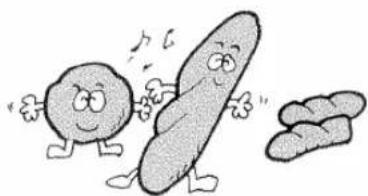
BREAD RAPID
● A speedy recipe for bread which is needed in a hurry.
It can be baked in 2 hours and 50 minutes.
The timer's delay feature cannot be used.
DOUGH
● A recipe with which you can make a variety of bread types such as dinner rolls or French bread.
natural_image
Cartoon illustration of two anthropomorphic characters and a large cylindrical object, no text or symbols presentThe timer's delay feature cannot be used.
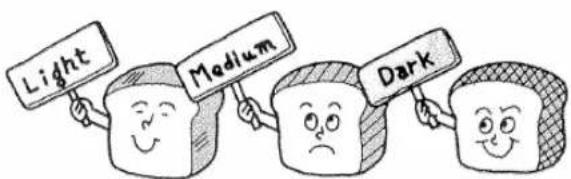
Light or dark crust setting
You can set the color setting to "light", "medium" or "dark", depending on the type of crust you prefer.
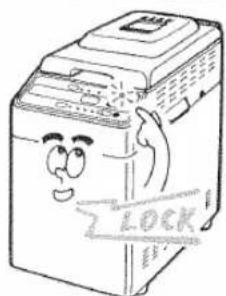
Lock button blocks the other settings
When you have set the bread maker and pressed the "START" button, push the "LOCK" button to block any other unwanted variations.
This means that it is impossible to accidentally press the "OFF" button....
INGREDIENTS USED FOR BAKING :
DRY YEAST | This is what causes the bread to rise and the most important ingredient in bread baking. The yeast for the bread maker dose not need preliminary fermentation.When combined with sugar and water at the right temperature, the yeast generates carbon dioxide and makes the dough rise.Fresh yeast is recommended.Once a package is opened, store it in the refrigerator to keep it active longer. |
FLOUR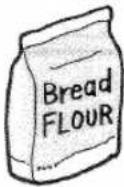 | Bread flour is highly desirable because of its high protein content.(For some types of bread, all-purpose flour may also be added).When flour is kneaded with water, gluten is formed for dough to rise better. |
SALT | Controls the action of the yeast, helps produce a firm dough, and prevents over-rising. |
SUGAR | Enhances the action of the yeast and flavor, makes the crust brown, and the bread soft. |
BUTTER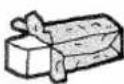 | Adds flavor, and makes the bread softer and glossier. |
DRY MILK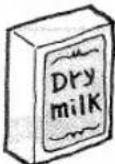 | Powdered milk enhances the gloss and flavor, and makes the bread richer and softer. |
WATER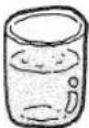 | Water is a key ingredient.It is added to flour to form the gluten and puts life into your bread.Water is a major factor in the success of your bread baking. |
IMPORTANT NOTICE
Compounding Ratio between Bread Flour and Water (or Milk)
The compounding ratio between bread flour and water (or milk) shall be kept at the volume of the instruction manual or the cook book.
In the case of putting an excessive volume of the bread flour into the bread pan compared with the volume of water (or milk), it will make some changes in the quality of the homemade bread, or it may cause malfunction due to the locking of the mixing blade.
Ingredients for Bread
The raisins, walnuts, vegetables, and other additional ingredients for bread shall be added at 4 (four) minutes before the kneading process is finished, it beeps 3 (three) times to tell you to add these ingredients.
Remove the seeds, shells and other hard foreign objects from the ingredients.
In the case of putting the hard foreign objects, such as candy sugar, crystal sugar, frozen butter, ice and other solid ingredients into the bread pan, the fluorocarbon resin coating will be scratched.
MAKING HOMEMADE BREAD WITH THE BREAD MAKER
Time shown below varies somewhat depending on room temperature.
1 Pre-knead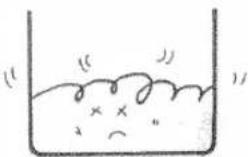 | 2 Rest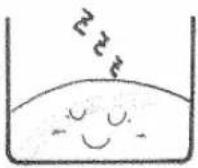 | 3 Knead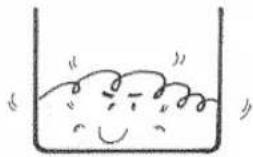 | 4 First rise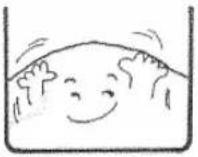 | ||||||
| Time | BREAD settingMIX BREAD setting | 7 minutes | 5 minutes | 16 – 24 minutes | 60 – 70 minutes | ||||
| BREAD RAPID setting | 7 minutes | 5 minutes | 16 – 24 minutes | 15 minutes | |||||
| DOUGH setting | 7 minutes | 5 minutes | 16 – 24 minutes | 64 – 72 minutes | |||||
5 Gas squeeze out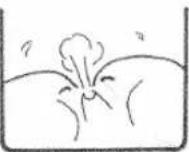 | 6 Second rise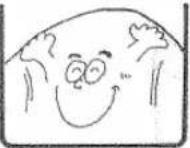 | 7 Bake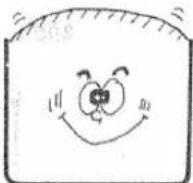 | 8 Finish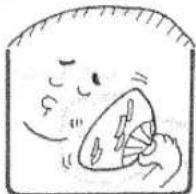 | 9 Complete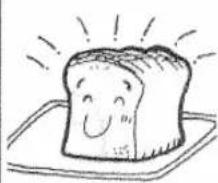 | |||||
| Time | BREAD settingMIX BREAD setting | 20 seconds | 70 minutes | 53 – 60 minutes | 20 – 31 minutes | ||||
| BREAD RAPID setting | 20 seconds | 45 minutes | 55 minutes | 20 – 28 minutes | |||||
| DOUGH setting | —— | —— | —— | —— | |||||
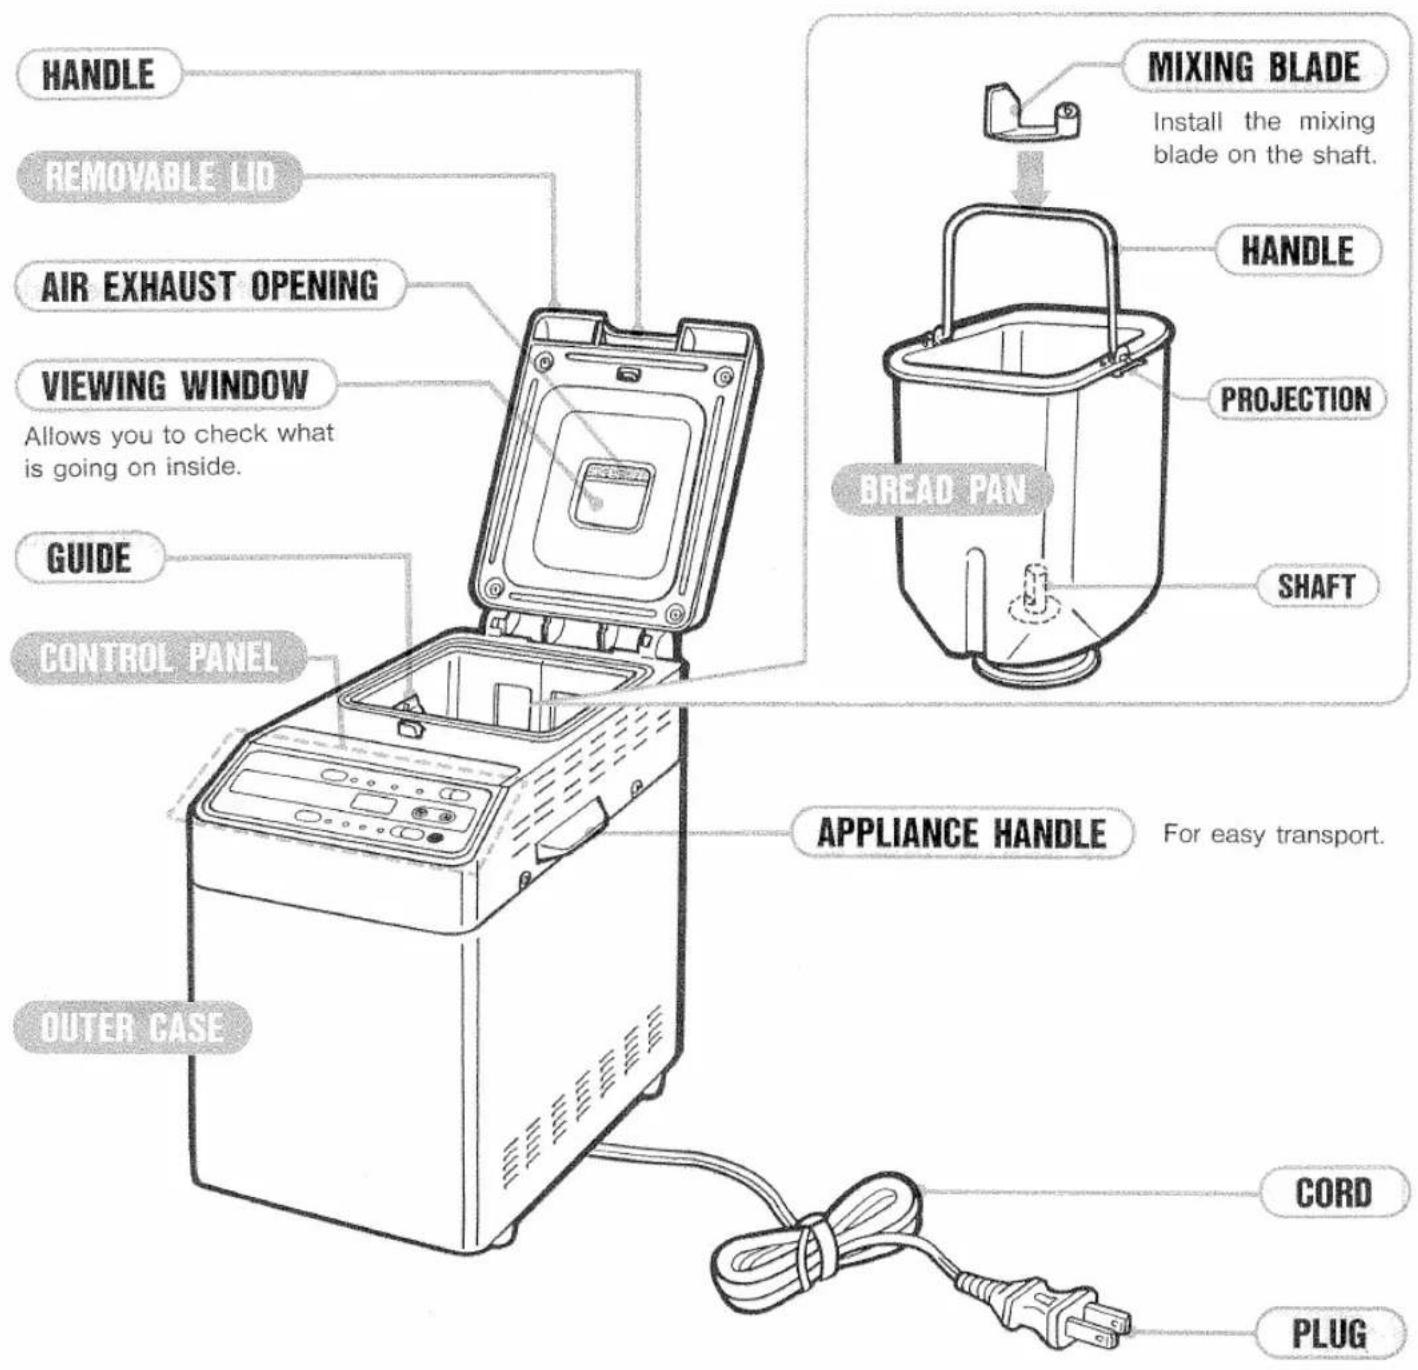
ACCESSORIES
Combination measuring spoon
Medium (M)
Large (L)
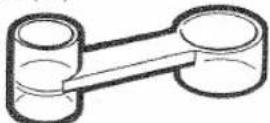
Small (S)
Use: Small (S) - for salt
Medium (M) - for dry yeast (Teaspoon, approx. 5ml)
Large (L) - for dry milk (Tablespoon, approx. 15ml) and sugar
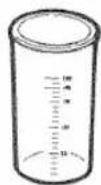
Measuring cup - for water and bread flour
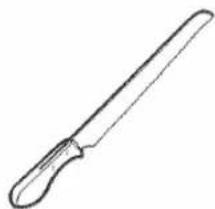
Bread knife
natural_image
Simple line drawing of a knife with a handle and blade (no text or symbols)Cook book
Note :
It is recommended that the amount of bread flour is measured by weight method.
The measuring cup is just reference for bread flour.
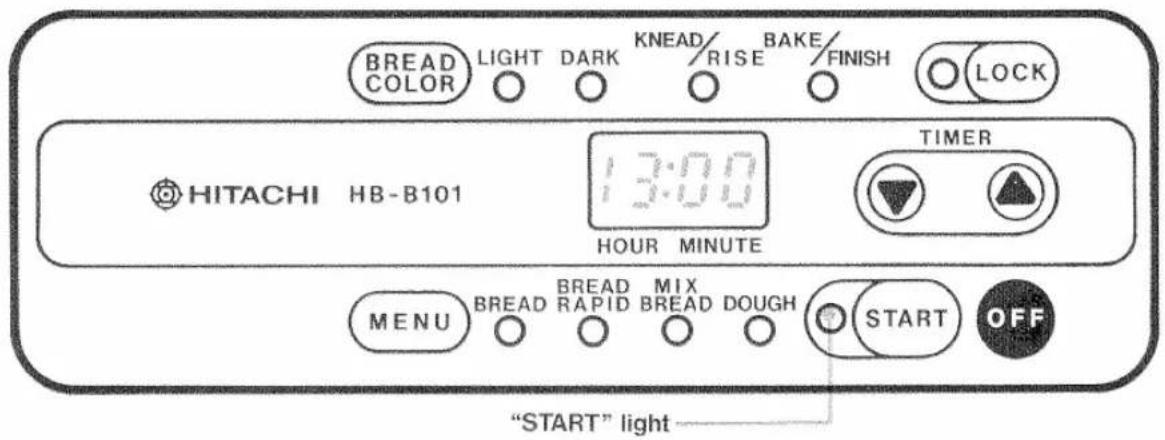
This light goes on when the "START" button is pressed, and goes off when the "OFF" button is pressed.
●When buttons are pressed, the control panel beeps.
| 1MENU | Press the select button for the type of bread you want, i.e. BREAD, BREAD RAPID, MIX BREAD or DOUGH.Each time you press this button, the next selection appears.(When the power goes on, the first selection shown is always BREAD) |
| 2BREAD COLOR | Press this button if you want to change the degree of browning.When this button is pressed, the browning stage switches to LIGHT or DARK.The light goes out when the setting returns to MEDIUM.* Unless the setting is changed, the bread will be baked on MEDIUM. |
| 3LOCK | If you want to block the setting button after the START button has been pressed, simply press the LOCK button.When the LOCK button has been pressed, the control light goes on, and all of the other buttons are blocked. When the baking process has finished the BAKE/FINISH light goes on, and the lock function is automatically turned off.If you wish to release the lock-function, press the LOCK button once more for at least 1⁄2 a second. |
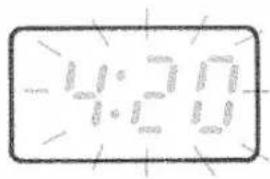
| 4TIMER | The delay time can be set on the timer by means of the arrows pointing up and down.The delay time can be set from 4 hours and 20 minutes up to 13 hours.When you press the button with the arrow pointing up, the time 4:20 appears. Each press of the button moves the time on by 10 minutes, up to 13:00.When you press the button with the arrow pointing down, press of the button moves the time back by 10 minutes, down to 4:20.If you keep the button pressed down, the timer settings run through quickly.* The timer can only be used for the BREAD setting. It cannot be used in conjunction with the settings BREAD RAPID, MIX BREAD and DOUGH. |
| 5START | Press the START button when you want to start baking immediately or to atart the timer function with a preset delay time. |
| 6OFF | Press the OFF button if you have accidentally pressed a wrong button, and want to cancel or change the delay time on the timer, or want to cut off the power supply to the bread maker. (If the lock-function has been activated, this must be cancelled first-see 3 "LOCK" avove-before pressing the OFF button.)* The BREAD setting continues to show after the OFF button has been pressed. |
Baking Bread
Press (MENU) button…BREAD
From start to finish
4 hrs and 10 min.
| Size Ingredients | Large(1.3 lb/590g of loaf bread) | Medium(13.9 oz/395g of loaf bread) | Small(7.1 oz/200g of loaf bread) |
| Water | 118 measuring cups(9.1 floz/270ml) | 34 measuring cup(6.1 floz/180ml) | 38 measuring cup(3.4 floz/100ml) |
| Bread flour | 3 measuring cups(13.2oz/375g) | 2 measuring cups(8.8oz/250g) | 1 measuring cup(4.4oz/125g) |
| Salt | 112 (S) spoons(0.2oz/6g) | 1 (S) spoon(0.15oz/4g) | 12 (S) spoon(0.07oz/2g) |
| Sugar | 3 (L) spoons(0.8oz/21g) | 2 (L) spoons(0.5oz/14g) | 1 (L) spoon(0.3oz/7g) |
| Dry milk | 112 (L) spoons(0.3oz/8g) | 1 (L) spoon(0.2oz/5g) | 12 (L) spoon(0.1oz/3g) |
| Butter | 112 (L) spoons(0.8oz/23g) | 1 (L) spoon(0.5oz/15g) | 12 (L) spoon(0.3oz/8g) |
| Dry yeast(no prefermentation type) | 1~ 112 (M) spoons(0.1oz/3g) | 1~ 112 (M) spoons(0.1oz/3g) | 12 (M) spoon(0.05oz/1.5g) |
- Teaspoon can be used for measuring instead of (S) spoon or (M) spoon.
Tablespoon can be used for measuring instead of (L) spoon. - 1 (M) spoon (0.1oz) of dry yeast is standard for a large loaf. However, should the bread not rise sufficiently, the yeast amount can be increased to 1 12 (M) spoons (0.15oz).
Be sure to use the spoon and cup included with this unit for all measuring!
For best results, measure each ingredient precisely.
(1 measuring spoon means 1 level measuring spoon)
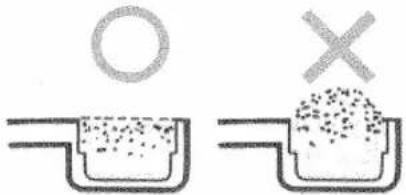
Spoon level (not heaping)
Up to the "1/2" mark in the middle.
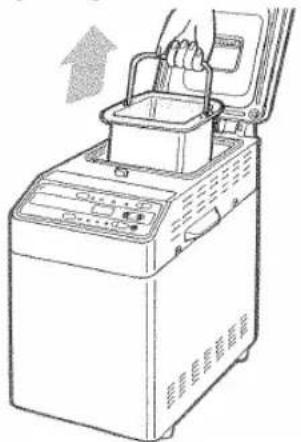
1 Remove the bread pan from the bread maker and install the mixing blade:
① Open the lid and remove the bread pan by lifting the handle.
natural_image
Line drawing of a laboratory instrument with a hand inserting a container into it (no text or symbols)② Install the mixing blade on the shaft inside the bread pan as the following figure shows.
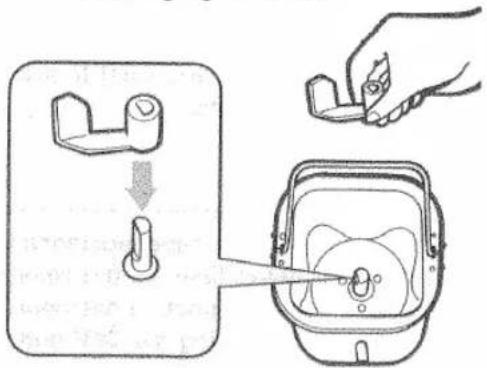
● Make sure the mixing blade is securely attached. If the mixing blade releases during operation, the dough will not be kneaded properly.
2 Place all ingredients in the bread pan: [NO DELAY]1 Place all ingredients in the bread pan, then go to instruction 3. [DELAYED BAKING]2 Pour water into the bread pan, add the flour, salt, sugar, butter, and dry milk, then place the DRY yeast on top of the DRY flour. Do not mix. (When using the bread mix, pour water into the bread pan first, then bread mix and place the DRY yeast on top of the DRY flour.)//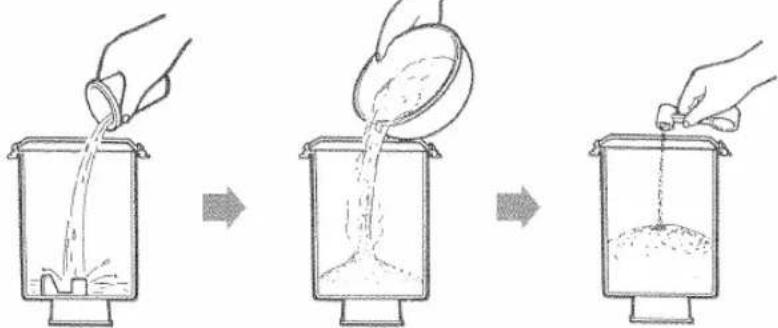 Water All ingredients DRY yeast on top of except DRY yeast flour away from water. Water All ingredients DRY yeast on top of except DRY yeast flour away from water. | NOTE: If you plan to use the timer's delay feature, the yeast must be kept dry away from water. (See instruction 2-2)If the yeast gets wet, it will ferment in advance and the dough will not rise when supposed to. |
3 Placing the bread pan into the bread maker:1 Put the bread pan into the bread maker, making sure the guide projection fits into the guide on the bread maker.2 Push the bread pan down as indicated in the figure below, and it will click into place. Push the handle down and back. 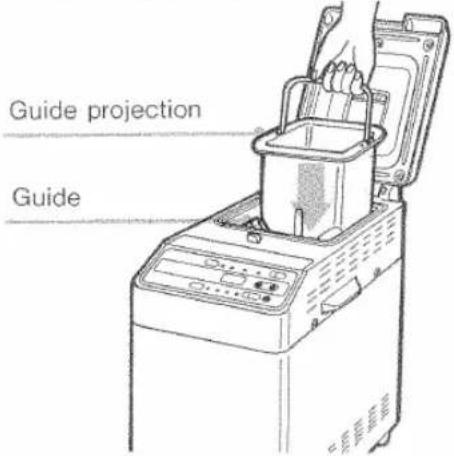 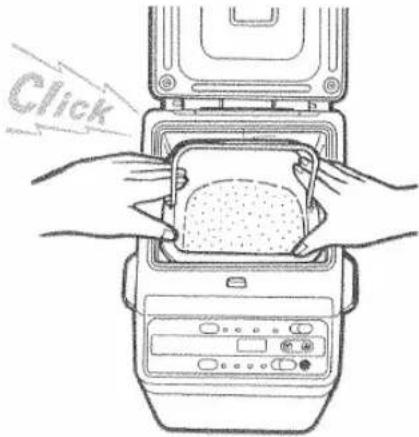 | ●If the bread pan is not inserted properly, baking will not start even when the START button has been pushed.The display shows "☐". |
4 Closing the lid:Using the handle, close the lid until it clicks audibly. 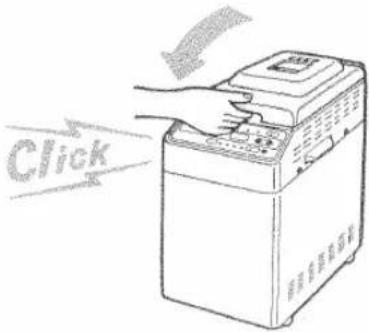 | ●If the lid is not properly closed, your bread will not bake properly. |

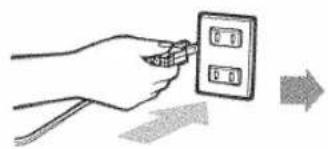
Plug the bread maker in:
Plug the bread maker in: The BREAD light is on.
natural_image
Hand holding a switch next to an electrical outlet with three buttons (no text or symbols visible)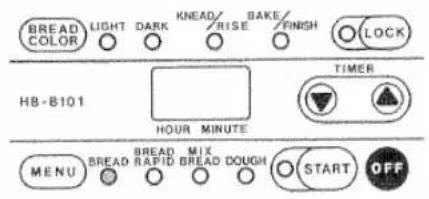

Stating the bread maker:
NO DELAY
Push the START button.
PRE-KNEAD

REST

KNEAD

FIRST RISE

GAS SQUEEZE OUT

SECOND RISE

BAKE

FINISH

COMPLETE
Notice the START light is on and the unit is running. Notice the time left for the bread to be finished is displayed [1-1] and is counting down.
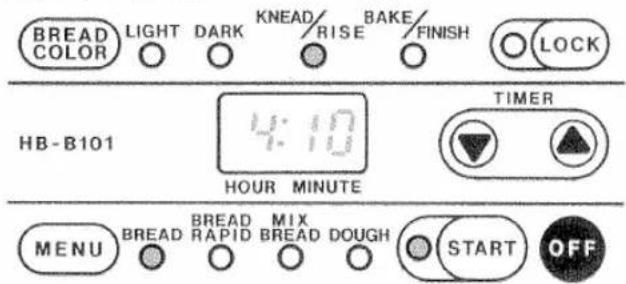
The timer counts down by the minute. Timer to go.
(1.10),1.10)……
When the time reaches about [1, 2], the bread maker starts the baking cycle.
The BAKE/FINISH light flashes quickly and cooling starts.
- When the baking process has been completed, the BAKE/FINISH light stops flashing to stay lit, and the beeper will sound 3 times telling you the bread is done. Notice on the timer display.
- If you would like to alter the degree of browning, simply press the BREAD COLOR button. The bread will bake on the MEDIUM setting, if the BREAD COLOR button is not activated. The degree of browning can be altered after starting up, if you press the BREAD COLOR button before the BAKE stage has been reached. If you have pressed the LOCK button, press it again to release the buttons and then select the browning setting you require.
- Press the LOCK button to block the setting functions after the START button has been pressed.
- If the bread maker does not start to work after the START button has been pressed, check the trouble shooting guide on pages 25 and 26.
- Remember that the bread maker remains hot until the BAKE/FINISH light has stopped flashing.
beep
beep
beep
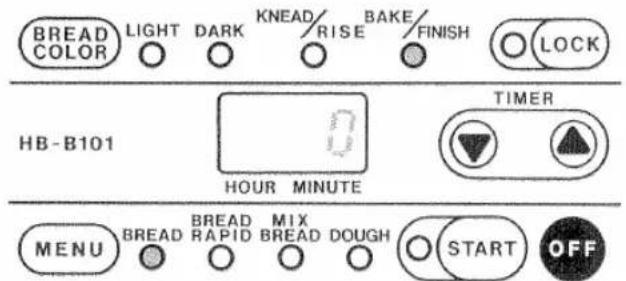
NOTE: When the FINISH light flashes quickly, it means that the baking process has ended.
You may remove the bread pan while the finish light is still flashing.
First, push the OFF button, then use a pot holder or a dish towel to lift the lid and remove the bread pan.
(Be careful: the bread maker and the bread pan are very hot!)
Then take the bread out of the pan, and place it on a wire rack to cool, if you do not want to cut it
warm.
The timer cannot be used in conjunction with the BREAD RAPID, MIX BREAD and DOUGH settings.
Set the timer for however long you want to wait before the bread is finished (from 4 hours and 20 minutes to 13 hours, in 10 minute intervals). The time you set will be the time that the bread is baked and ready to serve.
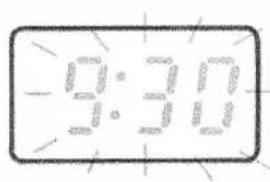
EXAMPLE: It is 9:00 pm now. You would like to have the bread ready at 6:30 am the next morning. Set the timer for 9:30, because there are 9 hours and 30 minutes between 9:00 pm and 6:30 am.
1
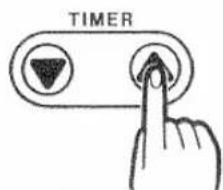
Pressing the

button once will cause
[Unreadable]
to appear.
2
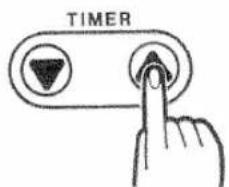
Continue pressing the

button until
3:30
is shown flashing.
3
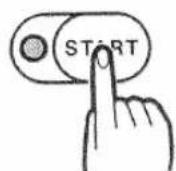
Push the START button: The display is not longer flashing, and the timer is set.
9:30
The use of the ▼ button.
- If you pass the time that you wanted, push button to go back.
If you keep pressing button, will be displayed. This is the longest time the timer can be set.
- Keep the button pressed down, the timer will run back in 10 minute intervals.
The timer counts down by the minute.
8:29,8:30……
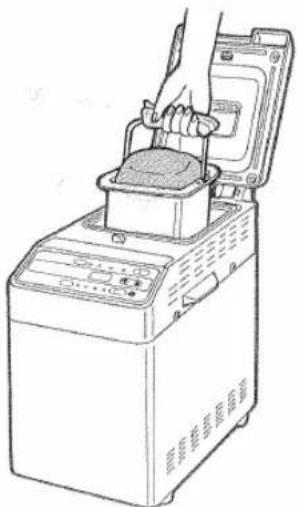
7 When baking has been completed, remove the bread pan from the bread maker.
After the beeping sound stops, push the OFF button, open the lid, and pull the pan out by the handle.
Be sure to use pot holders or a dish towel, because the bread maker is very hot, especially inside.
natural_image
Line drawing of a hand operating a device with a handle, no text or symbols present- If you do not push the OFF button after the beeping sound stops, the ventilator will run for 30 minutes to keep the bread from getting soggy from the cooled steam.
- Do not put the hot bread pan on the lid of the bread maker or any other item that may be damaged or discolored from the heat!
Removing the bread
Turn the bread pan upside down and shake until the bread comes loose.
If you have baked a small loaf, it may stick to the mixing blade and may become hard to shake out. In this case, wait until the bread pan is cooled off sufficiently to allow it to be handled. You can then put your finger between the loaf and the bread pan to lift it out.
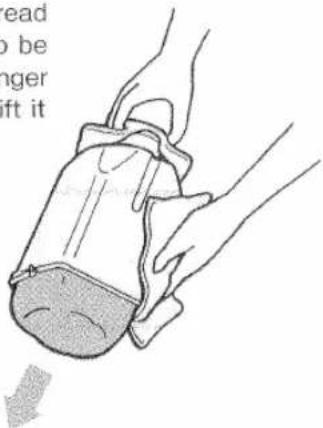
- If the mixing blade comes out attached to the bread, remove it with tongs or a towel.
WARNING: It is hot!
- If the mixing blade remains inside the bread pan, see page 19. "Maintenance" for further information.
After use
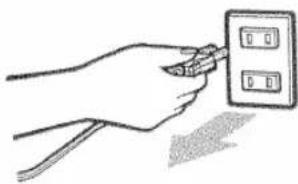
Always unplug the bread maker after each use.
natural_image
Hand holding a wall-mounted electrical switch with two buttons (no text or symbols visible)CAUTION
● For safety reasons, be sure to unplug the bread maker after each use.
If you only push the OFF button, the BREAD indicator light stays on and the START button could be pushed by accident.
If you want to bake bread in a hurry. Select the BREAD RAPID(MENU button) setting
- Add extra dry yeast:
From start to finish 2 hours and 50 minutes
| Ingredients\Size | Large(1.3 lb/590g of loaf bread) | Medium(14oz/395g of loaf bread) | Small(7oz/200g of loaf bread) |
| Water | 118 measuring cups(9.1 floz/270ml) | 34 measuring cup(6.1 floz/180ml) | 38 measuring cup(3.4 floz/100ml) |
| Bread flour | 3 measuring cups(13.2oz/375g) | 2 measuring cups(8.8oz/250g) | 1 measuring cup(4.4oz/125g) |
| Salt | 112 (S) spoons(0.2oz/6g) | 1 (S) spoon(0.15oz/4g) | 12 (S) spoon(0.1oz/2g) |
| Sugar | 3 (L) spoons(0.8oz/21g) | 2 (L) spoons(0.5oz/14g) | 1 (L) spoon(0.3oz/7g) |
| Dry milk | 112 (L) spoons(0.3oz/8g) | 1 (L) spoon(0.2oz/5g) | 12 (L) spoon(0.1oz/3g) |
| Butter | 112 (L) spoons(0.8oz/23g) | 1 (L) spoon(0.5oz/15g) | 12 (L) spoon(0.3oz/8g) |
| Dry yeast(no prefermentation type) | 2 (M) spoons(0.2oz/6g) | 2 (M) spoons(0.2oz/6g) | 1 (M) spoon(0.1oz/3g) |
● Teaspoon can be used for measuring instead of (S) spoon or (M) spoon.
Tablespoon can be used for measuring instead of (L) spoon.
● Bread with added fruit cannot be baked on the RAPID BREAD setting.
● The timer cannot be used in conjunction with the BREAD RAPID setting.
From removing the bread pan to plugging the bread maker in, follow the same procedures for BREAD. (1 thru 5 only-page 9 to 11)

Starting the bread maker :
① Select the BREAD RAPID setting
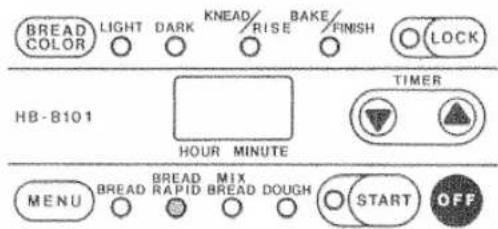
② Press the START button
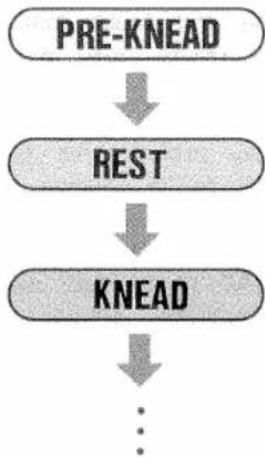
flowchart
graph TD
    A["PRE-KNEAD"] --> B["REST"]
    B --> C["KNEAD"]
    C --> D["..."]
The START light goes on, the time [25] to end of baking time appears, and the bread maker starts kneading.
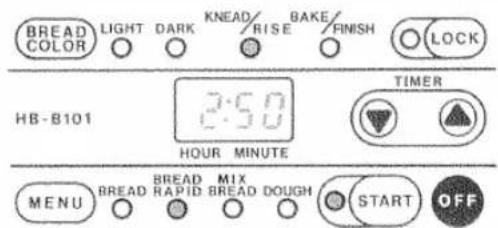
The timer counts down by the minutes.

● Make sure you select BREAD RAPID.
- If the bread maker does not start to operate when the START button has been pressed, check the trouble shooting guide on pages 25 and 26.
- For browning control and lock function, see the notes under BREAD.
The process from rising to end of baking is the same as that shown under BREAD. When the bread is finished, it can be removed from the bread pan in the same way.
How to make raisin bread
Select the MIX BREAD (MENU button) setting From start to finish 4 hours and 10 minutes
- Use the same ingredients as for normal bread, and add the fruit to the dough during the KNEAD phase.
| Loaf size | Large | Medium | Small |
| Amount of raisins | 1⁄2 measuring cup (3.2oz) | 1⁄4 measuring cup (2.1oz) | 1⁄8 measuring cup (1.1oz) |
NOTE: The timer's delay feature cannot be used for MIX BREAD setting.
From removing the bread pan to plugging the bread maker in, follow the same procedures for BREAD (1 thru 5 only-page 9 to 11).

Starting the bread maker
① Select the MIX BREAD (MENU button) setting.
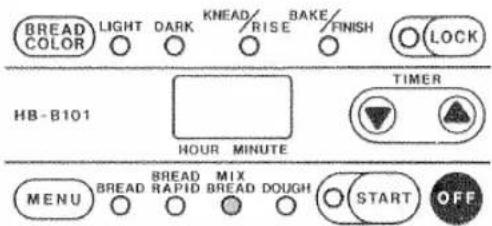
② Press the START button.
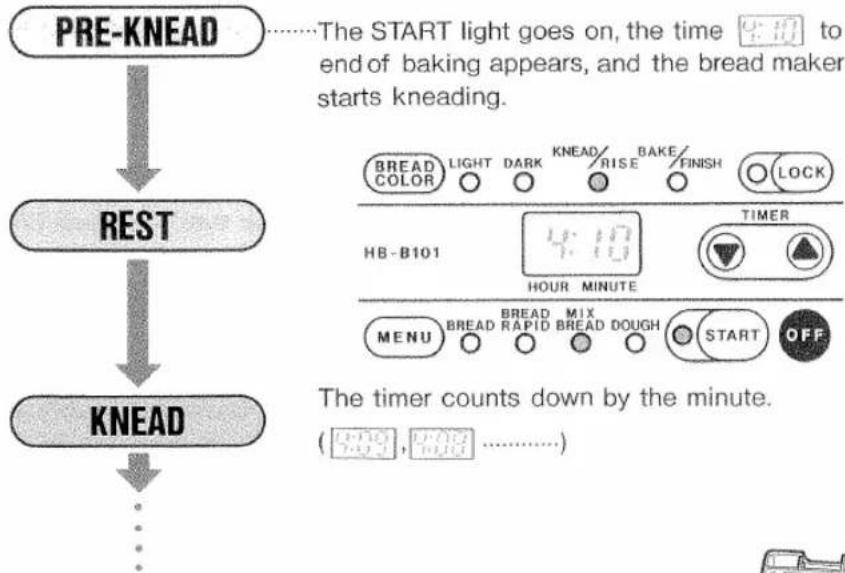
flowchart
graph TD
    A["PRE-KNEAD"] --> B["REST"]
    B --> C["KNEAD"]
    C --> D["..."]
③ Add the raisins etc. when the beeper sounds.
After about 25 minutes from the start and 4 minutes before the kneading is finished, it sounds 3 times to tell you to add raisins. Open the lid and sprinkle raisins quickly and evenly over the dough.
Opening the lid at this time will not stop the kneading, so be careful!
After adding the raisins, quickly close the lid to prevent heat loss.
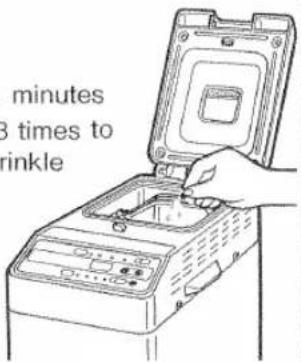
● Make sure that you select MIX BREAD setting. If you forget, the beeper will not tell you when to add the raisins!
- For browning control and lock function, see the note under BREAD.
- Add the raisins evenly. If you add all the raisins at the same time, they will all be in one clump when the bread is finished.
- Do not add the raisins before the 5 beeping sound. If you do, you will not have RAISIN BREAD but crushed raisin bread or raisin colored bread without a raisin to be found; and dough that contains raisins may not rise sufficiently.
- If you prefer some of the raisins to be crushed, these should be added to the ingredients at the start of the BREAD phase and will be automatically baked. (The color of the finished bread will be darker).
The process from rising to end of baking is the same as that shown under BREAD. When the bread is finished, it can be removed from the bread pan in the same way.
Preparing the dough
Select the DOUGH (MENU button) setting
From start to finish 1 hour and 40 minutes
- Please check with the enclosed "COOK BOOK" for information on preparing ingredients for various types of bread and doughs that can be made using the DOUGH setting.
NOTE: The timer's delay feature cannot be used for DOUGH setting.
From removing the bread pan to plugging the bread maker in, follow the same procedures for BREAD. (1 thru 5 only-page 9 to 11)

Starting the bread maker.
① Select the DOUGH (MENU button) setting.
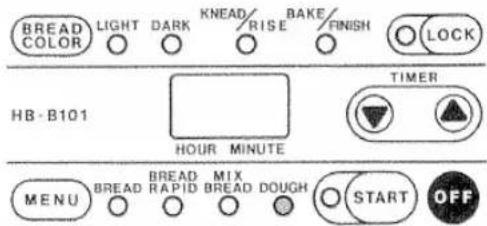
② Press the START button.
PRE-KNEAD
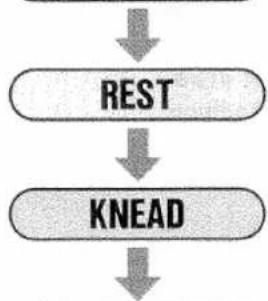
flowchart
graph TD
    A["REST"] --> B["KNEAD"]
The START light goes on, the time, □, to end of the first rise time appears, and the bread maker starts kneading.
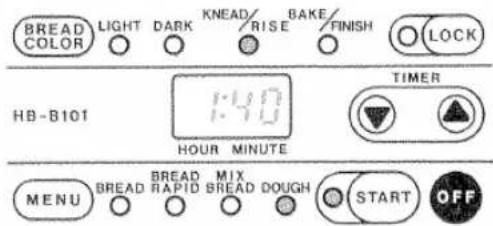
FIRST RISE

The timer counts down by the minutes.

Make sure that you select Dough setting.
● For browning control and lock function, see the notes under BREAD.
beep beep beep
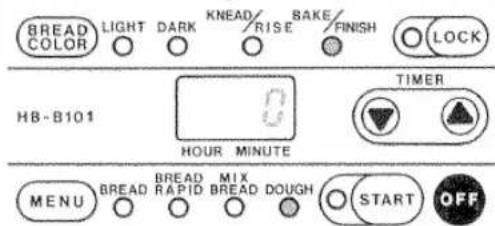

To take dough out:
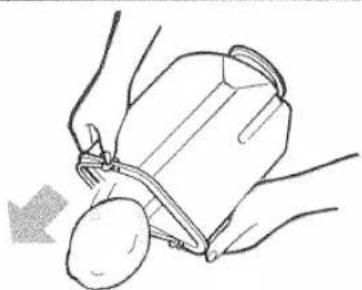
① Push the OFF button, open the lid and pull the pan out by the handle.
② Gently take the dough out.
Now carefully remove the mixing blade.
natural_image
Line drawing of hands holding a small object with a handle, no text or symbols presentCAUTION
- Be sure to unplug this unit after each use.
Now you can shape the dough as you wish.
Let it rise in a warm place and bake it in your oven.
1 Use only fresh ingredients
Store the flour in place free from moisture. Use the package as quickly as possible after opening.

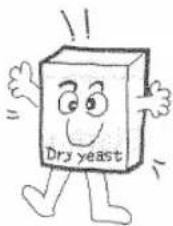
Yeast
Use only dry yeast which does not need preliminary fermentation. The low bread may be baked according to the type of dry yeast.
After opening a package, store unused yeast in your refrigerator.
2 Measure the ingredients accurately:
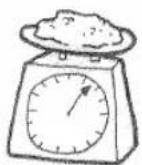
Accurate measurements are essential to making delicious bread.
For better results, use a scale which can calibrate grams or ounces rather than a measuring cup.
(Use a scale for cooking)
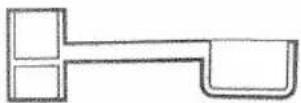
When using the spoon included, measure an even spoonful of ingredients. Do not pack the ingredients into the spoon.
An even spoonful of ingredients.
3 To ensure tasty bread:
When eating:
Enjoy it toasted or freshly sliced.
Refer to cook book included to enjoy variety of home baking recipes.
When eating later:
Wrap the bread in a plastic bag to prevent it from drying out.
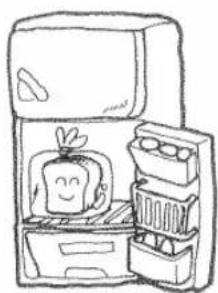
When storing
After cooling the bread completely, wrap in foil or a plastic bag.
For 2 or 3 days' storage, wrap well and store homemade bread in a refrigerator.
For longer storage, wrap well and store it in a freezer.
natural_image
Simple line drawing of a refrigerator with a smiling face and open storage compartments (no text or symbols)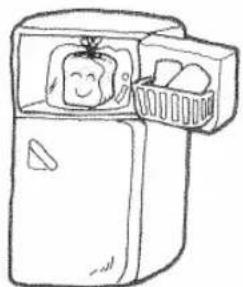
natural_image
Simple line drawing of a refrigerator with a smiling face inside and two compartments (no text or symbols)
When the START button is pressed:
| Display | Cause | How to reset |
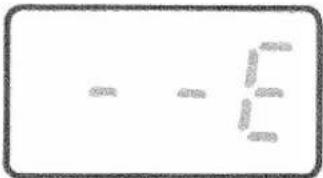 HOUR MINUTEand beep beep beep HOUR MINUTEand beep beep beep | There is no bread pan in the bread maker, or the bread pan has not been properly positioned. | Put the bread pan in the bread maker again: you should clearly hear a click. Check that the display "☐" is no longer showing, and press the START button again. |
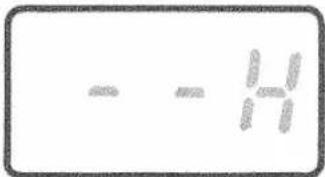 HOUR MINUTEand beep beep beep HOUR MINUTEand beep beep beep | The oven area is hot (above 100°F/38°C).This may occur during continuous use. | Open the lid to cool the oven area for 30 minutes to 1 hour.If the ventilating is finished, START can be set after 5~10 minutes again.When the ☐ indication goes out, press the START button. |
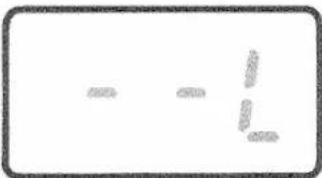 HOUR MINUTEand beep beep beep HOUR MINUTEand beep beep beep | The oven area is cool (under 14°F/-10°C) | Remove the unit to warm place.When the ☐ indication goes out, press the START button. |
When the interruption in the power supply is caused:
| Display | Cause | How to reset |
The timer display flashes on and off, without showing the time.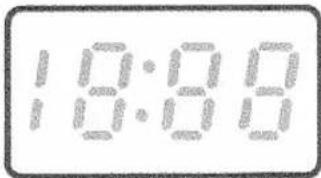 | There has been an interruption in the power supply for more than 10 minutes during operation. | Remove the dough and start again using all new ingredients.If the interruption in the power supply is momentary, the operation will not be affected. |
| Only the "BREAD" menu display is showing.[IMAGE] | There has been an interruption in the power supply for more than 1 hour during operation. |
FIRST STEP
- Be sure to disconnect power by pulling out the plug, and allow the main body to cool down enough before initiating maintenance.
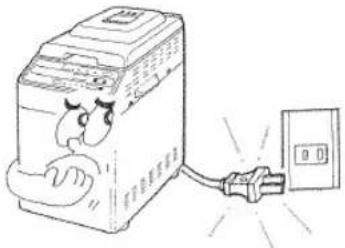
natural_image
Cartoon illustration of a washing machine emitting exhaust smoke from a power outlet (no text or symbols)METHOD OF DETACHING THE MIXING BLADE
● The mixing blade may become hard to detach from the shaft as it sticks.
- Immediately after removing the baked bread, pour water or tepid water into the bread pan. Leave it for 30 minutes to loosen, then detach the mixing blade.
(If you leave the mixing blade in the bread pan, it becomes harder to detach.)
- If the mixing blade can not be detached, pour hot water in the bread pan and leave it for more than 30 minutes to loosen and detach the mixing blade.
CAUTION!
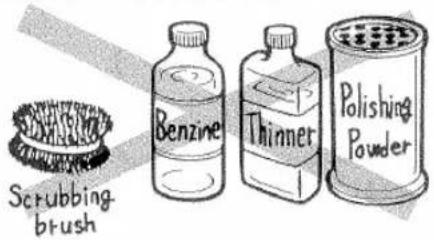
- Avoid using any cleaning agent other than tableware detergent, such as benzine, thinner, polishing powder and scrubbing brush, for they are harmful to the surface finish.
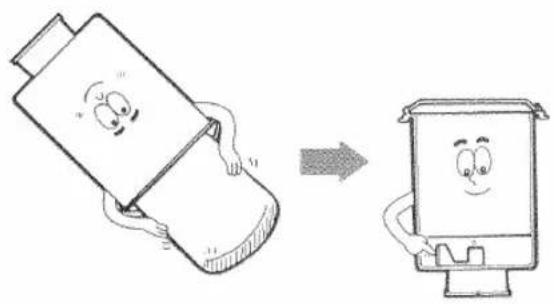
natural_image
Illustration of a battery being held by a computer, showing the process from left to right (no text or symbols present)Do not immerse this bottom in water. Wipe with well wrung dishcloth.
MAIN BODY, LID
- Wipe with well wrung dishcloth. Do not immerse in water or splash water, as they may become the cause of malfunction or electric shock.
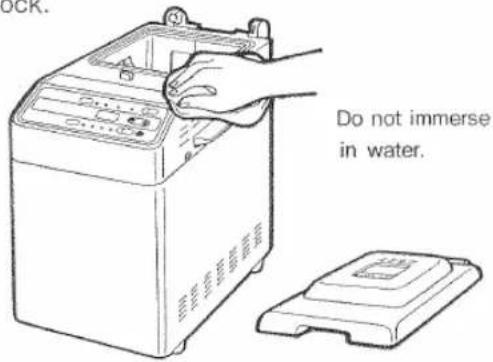
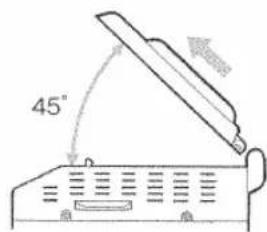
- You can remove the lid by opening it up to 45 degrees of angle and pull it upward.
- Be sure that the oven area is always kept clean.
- Do not use the bread maker without rubber packing inside the inner case.
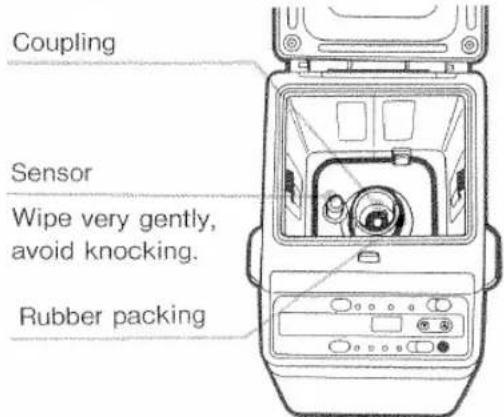
- If you remove the rubber packing, it will cause noise. Wash the rubber packing with soft material like sponge and let it dry.
● After using, unplug and gently wipe out crumbs or dust in the oven area with well wrung dishcloth.
Coupling: clean soiling with a tissue paper.
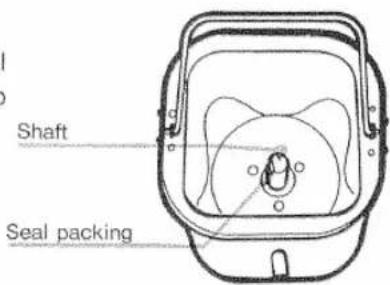
BREAD PAN
- Wash the shaft with soft material like sponge, to prevent damage to the seal packing and let it dry.
MIXING BLADE TREATED WITH FLUOROCARBON
- Wash with a soft material like sponge, and let it dry.
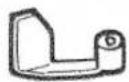
If the aperture in the mixing blade is blocked, the blade should be immersed in water for a short time and then cleaned with a toothbrush or the like.
● After immersing it in water for a while, clean it by using a soft toothbrush.
BREAD PAN AND MIXING BLADE
IN ORDER TO PREVENT DAMAGE TO THE FLUOROCARBON RESIN COATING
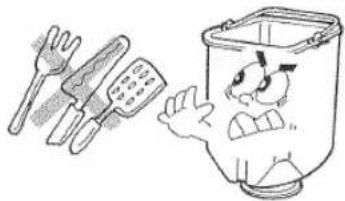
- Metallic scoop, knife or fork, etc., should not be used.
- Be sure to keep clean after each use. After continued use, some slight amount of discoloration may take place due to the action from the moisture and steam. This will not make any
changes in ease of use or in the quality of the baked bread.
natural_image
Cartoon illustration of a bowl with chopsticks and a surprised face, no text or symbols presentSTORING THE BREAD MAKER
Be sure that the body has cooled completely before storing.
natural_image
Cartoon illustration of a smiling refrigerator with arms and legs, no text or symbols presentBe sure to close the lid.
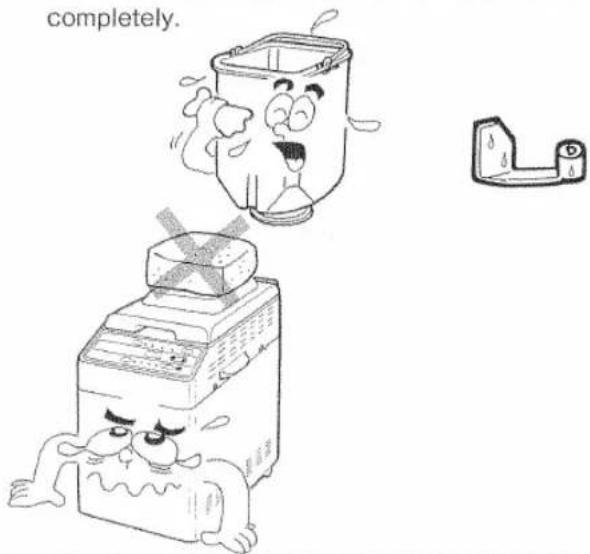
Do not place a heavy object on the lid. This may damage the seal.
Be sure that all moisture inside the unit has dried completely.
Q1 Why the height and shape of bread differ in each use?
natural_image
Cartoon illustration of two anthropomorphic bread slices with expressive faces (no text or symbols)A1 The height and shape of bread differ depending on the room temperature and resting time (when using timer).
Also accurate measurement of ingredients is essential to make delicious bread.
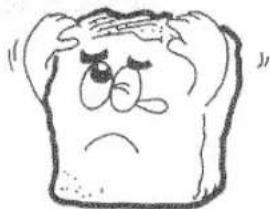
Q2 Why the bread didn't rise?
natural_image
Cartoon illustration of a sad, anthropomorphic bread character with frowning expression (no text or symbols)A2 If you forget to add the yeast or to install the mixing blade, the bread does not rise.
Also, if the yeast is not enough or is stale, a small loaf may result.
A small loaf may result according to type, amount and freshness of yeast.
Q3 The bread has an offensive odor, why?
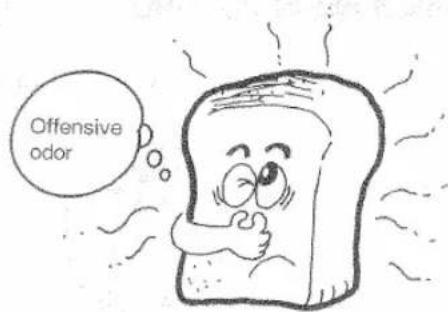
A3 Because stale ingredients may have been used, or the yeast may have been added too much.
The BREAD RAPID setting requires the use of a larger amount of yeast, and this can lead to the development of a strong smell.
We recommend using fresh ingredients.
Accurate measurement of ingredients is essential to make delicious bread.
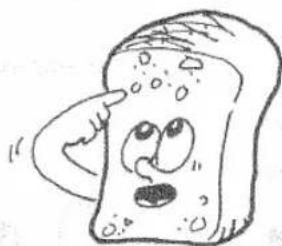
Q4 The structure of the bread is coarse, why?
natural_image
Cartoon illustration of a smiling slice of bread with eyes and nose, pointing to the side (no text or symbols)A4 The bread is cottage loaf shaped, not long like most commercial loaves. The shape of the bread pan means that it has to rise and be baked vertically, and this gives it a different structure from commercially baked bread.
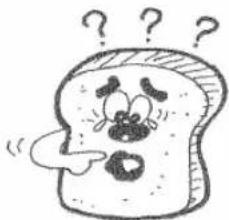
Q5 Why there is a big hole in the center of the loaf?
natural_image
Cartoon illustration of a confused loaf with question marks above it (no text or symbols)A5 During kneading air has collected in this spot and has not been expelled during gas squeeze-out process. The bread was baked with this air bubble inside.
Q6 The mixing blade comes out with the bread.
natural_image
Cartoon illustration of a character inside a cylindrical container with a lamp and a small object on its head (no text or symbols)A6 It is not abnormal as the mixing blade is detachable.
Use a non-metallic skewer, chopsticks or tongs to remove it.
Caution: The mixing blade will be hot.
TIMER
Q7 The timer can be set only for 4 hours and 20 minutes up to 13 hours.
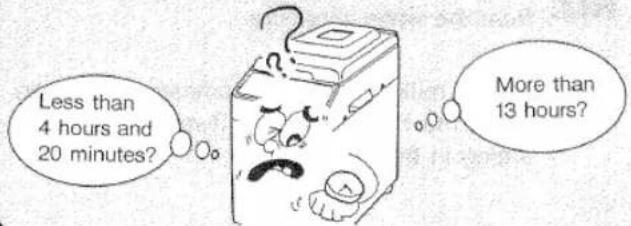
A7 Bread making takes a minimum of 4 hours and 10 minutes.
Any ingredient may be spoiled, if the timer setting exceeds 13 hours.
Q8 Why raisins are not added with all the other ingredients?
A8 The purpose is to keep the shape of the raisins without smashing, and dough that contains raisin in one clamp may not rise sufficiently.
Add them in the middle of kneading process at the 5 beeping sounds.
(Refer to how to make raisin bread on page 13.)
Q9 The timer can not be used for MIX BREAD setting, why?
A9 Because you have to open the lid and add raisins in the middle of kneading process.
Egg is not recommended when using the timer, because it may spoil while sitting in the bread pan.
Q10 The timer can not be used for DOUGH setting why?
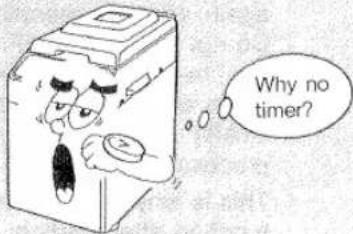
A10 Because dough may spoil while sitting in the bread pan.
INGREDIENTS
Q11
Can 12 or double ingredients of prescribed amount be used?
natural_image
Simple line drawing of a box with a cat inside, showing a curled-up and a wavy line (no text or symbols)A11
Home bakery sizes are: Small (7oz/200g of loaf bread), medium (14oz/395g of loaf bread) and large loaves (1.3lb/590g of loaf bread).
If it is too little, the mixing blade may come off.
If it is too much, bread swells out from the bread pan.
Q12
Can fresh milk be used in place of dry milk?
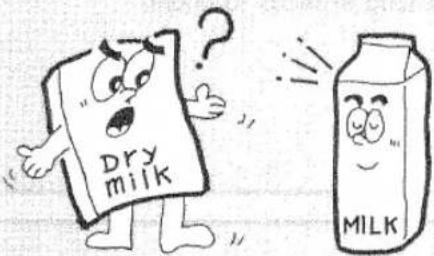
A12
Yes. Be sure to deduct the same amount from the water measure.
Fresh milk is not recommended when using the timer, because it may spoil while sitting in the bread pan.
OTHERS
Q13
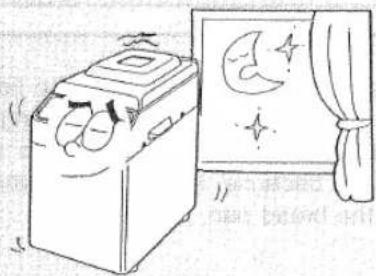
The bread maker makes a noise at night when using the timer, why?
natural_image
Simple line drawing of a washing machine with a window and curtains, no text or symbols present.A13
Because the bread maker starts kneading at night to make fresh bread the next morning.
It is the noise of the mixing motor and ventilator.
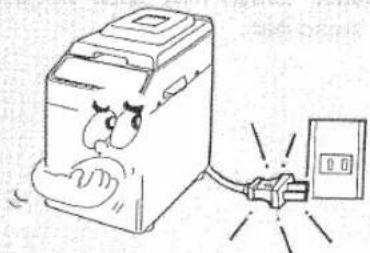
Q14
The bread maker was unplugged during operation by accident.
natural_image
Cartoon illustration of a washing machine with a sad face and connected to a wall-mounted power outlet (no text or symbols)A14
If the interruption in the power supply is momentary within 10 minutes, (according to lower room temperature, it becomes shorter), the operation will not be affected. Plug in again, and the operation will continue.
Do not press the OFF button during operation, because it cancels all operations and shuts off all power; and then pressing the START button starts with the first kneading process.
This is why it is advisable to use the LOCK function after starting.
Q15 What will happen if the bread is not removed from the bread pan after baking?
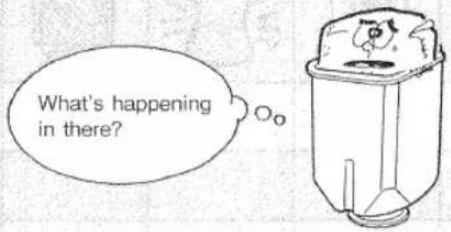
A15 The bread will be cooled down and moisture taken out during the last process, and the ventilator will run for additional 30 minutes to keep the bread from getting soggy.
For best results, then carefully remove the bread from the pan and cool on a wire rack.
Q16 The finish is sometimes light and sometimes dark, why?
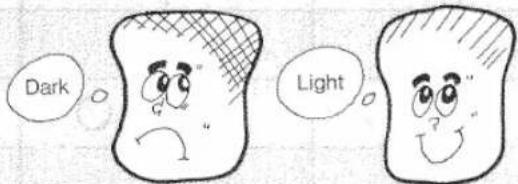
A16 Use the BREAD COLOR button to choose the crust color you prefer, LIGHT, MEDIUM or DARK.
You can choose your setting even after the START button has been pushed, but it must be before the BAKE light goes on. If you have activated the LOCK function, you must cancel this first to change your choice of color.
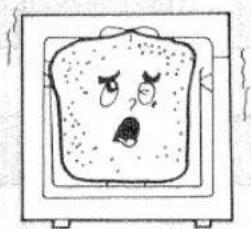
Q17 What should I do if the bread rises up to the lid and the viewing window?
natural_image
Cartoon illustration of a steamed bread with a surprised face and steam lines (no text or symbols)A17 Use less dry yeast and/or sugar.
Q18 Why can't I bake fruit bread on the BREAD RAPID setting?
A18 The rising time is decreased in the BREAD RAPID setting. This means that the baking time is strongly influenced by the amount of ingredients and type of bread desired, and fruit bread doesn't apply to this setting.
| BAKING RESULTS:Please checkthe following: | Does not operate | Smoke emitted from openings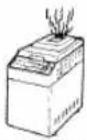 | Sides collapse and damp inside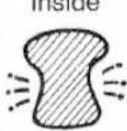 | Top inflated and browned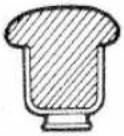 | Bread loaf too short | ||
| Unplugged | ○ | ||||||
| Oven area is abnormal | Display - - -1 | ○ | |||||
| Display - - -1 | ○ | ||||||
| Display - - -1 | ○ | ||||||
| Ingredients spilled on heating element or oven area. | ○ | ||||||
| Bread left in bread pan too long after baking. | ○ | ||||||
| Measurement errors | Flour | Too much | ○ | ||||
| Not enough | ○ | ||||||
| Yeast | Too much | ○ | |||||
| Not enough | ○ | ||||||
| Sugar | Too much | ○ | |||||
| Not enough | ○ | ||||||
| Water | Too much | ||||||
| Not enough | ○ | ||||||
| Mixing blade not installed in bread pan. | |||||||
| Power outage. (Is the time flashing on and off, or is the display only showing BREAD?) | |||||||
| OFF button was pressed after starting. | |||||||
| Lid was open during operation. | |||||||
| Type of flour | Whole wheat flour used. | ○ | |||||
| Self rising flour used. | ○ | ||||||
| Wrong type of yeast used. | ○ | ||||||
| Old flour, yeast used. | ○ | ||||||
| Bread sliced just after baking (Steam was not allowed to escape). | |||||||
| Accidentally chose the DARK setting. | |||||||
Floured top | Under-baked | Coarse bread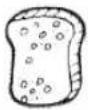 | Over-baked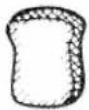 | III-shaped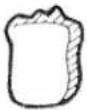 | Slices unevenly and is sticky | REMEDY | ||
| Plug the bread maker in and press the START button. | ||||||||
| Press the START button when oven area is normal.(14°F/−10°C to 100°F/38°C) | ||||||||
| Put the bread pan in the bread maker again: you should clearly hear a click.Check that the display “--£” is no longer showing, and press the "START" button again. | ||||||||
| Start again wiping out crumbs or dust in oven area. | ||||||||
| Remove the bread from the bread pan immediately after baking. | ||||||||
| Start measuring the ingredients accurately again. | ||||||||
| ○ | ||||||||
| ○ | ||||||||
| ○ | ||||||||
| ○ | ○ | |||||||
| ○ | Start installing the mixing blade on the shaft again. | |||||||
| ○ | Start using all new ingredients again. | |||||||
| ○ | Start using all new ingredients again. | |||||||
| ○ | Start using all new ingredients again. | |||||||
| Start using bread flour again. | ||||||||
| Start using yeast which does not need preliminary fermentation again. | ||||||||
| Start using fresh flour and yeast again. | ||||||||
| ○ | Cut bread after cooling it. | |||||||
| ○ | Start using all new ingredients again and choose the medium or light settings. | |||||||
SPECIFICATIONS
| Power supply | A.C. 120V, 60Hz |
| Power Consumption | 680W |
| Dimensions (W X D X H) | 91516 × 1438 × 131932 (25.2cm × 36.5cm × 34.5cm) |
| Weight | approx. 17 lbs (approx. 7.7kg) |
| Timer | 4 hours and 20 minutes up to 13 hours (digital clock, runs backwards) |
| Power cord | 4'7" (1.4m) |
| Thermal fuse | 378°F (192°C) |
AFTER SERVICE
When abnormality is recognized during use, ask the store you bought it from for repair instructions. Do not repair or work on it yourself.
- CONTENTS
- WARNING
- CAUTION
- TIMER
- You can choose from 4 recipes:
- BREAD (basic loaf bread)
- MIX BREAD
- BREAD RAPID
- DOUGH
- Light or dark crust setting
- Lock button blocks the other settings
- IMPORTANT NOTICE
- Compounding Ratio between Bread Flour and Water (or Milk)
- Ingredients for Bread
- MAKING HOMEMADE BREAD WITH THE BREAD MAKER
- ACCESSORIES
- Note :
- Baking Bread
- Press (MENU) button…BREAD
- From start to finish
- hrs and 10 min.
- Remove the bread pan from the bread maker and install the mixing blade:
- Plug the bread maker in:
- Stating the bread maker:
- NO DELAY
- PRE-KNEAD
- REST
- KNEAD
- FIRST RISE
- GAS SQUEEZE OUT
- SECOND RISE
- BAKE
- FINISH
- COMPLETE
- When baking has been completed, remove the bread pan from the bread maker.
- Removing the bread
- After use
- If you want to bake bread in a hurry. Select the BREAD RAPID(MENU button) setting
- From removing the bread pan to plugging the bread maker in, follow the same procedures for BREAD. (1 thru 5 only-page 9 to 11)
- Starting the bread maker :
- How to make raisin bread
- From removing the bread pan to plugging the bread maker in, follow the same procedures for BREAD (1 thru 5 only-page 9 to 11).
- Starting the bread maker
- Preparing the dough
- To take dough out:
- Use only fresh ingredients
- Yeast
- Measure the ingredients accurately:
- To ensure tasty bread:
- When storing
- When the START button is pressed:
- When the interruption in the power supply is caused:
- FIRST STEP
- METHOD OF DETACHING THE MIXING BLADE
- CAUTION!
- MAIN BODY, LID
- BREAD PAN
- MIXING BLADE TREATED WITH FLUOROCARBON
- BREAD PAN AND MIXING BLADE
- IN ORDER TO PREVENT DAMAGE TO THE FLUOROCARBON RESIN COATING
- STORING THE BREAD MAKER
- INGREDIENTS
- Q11
- A11
- Q12
- A12
- OTHERS
- Q13
- A13
- Q14
- A14
- SPECIFICATIONS
- AFTER SERVICE
Brand : HITACHI
Model : HBB101
Category : Bread maker