
F280 - Exercise bike TUNTURI - Free user manual and instructions
Find the device manual for free F280 TUNTURI in PDF.


| Product Type | Exercise Bike |
| Brand | Tunturi |
| Model | F280 |
| Dimensions (L x W x H) | Approximately 100 x 50 x 130 cm |
| Net Weight | Approximately 35 kg |
| Max User Weight | 120 kg |
| Resistance System | Magnetic, manually adjustable |
| Number of Resistance Levels | 8 |
| Display Type | LCD |
| Display Metrics | Time, Distance, Speed, Calories, Pulse |
| Pulse Measurement | Hand grip pulse sensors |
| Flywheel Weight | Approximately 8 kg |
| Seat Adjustment | Horizontal and vertical |
| Pedals | Adjustable straps |
| Transport Wheels | Yes |
| Water Bottle Holder | Yes |
| Power Source | Self-powered (no mains required) |
| Frame Material | Steel |
| Maintenance | Clean with damp cloth, lubricate chain periodically |
| Warranty | 2 years |
| Country of Origin | Finland |
Frequently Asked Questions - F280 TUNTURI
User questions about F280 TUNTURI
0 question about this device. Answer the ones you know or ask your own.
Ask a new question about this device
Download the instructions for your Exercise bike in PDF format for free! Find your manual F280 - TUNTURI and take your electronic device back in hand. On this page are published all the documents necessary for the use of your device. F280 by TUNTURI.
USER MANUAL F280 TUNTURI
natural_image
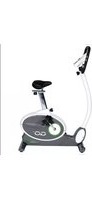
Exterior view of a Tunturi exercise bike (no signage or text visible on the device body)The ECB Performance Cycle F 380 with silent magnetic brake and the Fitness Cycle F 280 with conventional belt brake are reliable exercise cycles for home use, which enable you to monitor your fitness.
PLEASE READ THIS OWNER'S MANUAL THROUGH CAREFULLY BEFORE ASSEMBLING AND USING THE CYCLE!
REMARKS AND WARNINGS
* Before beginning to exercise have a doctor check that you are in good health.
* If you experience nausea, dizziness or other abnormal symptoms during exercise, stop immediately and consult a doctor.
* The cycle is not meant for children. Keep children and pets away when you are exercising.
* Place the cycle on as even a base as possible.
* Only one person should use the cycle at a time.
* Keep a firm grip on the handlebar when you get on and off the cycle. Do not step on the frame housing.
* Wear appropriate clothing and footwear when exercising.
* Never put your hands near moving parts.
*To avoid sore muscles, stretch and do warming up and cooling down exercises.
* Do not attempt to carry out any other adjustments or servicing than those described in this manual. If problems arise with the cycle, stop exercising and contact an authorized TUNTURI dealer or the manufacturer.
* The cycle is not recommended for use by persons weighing more than 100 kg.
*Despite continuous quality control, faults or malfunctions due to individual components may arise. It is, however, unnecessary to send the whole device to be repaired as the fault can in most cases be repaired by replacing the component in question.
ASSEMBLY
Unpack the cycle with all its parts and assemble it as follows (right, left, front and rear are as seen from the exercising position. The figures referred to in the text are shown on the fold-out page of the back cover):
Place the four AA size batteries supplied in the battery case on the bottom of the meter. Connect the meter wire plug to the socket in the bottom of the meter (fig. 1). Push the meter into place. Be careful not to catch the wire. Connect the meter wire coming from the upper end of the frame tube to the wire at the lower end of the handlebar tube (fig. 2). Press the handlebar tube into place, being careful not to catch the wire. Tighten the securing screw of the handlebar tube carefully.
Then fasten the resistance adjustment knob to the handlebar tube with the screws (fig. 3).
Put the back support in place under the rear part of the frame and secure it with two M8 screws and washers. Tighten the screws from above the support (fig. 4).
Attach the right pedal to the right-hand crank by turning clockwise and the left pedal to the left-hand crank by turning anti-clockwise. Use a fork wrench. The pedals are marked R for right and L for left.
Insert the seat tube into the frame tube and set it to the desired height by tightening the adjustment knob (Note! between the min and max marks). Fasten the seat to the seat tube with the nuts provided.
USE
Adjusting seat height
Set the seat height so that the middle part of the foot rests on the pedal with the leg almost straight and the pedal in the lowest position. The seat inclination can be adjusted to a certain extent by inserting spacers under the seat securing screws. Always make sure before using the cycle that the locking pin of the seat tube is properly tightened and in its hole.
Adjusting the handlebar
Loosen the handlebar adjusting knob and turn the handlebar until it feels comfortable for exercising. Remember to tighten the knob after adjustment.
Adjusting pedalling resistance
Adjust resistance by turning the knob below the meter. To increase resistance, turn clockwise (+), to decrease resistance turn anti-clockwise (-). It is advisable to start pedalling at low resistance. After warming up for a few minutes, you can gradually increase the resistance. When you stop exercising, decrease resistance and slow down.
METER
Protect the meter from strong sunlight, as it may damage the liquid crystal display. Also make sure the meter does not come into contact with water.
The meter allows you to follow time elapsed, distance cycled and energy expended during exercise and to monitor pulse rate
KEYS
START/STOP
Switches the meter on. The meter will switch off automatically if the cycle has not been used or any key pressed for about 3 minutes.
When the power is switched on the meter is always in the STOP status (text STOP on display). It is then possible to set exercise time, distance or maximum pulse rate. When you press the START/STOP key, the meter goes to the START status and begins to measure time, distance, energy expenditure and pulse rate. If the START/STOP key is pressed again, the meter returns to the STOP status, and the measured values are stored in the memory until the meter switches off or the stored values are reset.
SET KEYS
For setting values (exercise time, distance and maximum pulse rate). Make sure the meter is in the STOP status and the SCAN mode is off. To reset time, distance and energy expenditure, press both SET keys simultaneously when the value to be reset is on the display.
MODE
Selects different modes and displays in the following order: time, speed, distance, revolutions per minute of the flywheel, energy expenditure and pulse rate. The arrowhead at the bottom of the display indicates which mode has been selected.
MODES:
TIME
Either time elapsed counting from zero (0-99 min) or set time counting down to zero
SPEED
Either cumulative distance counting from zero (0-99.99 km) or set distance counting down to zero (99.99-0 km).
RPM
Revolutions per minute of flywheel (0-700 rpm). Rpm can also be seen continuously as a bar graph at the top of the display, whatever mode the digital display is in. One revolution of the pedals equals 3.5625 revolutions of the flywheel (e.g. 285 rpm of flywheel = 80 revolutions of pedals/min)
KCAL
Estimated energy expenditure in kilocalories (1-9990) during exercise. In theory the energy expended can be calculated on the basis of resistance, pedalling speed and distance, but as people's capacity to produce energy - i.e. efficiency - varies, the energy expenditure value is bound to be only a rough estimate of real expenditure. In this matter, energy expenditure has been calculated at a relatively low resistance of only about 1/3 of maximum resistance, the number of kilocalories expended by the user is about three times that indicated on the display
PULSE
The pulse frequency per minute (maximum 199). The pulse is measured by means of an ear sensor. Clip the sensor to the ear lobe and plug it into the socket on the front of the meter. When the heart symbol appears at the right of the display, pulse rate is being measured. N.B! When not using pulse rate measurement, unplug the ear sensor from the meter so as to save the batteries.
If the meter does not seem to connect to the pulse immediately, rub the ear lobe for a short time to quicken the circulation. Vigorous movement of the sensor or its wire may cause disturbances in pulse measurement, especially at high pulse rates (more than 130 beats/min). To keep the sensor and wire better in place, lasten the wire, for example, to your collar with the clip provided. The number of disturbances - extra beats or uncounted beats - can be estimated by following the flashing of the heart symbol on the display. In about ten per cent of people, the pulse can not be measured from the ear, e.g. due to poor circulation in the ear lobe. In this case, try attaching the sensor to the tip of a finger.
It is possible to set the high pulse limit (30-199 beats/min; initial setting 199). If you do not know your own maximum pulse limit (upper limit), you can use the formula 205-(age/2) as a guideline. It is, however, recommended that you have your doctor confirm it. During exercise, the pulse should remain on a level of approximately 60 - 80% of the maximum pulse. If your pulse rises above the set high limit during exercise, the meter will give an audible alarm. Slow down or decrease resistance so that your pulse can return to normal. The alarm signal will stop when your pulse has fallen below the limit. The high pulse limit cannot be reset
SCAN
Alternation of displays. Pressing the MODE key when the arrow points to the TIME display switches the SCAN mode on (text SCAN on display) or off. When the SCAN mode is on, all the displays alternate automatically, at five-second intervals. N.B! Remember to switch off the SCAN mode when setting values!
SETTING VALUES
To set a certain exercise time, distance and/or high pulse limit on the meter.
- Switch the meter on by pressing the START/STOP key.
- Make sure that the meter is in STOP status.
- Press the MODE key until the arrowhead is at the TIME display.
4 Set the desired time by pressing the SET keys. - Press the MODE key until the arrowhead is at the DIST display.
- Set the desired distance by pressing the SET keys
- Press the MODE key until the arrowhead is at the PULSE display
- Set the desired high pulse limit by pressing the SET keys (initial setting 199 beats/min). If you do not know your own maximum pulse rate, you can use the formula for average maximum pulse based on age (205-age/2).
- Start countdown from set values by pressing the START/STOP key.
- The meter gives an audible alarm for a few seconds when the set values (time/distance) have been reached. If your pulse rises above the set high limit during exercise, the meter will give an audible alarm. Slow down or decrease resistance so that your pulse can return to normal. The alarm signal will stop when your pulse has fallen below the limit.
MEANINGS OF DISPLAY SYMBOLS
STOP Meter in STOP status
SCAN Display alternation mode on
"Clock" Exercise time set
"Sound waves" Distance set
"Heart symbol" Pulse measurement on
When the set values have been reached or are reset, the set time and/or distance symbols disappear from the display.
REPLACING BATTERIES
If the meter display fades considerably or disappears altogether, replace the batteries. Remove the meter from its bracket and open the battery case lid at the back of the meter. Replace the used batteries with new ones (4 x 1.5 V AA), following the + and - signs on the bottom of the case. Push the meter back into place.
The meter uses four batteries. Pulse measurement receives current from the two lower batteries, other functions are operated by the two upper batteries. If pulse measurement does not function properly, but otherwise the meter functions normally change only the two lower batteries.
To save the batteries, remove them from the meter, when the meter is not being used.
STORAGE AND MAINTENANCE
To prevent malfunctioning and rusting, use and store the cycle in a dry space with as little temperature variation as possible, protected against dust. The TUNTURI F 280 and F 380 need a minimum of maintenance. However, check now and again that all screws and nuts are tight. If malfunctions occur during use, contact your TUNTURI dealer or the manufacturer immediately
TECHNICAL DATA
Length 84 cm
Height 115 cm
Width 60 cm
Weight 37 kg (F 280), 39 kg (F 380)
Flywheel weight/
moment of inertia 14 kg/3.5 kgm2
Transmission ratio 13.5625
Frame material Steel
Ref. no Part no.
| 1 | 203 0004 (incl. parts 2, 3) | 22 | 653 0042 | 49 | 103 0006 |
| 2 | 213 0001 (incl part 3) | 23 | 253 0002 | 50 | 533 0015 |
| 4 | 513 0002 | 24 | 363 0002 (incl. part 25) | 51 | 653 0052 |
| 5 | 653 0036 | 25 | 363 0003 | 52 | 653 0053 |
| 6 | 653 0037 | 26* | 373 0007 (incl. 27, 28, 29, 30) | 53* | 653 0050 |
| 7 | 203 0005 | 27* | 653 0043 | 54* | 653 0051 |
| 8 | 653 0038 | 28* | 343 0003 | 55* | 643 0002 |
| 9 | 233 0015 | 29* | 523 0006 | 56 | 533 0016 |
| 10 | 233 0017 | 30* | 673 0002 | 57 | 653 0044 |
| 11+ | 373 0005 | 31+ | 303 0003 (incl. parts 32 - 40) | 58 | 523 0008 |
| 11* | 373 0006 | 31* | 303 0004 (incl. parts 32 - 42) | 59 | 653 0045 |
| 12 | 653 0039 | 32 | 333 0004 | 60 | 653 0046 |
| 13 | 423 0041 | +* | 333 0005 (incl. 33-36, 38, 39) | 61 | 653 0047 |
| 14 | 533 0013 | 37 | 233 0018 | 62 | 653 0048 |
| 15 | 153 0006 | 40 | 263 100 88 | 63 | 653 0049 |
| 16 | 153 0005 | 43+ | 443 0005 | 64 | 173 0003 (R) |
| 17 | 653 0040 | 44+ | 503 0008 | 64 | 173 0004 (L) |
| 18 | 653 0041 | 45+ | 653 0024 | 65+ | 423 0042 (incl. part 66) |
| 19 | 103 0005 | 46 | 533 0014 | 65* | 423 0043 (incl. part 66) |
| 20 | 353 0009 | 47 | 653 0054 | ||
| 21 | 353 0010 (incl. 22) | 48 | 653 0055 | +F280/ | 'F380 |
THE CYCLE IS INTENDED FOR HOME USE! IF IT IS USED IN GYMS OR SIMILAR CONDITIONS, TUNTURIPYÖRÄ OY OR ITS REPRESENTATIVES ARE NOT LIABLE FOR ANY INJURY TO USERS OR DAMAGE TO THE CYCLE!
Specifications may be changed due to our continuous programme of product development.
- PLEASE READ THIS OWNER'S MANUAL THROUGH CAREFULLY BEFORE ASSEMBLING AND USING THE CYCLE!
- REMARKS AND WARNINGS
- ASSEMBLY
- USE
- Adjusting seat height
- Adjusting the handlebar
- Adjusting pedalling resistance
- METER
- KEYS
- START/STOP
- SET KEYS
- MODE
- MODES:
- TIME
- SPEED
- RPM
- KCAL
- PULSE
- SCAN
- SETTING VALUES
- MEANINGS OF DISPLAY SYMBOLS
- REPLACING BATTERIES
- STORAGE AND MAINTENANCE
- TECHNICAL DATA
Brand : TUNTURI
Model : F280
Category : Exercise bike