
SV-RX10 - Razor SANYO - Free user manual and instructions
Find the device manual for free SV-RX10 SANYO in PDF.


| Product Type | Electric Shaver |
| Brand | Sanyo |
| Model | SV-RX10 |
| Dimensions (approx.) | 15.5 x 6.5 x 4.5 cm |
| Weight | Approx. 200 g |
| Power Source | Rechargeable battery (Nickel-Metal Hydride) |
| Battery Life | Approx. 45 minutes of use |
| Charging Time | 8 hours for full charge |
| Usage Type | Wet & Dry |
| Shaving System | Dual-blade cutting system |
| Trimmer | Pop-up trimmer for sideburns |
| Cleaning | Rinse under running water |
| Maintenance | Replace foil and cutter every 12 months |
| Indicators | LED battery indicator |
| Safety Features | Auto shut-off, waterproof design |
| Included Accessories | Protective cap, cleaning brush, charger |
| Spare Parts Available | Foil, cutter, battery pack |
| Warranty | 2 years limited |
Frequently Asked Questions - SV-RX10 SANYO
User questions about SV-RX10 SANYO
0 question about this device. Answer the ones you know or ask your own.
Ask a new question about this device
Download the instructions for your Razor in PDF format for free! Find your manual SV-RX10 - SANYO and take your electronic device back in hand. On this page are published all the documents necessary for the use of your device. SV-RX10 by SANYO.
USER MANUAL SV-RX10 SANYO
natural_image
Illustration of a T-SOLID electric shaver with dual leads and a brand mark (no text or symbols on the device itself)INDEX
- MAIN FEATURES....1
- IMPORTANT PRECAUTIONS TO AVOID MALFUNCTIONS AND ACCIDENTS......2
- NAME AND USE OF PARTS 3-4
- HOW TO RECHARGE.... 5-6
- MOTOR POWER SELECTOR....6
- HOW TO USE....7-9
- CARE AND MAINTENANCE....10-12
- FOIL AND BLADES REPLACEMENT....13
- SPECIFICATIONS....14
1. MAIN FEATURES
① 4.8V High Power Motor
The extra power gives you a closer and quicker shave.
② 9 minutes for full charge, 1 minute for one shave.
③ Four-blade head.
Combination of two main blades, a slide-up trimmer and a side blade effectively removes all types of facial hair.
④ Washable
⑤ Battery sign (Low battery and charging)
This indicator is provided to let you know the status of the built-in rechargeable batteries.
⑥ Motor power selector
You can select motor power according to your needs by this selector switch.
2. IMPORTANT PRECAUTIONS TO AVOID MALFUNCTIONS AND ACCIDENTS
- Do not attempt to disassemble the unit by yourself.
- Do not use the charging adaptor if any part of the charging adaptor is damaged. Please replace to a new complete charging adaptor.
- When the foil frame is removed from the shaver body, push the switch off.
- Do not leave the shaver with switch left on.
- Since the blade and foil are thin and precision-manufactured, do not press your skin with excessive force or hit the foil with a sharp object.
- Do not throw or damage the unit.
- In case of malfunction, unplug the unit immediately and refrain from use.
- Do not use the charging adaptor while taking a bath, and avoid recharging in humid places.
- Do not wash the charging adaptor in water, Contact of the inner mechanism with water may cause unit breakdown.
- Do not touch to the charging adaptor with a wet hand.
- If the shaver drops into the water, unplug the charging adaptor before taking out.
- Before cleaning the shaver under water, the hand-held shaver must be divided from the connecting cable.
- Do not immerse the shaver body in water on purpose. This may cause the unit to malfunction.
- Recharge only within the rated voltage.
- Use only exclusive adaptor for recharging.
- Do not wrap with cloth or blankets during charging.
- To maintain the sharpness of the blades, apply shaver oil to them every time after rinsing the shaver with water, and clean with the brush, once a week.
- Do not use benzene or other chemicals to clean the body, since this may result in damage to the plastic case. Clean using a cloth dampened with a mild detergent or water, and then wipe dry.
- Do not use or leave the unit in direct sunlight, near heaters, or in hot areas.
- Close supervision is necessary when this shaver is used by, on, or near children or invalids.
3. NAME AND USE OF PARTS
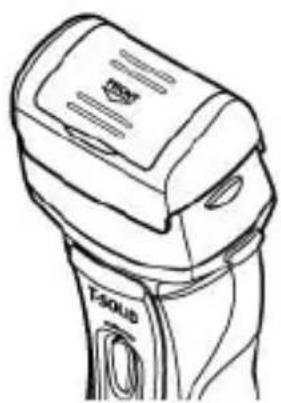
Shaver


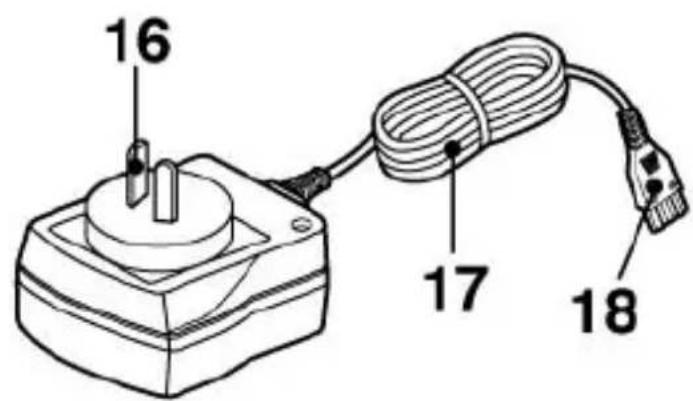
Charging Adaptor
Accessories
Carry pouch
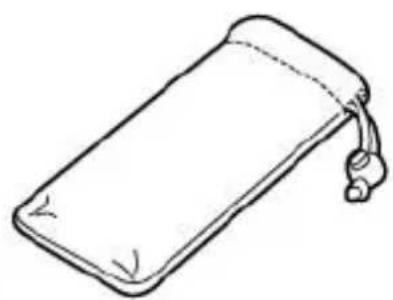
natural_image
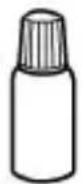
Simple line drawing of a rectangular device with a strap and ear tag (no text or symbols)Shaver oil
Brush

- Oil flow cap
- Oil sheet
- Trimmer
(In the lowered position, use it for kinky hair or stubble that proves difficult to remove using the regular blade. Slide it up to use it for sideburns or a long beard.)
- Foil
- Foil frame
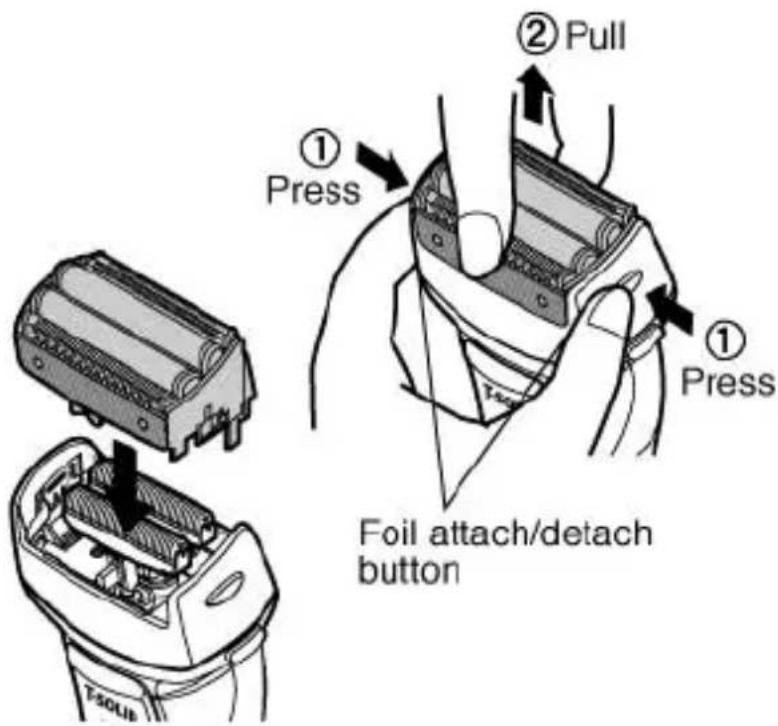
- Foil attach/detach button (Press to attach or detach the foil. Do not press the buttons while using the shaver.)
-
Blades
-
Blade holder
-
Foil frame attach/detach button (Press to attach or detach the foil frame. Do not press the buttons while using the shaver.)
-
On/Off Switch
- Motor power selector
- Low battery indicator lamp
- Charging indicator lamp
- Unit plug receptacle
- Trimmer switch
- Power plug
- Power cord
- Unit plug
About the Oil Flow Cap
natural_image
Line drawing of a handheld electronic device with no visible text or symbols- Open the lid and apply the shaver oil to the center of the black pad as shown. (Apply 2 or 3 drops. Lubricate once a month.)
- This allows the blades to be constantly lubricated and to maintain optimal shaving performance.

natural_image
Line drawing of a handheld device with a tool inserted, showing internal components and a label 'SOLID' (no readable text or symbols beyond label)4. HOW TO RECHARGE
Precautions when charging:
- Avoid recharging the batteries at temperature below 0°C or over 40°C.
- Do not recharge the batteries frequently when the battery capacity sizably remains
- During recharging, the noise generated from the shaver may interfere with radio reception. To prevent this, use the AC outlet as far away from the radio as possible.
When you first purchase the shaver or if you have not used it for a long period, charge the batteries before use.
- Be sure to turn off the shaver.
Connect the charging adaptor to the shaver and insert the power plug into a wall outlet as shown.
- Be sure the charging indicator lamp (Green) lights up.

-
The standard charging time is 9 minutes.
-
Once fully charged, the shaver can be used approximately 7 times (3 minutes/shave). (when charged and used at room temperature of approx. 20ircC ).
- When fully charged, the charging indicator lamp (Green) blinks.
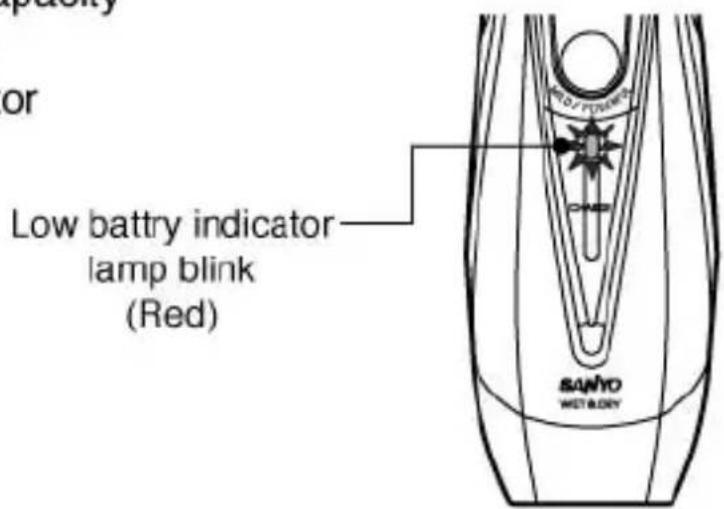
■ Low battery indicator
When the remaining battery capacity is only enough for 1 or 2 more shaves, the low battery indicator lamp (Red) blinks.
5.MOTOR POWER SELECTOR
You can select motor power according to your needs by pushing the selector switch as below.

- When the switch is OFF, the mode cannot be changed by pushing the selector switch. Therefore, the mode will default to what was selected before the power was turned off.
6. HOW TO USE
Shaving
- Remove the cap from the shaver, and lightly push the switch on.
- With the shaver held perpendicular to your face, lightly place the shaver head against your skin and shave against the grain of the beard.
- When finished shaving, push the switch off. Rinse or brush out hair from the shaving head and replace the cap.

natural_image
Illustration of a hand holding a T-SOLID handheld device with an arrow indicating the grip (no text or symbols on the device itself)
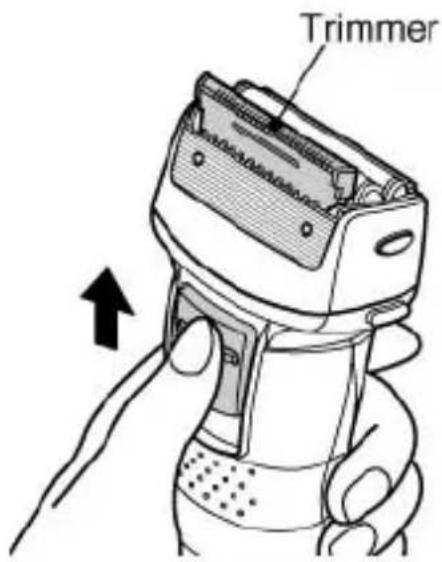
The trimmer is effective for kinky or long hairs.
- Use the trimmer as shown. Shave against the grain of the beard using a scooping motion.


■ Trimming sideburns
-
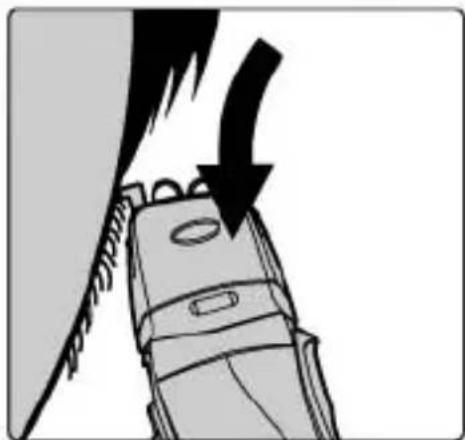
Push the switch on, and slide the hair trimmer switch located on the back of the shaver in the direction indicated by the arrow. Be sure to slide the hair trimmer switch until it clicks into place.
-
With the trimmer held perpendicular to your face, place it lightly against your skin and trim your sideburns by slowly moving the edge downward.
-
When finished, slide the hair trimmer switch back to its original position and push the switch off.
natural_image
Illustration of a mobile phone emitting sound waves from a wall, with no visible text or symbols■ Using foam for shaving
- Apply lathered soap or shaving foam to the face.
- With the shaver held perpendicular to your face, lightly place the foil against your skin and shave against the grain of the beard.
- When finished, rinse the blade with water. (Refer to the section entitled "Care and Maintenance" for further details.)
■ Efficient shaving
Refer to the following in order to ensure that the shaver operates with maximum efficiency.
- When shaving hard-to-shave areas, such as the jaw line, pull the skin slightly to facilitate shaving.
- For thick or heavy beards which cannot be completely shaved off during one shave, shave once quickly and lightly, and then shave once more.
- Kinky or long hairs that prove difficult to remove using the regular blade can be easily shaved off using the trimmer.
Cheek / Under Nose

Chin / Throat

6. CARE AND MAINTENANCE (Be sure to turn off the shaver)
In all cases of care and maintenance unplug the shaver.
■ Rinsing the shaver with water
- Push the switch off.
- Pull to remove the foil frame while pressing the foil frame attach/detach buttons.
-
Rinse the foil and blade with tap water and then push the switch on to rinse away the shaving debris.
-
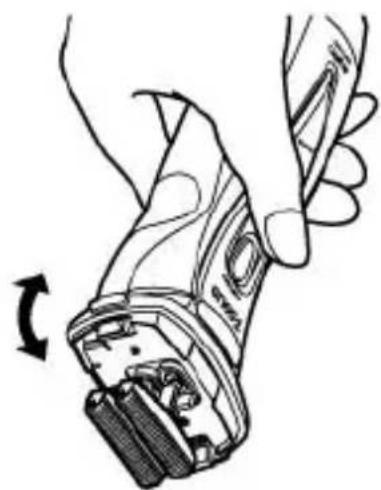
After rinsing, push the switch off and lightly shake the shaver to remove excess moisture and wipe the body dry with a clean cloth and replace the foil frame.
-
After the unit has completely dried out, lubricate it with shaver oil, and run the shaver briefly without shaving.

Foil frame attach/detach button

natural_image
Illustration of a hand holding a small electronic device with a tool, showing mechanical components and a rotational arrow (no text or symbols)■ Cleaning with the brush
If soap or shaving debris remains after rinsing the shaver, clean the shaver with the brush provided.
- Push the switch off.
- Detach the foil while pressing the foil attach/detach buttons.

- Pull to remove the foil frame while pressing the foil frame attach/detach buttons.

- Remove the blades from the blade holder by pulling them up while holding both sides of the blades.

- Clean the foil, trimmer, blades, foil frame and body with the brush.

natural_image
Illustration of hands inserting a plug into a device, showing mechanical assembly and wiring (no text or symbols)- After cleaning, reverse the aforementioned procedures to remount the blades, foil and foil frame.

8. FOIL AND BLADES REPLACEMENT (Be sure to turn off the shaver)
● The foil and blades are precision parts. Handle them with care.
- Do not detach the foil for any reason other than to replace a damaged or deformed one.
● After replacing the foil and blades, check that the foil, blades, and foil frame are firmly attached with no signs of looseness or shakiness.
How to replace the foil
- Push the switch off. Detach the foil while pressing the foil attach/detach buttons.
- Attach the new foil to the foil frame.
How to replace the blades
- Pull to remove the blades from the blade holder.
- Attach the new blades to the blade holder.
※ Make sure the blades and the foil are secured firmly in place.
- Replacement foil and blades are available at the store where you purchased the Sanyo shaver.
Foil : No.VK-DX40
Blades : No.VK-DM20U

9.SPECIFICATIONS
Power source: 220-240 Volt AC
Sanyo Ni-Cd Batteries
DC4.8V 250mAh
Recharging time: 9 minutes
Dimensions: 60(W) X 39(D) X 161(H) mm
Weight: 192 g
Accessories : Brush, Carry pouch, Shaver oil
SANYO
SANYO Electric Co., Ltd.
OSAKA, JAPAN
- INDEX
- MAIN FEATURES
- IMPORTANT PRECAUTIONS TO AVOID MALFUNCTIONS AND ACCIDENTS
- NAME AND USE OF PARTS
- About the Oil Flow Cap
- HOW TO RECHARGE
- Precautions when charging:
- ■ Low battery indicator
- 5.MOTOR POWER SELECTOR
- HOW TO USE
- Shaving
- The trimmer is effective for kinky or long hairs.
- ■ Trimming sideburns
- ■ Using foam for shaving
- ■ Efficient shaving
- CARE AND MAINTENANCE (Be sure to turn off the shaver)
- ■ Rinsing the shaver with water
- ■ Cleaning with the brush
- FOIL AND BLADES REPLACEMENT (Be sure to turn off the shaver)
- How to replace the foil
- How to replace the blades
- 9.SPECIFICATIONS
Brand : SANYO
Model : SV-RX10
Category : Razor