LS-1000U - Barcode scanners Posiflex - Free user manual and instructions
Find the device manual for free LS-1000U Posiflex in PDF.


| Product Type | Laser Barcode Scanner |
| Model | LS-1000U |
| Brand | Posiflex |
| Scan Pattern | Omni-directional (20-line) and Single-line |
| Scan Speed | 1400 scans/sec (omni-directional), 74 scans/sec (single-line) |
| Laser Type | Visible laser diode, 650 nm, Class IIa (IEC 60825-1 Class 1) |
| Radiant Power | < 3.9 μW (through 7mm aperture, averaged over 10 seconds) |
| Interfaces | USB or RS232 (via 8-pin RJ45 modular plug) |
| Power Supply | +5V DC via interface cable power adaptor or pin 9 of RS232 COM port |
| Object Detection Range | Up to 15 cm (6 inches) from scan window |
| Supported Barcode Types | UPC, EAN, JAN, Code 39 (default enabled); ITF 2 of 5, Codabar, Chinese Post Code, MSI/Plessey, Code 93, Code 128, Code 32, ISSN/ISBN, EAN-128 (disable by default, programmable) |
| Indicator LED | Dual color red-blue: steady blue (ready), one red flash (good read), steady red (programming mode), flashing blue (sleep), steady red+blue (fault), alternating flash (power issue) |
| Beeper Volume | 3 levels (low, medium, loud) adjustable via function button (temporary) or programming guide (permanent) |
| Sleep Mode Timers | Default: laser sleeps after 10 min, motor after 30 min (programmable) |
| Weight | Not specified in manual |
| Dimensions | Not specified in manual |
| Maintenance | Clean scan window with soft lint-free cloth and non-abrasive cleaner; field-replaceable interface cable |
| Safety Compliance | Class A digital device (FCC Part 15, EN55022), CE, IEC 60825-1 Class 1 laser, CDRH Class IIa |
| Repairability | No user-serviceable parts inside; do not remove protective housing; warranty void if opened by unauthorized personnel |
| Stand Included | Yes (presentation stand for hands-free usage) |
| Durability | Designed for long-term trouble-free operation; no routine maintenance required |
| Operating Environment | Commercial environment (per FCC class A) |
Frequently Asked Questions - LS-1000U Posiflex
User questions about LS-1000U Posiflex
0 question about this device. Answer the ones you know or ask your own.
Ask a new question about this device
Download the instructions for your Barcode scanners in PDF format for free! Find your manual LS-1000U - Posiflex and take your electronic device back in hand. On this page are published all the documents necessary for the use of your device. LS-1000U by Posiflex.
USER MANUAL LS-1000U Posiflex
LS-1000 Series Laser Barcode Scanner User's Manual
Rev. A0

FCC Notes: This equipment generates, uses, and can radiate radio frequency energy and, if not installed and used in accordance with the instructions manual, may cause interference to radio communications. It has been tested and found to comply with limits for a Class A digital device pursuant to EN55022 and 47 CFR. Part 2 and subpart J of Part 15 of FCC Rules, which are designed to provide reasonable protection against interference when operated in a commercial environment. Operation of this equipment in a residential area is likely to cause interference in which case the user at his own expense will be required to take whatever measures to correct the interference.
For CE-countries: This scanner is in conformity with CE standards. Please note that an approved, CE-marked power supply unit should be used in order to maintain CE conformance.
Laser Safety: The laser scanner complies with safety standard IEC 60825-1 for a Class I laser produce. It also complies with CDRH as applicable to a Class IIa laser product. Avoid long term staring into direct laser light.
Radiant Energy: The laser scanner uses one low-power visible laser diodes operating at 650nm in an opto-mechanical scanner resulting in less than 3.9μW radiated power as observed through a 7mm aperture and averaged over 10 seconds.
Do not attempt to remove the protective housing of the scanner, as unscanned laser light with a peak output up to 0.8mW would be accessible inside.
Laser Light Viewing: The scan window is the only aperture through which laser light may be observed from this product. A failure of the scanner motor, while the laser diode continues to emit a laser beam, may cause emission levels to exceed those for safe operation. The scanner has safeguards to prevent this occurrence. If, however, a stationary laser beam is emitted, the failing scanner should be disconnected from its power source immediately.
Adjustments: Do not attempt any adjustments or alteration of this product. Do not remove the protective housing of the scanner. There are no user-serviceable parts inside.
Caution: Use of controls or adjustments or performance of procedures other than those specified herein may result in hazardous laser light exposure.
Optical: The use of optical instruments with this product will increase the eye hazard. Optical instruments include binoculars, magnifying glasses, and microscopes but do not include normal eye glasses worn by the user.
Warranty Limits: Warranty terminates automatically when any person other than the authorized technicians opens the machine. The user should consult his/her dealer for the problem happened. Warranty voids if the user does not follow the instructions in application of this merchandise. The manufacturer is by no means responsible for any damage or hazard caused by improper application.
No part of this document may be reproduced, transmitted, stored in a retrieval system, transcribed, or translated into any language or computer language in any form or by any means electronic, mechanical, magnetic, optical, chemical, manual or otherwise, without express written consent and authorization.
We reserve the right to make changes in product design without reservation and without notification. The material in this guide is for information only and is subject to change without notice.
All trademarks mentioned herein, registered or otherwise, are the properties of their various respective owners.
About This Manual:
Posiflex Technologies, Inc. has made every effort for the accuracy of the content in this manual. However, Posiflex Technologies, Inc. will assume no liability for any technical inaccuracies or editorial or other errors or omissions contained herein, nor for direct, indirect, incidental, consequential or otherwise damages, including without limitation loss of data or profits, resulting from furnishing, performance, or use of this material.
This information is provided “as is” and Posiflex Technologies, Inc. expressly disclaims any warranties, expressed, implied or statutory, including without limitation implied warranties of merchantability or fitness for particular purpose, good title and against infringement.
The information in this manual contains only essential hardware concerns for general user and is subject to change without notice. Posiflex Technologies, Inc. reserves the right to alter product designs, layouts or drivers without notification. The system integrator shall provide applicative notices and arrangement for special options utilizing this product. The user may find the most up to date information of the hardware from: http://www.posiflex.com or http://www.posiflex.com.tw or http://www.posiflexusa.com
All data should be backed-up prior to the installation of any drive unit or storage peripheral. Posiflex Technologies, Inc. will not be responsible for any loss of data resulting from the use, disuse or misuse of this or any other Posiflex product.
All rights are strictly reserved. No part of this documentation may be reproduced, stored in a retrieval system, or transmitted in any form or by any means, electronic, mechanical, photocopying, or otherwise, without prior express written consent from Posiflex Technologies, Inc. the publisher of this documentation.
© Copyright Posiflex Technologies, Inc. 2009
All brand and product names and trademarks are the property of their respective holders.
FUNDAMENTAL INFORMATION
MODEL NAME: LS-1000
CONTENT (Besides this guide):
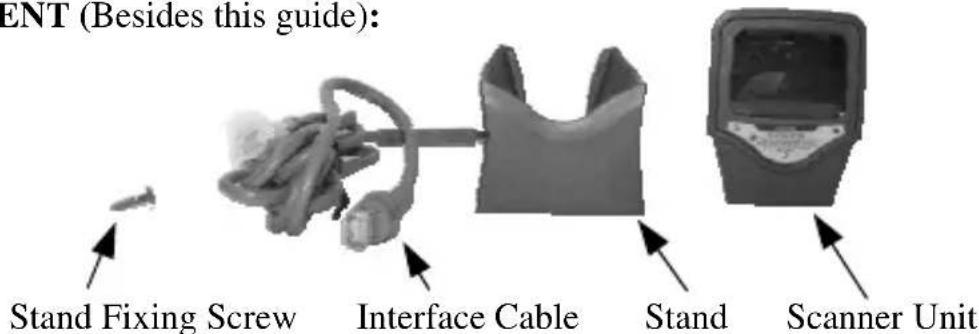
Fig. 1 Box content besides this guide
INSTALLATION GUIDES
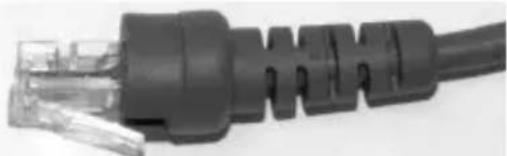
- Install the USB or RS232 interface cable onto the scanner by inserting the 8 pin RJ45 type modular plug (Fig. 2) of the cable into the scanner until a firm click is heard.
natural_image
Close-up of a black Ethernet cable with connector port (no text or symbols visible)Fig. 2 RJ45 Type Modular Plug
natural_image
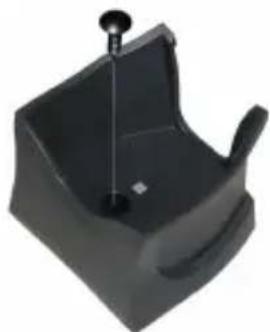
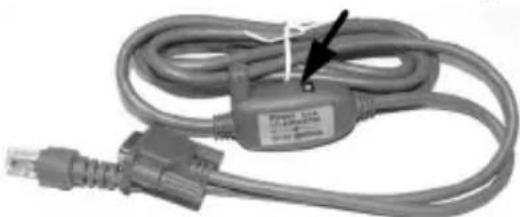
Black plastic mechanical component with a central pin and handle (no text or symbols visible)Fig. 3 Fix The Stand power adaptor to the power input connector on interface cable (Fig. 5) or set the +5V power support in pin 9 of the system COM port for RS232 model. Set the COM port protocol to 9600, n,
natural_image
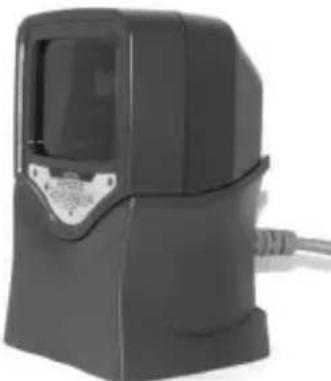
Black rectangular electronic device with a metallic connector and cable, no visible text or symbolsFig. 4 LS-1000 in Stand
natural_image
Coiled electrical cable with a connector and USB port, no visible text or symbolsFig. 5 RS232 Power Connection
8, 1 and no handshaking for RS232 model. Peel off the protective film on scanner for ready to use after all the operations done. The scanner will always be in omni-directional scan mode when it is in the stand.
USING THE SCANNER
SCANNER INTRODUCTION
Features
The scanner unit is a compact and space-saving hands-free omni-directional laser scanner. It can operate in a single-line laser scan mode by pressing down a button. Featured with Z-scan hardware decode technology, it guarantees the real-time decode and provide the best scanning performance you could expect.
The scanner includes key features as:
- Button switch in between omni-directional and single-line scanning capability, ideal for increasing your operating efficiency.
● Powerful 20-line scan pattern yields:
√ 1400 scans per second for omni-directional scanning
√ 74 scans per second for single-line scanning
- Implement with the proprietary real-time hardware decoding technology that ensures instant recognition and decoding barcodes
Parts Identification
Each part of the scanner as indicated in the front and rear pictures below is described in the table below.
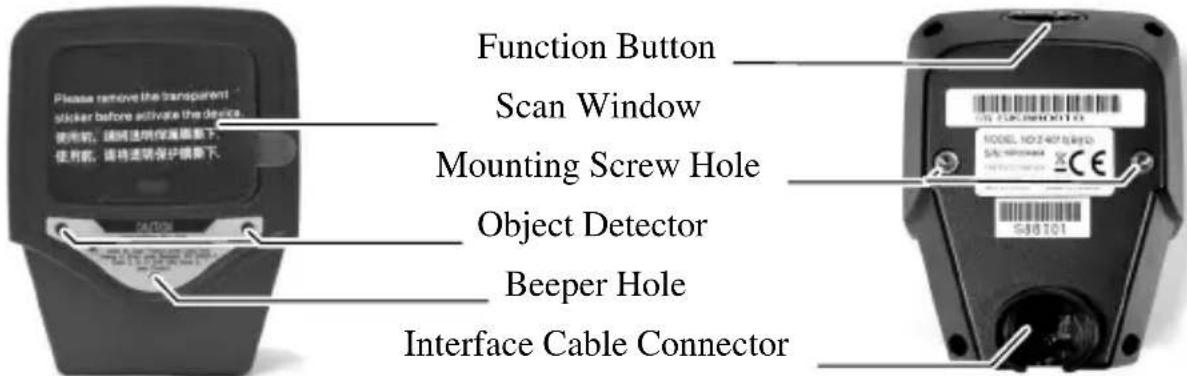
| Description Function | |
| Scan Window Reads barcodes | |
| Object Detector | Trigger and wake up scanner automatically when presented with barcode in its range |
| Beeper Hole | For beep tone indication |
| Function Button(Embedded with the LED Indicator) | Wake up scannerWhen the scanner enters the sleep mode, pressing this switch can wake the scanner up. The sleep mode feature can be programmed using the menu labels from the Programming Guide.NOTE: The default time-out value is set to 10 minutes after laser slept, 30 minutes after motor slept. When the scanner is in sleep mode, the LED inside function button is intermittently flashing Blue. |
| Single -line modePress and release the button will activate single line scan mode if the scanner is not seated in the stand. | |
| Mounting Screw Holes | To fix the scanner onto the bracket of SK-200 kit. |
| Interface Cable Connector | For USB interface cable connection. |
Operation Status
When the scanner powers up, the buzzer gives four beeps and the LED indicator in function button glows.
Present a known-good test barcode to the scanner. The scanner should issue a short beep and the LED should flash red momentarily.
Note: Refer to LED Indications and Beeper Indications sections for operation status or refer to the section on Troubleshooting Guide for diagnostic tips.
Supported Bar Code Types
| Supported Bar Code (Symbol) Type | Default Status |
| UPC, EAN, JAN Enabled | |
| ITF 2 of 5 Disabled | |
| Code 39 Enabled | |
| Codabar | Disabled |
| Chinese Post Code Disabled | |
| MSI / PLESSY Disabled | |
| Code 93 Disabled | |
| Code 128 Disabled | |
| Code 32 (Italian Pharmacode) Disabled | |
| ISSN / ISBN Disabled | |
| EAN-128 | Disabled |
SCANNER SETUP (PROGRAMMING)
In most of the cases no setup is required. The default setup of the scanner makes the scanner able to detect automatically the most commonly applied bar code types as tabulated above and send the data to the host system as if they are read from an USB or RS232 keyboard. To read the disabled bar code types, the programming barcodes enclosed in the later sections of this booklet are required to enable the required bar code type.
There are other advanced features like beep tone, sleep mode timings, same-code delay time, setting headers and trailers for data output and setting some particular parameters within each code type, or even the communication interface types (However, must select only the type of the interface cable physically applied.) can be achieved by downloading the advanced programming bar codes from our web site and scanning the printed programming codes.
Individual parameters may be set at any time without affecting the other parameters.
Scan Test
With the scanner running (LED blue) and the host system on with an active window of a text editor, try to scan several known-good barcodes.
Check the results on the system screen. If the scanner is reading okay, no further setup may be necessary.
If the POS screen does not show the expected scans, go to Set Up, below.
Reset to Default Status
Since the scanner firmware covers several interface types, when you want to reset the scanner to default status, please scan
Set Up
When the scanner is powered on (LED blue), present the
Decide which parameters are required and find their barcodes in the programming codes section.
Cover unwanted codes with your hand and present the desired codes, one by one, to the scanner, the scanner beeps once as it accepts each code.
When done, again present the
Test again with known-good barcodes. If results are good, you are done setting up. Otherwise, return to step 1 and try again.
A demonstrative process flow chart is given below to illustrate the whole setup process.
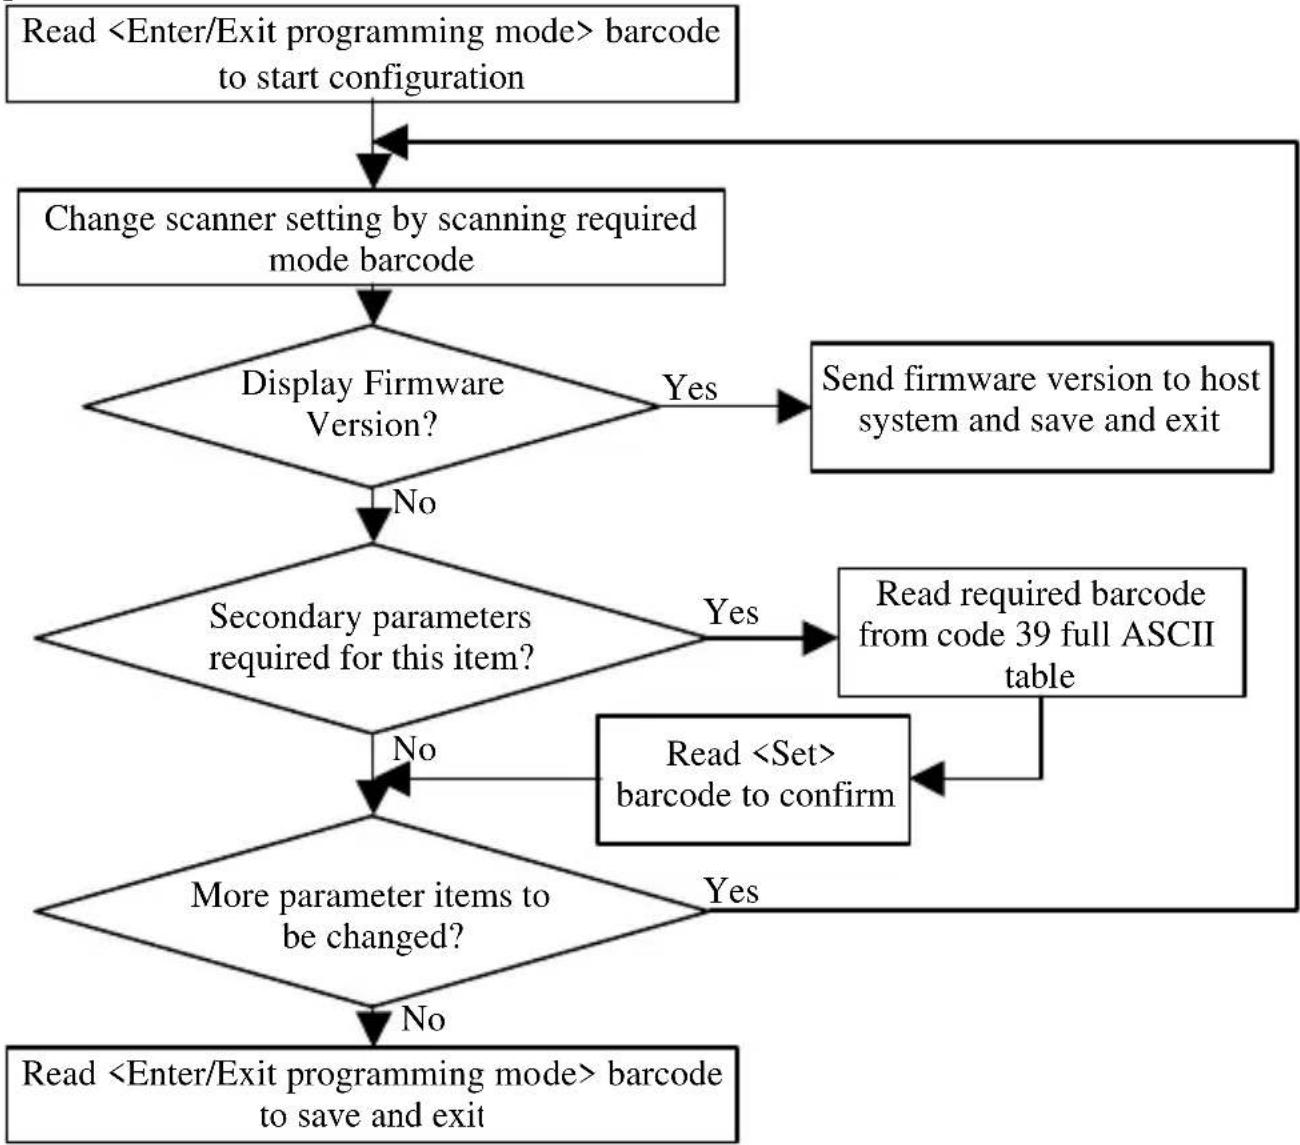
flowchart
graph TD
    A["Read <Enter/Exit programming mode> barcode to start configuration"] --> B["Change scanner setting by scanning required mode barcode"]
    B --> C{Display Firmware Version?}
    C -->|Yes| D["Send firmware version to host system and save and exit"]
    C -->|No| E{Secondary parameters required for this item?}
    E -->|Yes| F["Read required barcode from code 39 full ASCII table"]
    E -->|No| G{More parameter items to be changed?}
    G -->|Yes| H["Read <Set> barcode to confirm"]
    G -->|No| I["Read <Enter/Exit programming mode> barcode to save and exit"]
SCANNER OPERATION
Operating the Scanner
The scanner reads barcodes in omni-directional scan mode as regular practice. It can also operate in single-line mode for a better aiming on a specific barcode that is printed on a surface with more than one barcode printed closely.
Single Line Scan Mode
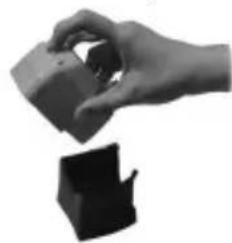
In this mode the scanner can emit a single line pattern for user to selectively scan at a barcode among multiple barcodes on one object. Please first pick the scanner unit up from the stand if the stand is used before pressing function button to enter this mode. Press and then release the function button (where the indicator LED resides), a line pattern appears, it allows you to aim at the barcode.
natural_image
Hand holding a small object above a black abstract shape (no text or symbols visible)Ensure the scan line crosses every bar and space of the symbol code as indicated in the right.
Press the function button to decode and transmit the barcode, the good read beeps once. For consecutive single line scan, present the next barcode and press the function button within 5 seconds.
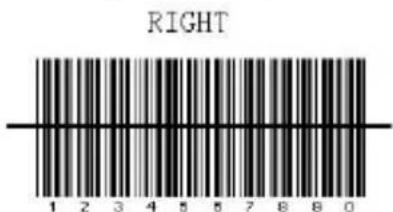
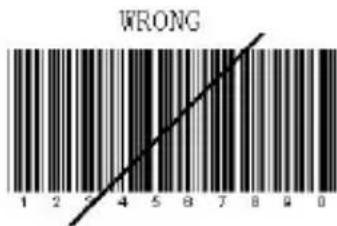
When the function button is released, it automatically switches back to omni-directional scan mode in 5 seconds. Press the button again to switch to single-line scan when necessary.
Omni-Directional Scan Mode
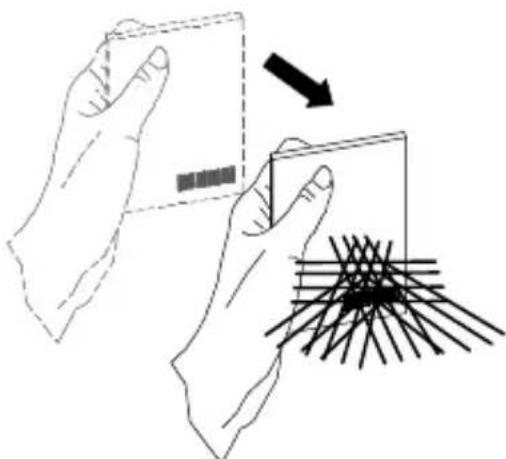
The scanner will always stay active in Omni-Directional Scan mode in normal operation. In other words, the scanner will always emit multiple scan lines for the convenience in reading a barcode. To have successful barcode reading in this mode, the barcode must be presented in the way that there is at least one of the scan lines crosses every bar and space of the symbol code as indicated in the right.
natural_image
Illustration of two hands holding a card and a magnified view of a grid pattern (no text or symbols)Sleep Mode
After the scanner has been inactive for a period of time, the laser automatically turns off; then the motor will turn off and the scanner will enter the “Sleep Mode”, the blue status LED keeps blinking as indication. To wake up the scanner, simply present an object close to the scan window, or press the function button.
Note: The scanner includes a motion sensor that detects activity in front of the scan window. The detecting distance is up to about 15cm (6 inches) from the window.
Change Beeper Volumn Using Function Button
The beep tone, volume and duration are programmable by advanced programming codes. And the beep volume is adjustable by pressing the function button
The volume has 3 different levels, low, medium, loud, follow the following steps to tune the volume.
Always keep the scanner operating.
Press and hold down the function button for about 3 seconds, the scanner will enter (medium --- low --- loud) beeper cycle, every level of setting beeps twice.
Release the button when you hear the right beeps.
The scanner beeps accordingly.
Note: .The volume setting in this way is not saved in non-volatile memory. In other words, the change will be lost by power-off and reset to the configured setting.
Use the advanced programming guide to set the changes if you wish to keep the changed volume setting.
LED Indications
A dual color red-blue LED indicates operating status as follows:
| LED status Indication | |
| Off No power supplied to the scanner | |
| Steady blue light | The scanner is on and ready to scan |
| One red flash A barcode has been successfully decoded. | |
| Steady red light | A barcode has been successfully decoded, but the object is not removed from the scan window. |
| The scanner is in programming mode. | |
| Flashing blue light The scanner is in sleep mode. | |
| Steady red and blue light | This indicates the scanner has a motor or laser failure. For motor failure, a periodic beep is sounded. Return the unit for repair. |
| Alternate flashing red and blue light | The scanner detects failing power. Please check the power supply. |
Beeper Indications
A beeper gives audible feedback on scanner operation.
| Beeps Indication | |
| One beep | A barcode has been successfully decoded. |
| Four beeps in series | This indicates the scanner passed the power on self-test and is operating properly. |
| Two beeps: low-high | The scanner has entered programming mode. |
| Two beeps: same tone | Scanner has returned from programming to normal mode. |
| Continuous tone | This is a failure indication. Return the unit for repair. |
Maintaining the Scanner
The scanner is designed for long-term trouble-free operation and rarely requires any maintenance. Only an occasional cleaning of the scanner window is necessary in order to remove dirt and fingerprints.
Cleaning the Scan Window
Wipe the scan window with a soft lint-free cloth and a non-abrasive cleaner to avoid scratching and damaging the scan window. The scan window may be cleaned while the scanner is running.
Replacing Interface Cable
The standard interface cable is attached to the scanner with an 10-pin modular connector. When the connector is properly seated, it is secured in the scanner by a flexible retention tab. The cable is designed to be field replaceable.
Replacement cables can be obtained from your authorized distributor.
To replace the cable, take the following steps.
Make sure the power of both host computer and the scanner is switched off.
Disconnect the old scanner cable from the computer system.
Press down the retention tab, and gently pull out the cable.
Insert the new interface cable into the bottom of the scanner until it clicks.
Plug the new cable into the host.
TROUBLE SHOOTING GUIDE
This section contains information about how to solve problems that you may encounter when operating the scanner. If troubles occur, please refer to the following diagnostic tips as a mean to solve the trouble. However, before referring to the tips,
make sure that the scanner is installed as instructed in this manual and that all cables are properly connected. If the problem remains, contact your dealer.
| Problem Diagnostic Tips | |
| The scanner is on but cannot read barcodes.The LED stays blue | The scanner window is dirty. Clean the scanner window as described in the Maintenance section. |
| The presented barcode type is not enabled. Use the Programming Guide to tell the scanner to accept that type of barcode. | |
| The host has disabled the scanner. Check host setup. | |
| The barcode type presented is not supported by the scanner. | |
| The scanner is on, but the motor is not running; the facet wheel is not rotating.A barcode cannot be read.The LED is intermittently flashing blue. | The scanner has entered into the sleep mode. Press the function button to wake up the scanner, or present an object close to the scan window. |
| The LED remains red and blue (purple). | Possible failure of the scanning safeguard circuit. Disconnect the scanner from its power source immediately and contact your dealer. |
| The scanner does not accept more than two or three bar-code labels. | There is no proper handshaking with the POS system. Check connection and communication settings of the host POS system. |
| A stray barcode is sitting somewhere in the scanner field of view. Remove all barcode labels from the scanner's scan volume and try again. | |
| The scanner cannot send the data to the POS system. Make sure that all cables are connected and your host POS system is ready to receive data. | |
| A barcode is read by the scanner but not accepted by the POS system. | The communication settings of the system port and the scanner do not match. Adjust the settings so they match. |
| The communication cable used is incorrect. Contact your dealer for the correct communication cable. | |
| The software running on the POS system does not support the data format of the barcode label. | |
PROGRAMMING CODES
All framed barcode names represent as default settings.
Please refer to flow chart illustrated earlier for conceptual understanding.
Please cover the unwanted codes for scanning the specific code required for the programming to prevent confusion in code scanning.
Use the download file from our web for advanced programming.
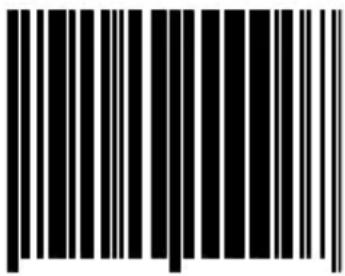
Enter/Exit Programming Mode
Note: Scan this code to enter and exit programming mode.
A slightly enlarged image of this code is also printed on the last page of this section for ease of application.

Display Firmware Version
Note: The reading of the “Display Firmware Version” label will read out the firmware version and exit the programming mode.
Abort
Note: The reading of the “ABORT” label discards all the parameters changed previously. However the reading of the “Enter/Exit of Programming” label is still required to exit the programming mode.

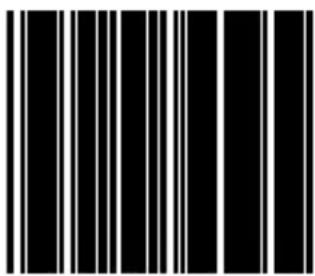
RESET
Note: The reading of the “RESET” label turns all the parameters back to default values but leaving the interface mode unchanged. It is suggested to scan also the “Return to USB default” or “Return to RS232 default” label after this for LS-1000 scanners.
Return to USB default
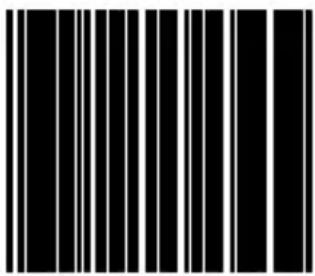
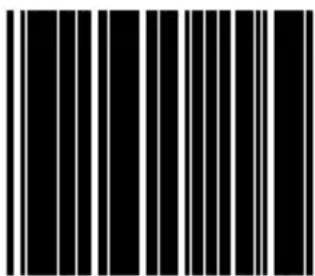
Return to RS232 default
US Keyboard
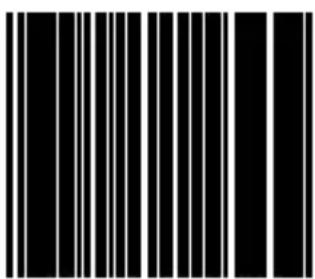
International Keyboard (ALT method)
Message Terminator-Enter

Message Terminator-H.tab
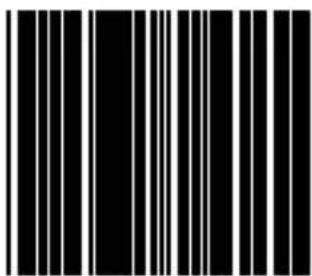
Message terminator-None
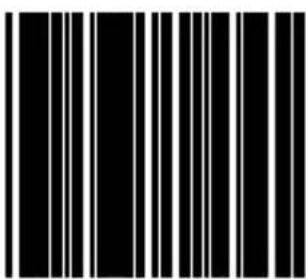

Return to customer default
Note: The reading of the label will recover all parameter back to customer default.
Save as customer default

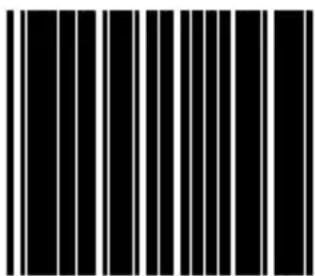
Codabar Enable
Codabar Disable
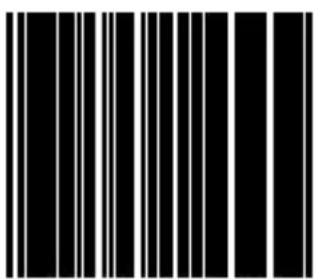
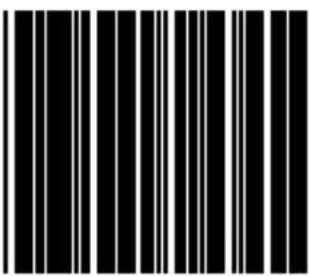
Code 39 Enable
Code 39 Disable
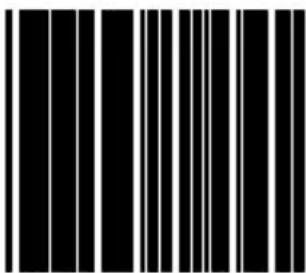
Full ASCII CODE39 Enable
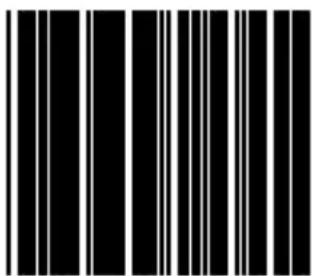
Full ASCII CODE 39 Disable
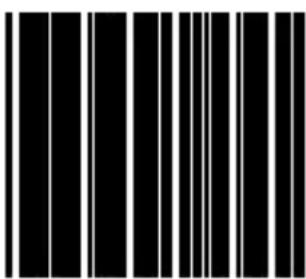
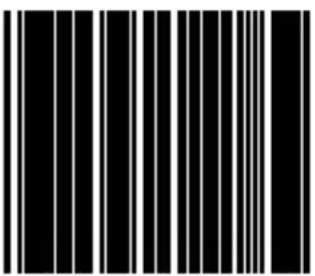
UPC/EAN/JAN Enable
UPC/EAN/JAN Disable
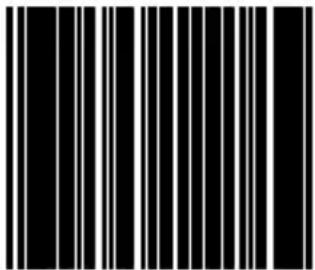
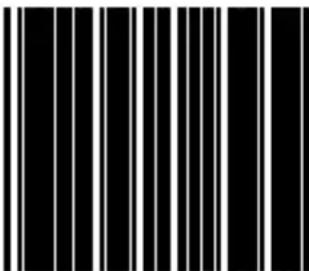
ITF 2 of 5 Enable
ITF 2 OF 5 Disable
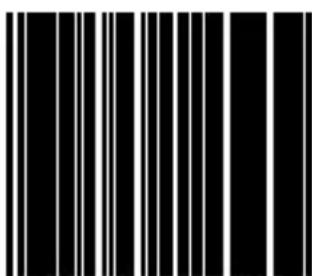
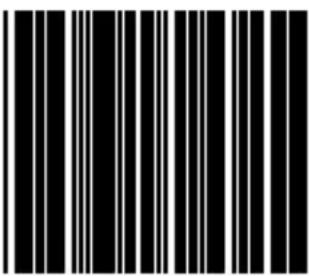
UPC/EAN ADD ON OFF
ADD ON 5 only
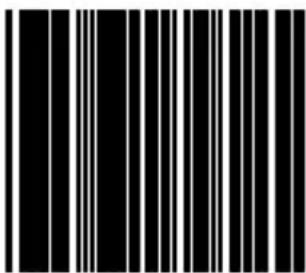
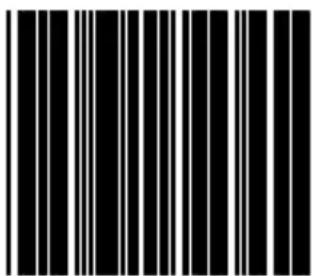
ADD ON 2 only
ADD ON 2 or 5
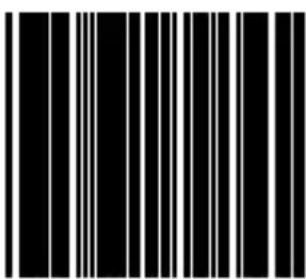

EAN/UPC +Add on (none mandatory)
EAN/UPC + Add on (mandatory)
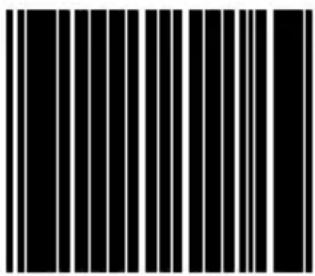
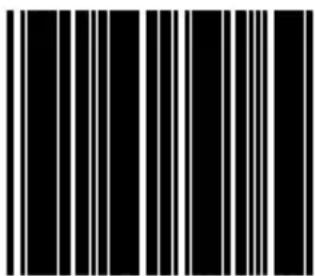
Force UPC-A to EAN-13 format enable
Force UPC-A to EAN-13 format disable
Page 18
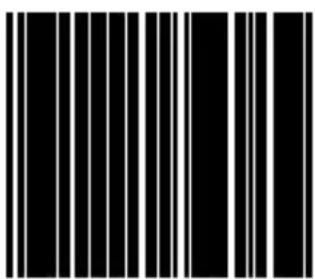
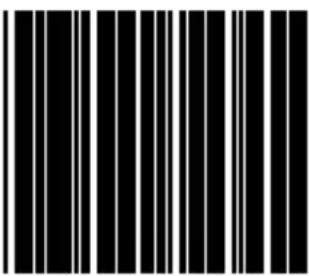
EAN-13 Convert to ISBN/ISSN Enable
EAN-13 Convert to ISBN/ISSN Disable
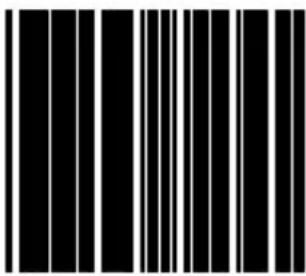
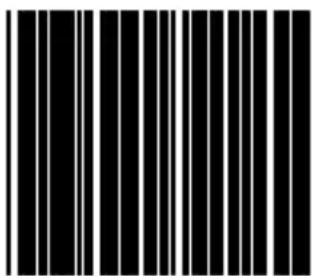
EAN-128 Enable
EAN-128 Disable
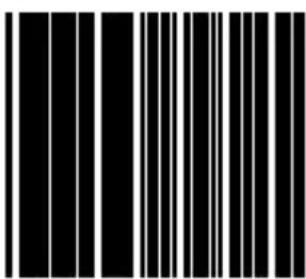
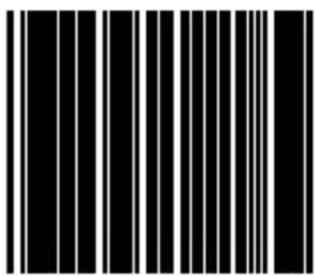
Code 128 Enable
Code 128 Disable
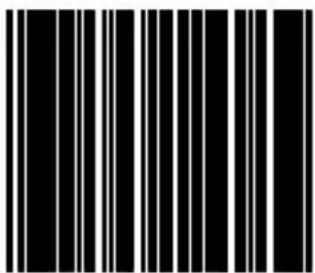
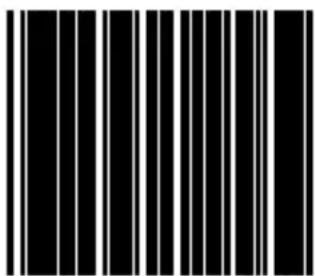
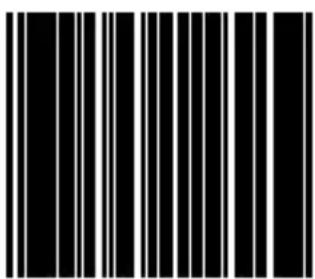
Code 93 Enable
Code 93 Disable
Page 20
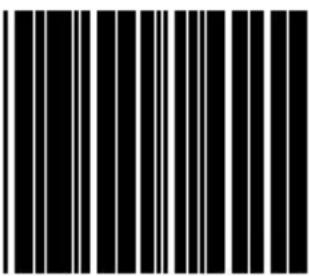
Chinese Post Code Enable
Chinese Post Code Disable
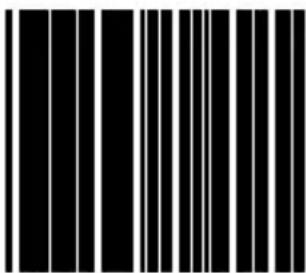
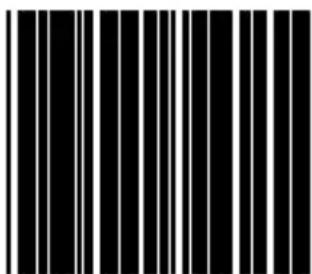
Code 32 (Italian Pharmacy Code) Enable
Code 32 (Italian Pharmacy Code) Disable
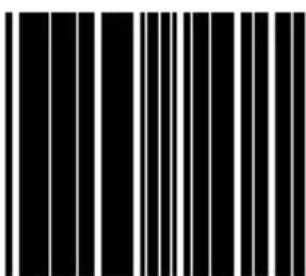

MSI enable
MSI Disable
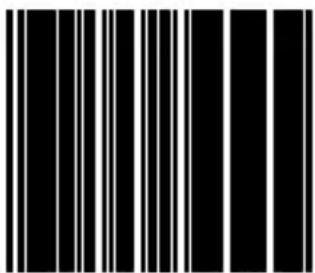

Enter/Exit Programming Mode
- LS-1000 Series Laser Barcode Scanner User's Manual
- About This Manual:
- FUNDAMENTAL INFORMATION
- INSTALLATION GUIDES
- USING THE SCANNER
- SCANNER INTRODUCTION
- Features
- Parts Identification
- Operation Status
- SCANNER SETUP (PROGRAMMING)
- Scan Test
- Reset to Default Status
- Set Up
- SCANNER OPERATION
- Operating the Scanner
- Single Line Scan Mode
- Omni-Directional Scan Mode
- Sleep Mode
- Change Beeper Volumn Using Function Button
- LED Indications
- Beeper Indications
- Maintaining the Scanner
- Cleaning the Scan Window
- Replacing Interface Cable
- TROUBLE SHOOTING GUIDE
- PROGRAMMING CODES
- Enter/Exit Programming Mode
- Display Firmware Version
- Abort
- RESET
- Return to customer default
Brand : Posiflex
Model : LS-1000U
Category : Barcode scanners