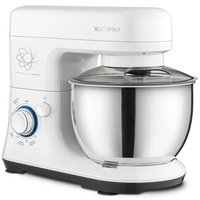
KEM500 - Food processor Kambrook - Free user manual and instructions
Find the device manual for free KEM500 Kambrook in PDF.


| Product Type | Food Processor |
| Brand | Kambrook |
| Model | KEM500 |
| Motor Power | 1000 W |
| Bowl Capacity | 2.5 L |
| Dimensions (W x D x H) | 30 x 25 x 40 cm |
| Net Weight | 5.2 kg |
| Power Supply | 220-240 V, 50 Hz |
| Variable Speed | Yes, with pulse function |
| Functions | Chopping, Slicing, Shredding, Mixing, Dough Kneading |
| Included Discs | Slicing disc, Shredding disc, Chopping blade, Dough blade |
| Feed Tube | Large feed tube for whole fruits |
| Bowl Material | BPA-free plastic |
| Blade Material | Stainless steel |
| Safety Features | Interlock mechanism, Non-slip feet, Overload protection |
| Cleaning | Removable parts are dishwasher safe |
| Cord Length | 1.2 m |
| Spare Parts Available | Yes, through Kambrook service centers |
| Warranty | 2 years limited |
| User Manual Format | PDF (24 pages) |
Frequently Asked Questions - KEM500 Kambrook
User questions about KEM500 Kambrook
0 question about this device. Answer the ones you know or ask your own.
Ask a new question about this device
Download the instructions for your Food processor in PDF format for free! Find your manual KEM500 - Kambrook and take your electronic device back in hand. On this page are published all the documents necessary for the use of your device. KEM500 by Kambrook.
USER MANUAL KEM500 Kambrook
natural_image
Exterior view of a KAMBROOK kitchen mixer with control knobs and a mesh bowl (no visible text or symbols on the main body)PowerMix Planetary Bench Mixer
Suits all KSM500 &
KEM500 models
Instruction Booklet
Important
Please retain your instruction book for future use.
In the event that you need some assistance with your Kambrook appliance, please contact our Customer Service Department on 1300 139 798 (Australia) or 0800 273 845 (New Zealand). Alternatively, visit us on our website at www.kambrook.com.au or www.kambrook.co.nz.
Contents
Kambrook Recommends p4
Safety First
Your Kambrook PowerMix p6
Planetary Bench Mixer
Assembly and Operation of Your p7
Kambrook Bench Mixer
Care, Cleaning and Storage p11
Mixing Guide p12
Troubleshooting Guide p13
Recipes p15
Kambrook Recommends Safety First
IMPORTANT: Please retain your instruction book for future use.
At Kambrook, we believe that safe performance is the first priority in any consumer product, so that you, our valued customer can confidently use and trust our products. We ask that any electrical appliance that you use be operated in a sensible fashion with due care and attention placed on the following important operating instructions.
Important Safeguards For Your Kambrook PowerMix Planetary Bench Mixer
- Carefully read all instructions before operating the Kambrook Bench Mixer for the first time and save for future reference.
- Remove and safely discard any packaging material and promotional labels before using the Bench Mixer for the first time.
- To eliminate a choking hazard for young children, remove and safely discard the protective cover fitted to the power plug of this Bench Mixer.
- Do not place the Bench Mixer near the edge of a bench or table during operation. Ensure the surface is level, clean and free of water and other substances. Vibration during operation may cause the Bench Mixer to move.
- Do not use the Bench Mixer on a sink drain board.
- Do not place the Bench Mixer on or near a hot gas or electric burner, or where it could touch a heated oven.
- Always ensure the Bench Mixer is completely assembled before operating. Follow the instructions provided in this booklet.
- Do not operate the Bench Mixer with wet hands.
-
Ensure the Speed Control Dial is in the 'OFF' position and the Bench Mixer is switched off at the power outlet and the power cord is unplugged before attaching the attachment (leaf beater, dough hook or whisk attachment).
-
Do not use attachments other than those provided with the Bench Mixer. Use only the attachments and mixing bowl supplied with the Bench Mixer.
- Do not operate this Bench Mixer continuously on heavy loads for more than 3 minutes at a time. None of the recipes in this book are considered a heavy load.
- Handle the Bench Mixer and attachments with care. Never place your fingers inside the mixing bowl or near the attachment during operation.
- The Bench Mixer can be used for mixing yeast dough. When doing this, fill the mixing bowl with a mass of flour not exceeding 35% of the bowl's maximum capacity.
- Keep hands, hair, clothing, as well as spatulas and other utensils away from the attachment and mixing bowl during operation to reduce the risk of injury to persons and/or damage to the Bench Mixer.
- Should an object, such as a spoon or spatula fall into the bowl while mixing, immediately switch the Bench Mixer to 'OFF' position, turn off at the power outlet and remove the cord from the power outlet, then remove the object.
-
Do not place hands in the mixing bowl unless the Bench Mixer is disconnected from the power outlet.
-
Always remove the attachment from the Bench Mixer before cleaning. Care should be taken when removing the food from the mixing bowl by ensuring the motor and the attachment have completely stopped before disassembling. Ensure the Speed Control Dial is in the 'OFF' position, the Bench Mixer is switched off at the power outlet and unplugged before unlocking the Bench Mixer head and moving into the upright position. The attachment should be released from the Mixer Head before attempted to remove the processed food from the mixer bowl and the attachment.
- Ensure the Bench Mixer head is locked into the horizontal (closed) position when not in use and before storing.
- Always ensure the Speed Control Dial is in the 'OFF' position, the power is switched off at the power outlet before attempting to move the Bench Mixer, before assembling or disassembling the Bench Mixer, when the Bench Mixer is not in use and before cleaning or storing.
- Do not move the Bench Mixer whilst in operation.
-
Always switch off the Bench Mixer and disconnect from the power outlet before removing attachments, changing accessories or approaching parts that move in use.
-
Do not cover the air vents on the Mixer Head and Mixer Stand to avoid overheating.
- The use of any accessory attachments not recommended by Kambrook may cause injuries.
- Do not leave the Bench Mixer unattended when in use.
- Do not place any part of the Bench Mixer except the mixing bowl in the dishwasher.
- Keep the Bench Mixer clean. Follow the Care, Cleaning and Storage instructions provided in this book.

CAUTION: In order to avoid a hazard due to inadvertent resetting of the thermal cut-out, this appliance must not be supplied through an external switching device, such as a timer, or connected to a circuit that is regularly switched on and off by the utility.
Important Safeguards For All Electrical Appliances
- Fully unwind the power cord before use.
- Connect only to a 230V or 240V power outlet.
- Do not let the power cord hang over the edge of a bench or table, touch hot surfaces or become knotted.
- To protect against electric shock, do not immerse the power cord, power plug or appliance in water or any other liquid or allow moisture to come in contact with the part, unless it is recommended in the cleaning instructions.
- The appliance is not intended for use by persons (including children) with reduced physical, sensory or mental abilities, or lack of experience and knowledge, unless they have been given supervision or instruction concerning use of the appliance by a person responsible for their safety.
• Children should be supervised to ensure that they do not play with the appliance. - It is recommended to regularly inspect the appliance. To avoid a hazard, do not use the appliance if power cord, power plug or appliance becomes damaged in any way. Return the entire appliance to the nearest authorised Kambrook Service Centre for examination and/or repair.
-
Any maintenance other than cleaning should be performed at an authorised Kambrook Service Centre.
-
This appliance is for household use only. Do not use this appliance for anything other than its intended use. Do not use in moving vehicles or boats. Do not use outdoors. Misuse may cause injury.
- The installation of a residual current device (safety switch) is recommended to provide additional safety protection when using electrical appliances. It is advisable that a safety switch with a rated residual operating current not exceeding 30mA be installed in the electrical circuit supplying the appliance. See your electrician for professional advice.
- Always turn the appliance to the OFF position, switch off at the power outlet and unplug at the power outlet when the appliance is not in use.
- Before cleaning, always turn the appliance to the OFF position, switch off at the power outlet, unplug at the power outlet and remove the power cord, if detachable, from the appliance and allow all parts to cool.
- Do not place this appliance on or near a heat source, such as hot plate, oven or heaters.
- Position the appliance at a minimum distance of 20cm away from walls, curtains and other heat or steam sensitive materials and provide adequate space above and on all sides for air circulation.
Your Kambrook PowerMix Planetary Bench Mixer
- Mixer Head
- Mixer Stand with non-slip suction feet for stability
- Speed Control Dial- 6 speeds and pulse function
-
Tilt button- locks the mixing head in the down position for added control while mixing and locks it in the raised position for added convenience while cleaning and inserting the attachments.
-
Attachment Shaft
- 3.5L stainless steel mixing bowl
- Splash guard
- Leaf beater attachment
- Dough hook attachment
- Whisk attachment
Not Shown
• Cord wrap for easy storage

natural_image
White 3D-printed white object resembling a stylized dome or antenna, mounted on a stand (no text or symbols visible)
natural_image
Close-up of a metallic curved stand with a small protrusion, no visible text or symbols
natural_image
White kitchen stand with wire mesh head and base, no visible text or symbols
Assembly and Operation of Your Kambrook Bench Mixer
Before First Use
Before assembling your Kambrook Bench Mixer, remove and safely discard any packaging material and promotional labels.
Ensure the Speed Control Dial is in the 'OFF' position and the appliance is switched off at the power outlet and remove the power cord from the outlet.
Wash the mixing bowl, splash guard, leaf beater, dough hook and whisk attachment in warm soapy water with a soft cloth. Rinse and dry thoroughly. The mixing bowl may also be washed in the dishwasher.
NOTE: When first using your Bench Mixer you may notice an odour coming from the motor. This is normal and will dissipate with use.
Attaching the Mixing Bowl
- Place one hand on top of the Mixer Head and with the other hand press and hold the 'Tilt' button to lift the Mixer Head up until it stops (See Fig. 1). Release the 'Tilt' button. The Mixer Head will lock into the elevated position. It is now easy to position the mixing bowl.

natural_image
Close-up of a hand using a medical or laboratory instrument with a red arrow indicating rotation (no text or symbols visible)- Fit the bowl so that it aligns with the grooves on the Mixer Stand (See Fig. 2).

natural_image
Close-up of a kitchen appliance with a hand pressing a small bowl, showing a red arrow indicating a step (no text or symbols on the device itself)- To lock the mixing bowl, turn it clockwise following the '◀LOCK' on the Mixer Stand. Make sure that the mixing bowl is securely locked in place.
Removing the Mixing Bowl
- Place one hand on top of the Mixer Head and with the other hand press and hold the 'Tilt' button to lift the Mixer Head up until it stops (See Fig. 1). Release the 'Tilt' button. The Mixer Head will lock into the elevated position.
- Hold the mixing bowl and turn it anti-clockwise and in the opposite direction of the '◄LOCK' on the Mixer Stand. Then lift the mixing bowl and pull it away from the Mixer Stand.
Assembly and Operation of Your Kambrook Bench Mixer continued
Attaching the Splash Guard
-
Place one hand on top of the Mixer Head and with the other hand press and hold the 'Tilt' button to lift the Mixer Head up until it stops (See Fig. 1). Release the 'Tilt' button. The Mixer Head will lock into the elevated position.
-
Place the splash guard under the Mixer Head. Align the 'ALIGN' on the Mixer Head with the '▲' on the splash guard. Turn the splash guard clockwise so that the 'LOCK' on the Mixer Head aligns with the '▲' on the splash guard. Make sure the splash guard is securely locked in place.
NOTE: We recommend to always use the splash guard to avoid splatter coming out of the mixing bowl. The opening on the splash guard can be used to add quick incorporations, such as chocolate chips to cookie mixes or fruit and nuts to bread doughs.
Inserting the Leaf Beater/Dough Hook/Whisk Attachment
-
Place one hand on top of the Mixer Head and with the other hand press and hold the 'Tilt' button to lift the Mixer Head up until it stops (See Fig. 1). Release the 'Tilt' button. The Mixer Head will lock into the elevated position.
-
Align the chosen attachment so that grooves on the attachment align with the Attachment Shaft located under the Mixer Head. With some pressure, push the attachment towards the Mixer Head, lifting the Attachment Shaft spring upwards and twist the attachment in an anti-clockwise direction. Make sure that the attachment is securely locked in place.
NOTE: It is important that the leaf beater, dough hook or whisk attachment is securely locked into place on the Attachment Shaft or your Bench Mixer will not operate correctly.
Removing the Leaf Beater/Dough Hook/Whisk Attachment
-
Place one hand on top of the Mixer Head and with the other hand press and hold the 'Tilt' button to lift the Mixer Head up until it stops (See Fig. 1). Release the 'Tilt' button. The Mixer Head will lock into the elevated position.
-
Hold onto the assembled attachment. With some pressure, push the attachment towards the Mixer Head, lifting the Attachment Shaft spring upwards and twist the attachment in a clockwise direction. Pull the attachment away from the Attachment Shaft to remove it from the Mixer Head.
Operating Your Kambrook Bench Mixer
- Ensure the Speed Control Dial is set to the 'OFF' position.
- Place one hand on top of the Mixer Head and with the other hand press and hold the 'Tilt' button to lift the Mixer Head up until it stops. Release the 'Tilt' button. The Mixer Head is now in the elevated position.
- Attach and securely lock the mixing bowl in place.
- Attach and securely lock the splash guard in place.
- Insert the leaf beater, dough hook or whisk attachment depending on which attachment the recipe requires.
- Add ingredients into the mixing bowl supplied as listed in the recipe.
- Place one hand on top of the Mixer Head and with the other hand press and hold the 'Tilt' button. Push the Mixer Head down so that it is in the horizontal position and the leaf beater, dough hook or whisk attachment is inside the mixing bowl. Release the 'Tilt' button.
- Insert the power cord into a 230 or 240V power outlet and switch the power outlet on. The Speed Control Dial will illuminate and "flash" red.

WARNING: Never exceed speed setting number 1 when kneading heavy ingredients such as dough.
-
To commence mixing, turn the Speed Control Dial in a clockwise direction. The Speed Control Dial will illuminate red. Always begin mixing at a lower speed setting to prevent splattering. Increase the speed suited to the mixing task. The speed setting can be adjusted during operation by turning the Speed Control Dial. Use the Mixing Guide on page 12 as a reference.
-
Use the Pulse Function when you require a quick burst of power or for quick incorporations, such as adding chocolate chips to cookie mixes, fruit and nuts to bread dough, or flour to cake batter. Turn the Speed Control Dial in an anti-clockwise direction and hold it in this position. Hold the dial for no more than 30 seconds at one time to avoid overheating. When the dial is released, it returns automatically to the 'OFF' position.
-
Occasionally stop the mixer during the operation and scrape any food mixture down the sides of the mixing bowl with a spatula.
NOTE: Always turn the Speed Control Dial to the 'OFF' position if you need to scrape down the mixing bowl during use.
-
When mixing is complete, turn the Speed Control Dial to the 'OFF' position, switch the appliance off at the power outlet and remove the power cord from the outlet.
-
Place one hand on top of the Mixer Head and with the other hand press and hold the 'Tilt' button to lift the Mixer Head up until it stops. Release the 'Tilt' button. The Mixer Head is now in the elevated position.
- Remove the leaf beater, dough hook or whisk attachment as described prior in the Removing the Leaf Beater/ Dough Hook/ Whisk Attachment section on page 8. Use a spatula to remove the mixture from the leaf beater, dough hook or whisk attachment. Do not strike the leaf beater, dough hook or whisk attachment on the rim of the mixing bowl.

WARNING: After mixing, take out the leaf beater, dough hook or whisk attachment with care as they may be hot after use.
Overload Protection System
The motor is protected from burning out by a manual reset cut-out switch. If the Bench Mixer is overloaded or operated continuously for too long, the motor may overheat and stop. To operate the Bench Mixer again, you must switch off, unplug and allow to cool for approximately 30 minutes. Once the motor has fully cooled, it is ready for use again. Some stiff mixtures, such as dough, may cause the dough hook to rotate more slowly than normal.
Do not operate the Bench Mixer continuously with an excessive load for more than 3 minutes. If this occurs again, the mixing bowl may be overloaded, so remove some of the food and process in smaller batches.
Care, Cleaning and Storage
Cleaning After Use
- Always ensure that the Speed Control Dial is in the 'OFF' position and that the power is switched off at the power outlet then remove the power cord from the power outlet.
- Remove the leaf beater, dough hook or whisk attachment from the Attachment Shaft on the Mixer Head.
- Remove the splash guard from the Mixer Head.
- Wipe the Mixer Head and Mixer Stand with a soft, damp cloth then dry thoroughly.
- Wipe any excess food particles from the power cord.
- Wash the mixing bowl, splash guard, leaf beater, dough hook and whisk attachment in warm soapy water with a soft damp cloth. Rinse and dry thoroughly. The mixing bowl can also be washed in the dishwasher.

WARNING: Never immerse the Bench Mixer, power cord or plug in water or any other liquid.
NOTE: Do not place any part of the Bench Mixer except the mixing bowl in the dishwasher.
NOTE: Do not use abrasive scouring pads or cleaners when cleaning the mixing bowl, leaf beater, dough hook and whisk attachments as these may scratch the surface. Ensure the mixing bowl, leaf beater, dough hook or whisk attachments do not soak in water for an extended period of time, i.e. for several hours or overnight, as this may damage the metal finish. Do not wash or soak the Mixer Stand in water or any other liquid. Clean with a damp cloth and dry thoroughly. Do not allow water or any other liquid to enter the gear system as damage may result.
Storage
Your Kambrook Bench Mixer should be kept in a convenient position on your kitchen bench top or in an accessible cupboard.
- Always unplug your Kambrook Bench Mixer from the power outlet before storing.
- Use the cord wrap on the bottom of the Bench Mixer to easily store the power cord.
- Attach the mixing bowl to the Mixer Stand.
- Attach the splash guard to the Mixer Head.
- Place the leaf beater, dough hook and whisk attachments inside the mixing bowl and lower the Mixer Head with the splash guard into the horizontal position.
Mixing Guide
| Speed Setting | Purpose Attachment Best For Mixing | ||
| ONLY setting 1 | Kneading • Recipes that call for 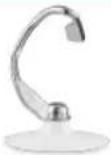 | LOW speedPizza & Pasta Dough, Bread Dough, Scones | |
| 1-2 Folding | 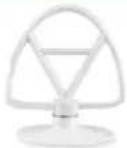 | • Recipes that call for LOW speedHeavy Batter & Pastry | |
| 3-4 Light Mixing |  | • Recipes that call for MEDIUM speedCake & Biscuit | |
| 4-5 Beating & Creaming | 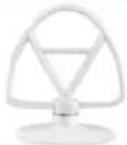 | • Butter & SugarEggIcing | |
| 5-6 Aerating & Whisking |  | • Egg Whites & Cream | |
| Pulse Function | Quick bursts of power |  | • Adding additional ingredients to mixture i.e. chocolate chips to cookie batter |
NOTE: Always begin mixing at a low speed, then increase to a high speed to prevent splattering.

WARNING: Never exceed speed setting number 1 when kneading heavy ingredients such as dough.
Troubleshooting Guide
| Problem Solution | |
| Unsure whether to use leaf beater, dough hook or whisk attachment | ·Use the leaf beater for all mixing/ whipping tasks.·Use the dough hook only for the preparation of yeast/ bread doughs.·Use the whisk for aerating egg whites. |
| Unsure of which speed setting to use | ·Use the Mixing Guide on page 12 to help select correct mixing speed when preparing recipes.·Begin mixing at lowest speed, then increase to higher speed to prevent splattering. |
| Object has fallen into the Bench Mixer mixing bowl | ·Should an object, such as a spoon or spatula, fall into the mixing bowl while mixing, immediately switch the Bench Mixer to 'OFF' position, turn off at the power outlet and remove the cord from the power outlet, then remove the object.·If the Bench Mixer is damaged in any way, return to a Kambrook Authorised Service Centre. |
| Over-mixing has occurred | ·Mix for the recommended time in the recipe to avoid over-mixing. |
| Egg whites are not whipping | ·Be sure the whisk attachment and mixing bowl are completely clean and dry before use as even a small amount of fat will affect the whipping performance. |
| Bread dough is not combining | ·Some brands of flour absorb more liquid than others so additional amounts of liquid may need to be added if the bread is not combining.·DO NOT exceed speed setting 1 when kneading. DO NOT place hands near the dough hook when mixer is operating. |
| If batter is too firm | ·Add more liquid to your batter. |
| Mixture is curdling after the eggs have been added | ·Add eggs one at a time, beating well after each addition.·Make sure eggs are at room temperature. |
| Sugar crystals still visible after creaming | ·Continue to cream until sugar has dissolved, or use caster sugar. |
| Lumps in batter or dough | ·Sift the flours and sugar before mixing. |
| Cooked pavlova weeping (sugar not dissolved) | ·Next time, continue to whip until all sugar is dissolved. Test by rubbing a small amount of mixture between your fingers; if sugar granules are still felt, further mixing is required. |
NOTE: Always begin mixing at a low speed, then increase to a high speed to prevent splattering.

WARNING: Never exceed speed setting number 1 when kneading heavy ingredients such as dough.
Recipes
Using the Dough Hook Attachment
Pizza Dough
Makes 4 pizzas
500g bread flour
3 tsp caster sugar
3 tsp salt
3 tsp dried yeast
250ml warm water
40ml olive oil
- Place the flour, sugar, salt, yeast, water and olive oil into the mixing bowl with the dough hook attached and knead for 1 minute on speed setting 1.
- Remove from the mixing bowl and place into a lightly greased glass bowl. Cover with plastic wrap and place in a warm spot for 1 hour.
- Place dough ball back into the mixing bowl and knead for a further 30 seconds and then cut into 4 pieces. Place each ball into a freezer bag and store in the refrigerator for up to 4 days or the freezer for up to 3 months.
NOTE: When rolling out your pizza dough, dust the rolling pin and bench surface with a small amount of flour before rolling.
NOTE: Top with your favourite toppings and then grated mozzarella cheese. Choices might include: sliced meats, seafood, char grilled vegetables, sliced fruits, cheeses and herbs. For a sweet pizza, try using a chocolate hazelnut spread for the base and topping with fruit, nuts and a drizzle of honey.
Pasta Dough
Makes 4 serves
1 ¼ cups 'OO' flour
(an alternative is plain flour)
12 tsp salt
2 x 59g free range eggs, at room temperature
1 tbsp olive oil
1 tbsp cold water
Plain flour, extra, to dust
- Place the flour, salt, eggs olive oil and water into the mixing bowl with the dough hook attached and knead for 1 minute on speed setting 1.
- Remove from the mixing bowl and process through a pasta maker to make pasta or wrap in cling wrap and store in the refrigerator for up to 3 days or in the freezer for up to 3 months.
NOTE: Serve pasta with your favourite pasta sauce or toss through some fresh herbs and grated cheeses.
NOTE: Cook pasta in boiling water for 60 seconds or until it floats to the surface.
Cheese and Bacon BBQ rolls
Makes 6 rolls
375ml warm water
60ml olive oil
1 tsp caster sugar
1 tsp salt
600g bread flour
2 tsp dried yeast
3 tbsp barbeque sauce
1 cup bacon, diced
1 cup tasty cheese, grated
-
Place the water, olive oil, sugar, salt, flour and yeast into the mixing bowl with the dough hook attached and knead for 3 minutes on speed setting 1.
-
Shape into a ball and place in a large glass bowl. Cover with plastic wrap and place into a warm, draught-free place to rise for 1 ½ hours or until doubled in size.
-
Preheat a fan forced oven to 180°C and line a baking tray with canola oil spray and baking paper.
-
Place dough ball back into the mixing bowl and knead for a further 2 minutes on speed setting 1. Roll dough ball out onto a floured surface and cut into 6 balls.
-
Place the 6 dough balls onto a baking tray lined with baking paper and allow to rest for 20 minutes.
-
Top each dough ball evenly with barbeque sauce, bacon and cheese and place into the oven and cook for 20 minutes.
Fruit and Nut Buns
Makes 12 buns
205ml water, luke warm
25ml olive oil
1 tsp salt
1 ½ tbsp sugar
265g wholemeal flour
60g plain flour
1 tbsp milk powder
1 ½ tsp dried yeast
12 tsp cinnamon, ground
12 tsp all spice, ground
14 cup walnuts, roughly chopped
14 cup dried cranberries
60g butter, melted
12 cup brown sugar
Butter, to serve
-
Place the water, oil, salt, sugar, flours, milk and yeast into the mixing bowl with the dough hook attached and knead mixture for 2 minutes on speed setting
-
Shape into a ball and place into a large glass bowl. Cover with plastic wrap and place into a warm, draught-free place to rise for 1 ½ hours or until doubled in size.
-
Preheat a fan forced oven to 180^ C and line 2 baking trays with canola oil spray and baking paper.
-
Place dough ball back into the mixing bowl and add the cinnamon, all spice, walnuts and cranberries. Knead for a further 2 minutes on speed setting 1.
-
Cut the dough ball into 12 even sized portions and shape into balls. Place onto the prepared baking trays, roughly 3cm apart and allow to stand for 10 minutes.
-
Brush the rolls with butter and then sprinkle with brown sugar and place into the oven for 25 minutes. Allow to cool until warm and serve with butter.
Scones
Makes 12 scones
3 ½ cups self raising flour, sifted
14 cup caster sugar
300ml pure cream
375ml lemonade
1 tbsp milk
- Preheat a fan forced oven to 200^ C and line a baking tray with canola oil spray and baking paper.
- Place the flour, sugar, cream and lemonade into the mixing bowl with the dough hook attached and mix on speed setting 1 until just combined.
- Turn out onto a lightly floured surface and divide into 12 dough balls.
- Place the dough balls evenly on the prepared tray and brush the dough balls with milk and bake for 12 minutes.
- Allow to cool on a cake cooling rack and serve with lemon curd or jam and cream.
Recipes
Using the Leaf Beater Attachment
Gooey Chocolate Chip Cookies
Makes 40
185g butter, softened
1 cup brown sugar
12 cup caster sugar
1 tsp vanilla essence
2 x 59g free range eggs
2 cups plain flour
12 cup self raising flour
12 tsp baking powder
2 tbsp cocoa powder
100g white chocolate chips
100g dark chocolate chips
100g caramel chips
-
Preheat a fan forced oven to 180^ C and line 2 baking trays with canola oil spray and baking paper.
-
Place the butter, sugars and vanilla into the mixing bowl with the leaf beater attached and cream for 3 minutes on speed setting 5, scraping the sides of the mixing bowl after each minute.
-
Add the eggs one at a time, mixing well after each addition. Fold through the flours, baking powder, cocoa powder and chocolate chips on speed setting 1 until just combined, approximately 30 seconds.
-
Roll tablespoon sized balls and place onto the oven trays. Gently press down, making sure the cookies are placed 5cm apart. Place into the oven for 12 minutes or until golden brown. Allow to cool on cake cooling racks.
NOTE: Caramel chips can be found next to the chocolate chips in the supermarket. If you cannot find caramel chips, use milk chocolate chips.
NOTE: If cookie dough is too soft, place into the refrigerator for 10 minutes to set slightly.
NOTE: Cookies are easier to roll if you have a small amount of water on your hands.
Baked Passionfruit Cheesecake
Makes 20cm cheesecake
250g digestive biscuits, halved
80g butter, melted
500g cream cheese, cubed, room temperature
12 cup caster sugar
300g reduced fat sour cream
3 x 59g free range eggs
1 tsp lemon rind
12 cup passionfruit pulp
-
Preheat a fan forced oven to 140^ C and line the base of a 20cm springform cake tin with baking paper.
-
Using a food processor, with a blade attachment, pulse the biscuits for 10 seconds or until completely crushed. Pour into a bowl and stir through the butter. Firmly press the biscuit mixture into the base of the cake tin and place into the refrigerator to set for 20 minutes.
-
Place the cream cheese and caster sugar into the mixing bowl, with the leaf beater attached and beat on speed setting 4 for 3 minutes, scraping the sides of the bowl every minute.
-
Add the sour cream and beat for a further 30 seconds on speed setting
-
Add the eggs on at a time, beating well after each addition.
-
Scrape down the sides of the bowl and add the lemon rind and passionfruit pulp and beat for a further 30 seconds on speed setting 4.
-
Pour mixture into the cake tin and place onto an oven tray and then into the oven for 50 minutes. Place into the refrigerator overnight to set.
Lemon and Poppy seed Cupcakes
Makes 18 cupcakes
14 cup milk
2 tbsp poppy seeds
125g butter, softened
1 cup caster sugar, sifted
2 x 59g free range eggs
2 tbsp lemon juice
2 tsp lemon rind
2 cups self raising flour
12 cup pure icing sugar, to serve
Whipped cream, to serve
-
In a jug, combine the milk and poppy seeds and allow to stand for 20 minutes.
-
Preheat a fan forced oven to 170^ C and line 3 x 6 holed cupcake pan with patty pans.
-
Place the butter and sugar into the mixing bowl with the leaf beater attached and cream until light and thickend, approximately 3 minutes on speed setting 5, scraping down the sides every minute.
-
Add the eggs one at a time, beating well after each addition until heightened and thick, approximately 1 minute.
-
Fold through the lemon, flour, milk and poppy seeds on speed setting 1 until just combined.
-
Spoon evenly into the trays and bake for 17 minutes or until a skewer can be removed cleanly. Allow to cool.
-
Dust evenly with icing sugar and serve with a dollop of whipped cream.
Recipes
Using the Whisk Attachment
Garlic Butter
Makes 1 cup
200g butter, softened
6 cloves garlic, minced
4 tsp salt
1 tbsp dill, finely chopped
2 French sticks, halved
- Place the butter, garlic, salt and dill into the mixing bowl with the whisk attached and beat for 4 minutes on speed setting 8, scraping down the sides of the bowl every minute.
- Preheat a fan forced oven to 180^ C and set aside a baking tray.
- Cut the French stick into 2cm slices, without cutting through the base and spread the garlic butter generously between each slice. Wrap in aluminium foil and bake for 15 minutes.
NOTE: If you don't need to bake all of the garlic bread, wrap in a freezer bag and freeze for up to 3 months.
Pancakes
Makes 12 pancakes
2 cups self raising flour
^1/_3 cup plain flour
3 tbsp caster sugar
2 ¼ cups milk
130g butter, melted
59g free range egg, lightly whisked
- Place the flour, sugar, milk, 90g butter and eggs into the mixing bowl with the whisk attached and mix well for 2 minutes on speed setting 4 or until the mixture is smooth and lump free.
- Brush a frypan with some of the extra butter and then heat over a medium heat until butter sizzles. Pour approximately 1/3 cup of mixture into the pan and evenly move mixture around to form a circle.
- When bubbles cover the whole pancake, flip the pancake using an egg flipper and cook for a further 1 minute.
- Repeat until all pancakes are cooked and serve with lemon and sugar or maple syrup and ice cream.
Pavlova
Makes 8 serves
6 x egg whites (from 59g free range eggs)
1 tsp cream of tartar
1 ½ cup caster sugar
300ml pure cream, to serve
300g strawberries, hulled, halved, to serve
300g raspberries, to serve
2 x passionfruit, flesh only, to serve
-
Preheat a fan forced oven to 140^ C and line a flat baking tray with canola oil spray and baking paper.
-
Place the egg whites into the mixing bowl with the whisk attached and whisk on speed setting 8 until soft peaks form, approximately 30 seconds.
-
Add the cream of tartar and then the sugar, one tablespoon at a time, mixing well after each addition. Whisk for approximately 10 minutes in total.
-
Scoop out onto the baking tray in a round shape approximately 10cm high and 20cm across and spread evenly using a spatula and place into the oven for 50 minutes to bake.
-
Turn the oven off and place a wooden spoon in the oven door and allow the pavlova to cool inside the oven.
-
Thoroughly clean the mixing bowl and whisk attachment and whisk the cream until stiff peaks form, approximately 45 seconds.
-
Top the pavlova with cream, berries and passionfruit and serve immediately.
NOTE: Test that the sugar in the meringue has dissolved completely by rubbing a small amount between two fingers and checking for sugar granules. If you can feel sugar feel sugar granules, continue to whisk for a further minute until completely dissolved.
Chocolate Mousse
Makes 6 serves
300g dark chocolate melts
3 x 59g free range eggs
14 cup caster sugar
1 tbsp cocoa powder
300ml pure cream
200g fresh raspberries, to serve
-
Place the chocolate melts into a heat proof glass bowl and microwave for 1 minute on high. Remove from the microwave and stir. If not completely melted, melt for a further 30 seconds.
-
Place the eggs and sugar into the mixing bowl, with the whisk attached and beat for 3 minutes on speed setting 8.
-
Fold in chocolate and cocoa powder on speed setting 1 until just combined.
-
Pour chocolate mixture back into the melted chocolate bowl and wash the mixing bowl and whisk attachment thoroughly. Reassemble the mixer and pour the cream into the mixing bowl. Whisk for 1 minute on speed setting 8 or until stiff peak consistency is reached.
-
Using a large metal spoon, fold the chocolate mixture through the cream until just combined. Evenly divide the mousse into 6 glasses and chill in the refrigerator for 2 hours and serve with fresh berries.
NOTE: Stiff peak consistency is when the cream holds a firm shape when spooned out of the bowl.
Notes
Notes
Kambrook - Australia
Building 2, Port Air Industrial Estate
1A Hale Street
Botany NSW 2019
Australia
Customer Service Line 1300 139 798
Customer Service Fax 1800 621 337
www.kambrook.com.au
Kambrook - New Zealand
Private Bag 94411
Botany, Manukau
Auckland 2163
New Zealand
Customer Service Line/
Spare Parts 0800 273 845
Customer Service Fax 0800 288 513
www.kambrook.co.nz


- PowerMix Planetary Bench Mixer
- Important
- Please retain your instruction book for future use.
- Contents
- Kambrook Recommends Safety First
- IMPORTANT: Please retain your instruction book for future use.
- Important Safeguards For Your Kambrook PowerMix Planetary Bench Mixer
- Important Safeguards For All Electrical Appliances
- Your Kambrook PowerMix Planetary Bench Mixer
- Not Shown
- Assembly and Operation of Your Kambrook Bench Mixer
- Before First Use
- Attaching the Mixing Bowl
- Removing the Mixing Bowl
- Assembly and Operation of Your Kambrook Bench Mixer continued
- Attaching the Splash Guard
- Inserting the Leaf Beater/Dough Hook/Whisk Attachment
- Removing the Leaf Beater/Dough Hook/Whisk Attachment
- Operating Your Kambrook Bench Mixer
- Overload Protection System
- Care, Cleaning and Storage
- Cleaning After Use
- Storage
- Mixing Guide
- Troubleshooting Guide
- Recipes
- Using the Dough Hook Attachment
- Pizza Dough
- Makes 4 pizzas
- Pasta Dough
- Makes 4 serves
- Cheese and Bacon BBQ rolls
- Makes 6 rolls
- Fruit and Nut Buns
- Makes 12 buns
- Scones
- Makes 12 scones
- Using the Leaf Beater Attachment
- Gooey Chocolate Chip Cookies
- Makes 40
- Baked Passionfruit Cheesecake
- Makes 20cm cheesecake
- Lemon and Poppy seed Cupcakes
- Makes 18 cupcakes
- Using the Whisk Attachment
- Garlic Butter
- Makes 1 cup
- Pancakes
- Makes 12 pancakes
- Pavlova
- Makes 8 serves
- Chocolate Mousse
- Makes 6 serves
- Notes
Brand : Kambrook
Model : KEM500
Category : Food processor