
IS-XPERT-MGMT - Computer Server AMX - Free user manual and instructions
Find the device manual for free IS-XPERT-MGMT AMX in PDF.


| Product Type | Control System Management Module |
| Brand | AMX |
| Model | IS-XPERT-MGMT |
| Dimensions (H x W x D) | 1.7 x 17.4 x 10.5 inches (4.3 x 44.2 x 26.7 cm) |
| Weight | 4.5 lbs (2.0 kg) |
| Power Supply | 12V DC, 2A |
| Power Consumption | 24W max |
| Main Functions | Centralized control of AV systems, scheduling, monitoring, and remote management via web interface |
| Connectivity | Ethernet (RJ-45), RS-232, USB, IR ports |
| Operating System | Proprietary AMX firmware |
| Memory | 512 MB RAM, 256 MB Flash |
| Protocols Supported | TCP/IP, UDP, SNMP, HTTP, HTTPS |
| Care and Cleaning | Wipe with a soft, dry cloth. Do not use liquid cleaners. |
| Safety Precautions | Follow installation manual; ensure proper ventilation; do not expose to moisture. |
| Spare Parts and Repair | Contact AMX support for authorized service and genuine spare parts. |
| Warranty | 2 years limited |
| Operating Temperature | 32-104°F (0-40°C) |
| Compliance | FCC, CE, RoHS |
Frequently Asked Questions - IS-XPERT-MGMT AMX
User questions about IS-XPERT-MGMT AMX
0 question about this device. Answer the ones you know or ask your own.
Ask a new question about this device
Download the instructions for your Computer Server in PDF format for free! Find your manual IS-XPERT-MGMT - AMX and take your electronic device back in hand. On this page are published all the documents necessary for the use of your device. IS-XPERT-MGMT by AMX.
USER MANUAL IS-XPERT-MGMT AMX
IMPORTANT SAFETY INSTRUCTIONS
- READ these instructions.
- KEEP these instructions.
- HEED all warnings.
- FOLLOW all instructions.
- DO NOT use this apparatus near water.
- CLEAN ONLY with dry cloth.
- DO NOT block any ventilation openings. Install in accordance with the manufacturer's instructions.
- DO NOT install near any heat sources such as radiators, heat registers, stoves, or other apparatus (including amplifiers) that produce heat.
- DO NOT defeat the safety purpose of the polarized or grounding type plug. A polarized plug has two blades with one wider than the other. A grounding type plug has two blades and a third grounding prong. The wider blade or the third prong are provided for your safety. If the provided plug does not fit into your outlet, consult an electrician for replacement of the obsolete outlet.
- PROTECT the power cord from being walked on or pinched, particularly at plugs, convenience receptacles, and the point where they exit from the apparatus.
- ONLY USE attachments/accessories specified by the manufacturer.

-
USE ONLY with a cart, stand, tripod, bracket, or table specified by the manufacturer, or sold with the apparatus. When a cart is used, use caution when moving the cart/apparatus combination to avoid injury from tip-over.
-
UNPLUG this apparatus during lightning storms or when unused for long periods of time.
- REFER all servicing to qualified service personnel. Servicing is required when the apparatus has been damaged in any way, such as power-supply cord or plug is damaged, liquid has been spilled or objects have fallen into the apparatus, the apparatus has been exposed to rain or moisture, does not operate normally, or has been dropped.
- DO NOT expose this apparatus to dripping or splashing and ensure that no objects filled with liquids, such as vases, are placed on the apparatus.
- To completely disconnect this apparatus from the AC Mains, disconnect the power supply cord plug from the AC receptacle.
- Where the mains plug or an appliance coupler is used as the disconnect device, the disconnect device shall remain readily operable.
- DO NOT overload wall outlets or extension cords beyond their rated capacity as this can cause electric shock or fire.

The exclamation point, within an equilateral triangle, is intended to alert the user to the presence of important operating and maintenance (servicing) instructions in the literature accompanying the product.

The lightning flash with arrowhead symbol within an equilateral triangle is intended to alert the user to the presence of uninsulated "dangerous voltage" within the product's enclosure that may be of sufficient magnitude to constitute a risk of electrical shock to persons.

ESD Warning: The icon to the left indicates text regarding potential danger associated with the discharge of static electricity from an outside source (such as human hands) into an integrated circuit, often resulting in damage to the circuit.
WARNING: To reduce the risk of fire or electrical shock, do not expose this apparatus to rain or moisture.
WARNING: No naked flame sources - such as candles - should be placed on the product.
WARNING: Equipment shall be connected to a MAINS socket outlet with a protective earthing connection.
WARNING: To reduce the risk of electric shock, grounding of the center pin of this plug must be maintained.
COPYRIGHT NOTICE
AMX© 2015, all rights reserved. No part of this publication may be reproduced, stored in a retrieval system, or transmitted, in any form or by any means, electronic, mechanical, photocopying, recording, or otherwise, without the prior written permission of AMX. Copyright protection claimed extends to AMX hardware and software and includes all forms and matters copyrightable material and information now allowed by statutory or judicial law or herein after granted, including without limitation, material generated from the software programs which are displayed on the screen such as icons, screen display looks, etc. Reproduction or disassembly of embodied computer programs or algorithms is expressly prohibited.
LIABILITY NOTICE
No patent liability is assumed with respect to the use of information contained herein. While every precaution has been taken in the preparation of this publication, AMX assumes no responsibility for error or omissions. No liability is assumed for damages resulting from the use of the information contained herein. Further, this publication and features described herein are subject to change without notice.
AMX WARRANTY AND RETURN POLICY
The AMX Warranty and Return Policy and related documents can be viewed/downloaded at www.amx.com.
Table of Contents
Composer Upgrade Overview ....1
Composer 5.6 Enhancements .... 1
Additional Documentation.... 1
Inspired Signage - Overview 2
Overview 2
Core Components.... 2
Composer 3
Overview 3
IS-Player....3
Babel....3
Composer Processes.... 3
Template Definitions 4
Non-Visual Template Definition Elements 5
Switches.... 5
Selectors....5
Visual Template Elements 5
Template Definition Properties.... 5
Templates....5
Template Definitions, Templates, and Messages.... 6
Template Packs....7
Creating Templates from Template Definitions 7
Automatic Template Properties.... 8
Messages....8
Scheduling (Validity Rules) 9
Playlists 9
Playlist Modes.... 10
Playlist Versions 10
Playlist Naming Conventions.... 10
Publish Points (Publishing Playlists).... 10
Approval 12
Approval Actions Available 12
Playlist Permissions.... 12
Composer - Users 13
Overview 13
Administrator User Group.... 13
Manager User Group 13
Editor User Group.... 14
Basic User Group.... 14
Table of Contents
Permissions and Resource Pools 15
Resource Pools 15
List of Permissions by Category 15
Locking 17
Composer - Main Window 17
Overview 17
Access Dashboard 18
Dashboard.... 18
Welcome 18
System Summary...... 18
Approval Queue 19
Menu Pane 20
Data Table.... 21
Selecting Items.... 21
Expanded View of Items 21
Changing Table Column Width 21
Changing Column Order 21
Sort Table Using the Values in a Column.... 21
Tasks Pane.... 22
Approval Pane 22
View Changes 23
Revert.... 23
Reject 23
Approve.... 23
Tool Bar 23
Publish 23
Publish Content Changes 24
Republish All.... 24
Republish Selected 24
Current Publish Progress 24
Publish Status.... 24
When The System Is Alive 26
When Publisher Guardian Is Not Running.... 26
When Post Office Is Not Running.... 26
Player Status Tab.... 27
Login/Logout 27
Change Password 27
Zoom 28
Refresh Display Button 28
Help 28
Status Bar 29
Getting Started 30
Logging In to Composer 30
Table of Contents
Logging Out of Composer 30
A Basic Administrator Work Flow 31
Administrator Setup Tasks.... 31
Setting Up Players 31
Importing Template Packs 33
Creating a Publish Point System 34
Setting up Playlists 35
Setting Up User Groups, and Permissions 36
Creating Resource Pools for User Groups 36
Configuring Playlists to Display on All or Selected Players 38
Day to Day Tasks.... 39
Creating and Publishing Messages 39
Reviewing Changes to Messages, Templates, or Playlists.... 42
Changing Message Play Order.... 43
Changing Rejected Messages/Templates.... 44
Removing Messages From Playlists 44
Setting When a Message can be Displayed 46
Creating Templates 48
Creating Playlists for Special Circumstances.... 49
Add a New User.... 51
Deactivating an Existing User Account.... 51
Adding Images to Messages or Templates 52
Adding Video to Messages or Templates 52
Content Management ....53
Overview 53
Messages....53
Edit Message....54
Create Message 55
Message Properties 57
Image Property.... 57
Limitations of displaying web pages 58
Video Property 58
Text Property 58
Numeric Property 58
Color Property 59
Switch Property 59
Selector Property.... 59
Restrict to Publish Points.... 59
Setting Message Validity 60
Set a Valid From Date (Start Of Date Range) 60
Set a Valid To Date (End Of Date Range) 60
Defining Specific Weekday Rules.... 61
Creating a Time Interval.... 61
Clearing a Time Interval 61
Table of Contents
Combining Validity Rules.... 61
Deleting Validity Rules 61
Duplicate Messages.... 62
Preview Messages 63
Quick Preview Messages.... 63
Launching a Preview 64
Changing Data 64
Assign to Resource Pools 65
Add Messages to Playlists 66
As Run Report 68
Enabling As Run Logging on (All or Selected) Players 68
Generate As Run Report 70
Optionally Filter By Messages.... 71
XML As-Run Report 71
Terminology....71
SiteSummary Element 71
DateRange Elements.... 71
SiteMessageSummary Elements 72
Player Report Section 72
DateRange Elements.... 72
Summary Elements 72
MessageSummary Elements 72
DailyAsRun Element 72
DailySummary Element.... 72
MessageSummary Elements 72
MessagePlays Element 72
MessagePlay Elements 72
TimeSpan Element....72
CSV As-Run Report 73
Delete Messages....73
Playlists 75
Edit Playlist 75
Add Message to End of Playlist.... 77
Add Message to Beginning of Playlist 77
Remove Messages from a Playlist 77
Duplicate Assignment....77
Create/Edit Playlist Versions.... 78
Add New Playlist Version.... 78
Remove Version 79
Activate Version....79
Assign Playlists to Resource Pools 79
Playlist Conflict Prevention.... 79
Assign Playlist Publish Points 80
View Playlist Conflicts.... 81
Set Playlist Restrictions 82
Playlist Restrictions 82
Adding Template Definitions To The Restriction List 82
Setting Up Playlist Restrictions Using Labels.... 82
Table of Contents
Area Playlist Mixing Rules.... 82
Link Between Layout Message Area Property Values and Area Playlists.... 83
Scheduling Different Layouts at Different Times.... 84
Practical Examples.... 84
Playlist Mixing Example 84
Removing Template Definitions From the Restriction List 85
Auto Populate Restrictions.... 85
Displaying Different Layouts on Different Groups of Players 85
Create Playlist.... 85
Export Playlists 87
Delete Playlists.... 88
Resource Pools 89
Create New Resource Pool 90
Edit Resource Pool 91
Remove Resources 92
Delete Resource Pools 92
Templates....93
Template Property Types 94
Name check-box 94
Enable Property Editing in Message Check-box.... 94
On Publish, Populate with Check-box.... 94
Text Property 94
Numeric Property 94
Image Property 95
Limitations of Displaying Web Pages 95
Color Property 95
Video Property 95
Selector Property 95
Switch Property 95
Create Template 96
Editing a Template 98
Deleting a Template.... 100
Assign Templates to Resource Pools 101
Player Management 103
Overview 103
Players.... 103
Player Settings Table.... 104
Configure Player 104
Discover Players 105
Create a Player 106
Temporarily Disabling a Player.... 108
Assign to Publish Points 109
Assign Playlists to Player.... 110
Publish TPKs to Players 111
Republish TPKs to Selected Player 112
Table of Contents
| Copy Feed Reels | 114 |
| Delete Players | 114 |
| Publish Points | 115 |
| Add Players to a Publish Point | 116 |
| Add a Root Publish Point | 117 |
| Add a Child Publish Point | 118 |
| Deleting Publish Points | 119 |
| Assign Playlists to Publish Point | 120 |
| Assign Playlists to Player | 120 |
Template Pack Management 122
Overview 122
Importing a Template Pack.... 122
Content Import Options.... 124
Playlist and Template Pack Options 124
Publish Points 124
Manage Template Packs.... 124
Template Definitions 126
Assign Template Definitions to Resource Pools.... 126
Create Template 127
Delete Template Definitions.... 127
User Management 129
Overview 129
User Groups.... 129
Edit User Group.... 129
Create User Group.... 131
Assign Users to Groups 133
Delete User Groups.... 134
Users.... 134
Edit User.... 135
Create User 136
Delete Users.... 137
User Authentication Against Active Directory.... 138
Appendix 139
Error Messages.... 139
Troubleshooting Issues with Composer/Player 141
Supported File Types.... 141
Images....141
Image Size 141
Video 141
Aspect Ratio: 142
Advanced Playlist Theory 142
Table of Contents
| Playlist Types | 142 |
| Content Pool Playlists | 142 |
| Standard Playlists | 142 |
| Playlist Properties | 143 |
| Playlist Restrictions | 143 |
| Playlist Restriction List | 143 |
| Setting up Playlist Restrictions | 143 |
| Automatic Restriction Groups and Restriction Lists | 143 |
| Meta-data | 145 |
Composer Upgrade Overview
Composer 5.6 Enhancements
The following table shows the changes made to Composer 5.6.
| Feature Changes | |
| Feature Description | |
| Tool Tip Icons Added more detailed description to tool tip when user hovers over message validity icon on Messages grid. See Messages on page 53. | |
| Time Validity | Added Start Time and End Time to Valid From and Valid To dates on message validity settings. See Setting Message Validity on page 60. |
| Playlist Conflict Detection Conflict prevention added so that the user is not allowed to assign playlists with duplicate file names to a player. See Playlist Conflict Prevention on page 79. | |
| Assign Playlists to Publish Points | Changed to from "Set Playlist Publish Points." to "Assign Playlists to Publish Points". Added a blue ball to indicate when parent publish points contain playlist selections. See Assign Playlist Publish Points on page 80. |
| View Playlist Conflicts | This new task searches the system for conflicts such as playlists with duplicate pool filenames. The new design now uses a collapsed tree-like view whereby content is only retrieved when the user expands a node. See View Playlist Conflicts on page 81. |
| Resource Pool Added search message filter functionality on the Messages tab. Click the Assign To Resource Pools task, enter a value in the edit box, filtered based on the text entered. See Assign to Resource Pools on page 65 Resource Pools on page 15 | |
| Assign Playlist To Players This new task makes it easier to view and modify all playlists assigned to a player. See Assign Playlists to Player on page 110. | |
| Publish Points Improved, added play lists with icons to the hierarchy to indicate which folders/players owned playlists. See Publish Points on page 115. | |
| Publishing Mechanism | Improved to handle 1000s of players. See Publish on page 23. |
| Publishing Feedback | Improved, and added search filters. See Current Publish Progress on page 24. |
| Quick Preview Functionality | New! Enables users to preview certain quick preview enabled templates loaded from the new Template Packs. See Quick Preview Messages on page 63. |
Additional Documentation
For an overview of installing and setting up Players, refer documentation and videos at: http://www.amx.com/products/IS-XPERT-MGMT.asp
Inspired Signage - Overview
Overview
The Inspired Signage System provides a solution for clients requiring a dynamic Signage solution offering the highest quality graphical output, in a multi-site, multi-channel configuration. It provides a unique set of features making it the world's leading dynamic Signage system solution.
These include:
- The most flexible and extensive range of content functionality available.
- The best picture quality with the smoothest animation of text and pictures.
- The easiest to use toolkit for the creation and management of on-screen content.
Using the Inspired Signage system, information can be displayed to a large audience in an attractive and consistent manner.
The unique design of Inspired Signage enables it to handle high volume messaging requirements in large, multi-site, multi-channel organizations, however, the system is equally at home managing low volumes of traffic on a single site. On-screen content messages can be routed from any location, such as head office, regional offices, local branches, etc. Each message can be created, scheduled and delivered directly by the department responsible.
With the appropriate licenses, your content schedule can also include content from external sources such as news providers and weather services, or any other structured data source. Such content can be generated and updated automatically using components of the system. The ability to mix content from a variety of sources into a single schedule, and in a sequence determined by the content management staff, ensures that you can provide a mix of advertising, information and entertainment in a format that is virtually unlimited.
Core Components
The Inspired Signage software suite is made up of a set of collaborating applications:
- Player - The Player renders and displays animated content on screen. The Player is connected to one or more display screens. The Player does not require user interaction. It can be configured over the web using the Player Web Configuration Tool.
- Composer-Composer is a content management application used to customize, manage, and publish content to the Post Office for distribution to one or more Players (Player machines). Composer is a web application installed on a server accessible by supported browsers over the Intranet. Composer can be used by many users with different rights over the content and content management process.
- Post Office - Post Office manages and optimizes the transfer and distribution of media files, Templates, and Playlists to the Players in an Inspired Signage Solution. The Post Office is usually installed on the same machine as Composer, however in very large systems it can be placed on a separate machine for maximum performance.
- Babel - Babel is the application responsible for automatically fetching data from databases, files, and other structured data (for example XML feeds and files) and generating content from it. The content generated by Babel is passed to Composer for publishing via the Post Office.
- Previewer - The Previewer application generates a frame by frame preview of selected Signage content to enable users to see how this content will appear on screen.
Composer
Overview
Composer is a web application for the Inspired Signage Platform. Composer is used to customize and manage Signage content and publish it for display. Composer represents one of several components that comprise an Inspired Signage solution which also includes the Composer server (a server running the Composer web application), a number of IS-Player machines (to display the Signage) and optionally Babel (the data integration application).
IS-Player
The IS-Player is a rack-mountable device, configured to display digital Signage content on one or more attached screens. The IS-Player runs the AMX Inspired Signage Player application.
Babel
Babel is an optional component responsible for automatically fetching data from databases, files, and other structured data sources (XML feeds, RSS feeds, etc.) and generating content from it.
FIG. 1 shows the architecture of Composer. Composer publishes data to the Post Office which handles the job of transferring this data to the Players for display.

flowchart
graph TD
    A["Users"] --> B["Composer"]
    B --> C["Post Office"]
    C --> D["Player"]
    C --> E["Player"]
    C --> F["Player"]
    B --> G["Sends changed messages and playlists to the Post Office"]
    C --> H["Handles sending messages, playlists, media files, etc to Players"]
    B --> I["Can be on the same or separate machines"]
FIG. 1 Composer Architecture - Simplified
Composer Server runs on the following operating systems:
• Windows Server 2008 32/64 bit
- Windows 7 32/64 bit
Composer Processes
This section describes the processes users need to understand to get the most out of Composer. The AMX Inspired Signage systems display information (advertisements, announcements, etc.) on one or more screens. This information, collectively known as content, is constructed using Composer from the following building blocks:
- Template Definitions (See page 4)
- Templates (See page 5)
- Messages (See page 8)
- Playlists (See page 9)
The basic component of AMX Inspired Signage content is the Message. There are two main types of Messages:
- Control Messages (invisible) which controls some aspect of the display, such as screen layout. Control Messages are an advanced subject not discussed here.
- Standard Messages (visible) are collections of images, video, text, shapes, and animations used to create announcements, notices, and advertisements.
FIG. 2 shows an example Standard Message. A user can modify the Message using Composer to change the items indicated with arrows. The user can enter different text for the time, location, topic, or meeting fields, or choose a different image for the meeting picture.

FIG. 2 Standard Message Overview
Messages are held in Playlists which are similar to the Playlists created for songs on an MP3 player, except that these Playlists control a specific rectangular screen area. Playlists determine the order used to display Messages in this screen area. The system provides the option to shuffle the Messages in a Playlist before displaying them as well. Signage content displayed on screen is built up from a number of Playlists controlling different areas of the screen.
When creating a Message using Composer, a Template is chosen to base the Message on, and then the undefined elements of the Template are filled in. Inspired Signage takes the concept of a Template one step further and provides Meta-Templates (Template Definitions on page 4) which are used to construct Templates.
Administrators do the majority of the work necessary to setup and customize an installation of Composer including setting up accounts for other users.
Template Definition s
A Template Definition is a collection of interrelated elements (visual and non-visual, animated, and fixed) created by a graphic designer to convey particular information to an audience. It is effectively a prototype for a digital sign, for example; a meeting announcement, a fire alarm warning, and so on. Each AMX Inspired Signage solution contains a number of Template Definitions created by AMX designers. These are packaged together in a Template Pack. Template Definitions are constructed from visual and non-visual elements.
Examples of the visual elements include: shapes, pictures, video, text, and animations. Examples of the non-visual include switches and selectors, which indirectly affect visual elements.
FIG. 3 shows a Template Definition for a Meeting, describes the different visual elements used, and indicates the modifiable element attribute pairs listed in bold using the convention - Element Name (Element Type : Attribute Name).

FIG. 3 Template Definitions
Non-Visual Template Definition Elements
There are two main types of non-visual elements:
- Switches
- Selectors
Switches
Switches have two states, on or off. They are generally used for the following:
- Turning animations on or off for a group of related visual elements. See Visual Template Elements on page 5 for more details.
- Making a group of related Visual Template Elements visible or invisible. See Switch Property on page 95.
Selectors
Selectors are used to choose a value for a property from a set of named values, for example, you could use a selector to allow the user to choose the background color of a Message from one of the colors of the rainbow: (red, orange, yellow, green, blue, indigo, violet). Selectors can also be used to choose animations for visual elements of a Message from a group of options. For example, you could choose the animation used to remove a Message from the screen (fade to black, fade to white, slide off screen to the right, slide off screen to the left) etc. See Selector Property on page 95.
Visual Template Elements
Template Definitions are constructed from one or more visual elements defined in the table below.
| Visual Element Definition | |
| Text These consist of one or more lines of text. The number of characters is limited by the size of the font, font type, and the dimensions of the space in which the text element fits. | |
| Shape These are geometric shapes which can be filled with patterns (graphic textures), solid colors, gradient fills. | |
| Images (image files) These are a special type of shape element filled with an image. | |
| Video (video files) These are a special type of shape element filled with a video. | |
Visual elements have attributes which influence how they are displayed. For example, text elements have a text field containing the actual text to display as well as attributes such as color, font type, and font size.
Each visual element can have an animation attached to it. Animations are composed of rotations, scales, zooms, fades, and so on.
Template Definition Properties
Once an AMX designer has created visual and non-visual elements for a Template Definition, he/she specifies which elements and which attributes of these elements can be modified when creating Templates from this Template Definition. Modifiable attributes of Template Definitions are known as properties.
The elements that make up a Template Definition can be divided into the following groups:
- Elements used to convey information to an audience, generally text elements, although image and video elements can also be used. An example would be a Message that provides details of a meeting. This could have the following text elements: meeting title, time, topic, and location along with an image appropriate to the meeting type (Sales Meeting, Staff Meeting, Board Meeting, etc.). The designer sets one or more modifiable attributes for the information carrying elements. In the case of text fields, this is normally the actual text to use.
- Elements that provide the basic style or theme for a Template, for example, shape elements, animations, and so on. The designer normally sets a number of minor modifiable attributes for these elements such as the colors used. Template Definition users can modify these attributes to make a number of different Templates with the same purpose and basic design but with different themes or styles.
- Elements that brand a Message for use in a specific sector or organization, for example, logos. The attributes of these elements are not normally modifiable.
Templates
Users create Templates from Template Definitions by inserting text, images, or video files in some of the properties of the Template Definition. For example, using a Meeting Template Definition you can create a number of different Templates for different types of meetings, such as: staff meetings, sales meetings, golf club meetings and so on. Some of the information and settings for final display are chosen at this level and fixed so they cannot be modified when creating a Message. This is often done to brand a Template Definition to create a Template for use within an organization. This job is usually carried out by more experienced users. You can also set default property values which the Template user can either accept or change.
AMX designers provide a number of default (pre-created) Templates for each Template Definition. You can use these Templates to create Messages or use them as the basis for custom Templates for your organization, different groups within your organization, or different tasks.
To summarize you can do the following with Templates:
- Change property names from the names provided in the Template Definition, typically to make the names more descriptive and self-explanatory for Template users.
- Set default values for Template Properties to reduce the workload for users.
- Fix and hide properties to prevent end users from changing these values. This helps to ensure consistency and correctness in Messages created by end users.
FIG. 4 shows an example Template created from a Template Definition:

flowchart
graph TD
    A["Template Definition\nMeeting Template Definition"] --> B["Template\nGolf Club Meeting"]
    B --> C["Modifiable Property\nSet by AMX Template\nDefinition Designers"]
    C --> D["Fixed Value for Property\ncannot be modified when\ncreating Messages from this\nTemplate. Set by Template\nCreator"]
    D --> E["Modifiable Property\nFor Messages based on this\nTemplate.\nSet by Template Creator"]
    B --> F["Template\nGolf Club Meeting Template"]
    F --> G["Time\nMeeting Room"]
    G --> H["Topic"]
    H --> I["Note AMX may supply some Default Templates"]
    B --> J["Time\nLocation"]
    J --> K["Topic"]
    K --> L["Supplied by AMX\nInspired Signage\nCreative Team"]
FIG. 4 Create a Template from a Template Definition
To create the illustrated Templates you must:
- Set and fix default values for the Location and Meeting Name fields (Meeting Room and Golf Club Meeting respectively).
- Add a picture of a golfer for the Meeting Image and fix this setting. This Template can now be used to create Golf Club Meeting signs quickly and accurately when needed.
See Also Creating Templates from Template Definitions on page 7 for more details.
Template Definitions, Templates, and Messages
Template Definitions, Templates, and Messages form a tree structure or hierarchy with Template Definitions at the top (or root), followed by all the Templates created from that Template Definition, and finally all the Messages created from those Templates. Different Composer Users have different access rights to add, modify, or delete items at each level of this hierarchy depending on the User Group they belong to.
FIG. 5 shows the hierarchy and the default User Groups that have access to certain levels of the hierarchy. In this example is a Template Definition for a Meeting sign. A user has created two Templates from this Template Definition: a Template for Sales Meetings and one for Staff Meetings. Using these Templates the user has created a number of Staff and Sales Meeting Messages for specific meetings. These Messages could be placed in Playlists for publishing and display.

flowchart
graph TD
    A["Administrator Domain"] --> B["Manager Domain"]
    B --> C["Editors"]
    C --> D["Basic"]
    D --> E["Sales Meeting Template"]
    E --> F["Template1 Template2"]
    E --> G["Message 2 Message3 Message5"]
    E --> H["Staff Meeting Template"]
    H --> I["Message 6 Message4"]
    H --> J["Message 7 Message5"]
    H --> K["Message 8 Message6"]
    E --> L["Template Definition"]
    style A fill:#f9f,stroke:#333
    style B fill:#ccf,stroke:#333
    style C fill:#cfc,stroke:#333
    style D fill:#fcc,stroke:#333
    style E fill:#cff,stroke:#333
    style F fill:#ffc,stroke:#333
    style G fill:#cfc,stroke:#333
    style H fill:#cfc,stroke:#333
    style I fill:#ffc,stroke:#333
    style J fill:#cfc,stroke:#333
    style K fill:#cfc,stroke:#333
FIG. 5 Hierarchy of Template Definitions, Templates, and Messages
As the diagram shows, you can create many Templates from one Template Definition. You can also create many Messages from one Template. Changes at one level propagate down to lower levels; if you modify a Template Definition this will change all the unmodified (default) properties of any Templates based on this Template Definition and all the unmodified (default) properties of any Messages based on these Templates. If you delete a Template then all Messages based on that Template are also deleted, and so on.
Template Pa c ks
A Template Pack contains a number of related Templates Definitions along with all the required media (video and image files) and fonts grouped together in a file with the file extension .TPK. Template Definitions can be used to create Templates which can be used in turn to create Messages. These Messages can be added to Playlists and displayed on screen.
- AMX can tag Template Definitions with metadata labels to enable easy classification. Metadata labels are used to restrict the Messages that can be added to Playlists, this is called Playlist Restrictions.
- A Template Pack can also be an update of a previous Template Pack. Importing an updated Template Pack will update any Templates and Messages based on the updated Template Definitions in the Template Pack.
Template Packs must be imported into Composer and then published to Signage Players. These Players are then capable of displaying of Messages based on the Template Definitions in these Template Packs. If you publish a Message to a Player which has not already had the relevant Template Pack published to it then the Message will not display.
NOTE: Importing TPKs is a very intensive process which involves a lot of template and player message changes. It is recommended that all users are logged off of the system. Once the administrator has imported a TPK, then the users may log back in. For this reason, TPK imports will usually take place at the start of the day or at the end of the day when no users are on the system.
There are two main types of Template Pack:
- Architecture Template Packs - These Template Packs are used either to setup Players to display content or to setup Playlists in Composer. Architectural Template Packs do not generally contain Template Definitions you can use to create Messages.
NOTE: Architecture Template Packs must be published to the Players which use them otherwise the Players will not display any content correctly. - Standard Template Packs - These Template Packs contain Template Definitions which can be used to create Messages for display on Players. These Template Packs need to be imported into Composer and published to any Players which will display Messages based on the Template Definitions in these Template Packs.
Creating Templates from Template Definitions
FIG. 6 shows two example Templates created from a single Template Definition:

flowchart
graph TD
    A["Property with fixed value"] --> B["Modifiable property with default value"]
    B --> C["Modifiable property"]
    D["Meeting Name"] --> E["Staff Meeting Template"]
    D --> F["Golf Meeting Template"]
    G["Time Location"] --> H["Topic"]
    I["Property changes cascade down: changes to the Template Definition affect all Templates created from this Template Definition and all Messages created from those Templates."] --> J["Change in the concept of the templates"]
    K["Staff Meeting"] --> L["8:30 am Room 53"]
    K --> M["Topic"]
    N["Time Meeting Room"] --> O["Topic"]
    P["Golf Club Meeting"] --> Q["Topic"]
FIG. 6 Creating Two different Templates from the same Template Definition
Automatic Template Properties
Automatic Template properties are populated automatically in any Messages created from these Templates at publish time. Composer supports the following Automatic Template Properties:
| Automatic Template Properties | |
| Name Description | |
| Person who approved the Message Username | of the person who approved the latest version of the Message (Message created from this Template) |
| Date approved Date and time that this version | of the Message was approved |
| Person who created the message Username | of the person who originally created the Message |
| Date of creation Date and time that this version | on of the Message was created |
| Person who last modified the message Username | name of the person who last modified the Message |
| Date last modified Date and time the Message | was last modified |
| Date of publish Date and time the Message was published to the Player | |
Messages
Once a set of Templates is defined, users can use these Templates to create Messages to display on screen by specifying values for any remaining undefined property fields (FIG. 7). For example the end user:
- Inputs any missing text information.
- Specifies images or video filenames where appropriate.
- Selects values for some properties from a predefined set. For example, you could choose from a predefined set of colors (red, blue, orange, and yellow) for a Message background. The actual color values used are defined by the graphic designer who created the Template Definition.
- Specifies missing numerical values such as prices or quantities.
- Sets color values for visual elements in a template.
- Uses switch properties to turn animation effects or visual elements on or off.
Once created, Messages can be added to lists called Playlists for publishing to one or more Players for display on screens. Users creating Messages should give each Message a suitable name to distinguish it from other Messages. AMX recommends adopting a naming convention for your Messages. Changes to Templates cascade down to alter all default (unmodified) properties of Messages derived from this Template.
Each Message has a duration which determines how long the Message remains visible on screen. The duration is determined either wholly or partly by the designer who created the Template Definition from which the Message derives. If the Template contains a video file property then the duration of a Message based on this Template is affected by the length of the video file attached by the User. The following image are two example Messages created from a Template:

flowchart
graph TD
    A["Example Golf Club Meeting Template"] --> B["Time Meeting Room"]
    B --> C["Golf Club Meeting"]
    C --> D["Planning Club Tournament"]
    D --> E["5:30pm Saturday 20th January Meeting Room"]
    D --> F["Ryder Cup"]
    C --> G["Golf Club Meeting Message1"]
    C --> H["Golf Club Meeting Message2"]
    style A fill:#f9f,stroke:#333
    style B fill:#ccf,stroke:#333
    style C fill:#cfc,stroke:#333
    style D fill:#fcc,stroke:#333
    style E fill:#cff,stroke:#333
    style F fill:#ffc,stroke:#333
    style G fill:#cfc,stroke:#333
    style H fill:#fcc,stroke:#333
FIG. 7 Two Example Messages Created from the same Template
Scheduling (Validity Rules)
Validity Rules enable scheduling when a Message is valid for display. Messages are either:
- Valid, a Message is called "Valid" when the current date and time meet the criteria set by the validity rules for that Message. The Message is then valid for display.
NOTE: Whether a message is actually displayed depends on a number of other factors including whether the Message is present in a Playlist and its position in that Playlist.
- Invalid, a Message is called "Invalid" when the current date and time fall outside the ranges defined in the validity rules for that Message. A Message will not be displayed on screen when it is Invalid.
Playlists
Playlists are used to display Messages in a rectangular region of a screen, the Playlist Area, (or screens in the case of media walls). Playlists control rectangular regions of a screen (or screens in the case of video walls).
FIG. 8 shows a common single screen layout with four Playlist Areas (numbers denote aspect ratio of that Playlist Area).

other
| Category | Value | |---|---| | Main Area | 16x9 | | Side Bar | 3x5 | | Bottom Bar | 10x1 | | Ticker Area | 26x1 |FIG. 8 A Common Single Screen Layout with Multiple Playlists
The Main Area Playlist is generally used for the most important Messages, the Side Bar for less important Messages and so on. Playlists contain a list of Messages to display in their associated Playlist Area. Each Message has a duration which determines how long it is visible on screen. A Message is displayed on the screen unless it is currently Invalid (not scheduled for display or its duration exhausted). Once a Message has finished playing it is removed from the active part of the Playlist and the next Message plays. When the active part of the Playlist is exhausted, the list either repeats, if Playlist looping is enabled, or it ends.
Playlist Area rectangular regions are defined by width and height. The ratio of width to height (width/height) is called the Playlist aspect ratio. Messages should generally have the same aspect ratio as the Playlist Area they are used with to prevent distortion. FIG. 9 shows a basic example Playlist with two Messages (one following the other):

FIG. 9 A Basic Example Playlist containing two Messages\
Playlist Modes
There are four Playlist modes:
| Playlist Mode Description | |
| In Sequence This is the default | Playlist mode for Standard Playlists. Messages are played in the order they are arranged In the Playlist (by default, the order they are added). This mode only applies to Standard Playlists. Once the Playlist finishes it doesn't restart. |
| In Sequence, Looping Messages | ages are played in the order they are arranged in the Playlist (by default the order they are added). Once the Playlist finishes, it restarts. This mode only applies to Standard Playlists. |
| All Valid, Random All the Mess | ages in the Playlist are shuffled in a random order and is reshuffled again before it restarts. The shuffling process ensures that the first Message of a new shuffled list and last Message of the previous shuffled list are always different. The Messages in the Playlist which are Invalid (not scheduled for display) are skipped. This mode only applies to Content Pool Playlists. |
| All Valid, in Sequence The same | as In Sequence mode but invalid Messages in the Playlist are skipped. This mode only applies to Content Pool Playlists. Note, this is the default setting for Content Pool Playlists. |
Playlist Versions
You can create different versions of a Playlist for use in different circumstances. Only one version of a Playlist can be displayed (active) at any one time. You can quickly switch the active Playlist from one version to another as needed. Playlist versions are best utilized to let users change the Playlist to respond quickly to unpredictable events. One example is an emergency version of a standard Playlist.
Playlist Naming Conventions
In order to create more interesting and varied displays you will need to understand the process of creating new Playlists. Each Playlist you create must have a filename which follows a naming convention that depends on the Playlist type, i.e., Content Playlist, LiveMedia Playlist, etc. Note that if you do not use this convention, the Playlist will behave incorrectly or will not be displayed.
The naming conventions are listed below
| Playlist Filename Convention | ||
| Playlist Type Playlist File Name | Convention Example Playlist Filename | |
| Primary Area Content Playlists AreaContent__Main.pool AreaContent_R1_Main.pool | ||
| Secondary Area Content Playlists AreaContent__Sub__.pool | AreaContent_R1_Sub_Sales.poolAreaContent_R1_Sub_Marketing.pool | |
| Overlay Playlists OverlayContent.pool | ||
| Override Playlists | OverrideContent_.pool | OverrideContent_Default.poolOverrideContent_Fire.pool |
| Audio | AudioContent.pool | |
| Live Media Area Playlists | AreaContent__LiveMedia.pool | AreaContent_R1_LiveMedia.pool |
| Layout | LayoutSelection.pool | |
Once a Playlist has been created, the content that can be added to the Playlist can be restricted using Playlist Restrictions. Playlist Restrictions are a list of Template Definitions. Only Messages derived from Template Definitions that are not in the Restriction List can be added to the Playlist. Refer to Set Playlist Restrictions on page 82.
Publish Points (Publishing Playlists)
To display Playlists, they need to be published to Players. In a system with a large number of Players it is useful to be able to group Players together to simplify the Publishing task. Composer accomplishes this by using Publish Points. A Publish Point is a single Player or group of Players that Playlists can be published to for display.
Publishing a Playlist to a Publish Point will also publish the same Playlist to all the Publish Points contained within this Publish Point (known as a child Publish Points). So if a Dallas Publish Point contains an East Dallas Publish Point and a West Dallas Publish Point, publishing a Playlist to the Dallas Publish Point also publishes this Playlist to the East and West Dallas Publish Points.
A Publish Point usually corresponds to a geographical location (i.e., Head office), a part of an organization (i.e., Sales), or an organizational function (i.e., Receptionists.)
NOTE: A Player can belong to more than one Publish Point. Players can be grouped by function in one Publish Point and by location in another Publish Point.
An example will help to illustrate this. If we use the Inspired Signage system to display travel information and advertisements throughout the London rail transport system - underground (metro) and rail stations - then the best system would be to group Players according to geographic location. We could then create Publish Points for different metro and rail stations and optionally for different parts of these stations. Finally we could create Publish Points for all London stations and for all London Underground (Metro) stations. Using this system you can easily publish Playlists to all the Players in every London station whether part of the rail or metro network.
Publish Points form a tree structure called the Publish Point System. An example Publish Point System is shown in the diagram below:

flowchart
graph TD
    A["London"] --> B["Kings Cross"]
    A --> C["Waterloo"]
    B --> D["Kings Cross Underground/Metro"]
    B --> E["Kings Cross Rail Station"]
    C --> F["Waterloo Underground/Metro"]
    C --> G["Waterloo Rail Station"]
    F --> H["Entrance"]
    F --> I["Northern Line Concourse"]
    F --> J["Jubilee Line Concourse"]
    G --> K["Foyer"]
    G --> L["Entrance"]
    G --> M["Main Hall"]
    M --> N["Player East"]
    M --> O["Player West"]
    D -.-> P["The rest of the Tree is hidden"]
    I --> P
    J --> P
    K --> P
    L --> P
    M --> Q["Key"]
    Q --> R["PlayerSet"]
    R --> S["Publish Points"]
FIG. 10 Example Publish Point System - Conceptual Diagram
This Publish Point System is represented inside Composer as follows:

FIG. 11 Example Publish Point System - as created in Composer
The Publish Points part of the window shows all the Publish Points defined in the system including the playlists and where they were assigned. To add new Publish Points, delete Publish Points, or to change the relationship between Publish Points refer to Players on page 103.
Approval
To prevent users publishing unauthorized content or making unauthorized changes to Templates, Messages, or Playlists; AMX provides an approval mechanism. Message, Templates, and Playlists (items) have an approval status which indicates whether they are an approved version or one of the two types of proposed version (rejected or waiting for approval).
All edits to items apply to a common provisional copy (the proposed version) of this item and not the approved version. A provisional copy (the proposed version) is created as soon as a user saves an edit. Subsequent edits apply to this provisional version which is common to all users. The proposed version only replaces the approved version when it is approved by a user with review rights. Most users do not have review rights by default. The following table shows the different approval status values that items can have.
| Message, Template, or Playlist Approval Status | |
| Status of Item Description | |
| Approved Someone with | review rights has approved the proposed changes causing the proposed version to overwrite the current approved version of the item. |
| Waiting for Approval Someone | has edited the item creating a proposed (provisional) version of the item. The proposed change is waiting for approval by someone with review rights |
| Rejected Someone with | review rights has rejected the proposed changes to the item. The editor provides an optional comment containing the reason for the rejection and any changes required to obtain approval. |
Approval Actions Available
| Message, Template, or Playlist Approval Status | |
| Status of Item Description | |
| Revert Revert to the approved version of the item. Removes the current proposed version. New edits will be made to a new proposed version of the item. | |
| Reject The user doing the rejecting enters a comment to say why they are rejecting the current Proposed version of the item. Other users can read the rejection comment and edit the proposed version of the item appropriately | |
| Approve The proposed version of the item becomes the new Approved version |
NOTE: Only approved versions of items can be published.
Be careful to coordinate with other users before Approving, Rejecting, or Reverting changes to items to avoid confusion.
Playlist Permissions
The Administrator can configure Permissions for which Users can access which Playlists. For example, if you have a structure with multiple Playlists like the following diagram, an Administrator can restrict Users with less experience from adding content to the Main Area Playlist by changing the User's permissions so that they do not have edit access to this Playlist.

other
| Category | Value | |---|---| | Main Area | 16x9 | | Side Bar | 3x5 | | Bottom Bar | 10x1 | | Ticker Area | 26x1 |FIG. 12 Multiple Playlist Structure Diagram
Composer - Users
Overview
When logging into Composer, you define yourself as an Administrator, a Manager, an Editor, or a Basic User, based on the role (more accurately, User Group). These four default User Groups each have different access rights, content, and content management processes. Most users of Composer will be Editors or Basic Users.
Administrator User Group
Administrators are the highest level of user (usually there are only a few Administrators for each installation of Composer). Administrators have access to all Composer functions, they are responsible for setting up and configuring an installation of Composer. Typical tasks include:
- Setting up extra User Groups if needed based on the default groups provided
- Setting up and managing User Accounts
- Configuring Players
- Configuring Playlists
- Creating Publish Points and setting up a Publish Point System
- Importing Template Packs and Publishing/Republishing Template Packs to Players
- Setting up extra Resource Pools if needed
Manager User Group
Managers are effectively super users. Managers can create new Templates for specific purposes as well as modifying or deleting existing Templates. They can also create, modify, delete, or publish Messages. Managers can also approve changes to Messages made by Editors or other users without review rights. Finally, Managers have the ability to create Publish Points and modify the Publish Point System. The following table shows the permissions for the Manager User Group:
| Manager User Group Permissions | |||
| Class Category Permissions Applicable Resource Pool | |||
| Resources Template Definitions All Permissions Only on Editor, Manager and Basic | User Resource Pool | ||
| Others Resource Pools | Create/Edit/Delete/View/Add Resources | N/A | |
| Publish Points | Create/Edit/Delete/View | N/A | |
| Publish | Publish Changes/Republish | N/A | |
| User Groups | - | N/A | |
| User Accounts | - | N/A | |
NOTE: If users find themselves logged out of a system whilst doing work it could be that a virus scanner is running on the server. If a virus scanner is required on the server then it is best to make sure that the directory under which Composer is installed (normally C:\Program Files\AMX\IS\Composer\Server\Web for 64 bit system) and its subdirectories should be excluded as part of the virus scanner scan process.
Editor User Group
By default, (non administrative) users are provided with limited access to Composer, with an emphasis on content management (including creating and editing Messages, populating Playlists, and publishing them to Players. While Users have access to functions and options directly related to content management, they are restricted from accessing Administrator specific functions (including network configuration, managing users, restricting content, etc.).
The following table shows the permissions for the Editor User Group:
| Editor User Group Permissions | |||
| Class Category Permissions Applicable Resource | Pool | ||
| Resources Template Definitions View Only on Editor, Manager and Basic User Resource Pool | |||
| Others | Resource Pools View N/A | ||
| Publish Points | View N/A | ||
| Publish | Publish Changes/Republish | N/A | |
| User Groups | - | N/A | |
| User Accounts | - | N/A | |
Basic User Group
Basic Users are the most restricted User Group. They only have access to Message functions plus the ability to add Messages to Playlists and publish these changed Playlists to Players. They can also only carry out tasks on Message in the Basic Resource Pool. Finally, they can only view and modify Playlists in the Basic Resource Pool.
The following table shows the permissions for the Basic User Group:
| Basic User Group Permissions | |||
| Class | Category | Permissions Applicable Resource | Pool |
| Resources Template Definitions | N/A | ||
| Templates View View only on Basic Resource | Pool | ||
| Messages | Create/Edit/Delete/View/Review Only on Basic User Resource Pool | ||
| Playlists | Edit Playlist/View | Edit/View/Review Only on Basic User Resource Pool | User Resource Pool |
| Others | Resource Pools – | N/A | |
| Publish Points | – | N/A | |
| Publish | Publish Changes/Republish | N/A | |
| User Groups | – | N/A | |
| User Accounts | – | N/A | |
There is no strict boundary between the four sets of functions listed above, and such a boundary is likely to vary greatly according to the size and complexity of each project and system. All tasks, whether relating to content management or system administration, are performed in the same user interface.
NOTE: Editor or Basic User is the primary mode for most Composer users.
NOTE: The status bar at the top right of the browser screen indicates the username of the current user.
Permissions and Resource Pools
Every user in Composer can belong to a group of similar users called a User Group. Composer has a rights or permissions system to define the actions that each User Group member (user) can carry out, for example: whether users can create Templates or not, whether a user can approve changes to Templates, and so on. Users are not limited to one User Group, they can belong to multiple User Groups in which case their permissions settings will be the result of merging the permissions of all the User Groups they belong to.
Composer comes with a number of default User Groups defined above. The standard permissions for the different objects that make up Composer (Playlists, Templates, Players, Messages, and so on) are as follows:
- Create - Create a new item of this type.
- Edit - Edit an item of this type.
• View - View items of this type in Composer. - Review - Approve, Reject, or Revert a change to an item of this type.
- Delete - Delete an item of this type.
The actual permissions for each object can vary from the list above. Normally there are some additions and subtractions. See List of Permissions by Category on page 15.
Permissions can be divided into two categories:
- Coarse Grained - User Group Permissions which apply to all users in this user group. For many users, setting permissions at this level will be sufficient.
- Fine Grained - Resource Pools Permissions. These are permissions which apply to a collection of resources for users belonging to a specified User Group. Note, resources can be Template Definitions, Templates, Playlists, or Messages.
User Group permissions have the same priority as Resource Pool permissions. All User Group permissions and all Resource Pool permissions are merged together to determine the final permissions for each resource and user.
Resource Pools
Templates, Template Definitions, Messages, and Playlists can be added to a collection of resources called Resource Pools. Once these Resources have been added to the pool you can set the actions which specific user groups can perform on the resources in this pool. These Resource Pool permissions are merged with the relevant User Group permissions to calculate the final permissions for the individual User when accessing these Resources.
List of Permissions by Category
This section contains a list of the different resources in Composer and the different permissions available for those resources along with a description of each permission. The basic permissions are as follows:
- Create = Create new items of this type
- Edit = Edit items of this type
- Delete = Delete items of this type
- View = View items of this type
- Review = Approve, Reject, or Revert changes to items of this type
Some permissions settings are linked, for example: If you have create permission it implies that you can view the items you are creating so you must have view permission too. The following table lists the Resource type, Permissions Settings and the Associated Tasks Allowed by Each Permission.
| Table of Permissions forComposer | Standard Associated Tasks Other Tasks | |||||
| Category/ResourceType | PermissionsSettings | Create | Edit View | Delete | ||
| TemplateDefinitions | Import or PublishTemplate Packs | P | IAssign to Resource PoolsPublish/Republish Template Packsto Players | |||
| Delete | P | Delete Template Definitions | ||||
| View | P | View Template Definitions | ||||
m
Continued ↓
| Table of Permissions forComposer | Standard Associated Tasks | Other Tasks | ||||
| Category/ResourceType | PermissionsSettings | Create | Edit | View | Delete | |
| Templates Create | p | p | • Assign to Resource Pools• View Changes (Approval) | |||
| Edit | p | p | • Assign to Resource Pools• View Changes (Approval) | |||
| Delete | p | p | • Assign to Resource Pools• View Changes (Approval) | |||
| View P | ||||||
| Review | p | p | • Accept, Reject, or Revert Changes | |||
| Message Create | p | p | • Duplicate Message• Assign to Resource Pools• V i e w | |||
| Edit | p | p | • S e t M e s s a g e V a• Restrict to specific Publish Points• Assign to Resource Pools | |||
| View P | ||||||
| Delete | p | p | • View Changes (Approval) | |||
| Review | p | • Accept, Reject, or Revert Changes | ||||
| Playlists Create or | Configure | p | p | • Assign to Resource Pools• View Changes (Approval)• Edit Playlist Publish Points• Set Playlist Restrictions• Edit Playlist Version• Set Active Playlist Version• Edit Playlist Configuration | ||
| Edit P P • View | ||||||
| View P • View Changes (Approval) | ||||||
| Delete | p | p | • Assign to Resource Pools• View Changes (Approval) | |||
| Review | p | • Accept, Reject, or Revert Changes | ||||
| Publish | p | • Publish Content Changes,• Republish all Playlists to all Publish Points• Republish Selected Playlists to Selected Publish Points | ||||
| Players Create | p | p | • Discover Players on the network | |||
| Configure | p | p | • Copy Feed Reels | |||
| View | p | |||||
| Delete | p | p | ||||
| Assign to Publish Point | ||||||
| Publish Points | Create | p | p | |||
| Edit = Rename | p | p | ||||
| View | p | |||||
| Delete | p | p | ||||
| Users | Administration - one setting to allow all operations on user accounts and user groups | |||||
| Resource Pools | Administration - one setting to allow all operations in the resource pool tab | |||||
l i d i t y R u
NOTE: If a user is given all Message permissions: i.e. Create, Edit, Review, View, and Delete then they are given the ability to generate As-Run reports. Refer to Assign Playlists to Player on page 141.
Locking
If you try to use a Message or Template which is being used by another user then Composer prevents the action and displays a warning message, this is called a Lock. Note, less obviously, this also happens if you try to use a Message based on a Template while another user is modifying the Template. There are a number of options at this point:
- You can wait until the other user has finished using the Message or Template which is the cause of the lock.
- You can speak to the other user and ask them to cancel what they are doing to release the lock.
If a user starts editing a Message or Template and then stops using Composer for 30 minutes then they will be logged out due to lack of activity. The locked Messages/Templates will now become available to other users.
NOTE: Although locking prevents data corruption we advise that users coordinate their work to prevent confusion, particularly when using the User Management section or when assigning resources to Resource Pools.
Composer - Main Window
Overview
When you log into Composer (see Default Login Information - Users), the Composer User Interface appears. The browser screen is made up of the following components which form the Composer work area and are further defined in this section of the manual:
- Access Dashboard – located at the top left of the screen enabling users to switch between the Dashboard and Composer views. See Access Dashboard on page 18.
- The Menu Pane – located on the left of the screen showing the different sections [menus] and sub-sections [menu items] that make up Composer). See Menu Pane on page 20.
- The Tasks Pane – located on the right of the screen. The available tasks depend on the Composer section and sub-section selected. See Tasks Pane on page 22.
- Approval Pane – located under the Tasks pane, enables users to check or approve current status of the selected item (Playlist, Message, or Template). See Approval Pane on page 22.
- The Tool Bar – located at the top of the screen, provides quick access to publishing content, changing password, zooming and refreshing the display. See Tool Bar on page 23.
- The Data Table – located at the center of the screen shows items associated with the selected Composer sub section. See Data Table on page 21.
- The Status Bar – located in the bottom right corner of the screen. See Status Bar on page 29.:

FIG. 13 Composer User Interface Elements
Access Dashboard
The two sections of the user interface, Dashboard and Composer, are easily accessed by selecting the "Go to" icon located at the top left of the interface (FIG. 14). When currently displaying the user dashboard, the icon displays as "Go to Composer" and visa-versa.
FIG. 14 Go to Icon
The two sections provide the following user information and tasks:
- Go to Dashboard – use this section to view your user rights, license information, system summary information and a user process for setting up a Signage display using Composer.
- Go to Composer – Use this section to provision users, playlists, players, etc. It contains a dashboard where useful information can be viewed about the current user and your Composer system.
Dashboard
The dashboard contains the following sections:
- Welcome
• System Summary - Approval Queue
Welcome
The welcome window contains two columns. The left hand column contains some text describing Composer along with an explanation of a typical work flow for this user type with links to the relevant sections of the application.
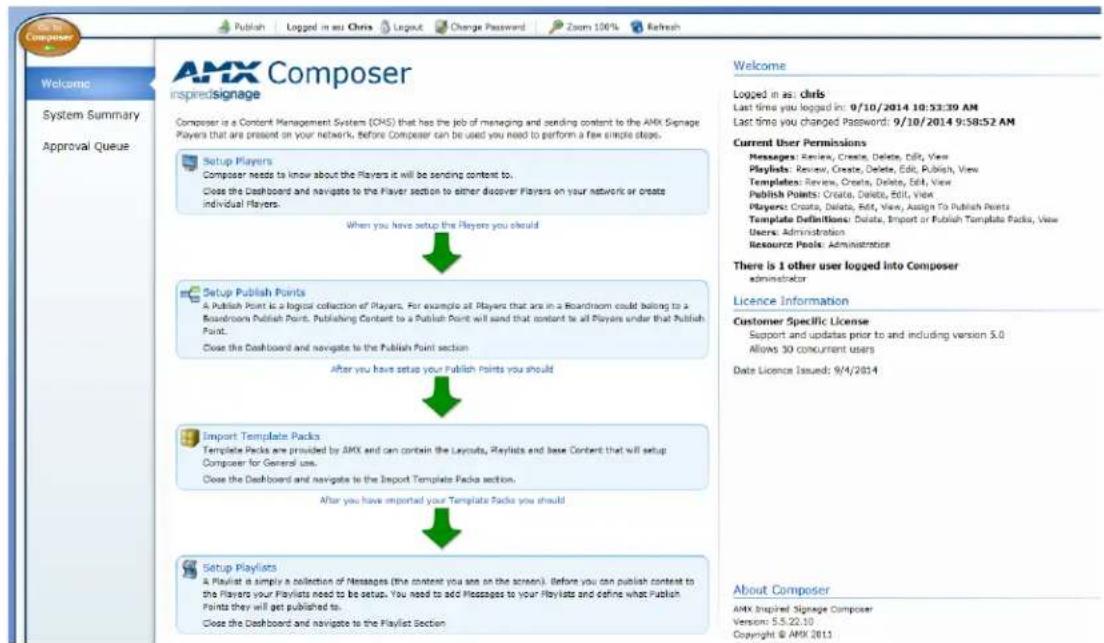
FIG. 15 Dashboard Welcome Screen
These tasks will vary depending on the current user type (administrator or standard). The right column contains:
- License information - License information for this installation of Composer
- Version information - Version Information for Composer
- Current User Rights - rights for the current user arrange by Permission category
- Login information
System Summary
System Summary shows the number of Template Packs, Template Definitions, Templates, Messages, Players and Playlist set up in the system.
Unattached Items
These are Composer items which have been created but which need attaching or assigning to other Composer items so that they can be displayed. The list of items is described in the table below:
Recent Changes

FIG. 16 Dashboard System Summary
| Unattached Item Definition | |
| unattached Messages Messages not assigned to a Playlist. | |
| unattached Playlists Playlists not attached to Publish Points i.e. they cannot be published. | |
| unattached Players Players which are not attached to a Publish point i.e. they cannot be published to. |
This shows all recent user activity in the Composer system. Select the Filter by drop down menu to select the a specific change category e.g. changes to Messages, etc.
Approval Queue
The Approval Queue section contains a data table which shows content (Messages, Playlists, and Templates) with changes that are waiting for approval. Select an item in the table and use the approval pane to view the changes and approve, reject, or revert items to the last approved state losing all changes. Alternatively you can show only rejected content to view all content which has had changes rejected. Select an item and use the approval pane to view the rejected changes along with any rejection comments.

FIG. 17 Dashboard Approval Queue
See also Approval Pane on page 22 for more details on the Approval functions.
Menu Pane
The group of menus on the left of the Composer window is the Menu Pane (FIG. 18). The Menu Pane is used to access the different sections of Composer.
The selected sub-section is shown with a light gray background. Click on the arrows to the right of the menu titles to expand the menu, revealing the sub-sections inside this section of Composer. Click on the arrow again to contract the menu.
The Composer application contains four headings accessible from the menu pane.
NOTE: If you belong to a User Group with limited access rights such as the Basic User Group, you may not see all these sections.
- Content Management
- Player Management
- Template Pack Management Section
- User Management

FIG. 18 Section Selector Bar
Left-click on the arrow to the right of a menu to expand the menu and show the sub-sections that make up this particular section of Composer Composer is organized into the following sections which correspond to the icons in the Section Selector Bar.
From top to bottom the menus provide the following functions:
- Content Management – Messages, Playlists, Resource Pools, and Templates. See page 53 for more details.
- Player Management – to configure Players and Publish Points. See page 103 for more details.
- Template Pack Management Section – to manage Template Packs. See page 122 for more details. -
- User Management – to configure Users and User Groups. See page 129 for more details.
Data Table
Each sub-section of Composer contains one or more tables (called data tables) which lists relevant items and their properties (FIG. 19). For example the Message table lists all the Messages stored in Composer. Each row in the table is an individual item, the columns show the properties of each item.

FIG. 19 Data Table
Selecting Items
- To select an item, left-click on the item's row in the table. To select multiple items, hold down the Ctrl key while you select individual items.
• To select all the items in the table press Ctrl + a. - To select a range of items, left-click on the row of an item at the start of the range. Hold down the Shift key and select the row of an item at the end of the range to select all the items in the range.
Expanded View of Items
You can choose to view a more detailed (expanded) view of each item in the table, if relevant this will include a preview image. Choose an option from the View mode drop down box. The available options are:
- Details All Expanded - Expand all items in the table.
• Details Expand on Select - Only expand selected items.
• Details - Don't expand any item.
Changing Table Column Width
To expand or contract a column in the table:
- Let the cursor hover over the separator line between two columns. After a short time stationary over the separator the cursor changes to an arrow as shown below:

FIG. 20 Changing Table Column Width
- Click and drag left or right to expand or contract the column respectively.
Changing Column Order
Click on a column heading, hold the mouse button down, and drag the column heading to the left or right. A black vertical line appears indicating where the left hand edge of the column will be inserted (FIG. 21). Release the mouse button to move the column to this position. The following diagram shows the User moving the column Added by after the column Date Added.

FIG. 21 Changing Column Order
Sort Table Using the Values in a Column
Click on a cell in the table header row to sort the items in the table by the values in that column. A little triangle appears to the right of the text in the header column. By default the triangle points upwards and the items in the table are arranged in ascending order based on these values
Click the header cell to change the sorting order from ascending (value increase as you move down the screen) to descending (the values decrease as you move down the screen) and back again. If the column contains text then the values are sorted alphabetically (or more accurately alphanumerically). If the columns contain date/time values then the values are sorted from earliest to latest in ascending order and from latest to earliest in descending order.
Tasks Pane
The Tasks Pane is displayed on the right hand side of the browser, it changes to reflect the currently selected Menu pane Section / Sub Section. The Tasks pane contains a list of Task icons, actions you can perform, each with a short description, and an optional keyboard shortcut. Usually you have the following basic tasks:
- Create a new item (Message, Playlist, etc. depending on the current Tab).
- Edit an item.
- Delete an item.
FIG. 22 shows an example Task Pane (In this case, part of the Content Management : Playlist Task Pane). Underneath each item is its keyboard shortcut.
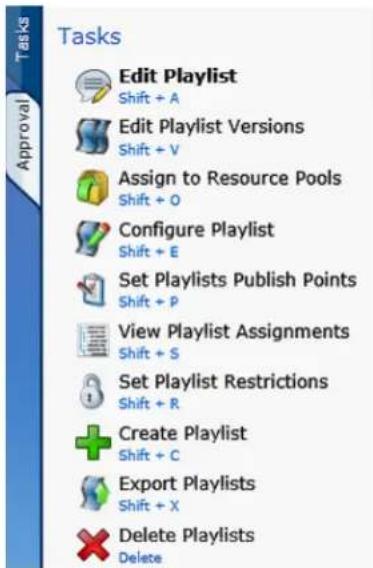
FIG. 22 Task Pane
Approval Pane
Click the Approval tab below the Task Pane in the right side of the screen to open the Approval Pane (FIG. 23).
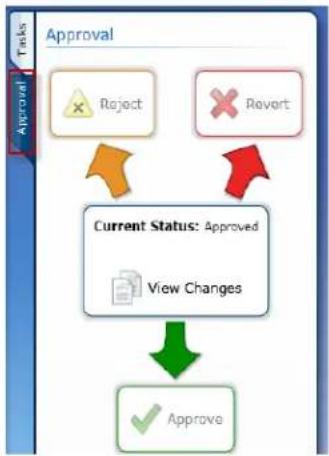
flowchart
graph TD
    A["Reject"] --> C["Current Status: Approved"]
    B["Revert"] --> C
    C --> D["View Changes"]
    D --> E["Approve"]
FIG. 23 Approval Pane
To return to the Task pane for this section of Composer, click the Tasks tab just above the Approval tab.
The Approval pane shows the current status of the selected item (Playlist, Message, or Template). The status can be one of:
- Approved
- Waiting for Approval
- Rejected
The available approval actions are shown at the end of the three arrows (Reject, Revert Approve) if any of these options are not available then they are grayed out.
Click View Changes if available to view the Proposed version of the selected item and the Approved version of this item side by side to identify any changes.
For more details see the Approval on page 12 for more details.
View Changes
In View Changes mode you can see the Proposed new version of the selected item (Playlist, Message, or Template) and the approved version of this item side by side.
Revert
Click to remove the proposed version of the item (Playlist, Message, or Template). New edits will be made to a new proposed version of the item.
NOTE: The status will change back to Approved as Revert causes Composer to revert back to the previous approved version of the item.
Reject
Click to reject the proposed version of the item (Playlist, Message, or Template). The user doing the rejecting enters a comment to say why they are rejecting the current Proposed version of the item (Playlist, Message, or Template). Other Users can read the rejection comment and edit the proposed version of the item as appropriate.
Approve
The proposed version of the item (Playlist, Message, or Template as appropriate) becomes the new approved version.
Too | Bar
The Tool Bar is located at the top of the browser display and it contains the following components:
• Publish, see page 23
- Login/Logout, see page 27
- Change Password, see page 27
- Zoom, see page 28
- Refresh, see page 28
• Help, see page 28
The following screen shot shows the Tool Bar:

FIG. 24 Tool Bar
Publish
The publishing mechanism is used to publish content to players. This takes place in two steps:
-
The content has to be generated into a format that the players understand, which is undertaken by the AMX IS Composer Content Publisher Consumer Guardian service.
-
The content must be sent to the players, which is undertaken by the AMX IS Post Office Worker Service.
Users prepare playlists and then send the playlists and their messages to the players that have been assigned to them either directly or via publish points. The Publish Menu is used to publish or send changes to Playlists or their contents (the Messages in the Playlists) to the relevant Players. These Players then display the updated data on the attached screen or screens. Composer sends the Playlist changes to the Post Office for distribution to the appropriate Players. The Post Office application is the component of the Inspired Signage system responsible for transferring changes in Playlists and Messages including media files, etc. to the appropriate Players.
When a user publishes content (not when they change content) a number is shown next to the publish button which indicates that X number of jobs that will be processed to determine if there is content to send to a player. So if a system has 30 players then 30 jobs are put in a queue of which some will have files to be sent. The publish button will show the number 30 next to it and as each job is processed the number will count down.
In addition the publish button will flash indicating there are players to be processed. Once all the players have been processed then the button will stop flashing.
Access the Publish Menu by clicking the Publish icon on the toolbar shown in FIG. 24. The Publish icon flashes yellow if changes have been made to Playlists or the Messages they contain since the last Publish. This alerts the users that a Publish operation may be required.

FIG. 25 Publish Toolbar
The publish menu contain the following subsections:
- Publish Content Changes - Publish content changes to all Publish Points
• Republish All - Republish all Playlists to all Publish Points
• Republish to Selected - Republish selected Playlist to selected Publish Points - Current Publish Progress - View changes since last publish and the progress of any ongoing publish operations.
Publish Content Changes
Before a Player can display updates to Messages or Playlists, the changes must be Published to it. Publishing sends the changed Playlists and any Media Files (Images, Video or Audio) to the relevant Players so that new information can be displayed.
When publishing changes, Composer only sends amendments to the Players (as opposed to sending all files including ones that were not changed). Occasionally, if there has been external intervention or a software problem, Composer and the Player will not have the same information. In this case there is an option in the Publish menu to Republish all or selected Playlists to all Players (or a selected group of Players).
To Publish content changes to the Player:
- Click Publish Content Changes in the Publish Menu.
- A dialog box appears with the Message "Publish All Changed Content?". Click Yes to continue or No to quit.
- If you click Yes then the Publish Feedback sub-section is displayed showing the progress of the Publish operation.
Republish All
When publishing content changes, Composer only sends the amendments to Playlists or Messages to the appropriate Players. Occasionally, if there has been external intervention or a software problem, Composer and the Players will not have the same information, i.e. they are out of sync with each other. In this case there is an option to send all files (not just the amendments). This is called Republish. You can either Republish to all Publish Points or a selected set of Publish Points.
To republish all valid Messages to all Publish Points:
- Click Republish All Messages in the publish menu.
Republish Selected
To republish all valid Messages in selected Playlists to a selected group of Publish Points (rather than all Publish Points) proceed as follows:
- Choose the Publish Points to send Playlists to.
- Choose the Playlists to send.
- Click Republish to Selected to start publishing the selected Playlist to the selected Publish Points.
- Click Cancel to exit without publishing.
Current Publish Progress
The Current Publish Progress window contains two tabs, Publish Status and Player Status. The Publish Status tab provides feedback on the progress of the Publish operation. The Player Status tab provides feedback on the Players that are being published to so you can observe the updates on the displays belonging to these Players.
Publish Status
The Publish Status tab contains the Post Office Publish Progress table, showing all the Players that the Post Office is currently publishing to. There is also a summary of the changes to Playlists and Messages since the last Publish operation. This shows the number of Message and Playlist changes that are waiting to be published with names of the effected items. The number of new Media Files waiting to be published to the Player are also shown.
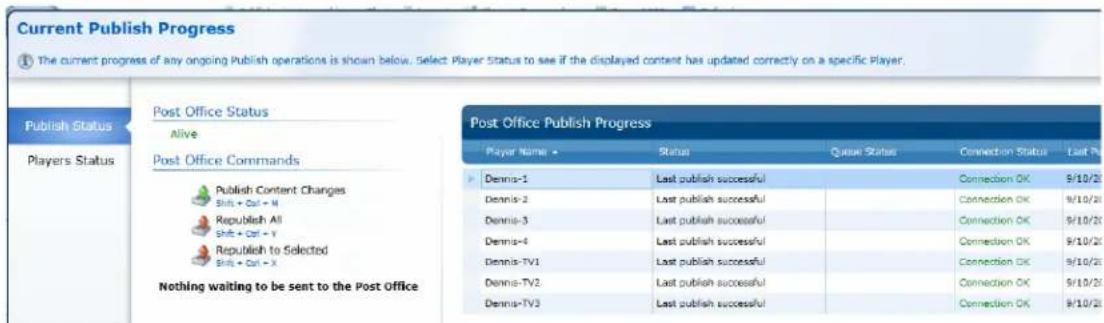
FIG. 26 Current Publish Progress Window
| Post Office Publish Progress Table | |
| Column Description | |
| Player Name Name of the actual display. | |
| Status There are several possible values:Login failed - Unable to connect to the File transfer (FTP) server on the Player blank.Able to connect to Player FTP serviceLast Publish SuccessfulContent has not been published - Where content has never been sent. | |
| Queue Status The number of files queued to send to this Player plus the number of Mb/s being transferred for large files | |
| Connection Status There are two possible values:Error connecting to the Player - The Post Office is unable to establish a network connection to the PlayerConnection OK - The Post Office is able to establish a network connection to the Player | |
| Last Published Indicates the last publish day of the playlist. | |
In order to allow a user to find the players they are interested in, a search filter provides the user with various ways of finding the players. Click on the More filter at the top of the window to open a popup and enter a player name or status to search for. Refer to FIG. 27.

FIG. 27 Player Status Search Fields
By default searching is done by player name. Users can search against status so searches to find players that have login issues could be searched for by using this field. Queue status is another field that could be used. In addition we have the last published date time filters to find the players that have received content during the 'from' and 'to' date time periods that are entered by the user.
In addition there is the Connection Status field that allows users to search for predefined messages (FIG. 28):

FIG. 28 Connection Status Field Options
When The System Is Alive
The Post Office Status Indicator shows whether the Post Office application is running and can be contacted. If the system is Alive, this indicates there are no problems, should the user need to publish. The following screen is shown when the publish task is pressed to check the status of the publishing (FIG. 29):
Post Office Status
Alive
Post Office Commands
FIG. 29 Post Office Status
When Publisher Guardian Is Not Running
Content generation is undertaken by the AMX IS Composer Content Publisher Consumer Guardian service. If this service is not running for some reason, FIG. 29 is shown when the user checks the status of the publishing.

FIG. 30 Post Office Status - Guardian Not Running
When Post Off ice Is Not Running
In addition to the publisher guardian service there is the AMX IS Post Office Worker Service which is responsible for sending out content to the players. If this service is not running then FIG. 31 is shown.
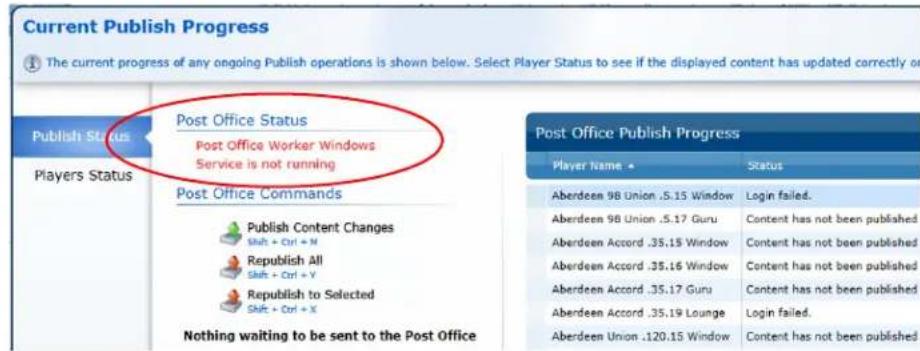
FIG. 31 Post Office Not Running
NOTE: This service may not be running if there is a problem with SQL server or the connection string has been entered incorrectly when the system was set up.
Player Status Tab
The Player Status Tab shows a Table containing all the Players configured and enabled in Composer.

FIG. 32 Current Player Status
You can search for a Player and view a screen shot showing the Player display. This is useful to check that the Player screen has updated correctly as a result of the recent publish operation.
Login/Logout
The toolbar lists the current user logged into this session of Composer and provides a Logout icon that enables the user to exit this session (page 27).

FIG. 33 Login/Logout Tool Bar Tools
- Click on the Logout icon to exit session.
Change Password
Click Change Password to open the Change Password dialog (FIG. 34).
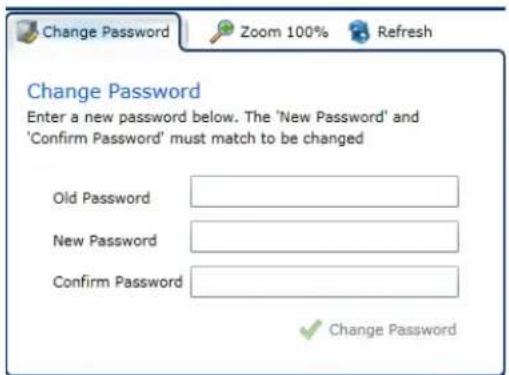
FIG. 34 Toolbar - Change Password
Enter your old password followed by the new password which must be at least six characters in length. Confirm the new password in the Confirm Password field. The new password will apply once you log out.
Zoom
Click Zoom to open the zoom dialog containing a bar and a number field (FIG. 35).

FIG. 35 Toolbar - Zoom Function
Drag the bar downwards to decrease the size of the interface graphics to see more information on screen at the cost of a reduction in text size and readability. Drag the bar upwards to increase the size of the application's graphics; this is useful if you find the text hard to read. 100% is the default setting. You can also enter a percentage scale factor (50-150%) in the box or adjust the scale up or down by a percentage point using the small arrow bars.
Refresh Display Button
Click Refresh to update the user interface to show any changes made by other users - the updated information is fetched from the central Composer Server. The local web browser automatically fetches and displays any changes to Composer at pre-set time intervals. However, clicking Refresh ensures that what you are seeing is right up-to-date. You could use this to see changes that have just been made by a colleague.
Help
Clicking on the help tool Help tool will launch a separate window (FIG. 36). Check the system pop-up blocker if you do not see a Help window appear.

FIG. 36 Tool Bar Help Tool
The Help window (FIG. 37) provides an index of common tasks that need to be performed and details on successfully doing so. Click on the Search tab on the left pane to bring up a search window to type keywords into.

FIG. 37 Login/Logout Tool Bar Tools
Status Bar
You can view the Status Bar by clicking the transparent arrow at the bottom right hand corner of the screen.

natural_image
Pure geometric lines forming an L-shape with a red circle highlighting a small square (no text or symbols)FIG. 38 Hidden Status Bar Access Button
The status bar displays the following information (FIG. 39):
• The current version of Composer.
- The username of the current user.
- The current Composer state which can be one of the following:
- Ready - indicates Composer is ready to perform a task.
- Busy - indicates Composer is busy carrying out a task. If appropriate, you will see a progress bar.

FIG. 39 Composer Status Bar
Getting Started
Logging In to Composer
Composer can be configured to have many users, each with different user rights. Log in to Composer using the hostname and port for the Composer server. Contact your server administrator for this information, the default port is 5143.
Point your web browser to:
http://
You should see the following progress screen (FIG 1) as the Composer Silverlight application loads:

FIG. 1 Loading Modules Window
Please note, the first time that you access Composer from a machine, the process may take a number of minutes as you may need to download the Silverlight plugin from Microsoft (this is not needed when you login subsequently). Once all downloads are complete, a login screen appears (FIG. 2):
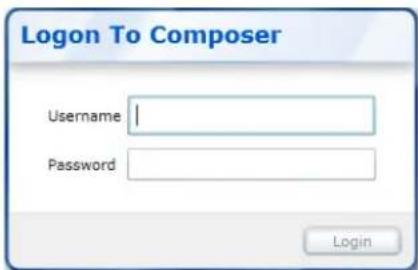
FIG. 2 Login Screen
Login to Composer as follows:
-
Enter your username and password.
-
If the Server version of Composer is configured to use an external directory provider then a menu called "directory" is displayed. Select the directory containing the account to access using the drop down. Alternatively select Local Composer Users to login using the administrator account or any manually created local account.
-
Click Login.
NOTE: If a user logs in (with a username/password), then only one session is allowed for that user. If another user logs in with the same username and password then the first session is closed and the first user is logged out. Different users should not be using the same username and password.
NOTE: If users are automatically logged out of a system while doing work, it could be that a virus scanner is running on the server. If a virus scanner is required on the server, make sure the directory which Composer is installed, and its subdirectories are be excluded as part of the virus scanner scan process.
(normally C:\ProgramFiles\AMX\IS\Composer\Server\Web for 64 bit system)
Logging Out of Composer
To logout of Composer, click Logout in the Tool Bar at the top of the main screen.
A Basic Administrator Work Flow
This section describes how to get started publishing the content of a single Playlist to a single Player. The work flow is as follows:
- Either manually configure a Player, see Create a Player on page 106 for more details, or import all the Players on the network. See Discover Players on page 105.
- Create a Publish Point, see Creating and Publishing Messages on page 39 for more details, containing a Player configured in the previous step.
- Create a Playlist, see Create Playlist on page 85 for more details, using the Playlist details supplied by AMX or your reseller. Creating Playlists isn't necessary if using a Template Pack which automatically sets up Playlists during import to the Player. For large installations where Players are added, then the administrator maybe required to create Playlists.
- Select one of the Playlists configured in the previous step and click Edit Playlist Publish Points. Next select the single Publish Point created in step 2.
- Import a Template Pack, see Importing Template Packs on page 33 for more details, using the option Publish to Selected to publish the imported TPK to selected Publish Points, in this case the Publish point containing the Player or Players configured in step 1. Select the import options: Create Templates and Create Messages from Templates.
- Edit Playlist (Assign some Messages to a Playlist). See Edit Playlist on page 75 for more details.
- Choose Publish Content Changes. See Publish Content Changes on page 24 for more details. from the Publish Menu on the toolbar. After a delay of approximately 5 seconds, the content you have just published should be displayed on screen.
Once you have a single Player working consult the Administrator Setup Tasks below for more details on setting up a full Inspired Signage System.
Administrator Setup Tasks
This section describes how to setup Composer for use with an Inspired Signage system. To setup Composer proceed as follows:
- Install and Configure the IS-XPT-2100 system Players (FG1232-100). Refer to the IS-XPT-2100 Installation Guide and Instruction Manual for details on installing and configuring IS Players.
- Create a Publish Point System for these Players. See Creating a Publish Point System on page 34.
- Setup Playlists and Playlist Restriction Lists based on the Playlist Setup Information provided by AMX or your re-seller. See Setting up Playlists on page 35.
- Assign the Playlists setup in the previous step to Publish Points. This determines which Players receive these Playlists when they are Published. See Configuring Playlists to Display on All or Selected Players on page 38.
- Import the Template Packs you need and Publish those Template Packs to the relevant Players. See Importing Template Packs on page 33.
- Create Resource Pools and User Groups. See Creating Resource Pools for User Groups on page 36.
- Create User Accounts and assign them to the correct User Groups. See Setting Up User Groups, and Permissions on page 36.
- Refine Playlist Restrictions Manually. See Advanced Playlist Theory on page 142 of the Appendix.
These Tasks are discussed further in the pages that follow.
Setting Up Players
Setup each Player in your Inspired Signage System as follows:
- Install the Player Hardware, consult the Player Installation Guide for details.
- Configure the Player settings manually within Composer or automatically discover and import the settings for all Players on the network (recommended).
To automatically discover and import Player settings:
a. Go to the Player Management section and select the Players option (FIG. 3).

FIG. 3 Player Management Menu
b. On the right side Tasks menu, click Discover Players (FIG. 4.)

FIG. 4 Player Management Menu
c. The Discover and Import pop-up window appears (FIG. 5). Click Discover and wait while Composer discovers accessible Players on the network and imports the details.
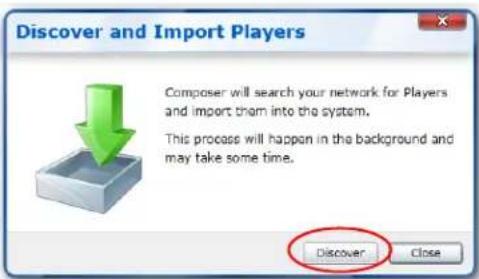
FIG. 5 Discover and Import Window
To manually configure Player settings:
a. Go to the Player Management section as shown in FIG. 6 and select the Players option.

FIG. 6 Player Management Menu
b. On the right side Tasks Bar menu, click Create Player as shown in FIG. 7.

FIG. 7 Player Management Menu
c. Follow the instructions for adding a new Player. See Create a Player on page 106 for more details.
- Add the newly created Player to the Publish Point System as follows:
a. In the New Player options popup, select Assign to Publish Points.
b. Look through the Publish Point System (expanding the folders where necessary) and find an appropriate Publish Point to add this Player to. Publish Points are represented by folders as follows If there are no appropriate Publish Point, for example this Player is in a new location, or the Player belongs to a group of Players performing a new function within an organization, consider creating a new Publish Point for this Player. See Creating a Publish Point System. See page 88 for more details. for more details.
c. Select the chosen Publish Point or Points.
d. Click Save.
e. This adds the Player to the selected Publish Point or Points.
- Import and Publish any Template Packs which contain Templates and Template Definitions you want to use to create Messages to display on this Player. Note, if you miss this step then you will not be able to see these Messages on this Player. Import and Publish Template Packs as follows:
a. In the New Player options popup, select Publish TPKs (Template Packs) to Players.
b. Select one or more Template Packs that have already been imported.
c. Click OK to proceed.
d. A dialogue appears asking you if you are sure you want to publish these Template Packs to the Player.
e. Click Yes to proceed.
Importing Template Packs
Composer comes with a number of Templates Packs to get you started. However, AMX's creative team can create industry specific Template Packs or, where commissioned, customer specific Template Packs containing a number of specific Templates. etc. Template Packs can be downloaded (from www.amx.com).
A Template Pack (file ending in .tpk) contains a number of Template Definitions, along with all the media (video and image files) and fonts required. These can be new Template Definitions or updates to existing Template Definitions.
There are four main types of Template Pack:
- Architecture Template Packs - These Template Packs are used either to setup the Player to display content (Player Architecture Templates) or to setup Composer (Composer Architecture Templates). Architectural Template Packs do not generally contain Template Definitions you can use to create Messages.
NOTE: Player Architecture Template Packs must be published to the Players which use them otherwise the Players will not display content correctly.
-
Standard Template Packs - These Template Packs contain Template Definitions which can be used to create Messages for display on Players. These Template Packs need to be imported into Composer and published to any Players which will display Messages based on the Template Definitions in these Template Packs.
-
Feed Reel Template Packs - These Template Packs contain Template Definitions which can be used to display data feeds such as RSS feeds, Weather data, etc by automatically populating Message properties with the information From the data feed.
-
Layout Template Packs - These Template Packs contain Template Definitions which can be used to create Layout Messages. When added to a Layout Playlist they determine the subdivision of Player displays into one or more Layout Areas where standard Playlists can be displayed.
NOTE: When importing a Template Pack, it is imperative that the template pack is imported into Composer when there are no other users logged into Composer. The reason for this is that importing a template pack involves a large number of structural changes to the data and in addition, in order to do that, locks are taken out on content to prevent others from changing the content whilst an import is taking place. With a large number of users on the system this will degrade performance. The normal procedure is for the administrator to send an email to all Composer users advising them to not log onto Composer during certain periods of the day. During this period the importing of the Template Pack can take place.
When importing a Template Pack, you have the option of creating Templates and Messages from these Template Definitions. Normally this is only relevant for Standard Template Packs. Although a Template Pack automates the process, it is still possible to manually create Templates from Template Definitions that were supplied in a Template Pack. Importing a Template Pack also populates Playlist Restriction Lists where the imported Templates have labels which match Automated Playlist Restriction settings. To import a Template Pack:
- Choose the Template Management section of Composer.
- Select the Import Template Packs sub-section.
- Select Import Template Packs from the Task pane.
- Click Browse to select a Template Pack file to import.
- Once you have selected a Template Pack, its filename is displayed in the Upload Window with status "Pending", this means that Composer is ready to upload this Template Pack but has not started yet. To the right of the status bar is an upload progress bar.
Click the red "X" icon on the same line as a Template Pack filename to remove that Template Pack from the import list. Repeat steps 4-5 for each Template Pack file until you have selected all those you wish to import. - Click Upload to begin uploading the Template Packs or Cancel to quit. The Upload window shows the progress made uploading the Template Packs.Once all the selected Template Packs have been uploaded the Import Template Pack window opens. The Import Template Pack window is divided into three sections:
a. Content Import Options.
b. Playlist and Template Pack Options.
c. Publish Points - The Publish Points to Publish the Imported Template Packs to.
- Set Content Import Options as follows:
Set/Clear Import Template Definitions depending on whether wanting to Import the Template Definitions in the uploaded Template Packs into Composer. The default is to use this option, however this step is not necessary with Architecture or Playlist Template Packs. If you do not set this option, skip to the Playlist and Template Pack options Publish Point section of this window.
If deciding to Import the Template Definitions then for each Imported Template Definitions, choose one of the following options:
- Create a Template For Newly Imported Template Definitions - This option creates templates for any new templates (those that do not already exist in Composer). This is the default option.
- Create a Template For All Imported Template Definitions - this option creates templates for all Template Definitions in the Template Pack.
- Don't Create Templates - This option doesn't create any Template Definitions.
NOTE: Composer will only create Messages or Templates for new Template Definitions which are not already present in Composer
- Set Playlist and Template Pack Options as follows:
Choose whether to Publish the uploaded Template Packs to one or more of your Players, set/clear the check-box Publish the Imported Template Packs to Players as appropriate. Only clear this option if you have imported a Playlist TPK just for the purpose of configuring Playlists in Composer. In all other cases you will want to Publish the Template Packs to one or more of your Players.
If you have uploaded one or more Playlist Template Packs you can choose to create any Playlists contained in the Playlist Template Packs in Composer. These Playlists are then allocated to the Publish Points selected in the Publish Points section below.
- Set Publish Points to Allocate and/or Publish to:
In the final section of this window, choose to send any imported Template Definitions or Playlists to all, or a selected set of Publish Points. Set the option Select the Publish Points...toto select the Publish Points. You are then shown the Publish Point System. Set the check-box besides the Publish Points (individual Players or groups of Players) you want to allocate or publish to. Click the black triangles in front of Publish Points to expand them to reveal their contents.
- Click Import to begin importing the uploaded Template Packs, this will take a number of seconds. The data table in the Import Template Packs sub-section shows the progress of all current imports.
NOTE: A Template Pack must be published to a Player if you plan to publish Messages based on Templates Definitions in this Template Pack to this Player otherwise you will not see anything.
Once import has finished then you can see the newly imported and created items (Templates Definitions, Templates, and Messages). If you cannot see these imported items but an Administrator is able to view them, then you (or someone with the correct permissions) needs to assign the imported items to a Resource Pool that can be accessed.
NOTE: It is usually best to setup one Player and practice publishing content to this Player to get a feel for the system before setting up a number of Players, User Groups, etc
Creating a Publish Point System
Once you have configured all the initial Players supplied with your system according to their Installation manuals, a logical structure must be created to represent Player groupings and hierarchies. This structure is called a Publish Point System. To create a Publish Point System:
- Group Players by function within the organization for example: Internal Players (Players used to display information to employees) and External Players (Players used to display information to the public or by location e.g. Head Office, Branch Office, and so on). Identify these different groups and any hierarchies for these groups. For example you could create a group for offices in England and sub-groups for the offices in Northern England and Southern England. Then you could create further sub-groups corresponding to different cities in these regions. We call these groups Publish Points. Publish Points can contain Players and/or other Publish Points. Note that Publish Points can only have one parent so interleaved hierarchies are not possible.
- Identify the top level of each hierarchy, using the previous example this would be the England Publish Point. Create a root Publish Point and give it a descriptive name.
- Add child Publish Points. In the case of our example: Northern England and Southern England. Repeat this process until you have created all the levels of the Hierarchy.
- Repeat the previous two steps to create more hierarchies, if needed. For example: create a root Publish Point called Function containing Internal and External Publish Points.
- Select Players and add them to the appropriate Publish Point (usually Players are added to the lowest level of a hierarchy). Hold Ctrl to select multiple Players.
Setting up Playlists
To Setup Playlists for your Inspired Signage System first consult the Playlist Setup Information provided by AMX or your reseller. This should contain a list of Playlists to setup. For each Playlist in this list:
- Select Playlists in the Content Management menu (FIG 8).

FIG. 8 Content Management Menu - Playlists
- On the right side Tasks Bar menu, click Create Playlist, this opens the Playlist Settings window (FIG 9).

FIG. 9 Content Management Tasks Bar Menu - Create Playlist
- The following pop-up window appears (FIG 10). Enter a descriptive name for the Playlist as listed in the Playlist Setup Information.

FIG. 10 Create a Playlist Window
-
Enter the Playlist filename. This filename must match the Playlist Setup Information.
-
Select the Playlist type and options for that Playlist type. The Playlist types are as follows:
- Pooling Playlist - This Playlist is a content pool which can be fed by a number of sub pools (feeder pools). The Playlist designer (normally AMX) selects the rules used to select content from any feeder pools.
Note that Content Pool Playlists can be played in a random order by selecting the Random Sequence Option (strictly speaking they are shuffled).
- Standard Playlists - These Playlists are straight forward linear Playlists, they do not support validity rules for Playlist Messages. Select looping to force the Playlist to loop once it is finished.
-
Automated Playlist - These Playlists can only be controlled by an external application. An automated Playlist cannot be edited in Composer. Automated Playlists are only used for integration with the Babel application, for automatic publication of content from various data sources, for example XML, Databases, and so on. Administrators who are creating playlists will not be working with babel integration.
-
If wanting to restrict what can be added to the Playlist, Composer has the following option.
- Enter a comma separated list of labels such as Zone1, Zone2, Zone3 (spaces before and after the commas are ignored) under Automatic Restriction Groups to specify the Playlist Restriction labels for this Playlist. When the next Template Pack is imported, Composer scans the Template Definitions in the Template Pack and adds any Template Definitions which have matching metadata labels i.e which match any of the labels in this Playlist's Restriction List. Only Messages which derive from Template Definitions in the Restriction List can be added to the Playlist. All standard Template Definitions are tagged with an aspect ratio. If you wanted to allow Messages with the aspect ratio 10x1 to be added to this Playlist, you would set the Restriction List to A10x1.
- Click Save to save the changes to the Playlist and close the window or click Cancel to close the window without saving.
- If you are making use of Resource Pools then you should continue by assigning this Playlist to the correct Resource Pool.
- You will also need to assign this Playlist to one or more Publish points so that it will appear on screen.
Setting Up User Groups, and Permissions
By default AMX provide four User Groups: Administrator, Manager, Editors, and Basic Users. These are a starting point for an installation however you may decide that you need User Groups with different permissions settings and/or a different number of User Groups. For more details on User Groups and permissions read Composer - Users on page 13.
When deciding what Users Groups are needed for your installation, you should consult the Administrator manual for details of the different Permissions available in Composer and then consider the following issues:
- How much of the management of your Signage system you wish to delegate to other users,
- How many users are you likely to have. Large Inspired Signage systems usually require a greater subdivision of labor with different user groups responsible for different tasks.
- The different types of users you will have. Identify the tasks they are likely to carry out. Can you group your potential users into categories? These categories would be your User Groups.
- Whether you need to use the approval system where changes to Templates, Messages, and Playlists have to be approved or rejected by users with review rights before the changes can be displayed on screen. If you give all your users review rights then all changes they make are automatically approved.
Now you have a basic idea of the different User Groups required. Identify any Resource Pools that you need for your system.
Resource Pools are collections of items in Composer (specifically Templates, Template Definitions, Messages, and Playlists). Decide if you would like to restrict access to groups of items available in Composer to specific User Groups or if some User Groups should have different access right to some Composer items. If either of these cases apply then you must create Resource Pools and set permissions for each Resource Pool and User Group combination.
Creating Resource Pools for User Groups
To Create Resource Pools for User Groups:
- Select Resource Pools in the Content Management section of Composer (FIG. 11).

FIG. 11 Content Management Menu - Resource Pools
- A table of Resource Pools is displayed as shown in FIG. 12. On the right side Tasks Bar menu, click Create Resource Pool, also shown in FIG. 12, to create a new Resource Pool.
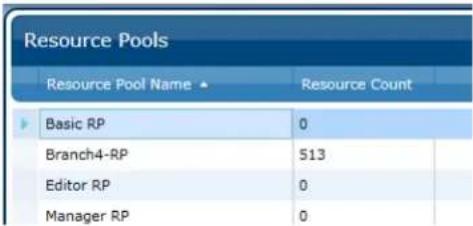

FIG. 12 Resource Pools Table
- The create Resource Pool window appears as shown in FIG. 13. Enter a name for the Resource Pool in the top right Resource Pool Name field.

FIG. 13 Create Resource Pool Window
- Pick a resource type to assign to the new Resource Pool using the resource type drop down. The available resource types are Template Definitions, Templates, Playlists, and Messages. The data table under the drop down shows all items of the selected type in Composer. You can use the search pane to select the correct item.
- Select the items to be added.
- Click Add Resources to add the selected resources to the Assigned Resources Pool (FIG. 14). The data table to the right of the window shows all the resources of the selected type assigned to the Resource Pool. Click Show All to show all resources assigned to this pool.
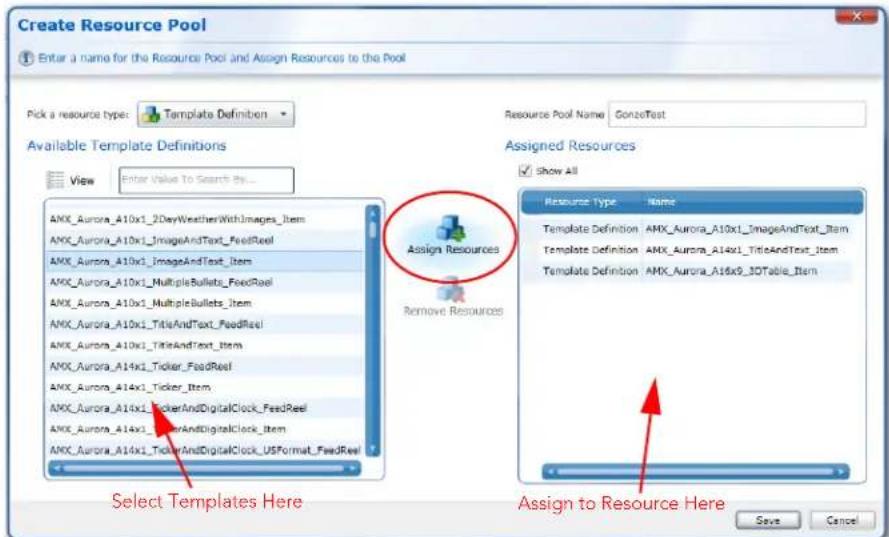
FIG. 14 Create Resource Pool - Templates Assigned
Alternatively you can use the Assign to Resource Pool options in the Message, Playlist, and Template Content Management sub sections or in the Template Definitions sub section of Template Management.
- Click Save at the bottom right of the window to save the changes and new Resource Pool.
- Next, associate the new Resource Pool with one or more User Groups and set the permissions for these Resource Pool / User Group combinations.
Configuring Playlists to Display on All or Selected Players
Once you have created Playlists for your Inspired Signage system you need to assign these Playlists to Publish Points to display the Playlist contents on all or selected Players. The process is as follows:
- Select Playlists in the Content Management menu (FIG. 15).

FIG. 15 Content Management Menu - Resource Pools
- The Playlist table is now displayed as shown in FIG. 16. Select a Playlist from the list.
| Name ▲ | Approval Status | Active Version | Messages | Playlist Type | Play Method | Publish file Name |
| Area Playlist: A10x1 (primary) | Approved | Main | 3 | Manual | Pooling Playlist | AreaContent_A10x1_Main.pool |
| Area Playlist: A14x1 (primary) | Approved | Main | 0 | Manual | Pooling Playlist | AreaContent_A14x1_Main.pool |
| Area Playlist: A16x9 (live media) | Approved | Main | 1 | Manual | Pooling Playlist | AreaContent_A16x9_LiveMedia.pool |
| Area Playlist: A15x9 (primary) | Approved | Main | 7 | Manual | Pooling Playlist | AreaContent_A15x9_Main.pool |
| Area Playlist: A1x1 (primary) | Approved | Main | 3 | Manual | Pooling Playlist | AreaContent_A1x1_Main.pool |
| Area Playlist: A28x1 (primary) | Approved | Main | 0 | Manual | Pooling Playlist | AreaContent_A28x1_Main.pool |
| Area Playlist: A3x1 (primary) | Approved | Main | 3 | Manual | Pooling Playlist | AreaContent_A3x1_Main.pool |
| Area Playlist: A3x4 (primary) | Approved | Main | 0 | Manual | Pooling Playlist | AreaContent_A3x4_Main.pool |
| Area Playlist: A3x5 (primary) | Approved | Main | 3 | Manual | Pooling Playlist | AreaContent_A3x5_Main.pool |
| Area Playlist: A4x3 (primary) | Approved | Main | 0 | Manual | Pooling Playlist | AreaContent_A4x3_Main.pool |
| Area Playlist: A9x16 (primary) | Approved | Main | 0 | Manual | Pooling Playlist | AreaContent_A9x16_Main.pool |
| Audio Playlist | Approved | Main | 0 | Manual | Pooling Playlist | AudioContent.pool |
| Layout Selector | Approved | Main | 27 | Manual | Pooling Playlist | LayoutSelection.pool |
| Overlay Playlist | Approved | Main | 0 | Manual | Pooling Playlist | OverlayContent.pool |
| Override Playlist: (default) Approved Main 1 Manual Pooling Playlist OverrideContent_default.pool | ||||||
FIG. 16 Playlists Table
- Click Set Playlist Publish Points on the Tasks Bar menu shown in FIG. 17, to open the Pick Publish Points window.

FIG. 17 Content Management Tasks Bar Menu - Create Playlist
- This Pick Publish Points window consists of two halves: the left half which shows the Publish Point system and is used to select Publish Points, and the right half which shows the selected Publish Points (FIG. 18). Click the arrow beside a Publish Point icon to expand it to reveal its contents if needed.
![Pick Publish Points Area Playlist: A10x1 (primary) Set the Publish Points the Playlist will be published to Publish Points Choose the Desired publish points Selected Below is a summary of all selected publish points All Players All Players All Players Branch-4 [8] Dennis-1 (Host: 192.168.216.229, Playlists: Dennis-2 (Host: 192.168.216.105, Playlists: Dennis-3 (Host: 192.168.216.219, Playlists: Dennis-4 (Host: 192.168.216.108, Playlists: Dennis-TV1 (Host: 192.168.216.82, Playlists: Dennis-TV2 (Host: 192.168.216.151, Playlists: Dennis-TV3 (Host: 192.168.216.104, Playlists](/content/2026/05/1045850/images/82d1cab840cc210db462bf6aa19c578212dfdd9150436911bc1460cf368da3ee.jpg)
FIG. 18 Pick Publish Points Window
- Find a Publish Point to associate with the Playlist (All Players in this example) and click the check box to the left of the Publish Point. The Selected Publish Points section updates to show all Publish Points associated with this Playlist.
- Click on Save in the bottom right corner of the window to save changes.
Day to Day Tasks
The following pages describe the main day to day tasks you are likely to perform. Note that this is not an exhaustive list.
Creating and Publishing Messages
NOTE: The following instructions assume that you or an Administrator has configured Playlists, Players, and a Publish Point System for your Inspired Signage system, imported any Template Packs required and associated Playlists to the correct Publish Points.
To create custom content as a user, first determine what type of content to display. Select a Message that closely matches those requirements, and then customize that Message for your specific needs.
- Select Messages in the Content Management menu.
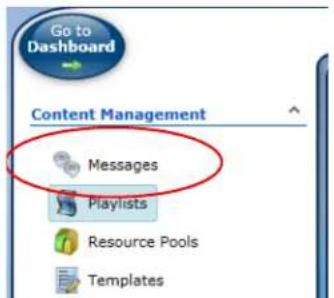
FIG. 19 Content Management Menu
- In the right side Task Pane Menu click Create Message.
- The Create Message window appears as shown in FIG. 21.
- Create a Message as follows:
f. Choose the most suitable Template for the new Message. Use the Search pane if needed.
g. Enter or select appropriate information in the Message fields. A meeting announcement may have a number of fields (the exact details depend on the Message's Template) such as Meeting Location, Meeting Time, Meeting Topic, etc.
h. Enter a name for the Message.
i. Click Save to create a provisional Message.
j. If necessary use the Task Pane options to set Validity Rules for the Message to determine when the Message can appear on screen.
k. Ask a Manager to approve the Message you have created (not necessary if you have review rights as the Message will be automatically approved).
- Select Playlists in the Content Management menu as shown in FIG 22.
- Select the Playlist to add the Message to from the Table.
- On the right side Task Pane Menu (FIG 23) click Edit Playlist.

FIG. 20 Messages Task Pane Menu - Create Message Selection

FIG. 21 Create Message Window
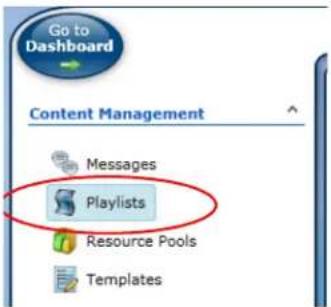
FIG. 22 Content Management Menu
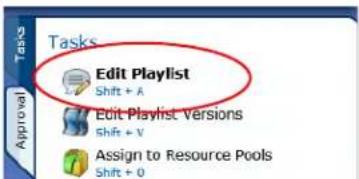
FIG. 23 Playlist Task Pane Menu - Edit Playlist Option
- Search for the newly created Message in the left hand pane and click Append Messages to add this Message to the end of the Playlist (FIG. 24).

FIG. 24 Append Messages Selection
- Select the newly added Message and move it up or down in the play order as required (FIG 25).
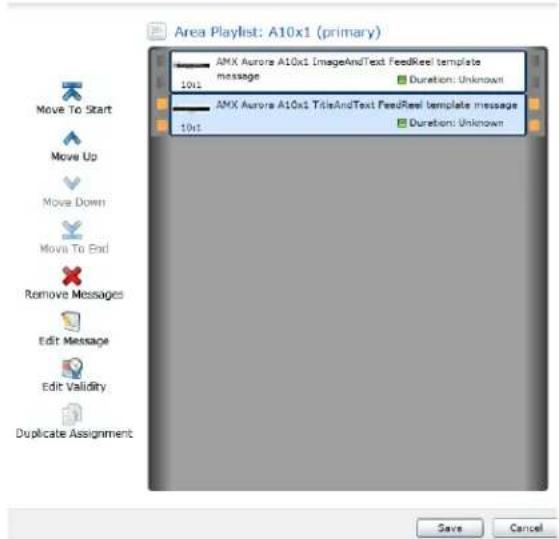
FIG. 25 Area Playlist Arrangement
- Click OK to confirm the changes to the Playlist. This creates a provisional updated version of this Playlist.
- Ask a Manager to check and approve the changed Playlist (not necessary if you have review rights - the Playlist will be automatically approved in this situation).
- Select the Publish Menu from the toolbar
- At the top left of the main window, click on the Publish option to show the drop down.
- Click Publish Content Changes to publish the changes to the Playlist to all the Players associated with these Playlists (FIG. 26). All the Players should then update to display the changes.

FIG. 26 Publish Menu
Reviewing Changes to Messages, Templates, or Playlists
A Manager may need to review changes to Composer items made by other users and approve or reject these changes. Changes to Templates, Messages, or Playlists are supported by the approval system. The steps needed to review changes are as follows:
1. Click Go to Dashboard

- Select the Approval Queue tab (FIG. 27). This shows a table of all the items waiting for approval along with an approval task pane where you can approve the change to the item, view the change.
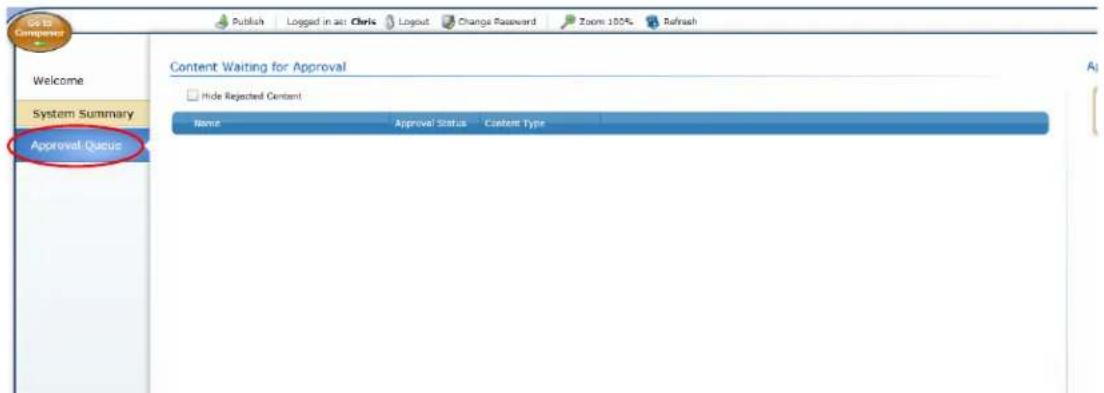
FIG. 27 Approval Queue Selection
- Select a row in the table. The approval pane to the right of the table can be used to approve the changes, view the changes, reject the changes with a comment explaining why, or revert to the previous approved version of the item.
- Click View Changes in the Approval Pane to view the modifications to the selected item.
In the case of Templates or Messages then Composer only shows those properties that a user has modified, unaltered properties are not shown. The left hand column shows the approved property values, the right hand column shows the proposed values. Text changes are highlighted (changed text is shown in red in the right hand column, the original text is shown in blue in the left hand column).
View Changes
Details (Approved)
Name: AMX Daylight A16x9 ImageAndText Item
Based On: AMX Daylight A16x9 ImageAndText Item template
Properties (Approved)
Body (Approved) Visible
The quick, brown fox jumps over a lazy dog. DJs flock by when MTV ax quiz prog. Junk MTV quiz graced by fox whelps. Bawds jog, flick quartz, vex nymphs. Waltz, bad nymph, for quick jigs vex! Fox nymphs grab quick-jived waltz. Brick quiz whangs jumpy veldt fox. Bright vixens jump; dozy fowl quack. Quick wafting zephyrs vex bold Jim. Quick zephyrs blow, vexing daft Jim.
Details (Proposed)
Name: AMX Daylight A16x9 ImageAndText Item
Based On: AMX Daylight A16x9 ImageAndText Item template
Properties (Proposed)
Body (Proposed) Visible
The quick, brown cat jumped over a lazy dog. Dis flock by when MTV ax quiz prog. Junk MTV quiz graced by fox whelps. Bawds jog, flick quartz, vex nymphs. Waltz, bad nymph, for quick jigs vex! Fox nymphs grab quick-jived waltz. Brick quiz whangs jumpy veldt fox. Bright vixens jump; dozy fowl quack. Quick wafting zephyrs vex bold Jim. Quick zephyrs blow, vexing daft Jim.
Image (Approved) Visible

MidnightDayLight_ExampleImage_6.jpg
Image (Proposed) Visible

Desert.jpg
Close
FIG. 28 View Changes for a Message Showing Modified Properties, Note the Highlighted Text Changes
- Either click Approve to approve the changes to the selected item or click Reject to reject these changes, if you reject the changes, enter a reason for the rejection so the user who submitted the change can correct the error or errors and re-submit. If the user needs to start again completely then click Revert to revert to the last approved copy of the item, losing any proposed edits made by users.
Changing Message Play Order
To change the order in which Messages are displayed:
- Select Playlists in the Content Management menu (FIG 29).

FIG. 29 Content Management Selection
- The Playlist Table window appears (FIG 30). Select the Playlist containing the Messages to re-order.
| Name - | Approval Status | Active Version | Messages | Playlist Type | Play Method | Publish file Name |
| Area Playlist: A10x1 (primary) | Approved | Main | 3 | Manual | Pooling Playlist | AreaContent_A10x1_Main.pool |
| Area Playlist: A14x1 (primary) | Approved | Main | 0 | Manual | Pooling Playlist | AreaContent_A14x1_Main.pool |
| Area Playlist: A16x9 (live media) | Approved | Main | 1 | Manual | Pooling Playlist | AreaContent_A16x9_LiveMedia.pool |
| Area Playlist: A16x9 (primary) | Approved | Main | 7 | Manual | Pooling Playlist | AreaContent_A16x9_Main.pool |
| Area Playlist: A1x1 (primary) | Approved | Main | 3 | Manual | Pooling Playlist | AreaContent_A1x1_Main.pool |
| Area Playlist: A26x1 (primary) | Approved | Main | 0 | Manual | Pooling Playlist | AreaContent_A26x1_Main.pool |
| Area Playlist: A3x1 (primary) | Approved | Main | 3 | Manual | Pooling Playlist | AreaContent_A3x1_Main.pool |
| Area Playlist: A3x4 (primary) | Approved | Main | 0 | Manual | Pooling Playlist | AreaContent_A3x4_Main.pool |
| Area Playlist: A3x5 (primary) | Approved | Main | 3 | Manual | Pooling Playlist | AreaContent_A3x5_Main.pool |
| Area Playlist: A4x3 (primary) | Approved | Main | 0 | Manual | Pooling Playlist | AreaContent_A4x3_Main.pool |
| Area Playlist: A9x16 (primary) | Approved | Main | 0 | Manual | Pooling Playlist | AreaContent_A9x16_Main.pool |
| Audio Playlist | Approved | Main | 0 | Manual | Pooling Playlist | AudioContent.pool |
| Layout Selector | Approved | Main | 27 | Manual | Pooling Playlist | LayoutSelection.pool |
| Overlay Playlist | Approved | Main | 0 | Manual | Pooling Playlist | OverlayContent.pool |
| Override Playlist (default) | Approved | Main | 1 | Manual | Pooling Playlist | OverrideContent_default.pool |
FIG. 30 Select Playlists
- Click Edit Playlist. This opens a window showing the Messages in this Playlist (FIG. 31).

FIG. 31 Edit Playlist Window
-
Select a Message or Messages in the right hand pane.
-
Select the Move to Start to put a message at the top of the playlist (1st in order) or select Move Up to move Messages up to move them forward in the play order. Select Move Down to move them backward in the play order.
- Once the Messages are in the correct order, click Save to make a provisional copy of the modified Playlist.
-
Ask a manager to check and approve the changes to this Playlist (not necessary if you have review rights for Playlists).
-
Once the modified Playlist has been approved, click Publish Content Changes in the Publish menu in the Toolbar (FIG. 32). This will publish the changes to the Playlist and update all Players which display this Playlist.

FIG. 32 Publish Content Menu
Changing Rejected Messages/Templates
Managers can reject changes to Messages/Templates. They will usually provide a reason. View rejected Messages/Templates as follows:
- Select Messages or Templates in the Content Management menu (FIG 33).

FIG. 33 Content Management Selection
- Click the top of the Approval Status table column to sort all the Messages/Templates in the system by Approval Status (FIG. 34).

FIG. 34 Approval Status Table Selection
- Select one of the Rejected Messages/Templates.
- Click the Approve tab to open the Approval Pane. This shows any comments made by the Manager who rejected the Message/Template.
- Click Edit Message (Edit Template) to make the changes requested.
- Click Save once you have finished creating a new provisional Message (Template). Ask a manager to check the changes.
Removing Messages From Playlists
If you no longer want to see a Message then you need to remove it from all the relevant Playlists. The steps are as follows:
- Select Playlists in the Content Management menu (FIG 35).
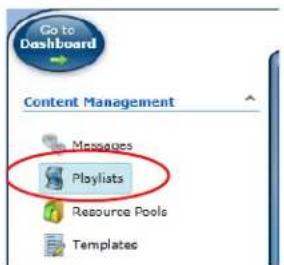
FIG. 35 Playlists Selection
- Select a Playlist containing the Message to remove (FIG. 36).
| Name > | Approval Status | Active Version | Messages | Playlist Type | Play Method | Publish File Name |
| Area Playlist: A10x1 (primary) | ✓ Approved | Main | 3 | Manual | Pooling Playlist | AreaContent_A10x1_Main.pool |
| Area Playlist: A14x1 (primary) | ✓ Approved | Main | 0 | Manual | Pooling Playlist | AreaContent_A14x1_Main.pool |
| Area Playlist: A16x9 (live media) | ✓ Approved | Main | 1 | Manual | Pooling Playlist | AreaContent_A16x9_LivcMedia.pool |
| Area Playlist: A16x9 (primary) | ✓ Approved | Main | 7 | Manual | Pooling Playlist | AreaContent_A16x9_Main.pool |
| Area Playlist: A1x1 (primary) | ✓ Approved | Main | 3 | Manual | Pooling Playlist | AreaContent_A1x1_Main.pool |
| Area Playlist: A26x1 (primary) | ✓ Approved | Main | 0 | Manual | Pooling Playlist | AreaContent_A26x1_Main.pool |
| Area Playlist: A3x1 (primary) | ✓ Approved | Main | 3 | Manual | Pooling Playlist | AreaContent_A3x1_Main.pool |
| Area Playlist: A3x4 (primary) | ✓ Approved | Main | 0 | Manual | Pooling Playlist | AreaContent_A3x4_Main.pool |
| Area Playlist: A3x5 (primary) | ✓ Approved | Main | 3 | Manual | Pooling Playlist | AreaContent_A3x5_Main.pool |
| Area Playlist: A4x3 (primary) | ✓ Approved | Main | 0 | Manual | Pooling Playlist | AreaContent_A4x3_Main.pool |
| Area Playlist: A9x16 (primary) | ✓ Approved | Main | 0 | Manual | Pooling Playlist | AreaContent_A9x16_Main.pool |
| Audio Playlist | ✓ Approved | Main | 0 | Manual | Pooling Playlist | AudioContent.pool |
| Layout Selector | ✓ Approved | Main | 27 | Manual | Pooling Playlist | LayoutSelection.pool |
| Overlay Playlist | ✓ Approved | Main | 0 | Manual | Pooling Playlist | OverlayContent.pool |
FIG. 36 Playlists Table
- On the right side Tasks Bar menu click Edit Playlist (FIG. 37).
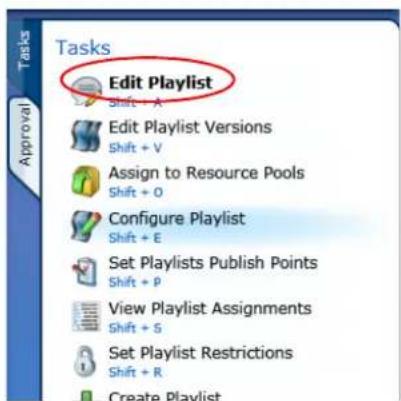
FIG. 37 Content Management Playlists Task Pane Menu
- Select the Message to remove and click Remove Messages (FIG. 38).

FIG. 38 Remove Message
- Click OK.
- Ask a Manager to approve the changes to the Playlist (unless you have review rights yourself).
-
Repeat steps 3-7 for all Playlists containing this Message.
-
Once all the modified Playlists have been approved (not necessary if you have review rights as the change are automatically approved), click the Publish icon in the toolbar and click Publish Content Changes to publish the changes to the Playlist. See FIG. 39. The removed Message should no longer be displayed on any of the Players.

FIG. 39 Publish Content Menu
Setting When a Message can be Displayed
Composer provides the ability to set the dates and times when Playlist Messages can be displayed on screen.
Once a date range for a Message has been set, set the days of the week and the times during those days that this Message can be displayed. Multiple date ranges for a Message can be set, these settings are known as Validity Rules.
To set Validity Rules for a Message:
- Select Messages in the Content Management menu (FIG. 40).

FIG. 40 Content Management Selection - Messages Option
- Select the Message to restrict to a certain date (FIG. 41). Use the Quick Search Pane or Advanced Search feature to find the Message (if needed).

FIG. 41 Message Table - Selection
- On the right side of the window click Set Message Validity in the Task Menu Bar (FIG 42).

FIG. 42 Messages Task Menu
- Click Add Rule to create a date range within which the Message can be displayed on Screen (FIG. 43).

FIG. 43 Set Message Validity Window
- Enter a start date for the range in the Valid From field. If you don't provide a start date then the range will be valid from today's date onwards.
- Enter an end date for the range in the Valid To field. If you don't provide a end date then the range will not end.
- To set the days of the week (and times) within this range when the Message can be displayed, set the Define Specific Weekday Rules check-box, this brings up a timesheet.

FIG. 44 Validity Rules - Specific Weekday Rules
-
Use the timesheet to set time intervals during the different days of the week when a Message can be displayed. Left-click and drag to set a range where the Message is valid, shown in orange. If you make a mistake you can erase part of a time range by left clicking a time when the Message is valid and dragging the cursor over the range. See Setting Message Validity on page 60 for more information.
-
Click Save once finished setting Validity Rules for this message. This creates a new provisional version of this Message with these Validity Rules.
- If lacking in review rights, ask a Manager to approve these changes.
- Go to the Publish Menu in the toolbar and select Publish Content Changes (FIG 45).

FIG. 45 Publish Content Menu
Creating Templates
If planning to regularly create similar Messages it makes sense to create a Template to simplify this task, help ensure consistency, and reduce the opportunity for error. The process is as follows:
- Select Templates in the Content Management menu (FIG 46).

FIG. 46 Content Management Selection - Templates Option
- On the Task Pane Menu click Create Template (FIG 47).

FIG. 47 Templates Task Pane Menu
- Select an existing Template Definition with the desired Aspect Ratio to base the new Template on and click Next (FIG. 48).

FIG. 48 Create Template Window
- Enter a name for this Template. Make the name easily recognizable including Aspect Ratios and locations is appropriate (FIG. 49).
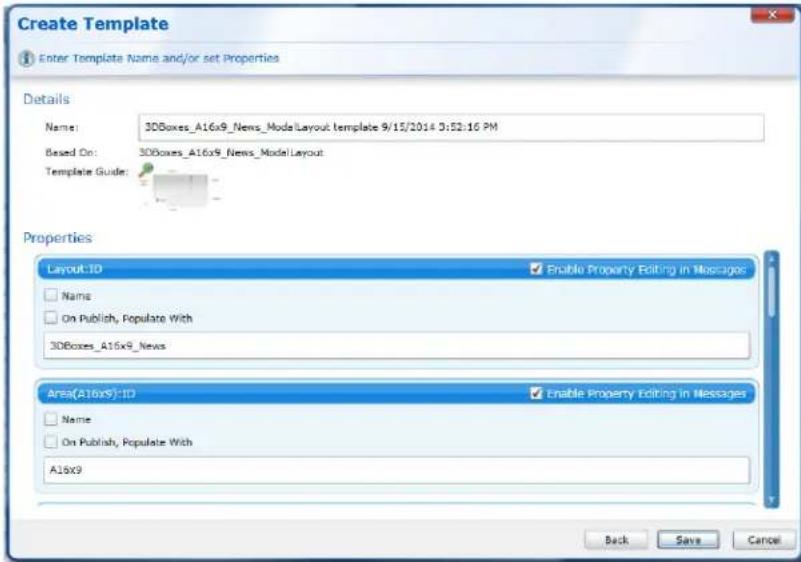
FIG. 49 Create Template Window
- Go through the Template Properties fields. For each field:
a. Set a default value for each Property where needed to simplify the job of Template Users.
b. If you don't want users creating Messages from this Template to modify this property field, clear the Enable Property Editing in Messages check box.
c. If you want to change the property name to something more identifiable, set the Name check box and enter a new name for this property.
-
Click Save to create the new provisional Template.
-
If you don't have review rights the Template will be listed as Waiting for Approval. Ask a manager to review and approve the Template. Once the manager has approved the Template then it can be used to create Messages.
Creating Playlists for Special Circumstances
To quickly display an alternate, pre-prepared Playlist in special circumstances whose timing cannot be predicted in advance (for example, an emergency) then a Playlist Version is a good solution. Predicting when you might want to display certain content then Message Scheduling or Validity Rules is normally a better option. A Playlist Version is effectively an alternate version of a Playlist which can be turned on or off at any time. Create a Playlist Version as follows:
- Choose Playlists from the Content Management menu (FIG. 50).

FIG. 50 Playlists Menu Selection
-
Select the Playlist to make a variant of from the Playlist Table.
-
On the Task Pane menu on the right click Edit Playlist Versions to bring up the Edit Playlist Version window (FIG. 51). This shows all the versions of a Playlist. There is always one version called Main, the original Playlist.

FIG. 51 Playlist Task Pane Menu - Edit Playlist Version Selection
- Click Add Version to create a new Playlist Version(FIG. 52).
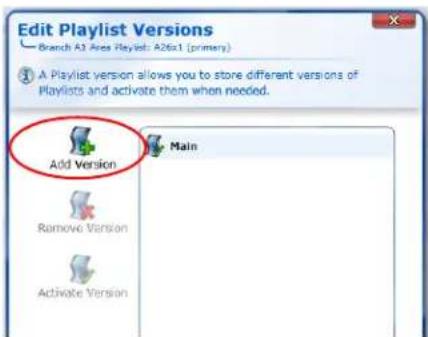
FIG. 52 Edit Playlist Version Window
- Type an appropriate name for this Version (FIG. 53).
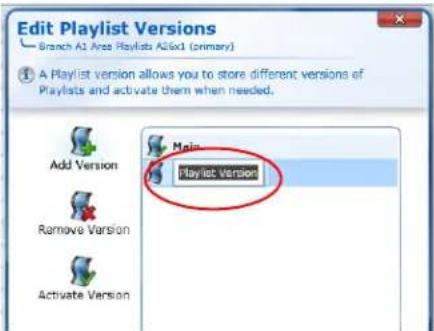
FIG. 53 Add Playlist Version - Name
- Click Activate Version to make the new Playlist Version active. You can now add messages to this Playlist Version or publish it to display it on-screen.
- Once you have perfected the Playlist version re-activate the default Main Playlist.
- When you need to display the alternate Playlist, you can just re-activate it and select Publish Content Changes from the Publish menu to display it on screen.
Add a New User
To add a new user:
- Select Users in the User Management menu (FIG. 54).

FIG. 54 User Management - Users Selection
- Click Create User in the Tasks pane (FIG. 55).

FIG. 55 Users Tasks List
- Enter a username for the new User (FIG. 56).

FIG. 56 User Details Window
- Make sure the User Active box is checked. To activate the user later, uncheck this box.
- Choose the User Group or Groups the new user belongs to.
- Enter a password for the new User.
- Click Save.
Deactivating an Existing User Account
To deactivate an existing User Account:
- Go to the User Management Section.
- Click Users.
- Select the User you wish to deactivate from the Users Table, use the search pane if needed.
- Click Edit User.
- Clear the User Active check-box.
- Click Save.
This will log the user out of Composer and prevent them logging back in again.
Adding Images to Messages or Templates
When adding Images to Messages or Templates, consider two factors:
- The aspect ratio of the image and the aspect ratio of the rectangle used to display this image.
- The resolution of the image. Images should not exceed 1280 pixels in width and 1024 pixels in height as screens used in most installation do not normally exceed this resolution. The Player will scale the images you provided as needed but excessively high resolution images such as those used for printing may effect Player performance and could cause the Player output to jitter.
The image property name in the Template or Template Definition contains the aspect ratio of the rectangle that will be used to display the image. For example: Meeting Picture4x3 indicates this picture has an aspect ration of 4x3 so the ratio of width to height is 4 to 3. To get best results you should use images with a similar aspect ratio otherwise the Player will stretch/shrink, or crop the image provided as appropriate. Calculate the aspect ratio of you picture by dividing the width by the height, in this case it should be as close as possible to 4/3.
The following image formats are supported by Composer:
• .BMP (24 bits per pixel only)
• .GIF
- .JPG/.JPEG - Note that Progressive JPEGs are not supported.
• .PNG
• .TGA (24/32 bits per pixel only)
- WMF
NOTE: CMYK formats are not supported.
Adding Video to Messages or Templates
When adding Video to Messages or Templates, consider the following factors:
- The aspect ratio of the video and the aspect ratio of the rectangle used to display this video in the Template or Message. The video property name will describe the aspect ratio of the rectangle used to display the video e.g. VideoField16x9 has a 16x9 aspect ratio. Aspect ratio is the ratio of height to length for video and images.
- The resolution of the video. The higher the video resolution the greater the stress on the Player. If the Player is under stress it will run hotter and use more power.
NOTE: When creating video for Digital Signage encode from a digital source over a digital link. Do not use composite at any point in the chain if at all possible as this will severely compromise quality.
| Table of Supported Video CODECs and Container Formats | ||||
| Container format Video CODEC HD Support Audio CODEC Max Bitrate | ||||
| .mp4 h.264 Yes AAC | 10Mbits/sec | |||
| .mpg | MPEG-1 | No | MPEG Layer I,II | 10Mbits/sec |
| .mov | h.264 Yes AAC | 10Mblts/sec | ||
AMX advises 1080p video should be played full-screen only - never in a layout area belonging to a multi area Layout. Video played inside one of a number of layout areas should be at most 720p
Content Management
Overview
The Content Management section is accessible in the Menu Pane and is used for:
- Creating and Managing Message for display on Player screens.
- Creating/Editing/Assigning Messages to Playlists.
- Creating / Editing / Deleting Resource Pools.
- Creating and Managing Templates.
This is the most commonly used section of Composer. Typical tasks include: creating Messages and adding Messages to Playlists.
A typical work flow would be:
- Create some Messages based on pre-defined Templates
- Assign these Messages to Playlists.
- Publish the new Playlist to update the Signage content displayed on screen.
The Content Management contains the following sub-sections:
- Messages Sub Section, see page 53 for more details.
- Playlists Sub Section, see page 75 for more details. Playlist Sub Section, see page 49 for more details.
• Resource Pools, see page 89 for more details. - Templates Sub Section, see page 93 for more details.
Messages
The Content Management : Messages option shows a data table with a list of all the Messages in Composer that you have permission to view. The Message Task Pane allows you to carry out the following actions:
- Edit Message. See page 54.
- Create Message. See page 55.
- Set Message Validity. See page 60.
- Restrict to Publish Points. See page 59.
• Duplicate Messages. See page 62. - Preview Message and/or Quick Preview Message. See page 63.
- Assign to Resource Pools. See page 65.
- Add Messages to Playlists. See page 66.
• As Run Report. See page 68. - Delete Messages. See page 73.
FIG. 1 shows the Message Data Table and explains the different columns in the table:
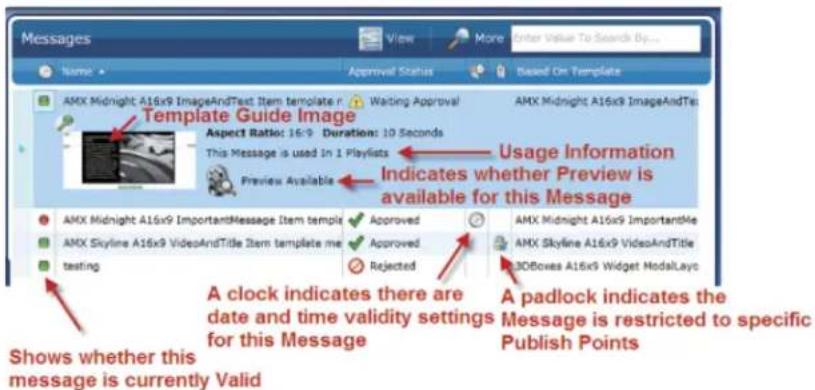
FIG. 1 Message Table Columns
Hovering over the colored message indicator brings up a pop-up status messages shown in FIG. 2.

FIG. 2 Message Validity Tool Tip
Edit Message
To edit an existing Message:
- Select Messages in the Content Management menu (FIG. 3).

FIG. 3 Content Management Menu
- Find the Message to edit in the Message Data Table and left-click on it (FIG. 4).

FIG. 4 Message Selected to Edit
- Select Edit Message in the Tasks menu panel (FIG. 5).

FIG. 5 Edit Message
- The Edit Message Dialog opens to show:
a. The Message Name (FIG. 6).
b. The name of the Template that this Message is based on.
c. A thumbnail template guide, click the Magnifying glass to expand this guide and see what parts of the Message each Message property controls.
d. A set of property fields.

FIG. 6 Edit Message Window
- Edit the values for each property to change the Message.
- Click Save to save the changes to the Messages. Note that if you do not have review rights then your changes are provisional and await approval by an administrator or manager. See approval. See page 17 for more details. for more details. Alternatively, click Cancel to discard all changes).
See Also:
- Setting Validity Rules. See page 44 for more details.
- Creating a Message. See page 39 for more details.
- Copying a Message. See page 47 for more details.
Create Message
To create a new Message:
- Select Create Message from the Content Management > Message Tasks panel (FIG. 7).
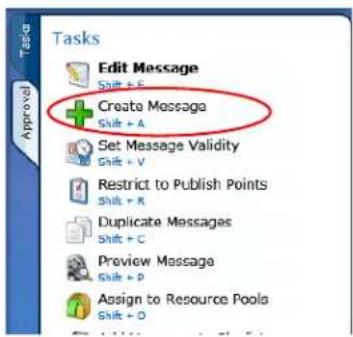
FIG. 7 Create Message Selection
- A window appears containing a data table showing all the Templates in Composer (FIG. 8). Select an approved Template to use to base the new Message on.
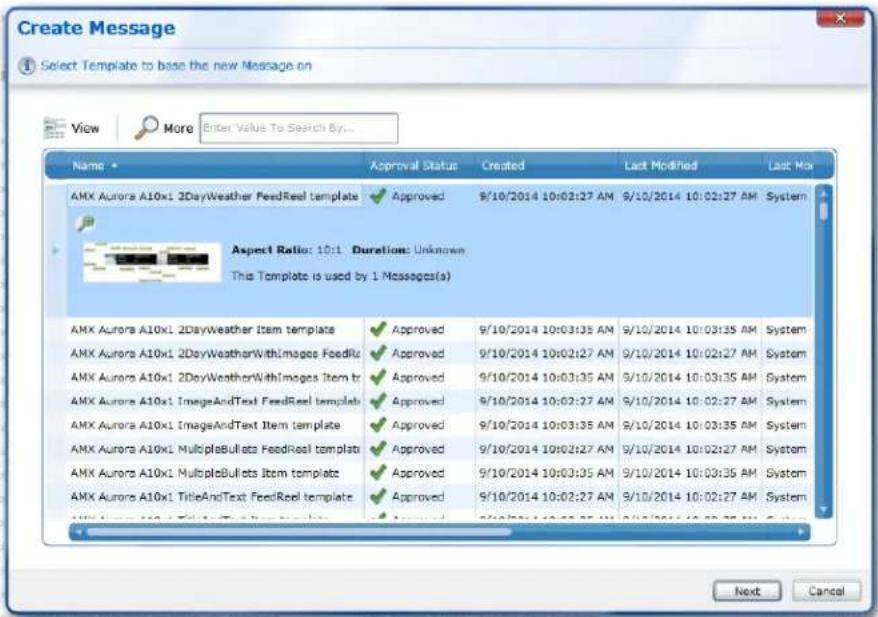
FIG. 8 Create Message Window
- Click Next at the bottom right of the window to continue or Cancel to quit.
- The Create Message window opens, showing information about the Message such as the Message name, Template the Message is based on, and Template guide (thumbnail image of Template showing modifiable properties) (FIG. 9).

FIG. 9 Message Details: Message Name, Name of Template that Message Is Based On, and Template Guide Thumbnail
The Create Message window also contains Message property fields (FIG. 10). These fields are populated by the Template the Message is based on. Message properties are things like text, images, videos, colours, audio, etc. Each Property field will look similar to the diagram below:
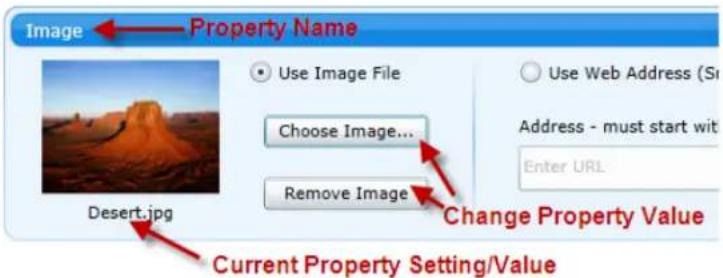
FIG. 10 Example Message Property Field
The text in white is the name of the Message property, underneath this text is the current property value.
See Message Property List for details of all the different Message Property types. Note, some property fields have preset values.
- Click on the magnifying glass by the Template Guide thumbnail to view the Template Guide(FIG. 11).

Duration: 10 Seconds
FIG. 11 Template Guide showing two modifiable properties: Image and Title
The Template Guide shows an illustration of the Template and lists the names of the modifiable properties.
- Enter a new Name for the Message in the Message name field (use a descriptive name if possible).
- Enter/choose new values for each Message property field or use the preset values provided by the Template.
- Click Save to save the changes and create the Message (or click Cancel to discard all changes).
-
The New Message Options window opens. Here you have a number of actions you can perform on the newly created Message:
-
Edit Message - Edit Message contents
- Set Message Validity Rules - Schedule when a message is valid for display
- Add the Message to Playlists - Add the selected Message to Playlists ready for publishing to Players
- Preview the Message - Preview how the message will look on screen
- Assign the Message to Resource Pools - Messages can belong to content groups called resource pools which have specific access rights, use this option to add the message to one or more Resource Pools
-
Restrict the Message to selected Publish Points - Restrict the Message so it can only be displayed on Players attached to selected Publish Points
-
If you don't want to do anything more with the Message. Click Finished to exit.
- If you have access to a number of Resource Pools then a window opens showing all the Resource Pools that your user account has access to.
- Click the check-box(es) beside the Resource Pools you want to assign this Message to. Warning, if you do not assign the Message to any Resource Pools then you may not be able to view or edit it later.
- Click Save to finish creating the Message and assign it to the selected Resource Pools.
NOTE: If your User Group has a single associated Resource Pool then the newly created Message is automatically assigned to this Resource Pool.
See Also:
- Edit Message on page 54 for more details.
- Delete Messages on page 73 for more details.
Message Properties
The following section describes the different Message property types.
Image Property
An image property field is divided into two sections, left and right. The left hand section is used for standard images and contains the following:
- The name of the image property.
- The name of the attached image file (if any) and a thumbnail picture of the attached image. Note, that due to a limitation in Microsoft's Silverlight plugin we are unable to generate thumbnail images for files other than .png and .jpg. However, these files will still display on the Player.
The right hand section is used to display web pages and contains the URL of the web page to display.
Display an image as follows:
-
Check that the Use Image File check box is set; if not you will need to enable it.
-
Click Choose Image to browse for a image file to attach to this property.
NOTE: If you decide you no longer want to display an image then click Remove Image to remove the current image and leave this area of the Message blank.
To display a web page or any image accessible via a URL (web link) e.g. a png, bmp, or jpeg, etc. Proceed as follows:
- Set the check box Use Web Address (Snapshot). Note, this also removes any images set in the left hand section of the Image property.
- Enter the URL of the web page in the Address field. For example http://en.wikipedia.org/wiki/Website
- Click Test to view the page. Note that this just displays the page in your browser. It allows you to check that the URL is correct, however it does not mean that the Player can correctly display it. To verify that you will need to use the Message Preview facility.
NOTE: By default the URL image will be refreshed at least once day although it may happen more regularly. If you require a faster refresh rate then you will need to use a Template which is designed to update at a faster rate.
Contact AMX support to request a custom Template.
If the website you wish to display is a different aspect ratio to the image area then the webpage snapshot will be distorted. Consider using the URL_Item Template provided by the URL Template Pack available from the digital Signage resources section of the amx.com website. This Template can display a website using the whole of the main area A16x9 Aspect ratio Playlist.
Limitations of displaying web pages
This feature is not designed for large or complex websites and has the following limitations:
- Redirected URLs do not work. Use the URL that the redirector points to instead.
- The following plugins are not supported: WebGL, Flash (except version 7 or earlier), Silverlight.
- Pop-ups, and user dialog prompts will cause unexpected behavior.
- Plugins like PDF viewer are not supported.
- Similarly, VRML rendering and 3D windows such as X3DOM also not supported.
- This feature is only supported by Players running version 1.6.4 of the Player software or beyond. Check the Player version using the Player web configuration tool or (in Composer v5.4 or later) by looking at the version column in the Player table in the Player Management > Players section.
Video Property
A video property field contains the following:
• The name of the video property
- The name of the attached video file (if any) and a stock picture of a roll of film.
- Click Choose Video to browse for a video file to attach to this property (FIG. 12).

FIG. 12 Video Property Field\
Text Property
A text property field contains the following:
- The name of the text property.
- An edit box containing the actual text.
The text field may have a default value provided by the Template used to create this Message (FIG. 13).

FIG. 13 Text property field
Numeric Property
A numeric property field contains the following:
- The name of the numeric property.
-
An edit box containing the actual numeric value.
There are two different types of numeric properties: Single and Decimal. -
Single - whole numbers (integers) only
- Decimal - Decimal numbers
The numeric field may have a default value provided by the Template used to create this Message.
Numeric property fields appear the same as text fields but Composer will warn you if you try to enter text.
Color Property
Color properties are used to set the color of visual elements in a Message for example: the Message's background.
A color property field contains the following:
- The name of the color property
- A rectangle showing the current color and its RGB (Red, Green, Blue) values.
- A grid of standard colors. Click one of the standard colors in the grid to select.
- An color picker icon which you can click to access more colors.
Switch Property
A switch property contains the following:
- The name of the switch property.
- A check-box value.
A check-box value which you can set or clear to turn on or off an effect respectively. This is often used to make certain visual elements in a Message invisible or visible and to turn on or off animations or other effects.
Selector Property
A selector property contains the following:
- The name of the selector property
- The value of the selector. click on the drop down list and choose one of the available options
Selector properties are used to choose one of several options. For example: which animation to use for certain visual elements in the Template.
Restrict to Publish Points
You can restrict a Message to specific Publish Points. Restricting a Message to a specific Publish Points means that a Message belonging to a Playlist will only be displayed by a Player, if the Publish Point the Player is attached to is part of the list of restricted Publish Points for this Message. This is useful to prevent a Message being displayed in the wrong area deliberately or by mistake.
The process is as follows:
- Select the Content Management section of Composer.
- Select the Message sub-section.
- Click Restrict to Publish Points in the Task Pane to open the Pick Publish Points window which contains two sections: a view of the Publish Point system above a list of selected Publish Points. Use the top section of the Publish Points window to select the Publish Points you wish to restrict this Message to.
- Click the arrow in front of a Publish Point to expand the Publish Point to reveal it's children.
- Set check-boxes beside Publish Points to select these Publish Points. Note that selecting a Publish Point automatically selects all its child Publish Points (any Publish Points which belong to this Publish Point) as the Playlist will automatically be published to any Publish Points that are children of the selected Publish Points.
- The Summary Section shows the Publish Points that this Message is restricted to.
- Finally, click Save to restrict the Message to this set of Publish Points or Cancel to leave the restrictions unchanged.

FIG. 14 Restrict Message Example
See Also:
- See Publish Points (Publishing Playlists) on page 10 for more details.
Setting Message Validity
A Message can have a number of Validity Rules which determine the times and dates that a Message is valid for display on Player screens. Note, that this does not mean a Message will actually be displayed (for that a Message must belong to a Playlist which has been published to a Player). An invalid Message will not be selected for display by the Player. A Validity Rules sets a date range within which a Message is valid for display. So, for example, you can specify that a Message is valid and can be displayed on screen from 10th May 2014 to 10th December 2014. You can also have multiple Validity Rules for the same Message. For example, you can set that a Message is valid and can be displayed from 15th January 2015 to 15th February 2015 and also from 15th May 2015 to 15th June 2015.
NOTE: A Message which becomes invalid while it is playing will still continue to play.
To create a Validity Rule, click the Add Rule icon. This brings up a rule date bar as follows:

FIG. 15 Weekday Validity Rule Date Bar
NOTE: If you have multiple Validity Rules a scroll bar will appear on the right hand side of the Message Validity Rules window. Use this scroll bar to view all the Validity Rules for this Message.
Set a Valid From Date (Start Of Date Range)
Set a Valid From date as follows:
- Set the Valid From check-box.
- Enter a date in day, month, year format in the Valid From field or click on the Calendar icon to choose a date from the Calendar pop-up.
If you don't enter a Valid From date then the Valid From field will be filled with the current date (date of creation of this rule).
Set a Valid To Date (End Of Date Range)
Set a Valid To date as follows:
- Set the Valid To check-box.
- Enter a date in day, month, year format in the Valid To field or click on the Calendar icon to choose a date from the Calendar pop-up.
If you don't enter a Valid To date then the Valid To field will be filled with the current date (date of creation of this rule).
Defining Specific Weekday Rules
Selecting the Define Specific Weekday Rules check box to display a timesheet showing all the days of the week and the hours from midnight of the previous day to midnight on the current day. When the user enables the Define Specific Weekday Rules option, the start and end times will be ignored (all day scenarios for from/to dates) and disabled as shown in FIG. 16. Use this timesheet to precisely specify which days of the week and which time intervals within those days that the Message is valid in 15 minute granularity. For example, you can specify that a Message is valid on Wednesday and Thursday afternoons from 2:00 pm to 6:00pm between 10th May and 10th December 2014. Intervals where the Message is valid are shown in bright orange, intervals where the Message is invalid are shown in gray.

When checked, time fields are grayed out.
FIG. 16 Set Time Intervals that Message is Valid on Specific Days of the Week Within the Date Range
Creating a Time Interval
To create a time interval:
- Click on the timesheet and hold the left mouse button while moving the cursor to set a period of time when the Message is valid in 15 minutes chunks. This creates an time interval bar underneath the timesheet showing the begin and end time for this interval using the 24 hour clock. The time are shown in hour:minute:second format.
- Edit the values in the Begin and End fields to set accurate beginning and ending times to the nearest second.
- If you want to set a Message to be valid for the entire duration of a particular day, click on the day name to the left of the timesheet.
- Click Save to save the current rule or Cancel to quit without saving the changes.
Clearing a Time Interval
To clear a time interval:
- Either, click on a part of the timesheet which is already set and drag the cursor to clear the appropriate area of the timesheet. Or, click Delete at the right hand end of a time interval bar to delete this interval.
- Click Save to save the current rule or Cancel to quit without saving the changes to the rule.
Combining Validity Rules
If you create more than one rule then the rules are combined; where rules overlap they are merged. For example, if you create a rule that applies from 10th May to 20th May where the Message is valid in the afternoons on every day and a rule from 10th May to 15th May where the Message is valid in the mornings. The end result is that the Message is valid all day from 10th May - 15th May and only in the afternoon from 15th May to 20th May.
Deleting Validity Rules
Delete Validity Rules as follows:
- Click Remove Rule underneath a rule to remove this rule
- Click Remove All to delete all rules for a Message.
In the Data Table in the Messages part of the Content Management section, Messages with Validity Rules are shown with a clock. Messages which are currently valid are shown with a green square, those which are currently invalid are shown with a red square.
Duplicate Messages
The Duplicate Messages icon in the Content Management, Messages Task pane allows duplicating an existing Message or Messages, making it easier to create several Messages with similar content. To duplicate Messages:
- Select the Message to copy in the Message Table (FIG. 17). Hold Ctrl to select multiple Messages.

FIG. 17 Select Messages to Copy
- Click Duplicate Messages in the Tasks panel (FIG. 18). This opens the Duplicate Messages window.
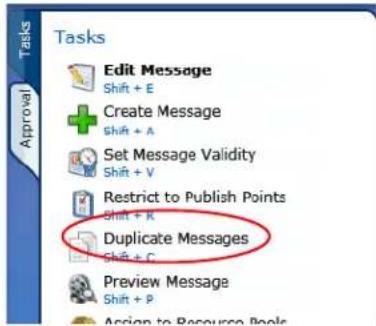
FIG. 18 Messages Task Pane
- Enter the number of copies you want to create of the Messages (FIG. 19).

FIG. 19 Duplicate Messages Window
- Click OK to continue or Cancel to quit.
Preview Messages
Composer 4 onwards has previewer functionality which allows users to preview messages in a story board layout cycling through images to give the impression of animation. Users modify a message, then save, which closes the message, and then press the preview button to preview it.
Click Preview Message to open the preview window and view an animation of the currently selected Message showing how it will appear on screen.
NOTE: Control Messages such as Layout Messages cannot be previewed.
To see which Messages can be previewed, select view mode Details Expand on Select or Details Expand All in the Message Tab. If a Message cannot be Previewed you will see the icon in FIG. 20.

Preview Not Available
FIG. 20 Preview Not Available Icon
Previews are generated over the network; at times of heavy demand from other users you may have to wait while the preview is generated. If you are previewing a message containing a video file then the preview will take longer to generate and you will only be able to view the first 30 seconds of the video. The preview window contains a panel showing the selected Message animating in a loop. Under this panel is a time bar showing snapshots from the animation at intervals of 0.5 seconds. The following actions are available in the preview window:
- Click a snapshot to restart the preview animation at this point.
- Click the arrow at the left of the screen to view earlier snapshots.
- Click the arrow at the right of the screen to view later snapshots.
Quick Preview Messages
In addition to the existing Preview functionality which needs access to a dedicated graphics card, the quick preview functionality is software rendered and does not require a graphics card on the server (FIG. 21). The quick previewer allows users to edit messages and preview content without leaving a message so that changes to a message can be saved or canceled.
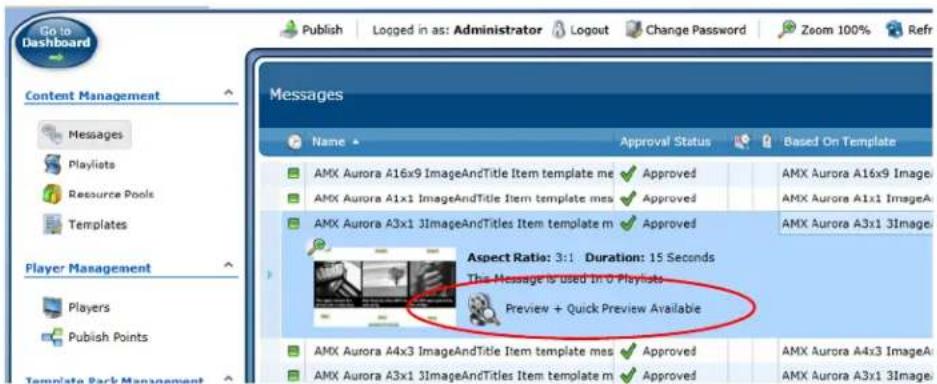
FIG. 21 Quick Preview Availability
Only certain messages are allowed to be previewed. When a message is selected the expanded view of the message will show whether a message has a Quick Preview or not. Below the message 'Preview + Quick Preview Available' indicates that the message can be previewed using the existing functionality and the new quick preview functionality.
Quick preview functionality is only available if the template packs have been updated to contain quick preview enabled content. After upgrading Composer, existing messages will only work with the old preview functionality. Once a template pack has been installed, and if template pack has template messages with quick preview enabled content, then those messages can be quick previewed
NOTE: Do not expect quick preview to work after upgrading unless template packs which have preview enabled content have been imported first.
Launching a Preview
"Double Click" a message to preview it or select it and select Edit Message from the Task Pane. In the bottom left corner of the Edit Message view, a 'Quick Preview' button is shown. Refer to FIG. 22.

FIG. 22 Launching the Quick Previewer
When the 'Quick Preview' button is pressed the previewer is launched using the existing content of the message. Refer to FIG. 23.
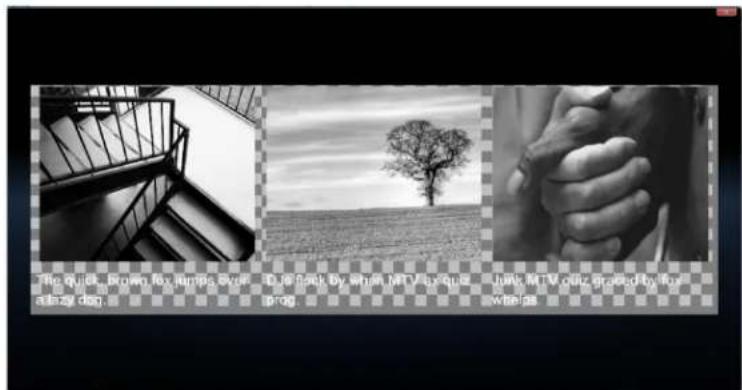
FIG. 23 Quick Preview of a Message
Changing Data
If the user chooses an image to be part of the preview in the Edit Message window above, the previewer will use that image in the preview it displays of the existing message. Refer to FIG. 24.

FIG. 24 Changing an Image In Quick Previewer
In addition to uploading images, the user can change all the properties of a message that can be edited.
Assign to Resource Pools
To assign (add) Messages to a Resource Pool:
- Select Messages in the Content Management section of Composer as shown in FIG. 25.

FIG. 25 Content Management Menu
- Select one or more Messages in the Message Table (FIG. 26). To add multiple Messages, press and hold the Ctrl key and then click on each Message to add..

FIG. 26 Select Messages to Add to a Playlist
- On the right side of the screen in the Task menu panel click Assign to Resource Pool to open a window showing all the Resource Pools in Composer (FIG. 27).

FIG. 27 Assign to Resource Pools - Messages Task Menu
- Note the Key in the window indicating one or more of the selected Messages already belongs to a Resource Pool (FIG. 28). This is indicated by a - (tick mark) in the check box to the left of the relevant Resource Pool. Messages will be unassigned from their current Resource Pools if you continue. If all of the selected Messages belong to a Resource Pool this is indicated by a check mark, these Messages will not be unassigned from their current Resource Pool if you continue. Enter a value in the edit box above the resource pool list to filtered the list based on the text entered.
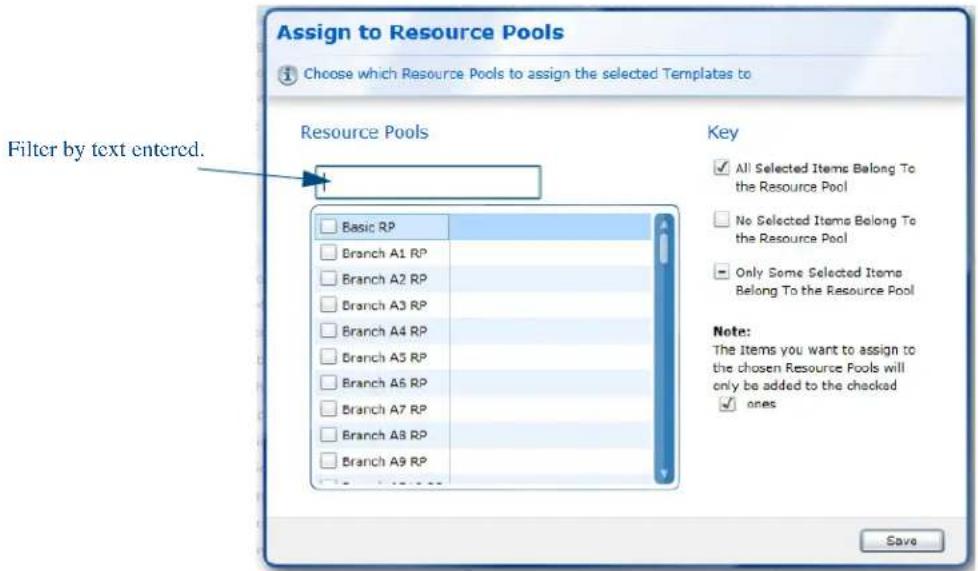
FIG. 28 Assign to Resource Pools Window
- Select the Resource Pools to add the selected Messages to.
- Click Save to complete the assignment or Cancel to quit.
Add Messages to Playlists
The Add Messages to Playlists task allows you to add one or more Messages to the end of one or more selected Playlists. The process is as follows:
- Select Messages in the Content Management menu (FIG. 29).

FIG. 29 Content Management Menu
- Select one or more Messages in the Message Table (FIG. 30). To add multiple Messages, press and hold the Ctrl key and then click on each Message to add.
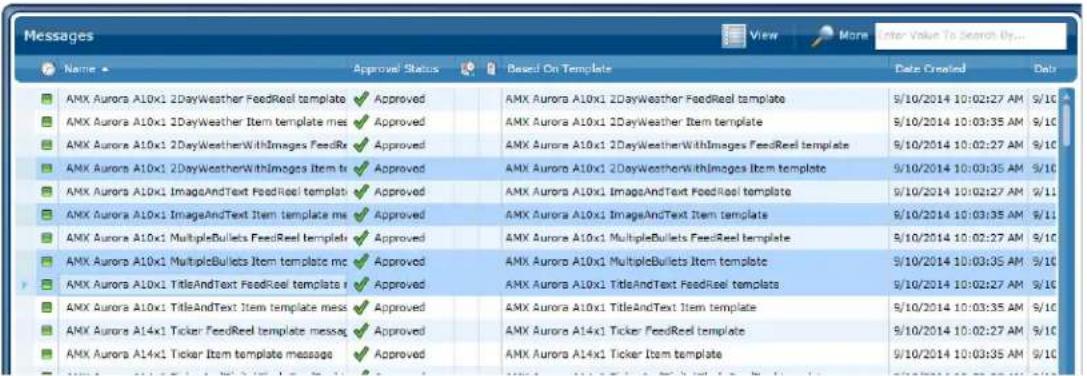
FIG. 30 Select Messages to Add to a Playlist
- On the right side of the screen in the Tasks menu panel click Add Messages to Playlist (FIG. 31).

FIG. 31 Add Messages to Playlists - Task Menu
- Select one or more Playlists by pressing and holding the Ctrl key (FIG. 32). Alternatively, press and hold the Shift key to select a range of Playlists.

FIG. 32 Add Messages to Playlists
- Click OK to add the selected Messages to the end of the selected Playlists
NOTE: Only Messages that have an Approved version can be added to Playlists.
Newly created Messages will not have an Approved version so can't be added to Playlists for Publishing to Players. This is not relevant to Users with review rights as any Messages they create or edit are automatically approved.
As Run Report
IS XPert enables Message display As Run Logging so users can log which messages play, their contents, and for how long. Composer can interrogate these logs to generate XML or CSV reports detailing how often different Messages have been displayed on Players and could be used in cases to bill another customer for advertising or data mining purposes.
There are three steps required to generate a report on what your Players are displaying:
- Enable As Run logging on the Players you wish to monitor.
- Leave the Players to collect data over the time period you are interested in.
- Generate a Report using the As Run Report option in the Content Management > Messages Task Pane.
Steps 1 and 3 are described in detail below.
NOTE: Make sure that Composer is updated to a version which supports As-Run logging (version 5.4 or above). Once Composer is updated, Republish All Messages needs to be performed to those Players to monitor, otherwise the As-Run logs will not be created properly on the Players
Enabling As Run Logging on (All or Selected) Players
If you have a large installation with many Players, contact AMX support for help enabling As Run Logging on all your Players. Alternatively you can enable logging on individual Players as follows:
- Select Players in the Player Management menu (FIG. 33).

FIG. 33 Player Management Task menu
- Select a Player to enable As Run Logging for in the Player table and click its Webconfig link (FIG. 34). This will open another browser tab showing the Player web configuration tool.

FIG. 34 Players Window
- Click Login to login to the web configuration tool and enter the Player's web config tool username and password. By default these are username = administrator password = administrator.
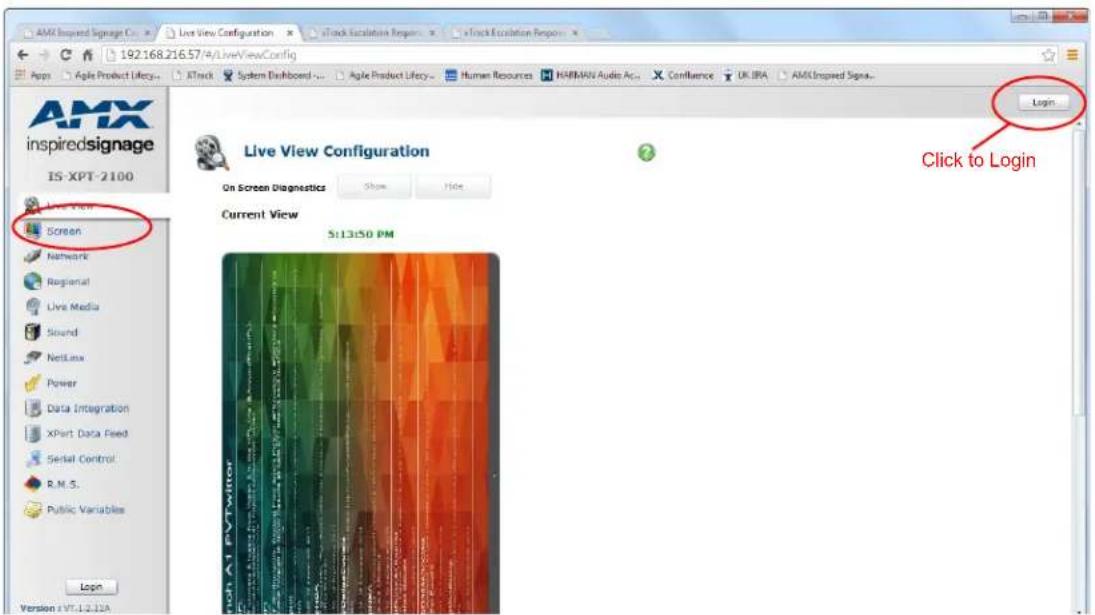
FIG. 35 Live View Configuration
- Select Screen in the left hand pane shown in FIG. 36.
- Search for As-Run Logging under rotation. Set the check-box Enable As-Run Logging.
- Click Save to save changes.

FIG. 36 Screen Configuration
-
To save log space and not report the data that each Message displays, set the check-box Exclude Templated Data.
-
Next. reboot the Player for the new setting to take effect. Select the Power option on the left menu tree (FIG. 37).
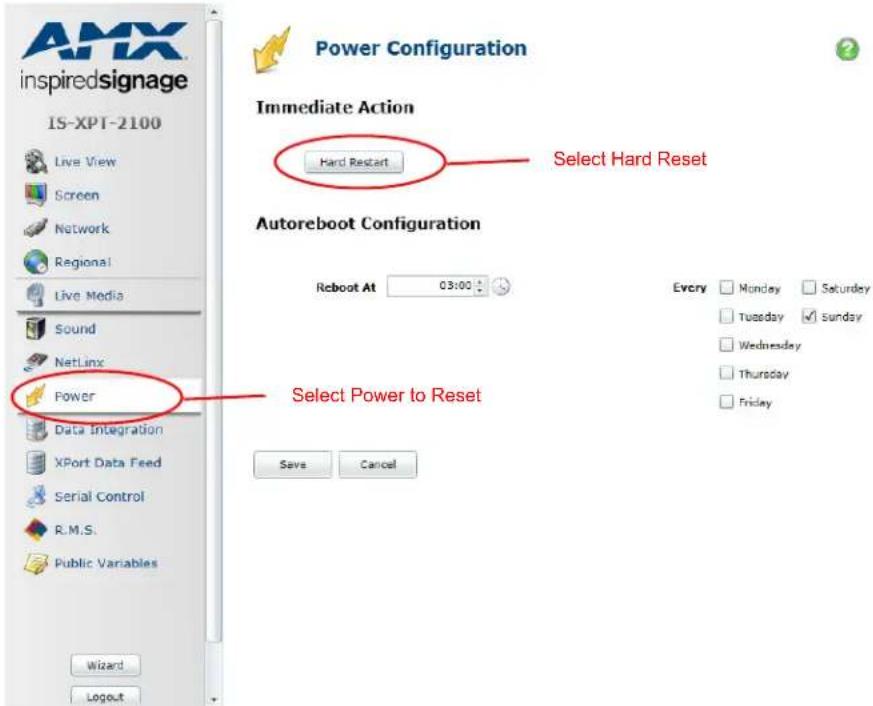
FIG. 37 Live View - Power Option
-
Select Hard Reset at the top off the page and wait for the Player to reboot. As-Run Logging is now enabled.
-
Repeat the process for all Players you wish to log.
Once you have enabled As Run Logging on your Players you can now generate reports showing when Messages have played on these Players.
Generate As Run Report
To generate a report proceed as follows:
- Select the Messages you want to generate a report on. Note, if you want a report which includes all Messages then skip this step.
-
Select As Run Report from the Task Pane within Content Management > Messages. This opens the As-Run Report dialogue box. The As-Run Report dialogue is divided into four sections:
-
Pick Source Players - use this section to select which Players to include in the report. You can either select individual Players or Publish Points (groups of Players)
- Pick Dates - this section allows you to select the dates that you want to produce a report for.
- Select Sources - shows the Players or Publish points chosen in the Pick Source Players section
- Optionally Filter By Messages - use this section to choose whether to report on all Messages or only those Messages you selected before clicking As Run Report in the Messages Task Pane The different sections are described in detail below.
Pick Source Players
Set check boxes beside the Players or Publish Points you want to report on. Selecting a publish point selects all the Players and Publish Points under that Publish Point. Click on the black triangles in front of a Publish Point to expand the tree and view any Players or Publish Points it contains.
NOTE: If you select a large number of Players then the report could take a long time to generate.
Pick Dates
Select a date that you want to report on by clicking on the calendar. Click the arrows to move backward or forward by one month. Select multiple dates by either:
- Holding down Ctrl while clicking on individual dates.
Or
- Selecting a start date. Then hold down Shift and select an end date to select a date range.
NOTE: If you select a large number of dates and a large number of Players then the report could take a long time to generate.
To the right of the calendar is a counter showing the total number of days selected and a selection of popular date ranges: Today, Yesterday, Last 7 days, Last week, This Month. Click on one of these date ranges to select the dates specified.
- This Month – from the 1st day of this month up to and including the present day
- Last week - Monday to Sunday of the previous week
- Yesterday - Yesterday
- To day - To day
- Last 7 days - Last 7 days
Select Sources
This shows the selected Players/Publish Points from the Pick Dates section.
Optionally Filter By Messages
There are two choices in this section:
- Set the check-box Only Report on Selected Messages to only generate a report on the Messages you selected prior to opening this dialogue. The list of selected Messages is shown in the pane underneath the check-box. Click on a Message to go to the Edit Message dialogue and view the Message details, this is useful to confirm you have selected the correct Messages for your As-Run Report.
- Clear check-box to generate a report on all Messages
Once you have completed all sections of the dialogue you can either click Generate As Run XML Report or Generate CSV Report. These options are described in detail below. Note that you may need to change your browser security settings to allow file download so that you can see the generated report. On Internet Explorer you need to enable Automatic prompting for file downloads
See Tools > Internet Options > Security > Custom Level > Downloads
XML Report
This generates a report in XML format, see link for further details.
CSV Report
This generates a report in CSV format, see link for further details.
XML As-Run Report
This section describes the contents of the XML As-Run Report, it assumes that the reader is familiar with the basics of XML. The XML report is divided into two sections:
- Site Summary section which contains summary statistics for all chosen Players.
- Player Report section which shows statistics for each of the chosen Players in turn.
These sections are described in detail below. Please note that all the times in the As-Run logs are only accurate to +/- 0.1 seconds.
Terminology
- Chosen Players = Players selected for analysis in the report.
- Chosen Messages = Messages selected for analysis in the report. Note the user can choose to produce a report on all Composer Messages.
- Chosen dates = dates selected for analysis in the report.
SiteSummary Element
The Site Summary section consists of a SiteSummary element which contains the following attributes:
- AllMessagePlayCount - sum of the total number of times that the chosen Messages are played on chosen Players for all chosen dates.
- AllMessageDuration - sums the total duration of all the chosen Messages played on chosen Players for all chosen dates.
- UnreadableLogCount - count of the number of As-Run entries that don't have a Message name. If this value is not zero then you have enabled As- Run logs on the Player but Player is not finding the Message data. This is because that some or all of the Messages on the Player were published with a version of Composer prior to 5.4. You will need to republish all Message that are on the Player to correct this issue.
The SiteSummary element contains:
- a DateRange element.
- a SiteMessageSummary element for each chosen Message, summary data for all chosen Players.
These elements are described in detail below.
DateRange Elements
The DateRange elements contain a number of Summary elements, one for each chosen date.
The Summary elements contain summary data for all Players for a specific date.
Summary elements contains the following attributes:
- Date - Date being summarized
- DailySiteMessagePlays - Number of chosen Messages played on the chosen Players during the date indicated by the Date attribute
- DailySiteMessagesDuration - Total duration (playing time) of chosen Messages played on the chosen
Players during the date indicated by the Date attribute
SiteMessageSummary Elements
The SiteMessageSummary elements show summary information for individual Messages. They contain the following attributes:
- name - Message name
- DailySiteMessagePlays - count of number of times the named Message was played on the chosen Players
- DailySiteMessagesDuration - sum total of the time that the named Message was displayed on the chosen Players
Player Report Section
The Player Report section consists of a PlayerReport for each of the chosen Players. Each PlayerReport element has a number of attributes:
• Name - the name of this Player.
- Host - the Hostname or IP address of this Player.
- AllMessagePlays - sum of the chosen Messages played on this Player for all chosen dates.
- AllMessageDuration - sum total of the time that the chosen Messages were displayed on this Player.
Player report elements contain:
- A single DateRange element.
- A MessageSummary element for each of the chosen Messages.
- A DailyAsRun element for each of the chosen dates. This provides summary and detailed information about what was displayed on this Player on each of the chosen dates.
DateRange Elements
The DateRange elements contain a number of Summary elements, one for each chosen date.
Summary Elements
The Summary elements contain summary data for a specific Player on a specific date.
Summary elements contains the following attributes:
- Date - Date being summarized.
- DailyMessagePlays - Number of chosen Messages played on this Player during the date indicated by the Date attribute.
- DailyMessages Duration - Total duration (playing time) of chosen Messages played on this Player during the date indicated by the Date attribute.
MessageSummary Elements
The MessageSummary elements show summary information for individual Messages. They contain the following attributes:
- name - Message name.
- PlayCount - count of number of times the named Message was played on the specific Player.
- TotalDuration - sum total of the time that the named Message was displayed on the specific Player.
DailyAsRun Element
The DailyAsRun has a date attribute. This date is one of the chosen dates. The element contains:
• A single DailySummary element.
- A MessagePlays element for each chosen Message that was displayed on the Player.
DailySummary Element
The DailySummary element contains a number of MessageSummary elements. These are described below.
MessageSummary Elements
The MessageSummary elements show summary information for Messages from the list of chosen Messages that have been displayed at least once on the Player during this date. They contain the following attributes:
- name - Message name.
- PlayCount - count of number of times the named Message was played on this Player on this date.
- TotalDuration - sum total of the time that the named Message was displayed on this Player on this date.
MessagePlays Element
MessagePlays element contains a MessagePlay element.
MessagePlay Elements
MessagePlay Element contains the following attributes:
- name - name of a chosen Message that has been displayed on this Player on this day. The MessagePlay element contains a TimeSpan element for every time the named Message is displayed on this Player on this date.
TimeSpan Element
This element contains a number of attributes:
- StartTime - Start of Message display.
-
EndTime - End of Message display.
-
PlayDuration - Duration Message is displayed (EndTime-StartTime).
- ExpectedDuration - Expected Duration for Message/ Note that this and Play Duration may differ if something happens to cause the Message to be cut short such as a change of Layout.
CSV As-Run Report
The following table describes the columns which make up the CSV As-Run Report:
| CSV As-Run Report | |
| Column Name Description | |
| Player Player Name | |
| Host Hostname or IP of Player | |
| Date Date of Log entry | |
| MessageName Name of Message displayed on Player | |
| StartTime Start of Message Display (accurate to +/- 0.1 secs) | |
| EndTime End of Message Display (accurate to +/- 0.1 secs) | |
| Duration EndTime-StartTime (accurate to +/- 0.1 secs) | |
| TemplateData Optional column (only included if the Exclude Template Data option is not set in your Players' Web Configuration Tool). This contains a list of all Message Properties and their values using the following syntax:==e.g. Layout:ID=3DBoxes_A16x9_AltWidgets Area | |
The rows of log data are ordered by Player. Within a list of log entries for a particular Player the entries are arranged by Date order. Within Dates each log entry is ordered Start Time i.e.:
Player 1 Date 1
Player 1 Date 2
Player 1 Date N
Player 2 Date 1
Player 2 Date 2
......
Player 2 Date N
Player 3 Date 1
Delete Messages
To delete Messages:
- Select Messages in the Content Management menu shown in FIG 38.
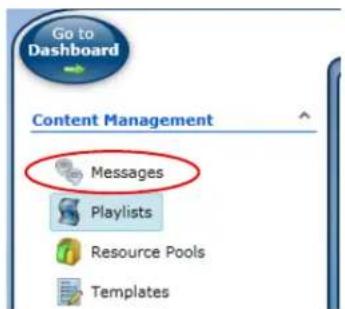
FIG. 38 Content Management Menu
- Find the Message or Messages in the Message table (FIG. 39) to delete and left-click to select. To delete multiple Messages, press and hold the Ctrl key and then click on each Message to delete.

FIG. 39 Message Table List - Select to Delete
- Click Delete Messages at the bottom of the Task Pane as shown in FIG. 40.

FIG. 40 Delete Messages
See Also:
- Creating a Message, See Create Message on page 55
• Editing a Message, See Edit Message on page 54
• Duplicating Messages, See Duplicate Messages on page 62
Playlists
The Content Management: Playlist sub-section contains a Task Pane with the following actions:
- Edit Playlist on page 75 for more details.
• See Create/Edit Playlist Versions on page 78 - Assign Playlists to Resource Pools on page 79
- Assign Playlist Publish Points on page 80
- Assign Playlist Publish Points on page 80
• View Playlist Conflicts on page 81 - Set Playlist Restrictions on page 82
- Scheduling Different Layouts at Different Times on page 84
- Playlist Mixing Example on page 84
• Create Playlist on page 85.
• Export Playlists on page 87. - Delete Playlists on page 88.
The Playlist sub-section also contains a Data Table. See page 30 for more details, which shows all the Playlists defined in the Inspired Signage System. The table following this list describes the columns in this Data Table.
| Playlist Data Table | |
| Column Description | |
| Name Descriptive name for Playlist | |
| Approval Status Indicates whether changes to the Playlist have been approved.Only approved Playlists can be published. Status can be Approved, Pending, Rejected | |
| Active Version Active Playlist Version | |
| Messages Number of Messages | |
| Playlist Type Either Manual or Automatic. | • Manual Playlists are modifiable inside Composer.• Automatic Playlists can only be modified by external applications such as Babel |
| Play Method Either Pooling Playlist or Standard Playlist. The Playlist type is determined by the content architecture.• Standard Playlist are a fixed, sequential set of Items• Pooling Playlists can be randomized, or interleaved with other Pooling Playlists before being shown on screen | |
| Publish file name The name of the Playlist file that this Playlist is published to on Players | |
Edit Playlist
- Select Playlists from the Content Management menu (FIG 41).
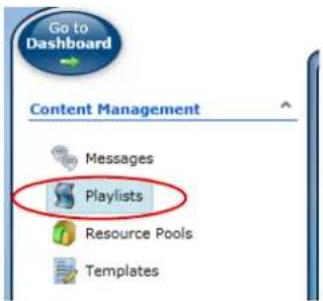
FIG. 41 Content Management Menu - Playlists
- The Playlist menu shows a list of Playlists in the Playlist Table. Click on the Playlist to modify (FIG. 42).
| Name - | Approval Status | Active Version | Messages | Playlist Type | Play Method | publish file Name |
| Area Playlist: A10x1 (primary) | Approved | Main | 3 | Manual | Pooling Playlist | AreaContent_A10x1_Main.pool |
| Area Playlist: A14x1 (primary) | Approved | Main | 0 | Manual | Pooling Playlist | AreaContent_A14x1_Main.pool |
| Area Playlist: A16x9 (live media) | Approved | Main | 1 | Manual | Pooling Playlist | AreaContent_A16x9_LiveMedia.pool |
| Area Playlist: A16x9 (primary) | Approved | Main | 7 | Manual | Pooling Playlist | AreaContent_A16x9_Main.pool |
| Area Playlist: A1x1 (primary) | Approved | Main | 3 | Manual | Pooling Playlist | AreaContent_A1x1_Main.pool |
| Area Playlist: A26x1 (primary) | Approved | Main | 0 | Manual | Pooling Playlist | AreaContent_A26x1_Main.pool |
| Area Playlist: A3x1 (primary) | Approved | Main | 3 | Manual | Pooling Playlist | AreaContent_A3x1_Main.pool |
| Area Playlist: A3x4 (primary) | Approved | Main | 0 | Manual | Pooling Playlist | AreaContent_A3x4_Main.pool |
| Area Playlist: A3x5 (primary) | Approved | Main | 3 | Manual | Pooling Playlist | AreaContent_A3x5_Main.pool |
| Area Playlist: A4x3 (primary) | Approved | Main | 0 | Manual | Pooling Playlist | AreaContent_A4x3_Main.pool |
| Area Playlist: A9x15 (primary) | Approved | Main | 0 | Manual | Pooling Playlist | AreaContent_A9x15_Main.pool |
| Audio Playlist | Approved | Main | 0 | Manual | Pooling Playlist | AudioContent.pool |
| Layout Selector | Approved | Main | 27 | Manual | Pooling Playlist | LayoutSelection.pool |
| Overlay Playlist | Approved | Main | 0 | Manual | Pooling Playlist | OverlayContent.pool |
FIG. 42 Playlists Table
- On the Task menu panel, click Edit Playlist Version to open the Edit Playlist window (FIG. 43).
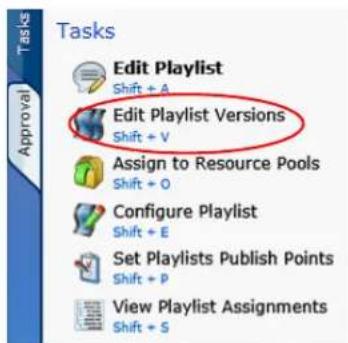
FIG. 43 Playlists Task Menu Pane
The Edit Playlist window contains two tables (FIG. 44):
- On the left is the Message Table which contains a list of all the Messages which can be added to the Playlist.
Only Messages that have an approved version will be shown as only the approved version of a Message can be added to a Playlist and published to Players. Newly created Messages will not have an Approved version so will not appear. This is not relevant to Users with review rights as any Messages they create or edit are automatically approved. The available Messages are also filtered according to the Playlist Restrictions set on this Playlist. - On the right is the Filmstrip which lists all the Messages in the selected Playlist. The fact that this is a Playlist is shown by the film strip graphics.
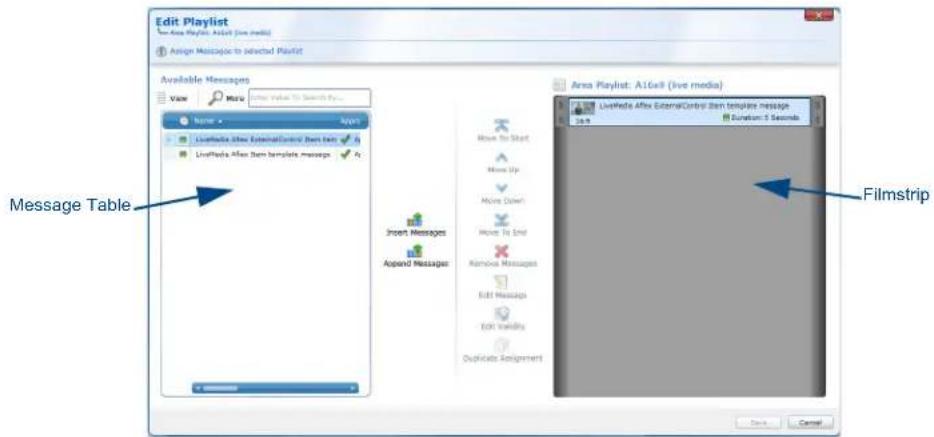
FIG. 44 Edit Playlists
Click on a Message in either table to select it (FIG. 45). Selected Messages in the Filmstrip are indicate with orange rectangles.
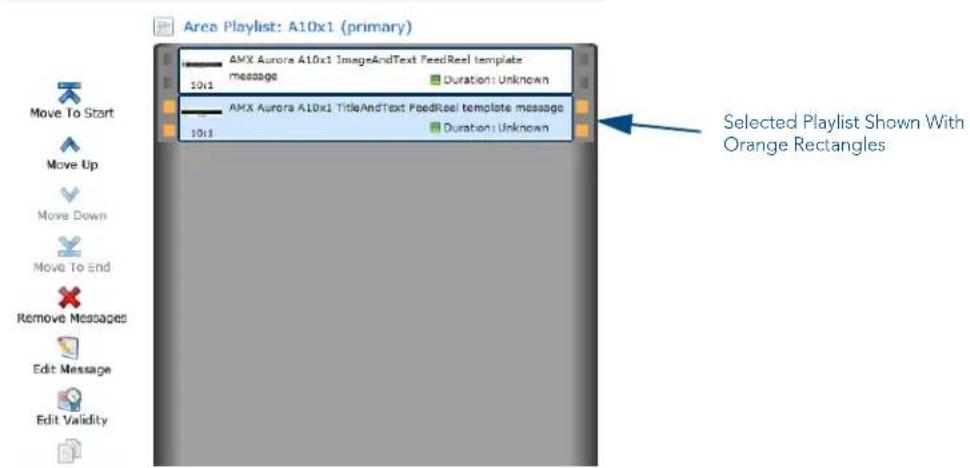
FIG. 45 Playlists - Area Playlist Selections (Orange Rectangles)
If the Playlist is configured to play sequentially then the Messages order in the Filmstrip determines the order in which Messages are displayed. That is to say: Messages at the top are displayed before Messages lower down. To change the Message order select a Message and click Move Up or Move Down to move the Message up or down in the play order. You can also click Move to Start or Move to End to move the selected Message to the Start or End of the Playlist as required.
Add Message to End of Playlist
To add one or more Message to the end of the current Playlist:
- Select Messages from the Message Table on the left side of the Edit Playlist window shown in FIG. 44 above.
- Click Append Messages between the left and right panels. The selected Messages are added to the end of the Playlist.
Add Message to Beginning of Playlist
To insert one or more Messages before the selected location in the Playlist:
- Select Messages from the Message Table on the left side of the Edit Playlist window shown in FIG. 44 above.
- Click Insert Messages. The Selected Messages are inserted into the Area Playlist on the right panel.
- Select the message and click on the Move Up arrow or Move to Top arrow on the left of the Area Playlist panel to move the e current selected Message up in the Playlist.
NOTE: When adding or inserting a Message being added to a link to that Message to the Playlist, if you edit that Message you are editing all copies of the Message in the Playlist as they are all linked.
Remove Messages from a Playlist
To remove Messages from the Playlist:
- Select Messages from the Playlist.
- Click Remove Messages. The Selected Messages are removed from the Playlist.
Duplicate Assignment
Use duplicate assignment to add a copy of a Message which is already in the Playlist. The copied Message is added just before the Message you want to copy creating a duplicate of the selected Message. The process is as follows:
- Select a Message in the Playlist.
- Click Duplicate Assignment.
NOTE: These duplicate Messages are not separate Messages (they are links to the same Message). If you edit that Message then you are editing all copies of the Message in the Playlist.
One you have finished editing the Playlist. Click Save to confirm the changes to the Playlist or Cancel to close the Assign Playlist Message window without modifying the Playlist. There are a couple of Message manipulation operations available. These are as follows:
- Click Edit Message to edit the contents of the selected Message in the Playlist.
- Click Edit Validity to edit the Message Validity of the selected Message in the Playlist to determine when this Message can be displayed on any Players it is published to.
Create/Edit Playlist Versions
The Edit Playlist Versions Window contains a list of Playlist Versions for the chosen Playlist.
This is the current active version icon shown to the left.

The Inactive version is shown by the icon to the left.
This window also has a number of actions represented by icons:
- Add Version.
- Remove Version.
- Activate Version.
These are discussed in more detail below:
Add New Playlist Version
Create a new Playlist Version as follows:
- Select Playlists from the Content Management menu (FIG 46).
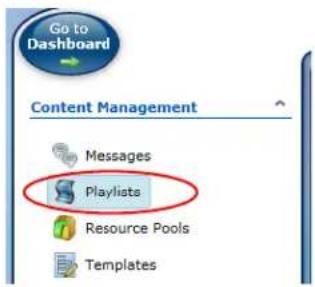
FIG. 46 Content Management Menu - Playlists
- The Playlist menu (FIG. 47) shows a list of Playlists in the Playlist Table. Click on the Playlist to modify.
| Name * | Approval Status | Active Version | Messages | Playlist Type | Play Method | Publish file name |
| Area Playlist: A10x1 (primary) | Approved | Main | 3 | Manual | Pooling Playlist | AreaContent_A10x1_Main.pool |
| Area Playlist: A14x1 (primary) | Approved | Main | 0 | Manual | Pooling Playlist | AreaContent_A14x1_Main.pool |
| Area Playlist: A15x9 (live media) | Approved | Main | 1 | Manual | Pooling Playlist | AreaContent_A15x9_LiveMedia.pool |
| Area Playlist: A15x9 (primary) | Approved | Main | 7 | Manual | Pooling Playlist | AreaContent_A15x9_Main.pool |
| Area Playlist: A1x1 (primary) | Approved | Main | 3 | Manual | Pooling Playlist | AreaContent_A1x1_Main pool |
| Area Playlist: A26x1 (primary) | Approved | Main | 0 | Manual | Pooling Playlist | AreaContent_A26x1_Main pool |
| Area Playlist: A3x1 (primary) | Approved | Main | 3 | Manual | Pooling Playlist | AreaContent_A3x1_Main pool |
| Area Playlist: A3x4 (primary) | Approved | Main | 0 | Manual | Pooling Playlist | AreaContent_A3x4_Main pool |
| Area Playlist: A3x5 (primary) | Approved | Main | 3 | Manual | Pooling Playlist | AreaContent_A3x5_Main pool |
| Area Playlist: A4x3 (primary) | Approved | Main | 0 | Manual | Pooling Playlist | AreaContent_A4x3_Main pool |
| Area Playlist: A8x15 (primary) | Approved | Main | 0 | Manual | Pooling Playlist | AreaContent_A8x16_Main pool |
| Audio Playlist | Approved | Main | 0 | Manual | Pooling Playlist | AudioContent.pool |
| Layout Selector | Approved | Main | 27 | Manual | Pooling Playlist | LayoutSelection.pool |
| Overlay Playlist | Approved | Main | 0 | Manual | Pooling Playlist | OverlayContent.pool |
FIG. 47 Playlists Table
- On the Task menu panel, click Edit Playlist to open the Edit Playlist window.

FIG. 48 Playlists Task Menu Pane
- Click Add Version.
- Enter a name for the new Playlist Version.
Remove Version
-
Select the Playlist Version to remove from the list.
-
Click Remove Version.
NOTE: If a currently active Version is removed, the default 'main' version becomes active.
Activate Version
- Select the Playlist Version to activate.
- Click Activate Version.
Assign Playlists to Resource Pools
A search filter functionality has been added to this dialog. For Example, select a message on the Messages tab and click the Assign To Resource Pools task. When the user enters a value in the edit box above the resource pool list, the list is filtered based on the text entered. Refer to FIG. 49.
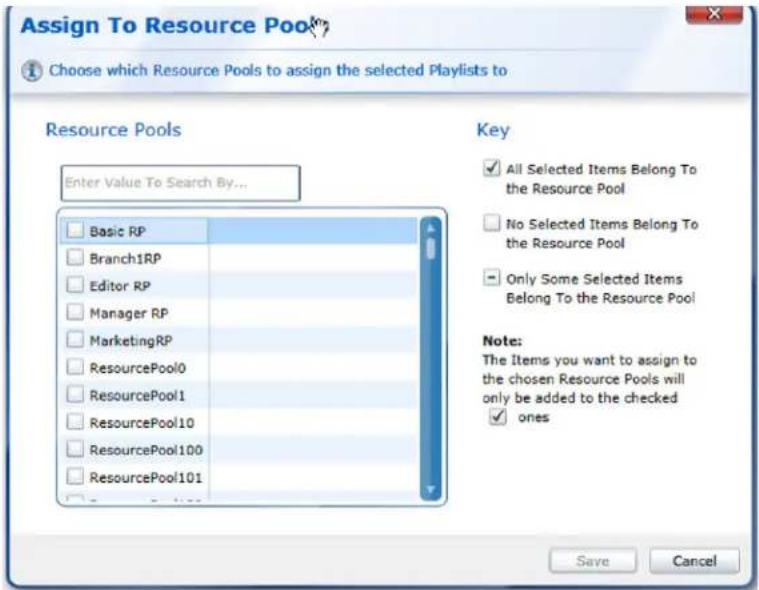
FIG. 49 Assign to Resource Pool
To assign (add) Playlists to Resource Pools:
- Select a Playlist or Playlists - not necessary if you have accessed this through the new Playlist options window
- Click Assign to Resource Pool to open the Assign to Resource Pools window. This window shows all the Resource pools in Composer. If one or more of the selected Playlists already belongs to a Resource Pool this is indicated by a - in the check-box to the left of the relevant Resource Pool. Note these Playlists will be unassigned from their current Resource Pools if you continue. If all of the selected Playlists belong to a Resource Pool this is indicated by a tick, these Playlists will not be unassigned from their current Resource Pool if you continue.
- Select the Resource Pools you wish to add the selected Playlists to.
- Click Save to complete the assignment or Cancel to quit.
Playlist Conflict Prevention
A playlist conflict occurs when two or more playlists defined with identical pool names are assigned to a player -either directly to the player or indirectly through the player's parent publish points. When a playlist conflict is created the system will not allow the user to perform any publishing tasks until the conflicts are removed. The reason is that the player uses the playlists pool name as a unique identifier when the content is rendered. Why do we allow the user to create playlists with duplicate pool names? Well, originally it was decided that an administrator with this advanced knowledge can use this "feature" to swap playlist content on the player. He/she would create 2 or more playlists with different content, define them with the same pool name, then swap them out when the content needs to change (only one of the playlists would be assigned to the player at any given time).
The problem is that admins without this knowledge can get themselves in trouble because the system does not prevent the user from assigning playlists with duplicate pool names to a player. As much prevention as possible has been added so that the user is not allowed to assign playlists with duplicate file names to a player. So, any time the user assigns a playlist to a player (or publish point) the user may see the prevention triggered.
FIG. 50 provides an example where the user cannot click the Save button until the conflict is corrected.
![Pick Publish Points Playlist00Test2 Duplicate publish file names for assigned playlists have been detected. Resolve these duplicates before saving changes. Publish Points Choose the Desired publish points ▶ Landscape [2] ◀ Portrait [1] ✓ test2 (Host: test2, Playlists: 1) ▶ RatoBankPlayerSet [901] □ Test [0] Selected Below is a summary of all selected publish points. PlayerSet00Test Landscape ▲ test2 Save Cancel](/content/2026/05/1045850/images/29c2890e14dfc72adbb574ce3216f8fab0fda7c99642ad93b399894fcfc68b22.jpg)
FIG. 50 Set Playlists Publish Points Task Example - New Feature
Assign Playlist Publish Points
This option allows users to change the Publish Points associated with a Playlist. When you Publish Content Changes using the Publish Menu, this Playlist is sent to all the Players which belong to the associated Publish Points. Publish Points are represented by folders in the Publish Point view and individual Players by icons. This view indicates which publish points the playlist(s) are already assigned to by showing a check in the check-box. A blue ball indicates when parent publish points contain selections so a user can navigate down the appropriate path to find the checked selection.
The Publish Points part of the window shows all the Publish Points defined in the system including the playlists and where they were assigned. To add new Publish Points, delete Publish Points, or to change the relationship between Publish Points use the Player Management section.
- Click on Playlists under the Content Management menu.
- Select a Playlist in the Playlist Table and select Assign to Publish Points in the Tasks Menu Pane (FIG. 51).

FIG. 51 Assign to Publish Points Menu Selection
Click on a Publish Point arrow to expand it to reveal its contents. When you find a Publish Point you want to associate with the Playlist, click the check-box on the same line, to the left of the Publish Point. The Selected Publish Points section updates to show all Publish Points associated with this Playlist. In FIG. 52 you can see who owns playlists.
![Assign to Publish Points Area Playbin All (Myers) Set the Publish Points to the Playlist will be published to Publish Points Choose the Desired publish points Landscape [0] Portrait [1] Text [2] Parent contains one or more selected items Selected Below is a summary of all selected publish points Landscape Text-1-1-1 Save Cancel](/content/2026/05/1045850/images/f825f7485a682d9b62614c59110130425d0baef41efdc1fa391141a71e5c0dfa.jpg)
Tooltip Shows What the Ball Represents
![Assign to Publish Points Area Publish A1 (Primary) Set the Publish Points the Playlist will be published to Publish Points Choose the Desired publish points Landscape: [8] Portrait: [3] Text: [2] Player1 (Host: Player1, PlayInfo: 1) TextChild: [2] Selected Below is a summary of all selected publish points Landscape Text1->1 Save Cancel](/content/2026/05/1045850/images/d3771f04787cf55bb9e7bda4f1541656f24136d1bc9876fe593e7b7b9db6bfed.jpg)
Drill Down Following The Blue Ball
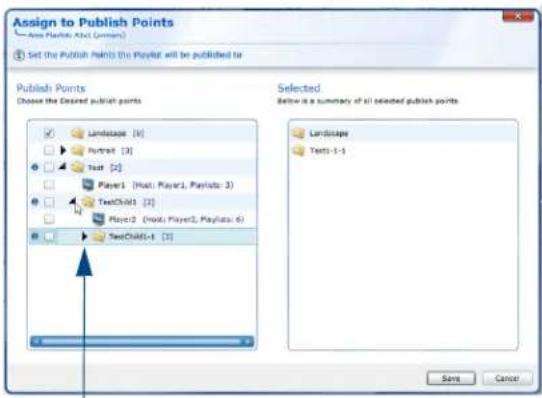
Drill Down Following The Blue Ball
![Assign to Publish Points Assign Playbox A#1 (General) Set the Publish Points: the Playlist will be published to Publish Points Choose the Desired publish points Selected Below is a summary of all selected publish points Landscape Text1-1-1 ✓ ✓ Text3-1-1. [0] Text3-1-1. [0] Text3-1-1. [0] Text3-1-1. [0] Text3-1-1. [0] Text3-1-1. [0] Text3-1-1. [0] Text3-1-1. [0] Text3-1-1. [0]](/content/2026/05/1045850/images/a7fe8916d7fbaad3ead0864b18c27be833118ab795359c9611093b01521fb029.jpg)
Check Box Indicates
FIG. 52 Player Current Publish Points
View Playlist Conflicts
Even with the added logic of prevention (explained above) there are holes in the system where the user can still create a conflict. Playlists conflicts occur when a player is assigned playlists (either directly or inherited via publish point folders) which have duplicate pool filenames. The View Playlist Conflicts task will search the system for conflicts.
This task also serves two purposes. When this task is selected, the logic will first check for playlist conflicts in the system. If any conflicts are found the Playlist Report shows all the conflicts listed by Player and the offending playlists FIG. 53. This screen shows the Publish Point hierarchy containing Players and Player Groups (child Publish Points). It uses a collapsed tree-like view whereby content is only retrieved when the user expands a node. Click the arrows in front of Publish Points to expand or contract them as needed to show their contents.
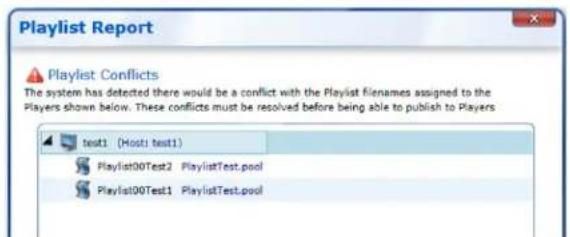
FIG. 53 Playlist Report Without Conflicts (left), and with Conflicts (right)
If no playlist conflicts are found a dialog window appears indicating so as shown in FIG. 54.

FIG. 54 No Conflicts to Report
Set Playlist Restrictions
Playlist Restrictions are used to restrict which Message can be added to a Playlist. Each Playlist can have a list of Template Definitions associated with it called a Restriction List. If a Playlist has a Restriction List then you can only assign Messages based on Definitions in the Restriction List to the Playlist. This technique is used to stop users putting inappropriate Messages in a Playlist. There are two ways you can create Playlist Restrictions, manually or automatically.
Playlist Restrictions can be setup automatically by setting a list of Metadata labels (The automatic restriction group) you want to select and importing a Template Pack containing Template Definitions tagged with one or more of these labels, see Auto Populate below.
Create Manual Playlist Restrictions by specifying a list of Templates Definitions that Playlist Messages must derive from. Now when you go to assign Messages to a Playlist only Messages created from these Template Definitions are available.
NOTE: If you change the Restrictions for a Playlist then any Messages which are now restricted are removed.
Playlist Restrictions
In the Playlist Restrictions window, the left hand side contains a table with all Template Definitions stored in Composer. The right hand side of the window contains a table showing the Template Definitions in the Restriction List. If there are no Template Definitions in the Restriction List then all Messages are allowed.
Adding Template Definitions To The Restriction List
Once you have created a Playlist you can restrict the content that can be added to the Playlist using Playlist Restrictions. Playlist Restrictions are a list of Template Definitions; only Messages derived from Template Definitions that are not in the Restriction List can be added to the Playlist.
AMX offers a way to quickly add a number of Template Definitions to the Restriction List based on the metadata label(s) the Template Definitions are tagged with. To setup Playlist restrictions we need to know what labels are used by the Template Definition creators.
AMX Template Packs use the following labels:
• Livemedia - used for LiveMedia Template Definitions
- Layout - used for Layout Template Definitions
- A10x1 - used for Template Definitions with this aspect ratio
- A26x1 - used for Template Definitions with this aspect ratio
- A3x5 - used for Template Definitions with this aspect ratio
- A3x4 - used for Template Definitions with this aspect ratio
• A9x16 - used for Template Definitions with this aspect ratio
• A16x9 - used for Template Definitions with this aspect ratio
Setting Up Playlist Restrictions Using Labels
- Select the Content Management Section of Composer.
- Select the Playlist sub-section
- Select Set Playlist Restrictions
-
Click Auto Populate
-
Enter one or more of the labels listed above into the dialog box separated by commas.
You can now refine the Playlist Restrictions manually by adding/removing Template Definitions to/from the Chosen Template Definitions column. Select Template Definitions from the left hand side of the dialog and click Add Restriction to add the selected Template Definitions to the Restriction List.
Area Playlist Mixing Rules
The area mixing rules determine how the three types of Area Playlist are mixed together to create the display for each Layout area. The rules are as follows:
- If there is a valid LiveMedia message in the LiveMedia Playlist for this area, display this LiveMedia message in this Layout area.
- If there are no valid LiveMedia messages in the LiveMedia Playlist for this area, display 3 messages from the Primary Playlist for every 1 message taken from the Secondary Playlist.
Construct the Secondary Playlist by taking 1 message in turn from each of the Secondary Playlists.
You can alter the three numbers described in the previous paragraph by setting the Public Variable PlaylistControl:SelectCounts to a comma separated group of three numbers.
The default value is 3,1,1
NOTE: See the Public Variable section of the Player Web Configuration Tool help for more details about modifying Public Variables.
FIG. 55 explains the three numbers making up the public variable PlaylistControl:SelectCounts used to control Playlist Mixing:
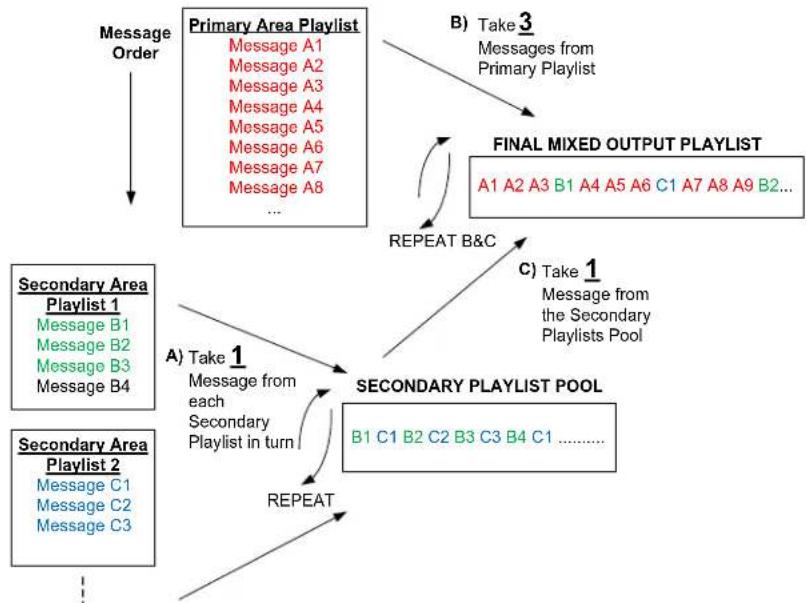
flowchart
graph TD
    A["Message Order"] --> B["Primary Area Playlist"]
    B --> C{Message A1}
    B --> D{Message A2}
    B --> E{Message A3}
    B --> F{Message A4}
    B --> G{Message A5}
    B --> H{Message A6}
    B --> I{Message A7}
    B --> J{Message A8 ...}
    C --> K["FINAL MIXED OUTPUT PLAYLIST"]
    D --> K
    E --> K
    F --> K
    G --> K
    H --> K
    I --> K
    J --> K
    K --> L["REPEAT B&C"]
    L --> M["SECONDARY PLAYLIST POOL"]
    M --> N["A) Take 1 Message from each Secondary Playlist in turn"]
    N --> O["REPEAT"]
    O --> P["SECONDARY PLAYLIST POOL"]
    P --> Q["B1 C1 B2 C2 B3 C3 B4 C1 ......"]
    Q --> R["Secondary Area Playlist 1"]
    Q --> S["Secondary Area Playlist 2"]
    R --> T["Secondary Area Playlist 1"]
    R --> U["Secondary Area Playlist 2"]
FIG. 55 Default Playlist Mixing Rules - Public Variable Playlist Control: Select Counts set to 3,1,1
- The first number controls how many Messages to take from the Primary Playlist.
- The second number controls how many Messages to take from the Secondary Playlist Pool.
- The third number controls how many Messages to take in turn from each Secondary area Playlist to construct the Secondary Playlist Pool
Link Between Layout Message Area Property Values and Area Playlists
Each Layout contains a number of area properties used to select the Playlists to display in this area (FIG. 56). In the following example, one of the Layout Message area properties is set to A16x9. The contents of any Playlist with a filename which match AreaContent_A16x9_Main.pool or AreaContent_A16x9_Sub_

FIG. 56 Link Between Area Playlists and Layout Messages
Examples Playlists that would match an area property setting of A16x9 are shown in the following table:
| Example of Playlists that would match an Area Property Setting of A16x9 | |
| Playlist Types Example Playlist Filenames | |
| Primary Content Playlist | AreaContent_A16x9_Main.pool - used for priority messages for this layout area |
| Secondary Content Playlists | AreaContent_A16x9_Sub_Marketing.pool - used for Marketing messagesAreaContent_A16x9_Sub_Sales.pool - used for Sales messages |
| LiveMedia Playlist AreaContent | A16x9_LiveMedia.pool |
Scheduling Different Layouts at Different Times
You can schedule different Layout at different times by:
- Adding more than one Layout Message to the Layout Scheduling Playlist.
- Setting Validity Rules on these Layout Messages so that only one Layout Message is valid at a particular time.
FIG. 57 shows how the Area Playlists restart when changing Layout (Layout Messages). Please note that the Player takes 10 seconds to change from one Layout to another.

flowchart
graph TD
    A["Layout Scheduling Playlist"] --> B["ClassicSplit (Four-Way)"]
    A --> C["Full Screen"]
    A --> D["ClassicSplit (Four-Way)"]

    E["Area Playlists"] --> F["A16x9 Area Playlist"]
    E --> G["A3x5 Area Playlist"]
    E --> H["A10x1 Area Playlist"]
    E --> I["A26x1 Area Playlist"]

    J["Time Line"] --> K["9:00AM"]
    J --> L["9:05AM"]
    J --> M["9:10AM"]
    J --> N["9:15AM"]
    J --> O["9:20AM"]
    J --> P["9:25AM"]
    J --> Q["9:30AM"]
FIG. 57 Interaction between Layout Scheduling Playlist and Area Playlists
Practical Examples
In this sub-section we illustrate some advanced practical examples.
Playlist Mixing Example
This sub-section describes how to use Playlist mixing to make your content more interesting. In the following example scenario there are two different departments in an organization, Engineering and Marketing, which both want to display Messages on screen. Typically an organization would also want to display news and weather feeds interleaved with the Messages from the Engineering and Marketing departments. Here are the outline steps required to achieve this effect:
- Create Secondary Area Playlists for each department to be shown in one of the layout areas such as the A10x1 area. For example, create an Engineering Secondary Area Playlist and a Marketing Secondary Area Playlist using the following Playlist filenames:
AreaContent_A10x1_Sub_Marketing.pool
AreaContentA10x1_Sub_Engineering.pool
- Create an additional Secondary Area Playlist for news data feeds with filename:
AreaContent_A10x1_Sub_NewsFeed.pool
- Optional - set Playlist Restrictions so that only Messages based on Feed Reel Templates can be added to this Playlist.
- Create an additional Secondary Area Playlist for a weather data feed.
-
Optional - set Playlist Restrictions so that only Messages based on Feed Reel Templates can be added to this Playlist.
-
Restrict access to the Engineering and Marketing Playlists so that only Engineering Staff can add Messages to the Engineering Playlist and only Marketing Staff can add Messages to the Marketing Playlist.
- Finally you can configure the Permissions so that only Managers can access the Primary Area Playlist to display priority messages in this Layout Area.
See Resource Pools, User Groups, and Permissions in the Composer Help or the Composer Operation/Reference Guide for details.
The Player will now take 3 Messages from the Primary Area Playlist (Manager content) followed by 1 Message taken from a collection (pool) of Messages constructed by taking 1 Message from each Secondary Area Playlist in turn.
- Repeat the process for the remaining layout areas.
Removing Template Definitions From the Restriction List
Select Template Definitions from the right hand side of the dialog and click Remove Restriction to remove the selected Template Definitions from the Restriction List.
Auto Populate Restrictions
This option allows you to quickly add large numbers of Template Definitions to the Playlist Restriction List. Warning, this will clear any Template Definitions currently in the Playlist Restriction List. Enter a comma separated list of labels such as Zone1, Zone2, Zone3 (spaces before and after the commas are ignored) under Automatic Restriction Groups and click the green tick icon.
NOTE: Template Definitions are usually tagged with their aspect ratio, for example some 10x1 Template Definitions would be tagged with the label A10x1.
The Playlist Restriction List is cleared and any Template Definitions containing one or more of the metadata labels specified are added to the List. AMX tag the Template Definitions in Template Packs with metadata labels, when you next import a Template Pack, Composer scans the Template Definitions in the Template Pack and adds any Template Definitions which have matching metadata labels to the Restriction List automatically.
See Also:
- Set Playlist Restrictions on page 82
• Meta-data on page 145
Displaying Different Layouts on Different Groups of Players
This section describes how to display a Portrait Layout on one Group of Players and a Landscape Layout on another group of Players:
- Configure all Portrait Players display settings to display an aspect ratio of 9x16 and a display angle of 90 degree using the Player Web Configuration Tool.
- Create a new Layout Playlist to control Layout Scheduling for the Portrait Players.
- Create two new Player Sets, Portrait Players and Landscape Players and add the relevant Players to each Player Set.
-
Change where the landscape layout playlist (Layout Playlist) and the new portrait layout playlist are published.
-
Set the Portrait Layout Playlist to publish to the Portrait Player Set.
-
Set the Landscape Layout Playlist to publish to the Landscape Player Set.
-
Publish the Playlist changes.
NOTE: The technique can also be used to display different Area, Override, or Overlay Playlists on different groups of Players.
Create Playlist
The content displayed by the Player is made up of a number of Messages, which can be put together into one or more Playlists. Playlists in Composer represent the same basic concept as Playlists on mp3 players like the iPod. You should only create Playlists based on Playlist Setup Information provided by your reseller or AMX, otherwise the Playlist will not be displayed. Refer to Playlist Naming Conventions on page 10 for details.
To create a new Playlist:
- Select Playlists in the Content Management menu (FIG. 58).

FIG. 58 Content Management Menu - Playlists Selection
- In the Task Pane menu, click Create Playlist (FIG. 59).

FIG. 59 Playlists Task Pane - Create Playlist Option
- This opens a new window (FIG. 60). Consult the Playlist setup information and enter a name for the new Playlist.
NOTE: If attempting to create a playlist with a duplicate name, an error dialog appears: "PlayList: Name must be unique."

FIG. 60 Create Playlist Window
-
Enter a Filename for the Playlist.
-
Select the Playlist type and options for that Playlist type. The Playlist types are as follows:
-
Pooling Playlist - This Playlist is a pool which can be fed by a number of sub pools (feeder pools). The Playlist designer (normally AMX) selects the rules used to select content from the feeder pools. Content Pool Playlists can be played in a random order by selecting the Random Sequence Option (strictly speaking they are shuffled).
- Standard Playlists - These are sequential Playlists where items are played in order one after another, they do not support validity rules for Playlist Messages. Select looping to force the Playlist to loop once it is finished.
-
Automated Playlist - You cannot edit an automated Playlist in Composer. Automated playlists are used by babel to automatically create messages in a playlist.
-
Optional only needed if you want to restrict what can be added to the Playlist - Enter a comma separated list of labels such as Zone1, Zone2, Zone3 (spaces before and after the commas are ignored) under Automatic Restriction Groups to specify the Playlist Restriction labels for this Playlist. When you next import a Template Pack, Composer scans the Template Definitions in the Template Pack and adds any Template Definitions which have matching metadata labels i.e which match any of the labels in this Playlist Restriction List. Only Messages which derive from Template Definitions in the Restriction List can be added to the Playlist. All standard Template Definitions are tagged with an aspect ratio. If you wanted to allow Messages with the aspect ratio 10x1 to be added to this Playlist, you would set the Restriction List to A10x1.
- Click Save to save the changes to the Playlist and close the window or select Cancel to close the window without saving.
-
The New Playlist Options window opens. Here you have a number of actions you can perform on the newly created Playlist:
-
Assign to Resource Pools - Playlists can belong to content collections called Resource Pools which have specific access rights for specific user groups, use this section to add the Playlist to one or more Resource Pools.
- Set Playlist Publish Points - select the Publish Points that the Playlist is published to when the User selects one of the Publish options.
- Edit Playlist - Edit Playlist Configuration.
See Also:
- Deleting a Playlist. See page 88 for more details.
Export Playlists
Exporting playlists enables users to store playlists as XML files for use in template packs (TPKs). Exported playlists are usually used by Integrators who need to create a lot of playlists that are based on existing playlists. They would export a number of existing playlists as an XML file, then edit the playlists names and package them into a template pack. This template pack is then re-imported into composer.
To export a Play list:
- Select Playlists in the Content Management menu (FIG. 61).

FIG. 61 Content Management Menu - Playlists Selection
- In the Task Pane menu, click Export Playlists (FIG. 62).

FIG. 62 Playlists Task Pane - Export Playlists Option
- A confirmation window (FIG. 63) opens with the option to Cancel or Export. Select Export to save the file to your local computer.
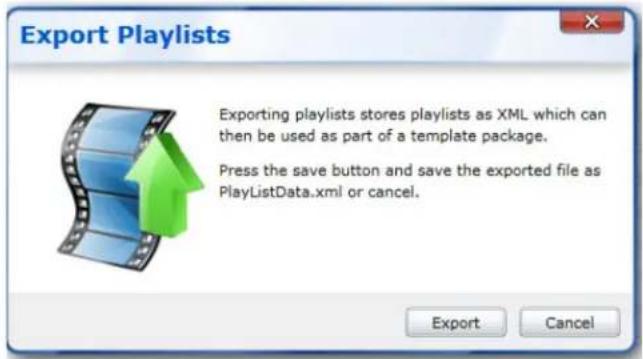
FIG. 63 Export Playlists Response Window
- Select a location on the local desktop to save playlists for future TPKs (FIG. 64).

FIG. 64 Export Playlists - Save As Window
Delete Playlists
If a Playlist is no longer required it may be deleted.
- Select Playlists in the Content Management menu (FIG. 65).

FIG. 65 Content Management Menu - Playlists Selection
- Select the Playlist or Ctrl+Playlists to delete from the Playlist Settings Table (FIG. 66).
| Name | Approval Status | Active Version | Messages | Playlist Type | Play Method | Publish file Name |
| Area Playlist: A10x1 (primary) | ✓ Approved | Main | 3 | Manual | Pooling Playlist | AreaContent_A10x1_Main.pool |
| Area Playlist: A14x1 (primary) | ✓ Approved | Main | 0 | Manual | Pooling Playlist | AreaContent_A14x1_Main.pool |
| Area Playlist: A15x9 (live media) | ✓ Approved | Main | 1 | Manual | Pooling Playlist | AreaContent_A16x9_LiveMedia.pool |
| Area Playlist: A15x9 (primary) | ✓ Approved | Main | 7 | Manual | Pooling Playlist | AreaContent_A16x9_Main.pool |
| Area Playlist: A1x1 (primary) | ✓ Approved | Main | 3 | Manual | Pooling Playlist | AreaContent_A1x1_Main.pool |
| Area Playlist: A25x1 (primary) | ✓ Approved | Main | 0 | Manual | Pooling Playlist | AreaContent_A26x1_Main.pool |
| Area Playlist: A3x1 (primary) | ✓ Approved | Main | 3 | Manual | Pooling Playlist | AreaContent_A3x1_Main.pool |
| Area Playlist: A3x4 (primary) | ✓ Approved | Main | 0 | Manual | Pooling Playlist | AreaContent_A3x4_Main.pool |
| Area Playlist: A3x5 (primary) | ✓ Approved | Main | 3 | Manual | Pooling Playlist | AreaContent_A3x5_Main.pool |
| Area Playlist: A4x3 (primary) | ✓ Approved | Main | 0 | Manual | Pooling Playlist | AreaContent_A4x3_Main.pool |
FIG. 66 Playlists Table
- Click Delete Playlists from the Task Pane menu on the right (FIG. 67).

FIG. 67 Playlists Task Pane Menu
- A dialog bar appears asking for confirmation. Click Yes to continue or No to cancel this action.
NOTE: It is very dangerous to delete a Playlist because the Player is configured to render and display content from a particular predefined Playlist filename. Deleting a Playlist should only be done by an Administrator.
See Also:
• Create Playlist on page 85
• Edit Playlist on page 75.
Resource Pools
The Content Management: Resource Pools Sub Section contains a data table which shows all the Resource Pools in Composer. A Resource Pool can contain the following: Templates, Template Definitions, Messages, and Playlists. For each resource type the Resource Pool defines what actions a User belonging to a specific User Group can perform. Resource Pools are used to restrict access to certain Templates, Template Definitions,
Messages, and Playlists to members of particular User Groups and to set the tasks members of a User Group can perform. They complement User Group permissions and allow finer grain control.
The Resource Pools sub section also contains a task pane with the following actions:
• Create New Resource Pool
- Edit Resource Pool
- Delete Resource Pools
Create New Resource Pool
Create a Resource Pool as follows:
- Select Resource Pools in the Content Management menu (FIG. 68).

FIG. 68 Content Management - Resource Pools Option
- On the right side of the screen on the Task Pane menu click Create Resource Pool (FIG. 69).

FIG. 69 Resource Pools Task Pane Menu
- When the Resource Pools window appears, enter a name for the resource pool in the Resource Pool Name field (FIG. 70).

FIG. 70 Create Resource Pool Window
Now assign resources such as Templates, Template Definitions, Messages, and Playlists to the Resource Pool as follows:
-
Choose a resource type to add to the Resource Pool from the drop down list Resource Type. Choose one of:
-
Messages
- Templates
- Template Definitions
-
Playlists.
-
The Assigned Resources section shows all Resources of the selected type in the Resource Pool. Set the Show All check-box to see all the Assigned Resources irrespective of type.
- Hold Ctrl and select the resources you want to add and click Assign Resources in the middle of the window.
- Click Save to save changes or Cancel to exit without saving.
Edit Resource Pool
To edit the contents of a Resource Pool:
- Select Resource Pools in the Content Management menu (FIG. 71).
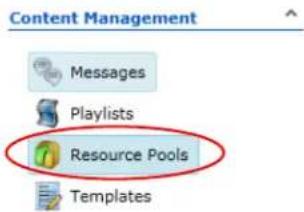
FIG. 71 Content Management - Resource Pools Option
- On the right side of the screen on the Task Pane menu click Edit Resource Pool (FIG. 72).
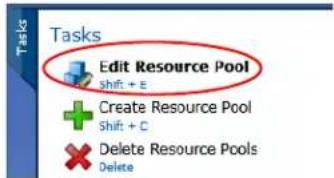
FIG. 72 Resource Pools Task Pane Menu
-
When the Resource Pool table appears (FIG. 73), choose a resource type to add to the Resource Pool from the drop down list Resource Type. Choose one of:
-
Messages
- Templates
- Template Definitions
-
Playlists
-
The Assigned Resources section shows all Resources of the selected type in the Resource Pool. Set the Show All check-box to see all the Assigned Resources irrespective of type.
- Hold Ctrl and select the resources you want to add and click Assign Resources Once you have added resources desired. Next set what actions Users belonging to a particular User Group can perform on the resources. Refer to User Groups on page 129.

FIG. 73 Edit Resource Pool Window
- Click Save to save changes or Cancel to exit without saving.
Remove Resources
- Select Resource Pools in the Content Management menu (FIG 74).

FIG. 74 Content Management - Resource Pools Option
- Click Edit Resource Pool in the Task Pane menu (FIG. 75).

FIG. 75 Resource Pools Task Pane Menu
- Select the resources to remove. To select multiple resources hold Ctrl and select multiple resources (FIG. 76).

FIG. 76 Remove Resources
-
Click Remove Resources.
-
Click Save to save changes or Cancel to exit without saving.
Delete Resource Pools
Delete Resource Pools as follows:
- Select the Resource Pools option in the Content management menu (FIG. 77).
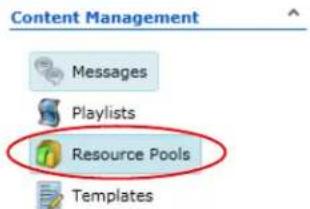
FIG. 77 Content Management - Resource Pools Option
- When the Resource Pool table appears, select the Pool or Ctrl+Pools to delete (FIG. 78).

FIG. 78 Resource Pools Table
- On the right side Task Pane menu, click Delete Resource Pools (FIG. 79).

FIG. 79 Resource Pools Task Pane Menu
- Confirm whether you want delete these Resource Pools by clicking Yes or No when the confirmation window appears (FIG. 80).

FIG. 80 Delete Resource Pool Confirmation Window
Templates
The Content Management: Template sub section shows a data table with a list of all the Templates in Composer (FIG. 81).

FIG. 81 Content Management Menu - Templates
The Task Pane for this sub section allows you to create, edit, and delete Templates (FIG. 82).

FIG. 82 Templates Task Pane Menu
The available tasks are as follows:
- Create Template, see page 96 for more details.
- Edit a Template, see page 98 for more details.
- Delete a Template, see page 100 for more details.
- Assign Templates to Resource Pools, see page 101 for more details.
Template P property Ty pes
Composer supports the following Template Property types:
- Text
- Images
- Videos
- Numbers (decimal, whole)
- Switches
- Selectors
- Colors
All Template Property Fields have the following:
- Property Name - comes from the Template Definition this Template is based on.
- Name check-box - If you set this check-box you can enter a new name for this Property to use in Messages created from this Template.
- Enable Property Editing in Messages - this check-box sets whether this property is editable when creating Messages from this Template.
Name check-box
The Name check-box allows you to enter another name for this Property when you create or edit a Message based on this Template. This enables Administrators, Managers, and Editors who create a Template to select a name which might be clearer for end users. This is useful when the name provided by the AMX designers as part of the Template Definition is not sufficiently precise.
Enable Property Editing in Message Check-box
Set or clear Visible To Messages to determine whether this property is visible and can be edited when Template users create a Message based on this Template. If this check box is cleared, Template users cannot see or edit this property when they create or edit Messages based on this template. By default all properties in a Template are visible to Template users.
On Publish, Populate with Check-box
This check-box is only available with Text Properties. It allows the user to automatically populate the text property of any Messages created from this Template with one of the following items, chosen from a drop down list:
- Person who approved the message - name of the user who approved the Message
- Date approved - the date the Message was approved
- Person who created the message - name of the user that created the Message
- Date of creation - date the Message was created
- Person who last modified the message - name of the user that last modified the Message
- Date last modified - the date that the Message was last modified.
- Date of publish - the date that the Message was published to Players
Text Propert y
A text property is used to display text in a Message created from this Template. The Font and Text color are usually fixed by the designers of the Template Definition from which this Template derives. Enter the Text to display in the text field.
Numeric Property
A numeric property is used to display numeric values in a Message created from this Template or to set a property. Only numeric values can be used unlike text properties which can contain numbers, symbols, or text combined. The Font and Text color are usually fixed by the designers of the Template Definition. Enter the name for this Numeric Property in the Name Override field and the Number that you want to display in the edit box underneath.
There are two different types of numeric properties: Single and Decimal.
- Single - only whole numbers (integers) are allowed
- Decimal - Decimal numbers
Image Property
An Image Property allows you to display an image file or web page (or web based image) in Messages created from this Template. See Supported File Types on page 141 of the Appendix for supported Image file types.
An image property is divided into sections, left and right. The left hand section is used for standard images and contains the following:
• The name of the image property.
- The name of the attached image file (if any) and a thumbnail picture of the attached image. Note, that due to a limitation in Microsoft's Silverlight plugin we are unable to generate thumbnail images for files other than .png and .jpg. However, these files will still display on the Player.
The right hand section is used to display web pages and contains the URL of the web page to display.
To display an image file proceed as follows:
- Check that the Use Image File check box is set; if not you will need to enable it.
- Click Choose Image to browse for a image file to attach to this property.
NOTE: If you decide you no longer want to display an image then click Remove Image to remove the current image and leave this area blank.
To display a web page or any image accessible via a URL (web link) e.g. a png, bmp, or jpeg, etc. proceed as follows:
- Set the check-box Use Web Address (Snapshot). Note, this also removes any images set in the left hand section of the Image property.
- Enter the URL of the web page in the Address field. For example http://en.wikipedia.org/wiki/Website
- Click Test to view the page. Note that this just displays the page in your browser. It allows you to check that the URL is correct, however it does not mean that the Player can correctly display it. To verify that you will need to use the Message Preview facility on any Message created from this Template.
NOTE: By default the URL image will be refreshed at least once day although it may happen more regularly. If you require a faster refresh rate then you will need to use a Template Definition which is designed to update at a faster rate. Contact AMX support to request a custom Template Definition.
Limitations of Displaying Web Pages
This feature is not designed for large or complex websites and has the following limitations:
- Redirected URLs do not work. Use the URL that the redirector points to instead.
- The following plugins are not supported: WebGL, Flash (except version 7 or earlier), Silverlight.
- Pop-ups, and user dialog prompts will cause unexpected behavior
- Plugins like PDF viewer are not supported.
- Similarly, VRML rendering and 3D windows such as X3DOM also not supported.
- This feature is only supported by Players running version 1.6.4 of the Player software or beyond. You can check the Player version using the Player web configuration tool or (in Composer v5.4 or later) by looking at the version column in the Player table in the Player Management > Players section.
Color Property
Use a color property to select the color to use for one or more visual element of a Message; for example the color of the Message's background, etc. Select a color from the grid of standard colors or click the color picker to access more colors.
Video Property
A Video Property allows you to display an video file in a Message created from this Template. see Supported File Types for supported video file types. The Video Property Field contains the filename and file extension of the video attached to this property (if any). Click Choose Video to choose a video file.
Selector Property
A selector property allows you to select a value for a property from a set of named values, for example you could select the background color of a Message from one of the colors of the rainbow: (red, orange, yellow, green, blue, indigo, violet). Selectors can also be used to choose certain types of animation for a Message from a group of option, for example you could chose an option for the animation to remove a Message from the screen from the following list: (fade to black, fade to white, slide off screen to the right, slide off screen to the left). Select a value from the Pick Value drop down menu.
Switch Property
A Switch property allows you to choose between two states: on or off. It can be used to turn on or off animations for a group of visual elements or to turn a group of visual elements visible or invisible. Set or clear the property check-box to enable or disable the switch.
Create Template
Templates can be created from a Template Definition by modifying the names of Template Definition properties, setting default values for some properties, and preventing other properties. In effect you are creating a restricted or customized version of the Template Definition.
To create a new Template:
- Select Template from the Content Management menu of Composer (FIG. 83).
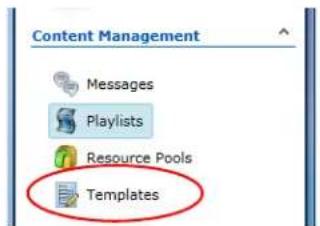
FIG. 83 Content Management Menu - Templates
- On the right side of the window click Create Template in the Templates Task Pane (FIG 84).
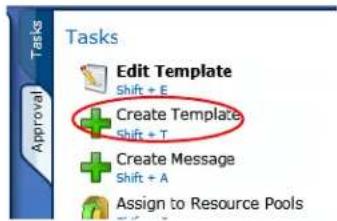
FIG. 84 Templates Task Pane Menu
- This opens a window containing a list of Template Definitions and a Search Pane (FIG. 85). Select the Template Definition with the desired aspect ratio to use as a basis for the new Template. Use the Search Pane to find the required Template Definition.

FIG. 85 Templates Task Pane Menu
-
Click Next to Open the Create Template window (FIG. 86).
-
This window contains the following:
-
The Template Name field. Enter a name for the Template using a descriptive name so Users can easily identify the Template later (for example when building Messages).
- The name of the Template Definition this Template is based on (previously selected in step 3).
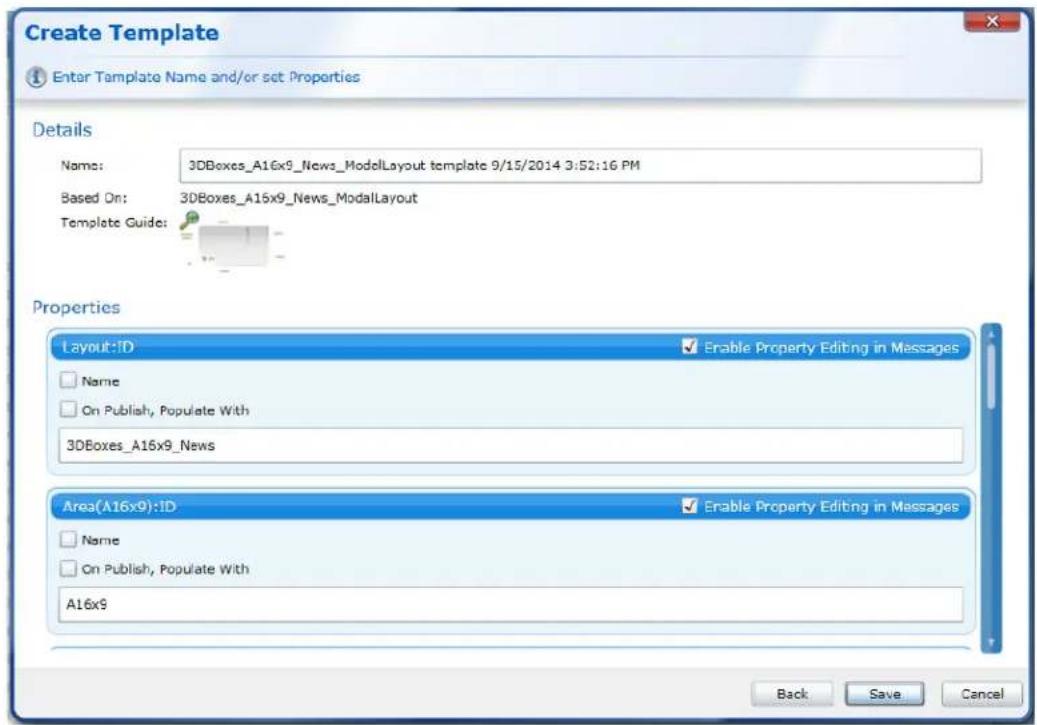
FIG. 86 Create Template - Continued
- A Template guide image showing the Template Definition this Template is based on. Click the magnifying glass to view an expanded version showing all the modifiable Template properties.
- A list of Template Property fields derived from the Template Definition. Each Template Property field is displayed in the light blue area as shown in FIG. 87.

FIG. 87 Creating a Template
See Template Property Types on page 94 for a list of all the property types available.
- Choose which properties can be edited when creating a Message from this Template. By default all Properties are editable when creating a Message from a Template. Clear the Enable Property Editing in Messages check-box for all properties you want to prevent the user modifying when using this Template to create Messages.
- Property names appear in the top left of the property box. To use a different property name than the name in the Template Definition, for example, if the property name is unclear or confusing, then click the Name check-box and enter a new name in the field that appears to its right.
- Choose or enter a value for each property. This value will be the default for this property for all Messages created from this Template.
- When adding image or video files, select the Browse... button to locate and select the relevant file (in the Open dialog). Note: When selecting a video file, it may take some time to upload. A progress bar will appear.
-
If a property is a text field you can choose to have Composer generate the text field when publishing a Message based on this Template. Set the check-box on publish, populate with and choose what to display in this field from the drop down list. Options include: the person who created this Message, the date the message was created, and so on. Automatically Generated Template Properties provide a way to view Information about a Message on screen and to provide a simple audit trail for Messages created from this Template.
-
You can control the basic flow and layout of text in each text property. To insert a carriage return, press the Enter key or Shift+Enter keys. Note that there are no checks on field lengths, make sure that the text you enter will fit on screen.
- Repeat Steps 6-10 above for each Template Property field.
- Click Save to proceed to the next stage of Template creation (or click Cancel to discard this Template).
- A window opens showing all the Resource Pools that this user account has access to (FIG 88). Set the check-box(es) beside the Resource Pools to assign this Template to. Clear those you do not want the Template assigned to.
NOTE: If you do not assign the Template to any resource pools, you may not be able to view or edit it later.
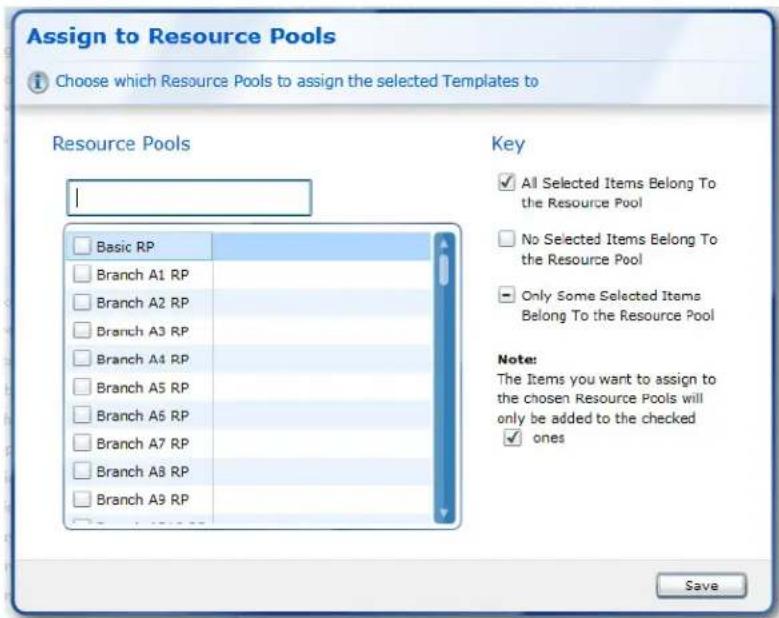
FIG. 88 Assign to Resource Pools
- Click Save to complete the process.
NOTE: If you don't have review rights, this creates a provisional copy of the Template. See Approval on page 17 for more details. Once approved the new Template will be available to Users for creating Messages. If you have review rights then the Template will be automatically approved.
See Also:
- Editing a Template. See below for more details.
- Deleting a Template. See page 100 for more details.
Editing a Template
Once a Template has been created, it may be edited. When editing a Template, the changes to the Template will apply to the default (unmodified) properties of all Messages created from this Template.
To edit a Template :
- Select Template from the Content Management menu of Composer (FIG. 89).

FIG. 89 Content Management Menu - Templates
- Select the Template to edit from the Templates table (FIG. 90).
| Name ▲ | Approval Status | Created | Last Modified | Last Modified User |
| Rabo Welkom advertentie zonder plaatje item tempi | ✓ Approved | 9/10/2014 2:57:53 PM | 9/10/2014 2:57:53 PM | System |
| Rabobank A9x16 FullScreenPortrait ModalLayout ten | ✓ Approved | 9/10/2014 2:57:21 PM | 9/10/2014 2:57:21 PM | System |
| Rabobank A9x16 Image Item template | ✓ Approved | 9/10/2014 2:57:21 PM | 9/10/2014 2:57:21 PM | System |
| Rabobank A9x16 ImageAndText V2 Item template | ✓ Approved | 9/10/2014 2:57:21 PM | 9/10/2014 2:57:21 PM | System |
| Rabobank A9x16 Logo Item template | ✓ Approved | 9/10/2014 2:57:21 PM | 9/10/2014 2:57:21 PM | System |
| Rabobank A9x16 Video Item template | ✓ Approved | 9/10/2014 2:57:21 PM | 9/10/2014 2:57:21 PM | System |
| Redbul2014 3WaySplit ModalLayout template | ✓ Approved | 9/15/2014 3:07:46 PM | 9/15/2014 3:07:46 PM | System |
| Redbul2014 A10x1 2DayWeather FeedReel template | ✓ Approved | 9/15/2014 3:07:01 PM | 9/15/2014 3:07:01 PM | System |
| Redbul2014 A10x1 2DayWeather Item template | ✓ Approved | 9/15/2014 3:07:34 PM | 9/15/2014 3:07:34 PM | System |
| Redbul2014 A10x1 News FeedReel template | ✓ Approved | 9/15/2014 3:07:01 PM | 9/15/2014 3:07:01 PM | System |
FIG. 90 Templates Table
- Select Edit Template from the Tasks Pane on the right side of the window (FIG 91).

FIG. 91 Templates Task Pane Menu
- This opens the dialog Edit Template (FIG. 92).

FIG. 92 Edit Template Window
This dialog contains the following:
- The Template Name field. Use this field to change the name of the Template; use a descriptive name so users can easily identify the Template later (for example when building Messages).
- The name of the Template Definition this Template is based on.
-
A collection of Template Properties fields from the Template Definition this Template is based on. Each Template Property field is in a light blue rectangle with curved corners.
See the Template Property Types on page 94 for more details, for a list of all the property types available. -
Choose whether a property can be edited when creating a Message from this Template. By default all Template Definition Properties are visible to Messages. Clear the Enable Property Editing in Message check-box to hide this property when using this Template to create Messages. This prevents the Template user from editing this property when they create Messages from this Template.
- The property names appear in the top left of the property boxes. To use a different property name than the name in the Template Definition, for example, if the property name is unclear or confusing, then enter a new name in the Name Override field. This name will be used for this property when creating Messages from this Template.
- Edit the property value (how you do this will depend on the Property type). This value will be the default for this property for all Messages created from this Template.
- When choosing different images or video files, select the Choose Image or Choose Video buttons (as appropriate) to locate and select the relevant file (in the Open dialog). Note that when you select a video file, it may take some time to upload. A progress bar will appear.
The basic flow and layout of text can be controlled in each text property.
- To insert a carriage return, press the Enter key or Shift+Enter keys.
NOTE: There are no checks on field lengths for text entry. Make sure that the text entered will fit on screen.
-
Repeat Steps 4-9 above for each Template Property field.
-
Click Save to proceed to the next stage of Template editing (or click Cancel to discard all changes).
NOTE: Changes are made to a provisional copy of the current approved Template. See Approval on page 17 for more details. Once approved, all Messages in Composer based on this Template are updated. These Message updates are automatically approved.
See Also:
- Creating a Template. See page 96 for more details.
- Deleting a Template. See below for details.
Deleting a Template
NOTE: If a Template is deleted, it will also delete any Messages created using that Template.
To delete Templates :
- Select Templates from the Content Management menu (FIG. 93).
FIG. 93 Content Management Menu - Templates
- Select a templates or Ctrl+ templates to select multiple items from the Templates Table (FIG. 94).

FIG. 94 Templates Table
- Select Delete Template from the Tasks panel to delete the Templates (FIG 95).

FIG. 95 Templates Task Pane Menu
- This opens a dialog box prompting whether to delete these Templates (FIG. 96).

FIG. 96 Delete Template Confirmation
- Click Yes to confirm, click No to cancel.
See Also:
- Creating a Template. See page 96 for more details.
- Editing a Template. See page 98 for more details.
Assign Templates to Resource Pools
To assign Templates to Resource Pools:
- Select Template from the Content Management menu (FIG 97).
FIG. 97 Content Management Menu - Templates
- Select a template or Ctrl+ Templates from the Templates Table (FIG. 98).

FIG. 98 Templates Table
- Click Assign to Resource Pool from the Tasks Pane on the right side of the window (FIG. 99).
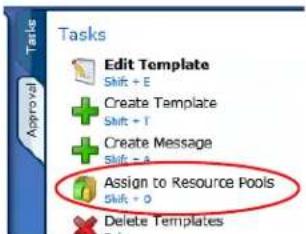
FIG. 99 Templates Task Pane Menu
- This opens the Assign to Resource Pools window which shows all the Resource pools in Composer (FIG. 100). If one or more of the selected Templates already belongs to a Resource Pool, it is indicated by a - in the check-box to the left of the Resource Pool. If all of the selected Templates belong to a resource pool, it is indicated by a tick.
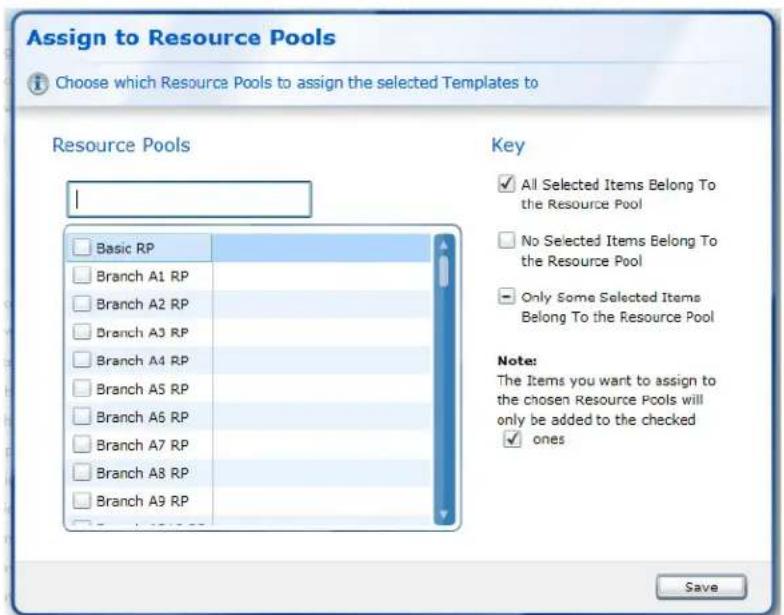
FIG. 100 Assign to Resource Pools
- Select the Resource Pools to add the selected Templates to.
- Click Save to complete the assignment or Cancel to quit.
Player Management
Overview
The Player Management section enables users to manage the Players processing Inspired Signage output.

FIG. 1 Player Management Menu
It contains the following sub sections:
- The Players sub section. This contains a table showing all the Players configured in Composer. Use this sub section to view Player details, to configure or edit Players, view a snapshot of the Player's output, and access each individual Player's internal web page.
- The Publish Points sub section. This contains a table showing all the Publish Points currently configured in Composer. Use this sub section to create and manage Publish Points (either Players or groups of Players) Publish points allow you to group Players together and publish Playlists to that group of Players.t Sub Section
Players
The Player sub section, contains a data table called the Player Settings Table (FIG. 2) showing all the Players configured in Composer.

FIG. 2 Players Table
The Players Task Pane allows you to carry out the following actions:
- Configure Player. See page 104.
• Discover Players. See page 105. - Create a Player. See page 106.
- Assign to Publish Points. See page 109.
- Assign Playlists to Player. See page 110.
- Publish TPKs to Players. See page 111.
• Republish TPKs to Selected Player. See page 112.
• Copy Feed Reels. See page 114. - Delete Players. See page 114.
Player Settings Table
FIG. 3 shows a small sub section of the Player Settings Table with the Player name, IP address or hostname, and FTP port displayed. Selecting the view drop down option - Details All Expanded, a screen shot of the Player display and a link to this Player's Web Configuration tool can be seen.

FIG. 3 Player Settings Window
Configure Player
To edit Player Configuration:
- Select Players under the Player Management menu (FIG. 4).

FIG. 4 Player Management Menu
- Choose the Player to edit from the Players table (FIG. 5).

FIG. 5 Players Table
- Click Configure Player in the Task pane on the right hand side (FIG. 6).

FIG. 6 Players Task Pane
- When the Player Table appears, Edit the Player Name (FIG. 7). Use a descriptive name so you can easily identify the Player later, for example, when publishing or previewing Playlists.

FIG. 7 Configure Player Table
- Set or Clear the Is Player Enabled check-box to Enable or Disable the Player. By default, this option is selected - do not deselect this option, it must bet set in order for this Player to receive new (changed) content.
- Edit the hostname field (hostname or IP address) for the Player.
- Edit the ftp port (TCP/IP port) used for file transfer to the Player, this is normally the standard FTP port, port 21. Contact AMX for details.
- Edit the web port (TCP/IP port) used to access the Player web configuration tool. Normally you can leave this at the standard setting of 80. This setting only needs changing if you have configured the web configuration tool to use a different port due to specific restrictions on the use of port 80 on the local network.
-
Edit the FTP Username and Password for the Player. The default settings are:
-
Username = inspiredsignage
- Password (blank)
AMX or your reseller will tell you if you should use a different username and password.
NOTE: If the correct FTP user name or password are not entered, then the Player will not accept any files and the files will remain queued in Composer.
- Click Save to save changes or Exit to close without saving.
Discover Players
This feature finds and imports all the Players on the same local network as the computer running Composer.
Proceed as follows:
- Select Players under the Player Management menu (FIG. 8).

FIG. 8 Player Management Menu
- On the right hand side Task Pane, click Discover Players (FIG. 9).
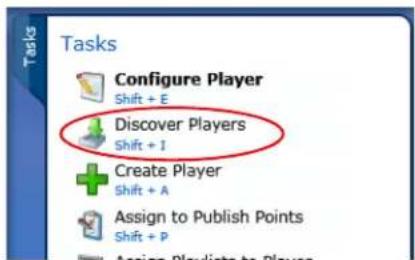
FIG. 9 Players Task Pane
- A confirmation window appears (FIG. 10). Click Discover and wait while Composer discovers accessible Players on the network and imports the details.

FIG. 10 Discover Players Confirmation
- Create Publish Points for the imported Players.
NOTE: For network administrators: the discover and import Player facility uses zero configuration technology.
To allow Composer to import all the Players on the LAN, to consult your network administrator and make sure that all routers or managed switches on the network can route multicast packets, specifically Multicast DNS traffic on UDP port 5353.
Create a Player
To create a new Player click Create Player. This opens the New Player window containing a number of fields. Enter details in these fields as follows:
- Select Players under the Player Management Menu (FIG. 11).

FIG. 11 Player Management Menu
- On the right hand side Task Pane, click Create Player (FIG. 12).
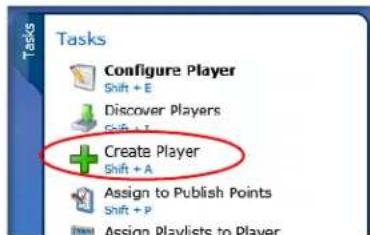
FIG. 12 Players Task Pane
- The Create Player window appears. Enter a name for the new Player in the Name field (FIG. 13). Use a descriptive name so it can be easily identified later, for example when publishing or previewing Playlists.

FIG. 13 Create Player Window
- Set the Is Player Enabled check-box to enable the Player. By default, this option is selected - do not deselect this option. It must remain checked in order for this Player to receive new (changed) content.
- Enter a Hostname or IP address for the Player.
- Enter the Port used for file transfer to the Player. This is normally the standard FTP port, port 21.
- Enter the Web Port. This is the port used by the Player monitoring application (the default value is 25001).
-
Enter the FTP Username and Password for the Player. The default settings are:
-
Username=inspiredsignage
- Password (blank)
AMX or your reseller will notify you if you should use a different username and password.
-
Once you have finished configuring the Player the New Player Options window opens showing the typical tasks that you need to carry out on a new Player: assigning the Player to a Publish Point and publishing Template Packs to the Player. You need to assign the Player to a Publish Point to allow you to publish Playlists to this Player. You must also publish a Template Pack to a Player if you plan to display messages based on the Templates in the Template Pack on that Player
-
Add the newly created Player to the Publish Point System as follows:
a. In the New Player options popup, select Assign to Publish Points.
b. Look through the Publish Point System (expanding the folders where necessary) and find an appropriate Publish Point (group of Players) to add this Player to. Publish Points are represented using folders as follows If there are no appropriate Publish Points, for example this Player is in a new location, or the Player belongs to a group of Players performing a new function within an organization, consider creating a new Publish Point to contain this Player.
See Creating a Publish Point System on page 34 for more details.
c. Select the chosen Publish Point or Points as required.
d. Click Save.
e. This adds the Player to the selected Publish Points within the Publish Point System.
- Import and Publish any Template Packs which contain Templates and Template Definitions you want to use to create Messages to display on this Player. Note, if you miss this step then you will not be able to see these Messages on this Player. Import and Publish Template Packs as follows:
a. In the New Player options popup, select Publish TPKs (Template Packs) to Players.
b. Select one or more Template Packs that have already been imported.
c. Click OK to proceed.
d. A dialogue appears asking you if you are sure you want to publish these Template Packs to the Player.
e. Click Yes to proceed.
- Click Finished to finish the Player setup.
See Also:
- Configure Player. See page 104 for more details.
- Deleting a Player. See page 114 for more details.
• Temporarily Disabling a Player. See page 108 for more details.
Temporarily Disabling a Player
Temporarily disabling a Player will prevent publishing any more content to that player. This would be used for example, if the Player is currently under maintenance.
- Select Players under the Player Management menu (FIG. 14).

FIG. 14 Player Management Menu
- Choose the Player you want to disable from the table showing all the Players in this installation of Composer (FIG. 15).

FIG. 15 Players Table
- Click Configure Player in the Task pane on the right hand side (FIG. 16).

FIG. 16 Players Task Pane
- Clear the check box Is Player Enabled (FIG. 12).

FIG. 17 Create Player Window
- Click on Save to save changes or Cancel to exit without saving changes.
See Also:
- Deleting a Player. See page 114 for more details.
Assign to Publish Points
To add Players to Publish Points.
- Select Players under the Player Management menu (FIG. 18).

FIG. 18 Player Management Menu
- Choose the Player to add to Publish Points (FIG. 19).

FIG. 19 Players Table
- Click the Assign to Publish Points in the Task Pane (FIG. 20).

FIG. 20 Players Task Pane
- Select the Publish Points to add to these Players to (FIG. 21).
![Assign to Publish Points Select the Publish Points to assign the selected Players to Publish Points Choose the Desired publish points All Players [78] Branch A1 [2] Branch A2 [2] Branch A2 Landscape [1] Branch A2 Portrait [1] Branch A3 [2] Branch A4 [2] Branch A5 [2] Branch A6 [2] Branch A7 [2] Branch A8 [2] Branch A9 [2] Branch A10 [2] Selected Below is a summary of all selected publish points Branch A2 Portrait Save Cancel](/content/2026/05/1045850/images/6fef1f49e096769343ee030ce46b10ac0c10819b5673c43ed256c2016a81e875.jpg)
FIG. 21 Assign to Publish Points
5. Click Save.
When Playlists are associated with the chosen Publish Points in step 4. These Playlists will be sent to these Players as well as any other Players associated with these Publish Points.
See Also:
• See Creating a Publish Point System on page 34 for more details.
Assign Playlists to Player
This feature makes it easier to view/assign playlists directly to a player. Before, users would have to select a playlist from the Playlists tab and then select the Set Playlists Publish Points. Without this new feature it was difficult to see which playlists were assigned directly to a player.
FIG. 22 shows the Assign Playlists to Player dialog. Notice the GlobalPlaylist1 selection is grayed out and identifies a publish point folder. This logic is present to indicate playlists the player inherits from parent publish points. The user cannot remove the assignment here because the assignment is on the player's parent publish point, not the player directly. To remove this assignment the user would have to go to the publish point and remove the playlist assignment there.
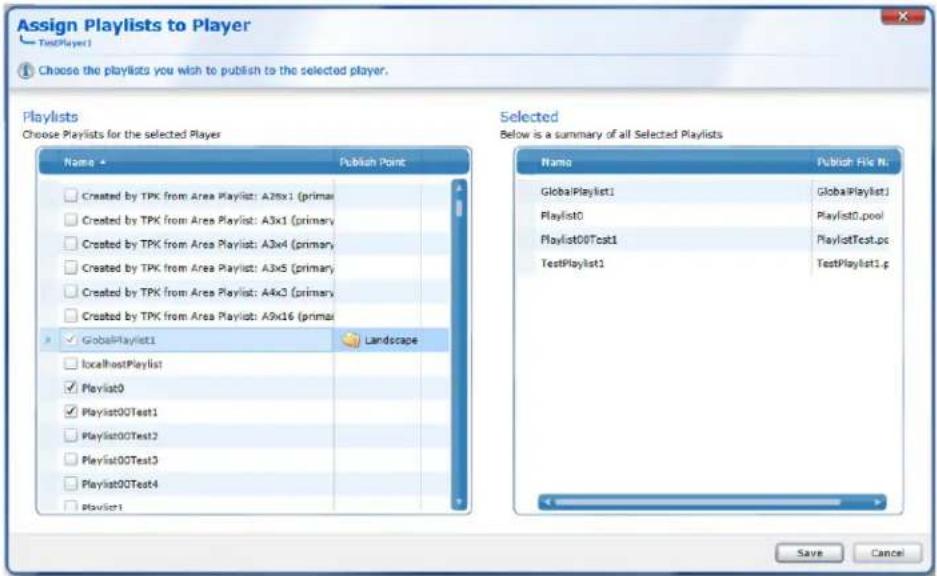
FIG. 22 Assign Playlists to Player - New Feature
Shown in FIG. 23, conflict prevention logic is present preventing the user from saving the changes until the conflict is resolved.

FIG. 23 Assign Playlist to Player - Conflicts
Publish TPKs to Players
Template Packs must be published to a Player to publish Messages based on Template Definitions in that Pack to the Player, otherwise these Messages will not be displayed.
To publish pre-imported Template Packs to selected Players from the Player Management proceeds as follows:
- Select Players under the Player Management Menu (FIG 24).

FIG. 24 Player Management Menu
- Choose the Player or Ctrl+ Players to Publish to (FIG. 25).

FIG. 25 Players Table
- Click the Publish TPKs to Players in the Task Pane (FIG. 26).
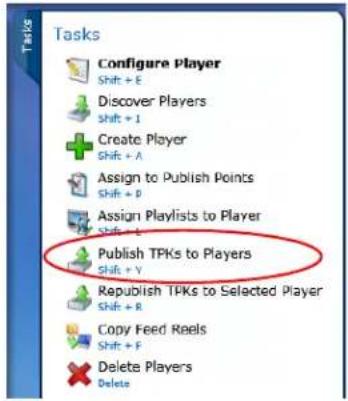
FIG. 26 Players Task Pane
- A window opens which shows all the Template Packs imported into Composer (FIG. 27).
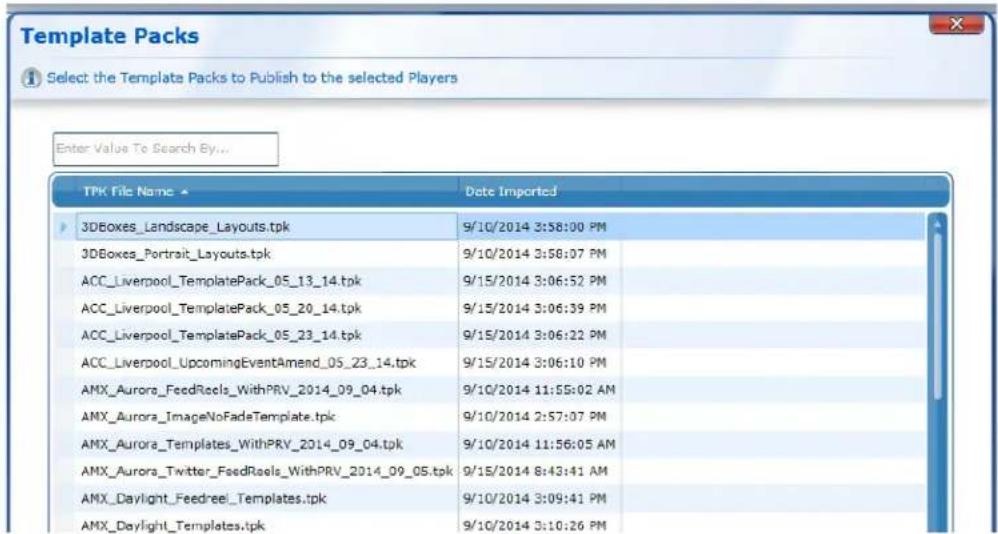
FIG. 27 Template Pa cks W i ndow
- Select the Template Pack (or Packs) to publish to the selected Players.
- Click OK.
- When prompted, click Yes to save changes or No to exit without saving changes (FIG. 28).
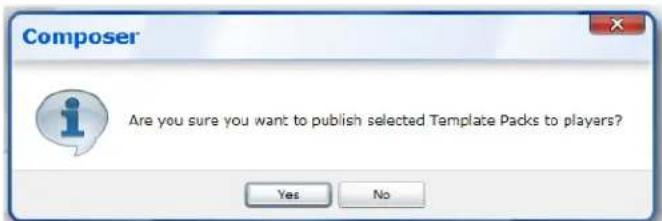
FIG. 28 Publish Template Pack Confirmation
Republish TPKs to Selected Player
Republishing Template Packs to a selected Player is used in the following scenarios:
- Template Packs published to Player but missing, perhaps due to network issues.
- Rebuilding a Player when a Player has been replaced perhaps due to hardware issues.
NOTE: It is not used when setting up a new Player. Instead use the task "Publish TPKs to selected Players" instead.
Composer maintains a record of the Template Packs published to a Player. To republish previously published Template Packs to a selected Player proceeds as follows:
- Select Players under the Player Management menu (FIG. 29).
Player Management

Players

Publish Points
FIG. 29 Player Management Menu
- Click Republish TPKs to Selected Player in the Task Pane (FIG. 30).

FIG. 30 Players Task Pane
- A window opens which shows all the Template Packs that have been published to this Player (FIG. 31).

FIG. 31 Template Packs Table
- Select the Template Pack or Ctrl+ Packs to republish to the selected Player.
- Click OK.
- Click Yes when prompted whether or not to republish the Template Packs to the Player.

FIG. 32 Republish TPK Confirmation
Copy Feed Reels
If you have configured Feeds on a Player then you can avoid having to repeat the process on other Players by copying the configuration details from the Player you have just setup (the source Player) to one or more publish Publish Points and hence to all child Players of those Publish Points.
The process is as follows:
- Select the Player which has been previously configured with feeds to display on other Players. This is the source Player.
- Click Copy Feed Reels in the Task Pane.
- Enter the login details for the web configuration tool on the source Player.
- The web config feed deployment window opens. This window shows the name of the Source Player, a list of all the Feeds configured on this Player, a list of target Publish Points, and a list of the selected Target Publish Points.
- Select the Feeds on the source Player to send to Target Players using the check-boxes to the left of the Feed names. Click Select all feed reels to select all the feeds on the Source Player.
- Click Remove all existing Feed Reels on target Players to delete any existing Feeds before copying.
- Use the Pick Targets section of the window to choose the Publish Points to send the selected Feeds to Expand the Publish Point system by clicking on the arrows to the left of the named Publish Points.
- Select one or more Publish Points by setting the check-boxes to the left of the Publish Points. The Selected Targets section shows the selected Publish Points.
- Click Send to send the chosen Feed Reels to the selected Publish Points and associated Players and child Publish Points (and so on). It will take a few seconds for the files to be sent.
- To check the transfer of Feed Configuration files go to the Dashboard.
- Select the System Summary tab.
- Select Player in the filter by drop down in the Recent Changes pane.
- Entries similar to the following should be viewable:
• User Administrator Date: 7/21/2011 4:26:27 PM
- Publish Player Player1, Feed Reel (YahooWeather_London) have been successful
- This shows the source and destination Player and the name of the feed configuration transferred.
Delete Players
To delete a Player (remove Player settings from Composer) (secondary Players only):
- Select Players under the Player Management Menu (FIG. 33).

FIG. 33 Player Management Menu
- Choose the Player to delete from the Players table (FIG. 34).

FIG. 34 Players Table
3. Click the Delete Players in the Task Pane (FIG. 35).

FIG. 35 Players Task Pane
- A dialog Bar appears asking if you really want to delete this Players (FIG. 36). Click Yes to continue or No to cancel.

FIG. 36 Delete Player Confirmation Window
See Also:
• Temporarily Disabling a Player. See page 108 for more details.
Publish Points
Publish Points are used to collect Players into logical groups, typically by function or geographic location. The Publish Point option is located under the Player Management menu and shows Players and groups of Players (child Publish Points) as icons in a file and folder structure which represents the Publish Point hierarchy (Publish Point System).

FIG. 37 Player Management Menu - Publish Points
The table below shows what the different icons used in this section represent:
| Publish Points Icons | |
| Name Icon | |
| Player |  |
| Groups of Players (Child Publish Point) |  |
FIG. 38 shows an example Publish Point System:
![All Players [2] total number of child Publish Points or Players London Office [1] Ian's XPert Player (Host: 192.168.81.117, Playlists: 15) Paris Office [0] Number of Playlists allocated to this Player Player IP adress / Hostname](/content/2026/05/1045850/images/9ca6c92e94e0e6632aa900c6d074fcc9376eab1074706cdd4c6c08e06cd8f90b.jpg)
FIG. 38 Example Publish Point System
Click beside a Publish Point to expand the Publish Point and display all the Players and other child Publish Points inside this Publish Point. The contents of the Publish Point appear underneath and indented to the right.
Click beside a Publish Point to contract the Publish Point, hiding its contents.
Empty Publish Points do not have an expand or contract icon.
The following actions are available in the Publish Point task panel:
- Add Players. See page 116 for more details.
- Add a Root Publish Point. See page 117 for more details.
- Add a Child Publish Point. See page 118 for more details.
- Delete Publish Points. See page 119 for more details.
- Assign Playlists to Publish Points. See page 120.
- Assign Playlists to Player. See page 120.
Add Players to a Publish Point
To add a Players to a Publish Point:
- Select Publish Points under the Player Management menu (FIG. 39).
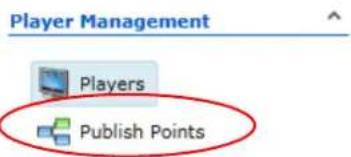
FIG. 39 Player Management Menu - Publish Points
- Select the Publish Point to add Players to (FIG. 40).
![Current Publish Points All Players [78] (PlayLists: 0) Branch A1 [2] (PlayLists: 1) Branch A1 Override Playlist OverrideContent_default.pool Branch A1 Landscape [1] (PlayLists: 15) Branch A1 Portrait [1] (PlayLists: 15) Branch A1 Area Playlist: A10x1 (primary) AreaContent_A10x1_Main.pool Branch A1 Area Playlist: A14x1 (primary) AreaContent_A14x1_Main.pool Branch A1 Area Playlist: A16x9 (live media) AreaContent_A16x9_LiveMedic.pool Branch A1 Area Playlist: A16x9 (primary) AreaContent_A16x9_Main.pool](/content/2026/05/1045850/images/05e164ccf19bd7762636c5bb04c33c1c8289d18f1f6110c0621d5f68e240d590.jpg)
FIG. 40 Current Publish Points Table
3. Click Add Players (FIG. 41).

FIG. 41 Publish Points Task Pane
- Select the Players to add to this Publish Point in the Player Settings Table (FIG. 42). Use the search pane if needed.
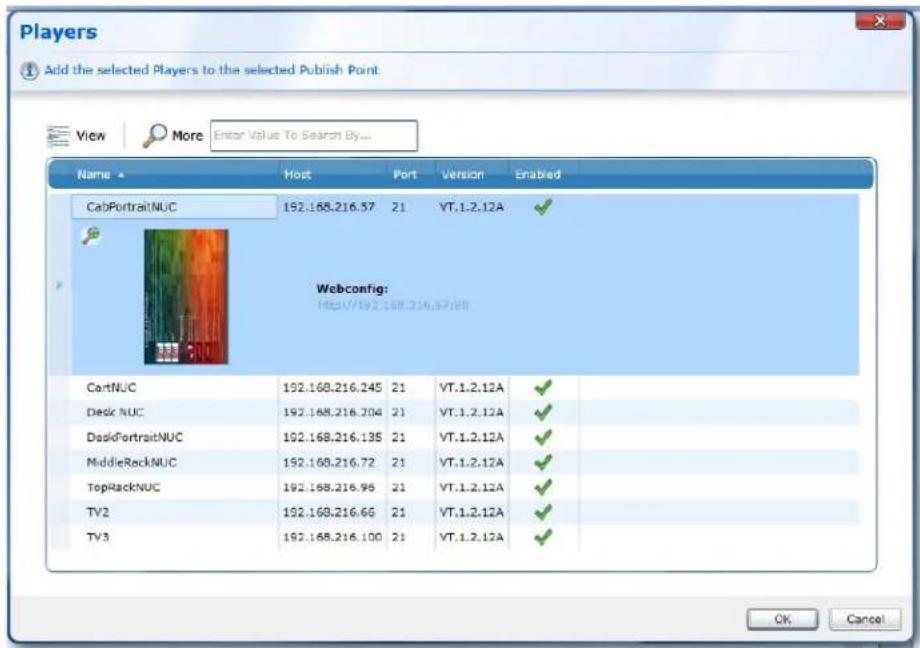
FIG. 42 Players Window
5. Click Ok.
NOTE: Players cannot be added more than once to the same Publish Point
See Also:
- Publish Point Theory. See page 10 for more details.
- Creating a Publish Point. See page 34 for more details.
- Add a Root Publish Point. See page 117 for more details.
Add a Root Publish Point
Create a root Publish Point when creating a Publish Point hierarchy in Composer. To create a root (top level) Publish Point:
- Select Publish Points under the Player Management menu (FIG. 43).

FIG. 43 Player Management Menu - Publish Points
- Click Add Root Publish Point to add a new top level Publish Point (FIG. 44).

FIG. 44 Publish Points Task Pane
- Enter a Name for this Publish Point.
FIG. 45 shows three root Publish Points - two existing and one recently created called New
Folder(I):
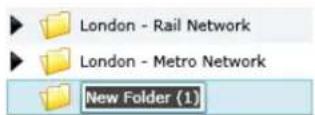
FIG. 45 Example Root Publish Points
Add a Child Publish Point
To add a child Publish Point:
- Select Publish Points under the Player Management menu (FIG. 46).
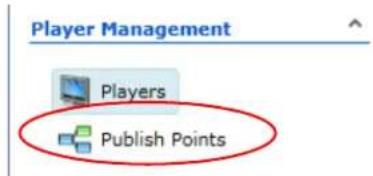
FIG. 46 Player Management Menu - Publish Points
- Select a Publish Points folder from the Current Publish Points table to add a Child Publish Point to (FIG. 47).
![Current Publish Points All Players [78] (PlayLists: 0) Branch A1 [2] (PlayLists: 1) Branch A1 Override Playlist OverrideContent_default.pool Branch A1 Landscape [1] (PlayLists: 15) Branch A1 Portrait [1] (PlayLists: 15) Branch A1 Area Playlist: A10x1 (primary) AreaContent_A10x1_Main.pool Branch A1 Area Playlist: A14x1 (primary) AreaContent_A14x1_Main.pool Branch A1 Area Playlist: A16x9 (live media) AreaContent_A16x9_LiveMedia.pool Branch A1 Area Playlist: A16x9 (primary) AreaContent_A16x9_Main.pool](/content/2026/05/1045850/images/24b95468a85876189c4890a551b408a6ae77793d8aed3dbd74f18c26bdab14b6.jpg)
FIG. 47 Current Publish Points Table
- Click Add Child Publish Point to expand the selected Publish Point and add a new Publish Point inside this Publish Point called New Folder (FIG. 48).

FIG. 48 Publish Points Task Pane
- Enter a new name for the Publish Point (FIG. 49).

Branch A1 Portrait Layout Selector LayoutSelection.pool

CabPortraitNUC (Host: 192.168.216.57, Playlists: 15)

New Player Set
FIG. 49 New Child Publish Point
Deleting Publish Points
To delete a Publish Point :
- Select Publish Points under the Player Management menu (FIG 50).
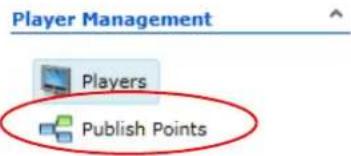
FIG. 50 Player Management Menu - Publish Points
- Select a Publish Point (individual Player or Ctrl+ group of Players) in the Publish Point table (FIG. 51).
![Current Publish Points All Players [78] (PlayLists: 0) Branch A1 [2] (PlayLists: 1) Branch A1 Override Playlist OverrideContent_default.pool Branch A1 Landscape [1] (PlayLists: 15) Branch A1 Portrait [1] (PlayLists: 15) Branch A1 Area Playlist: A10x1 (primary) AreaContent_A10x1_Main.pool Branch A1 Area Playlist: A14x1 (primary) AreaContent_A14x1_Main.pool Branch A1 Area Playlist: A16x9 (live media) AreaContent_A16x9_LiveMedia.pool Branch A1 Area Playlist: A16x9 (primary) AreaContent_A16x9_Main.pool](/content/2026/05/1045850/images/7eb69102d1c1fa2b18cf31aeb4d82a868172a8cf31a603650f0be884d67dfff0.jpg)
FIG. 51 Current Publish Points Table
- Click Delete Publish Points (FIG. 52). Note that this will delete all the children of this Publish Points

FIG. 52 Publish Points Task Pane
Assign Playlists to Publish Point
This new task is available from the Publish Points tab when a publish point folder is selected. Before the user would have to select one or more playlists and assign them to a publish point, but there was no way to see and modify all the playlists assigned to specific publish point. This new feature makes that possible.
FIG. 53 shows the Assign Playlists to Publish Point dialog. Notice the GlobalPlaylist1 selection is grayed out and identifies a publish point folder. This indicates the playlist is assigned to a parent publish point and can only be modified on the parent.

FIG. 53 Assign Playlists to Publish Points
NOTE: Conflict prevention logic is also present.
Assign Playlists to Player
This new feature was created so that it is easier to view/assign playlists directly to a player. Before the user would have to select a playlist from the Playlists tab and then select the Set Playlists Publish Points. Without this new feature it was difficult to see which playlists were assigned directly to a player.
FIG. 54 shows the Assign Playlists to Player dialog. Notice the GlobalPlaylist1 selection is grayed out and identifies a publish point folder. This logic is present to indicate playlists the player inherits from parent publish points. The user cannot remove the assignment here because the assignment is on the player's parent publish point, not the player directly. To remove this assignment the user would have to go to the publish point and remove the playlist assignment there.

FIG. 54 Assign Playlists to Player - New Feature
Also note in FIG. 55 that conflict prevention logic is also present preventing the user from saving the changes until the conflict is resolved.
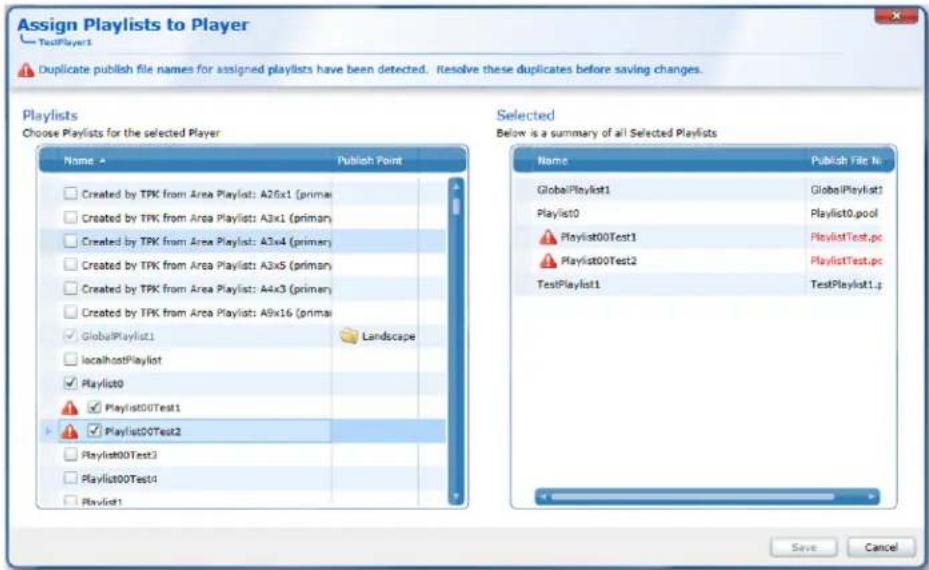
FIG. 55 Assign Playlist to Player - Conflicts
Template Pack Management
Overview
The Template Pack Management section (FIG. 1) is mainly for importing Template Packs into Composer and publishing the imported Template Packs to Players. Messages can only be shown on a Player if the Player has a Template Pack which contains the Template Definition from which the Message derives.

FIG. 1 Template Pack Management Menu
The Template Manager consists of the following sub sections:
- Importing Template Packs - This sub section allows you to import Template Packs and publish the imported packs to your Players. See below for more details.
- Manage Template Packs - This sub section allows you to Publish previously imported Template Packs to new Players that you have just added to the system. See page 124 for more details.
- Template Definitions Sub Section - This sub section allows you to delete unnecessary Template Definitions or to assign them to Resource Pools. See page 126 for more details.
Some new templates have a quick previewer which allows users to edit messages and preview without leaving a message, so that changes to a message can be saved or canceled. Note that the quick preview functionality is only available if the template packs have been updated to contain quick preview enabled content. After upgrading Composer, existing messages will only work with the old preview functionality. Once a template pack has been installed, and if the template pack has template messages with quick preview enabled content, then those messages can be quick previewed.
NOTE: Do not expect quick preview to work after upgrading unless template packs which have preview enabled content have been imported first.
Importing a Template Pack
The most important component of Composer is the Message. Messages are created from Templates which are themselves created from Template Definitions. Template Definitions are grouped together in Template Packs. AMX's creative team creates industry specific Template Packs or, where commissioned, customer specific Template Packs. Template Packs can be downloaded (from www.amx.com).
A Template Pack (file ending in .TPK) contains a number of Template Definitions, along with all the media (video and image files) and fonts required. These can be new Template Definitions or updates to existing Template Definitions.
NOTE: Importing TPKs is a very intensive process which involves many template and player message changes. It is recommended that all users are informed when a TPK update will take place so that they are not logged into the system. Once the administrator has imported a TPK, users may log back in. For this reason, TPK imports usually take place at the start of the day or at the end of the day when no users are on the system.
There are four main types of Template Pack:
- Architecture Template Packs - These Template Packs are used either to setup the Player to display content (Player Architecture Templates), or to setup Composer (Composer Architecture Templates). Architectural Template Packs do not generally contain Template Definitions you can use to create Messages.
NOTE: Player Architecture Template Packs must be published to the Players which use them otherwise the Players will not display content correctly.
- Standard Template Packs - These Template Packs contain Template Definitions which can be used to create Messages for display on Players. These Template Packs need to be imported into Composer and published to any Players which will display Messages based on the Template Definitions in these Template Packs.
- Feed Reel Template Packs - These Template Packs contain Template Definitions which can be used to display data feeds such as RSS feeds, Weather data, etc., by automatically populating Message properties with the information from the data feed.
- Layout Template Packs - These Template Packs contain Template Definitions which can be used to create Layout Messages. When added to a Layout Playlist, they determine the subdivision of Player displays into one or more Layout Areas where standard Playlists can be displayed.
When importing Template Packs into Composer, option of creating Templates and Messages from the Template Definitions in this Template Pack are available. Normally this is only relevant for Standard Template Packs.
NOTE: Composer will only create Messages or Templates for new Template Definitions which are not already present in Composer.
Although a Template Pack automates the process, it is still possible to manually create Templates from Template Definitions that were supplied in a Template Pack. Importing a Template Pack also populates Playlist Restriction Lists where the imported Templates have labels which match Automated Playlist Restriction settings.
To import a Template Pack:
- Select the Import Template Packs from the Template Pack Management menu (FIG 2).
Template Pack Management

FIG. 2 Template Pack Management Menu - Import Template Packs Option
- Click Import Template Packs in the Tasks pane to open the Upload window (FIG. 3).
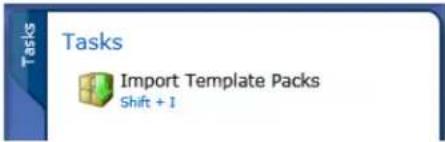
FIG. 3 Import Template Packs Tasks Pane
- Click Browse to open a file browsing window that can be used to pick the Template Pack, or Packs, to import (FIG. 4).
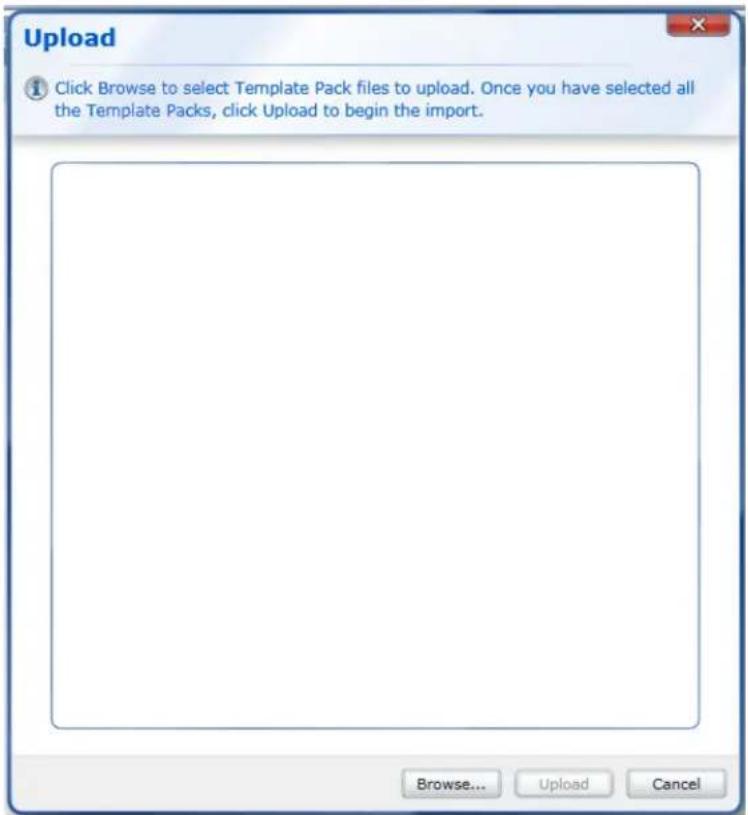
FIG. 4 Template Packs Upload Window
-
Once a Template Pack has been selected and opened, its filename is displayed in the Upload Window with status "Pending". This means that Composer is ready to upload this Template Pack but has not started yet. To the right of the status bar is an upload progress bar.
Clicking the large red X icon on the same line as a Template Pack filename will remove that Template Pack from the list ready for import.
Repeat steps 4-5 for each Template Pack file until all TPK desired to import have been selected. -
Click Upload to begin uploading the chosen Template Packs or Cancel to quit. The Upload window shows the progress made uploading the Template Packs. Once all the selected Template Packs have been uploaded, the Import Template Pack window opens.
The Import Template Pack window is divided into three sections:
- Content Import Options
- Playlist and Template Pack Options
- Publish Points
Content Import Options
Set Content Import Options as follows:
-
Set/Clear Import Template Definitions whether or not to Import the Template Definitions in the uploaded Template Packs into Composer. The default is to use this option, however, this step is not necessary with Architecture or Playlist Template Packs. If not setting this option, skip to the Playlist and Template Pack options or Publish Point section of this window. If Importing the Template Definitions, then for each Imported Template Definitions choose one of the following options:
-
Create a Template For Newly Imported Template Definitions - Create Templates for any new Templates (those that do not already exist in Composer). This is the default option.
- Create a Template For All Imported Template Definitions - Create Templates for all Template Definitions in the Template Pack.
- Don't Create Templates - Don't create any Template Definitions.
Playlist and Template Pack Options
Set Playlist and Template Pack Options as follows:
- Choose whether to Publish the uploaded Template Packs to one or more Players by setting/clearing the check-box as needed. Clear this option only if a Playlist TPK has been imported just for the purpose of configuring Playlists in Composer. In all other cases, Publish the Template Packs to one or more of the Players. If one or more Playlist Template Packs have been uploaded, choose to create any Playlists contained in the Playlist Template Packs in Composer. These Playlists are then allocated to the Publish Points selected in the Publish Points section below.
Publish Points
Set Publish Points to Allocate and/or Publish to:
- Choose to send any imported Template Definitions or Playlists to all, or a selected set of Publish Points. Set the option Select the Publish Points...to to select the Publish Points. You are then shown the Publish Point System. Set the check-box besides the Publish Points (Players or groups of Players) to publish to. Click the black triangles in front of Publish Points to expand them to reveal their contents.
- Click Import to begin importing the uploaded Template Packs. This will take a few seconds.
- The data table for this section shows the progress of any ongoing Template Pack imports.
NOTE: A Template Pack must be published to a Player to publish Messages based on Templates in this Template Pack, otherwise, nothing will be seen.
Once import has finished, the newly imported and created items (Templates Definitions, Templates, and Messages) may be seen in the relevant sub sections of Composer. If these imported items cannot be seen, but an Administrator is able to view them, then you (or someone with the correct permissions) needs to assign the imported items to a Resource Pool that can be accessed.
See Also:
- Delete Template Definitions on page 127
Manage Template Packs
This section contains a data table showing all the Template Packs which have been previously imported into Composer. Use this sub section to publish previously imported Template Packs to Players. Typically this is used to set up new Players added to the Signage network. Template Packs must be published to a Player to publish Messages based on Template Definitions in that Pack to the Player, otherwise these Messages will not be displayed. You can select Template Packs and publish them to selected Players. Once these Template Packs have been published to these Players, Messages can be displayed based on the Template Definitions in these Template Packs.
The process is as follows:
- Select the Manage Template Packs from the Template Pack Management menu (FIG. 5).

FIG. 5 Template Pack Management Menu - Manage Template Packs Option
- Select one or more Template Packs from the Template Pack table (FIG. 6).
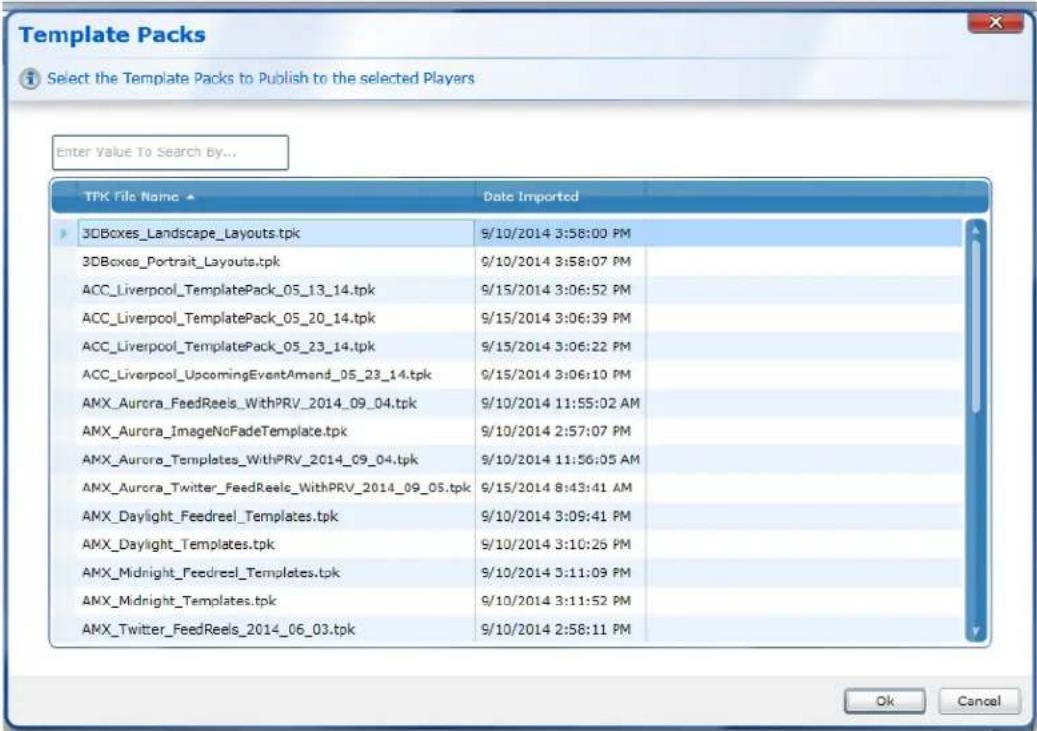
FIG. 6 Template Packs Table
- On the right side Tasks Pane, click Publish Template Packs (FIG. 7).

FIG. 7 Manage Template Packs Task Pane
- A Players window opens which shows all the Players configured in this installation of Composer (FIG. 8).

FIG. 8 Players Table
- Select the Players to publish the chosen Template Packs to.
- Click OK to Publish the selected Template Packs to the chosen Players.
Template Definition s
The Template Manager: Template Definitions sub section shows a data table with a list of all the Templates Definitions in Composer. The Template Definitions sub section enables users to delete any unneeded Template Definitions, assign Template Definitions to Resource Pools, and create a Template from a selected Template Definition.
The actions available in the task pane are as follows:
- Assign Template Definitions to Resource Pools on page 126
• Create Template section on page 96 - Delete Template Definitions on page 127
Assign Template Definitions to Resource Pools
To assign Template Definitions to Resource Pools:
- Select Template Definitions from the Template Pack Management menu (FIG. 9).
Template Pack Management

Import Template Packs

Manage Template Packs

Template Definitions
FIG. 9 Template Pack Management Menu - Template Definitions Option
2. The Template Definitions table appears. Select a Template Definition or Template Definitions (FIG. 10).
| Template Definitions View More Enter Value To Search By... | |||||
| Name ▲ | Date Added | Last Modified | Aspect Ratio | Duration | |
| 3DBoxes_A16x9_AltWidgets_Modallayout | 9/12/2014 5:59:34 PM | 9/9/2010 4:12:27 AM | 16:9 | Unknown | |
| 3DBoxes_A16x9_FS_Ticker_Modallayout | 9/12/2014 5:59:34 PM | 9/9/2010 4:12:33 AM | 16:9 | Unknown | |
| 3DBoxes_A16x9_News_Modallayout | 9/12/2014 5:59:35 PM | 9/9/2010 4:12:48 AM | 16:9 | Unknown | |
| 3DBoxes_A16x9_Widget_Modallayout | 9/12/2014 5:59:36 PM | 9/9/2010 4:12:54 AM | 16:9 | Unknown | |
| 3DBoxes_A9x16_FS_Ticker_Modallayout | 9/12/2014 5:59:46 PM | 9/9/2010 4:11:52 AM | 9:16 | Unknown | |
| 3DBoxes_A9x16_News_Modallayout | 9/12/2014 5:59:47 PM | 9/9/2010 4:12:06 AM | 9:16 | Unknown | |
| 3DBoxes_A9x16_Widgets_Modallayout | 9/12/2014 5:59:47 PM | 9/9/2010 4:12:22 AM | 9:16 | Unknown | |
| ACC_Liverpool_A16x9_AboutUs_Item | 9/15/2014 3:06:51 PM | 5/13/2014 5:07:03 AM | 16:9 | 32 Seconds | |
| ACC_Liverpool_A16x8_TheVenue_Item | 9/15/2014 3:06:51 PM | 5/13/2014 3:58:03 AM | 16:9 | 45 Seconds | |
FIG. 10 Template Definitions Table
- Click Assign to Resource Pool to open the Assign to Resource Pools window (FIG. 11). This window shows all the Resource Pools in Composer. If one or more of the selected Template Definitions already belongs to a Resource Pool this is indicated by a - in the check-box to the left of the relevant Resource Pool.
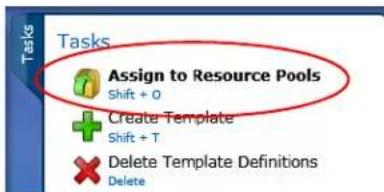
FIG. 11 Template Definitions Tasks Pane
NOTE: These Template Definitions will be unassigned from their current Resource Pools if you continue. If all of the selected Template Definitions belong to a Resource Pool this is indicated by a tick, these Template Definitions will not be unassigned from their current Resource Pool if you continue.
- Select the Resource Pools to add the selected Template Definitions to (FIG. 12).

FIG. 12 Assign to Resource Pools Window
- Click Save to complete the assignment or Cancel to quit.
Create Template
Creating a template is defined in Create Template section on page 96.
Delete Template Definitions
NOTE: Deleting a Template Definition will also delete all Templates that were created from the Template Definition, and any Messages that were created from Template derived from this Template Definition.
To delete a Template Definition:
- Select Template Definitions from the Template Pack Management menu (FIG. 13).

FIG. 13 Template Pack Management Menu - Template Definitions Option
- The Template Def initions table appears. Select the Templates Def initions to delete (FIG. 14).
| Template Definitions | View | More | Enter Value To Search By... | |
| Name ▲ | Date Added | Last Modified | Aspect Ratio | Duration |
| 3DBoxes_A16x9_AltWidgets_ModalLayout | 9/12/2014 5:59:34 PM | 9/9/2010 4:12:27 AM | 15:9 | Unknown |
| 3DBoxes_A16x9_FS_Ticker_ModalLayout | 9/12/2014 5:59:34 PM | 9/9/2010 4:12:33 AM | 15:9 | Unknown |
| 3DBoxes_A16x9_News_ModalLayout | 9/12/2014 5:59:35 PM | 9/9/2010 4:12:48 AM | 15:9 | Unknown |
| 3DBoxes_A16x9_Widget_ModalLayout | 9/12/2014 5:59:36 PM | 9/9/2010 4:12:54 AM | 15:9 | Unknown |
| 3DBoxes_A9x16_FS_Ticker_ModalLayout | 9/12/2014 5:59:46 PM | 9/9/2010 4:11:52 AM | 9:16 | Unknown |
| 3DBoxes_A9x16_News_ModalLayout | 9/12/2014 5:59:47 PM | 9/9/2010 4:12:06 AM | 9:16 | Unknown |
| 3DBoxes_A9x16_Widgets_ModalLayout | 9/12/2014 5:59:47 PM | 9/9/2010 4:12:22 AM | 9:16 | Unknown |
| ACC_Liverpool_A16x9_AboutUs_Item | 9/15/2014 3:06:51 PM | 5/13/2014 5:07:03 AM | 15:9 | 32 Seconds |
| ACC_Liverpool_A16x9_TraVenus_Item | 9/15/2014 3:06:51 PM | 5/13/2014 3:58:03 AM | 15:9 | 45 Seconds |
FIG. 14 Template Definitions Table
- Select Delete Template Definitions from the Task Pane on the right (FIG. 15).

FIG. 15 Template Definitions Table
- This Opens a dialog box which asks for confirmation (FIG. 16).

FIG. 16 Template Definitions Delete Confirmation
- Click Yes to continue and delete the Templates Definitions. Click No to cancel without deleting.
See Also:
- Importing a Template Pack on page 122
User Management
Overview
The User Management section contains two sub sections:
- User Groups - This section shows all the User Groups and Resource Pools.
- Users - This section shows all the user accounts.
NOTE: This section is not enabled if you have configured Composer to use an external directory provider to authenticate users. Refer to the Composer Installation Guide - Post Install Process for more details including how to re-enable this section.
User Groups
This sub-section contains a Data Table containing all the User Groups contained in this installation of Composer along with the number of Users in this User Group and the number of Resource Pools associated with this User Group. If you select the view options Details Expand on Select or Details All Expanded then you can also see a list of the Users inside this group.
The task pane for this sub-section is as follows:
- Edit User Group - Set Permissions for User Groups and Resource Pools. See below.
- Create User Group - Create a New User Group and set Permission. See page 131.
- Assign Users to Groups - Assign Users to User Groups. See page 133.
- Delete User Groups - Delete User Groups. See page 134.
Edit User Group
To Edit or Rename a User Group:
- Select User Groups from the left User Management List (FIG. 17).

FIG. 17 User Management List
- The window shown in FIG. 18 appears listing the configured user groups. Either double click on the User Group Name to be edited or select it and click on Edit User Group in the right Task panel shown below.


FIG. 18 User Groups List
-
The User Group Permissions window shown in FIG. 19 appears which contains three sections:
-
Group Permissions - This column is used to set permissions at the User Group level.
• Resource Pools - This column shows the Resource Pools associated with this User Group. -
Resource Pool Permissions - This column is used to set permissions at the Resource Pool level. Here the group name can be changed, permissions set, and resource pools assigned.
-
Click on the Associated Resource Pools arrow icon to open a search filter which enables string searches (FIG. 19).

FIG. 19 Edit User Group Window
To set permissions for a User Group and associated Resource Pools proceed as follows:
- Set permissions at the group level for each permission category as required. See the List of Permissions by Category on page 15 to see an explanation of the different permission categories, and the permissions available within those categories. FIG. 20 shows this section of the UI and explains the features available:

FIG. 20 Group Permissions
-
The second column of this window shows the Resource Pools associated with this User Group. Click Associated Resource Pools to open the Resource Pool Selection window showing all Composer Resource Pools. Set the check-boxes beside the Resource Pools to associate with this User Group.
-
Click Close to finish.
-
Set Permissions at the Resource Pool level for the Resource Pools associated with this User Group. Any permissions set at the User Group Level also apply at the Resource Pool level and are shown grayed out. FIG. 21 details these Composer tasks.

FIG. 21 Resource Pool Permissions
a. Click Set All Permissions to allow any user in this user group to carry out all Composer functions with the Resource Pools associated with this user group.
b. Set the check-box beside a permission category to allow a user in this user group to carry out all the tasks within this category on the resource pools associated with this User Group.
c. Click on the > symbol to the left of a permission category to view all of the tasks within this category and set permissions on specific tasks.
- Click Save to save the changes.
Create User Group
Create a new User Group as follows:
- Select User Groups from the User Management menu (FIG. 22).
FIG. 22 User Management List
- Click Create User Group from the right Task Pane (FIG. 23).

FIG. 23 User Groups Tasks List
This opens the Create User Group window containing three main sections as shown in FIG. 24. From left to right these are as follows:
- Group Details
- Group Permissions
• Resource Pools Permissions

FIG. 24 Create User Group Window
- Enter a name for the User Group in the name field.
- If the system administrator has enabled an external directory provider as part of the installation process for Composer, then there is a field called Directory Group name. Enter the directory group to map this User Group to. All users in this directory group will automatically become a part of this User Group when Save is selected.
- Set the permissions for this user group using the User Group Level Permissions section, or select the Set All Permissions check-box to enable all the permissions for members of this user group. The following permissions categories are available in this section:
- Template Definitions
- Templates
- Messages
- Playlists
- Players
- Publish Points
- Users
• Resource Pools
The Messages category sets what actions a user can perform with/on Messages in Composer. Click the arrow to the left of a permission category to show the permissions available in this category.
See Permissions and Resource Pools on page 15 for details about these Permission Categories
- Set the check-boxes to the right of a permission category name to give members of this user group all of the permissions of that type.
NOTE: A blue ball to the right of a permission category name indicates that one or more permissions of this type have been set.
-
To set permissions for members of this user group when they use Resources belonging to specific Resource Pools, those Resource Pools must be associated with this User Group. Click Associated Resource Pools (FIG. 25) and select one or more Resource Pools, or enter a first letter to filter for the desired resource name. Click Close when finished.
-
Select a Resource Pool in the list of associated Resource Pools. The Resource Pool permissions section updates to show the permissions for this User Group/Resource Pool combination. The following permission categories are available at the Resource Pool level:
- Template Definitions
- Templates
- Messages
- Playlists
Edit User Group
Edit Group Name, Set User Group permissions, Associate Resource Pools with the User Group and set the permissions for the Resource Pool/User Group combinations
Group Details
Name Branch4UG
Group Permissions
Users within this User Group will inherit the permissions that are defined below.
Resource Pool Permissions
Setting Permissions at a Resource Pool level allows the restriction of resources with Resource Pools that are associated with this User Group. Note User Group Permis priority over permissions set on Resource Pools
Associated Resource Pools

Set All Permissions
Set All Permissions
Template Definitions
Templates
Messages
Playlists
Players
Publish Points
Users
Resource Pools
Branch4-RP
FIG. 25 Resource Pool Permissions Example
- Set the permissions for this Resource Pool/User Group combination in the same way as the User Group level permissions. If a particular permission is set at the User Group level, then it will be set implicitly at the Resource Pool level.
- Once finished setting the Permissions, click Save.
Assign Users to Groups
Assign a user to one or more user groups so that it adopts the permissions settings of those user groups. The user account merges the permissions of all user groups it belongs to. So if a user is a member of a group A who can review Messages, and group B who can delete Messages, the user can both review and delete Messages.
The process is as follows:
- Select Users under the User Management menu (FIG. 26).
FIG. 26 User Management Menu
- Select a user account displayed in the users list.

FIG. 27 Users List
- Select one or more User Groups from the list on the right to assign these users to (FIG. 28).
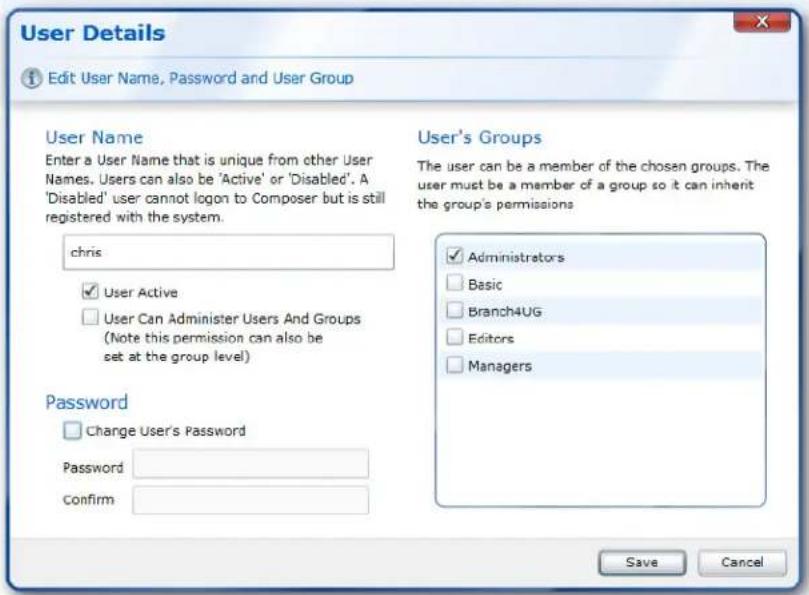
FIG. 28 User Details Window
- Click Save to save changes.
Delete User Groups
Delete user groups as follows:
- Select User Groups from the User Management menu (FIG. 29).

FIG. 29 User Management Menu
- Select a user group or (Ctrl+) a number of user groups to delete.
- Click Delete User Groups (FIG. 30) from the User Group Tasks menu and confirm whether to delete the group or groups.
Tasks


FIG. 30 User Groups Tasks List
Users
This sub-section contains a Data Table containing all the Users in this installation of Composer. The table shows whether the user account is active or not.
NOTE: If users are automatically logged out of a system while working, it could be due to a virus scanner running on the server. If a virus scanner is required on the server then make sure that the directory in which Composer is installed (normally C:\Program Files\AMX\IS\Composer\Server\Web for 64 bit system) and its subdirectories are excluded as part of the virus scanner scan process.
- Select View at the top right of the Users bar (FIG. 31) to choose how much data to display in the Users view. Refer to the following table for descriptions of each option.
The task pane for this sub-section is as follows:
- Edit User, See below.
• Create User, See page 136.
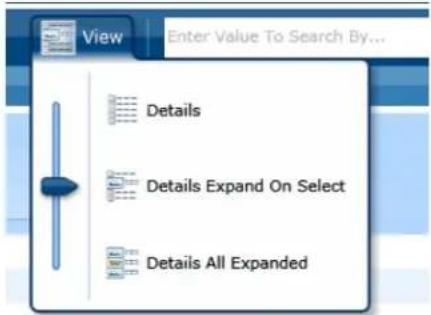
FIG. 31 Users View Options
| View Options Description | |
| Detail Display which users are active. | |
| Details Expand On Select Display | the user group a selected user is In and when they last changed their password. |
| Details All Expanded Expanded | display of the entire list of users, displaying the user groups that they belong to and when their passwords were last changed. |
- Delete Users, See page 137.
NOTE: If a user logs in (with a username/password), then only one session is allowed for that user. If another user logs in with the same username and password then the first session is closed and the first user is logged out. Different users should not be using the same username and password.
Edit User
Edit a user account as follows:
- Select Users under the User Management menu in the left pane (FIG. 32).

FIG. 32 User Management List
- The list of users is displayed as shown in FIG. 33. Select a user and click Edit User in the tasks pane to edit this user account. Alternately, a User may be double-clicked to open the Edit dialogue window.

FIG. 33 List of Users

- The User Details window appears as shown in FIG. 34.

FIG. 34 User Details Window
- Set or clear the active check-box to activate or deactivate this user account.
- Click User can Administer Users and Groups to allow this user the ability to create new users and user groups, etc. Alternatively, this permission can also be set for the User Group that contains this User.
- Set the check-box to change the user's password (has to be at least 6 characters in length).
- Confirm by entering the password a second time.
- Choose which User Groups this user belongs to by setting the check boxes beside the appropriate Groups. Refer to Setting Up User Groups, and Permissions on page 36 if needed, for definitions and permissions.
- Click Save to create the new user account or Cancel to quit.
Create User
- Select Users under the User Management menu on the left pane (FIG. 35).

FIG. 35 User Management List
- On the right Tasks pane, click Create User to create a new user account (FIG. 36).
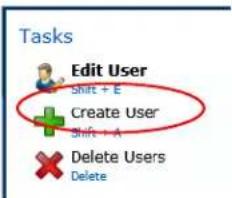
FIG. 36 Users Tasks Menu
- The User Details window appears as shown in FIG. 37.
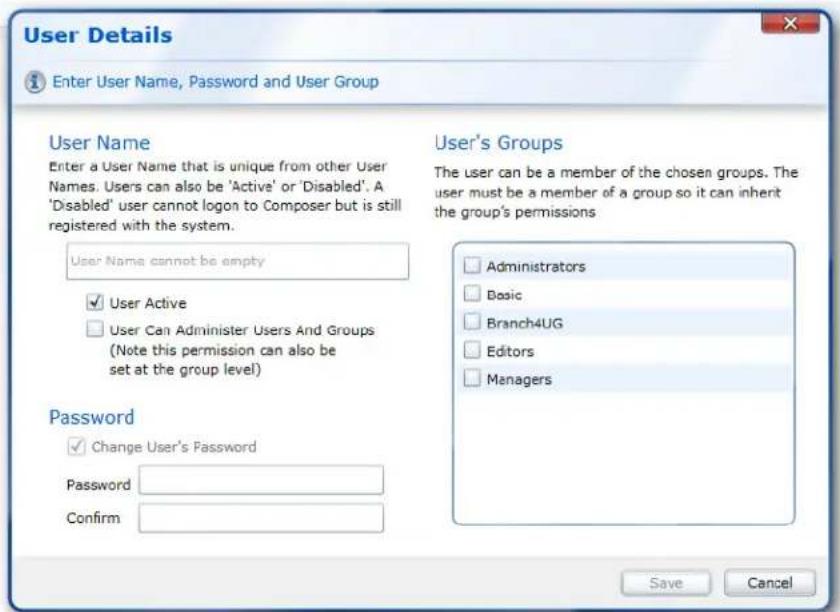
FIG. 37 User Details Window
- Enter a username for this account.
- Clear the User Active check-box if you do not want this user account to be active.
- Click User can Administer Users and Groups to allow this user the ability to create new users and user groups, etc. Alternatively, this permission can also be set for the User Group that contains this User.
- Enter at least a 6 character password for this user.
- Confirm by entering the password a second time.
- Choose which User Groups this User belongs to by setting the check boxes beside the Groups you want the User to belong to. Refer to Setting Up User Groups, and Permissions on page 36 if needed, for definitions and permissions.
- Click Save to create the new user account or Cancel to quit.
Delete Users
Only user accounts which have been unused (technically accounts which have not modified any Playlists) can be deleted. Accounts which have been used but which are no longer needed, need to be deactivated first. See Deactivating an Existing User Account on page 51.
Delete accounts as follows:
- Select Users under the User Management menu in the left pane (FIG. 38).

FIG. 38 User Management Menu
- Select the User account or accounts from the list to delete (FIG. 39).

FIG. 39 Users List
- From the task pane on the right side of the screen, click Delete Users (FIG. 40).

FIG. 40 Users Tasks List
User Authentication Against Active Directory
In order for a user to be authenticated against Active Directory, the user group with a corresponding distinguished name must first be created in Composer.
All users in this group can then be authenticated against the Active Directory store.
For example, if a user exists in the Active Directory, and is in one of the groups with the distinguished name CN=Inspired Signage, CN=Users, DC=TestAMX DC=local, then groups with the name "Inspired Signage" with the same distinguished name must be created in Composer. All users that are part of the "Inspired Signage" who login to Composer will be authenticated against the active directory store.
Appendix
Error Messages
This section defined error messages that may be seen in Composer and details the meaning of the messages in greater detail.
| Error Message Description | |
| ErrorPassword User has entered the old password incorrectly | |
| GroupCantDeleteCurrent Cannot delete User | Groups that the currently logged-on User belongs to |
| InvalidTpkFileName {0} has an invalid file name. | Can only import files that are of type 'tpk |
| LicenceClient Composer Desktop License | |
| LicenceCustom Customer Specific License | |
| LicenceDate Support and updates available until {0} | |
| LicenceMachine Licensed to run on {0} | |
| LicencePlayers {0} AMX Inspired Signage players to be registered in composer | |
| LicenceServer Composer Server License | |
| LicenceTemporary Trial License expires in {0} | |
| LicenceUsers | Allows {0} concurrent users |
| LicenceVersion | Support and updates prior to and including version {0} |
| LicenceVirtualPath | Licensed to run on IIS virtual path {0} |
| LockingDeleteMessage | Cannot lock Messages for delete. This may indicate the templates are already deleted or being edited by another user |
| LockingDeletePlaylist | Cannot lock Playlist for delete. This may indicate the Playlists are already deleted or being edited by another user |
| LockingDeleteTemplate | Cannot lock Templates for delete. This may indicate the templates are already deleted or being edited by another user |
| LockingDeleteTemplateDef | Cannot lock Template Definitions for delete. This may indicate the templates are already deleted or being edited by another user |
| MessageExists | Message with this name already exists |
| MessageNameEmpty | Message name must not be empty |
| NewSet | New Player Set |
| NoEnabledPlayersFoundException | At least one player has to be enabled to publish to |
| NoMessage | Player Message does not exist |
| NoPlayer | Player does not exist |
| NoPlaylist | Playlist does not exist |
| NoPlaylistsOnPlayersError | For Publish to succeed, you must assign at least one Playlist to a Publish Point |
| NoPreview | Message cannot be previewed. This could be because the Message is for layout or live data purposes |
| NoPublishPointFolder | Publish Point folder does not exist |
| NoPublishSelected | No Playlists or Publish Points have been selected |
| NoResourcePool | Resource Pool does not exist |
| NoTemplate | Template does not exist |
| NoTemplateDef | Template definition does not exist |
| NoUser | User does not exist |
| NoUserGroup | User Group does not exist |
| PermissionAssignMessageToPool | User does not have permission to assign Messages to Resource Pools |
| PermissionAssignPlayListToPool | User does not have permission to assign Playlists to Resource Pools |
| PermissionAssignTemplateDefToPool | User does not have permission to assign Template Definitions to Resource Pools |
| PermissionAssignTemplateToPool | User does not have permission to assign Templates to Resource Pools |
| PermissionAutomatePlaylist | Automated playlists cannot be approved |
| PermissionCreatePlayerset | User does not have permission to create a Player Set |
| PermissionDeleteMessages | User does not have permission to delete Messages |
| PermissionDeleteTemplate | User does not have permission to delete Templates |
| Error Message | Description |
| PermissionDeleteTemplateDef User does not have permission to delete Template Definitions | |
| PermissionEditPlayerset User does not have permission to rename a Player Set | |
| PermissionExportPlayLists User does not have permission to export Playlists | |
| PermissionImportNo User does not have permission to import Templates | |
| PermissionPlayListChange User does not have permission to modify Playlists | |
| PermissionPlayListConfigure User does not have permission to configure Playlists | |
| PermissionPlayListCreate User does not have permission to create a Playlist | |
| PermissionPlayListDelete User does not have permission to delete Playlists | |
| PermissionPlayListEditAuto Automated Playlists cannot be edited | |
| PermissionPlayListNoModify User does not have permission to modify Playlists | |
| PermissionPlayerDelete User does not have permission to delete Players | |
| PermissionPlayerMessageNoCreate User does not have permission to create a Message | |
| PermissionPlayerMessageNoModify User does not have permission to modify a Message | |
| PermissionPlayerModify | User does not have permission to modify Players |
| PermissionPlayerNoCreate User does not have permission to create Players | |
| PermissionPlayerNoImport | User does not have permission to discover and Import Players |
| PermissionPlayerToSet | User does not have permission to add Players to Player sets |
| PermissionPublishAll | User does not have publish access to all Playlists and therefore cannot publish. Please try 'Republish to Selected' and select the playlists you have publish access to |
| PermissionPublishSelected | User does not have publish access to the selected Playlists |
| PermissionResourcePool | User does not have Resource Pool Administration permission |
| PermissionReviewMessage | User does not have permission to review Messages |
| PermissionReviewPlaylist | User does not have permission to review PlayLists |
| PermissionReviewTemplate | User does not have permission to review Templates |
| PermissionTemplateModify | User does not have permission to modify Templates |
| PermissionTemplateNoCreate User does not have permission to create a Template | |
| PermissionRemove | User does not have permission to remove the Resource |
| PermissionCreate | User does not have permission to create a User |
| PermissionUserGroupCreate | User does not have permission to create a User Group |
| PermissionUserGroupError | User may not set permissions on User Group |
| PermissionViewPlayerSets User does not have permission to view Publish Points | |
| PlayListEmptyName | Playlist name must not be empty |
| PlayListNoVariations | User cannot change the variation of automated Playlists |
| PlayListVariationDuplicate | Two or more Playlist Versions that have the name |
| PlayListVariationNullName Playlist Variation name must not be empty | |
| PlayerLicenseCheckFail | User has reached the maximum number of Players that your license allows you to create |
| PlayersExist | The Players below are already part of |
| ResourcePoolExists | Resource Pool name already exists |
| ResourcePoolNameEmpty | Resource Pool name must not be empty |
| TemplateExists | Template with this name already exists |
| TemplateNameEmpty | Template name must not be empty |
| UserCannotBeDeletedIfItHasHistory | This user has modified resources and cannot be deleted. Please disable the user |
| UserCantDeleteCurrent | Cannot delete the currently logged-on User |
| UserGroupExists | User Group name already exists |
| UserGroupNameEmpty | User Group name must not be empty |
| UserPasswordEmptyError | User must have a Password |
| UserRemoveAdminError | Cannot remove Admin rights on currently logged-on Admin user (This action could result in the all loss of User administration rights) |
| UsernameNoSpaces | User Name must not contain spaces |
| WebConfigSuccessfulInstallMessage Feed Reel ( {0} ) has been successfully published to the player | |
| WebConfigWebServerLogonError Cannot log onto web config | |
| WebConfigWebServiceConnectionError Composer couldn't make a connection with the Player | |
| WebConfigWebServiceUnexpectedError Unexpected error in Web Config | |
| WebConfigWebServiceVersionError The version of web config on the player does not support the Feed Reels task | |
Troubleshooting Issues with Composer/Player
If you are having trouble displaying Messages on one or more Players, try the following:
- Check that the Template Pack that the Messages are derived from has been published to the Player.
- Check that an Architectural Template Pack has been published to the Players.
- Ensure the Players are Enabled.
- Check the network connectivity of the Players.
- Check the Message Validity.
- Try forcing Composer to publish to all or selected Players using one of the Republish options.
- Check all Playlists containing the Messages to display are being published to all of their Players. Use the View Playlist Conflicts task on page 81.
- Check that Players have been assigned to Publish Points so that the Players will receive any Playlists assigned to these Publish Points when you Publish Content Changes.
Supported File Types
Composer supports the following media file types:
- Images
- Video
- Audio
Images
The following image formats are supported:
- .JPG/.JPEG - Note that Progressive JPEG files are not supported.
• .BMP (24 bits per pixel only)
• .TGA (24/32 bits per pixel only)
• .PNG
• .GIF
• The vector format .WMF
NOTE: CMYK formats are not supported.
Image Size
Composer is able to open any size of image and will send them to the Players. Although the player will attempt to use them, performance may be affected.
- It is best practice to scale down images to a sensible resolution, as in most cases your screens will have fairly low resolution.
- An image should typically not exceed 1280 pixels in width and 1024 pixels in height, but this may depend on your installation.
Video
NOTE: For best quality, encode from a digital source over a digital link. Do not use composite at any point in the chain if at all possible as this will severely compromise quality.
| Table of Supported Video CODECs and Container Formats | ||||
| Container format | Video CODEC HD S | Support Audio CODE | EC Max Bitrate | |
| .mp4 h.264 Yes | AAC | 10Mbits/sec | ||
| .mpg | MPEG-1 | No | MPEG Layer I,II | 10Mbits/sec |
| .mov | h.264 Yes | AAC | 10Mbits/sec | |
AMX advises 1080p video should be played full-screen only and never in a layout area belonging to a multi area Layout. Video played inside one of a number of layout areas should be at most 720p
Aspect Ratio:
For display in a 16x9 template:
- Use Pillarbox to show 4x3 video.
For display in a 4x3 template:
- Standard 4x3 video.
- Use Letterbox to show 16x9 video.
Advanced Playlist Theory
Playlist Types
There are two main types of Playlists:
- Content Pool Playlists- these use a playlist filename ending in .pool.
- Standard Playlists - these use a playlist filename ending in .itm.
Content Pool Playlists
This type of Playlist creates a 'pool of content' (called a content pool) containing a variety of Messages, from which the Player can choose what to display in real time, according to a number of rules. Some of these rules are set by the AMX designers, but others are under the control of users, namely:
- User can define validity rules on Messages, and the player will only select Messages that are valid. For example, you could decide that a particular Message should only display on Fridays. Note that Validity will not work if the Playlist mode is set to Sequential only.
- User can control the way in which the player selects the Messages to display from the set of valid Messages in the pool, by specifying that it should do so either in sequence or at random (shuffled). See Playlist Modes on page 10 for more details.
The following diagram shows a typical Content Pool Playlist. This pool is used to display messages on a station concourse. AMX designers create a pool hierarchy where lower level pools feed into higher level pools. The content of this pool is created by taking one message from the Advertisement pool, three messages from the News Stories Pool and one message from the Train Departure Information pool. This process repeats indefinitely (the Pool creates a buffer containing content ready and waiting for display). The News pool is itself constructed by taking one message from the Entertainment News pool for every two messages from the Business News pool. This is summarized in FIG. 1:

flowchart
graph TD
    A["Station Concourse"] -->|1| B["Advertisements (A)\nA₁,A₂"]
    A -->|3| C["News Stories\nE₁,B₁,B₂,E₂,B₃,B₄,E₁,B₅,B₆..."]
    A -->|1| D["Train Departure Information (I)\nI₁,I₂,I₃"]
    C -->|2| E["Business News (B)\nB₁,B₂,B₃,B₄,B₅,B₆,B₇"]
    B -->|1| F["Entertainment News (E)\nE₁,E₂"]
    C -->|2| E
    style A fill:#f9f,stroke:#333
    style B fill:#ccf,stroke:#333
    style C fill:#cfc,stroke:#333
    style D fill:#fcc,stroke:#333
    style E fill:#cff,stroke:#333
    style F fill:#ffc,stroke:#333
FIG. 1 How Content Pool Playlists are Constructed from a Number of Content Pools Arranged in a Hierarchy
There is no concept of looping with Content Pool Playlists as they continue indefinitely.
Standard Playlists
Standard playlists are a basic Playlist which do not support validity. The items in standard playlists can only be displayed in sequence (it's not possible to display the contents of the playlist in a random order). Users can arrange for the playlist to loop if required. Playlist Modes on page 10.
Playlist Properties
Playlists have a number of properties which determine how they behave. With the exception of play order (the order in which Messages in Playlists are shown on screen, these properties are preset by AMX designers and cannot be modified in Composer. As a result we only discuss these preset properties briefly below.
- Priority - determines which Playlist is displayed in front of which other Playlist.
- Timing - determines when different Playlists are displayed on screen. For example, display Playlist A at the same time as Playlist B, or display Playlist B after Playlist A has f inished, and so on.
- Playlist Types - determines whether this is a simple standard Playlist, or a more complicated Playlist. this is known as a content pool which uses various rules to decide on the fly which Message to display next.
- Pooling - The output of content pool Playlists can be fed into the input of other content pool Playlists.
Special rules determine how many of each feeder Playlist to select at each turn. For example: Users can have a top level Playlist A with feeder Playlists B and C. User can then have a rule that Playlist A selects 2 Messages from Playlist B for every 1 Message from Playlist C. Playlists B and C can have feeder Playlist themselves, and so on.
Playlist Restrictions
Playlist Restrictions are used to restrict which Messages can be added to a Playlist. These restrictions stop users from accidentally or deliberately putting inappropriate Messages in a Playlist. For example, if the area controlled by a Playlist has an aspect ratio of 16x9, you may want to prevent users from adding Messages with a different aspect ratio to this Playlist. Alternatively you could have Messages for internal use (staff messages) and external (public) Messages. Playlist Restriction could be used to prevent internal Messages being added to Playlists shown on Players which can be viewed by members of the public.
Playlist Restriction List
Each Playlist can have a list of Template Definitions called a Playlist Restrictions List. If a Playlist has a Restriction List, only Messages based on Template Definitions in the Restriction List can be assigned to the Playlist.
If there is no Restriction List, any Message can be added to the Playlist.
Setting up Playlist Restrictions
Setup Playlist Restrictions as follows:
- Configure a number of Playlists. See Create Playlist on page 85 for more details. For each Playlist specify a list of labels to match against Template Definition Metadata. This is called an Automatic Playlist Restriction Group. Template Definitions in imported Template Packs which have any of these labels, are automatically added to the Restriction List for this Playlist.
- Import a Template Pack containing Template Definitions with Metadata containing the labels identified in the previous step. See Importing a Template Pack on page 122 for more details
- Manually refine Playlist Restrictions for each Playlist in step 1 above. See Edit Playlist on page 75 for more details See Also
• Meta-data on page 145 for more details.
Automatic Restriction Groups and Restriction Lists
Automatic Restriction Groups are a list of labels. They are used to automatically construct a list of Templates Definitions for a Playlist called the Restriction List. Only Messages derived from Template Definitions in the Restriction List can be added to the Playlist, so this allows preventing users from putting inappropriate Messages in a Playlist.
Manually adding Template Definitions to the Restriction List is time consuming. By taking advantage of the fact that Template Definitions can be labeled we can add all Template Definitions with selected labels to the Playlist Restriction List. A typical use is to prevent users adding Messages which are the wrong aspect ratio to a Playlist.
When importing a Template Pack, the Template Definitions in the Template Pack are scanned. If any of the Template Definitions are labeled, then the labels are checked against the list of labels in the Automatic Restriction Group for each Playlist. If there are any matches, then the Template Definition is added to the Restriction List for that Playlist. The documentation available for the Template Pack will provide information about the labels applied to the Template Definitions it contains.
FIG. 2 shows how labels are applied to Template Definitions within Template Packs. It provides an example Template Pack which contains seven Template Definitions marked with three different labels.

other
Example Labels applied to Template Definitions contained in Template Packs | Label | External Information = Ext | Priority Information = Pri | |---|---|---| | TD1 | 2 | 0 | | TD2 | 2 | 0 | | TD3 | 0 | 3 | | TD4 | 0 | 0 | | TD5 | 0 | 0 | | TD6 | 0 | 0 | | TD7 | 0 | 0 | | Internal Information = Int | 0 | 0 | Labels: Ext Pri Int TD = Template DefinitionFIG. 2 Template Pack Containing Template Definitions with Labels
FIG. 3 displays how automatically restricted messages can belong to a Playlist using the example Template Pack.

flowchart
graph TD
    A["Playlist 1<br>Automatic Restriction Group"] --> B["Ext"]
    C["Playlist 2<br>Automatic Restriction Group"] --> D["Int, Pri"]
    B --> E["Import Template Pack<br>containing Template<br>Definitions marked with labels Ext, Int, Pri"]
    D --> E
    E --> F["TD 1<br>TD 2<br>TD 3<br>TD 4<br>TD 5<br>TD 6<br>TD 7"]
    F --> G["TD = Template Definition"]
    G --> H["Restriction List for Playlist 1"]
    H --> I["TD 1<br>TD 2"]
    I --> J["Allowed Messages"]
    G --> K["Restriction List for Playlist 2"]
    K --> L["TD 3<br>TD 4<br>TD 5<br>TD 6<br>TD 7"]
    L --> M["Anything derived from the Templates<br>Definitions in the Restrictions List"]
    K --> N["TD 4 is marked with both Int and Pri"]
FIG. 3 Using Automatic Restriction Groups to Create Playlist Restriction Lists
There are two special cases with Automatic Restriction Groups where the mechanism does not behave as outlined above:
- If a Playlist Automatic Restriction Group is empty, and the Restriction List for that Playlist is also empty, then all Messages are allowed in the Playlist.
- If the Automatic Restriction Group is not empty, but none of the labels match the labels on the Template Definitions in the Composer database, and the Restriction List for that Playlist is also empty, then no Messages are allowed in the Playlist.
FIG. 4 illustrates these two special cases:
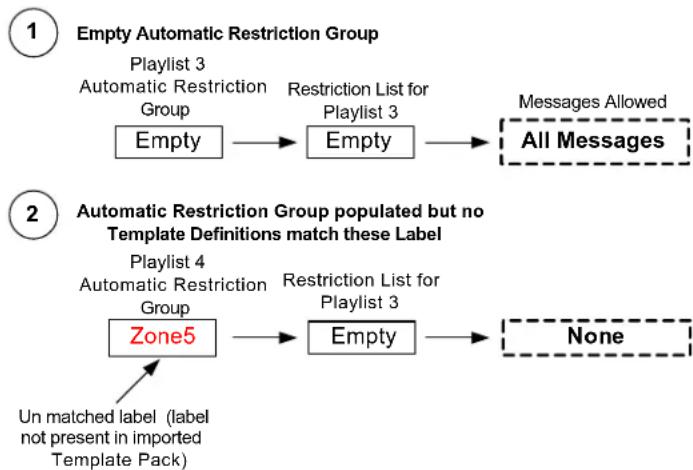
flowchart
graph TD
    A["Empty"] --> B["Empty"]
    B --> C["All Messages"]
    D["Zone5"] --> E["Empty"]
    E --> F["None"]
    G["Un matched label (label not present in imported Template Pack)"] --> D
    H["Automatic Restriction Group"] --> I["Playlist 3\nAutomatic Restriction Group"]
    I --> J["Restriction List for Playlist 3"]
    J --> K["Messages Allowed"]
    L["Automatic Restriction Group populated but no Template Definitions match these Label"]
FIG. 4 Automatic Restriction Group Special Cases
Meta-data
Template Pack designers can add extra information called Metadata to Template Definitions. This extra information includes:
| Metadata Description | |
| Aspect Ratio | Aspect Ratio is the ratio of width to height of this Template Definition. Normally you will only want to use Template Definitions with Playlists which have the same aspect ratio. |
| Duration The default duration of Messages created from this Template. | |
| Labels Used to classify Template Definitions. For example you could have labels such as Public or Internal to distinguish Templates designed to display information to the general public from those used to display information for internal use.Other possibilities include labels like Zone1, Zone2, etc. to indicate what can be displayed in different areas of a building.Labels are used to automatically setup Playlist Restriction Lists which restrict what Messages can be put in a Playlist. Playlist Restrictions Lists are a list of Templates Definitions.When Importing a Template Pack, the labels of the Imported Template Definitions are checked against the Playlist labels (|Automatic Restriction Group). If there is a match, then this Template Definition is added to the Playlist Restriction List for that Playlist. Only Messages which derive from Template Definitions In the Restriction List can be added to the Playlist. | |
HARMAN
© 2015 Harman. All rights reserved. AMX, AV FOR AN IT WORLD, and HARMAN, and their respective logos are registered trademarks of HARMAN. Oracle, Java and any other company or brand name referenced may be trademarks/registered trademarks of their respective companies.
AMX does not assume responsibility for errors or omissions. AMX also reserves the right to alter specifications without prior notice at any time.
The AMX Warranty and Return Policy and related documents can be viewed/downloaded at www.amx.com.
3000 RESEARCH DRIVE, RICHARDSON, TX 75082
AMX.com | 800.222.0193 | 469.624.8000 | +1.469.624.7400 | fax 469.624.7153
Last Revised:
7/23/2015
- IMPORTANT SAFETY INSTRUCTIONS
- COPYRIGHT NOTICE
- LIABILITY NOTICE
- AMX WARRANTY AND RETURN POLICY
- Table of Contents
- Composer Upgrade Overview ....1
- Inspired Signage - Overview 2
- Composer 3
- Template Definitions 4
- Templates....5
- Messages....8
- Playlists 9
- Publish Points (Publishing Playlists).... 10
- Approval 12
- Composer - Users 13
- Permissions and Resource Pools 15
- Locking 17
- Composer - Main Window 17
- Overview 17
- Access Dashboard 18
- Menu Pane 20
- Data Table.... 21
- Tasks Pane.... 22
- Approval Pane 22
- Tool Bar 23
- Current Publish Progress 24
- Login/Logout 27
- Status Bar 29
- Getting Started 30
- Logging In to Composer 30
- Template Pack Management 122
- User Management 129
- Appendix 139
- Composer Upgrade Overview
- Composer 5.6 Enhancements
- Additional Documentation
- Inspired Signage - Overview
- Overview
- Core Components
- Composer
- IS-Player
- Babel
- Composer Processes
- Template Definition s
- Non-Visual Template Definition Elements
- Switches
- Selectors
- Visual Template Elements
- Template Definition Properties
- Templates
- Template Definitions, Templates, and Messages
- Template Pa c ks
- Creating Templates from Template Definitions
- Automatic Template Properties
- Messages
- Scheduling (Validity Rules)
- Playlists
- Playlist Modes
- Playlist Versions
- Playlist Naming Conventions
- Publish Points (Publishing Playlists)
- Approval
- Approval Actions Available
- Playlist Permissions
- Composer - Users
- Administrator User Group
- Manager User Group
- Editor User Group
- Basic User Group
- Permissions and Resource Pools
- Resource Pools
- List of Permissions by Category
- Locking
- Composer - Main Window
- Access Dashboard
- Dashboard
- Welcome
- System Summary
- Approval Queue
- Menu Pane
- Data Table
- Selecting Items
- Expanded View of Items
- Changing Table Column Width
- Changing Column Order
- Sort Table Using the Values in a Column
- Tasks Pane
- Approval Pane
- View Changes
- Revert
- Reject
- Approve
- Too | Bar
- Publish
- Publish Content Changes
- Republish All
- Republish Selected
- Current Publish Progress
- Publish Status
- When The System Is Alive
- Post Office Status
- When Publisher Guardian Is Not Running
- When Post Off ice Is Not Running
- Player Status Tab
- Login/Logout
- Change Password
- Zoom
- Refresh Display Button
- Help
- Status Bar
- Getting Started
- Logging In to Composer
- Logging Out of Composer
- A Basic Administrator Work Flow
- Administrator Setup Tasks
- Setting Up Players
- Importing Template Packs
- Creating a Publish Point System
- Setting up Playlists
- Setting Up User Groups, and Permissions
- Creating Resource Pools for User Groups
- Configuring Playlists to Display on All or Selected Players
- Day to Day Tasks
- Creating and Publishing Messages
- Reviewing Changes to Messages, Templates, or Playlists
- Click Go to Dashboard
- Details (Approved)
- Properties (Approved)
- Body (Approved) Visible
- Details (Proposed)
- Properties (Proposed)
- Body (Proposed) Visible
- Image (Approved) Visible
- Image (Proposed) Visible
- Changing Message Play Order
- Changing Rejected Messages/Templates
- Removing Messages From Playlists
- Setting When a Message can be Displayed
- Creating Templates
- Creating Playlists for Special Circumstances
- Add a New User
- Deactivating an Existing User Account
- Adding Images to Messages or Templates
- Adding Video to Messages or Templates
- Content Management
- Edit Message
- Create Message
- Message Properties
- Image Property
- Limitations of displaying web pages
- Video Property
- Text Property
- Numeric Property
- Color Property
- Switch Property
- Selector Property
- Restrict to Publish Points
- Setting Message Validity
- Set a Valid From Date (Start Of Date Range)
- Set a Valid To Date (End Of Date Range)
- Defining Specific Weekday Rules
- Creating a Time Interval
- Clearing a Time Interval
- Combining Validity Rules
- Deleting Validity Rules
- Duplicate Messages
- Preview Messages
- Preview Not Available
- 20 Preview Not Available Icon
- Quick Preview Messages
- Launching a Preview
- Changing Data
- Assign to Resource Pools
- Add Messages to Playlists
- As Run Report
- Enabling As Run Logging on (All or Selected) Players
- Generate As Run Report
- Pick Source Players
- Pick Dates
- Optionally Filter By Messages
- XML As-Run Report
- Terminology
- SiteSummary Element
- DateRange Elements
- SiteMessageSummary Elements
- Player Report Section
- Summary Elements
- MessageSummary Elements
- DailyAsRun Element
- DailySummary Element
- MessagePlays Element
- MessagePlay Elements
- TimeSpan Element
- CSV As-Run Report
- Delete Messages
- Edit Playlist
- Add Message to End of Playlist
- Add Message to Beginning of Playlist
- Remove Messages from a Playlist
- Duplicate Assignment
- Create/Edit Playlist Versions
- Add New Playlist Version
- Remove Version
- Activate Version
- Assign Playlists to Resource Pools
- Playlist Conflict Prevention
- Assign Playlist Publish Points
- View Playlist Conflicts
- Set Playlist Restrictions
- Playlist Restrictions
- Adding Template Definitions To The Restriction List
- Setting Up Playlist Restrictions Using Labels
- Area Playlist Mixing Rules
- Link Between Layout Message Area Property Values and Area Playlists
- Scheduling Different Layouts at Different Times
- Practical Examples
- Playlist Mixing Example
- Removing Template Definitions From the Restriction List
- Auto Populate Restrictions
- Displaying Different Layouts on Different Groups of Players
- Create Playlist
- Export Playlists
- Delete Playlists
- Create New Resource Pool
- Edit Resource Pool
- Remove Resources
- Delete Resource Pools
- Template P property Ty pes
- Name check-box
- Enable Property Editing in Message Check-box
- On Publish, Populate with Check-box
- Text Propert y
- Create Template
- Editing a Template
- Deleting a Template
- Assign Templates to Resource Pools
- Player Management
- Players
- Player Settings Table
- Configure Player
- Discover Players
- Create a Player
- Temporarily Disabling a Player
- Assign to Publish Points
- Click Save.
- Assign Playlists to Player
- Publish TPKs to Players
- Republish TPKs to Selected Player
- Copy Feed Reels
- Delete Players
- Click the Delete Players in the Task Pane (FIG. 35).
- Publish Points
- Add Players to a Publish Point
- Click Add Players (FIG. 41).
- Click Ok.
- Add a Root Publish Point
- Add a Child Publish Point
- Deleting Publish Points
- Assign Playlists to Publish Point
- Template Pack Management
- Importing a Template Pack
- Content Import Options
- Playlist and Template Pack Options
- Manage Template Packs
- Assign Template Definitions to Resource Pools
- Delete Template Definitions
- User Management
- User Groups
- Edit User Group
- Create User Group
- Group Details
- Group Permissions
- Resource Pool Permissions
- Assign Users to Groups
- Delete User Groups
- Users
- Edit User
- Create User
- Delete Users
- User Authentication Against Active Directory
- Appendix
- Error Messages
- Troubleshooting Issues with Composer/Player
- Supported File Types
- Images
- Image Size
- Video
- Aspect Ratio:
- Advanced Playlist Theory
- Playlist Types
- Content Pool Playlists
- Standard Playlists
- Playlist Properties
- Playlist Restriction List
- Setting up Playlist Restrictions
- Automatic Restriction Groups and Restriction Lists
- Meta-data
Brand : AMX
Model : IS-XPERT-MGMT
Category : Computer Server