Eureka 50mm f/2 - Lens Thypoch - Free user manual and instructions
Find the device manual for free Eureka 50mm f/2 Thypoch in PDF.


| Product Type | Camera Lens |
| Brand | Thypoch |
| Model | Eureka 50mm f/2 |
| Focal Length | 50mm |
| Maximum Aperture | f/2 |
| Minimum Aperture | f/16 |
| Lens Mount | Leica M (rangefinder) |
| Lens Construction | 6 elements in 4 groups |
| Angle of View | 45° (diagonal) |
| Minimum Focus Distance | 0.7m |
| Filter Thread | 49mm |
| Dimensions (Length x Diameter) | Approx. 60mm x 52mm |
| Weight | Approx. 300g |
| Focus Type | Manual focus |
| Aperture Ring | Clickless with detents at full stops |
| Included Accessories | Front cap, rear cap, lens hood (optional) |
| Materials | All-metal barrel, brass mount |
| Compatibility | Full-frame and APS-C cameras (via adapter) |
| Cleaning | Use lens cleaning cloth, avoid solvents |
| Storage | Store in dry environment, use silica gel |
| Safety | Do not point at sun to avoid fire hazard |
| Repairability | Serviceable by authorized technicians |
| Warranty | 1 year limited warranty |
Frequently Asked Questions - Eureka 50mm f/2 Thypoch
User questions about Eureka 50mm f/2 Thypoch
0 question about this device. Answer the ones you know or ask your own.
Ask a new question about this device
Download the instructions for your Lens in PDF format for free! Find your manual Eureka 50mm f/2 - Thypoch and take your electronic device back in hand. On this page are published all the documents necessary for the use of your device. Eureka 50mm f/2 by Thypoch.
USER MANUAL Eureka 50mm f/2 Thypoch
EUREKA MIRRORLESS PRIME LENS USER'S MANUAL
A Gateway To Authenticity.
Art, a temporal echo, mirrors epochs past and those yet to flow. With imagery as its vessel, it carries the intangible essence of time, crystallizing specific slices of memory from bygone scenes and experiences.
Thypoch Eureka awakens the imagination of the golden era with classical grace, sculpting the elements of light and shadow, capturing all the sparkling fragments through the changing seasons.
Contents
| P1 P2Introduction | P1Safety Notes | Lens Parts |
| P3 P8Lens Control | P4Attaching/Removing | Depth of FieldScale Reading |
| 1. Attaching and Removinga Lens2. Attaching and Removingthe UV Filter/Lens Hood | ||
| P10 | P11P9 | |
| Rangefinder Focus After Scale if Service | ||
P_13
The Name and Content of Hazardous Substances
Note

Click to Go
Users can read the table of content(TOC) to have an overview of the Eureka Product Manual. Please click on the title or link to jump to the specific page.

Search Keyword
Users can pinpoint the content they are looking for with the search function.
Thank you for purchasing a Thypoch product!
The Eureka Series is Thypoch's homage to the optics of the world of yesterday. Eureka is a throwback into the classics, which manifests itself with the classic collapsible structure, modern sharpness, low contrast and vintage bokeh, all together bringing those classic moments into life.
With the collapsible design, you can take Eureka anywhere at ease by elongating and shortening the lens.
Safety Notes
Please do not watch the sun or bright light source through the lens, otherwise it will cause visually disabled.
▶ Never use organic solvents such as paint thinner or benzene to clean the lens.
Put the front and rear caps on when the lens is not in use.
To avoid mold, please store your lens and filter in a cool and dry location, and get away with direct sunlight as well as naphtha or mothballs.
Please keep the lens dry and wipe the water droplets off if there are any on the glass surface.
Leaving the lens near heater or in other extremely hot locations could cause damage or warping.
Use a blower to remove dust and lint from the glass surfaces of the lens or filter. To remove smudges and fingerprints, apply a small amount of lens cleaner to a soft, clean cotton cloth or lens-cleaning tissue and clean from the center outwards using a circular motion. Do not leave smears or touch the glass with your finger.
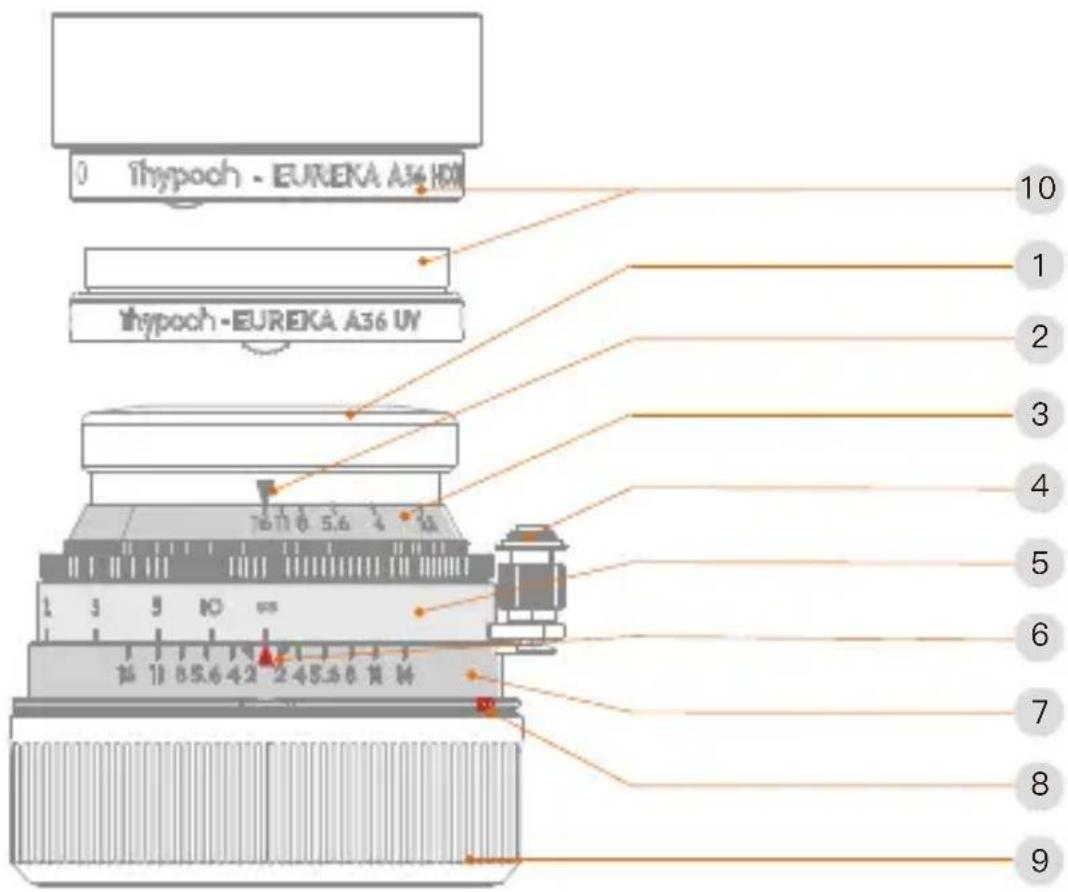
- Lens Front Cap
2 Aperture Ring Mark
3 Aperture Ring
4 Focus Ring Lock Wrench
5 Focus Ring
6 Focus Ring Mark
7 Depth-of-Field Scale
8 Mount installation identification
9 Lens Rear Cap
10 Lens Hood/ UV Filter
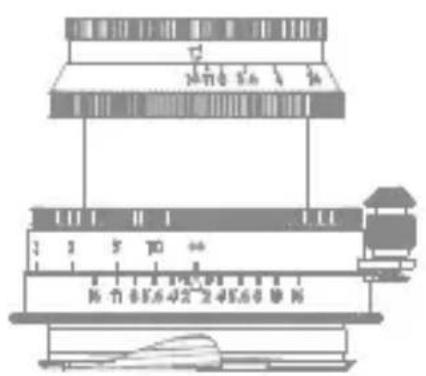
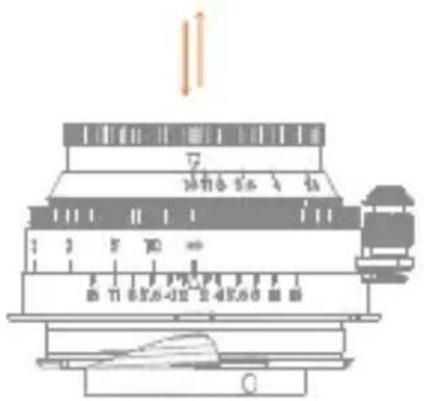
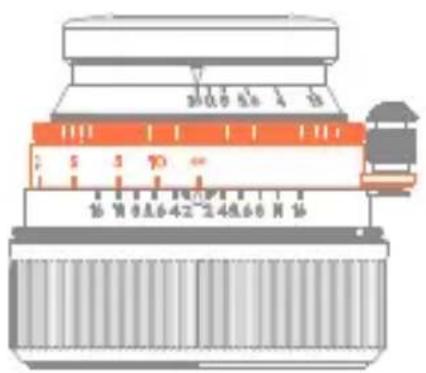
Focus Ring
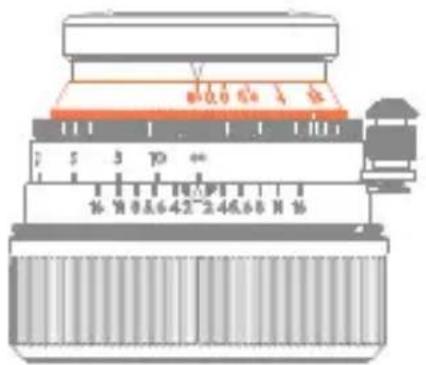
Aperture Ring
Switching between Use and Storage
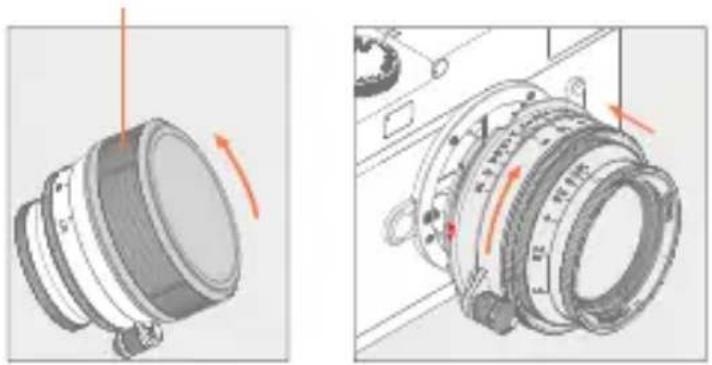
In use: To use your lens, please hold the front ring of the lens with your fingers, pull it out, and rotate it clockwise until it stops rotating.
In storage: If you don't use your lens, please hold the front ring of the lens with your fingers, rotate it counterclockwise until it stops rotating, and press it toward the bayonet until it cannot be shortened.
Focusing Control
When the focus ring is unlocked, rotate the focus ring to increase or decrease the focus distance, thereby adjusting the focus position in the screen.
Aperture Control
Rotating the aperture ring can enlarge or reduce the diameter of the aperture, adjust the brightness of the image and the background blur effect of the subject.
Note: The focusing control will only take effect after elongating the lens.
1. Attaching and Removing a Lens
Please turn off the camera's power before assembling or disassembling the lens.
Remove the lens rear cap
natural_image
Technical illustration of a mechanical component with directional arrows indicating rotation (no text or symbols present)1.1 Attaching a Lens
Remove the lens rear cap, align the lens mount installation mark with the body mount mark (as shown in the figure left), and rotate the lens clockwise. The lens is in place when you hear a "click" sound.
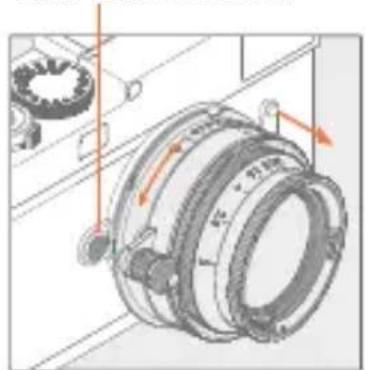
Lens Release Button
natural_image
Mechanical assembly diagram showing a gear and housing component with no visible text or symbols1.2 Removing the Lens
If you need to remove the lens from the camera, press the lens release button on the body and rotate the lens counterclock-wise to do it.
Note: After removing the lens, cover the rear lens cap and place the front end of the lens upward to avoid scratching the lens surface.
2. Attaching and Removing the UV Filter/Lens Hood
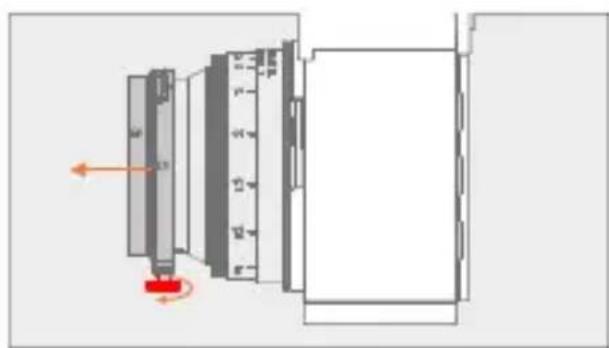
2.1 Attaching the UV Filter
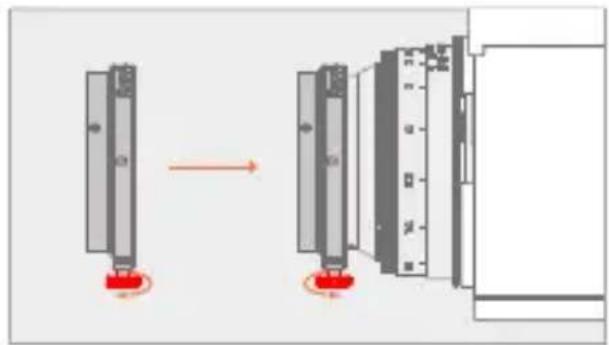
Loosen the locking screw on the UV filter counterclockwise, align it with the front ring of the lens, and turn the locking screw clockwise. At this time, the filter is fixed on the front ring of the lens, and the installation is complete.
natural_image
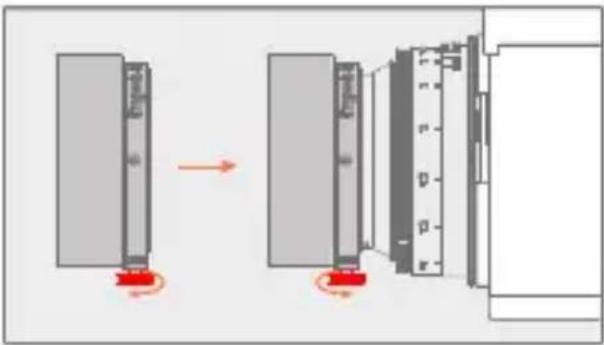
Diagram of a mechanical device with a red arrow indicating rotational motion, showing no text or symbols.2.2 Removing the UV Filter
Unscrew the locking screw on the UV filter counterclockwise and remove the filter.
2.3 Attaching the Lens Hood
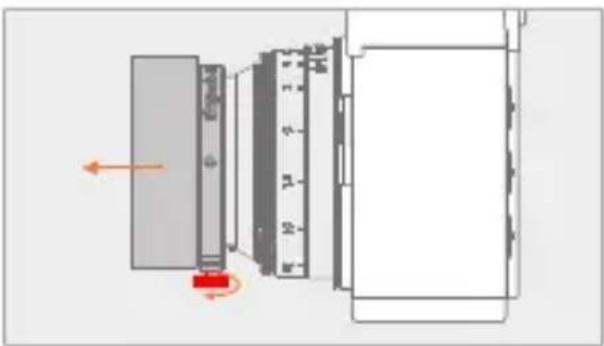
Loosen the locking screw on the lens hood counterclockwise, align it with the front ring of the lens, and turn the locking screw clockwise. At this time, the lens hood is fixed on the front ring of the lens, and the installation is complete.
natural_image
Diagram of a device interior showing a cylindrical component with internal structure and directional arrows indicating motion (no text or symbols)2.4 Removing the Lens Hood
Unscrew the locking screw on the lens hood counterclockwise and remove the hood.
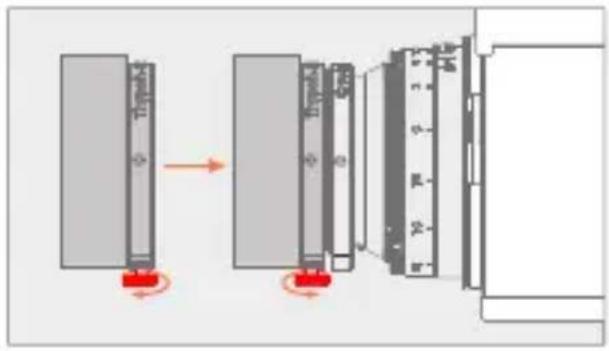
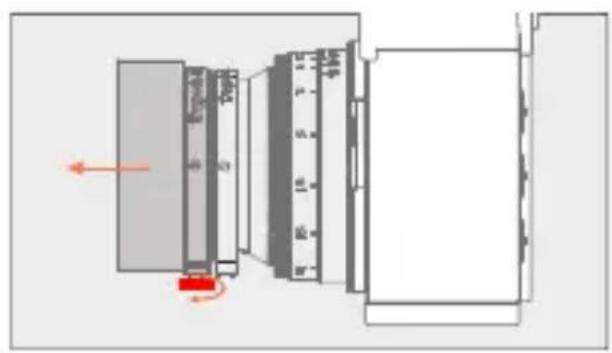
2.5 Combining Lens Hood with UV Filter
After installing the UV filter according to 2.1, loosen the locking screw on the hood counterclockwise, align it with the front end of the UV filter, and turn the locking screw clockwise. At this time, the hood is fixed on the front of the UV filter, which means the installation is complete.
2.6 Removing Lens Hood from UV Filter
First remove the lens hood after unscrewing the locking screw on the hood counter-clockwise.
Then unscrew the locking screw on the UV filter counterclockwise and remove the filter.
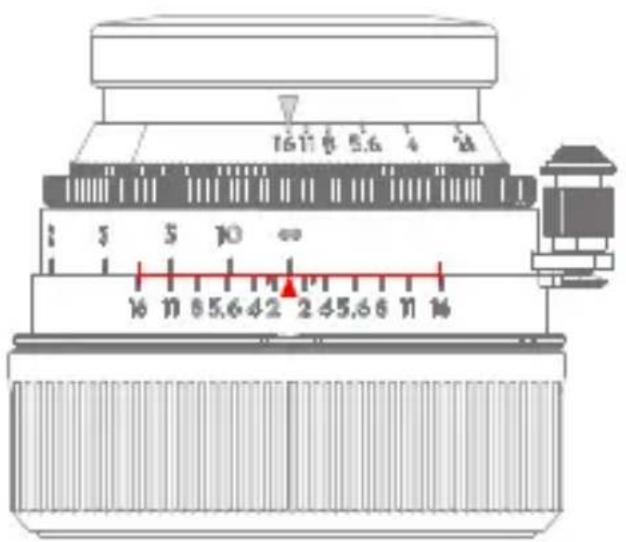
The focus ring mark is shown by the red arrow in the figure below
Note:
The depth of field scale is only used as a rough reference for the depth of field range, not the exact one.
The range of depth of field is the scale range corresponding to the straight line where the aperture scale is located on the left and right sides of the focus ring mark.
Adjusting the aperture level or focusing distance will change the depth of field range.
For example: As shown in the figure left, when the aperture is F16 and the focus distance is infinite, the depth of field range at this time is roughly 4m\~infinity.
How to use trap focus
- Predict the movement of the subject in advance;
- Adjust the aperture and focus ring to ensure the depth of field range is larger than the subject's movement range;
-
The subject moves along the predicted movement trajectory. At this time, the subject will always remain in focus in the image.
-
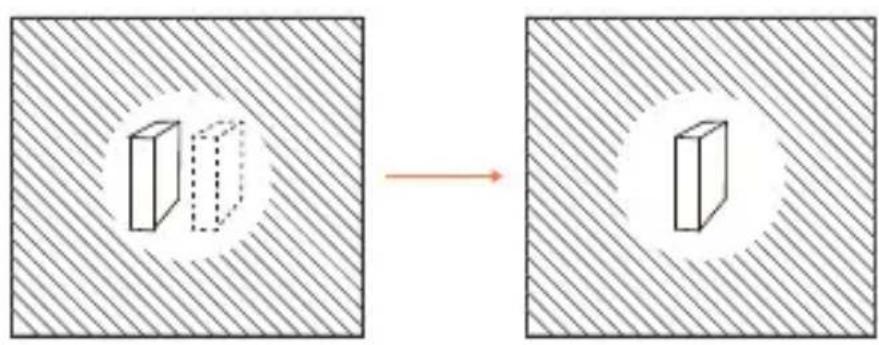
Install the lens to a camera with rangefinder focus function (such as Leica M series cameras);
-
Look at the viewfinder frame and turn the focus ring so that the overlapping image of the rangefinder area coincides with the subject (as shown in the picture below).
natural_image
Diagram showing a 3D block inside a square with a dashed circle inside, transforming into a circular shape (no text or symbols)- Observe the camera screen. At this time, the subject is in focus.
Notes:
(1) The rangefinder focus function only supports 1m\~infinity;
(2) The rangefinder focus range will vary from different camera models;
(3) Please check the camera for an effective rangefinder focus range.
| Name | Eureka |
| Colour | Brass Version / Aluminum Version |
| Focal Length | 50mm |
| Mount | M |
| Aperture | F2-F16 |
| Image Circle | 43.2mm (FF) |
| Construction of Optics | 6 Elements in 4 Groups |
| Flange Distance | 27.8mm (M) |
| Angle of view(diagonal, horizontal, vertical) | 46°/39°/27° |
| Type of focusing | Manual focus |
| Close Focus(from sensor plane) | 1m/3.3ft |
| Front Dia | §35.9mm/1.4" |
| Filter Size A36 | |
| Length | 41.2mm/1.6" (after elongating)27mm/1.1" (before elongating) |
| Iris Blade 12 | |
| Weight (Product) | Brass Version≈218g / Aluminum Version≈120g |
| Accessories UV Filter、Lens Hood、Lens Front Cap、Lens Rear Cap | |
How to Obtain After-Sales Service
If a product does not function as warranted during the warranty period, you may obtain after-sales service by contacting Thypoch support team or Thypoch's authorized dealers. Charges may apply for services not covered by this After-Sales Policy.
The After-Sales Policy varies from the country or region of purchase. Please contact Thypoch for specific information about your location.
Warranty Service
Thypoch grants a minimum warranty period of one and a half year from the date of purchase for lenses purchased through Thypoch's official dealers. Thypoch warrants that each Thypoch product that you purchase will be free from material and workmanship defects under normal use in accordance with Thypoch's user's manual and accompanying documentation during the warranty period. You may claim warranty service by returning it to the point of purchase. The owner is responsible for all shipping costs. The warranty period varies with the country or region of purchase. Please store the proof of purchase in a safe place, as you will need to provide a valid one for the warranty service. Parts replaced during the warranty service become Thypoch's property.
Service Outside the Warranty Period
Request for after-sales service will normally be accepted within a period of roughly 5 years following the end of production, during which time spares will be kept on hand, although owners may be offered an equivalent product during this period in the event that spares are not available. The specific cost standard is subject to Thypoch's quotation. Compatibility with consumables and accessories for the original product is not guaranteed. To prevent waste, Thypoch may collect returned parts or products.
Service Turn Around Time
After we receive the product, the after-sales service will generally be completed within two weeks. This turn around time does not include the time of return shipping. If there are special circumstances, we will notify you in advance.
What This After-Sales Policy Does NOT Cover
This after-sales policy does not cover the following and charges may apply:
- No valid proof-of-purchase of the product.
▶ Damage caused by unauthorized modification, disassembly, or repair not in accordance with official instructions or manuals.
▶ Damage caused by improper installation and operation not in accordance with official instructions or manuals.
▶ Damage caused by the storage environment not in accordance with official instructions or manuals.
Damage caused by operation in bad weather or environment (i.e. rain, sand/dust storms, humid environment, etc.).
Damage caused by, any third party products, including those that Thypoch may provide or integrate into the Thypoch product at your request.
Damage caused by any third-party product.
▶ Damage caused by force majeure.
Consumable accessories and optional parts that come with this product.
Privacy
Thypoch obeys all applicable laws and regulations concerning the handling of names, addresses, phone numbers, and other personal information provided by users.
The Name and Content of Hazardous Substances
Back to Contents
| Part Name | Hazardous Substances | |||||
| Pb Hg | Cd Cr(VI) | PBB PBDE | ||||
| Lens Shell | ○ | ○ | ○ | ○ | ○ | ○ |
| Inner Mechanics | × | ○ | ○ | ○ | ○ | ○ |
| Optics | ○ | ○ | ○ | ○ | ○ | ○ |
| Other Parts | ○ | ○ | ○ | ○ | ○ | ○ |
| This table is formulated in accordance of SJ/T11364.○: Indicates that the concentration of the hazardous substance in all homogeneous materials in the parts is below the relevant threshold of the GB/T26572 standard.×: Indicates that the concentration of the hazardous substance of at least one of all homogeneous materials in the parts may be above the relevant threshold of the GB/T26572 standard.The "×" in the above table indicates that there are one or more exemptions are applied in the parts stated in RoHS (2011/65/EU). | ||||||
Thypoch
Shenzhen xuchi optics technology co., Ltd.
1F., Building Three, Xinwuxia Industrial Park, No.32,
Cuibao Rd., Baolong St., Longgang Dist. ShenZhen, China
SEEING INTO ETERNITY

www.thypach.com

WECHAT: Thypoch
FB & INS: Thypoch
- EUREKA MIRRORLESS PRIME LENS USER'S MANUAL
- Contents
- P_13
- Note
- Click to Go
- Search Keyword
- Thank you for purchasing a Thypoch product!
- Safety Notes
- Switching between Use and Storage
- Focusing Control
- Aperture Control
- Attaching and Removing a Lens
- Attaching a Lens
- Removing the Lens
- Attaching and Removing the UV Filter/Lens Hood
- Attaching the UV Filter
- Removing the UV Filter
- Attaching the Lens Hood
- Removing the Lens Hood
- Combining Lens Hood with UV Filter
- Removing Lens Hood from UV Filter
- Note:
- How to use trap focus
- Notes:
- How to Obtain After-Sales Service
- Warranty Service
- Service Outside the Warranty Period
- Service Turn Around Time
- What This After-Sales Policy Does NOT Cover
- Privacy
- The Name and Content of Hazardous Substances
- Thypoch
Brand : Thypoch
Model : Eureka 50mm f/2
Category : Lens