CH-6000 - Heating N'oveen - Free user manual and instructions
Find the device manual for free CH-6000 N'oveen in PDF.

User questions about CH-6000 N'oveen
0 question about this device. Answer the ones you know or ask your own.
Ask a new question about this device
Download the instructions for your Heating in PDF format for free! Find your manual CH-6000 - N'oveen and take your electronic device back in hand. On this page are published all the documents necessary for the use of your device. CH-6000 by N'oveen.
USER MANUAL CH-6000 N'oveen
natural_image
White N°OVEEN electric heater with black ventilation grilles and control buttons, no visible text or symbols on the device itself.CH-6000 Timer Turbo Fan
PL....str. 1
EN....p. 9
text_image
Exploded view diagram of an air conditioner unit with numbered parts for identificationnatural_image
Technical line drawing of a mechanical component with a screwdriver inserted (no text or symbols)MONTAŻ NA ŚCIANIE
| Item | Symbol | Value | Unit | Item | Unit | |
| Heat output | Type of heat input, for electric storage local space heaters only (select one) | |||||
| Nominal heat output | Pnom | 1.8-2.0 | KW | Manual heat charge control, with integrated thermostat | N/A | |
| Minimum heat output (indicative) | Pmin | 0.8 | KW | Manual heat charge control, with room and/or outdoor temperature feedback | N/A | |
| Maximum continuous heat output | Pmax,c | 2.0 | KW | Electronic heat charge control with room and/or outdoor temperature feedback | N/A | |
| Auxiliary electricity consumption | Fan assisted heat output | N/A | ||||
| At nominal heat output | elmax | N/A | KW | Type of heat output/room temperature control (select one) | ||
| At minimum heat output | elmin | N/A | KW | Single stage heat output and no room temperature control | N/A | |
| In standby mode | elSB | N/A | W | Two or more manual stages, no room temperature control | N/A | |
| With mechanic thermostat room temperature control | [yes] | |||||
| With electronic thermostat room temperature control | N/A | |||||
| Electronic room temperature control plus day timer | N/A | |||||
| Electronic room temperature control plus week timer | N/A | |||||
| Other control options (multiple selections possible) | ||||||
| Room temperature control, with presence detection | N/A | |||||
| Room temperature control, with open window detection | N/A | |||||
| With distance control option | N/A | |||||
| With adaptive start control | N/A | |||||
| With working time limitation | N/A | |||||
| With black bulb sensor | N/A | |||||
| Contact details | COMTEL GROUP spółka z ograniczoną odpowiedzialnością sp.k. PLAC KUPIECKI 2, 32-800 BRZESKO TEL: +48 14 68 49 418 , FAX: +48 14 68 49 419. www.comtelgroup.pl e-mail: biuro@comtelgroup.pl , serwis@comtelgroup.pl | |||||
IMPORTANT Read these instructions fully before using the heater. Retain these instructions for future reference.
DEVICE DESCRIPTION

text_image
Exploded view diagram of a household air conditioner unit with numbered parts for identification| No | Part name | No | Part name |
| 1 | Back cover | 10 | Thermostat knob |
| 2 | Left handle | 11 | Power switch |
| 3 | Thermostat switch backup | 12 | Fan wheel |
| 4 | Thermostat switch | 13 | Motor |
| 5 | Right handle | 14 | Motor cover |
| 6 | Front cover | 15 | Fan switch |
| 7 | Feet | 16 | Timer cover |
| 8 | Heating wire backup | 17 | Timer |
| 9 | Heating element |
ASSEMBLY OF THE HEATER
Before using the heater, the feet (supplied separately in the cartoon, must be fitted to the unit. These are to be attached to the base of the heater using the 4 self-tapping screws provided, taking care to ensure that they are located correctly in the bottom ends of the heater side moldings.
natural_image
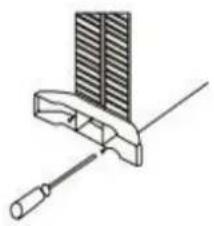
Technical line drawing of a mechanical clamp or tool with a ruler and clamped parts (no text or symbols)WALL MOUNTING
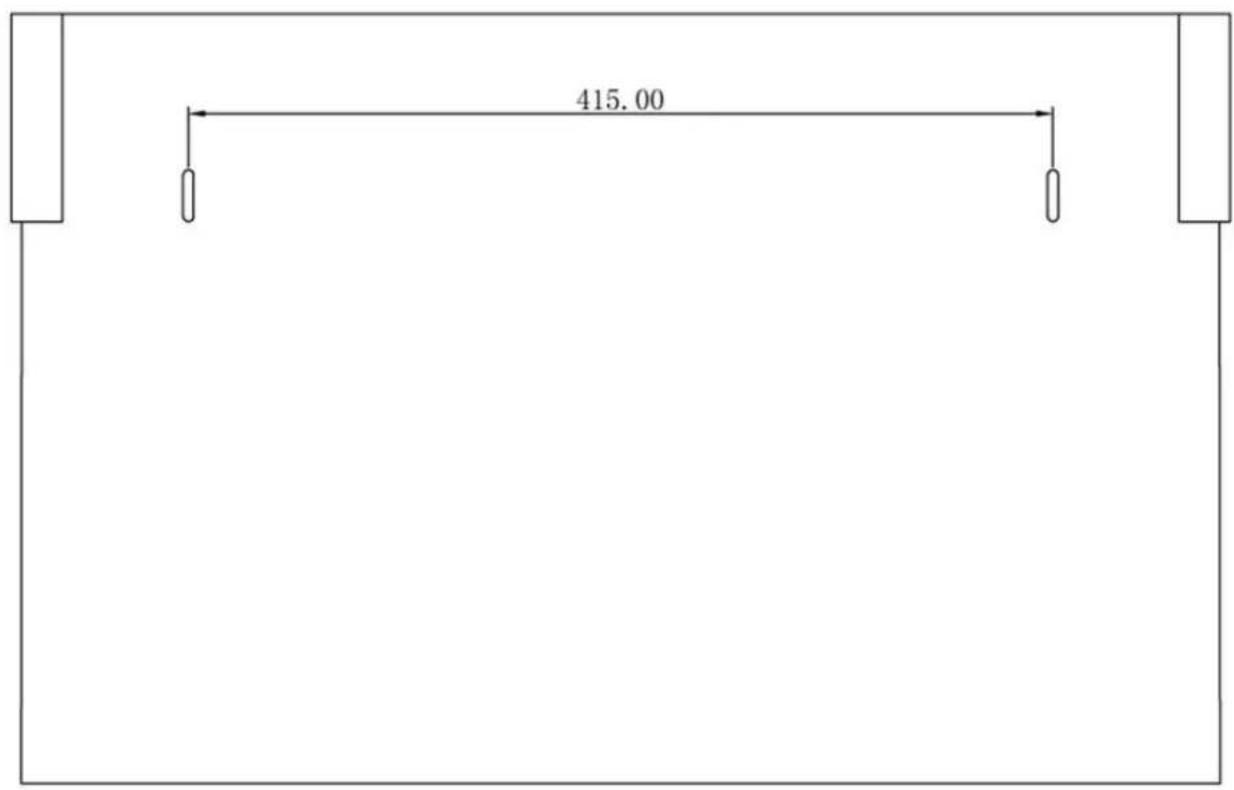
Convector has the option of wall mounting, assembly should take place using the fasteners attached to the device - as shown in the diagram below.
text_image
415.00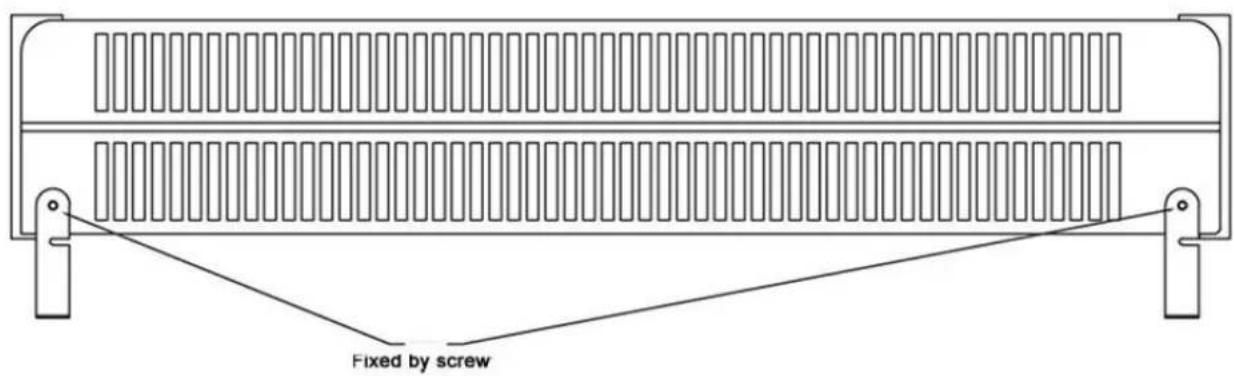
text_image
Fixed by screwSAFETY INSTRUCTIONS (to be read before operating the heater)
- Do not use the heater unless the feet are correctly attached.
- Ensure the power supply to the socket into which the heater is plugged is in accordance with the rating label on the heater and that the socket is earthed.
- Keep the power cord away from the hot body of the heater.
- Warning: Do not use this heater in the immediate surroundings of a bath, a shower or a swimming pool.
- Warning: In order to avoid overheating, do not cover the heater.
- Indoor use only.
- Do not place the heater on carpets having a very deep pile.
- Always ensure that the heater is placed on a firm level surface.
- Do not place the heater close to curtain or furniture in order to avoid a fire hazard.
- Do not insert any object through the heat outlet or air grilles of the heater.
- Do not use the heater in areas where flammable liquids are stored or where flammable fumes may be present.
- Always unplug the heater when moving it from one location to another.
- Warning: If the supply cord is damaged, it must be replaced by the manufacturer, its service agent or a similarly qualified person in order to avoid a hazard.
- This appliance is not intended for use by persons (including children) with reduced physical, sensory or mental capabilities, or lack of experience and knowledge, unless they have been given supervision or instruction concerning use of the appliance or a person responsible for their safety.
- Children should be supervised to ensure that they do not play with the appliance.
Note : It is normal when the heaters are turned on for the first time or when they are turned on after having been used for a long period of time the heaters may emit some smell and fumes. This will disappear when the heater has been on a short while.
- Choose a suitable location for the heater, taking into account the safety instructions above.
- Insert the plug of the heater into a suitable socket.
- Turn the thermostat knob fully in a clockwise directions to the maximum setting.
- Turn on the heating elements by means of the rocker switches on the side panel. When the heating elements are on the switches will illuminate. For maximum heat output both switches should be on.
- When the desired room temperature has been reached, the thermostat knob should be turned slowly anti-clockwise until the thermostat is heard to click off and the lights on the elements switches are seen to go out. After this the heater will keep the air temperature in the room at the set temperature by switching on and off automatically.
CH-6000 also incorporates an internal fan, which can be switched on independent of the heating elements.
Fan Operation: This is operated by means of the switch with the fan symbol along side it. The fan will only operate with the thermostat in the "ON" position and can be used when the heating elements are "ON" to blow warm air into the room. In warm conditions the fan can be used with the heating elements "OFF" to blow cool air into the room.
Timer Operation
The centre of the timer has a 3 position slide switch.
In the central position ( denoted by the clock symbol ) the timer will switch the heater on and off at times set by the segments , ( see setting the timer , below).
The position denoted by the "T", is a timer override position. The timer will continue to run but power will be fed continuously to the heater. This enables the heater to be on all the time if required.
In the position denoted by the "O", the timer continues to run but no power is fed to the heater.
Ensure the slide switch on the timer is at the mid position next to the clock symbol.
Rotate the outer ring of the timer in a clockwise direction until the current time is lined up
operation, the slide switch on the timer should be set to the central (clock) position.
Note : When using in timer mode , due consideration should be give to fact that the heater may come on whilst unattended.
CLEANING THE HEATER
Always un-plug the heater from the wall socket and allow it to cool down before cleaning. Clean the outside of the heater by wiping with a damp cloth and buff with a dry cloth. Do not use any detergents or abrasives and do not allow any water to enter the heater.
STORING THE HEATER
When the heater is not used for long period of time it should be protected from dust and stored in a clean dry place.