
ACPAD-01 - Smartphone Interface CRUX - Free user manual and instructions
Find the device manual for free ACPAD-01 CRUX in PDF.


| Product Type | Smartphone Integration Interface |
| Brand | CRUX |
| Model | ACPAD-01 |
| Category | Car Smartphone Interface |
| Compatible Vehicles | Audi A4, S4, A5, S5, Q5 (2009-2016 with 7" screen) |
| Required Radio System | MMI Control knob for Concert/Symphony systems on dashboard |
| Main Functions | Wireless Android Auto & CarPlay, wired Android Auto & CarPlay, smartphone mirroring, OEM camera retention, front/rear camera input |
| Touch Panel Size | 6.5 inches (included, must match OEM screen) |
| Display Resolution | 4K HDMI output |
| Power Supply | 12V DC (ACC), GND |
| Connections | HDMI, LVDS, USB, AMI to 3.5mm AUX, microphone jack, OSD control pad, power harness |
| Wireless Connectivity | Wi-Fi for wireless CarPlay/Android Auto and mirroring |
| Bluetooth | For hands-free calls (phone must be connected via Bluetooth) |
| Included Parts | Smart-Play module, touch panel, LVDS cables, HDMI cable, AMI to AUX adapter, microphone (optional), OSD controller, power harness, USB extension cable |
| Microphone | Included (optional, sold separately per manual; but actual description says optional - check package) |
| Audio Output | AUX input required (3.5mm or AMI port) |
| Steering Wheel Control | NAV button long press (2 seconds) to enter/exit Smart-Play mode |
| OSD Settings | Adjustable via OSD control pad; includes LVDS input, camera settings, save & reboot |
| Rear Camera | OEM backup camera retention; dynamic parking guide lines available |
| Front Camera | Support for front camera (optional), auto shows when shifted from Reverse to Drive with adjustable delay |
| DIP Switch Settings | Set for 7" screen; all switches OFF for 7" Audi A4/S4/A5/S5/Q5 |
| Dimensions (Module) | Approx. 4.7 x 2.6 x 1.2 inches (estimated based on typical interface box) |
| Weight | Approx. 1.5 lbs (estimated) |
| Certifications | Designed for Audi vehicles; further certifications not specified |
| Manufacturing Date | Rev. 042622 (April 2022) |
Frequently Asked Questions - ACPAD-01 CRUX
User questions about ACPAD-01 CRUX
0 question about this device. Answer the ones you know or ask your own.
Ask a new question about this device
Download the instructions for your Smartphone Interface in PDF format for free! Find your manual ACPAD-01 - CRUX and take your electronic device back in hand. On this page are published all the documents necessary for the use of your device. ACPAD-01 by CRUX.
USER MANUAL ACPAD-01 CRUX
- Smart-Play integration system allows connection of Android and other smartphones to the Audi non-MMI system
- Integrates wired/wireless Android Auto & CarPlay, smartphone mirroring.
- Control Apps using the smartphone's voice control feature or touch panel provided.
- Retains functionality of the OEM back-up camera, if present.
- Includes AMI to RCA auxiliary adapter cable.
NOTE: Vehicle must have AUX Input port or AMI port
NOTES:
Vehicle MUST have a NAV button on the steering wheel controls or part will NOT function.
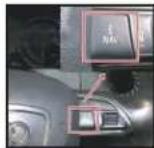
Vehicle MUST have the MMI controls on the radio.

PARTS INCLUDED:


natural_image
Coiled black and red wires with yellow connectors, no visible text or symbols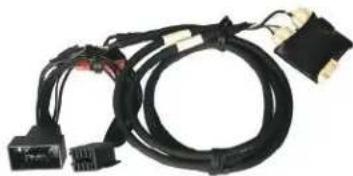
natural_image
Coiled black cable with connector and connectors, no visible text or symbolsACPAD-01W Module Power/Video Harness LVDS In/Out Cable
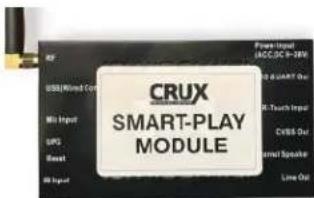
Smart-Play Interface Module
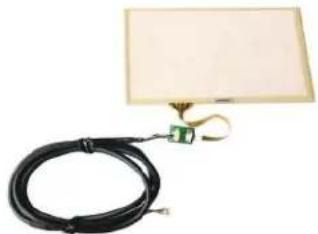
natural_image
Coiled black cable with a green sensor or probe attached to a rectangular panel (no text or symbols visible)Touch Panel 6.5 inches included
* = Please measure your infotainment display to match CRUX touch panel. Email Issues@cruxinterfacing.com with issues.
**= Please make sure AMI port or 3.5 mm AUX port is present in vehicle
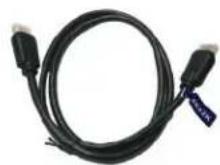
4K HDMI Cable

natural_image
Close-up of a black audio earplifier with coiled cable and clip (no text or symbols visible)Microphone

(Optional, sold separately)*
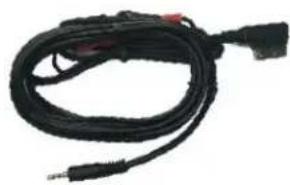
natural_image
Coiled black cable with connectors and a small connector at the end (no visible text or symbols)AMI to 3.5mm Aux Adapter Cable**

OSD Controller

Smart-Play Module Power Harness
INSTALLATION DIAGRAM:
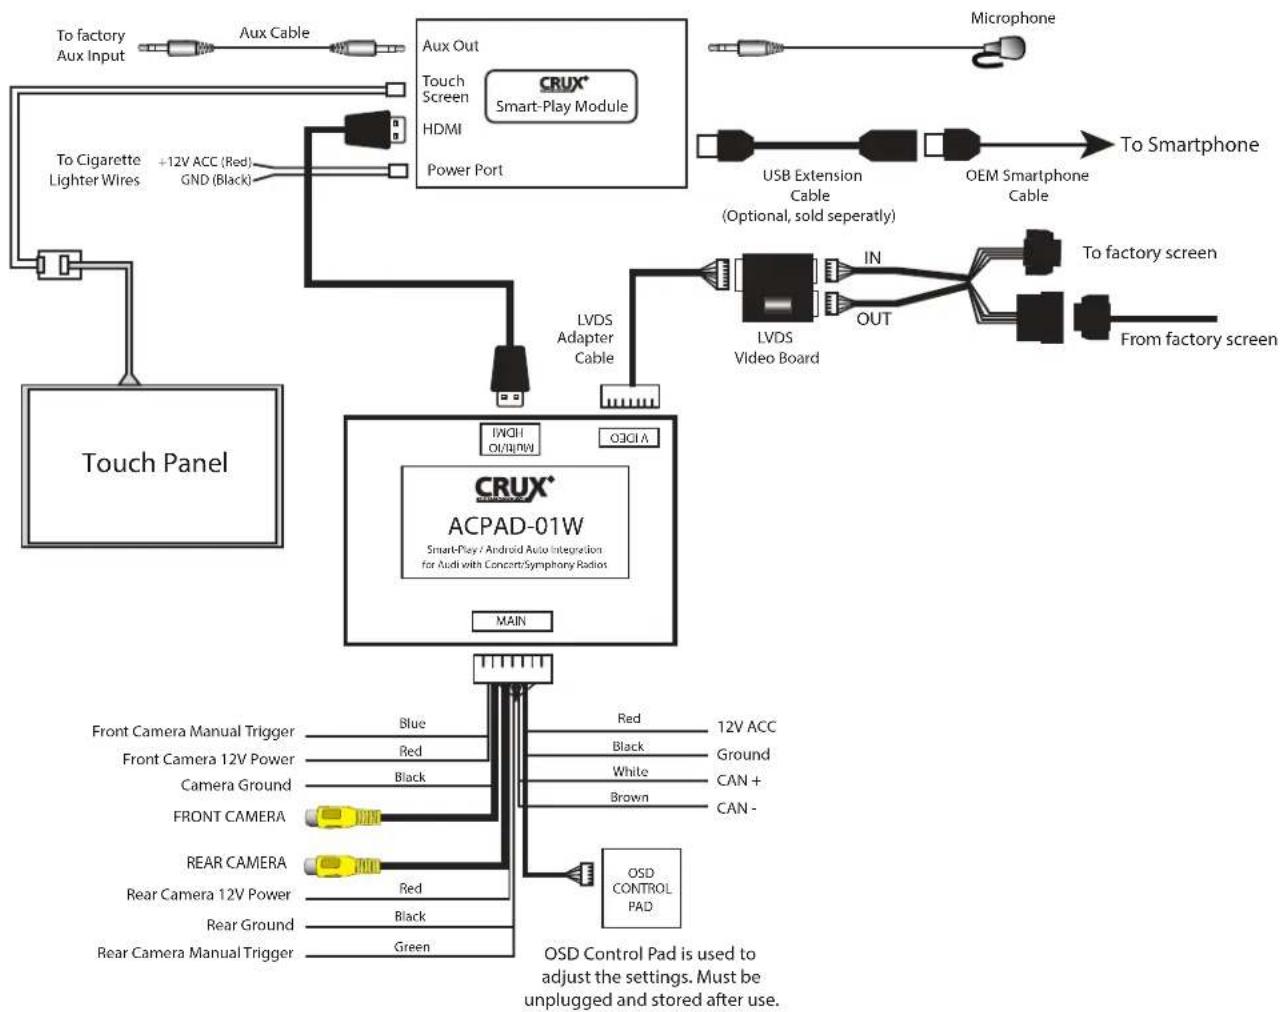
flowchart
graph TD
    A["Touch Panel"] --> B["To factory Aux Input"]
    A --> C["Aux Cable"]
    A --> D["To Cigarette Lighter Wires"]
    D --> E["+12V ACC (Red)"]
    D --> F["GND (Black)"]
    A --> G["Touch Screen"]
    G --> H["HDMI"]
    H --> I["Power Port"]
    I --> J["CRUX+ Smart-Play Module"]
    J --> K["Microphone"]
    J --> L["USB Extension Cable (Optional, sold separately)"]
    J --> M["OEM Smartphone Cable"]
    J --> N["LVDS Video Board"]
    N --> O["IN"]
    N --> P["OUT"]
    N --> Q["To factory screen"]
    N --> R["From factory screen"]
    A --> S["Main"]
    S --> T["CRUX+ ACPAD-01W<br>Smart-Play / Android Auto Integration<br>for Audi with Concert/Symphony Radios"]
    T --> U["Main"]
    U --> V["Front Camera Manual Trigger"]
    U --> W["Front Camera 12V Power"]
    U --> X["Camera Ground"]
    U --> Y["FRONT CAMERA"]
    U --> Z["REAR CAMERA"]
    U --> AA["Rear Camera 12V Power"]
    U --> AB["Rear Ground"]
    U --> AC["Rear Camera Manual Trigger"]
    T --> AD["OSD Control Pad"]
    AD --> AE["Red 12V ACC"]
    AD --> AF["Black Ground"]
    AD --> AG["White CAN +"]
    AD --> AH["Brown CAN -"]
    AD --> AI["Red Black"]
    AD --> AJ["Red Black"]
    AD --> AK["Red Black"]
    AD --> AL["Red Black"]
    AD --> AM["Red Black"]
    AD --> AN["Green Green"]
DIP SWITCH SETTINGS:

Note: ON is down and OFF is up
| DIP SETTING SCREEN SIZE VEHICLE | ____ | ||
| 1 to 8 ALL | OFF 7" A4, S4, | A5, S5, Q5 | |
INSTALLATION INSTRUCTIONS:

natural_image
Close-up of a hand using a blue tool to clean or adjust the dashboard panel of a car (no visible text or symbols)- Carefully remove the dash panel trim with a plastic pry tool. Work your way around the panel to avoid damaging it.

natural_image
Close-up of a hand inserting a small electronic component into a car's engine compartment (no visible text or symbols)- Unplug the connector behind the dash panel trim.

natural_image
Interior view of a car showing the grille and air vent, with a 'CAN' button visible (no readable text or symbols beyond branding)- Carefully remove the air vent using a plastic pry tool. Work your way around the vent to avoid damaging it.

natural_image
Close-up of a car's front panel showing internal components and wiring (no visible text or symbols)- Unplug the 2-pin connector behind the air vent.

natural_image
Close-up of a person inserting a blue card into a car's driver compartment, with no visible text or symbols.- Remove the AC control module with a plastic pry tool.
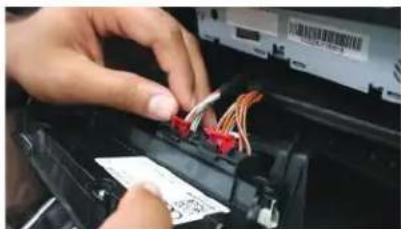
natural_image
Close-up of hands installing or adjusting cable colors into a laptop (no visible text or symbols)- Unplug the 2 connectors behind the AC control module.

- Remove the 4 screws holding the radio.
natural_image
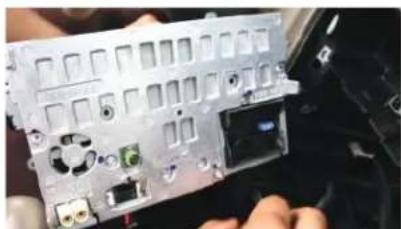
Close-up of a computer motherboard component with ports and connectors (no visible text or symbols)- Unplug the radio connectors, antenna and set aside the radio.

natural_image
Close-up of a hand holding a device with four red-circled buttons, no visible text or symbols- Remove the OEM screen by removing the 4 T-20 torx screws on each corner.
natural_image
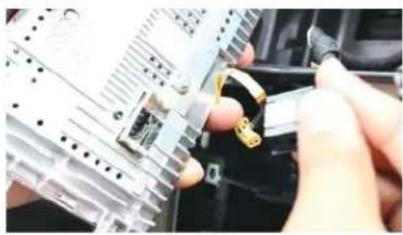
Close-up of hands installing a component on an electronic device (no visible text or symbols)- Unplug the 10 pin LVDS connector.

natural_image
Exterior view of a rectangular electronic device with a black screen and metallic components (no visible text or symbols)- On a clean, flat surface, remove the 4 screws holding the screens metal frame.

natural_image
Person holding a smartphone with scissors, writing on paper (no visible text or symbols)- Using a flat head screw driver, carefully pry the locks to release the metal frame.
natural_image
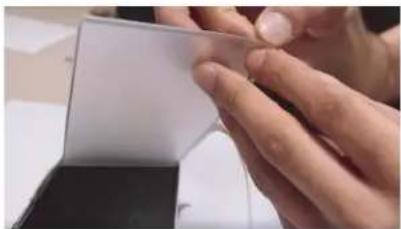
Close-up of hands holding a small transparent object, possibly a device or panel, with no visible text or symbols.- Gently peel off the touch panel's protective film on both sides.

natural_image
Close-up of gloved hands holding a flexible transparent film or optical component (no visible text or symbols)- Lay the touch panel on top of the OEM screen.
natural_image
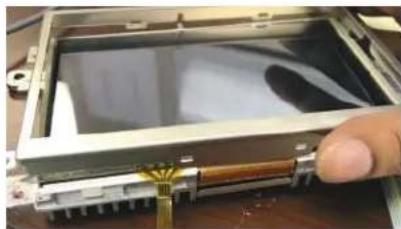
Close-up of a hand holding a cylindrical electronic component with a metallic frame (no visible text or symbols)- Reinstall the metal frame as shown above being careful not to damage the flexible circuit.

natural_image
Close-up of a hand inserting a small electronic component into a device panel (no visible text or symbols)- Reinstall the 4 screws holding the metal frame. Touch panel installation is now complete

natural_image
Close-up of hands holding a black cable with a yellow connector (no visible text or symbols)- Connect the touch screen's flexible circuit to the touch panel PCB/cable provided.

natural_image
Close-up of a person using a tool to adjust or install electronic components on a circuit board (no visible text or symbols)- Plug the 10-pin LVDS connector on the LVDS cable provided to the OEM screen.

natural_image
Close-up of hands installing a car seatbelt cover on a car (no visible text or symbols)- Plug the OEM LVDS connector to the LVDS cable provided in the kit.

natural_image
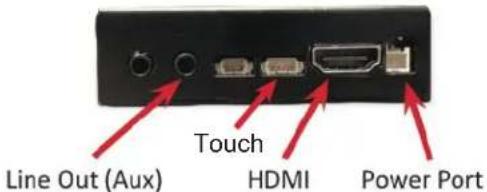
Close-up of hands using a handheld device to adjust or install a black object (no visible text or symbols)- Plug in the other end of the touch panel PCB/cable to the Smart-Play module port next to the HDMI port.

natural_image
Close-up of gloved hands working on electronic components with wires and a breadboard (no visible text or symbols)- Install the front and rear cameras (if applicable) and power using the power wires provided.

natural_image
Close-up of gloved hands holding a thin wire with wires, no visible text or symbols- Tap the Smart-Play module power wires to the cigarette lighter wires

natural_image
Close-up of gloved hands holding a black electronic device with red cables and connectors (no visible text or symbols)- Plug in the 4K HDMI cable provided with the kit to the Smart-Play module.

natural_image
Close-up of a gloved hand holding an electronic device with visible ports and wiring (no readable text or symbols)- Plug the 2 pin power wire connector to the Smart-Play module.

- Plug in the 4K HDMI cable to the ACPAD-01W module.

natural_image
Close-up of gloved hands holding a small electronic device (no visible text or symbols)- Plug in the USB extension cable to the Smart-Play module if wired CarPlay /Android Auto is desired.

natural_image
Close-up of hands operating electronic equipment with wires and components (no visible text or symbols)- Run the other end of the USB extension cable to an accessible location.

natural_image
Coiled black cable with red connectors and a USB port, no visible text or symbols- Plug the AMI to 3.5mm Audio adapter to the AMI port in the glove box.

natural_image
Close-up of a car trunk with wires and a yellow arrow pointing to a small component (no visible text or symbols)- Run the 3.5mm plug cable towards the radio. We suggest inserting it into the hole as pictured above.

natural_image
Close-up of gloved hands holding a small electronic device (no visible text or symbols)- Plug the 3.5mm Audio plug to the Aux input of the Smart-Play module.

natural_image
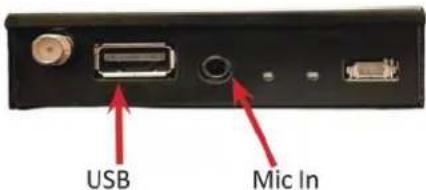
Interior view of a car showing the windshield and roof structure against a clear blue sky (no text or symbols visible)- Mount the microphone to the desired location. Run the cable towards the Smart-Play module location and plug it into the Mic port.

natural_image
Close-up of hands installing or adjusting a small electronic component with wires and components (no visible text or symbols)- Plug in a OEM smartphone cable to the USB extension cable and test for wired CarPlay and Android Auto functionality. For AA and other 2-way mirroring devices use the touch screen.
natural_image
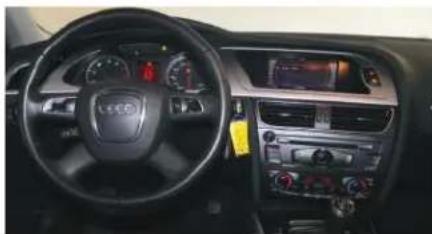
Interior view of a car dashboard with steering wheel, dashboard display, and control panels (no visible text or symbols)- Resintall the radio, AC control module and dash panel trim by reversing the process.
OPERATION:
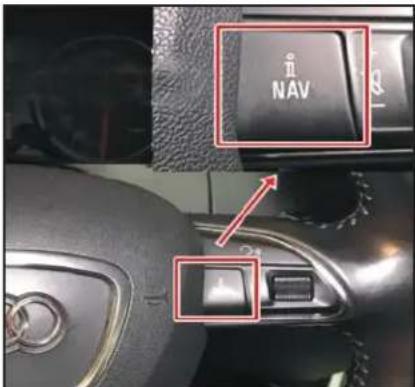
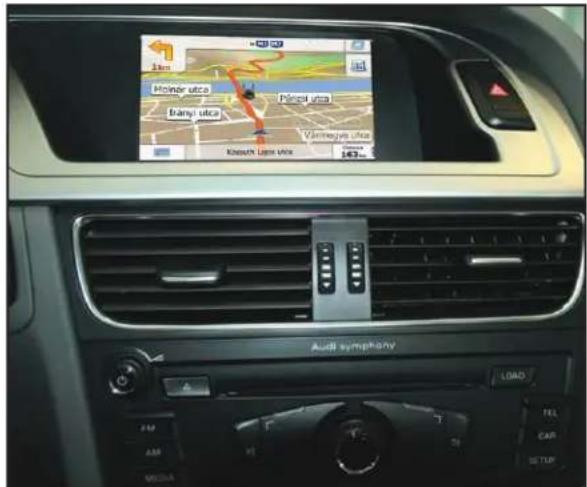
To enter and exit the Smart-Play mode, press the NAVbutton on the steering wheel controls for 2 seconds.
ON SCREEN DISPLAY (OSD) SETTINGS:
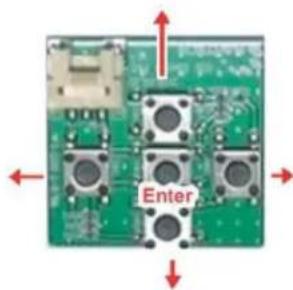
The OSD Setting Screen automatically pops up when the OSD Control Pad is connected.

Use the OSD menu to make the necessary settings. Remember to Run Save&Reboot after the settings are made. Unplug the OSD Control Pad after setting the cameras and keep it in a secure location in case it is needed to change the settings.
SMART-PLAY SETTING
![[OSD setting] (1/1) Rear Camera ON Front Camera ON LVDS Input ON Input Exten OFF 12V Output Reverse Advance SET > Save&Reboot Run](/content/2026/05/1045218/images/27c700cdb6d825e915f2e3abb9f07d85a7bcfb9b45dc11583893baa3ce8c9a8e.jpg)
After plugging in the OSD controller, navigate down to LVDS Input and set to ON. Push RIGHT button to go to the next menu.
![[LVDS Input] (1/1) Navi Brand NV17 Now Playing Podcasts Audio](/content/2026/05/1045218/images/38cd91195d861152c405d44a80a3bdfec3ed2d52a14e71ef925b714aa6961270.jpg)
Set Navi Brand to NV17 Navigate the OSD back the main menu and go to Save&Reboot then Run.
![[OSD setting] (1/1) Rear Camera ON Front CameraON LVDS Input ON Input Exten OFF 12V Output Reverse Advance SET > Save&Reboot Run System Ready](/content/2026/05/1045218/images/6b6eacdeb8113d7c3a74e91e933662a456008675d998dbe5623337c3ccf53388.jpg)
REAR AND FRONT CAMERA SETTING
![[OSD setting ] (1/1) Rear Camera ON Front Camera OFF LVDS Input ON Input Exten OFF 12V Output Constant Advance SET > Save&Reboot Run](/content/2026/05/1045218/images/e7c46d3e36151a310759d5756ec2799ae4d2e6a65051dc8d0d72dec594efc2a9.jpg)
![[Rear Camera] (1/1) Rear Mode REAR →](/content/2026/05/1045218/images/f6f5cc6a86e6c94ed0bd8956cc2f547bdbd0a85f326ad8a9da032b04a1072cc5.jpg)
![< [Rear Mode ] (1/1) Rear Input OEM →](/content/2026/05/1045218/images/ce3141eea32165160420e41a94885f58d793093c7b7f036c2fa947dcb7795822.jpg)
![< [Rear Mode ] (1/1) Rear Input Aftermarket OEM When instelling Aftermarket Rear View Camera When the car is equipped with OEM Rear View Camera](/content/2026/05/1045218/images/0a95485e7a4b91204dba057cdd0af5e8441e445bea90c0c247a347a1c0b4bb36.jpg)
![[OSD setting ] (1/1) Rear Camera ON Front Camera OFF LVDS Input ON Input Exten OFF 12V Output Constant Advance SET > Save&Reboot Run To Save Changes, must press this button at the end.](/content/2026/05/1045218/images/d6447e5d5dacc884c7ee0b56b930185e5025ffecea8d59e2dad7de791664c64d.jpg)
WIRELESS CARPLAY/ WIRELESS ANDROID AUTO CONNECTION SETTINGS
Android Auto Wireless connection


Have wifi & Bluetooth enabled
Apple Carplay Wireless Connection

Have wifi & Bluetooth Connected

Wait for screen that will state Use Carplay with "NVF17W-WIFI"
SMARTPHONE MIRRIORING CONNECTION
Smartphone Mirroring Connection for Iphones

Enable Wi-Fi and connect to "NV17W" module
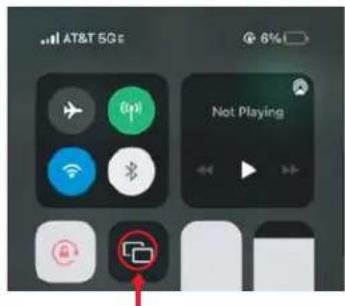
Open Control Center and Tap Screen Mirroring
a. On iPhone X or later; iPad with iPadOS 13 or later: Swipe down from the upper-right corner of the screen.
b. On iPhone 8 or earlier or IOS 11 or earlier: Swipe up from the bottom edge of screen

Airplay will pull up on screen mirroring app


Select "Airplay"
Smartphone Mirroring Connection for Androids

Enable Android AutoLink

Download Vehicle multimedia entertainment APP Autolink Pro APK

Download AutoLink Pro APP Available in the "Play Store"

Dynamic Parking Guide Lines
![< [Rear Set ] (1/1) Video FormatNTSC FPG (PAS) ON PDC ON Warning LANGON](/content/2026/05/1045218/images/b20aee265de32c988a866c7daaf3580d89c017d4227ffd434e6f12128d1d5952.jpg)
To turn ON the Dynamic Parking Guide Lines, go the Rear Input > Rear Set and turn ON Warning LANG. Go back to the root menu and Run Save&Reboot. Remember to unplug the OSD Control Pad otherwise the unit will not function properly. Set the parking brake on, start the car, put the gear in reverse, turn the steering wheel all the way to the left and all the way to right then put it in the center. The ACPAD-01W will calibrate automatically.
![< [Rear Set ] (1/1) Video FormatNTSC FPG (PAS) ON PDC ON Warning LANGON](/content/2026/05/1045218/images/8e336a116622805c6bc3c220a7ca1526a776ce0e518bf71b569170420716ae45.jpg)

natural_image
Interior view of a vehicle showing a blue ramp and orange lane markings (no visible text or symbols)FRONT CAMERA SETTING
![[OSD setting] (1/1) Rear Camera ON Front Camera ON LVDS Input ON Input Exten OFF 12V Output Constant Advance SET > Save&Reboot Run](/content/2026/05/1045218/images/1ea3d57c3e5e271e4889bbb290f180831a9fec384ae13b36cfcebfef46a96aba.jpg)
![< [Front Camera] (1/1) Video Format NTSC Timer DetectOFF To Turn ON Automatic Front Camera Switching after Reverse Gear to P, N,D](/content/2026/05/1045218/images/c1c73e5c0eb7745d7a1c633feea09bf3625174cbbec48b48c3da7b3401d512be.jpg)
![[OSD setting] (1/1) Rear Camera ON Front Camera OFF LVDS Input ON Input Exten OFF 12V Output Constant Advance SET > Save&Reboot Run To Save Changes, must press this button at the end.](/content/2026/05/1045218/images/48c8967a5253b6e3335e66ca1d3366e658bedb98295f0604eeb438cf6b5a3449.jpg)
![< [Front Camera] (1/1) Front Mode FRONT SIDE CAM](/content/2026/05/1045218/images/ba79eca94461c7c95939518497f333a59c1350aac7d688baecfae3dcee9e09ea.jpg)


natural_image
Interior view of a warehouse or retail space with shelves, tables, and products (no visible text or signage)

The front Camera will automatically show on the screen when the gear is put to Drive from Reverse. Set the delay time on the OSD menu. Delay time can be set from 1 to 60 seconds after a putting the car to drive from reverse.
VEHICLE APPLICATIONS:
Audi
2009 - 2016 A4, S4, A5, S5, Q5
Note: Please make sure your vehicle is equipped with the 7" screen.
COMPATIBLE RADIOS:
MMI Control knob for Concert and Symphony systems is on the dashboard.
*If your call audio does not use car's bluetooth, manually change it on the phone to select the vehicle during the call, then the phone should remember the last used setting


Changing the call audio routing setting to "BLUETOOTH HEADSET"
Go to Settings - Accessibility - Touch - Call Audio Routing. Keep it at "Automatic"
-
IF the screen is black & not showing factory infotainment screen or the CarPlay/Android Auto Screen
-
Confirm secure connection of LVDS cables to the top monitor.
-
Confirm LVDS cables are not damaged, pinched, kinked or bent.
-
No trigger issue /No click heard when long hold applied on NAV button
-
Check and confirm proper connection of the Main Car Interface Harness, CAN bus board, and 30-pin Car Interface Harness.
-
Check and confirm no loose pins or damage to the harness. Green/RED LED Light should be visible from the Metal Box
-
When long hold is applied on NAV button, black screen appears
-
Confirm proper secure connection of the HDMI Cable.
-
Confirm power wire is connected on the CarPlay Box. Red LED light should be visible from the CarPlay Box.
-
Screen image glitching or distorted
- Confirm correct dip switch setting.
-
Hands free call quality noise and echo
-
For iPhone, confirm the phone is connected to your vehicle via Bluetooth and
"Call Audio Routing setting" Keep it at "Automatic" -
For Android, confirm Bluetooth is being used for calls by observing phone's call audio output.
-
No sound
-
Confirm AUX cable connection, which is on the HDMI side of the CarPlay Box.
-
Confirm Car Media Source is in AUX mode. Confirm sound output from the phone to NV17W CarPlay.
-
Siri does not recognize my voice
-
Confirm Microphone jack connection (3.5mm), which is on the USB side of the CarPlay Box.
- Confirm that there are no wire damage.

12 of 12
rev.042622
- NOTES:
- PARTS INCLUDED:
- DIP SWITCH SETTINGS:
- INSTALLATION INSTRUCTIONS:
- OPERATION:
- ON SCREEN DISPLAY (OSD) SETTINGS:
- SMART-PLAY SETTING
- REAR AND FRONT CAMERA SETTING
- WIRELESS CARPLAY/ WIRELESS ANDROID AUTO CONNECTION SETTINGS
- Android Auto Wireless connection
- Apple Carplay Wireless Connection
- SMARTPHONE MIRRIORING CONNECTION
- Smartphone Mirroring Connection for Iphones
- Smartphone Mirroring Connection for Androids
- Dynamic Parking Guide Lines
- FRONT CAMERA SETTING
- VEHICLE APPLICATIONS:
- COMPATIBLE RADIOS:
Brand : CRUX
Model : ACPAD-01
Category : Smartphone Interface