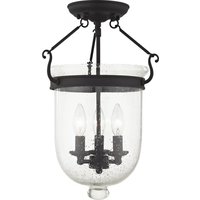
Jefferson 5082-04 - Lighting Livex Lighting - Free user manual and instructions
Find the device manual for free Jefferson 5082-04 Livex Lighting in PDF.


| Type of Product | Ceiling Mount Light Fixture |
| Brand | Livex Lighting |
| Model | Jefferson 5082-04 |
| Dimensions (Approx.) | 12" diameter x 10" height |
| Weight (Approx.) | 2 lbs |
| Material | Metal and Glass |
| Power Supply | Hardwired, 120V AC |
| Bulb Type | E12 Candelabra Base (not included) |
| Maximum Wattage | 60W per bulb |
| Number of Bulbs | 1 (based on single lamp holder) |
| Installation Type | Ceiling Mount, Junction Box Required |
| Safety Rating | UL Listed (assumed) |
| Dimmable | Depends on bulb used |
| Included Accessories | Mounting hardware, canopy, lamp holder, candle sleeve, bell glass, big ring |
| Installation Instructions | Refer to manual; requires electrical knowledge |
| Cleaning | Wipe with dry cloth; do not use abrasive cleaners |
| Repairability | Replacement parts available from manufacturer |
Frequently Asked Questions - Jefferson 5082-04 Livex Lighting
User questions about Jefferson 5082-04 Livex Lighting
0 question about this device. Answer the ones you know or ask your own.
Ask a new question about this device
Download the instructions for your Lighting in PDF format for free! Find your manual Jefferson 5082-04 - Livex Lighting and take your electronic device back in hand. On this page are published all the documents necessary for the use of your device. Jefferson 5082-04 by Livex Lighting.
USER MANUAL Jefferson 5082-04 Livex Lighting
ASSEMBLING & INSTALLATION INSTRUCTIONSPRODUCT# JEFFERSON SERIES FOR CEILING MOUNT FIXTURE
WARNING! SHUT POWER OFF AT FUSE OR CIRCUIT BREAK
MOUNTING THE FIXTURE (Fig.1)
- Shut off the power at the circuit breaker box. Remove old fixture and all hardware from Junction Box.
- Carefully unpack your new fixture and lay out all the parts on a clear area. Take care not to lose any small parts necessary for installation.
- Thread the two mounting screws about 1/4" into the pre-drilled holes in the single bar spaced the same distance apart as the holes in the fixture canopy (A).
- Install the single bar to the Junction Box with the two Junction Box Screws as shown. The side of the single bar marked "GND" must face out.
- While holding the column assembly towards the ceiling, connect the electrical wires as Shown in Fig.2, making sure that all wire nuts are secured. You may have to wrap the connections with electrical tape. If your outlet has a ground wire (green or bare copper), connect the fixture ground wire to it. Otherwise connect fixture's ground wire directly to the Mounting strap with the green screw provided. After wires are connected, tuck them carefully inside the Junction Box.
- Attach the pipe nipple(C) to top coupling of the lamp holder(F) and lock it until tight. Attach the canopy(A) onto the pipe nipple(C) and lock it until tight.
- Place the candle sleeve (E) onto the lamp holder(F).
- Install the light bulbs in accordance with the fixture specifications NOTE: DO NOT EXCEED THE SPECIFIED WATTAGE!
- Attach the bell glass(H) insert to the big ring(G). While holding the big ring(G) and canopy(A), hooked by the hook at both of the pipe(D).
- Attach the canopy(A) to the Junction box, aligning screws on single bar with mounting holes in canopy and lock it securely with ball nut (B).
Your installation is now complete Return power to the junction box and test the fixture.
Fig.1

Fig.2
FIXTURE WIRES Black or Smooth

HOUSE WIRES Black (Hot)
FIXTURE WIRES White or Ribbed

HOUSE (WIRES White (Neutral)
FIXTURE WIRES Bare Copper (Ground)

Green or Bare Copper (Ground)
Brand : Livex Lighting
Model : Jefferson 5082-04
Category : Lighting