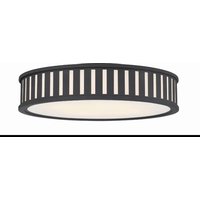
Kendal KEN-8305-BF - Lighting Crystorama - Free user manual and instructions
Find the device manual for free Kendal KEN-8305-BF Crystorama in PDF.


| Product Type | Ceiling Light Fixture |
| Model | Kendal KEN-8305-BF |
| Brand | Crystorama |
| Design Style | Contemporary / Transitional |
| Material | Metal and Crystal |
| Finish | Brushed Brass / Gold |
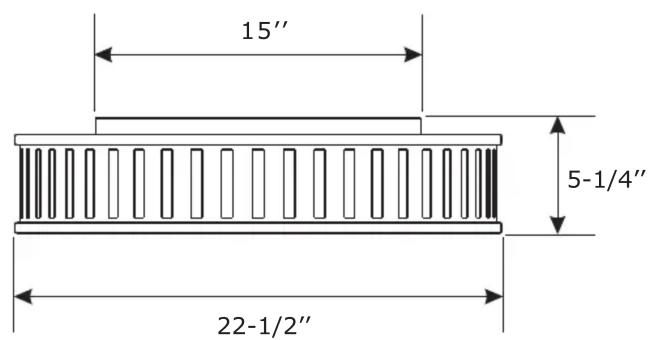
| Dimensions | Diameter: 14 inches (35.6 cm), Height: 12 inches (30.5 cm) |
| Weight | Approximately 5 lbs (2.3 kg) |
| Light Source | Incandescent / LED compatible (E26 base) |
| Number of Bulbs | 3 |
| Wattage (Max) | 60W per bulb (total 180W) |
| Voltage | 120V AC |
| Dimmable | Yes (with compatible dimmer and bulbs) |
| Mounting Type | Flush or semi-flush mount |
| Installation | Hardwired, includes mounting hardware |
| Safety Certification | ETL Listed / UL Listed |
| Location Rating | Indoor dry locations |
| Cleaning & Maintenance | Wipe with dry cloth; no harsh chemicals |
| Warranty | 1-year limited warranty against defects |
| Included Components | Fixture, mounting bracket, screws, wire connectors |
Frequently Asked Questions - Kendal KEN-8305-BF Crystorama
User questions about Kendal KEN-8305-BF Crystorama
0 question about this device. Answer the ones you know or ask your own.
Ask a new question about this device
Download the instructions for your Lighting in PDF format for free! Find your manual Kendal KEN-8305-BF - Crystorama and take your electronic device back in hand. On this page are published all the documents necessary for the use of your device. Kendal KEN-8305-BF by Crystorama.
USER MANUAL Kendal KEN-8305-BF Crystorama

WARNING:

Electrical Danger

Turn Power off
All electrical components must be
installed by a licensed electrician
in accordance with the National
Electric Code and the appropriate
local electrical codes.


You will need 4-Medium Base Bulb
40 Watts Frosted bulb Recommended
60 Watts Max.
USE LED BULBS FOR EXTENDED USE
This fixture is Damp rated
How to install
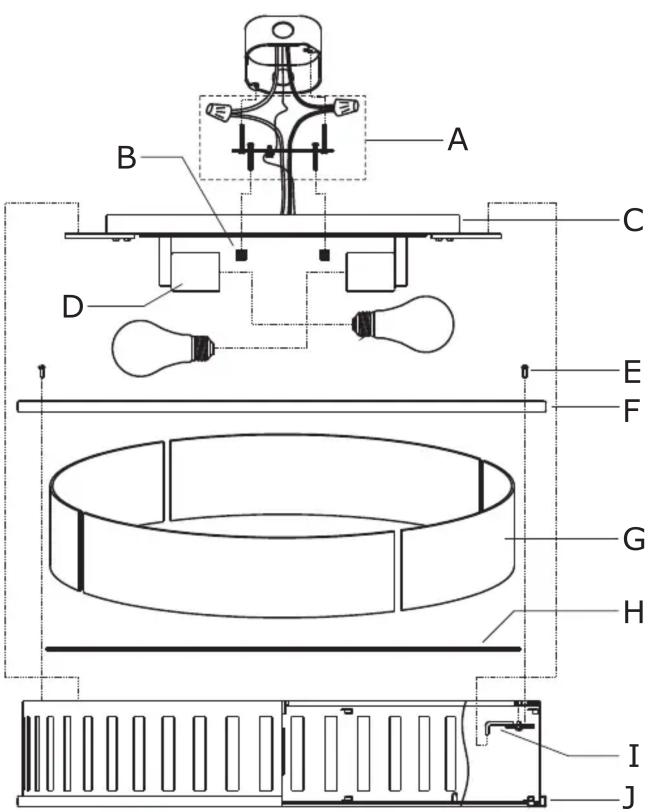
- Slide the glass diffuser onto the bottom of metal frame and secure it with clips.
- Slide the glass panels inside the metal frame and secure it with clips.
- Remove screw#2 from each of the hooks. Place one hook onto the bottom of the bracket on the metal frame by inserting screw#1 into the 1st hole on the bracket.
While holding the hook in place, place the top metal ring over the top of the bracket by aligning the hole on it with the 2nd hole on the bracket and hook. Secure it with screw#2. Repeat this for other hooks. - Install the mounting screws into the matching holes in the mounting plate. Secure the mounting plate to the outlet box with the outlet box screws.
- Raise ceiling pan allowing the mounting screws to protrude through the holes in the ceiling pan, and secure with the ball nut.
- Install the bulb(not included) into the socket.
- Place the metal frame over the ceiling pan by inserting the hooks into the holes of the metal tab on the ceiling pan.
How to change the bulb:
Raise the metal frame up over the ceiling pan and turn it sideway to take it down. Install the new bulb and put the metal frame back.
Part Number
Part Numbers
A. (1)-Mounting hardware
B. (2)-Ball nut #XRF8305BFBANUT
C. (1)-Ceiling pan
D. (4)-Socket
E. (4)-Screw
F. (1)-Top metal ring
G. (4)-Glass panel L15-1/4"xW3-7/8"xH3-1/8" #XRF8304GLA15.25IN
H. (1)-Glass diffuser W20-5/8" #XRF8304DIFF20.625IN
I. (4)-Hook
J. (1)-Metal frame
Brand : Crystorama
Model : Kendal KEN-8305-BF
Category : Lighting