
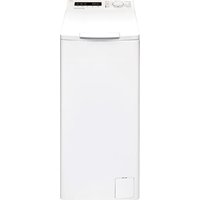
BT813HQA - Washing machine BRANDT - Free user manual and instructions
Find the device manual for free BT813HQA BRANDT in PDF.


| Product Type | Freestanding Washing Machine |
| Brand | Brandt |
| Model | BT813HQA |
| Washing Capacity | 8.0 kg |
| Dimensions (Width x Depth x Height) | 400 x 610 x 875 mm |
| Net Weight | 56 kg |
| Power Supply | 220-240 V ~, 50 Hz |
| Rated Power | 2000 W |
| Maximum Current | 10 A |
| Water Pressure Range | 0.1 - 1 MPa |
| Programs | Hygiene, Cotton, 20°C, Mixed, Wool, Synthetics, ECO 40-60, Drum Clean, Spin, Rinse and Spin, Baby Care, Sport, Duvet, Rapid 45', Flash 15' |
| Maximum Spin Speed | 1300 rpm |
| Temperature Range | Cold - 90°C |
| Child Lock | Yes (locks buttons during cycle) |
| Delayed Start | 1 - 24 hours |
| Noise Reduction | Acoustic foam included |
| Energy Efficiency | Tested in accordance with Hong Kong Code of Practice on Energy Labeling 2020 |
| Safety Features | Door lock, child lock, overflow protection, imbalance detection |
| Maintenance | Clean drum, detergent drawer, drain pump filter, water inlet filter; descaling recommended for hard water |
Frequently Asked Questions - BT813HQA BRANDT
User questions about BT813HQA BRANDT
0 question about this device. Answer the ones you know or ask your own.
Ask a new question about this device
Download the instructions for your Washing machine in PDF format for free! Find your manual BT813HQA - BRANDT and take your electronic device back in hand. On this page are published all the documents necessary for the use of your device. BT813HQA by BRANDT.
USER MANUAL BT813HQA BRANDT
EN GUIDE TO INSTALLATION AND USE
Washing Machine
BT813HQA

CONTENTS
Safety instructions .... 2
Installation....5
Operation 12
Maintenance operations 22
Troubleshooting 25
Availability of spare parts....27
Safety instructions
- This appliance is designed to be used for domestic and similar applications such as:
- kitchen areas for staff in shops, offices and other professional premises,
- farms,
- use by hotel, motel and other residential clients,
- B&B type environments.
- The appliance must be connected to the mains water supply using the brand new connection fittings supplied with the appliance. Never reuse old fittings.
• Never obstruct the ventilation openings.
- This appliance may be used by children aged 8 years or over and by individuals with reduced physical, sensory or mental capacity or lack of experience or knowledge of the device provided that they are correctly supervised or have been provided with instructions regarding the safe use of the appliance and provided that the risks present have been fully understood. Children must not be allowed to play with the appliance. Cleaning and maintenance operations must not be carried out by children without supervision.
• Children under the age of three should be kept away from the appliance unless they are under constant supervision.
- If the power cord is damaged, it should be replaced by the manufacturer, its after-sales service department or a similarly qualified person, so as to avoid danger.
- Regarding the instructions for installing the appliance and making its electrical connections, please refer to the appropriate section in this guide.
• WARNING: Do not connect the appliance to hot water.
• The maximum weight of dry laundry is 8 kilograms.
• Maximum water supply pressure: 1 MPa • Minimum water supply pressure: 0.1 MPa
Warning!
Product installation
• This washing machine is intended for indoor use only. - It is not designed for built-in installation. • Never obstruct the openings. - This washing machine must not be installed in bathrooms, very damp rooms or in rooms where there are explosive gases or caustic substances. - If the washing machine has only one water inlet valve, connect it to a cold water source only. - The power plug must remain accessible after the appliance is installed. - Remove all packaging materials and the transit bolts before using the appliance. Failure to do so may seriously damage your washing machine.
Appliance damage hazard!
- Your appliance is for household (domestic) use only and is designed solely for machine washable textiles.
- Do not climb on the top of the washing machine.
Care when handling the washing machine:
- The transit bolts must be refitted to the washing machine by a qualified person.
- Drain any water from the appliance before moving the washing machine.
- Handle the appliance with care. Never lift the appliance by grabbing projecting parts. The door must not be used as a handle when moving the appliance.
- This appliance is heavy. Carry it with care.
- Do not close the door using excessive force. If the door is hard to close, make sure that the drum is not overloaded and that the laundry is properly distributed.
- Do not wash carpets.
Operation of the appliance
- Use of inflammable and explosive solvents is prohibited. Never use fuel and alcohol, etc. as detergents. Only choose detergents that are suitable for machine washing.
- Empty the pockets of your clothes. Cutting and rigid objects like coins, pins, nails, screws, stones, etc. may seriously damage this appliance.
- Be careful to avoid injury when draining very hot washing water. • Never add water by hand during washing.
- Once the washing cycle has finished, wait two minutes before opening the door.
Installation
Description of the product


Note!
- The illustration of the accessories is provided for reference purposes only. Please refer to the actual product.
Accessories
    |  |  |  |
| Transit bolt hole covers | Cold water supply hose | Drain hose holder | User guide |
Installation location

Warning!
- It is important that the product is stabilised to prevent it from moving!
- Ensure that the appliance is not resting on the power cord.
To install your washing machine, choose a location that is:
- On a hard, dry, flat surface
- Not exposed to direct sunlight
- Adequately ventilated
- In a room at ambient temperature
- Away from heat sources
The washing machine is designed to operate at ambient temperature. If it is used in a room where the temperature is below 0°C, the water inlet valve and the drainage system may be damaged.


Unpacking the washing machine

Warning!
- Packaging materials (e.g. plastic film, polystyrene) can be hazardous to children.
- There is a suffocation hazard! Keep all packaging materials away from children.
- Remove the cardboard box and the polystyrene wrapping.
- Lift the washing machine and remove the packaging under it. Don't forget to remove the small foam triangle at the same time as the lower packaging. If you cannot do so, lay the washing machine on its side and remove the small foam triangle by hand.

- Remove the adhesive tape that holds the power cord and the drain hose in place.
- Remove the water supply hose from the drum.
Fit the acoustic foam

Note!
- Fitting acoustic foam helps to reduce noise when the washing machine is in use.

- Place your washing machine on one of its sides, making sure you protect the floor.
- Affix the foam as shown on the diagram, using the correct dimensions.
Remove the transit bolts

Warning!
- You need to remove all the transit bolts located at the back of the washing machine before using it.
- You'll need the transit bolts again if you move the washing machine. Keep them in a safe place.
Proceed as follows to remove the transit bolts:


- Use a spanner to loosen the four transit bolts then pull them out.
- Push the four transit bolt cover caps provided for this purpose into the holes.
- Keep the transit bolts in a safe place for future reuse.
Adjusting the levelling feet

Warning!
- The lock nuts on the four levelling feet must be tightened against the body of the washing machine.
- Check that the feet are still firmly attached to the washing machine. If this is not the case, return them to their original position and tighten the nuts.
- Slacken the lock nut and turn the foot until it touches the floor.
- Adjust the feet and lock them into position using a spanner. Check that the washing machine is stable.

Connecting the Water Supply Hose

Warning!
- Follow the instructions in this section to avoid water leaks or water damage.
- Don't twist, squash, modify or cut the water supply hose.
Connecting the water supply hose to a threaded tap

Threaded tap and water supply hose
Connect the other end of the water supply hose to the water supply valve located on the back of the washing machine then tighten down the hose by turning it clockwise.

Drain hose

Warning!
- Do not twist or extend the drain hose.
- Position the drain hose correctly. If you do not perform this operation correctly a water leak may occur.

Note!
- If the washing machine is provided with a drain hose holder, install it as follows:

Warning!
- When installing the drain hose, secure it properly with a cord.
- If the drain hose is too long, never force part of it into the washing machine, as this may cause unusual noises.
Operation
Quick start
Warning!
Before using your washing machine for the first time, always ensure it is correctly installed.
1. Before washing


- Connect the power cord, open the tap, and load the washing machine.


Make sure the hook on the drum door is engaged to ensure the door closes properly.

Check the bearings under the hook before each wash. They must run freely.

2. Washing

- Select the programme.

- Select a function or use the default settings.

- Start the programme.

Note!
- If you choose to use the default settings, you can skip step 2.
3. After washing
The word END appears on the control panel to indicate the end of the cycle.
Before every wash
- Always read the washing labels on garments and the explanations on how to use the detergent before washing. Choose detergent that produces little or no foam for optimum washing and to avoid any overflowing. Refer to the instructions provided by the detergent maker as shown on the detergent packaging.
 |  |  |
| Always read the garment labels | Empty the pockets of your clothes | Attach long strings/ribbons, close zips and fasten buttons |
 |  |  |
| Place small size clothes in pillowcases | If clothes have raise fabric or suffer from piling, turn them inside out | Sort clothes by texture |
Choosing the correct detergent
A washing care label symbol shows the right choice of detergent, temperature, and wash cycle.
| Type of fabric Programme Detergent | ||
White cotton  | Cotton temp. ≤ 90°C | Detergent with whitening product |
Colours made of linen or  cotton cotton | Cotton temp. ≤ 60°C Colours | without whitening product |
| Mixed fibres Mixed temp. ≤ 60°C Colour wash | ||
Synthetics  | Synthetics temp. ≤ 60°C | Colour/delicate wash |
Delicate textiles  | Wool temp. ≤ 40°C | Detergent for delicate textiles |
| Wool Wool temp. ≤ 40°C Detergent for wool | ||

Warning!
- If there are not enough clothes in the washing machine this may unbalance the drum and cause the unbalance detection to trigger, significantly reducing the spin speed.
- Add a few clothes to remove the unbalance so that the washing machine can spin at the speed you have selected.
Detergent compartment
I Prewash detergent II Main wash detergent

Softener

Removable detergent compartment

Warning!
- Do not exceed the MAX level when adding detergent or softener.
- You will need to put detergent in Compartments I and II when you choose the Prewash mode.
| Programme | I | II | Programme | I | II | ||
| Hygiene Spin | ● | ○ | |||||
| Cotton Rinse and Spin | ○ | ● | ○ | ○ | |||
| 20°C Baby care | ○ | ● | ○ | ○ | ● | ○ | |
| Mixed Sport | ○ | ● | ○ | ○ | ● | ○ | |
| Wool Duvet | ● | ○ | ● | ○ | |||
| Synthetics Rapid 45 | ○ | ● | ○ | ● | ○ | ||
| Eco 40-60 | ● | ○ | Flash 15' | ● | ○ | ||
| Drum clean |
- Must Do
○Optional
Washing products
• Use washing products designed specially for washing machines: - Powdered detergents for all kinds of textiles except delicate ones.
For these detergents, we recommend first diluting them with some water to avoid clogging the detergent pipe causing water to overflow when washing starts.
- Liquid detergents for all low temperature programmes for all kinds of textiles or specialist liquid detergents (e.g. for woollens).
- Choose the detergent with care to match the required washing temperature, to optimise washing while saving water and energy. Too much detergent may prevent laundry from being properly rinsed, leaving behind traces of the product. On the other hand, an inadequate dosage may cause poor washing results.
The control panel

1 Programme dial
You can select the programme of your choice to match your washing requirements.
2 Spin
By default, a spinning speed associated with the programme is proposed. You can modify it by pressing the Spin button.
3 Temperature / Delayed start.
By default, a temperature associated with the programme is proposed. You can modify it by pressing the Temp / Ⓤ button.
By holding the Temp / ⏻ button down for more than 3 seconds, you will access the delayed start.
4 Options.
Press this button successively to access the Prewash or Rinse+ option.
5 Start/Pause
Once your selections have been made, press this button to start the wash cycle. Pressing again pauses the cycle.
The screen below informs you about the settings, remaining time and options chosen


Warning!
- To change a setting after starting the washing cycle, turn the programme dial to the OFF position. Select the programme, the spin speed and the options again, then press the Start / Pause button. (Ensure that the child safety function is disabled or the initially selected programme will continue to run.)
- Just before leaving the factory, the appliance is subject to a last check when water is poured into the drum. Consequently, there may be water drops or condensation inside the washing machine. This is not an indication of a malfunction.

Note!
There may be a slight smell when the appliance is started and used for the first time.
Options
Prewash Prewash The Prewash option lets you perform an additional wash before the main wash. This is suitable option for eliminating dirt from your laundry. You will need to place detergent in compartment (I) after choosing this option.
Rinse + Rinse + When this option is selected, your laundry will get an extra rinse.

Delayed start
Select a programme, followed by the Delayed start function.
- Press the button for 3 seconds to enter delayed start mode. Select a time between 1 and 24 hours.
- Select the time required between 1 and 24 hours by keeping your finger pressed on the button. The screen shows the time remaining (in hours) before the start of your cycle.
- Press the Start/Pause button to start the Delayed start function.

Cancelling the delayed start function:
Press Start/Pause, then hold the Temp / Ⓤ button down until 0H shows on the screen.
This operation cannot be performed once the washing cycle is started. If the has already started, place the selector in the Off position to reset it.
Spin Speed Spin Speed Press the "Spin" button until the required spin speed is displayed: 0-400-600-800-1000-1200. Access to the choice is linked to the programme selected.
Temp / Ⓛ Temperature Press the Temp / Ⓛ button until the required temperature is obtained: Cold-20-30-40-60-90. Access to the choice is linked to the programme selected

Child Lock
This function locks the buttons so that the current programme cannot be changed especially if a child plays with the keys.
![graph TD A["Temp / 溫度"] --> B{Options 選項} B --> C["反馈回路"] C --> A](/content/2026/05/1044807/images/5e26a6c860594003effc5dfbb6cd9b7a5ae90ee5035219a1b41f2f44a91060bf.jpg)
Press Temp / Ⓤ and Options at the same time for 3 seconds, until the icon appears. The display alternately shows CL and the time remaining.


Warning!
- To disable the Child Lock, press the same two buttons for three seconds. The display alternately shows CL and the time remaining. At the end of the cycle, "End" appears on the screen and the Child Lock LED stays on.
- The "Child Lock" function will lock all of the buttons except the selector.
- If you switch off the appliance, the Child Lock will be disabled.
- The Child Lock function remains active when the washing machine restarts after a power break.

Warning!
- If a power break occurs when the washing machine is running, the internal memory saves the selected programme. Once the power has returned, press the Start/Pause button to resume the programme.
Programmes
The programmes are adapted to the kind of laundry.
| Quick 15' | This programme is used to very quickly wash a small load of laundry that is not very dirty. |
| Rapid 45' | This programme is used to quickly wash a usual load of laundry that is not very dirty. |
| Duvet | This programme is used to wash duvets without damaging their appearance. |
| Sport | This washing programme is designed to preserve the elastic fibres in sportswear so that they do not stretch and they retain their technical properties. |
| Baby care | This programme improves rinse performance to remove as much detergent residue as possible. This serves to better protect a baby's skin. |
| Spin | This programme is used to only spin your clothes by choosing the desired spin speed. |
| Rinse and Spin | This programme is used to simply rinse and spin your clothes. |
| Hygiene | This programme eliminates the main viruses and up to 99.9% of bacteria from your clothes and face coverings, thanks to a reinforced 30-minute washing phase at a stabilised temperature of 70°C. |
| Cotton | This programme is suited to a load consisting of resistant white or coloured cotton. To know which washing temperature is suitable, refer to the labels on your clothing. |
| 20°C | This low temperature washing programme protects lightly-soiled daily items from fading and dye transfer, while cool washes are gentler and use less energy. |
| Mix | This programme is ideal for a load consisting of mixed fibres. |
| Wool | This programme is specially intended for protecting your woollens. Thanks to longer soaking periods, your woollens will be washed gently. |
| Synthetics | This programme is ideal for a load consisting of resistant synthetics. |
| ECO 40-60 | This programme is used to wash your laundry at a temperature that cannot be changed, while optimising water and power consumption. |
| Drum clean | This special programme is used to disinfect the machine at a temperature of 90°C. |
Switching off the audible beep
Press the Spin button for 3 seconds to switch off the audible beep. Perform the same action to restart it.
The last setting will be retained until the next reset.

Warning!
- After switching off the audible beep, the appliance no longer makes any sound.
Options table
| Programme | Default temperature (°C) | Spin speed (rpm) | Possible options |
| Hygiene | 70 | 1300 | Delayed Start, Rinse + |
| Cotton | 40 | 1300 | Delayed Start, Rinse +, Prewash |
| 20°C | 20 | 1200 | Delayed Start, Rinse +, Prewash |
| Mixed | 40 | 1300 | Delayed Start, Rinse +, Prewash |
| Wool | 40 | 800 | Delayed Start, Rinse + |
| Synthetics | 40 | 1300 | Delayed Start, Rinse +, Prewash |
| ECO 40-60 | - | 1300 | Delayed Start |
| Drum Clean | 90 | 1300 | Delayed Start |
| Spin | - | 1300 | Delayed Start |
| Rinse and Spin | - | 1300 | Delayed Start, Rinse + |
| Baby care | 60 | 1200 | Delayed Start, Rinse +, Prewash |
| Sportsware | 20 | 1300 | Delayed Start, Rinse +, Prewash |
| Duvet | 40 | 800 | Delayed Start, Rinse + |
| Rapid 45' | 40 | 1200 | Delayed Start, Rinse + |
| Flash 15' | Cold | 800 | Delayed Start |
- The product is tested in accordance with the Hong Kong Code of Practice on Energy Labeling of Products 2020; IEC 60456:2010 standards. • Half load for 8.0kg machine is 4.0kg.
Cleaning and Care
Warning!
- Always switch off the appliance and turn off the water tap before any maintenance operations.
Cleaning the Exterior of your Washing Machine
Suitable maintenance will optimise the service life of your washing machine. Appliance surfaces can be cleaned with neutral non-abrasive detergents diluted where necessary. If the water overflows, wipe it up immediately. Never use sharp objects.

Note!
- Do not use formic acid and its diluted solvents or equivalents such as alcohol, solvents or chemicals, etc.
Cleaning the drum
Any rust left inside the drum by metal articles must be removed immediately with chlorine-free detergent.
Never use steel wool.
4 Note!
- Don't put laundry in the washing machine during the drum cleaning.
Cleaning the water supply hose filter

Note!
- If there is hardly any water in the appliance and the tap is open, then the water supply hose filter needs to be cleaned.
- Close the tap
- Remove the Water Inlet Hose from the tap.
- Clean the filter.
- Reconnect the water inlet hose.


Cleaning the washing machine filter
- Unscrew the water inlet hose from the back of the machine.
- Remove the filter using a pair of pliers.
- Use a brush to clean the filter.
- Refit the filter once cleaning is finished.
- Reconnect the water inlet hose.
Cleaning the detergent compartment
If you observe any dirtying of the detergent
drawer, clean it. To do this:
- Remove the detergent drawer by pressing the arrow on the softener compartment (shown as A below).
- Clean with water.
- Put the compartment back.


Note!
- Do not use alcohol, solvents or chemicals to clean the washing machine.
Cleaning the drain pump filter

Warning!
• Beware of hot water! - Disconnect the appliance to avoid any electric shock hazard. - The drain pump filter filters out lint and other small debris present in the laundry. - Clean the filter regularly to ensure proper washing machine operation.

- Open the service flap
2. Remove the filter by turning it counter clockwise
3. Remove any debris

- Refit the filter then close the service cover

Warning!
- Ensure that the filter is properly refitted to avoid any leakage.
- When the washing machine is running, never remove the filter. This operation must only be performed with the washing machine switched off.
Preventing scale build-up
If you live in an area with hard water, we recommend using a washing machine descaling product. Regularly check for any scale build-up in the drum. If necessary, run an empty washing cycle with a descaling product. Refer to the instructions provided on the product packaging.
Troubleshooting
The washing machine cannot start up or stops during operation. First attempt to solve the problem. If you cannot, then contact the service centre.
| Description | Cause | Solution |
| Washing machine cannot start up | The door is not properly closed | Switch the washing machine back on after closing the door.Check whether any clothes are trapped. |
| Door cannot be opened | Washing machine's safety protection system is working | Disconnect the power, reconnect it and switch the machine back on |
| Water leakage | The connection between the washing machine and the water supply hose or the drain hose is not tight | Check the water pipes and tighten the connections.Clean the drain hose |
| Detergent residues in the detergent compartment | The detergent is dampened and clumpy | Clean and dry the compartment |
| Washing machine lights or display do not light up | The appliance is not switched on.Circuit problem.Connection problem. | Check that the power is on and that the power cord is properly connected. |
| Unusual noise | Make sure that the fixing bolts have been removed.Make sure that the washing machine is installed on a solid and level floor | |
| E30 | The door is not properly closed | Close the door properly and restart the washing machine.Check whether any clothes are trapped |
| E10 | Problem adding water during washing | Check whether the water pressure is too low.Straighten the water supply hose.Check the water supply filter is not blocked |
| E21 | Water drainage takes too long | Check if the drain hose is blocked |
| E12 | Water leakage | Run another programme.If the error code is still displayed, turn off the water supply, disconnect the washing machine and call your after sales service. |
| E xx | Others | Do not hesitate to reset the washing machine.Contact our after sales service if the issues remain. |

Note!
- Once this check is complete, start the appliance. If the problem occurs again or if the error codes are displayed again, contact your after-sales service.
- Any attempt made by the user or a non professional to repair the appliance may affect user safety and void the appliance warranty.
Technical specifications
| Power supply 220-240V~, 50Hz | |
| Maximum current 10 A | |
| Standard water pressure 0.1 MPa-1 MPa |

| Model Washing | capacity | Dimensions(I * d * h mm) | Net weight Rated | power |
| BT813HQA | 8.0kg | 400*610*875 | 56kg | 2000W |
SERVICING AND REPAIRS

Any repairs that are made to your appliance must be handled by a qualified professional authorised to work on the brand. When calling, please provide the full references of your appliance [commercial reference, service reference, serial number), so that we can handle your call more efficiently. This information can be found on the data plate

This symbol on the product or in the instructions means that your electrical and electronic equipment should be disposed at the end of its life separately from your household waste. There are separate collection systems for recycling in the European Union.
For more information, please contact the local authority or your retailer where you purchased the product.
Please record the following product information
Model No.:
Serial No.:
Dealer:
Date of Purchase:
Invoice No.:
The product specifications may be changed without prior notice.
Please contact customer service for details if necessary.
The content of this manual is subject to the English version.
If there is any inconsistency or ambiguity
between the English version and the Chinese version,
the English version shall prevail.

Warranty Registration
Warranty Registration
Register your product online
www.dchtoolbox.com

Gilman
since 1841

DCHToolBox
DCH ToolBox
4/F, DCH Building, 20 Kai Cheung Road, Kowloon Bay, Hong Kong
Customer Service Hotline: (852) 8210 8210

- WASHING MACHINE
- CONTENTS
- SAFETY INSTRUCTIONS
- WARNING
- PRODUCT INSTALLATION
- APPLIANCE DAMAGE HAZARD
- OPERATION OF THE APPLIANCE
- INSTALLATION
- DESCRIPTION OF THE PRODUCT
- NOTE
- ACCESSORIES
- INSTALLATION LOCATION
- UNPACKING THE WASHING MACHINE
- FIT THE ACOUSTIC FOAM
- REMOVE THE TRANSIT BOLTS
- ADJUSTING THE LEVELLING FEET
- CONNECTING THE WATER SUPPLY HOSE
- DRAIN HOSE
- OPERATION
- QUICK START
- BEFORE WASHING
- WASHING
- AFTER WASHING
- BEFORE EVERY WASH
- CHOOSING THE CORRECT DETERGENT
- DETERGENT COMPARTMENT
- MUST DO
- ○OPTIONAL
- WASHING PRODUCTS
- THE CONTROL PANEL
- PROGRAMME DIAL
- SPIN
- TEMPERATURE / DELAYED START
- OPTIONS
- START/PAUSE
- DELAYED START
- CHILD LOCK
- PROGRAMMES
- SWITCHING OFF THE AUDIBLE BEEP
- CLEANING AND CARE
- CLEANING THE EXTERIOR OF YOUR WASHING MACHINE
- CLEANING THE DRUM
- CLEANING THE WATER SUPPLY HOSE FILTER
- CLEANING THE WASHING MACHINE FILTER
- CLEANING THE DETERGENT COMPARTMENT
- CLEANING THE DRAIN PUMP FILTER
- PREVENTING SCALE BUILD-UP
- TROUBLESHOOTING
- TECHNICAL SPECIFICATIONS
- SERVICING AND REPAIRS
- PLEASE RECORD THE FOLLOWING PRODUCT INFORMATION
Brand : BRANDT
Model : BT813HQA
Category : Washing machine