
ATBBQCG4 - Barbecue Artusi - Free user manual and instructions
Find the device manual for free ATBBQCG4 Artusi in PDF.


| Product Type | Barbecue |
| Brand | Artusi |
| Model | ATBBQCG4 |
| Dimensions (L x W x H) | 120 cm x 60 cm x 110 cm |
| Weight | 35 kg |
| Main Cooking Area | 2500 cm² |
| Number of Burners | 4 |
| Ignition Type | Electronic |
| Fuel Type | Propane / Natural Gas |
| Temperature Range | 150°C - 300°C |
| Side Burner | Yes, 1 side burner |
| Material | Stainless steel |
| Warranty | 2 years |
| Cleaning Recommendation | Hand wash with mild detergent |
| Safety Features | Flame failure device, thermocouple |
| Assembly Required | Yes |
| Included Accessories | Grease tray, cooking grate, lid |
| Spare Parts Availability | Burners, grates, ignition kit |
| Power (Gas) | 12 kW total |
| Portability | With wheels |
Frequently Asked Questions - ATBBQCG4 Artusi
User questions about ATBBQCG4 Artusi
0 question about this device. Answer the ones you know or ask your own.
Ask a new question about this device
Download the instructions for your Barbecue in PDF format for free! Find your manual ATBBQCG4 - Artusi and take your electronic device back in hand. On this page are published all the documents necessary for the use of your device. ATBBQCG4 by Artusi.
USER MANUAL ATBBQCG4 Artusi
natural_image
Line drawing of a portable electric grill with control panel and wheels (no text or symbols)
ARTUSI
THE ART OF LIVING
ATBBQCG4
4 BURNER BBQ
WITH SIDE WOK
OPERATION
MANUAL
BW-PC141111-1A
Congratulations, you are now the proud owner of an ARTUSI cooking appliance. Thank you for purchasing ARTUSI and welcome to the ARTUSI Family.
This instruction manual has been specially created to inform you of the full range of features your ARTUSI appliance has to offer and serves as an introduction to getting the very best out of your ARTUSI appliance.
We present detailed information on each of the features your ARTUSI appliance consists of. Once you have read this section you will be able to choose the most appropriate settings for your appliance when cooking different types of food.
We ask you to read the instructions in this booklet very carefully as this will allow you to get the best results from using your appliance. KEEP THE DOCUMENTATION OF THIS PRODUCT FOR FUTURE REFERENCE.
TO REGISTER YOUR PRODUCT WITH ARTUSI, PLEASE FILL OUT THE WARRANTY CARD AT THE END OF THIS BOOKLET AND POST IT TO: REPLY PAID 83617
LEICHHARDT NSW 2040
Dear Artusi Customer, please read this user manual carefully before using the product and, keep it permanently at your disposal.
Note: This user manual is prepared for more than one model. Some of the features specified in this Manual may not be available on your appliance.
All our appliances are only for domestic use, not for commercial use. Products marked with (*) are optional.
"THIS APPLIANCE SHALL BE INSTALLED IN ACCORDANCE WITH THE REGULA TIONS FORCE AND ONLY USED IN A WELL VENTILATED SPACE. READ THE INSTRUCTIONS BEFORE INSTALLING OR USING THIS APPLIANCE"
"Conforms with the WEEE Regulations."
Assembly and Operating Instructions
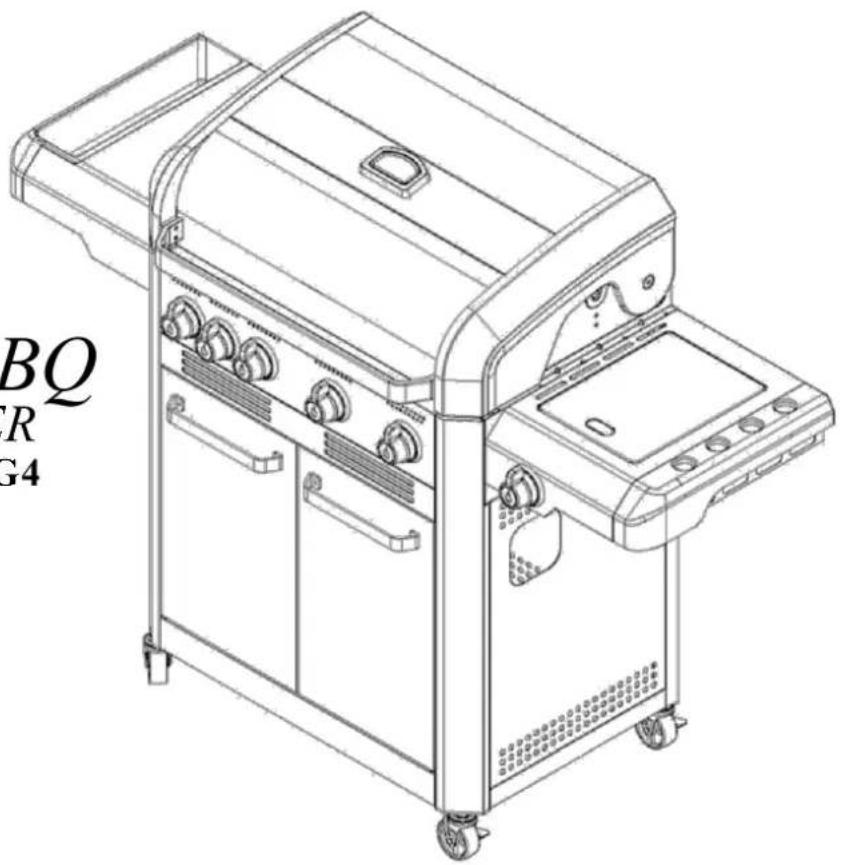
4 BURNER BBQ
WITH SIDE BURNER
Product Code: ATBBQCG4
(Model BW-PC141111-1A)
natural_image
Line drawing of a gas stove with mounted dish and control panel (no text or symbols)IMPORTANT: PLEASE CAREFULLY READ AND FOLLOW THE FOLLOWING
ASSEMBLY INSTRUCTIONS.
PLEASE READ RIGHT THROUGH THESE OPERATING INSTRUCTIONS BEFORE
OPERATING THIS UNIT.
FOLLOW ALL STEPS IN ORDER. NEVER ALLOW CHILDREN TO OPERATE THIS UNIT.
SAVE THESE INSTRUCTIONS FOR FUTURE REFERENCE.
THIS GAS APPLIANCE IS DESIGNED FOR OUTDOOR USE ONLY.
A WARNINGS:
- This appliance is strictly for outdoor use only. Under no circumstances should it be used indoors.
- Read the instructions fully before using the appliance. Retain these instructions for future reference.
- Assemble and operate only as detailed in this manual.
- DO NOT start the barbeque if there is any doubt over the correct assembly, ignition, gas control or cooking of the unit.
- DO NOT installed in, or connect to the consumer piping or gas supply system of a boat or caravan.
- DO NOT USE AN ADAPTOR AT THE CYLOINDER CONNECTION.
- Accessible parts maybe very hot, keep young children and the infirm clear of the appliance when it is in use or still hot.
- DO NOT move this appliance during use or while it is still hot. ALWAYS allow the barbeque to completely cool down before moving or covering.
- DO NOT leave this appliance unattended when in use or still hot.
- DO NOT attempt modify this appliance. That can be very dangerous.
- Turn OFF the gas supply at the gas cylinder after use.
- DO NOT store spare gas cylinders inside or in the vicinity of this or any other gas appliance.
- DO NOT attempt to adjust or alter any factory-sealed assemblies.
- NEVER attempt to ignite the barbeque with the main hood or side burner lid closed.
- DO NOT perform any servicing on the barbeque yourself. This includes internal adjustment of the regulator and gas valves. Servicing can only be carried out by authorised technicians.
- DO NOT spray aerosols in the vicinity of this appliance whilst it is in operation.
- DO NOT use or store flammable materials in or near this appliance.
• DO NOT place articles on or against this appliance.
• DO NOT modify this appliance.
FOR YOUR SAFETY:
- DO NOT store or use gasoline, methylated spirits or any other flammable vapours and liquids in the vicinity of this or any other gas appliance.
- NEVER attempt to use any additional fuels such as wood, charcoal, petrol, or any volatile liquids in this appliance. Smoking woods can only be used in a manner that prevents them from igniting (e.g., in a smoker box).
- Leak test the appliance, gas cylinder and all connections whenever you connect a gas cylinder and at least annually otherwise. See Page 19 for details on how to conduct a leak test.
- Aerosols must NOT be used near a lit barbeque.
• DO NOT place articles on or against or enclose this appliance.
• Take care with loose clothing and long hair when around the appliance in case of unexpected flare ups.
- FAT FIRES are the most common cause of problems in barbeques. They are caused by a build-up of grease and food particles in the grease channelling tray, the grease cup, and the inside of the BBQ frame. A fat fire can be very difficult to put out and will be dangerous if it spreads to the gas hose. You should keep your barbeque clean to avoid this occurrence. Damage from neglect leading to a fat fire is not covered by warranty. Do not attempt to extinguish a fat fire with water. If a fat fire occurs, shut down the gas supply and close the hood if safe to do so. Call your local fire brigade if personnel or property are endangered.
- It is fine to pre-heat with the hood closed, but with the hood closed, NEVER let the temperature on the hood thermometer exceed 250 degrees Celsius. Switch one or more burners to LOW or OFF as required.
- NEVER leave burners on HI for more than 15 minutes, always stay in control by adjusting burners to LOW and OFF as required to maintain suitable cooking temperatures.
- For safety reasons, it is advisable to keep a fire extinguisher and fire blanket close at hand.
- Please remove and thoughtfully dispose of all polythene packing and plastic bags carefully and keep out of the reach of children.
- The hood handle can become very hot. Grip only the centre of the handle. Always use oven gloves when cooking or carrying out any adjustments to the BBQ. Use purpose designed barbecue tools with long and heat resistant handles.
- Use caution when opening the hood, as hot steam inside may be released upon opening.
- Side oven can be used with pot up to 220mm in diameter.
LPG SAFETY:
IF YOU SMELL GAS:
- If safe to do so, shut off gas supply to the appliance.
- If safe to do so, extinguish any open flame.
- Open the BBQ hood, side burner lid and cart doors.
-
If the odour continues, DO NOT use the BBQ. Contact your local Fire Brigade.
-
Gas bottles MUST be transported, stored, and used vertically only.
• Store gas cylinders in a well-ventilated area. - Spare or extra gas bottles must NOT be stored inside or within close proximity of this barbeque or any other gas or electric appliance.
- Gas bottles should NOT be stored where they are exposed to continuous direct sunlight, as this is a potentially dangerous practice.
- The position of the assembled barbeque should be such that the gas bottle is NOT left exposed to direct sunlight as this is a potentially dangerous situation.
- For storage and gas cylinder exchange, disconnect the gas cylinder only, DO NOT disconnect the hose from the barbeque.
- Ensure any gas cylinder has been leak tested, periodically retest for leaks.
• Always keep gas cylinders upright and protected from falling over. - When transporting a gas cylinder, drive with the windows open.
- Do not have an open flame or cigarette in or near a vehicle transporting a cylinder.
- Do not leave a cylinder unattended in a vehicle.
- Do not expose a cylinder to direct heat or continuous sunlight in a vehicle.
- Drive with extra care when transporting a cylinder.
WHERE TO PUT YOUR BARBEQUE:
You must observe the clearances listed on the data sticker on your barbeque.
It will tell you how close you can put the barbeque to combustible surfaces (wood, gyprock, trees, wooden fences etc). If you don't follow these clearances, there is a chance that nearby surfaces will heat up and catch fire.
- This barbeque is an outdoor appliance only. Under no circumstances should it be used indoors.
- Keep the barbeque sheltered from the wind. Wind interferes with the flames and can prevent your barbeque from heating up properly and can even damage some components.
- Make sure the floor surface is hard, level and preferably non-combustible.
- Don't put the barbeque too close to windows or anywhere else where cooking smoke is likely to cause a problem.
- There MUST be a clearance of at least 300mm from the sides and the back of the barbeque to any combustible materials or surfaces. There must also be a clearance of at least 1000mm above the cooking surfaces to any combustible surface.
- Flammable materials of any description MUST be kept well away from the barbeque.
- The barbeque must be positioned to avoid walkways, gangways, and general pedestrian access. Use only a safe, firm flat surface. Apply the castor brakes unless moving the appliance.
- The nature of a barbeque is such that many of the surfaces are dangerously hot to touch, the positioning of the barbeque should take into consideration the possibility of accidental hand or body contact.
PUTTING YOUR GAS BARBEQUE IN AN ENCLOSURE:
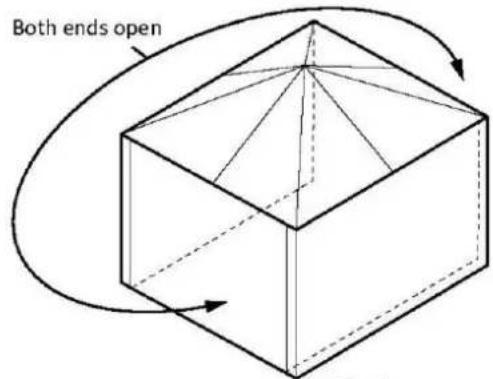
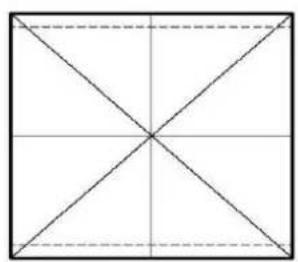
This appliance must only be used in an above ground, open air situation with natural ventilation, without stagnant areas, where gas leakage and products of combustion are rapidly dispersed by wind and natural convection. Any enclosure in which the appliance is used must comply with one of the following:
- An enclosure with walls on all sides, but at least one permanent opening at ground level and no overhead cover. SEE EXAMPLE 1
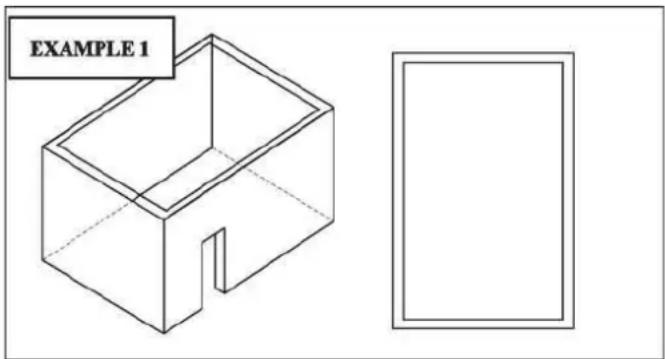
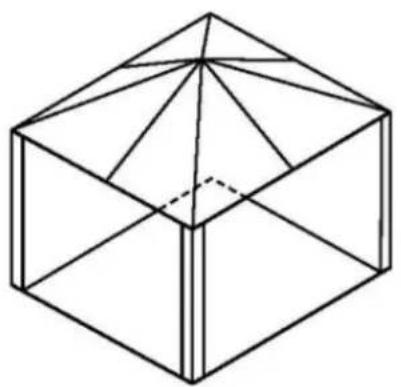
- Within a partial enclosure that includes an overhead cover and no more than two walls. SEE
EXAMPLES 2 & 3
natural_image
Line drawing of a 3D geometric solid resembling a pyramid or hexagonal prism (no text or symbols)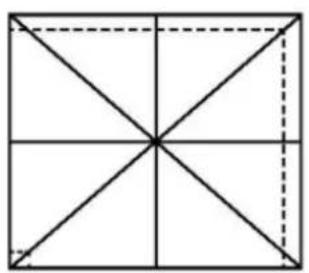
natural_image
Geometric diagram of a square divided into eight triangles by diagonals, with dashed lines indicating corner divisions (no text or symbols)Outdoor area — Example 2
natural_image
Geometric diagram of a square divided into four equal triangles by diagonals (no text or symbols)Outdoor area — Example 3
PUTTING YOUR GAS BARBEQUE IN AN ENCLOSURE (continued):
- Within a partial enclosure that includes an overhead cover and more than two walls, the following shall both apply:
(1) At least 25% of the total wall area is completely open and
(2) At least 30% of the remaining wall area is open and unrestricted
SEE EXAMPLES 4 & 5
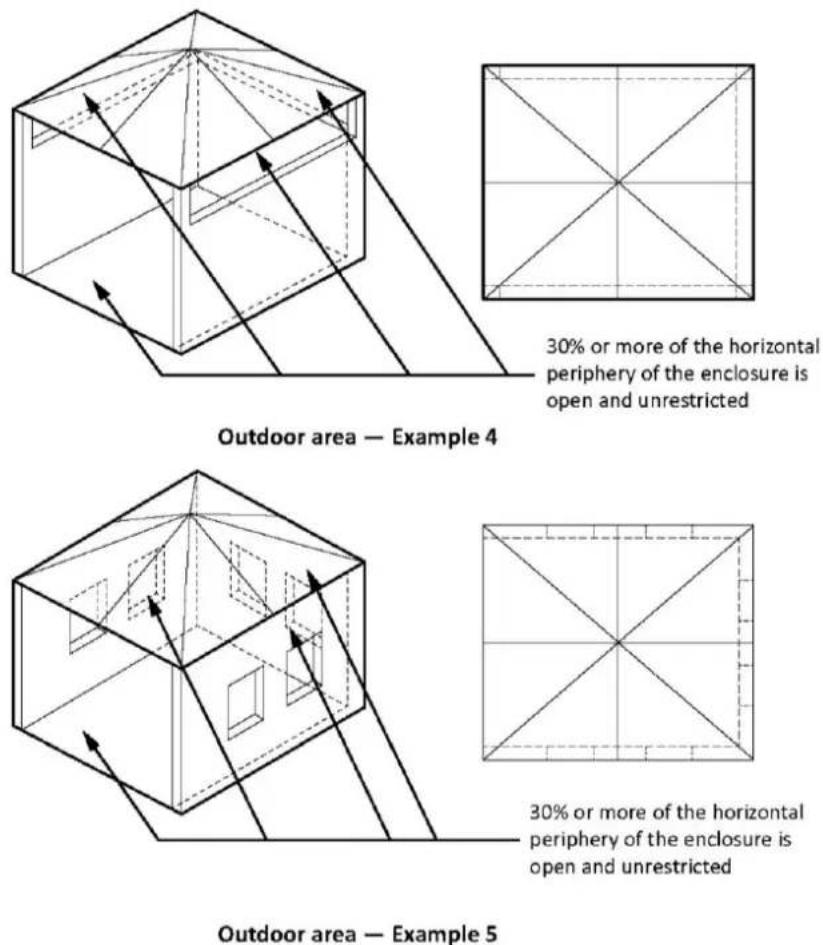
30% or more of the horizontal periphery of the enclosure is open and unrestricted
30% or more of the horizontal periphery of the enclosure is open and unrestricted
- In the case of balconies, at least 20% of the total of the side, back and front wall areas shall be and remain open and unrestricted.
IMPORTANT ISSUES FOR INSTALLATION:
• DO NOT obstruct any of the ventilation ports on the body or the hood of the barbeque.
- The gas cylinder must be kept out of direct sunlight and away from any heat sources.
- During a gas cylinder swap or re-fill, ensure that all control knobs are in the OFF position and that there are no naked flames in close proximity.
- Gas hoses must NOT be twisted, kinked or under any form of tension. The gas hoses should hang freely with no bends, folds or kinks.
- No part of the flexible hoses should come in contact with any part of the barbeque that will become hot during operation.
- A regular inspection of the hoses should be made to ensure that they are not cracking, breaking cutting or deteriorating in any other way.
- Any damage to a gas hose requires an immediate replacement from your local Barbeques Galore store. Use only the correct parts tested and certified for use with this barbeque.
CHECKING THE GAS TYPE:
Before assembling your barbeque, you should ensure your barbeque is suited to the type of gas which you are going to use.
IMPORTANT: Check the gas type (natural gas or bottled LPG) that is being supplied to the barbeque before connecting. The gas type supplied must match the gas type label on the barbeque.
This barbeque is manufactured to operate from LPG (Propane). It can be connected to LPG (Propane) without any alteration. This barbeque is not suitable for conversion to Natural Gas. It is extremely dangerous to use the wrong type of gas.
There are two approaches to installation: LPG, Also Known as Propane:
(1) This is most commonly supplied as a portable 4kg or 9kg gas cylinder, which can be refilled or swapped at petrol stations or your place of purchase when empty.
(2) Some homes have twin 45 kg LPG (Propane) cylinders permanently installed near an outside wall. These cylinders can supply LPG (Propane) gas to many appliances in the home via copper pipes and are filled on site as required by the gas supply company. Barbeques which are connected to twin 45 kg LPG cylinders or to Natural Gas must be installed by a licensed gasfitter, in accordance with the requirements of AS 5601, and local gas authority requirements.
CARTON CONTENTS:
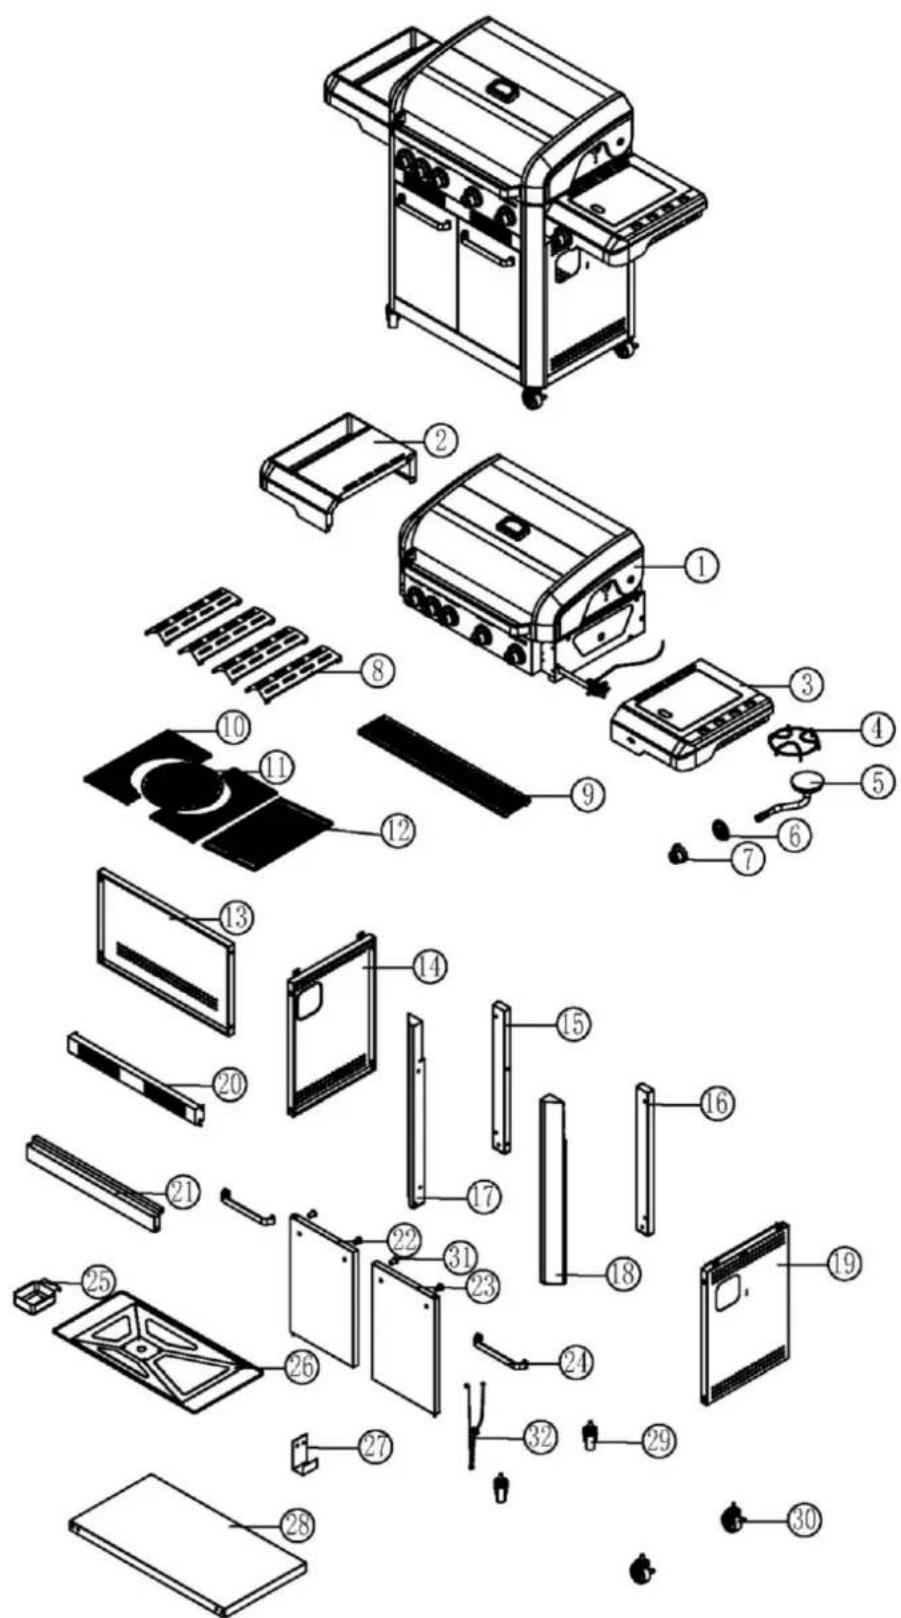
PARTS DETAILS:
IPC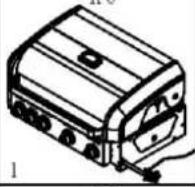 | IPC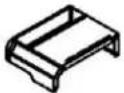 | IPC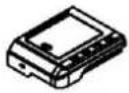 | IPC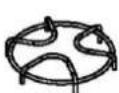 | IPC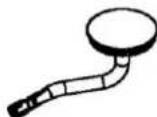 | IPC |
| 2 | 3 | 4 | 5 | 6 | |
IPC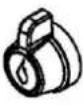 | 4PCS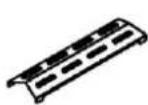 | IPC | 2PCS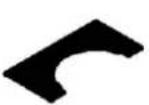 | 1PC | 1PC |
| 8 | 9 | 10 | 11 | 12 | |
IPC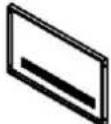 | IPC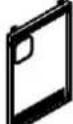 | IPC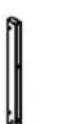 | 1PC | 1PC | 1PC |
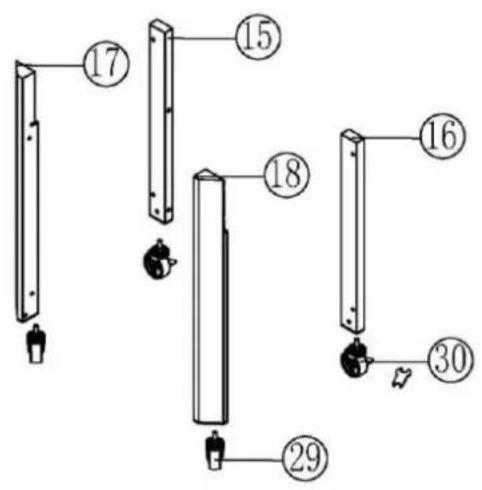
| 14 | 15 | 16 | 17 | 18 | |
IPC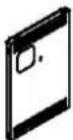 | IPC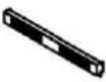 | IPC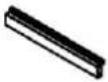 | IPC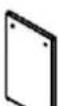 | 1PC | 2PCS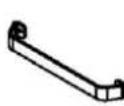 |
| 20 | 21 | 22 | 23 | 24 | |
IPC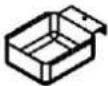 | IPC | IPC | 1PC | 2PCS | 2PCS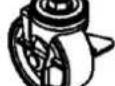 |
| 26 | 27 | 28 | 29 | 30 | |
4PCS | 1FC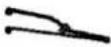 | ||||
| 32 |
| A | B | C | D | E | F | G |
 28PCS M6*10 28PCS M6*10 |  12PCS M6*12 12PCS M6*12 |  4PCS M6*6 4PCS M6*6 |  4PCS M4*8 4PCS M4*8 |  1PC M5*15 1PC M5*15 |  1PC 1PC |  1PC 1PC |
ASSEMBLY INSTRUCTIONS
Before beginning assembly, check that you have all the parts. If any parts are missing or damaged, do not attempt to assemble the product. Contact your store of purchase.
Remove any protective film and all packaging materials from all parts before using the BBQ. Keep the packaging until the BBQ is fully assembled to avoid misplacing required parts.
CAUTION: Although we take every effort to ensure that the assembly process is as easy as possible, it is possible with fabricated steel parts that corners and edges can cause cuts if not carefully handled during assembly procedures. Be very careful while handling any parts during assembly. It is strongly recommended that you protect hands with a pair of work gloves.
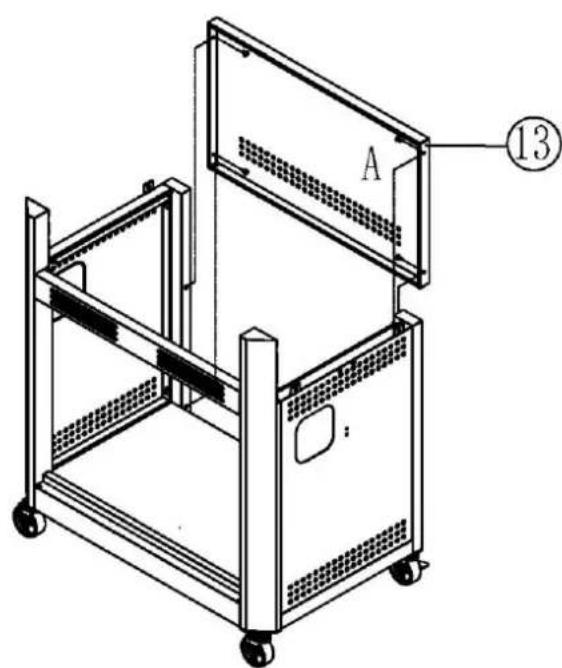
STEP ONE:
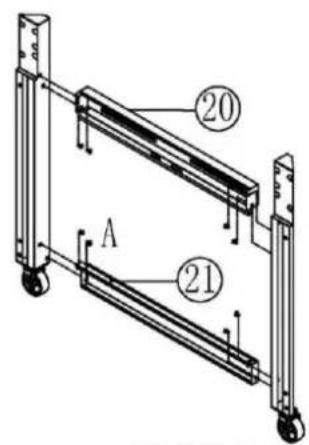
A. 8PCS M6*10
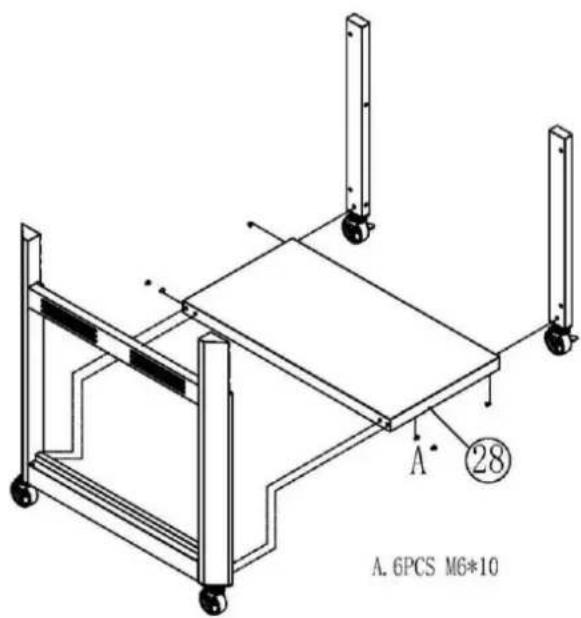
STEP TWO:
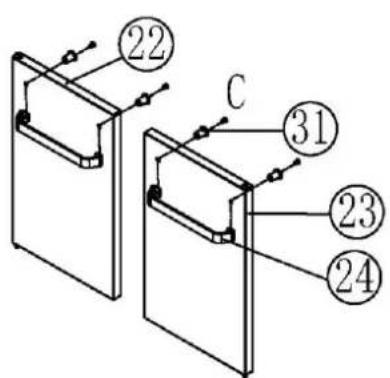
C. 4PCS M6*6
A. 4PCS M6*10
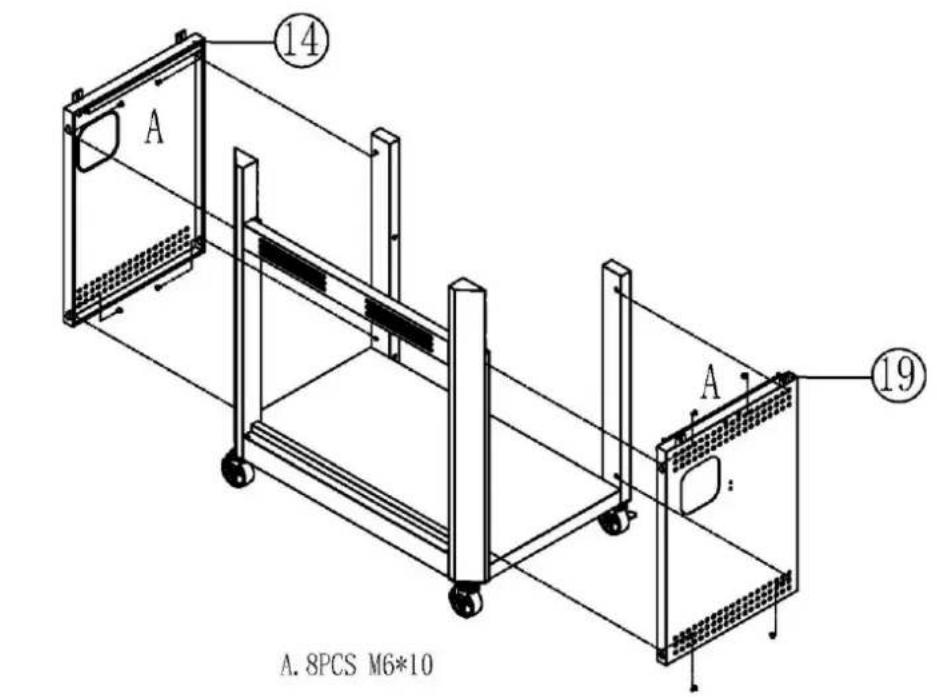
STEP THREE:
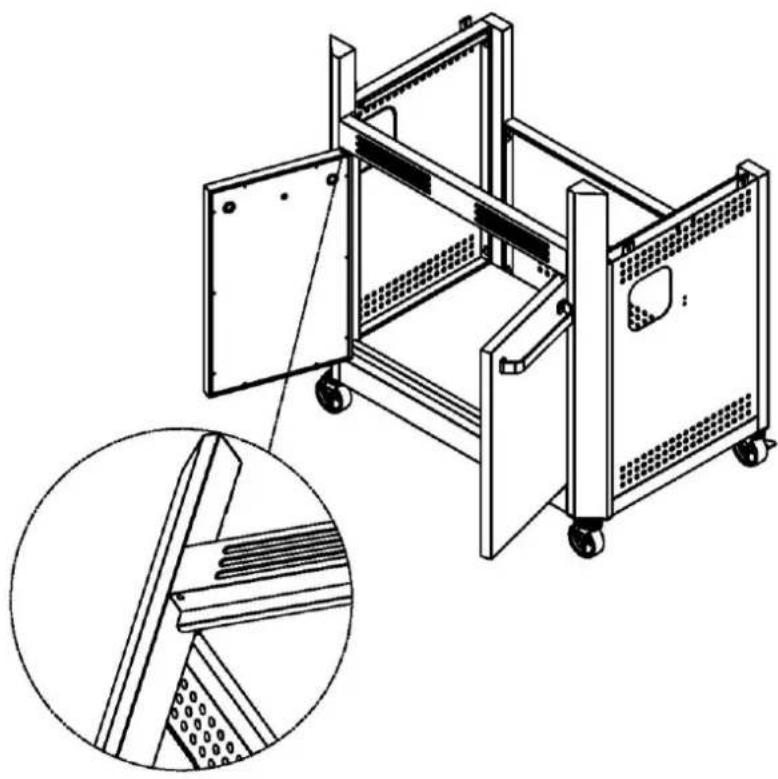
natural_image
Technical line drawing of a modular kitchen unit with open doors and wheels, showing internal structure and mounting details (no text or symbols)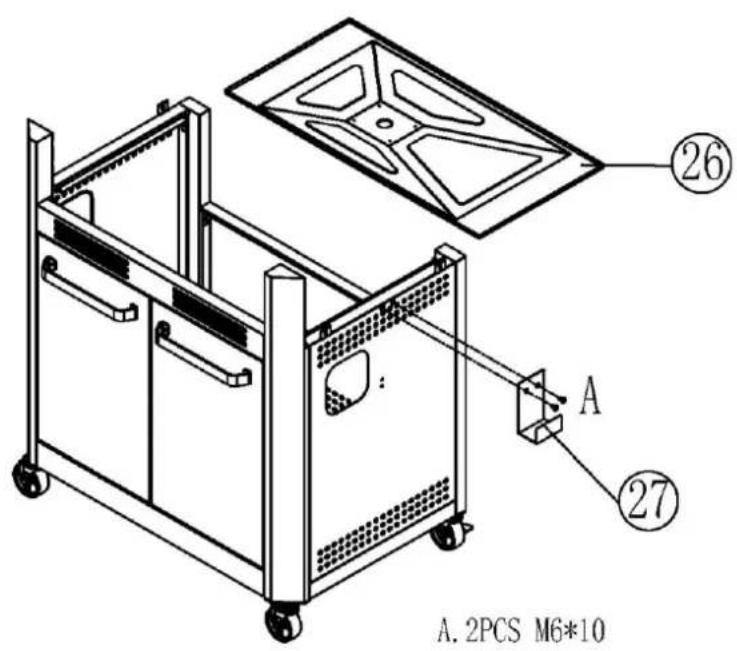
STEP FOUR:
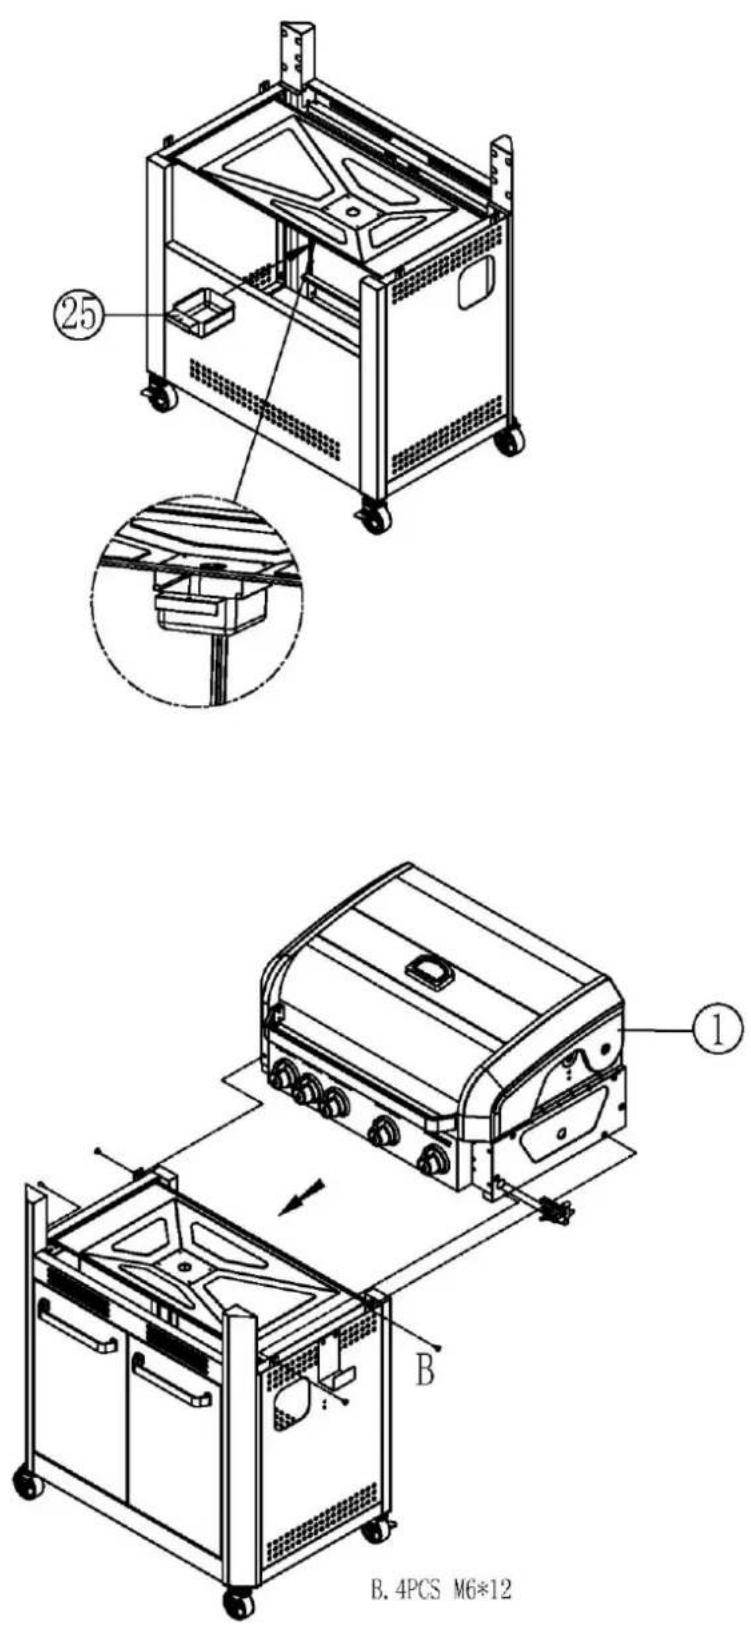
STEP FIVE:
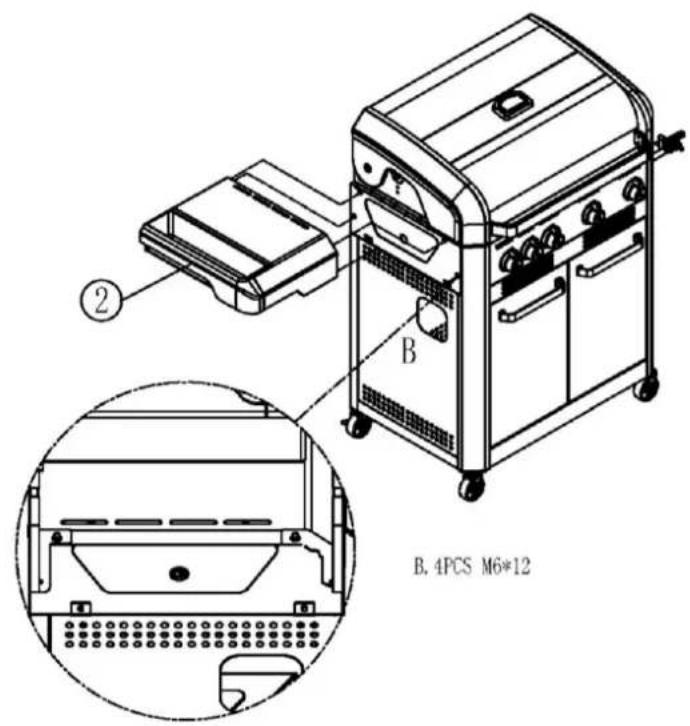
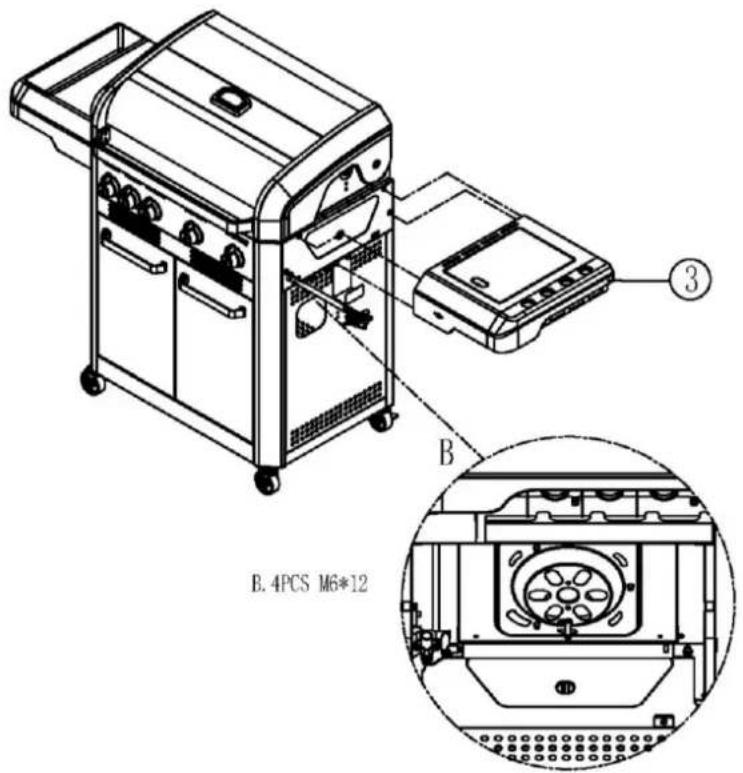
STEP SIX:
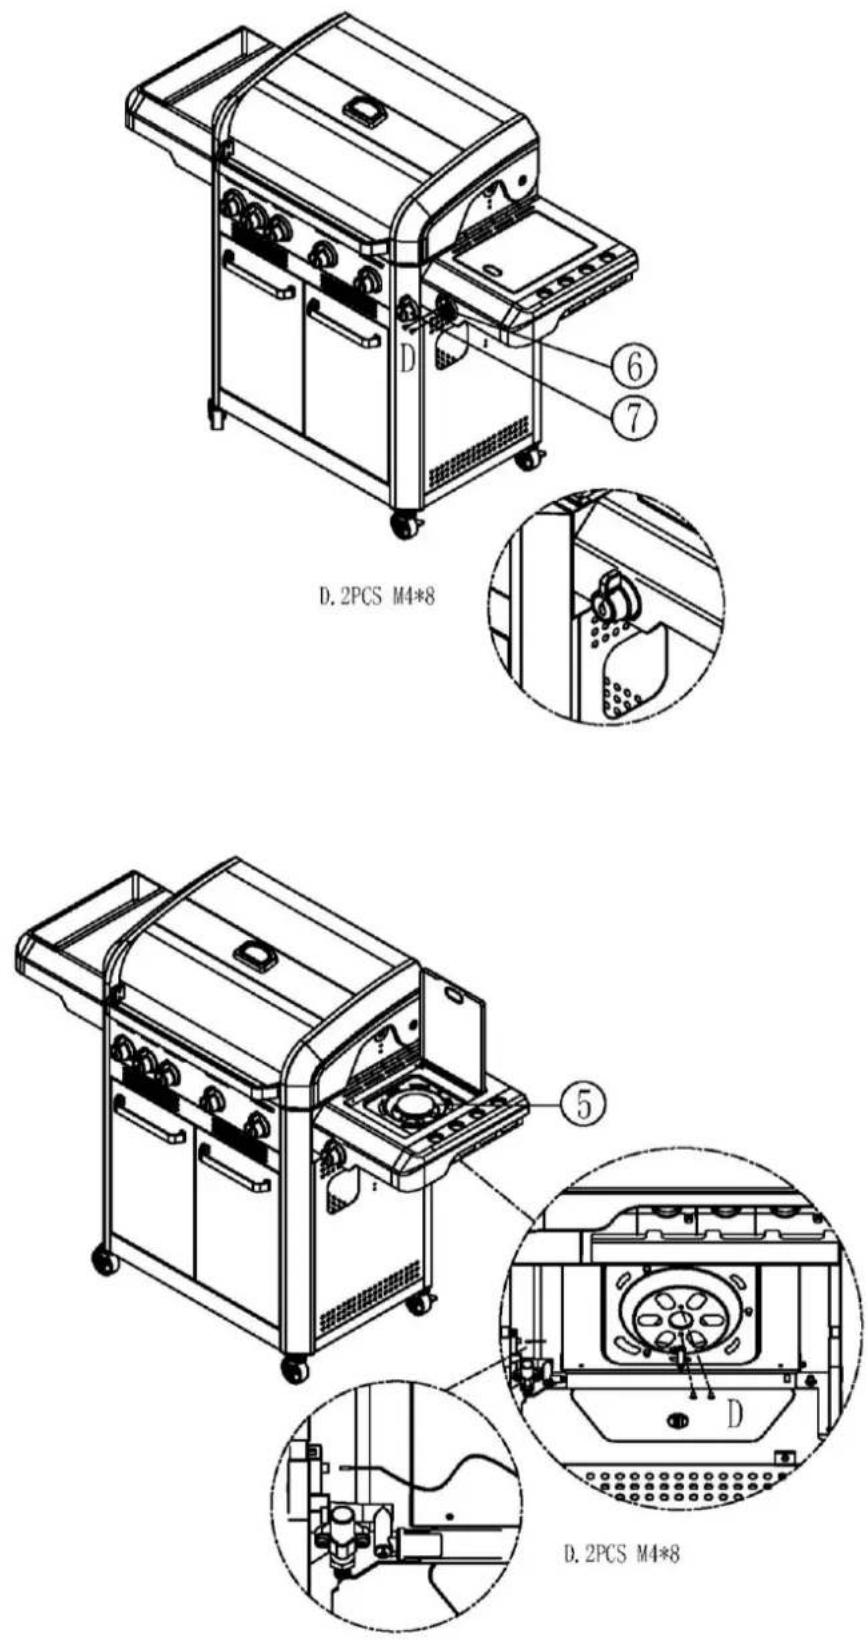
STEP SEVEN:
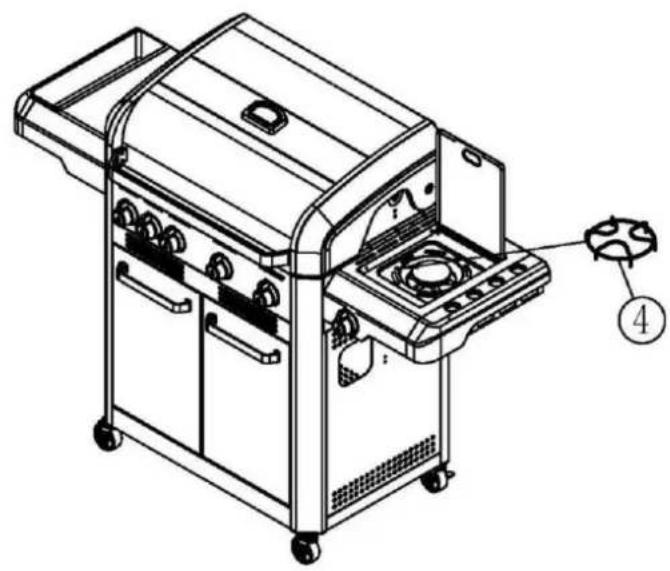
natural_image
Line drawing of a portable gas stove with control panel and fan (no text or symbols)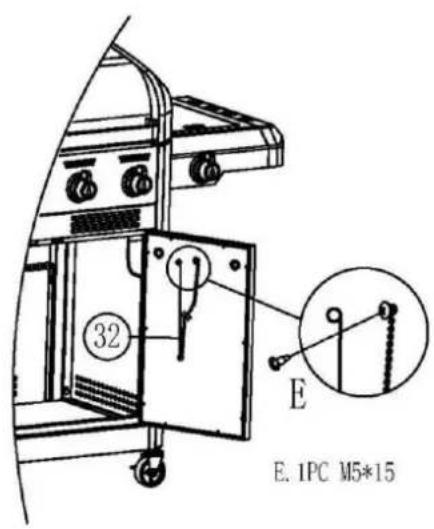
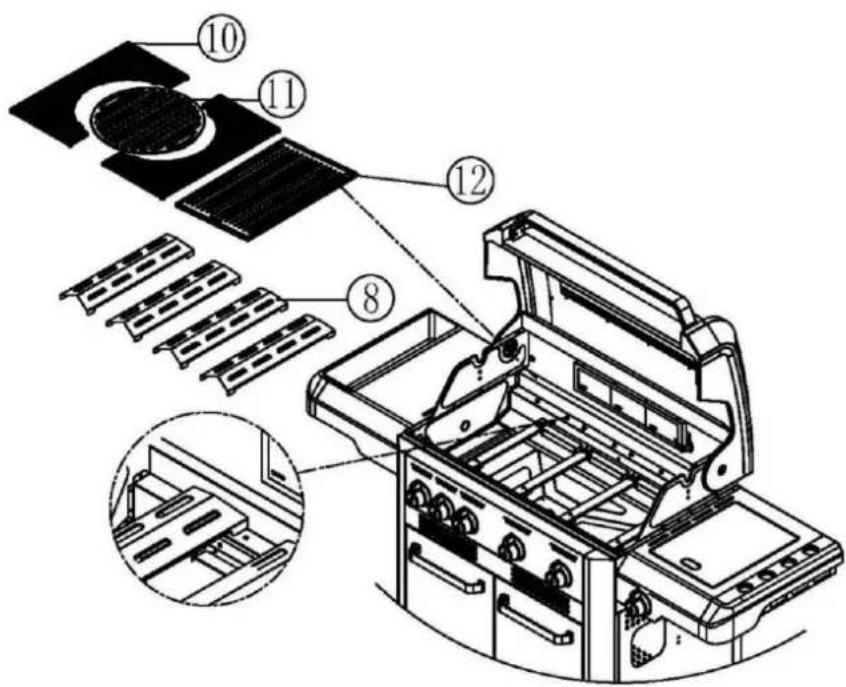
STEP EIGHT:
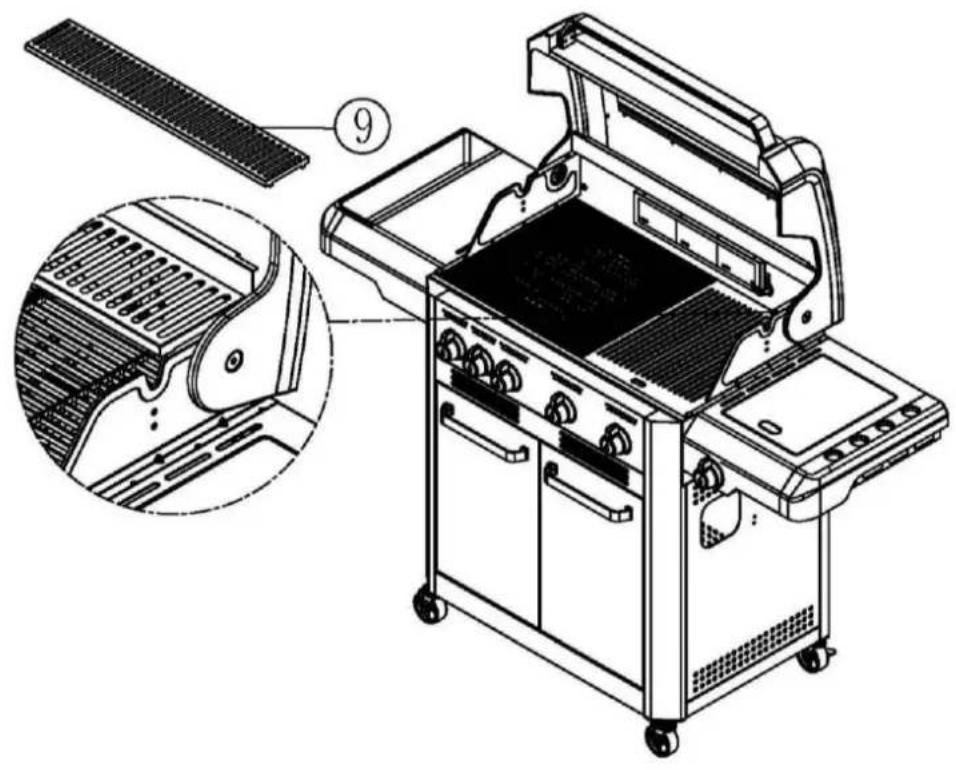
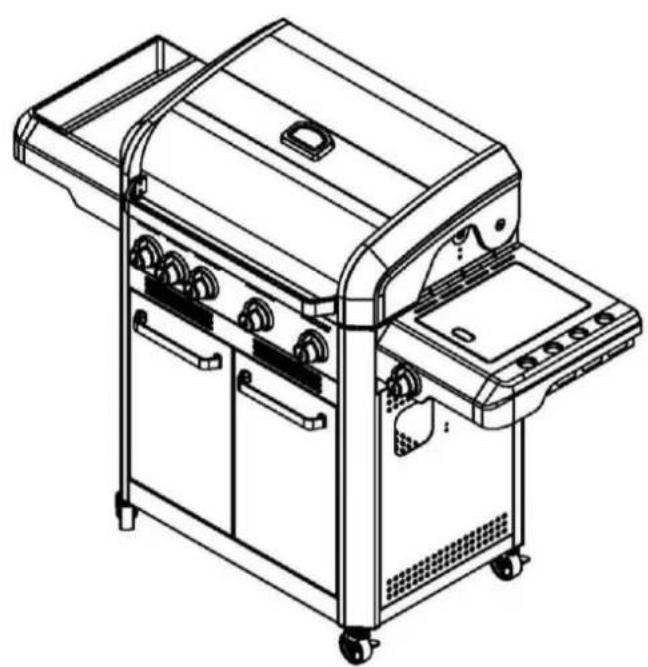
natural_image
Line drawing of a portable electric grill with control panel and wheels (no text or symbols)OPERATING INSTRUCTIONS
VERY IMPORTANTLY: BEFORE USE, BE SURE TO TEST GAS SYSTEM FOR GAS LEAKS, AS DESCRIBED BELOW.
For Portable LPG Cylinder Use:
- DO NOT attempt to connect to a gas cylinder before the BBQ is secured properly into its cart. Follow all previous instructions for safe assembly of the cart.
- Before connecting the cylinder, inspect the hose, fittings, and rubber seals. If there is any sign of splitting or wear, have the hose replaced.
- Check that all the control knobs (including side burner) are in the OFF position before any attempt is made to connect the regulator to the gas bottle.
- Double check that the gas bottle valve is securely in the OFF position before attempting to connect the regulator to the gas bottle.
- Hang the LPG (Propane) cylinder onto the hook on the left outside of the cart.
- Take the hose that came with the barbeque, check that it has an intact rubber seal on the regulator end of it and connect this end of the hose to the gas cylinder. You won't need a spanner here. Just turn the fitting in an anticlockwise direction into the cylinder outlet, and hand tighten as much as you can. This should seal it sufficiently.
- The regulator as supplied should be firmly tightened but care must be taken not to over-tighten the connections. The regulator as supplied is the correct regulator for this item.
- Check that no part of the gas hose is in contact with the BBQ firebox which will be very hot during operation.
- Ensure the gas cylinder remains upright at all times.
- Should there be any concern in making the correct regulator connection please contact after sales support help line mentioned at the back of this manual.
LEAK TESTING:
CONDUCT A LEAK TEST BEFORE FIRST USE.
CONDUCT A LEAK TEST EVERYTIME A GAS CYLINDER IS CONNECTED.
CONDUCT A LEAK TEST AT LEAST ANNUALLY.
NEVER USE AN OPEN FLAME TO TEST FOR LEAKS.
ONLY PERFORM LEAK TESTS IN A WELL-VENTILATED AREA.

(1) Confirm all control knobs are in the OFF position. Confirm the gas control valve on the gas cylinder vale is OFF.
(2) Open the gas control valve on the gas cylinder. Check for leaks by brushing or spraying a solution of 1/2 water and 1/2 liquid detergent or soap over all the gas system joints, including the gas cylinder valve connections, hose connections, and regulator connections.
(3) If bubbles form over any of the joints, then there is a leak. Turn OFF the gas supply at the gas cylinder. Retighten all joints. Repeat test. If bubbles form again, do not use the barbecue - contact your store of purchase for assistance. Always rinse the mixed water and detergent solution from all joints and connections after leak testing to help avoid corrosion.
LEAK TESTING (continued):
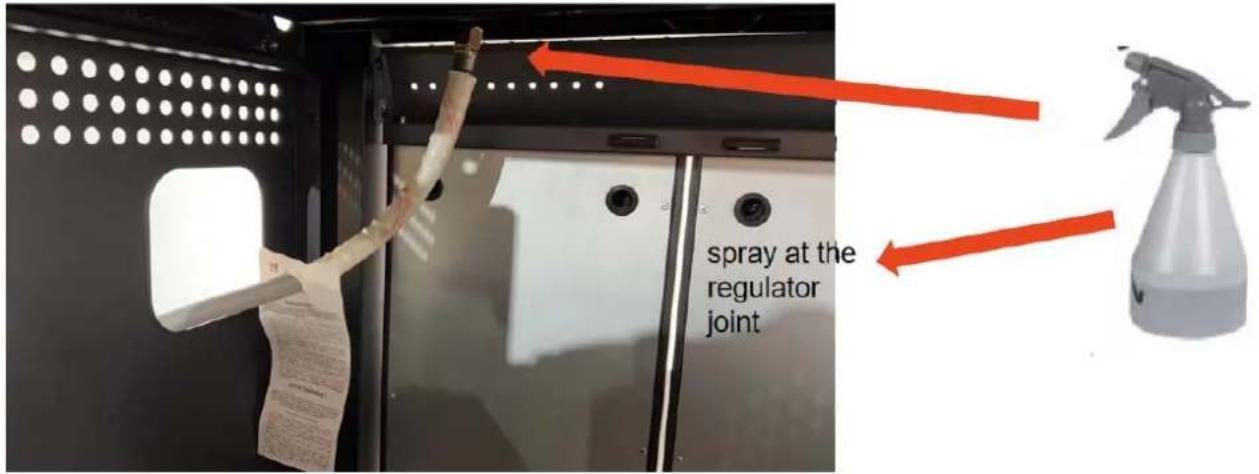
You can also check for leaks anytime using a gas safety gauge, available at your Barbeques Galore store. This provides an easier and more convenient way to check for leaks
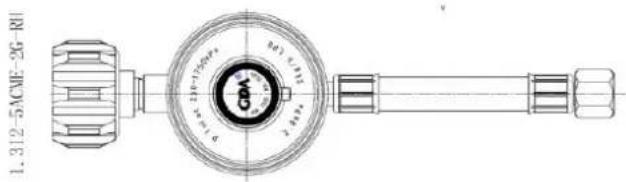
- Check your hose and regulator closely, at least annually, for any signs of damage, cracking or splits due to aging especially if the barbecue is stored outdoors. It is strongly recommended that the hose and regulator be replaced at least every 5 years to avoid failure due to aging.
(1) Always open the hood of the barbecue before lighting the main burners. Always open the lid of the side burner when lighting or using the side burner.
(2) Ensure all gas controls on the barbecue are turned to the OFF position and then slowly open the cylinder valve (anti-clockwise) about 1 to 1 1/2 turns. If the valve jams, try closing the valve first. It may have accidentally been left open previously. NEVER try to open the valve with a wrench.
(3) To ignite any main burner or the side burner, push IN and turn the desired control knob anticlockwise to HI.
(4) If ignition does not occur in 5 seconds, turn that burner control knob clockwise to OFF, wait 5 minutes, and repeat the lighting procedure.
(5) Repeat item 4 to lighting any additional burners.
Special note: "Backfire" is a situation where the flame burns inside the burner, towards the front. It can be recognised by a sharp roaring sound coming from the burner. It is not dangerous unless it is allowed to persist. If this occurs, simply turn the burner control clockwise to OFF, wait a few seconds, then relight.
If required, the barbecue burner can be lit manually. Important - to avoid possible burn injury, use a long match, or an extended reach gas lighter only-do not use a normal match or cigarette lighter.
LIGHTING THE BURNERS (continued):
To light any burner manually, while holding a lit match or lighter alongside the desired burner, push IN and turn the desired control knob anticlockwise to HI. Adjacent burners should then cross-light as their control knobs are in sequence pushed IN and turned anticlockwise to HI.
Should you have difficulty in lighting your barbecue while following these instructions, please turn OFF all burners and the gas supply, and contact your store of purchase for advice.
Once alight, the burner control knob can be adjusted anywhere between HI and LOW to adjust the heat level.
On HI, the burner flame should be 12-20mm long with a minimum of yellow tipping.
After lighting, observe the burner flame and make sure all burner ports are lit.
If a burner flame goes out during operation, immediately turn the gas cylinder valve clockwise to OFF. Turn all control knobs clockwise to OFF. Open the BBQ hood and side burner lid to let the gas clear for about 5 minutes before re-lighting.
SHUTTING DOWN:
Normally, when you've finished cooking, it's a good idea to leave the burner controls on HI with the hood open for a maximum of 5 minutes to burn off excess grease from the flame tamer, the burner, and other surfaces.
To shut the barbeque down, it is best to turn OFF at the cylinder first and allow all the gas left in the hose to burn off. This will only take a couple of seconds. Then turn OFF all burner's controls. If your barbeque is connected to piped gas, you can simply turn the burner controls OFF. It is okay to leave the cylinder connected to your barbeque while it's not in use, though you must ensure all barbeque and cylinder valves are OFF.
PREPARING THE COOKING SURFACES:
Before cooking on your barbeque for the first time, it is important that you clean off any residues which may be left over from manufacturing, storage and transport.
Before first use, clean the cooking surface with warm soapy water and a sponge. Thoroughly rinse with fresh water.
Dry the cooking surface, then lightly coat it with Bar-B-Chef Non Stick Barbeque Cooking Spray.
PRE HEATING THE BBQ:
After the main burner(s) are lit, allow the burners run on HI for 3-5 minutes to pre-heat before starting to cook. This should be done before each cooking session. The hood should be closed when pre-heating. With the hood closed, the burners need to be turned to LOW after 5 minutes to avoid overheating the BBQ.
CONTROLLING THE HEAT:
There are a number of ways to control the heat to achieve different cooking results.
It is important not to overheat the BBQ as that could be dangerous and will not give you good cooking results.
- The burner control knobs can be individually adjusted anywhere between HI and LOW to adjust the heat level and heat distribution.
- Individual burners can be turned OFF to adjust the heat level and heat distribution.
- Food to be cooked on the grills and optional hotplate can be positioned directly above burners at different settings to achieve different results.
• The hood can be open or closed during cooking which significantly affects cooking temperatures. - Food can be positioned to avoid direct heat on the warming rack, in optional roasting racks and roasting pans.
- Note that when burners are on under the optional hotplate, that the excess convection heat from those burners will spill out under the adjacent cooking grill(s), adding heat to those grills close to the hotplate.
DIRECT GRILL COOKING:
Rising heat from the burners will heat up the flame tamers underneath the grills as well as the grills themselves and any food on the grills. The natural food juices produced during cooking fall onto the hot flame tamer and vaporise. The subsequent rising smoke adds flavour to the food, imparting that unique barbecue taste. If the food fat content is too high, and the flame tamer is too hot, those falling juices can ignite causing flare-ups. A small amount of flare-up adds flame flavour to the food. Too much flare-up can become self-sustaining and badly burn the food.
TO HELP AVOID EXCESSIVE FLARE-UPS & FAT FIRES:
- Trim excess fat from the meat.
- Turning burner controls down before flare-up occurs will usually prevent it happening in the first place.
- Moving the meat away from the flare up will also reduce the problem.
- Some very fatty foods can only be cooked on the optional hotplate or indirectly with the hood closed (refer below). NEVER use more than one third of the main cooking area as hotplate.
• Use tongs instead of a fork when turning meat and poultry. A fork pierces the flesh and causes the juice to seep out. - Resist the temptation to keep turning meat over. Juices tend to rise to the top of a piece of meat and then settle. Each time you turn the meat over, the juices are lost. It's better to quickly sear the meat on each side (about half a minute) then with the burner controls down near low, leave the meat cook on one side at a time, turning once only before serving. An alternate approach that also works is to turn the meat very frequently, say every 30 seconds (but that's a lot of work).
TO HELP AVOID EXCESSIVE FLARE-UPS & FAT FIRES (continued):
- If you like salt with your food, try adding it at the end instead of before or during cooking. Salt draws the natural moisture out of the food and dries it out.
- Baste food with light marinade or canola oil a couple of times while cooking, though watch out for excessive flare-up if too much oil is used.
- Using a roasting hood as outlined later in these instructions is an excellent way to preserve moisture and succulence and takes the hard work out of barbeque cooking.
- Empty and clean the grease channelling tray and grease cup after each cooking session. If the BBQ is to be used for large gatherings, it may be necessary to turn off and cool the BBQ every two hours to clean the grease channelling tray and grease cup. The time between cleaning may need to be reduced if very fatty foods products are being cooked. Failure to do this may result in a fat fire, which may cause injury and could seriously damage the appliance.
IF A FAT FIRE OCCURS:
- If safe to do so: turn OFF the gas supply at the gas cylinder valve.
- If safe to do so, turn all control knobs clockwise to the OFF position.
- Keep everyone at a safe distance and wait until the fire has burnt out.
- NEVER try and extinguish a fat fire with water. If a fire extinguisher is used it must only be a powder type suitable for oil fires.
• DO NOT attempt to remove the grease channelling tray or the grease cup. - If the fire does not seem to be reducing or appears to be worsening or is potentially endangering personnel or property, then contact your local Fire Brigade for assistance.
COVERED COOKING:
Using the roasting hood traps heat, moisture and flavour that is normally lost on an open top barbeque. With the hood closed and the barbeque pre-heated, less heat is lost, so it is important not to exceed 250^ C on the hood thermometer. Turn the burners to LOW and/or some burners to OFF as required to stay at safe temperatures.
For covered cooking, there are two basic ways to cook: (A) Direct Cooking and (B) Indirect Cooking
(A) COVERED COOKING DIRECT METHOD:
This is when you place the food directly over the lit burners, either on the grill or the optional hotplate. This method is great for frying, searing, and grilling, especially with thinner cuts and foods that require shorter cooking time. Cooking takes less time than with the hood open, and the results are more tender and juicier.
Preheat the barbeque with all burners on HI and the hood closed for 5 minutes. Note that the temperature at the cooking surface may be higher than the temperature measured at the hood thermometer.
Importantly, once the barbeque is pre-heated and the hood is closed, heat is trapped around the food, so the burners may only need to be on LOW and in many cases, some of the burners OFF. Heat from the lit burners will circulate all through the hood cooking quite evenly.
(A) COVERED COOKING DIRECT METHOD (continued):
Fatty foods like sausages can be cooked completely above the OFF burners or on the warming rack, retaining juiciness and flavour without risk of flare-up that results only in burning. Quite close attention needs to be paid to the food, and the burners frequently reset to LOW or OFF as required to prevent overheating.
Don't be afraid to open the hood often to check progress. You are in full control of the temperature by turning burners higher, lower, or OFF as required. The gas burners will respond instantly and powerfully to your control.
Most importantly, use the hood thermometer as a warning guide that the barbeque is too hot. For grilling most foods, aim to keep the thermometer below 200^ C to avoid burning. Never let the temperature exceed 250^ C on the hood thermometer or the barbeque will dangerously overheat and burn your food.
A separate probe thermometer is available as an accessory from all Barbeques Galore stores.
This takes the guesswork out of knowing when your food is cooked.
(B) COVERED COOKING INDIRECT METHOD:
This is when you place the food only above burners that are OFF. The other burners are adjusted in combinations of HI, LOW and OFF to maintain constant lower roasting temperatures.
This method is ideal for thicker cuts of mean, legs of lamb, pork, shoulders of beef, whole chickens, and whole finish. Moist, hot air rises from the lit burners and circulates around the food, trapping juices and flavour. Even cakes and bread can be baked in your barbeque this way. Cooking low and slow lets the food cook completely through without burning on the outside yet remaining juicy and tender on the inside.
Best results are achieved by placing your roast in a rack and that rack in a drip pan (these optional accessories are available from your local Barbeques Galore store. The roast is elevated to allow heat to circulate all the way around, and water, wine, juices, herbs can be added to the drip pan to help flavour the roast and make a baste or gravy.
Preheat the barbeque with all burners on HI and the hood closed for 3 minutes.
Importantly, once the barbeque is pre-heated and the hood is closed, heat is trapped around the food, so the burners
that are on may only need to be on LOW and in some cases, more of the burners turned OFF. Heat from the lit burners will circulate all through the hood cooking quite evenly.
On a 4-burner barbeque, 2 burners under the grills on LOW and 2 burners OFF is usually the best setting for roasting. You can position the optional hotplate on one side of the barbeque, or in the middle. Ensure that each burner under a grill has flame tamer above it.
SHUTTING DOWN:
Great chefs will tell you that most meats need to "rest" away from the heat of the BBQ before slicing for several minutes to allow the moisture pushed to the surface to redistribute. If you don't rest the meat, moisture that has pooled near the surface will run out and the rest of the roast will be quite dry.
Before shutting down, use the few minutes while resting the meat away from the BBQ to open the hood, set all burners to HI for 3 or 5 minutes to burn off food residue. After 5 minutes, turn the burners OFF. While the cooking surfaces are still hot, take a long-handled brush or scraper and remove remaining oil and food residue. You should use an oven mitt to avoid burns.
Five minutes now will save 30 minutes next barbeque.
When you have finished using your barbecue, turn OFF the gas supply at the gas cylinder and then when the burners go out, turn OFF all the gas control knobs.
Wait until the barbecue is sufficiently cool before closing the hood or lid.
Silk screen pattern function:
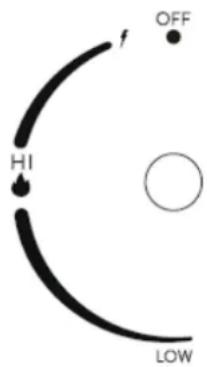
INTERNAL MEAT TEMPERATURES
| Type of Meat | Meat Probe Temperature | ||
| Rare | Medium | Well Done | |
| Beef | 140°F/60°C | 150°F/66°C | 170°F/77°C |
| Lamb | 140°F/60°C | 150°F/65°C | 165°F/75°C |
| Veal | Not Advised | 155°F/70°C | 165°F/75°C |
| Pork | Not Advised | 150°F/65°C | 160°F/70°C |
| Poultry | Not Advised | 170-175°F/75-80°C | 175°F/80°C |
To obtain correct temperature use an instant-read mean thermometer in the thickest part of the flesh, careful not to touch any bone.
COOKING TIMES
| POULTRY | |||
| Cut of Meat | Weight or Thickness | BBQ Method | Approx. Cook Time |
| Chicken (whole) | 2 kg | Indirect | 70-80 min |
| Chicken (halved or quartered) | 2 kg total | Indirect | 55-65 min |
| Chicken (breasts, boneless) | 150g | Direct | 12-15 min |
| Chicken (breasts, boneless) | 150g | Indirect | 23-25 min |
| Wings | 120g | Direct | 23-30 min |
| Wings | 120g | Indirect | 35 - 40 min |
| Cut Up Legs and Wings | 2 kg | Direct | 10 min |
| Cut Up Legs and Wings | 2 kg | Indirect | 40 min |
| Boneless Cubes (For Kebabs) | 2.5 cm | Direct | 12-15 min total |
| Turkey (Whole) | 4.5 kg | Indirect | 2-3 hours |
| BEEF | |||
| Cut of Meat | Weight or Thickness | BBQ Method | Approx. Cook Time |
| Roasts | 2 kg | Indirect | 50 min per kg (rare) |
| Steaks (T-bone, New York, Porterhouse, Round, Sirloin) | 2.5 cm | Direct | 5-6 min per side (rare) |
| Rump Steak | 3.5 cm | Direct | 5-7 min per side (med rare) |
| Minute Steaks | 0.5 cm | Direct | 1.5-2 min per side (rare) |
| Ground Beef Patties | 2.5 cm | Direct | 4-5 min per side (rare) |
| Ground Beef Patties | 2.5 cm | Direct | 5-6 min per side (med. Rare) Ground |
| Beef Patties | 2.5 cm | Direct | 6-7 min per side (well done) |
| Thermometer Temperature: Rare = 60°C, Medium = 66°C, Well = 77°C | |||
| SEAFOOD | |||
| Cut of Meat | Weight or Thickness | BBQ Method | Approx. Cook Time |
| Whole Fish (with or Without head and tail) | 2 kg | Indirect | 30-35 min |
| Steaks & Fillets | 2 cm | Direct | 3-4 min per side |
| Prawns | Medium sized | Direct | 1.5-2 min per side |
| Lobster Tails | 300 g | Direct | 9-13 min |
| Fish is done when flakes easily when prodded with a fork or knife in the thickest part. Frozen fillets should not be thawed before cooking. Cooking times will be approximately double that of fresh fish. | |||
GENERAL CARE AND MAINTENANCE:
- Regularly clean your BBQ between uses and especially after extended periods of storage. Ensure the BBQ and its components are sufficiently cool before cleaning. Do not leave the BBQ exposed to outside weather conditions or stored in damp, moist areas.
- Never douse the BBQ with water when its surfaces are hot.
- Never handle hot parts with unprotected hands.
- In order to extend the life and maintain the condition of your BBQ, we strongly recommend that the unit be covered when left outside for any length of time, especially during the winter months. Its good practice to fit a couple of sponges between the cover and the BBQ to promote ventilation and to help avoid condensation build-up under the cover.
- Even when your BBQ is covered, it should be inspected on a regular basis as damp or condensation can form which may result in damage to the BBQ. It may be necessary to dry the BBQ and the inside of the cover. It is possible for mould to grow on any fat remaining on parts of the BBQ. This should be cleaned off smooth surfaces with hot soapy water.
- Any rust that is found that does not come into contact with the food should be treated with a rust inhibitor and painted with hi temperature paint or a heat resistant paint. A chrome cleaner may be used on plated parts if required. To prevent surface rust, wipe plated parts with cooking oil after rinsing and drying.
COOKING SURFACES CARE & MAINTENANCE:
- When the barbecue has cooled, clean with hot soapy water. To remove any food residue, use a mild cream cleaner on a non-abrasive pad. Do not use scouring pads or powders as they can permanently damage the finish. Rinse well and dry thoroughly. Due to the weight of the cooking surfaces, we do not recommend cleaning in a dishwasher.
- It is quite normal for carbonised food residue to be present on the cooking surface. If rust appears after use, clean with a soft brass wire brush, re-oil and cure. Be careful not to damage the cooking surface.
BURNER CARE & MAINTENANCE:
- Provided that they are operating correctly, in normal usage, burning off the residue after cooking will keep the burners clean.
- The burners should be removed and cleaned annually, or whenever heavy build-up is found, to ensure that there are no signs of blockage (debris, insects, webs) in either the burner portholes or the primary air inlet of the burners. Use a pipe cleaner to clear any obstructions.
- When refitting the burners, be careful to check that the neck of the burner fits over the valve outlet. Refit the spring clips that lock the burners in place.
- It is quite normal for some surface rust to be present on the burners. If rust appears between uses or in storage, clean with a soft brass wire brush.
- Burners do deteriorate with use - this is normal. Periodic replacement may be needed.
FLAME TAMER CARE & MAINTENANCE:
- Remove any food residue from the flame tamer surface with a plastic or wooden scraper or brass wire brush.
- Do not use a steel scraper or wire brush. Clean with hot soapy water and rinse well.
- Flame tamers will deteriorate with use - this is normal. Periodic replacement may be needed.
DRIP TRAT CARE & MAINTENANCE:
• After every use, empty and clean the drip tray of any fat or food particles, using a plastic or wooden scraper if necessary.
- Failure to keep it clean, or excessive grease build up in use, can result in a fat fire. This can be hazardous and severely damage the barbecue. This is not a fault in the BBQ and is therefore not covered by the terms of the warranty. As required, the tray can be washed in hot soapy water, rinsed, dried, and replaced in the BBQ.
BBQ FIREBOX CARE & MAINTENANCE:
- Regularly remove excess grease or fat from the BBQ firebox using a cloth wrung out in hot soapy water and dry thoroughly. Excess fat and food debris can be removed from inside the BBQ firebox using a soft plastic or wooden scraper. It is not necessary to remove all the grease from the body. If you need to clean fully, use hot soapy water and a cloth, or nylon-bristled brush only. Do not use abrasives. Remove cooking surfaces and burners as detailed above before full cleaning. Do not immerse the gas controls or manifold in water. Check burner operation after carefully refitting back into body.
- A stainless-steel cleaner may be used on stainless steel parts if required.
- Whenever a BBQ is being assembled for the first time or its burners are being refitted after cleaning, make sure each gas valve tip fits into the burner venturi tube completely during the assembly or re-assembly process.
BARBEQUE HOOD CARE & MAINTENANCE:
- Use a non-abrasive cloth or pad and clean with hot, soapy water. Do not use scouring pads or powders as they can permanently damage the finish.
CART CARE & MAINTENANCE:
- Wipe with a cloth wrung out in hot soapy water and dry.
- All screws and bolts, etc. should be checked and tightened on a regular basis.
STORAGE
- Ensure the BBQ is properly cooled before covering or storing. Store your BBQ in a cool dry place.
- Cooking grills should be lightly coated with cooking oil.
- Cover the burners with aluminium foil in order to prevent insects or other debris from obstructing the burner holes. Position the foil so it is obvious that it needs to be removed before next use.
- If the BBQ is to be stored indoors, the gas cylinder must be disconnected and left outside. The gas cylinder should always be stored outside, in a dry, well-ventilated area, away from any sources of heat or ignition. Do not let children tamper with the cylinder. We strongly recommend using a gas safety gauge on your gas cylinder at all times.
- When first using the BBQ after extended periods of storage follow the cleaning procedures.
TROUBLESHOOTING
| Problem | Possible Solutions |
| Low heat generated with Knob in "HI" position | 1. Make certain the problem is isolated to only one burner. If it appears so, clean the orifice and burner, clearing ports of any obstruction.2. Check for a bent or kinked fuel hose.3. Make sure the air shutter on the burner venturi is properly adjusted.4. Check for proper gas supply and pressure.5. Pre-heat the grill for a full 15 minutes.6. Check that the LPG cylinder is not empty. |
| Burner will not light | 1. Push IN and rotate the control knob and check for ignition spark.If there is a spark, check to make sure gas is supplied to the burner.2. Purge the line of any trapped air.3. Check to see if you can match-light the burner.4. Check to see that the other burners operate.5. Visually check the electrode and wire while pushing the ignitor button. If a spark occurs anywhere but the ignitor tip, the ignitor must be replaced or adjusted. |
| Burner flame is yellow and gas odour can be smelled | 1. Check the burner inlet for obstruction, especially for spider webs and other insects. Probe with a cotton bud as the webs can be very hard to see.2. Check the air shutter on the burner venturi for proper adjustment.3. Check for the source of gas leaks by performing a leak test,following the safety procedures found earlier in these instructions. |
| Excessive flare-ups | 1. Keep hood up when grilling. Or close hood and cook indirectly.2. Keep controls on low.3. Turn one or more burners OFF if necessary.4. Pre-heat grill for 10-15 minutes, this will burn off old drippings.5. Use meats containing less fat, or trim excess fat before cooking.6. Always grill chicken on low, meat side down for 20 minutes and turn to skin side for another 20 minutes.7. If flare up continues, move meats to warming rack until flare-ups settle down.8. Never spray water on gas flames - it will damage your grill. |
| Burner blows out | 1. Check for any burner defects.2. Check for proper burner installation.3. Make certain the fuel mixture is not too lean by closing the venturi gap using the adjustable air shutter on the burners.4. Make sure the gas supply is sufficient.5. See if the LPG cylinder is empty.6. Move / turn the BBQ away from high wind exposure. |
TECHNICAL DATA:
| Model No.: | ATBBQCG4 (BW-PC141111-1A) | |
| Test Point Pressure: | 2.75kPa | 1.00kPa |
| Total Nominal Gas Consumption: | 75.7 MJ/h | 75.7 MJ/h |
| Gas Type: | ULPG | NG |
| Nominal gas consumption: | Main Burners: 12.5MJ/h x 4Side Burner: 12.5MJ/hBack Burner: 13.2MJ/h | Main Burners: 12.5MJ/h x 4Side Burner: 12.5MJ/hBack Burner: 13.2MJ/h |
| Injector Size: | Main Burners:∅1.00mmSide Burner: ∅1.00mmBack Burner: ∅1.02mm | Main Burners:∅1.64mmSide Burner: ∅1.64mmBack Burner: ∅1.7mm |
| AGA Approval No.: AGA 9074 | ||
| -Serial Number and Date Code:221010XXX-Manufacturer: Zhongshan Guanjian Metal Products Co. Ltd-For Use outdoors and in well ventilation areas.-Do not ignite burners with the lid closed.-Do not close the lid with the burner operating.-Do not disconnect hose from the appliance.-Close the valve of the gas cylinder or the regulator after use.-Warning: Accessible parts may be very hot, keep young children away.-Conversion of natural gas only to be done by authorized person.-The use of this appliance in enclosed areas can be dangerous and is prohibited.-For storage and cylinder exchange, disconnect the cylinder only.-Always maintain 1000mm minimum clearance to the ceiling.-Always maintain 75cm minimum clearance to combustible materials at the rear and sides of the BBQ.-Do not installed in or connect to the consumer piping or gas supply system of a boat or caravan. |  | |
The gas inlet on this BBQ is 3/8" SAE thread (5/8" UNF). It is positioned at the front of the BBQ under the left side near the front left leg as shown in the view from the rear of the BBQ below. It has a factory fitted semi flexible corrugated stainless-steel tube to a plastic hose and regulator.
Worldwide Appliances Pty Limited
A.B.N. 45868077422
Distributed by Eurolinx pty Ltd
Office:
48-50 Moore Street, Leichhardt N.S.W 2040 Post:
Locked Bag 3000, Annandale, N.S.W 2038
P: 1300 694 583
WARRANTY REGISTRATION
Your ongoing satisfaction with your artusi product is important to us. We ask that you complete the enclosed Warranty Registration Card and return it to us so that we have a record of the artusi product purchased by you.
PRIVACY
Worldwide Appliances respects your privacy and is committed to handling your personal information in accordance with the National Privacy Principles and the Privacy Act 1988 (Cth). A copy of the Worldwide Appliances Privacy Policy is available at www.artusi.com.au. Worldwide Appliances will not disclose any personal information set out in the Warranty Registration Card (“Personal Information”) without your consent unless required by:
-
law;
-
any Worldwide Appliances related company;
-
any service provider which provide services to artusi or assist artusi in providing services (including repair and warranty services) to customers. Our purpose in collecting the Personal Information is
to keep a record of the artusi product purchased by you, in order to provide a better warranty service to you in the unlikely event that there is a problem with your artusi product. Worldwide Appliances may contact you at any one or more of the address, email address or telephone numbers set out in the Warranty Registration Card. Please contact artusi on 1300 694 583 should you not wish to be contacted by Worldwide Appliances.
WARRANTY
1. Warranty
Worldwide Appliances warrants that each artusi product will remain, for a period of either 12 months or 24 months of warranty. All Warranties are valid from the original date of purchase, And warranty claims must be accompanied by the proof of purchase.
24 months warranty products:
All Built-in Appliances – Limited to Ovens, Gas, Induction and Electric Cooktops, and All Rangehoods. Freestanding Cookers - Gas and Electric Models (900mm Width).
Dishwashers - Freestanding, Fully Integrated, Semi Integrated and built-in. All Wine coolers. All Dryers. Freestanding Cookers - Gas and Electric Models in 50cm, 54cm and 60cm Widths
Portable Appliances* – Benchtop Models and Portable Gas Models
2. What is not Covered by the Warranty.
The Warranty does not apply if an artusi product is defective by a factor other than a defect arising in the manufacture of the artusi product, including but not limited to:
(a) damage through misuse (including failure to maintain, service or use with proper care), neglect, accident or ordinary wear and tear (including deterioration of parts and accessories and glass breakage);
(b) use for purpose for which the artusi product was not sold or designed;
(c) use or installation which is not in accordance with any specified instructions for use or installation;
(d) use or operation after a defect has occurred or been discovered;
(e) damage through freight, transportation or handling in transit (other than when Worldwide Appliances is responsible);
(f) damage through exposure to chemicals, dusts, residues, excessive voltage, heat, atmospheric conditions or other forces or environmental factors outside the control or Worldwide Appliances;
(g) repair, modification or tampering by the purchaser or any person other than Worldwide Appliances, an employee of Worldwide Appliances or an authorised artusi service contractor ^* ;
(h) use of parts, components or accessories which have not been supplied or specifically approved by artusi.
(i) damage to surface coatings caused by cleaning or maintenance using products not recommended in the artusi product handbook provided to the purchaser upon purchase of the artusi product;
(j) damage to the base of an electric oven due to items having been placed on the base of the oven cavity or covering the base, such as aluminium foil (this impedes the transfer of heat from the element to the oven cavity and can result in irreparable damage); or
(k) damages, dents or other cosmetic imperfections not affecting the performance of the artusi in respect of an artusi product purchased as a “factory second” or from display
The Warranty does not extend to light globes used in artusi products.
3. Domestic Use
Each artusi product is made for domestic use. This Warranty may not extend to artusi products used for commercial purposes.
4. Time for Claim under the Warranty
You must make any claim under this Warranty within twenty eight (28) days after the occurrence of an event which gives rise to a claim pursuant to the Warranty, by booking a service call on the telephone number below.
5. Proof of Purchase
Customers must retain proof of purchase in order to be eligible to make a warranty claim in respect of an artusi product.
6. Claiming under the Warranty
Customers will bear the cost of claiming under this Warranty unless Worldwide Appliances determines the expenses are reasonable, in which case the customer must claim those expenses by providing written evidence of each expense to Worldwide Appliances at the address on the Warranty Registration Card.
7. Statutory Rights
(a) These terms and conditions do not affect your statutory rights.
(b) The limitations on the Warranty set out in this document do not exclude or limit the application of the consumer guarantees set out in the Act or any other equivalent or corresponding legislation in the relevant jurisdiction where to do so would:
(i) contravene the law of the relevant jurisdiction; or
(ii) cause any part of the Warranty to be void.
(c) Worldwide Appliances excludes indirect or consequential loss of any kind (including, without limitation, loss of use of the artusi product) and (other than expressly provided for in these terms and conditions) subject to all terms, conditions and warranties implied by custom, the general law, the Act or other statute.
(d) The liability of Worldwide Appliances to you
for a breach of any express or non-excludable implied term, condition or warranty is limited at the option of Worldwide Appliances to:
(i) replacing or repairing the defective part of the artusi product;
(ii) paying the cost of replacing or repairing the defective part of the artusi product;
(iii) replacing the artusi product; or
(iv) paying the cost of replacing the artusi product.
(e) Our goods come with guarantees that cannot be excluded under the Australian Consumer Law. You are entitled to a replacement or refund for a major failure and for compensation for any other reasonably foreseeable loss or damage.
You are also entitled to have the goods repaired or replaced if the goods fail to be of acceptable quality and the failure does not amount to a major failure.
8. Defects
Any part of an artusi product deemed to be defective and replaced by Worldwide Appliances is the property of Worldwide Appliances.
Worldwide Appliances reserves the right to inspect and test artusi products in order to determine the extent of any defect and the validity of a claim under the Warranty.
All warranty service calls must be booked via the customer care department. The team can be contacted on 1 300 85 64 11 option 1 or customercare@eurolinx.com.au
01082016
DON'T FORGET TO REGISTER YOUR WARRANTY ONLINE NOW AT www.eurolinx.support

TO REGISTER YOUR WARRANTY

ARTUSI
THE ART OF LIVING
DISCLAIMER
Worldwide Appliances PTY LTD, trading as ARTUSI, is continually seeking ways to improve the design specifications, aesthetics and production techniques of its products. As a result alterations to our products and designs take place continually. Whilst every effort is made to produce information and literature that is up to date, this brochure should not be regarded as an infallible guide to the current specifications, nor does it constitute an offer for the sale of any particular product. Product dimensions indicated in our literature is indicative only. Actual product only should be used to define dimension cutouts. Distributors, and retailers are not agents of ARTUSI and are not authorised to bind ARTUSI by any express or implied undertaking or representation.
FOLLOW US ON:

/artusi_kitchen_laundry_outdoor
artusi.com.au
Australia National Telephone Number 1300 MYILVE (694 583) New Zealand Telephone Number 0508 458 369
ILVE showrooms are open daily from 9am-5pm and Saturdays 10am-4pm
NSW & ACT (Head Office)
48-50 Moore Street
Leichhardt
F 02 8569 4699
Victoria
2r/131 Church Street
Hawthorn
QLD
1/42 Cavendish Road
Coorparoo
WA & NT
Unit 10/55 Howe Street
Osborne Park
New Zealand
PO Box 11.160
Sockburn Christchurch
- Assembly and Operating Instructions
- BURNER BBQ
- A WARNINGS:
- FOR YOUR SAFETY:
- LPG SAFETY:
- IF YOU SMELL GAS:
- WHERE TO PUT YOUR BARBEQUE:
- PUTTING YOUR GAS BARBEQUE IN AN ENCLOSURE:
- EXAMPLES 2 & 3
- PUTTING YOUR GAS BARBEQUE IN AN ENCLOSURE (continued):
- SEE EXAMPLES 4 & 5
- IMPORTANT ISSUES FOR INSTALLATION:
- CHECKING THE GAS TYPE:
- There are two approaches to installation: LPG, Also Known as Propane:
- PARTS DETAILS:
- ASSEMBLY INSTRUCTIONS
- STEP FOUR:
- OPERATING INSTRUCTIONS
- VERY IMPORTANTLY: BEFORE USE, BE SURE TO TEST GAS SYSTEM FOR GAS LEAKS, AS DESCRIBED BELOW.
- For Portable LPG Cylinder Use:
- LEAK TESTING:
- LEAK TESTING (continued):
- LIGHTING THE BURNERS (continued):
- SHUTTING DOWN:
- PREPARING THE COOKING SURFACES:
- PRE HEATING THE BBQ:
- CONTROLLING THE HEAT:
- DIRECT GRILL COOKING:
- TO HELP AVOID EXCESSIVE FLARE-UPS & FAT FIRES:
- TO HELP AVOID EXCESSIVE FLARE-UPS & FAT FIRES (continued):
- IF A FAT FIRE OCCURS:
- COVERED COOKING:
- COVERED COOKING DIRECT METHOD:
- COVERED COOKING DIRECT METHOD (continued):
- COVERED COOKING INDIRECT METHOD:
- GENERAL CARE AND MAINTENANCE:
- COOKING SURFACES CARE & MAINTENANCE:
- BURNER CARE & MAINTENANCE:
- FLAME TAMER CARE & MAINTENANCE:
- DRIP TRAT CARE & MAINTENANCE:
- BBQ FIREBOX CARE & MAINTENANCE:
- BARBEQUE HOOD CARE & MAINTENANCE:
- CART CARE & MAINTENANCE:
- STORAGE
- WARRANTY REGISTRATION
- PRIVACY
- WARRANTY
- Warranty
- months warranty products:
- What is not Covered by the Warranty.
- Domestic Use
- Time for Claim under the Warranty
- Proof of Purchase
- Claiming under the Warranty
- Statutory Rights
- Defects
- DON'T FORGET TO REGISTER YOUR WARRANTY ONLINE NOW AT www.eurolinx.support
- ARTUSI
- THE ART OF LIVING
- DISCLAIMER
Brand : Artusi
Model : ATBBQCG4
Category : Barbecue