
HDV5200-1 - Camcorder Hamilton Buhl - Free user manual and instructions
Find the device manual for free HDV5200-1 Hamilton Buhl in PDF.


| Product Type | Camcorder |
| Brand | Hamilton Buhl |
| Model | HDV5200-1 |
| Dimensions | 4.5 x 2.5 x 2.0 inches |
| Weight | 0.5 lbs (with battery) |
| Power Source | Rechargeable lithium-ion battery |
| Battery Life | Up to 2 hours continuous recording |
| Recording Media | SD/SDHC card (up to 32GB) |
| Video Resolution | 1080p Full HD (1920x1080) |
| Photo Resolution | 12 megapixels |
| Optical Zoom | 5x |
| Digital Zoom | 10x |
| Display | 2.7-inch LCD |
| Connectivity | USB 2.0, HDMI, AV output |
| Microphone | Built-in stereo |
| Image Stabilization | Electronic |
| Maintenance | Clean lens with soft cloth; keep dry |
| Safety | Avoid direct sunlight; use only specified charger |
| Spare Parts | Battery, charger, USB cable available from Hamilton Buhl |
| General Info | Compatible with Windows/Mac; includes software for editing |
Frequently Asked Questions - HDV5200-1 Hamilton Buhl
User questions about HDV5200-1 Hamilton Buhl
0 question about this device. Answer the ones you know or ask your own.
Ask a new question about this device
Download the instructions for your Camcorder in PDF format for free! Find your manual HDV5200-1 - Hamilton Buhl and take your electronic device back in hand. On this page are published all the documents necessary for the use of your device. HDV5200-1 by Hamilton Buhl.
USER MANUAL HDV5200-1 Hamilton Buhl
Never Ending Learning Innovation
Instruction Manual
HDV5200-1

We appreciate your purchase of HD5200-1 (HD Digital Video Camera). Prior to usage, please make sure to review this instruction manual carefully and store the manual for future references.
Safety Information
Before using the DVC (Digital Video Camera), please ensure that you have read and understood the following safety precautions.
- Don’t try to open the crust of the DVC (Digital Video Camera) or change the DVC (Digital Video Camera) in any way. Only authorized maintenance personnel are allowed to maintain the DVC (Digital Video Camera).
- Keep the DVC (Digital Video Camera) far away from water and other liquids when in use. Don’t use the DVC (Digital Video Camera) with wet hands. Never use the DVC (Digital Video Camera) in rain or snow. Moisture will easily cause electric shock.
- Use the recommended power supply and accessories only. It will cause overheat, deformation, fire and electric shock if non-recommended power supply is used.
1. Components of the Video Camera
- Display Menu/On/Off Button
- LED Light On/Off Button
- Mode Selection (Movie/Picture/Playback) Button
- Power On/Off Button
- Menu Button
- Recording On/Off Button
- Zoom-In / Up Arrow Button ▲
- OK Button
- Function Indicating Light
- Mini HDMI Interface
- SD Card Slot
- Shutter Button
- USB Interface
- AV Interface
- TFT-LCD Screen
- Built-In Speaker
- Left Arrow Button
- Zoom-Out / Down Arrow Button
- Right Arrow / Self-Timer Button
- Wrist Strap Hole
- Tripod Mounting Hole
- Battery Compartment Cover


natural_image
Diagram of a device rear panel with labeled buttons and indicators (no text or symbols beyond basic labels)- Self-Timer Indicating Light
- Lens
- Built-in LED Light
- Microphone

2. Preparations before operating the camcorder Charging the Battery
- Make sure lithium battery is properly inserted in the battery compartment
- Fully charge the camcorder via USB charger prior to use

natural_image
Simple line drawing of a battery with no text or symbols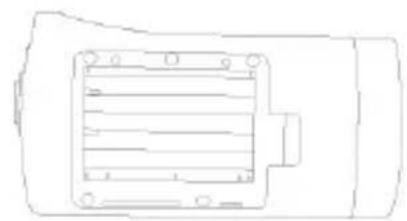
natural_image
Pure technical line drawing of a mechanical component without any text, numbers, or symbols
natural_image
Simple line drawing of a cylindrical battery (no text or symbols)Installing the memory card
There is no built-in memory in this camera. A compatible external memory card is required to take or save pictures and movies. If you want to shoot and save the files, please use a proper SD or MMC card.
Before inserting or taking out the card, please turn off the unit first to avoid any damages. Before inserting the card, please ensure to insert in the correct direction. If you feel resistance, please do not forcibly insert the card. The memory card is equipped with a write protection switch to avoid any unintentional data deletions. Therefore, if you want to save or delete files, please place the write protection in “Off” position.
- Make sure to turn off the camcorder.
- At the end of the camera, there is a rubber cover for SD card, open this cover you will see the SD card slot.
- Insert the memory card as shown in the sketch.
- Close the SD rubber cover.
* To take out the memory card, slightly press the edge of the memory card, then release, the card will be ejected.

natural_image
Line drawing of a portable electronic device with a door labeled 'TO CARD' and a remote control unit (no text or symbols on the device itself)Format Memory Card
All the data in the Memory Card (including the protected files) will be deleted when the Memory Card is formatted. Therefore, please back up the important files before formatting.
- Power on the DVC, to show the setting menu.
- Press the Up or Down button, select Format, then press the OK button to enter into the submenu under this option.
- Press the Up or Down button, select Yes, then press the OK button to format.
Setting of Languages
When using the DVC the first time after purchasing it, please set proper language before using the DVC.
- Power on the DVC, to show the setting menu.
- Press the Up or Down button, select Language, then press the OK button to enter into the submenu under language option.
- Press the Up or Down button to select the language you need, then press the OK button to confirm.
- At last, press the Menu button to quit the setting interface.
LCD Display
Video Recording Mode

Photography Mode

Playback Mode

3. Basic Operation
Power on or off the DVC
- Turn on the LCD screen, and press the On/Off button to power on the DVC.
- Press the On/Off button to power off the DVC when the DVC is in the status of power-on.
In order the save power, the DVC will power off automatically within a certain time after implementing the final operation. You can press the On/Off button again to power on the DVC. You can set the time of auto power-off resorting to the function of Auto Power-off.
Mode Switch
- Press the On/Off button to power on the DVC.
- Press the Mode button to change the working mode of the DVC. Pressing the Mode button each time, the mode of the DVC will be changed once.
| Icon Mode Description | |||
 | Video Recording Mode Record video file | ||
| Photography Mode Shoot static picture | |||
| Playback Mode Browse recorded files | |||
Video Recording
- Power on the DVC, and set the mode of the DVC into Video Recording
Mode

- Press the Video button to begin video recording, and press the Video button again to stop recording. The DVC will stop video recording automatically if the memory of the Memory Card is full.
Taking Photos
- Power on the DVC, and set the mode of the DVC into Photography Mode

- Find a view for the image you want through the LCD screen, and press the Shutter button to take photos.
- The number shown on the LCD screen will be lessened by one automatically after a photo is taken. For example: if the number shown on the LCD screen is 018, the number on the LCD screen will become 017 after a photo is taken, and the LCD screen will show “Insufficient Space” if the memory of the Memory Card is full.
- Don't hide the lens with your fingers or wristlet when taking photos.
- Press the LED Switch button to turn on the LED light when the light is insufficient.
How to Use the Self-Timer and Burst Functions
Use Self-Timer to set the delay time after pressing the Shutter and before taking a photo.
-
Power on the DVC, and set the mode of the DVC into Photography Mode.
-
Press the Menu button to show the menu for photography.
-
Press the Up or Down button to select the Shooting Mode, then press the OK button to enter into the submenu.
Disable: no delay, normal shooting.

2 seconds of self-timer: delay of shutter release in 2 seconds.
10 seconds of self-timer: delay of shutter release in 10 seconds.
Burst: three photos will be taken when pressing the Shutter once.
-
Press the Up or Down button to select the photography mode which you want.
-
Press the OK button to confirm the setting, and press the Menu button to quit.
-
Press the Shutter button to take photos.
4. Setting of the DVC
When menu option is shown, use Up, Down, Left and Right button to set the option.
Menu in Photography Mode
- Power on the DVC, and set the mode of the DVC into Photography Mode.
- Press the Menu button to show the menu in the Photography Mode.
- Press the Up or Down button to select an option to set.
- Press the OK button to enter into the submenu under this option.
- Press the Up or Down button to set, and press the OK button to confirm.
- Press the Menu button to quit.
Menu in Video Recording Mode
- Press the Menu button in the Video Recording Mode to show the video menu.
- Press the Up or Down button to select an option, then press OK button to enter into the submenu under this option.
- Press the Up or Down button to set, then press the OK button to confirm the setting.
- Press the Menu button to quit.
| Menu Option | Available Options and Functions |
| Video Format | Selecting the small size will enable a prolonged recording when the memory space is the same. There are two options:1920X1080/1280X720/848X480/640X480 |
| Metering Mode | There are three metering modes:Central Metering: conduct metering to the light in the central part.Multi-Metering: conduct metering to multiple spots and make comprehensive judgment.Spot Metering: make judgment only after conducting metering to the central part. |
| White Balance | Adjust White Balance to apply to various light sources. There are five options in White Balance: Auto / Daylight / Cloudy / Fluorescent / Tungsten. |
| Effect | Select a sort of Effect to enhance special effect of pictures. Normal / B&W / Sepia / Negative / Red / Green / Blue |
| Date & Time | Add current date and time into the shot files, and there are three modes:Disable: not displayed.Date: show date only.Date and Time: show date and time. |
Menu in Photography Mode
| Menu Option | Available Options and Functions |
| Image Size | Set the size of pictures, and there are five options available for selection: 12M[4000X3000] /8M[3264X2448] /5M[2592X1944] /3M[2048×1536]/1M[1280X960] |
| Image Quality | Selecting a lower image quality may reduce the space occupied by images, so as to take more pictures.There are three options in Image Quality: Super / Good / Normal. |
| Metering Mode | There are three metering modes:Central Metering: conduct metering to the light in the central part.Multi-Metering: conduct metering to multiple spots and make comprehensive judgment.Spot Metering: make judgment only after conducting metering to the central part. |
| White Balance | Adjust White Balance to apply to various light sources. There are five options in White Balance: Auto / Daylight / Cloudy / Fluorescent / Tungsten. |
| Exposure | Manually set Exposure Compensation Value, so as to conduct compensation under special conditions such as in indoor light condition, back light condition or strong light condition. The scope of Exposure Compensation is from -2.0 to 2.0. |
| Photography Mode | The DVC has four photography modes: [Disable] / [2s Self-Timber] / [10s Self-Timber] / [Burst] |
| Effect | Select a sort of Effect to enhance special effect of pictures.Normal / B&W / Sepia / Negative / Red / Green / Blue |
| Date & Time | Add current date and time into the shot files, and there are three modes:Disable: not displayed.Date: show date only.Date and Time: show date and time. |
Setting Menu
You may set system options through Setting Menu.
- Power on the DVC, and press the Menu button to show the menu.
- Press the Right button to select 📄.
- Press the Up or Down button to select the option you want to set.
- Press the OK button or enter into the submenu under this option.
- Press the OK button to confirm, and press the Menu button to quit the menu.
Setting Menu
| Menu Option Available Options and Functions | |
| Sound | The function has four options:[Shutter]: Press the Right button to enable or disable shutter sound.[Startup Sound]: Press the Right button to set startup sound. There are four options: [1] / [2] / [3] / [None].[Key Sound]: Press the Right button to enable or disable key sound.[Volume]: Press the Right button to set volume of sound. There are four options: [0] / [1] / [2] / [3]. |
| Auto Playback OFF/1S/3S | |
| Power Frequency | Power Frequency shall be set as 60HZ or 50HZaccording to the area where you stay. |
| AutoPower-off | In order to save power, the DVC will power off automatically after a period of idle time.The function has four options: 1 minute / 3 minutes / 5 minutes / disable. |
| Date and Time Set date and time, month/date/year/hour: minute. | |
| Language Select one language from the following languages to show menu and other information:[English]: English, [S.chinese]: Simplified Chinese. | |
| TV The images shown on the display screen of the DVCan also be shown on the screen of TV. The output of TV shall be set as NTSC or PAL according to the area where you stay.[NTSC]: US, Japan or others.[PAL]: China, Europe or others. | |
| Format | Formatting will permanently delete all the data in the Memory Card or the built-in Memorizer, including locked files. Back-up shall be made for important files before formatting. [Yes] / [No]. |
| RestoreDefault Setting | Enable the whole menu and button setting to restore to the initial setting state. [Yes] / [No]. |
5. Playback
Playback of Video
- Set the DVC into the Playback Mode.
- Press the Left or Right button to select the video file you want to play.
- Press the OK button to begin playing. Press the OK button to pause playing, and press the OK button again to continue playing. Press the Right button to fast forward played video, and press the Left button to fast backward the played video. Press the Menu button to stop playing.
Playback of Photos
-
Set the DVC into the Playback Mode. The finally shot file will be shown on the LCD screen, and the LCD screen will show “No Files” if there are no files in the Memory Card.
-
Press the Left or Right button to browse the previous or next image.
Other Functions under Playback Mode
Use Thumbnail
Press the Down button in the Playback Mode to enter into the Thumbnail File Browse Mode. Press the UP/Down/Left/Right button to select files. Press the OK button the browse files on full screen.
Delete Files
Delete files through the deletion function in the playback menu.
- Press the Menu button in the Playback Mode to enter into the menu interface.
- Press the Up or Down button to select File Deletion.
- Press the OK button to enter into the submenu: [Delete Single]: delete the current file; [Delete All]: delete all files.
- Press the Up or Down button to select the option you want.
- Press the OK button to enter into the corresponding deletion dialog box, and press the Up or Down button to select Yes.
- Press the OK button to confirm deletion.
Menu in Playback Mode
- Press the Menu button in the Playback Mode to shown the playback menu.
- Press the Up or Down button to select the options you need and conduct setting.
- Press the OK button to enter into the submenu under this option.
- Press the OK button to confirm setting.
- Press the Menu button to quit.
| Menu Option | Available Options and Functions |
| File Locking | Use this function to prevent accidental deletion of files.[Lock/Unlock Single]: lock or unlock the current file.[Lock All]: lock all files[Unlock All]: unlock all locked files. |
| File Deletion | Refer to pages of file deletion for details. |
| Slide Show Use | this function to automatically play files.[Start]: start playing after setting the playing direction of screen sheet and time interval. Press the Right button to set the time interval of playing between two files.[Interval]: 1s-10s.[Cycle]: Press the Right button to enable or disable Cycle. |
| Voice Memo Use | use this function to add Voice Memo for photos.[Add]: press the OK button to start sound recording, and press the Shutter button to end recording.[Delete]: press the OK button to delete Voice Memo. |
6. Connection
Connect the DVC to TV
Connect the DVC to TV, the LCD screen of the DVC will be shut off, and the TV is equal to the LCD screen of the DVC.
- Connect the DVC to TV with the AV wire.
- Power on the DVC and turn on the TV, and set the mode of the TV as AV Mode.
-
When the DVC is set as Photography/Video Recording Mode, you can browse the shot objects on the TV.
-
When the DVC is in the Playback Mode, you can browse and play the recorded picture, video and audio files on the TV.
HDMI Connection:
Connect the DVC to TV with HDMI wire (not included), the LCD screen of the DVC will be shut off, and the TV is equal to the LCD screen of the DVC. When HDMI wire is connected to the TV, the mode will be converted into Playback Mode automatically.
- Connect the DVC to TV with HDMI wire.
- Power on the DVC and turn on the TV, and set the signal source input of the TV as “HDMI” Mode.
- When the DVC is in the Playback Mode, you can browse and play the recorded picture, video files on the TV.
Download Images to Computer
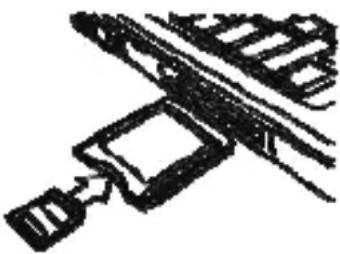
There are two methods which may be used to download the images into computer from the Memory Card of the DVC:
natural_image
Pure mechanical component diagram without any text, numbers, or symbols- Insert SD card into the flash memory card reader.
- Connect the DVC to computer with USB wire.
Use Card Reader
-
Eject the Memory Card from the DVC and then insert it into the card reader of computer.
-
Open My Computer or Windows Explorer, then double click the removable icon of the Memory Card.
-
Copy the images to the directory you select in the computer from the Memory Card.
Connect the DVC to Computer with USB wire
-
Connect the DVC to computer with USB wire, power on the DVC, and the LCD screen will show “MSDC (Removable Disk)” or "PC CAM (PC Camera)". Press the Mode button to switch between “MSDC”/“PCCAM” modes.
-
Open My Computer or Windows Explorer, then double click the removable icon of the Memory Card. All the files will be stored in a folder named "DCIM".
-
Copy the images to the directory you select in the computer from the folder "DCIM".
7. Installation of Software
Installation of Software
The attached software CD contains the drivers and software of the DVC. Insert the CD into the CD-ROM. Please open the optical disk drive in
Installation of PC Camera Function
(1) Open the contents of the drivers CD, click “Setup.exe” to complete installation according to the instruction.
(2) Copy the “PCCAM.exe” in the CD to the Desktop or the root directory you want in the computer.
How to Use PC Camera Drivers
- Install the PC camera drivers in the attached CD at first, connect the DVC to computer with the USB wire, and power on the DVC.
- Press the Mode button to switch the mode of the DVC into "PCCAM" mode.
- Double click “PCCAM.exe”, the system will pop up “AMCAP” video window.
- If it is the first time for you to use PC camera, maybe you need to click “Preview” in the “Options” menu at first, then you will be able to use the function of the PC camera normally.
You may set the size of PC camera window in the option “Video Capture Pin” in the pulldown menu of “Options”.
8. Technical Indicators
| Photoreceptor | 5 million pixels of CMOS |
| Screen | 2.7"TFT Liquid Crystal Display |
| Focal Length Range | 150cm ~ infinite |
| Aperture F: 3MM f=6.5mm | |
| Shutter 1/6,000~1/20 seconds | |
| Resolution Static | Picture: 12M(4000X3000); 8M(3264X2448); 5M(2592x1944); 3M(2048×1536); 1M(1280×960) Video: 1920X1080; 1280X720; 848X480; 640X480 |
| Light Sensitivity | Automatic |
| White Balance | Auto / Daylight / Cloudy / Fluorescent / Tungsten |
| Exposure Compensation | -2.0~2.0, the interval is 0.3 |
| Burst Available | |
| Photo Effects | B&W / Sepia / Negative / Red / Green / Blue |
| Self-Timer 2 seconds, 10 seconds | |
| Memory | External: SD card, MMC card |
| TV System NTSC / PAL | |
| Power Supply 3.7V lithium ion battery | |
| Environmental Temperature | Operating temperature: 0°C to 40°C; Storage temperature: 20°C to 60°C |
| Microphone Built-in | |
| Speaker Built-in | |
| Size 4.5” (L) x 2.5” (W) x 2.5”(H) | |
| Weight | 0.43lbs (without battery) & 0.49lbs (with battery) |

Product Registration Instructions
Visit: www.HamiltonBuhl.com
natural_image
Silhouette of a person with a laptop and three arrows pointing outward (no text or symbols)- Click on Customer Support
- Click on Product Registration Form
- Please fill out all field marked with * to register your product
Our Mission:
Since our founding in 1993, HamiltonBuhl continues to evolve as a leader in technology products for education and industry. Our products are embraced by educators, corporate trainers, presenters, government agencies and hospitals for their daily presentation, from classrooms to the boardroom.
- Instruction Manual
- HDV5200-1
- Safety Information
- Components of the Video Camera
- Preparations before operating the camcorder Charging the Battery
- Installing the memory card
- Format Memory Card
- Setting of Languages
- Playback Mode
- Basic Operation
- Power on or off the DVC
- Mode Switch
- Video Recording
- Taking Photos
- How to Use the Self-Timer and Burst Functions
- Setting of the DVC
- Menu in Photography Mode
- Menu in Video Recording Mode
- Setting Menu
- Playback
- Playback of Video
- Playback of Photos
- Other Functions under Playback Mode
- Use Thumbnail
- Delete Files
- Menu in Playback Mode
- Connection
- Connect the DVC to TV
- Download Images to Computer
- Use Card Reader
- Connect the DVC to Computer with USB wire
- Installation of Software
- Installation of Software
- Installation of PC Camera Function
- How to Use PC Camera Drivers
- Technical Indicators
- Our Mission:
Brand : Hamilton Buhl
Model : HDV5200-1
Category : Camcorder