
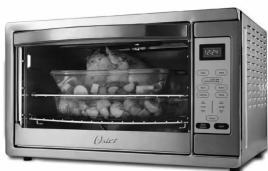
TSSTTVDGXL-SHP - Oven OSTER - Free user manual and instructions
Find the device manual for free TSSTTVDGXL-SHP OSTER in PDF.


| Product Type | Countertop Oven |
| Brand | Oster |
| Model | TSSTTVDGXL-SHP |
| Voltage | 120 V AC, 60 Hz |
| Power Consumption | 1500 W |
| Capacity | Extra Large (up to 16-inch pizza) |
| Interior Dimensions | 19.2 x 16.5 x 8.7 inches |
| Exterior Dimensions | 22.4 x 18.9 x 12.2 inches |
| Weight | 24.5 lbs |
| Functions | Bake, Convection Bake, Toast, Pizza, Broil, Keep Warm |
| Temperature Range | 150°F - 450°F |
| Timer | 120-minute timer with auto shut-off |
| Control Type | Dial and push-button controls |
| Interior Light | Yes |
| Rack Positions | 3 adjustable rack positions |
| Included Accessories | Baking pan, wire rack, crumb tray |
| Cleaning | Wipe with damp cloth; use mild detergent |
| Material | Stainless steel exterior, non-stick interior |
| Safety Features | Automatic shut-off, cool-touch handle |
| Warranty | 1-year limited warranty |
| Country of Origin | China |
Frequently Asked Questions - TSSTTVDGXL-SHP OSTER
User questions about TSSTTVDGXL-SHP OSTER
0 question about this device. Answer the ones you know or ask your own.
Ask a new question about this device
Download the instructions for your Oven in PDF format for free! Find your manual TSSTTVDGXL-SHP - OSTER and take your electronic device back in hand. On this page are published all the documents necessary for the use of your device. TSSTTVDGXL-SHP by OSTER.
USER MANUAL TSSTTVDGXL-SHP OSTER
(Canada: 1,800,66/8673
EE.UU:1.800.334.0759
2214.26. TUN1610Q 19872019
Distribuéd by Sunbeam Products, Inc., Bocá Raton, Florida 33431. Sunbeam Products, Inc. is a subsidiary of Newell Brands, Inc. (NYSE: NWL).
02017 Sunbeam Products, Inc. All rizj
WW.Osbr.com
Canada: 1,800,667,8623
6320FE1008T·YSH
Sunbeam Consumer Service

Oster
User Manual Extra Large Countertop Oven Instrucciones Horno de Mostrador Extra Grande
MODEL/MODELO TSSTTVDGXL
Visit us at www.oster.com
P.N. 176421 Rev. B
English-6
IMPORTANT SAFEGUARDS
When using electrical appliances, basic safety precautions should always be followed to reduce the risk of fire, electric shock, and/or injury to persons including the following:
-
Read all instructions before using this product.
-
This appliance generates heat during use. Do not touch hot surfaces. Use handles or knobs. Always protect your hands with non-slip oven mitts or similar.
-
To protect against electric shock, do not place or immerse cord, plugs, or appliance in water or other liquid.
-
This appliance is not to be used by children or by persons with reduced physical, sensory or mental capabilities.
-
Close supervision is necessary when any appliance is used near children. Children should not play with the appliance.
-
Unplus from outlet when not in use, before
-
Unplug from outlet when not in use, before pulling on or taking off parts and before cleaning. Allow to cool before putting on or taking off parts, and before cleaning. To disconnect, turn any control to OFF, then unplug power cord from outlet. Do not disconnect by pulling on cord. Always grasp the plug and pull to disconnect.
-
Do not operate any appliance with a damaged cord or plug or after the appliance malfunctions, or has been damaged in any manner. Do not attempt to replace or splice a damaged cord. Return appliance to the manufacturer (see warranty) for examination, repair or adjustment.
-
The use of accessory attachments not recommended by the appliance
manufacturer may cause injuries.
-
Do not use outdoors or for commercial purposes.
-
Do not let cord hang over edge of table or counter, or touch hot surfaces.
-
Do not place on or near wet surfaces, or heat sources such as a hot gas or electric burner, or in a heated oven.
-
Extreme caution must be used when moving an appliance or removing a pan, containing hot oil or other hot liquids. Always protect your hands with non-slip oven mitts or similar.
-
Do not use appliance for other than intended use. Misuse can cause injuries. Intended for household counterton use only. Keep 6 inches (152 mm) clear from
-
Organize foods or metal utensils must not be inserted in a toasters oven as rhow
-
Oversize foods of metal ductisms must not may create a fire or risk of electric shock.
-
A fire may occur if the toaster-oven is covered, touching or near flammable materials, including curtains, draperies, towels, walls, and the like, when in
operation. Do not store any item on top of the appliance when in operation. 16. Do not clean with metal scouring pads. Pieces can break off the pad and touch
-
Do not claim with micaal securing pads. Pieces can break on the pad mind to electrical parts, creating a risk of electric shock.
-
Extreme caution should be exercised when using containers constructed of
materials other than metal or glass.
-
Do not store any materials, other than manufacturers recommended accessories, in this oven when not in use.
-
Do not place any of the following materials in the oven: paper, cardboard,
plastic, or any materials that may catch fire or melt.
English-1 English-2
Preheating the Oven
Place oven rack into the desired position before heating the oven.
(See Poisoning Rack Section) Push the Bake button.
Use arrows to set desi
Push Timer √ down button until seven (7) minutes is displayed.
Push the Start button.
To Use the Bake Function
Place oven rack into the desired position before heating the oven. (See "Positioning R-sh" Section)
(34) Toxoming Rx - Stention Average food on the wire rack or
Arrange took on the white rack of in the taking pan. Push the Bake button. Use the Temperature arrow keys to select desired temperature.
Use the Time arrow keys to select desired time.
Push the Start button.
NOTE – Upper and lower heating elements will cycle ON and OFF to maintain the desired temperature, and may not slow.
When baking is completed, open door fully and remove food carefully.
To Use the Convection Fan Bake Function
When you select the Convection Bake the convection fan will turn on and circulate air allowing the feed to cook weekly and future.
allowing the food to cook evenly and faster. Place oven rack into the desired position before bearing the oven
(See "Positioning Rack" Section)
Arrange food on the wire rack or in the baking pan.
Push the Convection Bake button until "Convection Bake" lights up on display. Use the Temp arrow keys to select desired temperature.
Push Timer arrow keys to select desired time.
Push the Start button.
NOTE – Both heating elements will cycle ON and OFF to maintain the desired temperature and may not allow.
When baking is completed, open door fully and remove food carefully.
To Use the Broil Function
To use the Bron Function Select desired oven rack position. (S
Place pan into the guide rails below the rack and place the food on top of the rack.
Push Broil button until the word "Broil" ligh. Push Times aware to play the desired time.
Push Timer arrows to select the desired time. Push the Start button
NOTE - The top b
14.2.12 The step mining of the 50% S&P and S&P is sustained at least temperature, and may not glow. When boiling is completed, open dose fully and removes food as well.
When broiling is completed, open door fully and remove food carefully. WARNING: DO NOT LEAVE COUNTERTOR OVEN UNATTENDED
- Do not cover crumb tray or any part of the oven with metal foil. This will cause
overheating of the oven.
- Empty the crumb tray after each use.
- The glass door is made of tempered glass. Always inspect the glass door for china
The glass door is made of tempered ghost (always impler the glass door for 4mp cracks or any other damage. Do not use the countertop oven if the glass door is
damaged, as the glass may shatter during use.
2.3. Do not use with a programmer, timer, wireless plug adapter or outlet that allows
control remotely, or connect to a circuit that is regularly switched on and off by the utility.
Note 1.
SAVE THESE INSTRUCTIONS
HOUSEHOLD USE ONLY
North American models with polarized plugs:

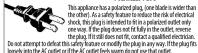
POWER CORD INSTRUCTIONS:
A short power-supply cord or detachable power-supply cord is provided to reduce risks resulting from becoming entangled in or tripping over a longer cord. Longer detachable power-supply cords or extension cords are available and may be used if care is exercised in their use. If a long detachable power-supply cord or extension cord is used:
a. The marked electrical rating of the cord set or extension cord should be a
b. The cord should be arranged so that it will not drape over the countertop
The work should be arranged so that it was not shaped over the 20 or tabletop where it can be pulled on by children or tripped over
unintentionally and
If the appliance is of the grounded type, the cord set or extension cord
should be a grounding-type 3-wire cord.
Do not pull, twist or otherwise abuse the power cord.
NOTICES
- Some countertop and table surfaces are not designed to withstand the prolonged
heat generated by certain appliances. Do not set the heated unit on a finished wood table. We recommend playing a hot bed up triquet under own counterston oven to
table. We recommend placing a hot par present possible damage to the surface
-
During initial use of this appliance, some slight smoke and/or odor may be
-
During inlet use of this appliance, some slight smoke and/or odor may be detected. This is normal with many heating appliances and will not recur after
a few uses.
Welcome
Congratulations on your purchase of an OSTER® Countertop Oven! If you require service on your OSTER® Countertop Oven, do not return to place of purchase. Please contact us at www.oster.com or 1,800,334,0759.
Features of Your Countertop Oven
(See Figure 1)
-
Removable Wire Racks/Broil Rack
-
Time Disp
-
Control Buttons
-
Two Rack Posit
-
Form Glass Interior Walls
-
Easy Clear
-
Class Door
-
Glass Door
-
Internal Removable Crumb Tray

FIGURE 1
Control Buttons
Function Buttons – (See Figure 2)
Bake - Convection (Fan Bake), Broil.
Toast – Select to toast bread, bagels, et
Pizza - Select to bake a large pizza
Defrost - Select to defrost foods.
Times: Adjust
Timer × 4 = Adjusts time.
Temp xV = Adjusted temperature
Clock - Sets the Countertop Oven Clock.
Stop/Cancel – Stops heating or cancels function.
Start – Starts baking/cooking process.
[Non-Text]
NOTE - Countertop Oven is on when display icons are
illuminated and flashing
Pressing Stop/Cancel button twice
turns off unit.

FIGURE 2
Preparing To Use Your Countertop Oven for the First Time
If you are working together, we for the future, should be met.
If you are using your countertop oven for the first time, please Remove any stickers from the surface of the countertop oven.
Open countertop oven door and remove all printed documents and paper from inside the
countertop oven.
Clean the rack, tray, and pan with hot water, a small amount of dishwashing liquid and a pan abrous stone or cleaning bed.
CAUTION: DO NOT IMMERSE THE BODY OF THE UNIT IN WATER.
Dry the unit thoroughly before using.
Select a location for the countertop ove
counter where the plug will reach an outlet.
Plug the countertop oven into a 120 Volt AC electrical outlet.
To Open the Countertop Oven Door:
Step 1: Grab the center of the handle underhanded with fingertips (See Figure 3).

Step 2: Pull down the countertop oven door carefully (See Figure 4).

CAUTION: This appliance generates heat during use. Do not touch hot surfaces.
Always use handles or knobs per above instructions.
Using Your Countertop Oven
Setting the Clock
Setting the Clock Push the Clock button. The clock will flash
Use the arrow keys to set the hour. Push the Clock button again.
Use the arrow keys to set the minutes.
Push the Clock button once more or the start button and the time will be set.
English-3 English-4
To Use the Toast Function
Place countertop oven rack into the desired position before heating the countertop oven.
(See Fussloring Rank Section) NOTE - Different types of bread requires different settings. Lighter breads and waffles
NOTE - Different types of bread require different settings. Lighter breads and winks require a lighter setting. Darker breads, muffins, and English muffins require a darker setting
Arrange food on the wire rack.
Push the Toast button. Use arrows to select Toast Shade.
Press the Start Button. When waving is completed, open door fully and removes food carefully.
When toasting is composed, open door fully and remove food carefully.
To Use the Pizza Function
Place countertop oven rack into the desired position before heating the countertop oven.
(See "Positioning Rack" Section) Arrange pizza on the wire rack
Push the Pizza button and 20:00 default time will appear. Use arrow keys to adjust
the time as desired. Push the Start button.
NOTE - The Pizza function temperature is set at 400°F and cannot be adjusted. If different temperatures is desired, cancel Pizza function and win Rake function
if different temperature is desired
Defrosting Function
When defrosting do not preheat countertop oven. Temperature Control is already set to 150°F.
Push the delrost button. Use arrow keys to adjust time. Allow 15 to 20 minutes per side for meats or fish to defrost. Always cook food promptly after thawing.
Push the Start button.
Positioning Rack
To accommodate a wide variety of foods, the
countertop oven has 2 racks and two (2) rack posi-
tions. (See Figure 5)
Positioning of the rack will depend on the size of the food and desired browning.
Before removing the rack, allow the unit to cool.
PLEASE NOTE - For best toast and pizza results,
position the rack in the up position on
the top back position.
Positioning Par
• To accommodate a wide variety of foods the countertop oven has two pan positions. The
pan can be placed on top of the rack or inserted into the guide rails below the rack. (See Figure 10-4)
• Before removing the pan allow the unit to cool.
- Positioning of the countertop oven pan will depend on the desired cooking method. For
baking, place the pan on top of one of the racks. For grilling or broiling, insert the pan into
the guide rails below the rack and place the food on top of the rack.

For Baking

[Non-Text]
[Non-Text]
[Non-Text]
1. P#V
is 190
sail
trans
[Non-Text]
1
red of
Brol
rack.
[Non-Text]
∴ m = 3/11
-
公司
-
[Unreadable]
[Unreadable]
A
1
√
For
ar be
[Non-Text]
[Non-Text]
[Non-Text]
[Non-Text]
[Non-Text]
[Non-Text]
[Non-Text]
[Non-Text]
[Non-Text]
[Non-Text]
[Non-Text]
[Non-Text]
[Non-Text]
[Non-Text]
[Non-Text]
[Non-Text]
[Non-Text]
[Non-Text]
[Non-Text]
[Non-Text]
[Non-Text]
[Non-Text]
[Non-Text]
[Non-Text]
[Non-Text]
[Non-Text]
[Non-Text]
[Non-Text]
[Non-Text]
[Non-Text]
[Non-Text]
[Non-Text]
[Non-Text]
[Non-Text]
[Non-Text]
[Non-Text]
[Non-Text]
[Non-Text]
[Non-Text]
[Non-Text]
[Non-Text]
[Non-Text]
[Non-Text]
[Non-Text]
[Non-Text]
[Non-Text]
[Non-Text]
[Non-Text]
[Non-Text]
[Non-Text]
[Non-Text]
[Non-Text]
[Non-Text]
[Non-Text]
[Non-Text]
[Non-Text]
[Non-Text]
[Non-Text]
[Non-Text]
[Non-Text]
[Non-Text]
[Non-Text]
[Non-Text]
[Non-Text]
[Non-Text]
[Non-Text]
[Non-Text]
[Non-Text]
[Non-Text]
[Non-Text]
[Non-Text]
[Non-Text]
[Non-Text]
[Non-Text]
[Non-Text]
PRECAUCIONES IMPORTANTES
Good words when answered, which is not a common
(1) The following table provides the information in English:
Tom (Tomson) - Sales
Toast (Postal) = Select hounds, etc.
Bulgens, etc.
Default (Descriptive) Selection paper
Delfrost (Descbügelar)
descongelar alimentos.
NOTA: Edd, and a related event.
Balance, the company has to be a major financial institution.
- OSTER
- MODEL/MODELO TSSTTVDGXL
- IMPORTANT SAFEGUARDS
- PREHEATING THE OVEN
- PUSH THE START BUTTON
- TO USE THE BAKE FUNCTION
- TO USE THE CONVECTION FAN BAKE FUNCTION
- TO USE THE BROIL FUNCTION
- TO USE THE BRON FUNCTION SELECT DESIRED OVEN RACK POSITION. (S
- SAVE THESE INSTRUCTIONS
- HOUSEHOLD USE ONLY
- POWER CORD INSTRUCTIONS
- NOTICES
- WELCOME
- FEATURES OF YOUR COUNTERTOP OVEN
- CONTROL BUTTONS
- PREPARING TO USE YOUR COUNTERTOP OVEN FOR THE FIRST TIME
- TO OPEN THE COUNTERTOP OVEN DOOR
- USING YOUR COUNTERTOP OVEN
- SETTING THE CLOCK
- TO USE THE TOAST FUNCTION
- DEFROSTING FUNCTION
- POSITIONING RACK
- POSITIONING PAR
- PRECAUCIONES IMPORTANTES
Brand : OSTER
Model : TSSTTVDGXL-SHP
Category : Oven