
Total S7 - Steam cleaner VAX - Free user manual and instructions
Find the device manual for free Total S7 VAX in PDF.


| Product Type | Steam Cleaner |
| Brand | VAX |
| Model | Total S7 |
| Dimensions (approx) | 30 x 25 x 20 cm |
| Weight | 3.5 kg |
| Power Consumption | 1500 W |
| Water Tank Capacity | 1.5 L |
| Heat-up Time | 3 minutes |
| Steam Pressure | 3 bar |
| Functions | Steam cleaning, sanitizing, degreasing |
| Maintenance | Descaling every 3 months |
| Safety Features | Auto shut-off, child lock |
| Spare Parts Available | Mop pads, microfibre cloths, nozzles |
| Manual Pages | 20 |
Frequently Asked Questions - Total S7 VAX
User questions about Total S7 VAX
0 question about this device. Answer the ones you know or ask your own.
Ask a new question about this device
Download the instructions for your Steam cleaner in PDF format for free! Find your manual Total S7 - VAX and take your electronic device back in hand. On this page are published all the documents necessary for the use of your device. Total S7 by VAX.
USER MANUAL Total S7 VAX
Multifunction Steamer
natural_image
Exterior view of a modern office building (no signage)
Basic safety precautions
This steamer is intended for household use only and NOT for commercial or industrial use.
- Only use the steamer indoors and keep the area you're cleaning well lit.
- Keep fingers, hair and loose clothing away from moving parts and openings whilst using the steamer.
- This appliance can be used by children aged from 8 years and above and persons with reduced physical, sensory or mental capabilities or lack of experience and knowledge, if they have been given supervision or instruction concerning use of the appliance in a safe way and understand the hazards involved.

Don'ts
- Don't touch any hot areas/accessories on the steamer. It's normal for the steamer and accessories to heat up during use, always turn off and allow them to cool down before handling or changing accessories.
- Don't leave the steamer plugged in when unattended.
- Don't use the steamer if it has been dropped, damaged, immersed in water or left outdoors.
- Don't run over the power cord or use steamer if the power cord or plug is damaged. Please contact our Customer Care Line on: 0330 026 8455 (Mon-Fri 8:30am-6:30pm, Sat 9:00am - 5:00pm).

Do's
- Always fill the water tank with water only, never add perfume, stain remover or products containing alcohol.
- Always vacuum your carpets thoroughly and make sure hard floor areas are free from grit and debris before using the steamer.
- Always unplug the steamer before carrying out any maintenance.
- Always replace the fuse in the plug with a British 13amp fuse. Always protect the power cable from heated surfaces or near open flames.
Children shall not play with the appliance. Cleaning and user maintenance shall not be made by children without supervision.
- Please refer to floor manufacturer's care recommendations before use, and test your flooring/carpet/rugs by running the steamer over a small hidden area, if no pile distortion or no damage occurs continue cleaning. Not suitable for use on wax polished floors or furniture, acrylic surfaces and synthetic, velvet or steam/water sensitive materials.
- This steamer should not be used to clean electrical appliances such as microwaves, televisions and electrical heating systems etc.
-
Only Vax recommended tools should be used with the steamer.
-
Don't handle the plug or use the steamer with wet hands.
- Don't pull or carry the steamer by the power cord. Don't use the power cord as a handle, pull the power cord around corners, sharp edges or close a door over the power cord. Don't unplug steamer by pulling on the power cord.
- Don't attempt to remove blockages with sharp objects as this may cause damage to the steamer, remove blockages only as instructed in this guide.
- Don't aim the steamer at people, animals, plants and electrical components such as the interior of ovens or wires. Never touch the steam jet from a short distance (there is a risk of scalding).
-
Don't use the steamer with incorrect voltage as this may result in damage or injury to the user. The correct voltage is listed on the ratings label.
-
Use only CE approved 13amp extension cords, non-approved extension cords may overheat. Care should be taken to arrange the extension cord as it could be a trip hazard.
• Always carry the steamer by the handle. - Store the steamer in a cool, dry area. Before storing the steamer please ensure the water tank is thoroughly clean and dry.
Please keep instructions for further use and use only as instructed in this guide.
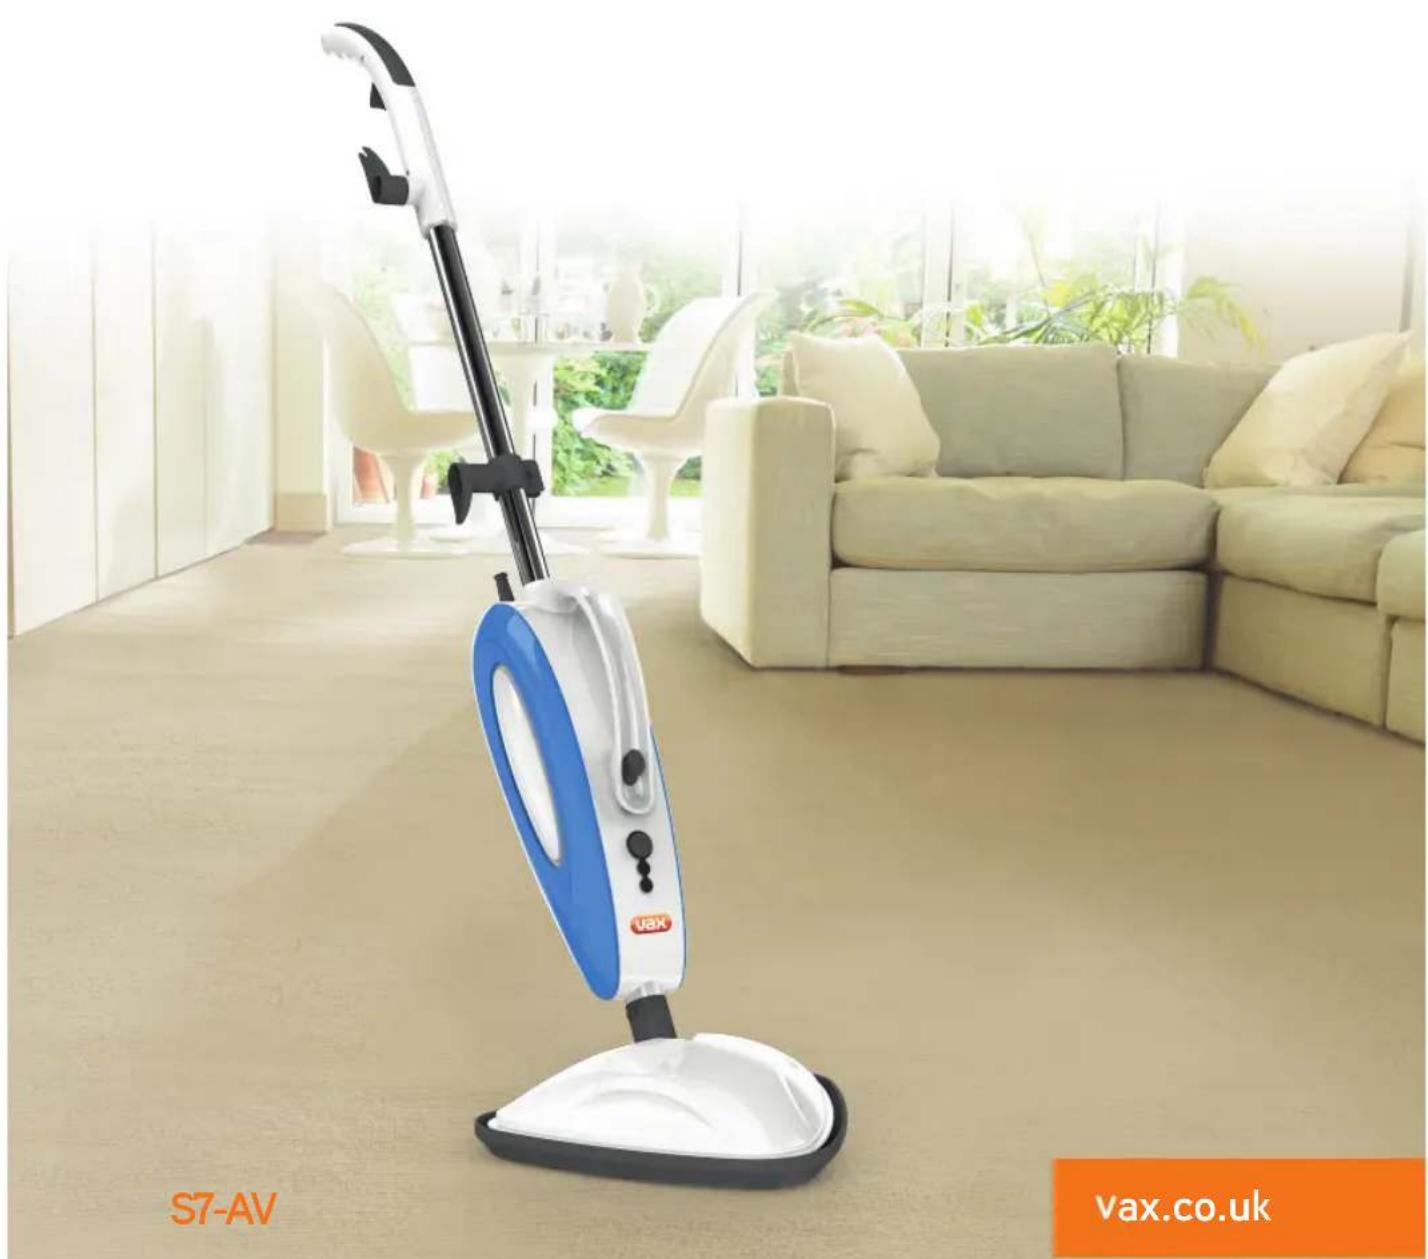
Thank you for buying this S7-AV Multifunction Steamer S7-AV Series.
Taking care of your floors and surfaces
The S7-AV Multifunction Steamer is designed to make steaming floors, upholstery and surfaces regularly, as effective and efficient as possible and this user guide will help you get the most out of your machine.
Maintaining your home with the S7-AV Multifunction Steamer will ensure it stays hygienically clean. Maintaining your floors will ensure they keep their appearance for longer. You've chosen the floors for your home for a reason and Vax will help you take good care of them.
Taking care of your S7-AV Multifunction Steamer
Also inside this guide are instructions on maintaining your new machine, so that it's always ready when you are to tackle your home.
Taking care of you
We're here if you need us. Instead of taking me back to the shop, simply visit:
vax.co.uk/support or call:
(UK) 0330 026 8455 (ROI) 1-800 928 308
Monday-Friday 8.30am to 6.30pm, Saturday 9.00am to 5.00pm
Calls are charged at the UK local rate. Please make a note of the serial number and model number of the product before calling.
Alternatively, you can write to us at:
Vax Ltd, Plot 302, Stonebridge Cross Business Park, Hampton Lovett, Droitwitch, WR9 OLW, UK
This User Guide can be found online at: vax.co.uk/support

You're home."

Let us know what you think @VaxUK
Contents
Let's talk safety
Getting to know your machine
Getting started
Using your machine
Taking care of your machine
Let's talk technical
What to do if it goes wrong
Getting in touch
Accessories
S7-AV
Multifunction Steamer
Included with your machine
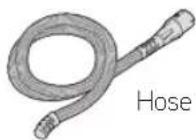
Detailer tool

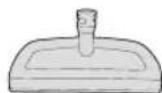
Window squeegee /Upholstery tool
Concentration nozzle
Accessories connector


Grout brush x2
Small plastic brush x2


Large plastic brush x2
Metal brush x2


Scraper tool
Shoulder strap
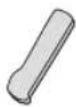
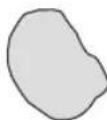
Window cloth
Microfibre cleaning pad
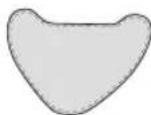
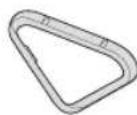
Carpet glider/Cooling base
Accessories storage bag
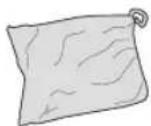
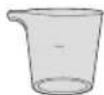
Measuring jug
Descaling pin

Getting to know your machine
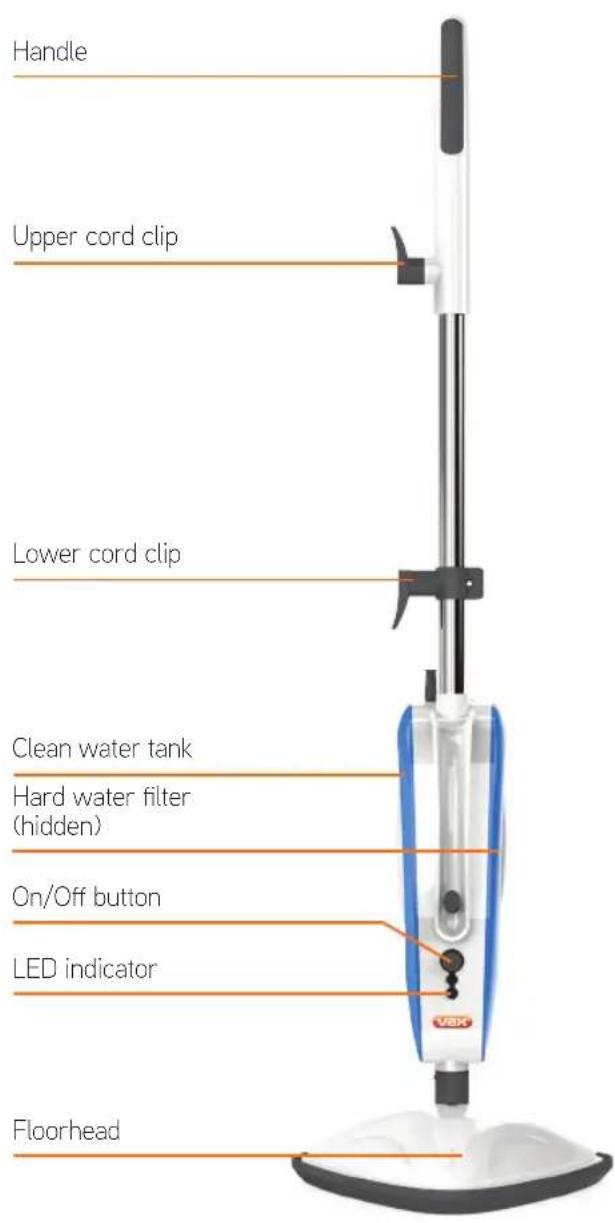
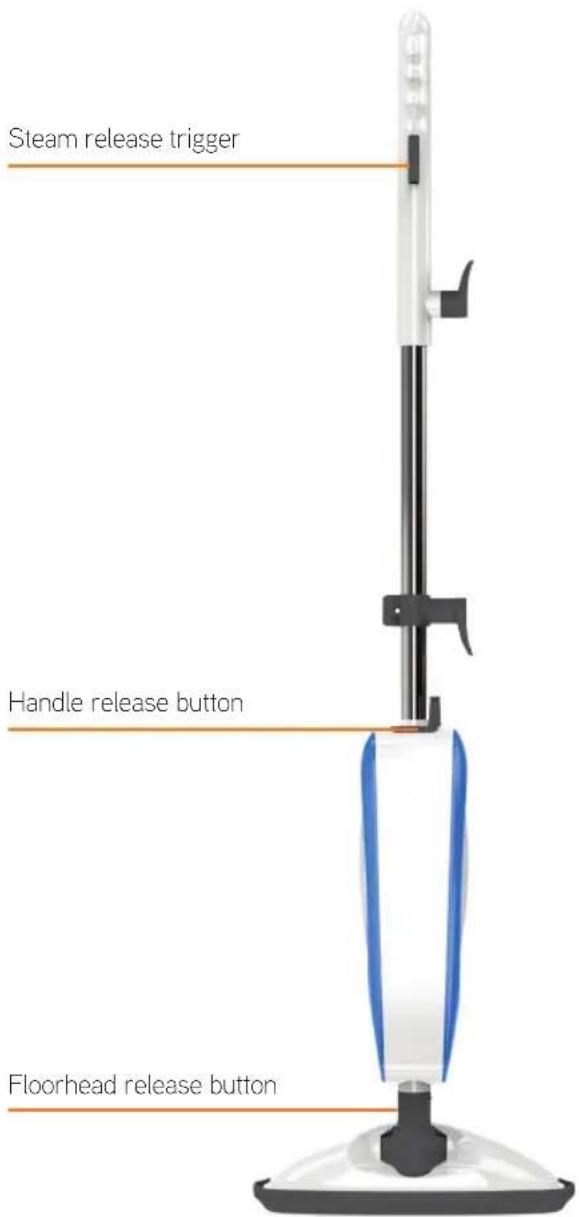
Technical Specification
| Product | S7-AVMultifunctionSteamer |
| Model code S7-AV | |
| Wattage 1600w | |
| Voltage 220-240v | |
| Water tank capacity 0.4l | |
| Cord length 7m | |
| Weight 2.7kg |
Subject to technical change without notice.
Accessories & Consumables*
| Hard Water Filter Kit (Type 1) | Carpet Glider (Type 1) |
| 1-1-133327-00 | 1-1-132671-00 |
| Microfibre Cleaning Pads (Type 1) | Shoulder Strap |
| 1-1-131448-00 | 1-1-132373-00 |
| Steam Accessory Brush Kit (Type 3) | Pro Cleaning Pads (Type 6) |
| 1-1-132730-00 | 1-1-132319-00 |
| Steam Accessory Tool Kit (Type 2) | |
| 1-1-132731-00 |
*To purchase consumables and accessories, please visit vax.co.uk
Getting started

CAUTION: The steamer head gets very hot during use. Always switch off the steamer before emptying the water tank or changing the cleaning pads/accessories.
IMPORTANT: Please refer to floor manufacturer's care recommendations before use and test the steamer on an hidden area of flooring/surface to begin with.
Before you begin cleaning
• Test for colour fastness in a small hidden area of upholstery/fabric to check for colour removal before use.
- When using the steamer, basic safety precautions should always be observed.
- Don't aim the steamer at people, animals, plants and electrical components such as interior of ovens or wires. Never touch the steam jet or floorhead from a short distance (there is a risk of scalding).
- The steamer is equipped with a thermostat and a thermal cut-out. If for any reason the steamer overheats it will switch off. If this happens turn off and unplug the steamer, allow to cool for a least 2 to 4 hours and re-start.
- Don't use hot or boiling water to fill clean water tank.
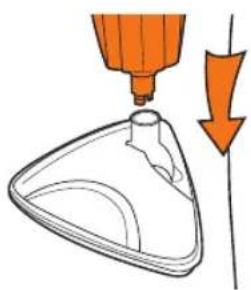
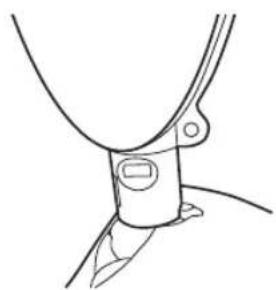
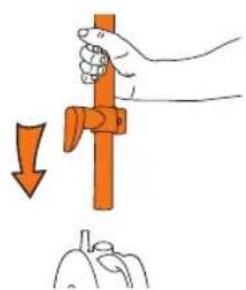
Assembling your steamer
natural_image
Diagram of a funnel-shaped object with an orange arrow indicating downward motion (no text or symbols)Push the main body down into the floorhead until it clicks into place.
natural_image
Pure technical line drawing of a mechanical clamp or bracket (no text or symbols)Stand the steamer upright by pushing the main body forward to lock into position.
natural_image
Illustration of a hand holding an orange tool with a downward arrow, next to a small object (no text or symbols)Push the handle into main body until it clicks into place.

Using your machine
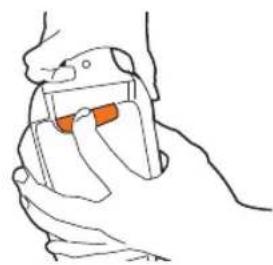
Filling water tank
natural_image
Line drawing of a hand holding an object, possibly a battery or scanner (no text or symbols visible)Press the water tank release button and pull tank to remove.
natural_image
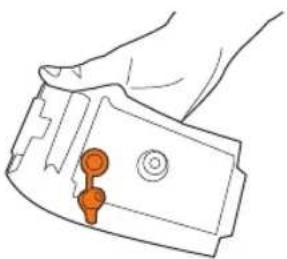
Line drawing of a hand holding a device with orange buttons (no text or symbols)Pull the tab on water tank cap to open.
natural_image
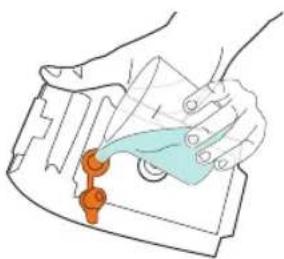
Illustration of hands holding a device with a blue handle and orange connectors (no text or symbols)Fill water tank with max 400ml of water. Replace cap and push firmly to close.
natural_image
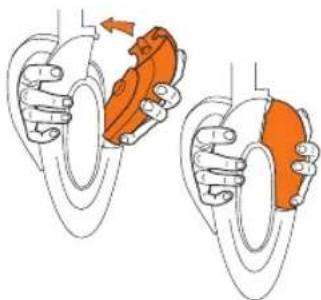
Illustration of two hands performing a manual exercise on a circular object, showing hand positioning and orange highlighted area (no text or symbols)To replace water tank, line up base of water tank into ridge of steamer. Push to click into place.
IMPORTANT: Never use the steamer without a cleaning pad attached to the floorhead. Never leave the steamer in one spot for extended period of time or with a damp or wet pad attached as this may damage the floor surface.
Using your steam mop
natural_image
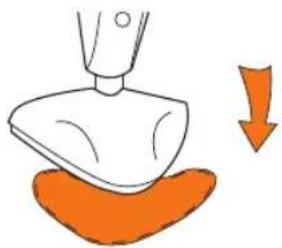
Simple line drawing of a kitchen utensil with an orange downward arrow indicating compression or reduction (no text or symbols)Place the microfibre pad on the floor white side facing up. Place steamer onto pad making sure the entire pad covers the floorhead.
natural_image
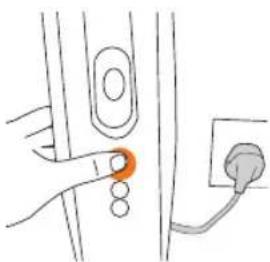
Simple line drawing of a hand holding a button next to a plug (no text or symbols)Plug into mains and press the power button to switch on.
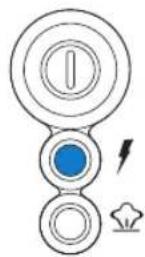
The blue light will illuminate to show power on and steamer is heating.
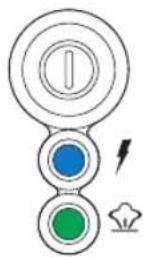
The green light will illuminate to show the steamer is ready to use. The green light will go off when the steamer is re-heating.
natural_image
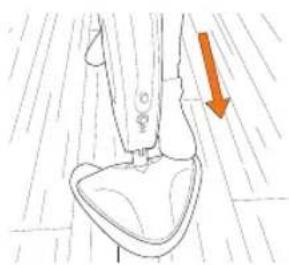
Illustration of a foot and ankle joint with an orange arrow indicating direction (no text or symbols)Place your foot onto the floorhead and pull handle backwards to recline.
natural_image
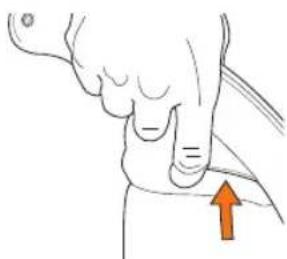
Illustration of a hand performing a finger movement with an orange arrow indicating direction (no text or symbols)To produce steam squeeze the trigger in short bursts. Don't hold the trigger continuously to prevent over wetting floors.
natural_image
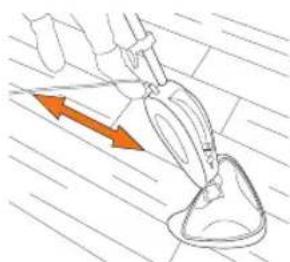
Diagram of a spray gun with orange spray arrow indicating direction (no text or symbols)Move the steamer slowly backwards and forwards across the floor paying particular attention to high traffic areas. Squeeze/ release trigger as required.
natural_image
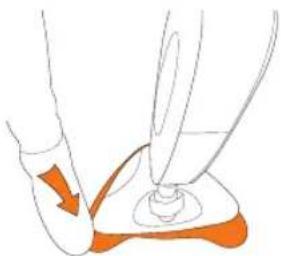
Illustration of a hand holding a pen over a small object on a base, with an orange arrow indicating direction (no text or symbols)Hold corner of pad down with your foot and lift steamer to remove.
CAUTION: Always allow the steamer to fully cool down before removing the microfibre pad.
Using your machine

IMPORTANT: When using on carpets, always make sure the microfibre cleaning pad covers the floorhead entirely before using the carpet glider. Only use the carpet glider when refreshing carpets.
Refreshing carpets
natural_image
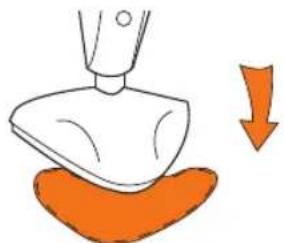
Simple line drawing of a kitchen utensil with an orange downward arrow indicating compression or reduction (no text or symbols)Place the microfibre pad on the floor white side facing up. Place steamer onto pad making sure the entire pad covers the floorhead.
natural_image
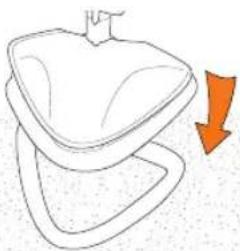
Simple line drawing of a heart-shaped object with an orange arrow indicating downward motion (no text or symbols)With microfibre pad attached, place steamer into the carpet glider. The carpet glider should only be used when refreshing carpets.
natural_image
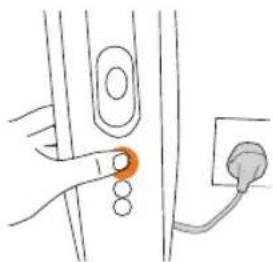
Simple line drawing of a hand holding an orange button next to a vertical panel with an electrical plug (no text or symbols)Plug into mains and press the power button to switch on.
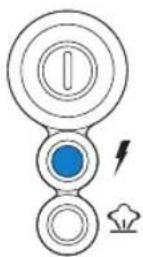
The blue light will illuminate to show power on and steamer is heating.
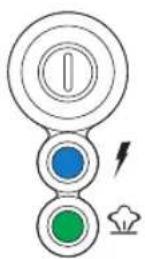
The green light will illuminate to show the steamer is ready to use. The green light will go off when the steamer is re-heating.
natural_image
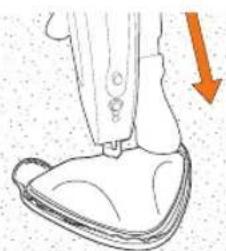
Illustration of a foot wearing a high-heeled shoe with a downward arrow indicating motion (no text or symbols)Place your foot onto the floorhead and pull handle backwards to recline.
natural_image
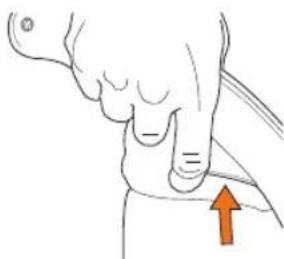
Illustration of a hand performing a finger movement with an orange arrow indicating direction (no text or symbols)To produce steam squeeze the trigger in short bursts. Don't hold the trigger continuously to prevent over wetting carpets.
natural_image
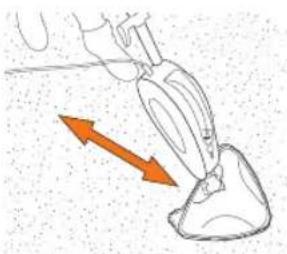
Illustration of a foot and ankle with two orange arrows indicating movement or force direction (no text or symbols)Move the steamer slowly backwards and forwards across the carpet paying particular attention to high traffic areas. Squeeze/ release trigger as required.
natural_image
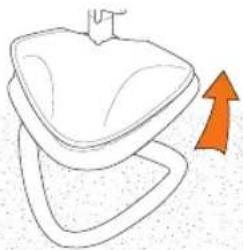
Simple line drawing of a stylized object resembling a heart or capsule with an upward arrow, no text or symbols present.Lift steamer off carpet glider.
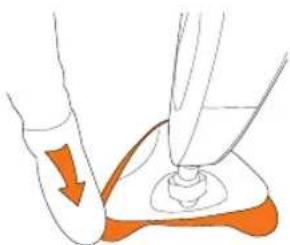
natural_image
Illustration of a hand using a pipette to apply liquid onto a small object, with an orange arrow indicating the process (no text or symbols present)Hold corner of pad down with your foot and lift steamer to remove.
CAUTION: Always allow the steamer to fully cool down before removing the microfibre pad.

Using your machine
IMPORTANT: Test for colourfastness on a small hidden area of upholstery/fabric to check for colour removal before use
Using the handheld steamer
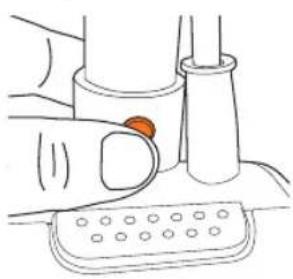
natural_image
Illustration of a hand pressing a button on a computer mouse (no text or symbols present)Push the handle release button and lift the handle to remove from main body.
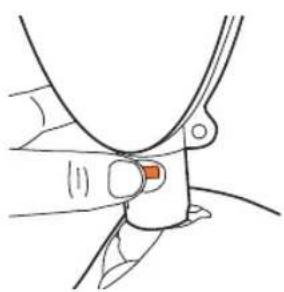
natural_image
Line drawing of a hand holding a clip with a red button, no text or symbols presentPush the floorhead release button and lift the main body from the floorhead to remove.
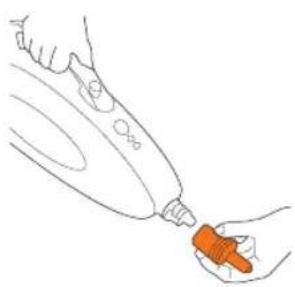
natural_image
Line drawing of a hand holding an orange tool near a device (no text or symbols)Push the accessory connector onto the steamer nozzle until it clicks into place.
natural_image
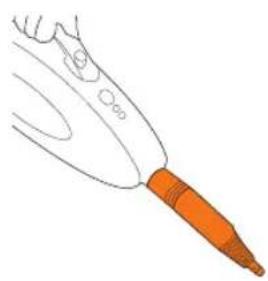
Line drawing of a stylized orange tool or brush with a pointed tip, no text or symbols presentLine up the concentration nozzle with the accessory connector, twist and push to lock into place.
natural_image
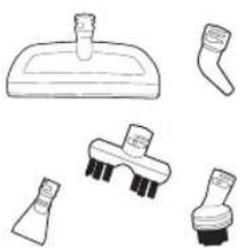
Illustration of cleaning tools including a brush, nail polish, and spray bottle (no text or symbols)Choose an accessory.
natural_image
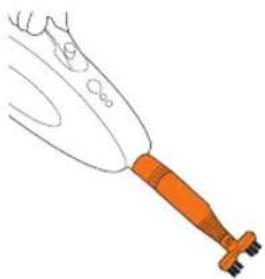
Illustration of a syringe with orange handle and black end cap (no text or symbols)Line up accessory with concentration nozzle, twist and push to lock into place.
natural_image
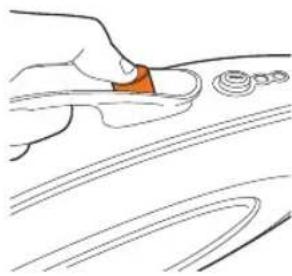
Line drawing of a hand pressing down on a curved surface with a magnified inset showing a small circular object (no text or symbols)Press the On/Off button to switch on.
Using your machine

CAUTION: Always allow tools and accessories to cool down before removing.
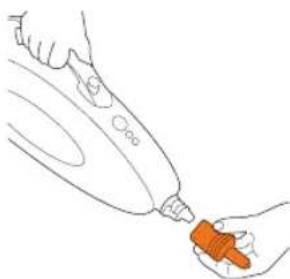
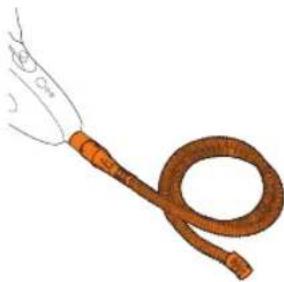
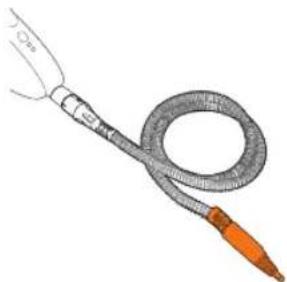
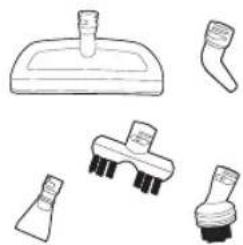
Attaching the accessory hose
natural_image
Line drawing of a hand holding an orange dropper near a white bottle (no text or symbols)Push the accessory connector onto the steamer nozzle until it clicks into place.
natural_image
Illustration of a coiled tube with a bulbous end, no text or symbols presentLine up hose with the accessory connector, twist and push to lock into place.
natural_image
Illustration of a coiled medical or laboratory device with a bulbous tip and orange handle (no text or symbols)Line up concentration nozzle with the hose, twist and push to lock into place.
natural_image
Illustration of various cleaning tools including a tool holder, brush, and filter (no text or symbols)Choose an accessory.
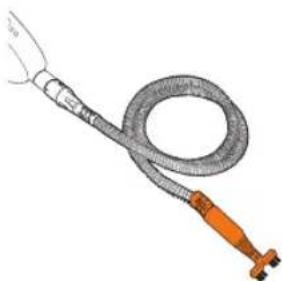
natural_image
Illustration of a coiled medical or laboratory device with a bulbous tube and orange handle (no text or symbols)Line up accessory with concentration nozzle, twist and push to lock into place.
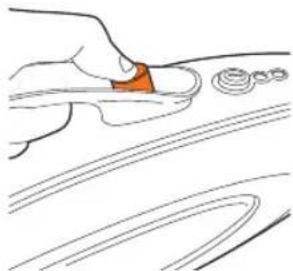
natural_image
Line drawing of a hand pressing down on a curved surface with a magnified inset showing a circular feature (no text or symbols)Press the On/Off button to switch on.
natural_image
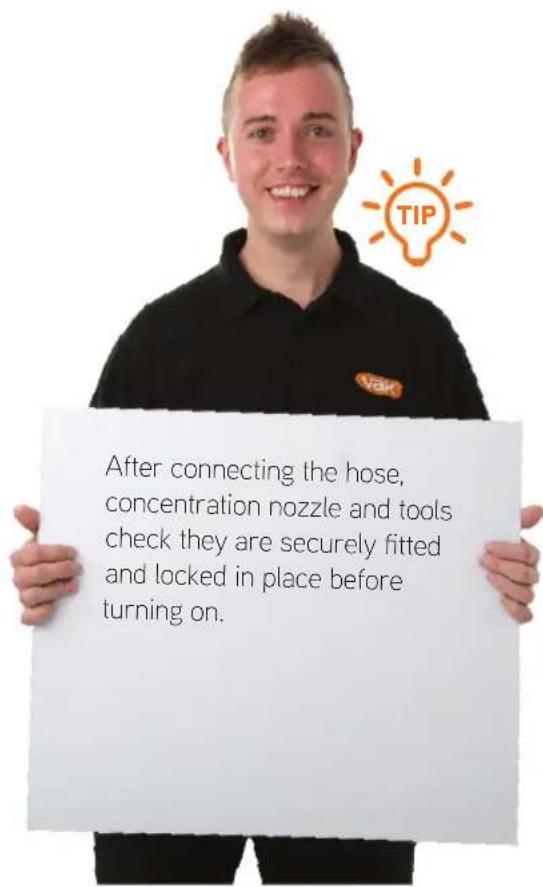
Portrait of a smiling man in a black polo shirt with a 'TIP' logo and tagline (no additional text or symbols)After connecting the hose, concentration nozzle and tools check they are securely fitted and locked in place before turning on.

Using your machine
IMPORTANT: Accessories can only be attached with the concentration nozzle. Taps should be turned off when steaming around them. Don't steam clean ovens, oven surfaces or grills when hot. Allow to cool to room temperature.
Using the tools
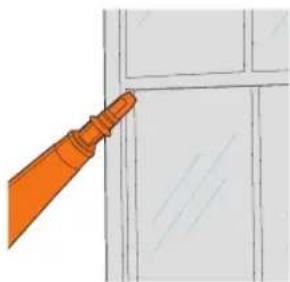
natural_image
Illustration of a door handle with an orange tool inserted, showing no text or symbolsConcentration nozzle
Use to remove soap scum in baths and shower enclosures and to clean stubborn stains in kitchens.
natural_image
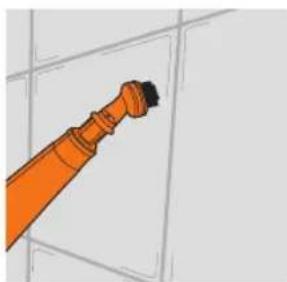
Illustration of a pipe fitting with orange ends, mounted on a grid background (no text or symbols)Brushes
Ideal for any surface from tiles, sinks, toilets and oven tops.
natural_image
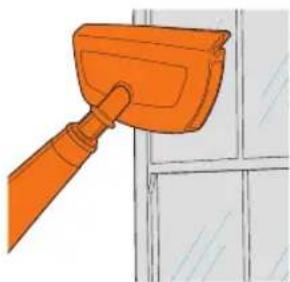
Illustration of an orange cleaning brush applying paint to a window (no text or symbols)Window squeegee tool
Great for leaving your windows, tiles and mirrors gleaming.
natural_image
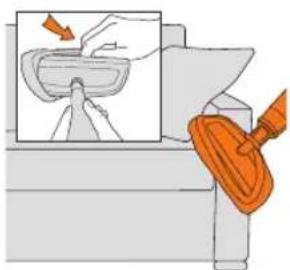
Illustration of a cleaning or cleaning process with an orange cloth and brush (no text or symbols)Window cloth
Attach the cloth to the squeegee tool for use on upholstery and clothes.
natural_image
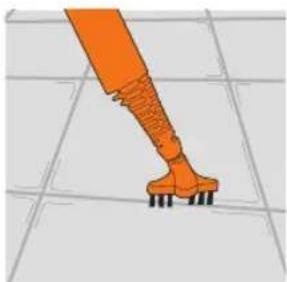
Illustration of a robotic arm gripping a grid-patterned object (no text or symbols)Grout brush
Lifts embedded dirt from in between tiles.
natural_image
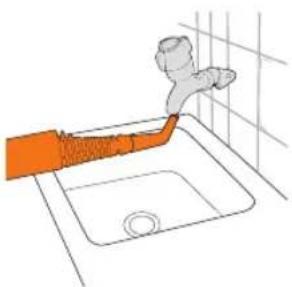
Line drawing of a hand cleaning a kitchen sink with a pipe bag (no text or symbols)Detail nozzle
For hard to reach areas e.g. around taps.
natural_image
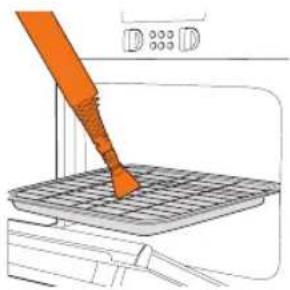
Illustration of a hand using a tool to press or install a grid on a machine (no text or symbols visible)Scraper tool
Ideal for removing dried on residue from ovens, work surfaces and pans.
CAUTION: Always allow tools and accessories to cool down before removing.
Taking care of your machine

IMPORTANT: Don't leave water in the tank between uses, this can effect the steamers performance, the water tank should to be emptied and rinsed after each use.
Emptying the water tank
natural_image
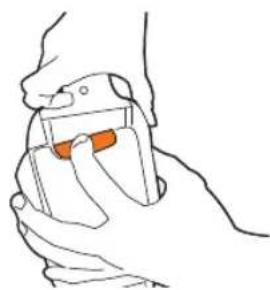
Line drawing of two hands holding a small object, no text or symbols presentPress the water tank release button and pull tank to remove.
natural_image
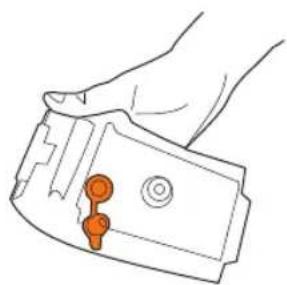
Line drawing of a hand holding a device with orange buttons (no text or symbols)Pull the tab on water tank cap to open.
natural_image
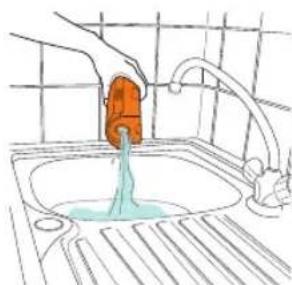
Illustration of a hand washing a sink with a water pump, no text or symbols presentEmpty any excess water over the sink.
Clearing blockages
natural_image
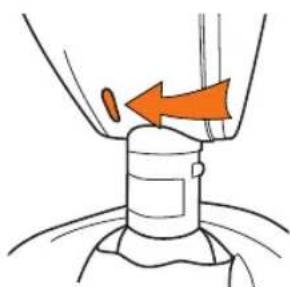
Illustration of a mechanical joint or seal with an orange arrow indicating direction (no text or symbols present)If there is an obstruction to the steam flow through the machine, steam may be released through the bleed valve.
natural_image
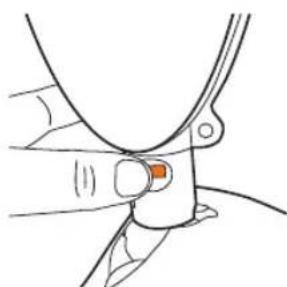
Line drawing of a hand holding a tool with a highlighted orange square (no text or symbols)Press the button on the neck of the machine to remove the floorhead.
natural_image
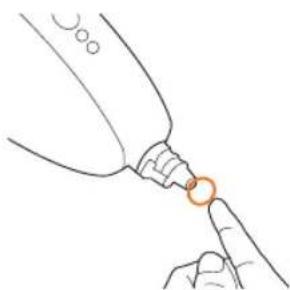
Line drawing of a finger pointing to a small orange ring attached to a medical device (no text or symbols)Using the de-scaling pin, insert the full length of the pin into the nozzle. It may be necessary to twist the pin to insert fully.
natural_image
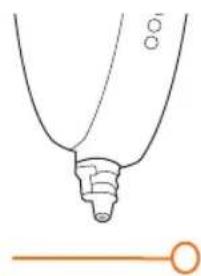
Simple line drawing of a bulb-like object with a pointed tip and a separate orange line below (no text or symbols)Remove the pin from the nozzle. Holding the main body of the steamer vertically, tap the nozzle on a hard surface to release any mineral deposits.
Taking care of your machine
IMPORTANT: Don't operate the steamer without hard water filter in place. The condition of the filter affects the performance of your steamer, check and change filter periodically. If you live in a hard water area the filter will discolour or darken over time. Depending on water hardness and frequency of use, the filter should be changed every 3 to 6 months (or if the filter has discoloured).
Changing the hard water filter
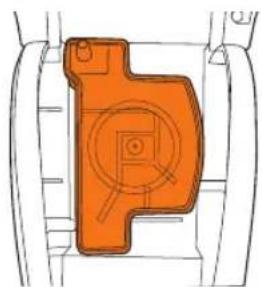
natural_image
Pure mechanical part diagram without any text, numbers, or symbolsRemove water tank to access the hard water filter.
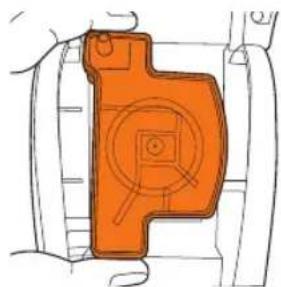
natural_image
Illustration of a hand holding a yellow object with orange outline, no text or symbols presentPull hard water filter to remove.
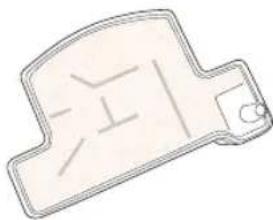
natural_image
Simple line drawing of a mechanical part or bracket (no text or symbols)New filter (beige/cream colour).
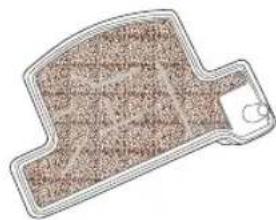
natural_image
Illustration of a rectangular object with textured surface and rounded edges, no visible text or symbolsHard water filter should be replaced every 3-6 months or if discoloured and darkened.
IMPORTANT: Never use bleach or fabric softener when washing the microfibre pad. Always allow the steamer to fully cool down before removing the microfibre pad.
Cleaning the microfibre pad
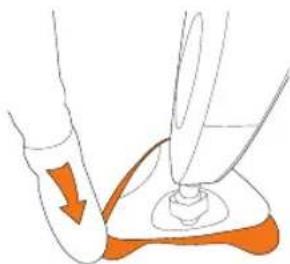
natural_image
Illustration of a medical procedure showing a hand holding a pen over a small orange object on a base (no text or symbols)Using your foot, hold the corner of the microfibre pad down, lift steamer to remove.
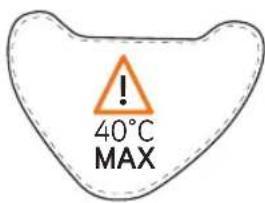
All cleaning pads are machine washable (Max 40°C) allow to fully dry before use.
Notes

What to do if it goes wrong
SolutionProblem
There is an accessory missing.
- Check the 'This pack contains' panel on the box to make sure the part is included with your machine.
The steamer has no power.
- Check the On/Off button has been pressed to on. The blue light should illuminate when on.
• The plug may not be fully pushed into the electrical socket.
- Check the fuse in the plug if this needs replacing, always replace with a British 13amp fuse.
Why is the steamer not producing steam?
- There may be no water in clean water tank, check the clean water tank has water.
- Check the clean water tank is correctly fitted. Go to 'Using your machine'.
- Check the hard water filter is in place, not damaged or blocked and need replacing. Go to 'Taking care of your machine'.
- Steam path may be blocked. Go to 'Let's talk technical'.
Why won't the cleaning pad pick up dirt?
- The cleaning pad may already be saturated or dirty, wash the cleaning pad. Go to 'Taking care of your machine'.
Why is steam coming from the side of the steamer?
- Steam coming from the side of the machine may indicate a blockage within the steamer. To clear any blockages go to 'Let's talk technical'.
It's quick and easy to
register for your FREE
2 year
guarantee
Online at: vax.co.uk/guarantees
Please retain your original receipt for proof of purchase.
we're here if you need us
Online vax.co.uk/support
Call: (UK) 0330 026 8455 (ROI) 1-800 928 308
Monday-Friday 8:30am to 6:30pm, Saturday 9:00am to 5:00pm*
Alternatively, you can write to us at:
Vax Ltd. Plot 302, Stonebridge Cross Business Park, Hampton Lovett, Droitwitch, WR9 OLW, UK
Accessories
Don't forget your accessories!
Order at: www.vax.co.uk/spares-and-solutions
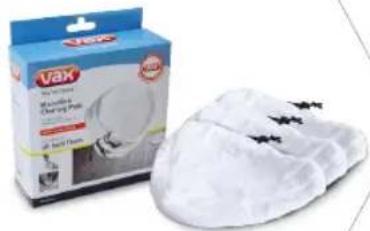
Steam Cleaning Pads (Type 2)
1-1-133071-00
3 microfibre cleaning pads (type 2). Drawstring attachment ideal for everyday cleaning. Machine washable for continuous use.
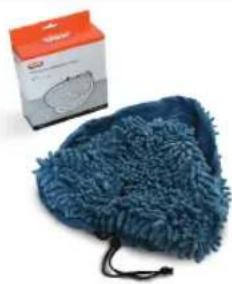
Coral Cleaning Pads (Type 3)
1-1-131643-00
These microfibre coral pads are super absorbent and are ideal for removing stubborn stains. The pads attach to the steam cleaner using a drawstring, to secure the pad in place over the steamer floorhead.
natural_image
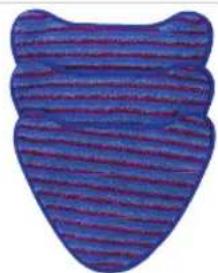
Blue textured fabric item with earbuds, next to a small orange box labeled 'SAR' (no visible text on fabric or items)Pro Cleaning Pads (Type 6)
1-1-132319-00
3 pro cleaning pads. Ideal for stubborn stain removal throughout your home. These cleaning pads attach to the base of the steam mop, so it's quick and easy to fit and remove.
natural_image
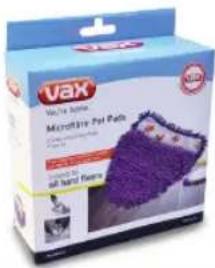
Blue textured object resembling a stylized shield or mask, with no visible text or symbolsMicrofibre Pet Pads (Type 9)
1-1-133265-00
Microfibre pet pads (Type 9) with one touch fit system. Ideal for picking up pet hairs. Machine washable for continuous use.
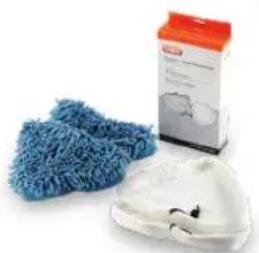
Steam Mop Cleaning Pads
1-1-131864-00
A pack of triangular steam cleaning pads for your Vax Steamer's triangular floorhead.
Pack contains: 2x Microfibre Cleaning Pads, 2x Coral Pads.
natural_image
Product photo showing blue mesh gloves, a white hard hat with cartoon eyes, and a cardboard box (no visible text or symbols)Total Home Pads
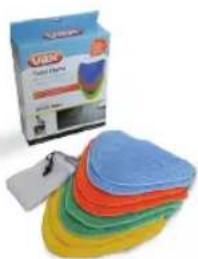
1-1-132528-00
Avoid cross contamination between different areas of your home with this Total Home cleaning kit. Kit contains 8 x coloured microfibre cleaning pads for all areas of your home.
natural_image
Product photo of a colorful bandage with a branded package and a stack of colorful bands (no visible text or symbols)
You're home.

@VaxUK
Vax Ltd., 5th Floor 2 Colmore Square, 38 Colmore Circus, Queensway, Birmingham, B4 6BN, UK email: info@vax.co.uk website: vax.co.uk
Version 1.0

EEC Statement of Compliance: Manufacturer/EEC importer: Vax Limited, hereby on our own responsibility, declare that the S7-AV is manufactured in compliance with the following Directives: Safety: 2006/95/EC Low Voltage Directive. EMC: 2004/108/EC Electromagnetic Compatibility Directive.
Waste electrical products should not be disposed of with household waste. Please recycle where facilities exist. Check with your Local Authority or retailer for recycling advice.
© 2014 All rights reserved. VAX®, VAX Lozenge are trade marks or registered trade marks of Techtronic Floor Care Technology Ltd.
- Multifunction Steamer
- This steamer is intended for household use only and NOT for commercial or industrial use.
- Thank you for buying this S7-AV Multifunction Steamer S7-AV Series.
- Taking care of your floors and surfaces
- Taking care of your S7-AV Multifunction Steamer
- Taking care of you
- Contents
- S7-AV
- Included with your machine
- Getting started
- Before you begin cleaning
- Assembling your steamer
- Using your machine
- Refreshing carpets
- Using the handheld steamer
- Attaching the accessory hose
- Using the tools
- Concentration nozzle
- Brushes
- Window squeegee tool
- Window cloth
- Grout brush
- Detail nozzle
- Scraper tool
- Taking care of your machine
- Emptying the water tank
- Clearing blockages
- Changing the hard water filter
- Cleaning the microfibre pad
- What to do if it goes wrong
- SolutionProblem
- Accessories
- Don't forget your accessories!
- Steam Cleaning Pads (Type 2)
- Coral Cleaning Pads (Type 3)
- Pro Cleaning Pads (Type 6)
- Microfibre Pet Pads (Type 9)
- 1-1-133265-00
- Steam Mop Cleaning Pads
- 1-1-131864-00
- Total Home Pads
- 1-1-132528-00
Brand : VAX
Model : Total S7
Category : Steam cleaner