MB-05AEU - Car radio Xomax - Free user manual and instructions
Find the device manual for free MB-05AEU Xomax in PDF.


| Product Type | Car Stereo |
| Brand | Xomax |
| Model | MB-05AEU |
| Form Factor | Single DIN (1-DIN) |
| Dimensions (W x H x D) | 178 x 50 x 100 mm (approximate) |
| Weight | 0.9 kg (approximate) |
| Power Supply | 12V DC (negative ground) |
| Max Power Output | 4 x 50W |
| Supported Media | USB, AUX, FM/AM Radio |
| Bluetooth | Yes (hands-free calling and audio streaming) |
| Display | LCD with backlight |
| Equalizer | Preset EQ modes (Rock, Pop, Classic, Flat) |
| USB Port | Front USB for MP3/WMA playback |
| AUX Input | 3.5mm front auxiliary input |
| Remote Control | Included (wired or infrared) |
| Installation | Standard single-DIN mounting sleeve |
| Cleaning | Use a soft dry cloth; avoid solvents |
| Safety Features | Removable front panel (theft protection) |
| Warranty | 1 year limited warranty |
| Spare Parts Availability | Contact Xomax support for replacement parts |
Frequently Asked Questions - MB-05AEU Xomax
User questions about MB-05AEU Xomax
0 question about this device. Answer the ones you know or ask your own.
Ask a new question about this device
Download the instructions for your Car radio in PDF format for free! Find your manual MB-05AEU - Xomax and take your electronic device back in hand. On this page are published all the documents necessary for the use of your device. MB-05AEU by Xomax.
USER MANUAL MB-05AEU Xomax
User Manual
Please read this manual carefully before using this device, and please keep it properly for future use.
1.Main User Interface
When unit first starts, it will enter the main UI every time. UI could be slid left and right. Press 📄 icon in any setting will return to the main UI. Scroll down from top, system notice section will appear.


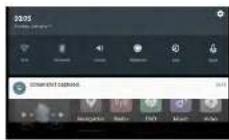
Press icon, user could clear the running operations.

Press ■ icon will enter the picture gallery section.
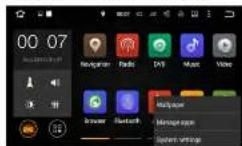
2. Main Menu User Interface
This multi-media system provides DVD, radio, Wi-Fi, Bluetooth, video, music, navigation and audio input functions. Press the ■ icon on the bottom left of Main UI to enter the Main Menu UI. Press the icon of the function that you want to enter. Press the Menu button or press the ■ icon on the top right to return to the Main Menu UI anytime.

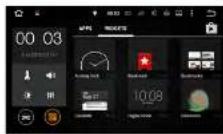
Main functions:
1.DVD
2.AV IN
- Bluetooth
4.Radio
5.Digital TV
- Photo
7.MUSIC
- Video
9.1Pod
10.AP (install)
-
Setting
-
File management
13.DVR
3. DVD
Insert the disc into the disc slot under any mode, disc will go in and play automatically. While disc is playing, touch any point of the screen, the playback control menu will appear on screen.

natural_image
Blurred outdoor scene with indistinct figures and foliage, no readable text or symbols visibleDVD player interface
1、Change page
2、Previous
3、Rewind
4、Play / Pause
5、Stop
6、Forward
7、▶ Next
4. Radio
Under any mode, press the BAND button on front panel, or press the radio icon in Main Menu will enter radio mode.

Radio interface
- Search: press once to search all available channels automatically, press again to stop the search;
- Stereo
- Loud
- Short press to move 0.1M forward, press and hold to move one channel forward
- Short press to move 0.1M backward, press and hold to move one channel backward
- AM AM could store 12 stations
- FM could store 18 stations
6. Bluetooth
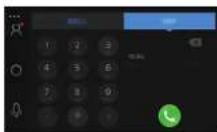
Press the Bluetooth button on front panel or press the Bluetooth icon on Main Menu to enter Bluetooth mode. After your callphone is paired with the unit successfully, all icons will be light up and 2 icon will appear on top of screen.

Bluetooth dial-up page
1) To switch to Bluetooth dialing page
2) To switch to Bluetooth phonebook page
a) To switch to Bluelcoth dialogue history page
4) To switch to Bluetooth pairing page, press this to search
5)、Bluetooth setting page
6) Delete number input, press and hold could delete all
7)、Receive/Dial calls
8)、End calls
91 To switch Bluetooth between the cellphone and head unit
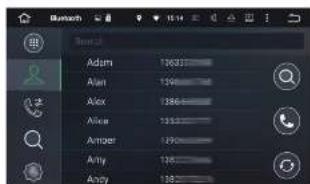
Bluetooth Phonebook Page Bluetooth Pairing Page
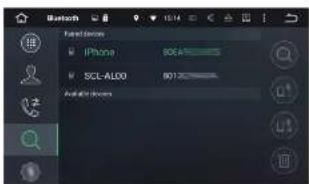
1). To search cell phone to pair with
2) To connect the chosen bell phone
37、吨 To cut on the paired unit
4)、To delete the paired unit
Press the ■ icon to enter Bluetooth music streaming

Bluetooth Setting Page

1)、Play / Pause
2)、Previous track
3)、 Next track
1. Setup the name of the Bluetooth device
2. Setup the password
7. Video Playback
- Press the Video icon to play the video files from inside the unit or from external SD card and USB. Supports H.263 P3, MPEG 4 Simple Profile, H. 264 / AVC formats.
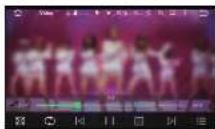
- □ Enlarge screen
- Play mode
- Previous track
- Play / Pause
- Stop
- Next track
- Video playlist
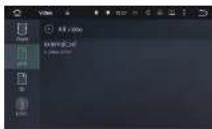
2.Slide the screen from right to left, the video playlist will appear.

8. Music Playback
- Press the Music icon to play the music inside the unit or external SD card and USB. Supports WMA, MP3 format.

- Slide the screen from right to left to display the Playlist, slide screen from left to right to display the file management.

9. Photo Gallery
Press the photo icon to enter the photo gallery. Users could see the photos stored in units or from external SD card and USB.


10. AV IN
Press the AV IN icon to play the video or music files from external sources.

natural_image
Coastal landscape with turquoise ocean and rocky cliffs under a partly cloudy sky (no text or symbols visible)
natural_image
Coastal landscape with green hills, blue sea, and cloudy sky (no text or symbols)11. File Management
Copy the files from external devices such as SD card and USB into the head unit memory.

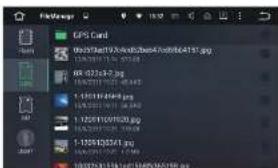
11、memory of head unit
2)、copy files
3)、paste files
4)、delete files
12. Setting
Press Setting icon to enter Setting page. User could modify setups of Wifi, audio, application, GPS, input method, data, time, settings
date, time ... etc settings.
- GPS: to adjust the sound ratio of GPS and music

- Video: to allow or disallow video playback while driving

13. GPS
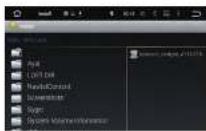
GPS NAVIGATION APK FILE INSTALLATION SETTING Select the GPS Card slot path, then click the APK installation files to install the map, as the below picture. When you need use the navigation, you must click "SD" at first. click "primo_800*480" "IGO" and install the "APK" file. When you install finished map, you can open the map, GPS navigation.




14. 3G Internet
Plug in the 3G dongle, after 30 seconds icon will appear on top, unit is connected to 3G internet.

15. Air Pin Connection
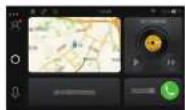
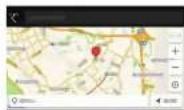
Press AirPin icon, turn ON the Hotspot of iPhone. Pair the head unit through Wifi with your iPhone. Restart the head unit, choose AirPlay from your iPhone, choose ITV@3 and turn ON the lens.

。
2
3

4

5
6

7

B
8

10
16. Android Connection
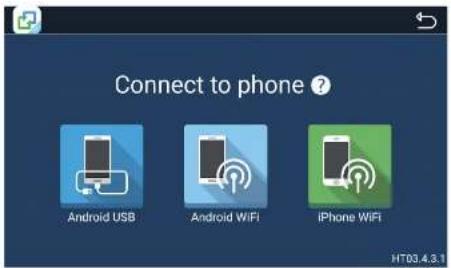
Press icon, turn ON the of your Android cell phone. Connect your Android phone to the head unit with the USB cable, after Bluetooth is successfully paired, two way control is successful.


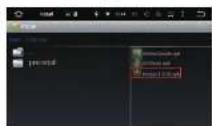
17. APK software installation
Press icon to enter APK, choose installation and the files, follow the steps.

1

2
3
4
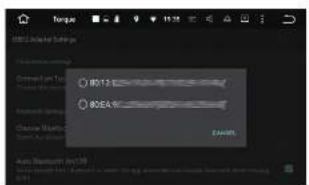
18. OBD Connection
Press icon to enter OEM menu. Install the torque.apk file, search the OBD name and connect it through Bluetooth. Press icon on Main Menu to enter OBD and setup the OBD type and Bluetooth setting, the connection is successful.

↑

2

3

4

5

System Setting
Touch the Main system icon to enter the main setting interface, as the below picture:

- WIFI Setting WIFI Connecting: Touch the setting icon to enter wireless network. Turn on the WIFI function, and then enter WIFI-setting the system will automatically search, select the WIFI name, click it then input password. The WIFI icon will appear at the top of notification bar after the connection is successful.
3G Internate connection: Plug the USB 3G device into the player, enter into the wireless network. Turn on the WIFI function, after 15 seconds when WIFI icon appears at the top of notification bar, the connection is successful.
- Sound Setting: Different notification ringtones are optional - Display Setting: Adjust screen brightness.dynamic screen

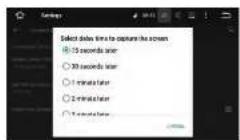
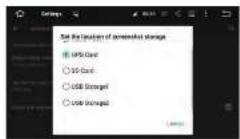
- Printscreen Setting: Select 15 seconds.30 seconds, 1 minute 2 minute, 3 minute to capture the image of screen and Storage Setting: Storage location.
• Storage Setting: Check SD card (option) capacity and uninstall it at any time.

- Application Setting: Check running status, space usage, installation and unloading of software
• Security Setting: All the Programs to factory reset.
- Language and input method setting: The player supports multi-language.End user can choose different language and input method.
- Backup and Reset Backup the installation data, application data, other settings and account information to Google server. If the system problem happens, end user can choose automatic reduction or restore the factory settings.
- Add Account: Register mailbox or set up E-mail, send and receive mails conveniently. check E-mail information easily.

- Date and Time Setting Select and set time and time display formate according to time zone.
- Auxiliary Function Select and set the text to speech function, time of touching. shortcut key of auxiliary function.
• GPS Setting Select and set GPS navigation sound mode and GPS running status display.
• Color setting of button light Select and set GPS navigation sound mode and GPS running status display. - Driving Setting Select and set multimedia playing when safe driving

- Amplifier Sound Setting
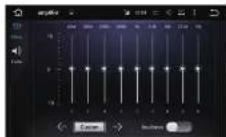

Enter into sound setting interface, then choose one from the following sound effects: Standard, Pop, Rock and Roll, Jazz, Class, Soft, ect to set or customize sound effect.
- Steering Wheel Learning Click on the "steering wheel" icon in the system settings interface to enter steering wheel button settings interface, as shown in the below instruction.
- Factory Set Click on factory setting, prompt box of entering password appears. Please enter "126", then select your car models logo and radio area. Please do not change and set other application information.
- About the player(Device) Display product information such as:Android version and kernel information

- About tablet
System updates, Status, Legal information, Model number, Android version, Baseband version, Kernel Version, Build number.
The video of car DVR are stored in TF card and most files are big, so please use at least 8GB TF
card to record the video for long time automatically. The product can automatically detect the car DVR when it is connected vis USB interface.

Click the icon to start recording video, the files can be stored automatically after stop recording.
Click ≡ the icom to check the recorded vida list.
The displays time, longitude, latitude and speed are displayed on the left side of video playing interface.
Click the icon to switch multi-cameras video recording.
FILES MANAGEMENT OPERATION
Enter into file management operation interface, as the below picture:

Click the icon to select the files to remove,select the copy icon ,then the paste
icon to copy and paste
files,When you don' I need the file,press the delecting icon to delete it.
SOFTWARE INSTALLATION MANAGEMENT
You can download the application software from PC or Internet through the network connection. Copy the download software to SD card or USB disc, then insert it into the card slot of the player or connect it.
Then click on the file management to select the software from SD card or USB downloaded application via USB connection.
Long press the APK installation package to install the software.
Browser After you connecting "hard driver", "SD", "USB", "photos", "movie" and "Tool", connect, then Click "File Manager", you will read the content.

Click"Browser"Open" Google"Inter page. You can enter into different websites, then web searching, read news, know the newest current events, stock inquiries.
STEERING WHEEL LEARNING
The steering wheel buttons of the product are appropriate for the original car steering wheel with non-bus control mode.
The original car's steering wheel buttons should be voltage input control, that is , when operating each button, the corresponding inputs of original car audio input different voltage. Before installation, find out the ground wire, original car steering wheel cables (Caution: some cars have three wires and others have two), and the steering wheel button power supply line (+5v), then connect with the corresponding steering wheel buttons power line still have power, no need to connect power line again, Otherwise, please connect it with the "+5v output of our product's steering wheel buttons function to use.)
Click the "steering wheel learning" icon on system setting interface to enter steering wheel buttons setting interface, as the shown picture:

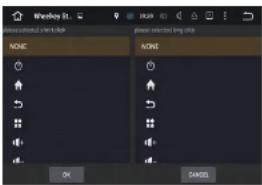
Steering Wheel Control Buttons Setting Enter the setting interface to select key learning, "steering wheel control reset" firstly. then long press the buttons on the steering wheel, select the corresponding keys in the interface. When the setting is successful, the corresponding buttons of interface will light up.
Wiring Diagram

- User Manual
- 1.Main User Interface
- Main Menu User Interface
- Main functions:
- DVD
- Radio
- Bluetooth
- Video Playback
- Music Playback
- Photo Gallery
- AV IN
- File Management
- Setting
- GPS
- 3G Internet
- Air Pin Connection
- Android Connection
- APK software installation
- OBD Connection
- System Setting
- FILES MANAGEMENT OPERATION
- SOFTWARE INSTALLATION MANAGEMENT
- STEERING WHEEL LEARNING
Brand : Xomax
Model : MB-05AEU
Category : Car radio