XM-VRSU743BT - Car radio Xomax - Free user manual and instructions
Find the device manual for free XM-VRSU743BT Xomax in PDF.


| Product Type | Car Stereo |
| Model | XM-VRSU743BT |
| Brand | Xomax |
| Dimensions (Approx.) | 178 x 100 x 160 mm (Standard DIN) |
| Weight (Approx.) | 1.2 kg |
| Power Supply | 12V DC (Car Battery) |
| Bluetooth | Yes, for hands-free calling and audio streaming |
| USB Port | Yes, for media playback and device charging |
| Auxiliary Input | 3.5 mm front AUX input |
| Radio Bands | FM/AM with RDS |
| Display | LCD with adjustable color illumination |
| Audio Output Power | 4 x 50 Watts max |
| Equalizer | Built-in preset EQ (Rock, Pop, Classic, etc.) |
| Steering Wheel Control Compatibility | Yes (requires adapter, sold separately) |
| SD Card Slot | Yes, for media playback |
| Remote Control | Included wireless remote control |
| Rear Camera Input | Yes, for optional reverse camera |
| Audio Outputs | Front, Rear, Subwoofer pre-outs |
| Playback Formats | MP3, WMA, WAV, FLAC via USB/SD |
| Language Support | English, Spanish, French, German, etc. |
Frequently Asked Questions - XM-VRSU743BT Xomax
User questions about XM-VRSU743BT Xomax
0 question about this device. Answer the ones you know or ask your own.
Ask a new question about this device
Download the instructions for your Car radio in PDF format for free! Find your manual XM-VRSU743BT - Xomax and take your electronic device back in hand. On this page are published all the documents necessary for the use of your device. XM-VRSU743BT by Xomax.
USER MANUAL XM-VRSU743BT Xomax
7"indash car Mp5 player
USER MANUAL
Before operating the unit, please read this manual Throughly and retain it for future reference

Summarizes the basic functions
This product uses high-definition digital touch screen, fine bright image, coupled with high-quality audio processing chip, has reached the perfect touching visual effects.
Efficient platform multimedia system, and plug-in USB/SD player functions. Intelligent steering wheel control function, the product and the perfect combination of the original car, the operation step, is your ideal choice!
Precautions
To avoid accidents, please read the following precautions before the installation and operation of the head unit.
★ About Security
1、Please observe local traffic rules and regulations.
2、 Don't watch or operate the head unit while driving.
3、Make sure to stop your car before you watch or operate the head unit.
★ About Installation
1、This machine should be installed by the qualified technical or service personnel.
2、If you install the head unit by yourself, you should follow the user manual.
★ If the car is parked under sunlight, do not turn on the head unit until it is cool.
Before turning on the machine, make sure the interior temperature is within (+60°C) to (-10°C).
★ Avoid using this machine in a magnetic environment( GPS,Bluetooth will be affected).
★ In the rainy or very humid areas, there might be moisture condensation inside the head unit.
Under this condition, the head unit will fail working properly. You should wait until the moisture has evaporated dehumidifier or before use.
★ In order to maintain the high quality audio and video, do not splash juice or other liquids on the head unit or CD-ROM.
★ Before switching off the ignition, turn off the head unit, otherwise it will cause consumption to car's battery.
★ Use the product for a long time will affect its service life. In order to extend the product service life, please choose the moderate volume.
★ Please don't rebuild the model privately. If rebuilding, it is likely to cause an accident.
Wiring diagram
-
This machine uses voltage is DC 12V, negative ground system, pre-installation required to confirm whether your car's electrical system of this type.
-
This unit with automatic antenna subwoofer separately powered.
-
It must be connected with the wire of wiring diagram, if connected incorrectly, it may cause malfunction or damage to the vehicles electrical system.
-
The speaker leads (-) must be connected to the speaker terminal (-), do not receive the body or interconnected to each speaker.
-
Do not block vents or heat sink, so as to avoid overheating and damage to the machine.

Specifications
FM receiver
FM receiver....87.5-108.0 MHZ
Noise sensitivity ≥37dB
AM receiver
Frequency range 530-17.10.MHZ....
Noise sensitivity ≥37dB.....
Total
Voltage 1.3.8V.DC....
Output power 4CHXWW....
Real power 4CHX.... W
Speaker impedance 4-8Ω
Dimensions 177..(Length)X178(Width) X50(Height)mm
Common icon and panel function instruction
 | Play/Pause | [BH6H] | Stop |
| [008C] | Previous track |  | Return |
| [KAO2] | Next track |  | Folder switch |
| [BT6H] | Black screen |  | Mute |
| [WOKS] | Random | [06CC] | Repeat |
Multimedia play introduction
Section switch/ Fast forward/Fast backward
Radio mode: Press it for manual search next stations; hold it for auto search next last stations Play mode: Press it for next track, hold it for fast forward x8.
Radio mode: Press it for manual search last stations; hold it for auto search last stations Play mode: Press it for last track, hold it for fast backward by fast backward×8.
★ MP3 select tracks player
-
Select tracks method 1: In selecting tracks from the list in MP3 mode, Press ➤ for next song, Farlast song.
-
Select tracks method 2: In MP3 mode directly touch the song of the list you choose on the screen when it is playing, also you can use the Remote Control with (0-9) button or 10+ button to select the track.
★ USB/SD play
When you plug into the USB/SD to the head unit, the system will search all the content of the USB/SD and start to play automatically.
Main menu
(for touch screen functionality)
Main Menu: Click 📋 on the panel, to power on, then press menu to enter the main menu. or when it is on radio mode, press 📋 icon to backward to the main menu.

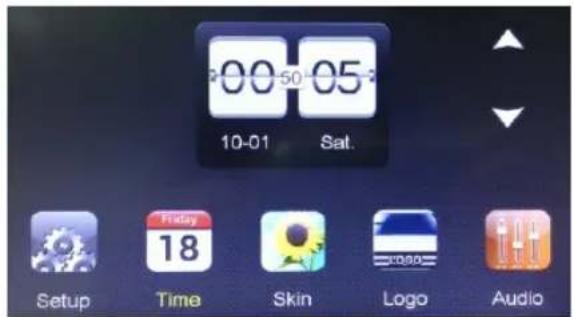
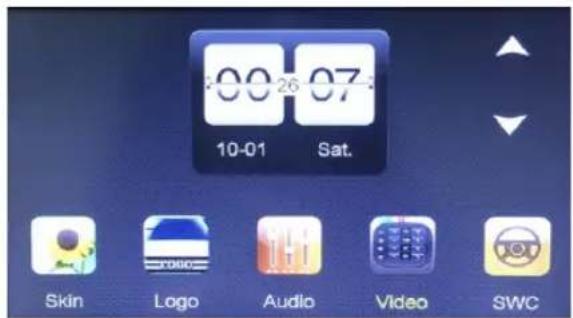
▲ Main manu interface
7.1 Radio
Click

on the menu to enter radio mode, as shown


FM interface
- Click ◀◀ or ▶▶ can automatic up or down searching different stations.
• BAND Click it to switch between FM1/FM2/FM3/AM1/AM2. - PTY : Press it to choose the function on RDS mode.
- AF/TA: Press it for TA on, press again for TA off.(Auto scan RDS stations) Hold it for AF on, hold again for AF OFF.(RDS function on)
- MUTE button: Click to mute.
- Scan the memorized station, hold it to search and store station automatically.
7.2 USB/SD Player
button 📄 or 📋 in the menu to enter USB/SD mode, insert the SD/USB it will enter play mode automatically.
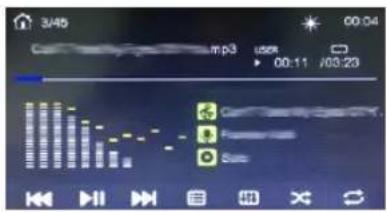
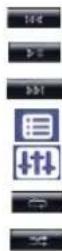
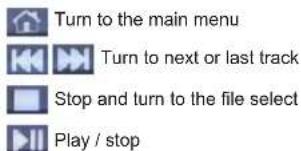
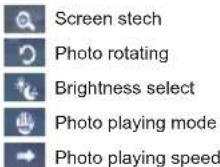
Press for last track, hold it for fast backward.
Play/Stop
Press for next track, hold it for fast forward.
File select
EQ choose.
Repeat.
Random.







7.3 Bluetooth
Click B on the main menu to enter the Bluetooth interface as below:


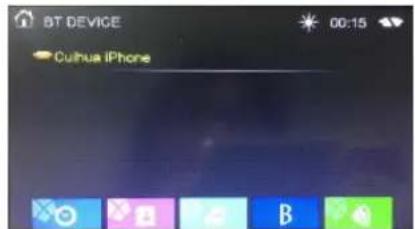
- When it's Bluetooth mode, search the Bluetooth name on your phone. Connect Bluetooth of your phone with the unit (For some phones, it needs to enter the code 0000 or 1234 for paring Bluetooth). When Bluetooth connected, when there is a call, the unit will turn to the Bluetooth interface for hand free answer. Click to answer the call. When the call is finished, it will turn to the previous interface automatically.
Handsfree phone call mode:
- Button phone call.
- button: Hang up.
- button: Delete the phone number.
- :phone call record down load.
- phone book.
- button: Click it to enter Bluetooth music mode.
- When it is on Bluetooth music mode, click it to for previous and next tracks.
- ▶ button: When it is on Bluetooth music mode, click it for play/pause function.
- :Mute.
- B: Show the Bluetooth connect record.
7.4 AUX
Click 📁 on the menu enter AUX mode
7.5 Set up
Click the menu enter Setup mode, as shown.
![Language Brake Default Area SystemVer KeyTone TouchAdjust ColorLight English On No Europe Nov 24 2018/17:25 On [ + ] Auto](/content/2026/05/1033312/images/e1687938f6bcc1ada05eb1872392e32f836571de121a3942118ce4061ee7aff0.jpg)
language set up
Brake set up
Default set up
Area set up
System version
Keye Tone
Screen adjust
Colour light
7.6 Clock
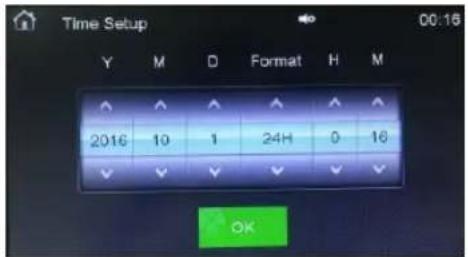
Click YEAR the proposed drag or adjust the correct years.
Click MONTH the opodesn drag to adjust should be correct months.
Click DATE the proposed drag to adjust the correct dates.
Click 24H then press ▲ or ▼ could set the hour limited with 24 hours or 12 hours.
Click HOUR then press ▲or ▼ could adjust the correct hours.
Click MIN then press ▲ or ▼ could adjust the correct minutes.
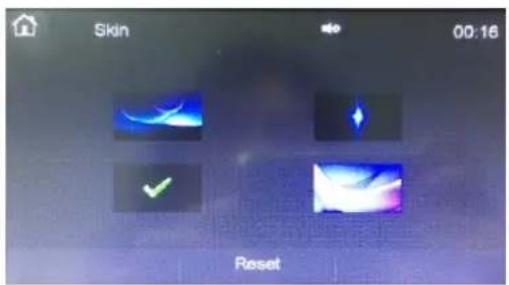
7.7 Skin set up
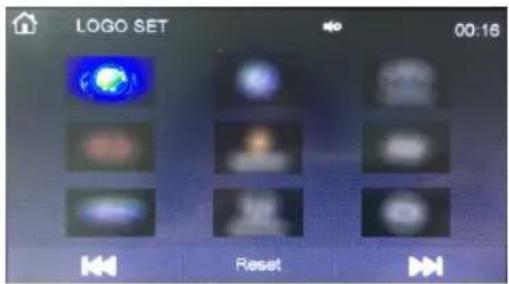
7.8 Auto logos set up
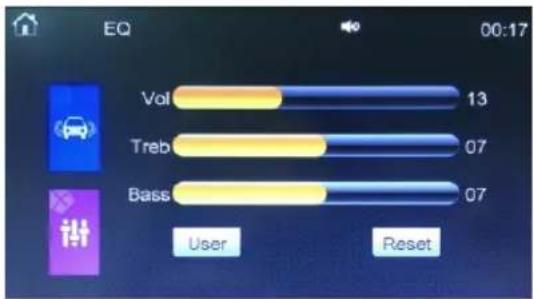
7.9 Speaker & EQ adjust


- Steering wheel set up
press button on the screen and hold on ,then press the key .

- 7"INDASH CAR MP5 PLAYER
- USER MANUAL
- SUMMARIZES THE BASIC FUNCTIONS
- PRECAUTIONS
- ★ ABOUT SECURITY
- ★ ABOUT INSTALLATION
- ★ IF THE CAR IS PARKED UNDER SUNLIGHT, DO NOT TURN ON THE HEAD UNIT UNTIL IT IS COOL
- ★ AVOID USING THIS MACHINE IN A MAGNETIC ENVIRONMENT( GPS,BLUETOOTH WILL BE AFFECTED)
- ★ IN THE RAINY OR VERY HUMID AREAS, THERE MIGHT BE MOISTURE CONDENSATION INSIDE THE HEAD UNIT
- WIRING DIAGRAM
- SPECIFICATIONS
- FM RECEIVER
- AM RECEIVER
- TOTAL
- MULTIMEDIA PLAY INTRODUCTION
- SECTION SWITCH/ FAST FORWARD/FAST BACKWARD
- ★ MP3 SELECT TRACKS PLAYER
- ★ USB/SD PLAY
- MAIN MENU
- 7.1 RADIO
- 7.2 USB/SD PLAYER
- 7.3 BLUETOOTH
- HANDSFREE PHONE CALL MODE
- 7.4 AUX
- 7.5 SET UP
- 7.6 CLOCK
- 7.7 SKIN SET UP
Brand : Xomax
Model : XM-VRSU743BT
Category : Car radio