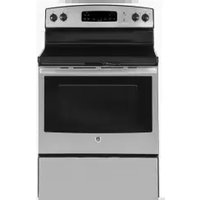
JCB630SJSS - Cooker Mabe - Free user manual and instructions
Find the device manual for free JCB630SJSS Mabe in PDF.


| Product Type | Freestanding Cooker |
| Brand | Mabe |
| Model | JCB630SJSS |
| Color | Stainless Steel |
| Features | 4 Gas Burners, Self-Cleaning Oven |
| Dimensions (Width x Depth x Height) | 30 x 26 x 47 inches |
| Weight | 150 lbs |
| Fuel Type | Natural Gas / LP Convertible |
| Number of Burners | 4 |
| Burner Output (Max) | Up to 15,000 BTU (center burner) |
| Oven Capacity | 4.6 cu ft |
| Oven Features | Broiler, Convection, Self-Cleaning |
| Control Type | Knobs (Burners), Electronic Oven Control |
| Ignition System | Electronic with Auto Re-ignition |
| Safety Features | Flame Failure Safety Valve, Child Lock |
| Cleaning | Self-Cleaning Oven, Removable Burner Grates |
| Voltage / Frequency | 120V / 60 Hz |
| Spare Parts Availability | Authorized Service Centers |
| Manual Language | English, Spanish |
Frequently Asked Questions - JCB630SJSS Mabe
User questions about JCB630SJSS Mabe
0 question about this device. Answer the ones you know or ask your own.
Ask a new question about this device
Download the instructions for your Cooker in PDF format for free! Find your manual JCB630SJSS - Mabe and take your electronic device back in hand. On this page are published all the documents necessary for the use of your device. JCB630SJSS by Mabe.
USER MANUAL JCB630SJSS Mabe
Electric Coil & Radiant Ranges
Safety Information 2-5
Operating Instructions
Clock, Timer and
Convenience Outlet .....15, 16
Controls 9 - 11
Cookware 7
Oven 12-14
Sabbath Feature .....19, 20
Self-Cleaning .....22, 23
Special Features ....18
Steam Clean 24
Surface Units 6,8
Temperature Conversions ..... 11
Thermostat 21
Timed Baking and Roasting .....17
Care and Cleaning....31
Troubleshooting Tips ..... 32-36
Accessories 37
Consumer Support
Consumer Support 41
Product Registration 38, 39
Warranty 40
Write the model and serial numbers here:
Model # ____
Serial # ____
You can find them on a label, behind the storage drawer on the oven frame.
Owner's Manual
Coil Top and
Radiant Top Models
Standard
Self-Clean
Clean Models
Models
JCBS630
JCB630
JCBS660
JCB635
IMPORTANT SAFETY INFORMATION.
READ ALL INSTRUCTIONS BEFORE USING.

WARNING
Read all safety instructions before using the product. Failure to follow these instructions may result in fire, electric shock, serious injury or death.
ANTI-TIP DEVICE
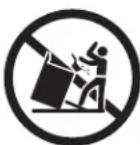
WARNING
- All ranges can tip.
• BURNS or other SERIOUS INJURIES can result.
• INSTALL and CHECK the ANTI-TIP bracket following the instructions supplied with the bracket.
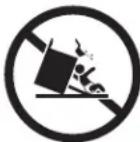
To reduce the risk of tipping the range, the range must be secured by a properly installed anti-tip bracket. See installation instructions shipped with the bracket for complete details before attempting to install.
For Freestanding Ranges:
To check if the bracket is installed and engaged properly, remove the storage drawer or kick panel and look underneath the range to see that the leveling leg is engaged in the bracket. On models without a storage drawer or kick panel, carefully tip the range forward. The bracket should stop the range within 10.2 cm (4 inches) If it does not, the bracket must be reinstalled. If the range is pulled from the wall for any reason, always repeat this procedure to verify the range is properly secured by the anti-tip bracket.
Never completely remove the leveling legs or the range will not be secured to the anti-tip device properly.
If you did not receive an anti-tip bracket with your purchase, call. 1 800 561 3344 to receive at no cost. For installation instructions of the bracket, visit GEAppliances.ca
WARNING
GENERAL SAFETY INSTRUCTIONS
Use this appliance for its intended purpose as described in this Owner's Manual.
Be sure your appliance is properly installed and grounded by a qualified installer in accordance with the provided installation instructions.
Do not attempt to repair or replace any part of your range unless it is specifically recommended in this manual. All other servicing should be referred to a qualified technician.
Before performing any service, unplug the range or disconnect the power supply at the household distribution panel by removing the fuse or switching off the circuit breaker.
Do not leave children alone—children should not be left alone or unattended in an area where an appliance is in use. They should never be allowed to climb, sit or stand on any part of the appliance.
■ CAUTION: Do not store items of interest to
children above a range or on the backguard of a range—children climbing on the range to reach items could be seriously injured.
Use only dry pot holders—moist or damp pot holders on hot surfaces may result in burns from steam. Do not let pot holders touch hot surface units or heating elements. Do not use a towel or other bulky cloth in place of pot holders.
■ Never use your appliance for warming or heating the room.
Do not touch the surface units, the heating elements or the interior surface of the oven. These surfaces may be hot enough to burn even though they are dark in color. During and after use, do not touch, or let clothing or other flammable materials contact the surface units, areas near by the surface units or any interior area of the oven; allow sufficient time for cooling first. Other surfaces of the appliance may be come hot enough to cause burns. Potentially hot surfaces include the cooktop, areas facing the cooktop, oven vent opening, surfaces near the opening and crevices around the oven door.
Do not heat unopened food containers. Pressure could build up and the container could burst, causing an injury.
Do not use aluminum foil to line drip pans or any where in the oven, except as described in this manual. Foil can trap heat or melt, resulting in damage to the product and a shock or fire hazard.
- Avoid scratching or impacting glass doors, cook tops or control panels. Doing so may lead to glass breakage. Do not cook on a product with broken glass Shock, fire or cuts may occur.
Cook meat and poultry thoroughly —meat to at least an internal temperature of 71.1 °C (160 °F) and poultry to at least an internal temperature of 82.2 °C (180°F)—Cooking to these temperatures usually protects against foodborne illness.
WARNING
KEEP FLAMMABLE MATERIALS AWAY FROM THE RANGE
Do not store or use flammable materials in an oven or near the cooktop, including paper, plastic, pot holders, linens, wall coverings, curtains, drapes and gasoline or other flammable vapors and liquids.
■ Never wear loose-fitting or hanging garments while using the appliance. These garments may ignite if they contact hot surfaces causing severe burns.
Do not let cooking grease or other flammable materials accumulate in or near the range. Grease in the oven or on the cooktop may ignite.
- Clean ventilating hoods frequently. Grease should not be allowed to accumulate on the hood or filter.
IMPORTANT SAFETY INFORMATION.
READ ALL INSTRUCTIONS BEFORE USING.
WARNING
IN THE EVENT OF A FIRE, TAKE THE FOLLOWING STEPS TO PREVENT THE FIRE FROM SPREADING:
Do not use water on grease fires Never pick up a flaming pan. Turn the controls off Smother a flaming pan on a surface unit by overing the pan completely with a well-fitting lid, cookie sheet or flat tray. Use a multi-purpose dry chemical or foam-type fire extinguisher.
If there is a fire in the oven during baking, smother the fire by closing the oven door and turning the oven off or by using a multi-purpose dry chemical or foam-type fire extinguisher.
If there is a fire in the oven during self-clean, turn the oven off and wait for the fire to go out. Do not force the door open Introduction of fresh air at self-clean temperatures may lead to a burst of flame from the oven Failure to follow this instruction may result in severe burns.
WARNING
COOKTOP SAFETY INSTRUCTIONS
Never leave the surface units unattended at medium or high heat settings. Boilovers cause smoking and greasy spillovers that may catch on fire.
Never leave oil unattended while frying. If allowed to heat beyond its smoking point, oil may ignite resulting in fire that may spread to surrounding cabinets. Use a deep fat thermometer whenever possible to monitor oil temperature.
To avoid oil spillover and fire, use a minimum amount of oil when shallow pan-frying and avoid cooking frozen foods with excessive amounts of ice.
Use proper pan size—select cookware having flat bottoms large enough to cover the surface heating element. The use of undersized cookware will expose a portion of the surface unit to direct contact and may result in ignition of clothing. Proper relationship of cookware to surface unit will also improve efficiency.
Only certain types of glass, glass/ceramic, earthenware or other glazed containers are suitable for cooktop service; others may break because of the sudden change in temperature.
To minimize the possibility of burns, ignition of flammable materials and spillage, the handle of a container should be turned toward the center of the range without extending over near by surface units.
- When preparing flaming foods under a hood, turn the fan on.
If power is lost to an electric cooktop while a surface unit is ON, the surface unit will turn back ON as soon as power is restored. In the event of power loss, failure to turn all surface unit knobs to the OFF position may result in ignition of items on or near the cooktop, leading to serious injury or death.
WARNING
RADIANTCOOKTOPSAFETYINSTRUCTIONS(Somemodels)
■ UsecarewhentouchingthecooktopTheglasssurface ofthecooktopwillretainheatafterthecontrolshave beenturnedoff.
Donotcookonabrokencooktoplfglasscooktop shouldbreak,cleaningsolutionsandspillovers maypenetratethebrokencooktopandcreatea riskofelectricshock. Contactaqualifiedtechnician immediately
AvoidscratchingtheglasscooktopThecooktopcanbe scratched with items such as knives, sharp instruments, ringsorotherjewelry,andrivetsonclothing.
Donotplaceorstoreitemsthatcanmeltorcatchfire ontheglasscooktop,evenwhenitisnotbeingused . If thecooktopisinadvertentlyturnedon,theymayignite . Heatfromthecooktoporovenventafteritisturnedoff maycausethemtoignitealso .
UseCERAMABRYTE® ceramic.CooktopCleanerand CERAMABRYTE® CleaningPadtocleanthecooktop . Waituntilthecooktopcoolsandtheindicatorlightgoes outbeforecleaning . Awetspongeorclothonahot surfacecancausesteamburns . Somecleanerscan producenoxiousfumesifappliedtoahotsurface . Note: Sugarspillsareanexception . Theyshouldbescraped offwhilestillhotusinganovenmittandascraper . See theCleaningtheglasscooktopsectionfordetailed instructions
Read and follow all instructions and warnings on the cleaningcreamlabel.
WARNING
OVENSAFETYINSTRUCTIONS
■ Standawayfromtherangewhenopeningtheoven door. Hotairorsteamwhichescapescancauseburns tohands,faceand/oreyes.
- Keeptheovenventunobstructed.
- KeeptheovenfreefromgreasebuildupGreaseinthe ovenmayignite.
Placeovenracksindesiredlocationwhileoveniscool Ifrackmustbemovedwhileovenishot,donotletpot holdercontacthotheatingelementinoven.
- When using cooking or roasting bags in the oven, follow the manufacturer's directions.
Pulltheovenracktothestop-lockpositionwhen loadingandunloadingfoodfromtheoven. Thishelps preventburnsfromtouchinghotsurfacesofthedoor andovenwalls.
Donotleaveitemssuchaspaper, cookingutensilsor foodintheovenwhennotinuseltemsstoredinan ovencanignite.
- Donotusealuminumfoiltolinetheovenbottom . Foilcantrapheatormelt,resultingindamagetothe productandashockorfirehazard .
WARNING
SELF-CLEANINGOVENSAFETYINSTRUCTIONS
(Somemodels)
Theseelf-cleaningfeatureoperatestheovenattemperatureshighenoughtoburnawayfoodsoilsintheoven. Followtheseinstructionsforsafeoperation.
Before operating the self-clean cycle, remove pans, shinymetalovenracksandotherutensilsfromthe oven. Onlygrayporcelain-coatedovenracksmaybe leftintheoven . Donotuseself-cleantocleanother parts,suchasdrippansorbowls .
Before operating the self-clean cycle, wipe grease and foodsoilsfromtheoven. Excessiveamountofgrease mayigniteleadingtosmokedamagetoyourhome.
If the self-cleaning modemalfunctions, turn the oven off and disconnect the powersupply. Have its serviced by a qualified technician.
■ DonotcleanthedoorgasketThedoorgasketis essentialforagoodseal . Careshouldbetakennotto rub,damageormovethegasket .
Do not use oven cleaners. No commercial oven cleaner orovenlinerprotectivecoatingofanykindshouldbe usedinoraroundanypartoftheoven
NOTE: Throughout this manual, features and appearance may vary from your model.
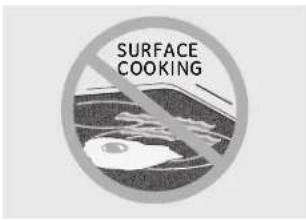
Never cook directly on the glass. Always use cookware.
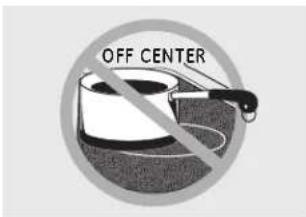
Always place the pan in the center of the surface unit you are cooking on.

Do not slide cookware across the control or cooktop surface because it can scratch the glass. The glass is scratch-resistant, not scratchproof.
About the Radiant Surface Units
WARNING: the surface
units are automatically disabled during the self-clean cycle. Make sure that all surface unit controls are turned off at all times during the self-clean cycle. Any surface unit that is set to an on position, while the self-clean cycle is operating, will automatically come on after the self-clean cycle is finished, and could result in an on, unattended surface unit. Wait until the self-clean cycle is finished to set and use the surface units.
The radiant cooktop features heating units beneath a smooth glass surface. Cooktop temperatures increase with the number of surface units that are on. With 3 or 4 units turned on, surface temperatures are high. Always use caution when touching the cooktop. An indicator light will come on when the surface unit is turned on.
The appropriate HOT surface indicator light will glow when its corresponding radiant element is turned on and will remain on until the surface has cooled below 65.5°C (150°F).
NOTE:
Hot surface indicator light will:
■ Come on when the surface unit is hot to the touch.
■ Stay on even after the unit is turned off.
Glow brightly until the unit has cooled below 65.5°C (150°F).
NOTE: A slight odor is normal when a new cooktop is used for the first time. It is caused by the heating of new parts and insulating materials and will disappear in a short time.
NOTE: On models with light-colored glass cooktops, it is normal for the cooking zones to change color when hot or cooling down. This is temporary and will disappear as the glass cools to room temperature.
It is safe to place hot cookware from the oven or surface on the glass cooktop when the surface is cool.
Even after the surface units are turned off, the glass cooktop retains enough heat to continue cooking. To avoid overcooking, remove pans from the surface units when the food is cooked. Avoid placing anything on the surface unit until it has cooled completely.
Water stains (mineral deposits) are removable using the cleaning cream or full strength white vinegar.
Use of window cleaner may leave an iridescent film on the cooktop. The cleaning cream will remove this discoloration.
- Don't store heavy items above the cooktop. If they drop onto the cooktop, they can cause damage.
Do not use the surface as a cutting board.
Temperature Limiter
Every radiant surface unit has a temperature limiter.
The temperature limiter protects the glass cooktop from getting too hot.
Thetemperaturelimitermaycyclethe unitsoff foratimeif:
The pan boils dry.
The pan bottom is not flat.
The pan is off center.
There is no pan on the unit
The following information will help you choose cookware which will give good performance on glass cooktops.
natural_image
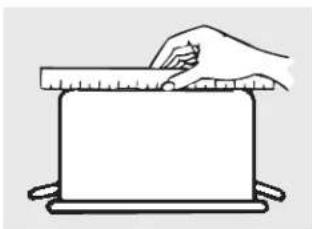
Simple line drawing of a hand holding a ruler above a blank rectangular object (no text or symbols)Check pans for flat bottoms by using a straight edge.
Stainless Steel:
recommended
Aluminum:
heavy weight recommended
Good conductivity. Aluminum residues sometimes appear as scratches on the cooktop, but can be removed if cleaned immediately. Because of its low melting point, thin-weight aluminum should not be used.
Glass-Ceramic:
usable, but not recommended
Poor performance. May scratch the surface.
Stoneware:
usable, but not recommended
Poor performance. May scratch the surface.
Home Canning Tips:
Be sure the canner is centered over the surface unit.
Make sure the canner is flat on the bottom.
Use recipes and procedures from reputable sources. These are available from manufacturers such as Bålland Kerr® and the Department of Agriculture Extension Service.
To prevent burns from steam or heat, use caution when canning.
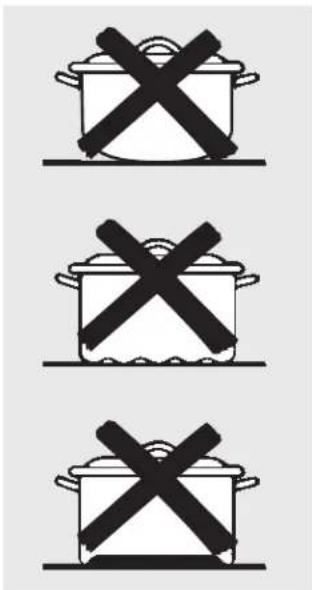
Pans with rounded, curved, ridged or warped bottoms are not recommended
Copper Bottom:
recommended
Copper may leave residues which can appear as scratches. The residues can be removed, as long as the cooktop is cleaned immediately. However, do not let these pots boil dry. Overheated metal can bond to glass cooktops. An overheated copper bottom pot will leave a residue that will permanently stain the cooktop if not removed immediately.
Porcelain Enamel-Covered Cast Iron:
recommended
As long as the cookware is covered completely with porcelain enamel, this cookware is recommended. Caution is recommended for cast-iron cookware that is not completely covered with smooth porcelain enamel, as it may 'scratch the glass-ceramic cooktop.
The following information will help you choose cookware which will give good performance on coil cooktops.
natural_image
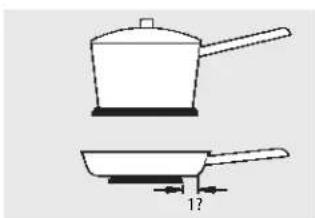
Two simple line drawings of cooking pots: a lid and a pan, with no text or symbols present.Not over 1 inch
Surface Cookware Tips
Use medium- or heavy-weight cookware. Aluminum cookware conducts heat faster than other metals. Cast-iron and coated cast-iron cookware are slow to absorb heat, but generally cook evenly at low to medium heat settings. Steel pans may cook unevenly if not combined with other metals.
For best cooking results, pans should be flat on the bottom. Match the size of the saucepan to the size of the surface unit. The pan should not extend over the edge of the surface unit more than 2.5 cm 1 inch.

natural_image
Two simple line drawings of cooking utensils: a crossed pot and a bowl, both without any text or symbols.Use only flat-bottomed woks.
Wok Cooking
We recommend that you use only a flat-bottomed wok. They are available at your local retail store.
Do not use woks that have support rings. Use of these types of woks, with or without the ring in place, can be dangerous.
Placing the ring over the surface unit will cause a buildup of heat that will damage the porcelain cooktop. Do not try to use such woks without the ring. You could be seriously burned if the wok tips over.
Using the surface units.
Throughout this manual, features and appearance may vary from your model.
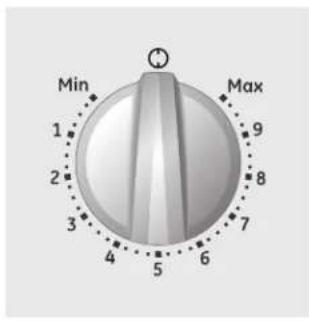
How to Set
Push the knob in and turn in either direction to the setting you want.
At both OFF and Max the control clicks into position. You may hear slight clicking sounds during cooking, indicating the control is keeping the power level you set.
Be sure you turn the control knob to OFF when you finding.
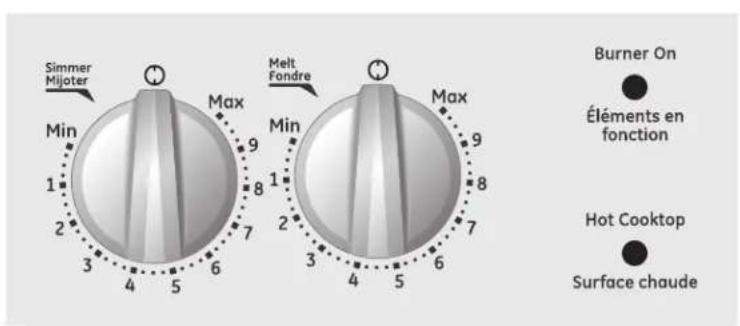
Indicator Lights (on radiant glass models only)
A Hot indicator light will glow when any radiant element is turned on, and will remain on until the surface is cool enough to touch.
A Burner On indicator light will glow when any surface unit is on.
NOTE: The Hot indicator light may glow between the surface control settings of Min and OFF, but there is no power to the surface units.
Throughout this manual, features and appearance may vary from your model.
flowchart
graph TD
    A["1: Oven Controls"] --> B["Bake Cuire Temp Recall"]
    C["2: Start / on Départ"] --> B
    D["3: TrueTemp"] --> E["Steam Clean Nettoyage Vapeur"]
    F["4: Time Controls"] --> G["Timer Minuterie On/Off"]
    H["5: Clock Horloge"] --> I["Cook Time Temps de Cuisson"]
    J["6: Automatic Oven Four Automatique"] --> K["Start Time Heure de Départ"]
    L["7: Display On/Off"] --> M["+ -"]
    N["8: On/Off"] --> O["Lightbulb Icon"]
    P["9: On/Off"] --> Q["+ -"]
    R["10: Display On/Off"] --> S["+ -"]
    T["11: Off Arrêt"] --> U["+ -"]
    V["12: Hi/Lo"] --> W["+ -"]
    X["13: Hi/Lo"] --> Y["+ -"]
    Z["14: End"]
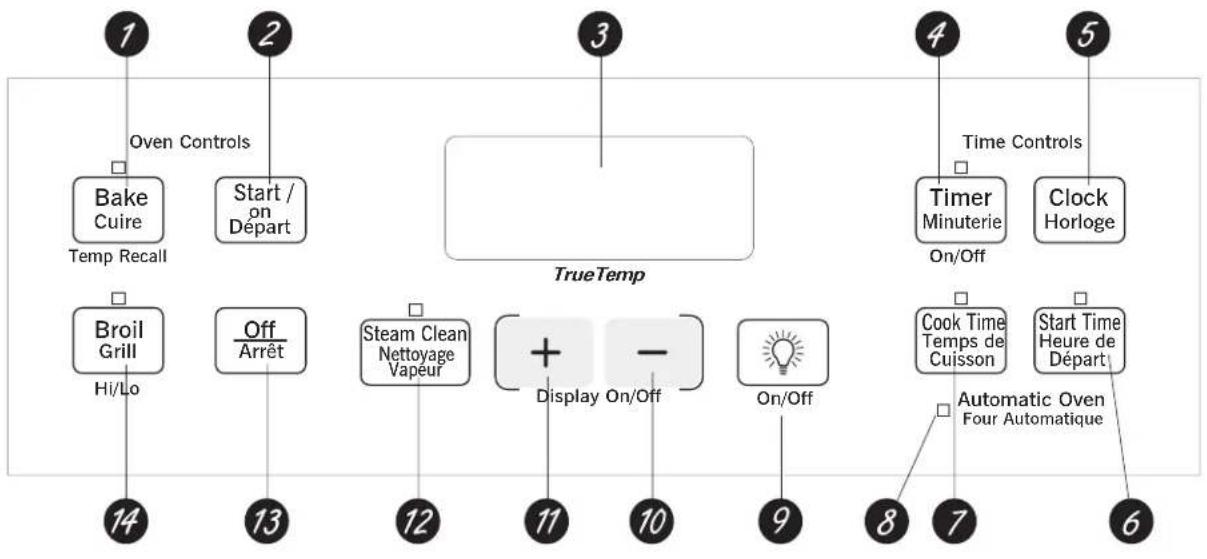
Control Graphics for JCBS630 Models.
flowchart
graph TD
    A["Bake Cuire Départ"] --> B["Start /on"]
    C["Broil Grill"] --> D["Off Arrêt"]
    E["Timer Minuterie"] --> F["+ -"]
    G["Clock Horloge"] --> H["+ -"]
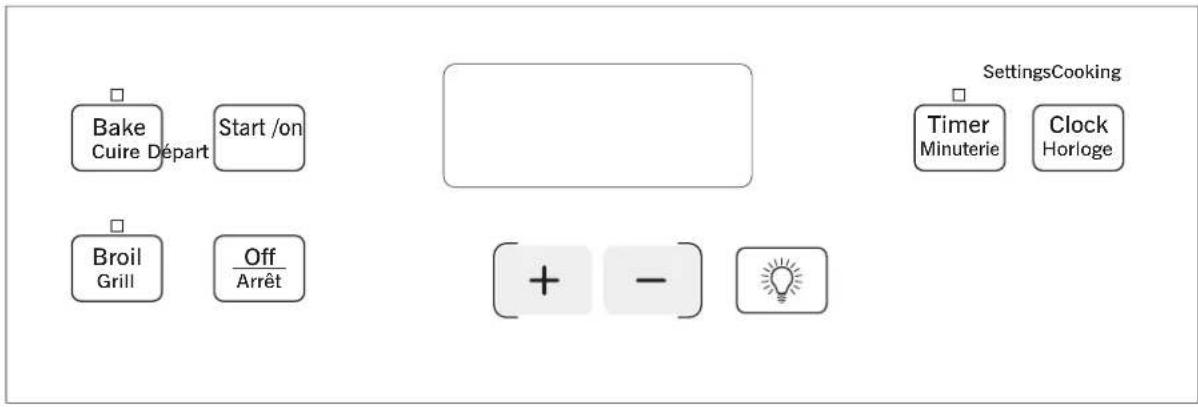
Control Graphics for JCB630, JCB635 Models.
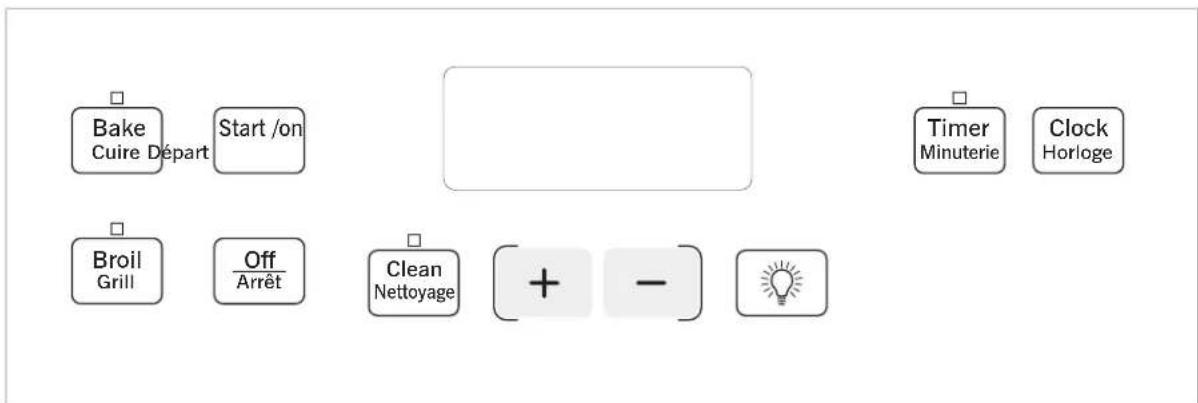
flowchart
graph TD
    A["Bake Cuire Départ"] --> B["Start /on"]
    C["Broil Grill"] --> D["Off Arrêt"]
    E["Clean Nettoyage"] --> F["+ -"]
    G["Timer Minuterie"] --> H["Clock Horloge"]
Using the oven controls.
Control Graphics for JCBS660 Model.
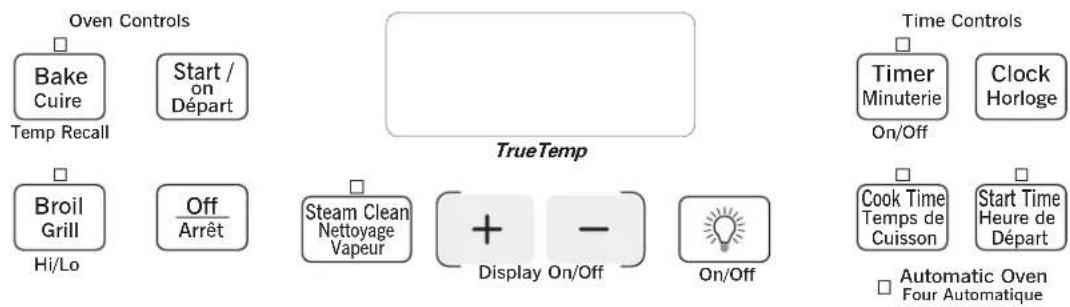
flowchart
graph TD
    A["Oven Controls"] --> B["Bake Cuire Temp Recall"]
    A --> C["Start / on Départ"]
    D["Time Controls"] --> E["Timer Minuterie On/Off"]
    D --> F["Clock Horloge"]
    G["Broil Grill Hi/Lo"] --> H["Off Arrêt"]
    I["Steam Clean Nettoyage Vapeur"] --> J["+ -"]
    K["Display On/Off"] --> L["On/Off"]
    M["Automatic Oven Four Automatique"] --> N["Cook Time Temps de Cuisson"]
    M --> O["Start Time Heure de Départ"]

Oven Control, Clock and Timer Features and Settings
BAKE Pad
Touch this pad to select the bake function.
BAKE Light
Flashes while in edit mode—you can change the oven temperature at this point. Glows when the oven is in bake mode.
2 START/ON Pad
Must be touched to start any cooking or cleaning function.
3 Display
Shows the time of day, oven temperature, whether the oven is in the bake, broil or self-cleaning mode and the times set for the timer or automatic oven operations. The display will show PRE while preheating. When the oven reaches the selected temperature, the oven control will beep and the display will show the oven temperature.
If "F- and a number or letter" flash in the display and the oven control signals, this indicates a function error code.
If your oven was set for a timed oven operation and a power outage occurred, the clock and all programmed functions must be reset.
The time of day will flash in the display when there has been a power outage. Reset the clock.
If the function error code appears during the self-cleaning cycle, check the oven door latch. The latch handle may have been moved, even if only slightly, from the latched position. Make sure the latch is moved to the right as far as it will go.
Touch the OFF pad. Allow the oven to cool for one hour. Put the oven back into operation. If the function error code repeats, disconnect the power to the range and call for service.
TIMER Pad
Touch this pad to select the timer feature.
Then touch the + and - pads to adjust the timer.
TIMER Light
Flashes while in edit mode—you can change the set time at this point. Glows when the timer has been activated. Flashes again when the time has run out until the control is reset.
5 CLOCK Pad
To set the clock, press this pad twice and then press the + and - pads. The time of day will flash in the display when the oven is first turned on.
6 START TIME Pad (on some models)
Use along with the COOK TIME or CLEAN pads to set the oven to start and stop automatically at a time you set.
START TIME Light
Flashes while in edit mode—you can change the start time at this point. Glows when the function has been activated.
COOK TIME Pad (on some models)
Touch this pad and then touch the + or - pads to set the amount of time you want your food to cook. The oven will shut off when the cooking time has run out.
COOK TIME Light
Flashes while in edit mode—you can change the set time at this point. Glows when the function has been activated. Flashes again when the time has run out until the control is reset.

Oven Control, Clock and Timer Features and Settings
8 AUTOMATIC OVEN Light (on some models) This lights anytime the oven has been programmed using the COOK TIME or START TIME functions.
9 OVEN LIGHT or ✪ Pad Touch this pad to turn the oven light on or off.
- Pad Short taps to this pad will decrease the time or temperature by small amounts. Touch and hold the pad to decrease the time or temperature by larger amounts.
11 + Pad Short taps to this pad will increase the time or temperature by small amounts. Touch and hold the pad to increase the time or temperature by larger amounts.
12 CLEAN Pad (on some models) Touch this pad to select the self-cleaning function. See the Using the self-cleaning oven section.
STEAM CLEAN pad
Touch this pad for easier cleaning of light soiling off the oven cavity or door. See using steam clean section.
CLEAN Light
Flashes while in edit mode—you can change the length of time for the self-clean cycle at this point. Glows when the oven is in the self-clean cycle. After the self-clean cycle, the light will turn off. Unlatch the door.
13 OFF Pad Touch this pad to cancel ALL oven operations except the clock and timer.
14 BROIL Pad Touch this pad to select the broil function.
BROIL Light
Flashes while in edit mode—you can switch from HI to LO BROIL at this point. Glows when the oven is in broil mode.
Indicator Lights (on some pads)
EDIT mode lasts several seconds after the last pad press. START TIME and COOK TIME will be the only pads lit if either of these options is selected. (Example: START TIME is selected with BAKE—the START TIME pad will remain lit until the clock reaches the programmed time, at which point it will turn off and the BAKE pad light will light up.)
Temperature Conversions
Fahrenheit°140150170200250275300325350375400425450475500525550
Celsius°60657595120135150160175190205220230245260275290
Power Outage
If a flashing time is in the display, you have experienced a power failure. Reset the clock.
To reset the clock, touch the CLOCK pad. Enter the correct time of day by touching the + or - pads. Touch the START/ON pad.
Using the oven.
Before you begin...
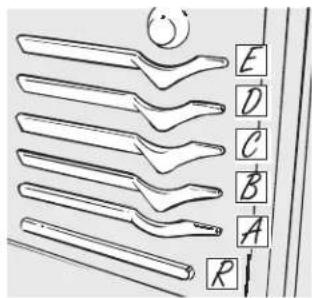
The oven has 5 rack positions. It also has a special lower rack position (R) for extra large items, such as a large turkey.
The racks have stops, so that when placed correctly on the supports, they will stop before coming completely out, and will not tilt.
When placing and removing cookware, pull the rack out until it stops.
To remove a rack, pull it toward you, tilt the front end up and pull it out.
To replace, place the end of the rack (stop-locks) on the support, tilt up the front and push the rack in.
CAUTION:
When you are using on (R), you will need the rack out. We the rack out several to pot holders, pull the sides of it. The rack is low if you place your hand and pull all the way out. In your hand on the door is the lowest position (R).

The oven has aspecial lower rack(R) position just above theoven bottom. Use it when extra cooking space is needed, for example, when cooking a large turkey. The rack is not designed to slide out at this position.
Howto Set theOven for Baking or Roasting
(on models without an oven temperature knob)

Touch the BAKE pad.

Touch the + or - pads until the desired temperature is displayed.

Touch the START/ON pad.
The oven will start automatically. The display will show PRE while preheating. When the oven reaches the selected temperature, the oven control will beep and the display will show the oven temperature.
To change the oven temperature during BAKE cycle, touch the BAKE pad and then the + or - pads to get the new temperature.

Check food for doneness at minimum time on recipe. Cook longer if necessary.

Touch the OFF pad when baking is finished and then remove the food from the oven.
Type of Food Rack Position
| Frozen pies (on cookie sheet) C | |
| Angel food cake, bundt or pound cakes | B |
| Biscuits, muffins, brownies, cookies, cup cakes, layer cakes, pies | B or C |
| Casseroles B or C | |
| Turkey R or A | |
| Roasting | R, A or B |
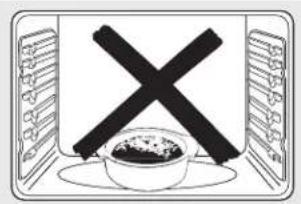
Do not place foods directly on the oven floo
Preheating and Pan Placement
Preheat the oven if the recipe calls for it. To preheat, set the oven at the correct temperature. Preheating is necessary for good results when baking cakes, cookies, pastry and breads.
The control will beep when the oven is preheated and the display will show your set temperature. This will take approximately 15-20 minutes.
Baking results will be better if baking pans are centered in the oven as much as possible. If baking with more than one pan, place the pans so each has at least 1" to 1½" of air space around it.
Aluminum Foil
Do not use aluminon foil on the bottom of the oven.
A smaller sheet of foil may be used to catch a spillover by placing it on a lower rack several inches below the food.
Never entirely cover a rack with aluminum foil. This will disturb the heat circulation and result in poor baking.
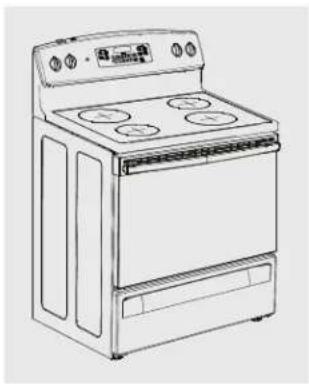
natural_image
Line drawing of a simple electric stove with four panes and top control panel (no text or symbols)How to Set the Oven for Broiling
NOTE: Close the door before start any broiling function.
Use LO Broil to cook foods such as poultry or thick cuts of meat thoroughly without overbrowning them.
1 Place the meat or fish on a broiler grid in a broiler pan designed for broiling.
2 Follow suggested rack positions in the Broiling Guide.
3 Touch the BROIL HI/LO pad once for HI Broil.
To change to LO Broil, touch the BROIL HI/LO pad again.
4 Touch the START pad.
5 When broiling is finished, touch the CLEAR/OFF pad.
Using the oven.
The size, weight, thickness, starting temperature and your preference of doneness will affect broiling times. This guide is based on meats at refrigerator temperature.
† The U.S. Department of Agriculture says "Rare beef is popular, but you should know that cooking it to only 60 °C (140 °F). means some food poisoning organisms may survive." (Source, Safe Food Book, Your Kitchen Guide, USDA Rev. June 1985.)
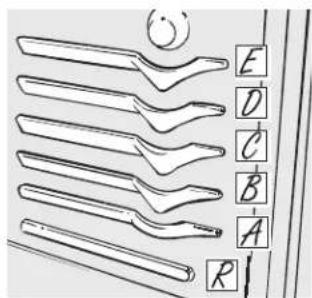
The oven has 5 rack positions.
Broiling Guide
| Food | Quantity and/ or Thickness | Rack* Position | First Side Time (min.) | Second Side Time (min.) | Comments |
| Ground Beef | 454 g (1 lb.) (4 patties)1.25 to 1.9 cm (1/2 to 3/4") thick1.8 kg (4 lbs.) (16 patties) | C | 10 | 7-10 | Space evenly. |
| C | 15 | 11 | |||
| Beef Steaks | |||||
| Rare † | 1.9 to 2.5 cm (3/4 to 1") thick | C | 6 | 4 | Steaks less than 1.9 cm(3/4?) thick are difficult to cook rare.Slash fat. |
| Medium | 454 to 680 g (1 to 11/2 lbs.) | D | 8 | 6 | |
| Well Done | D | 10 | 7-10 | ||
| Rare † | 3.8 cm (11/2") thick | C | 10 | 8 | |
| Medium | 900 g to 1.14 kg (2 to 21/2 lbs.) | D | 15 | 10-12 | |
| Well Done | D | 20 | 20 | ||
| Chicken | 1 whole cut up900 g to 1.14 kg (2 to 21/2 lbs.) split lengthwiseBreast | B | 25 | 25 | Brush each side with melted butter.Broil skin-side-down first. |
| B | 25 | 15 | |||
| Bakery Product | |||||
| Bread (toast) | 2 to 4 slices | D | 3 | 1 | Space evenly. Place English muffins outside-up and brush with butter if desired. |
| English Muffin | 2 (split) | E | 3-4 | ||
| Lobster Tails | 2-4 | B | 18-20 | Do not turn over. | Cut through back of shell. Spread open.Brush with melted butter before broiling and after half of broiling time. |
| Fish Fillets | 450 g (1 lb.) (0.6 to 1.25 cm [1/4 to 1/2"] thick) | D | 5 | 5 | Handle and turn very carefully. Brush with lemon butter before and during cooking, if desired. |
| Salmon | |||||
| Steaks | 2 (2.5 cm (1") thick) | D | 10 | 5 | Turn carefully. Do not turn skin side down. |
| Fillets | 2 (1.25 to 1.9 cm (1/2 to 3/4") thick) | D | 10 | ||
| Ham Slices(precooked) | 1.25 cm (1/2") thick | C | 6 | 6 | |
| 2.5 cm (1") thick | C | 8 | 8 | ||
| Pork Chops | 2 (1.25 cm (1/2") thick) | C | 10 | 10 | Slash fat. |
| Well Done | 2 (2.5 cm (1") thick) about 454 g (1 lb.) | C | 15 | 15 | |
| Lamb Chops | |||||
| Medium | 2 (2.5 cm (1?)) thick) about | D | 7 | 4 | Slash fat. |
| Well Done | 312 to 375 g (10 to 12 oz.) | D | 10 | 9 | |
| Medium | 2 (3.8 cm (11/2?)) thick) | D | 9 | 6 | |
| Well Done | about 454 g (1 lb.) | D | 14 | 10 | |
*See illustration for description of rack positions.
Not all features are on all models.

Make sure the clock is set to the correct time of day.
To Set the Clock
The clock must be set to the correct time of day for the automatic oven timing functions to work properly. The time of day cannot be changed during a timed baking or self-cleaning cycle.
1 Touch the CLOCK pad twice.
2 Touch the + or - pads.
If the + or - pads are not touched within one minute after you touch the CLOCK pad, the display reverts to the original setting. If this happens, touch the CLOCK pad and reenter the time of day.
3 Touch the START/ON pad until the time of day shows in the display. This enters the time and starts the clock.
To check the time of day when the display is showing other information, simply touch the CLOCK pad. The time of day shows until another pad is touched.
To Turn Off the Clock Display
If you have several clocks in your kitchen, you may wish to turn off the time of day clock display on your range.
7 Touch the CLOCK pad once to turn off the time of day display. Although you will not be able to see it, the clock maintains the correct time of day.
2 Touch the CLOCK pad again to recall the clock display.
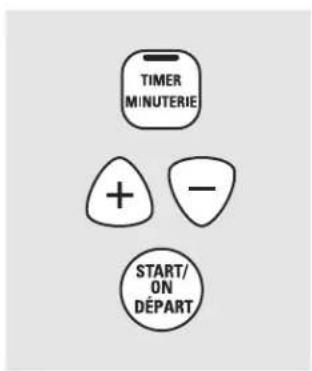
The timer is a minute timer only. The OFF pad does not affect the timer.
To Set the Timer
The timer does not control oven operations. The maximum setting on the timer is 9 hours and 59 minutes.
1 Touch the TIMER pad.
2 Touch the + or - pads until the amount of time you want shows in the display. The maximum time that can be entered in minutes is 59. Times more than 59 minutes should be changed to hours and minutes.
If you make a mistake, touch the TIMER pad and begin again.
3 Touch the START/ON pad. The time will start counting down, although the display does not change until one minute has passed.
4 When the timer reaches :00, the control will beep 3 times followed by one beep every 6 seconds until the TIMER pad is touched.
Using the clock, timer and convenience outlet. (on some models)
Not all features are on all models.
To Reset the Timer
If the display is still showing the time remaining, you may change it by touching the TIMER pad, then touch the + or - pads until the time you want appears in the display.
If the remaining time is not in the display (clock, delay start or cooking time are in the display), recall the remaining time by touching the TIMER pad and then touching the + or - pads to enter the new time you want.
To Cancel the Timer
Touch the TIMER pad twice.
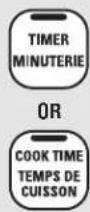
End of Cycle Tones (on some models)
Clear the tones by pressing the pad of the function you are using.
Power Outage
If a flashing time is in the display, you have experienced a power failure. Reset the clock.
To reset the clock, touch the CLOCK pad twice. Enter the correct time of day by touching the + or - pads. Touch the START/ON pad.

natural_image
Line drawing of a kitchen appliance with a speech bubble indicating a notification or call (no text or symbols present)Convenience Outlet (on some models)
The 120V convenience outlet located on the top of the backguard may be used to plug in small electrical appliances.
When using the outlet, be sure that the electrical cord does not rest on or near a surface unit. If the surface unit is turned on, the cord will be damaged.
To reset the circuit breaker, press the switch located near the outlet on top of the backguard.
Using the timed baking and roasting features. (on some models) GEAppliances.ca
Do not lock the oven door with the latch during timed cooking. The latch is used for self-cleaning only.
NOTE: Foods that spoil easily—such as milk, eggs, fish, stuffings, poultry and pork—should not be allowed to sit for more than 1 hour before or after cooking. Room temperature promotes the growth of harmful bacteria. Be sure that the oven light is off because heat from the bulb will speed harmful bacteria growth.
How to Set an Immediate Start and Automatic Stop
| The oven will turn on immediately and cook for a selected length of time. At the end of the cooking time, the oven will turn off automatically.Touch the BAKE pad.Touch the + or – pads to set the oven temperature.Touch the COOK TIME pad. | Touch the START/ON pad.The display shows either the oven temperature that you set or the cooking time countdown. (The display starts with PRE if showing the oven temperature.)The oven will continue to cook for the programmed amount of time, then turn off automatically.Touch the OFF pad to clear the display if necessary.Remove the food from the oven. Remember, even though the oven shuts off automatically, foods continue cooking after controls are off. |
| NOTE: If your recipe requires preheating, you may need to add additional time to the length of the cooking time.Touch the + or – pads to set the baking time.The cooking time that you entered will be displayed. (If you select Cooking Time first and then adjust the Bake Temperature, the oven temperature will be displayed instead.) |
How to Set a Delayed Start and Automatic Stop
The oven will turn on at the time of day you set, cook for a specific length of time and then turn off automatically.
Make sure the clock shows the correct time of day.
Touch the BAKE pad.
Touch the + or - pads to set the oven temperature.
Touch the COOK TIME pad.
Touch the + or - pads to set the desired length of cooking time.
Touch the START TIME pad.
Touch the + or - pads to set the time of day you want the oven to turn on and start cooking.
Touch the START/ON pad.
NOTE: An attention tone will sound if you are using timed baking and do not touch the START/ON pad.
NOTE: If you would like to check the times you have set, touch the START TIME pad to check the start time you have set or touch the COOK TIME pad to check the length of cooking time you have set.
When the oven turns on at the time of day you have set, the display will show PRE until it reaches the selected temperature, then it will display the oven temperature.
At the end of cooking time, the oven will turn off and the end of cycle tone will sound.
Touch the OFF pad to clear the display if necessary.
Remove the food from the oven. Remember, even though the oven shuts off automatically, foods continue cooking after controls are off.
Special features of your oven control.
Your new touch pad control has additional features that you may choose to use. The following are the features and how you may activate them.
The special feature modes can only be activated while the display is showing the time of day. They remain in the control's memory until the steps are repeated.
When the display shows your choice, touch the START/ON pad. The special features will remain in memory after a power failure.
NOTE: The Sabbath feature and the Thermostat Adjustment feature are also Special Features, but they are addressed separately in the following sections.
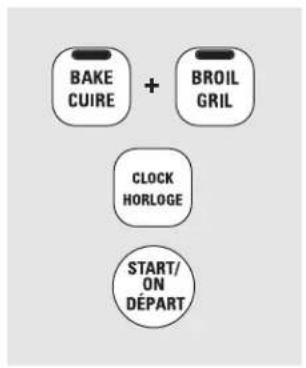
flowchart
graph TD
    A["BAKE CUIRE"] --> B["BROIL GRIL"]
    B --> C["CLOCK HORLOGE"]
    C --> D["START/ON DÉPART"]
12 Hour Shut-Off
With this feature, should you forget and leave the oven on, the control will automatically turn off the oven after 12 hours during baking functions or after 3 hours during a broil function.
If you wish to turn OFF this feature, follow the steps below.
1 Touch the BAKE and BROIL pads at the same time for 3 seconds until the display shows SF.
2 Touch the CLOCK pad. The display will show ON (12 hour shut-off). Touch the CLOCK pad repeatedly until the display shows OFF (no shut-off).
3 Touch the START/ON pad to activate the no shut-off and leave the control set in this special features mode.
The Sabbath feature can be used for baking/roasting only. It cannot be used for broiling, self-cleaning or Delay Start cooking.
NOTE: The oven light comes on automatically (on some models) when the door is opened and goes off when the door is closed. The bulb may be removed. See the Oven Light Replacement section. On models with a light switch on the control panel, the oven light may be turned on and left on.

flowchart
graph TD
    A["BAKE CUIRE"] + B["BROIL GRIL"]
    C["CLOCK HORLOGE"]
    D["START/ON DÉPART"]
    E["BAKE CUIRE"]
    F["+"]
    G["START/ON DÉPART"]
When the display shows □the oven is set in Sabbath. When the display shows □c the oven is baking/roasting.
How to Set for Regular Baking/Roasting
NOTE: To understand how the oven control works, practice using regular baking (non-Sabbath) before entering Sabbath mode.
Make sure the clock shows the correct time of day and the oven is off.
1 Touch and hold both the BAKE and BROIL pads, at the same time, until the display shows SF.
2 Tap the CLOCK pad until SAb appears in the display.
3 Touch the START/ON pad and ⊃will appear in the display.
4 Touch the BAKE pad. No signal will be given.
5 The preset starting temperature will automatically be set to 176.7°C (350°F). Tap the + or - pads to increase or decrease the temperature in 13.9°C (25°F) increments. The temperature can be set between 76.7°C (170°) and 287.8°C (550°F). No signal or temperature will be given.
6 Touch the START/ON pad.
After a random delay period of approximately 30 seconds to 1 minute, will appear in the display indicating that the oven is baking/roasting. If doesn't appear in the display, start again at Step 4.
To adjust the oven temperature, touch the BAKE pad and tap the + or - pads to increase or decrease the temperature in 13.9° (25°F) increments. Touch the START/ON pad.
NOTE: The OFF and COOK TIME pads are active during the Sabbath feature.

flowchart
graph TD
    A["BAKE CUIRE"] + B["BROIL GRIL"]
    C["CLOCK HORLOGE"] --> D["START/ON DÉPART"]
    E["COOK TIME TEMPS DE CUISSON"] --> F["+"]
    G["START/ON DÉPART"] --> H["-"]
When the display shows ⊃the oven is set in Sabbath. When the display shows ⊃the oven is baking/roasting.
How to Set for Timed Baking/Roasting—Immediate Start and Automatic Stop
NOTE: To understand how the oven control works, practice using regular (non-Sabbath) Immediate Start and Automatic Stop before entering the Sabbath mode.
Make sure the clock shows the correct time of day and the oven is off.
1 Touch and hold both the BAKE and BROIL pads, at the same time, until the display shows SF.
2 Tap the CLOCK pad until SAb appears in the display.
3 Touch the START/ON pad and ⊃ will appear in the display.
4 Touch the COOK TIME pad.
5 Touch the + or - pads to set the desired length of cooking time between 1 minute and 9 hours and 59 minutes. The cooking time that you entered will be displayed.
6 Touch the START/ON pad.
7 Touch the BAKE pad. No signal will be given.
8 The preset starting temperature will automatically be set to 176.7°C (350°F). Tap the + or - pads to increase or decrease the temperature in 13.9°C (25°F) increments. The temperature can be set between 76.7°C (170°F) and 550°C. No signal or temperature will be given.
9 Touch the START/ON pad.
10 After a random delay period of approximately 30 seconds to 1 minute, will appear in the display indicating that the oven is baking/roasting. If doesn't appear in the display, start again at Step 7.
To adjust the oven temperature, touch the BAKE pad and tap the + or - pads to increase or decrease the temperature in 25F° increments. Touch the START/ON pad.
When cooking is finished, the display will change from to, indicating that the oven has turned OFF but is still set in Sabbath. Remove the cooked food.
Using the Sabbath Feature. (on some models)
(Designed for use on the Jewish Sabbath and Holidays)

flowchart
graph TD
    A["OFF ARRÊT"] --> B["BAKE CUIRE"]
    B --> C["BROIL GRIL"]
    C --> D["CLOCK HORLOGE"]
    D --> E["START/ON DÉPART"]
How to Exit the Sabbath Feature
1 Touch the OFF pad.
2 If the oven is cooking, wait for a random delay period of approximately 30 seconds to 1 minute, until only ⊃ is in the display.
3 Touch and hold both the BAKE and BROIL pads, at the same time, until the display shows SF.
4 Tap the CLOCK pad until ON or OFF appears in the display. ON indicates that the oven will automatically turn off after 12 hours. OFF indicates that the oven will not automatically turn off. See the Special Features section for an explanation of the 12 Hour Shut-Off feature.
5 Touch the START/ON pad.
NOTE: If a power outage occurred while the oven was in Sabbath, the oven will automatically turn off and stay off even when the power returns. The oven control must be reset.
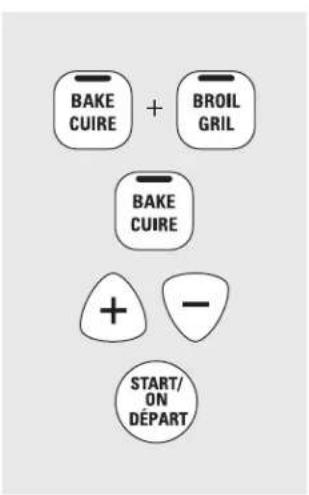
To Adjust the Thermostat
1 Touch the BAKE and BROIL pads at the same time for 2 seconds until the display shows SF.
2 Touch the BAKE pad. A two-digit number shows in the display.
3 The oven temperature can be adjusted up to (+) 17,5°C (35°F) hotter or (-) 17,5°C (35°F) cooler.
Touch the + pad to increase the temperature in 0,5°C (1°F) increments.
Touch the - pad to decrease the temperature in 0.5^ (1°F) increments.
4 When you have made the adjustment, touch the START/ON pad to go back to the time of day display. Use your oven as you would normally.
NOTE adjustment will not affect the broiling or self-cleaning temperatures. It will be retained in memory after a power failure.
The type of margarine will affect baking performance!
Most recipes for baking have been developed using high fat products such as butter or margarine (80% fat). If you decrease the fat, the recipe may not give the same results as with a higher fat product.
Recipe failure can result if cakes, pies, pastries, cookies or candies are made with low-fat spreads. The lower the fat content of a spread product, the more noticeable these differences become.
Federal standards require products labeled "margarine" to contain at least 80% fat by weight. Low-fat spreads, on the other hand, contain less fat and more water. The high moisture content of these spreads affects the texture and flavor of baked goods. For best results with your old favorite recipes, use margarine, butter or stick spreads containing at least 70% vegetable oil.
Using the self-cleaning oven. (on some models)
Never force the latch handle. Forcing the handle will damage the door lock mechanism. The oven door must be closed and all controls set correctly for the cycle to work properly.

natural_image
Illustration of a hand cleaning a kitchen appliance with multiple kitchen utensils (no text or symbols)Wipe up heavy soil on the oven bottom.
Before a Clean Cycle
For the first self-clean cycle, we recommend venting your kitchen with an open window or using a ventilation fan or hood.
Remove the racks, broiler pan, broiler grid, all cookware and any aluminum foil from the oven.
The oven racks can be self-cleaned, but they will darken, lose their luster and become hard to slide.
Soil on the front frame of the range and outside the gasket on the door will need to be cleaned by hand. Clean these areas with hot water, soap-filled steel-wool pads or cleansers such as Soft Scrub®. Rinse well with clean water and dry.
Do not clean the gasket. The fiberglass material of the oven door gasket cannot withstand abrasion. It is essential for the gasket to remain intact. If you notice it becoming worn or frayed, replace it.
Wipe up any heavy spillovers on the oven bottom.
Make sure the oven light bulb cover is in place and the oven light is off.
CAUTION: The grates and drip pans (on some models) should never be cleaned in the self-cleaning oven.
Do not use commercial oven cleaners or oven protectors in or near the self-cleaning oven. A combination of any of these products plus the high clean cycle temperatures may damage the porcelain finish of the oven.
IMPORTANT: The health of some birds is extremely sensitive to the fumes given off during the self-cleaning cycle of any range. Move birds to another well-ventilated room.
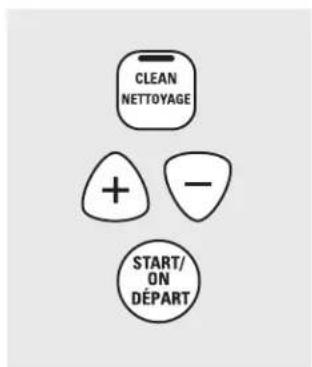
How to Set the Oven for Cleaning
Follow the directions in the Before a Clean Cycle section.
1 Latch the door.
NOTE: Never force the latch. If the oven is too hot, you will not be able to slide the latch. Allow the oven to cool.
2 Touch the CLEAN pad.
3 Touch the + or - pads until the desired Clean Time is displayed.
The Clean Time is normally 4 hours and 20 minutes. You can change the Clean Time to any time between 3 and 5 hours, depending on the amount of soil in your oven.
4 Touch the START/ON pad.
The self-clean cycle will automatically begin after CLEAN is displayed and the time countdown appears in the display.
While the oven is self-cleaning, you can touch the CLOCK pad to display the time of day. To return to the clean countdown, touch the CLEAN pad.
The oven shuts off automatically when the clean cycle is complete, and 0:00 will flash in the display.
5 Slide the latch handle to the left as far as it will go and open the door.
The oven door must be closed and all controls set correctly for the cycle to work properly.
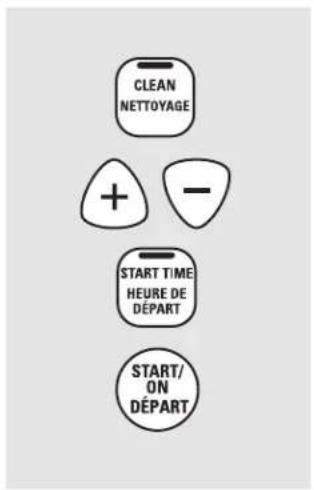
How to Delay the Start of Cleaning
You can set the oven control to delay-start the oven, clean for a specific length of time and then turn off automatically.
Make sure the clock shows the correct time of day.
Follow the directions in the Before a Clean Cycle section.
1 Latch the door.
NOTE: Never force the latch. If the oven is too hot, you will not be able to slide the latch. Allow the oven to cool.
2 Touch the CLEAN pad.
3 Touch the + or - pads to set the Clean Time.
The Clean Time is preset for 4 hours and 20 minutes. You can change the Clean Time to any time between 3 and 5 hours, depending on the amount of soil in your oven. If a different Clean Time is desired, touch the + or - pads until the desired Clean Time is displayed.
4 Touch the START TIME pad.
Change the Start Time by touching the + or - pads. The start time will appear in the display.
5 Touch the START/ON pad.
The self-clean cycle will automatically begin at the time set.
While the oven is self-cleaning, you can touch the CLOCK pad to display the time of day. To return to the clean countdown, touch the CLEAN pad.
The oven shuts off automatically when the clean cycle is complete, and 0:00 will flash in the display.
6 Slide the latch handle to the left as far as it will go and open the door.
To Stop a Clean Cycle
Touch the OFF pad.
Wait until the oven has cooled below the locking temperature to unlatch the door. You will not be able to open the door right away unless the oven has cooled below the locking temperature.
After a Clean Cycle
You may notice some white ash in the oven. Wipe it up with a damp cloth after the oven cools.
If white spots remain, remove them with a soap-filled steel-wool pad and rinse thoroughly with a vinegar and water mixture.
These deposits are usually a salt residue that cannot be removed by the clean cycle.
If the oven is not clean after one clean cycle, repeat the cycle.
- You cannot set the oven for cooking until the oven is cool enough for the door to unlock.
While the oven is self-cleaning, you can touch the CLOCK pad to display the time of day. To return to the clean countdown, touch the COOK TIME pad.
If the racks become hard to slide, apply a small amount of vegetable oil or cooking oil to a paper towel and wipe the edges of the oven racks with the paper towel.
Using Steam Clean. (JCBS650 model only)
CAUTION
During the steam clean cycle, the oven bottom becomes hot enough to cause burns. Wait until the cycle is over (30 minutes) before wiping the inside surfaces of the oven. Failure to do so may result in burns.
The Steam Clean cycle makes it easier to clean light soiling off the standard-clean porcelain oven interior.
The range should be at room temperature before beginning the Steam Clean cycle. If the oven is too hot, "hot" will appear on the display and the cycle will not activate until the oven cools down.
The Steam Clean cycle performs best on new spills or soils. Burned-on food is more difficult to remove.
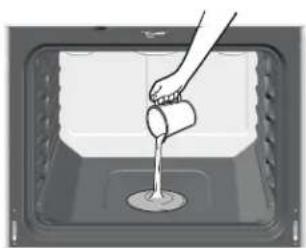
natural_image
Hand pouring liquid into a container inside an oven (no text or symbols visible)Pour 8 ounces of water onto the oven floor.

natural_image
Interior view of a modern kitchen appliance with a transparent door and side panel (no text or symbols visible)To Begin Steam Clean Cycle:
Remove racks and accessories from the oven cavity. Do not place cookware or other items in the oven during the Steam Clean cycle.
Pour 1 cup (8 oz.) room-temperature water onto the recessed area of the oven bottom. Do not add cleaning solutions or chemicals of any kind to the water. Only add water when using the Steam Clean cycle.
3 Close the door.
4 Press the Steam Clean pad; then press Start.
A 30-minute cycle will begin to count down on the display. It will not be possible to open the door until the cycle ends or you press the Clear/Off If door is opened during steam clean cycle, "dor" will appear on the display and an error beep will sound upon opening the door.
5 When the Steam Clean cycle is complete, the oven control will beep, and the Steam Clean light will blink. Press the Clear/Off pad and open the door.
6 The oven bottom and remaining water will still be very warm at the end of the cycle. This is normal.
7 Remove soils using a scrub brush or nylon scouring pad. A soap-filled steel wool pad may be used only on the porcelain oven interior. The use of abrasive pads will scratch the door glass. Do not wipe soil or water onto the door gasket.
8 Remove any remaining water with a dry cloth or sponge.
9 Leave the door open to air dry.
IMPORTANT NOTES:
- If a steam clean cycle is initiated without water, press the Clear/Off pad to end the cycle. Wait for the range to cool to room temperature before pouring water into the recessed area and initiating another steam cycle.
- Do not open the door during the Steam Clean cycle. An error beep will sound upon opening the "dor" will appear on the display.
- Press Clear/Off pad at any time to end the cycle.
- If mineral deposits remain in the oven bottom after cleaning, use a cloth or sponge soaked in vinegar to remove them.
- Some water may drip from the bottom of the oven door. If this happens, wipe it up at the end of the cycle.
- The door gasket may be wet when the Steam Clean cycle finishes. This is normal. Do not clean the gasket.
- If soil still remains after cleaning the oven, see the Care and cleaning of the range section of the Owner's Manual for additional options.
NOTE: Water will remain and will be still warm (this is normal) this will need to be wiped up at the end of cycle.
Care and cleaning of the range.
Be sure electrical power is off and all surfaces are cool before cleaning any part of the range.
natural_image
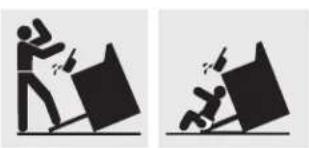
Two black-and-white illustrations showing a person pushing a large block and another falling with broken lines (no text or symbols)If your range is removed for cleaning, servicing or any reason, be sure the anti-tip device is re-engaged properly
when the range is replaced. Failure to take this precaution could result in tipping of the range and cause injury.
Oven Interior (non-self-clean models)
With proper care, the porcelain enamel finish on the inside of the oven—top, bottom, sides, back and inside of the door—will stay new-looking for years.
Let the range cool before cleaning. We recommend that you wear rubber gloves when cleaning the range.
Soap and water will normally do the job. Heavy spattering or spillovers may require cleaning with a mild abrasive cleaner. Soap-filled scouring pads may also be used.

Do not allow food spills with a high sugar or acid content (such as milk, tomatoes, sauerkraut, fruit juices or
pie filling) to remain on the surface. They may cause a dull spot even after cleaning.
Household ammonia may make the cleaning job easier. Place 1/2 cup in a shallow glass or pottery container in a cold oven overnight.
The ammonia fumes will help loosen the burned-on grease and food.
If necessary, you may use an oven cleaner. Follow the package directions.
Do not spray oven cleaner on the electrical controls and switches because it could cause a short circuit and result in sparking or fire.
Do not allow a film from the cleaner to build up on the temperature sensor—it could cause the oven to heat improperly. (The sensor is located at the top of the oven.) Carefully wipe the sensor clean after each oven cleaning, being careful not to move the sensor as a change in its position could affect how the oven bakes.
Do not spray any oven cleaner on the oven door, handles or any exterior surface of the oven, cabinets or painted surfaces. The cleaner can damage these surfaces.

natural_image
Simple line drawing of a rectangular device with three vertical lines inside, no text or symbols present.The gasket is designed with a gap at the bottom to allow for proper air circulation. Do not rub or clean the door gasket—it has an extremely low resistance to abrasion. If you notice the gasket becoming worn, frayed or damaged in any way or if it has become displaced on the door, you should have it replaced.
Cleaning the Oven Door
To clean the inside of the door:
Because the area inside the gasket is cleaned during the self-clean cycle, you do not need to clean this by hand.
The area outside the gasket and the door liner can be cleaned with a soap-filled or plastic scouring pad, hot water and detergent. Rinse well with a vinegar and water solution.
To clean the outside of the door:
Use soap and water to thoroughly clean the top, sides and front of the oven door. Rinse well. You may also use a glass cleaner to clean the glass on the outside of the door. Do not let water drip into the vent openings.
If any stain on the door vent trim is persistent, use a soft abrasive cleaner and a sponge-scrubber for best results.
Spillage of marinades, fruit juices, tomato sauces and basting materials containing acids may cause discoloration and should be wiped up immediately. When surface is cool, clean and rinse.
Do not use oven cleaners, cleaning powders or harsh abrasives on the outside of the door.
natural_image
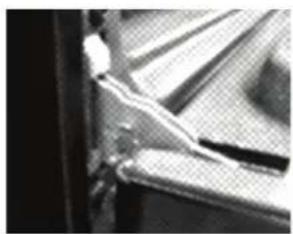
Close-up of a metallic mechanical component with visible cracks and grooves (no text or symbols)Pull hinge locks up to unlock

natural_image
Technical line drawing of a mechanical assembly with a magnified inset showing a detail (no text or symbols)Removal position
Lift-Off Oven Door (Faringosi hinges)
The door is very heavy. Be careful when removing and lifting the door. Do not lift door by the handle.
To remove the door:
1 Fully open the oven door.
2 With thumb and forefinger, pull the hinge lock on each hinge up to the unlocked position.
3 Firmly grasp both sides of the door at near the top.
4 Close door until the top of the door is approximately 3" from the range frame.
5 Lift door up and away from the range until both hinge arms are clear of the slots in the range frame.
To replace the door:
1 Firmly grasp both sides of the door near the top.
2 With the door at the same angle as the removal position, rest the notch in the
bottom of the left hinge arm on the bottom edge of the left hinge slot. The
notch in the hinge arm must be fully seated onto the bottom of the slot. Repeat for the right side.
natural_image
Close-up of a sewing machine needle and fabric (no visible text or symbols)3 Fully open the door. If the door will not fully open, the notches in the bottoms of the hinge arms are not seated
correctly onto the bottom edge of the slot. Lift the door off the range and repeat Step 2.
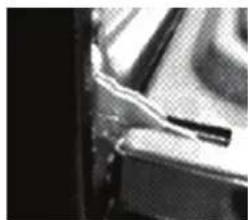
4 Push the hinge locks down to the locked position.
natural_image
Close-up of a mechanical component with no visible text or symbolsPush hinge locks down to lock
5 Close the oven door.

natural_image
Illustration of a hand using a tool to mark a step on a wooden beam (no text or symbols)Lift the door straight up and off the hinges.
Lift-Off Oven Door (on some models)
The oven door is removable for cleaning. Do not lift the door by the handle. Make sure the oven is completely cool.
To remove the door, open it to the special stop position. Grasp firmly on each side and lift the door straight up and off the hinges.
Do not place hands between the hinge and the oven door frame.
To replace the door, make sure the hinges are in the special stop position. Position the slots in the bottom of the door squarely over the hinges and slowly lower it over both hinges.
To clean the inside of the door:
Do not allow excess water to run into
Care and cleaning of the range.
natural_image
Illustration showing hands cleaning a kitchen appliance with a wavy line on the wall (no text or symbols)(on some models)
Oven Heating Elements
Do not clean the bake element or the broil element. Any soil will burn off when the elements are heated.
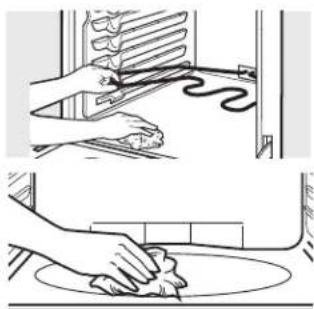
To clean the oven floor, gently lift the bake element Clean with warm soapy water
On some models, the bake element is not exposed and is under the oven floor. If spillover residue or ash accumulate on the oven floor, wipe up before self-cleaning.
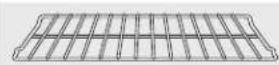
Oven rack
Oven Racks
All oven racks may be cleaned by hand with an abrasive cleaner or steel wool After cleaning, rinse the racks with lean water and drywith a clean cloth Gray porcelain-coated oven racks may remain in the oven during the self-cleaning cycle without being damaged The shiny, silver colored oven racks may remain in the oven during the self-cleaning cycle, but they will lose their luster and become hard to slide.
It will be necessary to grease all oven rack side edges with a light coating of
sliding the racks in and out of the oven
natural_image
Technical line drawing of a mechanical component with a circular housing and a curved handle, showing no text or symbols.Wirecoverholder
Oven Light Replacement (on some models)
CAUTION: Before
replacing your oven light bulb, turn the oven light off and disconnect the electrical power to the range at the main fuse or circuit breaker panel.
Be sure to let the light cover and bulb cool completely.
To remove the cover:
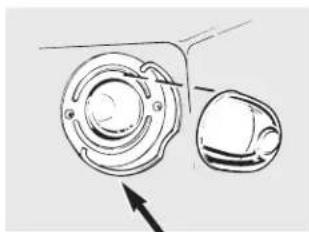
Hold a hand under the cover so it doesn't fall when released. With fingers of the same hand, firmly push back the wire cover holder. Lift off the cover.
Do not remove any screws to remove the cover.
2 Replace bulb with a 40-watt household appliance bulb.
To replace the cover:
1 Place it into groove of the light receptacle. Pull wire forward to the center of the cover until it snaps into place.
2 Connect electrical power to the range.
1 Place it into groove of the light receptacle. Pull wire forward to the center of the cover until it snaps into place.
2 Connect electrical power to the range.
natural_image
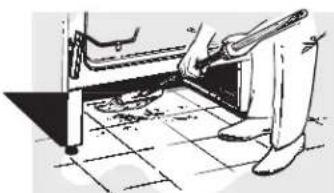
Illustration of a person using a tool to clean or repair a tiled floor (no text or symbols visible)Cleanundertherange.
Storage Drawer Removal (on some models)
To remove the storage drawer:
1 Pull the drawer out all the way.
2 Tilt up the front and remove it.
To replace the storage drawer:
1 Insert glides at the back the drawer beyond the stop on range glies
2 Lift the drawer if necessaryptinsert easily.
3 Let the front of the drawer down; then push in to close.
Porcelain Enamel Cooktop (on radiant models)
The porcelain enamel finish is sturdy but breakable if misused. This finish is acid-resistant. However, any acidic foods spilled (such as fruit juices, tomato or vinegar) should not be permitted to remain on the finish.
If acids spill on the cooktop while it is hot, use a dry paper towel or cloth to wipe it up right away. When the surface has cooled, wash with soap and water. Rinse well.
For other spills such as fat spatterings, wash with soap and water or cleansing powders after the surface has cooled. Rinse well. Polish with a dry cloth.
natural_image
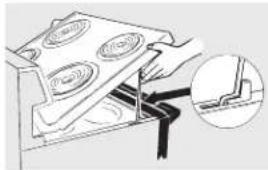
Diagram of a kitchen appliance with four circular components and a close-up inset showing a cutaway view (no text or symbols)Be sure all surface units are turned of before raising the cooktop.
Lift-Up Cooktop (on coil models)
Some models have a cooktop that can be lifted up for easier cleaning. The entire cooktop may be lifted up and supported in the up position.
The surface units do not need to be removed; however, you may remove one to make raising the cooktop easier. There are two side supports that lock into position when the cooktop is lifted up.
After cleaning under the cooktop with hot, mild soapy water and a clean cloth, lower the cooktop. Be careful not to pinch your fingers.
To lower the cooktop, push the rods back and gently lower the cooktop until it rests in place.
NOTE: Do not lift the cooktop on radiant top models. Lifting the cooktop can lead to damage and improper operation of the range.
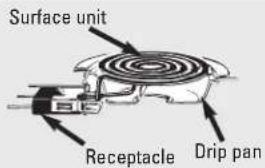
Surface Units (on coil models)
Be sure all the controls are turned to OFF and the surface units are cool before attempting to remove them.
To clean the surface units, turn the control to the highest setting for a minute. The coils will burn off any soil.
To remove a surface unit:
To remove the drip pans for cleaning, the surface units must be removed first.
Lift the surface unit about 1 inch above the drip pan and pull it out.
Do not lift the surface unit more than 1". If you do, it may not lie flat on the drip pan when you plug it back in.
Repeated lifting of the surface unit more than 1 inch above the drip pan can permanently damage the receptacle.
To replace a surface unit:
Replace the drip pan into the recess in the cooktop. Make sure the opening in the pan lines up with the receptacle.
Insert the terminals of the surface unit through the opening in the drip pan and into the receptacle.
Guide the surface unit into place so it rests evenly.

Do not immerse the surface units in liquids of any kind.
Do not clean the surface units in a dishwasher.
Do not bend the surface unit plug terminals.
Do not attempt to clean, adjust or in any way repair the plug-in receptacle.
Drip Pans (on coil models)
Remove the surface units. Then lift out the drip pans.
Place them in a covered container. Add 1/4 cup ammonia and let soak several hours or overnight. Wash, rinse well and dry.
The drip pans may also be cleaned in the dishwasher.
Clean the area under the drip pans often. Built-up soil, especially grease, may catch fire.
Do not cover the drip pans with foil. Using foil so close to the receptacle could cause shock, fire or damage to the range.
NOTE: Do not clean the drip pans in a self-cleaning oven.
Care and cleaning of the range.
natural_image
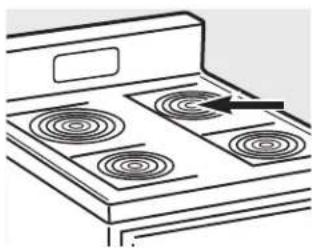
Line drawing of a four-tier electric stove with visible coil patterns and an arrow indicating the mounting point (no text or symbols)Oven Vent (on coil models)
On glass cooktop models, the oven is vented through an opening at the rear of the cooktop.
On coil cooktop modes, the oven is vented through an opening under the right rear surface unit.
Never cover the opening with aluminum foil or any other material.
Painted Surfaces (on some models)
Painted surfaces include the sides of the range and the sides of the door trim.
To clean the painted surfaces, use a hot, damp cloth with a mild detergent suitable for these surfaces. Use a clean, hot, damp cloth to remove soap. Dry with a dry, clean cloth.
Do not use steel-wood pads, commercial oven cleaners, cleaning powders or other abrasive cleaners. They will damage the surface.
Stainless Steel Surfaces (on some models)
Do not use a steel wool pad; it will scratch the surface.
To clean the stainless steel surface, use warm sudsy water or a stainless steel cleaner or polish. Always wipe the surface in the direction of the grain. Follow the cleaner instructions for cleaning the stainless steel surface.
To inquire about purchasing stainless steel appliance cleaner or polish, or to find the location of a dealer or Mabe Canada Parts Store nearest you, please call our toll-free number:
National Parts Center 1.80 0.661.1616
www.GEAppliances.ca
Glass Window (on some models)
To clean the outside glass finish, use a glass cleaner. Rinse and polish with a dry cloth.
natural_image
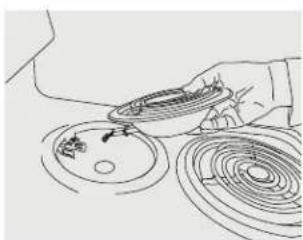
Line drawing of a hand pouring liquid into a circular container with a small bowl (no text or symbols)BOWL AND COIL ASSEMBLY (on coil models)
In order to do a right assembly of the bowl and the coil into the cook top you need to insert both components together as shown in the picture.
Avoid inserting components sparely, this will cause wrong assemble issues.

natural_image
Line drawing of an open oven with a stove and two appliances (no text or symbols)Attention (on coil models)
When using the oven is normal to have an increase of temperature on the cooktop surface, based on the fact that the release of heat from the oven is placed on the back right burner/coil of the range.
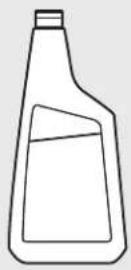
Clean your cooktop after each spill. Use Ceramic Cooktop Cleaner.
Normal Daily Use Cleaning
ONLY use Ceramic Cooktop Cleaner on the glass cooktop. Other types of cleaners may not be as effective.
To maintain and protect the surface of your glass cooktop, follow these steps:
Before using the cooktop for the first time, clean it with Ceramic Cooktop Cleaner. This helps protect the top and makes cleanup easier.
2 Daily use of Ceramic Cooktop Cleaner will help keep the cooktop looking new.
3 Shake the cleaning cream well. Apply a few drops of Ceramic Cooktop Cleaner directly to the cooktop.
4 Use a paper towel for Ceramic Cooktops to clean the entire cooktop surface.
5 Use a dry cloth or paper towel to remove all cleaning residue. No need to rinse.
NOTE: It is very important that you DO NOT heat the cooktop until it has been cleaned thoroughly.

natural_image
Simple line drawing of a hand using a tool to clean or mark on a circular object (no text or symbols)Use a Cleaning Pad for Ceramic Cooktops.
Burned-On Residue
WARNING: DAMAGE to your glass surface may occur if you use scrub pads other than those recommended.
1 Allow the cooktop to cool.
2 Spread a few drops of Ceramic Cooktop Cleaner on the entire burned residue area.
3 Using the included Cleaning Pad for Ceramic Cooktops, rub the residue area, applying pressure as needed.
4 If any residue remains, repeat the steps listed above as needed.
5 For additional protection, after all residue has been removed, polish the entire surface with Ceramic Cooktop Cleaner and a paper towel.

natural_image
Hand using a tool to clean or store food on a stovetop (no text or symbols visible)The Ceramic Cooktop Scraper and all recommended supplies are available through our dealers or through a Mabe Canada Parts Store.
NOTE: Do not use a dull or nicked blade.
Heavy, Burned-On Residue
1 Allow the cooktop to cool.
2 Use a single-edge razor blade scraper at approximately a 45^ angle against the glass surface and scrape the soil. It will be necessary to apply pressure to the razor scraper in order to remove the residue.
3 After scraping with the razor scraper, spread a few drops of Ceramic Cooktop Cleaner on the entire burned residue area. Use the Cleaning Pad to remove any remaining residue.
For additional protection, after all residue has been removed, polish the entire surface with Ceramic Cooktop Cleaner and a paper towel.
Cleaning the glass cooktop. (on radiant models)
Metal Marks and Scratches
1 Becarefulnottoslidepotsandpans across your cooktop. It will leave metal markingsonthecooktopsurface.
These remarks are removable using the Ceramic Cooktop Cleaner with the Cleaning Pad for Ceramic Cooktops.
2 If pots with a thin overlay of aluminum orcopperareallowedtoboildry,the overlay may leave black discoloration onthecooktop.
This should be removed immediately before heating again or the discoloration maybepermanent.
WARNING: Carefully check the bottom of pans for roughness that would scratch the cooktop.
Cooktop Seal
Tocleanthecooktopsealaround the edges of the glass, lay a wet cloth onitforafewminutes, thenwipeclean with nonabrasive cleaners.

natural_image
Line drawing of a closed drawer with a lid and drawer base (no text or symbols)Glass surface—potential for permanent damage.
Sugary spillovers (such as jellies, fudge, candy, syrups) or melted plastics can cause pitting of the surface of your cooktop (not covered by the warranty) unless the spill is remove while still hot. Special care should be taken when removing hot substances.
Be sure to use a new, sharp razor scraper.
Do notuse a dull or nicked blade.
Damage from Sugary Spills and Melted Plastic
1 Turn off all surface units. Remove hotpans.
2 Wearinganovenmitt:
a. Use a single-edge razor blade scraper to move the spill to a cool area on thecooktop.
b. Remove the spill with paper towels.
3 Anyremainingspillovershouldbeleft untilthesurfaceofthecooktophas cooled.
4 Don't use the surface units again until alloftheresiduehasbeencompletely removed.
NOTE: If pitting or indentation in the glass surface has already occurred, the cooktop glass will have to be replaced. In this case, service will be necessary.

To Order Parts
ToorderCERAMABRYTE® Ceramic CooktopCleanerandthecooktop scraper,pleasecallourtoll-freenumber:
National Parts Centre 800.661.1616
CERAMA BRYTE® Ceramic Cooktop Cleaner ....CERAMABRYTE
CERAMA BRYTE® Ceramic Cooktop Scraper .....TE 05-503
Kit ....45898 (Kit includes cream and cooktop scraper)
CERAMA BRYTE® Cleaning Pads for Ceramic Cooktops ..... 28001

Troubleshooting Tips
Save time and money! Review the charts on the following pages first and you may not need to call for service.
Problem Possible Causes What To Do
| Radiant Cooktops | ||
| Surface units will not maintain a rolling boil being used. of the surface unit selected. or cooking is not fast enough | Improper cookware | • Use pans which are flat and match the diameter |
| Surface units do not work properly | A fuse in your home may be blown or the circuit breaker tripped. | • Replace the fuse or reset the circuit breaker. |
| Cooktop controls improperly set. | • Check to see the correct control is set for the surface unit you are using. | |
| Scratches (may appear as cracks) on cooktop glass surface | Incorrect cleaning methods being used.Cookware with rough bottoms being used or coarse particles (salt or sand) were between the cookware and the surface of the cooktop.Cookware has been slid across the cooktop surface. | • Scratches are not removable. Tiny scratches will become less visible in time as a result of cleaning.• To avoid scratches, use the recommended cleaning procedures. Make sure bottoms of cookware are clean before use, and use cookware with smooth bottoms. |
| Areas of discoloration on the cooktop | Food spillovers not cleaned before next use. | • See the Cleaning the glass cooktop section. |
| Hot surface on a model with a light-colored glass cooktop. | • This is normal. The surface may appear discolored when it is hot. This is temporary and will disappear as the glass cools. | |
| Plastic melted to the surface | Hot cooktop came into contact with plastic placed on the hot cooktop. | • See the Glass surface—potential for permanent damage section in the Cleaning the glass cooktop section. |
| Pitting (or indentation) of the cooktop | Hot sugar mixture spilled on the cooktop. | • Call a qualified technician for replacement. |
| Frequent cycling off and on of surface units | Improper cookware being used. | • Use only flat cookware to minimize cycling. |
| Surface indicator lights turn on, but surface units do not work | The self-clean cycle has been set. | During a self-clean cycle, the surface units will not work Press the OFF pad to stop the self-clean cycle or wait until the self-clean cycle is finished to set and use the surface units. See the About the radiant surface units section. |
| Surface unit stops glowing when turned to a lower setting | This is normal. The unit is still on and hot. | |

Troubleshooting Tips
| Problem Possible Causes What To Do | ||
| Coil Cooktops | ||
| Surface units not functioning properly | The surface units are not plugged in solidly. | With the controls off, check to make sure the surface unit is plugged completely into the receptacle. |
| The surface unit controls improperly set. | Check to see the correct control is set for the surface unit you are using. | |
| The drip pans are not set securely in the cooktop. | With the controls off, check to make sure the drip pan is in the recess in the cooktop and that the opening in the pan lines up with the receptacle. | |
| Oven-All Models | ||
| Oven light does not work | Light bulb is loose or defective. | Tighten or replace the bulb. |
| Switch operating light is broken. | Call for service. | |
| Oven will not work | Plug on range is not completely inserted in the electrical outlet. | Make sure electrical plug is plugged into a live, properly grounded outlet. |
| A fuse in your home may be blown or the circuit breaker tripped. | Replace fuse or reset circuit breaker. | |
| Oven controls improperly set. | See the Using the oven section. | |
| On self-cleaning models, door left in the locked position. | If necessary, allow the oven to cool; then unlock the door. | |
| Food does not bake or roast properly | Oven controls improperly set. | See the Using the oven section. |
| Rack position is incorrect or the rack is not level. | See the Using the oven section. | |
| Incorrect cookware or cookware of improper size being used. | See the Using the oven section. | |
| Oven thermostat needs adjustment. | See the Adjust the oven thermostat—Easy to do yourself section. | |
| No power supply from convenience outlet on top of backguard (on some models) | Small appliance plug is not completely inserted in the convenience outlet. | Make sure the small appliance plug is properly inserted. |
| The backguard is too hot and the convenience outlet breaker has tripped. | Allow the range to cool; then reset the circuit breaker by pressing the switch located near the convenience outlet. | |
| Food does not broil properly | ||
| Improper rack position being used. | • See the Broiling guide. | |
| Food being cooked in a hot pan. | • Use the broiling pan and grid that came with your range.Make sure it is cool. | |
| Aluminum foil used on the broiling pan and grid has not been fitted properly and slit as recommended. | • See the Using the oven section. | |
| In some areas the power (voltage) may be low. | • Preheat the broil element for 10 minutes.Broil for the longest period of time recommended in the Broiling guide. | |
| Control signals after entering cooking time or delay start | You forgot to enter a bake temperature or cleaning time. | • Press the BAKE pad and desired temperature or the CLEAN pad and desired clean time. |
| Display flashes "bAd" then "linE" with a loud tone | The installed connection from the house to the unit is miswired. | • Contact installer or electrician to correct miswire. |
| Surface units do not work | There has been a main power supply surge and/or a power interruption and surge | • On the Control Panel, activate the Self Clean mode (press the SELF CLEAN button)Wait for 30 seconds and then press the OFF button.The cooktop should now be ready to operate |
| The words "CLOSE DOOR" flashes or scrolls in the display | This is a normal condition.The "CLOSE DOOR" is a reminder message to keep the oven door closed during broil mode | • This is normal. Keep oven door closed during broil mode |
Before you call for service...

Troubleshooting Tips
| Problem Possible Causes What To Do | ||
| Oven temperature too hot or too cold | Oven thermostat needs adjustment. | • See the Adjust the oven thermostat—Easy to do yourself! section. |
| Clock and timer do not work | Plug on range is not completely inserted in the electrical outlet. | • Make sure electrical plug is plugged into a live, properly grounded outlet. |
| A fuse in your home may be blown or the circuit breaker tripped. | • Replace fuse or reset circuit breaker. | |
| Oven controls improperly set. | • See the Using the clock, timer and convenience outlet section. | |
| Display goes blank | A fuse in your home may be blown or the circuit breaker tripped. | • Replace the fuse or reset the circuit breaker. |
| The clock is turned off from showing in the display. | • See the Using the clock, timer and convenience outlet section. | |
| Oven door is crooked | The door is out of position. | • Because the oven door is removable, it sometimes gets out of position during installation. To straighten the door, push down on the high corner. |
| Oven makes clicking noise | This is the sound of the heating element turning off and on during cooking functions. | • This is normal. |
| “F—and a number or letter” flash in the display | You have a function error code. | • Press the OFF pad. Put the oven back into operation. |
| If the function code repeats: | • Disconnect all power to the range for at least 30 seconds and then reconnect power. If the function error code repeats, call for service.• On self-cleaning models, if a function error code appears during the self-cleaning cycle, check the oven door latch. The latch may have been moved, if only slightly, from the locked position. Make sure the latch is moved to the right as far as it will go. Press the OFF pad. Allow the oven to cool for one hour. Put the oven back into operation. | |
| Power outage clock flashes | Power outage or surge. | • Some models will automatically resume their setting once the power is restored. On models with a clock, you must reset the clock. If the oven was in use, you must reset it by pressing the OFF pad, setting the clock and resetting any cooking function. |
| Display flashes | Power failure. | • Reset the clock. |
| Unable to get the display to show “SF” | Oven control pads were not pressed properly. | • The BAKE and BROIL pads must be pressed at the same time and held for 3 seconds. |
| "Burning" or "oily" odor emitting from the oven vent | This is normal in a new oven and will disappear in time. | • To speed the process, set a self-clean cycle for a minimum of 3 hours. See the Using the self-cleaning oven section. |
| Strong odor | An odor from the insulation around the inside of the oven is normal for the first few times the oven is used. | • This is temporary. |
| Self-Cleaning Models | ||
| Oven will not self-clean | The oven temperature is too high to set a self-clean operation. | • Allow the range to cool to room temperature and reset the controls. |
| Oven controls improperly set. | • See the Using the self-cleaning oven section. | |
| Oven door is not in the locked position. | • Make sure you move the door latch handle all the way to the right. | |
| Oven starts a self-clean cycle when you wanted to bake, roast or broil | Oven door locked during cooking. | • Turn the Oven Temperature knob to OFF. Allow the oven to cool. Never force the door latch handle. |
| "Crackling" or "popping" sound | This is the sound of the metal heating and cooling during both the cooking and cleaning functions. | • This is normal. |
| Excessive smoking during a clean cycle | Excessive soil. | • Press the OFF pad. Open the windows to rid the room of smoke. Wait until the light on the CLEAN pad goes off. Wipe up the excess soil and reset the clean cycle. |
| Oven door will not unlock | Oven too hot. | • Allow the oven to cool below locking temperature. |
| Oven not clean after a clean cycle | Oven controls not properly set. | • See Using the self-cleaning oven section. |
| Oven was heavily soiled. | • Clean up heavy spillovers before starting the clean cycle. Heavily soiled ovens may need to self-clean again or for a longer period of time. | |
Looking For Something More?
You can find these accessories and many more at www.GEAppliances.ca, or call 800.661.1616 (during normal business hours). Have your model number ready.
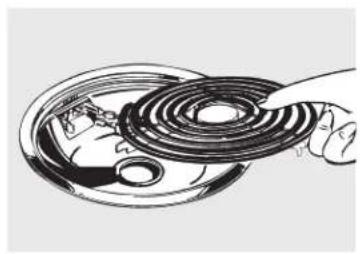
natural_image
Illustration of a hand inserting a ring into a circular component (no text or symbols)Surface Elements & Drip Pans
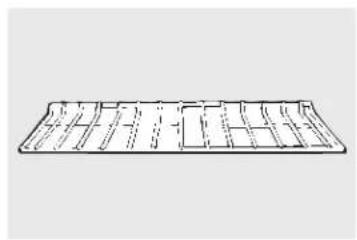
natural_image
Pure technical line drawing of a rectangular grid structure without any text, numbers, or symbolsOven Racks Broiler Pan

natural_image
Line drawing of a rectangular object with internal compartments (no text or symbols)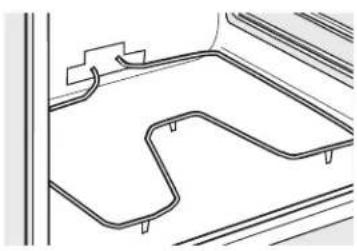
natural_image
Pure technical line drawing of a mechanical component or bracket (no text or symbols)Oven Elements Light Bulbs Knobs
natural_image
Simple line drawing of a light bulb with no text or symbols
natural_image
Simple line drawing of a round, segmented object resembling a beach or ball (no text or symbols)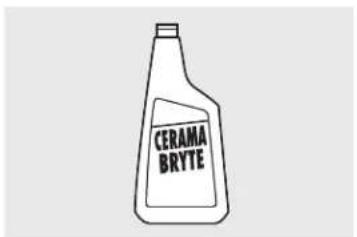
Cleaner Cleaning Pads Scraper
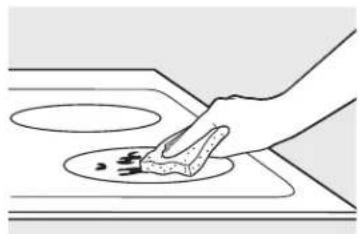
natural_image
Hand cleaning a kitchen appliance on a stove (no text or symbols visible)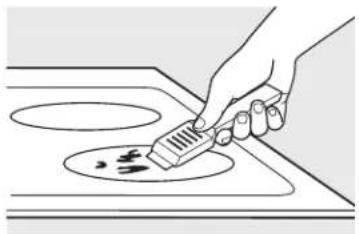
natural_image
Hand using a brush to clean or store food on an induction cooktop (no text or symbols visible)Tired of discolored racks? Wishing you had extra-heavy-duty oven racks?
NOW AVAILABLE for your range:
GE's innovative, self-cleanable porcelain-coated oven racks!
- Heavy Duty
- Durable
- Able to be cleaned in a self-cleaning oven
Visit www.GEAppliances.ca for more information.
Please place in envelope and mail to:

For Canadian Customers
CUT ALONG THIS LINE AND RETURN CARD—THANKS
| OWNERSHIP REGISTRATION CERTIFICATE - FICHE D'INSCRIPTION DU PROPRIÉTAIRE | |||||
| Please register your product to enable us to contact you in the remote event a safety notice is issued for this product and to allow for efficient communication under the terms of your warranty, should the need arise. | Veuillez enregistrer votre produit afin de nous permettre de communiquer avec vous si jamais un avis de sécurité concernant ce produit était émis et de communiquer facilement avec vous en vertu de votre garantie, si le besoin s'en fait sentir. | ||||
| REGISTER ON-LINE: www.geappliances.ca ENREGISTREMENT SUR INTERNET À: www.electromenagersge.ca | MAIL TO: P.O. BOX 1780, MISSISSAUGA POSTER À: ONTARIO, L4Y 4G1 | ||||
| ☐ MR./M ☐ MRS./MME.☐ MISS/MLLE ☐ MS. | FIRST NAME/PRÉNOM | LAST NAME/NOM | |||
| STREET NO/N° RUE | STREET NAME/RUE | APT. NO / APP./RR# | |||
| CITY/VILLE | PROVINCE | POSTAL CODE/POSTAL | |||
| AREA CODE/IND. RÉG. | TELEPHONE | ||||
| DID YOU PURCHASE A SERVICE CONTRACT FOR THIS APPLIANCE? AVEZ-VOUS ACHETÉ UN CONTRAT DE SERVICE POUR CET APPAREIL? YES/OUI ☐ Y/A ☐ D/JNO/NON ☐ IF YES/SI OUI: EXPIRATION | |||||
| NAME OF SELLING DEALER/NOM DU MARCHAND | MODEL/MODÈLE | ||||
| INSTALLATION DATE/DATE D'INSTALLATION Y/A ☐ M ☐ D/J | CORRESPONDENCE ☐ ENGLISH CORRESPONDANCE ☐ FRANÇAIS | SERIAL/SÉRIE | |||
| ☐ I do not wish to receive any promotional offers regarding this product.☐ Je ne désire pas recevoir d'offres promotionnelles concernant ce produit. | |||||
GE Electric Range Warranty.
All warranty service provided by our Factory Service Centers, or an authorized Customer Care® technician. To schedule service, call 1.800.561.3344. Please have serial number and model number available when calling for service.
Staple your receipt here. Proof of the original purchase date is needed to obtain service under the warranty.
For The Period Of: Mabe Will Provide:
One Year
From the date of the original purchase
Any part of the range which fails due to a defect in materials or workmanship. During this limited one-year warranty, Mabe will also provide, free of charge, all labor and related service to replace the defective part.
What Mabe Will Not Cover:
■ Service trips to your home to teach you how to use the product.
- Improper installation, delivery or maintenance.
- Failure of the product if it is abused, misused, or used for other than the intended purpose or used commercially.
■ Damage to the glass cooktop caused by use of cleaners other than the recommended cleaning creams and pads.
Damage to the glass cooktop caused by hardened spills of sugary materials or melted plastic that are not cleaned according to the directions in the Owner's Manual.
■ Replacement of house fuses or resetting of circuit breakers.
■ Damage to the product caused by accident, fire, floods or acts of God.
■ Incidental or consequential damage caused by possible defects with this appliance.
■ Damage caused after delivery.
■ Product not accessible to provide required service.
EXCLUSION OF IMPLIED WARRANTIES—Your sole and exclusive remedy is product repair as provided in this Limited Warranty. Any implied warranties, including the implied warranties of merchantability or fitness for a particular purpose, are limited to one year or the shortest period allowed by law.
This warranty is extended to the original purchaser and any succeeding owner for products purchased in Canada for home use within Canada. In-home warranty service will be provided in areas where it is available and deemed reasonable by Mabe to provide.
Some provinces do not allow the exclusion or limitation of incidental or consequential damages, so the above limitation or exclusion may not apply to you. This warranty gives you specific legal rights, and you may also have other rights which vary from province to province. To know what your legal rights are in your province, consult your local or provincial consumer affairs office.
Warrantor: Mabe Canada Inc., Burlington, Ontario
GE Appliances Website
www.geappliances.ca
Have a question or need assistance with your appliance? Visit our Website, www.geappliances.ca, 24 hours a day, anydayoftheyear!

Schedule Service 1.800.561.3344
GErepairserviceisclosetoyou.
ToarrangeserviceforyourGEappliance,allyouhavetodoiscall.

Parts and Accessories
Individuals qualified to service their own appliances can have parts or accessories sent directly to their homes (VISA, MasterCard and Discovercards are accepted).
Instructions contained in this manual cover procedures to be performed by any user. Other servicing generally should be referred to qualified service personnel. Caution must be exercised, since improper servicing may cause unsafe operation.
YouwillfindthenearestMabeServiceCenternumberintheyellowpagesofyourphonebook.Or,callusat1.800.661.1616.

Contact Us
If you are not satisfied with the service you have received:
First of all, communicate with the people who repaired your appliance.
Then, if you are still not satisfied, send all information including telephone numberto:
Director, Consumer Relations, Mabe Canada Inc.
Suite310,1FactoryLane
Moncton,N.B.E1C9M3

Register Your Appliance www.geappliances.ca
Register your new appliance on-line—at your convenience! Timely product registration will allow for enhanced communication and prompts service under the terms of your warranty, should then consider.
Youmayalsomailinthepre-printedregistrationcardincludedinthepackingmaterial.
- Electric Coil & Radiant Ranges
- Safety Information 2-5
- Operating Instructions
- Care and Cleaning....31
- Troubleshooting Tips ..... 32-36
- Accessories 37
- Consumer Support
- Owner's Manual
- IMPORTANT SAFETY INFORMATION.
- READ ALL INSTRUCTIONS BEFORE USING.
- WARNING
- ANTI-TIP DEVICE
- For Freestanding Ranges:
- GENERAL SAFETY INSTRUCTIONS
- KEEP FLAMMABLE MATERIALS AWAY FROM THE RANGE
- IN THE EVENT OF A FIRE, TAKE THE FOLLOWING STEPS TO PREVENT THE FIRE FROM SPREADING:
- COOKTOP SAFETY INSTRUCTIONS
- RADIANTCOOKTOPSAFETYINSTRUCTIONS(Somemodels)
- OVENSAFETYINSTRUCTIONS
- SELF-CLEANINGOVENSAFETYINSTRUCTIONS
- About the Radiant Surface Units
- WARNING: the surface
- NOTE:
- Temperature Limiter
- Stainless Steel:
- Aluminum:
- Glass-Ceramic:
- Stoneware:
- Home Canning Tips:
- Copper Bottom:
- Porcelain Enamel-Covered Cast Iron:
- Surface Cookware Tips
- Wok Cooking
- Using the surface units.
- How to Set
- Using the oven controls.
- Oven Control, Clock and Timer Features and Settings
- BAKE Pad
- START/ON Pad
- Display
- TIMER Pad
- CLOCK Pad
- START TIME Pad (on some models)
- COOK TIME Pad (on some models)
- Temperature Conversions
- Power Outage
- Using the oven.
- Before you begin...
- CAUTION:
- Howto Set theOven for Baking or Roasting
- Preheating and Pan Placement
- Aluminum Foil
- How to Set the Oven for Broiling
- To Set the Clock
- To Turn Off the Clock Display
- To Set the Timer
- Using the clock, timer and convenience outlet. (on some models)
- To Reset the Timer
- To Cancel the Timer
- End of Cycle Tones (on some models)
- Convenience Outlet (on some models)
- Using the timed baking and roasting features. (on some models) GEAppliances.ca
- How to Set a Delayed Start and Automatic Stop
- Special features of your oven control.
- Hour Shut-Off
- How to Set for Regular Baking/Roasting
- How to Set for Timed Baking/Roasting—Immediate Start and Automatic Stop
- Using the Sabbath Feature. (on some models)
- How to Exit the Sabbath Feature
- To Adjust the Thermostat
- The type of margarine will affect baking performance!
- Using the self-cleaning oven. (on some models)
- Before a Clean Cycle
- CAUTION: The grates and drip pans (on some models) should never be cleaned in the self-cleaning oven.
- How to Set the Oven for Cleaning
- How to Delay the Start of Cleaning
- To Stop a Clean Cycle
- After a Clean Cycle
- Using Steam Clean. (JCBS650 model only)
- CAUTION
- To Begin Steam Clean Cycle:
- Press the Steam Clean pad; then press Start.
- IMPORTANT NOTES:
- Care and cleaning of the range.
- Oven Interior (non-self-clean models)
- Cleaning the Oven Door
- To clean the inside of the door:
- To clean the outside of the door:
- Lift-Off Oven Door (Faringosi hinges)
- To remove the door:
- To replace the door:
- Lift-Off Oven Door (on some models)
- Oven Heating Elements
- Oven Racks
- Oven Light Replacement (on some models)
- CAUTION: Before
- To remove the cover:
- To replace the cover:
- Storage Drawer Removal (on some models)
- To remove the storage drawer:
- To replace the storage drawer:
- Porcelain Enamel Cooktop (on radiant models)
- Lift-Up Cooktop (on coil models)
- Surface Units (on coil models)
- To remove a surface unit:
- To replace a surface unit:
- Drip Pans (on coil models)
- Oven Vent (on coil models)
- Painted Surfaces (on some models)
- Stainless Steel Surfaces (on some models)
- Do not use a steel wool pad; it will scratch the surface.
- Glass Window (on some models)
- BOWL AND COIL ASSEMBLY (on coil models)
- Attention (on coil models)
- Normal Daily Use Cleaning
- Burned-On Residue
- Heavy, Burned-On Residue
- Cleaning the glass cooktop. (on radiant models)
- Metal Marks and Scratches
- Cooktop Seal
- Glass surface—potential for permanent damage.
- Damage from Sugary Spills and Melted Plastic
- To Order Parts
- Before you call for service...
- Troubleshooting Tips
- Looking For Something More?
- GE Electric Range Warranty.
- For The Period Of: Mabe Will Provide:
- One Year
- What Mabe Will Not Cover:
- GE Appliances Website
- Schedule Service 1.800.561.3344
- Parts and Accessories
- Contact Us
- Register Your Appliance www.geappliances.ca
Brand : Mabe
Model : JCB630SJSS
Category : Cooker