
Roadmaster (1995) - Automobile Buick - Free user manual and instructions
Find the device manual for free Roadmaster (1995) Buick in PDF.


| Product Type | Passenger vehicle |
| Brand | Buick |
| Model | Roadmaster (1995) |
| Category | Automobile |
| Engine Type | Gasoline V8 |
| Displacement | 5.7 L (350 cu in) |
| Transmission | 4-speed automatic |
| Drive Type | Rear-wheel drive |
| Fuel System | Electronic fuel injection |
| Length | 5.53 m (217.7 in) |
| Width | 1.98 m (78.0 in) |
| Height | 1.49 m (58.7 in) |
| Wheelbase | 3.07 m (121.0 in) |
| Curb Weight | Approximately 2000 kg (4400 lb) |
| Fuel Capacity | 74 L (19.5 gal) |
| Power Steering | Hydraulic power assist |
| Brake System | Front disc, rear drum with ABS |
| Safety Features | Dual front airbags, three-point seat belts, child safety locks |
| Maintenance | Regular oil changes, tire rotations, brake inspections |
| Spare Parts | Available through Buick dealers or aftermarket |
| Manual Locations | Glove compartment or online PDF |
Frequently Asked Questions - Roadmaster (1995) Buick
User questions about Roadmaster (1995) Buick
0 question about this device. Answer the ones you know or ask your own.
Ask a new question about this device
Download the instructions for your Automobile in PDF format for free! Find your manual Roadmaster (1995) - Buick and take your electronic device back in hand. On this page are published all the documents necessary for the use of your device. Roadmaster (1995) by Buick.
USER MANUAL Roadmaster (1995) Buick
2013BuickEnclaveOwnerManual
InBrief....1-1
InstrumentPanel......1-2
InitialDriveInformation......1-4
VehicleFeatures......1-14
Performanceand
Maintenance....1-19
Keys, Doors, and
Windows....2-1
KeysandLocks......2-1
Doors....2-8
VehicleSecurity......2-11
ExteriorMirrors......2-14
InteriorMirrors......2-16
Windows....2-17
Roof....2-19
SeatsandRestraints......3-1
HeadRestraints......3-2
FrontSeats......3-3
RearSeats......3-8
SafetyBelts....3-13
AirbagSystem......3-22
ChildRestraints......3-35
Storage....4-1
StorageCompartments......4-1
AdditionalStorageFeatures...4-3
RoofRackSystem......4-4
InstrumentsandControls....5-1
Controls....5-2
WarningLights,Gauges,and
Indicators......5-9
InformationDisplays......5-22
VehicleMessages......5-27
VehiclePersonalization......5-37
UniversalRemoteSystem....5-45
Lighting....6-1
ExteriorLighting......6-1
InteriorLighting......6-5
LightingFeatures......6-6
InfotainmentSystem......7-1
Introduction......7-1
Radio....7-6
AudioPlayers......7-12
RearSeatInfotainment......7-18
Phone....7-28
Settings......7-35
TrademarksandLicense
Agreements......7-37
ClimateControls......8-1
ClimateControlSystems.....8-1
AirVents....8-8
Maintenance....8-9
DrivingandOperating......9-1
DrivingInformation......9-2
StartingandOperating......9-13
EngineExhaust......9-20
AutomaticTransmission.....9-21
DriveSystems....9-24
Brakes....9-25
RideControlSystems......9-27
CruiseControl....9-29
ObjectDetectionSystems....9-31
Fuel....9-37
Towing....9-42
ConversionsandAdd-Ons...9-49
2013BuickEnclaveOwnerManual
VehicleCare....10-1
GeneralInformation......10-2
VehicleChecks......10-3
HeadlampAiming......10-25
BulbReplacement......10-25
ElectricalSystem......10-27
WheelsandTires......10-34
JumpStarting......10-65
Towing....10-68
AppearanceCare......10-72
ServiceandMaintenance...11-1
GeneralInformation......11-1
MaintenanceSchedule......11-3
SpecialApplication
Services......11-8
AdditionalMaintenance
andCare....11-9
RecommendedFluids,
Lubricants, and Parts.....11-12
MaintenanceRecords.....11-14
TechnicalData....12-1
VehicleIdentification......12-1
VehicleData....12-2
CustomerInformation.....13-1
CustomerInformation......13-2
ReportingSafetyDefects....13-17
VehicleDataRecordingand
Privacy....13-19
OnStar....14-1
OnStarOverview......14-1
OnStarServices......14-2
OnStarAdditional
Information......14-5
Index......i-1

Thenames, logos, emblems, slogans, vehiclemodelnames, and vehiclebodydesignsappearingin thismanualincluding, but not limited to, GM, the GM logo, BUICK, the BUICKEmblem, and ENCLAVEare trademarks and/or servicemarksof General Motors LLC, its subsidiaries, affiliates, or licensors.
Thismanualdescribesfeaturesthat mayormaynotbeonyourspecific vehicleeitherbecausetheyare optionsthatyoudidnotpurchaseor duetochangessubsequenttothe printingofthisownermanual.
Pleaserefertothepurchase documentationrelatingtoyour specificvehicletoc confirmeeachof thefeaturesfoundonyourvehicle. ForvehiclesfirstsoldinCanada, substitutethename"General MotorsofCanadaLimited"forBuick MotorDivisionwhereveritappears inthismanual.
Keepthismanualinthevehiclefor quickreference.
CanadianVehicleOwners
AFrenchlanguagemanualcanbe obtainedfromyourdealer,at www.helminc.com,orfrom:
Helm, Incorporated Attention: CustomerService 47911 HalyardDrive Plymouth, MI48170
LithoinU.S.A.
PartNo.22744235CThirdPrinting
©2013GeneralMotorsLLC.AllRightsReserved.
UsingthisManual
Toquicklylocateinformationabout thevehicle,usethelndexinthe backofthemanual.Itisan alphabeticalallistofwhatisinthe manualandthepagenumberwhere itcanbefound.
Danger,Warnings, and Cautions
Warning messages found on vehicle labels and this manual describe hazards and what to avoid or reduce them.
Dangerindicatesahazardwitha highlevelofriskwhichwillresultin seriousinjuryordeath.
Warningor Caution indicates a hazard that could result in injury or death.
WARNING
These mean there is something that could hurt you or other people.
Notice: This mean there is something that could result in property or vehicle damage. This would not be recovered by the vehicle's warranty.

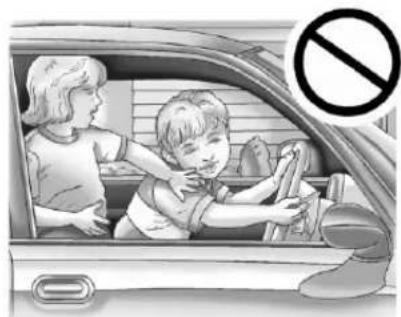
Acirclewithaslashthroughitisa safetysymbolwhichmeans“Do Not,”“Donotdothis,”or“Donotlet thishappen.”
Symbols
Thevehiclehascomponentsand labelsthatusesymbolsinsteadof text.Symbolsareshownalongwith thetextdescribingtheoperationor informationrelatingtoaspecific component,control,message, gauge,orindicator.
(i): This symbol is shown when you need to see your own manual for additional instructions or information.
☐: This symbol is shown when you need to see a service manual for additional instructions or information.
VehicleSymbolChart
Herearesomeadditionalsymbols that may be found on the vehicle and what they mean. Form more information on the symbol, refer to the Index.
AirbagReadinessLight
(ABS):AntilockBrakeSystem(ABS)
^1 :AudioSteeringWheelControls orOnStar ^®
(●):BrakeSystemWarningLight
- + : ChargingSystem
:CruiseControl
EngineCoolantTemperature
-ExteriorLamps
D:FogLamps
:FuelGauge
Fuses
ED:HeadlampHigh/Low-Beam
Changer
LATCHSystemChild Restraints
H:MalfunctionIndicatorLamp
:OilPressure
OutsidePowerFoldaway Mirrors
①:Power
Ω:RemoteVehicleStart
SafetyBeltReminders
():TirePressureMonitor
-∞:Tow/HaulMode
(TC):TractionControl/StabiliTrak®
WindshieldWasherFluid
vilntroduction
NOTES
InBrief
InstrumentPanel
InstrumentPanel......1-2
InitialDriveInformation
InitialDriveInformation.....1-4
RemoteKeylessEntry(RKE)
System......1-4
RemoteVehicleStart......1-4
DoorLocks......1-5
Liftgate....1-5
Windows....1-6
SeatAdjustment.....1-6
MemoryFeatures......1-7
SecondRowSeats......1-7
ThirdRowSeats......1-8
HeatedandVentilated
Seats......1-8
HeadRestraintAdjustment....1-9
SafetyBelts....1-9
PassengerSensingSystem...1-9
MirrorAdjustment......1-10
SteeringWheel
Adjustment....1-10
InteriorLighting......1-11
ExteriorLighting......1-12
WindshieldWiper/Washer....1-12
ClimateControls....1-13
Transmission....1-14
VehicleFeatures
Radio(s)....1-14
SatelliteRadio....1-16
PortableAudioDevices.....1-16
Bluetooth ^® ......1-16
SteeringWheelControls.....1-16
CruiseControl......1-17
InfotainmentSystem......1-17
UltrasonicParkingAssist....1-17
PowerOutlets......1-18
UniversalRemoteSystem...1-18
Sunroof....1-18
PerformanceandMaintenance
StabiliTrak® System......1-19
TirePressureMonitor......1-19
EngineOilLifeSystem.....1-20
DrivingforBetterFuel
Economy....1-20
RoadsideAssistance
Program......1-21
OnStar ^® ......1-21
InstrumentPanel
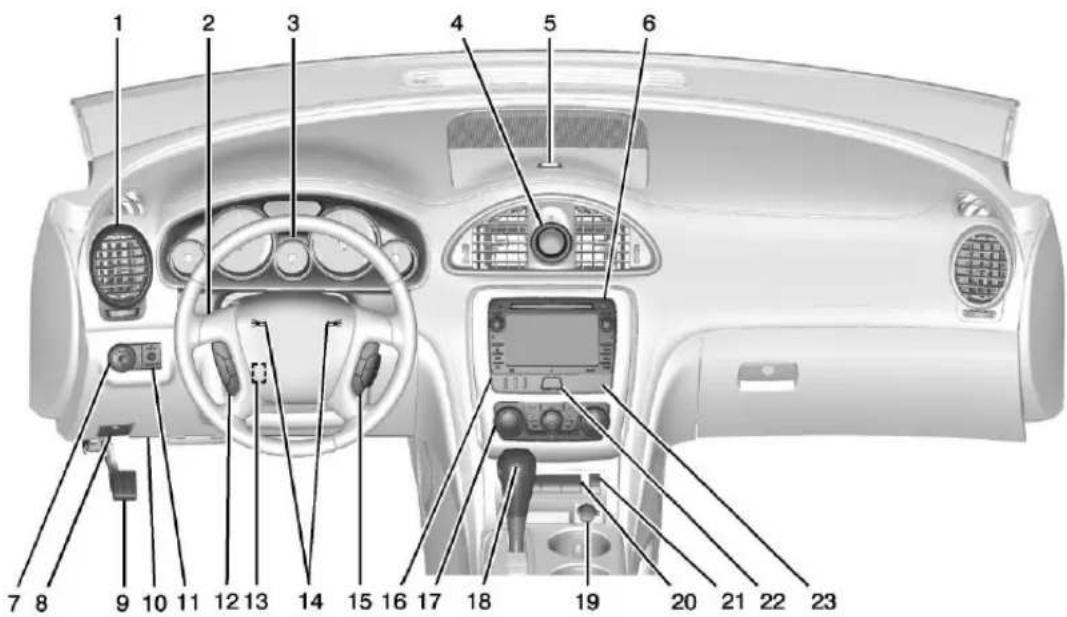
- AirVentsonpage8-8.
- TurnandLane-ChangeLever. See TurnandLane-Change Signalsonpage6-4. WindshieldWiper/Washeron page5-3.
- InstrumentClusteronpage5-10.
- Clockonpage5-6.
- InstrumentPanelStorageon page4-1. USBPort(InsideIPStorage)(If Equipped). SeeAuxiliary Devicesonpage7-17.
- Infotainmentpage7-1. Navigation/RadioSystem(If Equipped). Seetheinfotainment manual.
- Exterior Lamp Controlson page 6-1.
Fog Lampson page 6-4.
8.HoodRelease.SeeHoodon page10-4. -
Parking Brakeonpage 9-26.
-
DataLinkConnector(DLC) (OutofView). See Malfunction IndicatorLamponpage5-16.
- DomeLampOverride. See Dome Lampsonpage6-5. InstrumentPanelIllumination Controlonpage6-5.
- CruiseControlonpage9-29.
- Steering Wheel Adjustment page5-2.
14.Hornonpage5-3. - Steering Wheel Controlson page 5-3 (If Equipped).
16.DriverInformationCenter(DIC) Buttons.SeeDriverInformation Center(DIC)onpage5-22. - DualAutomaticClimateControl Systemonpage8-1.
-
ShiftLever. See Shifting Into Parkonpage9-18.
19.PowerOutletsonpage5-7. -
RearWindowWiper/Washeron page5-4. TractionControlSystem(TCS) DisableButton.See StabiliTrak® Systemon page9-27. Tow/HaulButton(IfEquipped). See Tow/HaulModeon page9-24. PowerLiftgateButton(If Equipped).See Liftgateon page2-8.
21.HeatedandVentilatedFront Seatsonpage3-7(If Equipped).
22.HazardWarningFlasherson page6-4.
23.PassengerAirbagStatus Indicator.SeePassenger SensingSystemonpage3-29.
InitialDrive Information
Thissectionprovidesabrief overviewaboutsomeofthe importantfeaturesthatmayormay notbeonyourspecificvehicle.
Formoredetailedinformation, refer toeachofthefeatureswhichcanbe foundlaterinthisownermanual.
RemoteKeylessEntry (RKE)System
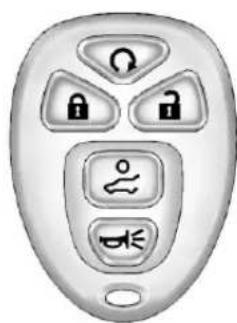
TheRKEtransmitterisused to remotelylockandunlockthedoors fromupto60m(195ft)awayfrom thevehicle.
natural_image
Close-up of a stylized remote control device with key buttons (no text or symbols visible)Press 🔒 tounlockthedriverdoor. Press 🔒 againwithinfiveseconds tounlockallremainingdoors.
Press 🔒 tolockalldoors. Lockandunlockfeedbackcanbe personalized.
Toopenorclosetheliftgate, press andhold untiltheliftgate beginstomove.
Press ⚡️ andreleasetolocatethe vehicle.
Press 🚙 andholdformorethan twosecondstosoundthepanic alarm.
Press 🚙️ againtocancelthepanic alarm.
See Remote Keyless Entry (RKE) System Operation on page 2-2.
RemoteVehicleStart StartingtheVehicle
With this feature the engine can be started from outside of the vehicle.
1.AimtheRKEtransmitteratthe vehicle.
-
Pressandrelease
-
Immediately after completing Step2, press and hold until the parking lamps flash.
Whenthevehiclestarts, the parking lampswillturnonandremainonas longastheengineisrunning. The doorswillbelockedandtheclimate controlsystemmaycomeon.
Theenginewillcontinuetorunfor 10minutes.Repeatthestepsfora 10-minutetimeextension.Remote startcanbeextendedonlyonce.
CancelingaRemoteStart
Tocancelaremotestart:
- AimtheRKEtransmitteratthe vehicleandpressandhold untiltheparkinglampsturnoff.
• Turnonthehazardwarning flashers.
• Turntheignitionswitchonand thenoff.
See Remote Vehicle Starton page2-4.
DoorLocks
Tolockorunlockadoormanually:
• Fromtheinside,usethedoor lockknobonthewindowsill.
- Fromtheoutside,turnthekey towardthefrontorrearofthe vehicle,orpress 📄oronth the RemoteKeylessEntry(RKE) transmitter.
PowerDoorLocks
natural_image
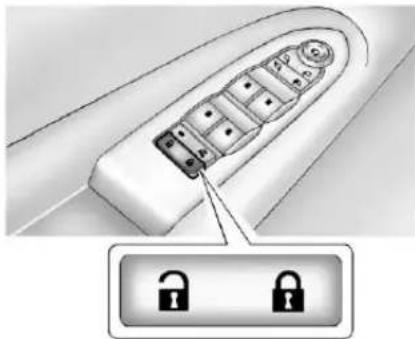
Diagram of a remote control panel with lock icons, no text or symbols present:Presstounlockthedoors.
:Presstolockthedoors.
SeePowerDoorLocksonpage2-7.
Liftgate
Toopentheliftgatethevehiclemust beinP(Park)andthebatterymust becharged.Pressthetouchpad undertheliftgatehandleandpull up.Toclosetheliftgate,usethepull cupasanaid.
PowerLiftgate
Onvehicleswithapowerliftgate, thevehiclemustbeinP(Park)to operateit.
- Pressandhold onthe RemoteKeylessEntry (RKE)transmitter.
1-6InBrief
- Press
- Pressthetouchpadswitchon theoutsideliftgatehandle.
SeeLiftgateonpage2-8.
Windows
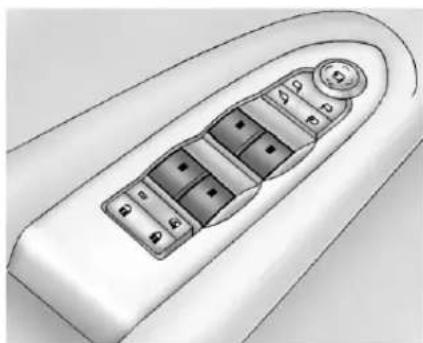
natural_image
Top-down view of a remote control panel with buttons and dials (no text or symbols visible)Presstheswitchtolowerthe window. Pulltheswitchupto raiseit.
Formoreinformation,seePower Windowsonpage2-17.
SeatAdjustment PowerSeats
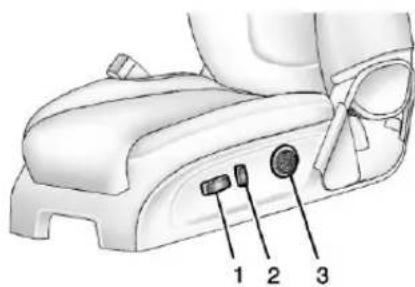
- SeatAdjustmentControl
- Reclining Seatback Control
- LumbarAdjustmentControl
Toadjusttheseat:
- Movetheseatforwardor rearwardbyslidingthe control(1)forwardorrearward.
- Raiseorlowerthefrontpartof theseatcushionbymovingthe frontofthecontrol(1)up ordown.
- Raiseorlowertheentireseatby movingtherearofthecontrol(1) upordown.
SeePowerSeatAdjustmenton page3-3.
- Adjusttheseatbackbytiltingthe topofthecontrol(2)forwardor rearward.
SeeRecliningSeatbackson page3-4.
- Increaseordecreaselumbar supportbypassingthefrontor rearofthecontrol(3).
SeeLumbarAdjustmenton page3-4.
MemoryFeatures
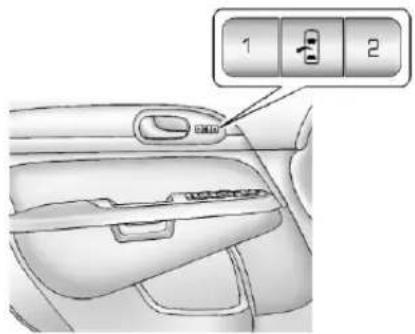
Ifavailable, the controlson the driverdoor are used to program and recall memory settings forth driver seat, outside mirrors, and power steering column, if available.
SeeMemorySeatsonpage3-5and VehiclePersonalizationon page5-37.
SecondRowSeats
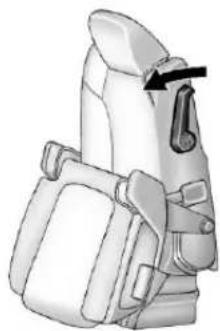
natural_image
Side view of a mechanical device with a black arrow pointing to a component (no text or symbols visible)Thesecondrowseatcanbefolded toaccessthethirdrow.Pullthe slidingseatleverforward;theseat cushionfolds,andtheseatslides forward.
SeeRearSeatsonpage3-8.
1-8InBrief
ThirdRowSeats
Thethirdrowseatbackscanbe foldedforward, andtheseatscan beremoved.
Tofoldthethirdrowseatback:
- Remove anything on or under theseat.
natural_image
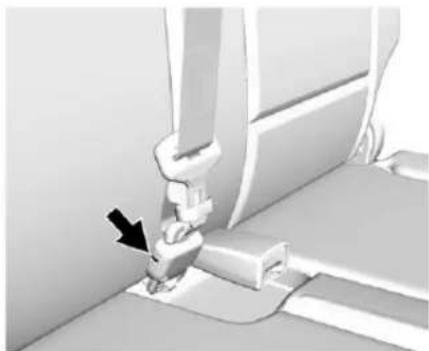
Mechanical assembly diagram showing a clamping mechanism with a black arrow indicating the point of motion (no text or symbols present)- Disconnecttherearsafetybelt mini-latchusingakeyintheslot onthemini-buckle, andletthe beltretractintotheheadliner. Stowthemini-latchintheholder intheheadliner.
natural_image
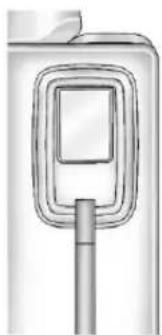
Simple line drawing of a mobile phone with a screen and antenna (no text or symbols)-
Pulluponthereleaseleveron thebackoftheseat.
-
Pushtheseatbackforwardto layflat.
See ThirdRowSeatsonpage3-10.
HeatedandVentilated Seats
natural_image
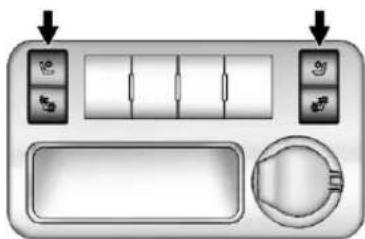
Front view of a car air conditioner control panel with buttons and indicator lights (no text or symbols visible)HeatedandCooledSeatButtons Shown, HeatedSeatButtons Similar
Ifavailable, the buttons are on the center console. To operate, the enginemustberunning.
:lfavailable,presstoheatthe seatbackonly.
:lfavailable,presstocoolthe
entireseat.
:Presstoheattheseatand seatback.
Pressthebuttononceforthe highestsetting.Witheachpressof thebutton,theseatwillchangeto thenextlowersetting,andthento theoffsetting.Thelightsindicate threeforthehighestsettingandone forthelowest.
See Heated and Ventilated Front Seatsonpage3-7.
HeadRestraint Adjustment
Donotdriveuntiltheheadrestraints foralloccupantsareinstalled and adjusted properly.
Toachieveacomfortableseating position,changetheseatback reclineangleaslittleasnecessary whilekeepingtheseatandthehead restraintheightintheproper position.
SeeHeadRestraintsonpage3-2 and PowerSeatAdjustmenton page3-3.
SafetyBelts
natural_image
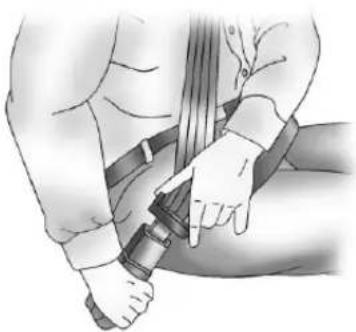
Illustration of a person adjusting a belt buckle (no text or symbols present)Refertothefollowingsectionsfor importantinformationonhowtouse safetybeltsproperly:
• SafetyBeltsonpage3-13.
• HowtoWearSafetyBelts Properlyonpage3-14.
• Lap-ShoulderBeltonpage3-15.
• LowerAnchorsandTethersfor Children(LATCHSystem)on page3-43.
PassengerSensing System
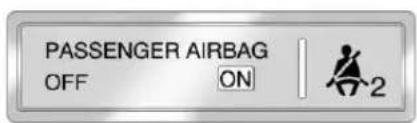
UnitedStates
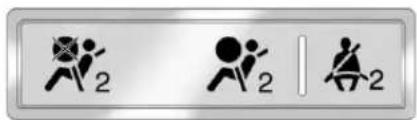
CanadaandMexico
Thepassengersensingsystemwill turnoffthefrontoutboard passengerfrontalairbagunder certainconditions.Nootherairbag isaffectedbythepassenger sensingsystem.
1-10InBrief
Thepassengerairbagstatus indicatorwilllightontheinstrument panelwhenthevehicleisstarted. SeePassengerSensingSystemon page3-29.
MirrorAdjustment
ExteriorMirrors
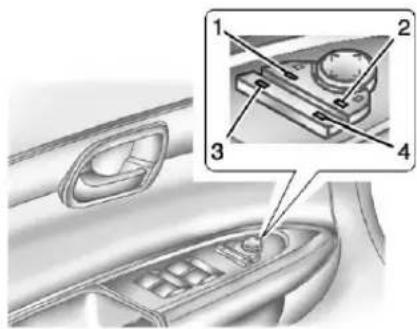
Toadjusteachmirror:
-
Press(1) or (2) to select the mirror.
-
Pressthecontrolpadtoadjust themirror.
-
Press(1) or (2) againtodeselect themirror.
FoldingMirrors
Forvehicleswithpowerfolding mirrors:
-
Press(3) tofold themirrors out tothedriving position.
-
Press(4) to fold them mirrors into the folded position.
Forvehicleswithmanualfolding mirrors, pushthemirrortowardthe vehicle. Pullthemirrorouttoreturn toitsoriginalposition.
InteriorMirror
Adjustment
Adjusttherearviewmirrortoclearly viewtheareabehindthevehicle.
Themirrorwillautomaticallyreduce theglarefromtheheadlampsfrom behind. Thedimmingfeaturecomes onwhenthevehicleisstarted.See AutomaticDimmingRearviewMirror onpage2-16.
SteeringWheel Adjustment
natural_image
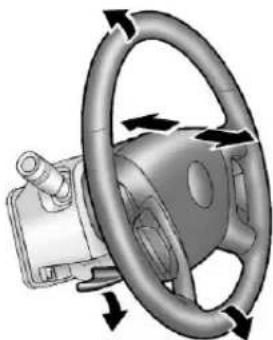
Diagram of a car steering wheel with directional arrows indicating rotational motion (no text or symbols)- Pulltheleverdown.
2.Movethesteeringwheelup ordown.
-
Pullorpushthesteeringwheel closerorawayfromyou.
-
Push the lever up to lock the steering wheel in place.
PowerTiltWheel
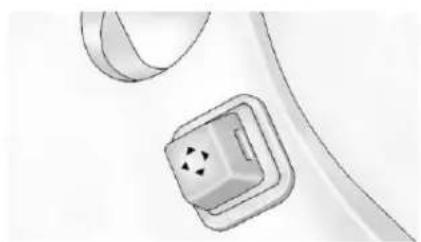
natural_image
Illustration of a small electrical plug with three pins, connected to a curved cable (no text or symbols)Forvehicleswiththepowertiltand telescopicwheel,thecontrolison theoutboardsideofthesteering column.
Pushthecontrolupordowntotilt thesteeringwheelupordown.
Pushthecontrolforwardor rearwardtomovethesteeringwheel towardthefrontorrearofthe vehicle. Tosetthememoryposition, see VehiclePersonalizationon page5-37.
Donotadjustthesteeringwheel whiledriving.
InteriorLighting
DomeLamps
Thedomelampsareinthe overheadconsoleandabovethe rearseatpassengers.
Thedomelampscomeonwhena doorisopened, unlessthedome lampoverridebuttonispressedin.
Tomanuallyturnthemon, turnthe instrumentpanelbrightnesscontrol clockwisetothefarthestposition.
DomeLampOverride
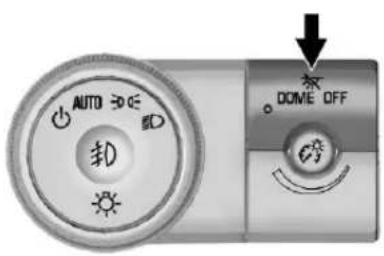
Thedomelampoverridebuttonis nexttotheexteriorlampscontrol.
※DOMEOFF:Pressthebutton andthedomelampsremainoff whenadoorisopened.Anindicator lightonthebuttoncomesonto showthatthedomelampsareoff. Pressthebuttonagainsothedome lampscomeonwhenadooris opened.
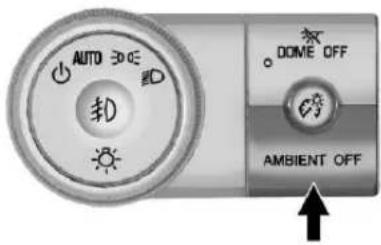
AMBIENTOFF(IfEquipped):
Pressthebuttontoturntheambient lightsoff.Pressthebuttonagainto turnambientlightson.
1-12InBrief
ReadingLamps
Pressthebuttonneareachlampto turnthemonoroff.
Formoreinformation,see:
• DomeLampsonpage6-5.
• InstrumentPanelIllumination Controlonpage6-5.
ExteriorLighting
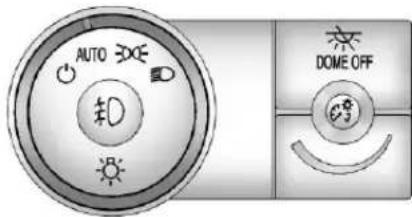
The exterior lamp control is on the instrument panel, to the left of the steering wheel.
☐:Turnstheautomaticlight controlonoroff.
AUTO: Automatic operation of the headlamps at normal brightness and other exterior lamps.
300: Manualoperationofthe parkinglampsandotherexterior lamps.
D: Manualoperationofthe headlampsandotherexterior lamps.
D:Usetoturnonoroffthefog lamps(ifequipped).
See:
• ExteriorLampControlson page6-1
• DaytimeRunningLamps(DRL)/AutomaticHeadlampSystemon page6-2
- FogLampsonpage6-4
WindshieldWiper/Washer
Thewindshieldwiper/washerlever islocatedontheleftsideofthe steeringcolumn.
Turnthebandwiththewipersymbol tocontrolthewindshieldwipers.
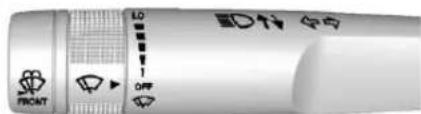
:Useforasinglewipingcycle.
OFF:Usetoturnthewipersoff.
:Delayswipingcycle.Turnthe bandupformorefrequentwipesor downforlessfrequentwipes.
LO:Slowwipes.
HI:Fastwipes.
WindshieldWasher
FRONT: Pressthebuttonat theendofthelevertospraywasher fluidonthewindshield.
RearWindowWiper/Washer
Therearwiperandrearwashbutton islocatedontheinstrumentpanel belowtheclimatecontrolsystem.
:Presstoturntherearwiperon andoff. Thewiperspeedcannot be changed.
:Presstospraywasherfluidon therearwindow. Thewindowwiper willalsocomeon.
See WindshieldWiper/Washeron page5-3 and Rear Window Wiper/Washeron page5-4.
ClimateControls
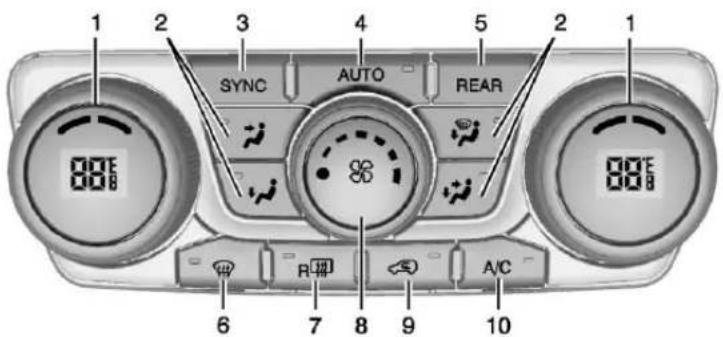
1.DriverandPassengerSide TemperatureControls
2. AirDeliveryModeControls
3. SYNC(Synchronized Temperature)
4. AUTO(AutomaticOperation)
5. REAR(RearClimateControl)
6.Defrost
7. RearWindowDefogger
8.FanControl
-
Recirculation
-
AirConditioning
See Dual Automatic Climate Control
Systemonpage8-1.Formore
informationabouttherearclimate
control, see Rear Climate Control
Systemonpage8-6orRear
ClimateControlSystem(withRear
SeatAudio)onpage8-7.
Transmission
ElectronicRangeSelect (ERS)Mode
ERSmodeallowsyoutochoose the top-gearlimitofthetransmission andthevehicle'sspeedwhile drivingdownhillortowingatrailer. Thevehiclehasanelectronicshift positionindicatorwithinthe instrumentcluster.Whenusingthe ERSmodeanumberwilldisplay nexttotheL,indicatingthecurrent gearthathasbeenselected.
Tousethisfeature:
-
MovetheshiftlevertoL(Low).
-
Presstheplus/minusbuttonon theshiftlever, toincreaseor decrease the gear range available.
SeeManualModeonpage9-23.
VehicleFeatures
Radio(s)
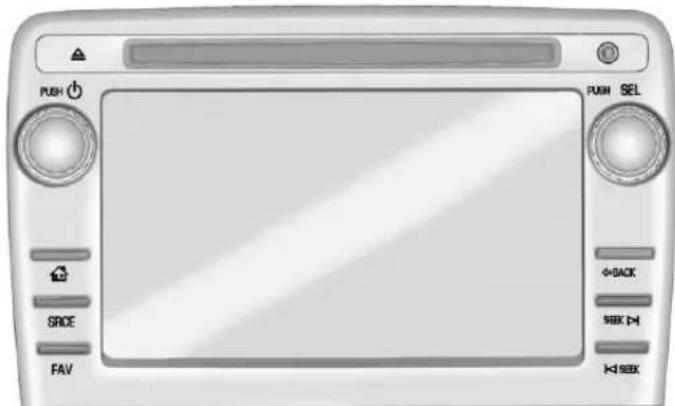
PUSH/☐:Presstoturnthesystem onandoff.Turntoadjustthe volume.
△:Presstoejectadiscfromthe CDplayer.SeeCDPlayeron page7-12.
AUXPort:3.5mm(1/8in) connectionforexternalaudio devices.
PUSH/SEL: Turntomanuallyfinda stationorhighlightamenu selection.Presstoselecta highlightedselection.
:PresstogototheHomePage. See "HomePage" in Operation on page 7-3.
SRCE: Presstochangetheaudio sourcetoAM, FM, SiriusXM ^® (if equipped), CD, USB, iPod ^® , or AUX.
FAV: Presstodisplaythefavorite listoraddafavorite. See Operation onpage7-3.
SEEK or SEEK: Seek or scan stationsandtracks.SeeOperation onpage7-3.
←BACK:Presstoreturntothe previoussscreeninamenu.
StoringRadioStationPresets
Upto30presetstationscanbe stored.AM,FM,andSiriusXM(if equipped)canbemixed.
-
From the AM, FM, or Sirius XM mainpage, press and hold any 1-5 buttons or one of the preset screen buttons at the bottom of the screen. After a few seconds, abeepis heard and thenew preset information display on that screen button.
-
Repeatforeachpreset.
- Presstheupordownarrowsto increaseordecreasetheHours, Minutes,AM,PM,or24hron theclock.
- Pressandholdtoquickly increaseordecreasethetime settings.
- PressOKortheBackscreen buttonosavetheadjustments thatweremade.
SetDate:
- Presstheupordownarrowsto increaseordecreasetheMonth, Day,andYearsettings.
- Pressandholdtoquickly increaseordecreasethedate settings.
- PressOKortheBackscreen buttonosavetheadjustments thatweremade.
SatelliteRadio
VehicleswithaSiriusXM ^ satellite radiotunerandavalidSiriusXM satelliteradiosubscriptioncan receiveSiriusXMprogramming.
SiriusXMSatelliteRadio Service
SiriusXMisasatelliteradioservice basedinthe48contiguousUnited Statesand10Canadianprovinces. SiriusXMsatelliteradiohasawide varietyofprogrammingand commercial-freemusic,coastto coast,andindigital-qualitysound. Afeeisrequiredtoreceivethe SiriusXMservice.
Referto:
• www.siriusxm.comorcall 1-866-635-2349(U.S.).
• www.xmradio.caorcall 1-877-209-0079(Canada).
SeeSatelliteRadioonpage7-9.
PortableAudioDevices
Thisvehiclemayhaveanauxiliary inputontheradiofaceplateanda USBportintheinstrumentpanel storagearea.Externaldevicessuch asiPods ^® , laptopcomputers, MP3 players, CDchangers, USBstorage devices, etc. can be connected to theauxiliaryportusinga3.5mm (1/8in)inputjackortheUSBport depending on the audiosystem.
SeeAuxiliaryDevicesonpage7-17.
Bluetooth®
TheBluetooth ^® systemallowsusers withaBluetooth-enabledmobile phonetomakeandreceive hands-freecallsusingthevehicle audiosystemandcontrols.
TheBluetooth-enabledmobile phonemustbepairedwiththe in-vehicleBluetoothsystembeforeit canbeusedinthevehicle. Notall phoneswillsupportallfunctions.
SeeBluetoothpage7-28.
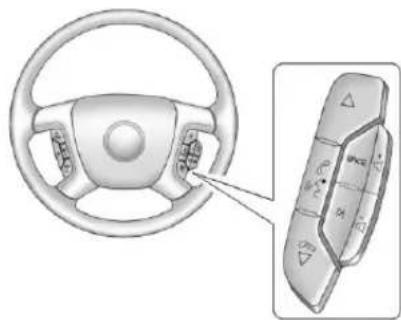
SteeringWheelControls
natural_image
Diagram of a car steering wheel and its internal control panel (no text or symbols)△ or ▶ /▽ : Press to change favoriteradiostations, selecttracks onaCD, or navigate tracksor foldersonaniPodorUSBdevice.
^6 M _12 : Press and hold to silence the vehiclespeakersonly. Press againtoturnthesoundon. Pressto interactwithOnStar ^® orBluetooth systems.
/▽ : Press to reject an incomingcall,orendacurrentcall.
SRCE: Presstoswitch between theradio, CD, and forequipped vehicles, frontauxiliary, and rear auxiliary.
D: Presstoseekthenextradio station, track, orchapterwhile sourcedtotheCDslot, ortoselect tracksandfoldersonaniPodor USBdevice.
+ or - : Press to increase or to decrease the volume.
See Steering Wheel Controlson page5-3.
CruiseControl
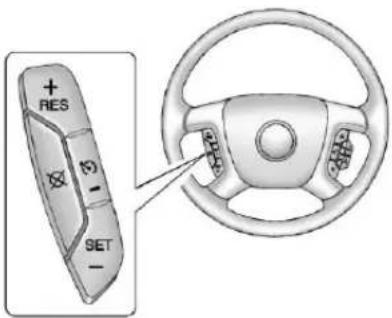
:Presstoturncruisecontrolon andoff. The indicator comes on when cruise control is on.
+RES:Pressbrieflytomakethe vehicleresumetoapreviouslyset speed,orpressandholdto accelerate.
SET-:Presstosetthespeed and activate cruise controlortomake the vehicle decelerate.
☒: Presstodisengagecruise controlwithouterasingtheset speedfrommemory.
See Cruise Control on page 9-29.
InfotainmentSystem
Ifthevehiclehasabaseradioitis includedinthismanual.Seethe separateinfotainmentmanualfor informationontheconnectedradios, audioplayers,phone,navigation system,andvoiceorspeech recognition.Thereisalso informationonsettingsand downloadableapplications(if equipped).
UltrasonicParkingAssist
Ifavailable, this system uses sensor on there are bumperto assist with parking and avoiding objects while in R (Reverse). It operates at speeds less than 8 km/h (5 mph). URPA uses a audible beep stop provided distance and system information.
1-18InBrief
Keepthesensorsonthevehicle's rearbumpercleantoensureproper operation.
See Ultrasonic Parking Assiston page9-31.
PowerOutlets
The vehicle has 12-voltaccessory power outlets which can be used to pluginelectric equipment, such as acellphone or MP3 player.
Thepoweroutletsarelocated:
• Ontheinstrumentpanelbelow theclimatecontrols.
• Insidethecenterfloorconsole.
- Attherearofthecenterfloor console.
• Intherearcargoarea.
Tousetheoutlets, remove the cover.
SeePowerOutletsonpage5-7.
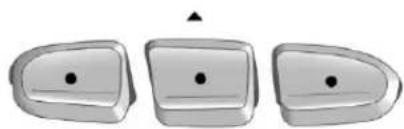
UniversalRemoteSystem
natural_image
Three identical metallic door buttons with black dots and a triangular pointer (no text or symbols)TheUniversalHomeRemote Systemallowsforgaragedoor openers,securitysystems,and homeautomationdevicestobe programmedtoworkwiththese buttonsinthevehicle.
See Universal Remote System on page 5-45.
Sunroof
TheignitionmustbeinON/RUN, ACC/ACCESSORY,orRetained AccessoryPower(RAP)mustbe activetooperatethesunroofand powersunshade.SeeRetained AccessoryPower(RAP)on page9-18.
The vehicle may have as unroof over the front seats and are a sunroof over these second row seats. There are unroof does not open.
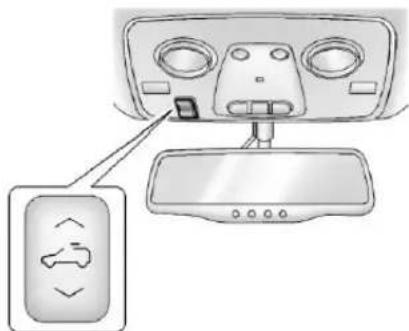
Vent: Pressthefrontorrearofthe switchtoventorclosethesunroof.
Express-open/Express-close: From the closed position, press and releas therear or front of the switch to express-open or express-closethesunroof.
ManualSunshade
Thefrontsunshademustbeopened andclosedmanually.Toopenthe sunshade,pressthebuttononthe sunshadehandletoreleaseitand guideitback.Toclosethe sunshade,pullthesunshade forwarduntillatches.
Formoreinformationsee Sunroof onpage2-19.
Performance and Maintenance
StabiliTrak® System
The vehicle has attraction control system that limits wheel spin, and the Stabili Trak system that assists with directional control of the vehicle difficult driving conditions. Both system turn on automatically every time the vehicle is started.
- Toturnofftractioncontrol, press andrelease (tc) located on the instrument panel, and the appropriate DIC message displays. See RideControl SystemMessagesonpage5-33.
- Pressandrelease(TC)against turnonthetractioncontrol system. TheStabiliTraksystem remainson.
Formoreinformation,see StabiliTrak® Systemonpage9-27.
TirePressureMonitor
This vehicle may have a Tire Pressure Monitor System (TPMS).

Thelowtirepressurewarninglight alertstoasignificantlossin pressureofoneofthevehicle's tires.Ifthewarninglightcomeson, stopassoonaspossibleandinflate thetirestotherecommended pressureshownontheTireand LoadingInformationlabel.See VehicleLoadLimitsonpage9-9. Thewarninglightwillremainonuntil thetirepressureiscorrected.
1-20InBrief
Thelowtirepressurewarninglight maycomeonincoolweatherwhen thevehicleisfirststarted,andthen turnoffasthevehicleisdriven.This maybeanearlyindicatorthatthe tirepressuresaregettinglowand thetiresneedtobeinflatedtothe properpressure.
The TPMS does not replacen normal monthly tire maintenance. Maintain the correct tire pressures.
See TirePressureMonitorSystem onpage10-43.
EngineOilLifeSystem
Theengineoillifesystemcalculates engineoillifebasedonvehicleuse anddisplaystheCHANGEENGINE OILSOONmessagewhenitistime tochangetheengineoilandfilter. Theoillifesystemshouldbereset to100%onlyfollowinganoil change.
ResettingtheOilLifeSystem
-
TurntheignitiontoON/RUN, withtheengineoff.
-
Pressthevehicleinformation buttonuntilOILLIFE REMAININGdisplays.
-
Pressandholdtheset/reset buttonuntil"100%"isdisplayed. Threechimessoundandthe CHANGEENGINEOILSOON messagegoesoff.
-
TurnthekeytoLOCK/OFF.
SeeEngineOilLifeSystemon page10-9.
DrivingforBetterFuel Economy
Drivinghabitscanaffectfuel mileage. Herearesomedrivingtips togetthebestfueleconomy possible.
- Avoidfaststartsandaccelerate smoothly.
- Brakegraduallyandavoid abruptstops.
- Avoididlingtheengineforlong periodsoftime.
- When road and weather conditions are appropriate, use cruise control.
-
Alwaysfollowpostedspeed limitsordrivemoreslowlywhen conditionsrequire.
-
Keepvehicletiresproperly inflated.
• Combineseveraltripsintoa singletrip. - Replacethevehicle'stireswith thesameTPCSpecnumber moldedintothetire'ssidewall nearthesize.
- Followrecommended scheduled maintenance.
Roadside Assistance Program
U.S.:1-800-252-1112
TTYUsers(U.S.Only): 1-888-889-2438
Canada:1-800-268-6800
Mexico:01-800-466-0818
AstheownerofanewBuick, you are automaticallyenrolledinthe RoadsideAssistanceprogram.
SeeRoadsideAssistanceProgram (Mexico)onpage 13-7orRoadside AssistanceProgram(U.S. and Canada)onpage 13-11.
OnStar®
Ifequipped, this vehicle has a comprehensive, in-vehiclesystem that can connect to all an Advisor for Emergency, Security, Navigation, Connection, and Diagnostic Services. See On Star Overview page 14-1.
1-22InBrief
NOTES
Keys, Doors, and Windows
KeysandLocks
Keys......2-1
RemoteKeylessEntry(RKE)
System......2-2
RemoteKeylessEntry(RKE)
SystemOperation......2-2
RemoteVehicleStart......2-4
DoorLocks......2-6
PowerDoorLocks......2-7
DelayedLocking......2-7
AutomaticDoorLocks......2-7
LockoutProtection......2-7
SafetyLocks......2-8
Doors
Liftgate....2-8
VehicleSecurity
VehicleSecurity......2-11
VehicleAlarmSystem......2-11
Immobilizer......2-13
ImmobilizerOperation.....2-13
ExteriorMirrors
ConvexMirrors......2-14
PowerMirrors......2-15
FoldingMirrors......2-15
HeatedMirrors......2-16
AutomaticDimmingMirror...2-16
ParkTiltMirrors......2-16
InteriorMirrors
AutomaticDimmingRearview
Mirror....2-16
Windows
Windows....2-17
PowerWindows......2-17
SunVisors......2-19
Roof
Sunroof....2-19
KeysandLocks
Keys

WARNING
Leavingchildreninavehiclewith theignitionkeyisdangerousand childrenorotherscouldbe seriouslyinjuredorkilled.They couldoperatethepowerwindows orothercontrolsormakethe vehiclemove.Thewindowswill functionwiththekeysinthe ignition,andchildrenorothers couldbecaughtinthepathofa closingwindow.Donotleave childreninavehiclewiththe ignitionkey.
natural_image
Illustration of a child cleaning a car window with an adult nearby; no text or symbols present.Thekeyisusedfortheignitionand alldoorlocks.
Thekeyhasabar-codedkeytag thatthedealerorqualifiedlocksmith canusetomakenewkeys.Store thisinformationinasafeplace,not inthevehicle.
Ifitbecomesdifficulttoturnthekey, inspectthekeybladefordebris.
Seeyourdealerifareplacement keyoradditionalkeyisneeded.
Iflockedoutofthevehicle, call RoadsideAssistance.SeeRoadside AssistanceProgram(Mexico) on page 13-7 or Roadside Assistance Program(U.S. and Canada) on page 13-11.
With an active On Stars subscription, an On Star Advisorm may remotely unlock the vehicle. See On Star Overview page 14-1.
RemoteKeylessEntry (RKE)System
SeeRadioFrequencyStatementon page13-20forinformation regardingPart15oftheFederal CommunicationsCommission(FCC) rulesandIndustryCanada StandardsRSS-GEN/210/220/310.
If thereisadecreaseintheRKE operatingrange:
- Checkthedistance. The transmitter may be too far from the vehicle.
- Checkthelocation. Other vehiclesorobjectsmaybe blockingthesignal.
- Checkthetransmitter'sbattery. See "BatteryReplacement" later inthissection.
- Ifthetransmitterisstillnot workingcorrectly,seeyour dealeroraqualifiedtechnician forservice.
RemoteKeylessEntry (RKE)SystemOperation
The Remote Keyless Entry (RKE) transmitter functions workup to 60m(195ft) away from the vehicle.
Thereareotherconditionswhich canaffecttheperformanceofthe transmitter.SeeRemoteKeyless Entry(RKE)Systemonpage2-2.
natural_image
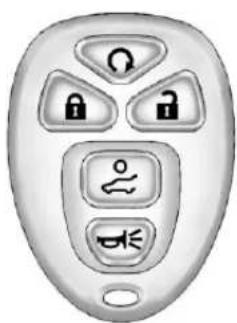
Close-up of a gray remote control device with five key buttons (no text or symbols visible)WithRemoteStartandPower LiftgateShown, WithoutSimilar
Ω(RemoteVehicleStart):For vehicleswiththisfeature,see Remote Vehicle Startonpage2-4 foradditionalinformation.
(Lock):Presstolockallthe doors.
IfenabledthroughtheDriver InformationCenter(DIC), the parkinglampsflashoncetoindicate lockinghasoccurred. Ifenabled
throughtheDIC,thehornsounds when 🔒ispressedagainwithin fiveseconds.See Vehicle Personalizationonpage5-37for additionalinformation.
Pressing 🔒 mayarmthecontent theft-deterrentsystem. See Vehicle AlarmSystemonpage2-11.
(Unlock):Pressoncetounlock onlythedriverdoor.If ispressed againwithinfiveseconds,all remainingdoorsunlock.Theinterior lampscomeonandstayonfor 20secondsoruntiltheignitionis turnedon.
If enabled through the DIC, the parking lamps flashtwiceto indicate unlocking has occurred. See Vehicle Personalization on page 5-37.
Pressing ☐ ontheRKEtransmitter disarmsthecontenttheft-deterrent system.See VehicleAlarmSystem onpage2-11.
(PowerLiftgate):Pressand holduntiltheliftgatebeginstomove toopenorclosetheliftgate. The taillampsflashandachimesounds toindicatewhentheliftgateis openingorclosing.
(VehicleLocator/Panic Alarm): Pressandreleaseto locatethevehicle. Theparking lampsflashandthehornsounds threetimes.
Pressandhold → formorethan twosecondstoactivatethepanic alarm. Theparkinglampsflashand thehornsoundsrepeatedly for 30 seconds. Thealarmturnsoff whentheignitionismovedtoON/RUNor → ispressedagain. The ignitionmustbeinLOCK/OFFfor thepanicalarmtowork.
ProgrammingTransmittersto theVehicle
OnlyRKEtransmittersprogrammed tothisvehiclewillwork.lfa transmitterislostorstolen,a replacementcanbepurchasedand programmedthroughyourdealer. Whenthereplacementtransmitteris programmedtothisvehicle,all remainingtransmittersmustalsobe reprogrammed.Anylostorstolen transmitterswillnolongerwork oncethenewtransmitteris programmed.Eachvehiclecan haveuptoeighttransmitters programmedtoit.Seeyourdealer toprogramtransmitterstothis vehicle.
BatteryReplacement
ReplacethebatteryiftheREPLACE BATTERYINREMOTEKEY messagedisplaysintheDIC.
Notice: When replacing the battery, donottouchany of the circuitry on the transmitter. Static from your body could damage the transmitter.
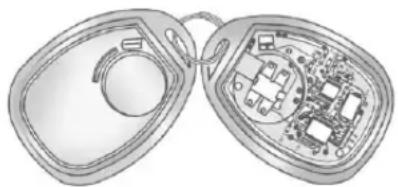
natural_image
Diagram of an open and closed electronic device showing internal components (no text or symbols)- Separatethetransmitterwitha flat,thinobject,suchasaflat headscrewdriver.
- Carefullyinsertthetoolinto thenotchlocatedalongthe partinglineofthe transmitter.Donotinsert thetooltoofar.Stopas soonasresistanceisfelt.
• Twistthetooluntilthe transmitterisseparated.
- Removetheoldbattery.Donot useametalobject.
- Insertthenewbattery, positive sidefacingdown. Replace with a CR2032orequivalent battery.
- Snapthetransmitterback together.
RemoteVehicleStart
This vehicle may have a remote starting feature that starts the engine from outside of the vehicle.
Q(RemoteStart): Thisbuttonis located on the RKE transmitter if the vehicle has remotestart.
Lawsinsomecommunitiesmay restricttheuseofremotestarters. Forexample,somelawsmay requireapersonusingtheremote starttohavethevehicleinview whendoingso.Checklocal regulationsforanyrequirementson remotestartingofvehicles.
Donotusetheremotestartfeature ifthevehicleislowonfuel. The vehiclecouldrunoutoffuel.
If the vehicle has theremotestart feature, the RKE transmitter range maybe less while the vehicle is running.
There are other condition that can affect the performance of the transmitter. See Remote Keyless Entry (RKE) System on page 2-2 for additional information.
StartingtheEngineUsing RemoteStart
Tostartthevehicle:
- AimtheRKEtransmitteratthe vehicle.
- Pressandrelease RKEtransmitter.
- Immediately after completing Step2, press and hold Q until the parking lamps flash. If the
vehicle'slightscannotbeseen, pressandhold foratleast fourseconds.
Whenthevehiclestarts, the parking lampswillturnonandremainonas longastheengineisrunning. The doorswillbelockedandtheclimate controlsystemwilloperate automaticallyifthevehiclehasthe automaticsystem, oratthesame settingaswhenthevehiclewaslast turnedoff.
If the vehicle has an automatic climate control system and heated seats, the heated seat turn on during colder outside temperature and shutoff when the key is turned to ON/RUN. See Heated and Ventilated Front Seat on page 3-7 form more information.
Therearwindowdefoggerand heatedmirrors,ifthevehiclehas them,turnonduringcolderoutside temperaturesandturnoffwhenthe keyisturnedtoON/RUN.
Afterenteringthevehicleduringa remotestart,insertandturnthekey totheON/RUNpositiontodrivethe vehicle.
If the vehicle is left running it automatically shut so after 10 minutes unless at time extension has been done.
ExtendingEngineRunTime
Toextendtheengineeruntimeby 10minutes,repeatSteps1–3while theengineisstillrunning.The engineeruntimecanonlybe extendedifitisthefirstremotestart sincethevehiclehasbeendriven. Remotestartcanbeextended onetime.
Iftheremotestartprocedureisused againbeforethefirst10-minutetime framehasended, thefirst 10minuteswillimmediatelyexpire andthesecond 10-minutetime framewillstart.
Forexample, if and then are pressed again after the vehicle has been running for five minutes, 10 minutes are added, allowing the enginetorunforatotal of 15 minutes.
A maximumoftworemotestartsor remotestartattemptsareallowed betweenignitioncycles.
Afterthevehicle'senginehasbeen startedtwotimesusingtheremote startbutton,theignitionmustbe turnedonandthenbackoffbefore theremotestartprocedurecanbe usedagain.
CancelingaRemoteStart
Tomanuallyshutoffaremotestart:
- AimtheRKEtransmitteratthe vehicleandpress 🔒untilthe parkinglampsturnoff.
• Turnonthehazardwarning flashers.
• Turntheignitionswitchonand thenoff.
ConditionsinWhichthe RemoteStartWillNotWork
The vehicle cannot be started using theremotestart feature if the key is in the ignition, the hood is open, or if there is an emission control system malfunction.
Theengineturnsoffduringaremote startifthecoolanttemperaturegets toohighoriftheoilpressure getslow.
DoorLocks

WARNING
Unlockeddoorscan be dangerous.
- Passengers, especially children, caneasily open the doors and fallout of famoving vehicle. When a doctor is locked, the handle will not open it. The chance of being thrown out of the vehicle in a (Continued)
WARNING(Continued)
crashisincreasedifthe doorsarenotlocked.So,all passengersshouldwear safetybeltsproperlyandthe doorsshouldbelocked wheneverthevehicleis driven.
- Youngchildrenwhogetinto unlockedvehiclesmaybe unabletogetout.Achildcan beovercomebyextremeheat andcansufferpermanent injuriesorevendeathfrom heatstroke.Alwayslockthe vehiclewheneverleavingit.
- Outsiderscaneasilyenter throughanunlockeddoor whenyouslowdownorstop thevehicle.Lockingthedoors canhelppreventthisfrom happening.
Tolockorunlockadoormanually:
• Fromtheinsideusethedoor lockknobonthewindowsill.
- Fromtheoutsideturnthekey towardthefrontorrearofthe vehicle,orpresstheorbuttonon theRemoteKeylessEntry(RKE) transmitter.
PowerDoorLocks
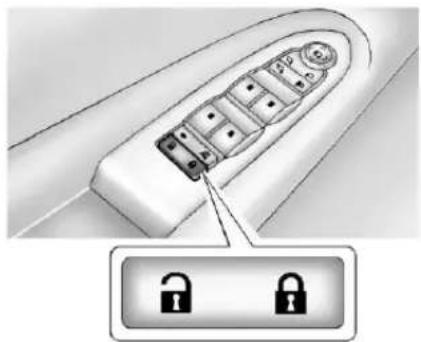
natural_image
Diagram of a remote control panel with two lock icons, no text or symbols present(Unlock):Presstounlockthe doors.
(Lock):Presstolockthedoors.
DelayedLocking
Whenlockingthedoorswiththe powerlockswitchchandadoororthe liftgateisopen, thedoorswilllock fiveseconsafterthelastdooris closed. Youwillhearthreechimes tosignalthatthedelayedlocking featureisinuse.
Pressingthepowerlockswitch twiceorthelockbuttonontheRKE transmittertwicewilloverridethe delayedlockingfeatureand immediatelylockallthedoors.
Thisfeaturewillnotoperateifthe keyisintheignition.
Thisfeaturecanbeprogrammedby usingtheDriverInformationCenter (DIC).See"DELAYDOORLOCK" underVehiclePersonalizationon page5-37.
AutomaticDoorLocks
Vehicleswithanautomaticclock/unlockfeatureenableyoutoprogramthevehicle'spowerdoorlocks. ThisfeaturecanbeprogrammedthroughtheDriverInformationCenter(DIC).SeeVehiclePersonalizationonpage5-37formoreinformation.
LockoutProtection
Thisfeatureprotectsyoufrom lockingthekeyinthevehiclewhen thekeyisintheignitionandafront doorisopen.
Ifthedriversidepowerdoorlock switchispressedwhenthdriver doorisopenandthekeyisinthe ignition,allofthedoorswillockand thenthdriverdoorwillunlock.
If the passengersidepowerdoor lockswitchispressedwhenthe frontpassengerdoorisopenand thekeyisintheignition,allofthe doorswilllockandthenthefront passengerdoorwillunlock.
SafetyLocks
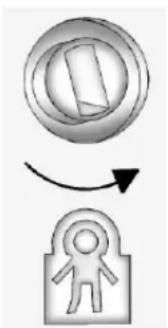
The vehicle has reardoor security lock stop prevent passengers from opening there ardoors from the inside.
flowchart
graph TD
    A["Process Step"] --> B["Lock Icon"]
Openthereardoorstoaccessthe securitylocksontheinsideedgeof eachdoor.
Tosetthelocks, insertakey into the slot and turnitto the horizontal position. Thedoor can only be opened from the outside with the door unlocked. Toreturn the doorto normal operation, turn the slot to the vertical position.
Doors
Liftgate
ManualLiftgate

WARNING
Exhaustgasescanenterthe vehicleifitisdrivenwiththe liftgateortrunk/hatchopen, orwithanyobjectsthatpass throughthesealbetweenthe bodyandthetrunk/hatchor liftgate.Engineexhaustcontains carbonmonoxide(CO)which cannotbeseenorsmelled.Itcan causeunconsciousnessandeven death.
If the vehicle must be driven with the lift gate or trunk/hatch open:
- Closeallofthewindows.
- Fullyopentheairoutletson orundertheinstrument panel.
(Continued)
WARNING(Continued)
- Adjusttheclimatecontrol systemtoasettingthat bringsinonlyoutsideairand setthefanspeedtothe highestsetting.See"Climate ControlSystems"inthe Index.
- If the vehicle is equipped with a power lift gate, disable the power lift gate function.
SeeEngineExhauston page9-20.
Notice: To avoid damaggeto the liftgateorliftgateglass, make sure the area above and behind the liftgate is clear before opening it.
Tounlocktheliftgate, press the powerdoorlockswitchorpress ontheRemoteKeylessEntry (RKE) transmittertwice. See RemoteKeylessEntry(RKE) SystemOperationonpage2-2.
Toopentheliftgate, pressthetouch padundertheliftgatehandleandlift up. The vehicle must be in P (Park) and the battery must be charged. Usethe pulluptolower and close the liftgate.
Alwaysclosetheliftgatebefore driving.
PowerLiftgate
Onvehicleswithapowerliftgate, thevehiclemustbeinP(Park)to operate. Thetaillampsflashanda chimesoundswhenthepower liftgatemoves.
WARNING
You, or others, could be injured if caught in the path of the power lift gate. Makes sure there is no one in the way of the lift gate as it is opening and closing.
Thepowerliftgatecanbepower openedandclosedinthe followingways:
- Pressandhold on the RKEtransmitter.SeeRemote KeylessEntry(RKE)System Operationonpage2-2.
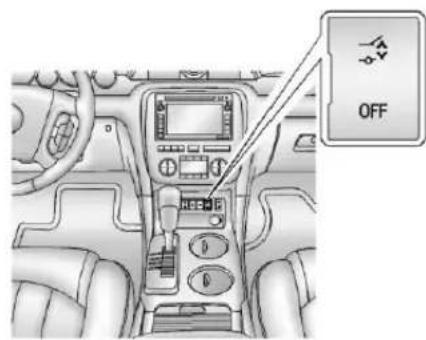
- Press
• Pressthetouchpadonthe outsideliftgatehandle.
Pressingthebuttonsortouchpada secondtimewhiletheliftgateis movingreversesthedirection.
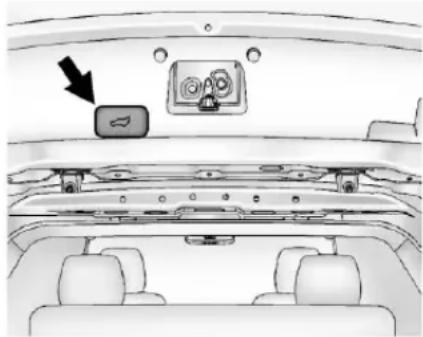
natural_image
Top-down view of a car's rearview showing dashboard, seats, and control panel (no text or symbols)PowerLiftgateTouchPad
Theliftgatecanalsobeclosedby pressing nexttotheliftgate latch. Press asecondtime duringtheliftgateoperation to reversetheoperation.
The power lift gate may be temporarily disabled under extreme temperatures or under low battery conditions. If this occurs, the lift gate can be operated manually.
If the vehicle is shifted out of P(Park) while the lift gate power function is in progress, it will
continuetocompletion. If the vehicle is shifted out of P (Park) and accelerated before the power lift gate latch closes, the lift gate may reverseto the open position. Cargo could fall out of the vehicle. Always makes sure the power lift gate is closed and latched before driving away.
If the power lift gate is used and the lift gates support strut shavel lost pressure, thetaillampswillflashand achimewillsound. Thelift gate will stay opentemporarily, and then slowly close. See adealer for service before using the lift gate if this occurs.
ObstacleDetectionFeatures
Awarningchimewillsoundandthe liftgatewillautomaticallyreverse directiontothefullclosedoropen positionifanobstacleis encounteredduringapoweropenor closecycle. Afterremovingthe obstacletheliftgatewillresume normaloperation.
If more obstacles are encountered on the same power cycle, the power function deactivates, and the lift gate must be opened or closed manually. Amessaged display on the Driver Information Center (DIC) to indicate that the lift gate is open. See Door Ajar Messages on page 5-28. After removing the obstacles, manually open the lift gate fully or close and latch the lift gate. The lift gate will resumen normal power operation.
The vehicle has pinch sensors located on the side edges of the liftgate. If an object is caught between the liftgate and the body of the vehicle and presses against a sensor, the lift gate will reverse direction and open fully. The lift gate will remain open until it is activated again or closed manually. Donot forc the lift gate open or closed during power cycle.
ManualOperationofPower Liftgate
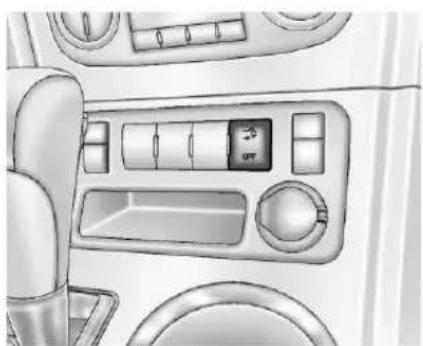
natural_image
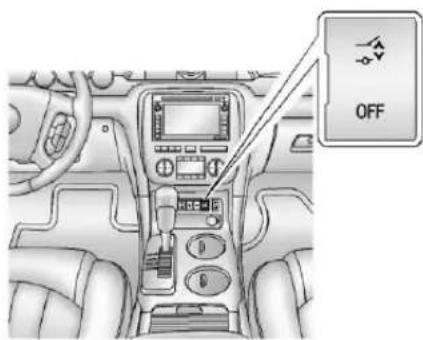
Interior view of a car dashboard with air conditioner and control panel (no text or symbols visible)Tochangetheliftgatetomanual operation, pressOFFonthepower liftgateswitch. Amessagedisplays ontheDICindicatingmanual operationmode. SeeDoorAjar Messagesonpage5-28.
Withtheliftgateinmanualmode andallofthedoors unlocked, the liftgatecanbemanuallyopened and closed.
Toopentheliftgate, pressthetouch padontheoutsideoftheliftgate handleandliftup. Usethepull handletolowerandclosethe liftgate; theliftgatelatchwillpower close.
Alwaysclosetheliftgatebefore driving.
If ontheRKEtransmitteror ontheliftgateispressedwhile inmanualoperationmode,the taillampswillflashthreetimes,but theliftgatewillnotmove.
It is not recommended to drivewith the liftgate open. However, if the vehicle must be driven with the liftgate open, the lift gates should be settomanual operation.
VehicleSecurity
Thisvehiclehastheft-deterrent features;however,theydonotmake thevehicleimpossibletosteal.
VehicleAlarmSystem
Onvehicleswithananti-theftalarm system,toactivatethesystem:
- Press on the Remote Keyless Entry(RKE) transmitter or the powerdoorlockswitch when any door is open.
Thesecuritylightflashes.
Whenthedoorisclosed, the securitylightstopsflashingand staysonsolidforapproximately 30seconds. Thecontent theft-deterrentalarmisnot armeduntilthesecuritylight goesoff.
If the delayed locking feature is active, the alarm is not activated until all doors are closed and the security light goes off.
- Press when the driver door is closed. These security light comes on solid for approximately 30 seconds and thengoes off. The content theft-deterrent alarm is not armed until these security light goes off.
Thetheft-deterrentsystemwillnot activateifthedoorsarelockedwith thevehicle'skeyorthemanual doorlock.
Ifalockeddoorisopenedwithout usingtheRKEtransmitter,a 10-secondpre-alarmoccurs.The
hornchirpsandthelightsflash. Ifthekeyisnotplacedinthe ignitionandturnedtoSTARTorthe doorisnotunlockedbypassing duringthe10-secondpre-alarm,th alarmgoesoff.Theheadlampsflas andthehornsoundsforabout 30seconds,thenturnsofftosave thebatterypower.
The vehicle can be started with the correction ignition key if the alarm has been set off.
To avoid setting off the alarm by accident:
- Lockthevehiclewiththedoor keyafterthedoorsareclosed.
- UnlockthedoorwiththeRKE transmitter. Unlockingadoorany otherwaysetsoffthealarmif thesystemhasbeenarmed.
Press 📄orplacethekeyinthe ignitionandturnittoSTARTtoturn offthealarm.
TestingtheAlarm
Totestthealarm:
- Frominsidethevehicle, lower thedriversidewindow, and open thedriverdoor.
- Press
- Getoutofthevehicle, closethe door, and waitforthesecurity lighttogoout.
- Reachinthroughthewindow, unlockthedoorwiththemanual doorlock, andopenthedoor. This should setoffthealarm.
If the alarm does not sound when it should, but the headlamps flash, check to see if the horn works. The horn fuse may be blown. Toreplace the fuse, see Fuses and Circuit Breakerson page 10-28.
If the alarm does not sound or the headlamps donot flash, see your dealer for service.
Immobilizer
See Radio Frequency Statement on page 13-20 for information regarding Part 15 of the Federal Communications Commission (FCC) rules and Industry Canada Standards RSS-GEN/210/220/310.
ImmobilizerOperation
ThisvehiclehasPASS-Key ^® III+ (PersonalizedAutomotiveSecurity System)theft-deterrentsystem. PASS-KeyIII+isapassive theft-deterrentsystem.
Thesystemisautomaticallyarmed whenthekeyisremovedfromthe ignition.
Thesystemisautomatically disarmedwhenthekeyisturnedto ON/RUN,ACC/ACCESSORY, orSTARTfromtheLOCK/OFF position.
Youdonothavetomanuallyarmor disarmthesystem.
Thesecuritylightcomesonifthere isaproblemwitharmingor disarmingthetheft-deterrent system.
WhenthePASS-KeyIII+system sensesanincorrectkey,thevehicle doesnotstart.Anyoneusinga trial-and-errormethodtostartthe vehiclewillbediscouragedbecause ofthehighnumberofelectricalkey codes.
If theenginedoesnotstart and the security light on the instrument panel comes on when trying to start the vehicle, therem maybe a problem with the theft-deterrent system. Turn the ignition off and try again.
Iftheenginestilldoesnotstart, and thekeyappearstobeundamaged, tryanotherignitionkeyandcheck thefuses.SeeFusesandCircuit Breakersonpage 10-28for additionalinformation.Iftheengine stilldoesnotstartwiththeotherkey,
thevehicleneedsservice.Ifthe vehicledoesstart,thefirstkeymay befaulty.Seeyourdealerwhocan servicethePASS-KeyIII+tohavea newkeymade.Inanemergency, contactRoadsideAssistance.See RoadsideAssistanceProgram (Mexico)onpage13-7orRoadside AssistanceProgram(U.S.and Canada)onpage13-11.
ItispossibleforthePASS-KeyIII+ decodertolearnthetransponder valueofaneworreplacementkey. Upto10keysmaybeprogrammed tothevehicle. The following procedure is for programming additional keysonly. If all currently programmed keys are lost on not operate, you must see your dealer oralocksmithwhocanservice PASS-KeyIII+ to have keys made and programmed to the system.
Seeyourdealeroralschsmithwho canservicePASS-Keyll+togeta newkeyblankthatiscutexactlyas theignitionkeythatoperatesthe system.
Toprogramthenewadditionalkey:
-
Verify that thenewkey has a stampedonit.
-
Insert the already programmed key in the ignition and start the engine. If the engine does not start, see your dealer for service.
-
After the engine has started, turn the key to LOCK/OFF, and movethe key.
-
Insertthekeytobeprogrammed andturnittotheON/RUN positionwithinfivesecondsof theoriginalkeybeingturnedto theLOCK/OFFposition.
Thesecuritylightturnsoffonce thekeyhasbeenprogrammed.
- RepeatSteps1–4 if additional keysaretobeprogrammed.
IfthePASS-KeyIII+keyislostor damaged, seeyourdealerora locksmithtohaveanewkeymade.
TheSERVICETHEFT DETERRENTSYSTEMmessage displaysontheDriverInformation Center(DIC)whenthereisa problemwiththetheft-deterrent system.SeeSecurityMessageson page5-34foradditionalinformation.
Donotleavethekeyordevicethat disarmsordeactivatesthe theft-deterrentsysteminthevehicle.
ExteriorMirrors
ConvexMirrors

WARNING
Aconvexmirrorcanmakethings, likeothervehicles, lookfarther awaythantheyreallyare. If you cuttoosharplyintotherightlane, youcouldhitavehicleonthe right. Checktheinsidemirroror glanceoveryourshoulderbefore changinglanes.
Thepassengersidemirrorisconvex shaped. Aconvexmirror's surface is curvesomorecanbeseen from thedriverseat.
PowerMirrors
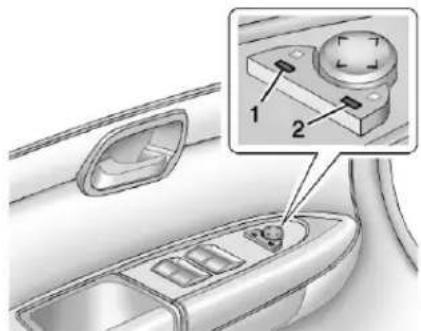
Toadjusteachmirror:
- Press(1)or(2)toselectthe mirror.
- Pressonthecontrolpadto adjustthemirror.
- Press(1) or (2) againstodeselect themirror.
SideBlindZoneAlert(SBZA)
IfthevehiclehastheSideBlind ZoneAlert(SBZA)system.See SideBlindZoneAlert(SBZA)on page9-32formoreinformation.
FoldingMirrors
Forvehicleswithmanualfolding mirrors, pushthemirrortowardthe vehicle. Pullthemirrorouttoreturn toitsoriginalposition.
Forvehicleswithoutsidepower foldawaymirrors:
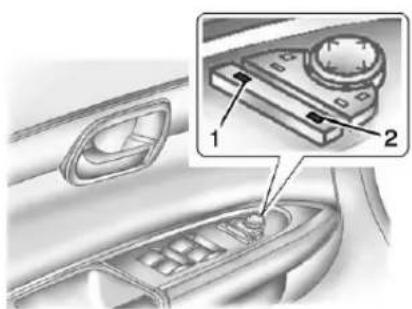
natural_image
Mechanical component diagram showing a dial and handle assembly (no text or symbols visible)- Press(1) tofold them mirrors out to the driving position.
- Press(2) tofold them mirrors into the folded position.
ResettingthePowerFoldaway Mirrors
Resetthepowerfoldawaymirrorsif:
• Themirrorsareaccidentally obstructedwhilefolding.
• They are accidentally manually folded/unfolded.
• Themirrorsvibrateatnormal drivingspeeds.
Foldandunfoldthemirrorsonetime usingthemirrorcontrolstoreset themtotheirnormalposition. Apoppingnoisemaybeheard duringtheresettingofthepower foldawaymirrors.Thissoundis normalafteramanualfolding operation.
HeatedMirrors
Forvehicleswithheatedmirrors:
(RearWindowDefogger): Presstoheatthemirrors.
See "RearWindowDefogger" under DualAutomaticClimateControl Systemonpage8-1.
AutomaticDimming Mirror
If the vehicle has the automatic dimming mirror, the driver outside mirror automatically adjusts for the glare of the headlamps from behind. This feature is controlled by the on and offsetting on the inside rear view mirror. See Automatic Dimming Rearview Mirror on page 2-16.
ParkTiltMirrors
Ifthevehiclehasthememory package, theoutsidemirrorshavea parktiltfeature. Thisfeaturetilts the outsidemirrorstoapreselected positionwhenthevehicleisin R(Reverse). Thisallowsthedriver toviewthecurbforparalleelparking.
The passenger and or driver mirror return to its original position when the vehicle is shifted out of R (Reverse), or the ignition is turned off to OFF/LOCK.
Thisfeaturecanbeturnedonoroff throughtheDriverInformation Center(DIC).See Vehicle Personalizationonpage5-37for moreinformation.
InteriorMirrors
AutomaticDimming RearviewMirror
Adjusttherearviewmirrortoclearly viewtheareabehindthevehicle.
Themirrorwillautomaticallyreduce theglarefromtheheadlampsfrom behind. Thedimmingfeature and theindicatorlightcomeonwhenthe vehicleisstarted. Theremaybean onandoffsetgingonthemirror.
On/Off): Presstoturnthe dimmingfeatureonoroff.
VehicleswithOnStarhavethree additionalcontrolbuttonsforthe OnStarsystem.Seeyourdealerfor moreinformationaboutOnStarand howtosubscribetoit.SeeOnStar Overviewonpage14-1.
CleaningtheMirror
Donotsprayglasscleanerdirectly onthemirror.Useasofttowel dampenedwithwater.
Windows

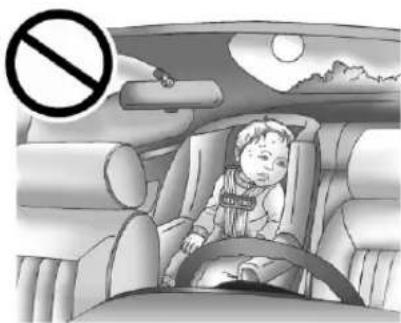
WARNING
Neverleaveachild,ahelpless adult,orapetaloneinavehicle, especiallywiththewindows closedinwarmorhotweather. Theycanbeovercomebythe extremeheatandsuffer permanentinjuriesorevendeath fromheatstroke.
natural_image
Interior view of a car with a child seated in the seat, no visible text or symbolsThe vehicle aerodynamics are designed to improve fueleconomy performance. This may result in a pulsingsound when either rear window is down and the front windows are up. Toreducethe sound, open either a front window or the sun roof, if equipped.
PowerWindows

WARNING
Childrencouldbeseriously injuredorkilledifcaughtinthe pathofaclosingwindow.Never leavekeysinavehiclewith children.Whentherearechildren intherearseat,usethewindow lockoutbuttontoprevent operationofthewindows.See Keysonpage2-1.
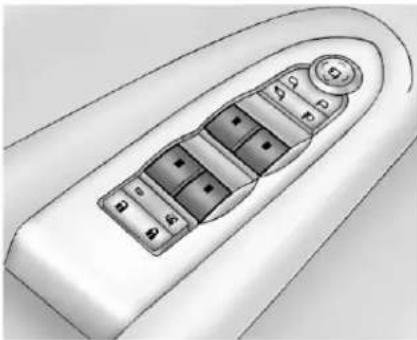
natural_image
Top-down view of a white remote control panel with multiple buttons and dials (no text or symbols visible)UplevelShown,BaseSimilar
The driver door also has switches that control the passenger and rear windows. The power window work with the ignition in ACC/ACCESSORY, ON/RUN or when Retained Accessory Power (RAP) is active. See Retained Accessory Power (RAP) on page 9-18.
Presstheswitchtolowerthe window.Pulluponthefrontedgeof theswitchtoraisethewindow.
Express-Up/Express-Down Windows
Awindowwiththeexpress-up/down featureallowsittoberaisedor loweredwithoutholdingtheswitch. Pressorpullthewindowswitchfully andreleaseittoactivatethe expressfeature.Theexpressmode canbecanceledbypressingor pullingtheswitch.
ProgrammingthePower Windows
Ifthebatteryonthevehiclehas beenrecharged, disconnected, orreplaced, windowswiththe express-upfeatureneedtobe reprogrammedforthisfeatureto work. Toprogramthewindow:
-
Closealldoorswiththeignition intheACC/ACCESSORY,ON/RUNposition,orwhenRetained AccessoryPower(RAP)is active.SeeRetainedAccessory Power(RAP)onpage9-18.
-
Pressandcontinuetoholdthe windowswitchuntilthewindow isfullyopen.
- Pullupandholdthewindow switchtoclosethewindow. Continuetoholditbrieflyafter thewindowisfullyclosed.
- Repeatforeachwindowthathas theexpress-upfeature.
Anti-PinchFeature
Theanti-pinchfeatureison windowswiththeexpress-up feature. Ifanobjectisinthewayof thewindowasitisexpress-closing, orincertainweatherconditionslike severeicing, thewindowwillstop andopentoafactorypreset position. Thewindowfunctions normallyoncetheobstructionis removed.
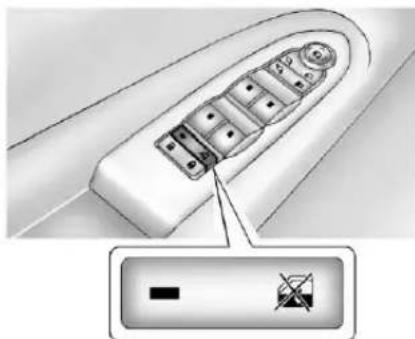
RearWindowLockout
natural_image
Top-down view of a small boat's side panel with control buttons and a warning icon (no text or symbols on the boat itself)Therearwindowlockoutfeature preventstherearpassenger windowsfromoperating,except fromthedriverposition.
Press 📄toactivatetherear windowlockoutswitch. The indicatorlightcomesonwhen activated.
Press ✉againtodeactivatethe lockoutswitch.
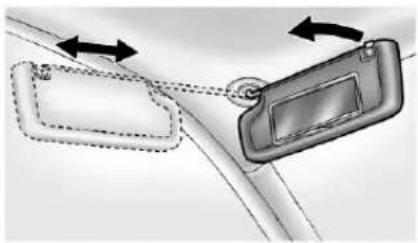
SunVisors
natural_image
Diagram showing two car seatbelt components with arrows indicating movement or force (no text or symbols present)Pullthesunvisordowntoblock glare.lfequipped, detachthesun visorfromthecentermounttopivot tothesidewindowortoextend alongtherod.
Roof
Sunroof
TheignitionmustbeinON/RUN, ACC/ACCESSORY,orRetained AccessoryPower(RAP)mustbe activetooperatethesunroofand powersunshade.SeeRetained AccessoryPower(RAP)on page9-18.
The vehicle may have as unroof over the front seats and are a sunroof over these second browseats. There are sunroof does not open.
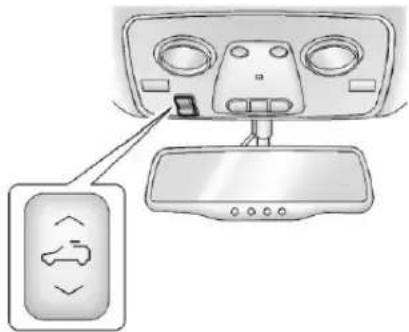
Vent: From the closed position, press and hold the front of the switch to vent the sunroof. Press and hold there are of the switch to closet the sunroof.
Express-open/Express-close:
From the closed position, press and releasetherearoftheswitchto express-openthesunroof. Press and releasethefrontoftheswitchto express-closethesunroof.
2-20Keys, Doors, and Windows
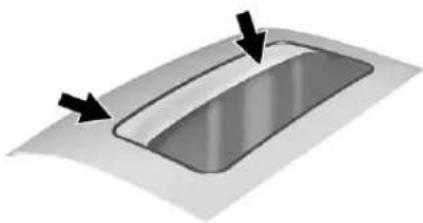
ManualSunshade
Thesunshadesmustbeopened andclosedmanually. Toopenthe sunshade, pressthebuttononthe sunshadehandletoreleaseitand guideitback. Toclosethe sunshade, pullthesunshade forwarduntillatches.
natural_image
3D diagram of a curved surface with two arrows pointing to its top edge (no text or symbols)Dirtanddebrismaycollectonthe sunroofsealorinthetrack. This could cause an issue with sunroof operation or noise. It could also plug the waterdrainagesystem.
Periodicallyopenthesunroofand removeanyobstaclesorloose debris.Wipethesunroofsealand roofsealingareausingaclean cloth,mildsoap,andwater.Donot removegreasefromthesunroof.
Seatsand Restraints
HeadRestraints
HeadRestraints......3-2
FrontSeats
PowerSeatAdjustment.....3-3
LumbarAdjustment......3-4
RecliningSeatbacks......3-4
MemorySeats......3-5
HeatedandVentilatedFront Seats....3-7
RearSeats
RearSeats......3-8
ThirdRowSeats......3-10
SafetyBelts
SafetyBelts....3-13
HowtoWearSafetyBelts
Properly....3-14
Lap-ShoulderBelt......3-15
SafetyBeltUseDuring Pregnancy....3-20
SafetyBeltExtender......3-20
SafetySystemCheck......3-20
SafetyBeltCare....3-21
ReplacingSafetyBeltSystem PartsafteraCrash......3-21
AirbagSystem
AirbagSystem......3-22
WhereAretheAirbags?.....3-24
WhenShouldanAirbag Inflate?......3-26
WhatMakesanAirbag Inflate?......3-27
HowDoesanAirbag Restrain?......3-27
WhatWillYouSeeafteran AirbagInflates?......3-27
PassengerSensing System....3-29
ServicingtheAirbag-Equipped Vehicle....3-33
AddingEquipmenttothe Airbag-EquippedVehicle...3-33
AirbagSystemCheck......3-34
ReplacingAirbagSystem PartsafteraCrash......3-35
ChildRestraints
OlderChildren....3-35
InfantsandYoung Children....3-37
ChildRestraintSystems.....3-40
WheretoPuttheRestraint...3-41
LowerAnchorsandTethers forChildren(LATCH System)....3-43
ReplacingLATCHSystem PartsAfteraCrash......3-50
SecuringChildRestraints (RearSeat)....3-50
SecuringChildRestraints (FrontPassengerSeat)....3-52
3-2 Seats and Restraints
HeadRestraints
FrontSeats

WARNING
Withheadrestraintsthatarenot installedandadjustedproperly, thereisagreaterchancethat occupantswillsufferaneck/spinalinjuryinacrash.Donot driveuntiltheheadrestraintsfor allooccupantsareinstalledand adjustedproperly.
The vehicle's front seat have adjustable head restraints in the outboard seating positions.
natural_image
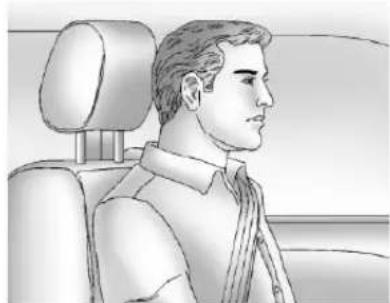
Side profile illustration of a man in a car seat, showing head, torso, and seat (no text or symbols)Adjusttheheadrestraintsothatthe topoftherestraintisatthesame heightasthetopoftheoccupant's head. Thispositionreducesthe chanceofaneckinjuryinacrash.
natural_image
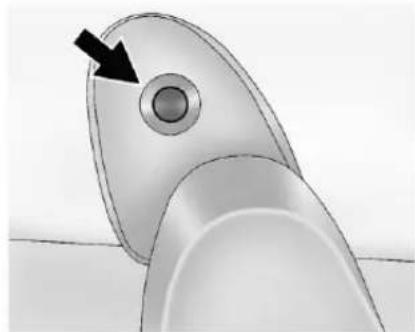
Close-up of a metallic object with a circular hole and an arrow pointing to it, no visible text or symbols.Toraiseorlowertheheadrestraint, pressthebuttonlocatedontheside oftheheadrestraint,andpullupor pushtheheadrestraintdown,and releasethebutton.Pullandpushon theheadrestraintafterthebuttonis releasedtomakesurethatitis lockedinplace.
Toadjusttheheadrestraintforward, grasptheheadrestraintandpull forwarduntilthedesiredlocking positionisreached.
Toadjusttheheadrestraint rearward, pressthebuttonlocated onthesideoftheheadrestraint, andpushtheheadrestraint rearwarduntilthedesiredlocking positionisreached. Trytomovethe headrestraintafterthebuttonis releasedtomakesurethatitis lockedinplace.
Thefrontseatoutboardhead restraintsarenotdesignedtobe removed.
RearSeats
The vehicle's second-row seats have head restraints in the outboard seating position that cannot be adjusted.
The vehicle's third-rowseat have headrestsintheoutboardseating positionsthatcannotbeadjusted.
Thesecond-rowheadrestraintsand third-rowheadrestsarenot designedtoberemoved.
FrontSeats
PowerSeatAdjustment

WARNING
Youcanlosecontrolofthe vehicleifyoutrytoadjustadriver seatwhilethevehicleismoving. Adjustthedriverseatonlywhen thevehicleisnotmoving.
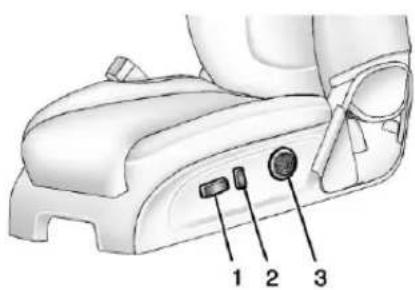
- SeatAdjustmentControl
-
Reclining Seatback Control
-
Lumbar Adjustment Control To adjust these seat:
-
Movetheseatforwardor rearwardbyslidingthe control(1)forwardorrearward.
- Raiseorlowerthefrontpartof theseatcushionbymovingthe frontofthecontrol(1)up ordown.
- Raiseorlowertheentireseatby movingtherearofthecontrol(1) upordown.
- Adjusttheseatbackbytiltingthe topofthecontrol(2)forwardor rearward.
SeeRecliningSeatbackson page3-4. - Increaseordecreaselumbar supportbypassingthefrontor rearofthecontrol(3).
SeeLumbarAdjustmenton page3-4.
3-4 Seats and Restraints
LumbarAdjustment
ManualLumbar
natural_image
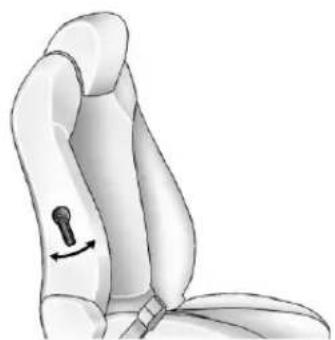
Illustration of a human hand with a key inserted, showing anatomical positioning (no text or symbols)Ifavailable, movethehandle forwardorrearwardtoincreaseor decreaselumbarsupport.
PowerLumbar
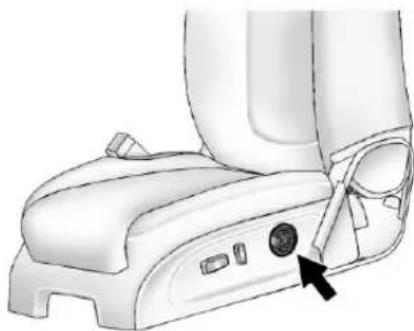
natural_image
Line drawing of a car seat with a knob and arrow pointing to the side panel (no text or symbols present)Ifavailable, pressandholdthefront orrearofcontroltoincreaseor decreaselumbarsupport. Release thecontrolwhentheseatback reachesthedesiredleveloflumbar support.
RecliningSeatbacks
PowerRecliningSeatbacks
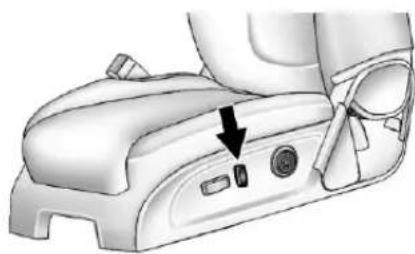
natural_image
Diagram of a car seat assembly with a black arrow pointing to a button (no text or symbols present)Toadjusttheseatback:
• Tiltthetopofthecontrol rearwardtorecline.
- Tiltthetopofthecontrolforward toraise.
WARNING
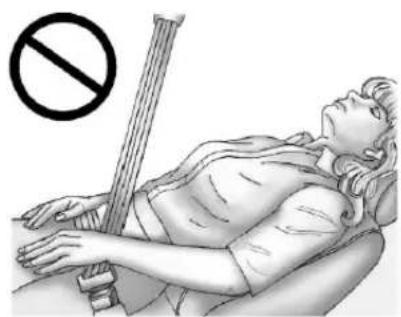
Sittinginareclinedpositionwhen thevehicleisinmotioncanbe dangerous.Evenwhenbuckled up,thesafetybeltscannotdo theirjob.
Theshoulderbeltwillnotbe againstyourbody.Instead,itwill beinfrontofyou.Inacrash,you couldgointoit,receivingneckor otherinjuries.
Thelapbeltcouldgoupover yourabdomen. Thebeltforces wouldbethere, notatyourpelvic bones. This could cause serious internal injuries.
Forproperprotectionwhenthe vehicleisinmotion,havethe seatbackupright.Thensitwell backintheseatandwearthe safetybeltproperly.
natural_image
Illustration of a person lying on their back with a no-smoking symbol above, no text or labels present.Donothaveaseatbackreclinedif thevehicleismoving.
MemorySeats
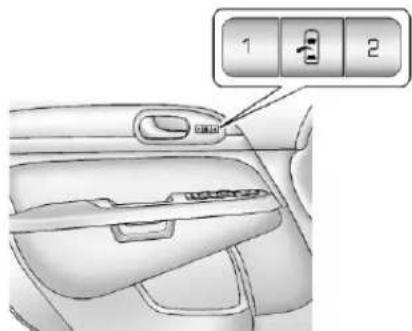
Ifavailable, the controlson the driverdoor are used to program and recall memory settings for the driver seat, outside mirrors, and power steering column (ifequipped).
3-6 Seats and Restraints
StoringMemoryPositions
Tosaveintomemory:
- Adjustthedriverseat and seatbackrecliner, bothoutside mirrors, and the power steering column (ifequipped).
Notallvehicleswillhavethe abilitytosaveandrecallthe mirrorpositions.
-
Pressandhold "1" until twobeepssound.
-
Repeatforaseconddriver positionusing "2."
Torecall, press and release "1" or "2." The vehicle must be in P (Park). As single beep will sound. Theseat, outside mirrors, and power steering column (ifequipped) will move to the positions previously stored for the identified driver.
MemoryRemoteRecall
Thememoryfeaturecanrecallthe driverseat,outsidemirrors,and powersteeringcolumn(ifequipped) tostoredpositionswhenentering thevehicle.
Toactivate, unlockthedriverdoor withtheRemoteKeyless Entry(RKE)transmitter. Thedriver seat, outsidemirrors, and power steeringcolumnwillmoveto the memorypositionsassociatedwith thetransmitterusedtounlockthe vehicle.
Thisfeatureisturnedonoroffusing thevehiclepersonalizationmenu. See VehiclePersonalizationon page5-37.
Tostoprecallmovement, pressone of the powerseat controls, memory buttons, power mirror buttons, or the power steering column control (if equipped).
If something has blocked the driver seat and/or steering column while recalling a memory position, the recall may stop. Removethe obstruction; then press and hold the appropriatemanual control for the memory item that is not recalling for twoseconds. Try recalling the memory position again by pressing the appropriate memory button. If the memory position is still not recalling, see your dealer for service.
EasyExitPositions
Theeasyexitfeaturecanmovethe driverseatrearwardandthepower steeringcolumn(ifequipped)up andforwardtoallowextraroomto exitthevehicle.
☐(EasyExitPositions):Pressto activatetherecall. The vehicle must beinP(Park).
If this feature is programmed on in the vehicle personalization menu, automatic driver seat and power steering column movement occur when the ignition key is removed.
Asinglebeepsounds. Thedriver seatmovesback approximately 8cm(3in)andthepowersteering column(ifequipped)movesupand forward. Tomovetheseatback farther, press · againuntiltheseat isallthewayback.
If something has blocked the driver seat while recalling the exit position, there call may stop. Removethe obstruction; then press and hold the power seat control rearward for twoseconds. Try recalling the exit position again. If the exit position is still not recalling, see your dealer for service.
See Vehicle Personalization on page 5-37.
HeatedandVentilated FrontSeats

WARNING
If you cannot feel temperature change or paint to the skin, the seat theater may cause burns. To reduce risk of burns, people with such a conditions should use care when using these seat theater, especially for long period so time. Don't place anything on these at that insulates against heat, such as a blanket, cushion, cover, or similar item. This may cause these seat at aerto overheat. An overheated seat theater may cause a burn or may damage these seat.
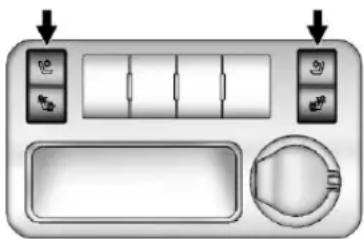
natural_image
Front view of a car air conditioner control panel with buttons and display (no text or symbols visible)HeatedandCooledSeatButtons Shown, HeatedSeatButtons Similar
Ifavailable, the buttons are on the center console. To operate, the enginemust berunning.
(HeatedSeatback): If available, presstoheattheseatback only.
(CooledSeat): If available, presstocooltheentireseat.
(HeatedSeatandSeatback): Presstoheattheseatand seatback.
Pressthebuttononceforthe highestsetting.Witheachpressof thebutton,theseatwillchangeto thenextlowersetting,andthento
3-8 Seats and Restraints
theoffsetting. Thelightsindicate threeforthehighestsettingandone forthelowest.
Thepassengerheatedseatmay takelongertoheatup.
Theheatedand/orcooledseatsare canceledaftertheignitionis turnedoff.
RemoteStartHeatedSeats
Whenitiscoldoutside,theheated seatsmayturnonautmatically duringaremotevehiclestart.The heatedseatswillbecanceledwhen theignitionisturnedon.Pressthe desiredheatedseatbuttontouse theheatedseatsafterthevehicleis started.
Theheatedseatbuttonlightswill notturnonduringaremotestart.
Thetemperatureofanunoccupied seatmaybereduced.
See Remote Vehicle Starton page2-4.
RearSeats
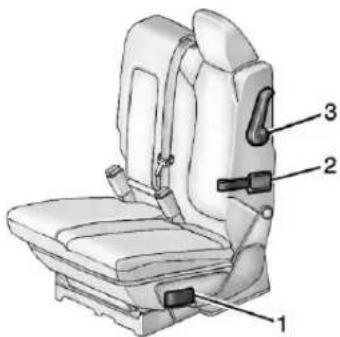
- SeatAdjustmentHandle
- Reclining SeatbackStrap
3.SlidingSeatLever
EnteringandExitingthe ThirdRow

WARNING
Using the third drowseating position while these second row is folded, or folded and tumbled, could cause injury in sudden stop or crash. Besure to return these at to the passenger seating position. Push and pull on the seat to make sure it is locked into place.
Notice: Folding arearseat with the safety belts still fastened may caused damage to theseator the safety belts. Always unbuckle the safety belts and return them to their normal stowed position before folding arearseat.
natural_image
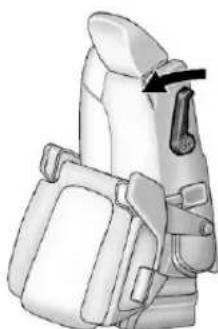
Side view of a vehicle seat with a black arrow pointing to the seat area (no text or symbols visible)Toaccessthethirdrow:
- Removeobjectsonthefloorin frontoforonthesecondrow seat, orintheseattracksonthe floor.
- Movethefrontcenterconsole armrestcompletelyforward.See CenterConsoleStorageon page4-2.
- Placethefoldingarmrestsinthe uprightposition.
-
Makesurethatthesafetybeltis unfastenedandinthestowed position.
-
Pull the sliding seat lever (3) forward. These at back will tilt forward, and these at will begin sliding forward. Continuetopush forward on these at back until the entire seat moves all the way forward and these at cushion is folded.
ReturningtheSeattothe SeatingPosition
Toreturnthesecondrowseattoits normalseatingposition:
- Remove object on the floor behind these second browser in these at track on the floor.
2.Slidetheseatrearwardby pushingontheseatbackuntil theseatislockedintoplace. - Continue pushing these at back rearward until these at back is locked into place.
-
Pushdownontherearofthe seatcushionuntilitislockedin place.
-
Pushandpullontheseatback andseatcushiontomakesure theyarelockedinplace.
- Check that the safety belt is not under these at cushion.
RecliningtheSeatbacks
Toreclinetheseatback:
- Leaningrearwardintheseat, pulltherecliningseatback strap(2).
2.Movetheseatbacktothe desiredposition,andthen releasethestrap(2)tolockthe seatbackinplace. - Pushandpullontheseatbackto makesureitislocked.
FoldingtheSeatback
Tofoldthesecondrowseatbacks:
- Remove anything on or under theseat.
- Placethearmrestintheupright position, and unfastenthe safetybelt.
3-10 Seats and Restraints
- Pullforwardonthereclining seatbackstrap(2).
Theheadrestraintwillfolddown automatically.
Toreturntheseatbacktothe seatingposition,lifttheseatback andpushitrearwarduntillocks intoplace.Pushandpullonthe seatbacktomakesureitislocked.Pullupontheheadrestraint to returnittothepright,locked position.
AdjustingtheSeats
Toadjustthesecondrowseats, pull outwardontheseatadjustment handle(1).SLidetheseatforwardor rearwardtothedesiredposition. Releasethehandle(1), and push and pull on theseattomakesureit is locked.
ThirdRowSeats
WARNING
Usingthethirdrowseating positionwhilethesecondrowis folded,orpushedforwardinthe entryposition,couldcauseinjury inasuddenstoporcrash.Be suretoreturntheseattothe passengerseatingposition.Push andpullontheseattomakesure itislockedintoplace.
FoldingtheSeatback
Notice: Folding arearseat with the safety belts still fastened may caused damage to theseator the safety belts. Always unbuckle the safety belts and return them to their normal stowed position before folding arearseat.
Tofoldthethirdrowseatback:
- Remove anything on or under theseat.
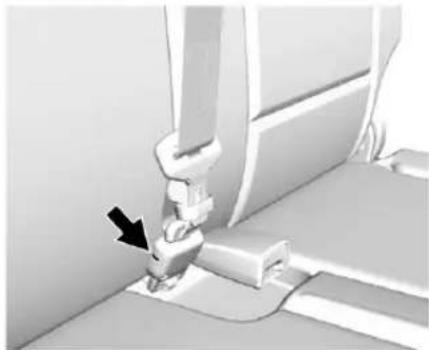
natural_image
Close-up of a sewing machine needle stitching a seat (no text or symbols visible)- Disconnecttherearsafetybelt mini-latch, usingakeyintheslot onthemini-buckle, andletthe beltretractintotheheadliner. Stowthemini-latchintheholder intheheadliner.
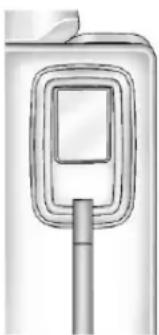
natural_image
Illustration of a mobile phone with a screen and antenna (no text or symbols)- Pulluponthereleaseleveron thebackoftheseat. The headrestmovesforward automatically.
- Pushtheseatbackforwardto layflat.
ReturningtheSeattothe SeatingPosition
Toreturntheseatbacktothe seatingposition:
- From therearofthevehicle, raisetheseatbacktotheupright positionusingthepullstrapon thebackofthethirdrowseat,
orlifttheseatbackandpushit intoplacefrominsidethe vehicle.
- The headrest must be locked into place before sitting in theseat.

WARNING
Ifeitherseatbackisnotlocked, it couldmoveforwardinasudden stoporcrash. That could cause injury to the person sitting there. Always push and pull on the seat back stobesure they are locked.
- Pushandpullontheseatbackto makesureitislockedinplace.

WARNING
Asafetybeltthatisimproperly routed, not properly attached, ortwisted will not provide the
(Continued)
WARNING(Continued)
protectionneededinacrash. The personwearingthebeltcouldbe seriouslyinjured. Afterraisingthe rearseatback,alwayschecktobe surethatthesafetybeltsare properlyroutedandattached,and arenottwisted.
- Reconnect the centers safety belt mini-latch to them mini-buckle. Do not let it twist.
- Pullonthesafetybelttobesure themini-latchissecure.
RemovingtheThirdRowSeats
Toremoveathirdrowseat:
- Removethecargomanagement system, if available and installed. See Cargo Management System page 4-3.
- Remove anything on or under theseat.
3-12 Seats and Restraints
Notice: Folding arearseat with the safety belts still fastened may caused damage to theseator the safety belts. Always unbuckle the safety belts and return them to their normal stowed position before folding arearseat.
- Foldtheseatbackdown.See "FoldingtheSeatback"earlierin thissection.
- Removetherearboltsonthe flooroneachsideoftheseat.
- Removetheseatbytiltingit slightlyupward, and then pulling it out of therearofthevehicle in onemotion.
- Replacetheboltsinthefloor holesforstorage.
InstallingtheThirdRowSeats
Toreinstallathirdrowseat:
- Before installing these seat the seat back must be folded forward. See "Folding the Seatback" earlier in this section.
Theseatsmustbeplacedinthe properlocationstoattach correctly. Thewiderseatmust beinstalledonthedriverside andthenarrowerseatonthe passengerside.Removethe boltsfromtheholesinthefloor beforeinstallingtheseats.
-
Placetheseatonthevehicle floorsothatthefrontseathooks areonthevehiclebars.
-
Reinstallthebolts, and torqueto 55N·m(41lbft). Pullupon the seattomakesureitislocked in place.
- Raisetheseatbacktoitsupright position. Pushandpullonthe seatbacktomakesureitis lockedintoplace.
- Push the head restup into position. Push and pull on the head rest to make sure it is locked into place.
- Reconnect the centers safety belt mini-latch to themini-buckle. Do not let it twist.
SafetyBelts
Thissectionofthemanual describeshowtousesafetybelts properly.Italsodescribessome thingsnottodowithsafetybelts.

WARNING
Donotletanyoneridewherea safetybeltcannotbeworn properly.Inacrash,ifyouoryour passenger(s)arenotwearing safetybelts,injuriescanbemuch worsethanifyouarewearing safetybelts.Youcanbeseriously injuredorkilledbyhittingthings insidethevehicleharderorby beingejectedfromthevehicle.In addition,anyonewhoisnot buckledupcanstrikeother passengersinthevehicle.
(Continued)
WARNING(Continued)
Itisextremelydangeroustoride inacargoarea,insideoroutside ofavehicle.Inacollision, passengersridingintheseareas aremorelikelytobeseriously injuredorkilled.Donotallow passengerstorideinanyareaof thevehiclethatisnotequipped withseatsandsafetybelts.
Alwayswearasafetybelt, and checkthatallpassenger(s) are restrainedproperlytoo.
Thisvehiclehasindicatorsasa remindertobucklethesafetybelts. See SafetyBeltReminderson page5-13.
WhySafetyBeltsWork
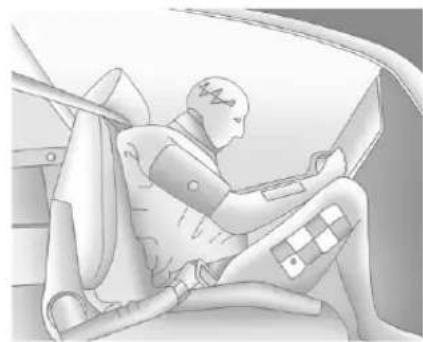
natural_image
Illustration of a person seated in a car, wearing a seatbelt and holding a device (no text or symbols visible)Whenridinginavehicle,youtravel asfastasthevehicledoes.Ifthe vehiclestopssuddenly,youkeep goinguntilsomethingstopsyou. Itcouldbethewindshield,the instrumentpanel,orthesafetybelts!
Whenyouwearasafetybelt,you andthevehicleslowdowntogether. Thereismoretimetostopbecause youstopoveralongerdistanceand, whenwornproperly,yourstrongest bonestaketheforcesfromthe
3-14 Seats and Restraints
safetybelts. That is why wearing safety belts make such good sense.
QuestionsandAnswersAbout SafetyBelts
Q: Willlbetrappedinthevehicle afteracrashiflamwearinga safetybelt?
A: You could be—whether you are wearing as safety belt or not. Your chance of being conscious during and after a crash, so you can unbuckle and get out, is much greater if you are belted.
Q: If my vehicle has air bags, why should have to wear safety belts?
A: Airbagsaresupplemental systemsonly; sotheyworkwith safetybelts—notinsteadof them. Whetherornotanairbag isprovided, allooccupantsstill havetobuckleuptogetthe mostprotection.
Also, innearly all states and in all Canadian provinces, the law requires wearingsafety belts.
HowtoWearSafetyBelts Properly
Thissectionisonlyforpeople of adultsize.
Therearespecialthingstoknow aboutsafetybeltsandchildren.And therearedifferentrulesforsmaller childrenandinfants.Ifachildwillbe ridinginthevehicle,seeOlder Childrenonpage3-35orInfants andYoungChildrenonpage3-37. Followthoserulesforeveryone's protection.
It is very important for allooccupants to buckleup. Statisticsshow that unbelted people are hurt more often incrashesthan those who are wearing safety belts.
Thereareimportantthingstoknow aboutwearingasafetybeltproperly.
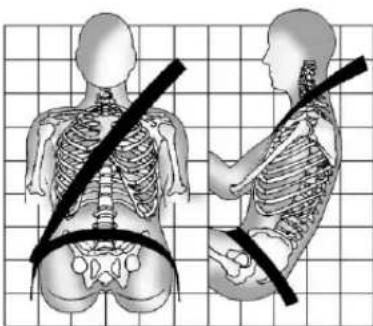
natural_image
Illustration of human back and torso with a diagonal band indicating muscle or spinal support, shown in two views (no text or labels)- Situpstraightandalwayskeep yourfeetonthefloorinfront ofyou.
• Alwaysusethecorrectbuckle foryourseatingposition.
- Wearthelappartofthebeltlow andsnugonthehips,just touchingthethighs.Inacrash, thisappliesforcetothestrong pelvicbonesandyouwouldbe lesslikelytoslideunderthelap belt.Ifyouslidunderit,thebelt wouldapplyforceonyour abdomen.Thiscouldcause seriousorevenfatalinjuries.
- Weartheshoulderbeltoverthe shoulderandacrossthechest. Thesepartsofthebodyarebest abletotakebeltrestraining forces. Theshoulderbeltlocksif thereisasuddenstoporcrash.
WARNING
Youcanbeseriouslyinjured, orevenkilled, bynotwearing yoursafetybeltproperly.
- Neverallowthelapor shoulderbelttobecome looseortwisted.
- Neverweartheshoulderbelt underbotharmsorbehind yourback.
- Neverroutethelapor shoulderbeltoveran armrest.
Lap-ShoulderBelt
Allseatingpositionsinthevehicle havealap-shoulderbelt.
If you are using a rearseating position with adetachables safety belt and the safety belt is not attached, see "Returning the Seat to the Seating Position" under Third Row Seat on page 3-10 for instruction on reconnecting the safety belt to themini-buckle.
The following instructionsexplain howtowearalap-shoulderbelt properly.
- Adjusttheseat, if theseatis adjustable, so you cansit up straight. Toseehow, see "Seats" in the Index.
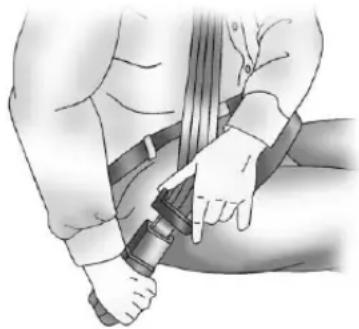
natural_image
Illustration of a person wearing a belt and holding a sword, with no visible text or symbols- Pickupthelatchplateandpull thebeltacrossyou.Donotletit gettwisted.
Thelap-shoulderbeltmaylockif youpullthebeltacrossyouvery quickly. If this happens, let the beltgobackslightlytounlockit. Then pullthebeltacrossyou moreslowly.
Iftheshoulderportionofa passengerbeltispulledoutall theway,thechildrestraint lockingfeaturemaybeengaged. Ifthishappens,letthebeltgo backallthewayandstartagain.
3-16SeatsandRestraints
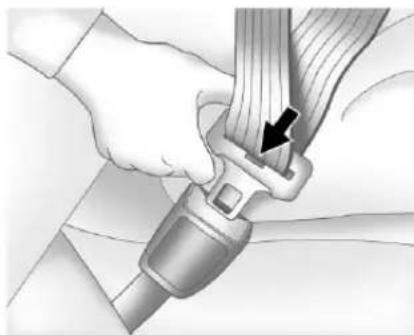
natural_image
Medical illustration showing a hand adjusting a car seatbelt with a black arrow indicating the cable (no text or symbols present)-
Pushthelatchplate into the buckle until it clicks.
-
Pulluponthelatchplateto makesureitissecure.Ifthebelt isnotlongenough,see Safety BeltExtenderonpage3-20.
Positionthereleasebuttonon thebucklesothatthesafetybelt couldbequicklyunbuckledif necessary.
- If equipped with a shoulder belt height adjuster, move it to the height that is right for you. See "Shoulder Belt Height Adjuster" later in this section for instructions on use and important safety information.
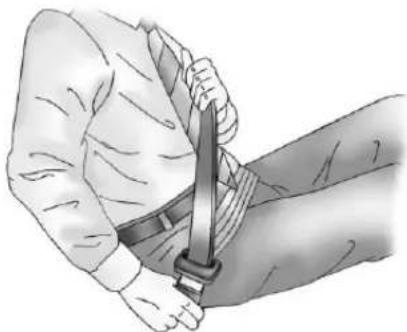
natural_image
Illustration of a person's arm being lifted by a belt, showing the band and wrist (no text or symbols)- Tomakethelapparttight, pull upontheshoulderbelt.
It may be necessary to pull the stitching on the safety belt through the latch plate to fully tight enthelap beltons smaller occupants.
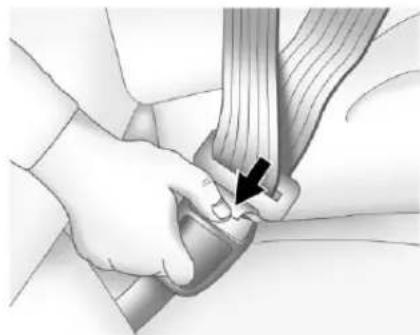
natural_image
Medical illustration showing a hand holding a medical device with a black arrow pointing to a specific anatomical structure (no text or symbols present)Tounlatchthebelt, pushthebutton onthebuckle. Thebelt should return to its stowed position. Slide thelatchplateupthesafetybelt webbing when the safety belt is not in use. Thelatch plates should rest on the stitching on the safety belt, near the guideloop on the sidewall.
Beforeadoorisclosed,besurethe safetybeltisoutoftheway.Ifa doorisslammedagainstasafety belt,damagecanoccurtoboththe safetybeltandthevehicle.
ShoulderBeltHeightAdjuster
The vehicle has a shoulder belt height adjuster forth the driver and right front passenger seating positions.
Adjusttheheightsotheshoulder portionofthebeltisontheshoulder butnotfallingoffofit. Thebelt shouldbeclosetobutnot contactingtheneck. Improper shoulderbeltheightadjustment couldreducetheeffectiveness of thesafetybeltinacrash. SeeHow toWearSafetyBeltsProperlyon page3-14.
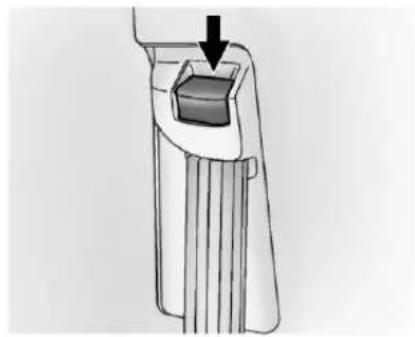
natural_image
Diagram of a mechanical component with a downward arrow indicating force or direction (no text or symbols present)Tomoveitdown, pushdownonthe releasebuttonandmovetheheight adjustertothedesiredposition. You canmovetheheightadjusterupby pushingupontheshoulderbelt guide.
Aftertheadjusterissettothe desiredposition,trytomoveitdown withoutpushingthereleasebutton tomakesureithaslockedinto position.
SafetyBeltPretensioners
This vehicle hassafety belt pretensioners for the front outboard occupants. Although the safety belt pretensioners cannot be seen, they are part of the safety belt assembly. They can help to enthes safety belts during the early stages of a moderate to severe frontal, near frontal, or rear crash if the threshold conditions for pretensioner activation are met. And, for vehicles with side impact air bags, safety belt pretensioners can help to enthes safety belts in aside crash or rolloverevent.
Pretensionersworkonlyonce.Ifthe pretensionersactivateinacrash, theywillneedtobereplaced,and probablyothernewpartsforthe vehicle'ssafetybeltsystem.See ReplacingSafetyBeltSystemParts afteraCrashonpage3-21.
3-18 Seats and Restraints
RearSafetyBeltComfort Guides
This vehicle may have ears safety belt comfort guides. If not, they are available through your dealer. The guides may provide added safety belt comfort for older children who have outgrown booster seats and for some adults. When installed and properly adjusted, the comfort guide position should be belt away from theseckand head.
Hereishowtoinstallacomfort guidetothesafetybelt:
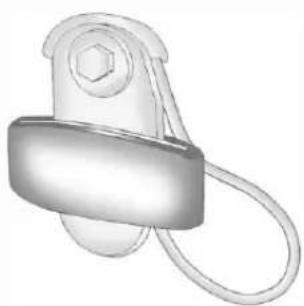
natural_image
3D rendered image of a mechanical pulley or clamp device (no text or symbols visible)OutboardPositions
- Fortheoutboardpositions, removetheguidefromits storageclipontheinteriorbody.
Forthethirdrowcenterposition, locatethecomfortguidewhichis locatedinastoragepocket, at thetopoftheseat, underthe headrestonthedriverside of thevehicle. Toaccessthe comfortguide, youwillfirstneed tomovetheheadrestforwardby pullingonthehandlebehindthe seatback. Thecomfortguidewill nowbeaccessible.
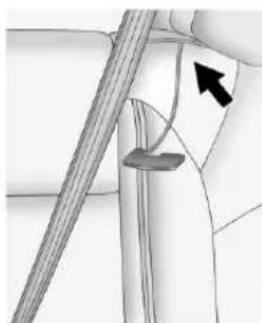
natural_image
Diagram of a mechanical or structural component with a rod and curved elements, no visible text or symbolsThirdRowCenterPosition
Pullthecomfortguideoutofits storagelocationandthenreturn theheadresttoitsupright position.
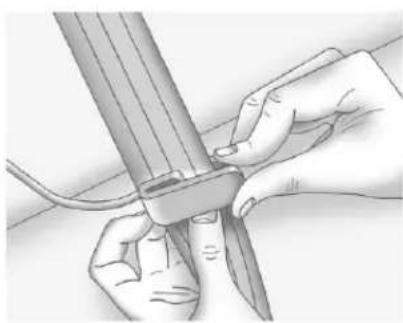
natural_image
Illustration of hands using a tool to adjust or install a sheet metal (no text or symbols visible)- Placetheguideoverthebelt andinsertthetwoedgesofthe beltintotheslotsoftheguide.
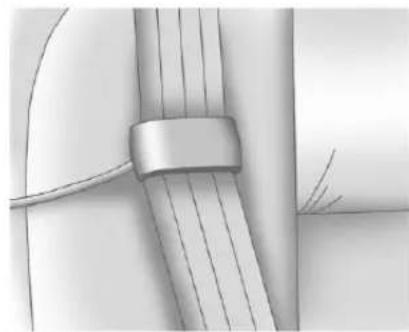
natural_image
Close-up of a metallic cable or wire being held by a clasp, with no visible text or symbols.- Besurethatthebeltisnot twistedanditiesflat. The elasticcordmustbeunderthe beltandtheguideontop.
WARNING
Asafetybeltthatisnotproperly wornmaynotprovidethe protectionneededinacrash. The personwearingthebeltcouldbe seriouslyinjured. Theshoulder beltshouldgooverthesthoulder andacrossthechest. Theseparts ofthebodyarebestabletotake beltrestrainingforces.
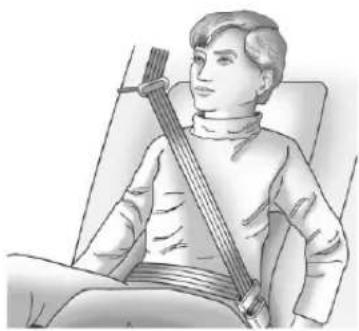
natural_image
Illustration of a person sitting in a chair holding a stringed instrument (no text or symbols visible)3-20SeatsandRestraints
- Buckle, position, and releasethe safetybeltasdescribed previously in this section. Make suretheshoulder portion of the beltisontheshoulder and not falling off of it. The belt should be closeto, but not contacting, theneck.
Toremoveandstorethecomfort guide,squeezethebeltedges togethersothatthesafetybeltcan beremovedfromtheguide.Slide theguideintoitsstoragelocationor onitsstorageeclip.
SafetyBeltUseDuring Pregnancy
Safetybeltsworkforeveryone, includingpregnantwomen.Likeall occupants,theyaremorelikelyto beseriouslyinjurediftheydonot wearsafetybelts.
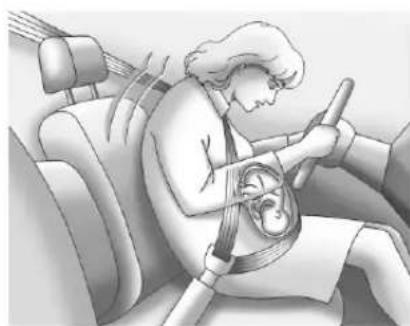
natural_image
Illustration of a person wearing a car seatbelt and head down, seated in a vehicle (no text or symbols visible)Apregnantwomanshouldweara lap-shoulderbelt, and the lap portions should bewornaslowas possible, belowtherounding, throughout the pregnancy.
The best way to protect the fetus is to protect them other. When as safety belt is worn properly, it is more likely that the fetus will not be hurt in a crash. For pregnant women, as for anyone, the key to makings safety belt is effective is wearing them properly.
SafetyBeltExtender
Ifthevehicle'ssafetybeltwillfasten aroundyou,youshoulduseit.
Butifasafetybeltisnotlong enough,yourdealerwillorderyou anextender.Whenyougointo orderit,taketheheaviestcoatyou willwear,sotheextenderwillbe longenoughforyou.Tohelpavoid personalinjury,donotletsomeone elseuseit,anduseitonlyforthe seatitismadetofit.Theextender hasbeendesignedforadults.Never useitforsecuringchildseats.To wearit,attachittotheregularsafety belt.Seetheinstructionsheetthat comeswiththeextender.
SafetySystemCheck
Nowandthen, check that the safety belt reminder light, safety belts, buckles, latch plates, retractors, and anchorages are all working properly.
Lookforanyotherlooseor damagedsafetybeltsystemparts thatmightkeepasafetybeltsystem fromdoingitsjob.Seeyourdealer tohaveitrepaired.Tornorfrayed safetybeltsmaynotprotectyouina crash.Theycanripapartunder impactforces.Ifabeltistornor frayed,getanewonerightaway.
Makesurethesafetybeltreminder lightisworking.SeeSafetyBelt Remindersonpage5-13.
Keepsafetybeltscleananddry. See SafetyBeltCareonpage3-21.
SafetyBeltCare
Keepbeltscleananddry.

WARNING
Donotbleachordyesafetybelts. Itmayseverelyweakenthem. In acrash, they might not be able to provide adequate protection. Cleansafetybeltsonly with mild soap and lukewarmwater.
ReplacingSafetyBelt SystemPartsaftera Crash

WARNING
Acrashcandamagethesafety beltsysteminthevehicle.
Adamagedsafetybeltsystem may not properly protect the person using it, resulting in serious injury overvendeathina crash. To help makes sure the safety belts systems are working properly after a crash, havethem inspected and any necessary replacements made as soon as possible.
Afteraminorcrash, replacement of safetybeltsmaynotbenecessary. Butthesafetybeltasembliesthat were used during any crash may have been stressedordamaged. Seeyourdealertohavethesafety beltassembliesinspectedor replaced.
Newpartsandrepairsmaybe necessaryevenifthesafetybelt systemwasnotbeingusedatthe timeofthecrash.
Havethesafetybeltpretensioners checkedifthevehiclehasbeenina crash,oriftheairbagreadinesslight staysonafteryoustartthevehicle orwhileyouaredriving.SeeAirbag ReadinessLightonpage5-14.
AirbagSystem
The vehicle has the following airbags:
• Afrontalairbagforthedriver.
• Afrontalairbagforthefront outboardpassenger.
- Afrontcenterairbagforthe driverandfrontoutboard passenger.
- Aseat-mountedsideimpact airbagforthedriver.
- Aseat-mountedsideimpact airbagforthefrontoutboard passenger.
- Aroof-railairbagforthedriver andforthesecondandthirdrow passengersseateddirectly behindthedriver.
- Aroof-railairbagforthefront outboardpassengerandthe secondandthirdrow passengersseateddirectly behindthefrontoutboard passenger.
Allvehicleairbagshavetheword AIRBAGonthetrimoronan attachedlabelnearthedeployment opening.
Forfrontalairbags, theword AIRBAGisonthecenterofthe steeringwheelforthedriverandon theinstrumentpanelforthefront outboardpassenger.
Forthefrontcenterairbag, theword AIRBAGisontheinboardsideof thedriverseatback.
Forseat-mountedsideimpact airbags, thewordAIRBAGisonthe sideoftheseatbackclosestto thedoor.
Forroof-railairbags, theword AIRBAGisontheceilingortrim.
Airbagsaredesignedtosupplement theprotectionprovidedbysafety belts. Eventhoughtoday'sairbags arealsodesignedtohelpreduce theriskofinjuryfromtheforceofan inflatingbag,allairbagsmustinflate veryquicklytodotheirjob.
Herearethemostimportantthings toknowabouttheairbagsystem:

WARNING
Youcanbeseverelyinjuredor killedinacrashifyouarenot wearingyoursafetybelt,even withairbags.Airbagsare designedtoworkwithsafety belts,notreplacethem.Also, airbagsarenotdesignedtoinflate in everycrash.Insomecrashes safetybeltsaretheonlyrestraint. SeeWhenShouldanAirbag Inflate?onpage3-26.
Wearingyoursafetybeltduringa crashhelpsreducethechanceof hittingthingsinsidethevehicleor beingejectedfromit.Airbagsare "supplementalrestraints"tothe safetybelts.Everyoneinthe vehicleshouldwearasafetybelt properly,whetherornotthereis anairbagforthatperson.
WARNING
Because airbagsinflatewithgreat forceandfasterthantheblinkof aneye,anyonewhoisup against,orveryclosetoany airbagwhenitinflatescanbe seriouslyinjuredorkilled.Donot situnnecessarilyclosetoany airbag,asyouwouldbeifsitting ontheedgeoftheseatorleaning forward.Safetybeltshelpkeep youinpositionbeforeandduring acrash.Alwayswearasafety belt,evenwithairbags.Thedriver shouldsitasfarbackaspossible whilestillmaintainingcontrol of thevehicle.
Occupantsshouldnotleanonor sleepagainstthefrontcenter armrestorconsolewithafront centerairbag.
(Continued)
WARNING(Continued)
Occupantsshouldnotleanonor sleepagainsththedororside windowsinseatingpositionswith seat-mountedsideimpactairbags and/orroof-railairbags.
WARNING
Childrenwhoareupagainst, orverycloseto,anyairbagwhen itinflatescanbeseriouslyinjured orkilled.Alwayssecurechildren properlyinthevehicle.Toread how,seeOlderChildrenon page3-35orInfantsandYoung Childrenonpage3-37.

Thereisanairbagreadinesslight ontheinstrumentcluster,which showstheairbagsymbol.
Thesystemcheckstheairbag electricalsystemformalfunctions. Thelighttellsyouifthereisan electricalproblem.SeeAirbag ReadinessLightonpage5-14for moreinformation.
3-24SeatsandRestraints
WhereAretheAirbags?
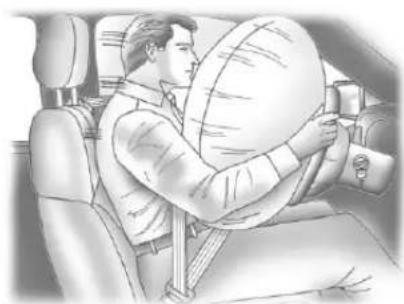
natural_image
Interior view of a car showing a person seated inside, holding a large globe (no text or symbols visible)Thedriverfrontalairbagisinthe centerofthesteeringwheel.
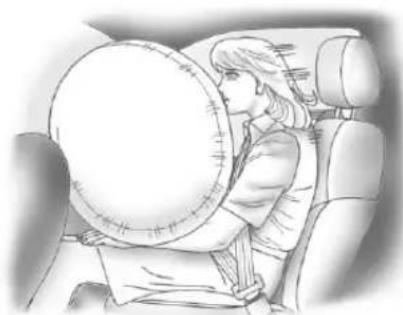
natural_image
Illustration of a person sitting in a car, holding a large circular object (no text or symbols visible)Thefrontoutboardpassenger frontalairbagisinthepassenger sideinstrumentpanel.
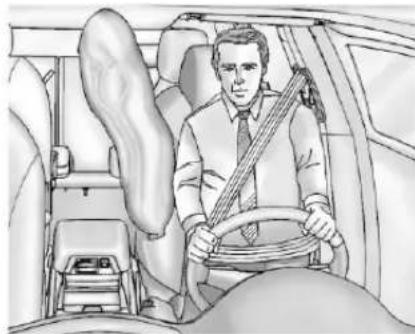
natural_image
Line drawing of a man seated in a car, holding a steering wheel and seatbelt (no text or symbols)Thefrontcenterairbagisinthe inboardsideofthedriverseatback.
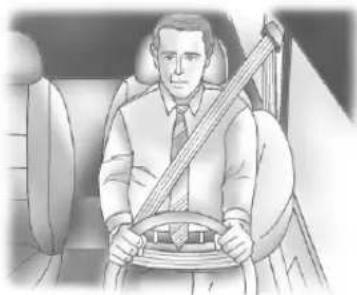
natural_image
Illustration of a man sitting in a car, holding a steering wheel (no text or symbols visible)DriverSideShown, Passenger SideSimilar
The driver and front outboard passenger seat-mounted side impact air bags are in the side of the seat back closest to the door.
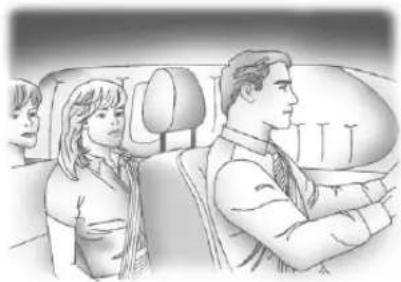
natural_image
Illustration of a car interior with three people seated, one standing and two facing away (no text or symbols visible)DriverSideShown, Passenger SideSimilar
Theroof-railairbagsforthedriver, frontoutboardpassenger,and secondandthirdrowoutboard passengersareintheceilingabove thesidewindows.

WARNING
If something is between an occupant and an airbag, the airbag might not inflate properly or might for the object into
(Continued)
WARNING(Continued)
thatpersoncausingsevereinjury orevendeath.Thepathofan inflatingairbagmustbekept clear.Donotputanything betweenanoccupantandan airbag,andonotattachorput anythingonthesteeringwheel huboronornearanyother airbagcovering.
Donotuseseatorconsole accessoriesethatblockthe inflationpathofaseat-mounted sideimpactairbagorthefront centerairbag.
Neversecureanythingtotheroof ofvehiclewithroof-railairbags byroutingaropeortie-down throughanydoororwindow opening. If youdo, the pathofan inflatingroof-railairbagwillbe blocked.
WhenShouldanAirbag Inflate?
Thevehiclehasfrontalairbags, a frontcenterairbag, seat-mounted sideimpactairbags, androof-rail airbags. See Airbag System on page 3-22. These airbags are designed to inflate if the impact exceeds specific airbag system's deployment threshold. Deployment thresholds are used to predict how severe acrash is likely to be in time for the airbag to inflate and help prestrain the occupants. Deployment thresholds can vary with specific vehicle design.
Frontalairbagsaredesignedto inflateinmoderatetoseverefrontal ornearfrontalcrashestohelp reducethepotentialforsevere injuries,mainlytothedriver'sor frontoutboardpassenger'shead andchest.
Whether the frontal air bags will or should inflate is not based primarily on how fast the vehicle is traveling.
Itdependsonwhatishit,the directionoftheimpact,andhow quicklythevehicleslowsdown.
Frontalairbagsmayinflateat differentcrashspeedsdependingon whetherthevehiclehitsanobject straightonoratanangle,and whethertheobjectisfixedor moving,rigidordeformable,narrow orwide.
Frontalairbagsarenotintendedto inflateduringvehiclerollovers, rear impacts, ormanysideimpacts.
Inaddition, the vehicle has dual-stage frontal airbags. Dual-stage airbags adjust the restraint according to crash severity. The vehicle has electronic frontal sensors, which help the sensing system distinguish between a moderate frontal impact and more severe frontal impact. Form moderate frontal impacts, dual-stage airbags inflate at level less than full deployment. Form more severe frontal impacts, full deployment occurs.
Thefrontcenterairbag, seat-mountedsideimpactairbags, androof-railairbagsareintendedto inflateinmoderatetosevereside crashesdependingonthelocation oftheimpact.Aseat-mountedside impactairbagisintendedtoinflate onthesideofthevehiclethatis struck.Thefrontcenterairbagand bothroof-railairbagsareintendedto inflatewheneithersideofthe vehicleisstruck.Inaddition,the roof-railairbagsandthefrontcenter airbagareintendedtoinflatewhen thesensingsystempredictsthatthe vehicleisabouttorolloveronits side.Theroof-railairbagsarealso intendedtoinflateinaseverefrontal impact.
Thefrontcenterairbagisnot intendedtoinflateinfrontalimpacts, nearfrontalimpacts, orrear impacts. Seat-mountedsideimpact airbagsarenotintendedtoinflatein frontalimpacts, nearfrontalimpacts,
rollovers, rear impacts, oron the non-struckside of a vehicle in a side impact. Roof-rail air bags are not intended to inflate in rear impacts.
Inanyparticularcrash, noonecan saywhetheranairbagshouldhave inflated simply because of the vehicle damage or there repair costs.
WhatMakesanAirbag Inflate?
Inadeploymentevent,thesensing systemsendsanelectricalsignal triggeringareleaseofgasfromthe inflator.Gasfromtheinflatorfills the airbagcausingthebagtobreakout ofthecover.Theinflator,theairbag, andrelatedhardwareareallpartof theairbagmodule.
Forairbaglocations, see WhereAre theAirbags?onpage3-24.
HowDoesanAirbag Restrain?
Inmoderatetoseverefrontalor nearfrontalcollisions, evenbelted occupantscancontactthesteering wheelortheinstrumentpanel. In moderatetoseveresidecollisions, evenbeltedoccupantscancontact theinsideofthevehicle.
Airbagssupplementtheprotection providedbysafetybeltsby distributingtheforceoftheimpact moreevenlyoverthe occupant'sbody.
Rollovercapableroof-railairbags arealsodesignedtohelpcontain theheadandchestofoccupantsin theoutboardseatingpositionsinthe first,second,andthirdrows.The rollovercapableroof-railairbagsare designedtohelpreducetheriskof fullorpartialejectioninrollover events,althoughnosystemcan preventallsuchejections.
Butairbagswouldnothelpinmany typesofcollisions,primarily becausetheoccupant'smotionis nottowardthoseairbags.SeeWhen ShouldanAirbagInflate?on page3-26formoreinformation.
Airbagsshouldneverberegarded asanythingmorethanasupplement tosafetybelts.
WhatWillYouSeeafter anAirbagInflates?
Afterthefrontalairbagsand seat-mountedsideimpactairbags inflate,theyquicklydeflate,so quicklythatsomepeoplemaynot evenrealizeanairbaginflated.The frontcenterairbagandroof-rail airbagsmaystillbeatleastpartially inflatedforsometimeafterthey inflate.Somecomponentsofthe airbagmodulemaybehotfor severalminutes.Forlocationofthe airbags,seeWhereArethe Airbags?onpage3-24.
3-28SeatsandRestraints
Thepartsoftheairbagthatcome intocontactwithyoumaybewarm, butnottoohottotouch. Theremay besomesmokeanddustcoming fromtheventsinthedeflated airbags. Airbaginflationdoesnot preventthedriverfromseeingoutof thewindshieldorbeingabletosteer thevehicle, nordoesitprevent peoplefromleavingthevehicle.

WARNING
Whenanairbaginflates, there maybedustintheair. This dust could cause breathing problems for people with a history of asthma or other breathing trouble. To avoid this, everyone in the vehicles should get out as soon as it is safetodoso. If you have breathing problems but cannot get out of the vehicle after an air baginflates, then get fresh hair by opening a window or a door. If you experience breathing
(Continued)
WARNING(Continued)
problemsfollowinganairbag deployment,youshouldseek medicalattention.
The vehicle has a safe feature that may automatically unlock the doors, turn on the interior lamps and hazard warning flashers, and should the fuel system after the air bags inflate. You can lock the doors, and turn off the interior lamps and hazard warning flashers by using the controls for those features.

WARNING
Acrashsevereenoughtoinflate theairbagsmayhavealso damagedimportantfunctionsin thevehicle,suchasthefuel system,brakeandsteering systems,etc.Evenifthevehicle appearstobedrivableaftera
(Continued)
WARNING(Continued)
moderatecrash,theremaybe concealeddamagethatcould makeitdifficulttosafelyoperate thevehicle.
Usecautionifyoushouldattempt torestarttheengineafteracrash hasoccurred.
Inmanycrashessevereenoughto inflatetheairbag, windshieldsare brokenbyvehicledeformation. Additionalwindshieldbreakagemay alsooccurfromthefrontoutboard passengerairbag.
- Airbagsaredesignedtoinflate onlyonce. Afteranairbag inflates, youwillneedsomenew partsfortheairbagsystem. Ifyoudonotgetthem, the airbagsystemwillnotbethere tohelpprotectyouinanother crash. A newsystemwillinclude airbagmodulesandpossibly
otherparts. Theservicemanual forthevehiclecoverstheneed toreplaceotherparts.
- Thevehiclehasacrashsensing anddiagnosticmodulewhich recordsinformationaftera crash.SeeVehicleData RecordingandPrivacyon page 13-19andEventData Recordersonpage 13-19.
- Letonlyqualifiedtechnicians workontheairbagsystems. Improperservicecanmeanthat anairbagsystemwillnotwork properly.Seeyourdealerfor service.
PassengerSensing System
The vehicle has a passenger sensing system for the front outboard passenger position. The passenger air bag status indicator will light on the instrument panel when the vehicle is started.
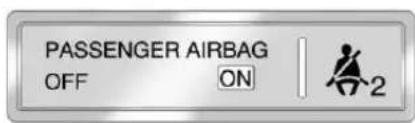
UnitedStates
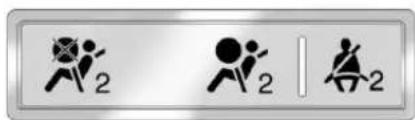
CanadaandMexico
ThewordsONandOFF,orthe symbolforonandoff,arevisible duringthesystemcheck.Ifyouuse remotestart,ifequipped,tostartthe vehicle,youmaynotseethesystem check.Whenthesystemcheckis complete,eitherthewordONor OFF,orthesymbolforonoroff,will bevisible.SeePassengerAirbag StatusIndicatoronpage5-15.
Thepassengersensingsystem turnsoffthefrontoutboard passengerfrontalairbagunder
certainconditions. No other airbag is affected by the passenger sensingsystem.
Thepassengersensingsystem workswithsensorsthatarepartof thefrontoutboardpassengerseat. Thesensorsaredesignedtodetect thepresenceofaproperly-seated occupantanddetermineifthefront outboardpassengerfrontalairbag shouldbeallowedtoinflateornot.
According to accident statistics, children are safer when properly secured in a rearseatin the correct child restraint for their weight and size.
Werecommendthatchildrenbe securedinarearseat,including:an infantorachildridingina rear-facingchildrestraint;achild ridinginaforward-facingchildseat; anolderchildridinginabooster seat;andchildren,whoarelarge enough,usingsafetybelts.
3-30 Seats and Restraints
Neverputarear-facingchildseatin thefront. Thisisbecausetheriskto therear-facingchildissogreat, iftheairbaginflates.

WARNING
Achildinarear-facingchild restraintcanbeseriouslyinjured orkilledifthepassengerfrontal airbaginflates. Thisisbecause thebackoftherear-facingchild restraintwouldbeverycloseto theirinflatingairbag. Achildina forward-facingchildrestraintcan beseriouslyinjuredorkilledifthe passengerfrontalairbaginflates andthepassengerseatisina forwardposition.
Evenifthepassengersensing systemhasturnedoffthe passengerfrontalairbag,no systemisfail-safe.Noonecan guaranteeethatanairbagwillnot (Continued)
WARNING(Continued)
inflateundersomeunusual circumstance, eventhoughthe airbagisoff.
Securerear-facingchildrestraints inarearseat, eveniftheairbag isoff. Ifyousecurea forward-facingchildrestraintin thefrontoutboardpassenger seat, alwaysmovetheseatasfar backasitwillgo. Itisbetterto securethechildrestraintina rearseat.
Thepassengersensingsystemis designedtoturnoffthefront outboardpassengerfrontalairbagif:
- Thefrontoutboardpassenger seatisunoccupied.
-
Thesystemdeterminesthatan infantispresentinachild restraint.
-
Afrontoutboardpassenger takeshis/herweightoffofthe seatforaperiodoftime.
- Thereisacriticalproblemwith theairbagsystemorthe passengersensingsystem.
Whenthepassengersensing systemhasturnedoffthefront outboardpassengerfrontalairbag, theoffindicatorwilllightandstaylit asareminderthattheairbagisoff. SeePassengerAirbagStatus Indicatoronpage5-15.
Thepassengersensingsystemis designedtoturnonthefront outboardpassengerfrontalairbag anytimethesystemsensesthata personofadultsizeissitting properlyinthefrontoutboard passengerseat.
Whenthepassengersensing systemhasallowedtheairbagtobe enabled,theonindicatorwilllight andstaylitasareminderthatthe airbagisactive.
Forsomechildren, including childreninchildrestraints, and for very small adults, the passenger sensing system may inform not turn off the front outboard passenger frontal airbag, depending upon the person's seating posture and body build. Everyone in the vehicle who has out grown childrestraints should wear safety belt properly—whether or not there is an airbag for that person.

WARNING
If the airbagreadiness light ever comes on and stay on, it means that something may be wrong with the air bags system. To help avoid injury to your self for others, have the vehicles serviced right away. See Airbag Readiness Lighton page 5-14 form more information, including important safety information.
IftheOnIndicatorIsLitfora ChildRestraint
Ifachildrestrainthasbeeninstalled andtheonindicatorislit:
- Turnthevehicleoff.
- Removethechildrestraint from the vehicle.
- Remove any additional items from these seats such as blankets, cushions, seat covers, seat heaters, or seat massagers.
-
Reinstall the child restraint following the directions provided by the child restraint manufacturer and refer to Securing Child Restraints (Front Passenger Seat) on page 3-52 or Securing Child Restraints (Rear Seat) on page 3-50.
-
If, afterreinstalling the child restraint and restarting the vehicle, the on indicator is still lit, turn the vehicle off. Then slightly reclin the vehicle seat back and adjust these at cushion, if adjustable, to make sure that the vehicle seat back is not pushing the child restraint into these at cushion.
Alsomakesurethechild restraintisnottrappedunderthe vehicleheadrestraint.Ifthis happens,adjustthehead restraint.SeeHeadRestraints onpage3-2.
6.Restartthevehicle.
Thepassengersensingsystem mayormaynotturnoffthe airbagforachildinachild restraintdependinguponthe child'sseatingpostureandbody build.Itisbettertosecurethe childrestraintinarearseat.
IftheOffIndicatorIsLitforan Adult-SizeOccupant
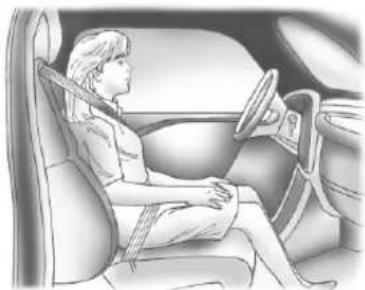
natural_image
Interior view of a car showing a person seated in the driver's seat, wearing a seatbelt (no text or symbols visible)Ifapersonofadult-sizeissittingin thefrontoutboardpassengerseat, buttheoffindicatorislit,itcouldbe becausethatpersonisnotsitting properlyintheseat.Usethe followingstepstoallowthesystem todetectthatpersonandenablethe frontoutboardpassengerfrontal airbag:
-
Turnthevehicleoff.
-
Remove any additional material from these seat, such as blankets, cushions, seat covers, seat heaters, seat massagers, laptops, or other electronic devices.
- Placetheseatbackinthefully uprightposition.
- Havethepersonsituprightin theseat, centeredontheseat cushion, with legscomfortably extended.
- Restartthevehicleandhave the personremaininthispositionfor twotothreeminutesaftertheon indicatorislit.
AdditionalFactorsAffecting SystemOperation
Safetybeltshelpkeepthe passengerinpositionontheseat duringvehiclemaneuversand braking,whichhelpsthepassenger sensingsystemmaintainthe passengerairbagstatus.See "SafetyBelts" and "ChildRestraints"
inthelndexforadditional informationabouttheimportanceof properrestraintuse.
Athicklayerofadditionalmaterial, suchasablanketorcushion, oraftermarketequipmentsuchas seatcovers,seatheaters,andseat massagerscanaffecthowwellthe passengersensingsystem operates.Werecommendthatyou notuseseatcoversorother aftermarketequipmentexceptwhen approvedbyGMforyourspecific vehicle.SeeAddingEquipmentto theAirbag-EquippedVehicleon page3-33formoreinformation aboutmodificationsthatcanaffect howthesystemoperates.
Awetseatcanaffectthe performanceofthepassenger sensingsystem.Hereishow:
- Thepassengersensingsystem mayturnoffthepassenger airbagwhenliquidissoakedinto theseat.Ifthishappens,theoff
indicatorwillbelit, and the airbagreadinesslightonthe instrumentpanelwillalsobelit.
- Liquidpooledontheseatthat hasnotsoakedinmaymakeit morelikelythatthepassenger sensingsystemwillturnonthe passengerairbagwhileachild restraintorchildoccupantison theseat.Ifthepassengerairbag isturnedon,theonindicatorwill belit.
If the passenger seat gets wet, dry these at immediately. If the airbag readiness light is lit, donot install a child restraint or allow any oneto occupy these at. See Airbag Readiness Light on page 5-14 for important safety information.
Theonindicatormaybelitifan object,suchasabriefcase, handbag,grocerybag,laptopor otherelectronicdevice,isputonan unoccupiedseat.Ifthisisnot desiredremovetheobjectfrom theseat.
WARNING
Stowingofarticlesunderthe passengerseatorbetweenthe passengerseatcushionand seatbackmayinterferewiththe properoperationofthepassenger sensingsystem.
Servicingthe Airbag-EquippedVehicle
Airbagsaffecthowthevehicle shouldbeserviced.Thereareparts oftheairbagsysteminseveral placesaroundthevehicle.Your dealerandtheservicemanualhave informationaboutservicingthe vehicleandtheairbagsystem.To purchaseaservicemanual,see ServicePublicationsOrdering Informationonpage13-16.
WARNING
Forupto10secondsafterthe vehicleisturnedoffandthe batteryisdisconnected,anairbag canstillinflateduringimproper service.Youcanbeinjuredifyou areclosetoanairbagwhenit inflates.Avoidyellowconnectors. Theyareprobablypartofthe airbagsystem.Besuretofollow properserviceprocedures,and makesurethepersonperforming workforyouisqualifiedtodoso.
AddingEquipmenttothe Airbag-EquippedVehicle
Addingaccessoriesthatchangethe vehicle'sframe,bumpersystem, height,frontend,orsidesheet metalmaykeeptheairbagsystem fromworkingproperly.
Theoperationoftheairbagsystem canalsobeaffectedbychanging anypartsofthefrontseats,safety belts,airbagsensinganddiagnostic module,steeringwheel,instrument panel,roof-railairbagmodules, ceilingorpillargarnishtrim, overheadconsole,frontsensors, sideimpactsensors,airbagwiring, orfrontcenterconsole.
Yourdealerandtheservicemanual haveinformationaboutthelocation oftheairbagsensors,sensingand diagnosticmodule,andairbag wiring.
Inaddition,thevehiclehasa passengersensingsystemthat includessensorsaspartofthefront outboardpassengerseat.The passengersensingsystemmaynot operateproperlyiftheoriginalseat trimisreplacedwithnon-GM covers,upholstery,ortrim,or;with GMcovers,upholstery,ortrim designedforadifferentvehicle.Any object,suchasanaftermarketseat heateroracomfort-enhancingpad ordevice,installedunderorontop
oftheseatfabric,couldalso interferewiththeoperationofthe passengersensingsystem.This couldeitherpreventproper deploymentofthepassenger airbag(s)orpreventthepassenger sensingsystemfromproperly turningoffthepassengerairbag(s). SeePassengerSensingSystemon page3-29.
If the vehicle has rolloverroof-rail airbags, see Different Size Tires and Wheelson page 10-51 for additional information.
If your vehicle need to be modified because you have adisability and you have questions about whether them modifications will affect the vehicle's air bags system, or if you have questions about whether the air bags system will be affected if the vehicle is modified for any other reason, call Customer Assistance. See Customer Assistance Offices (U.S. and Canada) on page 13-5 or Customer Assistance Offices (Mexico) on page 13-5.
AirbagSystemCheck
Theairbagsystemdoesnotneed regularly scheduled maintenance or replacement. Makesuretheairbag readinesslightisworking. See AirbagReadinessLighton page5-14.
Notice:Ifanairbagcoveringis damaged,opened,orbroken,the airbagmaynotworkproperly.Do notopenorbreaktheairbag coverings.Ifthereareany openedorbrokenairbagcovers, havetheairbagcoveringand/or airbagmodulereplaced.Forthe locationoftheairbags,see WhereAretheAirbags?on page3-24.Seeyourdealerfor service.
ReplacingAirbagSystem PartsafteraCrash

WARNING
Acrashcandamagetheairbag systemsinthevehicle. Adamagedairbagsystemmay notworkproperlyandmaynot protectyouandyour passenger(s)inacrash,resulting inseriousinjuryorevendeath.To helpmakesuretheairbag systemsareworkingproperly afteracrash,havethem inspectedandanynecessary replacementsmadeassoonas possible.
Ifanairbaginflates, you will need to replace airbagsystemparts. See your dealerforservice.
If the airbag readiness light stay on after the vehicle is started or comes on when you are driving, the airbag system may not work properly. Have the vehicles serviced right away. See Airbag Readiness Lighton page 5-14.
ChildRestraints OlderChildren
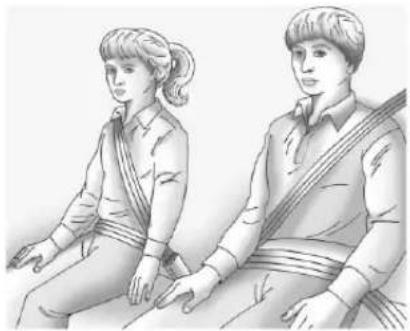
natural_image
Illustration of two people seated, one wearing a patterned garment and the other in casual wear (no text or symbols)Olderchildrenwhohaveoutgrown boosterseatsshouldwearthe vehiclesafetybelts.
3-36SeatsandRestraints
Themanufacturerinstructionsthat comewiththeboosterseatstatethe weightandheightlimitationsforthat booster.Useaboosterseatwitha lap-shoulderbeltuntilthechild passesthefittestbelow:
- Sitallthewaybackontheseat. Dothekneesbendattheseat edge?Ifyes,continue.Ifno, returntotheboosterseat.
- Bucklethelap-shoulderbelt. Doestheshoulderbeltreston theshoulder?Ifyes,continue. Ifno,tryusingtherearsafety beltcomfortguide.See“Rear SafetyBeltComfortGuides” underLap-ShoulderBelton page3-15.Iftheshoulderbelt stilldoesnotrestonthe shoulder,thenreturntothe boosterseat.
- Doesthelapbeltfitlowand snugonthehips,touchingthe thighs?Ifyes,continue.Ifno, returntotheboosterseat.
- Canpropersafetybeltfitbe maintainedforthelengthofthe trip?Ifyes,continue.Ifno, returntotheboosterseat.
Q: Whatistheproperway to wearsafetybelts?
A: Anolderchildshouldweara lap-shoulderbeltandgetthe additionalrestraintashoulder beltcanprovide. Theshoulder beltshouldnotcrossthefaceor neck. Thelapbeltshouldfit snuglybelowthehips, just touchingthetopofthethighs. Thisappliesbeltforcetothe child'spelvicbonesinacrash. Itshouldneverbewornoverthe abdomen, whichcouldcause severeorevenfatalinternal injuriesinacrash.
Alsosee"RearSafetyBeltComfort Guides"underLap-ShoulderBelton page3-15.
According to accident statistics, children and infants are safer when properly restrained in a child restraintsystemor infant restraint system secured in a rearseating position.
Inacrash, children who are not buckled up can strike other people who are buckled up, or can be thrown out of the vehicle. Older children need to use safety belts properly.

WARNING
Neverallowmorethanonechild towearthesamesafetybelt. The safetybelt cannot properly spread the impact forces. Inacrash, they can be crushed together and seriously injured. As safety belt must be used by only one person at time.
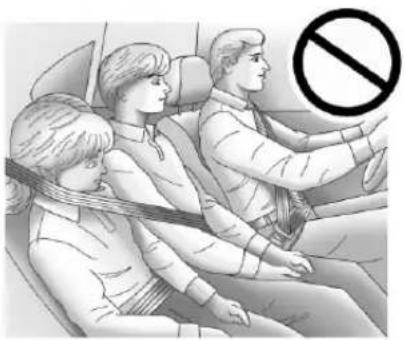
natural_image
Illustration of three people seated in a car, one wearing a seatbelt, with a no-smoking symbol overlay (no text or symbols present)
WARNING
Neverallowachildtowearthe safetybeltwiththeshoulderbelt behindtheirback.Achildcanbe seriouslyinjuredbynotwearing thelap-shoulderbeltproperly.Ina crash,thechildwouldnotbe restrainedbytheshoulderbelt.
(Continued)
WARNING(Continued)
Thechildcouldmovetoofar forwardincreasingthechanceof headandneckinjury. Thechild mightalsoslideunderthelap belt. Thebeltforcewouldthenbe appliedrightontheabdomen. Thatcouldcauseseriousorfatal injuries. Theshoulderbeltshould goovertheshoulderandacross thechest.
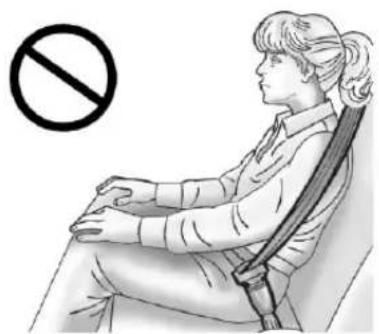
natural_image
Illustration of a person sitting in a chair with a no-smoking symbol (no text or labels present)InfantsandYoung Children
Everyoneinavehicleneeds protection! This includes infants and all other children. Neither the distancetraveled nor the age and sizeof the traveler changesthe need, foreveryone, touses safety restraints. Infact, the lawine every state in the United States and in every Canadian provinces says childrenuptosomeagemustbe restrained while in a vehicle.

WARNING
Childrencanbeseriouslyinjured orstrangledifashoulderbeltis wrappedaroundtheirneckand thesafetybeltcontinuesto tighten.Neverleavechildren unattendedinvehicleandnever allowchildrentoplaywiththe safetybelts.
3-38SeatsandRestraints
Everytimeinfantsandyoung childrenrideinvehicles,theyshould havetheprotectionprovidedby appropriatechildrestraints.Neither thevehicle'ssafetybeltsystemnor itsairbagsystemisdesigned forthem.
Childrenwhoarenotrestrained properlycanstrikeotherpeople, orcanbethrownoutofthevehicle.
WARNING
Neverholdaninfantorachild whileridinginavehicle.Dueto crashforces,aninfantorachild willbecomesoheavyitisnot possibletoholditduringacrash. Forexample,inacrashatonly 40km/h(25mph),a5.5kg(12lb) infantwillsuddenlybecomea 110kg(240lb)forceonaperson's arms.Aninfantshouldbe securedinanappropriate restraint.
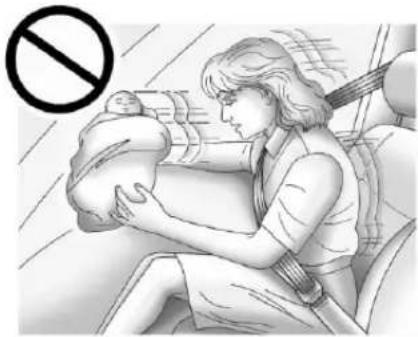
natural_image
Illustration of a woman breastfeeding a baby in a car seat, with a no-smoking symbol overlay (no text or symbols on the diagram itself){ WARNING
Childrenwhoareupagainst, orverycloseto,anyairbagwhen itinflatescanbeseriouslyinjured orkilled.Neverputarear-facing childrestraintintherightfront seat.Securearear-facingchild restraintinarearseat.
Itisalsobettertosecurea forward-facingchildrestraintina rearseat. Ifaforward-facingchild restraintmustbesecuredinthe
(Continued)
WARNING(Continued)
rightfrontseat,alwaysmovethe frontpassengerseatasfarback asitwillgo.
Ifachildrestraintisinstalledin thesecondrowcenterseat,move thesecondrowseattothe rearwardposition,whenever possible,tominimizecontactwith thefrontcenterairbag.
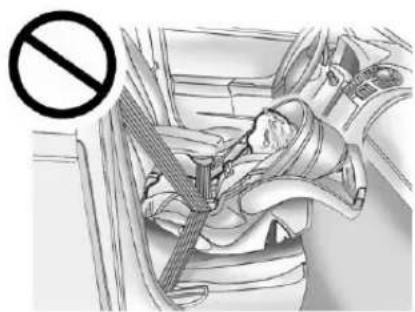
natural_image
Interior view of a car showing a person seated in a seatbelt, with a no-smoking symbol overlaid (no text or labels present)Q: Whatarethedifferenttypes of add-onchildrestraints?
A: Add-onchildrestraints, which are purchased by the vehicle owner, are available in four basic types. Selection of particular restraint should take into consideration not only the child's weight, height, and age but also whether or not therestraint will be compatible with the motor vehicle in which it will be used. Formost basic types of child restraints, there are many different models available. When purchasing a child restraint, be sureitis designed to be used in amotor vehicle. If it is, the restraint will have all labels saying that it meets federal motor vehicles safety standards.
Therestraintmanufacturer instructionsthatcomewiththe restraintstatetheweightand heightlimitationsforaparticular childrestraint. Inaddition, there aremanykindsofrestraints availableforchildrenwith specialneeds.
WARNING
Toreducetheriskofneck and headinjury during acrash, infants need completes support. In a crash, if an infant's in a rear-facing child restraint, the crash forces can be distributed across the strongest part of an infant's body, the back and shoulders. Infant should always be secured in rear-facing child restraints.
WARNING
Ayoungchild'shipbonesarestill sosmallthatthevehicle'sregular safetybeltmaynotremainlowon thehipbones,asitshould. Instead,itmaysettleuparound thechild'sabdomen.Inacrash, thebeltwouldapplyforceona bodyareathatisunprotected by anybonystructure.Thisalone couldcauseseriousorfatal injuries.Toreducetheriskof seriousorfatalinjuriesduringa crash,youngchildrenshould alwaysbesecuredinappropriate childrestraints.
3-40SeatsandRestraints
ChildRestraintSystems
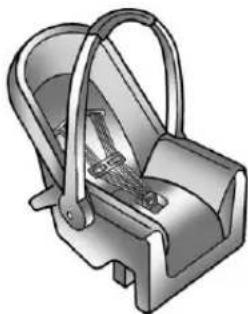
natural_image
3D illustration of a mechanical device with handle and internal components (no text or symbols)Rear-FacingInfantSeat
Arear-facinginfantseatprovides restraintwiththeseatingsurface againstthebackoftheinfant.
The harnesssystemholdstheinfant inplaceand,inacrash,actsto keeptheinfantpositionedinthe restraint.
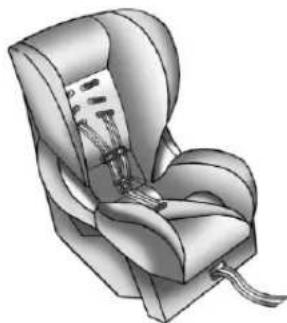
natural_image
Illustration of a car seat with straps and seatbelt (no text or symbols)Forward-FacingChildSeat
Aforward-facingchildseatprovides restraintforthechild'sbodywiththe harness.
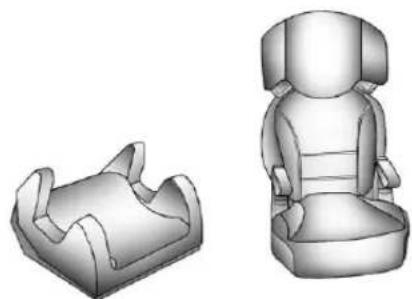
natural_image
Two 3D-rendered car seat models shown in grayscale, no text or symbols presentBoosterSeats
Aboosterseatisachildrestraint designedtoimprovethefitofthe vehicle'ssafetybeltsystem. Aboosterseatcanalsohelpachild toseeoutthewindow.
SecuringanAdd-OnChild RestraintintheVehicle
WARNING
Achildcanbeseriouslyinjuredor killedinacrashifthechild restraintisnotproperlysecured in the vehicle. Secure the child restraint properly in the vehicle using the vehicles safety belt or LATCH system, following the instruction that camewith that child restraint and the instructions in this manual.
To help reduce the chance of injury, the child restraint must be secured in the vehicle. Child restraint systems must be secured in vehicle seats by lap belts or the lap belt portion of lap - shoulder belt, or by the LATCH system. See Lower Anchors and Tethers for Children (LATCH System) on page 3-43.
Childrencanbeendangeredina crashifthechildrestraintisnot properlysecuredinthevehicle.
Whensecuringanadd-onchild restraint, refertotheinstructions that comewiththerestraint which maybeontherestraintitselforina booklet, or both, and to this manual. The child restraint instructions are important, so if they are not available, obtain are replacement copy from the manufacturer.
Keepinmindthatanunsecured childrestraintcanmovearoundina collisionorsuddenstopandinjure peopleinthevehicle.Besureto properlysecureanychildrestraintin thevehicle—evenwhennochildis init.
Insomeareas, Certified Child Passenger Safety Technicians (CPSTs) are available to inspect and demonstrate how to correctly use and install child restraints. In the U.S., referto the National Highway Traffic Safety Administration (NHTSA) website to
locatethenearestchildsafetyseat inspectionstation.ForCPST availabilityinCanada,checkwith TransportCanadaortheProvincial MinistryofTransportationoffice.
SecuringtheChildwithinthe ChildRestraint
WARNING
Achildcanbeseriouslyinjuredor killedinacrashifthechildisnot properlysecuredinthechild restraint. Securethechild properlyfollowingtheinstructions thatcamewiththatchildrestraint.
WheretoPutthe Restraint
According to accident statistics, children and infants are safer when properly restrained in a child restraintsystemor infant restraint system secured in a rearseating position.
3-42SeatsandRestraints
Werecommendthatchildrenand childrestraintsbesecuredinarear seat,including:aninfantorachild ridinginarear-facingchildrestraint; achildridinginaforward-facing childseat;anolderchildridingina boosterseat;andchildren,whoare largeenough,usingsafetybelts.
The vehicle is equipped with a front center air bag in the in boards side of the river seat. Even with a front center air bag, a child restraint can be installed in any second row seating position.
Neverputarear-facingchildseatin thefront. Thisisbecausetheriskto therear-facingchildissogreatifthe airbagdeploys.
WARNING
Achildinarear-facingchild restraintcanbeseriouslyinjured orkillediftherightfront passengerairbaginflates. This is because the back of the rear-facing child restraint would be very closetotheinflating airbag. Achildinaforward-facing child restraint can beseriously injured or killed iftherightfront passengerairbaginflates and the passenger seat is in a forward position.
Evenifthepassengersensing systemhasturnedofftheright frontpassengerfrontalairbag,no systemisfail-safe.Noonecan guaranteeethatanairbagwillnot deployundersomeunusual circumstance,eventhoughitis turnedoff.Securerear-facing (Continued)
WARNING(Continued)
childrestraintsinarearseat, evenifthefrontpassengerfrontal airbagisoff.
Itisalsobettertosecurea forward-facingchildrestraintina rearseat.Ifaforward-facingchild restraintmustbesecuredinthe rightfrontseat,alwaysmovethe frontpassengerseatasfarback asitwillgo.
See Passenger Sensing System on page 3-29 for additional information.
Ifachildrestraintisinstalledina secondrowcenterseat,movethe secondrowseattotherearward position,wheneverpossible,to minimizecontactwiththefront centerairbag.
Whensecuringachildrestraintina rearseatingposition,studythe instructionsthatcamewiththechild restrainttomakesureitis compatiblewiththisvehicle.
Childrestraintsandboosterseats varyconsiderablyinsize, and some may fit uncertain seating positions better than others. Always make sure the child restraint is properly secured.
Dependingonwhereyouplacethe childrestraintandthesizeofthe childrestraint,youmaynotbeable toaccessadjacentsafetybelt assembliesorLATCHanchorsfor additionalpassengersorchild restraints.Adjacentseating positionsshouldnotbeusedifthe childrestraintpreventsaccesstoor interfereswiththeroutingofthe safetybelt.
Whereverachildrestraintis installed, besuretosecurethechild restraintproperly.
Keepinmindthatanunsecured childrestraintcanmovearoundina collisionorsuddenstopandinjure peopleinthevehicle.Besureto properlysecureanychildrestraintin thevehicle—evenwhennochildis init.
LowerAnchorsand TethersforChildren (LATCHSystem)
The LATCHsystem secures a child restraint during driving or in a crash. LATCH attachment on the child restraint are used to attach the child restraint to the anchors in the vehicle. This system is designed to make installation of a child restraint easier.
MakesurethataLATCH-compatible childrestraintisproperlyinstalled usingtheanchors,orusethe vehicle'ssafetybeltstosecurethe restraint,followingtheinstructions thatcamewiththatrestraint,and alsotheinstructionsinthismanual.
Wheninstallingachildrestraintwith atoptether,youmustalsouse eithertheloweranchorsorthe safetybeltstoproperlysecurethe childrestraint.Achildrestraintmust neverbeattachedusingonlythetop tetherandanchor.
InordertousetheLATCHsystemin yourvehicle,youneedachild restraintthathasLATCH attachments.Thechildrestraint manufacturerwillprovideyouwith instructionsonhowtousethechild restraintanditsattachments.The followingexplainshowtoattacha childrestraintwiththese attachmentsinyourvehicle.
Notallvehicleseatingpositionson childrestraintshaveloweranchors andattachmentsortoptether anchorsandattachments.
LowerAnchors
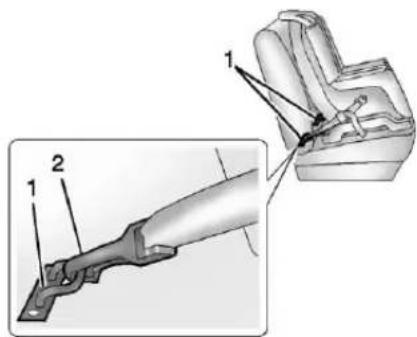
Loweranchors(1)aremetalbars builtintothevehicle.Therearetwo loweranchorsforeachLATCH seatingpositionthatwill accommodateachildrestraintwith lowerattachments(2).
TopTetherAnchor
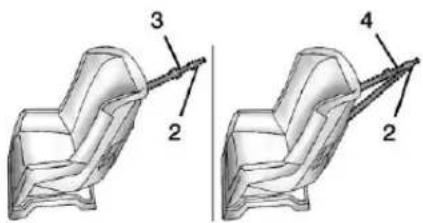
Atoptether(3,4)anchorsthetopof thechildrestrainttothevehicle. Atoptetheranchorisbuiltintothe vehicle. Thetoptether attachment(2)onthechildrestraint connectstothetoptetheranchorin thevehicleinordertoreducethe forwardmovementandrotationof thechildrestraintduringdrivingorin acrash.
Thechildrestraintmayhavea singletether(3)oradualtether(4). Eitherwillhaveasingle attachment(2)tosecurethetop tethertotheanchor.
Somechildrestraintswithtop tethersaredesignedforusewithor withoutthetoptetherbeing attached.Othersrequirethetop tetheralwaystobeattached.In Canada,thelawrequiresthat forward-facingchildrestraintshave atoptether,andthatthetetherbe attached.Besuretoreadandfollow theinstructionsforyourchild restraint.
LowerAnchorandTopTether AnchorLocations
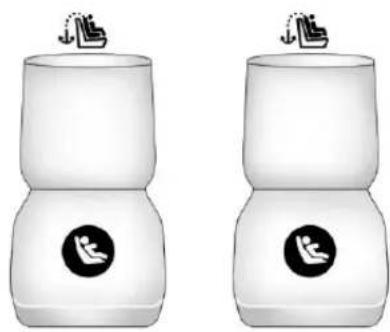
natural_image
Two identical white cylindrical objects with black circular logos, each with a small bird icon on top (no text or symbols)SecondRow—Bucket
(TopTetherAnchor): Seating positions with toptetheranchors.
(LowerAnchor): Seating positions with twoloweranchors.
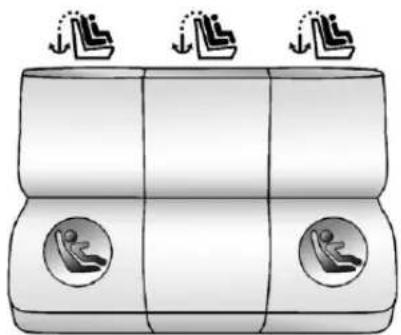
natural_image
Diagram of a car backrest with two sleeping figures and three standing figures on top (no text or symbols)SecondRow—60/40Bench
(TopTetherAnchor): Seating positions with toptetheranchors.
(LowerAnchor): Seating positions with two lower anchors.
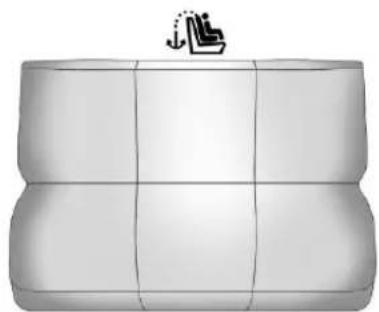
natural_image
3D rendered diagram of a rectangular object with internal grid lines and a small icon above (no text or symbols)ThirdRow
(TopTetherAnchor): Seating positions with toptetheranchors.

Toassistinlocatingthelower anchors, eachsecondrowanchor positionhasalabel, nearthecrease between theseatback and theseat cushion.
Toassistinlocatingthetoptether anchors, thetoptetheranchor symbolisneartheanchor.
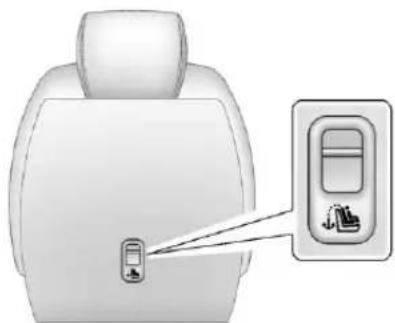
natural_image
Diagram of a car seat with a small device and a side panel showing a vehicle (no text or symbols present)SecondRow—BucketShown, BenchSimilar
Thetoptetheranchorsareatthe bottomrearoftheseatbackforeach seatingpositioninthesecondrow.
Besuretouseananchoronthe samesideofthevehicleasthe seatingpositionwherethechild restraintwillbeplaced.
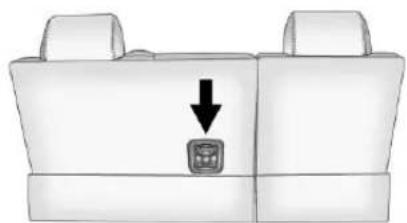
natural_image
Diagram of a car seatbelt with a directional arrow pointing to the lower side (no text or symbols present)ThirdRow
Thethirdrowhasonetoptether anchoratthebottomrearofthe centerseatback. Thisanchorshould beusedforthecenterseating positiononly.Neverinstalltwotop tethersusingthesametoptether anchor.
Donotsecureachildrestraintina positionwithoutatoptetheranchor ifanationalorlocallawrequires
thatthetoptetherbeattached,orif theinstructionsthatcomewiththe childrestraintsaythatthetoptether mustbeattached.
According to accident statistics, children and infants are safer when properly restrained in a child restraint system or infant restraint system secured in a rearseating position. See Where to Put the Restrainton page 3-41 for additional information.
SecuringaChildRestraint DesignedfortheLATCH System

WARNING
IfaLATCH-typechildrestraintis notattachedtoanchors, thechild restraintwillnotbeabletoprotect thechildcorrectly. Inacrash, the childcouldbeseriouslyinjuredor killed. InstallaLATCH-typechild restraintproperlyusingthe
(Continued)
WARNING(Continued)
anchors, orusethevehiclesafety beltstosecuretherestraint, followingtheinstructionsthat camewiththechildrestraintand theinstructionsinthismanual.

WARNING
Donotattachmorethanonechild restrainttoasingleanchor. Attachingmorethanonechild restrainttoasingleanchor could causetheanchororattachment tocomelooseorevenbreak duringacrash. Achildorothers could be injured. Toreducethe riskofseriousorfatalinjuries duringacrash, attachonlyone childrestraintperanchor.

WARNING
Childrencanbeseriouslyinjured orstrangledifashoulderbeltis wrappedaroundtheirneckand thesafetybeltcontinuesto tighten.Buckleanyunusedsafety beltsbehindthechildrestraintso childrencannotreachthem.Pull theshoulderbeltallthewayout oftheretractortosetthelock, ifthevehiclehasone,afterthe childrestrainthasbeeninstalled.
Notice: DonotlettheLATCH attachmentsrubagainstthe vehicle'ssafetybelts. This may damage these parts. If necessary, move buckledsafetybeltsto avoid rubbing the LATCH attachments.
Donotfoldtheemptyrearseat withasafetybeltbuckled. This coulddamagethesafetybeltor theseat. Unbuckleandreturnthe safetybelttoitsstowedposition, beforefoldingtheseat.
The vehicle is equipped with a front center air bag in the board side of the river seat. Even with a front center air bag, a child restraint can be installed in any second row seating position. If a child restraint is installed in second row center seat, mov these second row seat to there forward position, whenever possible, to minimize contact with the front center air bag.
If you need to secure more than one child restraint in there are seat, see Where to Put the Restrainton page 3-41.
This system is designed to make installation of child restraint easier. When using lower anchors, donot use the vehicle's safety belts. Instead, use the vehicle's anchors and child restraint attachment to secure therestrants. Some restraints also use another vehicle anchort secure at optether.
- Attachandtightenthelower attachmentstothelower anchors. If thechildrestraint does nothavelower attachmentsorthedesired seatingpositiondoesnothave loweranchors, secure thechild restraint with thetoptether and thesafetybelts. Refertoyour childrestraint manufacturer instructions and theinstructions in this manual.
1.1. Find the lower anchors for the desired seating position.
1.2. To access the lower anchors in these second row, it may help to reclin the seat back.
Thirdrowseatbacksmust beuprightbeforeplacing thechildrestraint on theseat.
1.3. Put the child restraint on theseat.
1.4. Attachandtightenthelower attachmentsonthechild restrainttothelower anchors. Ifnecessary, adjust the angle of thesecondrow seatback to achieve at tight installation. Makesure the secondrow bench seatbacks are aligned at the same angle.
- If the child restraint manufacturer recommend that the toptether be attached, attach and tighten the toptethertothetoptether anchor, if the vehicle has one. Referto the child restraint instructions and the following steps:
2.1. Findthetoptetheranchor.
2.2. Route, attach, and tighten the toptether according to your child restraint instructions and the following instructions:
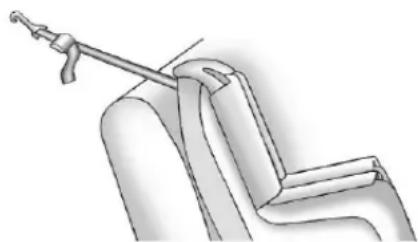
natural_image
Technical illustration of a mechanical clamp or bracket assembly (no text or symbols)If the position you are using does not have ahead rest or head restraint and you are using a single tether, routethetether over the seat back.
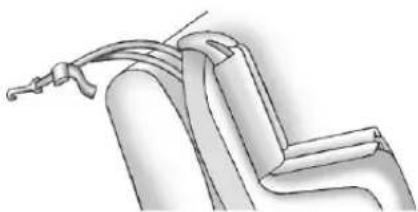
natural_image
Technical line drawing of a mechanical component or assembly (no text or symbols)If the position you are using does not have ahead rest or head restraint and you are using adult tether, routethetether over the seat back.
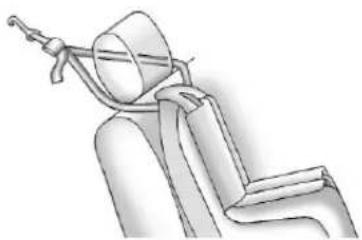
natural_image
Line drawing of a mechanical assembly with a cylindrical component and attached rod (no text or symbols)If the position you are using has a fixed head restor head restraint and you are using adultether, route the tether around the head restor head restraint.
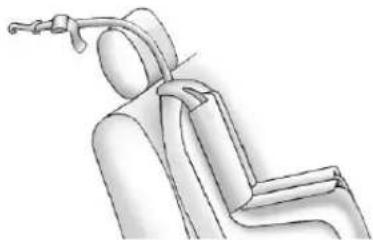
natural_image
Line drawing of a seated car seat with a handle and seatbelt (no text or symbols)If the position you are using has a fixed head restor head restraint and you are using a singletether, route the tether over the head rest or head restraint.
3. Beforeplacingachildinthe childrestraint,makesureitis securelyheldinplace.Tocheck, graspthechildrestraintatthe LATCHpathandattemptto moveitsidetosideandback andforth.Thereshouldbeno morethan2.5cm(1in)of movement,forproper installation.
ReplacingLATCHSystem PartsAfteraCrash

WARNING
AcrashcandamagetheLATCH systeminthevehicle. Adamaged LATCHsystemmaynotproperly securethechildrestraint, resultinginseriousinjuryoreven deathinacrash. To helpmake suretheLATCHsystemis workingproperlyafteracrash, seeyourdealertohavethe systeminspectedandany necessary replacementsmadeas soonaspossible.
If the vehicle has the LATCH system and it was being used during a crash, new LATCH system parts may be needed.
Newpartsandrepairsmaybe necessaryeveniftheLATCH systemwasnotbeingusedatthe timeofthecrash.
SecuringChildRestraints (RearSeat)
Thevehicleisequippedwithafront centerairbagintheinboardsideof thedriverseat.Evenwithafront centerairbag,achildrestraintcan beinstalledinanysecondrow seatingposition.Ifyouinstallachild restraintinasecondrowcenter seat,movethesecondrowseatto therearwardposition,whenever possible,tominimizecontactwith thefrontcenterairbag.
Whensecuringachildrestraintina rearseatingposition,studythe instructionsthatcamewiththechild restrainttomakesureitis compatiblewiththisvehicle.
If the child restraint has the LATCH system, see Lower Anchors and Tethers for Children (LATCH System) on page 3-43 for how and where to install the child restraint using LATCH. If a child restraint is secured in the vehicle using a safety belt and it uses to opt tether, see Lower Anchors and Tethers for
Children(LATCHSystem) on page3-43fortoptetheranchor locations.
Donotsecureachildseatina positionwithoutatoptetheranchor ifanationalorlocallawrequires thatthetoptetherbeanchored,orif theinstructionsthatcomewiththe childrestraintsaythatthetopstrap mustbeanchored.
InCanada, the law requires that forward-facing child restraint have adopted, and that the tether be attached.
If the child restraint does not have the LATCH system, you will be using the safety belt to secure the child restraint in this position. Be sure to follow the instruction that camewith the child restraint. Secure the child in the child restraint when and asthe instruction say.
If more than one child restraint need to be installed in therear seat, besuretoread Where to Put the Restrainton page 3-41.
- Putthechildrestraint on theseat.
- Pickup the latch plate, and run the lap and shoulder portions of the vehicle's safety belt through or around therestraint. The child restraint instructions will show you how.
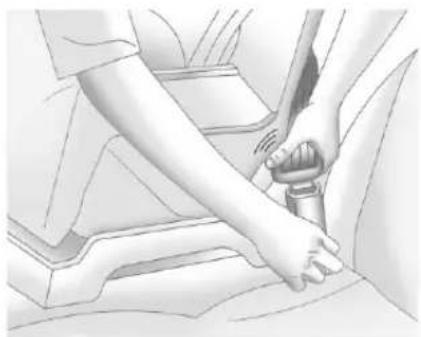
natural_image
Illustration of a person's arm and hand using a belt switch (no text or symbols)- Pushthelatchplate into the buckle until it clicks.
Positionthereleasebuttonon thebucklesothatthesafetybelt couldbequicklyunbuckledif necessary.
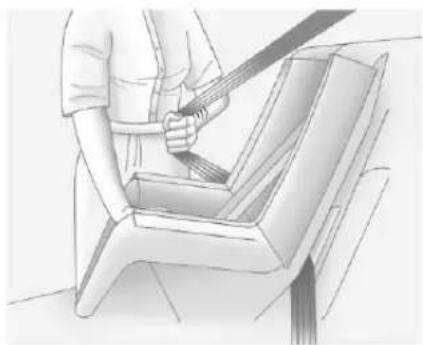
natural_image
Illustration of a person using a belt to lift a seatbelt (no text or symbols present)- Pull the shoulder belt all the way out of theretractor to set the lock. When theretractor lock is set, the shoulder belt can be tightened but not pulled out of theretractor.
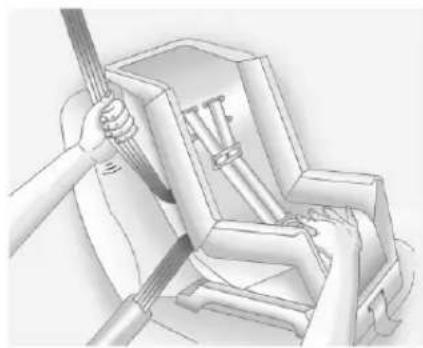
natural_image
Illustration of hands using a tool to interact with mechanical components (no text or symbols visible)- Totightenthebelt, pushdown onthechildrestraint, pullthe shoulderportionofthebelt to tightenthelapportionofthebelt, andfeedtheshoulderbeltback intotheretractor. Wheninstalling aforward-facingchildrestraint, it maybehelpfultouseyourknee topushdownonthechild restraintasyoutightenthebelt.
Trytopullthebeltoutofthe retractortomakesurethe retractorislocked.Ifthe retractorisnotlocked,repeat Steps4and5.
3-52SeatsandRestraints
- If the child restraint has a top tether, follow the child restraint manufacturer's instructions regarding the use of the top tether. See Lower Anchors and Tethers for Children (LATCH System) on page 3-43 form more information.
- Beforeplacingachildinthe childrestraint, makesureitis securelyheldinplace. To check, graspthechildrestraintatthe safetybeltpathandattemptto moveitsidetosideandback andforth. Whenthechild restraintisproperlyinstalled, thereshouldbenomorethan 2.5cm(1in)ofmovement.
Toremovethechildrestraint, unbucklethevehiclesafetybeltand letitreturntothestowedposition. Ifthetoptetherisattachedtoatop tetheranchor, disconnectit.
SecuringChildRestraints (FrontPassengerSeat)
Thevehiclehasairbags.Arearseat isasaferplacetosecurea forward-facingchildrestraint.See WheretoPuttheRestrainton page3-41.
Inaddition, the vehicle has a passengersensingsystem which is designed to turn off their right front passenger frontal air bag under certain conditions. See Passenger Sensing System on page 3-29 and Passenger Airbag Status Indicator on page 5-15 form more information, including important safety information.
Neverputarear-facingchildseatin thefront. Thisisbecausetheriskto therear-facingchildissogreat, iftheairbagdeploys.

WARNING
Achildinarear-facingchild restraintcanbeseriouslyinjured orkillediftherightfront passengerairbaginflates. This is because the back of the rear-facing child restraint would be very closetotheinflating airbag. Achildinaforward-facing child restraint can beseriously injured or killed iftherightfront passengerairbaginflates and the passenger seatisinaforward position.
Evenifthepassengersensing systemhasturnedofftheright frontpassengerfrontalairbag,no systemisfail-safe.Noonecan guaranteeethatanairbagwillnot deployundersomeunusual circumstance,eventoughitis turnedoff.
(Continued)
WARNING(Continued)
Securerear-facingchildrestraints inarearseat, eveniftheairbag isoff. Ifyousecurea forward-facingchildrestraintin therightfrontseat, alwaysmove thefrontpassengerseatasfar backasitwillgo. Itisbetterto securethechildrestraintina rearseat.
See Passenger Sensing System on page 3-29 for additional information.
If the child restraint that the LATCH system, see Lower Anchors and Tethers for Children (LATCH System) on page 3-43 for how and where to install the child restraint using LATCH. If a child restraint is secured using safety belt and uses to optether, see Lower Anchors and Tethers for Children (LATCH System) on page 3-43 for to optether anchor locations.
Donotsecureachildseatina positionwithoutatoptetheranchor ifanationalorlocallawrequires thatthetoptetherbeanchored,orif theinstructionsthatcomewiththe childrestraintsaythatthetopstrap mustbeanchored.
In Canada, the law requires that forward-facing child restraint have adopted, and that the tether be attached.
Youwillbeusingthelap-shoulder belttosecurethechildrestraintin thisposition.Followtheinstructions thatcamewiththechildrestraint.
-
Movetheseatasfarbackasit willgobeforesecuringthe forward-facingchildrestraint. Whenthepassengersensing systemhasturnedofftheright frontpassengerfrontalairbag, theoffindicatoronthe passengerairbagstatus indicatorshouldlightandstaylit whenthevehicleisstarted.See PassengerAirbagStatus Indicatoronpage5-15.
-
Put the child restraint on theseat.
-
Pickup the latch plate, and run the lap and shoulder portions of the vehicle's safety belt through or around therestraint. The child restraint instructions will show you how.
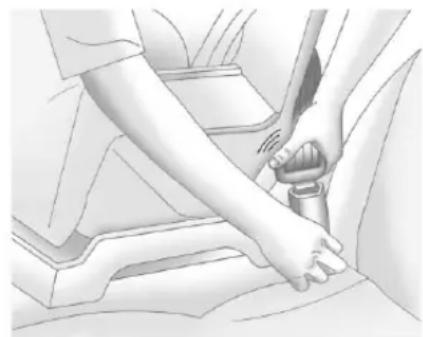
natural_image
Illustration of a hand adjusting a car seatbelt, showing the mechanism (no text or symbols present)- Pushthelatchplate into the buckle until it clicks.
Positionthereleasebuttonon thebucklesothatthesafetybelt couldbequicklyunbuckledif necessary.
3-54SeatsandRestraints
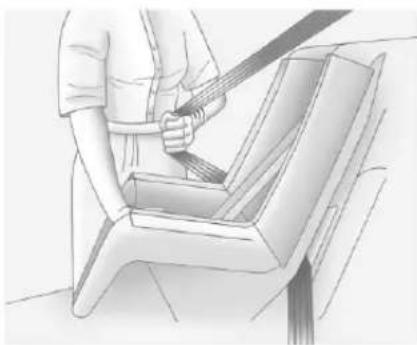
natural_image
Illustration of a person using a belt to lift a seatbelt (no text or symbols present)- Pulltheshoulderbeltalltheway outoftheretractortosetthe lock. Whentheretractorlockis set, thebeltcanbetightenedbut notpulledoutoftheretractor.
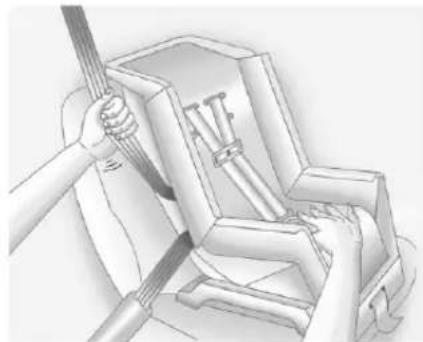
natural_image
Illustration of hands using a tool to adjust or install a mechanical component (no text or symbols visible)-
Totightenthebelt, pushdown onthechildrestraint, pullthe shoulderportionofthebelt to tightenthalapportionofthebelt, andfeedtheshoulderbeltback intotheretractor. Wheninstalling aforward-facingchildrestraint, it maybehelpfultouseyourknee topushdownonthechild restraintasyoutightenthebelt.
Trytopullthebeltoutofthe retractortomakesurethe retractorislocked.Ifthe retractorisnotlockedrepeat Steps5and6. -
Beforeplacingachildinthe childrestraint, makesureitis securelyheldinplace. To check, graspthechildrestraintatthe safetybeltpathandattemptto moveitsidetosideandback andforth. Whenthechild restraintisproperlyinstalled, thereshouldbenomorethan 2.5cm(1in)ofmovement.
If the air bags are off, the off indicator in the passenger air bag status indicator will come on and stay on when the vehicle is started.
Ifachildrestrainthasbeeninstalled andtheonindicatorislit,see"Ifthe OnIndicatorIsLitforaChild Restraint"underPassengerSensing Systemonpage3-29formore information.
Toremovethechildrestraint, unbucklethevehiclesafetybeltand letitreturntothestowedposition.
Storage
StorageCompartments
InstrumentPanelStorage.....4-1
GloveBox......4-1
Cupholders......4-1
ArmrestStorage......4-2
CenterConsoleStorage.....4-2
AdditionalStorageFeatures
CargoCover......4-3
CargoTie-Downs......4-3
CargoManagement
System......4-3
ConvenienceNet......4-4
RoofRackSystem
RoofRackSystem......4-4
Storage Compartments
InstrumentPanelStorage
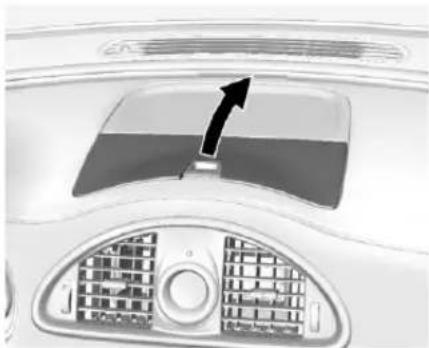
natural_image
Top-down view of a car air conditioner unit with a black arrow pointing to the grille (no text or symbols visible)This vehicle has an instrument panel storage area. To open, press the button on the cover.
The vehicle may have an auxiliary input jack on the upper right side of the face plate. For vehicles with a USB port, it is in the instrument panel storage. See Auxiliary Devices on page 7-17.
GloveBox
Liftthegloveboxhandletoopenit.
Usethekeytolockandunlockthe glovebox.
Cupholders
Therearetwocupholders, with removableliners, infrontofthe centerconsole. Theremaybe cupholdersinthesecondrowseat armrest. Toaccess, pullthearmrest down. Thereareadditional cupholdersoneachsideofthethird rowseatandineachdoor.
4-2Storage
ArmrestStorage
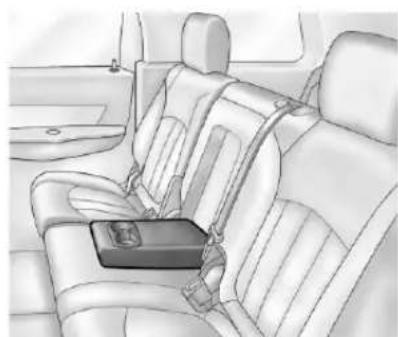
natural_image
Interior view of a car showing rear seats and seatbelt (no text or symbols visible)Vehicleswitharearseatarmrest havetwocupholders.Pullthe armrestdowntoaccessthe cupholders.
CenterConsoleStorage
natural_image
Line drawing of a car frontrest seat with no text or symbolsPulluponthelever,onthefrontof thecenterconsolearmrest,toslide itforwardandbackward.Toopen thearmreststoragearea,pressthe buttononthefrontofthearmrest.
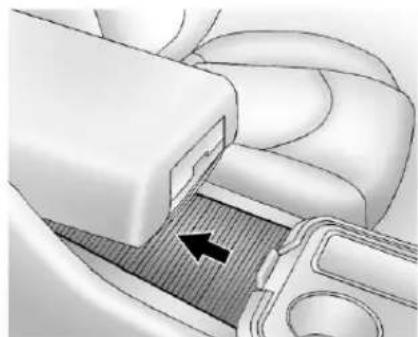
natural_image
Mechanical assembly diagram showing a car seatbelt with a black arrow indicating a specific component (no text or symbols present)Thereisadditionalstorageunder thearmrest.Movethearmrestall thewaytotherearposition,then slidethestoragecoverbackto access.
Thereisaremovabletrayinthe storagearea.Pulluponthetrayto removeandaccessthelower storageareaandpoweroutlet.See PowerOutletsonpage5-7.
AdditionalStorage Features
CargoCover
Forvehicleswithacargocover,it canbeusedtocoveritemsinthe rearofthevehicle.Toinstallthe cover,placetheloopsoneach cornerofthecoveronthefour hooksintherearofthevehicle.The covershouldbestoredsecurely whennotinuse.
CargoTie-Downs
Fourcargotie-downsarelocated in therearcompartmentofthevehicle. Thetie-downscanbeusedto securesmallloads.
CargoManagement System
This vehicle has a cargo managementsystemlocated in therear.
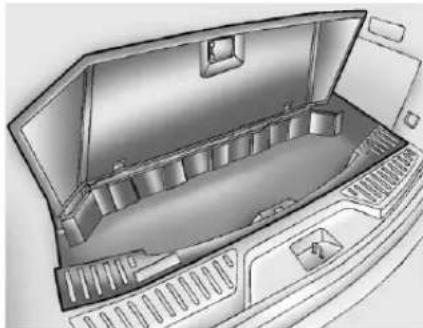
natural_image
Interior view of a vehicle cab with open trunk and side compartments (no text or symbols)Toremovethecargomanagement cover:
-
Openthecover.Itremainsopen whenlifted.
-
Pull the cover up makingsure to unhook the hinges at therear of the cover.
WARNING
Animproperlylatchedandclosed cargocover,orcargocoverleftin theopenposition,couldbe thrownaboutthevehicleduringa crashorsuddenmaneuver. Someonecouldbeinjured.Be suretoreturnthecovertothe closedpositionandlatchbefore driving.Ifthecoversremoved, alwaysstoreitoutsideofthe vehicle.Whenitisreplaced, alwaysbesurethatitissecurely reattached.
- Removethecoverfromthe vehicleandstoreoutsideofthe vehicle.
ConvenienceNet
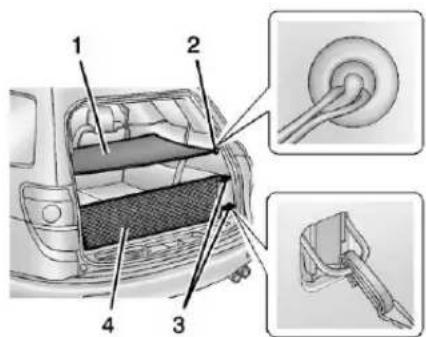
PowerLiftgateShown, Manual LiftgateSimilar
- CargoCover
2.CargoCoverHooks
3.CargoTie-Downs - ConvenienceNet
Forvehicleswithaconvenience net(4),attachittothevehicleusing onlythecargotie-downs(3)on eachside.Thenetisusedtostore smallloadsandshouldnotbeused heavyloads.
Thecargocoverhooks(2)areused toattachthecargocover(1)tothe vehicleonly.Donotusethehooks tosecureloadsorotheritemstothe vehicleorthehookscouldbe damaged.
RoofRackSystem

WARNING
If something is carried on top of the vehicle that is longer or wider than the or off track—like paneling, plywood, or amattress—the wind can catch it while the vehicle is being driven. The item being carried could be violently torn off, and this could cause a collision and damage the vehicle. Never carries something longer or wider than the or off track on top of the vehicle unless using a GM certified accessory carrier.
For vehicles with a roofrack, the rack can be used to load items. For roofrack sthat donothave crossrails included, GMC certified cross rail scan be purchased as an accessory. See your dealer for additional information.
Notice: Loading cargo on the roof rack that weigh more than 91 kg (200 lbs) or hang over the rearorsides of the vehicle may damage the vehicle. Load cargo so that it rest sevenly between the cross rails, makingsure to fast encargose securely.
Topreventdamageorlossofcargo whendriving,checktomakesure crossrailsandcargoaresecurely fastened. Loadingcargoontheroof rackwillmakethevehicle'scenter ofgravityhigher.Avoidhighspeeds, suddenstarts,sharpturns,sudden braking,orabruptmaneuvers; otherwiseitmayresultinlossof control.Ifdrivingforalongdistance, onroughroads,orathighspeeds, occasionallystopthevehicletomakesurethecargoremainsinits place.Donotexceedthemaximum vehiclecapacitywhenloadingthe vehicle.
See VehicleLoadLimitson page9-9.
4-6Storage
NOTES
Instruments and Controls
Controls
SteeringWheelAdjustment...5-2
SteeringWheelControls.....5-3
Horn....5-3
WindshieldWiper/Washer.....5-3
RearWindowWiper/
Washer....5-4
Compass....5-5
Clock....5-6
PowerOutlets......5-7
WarningLights, Gauges, and Indicators
WarningLights, Gauges, and
Indicators......5-9
InstrumentCluster......5-10
Speedometer....5-11
Odometer....5-11
Tachometer....5-11
FuelGauge....5-11
EngineCoolantTemperature Gauge....5-12
VoltmeterGauge......5-13
SafetyBeltReminders.....5-13
AirbagReadinessLight.....5-14
PassengerAirbagStatus Indicator....5-15
ChargingSystemLight.....5-15
Malfunction IndicatorLamp......5-16
BrakeSystemWarning Light....5-18
AntilockBrakeSystem(ABS) WarningLight....5-19
Tow/HaulModeLight......5-19
StabiliTrak® IndicatorLight...5-19
EngineCoolantTemperature WarningLight....5-20
TirePressureLight......5-20
EngineOilPressureLight....5-21
SecurityLight......5-21
High-BeamOnLight......5-21
FrontFogLampLight......5-22
CruiseControlLight.....5-22
InformationDisplays
DriverInformation Center(DIC)......5-22
VehicleMessages
VehicleMessages......5-27
BatteryVoltageandCharging Messages....5-28
BrakeSystemMessages....5-28
CruiseControlMessages....5-28
DoorAjarMessages......5-28
EngineCoolingSystem Messages....5-29
EngineOilMessages......5-30
EnginePowerMessages....5-31
FuelSystemMessages.....5-31
KeyandLockMessages.....5-32
LampMessages......5-32
ObjectDetectionSystem Messages....5-32
RideControlSystem Messages......5-33
AirbagSystemMessages....5-34
SecurityMessages......5-34
ServiceVehicleMessages...5-34
TireMessages......5-35
TransmissionMessages.....5-35
VehicleReminder Messages......5-36
VehicleSpeedMessages....5-36
WasherFluidMessages.....5-37
5-2 InstrumentsandControls
VehiclePersonalization
VehiclePersonalization.....5-37
UniversalRemoteSystem
UniversalRemoteSystem...5-45
UniversalRemoteSystem
Programming......5-45
UniversalRemoteSystem
Operation......5-48
Controls
SteeringWheel Adjustment
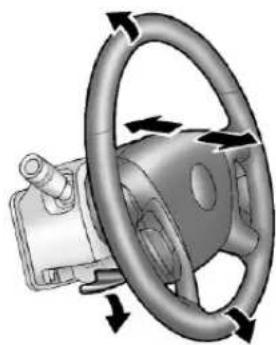
natural_image
Mechanical component diagram showing a steering wheel and gear assembly with directional arrows (no text or symbols)-
Pulltheleverdown.
-
Movethesteeringwheelup ordown.
-
Pullorpushthesteeringwheel closerorawayfromyou.
-
Push the lever up to lock the steering wheel in place.
PowerTiltWheel
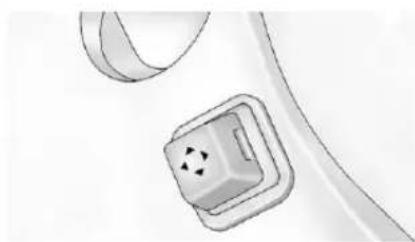
natural_image
Illustration of a wall socket with a screw and cable (no text or symbols)Forvehicleswiththepowertiltand telescopicwheel,thecontrolison theoutboardsideofthesteering column.
Pushthecontrolupordowntotilt thesteeringwheelupordown.
Pushthecontrolforwardor rearwardtomovethesteeringwheel towardthefrontorrearofthe vehicle. Tosetthememoryposition, see VehiclePersonalizationon page5-37.
Donotadjustthesteeringwheel whiledriving.
SteeringWheelControls
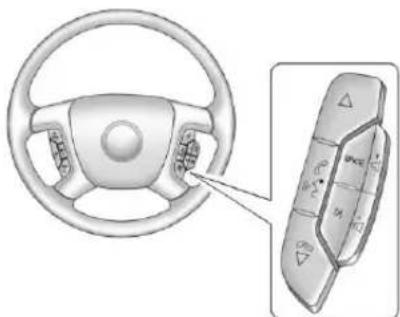
natural_image
Diagram of a car steering wheel and dashboard with control panel (no text or symbols)Vehicleswithaudiosteeringwheel controlscoulddifferdepending on thevehicle'soptions.Someaudio controlscanbeadjustedatthe steeringwheel.
△ or ▶ (Next/Previous): Presstoselectpresetorfavorite radiostations, selecttracksona CD, or selecttracksandnavigate foldersonaniPod ^® or USB device.
ToselecttracksonaniPodorUSB device:
- Press and hold △ or 📄 /▽ whilelisteningtoasonglistedin themainaudiopage,toquickly moveforwardorinreverse throughthetracks.
- Trackinformationisdisplayed onthescreen.Release △or ⚡/▽whenthedesiredtrack isreached.
^9 (Mute/Push to Talk): Press andholdtosilencethevehicle speakersonly. Pressagaintoturn thesoundon.
ForvehicleswithBluetooththrough theOnStar® system;pressto interact,thensay"OnStar."See Bluetoothpage7-28andOnStar Overviewpage14-1.
/▽ (End): Press to reject an incomingcall,orendacurrentcall.
SRCE(Source): Presstoswitch between theradio, CD, and for equipped vehicles, frontauxiliary, rearauxiliary, and Pod/USB.
D(Seek):Presstogotothenext radiostationwhileinAM,FM, orSiriusXM®.
Press Dtogotothenexttrackor chapterwhilesourcedtothe CDslot.
Press ⚠toselectatrackorafolder when navigatingfoldersonaniPod orUSBdevice.
+ or - (Volume): Press to increaseortodecreasethevolume.
Horn
Press ▶ onthesteeringwheelpad tosoundthehorn.
WindshieldWiper/Washer
Thewindshieldwiper/washerlever islocatedontheleftsideofthe steeringcolumn.
Turnthebandwiththewipersymbol tocontrolthewindshieldwipers.
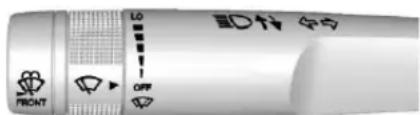
(Mist): Use forasinglewiping cycle.
OFF: Usetoturnthewipersoff.
(AdjustableIntervalWipes): Delayswipingcycle.Turntheband upformorefrequentwipesordown forlessfrequentwipes.
LO:Slowwipes.
HI:Fastwipes.
Cleariceandsnowfromthewiper bladesbeforeusingthem.Iffrozen tothewindshield,carefullyloosenor thawthem.Damagedwiperblades shouldbereplaced.SeeWiper BladeReplacementonpage 10-24.
Heavysnoworicecanoverloadthe wipers.Acircuitbreakerstopsthem untilthemotorcools.
WindshieldWasher
FRONT(WasherFluid):Press thebuttonattheendofthelever,to spraywasherfluidonthe windshield. Thewipersclearthe windshielddandeitherstoporreturn tothepresetspeed. Theignitionkey mustbeinACC/ACCESSORYor ON/RUNforthistowork.See WasherFluidonpage 10-18.
WARNING
Infreezingweather, donotuse the washer until the windshield is warmed. Otherwise the fluid can form mice on the windshield, blocking your vision.
WASHERFLUIDLOWADDFLUID isdisplayedontheDriver InformationCenter(DIC)whenthe washerfluidislow.SeeWasher FluidMessagesonpage5-37.
RearWindowWiper/Washer
Therearwiperandrearwashbutton islocatedontheinstrumentpanel belowtheclimatecontrolsystem.
(RearWiper): Presstoturnthe rearwiperonandoff. Thewiper speedcannotbechanged.
(Wash): Presstospraywasher fluidontherearwindow. The windowwiperwillalsocomeon. Releasethebuttonwhenenough fluidhasbeensprayedonthe window. Therearwiperwillruna fewmorecyclesafteritisreleased. Iftherearwiperfunctionwas alreadyonpriortopressingthe washbutton, itstaysonuntilthe wiperbuttonispressedagain.
Therearwindowwasherusesthe samefluidthatisinthewindshield washerreservoir.See WasherFluid onpage 10-18.
Compass
Yourvehiclemayhaveaccompass intheDriverInformationCenter (DIC).SeeDriverInformation Center(DIC)onpage5-22formore informationabouttheDIC.
CompassZone
Thezoneissettozoneeightupon leavingthefactory. Yourdealerwill setthecorrectzoneforyour location.
Undercertaincircumstances, such as during along distance cross-country tripormoving to a new state or province, it will be necessary to compensate for compass variance by resetting the zonethrough the DIC if the zone is not set correctly.
Compassvarianceisthedifference betweentheearth'smagneticnorth andtruegeographicnorth.Ifthe compassisnotsettothezone whereyoulive,thecompassmay givefalsereadings.Thecompass mustbesettothevariancezonein whichthevehicleistraveling.
Toadjustforcompassvariance, use the following procedure:
CompassVariance(Zone) Procedure
- Donotsetthecompasszone whenthevehicleismoving. Only setitwhenthevehicleisin P(Park).
Pressthevehicleinformation buttonuntilPRESS √TO CHANGECOMPASSZONE displays.
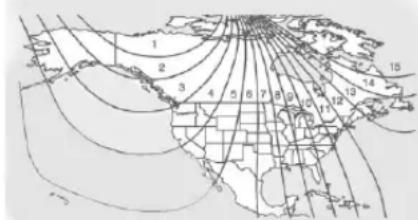
- Find the vehicle's current location and variance zone number on themap. Zones 1 through 15 are available.
- Presstheset/resetbutton to scrollthroughandselectthe appropriatevariancezone.
-
Pressthetrip/fuelbuttonuntil thevehicleheading, for example, NforNorth, is displayed in the DIC.
-
If calibration is necessary, calibratethecompass. See "Compass Calibration Procedure" following.
CompassCalibration
The compasscanbemanually calibrated. Only calibratethe compassinamagnetically clean and safelocation, such as an open parking lot, wheredriving the vehicle in circles is not adanger. It suggests to calibrate away from all buildings, utility wires, manhole covers, or other industrial structures, if possible.
IfCALshouldeverappearinthe DICdisplay, thecompassshouldbe calibrated.
If the DIC display does not show a heading, forexample, N for North, or the heading does not change after making turns, therem maybe a strong magnetic field interfering with the compass. Such interference may be caused by amagnetic CB or cellphone antennamount, a magnetic emergency light, magnetic notepadholder, oranyother magneticitem. Turnoffthevehicle, movethemagneticitem, thenturn onthevehicle and calibratethe compass.
Tocalibratethecompass, usethe following procedure:
CompassCalibrationProcedure
- Before calibrating the compass, makes sure the compass zone is set to the variance zone in which the vehicle is located. See "Compass Variance (Zone) Procedure" earlier in this section.
Donotoperateanyswitches suchaswindow,sunroof, climatecontrols,seats,etc. duringthecalibrationprocedure.
-
Pressthevehicleinformation buttonuntilIPRESS √TO CALIBRATECOMPASS displays.
-
Presstheset/resetbutton to start the compass calibration.
-
The DIC will display CALIBRATING: DRIVEIN CIRCLES. Drivethe vehicle in tight circles at less than 8 km/h (5 mph) to complete the calibration. The DIC will display CALIBRATION COMPLETE for a few seconds when the calibration is complete. The DIC display will then return to the previous menu.
Clock
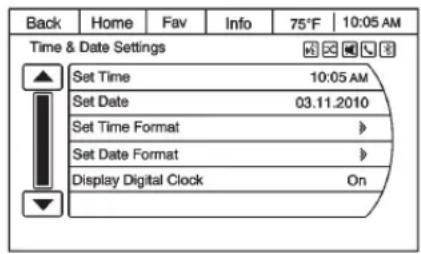
PressSettingstheHomePage, thenpresstheSetTimeorSetDate settingsscreenbuttontodisplaythe differentoptionsforsettingthetime anddate.
SetTime:
- Presstheupordownarrowsto increaseordecreaseteHours, Minutes, AM, PM, or 24hron theclock.
- Pressandholdtoquickly increaseordecreasethetime settings.
- PressOKortheBackscreen buttontosavetheadjustments.
SetDate:
- Presstheupordownarrowsto increaseordecreasetheMonth, Day,andYearsettings.
- Pressandholdtoquickly increaseordecreasethedate settings.
- PressOKortheBackscreen buttonosavetheadjustments.
PowerOutlets
The vehicle has 12-voltoutlet that can be used to plug in electrical equipment, such as a cell phone or MP3 player.
The power outlets are on the center stack below the climate controls, inside the center floor console, at therear of the center console, and in therearc cargo area. Lift the cover to access the outlet and replace when not in use.

WARNING
Powerisalwayssuppliedtothe outlets. Donotleaveelectrical equipmentpluggedinwhenthe vehicleisnotinusebecausethe vehiclecouldcatchfireandcause injuryordeath.
Notice:Leavingelectrical equipmentpluggedinforan extendedperiodoftimewhilethe vehicleisoffwilldrainthe battery.Alwaysunplugelectrical equipmentwhennotinuseand donotpluginequipmentthat exceedsthemaximum20ampere rating.
Certainaccessoryplugsmaynotbe compatiblewiththeaccessory poweroutlandcouldoverload vehicleandadapterfuses.lfa problemisexperienced,seeyour dealer.
When adding electrical equipment, besuretofollow the proper installation instructions included with the equipment. See Add-On Electrical Equipment on page 9-49.
Notice: Hangingheavy equipment from the power outlet can caused damage not covered by the vehicle warranty. The power outlets are designed for accessory power plug only, such as cell phone charge cords.
PowerOutlet120Volt AlternatingCurrent
The vehicle may have a power outlet that can be used to plugin electric equipment that uses a maximum limit of 150 watts.
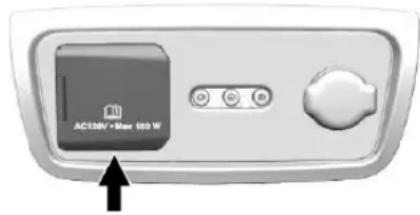
Thepoweroutletisontherearof thecenterconsole.
Anindicatorlightontheoutletturns ontoshowitisinuse. Thelight comesonwhentheignitionisin ON/RUNandequipmentrequiring lessthan150wattsispluggedinto theoutlet, andnosystemfaultis detected.
The indicator light does not come on when the ignition is in LOCK/OFF for if the equipment is not fully seated into the outlet.
If equipment is connected using more than 150 watts or a system fault is detected, a protection circuit shut soff the powersupply and the indicator light turn soff. To reset the circuit, unplug the item and plug it back inorturn the Retained Accessory Power (RAP) off and then back on. See Retained Accessory Power (RAP) on page 9-18. The power restarts when equipment using 150 watts or less is plugged into the outlet and a system fault is not detected.
The power outlet is not designed for and may not work properly, if the following are plugged in:
• Equipmentwithhighinitialpeak wattagesuchas: compressor-drivenrefrigerators andelectricpowertools.
- Otherequipmentrequiringan extremelystablepowersupply suchas: microcomputer-controlled electricblankets,touchsensor lamps,etc.
See High Voltage Devices and Wiring on page 10-27.
WarningLights, Gauges,and Indicators
Warninglightsandgaugescan signalthatsomethingiswrong beforeitbecomesseriouslyenough tocauseanexpensiverepairor replacement.Payingattentiontothe warninglightsandgaugescould preventinjury.
Warninglightscomeonwhenthere couldbeaproblemwithvehicle function. Somewarninglightscome onbrieflywhentheengineisstarted toindicatetheyareworking.
Gaugescanindicatewhenthere couldbeaproblemwithvehicle function.Oftengaugesandwarning lightsworktogethertoindicatea problemwiththevehicle.
Whenoneofthewarninglights comesonandstaysonwhile driving,orwhenoneofthegauges showstheremaybeaproblem, checkthesectionthatexplainswhat todo.Followthismanual'sadvice. Waitingtodorepairscanbecostly andevendangerous.
InstrumentCluster
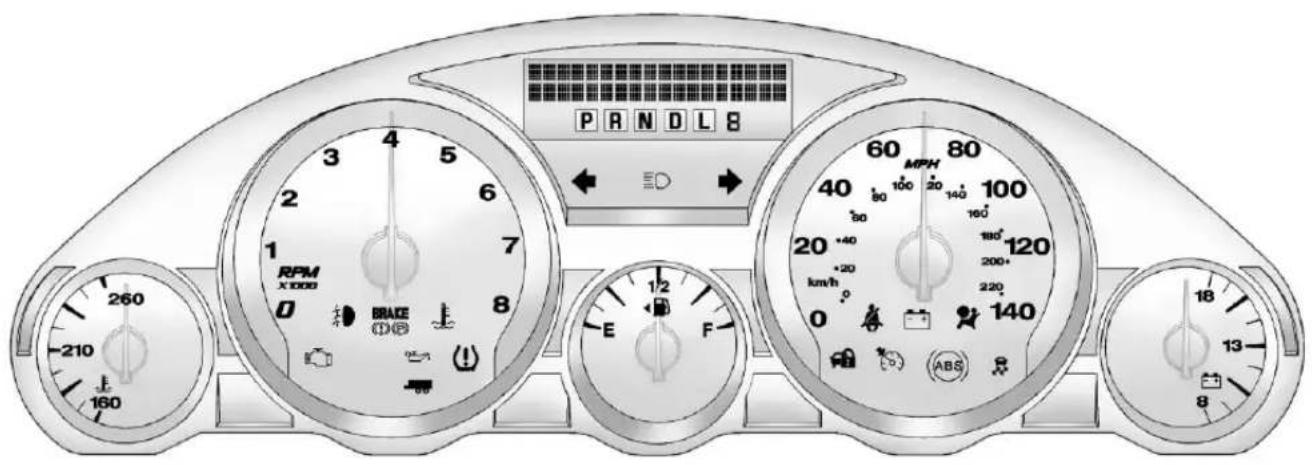
EnglishShown, MetricSimilar
Speedometer
Thespeedometershowsthe vehicle'sspeedineitherkilometers perhour(km/h)ormilesper hour(mph).
Odometer
Theodometershowshowfarthe vehiclehasbeendriven,ineither kilometersormiles.
This vehicle has atamper-resistant odometer. If the vehicleneedsa new odometer installed, thenew oneissettothemileage of the old odometer. If this is not possible, it is set at zero and a label is put on the driver doortoshow the old mileage reading.
Tachometer
Thetachometerdisplaystheengine speedinrevolutionsper minute(rpm).
FuelGauge
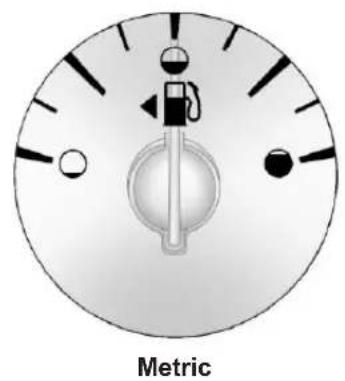
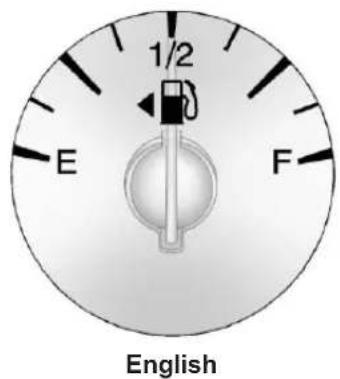
Whentheignitionison, thefuel gaugeshowsabouthowmuchfuel thevehiclehasleftinthefueltank.
Anarrowonthefuelgauge indicatesthesideofthevehiclethe fueldoorison.
Thegaugewillfirstindicateempty beforethevehicleisoutoffuel,but thevehicle'sfueltankshouldbe filledsoon.
Whenthefueltankislowonfuel, theFUELLEVELLOWmessage appearsontheDriverInformation Center(DIC).Formoreinformation seeFuelSystemMessageson page5-31.
Herearesomesituationsthatcan occurwiththefuelgauge.Noneof theseindicateaproblemwiththe fuelgauge.
- Atthegasstation, thefuelpump shutsoffbeforethegauge readsfull.
5-12 InstrumentsandControls
- Ittakesalittlemoreorlessfuel tofillupthanthefuelgauge indicated. Forexample, the gaugemayhaveindicatedthe tankwashalffull, butitactually tookalittlemoreorlessthan halfthetank'scapacitytofill thetank.
• Thegaugemovesalittlewhile turningacornerorspeedingup. - Thegaugegoesbacktoempty whentheignitionisturnedoff.
EngineCoolant
TemperatureGauge
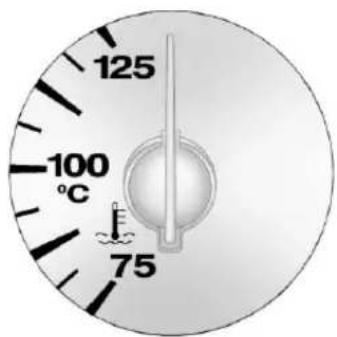
Metric
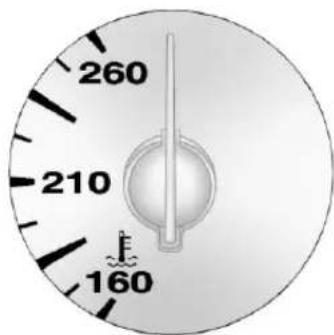
English
Thisgaugeshowstheengine coolanttemperature.Undernormal drivingconditionsthegaugewill read100°C(210°F)orless.Ifthe gaugepointerisnear125°C (260°F),theengineistoohot.
Itmeansthattheenginecoolanthas overheated. If the vehicle has been operating under normal driving conditions, pullofftheroad, stop the vehicle, and turn off the engine as soon as possible.
SeeEngineOverheatingon page10-16formoreinformation.
VoltmeterGauge
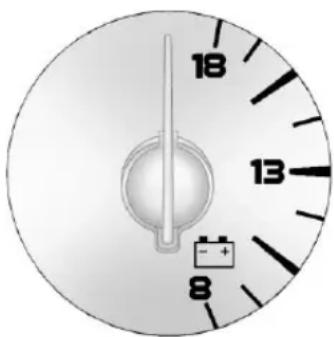
natural_image
Close-up of a circular dial with a central pointer and battery icon, no text or symbols present.Whentheengineisnotrunning, but theignitionison, thisgaugeshows thebattery'sstateofchargein DCvolts.
Whentheengineisrunning, this gaugeshowstheconditionofthe chargingsystem. Thevehicle's chargingsystemregulatesvoltage basedonthestateofchargeofthe battery. Thevoltmetermayfluctuate. Thisisnormal. Readingsbetween thelowandhighwarningzones indicatethenormaloperatingrange.
Readingsinthelowwarningzone mayoccurwhenalargenumberof electricalaccessoriesareoperating inthevehicleandtheengineisleft idlingforanextendedperiod.
If there is a problem with the battery charging system, a SERVICE BATTERY CHARGING SYSTEM message appears in the Driver Information Center (DIC) and/or the charging system light comes on. See Battery Voltage and Charging Messages on page 5-28 form more information.
However, readingsineitherwarning zonecanindicateapossible problemintheelectricalsystem. Havethevehicleservicedassoon aspossible.
SafetyBeltReminders
DriverSafetyBeltReminder Light
Thereisadriversafetybelt reminderlightontheinstrument cluster.
Whenthevehicleisstarted, this lightflashesandachimemaycome ontoremindthedrivertofasten theirsafetybelt. Thenthelightstays onsoliduntilthebeltisbuckled. Thiscyclemaycontinueseveral timesifthedriverremainsor becomesunbuckledwhilethe vehicleismoving.
If the drivers safety belt is buckled, neither the chimenorthelight comes on.
PassengerSafetyBelt ReminderLight
Thereisapassengersafetybelt reminderlightnearthepassenger airbagstatusindicator.See PassengerSensingSystemon page3-29.
Whenthevehicleisstarted, this lightflashesandachimemaycome ontoremindpassengerstofasten theirsafetybelt. Thenthelightstays onsoliduntilthebeltisbuckled. Thiscyclecontinuesseveraltimesif thepassengerremainsorbecomes unbuckledwhilethevehicleis moving.
Ifthepassengersafetybeltis buckled, neitherthechimenorthe lightcomeson.
Thefrontpassengersafetybelt warninglightandchimemayturnon ifanobjectisputontheseatsuch asabriefcase,handbag,grocery bag,laptop,orotherelectronic device. Toturnoffthewarninglight and/orchime,removetheobject fromtheseatorbucklethe safetybelt.
AirbagReadinessLight
Thislightshowsifthereisan electricalproblemwiththeairbag system. Thesystemcheckincludes theairbagsensor(s), passenger sensingsystem, thepretensioners, theairbagmodules, thewiring, and thecrashsensinganddiagnostic module. Formoreinformationonthe airbagsystem, seeAirbagSystem onpage3-22.

Theairbagreadinesslightcomeson forseveralsecndswhenthe vehicleisstarted.Ifthelightdoes notcomeonthen,haveitfixed immediately.
WARNING
If the airbagreadinesslightstays on after the vehicle is started or comes on while driving, it means the air bagsystem might not be working properly. The airbags in the vehicle might not inflate a crash, or they could even inflate without a crash. To help avoid injury, have the vehicles serviced right away.
If there is a problem with the airbag system, a Driver Information Center (DIC) message may also come on. See Airbag System Messages on page 5-34.
PassengerAirbagStatus Indicator
The vehicle has a passenger sensing system. See Passenger Sensing System on page 3-29 for important safety information. The instrument panel has a passenger airbag status indicator.
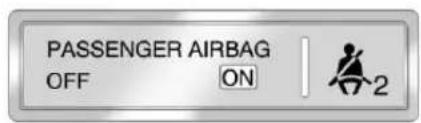
UnitedStates
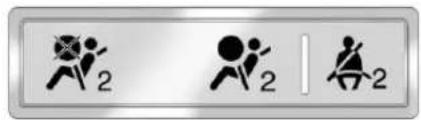
CanadaandMexico
Whenthevehicleisstarted,the passengerairbagstatusindicator willlightONandOFF,orthesymbol foronandoff,forseveralseconds
asasystemcheck.Ifyouuse remotestart,ifequipped,tostarthe vehicle,youmaynotseethesystem check.Then,afterseveralmore seconds,thestatusindicatorwill lighteitherONorOFF,oreitherthe onoroffsymboltoletyouknowthe statusofthefrontoutboard passengerfrontalairbag.
IfthewordONortheonsymbolis litonthepassengerairbagstatus indicator, itmeansthatthefront outboardpassengerfrontalairbagis allowedtoinflate.
IfthewordOFFortheoffsymbolis litonthepassengerairbagstatus indicator, itmeansthatthe passengersensingsystemhas turnedoffthefrontoutboard passengerfrontalairbag.
If,afterseveralseconds,bothstatus indicatorlightsremainon,orifthere arenolightsatall,theremaybea problemwiththelightsorthe passengersensingsystem.See yourdealerforservice.
WARNING
If the airbagreadiness light ever comes on and stay on, it means that something may be wrong with the air bags system. To help avoid injury to your self for others, have the vehicles serviced right away. See Airbag Readiness Lighton page 5-14 form more information, including important safety information.
ChargingSystemLight
Thechargingsystemlightcomeson brieflywhentheignitionisturned on,buttheengineisnotrunning,as
achecktoshowthelightisworking. It should go out when the engine is started.
Ifthelightstayson,orcomeson whiledriving,theremaybea problemwiththeelectricalcharging system.Haveitcheckedbyyour dealer.Drivingwhilethislightison coulddrainthebattery.
Whenthislightcomeson,theDriver InformationCenter(DIC)also displaytheSERVICEBATTERY CHARGINGSYSTEMmessage.
See VehicleMessages on page5-27 formoreinformation.
Ifashortdistancemustbedriven withthelighton,besuretoturnoff allaccessories,suchastheradio andairconditioner.
Malfunction IndicatorLamp
AcomputersystemcalledOBDII (On-BoardDiagnostics-Second Generation)monitortheoperation ofthevehicletoensureemissions
areatacceptablelevels,helpingto maintainacleanenvironment.The malfunctionindicatorlampcomes onwhenthevehicleisplacedin ON/RUN,asachecktoshowitis working.Ifitdoesnot,havethe vehicleservicedbyyourdealer.See IgnitionPositionsonpage9-14.
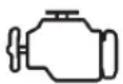
Ifthemalfunctionindicatorlamp comesonwhiletheengineis running, this indicates that the OBD II system has detected a problem and diagnosis and servicemight be required.
Malfunctionsoftenareindicated by thesystembeforeanyproblemis apparent. Beingawareofthelight canpreventmoreseriousdamage tothevehicle. Thissystemalso
assiststheservicetechnicianin correctlydiagnosingany malfunction.
Notice: If the vehicle is continually driven with this light on, the emission control might not work as well, the vehicle fuel economy might not be as good, and the engine might not run as smoothly. This could lead to costly repair that might not be covered by the vehicle warranty.
Notice: Modificationsmadetothe engine, transmission, exhaust, intake, orfuelsystemofthe vehicleorthereplacementofthe originaltireswithotherthan thoseofthesameTire PerformanceCriteria(TPC)can affectthevehicle'semission controlsandcancausethislight tocomeon.Modificationsto thesesystemscouldleadto costlyrepairsnotcoveredbythe vehiclewarranty.Thiscouldalso resultinafailuretopassa requiredEmissionInspection/
Maintenancetest.See AccessoriesandModificationson page10-3.
Thislightcomesonduringa malfunctioninoneoftwoways:
LightFlashing: Amisfirecondition has been detected. Amisfire increases vehicle emissions and could damage the emission control system on the vehicle. Diagnosis and servicemight berequired.
Topreventmoreseriousdamageto thevehicle:
- Reducevehiclespeed.
- Avoidhardaccelerations.
- Avoidsteepuphillgrades.
- Iftowingatrailer, reducethe amountofcargobeinghauledas soonasitispossible.
Ifthelightcontinuestoflash,finda safeplacetostopandparkthe vehicle.Turnthevehicleoff,waitat least10seconds,andrestartthe engine.Ifthelightisstillflashing,
followthepreviousstepsandsee yourdealerforserviceassoonas possible.
LightOnSteady: Anemission controlsystemmalfunctionhas beendetectedonthevehicle. Diagnosisandservicemightbe required.
The following maycorrectan emissioncontrolsystem malfunction:
- Check that the fuel cap is fully installed. See Filling the Tankon page 9-40. The diagnostic system can determine if the fuel cap has been left for improperly installed. A loose or missing fuel cap allows fuel to evaporate into the atmosphere. Afew driving trips with the cap properly installed should turn the light off.
- Checkthatgoodqualityfuelis used.Poorfuelqualitycauses theenginenottorunas efficientlyasdesignedandmay causestallingafterstart-up,
stallingwhenthevehicleis changedintogear,misfiring, hesitationonacceleration, orstumblingonacceleration. Theseconditionsmightgoaway oncetheengineiswarmedup.
Ifoneormoreoftheseconditions occurs, changethefuelbrandused. It may require at least one full tank of the proper fuel to turn the lightoff.
SeeRecommendedFuelon page9-38.
If none of the above havemad the light turn off, your dealer can check the vehicle. The dealer has the propertestequipment and diagnostictoolstofix any mechanicalorelectrical problems that might have developed.
EmissionsInspection and Maintenance Programs
Dependingonwhereyoulive,your vehiclemayberequired to participateinanemissioncontrol systeminspectionandmaintenance program.Fortheinspection,the
emissionsystemtestequipmentwill likelyconnecttothevehicle'sData LinkConnector(DLC).
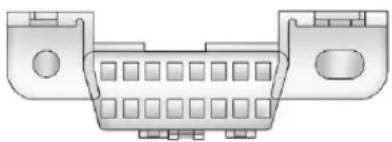
natural_image
Diagram of a connector pinout with no text or symbolsThe DLC is under the instrument panel to the left of the steering wheel. See your dealer if assistance is needed.
The vehicle may not pass inspection if:
- Themalfunctionindicatorlampis onwiththeengine running,orif thelightdoesnotcomeonwhen theignitionisturnedtoON/RUN whiletheengineisoff.Seeyour dealerforassistanceinverifying properoperationofthe malfunctionindicatorlamp.
• TheOBDII(On-Board Diagnostics)systemdetermines thatcriticalemissioncontrol
systemshavenotbeen completelydiagnosed. The vehiclewouldbeconsiderednot readyforinspection. Thiscan happenifthe12-voltbatteryhas recentlybeenreplacedorrun down. Thediagnosticsystemis designedtoevaluatecritical emissioncontrolsystemsduring normaldriving. Thiscantake severaldaysofroutinedriving. Ifthishasbeendoneandthe vehiclestilldoesnotpassthe inspectionforlackofOBDII systemreadiness,yourdealer canpreparethevehiclefor inspection.
BrakeSystemWarning Light
The vehicle brakes system consists of two hydraulic circuits. If one circuit is not working, there are remaining circuit can still work to stop the vehicle. Fornormal braking performance, both circuits need to be working.
If the warning light comes on, there is a brake problem. Havethe brake system inspected right away.


MetricEnglish
Thislightshouldcomeonbriefly whentheignitionkeyisturnedto ON/RUN. Ifitdoesnotcomeon then, haveitfixedsoitwillbeready towarnifthereisaproblem.
Thislightmayalsocomeondueto lowbrakefluid.SeeBrakeFluidon page 10-20.
Whentheignitionison,thebrake systemwarninglightwillalsocome onwhentheparkingbrakeisset. Thelightwillstayoniftheparking brakedoesnotreleasefully.Ifit staysonaftertheparkingbrakeis fullyreleased,itmeansthereisa brakeproblem.
Ifthelightcomesonwhiledriving, pullofftheroadandstopcarefully. Makesuretheparkingbrakeisfully released. Thepedalmaybeharder topushor, thepedalmaygocloser tothefloor. Itmaytakelongerto stop. Ifthelightisstillon, havethe vehicletowedforservice. See Towingthe Vehicleonpage 10-68.

WARNING
Thebrakesystemmightnotbe workingproperlyifthebrake systemwarninglightison. Drivingwiththebrakesystem warninglightoncanleadtoa crash.Ifthelightisstillonafter thevehiclehasbeenpulledoff theroadandcarefullystopped, havethevehicletowedfor service.
Thebrakemessageremainsonuntil anyDICbuttonispressed. The brakelightremainsonuntilthe problemisfixed.SeeBrakeSystem Messagesonpage5-28.
AntilockBrakeSystem (ABS)WarningLight

TheABSwarninglightcomeson brieflywhentheignitionkeyis turnedtoON/RUN.Thisisnormal. Ifthelightdoesnotcomeonthen, haveitfixedsoitwillbereadyto warnyouifthereisaproblem.
Ifthelightstayson,turntheignition toLOCK/OFF.Ifthelightcomeson whiledriving,stopassoonas possibleandturntheignitionoff. Thenstarttheengineagaintoreset thesystem.Ifthelightstillstayson, orcomesonagainwhiledriving,the vehicleneedsservice.Iftheregular brakesystemwarninglightisnot on,therearestillbrakes,butno antilockbrakes.Iftheregularbrake systemwarninglightisalsoon,
therearenoantilockbrakesand thereisaproblemwiththeregular brakes.SeeBrakeSystemWarning Lightonpage5-18.
Tow/HaulModeLight

ThislightcomesonwhentheTow/Haulmodehasbeenactivated.
Formoreinformation, see Tow/Haul Modeonpage9-24.
StabiliTrak® Indicator Light

Thislightcomesonbrieflywhile startingtheengine.Ifitdoesnot, havethevehicleservicedbyyour dealer.Ifthesystemisworking normally,theindicatorlightgoesoff.
Ifitstayson,orcomesonwhile driving,therecouldbeaproblem withtheStabiliTraksystemandthe vehiclemightneedservice.When thiswarninglightison,thesystem isoffandwillnotlimitwheelspin.
Thislightflasheswhenthe StabiliTraksystemisactive.
SeeStabiliTrak ^® Systemon page9-27formoreinformation.
EngineCoolant TemperatureWarning Light
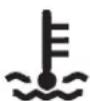
The engine coolant temperature warning light comes on briefly when the vehicle is started.
Ifitdoesnot,havethevehicle servicedbyyourdealer.Ifthe systemisworkingnormally,the indicatorlightthengoesoff.
Ifthelightcomesonandstayson whiledriving,thevehiclemayhave aproblemwiththecoolingsystem. Stopandturnoffthevehicleto avoiddamagetotheengine. A warningchimesoundswhenthis lightison.
SeeEngineOverheatingon page10-16formoreinformation.
TirePressureLight

ForvehicleswiththeTirePressure MonitorSystem(TPMS), thislight comesonbrieflywhentheengineis started. Itprovidesinformation abouttirepressuresandtheTPMS.
WhentheLightIsOnSteady
This indicates that one or more of the tires are significantly underinflated.
ADriverInformationCenter(DIC) tirepressuremessagemayalso display.See TireMessageson page5-35.Stopassoonas possible, andinflatethetirestothe pressurevalueshownontheTire andLoadingInformationlabel.See TirePressureonpage10-41.
WhentheLightFlashesFirstand ThenIsOnSteady
If the light flashes for about a minute and then stay on, ther may be a problem with the TPMS. If the problem is not corrected, the light will come on at every ignition cycle. See Tire Pressure Monitor Operation on page 10-44.
EngineOilPressureLight
Notice:Lackofproperengineoil maintenancecandamagethe engine.Drivingwiththeengine oilowcanalsodamagethe engine.Therepairswouldnotbe coveredbythevehiclewarranty. Checktheoillevelassoonas possible.Addoilifrequired,but iftheoilleveliswithinthe operatingrangeandtheoil pressureisstillow,havethe vehicleserviced.Alwaysfollow themaintenanceschedulefor changingengineoil.
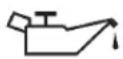
The oil pressure light should come on briefly asthe engine is started. If it does not come on, havethe vehicle serviced by your dealer.
Ifthelightcomesonandstayson, it meansthatoilisnotflowingthrough theengineproperly. Thevehicle couldbelowonoilandmighthave someothersystemproblem.See yourdealer.
SecurityLight

Thesecuritylightshouldcomeon brieflyastheengineisstarted.Ifthe systemisworkingnormally,the indicatorlightturnsoff.Ifitdoesnot comeon,havethevehicleserviced byyourdealer.
Ifthelightstaysonandtheengine doesnotstart,therecouldbea problemwiththetheft-deterrent system.
Thislightisalsousedtoindicatethe statusoftheanti-theftalarmsystem whentheignitionisturnedoff.The lightwillflashrapidlyifthealarm systemisarmingandoneormore ofthemonitoredentrypointsisnot closed. Thelightwillstayonifthe alarmisarmingandallentrypoints areclosed.
Forinformationregardingthislight andthevehicle'ssecuritysystem, see VehicleAlarmSystemon page2-11.
High-BeamOnLight

The high-beam on light comes on when the high-beam head lamps are in use.
SeeHeadlampHigh/Low-Beam Changeronpage6-2formore information.
FrontFogLampLight
Thefoglamplightcomesonwhen thefoglampsareinuse.
Thelightgoesoutwhenthefog lampsareturnedoff.SeeFog Lampsonpage6-4formore information.
CruiseControlLight
Thislightcomesonwheneverthe cruisecontrolisset.
Thelightgoesoutwhenthecruise controlisturnedoff.SeeCruise Controlonpage9-29formore information.
InformationDisplays
DriverInformation Center(DIC)
The DIC displays information about your vehicle. It also displays warning messages if a system problem is detected.
AllmessageswillappearintheDIC displaylocatedatthetopofthe instrumentcluster.
The DIC comes on when the ignition is on. After a short delay, the DIC will display the information that was last displayed before the engine was turned off.
The DICalsodisplaysashiftlever positionindicatoronthebottomline ofthedisplay.SeeAutomatic Transmissiononpage9-21formore information.
The outside air temperature and compass, if equipped, also display on the DIC when viewing the trip and fuel information. The outside air
temperatureautomaticallyappears inthetoprightcorneroftheDIC display.Ifthereisaproblemwith thesystemthatcontrolsthe temperaturedisplay,thenumbers willbereplacedwithdashes.Ifthis occurs,havethevehicleserviced. Thecompasswillbeshowninthe bottomrightcorneroftheDIC display.SeeCompassonpage5-5 formoreinformation.
The DIChasdifferentdisplays which can be accessed by pressing the DICbuttonslocated on the instrument panel.
The DIC also allow some features to be customized. See Vehicle Personalization on page 5-37 for more information.
DICButtons
Thebuttonsaretheset/reset, customization, vehicleinformation, andtrip/fuelbuttons. Thebutton functionsaredetailedinthe followingpages.
√(Set/Reset):Pressthisbutton to setorreset certain functions and to turnofforacknowledgemessages on the DIC.
E: (Customization): Pressthis buttontocustomizethefeature settingsyourvehicle. See VehiclePersonalization on page5-37formoreinformation.
i(VehicleInformation):Press thisbuttontodisplaytheoillife, parkassistonvehicleswiththis feature, units, tirepressurereadings onvehicleswiththisfeature, and compasscalibrationandzone settingonvehicleswiththisfeature.
( Trip/Fuel):Pressthisbutton todisplaytheodometer,trip odometers,fuelrange,average economy,timer,fuelused,and averagespeed.
Vehicle Information Menu Items
i(VehicleInformation):Press thisbuttontoscrollthroughthe followingmenuitems:
OILLIFE
Pressthevehicleinformationbutton untilOILLIFEREMAINING displays. Thisdisplayshowsan estimateoftheoil'sremaininguseful life. If you see 99% OILLIFE REMAINING on the display, that means 99% of the current to ill life remains. The engine oil lifespan will alert you to change the oil on a schedule consistent with your driving conditions.
Whentheremainingoillifeislow, theCHANGEENGINEOILSOON messagewillappearonthedisplay. See"CHANGEENGINEOILSOON" underEngineOilMessageson page5-30. Youshouldchangethe oilassoonasyoucan.SeeEngine Oilonpage10-7.Inadditiontothe engineoilifesystemmonitoringthe oillife,additionalmaintenanceis
recommendedintheMaintenance Scheduleinthismanual.See MaintenanceScheduleon page11-3formoreinformation.
Remember,youmustresettheOIL LIFEdisplayyourselfafterechoil change.Itwillnotresetitself.Also, be carefulnottoresettheOILLIFE displayaccidentallyatanytime otherthanwhentheoilhasjust beenchanged.Itcannotbereset accuratelyuntilthenextoilchange. Toresettheengineoillifesystem, seeEngineOilLifeSystemon page10-9.
SIDEBLINDZONEALERT
IfthevehiclehastheSideBlind ZoneAlert(SBZA)system,this displayallowsthesystemtobe turnedonoroff.Onceinthis display,presstheset/resetbutton to selectbetweenONorOFF.Ifyou chooseON,thesystemwill be turnedon.IfyouchooseOFF,the systemwillbeturnedoff.Whenthe SBZAsystemisturnedoff,theDIC willdisplaytheSIDEBLINDZONE
ALERTSYSTEMOFFmessageas areminderthatthesystemhas beenturnedoff.SeeObject DetectionSystemMessageson page5-32andSideBlindZoneAlert (SBZA)onpage9-32.
PARKASSIST
IfyourvehiclehastheUltrasonic RearParkingAssist(URPA)system, pressthevehicleinformationbutton untilPARKASSISTdisplays.This displayallowsthesystemtobe turnedonoroff.Onceinthis display,presstheset/resetbuttonto selectbetweenONorOFF.Ifyou chooseON,thesystemwillbe turnedon.IfyouchooseOFF,the systemwillbeturnedoff.TheURPA systemautomaticallyturnsbackon aftereachvehiclestart.Whenthe URPAsystemisturnedoffandthe vehicleisshiftedoutofP(Park),the DICwilldisplaythePARKASSIST OFFmessageasareminderthat thesystemhasbeenturnedoff.See ObjectDetectionSystemMessages onpage5-32andUltrasonic ParkingAssistonpage9-31.
REARCROSSTRAFFICALERT
IfthevehiclehastheRearCross TrafficAlert(RCTA)system,this displayallowsthesystemtobe turnedonoroff.Onceinthis display,presstheset/resetbutton to selectbetweenONorOFF.Ifyou chooseON,thesystemwill be turnedon.IfyouchooseOFF,the systemwillbeturnedoff.Whenthe RCTAsystemisturnedoff,theDIC willdisplaytheREARCROSS TRAFFICALERTSYSTEMOFF messageasareminderthatthe systemhasbeenturnedoff.See ObjectDetectionSystemMessages onpage5-32andRearVision Camera(RVC)onpage9-35.
UNITS
Pressthevehicleinformationbutton untilUNITSdisplays.Thisdisplay allowsyoutoselectbetweenmetric orEnglishunitsofmeasurement.Onceinthisdisplay,presstheset/resetbuttontoselectbetween METRICorENGLISHunits.Allof
thevehicleinformationwillthenbe displayedintheunitof measurementselected.
FRONTIRESorREARTIRES
OnvehicleswiththeTirePressure MonitorSystem(TPMS), the pressureforeachtirecanbeviewed intheDIC. Thetirepressurewill be shownineitherkilopascals(kPa)or poundspersquareinch(psi).Press thevehicleinformationbuttonuntil theDICdisplaysFRONT TIRESkPa(PSI)LEFT## RIGHT##.Pressthevehicle informationbuttonagainuntilthe DICdisplaysREARTIRESkPa (PSI)LEFT##RIGHT##.
Ifalowtirepressureconditionis detectedbythesystemwhile driving,amessageadvisingyou addairtoaspecificitirewillappear inthedisplay.SeeTirePressureon page 10-41and TireMessageson page5-35formoreinformation.
If the tire pressured display shows dashes instead of a value, there may be a problem with your vehicle. If this consistently occurs, see your dealer for service.
COMPASSZONESETTING
Thisdisplaywillbeavailableifthe vehiclehasacompass.See Compassonpage5-5formore information.
COMPASSRECALIBRATION
Thisdisplaywillbeavailableifthe vehiclehasacompass.See Compassonpage5-5formore information.
BlankDisplay
Thisdisplayshowsnoinformation.
Trip/FuelMenultems
( Trip/Fuel ): Pressthisbutton toscrollthroughthefollowingmenu items:
ODOMETER
Pressthetrip/fuelbuttonuntil ODOMETERdisplays. Thisdisplay showsthedistancethevehiclehas beendrivenineitherkilometers(km) ormiles(mi).Pressingthetrip odometerresetstemwillalso displaytheodometer.
ToswitchbetweenEnglishand metricmeasurements,see"UNITS" earlierinthissection.
TRIPAandTRIPB
Pressthetrip/fuelbuttonuntil TRIPAorTRIPBdisplays. This displayshowsthecurrentdistance traveledineitherkilometers(km)or miles(mi)sincethelastresetfor eachtripodometer. Bothtrip odometerscanbeusedatthesame time. Pressingthetripodometer resetstemwillalsodisplaythetrip odometers.
5-26InstrumentsandControls
Eachtripodometercanberesetto zeroseparatelybypassingtheset/resetbuttonorthetripodometer resetstemwhilethedesiredtrip odometerisdisplayed.
Thetripodometerhasafeature calledretroactivereset. Thiscanbe usedtosethetripodometertothe numberofkilometers(miles)driven sincetheignitionwaslastturnedon. Thiscanbeusedifthetrip odometerisnotresetatthe beginningofthetrip.
Tousetheretroactiveresetfeature, pressandholdtheset/resetbutton foratleastfourseconds. Thetrip odometerwilldisplaythenumberof kilometers(km)ormiles(mi)driven sincetheignitionwaslastturnedon andthevehiclewasmoving.Once thevehiclebeginsmoving,thetrip odometerwillaccumulatemileage.
Forexample, if the vehicle was driven 8 km (5 mi) before it is started again, and then thereto activereset feature is activated, the display will show 8 km (5 mi). Asthe vehicle begins moving, the display will then increaseto 8.2 km (5.1 mi), 8.4 km (5.2 mi), etc.
Iftheretroactiveresetfeatureis activatedafterthevehicleisstarted, butbeforeitbeginsmoving,the displaywillshowthenumberof kilometers(km)ormiles(mi)driven duringthelastignitioncycle.
RANGE
Pressthetrip/fuelbuttonuntil RANGEdisplays.Thisdisplay showstheapproximatenumberof remainingkilometers(km)or miles(mi)thevehiclecanbedriven withoutrefueling.Thedisplaywill showLOWifthefuellevelislow.
The fuel range estimate is based on an average of the vehicle's fuel economy over recent driving history
andtheamountoffuelremainingin thefueltank. Thisestimatewill changeifdrivingconditionschange. Forexample,ifdrivingintrafficand makingfrequentstops,thisdisplay mayreadonenumber,butifthe vehicleisdrivenonafreeway,the numbermaychangeeeventhough thesameamountoffuelisinthe fueltank.Thisisbecausedifferent drivingconditionsproducedifferent fueleconomies.Generally,freeway drivingproducesbetterfuel economythancitydriving.Fuel rangecannotbereset.
AVG(Average)ECONOMY
Pressthetrip/fuelbuttonuntilAVG ECONOMYdisplays.Thisdisplay showstheapproximateaverage litersper100kilometers(L/100km) ormilespergallon(mpg).This numberiscalculatedbasedonthe numberofL/100km(mpg)recorded sincethelasttimethismenuitem wasreset.ToresetAVG ECONOMY,pressandholdtheset/resetbutton.
TIMER
Pressthetrip/fuelbuttonuntil TIMERdisplays. Thisdisplaycanbe usedasatimer.
Tostartthetimer, presstheset/resetbuttonwhileTIMERis displayed. Thedisplaywillshowthe amountoftimethathaspassed sincethetimerwaslastreset, not includingtimetheignitionisoff. Timewillcontinuetobecountedas longastheignitionison, even if anotherdisplayisbeingshownon theDIC. Thetimerwillrecordupto 99hours, 59minutesand 59seconds(99:59:59)afterwhich thedisplaywillreturntozero.
Tostopthetimer, presstheset/reset buttonbrieflywhileTIMERis displayed.
Toresetthetimertozero, pressand holdtheset/resetbuttonwhile TIMERisdisplayed.
FUELUSED
Pressthetrip/fuelbuttonuntilFUEL USEDdisplays.Thisdisplayshows thenumberofliters(L)or gallons(gal)offuelusedsincethe lastresetofthismenuitem.Toreset thefuelusedinformation,pressand holdtheset/resetbuttonwhileFUEL USEDisdisplayed.
AVG(Average)SPEED
Pressthetrip/fuelbuttonuntilAVG SPEEDdisplays.Thisdisplay showstheaveragespeedofthe vehicleinkilometersperhour(km/h) ormilesperhour(mph).This averageiscalculatedbasedonthe variousvehiclespeedsrecorded sincethelastresetofthisvalue.To resetthevaluetozero,pressand holdtheset/resetbutton.
BlankDisplay
Thisdisplayshowsnoinformation.
VehicleMessages
MessagesaredisplayedontheDIC tonotifythedriverthatthestatusof thevehiclehaschangedandthat someactionmaybeneededbythe drivertocorrectthecondition. Multiplemessagesmayappearone afteranother.
Somemessagesmaynotrequire immediateaction,butyoucanpress anyoftheDICbuttonsonthe instrumentpaneltoacknowledge thatyoureceivedthemessagesand toclearthemfromthedisplay.
Somemessagescannotbecleared fromtheDICdisplaybecausethey aremoreurgent. These messages requireactionbeforetheycanbe cleared. You should take any message that appear on the display seriously and remember that clearing them messages will only make them messages disappear, not correct the problem.
The following are the possible message that can be displayed and some information about them.
BatteryVoltage and ChargingMessages
BATTERYSAVERACTIVE
Thismessagedisplayswhenthe systemdetectsthatthebattery voltageisdroppingbelowexpected levels. Thebatterysaversystem startsreducingcertainfeatures of thevehiclethatyoumaybeable to notice.Atthepointthatthefeatures aredisabled,thismessageis displayed.Itmeansthatthevehicle istryngtosavethechargeinthe battery.
Turnoffallunnecessary accessoriestoallowthebatteryto recharge.
Thenormalbatteryvoltagerangeis 11.5to15.5volts.
SERVICEBATTERY CHARGINGSYSTEM
Onsomevehicles, this message displays if there is a problem with the battery charging system. Under certain conditions, the charging system light may also turn on the instrument cluster. See Charging System Light on page 5-15. Driving with this problem could drain the battery. Turnoff all unnecessary accessories. Have the electrical system checked as soon as possible. Se your dealer.
BrakeSystemMessages SERVICEBRAKESYSTEM
Thismessagedisplaysalongwith thebrakesystemwarninglightif thereisaproblemwiththebrake system.SeeBrakeSystemWarning Lightonpage5-18.Ifthismessage appears,stopassoonaspossible andturnoffthevehicle.Restartthe vehicleandcheckforthemessage
ontheDICdisplay.Ifthemessage isstilldisplayedorappearsagain whenyoubegindriving,thebrake systemneedsserviceassoonas possible.Seeyourdealer.
CruiseControlMessages
CRUISESETTOXXX
Thismessagedisplayswhenever thecruisecontrolisset.SeeCruise Controlonpage9-29formore information.
DoorAjarMessages DRIVERDOOROPEN
Thismessagedisplaysandachime soundsifthedriverdoorisnotfully closedandthevehicleisshiftedout ofP(Park).Stopandturnoffthe vehicle,checkthedorfor obstructions,andclosethedoor again.Checktoseeifthemessage stillappearsontheDIC.
HOODOPEN
Onsomemodels, this message displays and achimesounds if the hood is not fully closed. Stop and turnoff the vehicle, check the hood for obstructions, and closet the hood again. Check to see if them message still appear on the DIC.
LEFTREARDOOROPEN
Thismessagedisplaysandachime soundsifthedriversidereardooris notfullyclosedandthevehicleis shiftedoutofP(Park).Stopandturn offthevehicle,checkthedorfor obstructions,andclosethedoor again.Checktoseeifthemessage stillappearsontheDIC.
LIFTGATEOPEN
Thismessagedisplaysandachime soundsiftheliftgateisopenwhile theignitionisinON/RUN.Turnoff thevehicleandchecktheliftgate. Restartthevehicleandcheckfor themessageontheDICdisplay.
PASSENGERDOOROPEN
Thismessagedisplaysandachime soundsifthepassengerdoorisnot fullyclosedandthevehicleis shiftedoutofP(Park).Stopandturn offthevehicle,checkthedorfor obstructions,andclosethedoor again.Checktoseeifthemessage stillappearsontheDIC.
POWERLIFTGATEOFF
Thismessagedisplayswhenthe powerliftgatehasbeenturnedoff bypassingthepowerliftgatebutton onthecenterconsole.
RIGHTREARDOOROPEN
Thismessagedisplaysandachime soundsifthepassengersiderear doorisnotfullyclosedandthe vehicleisshiftedoutofP(Park). Stopandturnoffthevehicle,check thedoorforobstructions,andclose thedooragain.Checktoseeifthe messagestillappearsontheDIC.
EngineCoolingSystem Messages
ENGINEHOTA/C(Air Conditioning)OFF
Thismessagedisplayswhenthe enginecoolantbecomeshotterthan thenormaloperatingtemperature. SeeEngineCoolantTemperature Gaugeonpage5-12.Toavoid addedstrainonahotengine,theair conditioningcompressor automaticallyturnsoff.Whenthe coolanttemperaturereturnsto normal,theairconditioning compressorturnsbackon.Youcan continuetodriveyourvehicle.
If this message continues to appear, havethesystem repaired by your dealer as soon as possible to avoid damage to the engine.
ENGINEOVERHEATEDIDLE ENGINE
Notice: If you driv the vehicle while the engine is overheating, severe enginedamagemay occur. If an overheat warning appears on the instrument cluster and/or DIC, stop the vehicle as soon as possible. Donot increase the enginespeed abovenormal idlingspeed. See Engine Overheating on page 10-16 for more information.
Thismessagedisplayswhenthe enginecoolanttemperatureistoo hot.Stopandallowthevehicleto idleuntilcoolsdown.SeeEngine Coolant Temperature Gaugeon page5-12.
See Overheated Engine Protection Operating Mode on page 10-17 for information on driving to asafe place in an emergency.
ENGINEOVERHEATEDSTOP ENGINE
Notice: If you driv the vehicle while the engine is overheating, severe enginedamagemay occur. If an overheat warning appears on the instrument cluster and/or DIC, stop the vehicle as soon as possible. Donot increase the enginespeed abovenormal idlingspeed. See Engine Overheating on page 10-16 for more information.
Thismessagedisplaysanda continuouschimesoundsifthe enginecoolingsystemreaches unsafetemperaturesforoperation. Stopandturnoffthevehicleas soonasitissafetodosotoavoid severedamage. Thismessage clearswhentheenginehascooled toasafeoperatingtemperature.
EngineOilMessages CHANGEENGINEOILSOON
Thismessagedisplayswhen serviceisrequiredforthevehicle. Seeyourdealer.SeeEngineOilon page 10-7andMaintenance Scheduleonpage 11-3formore information.
AcknowledgingtheCHANGE ENGINEOILSOONmessagewill notresettheOILLIFEREMAINING. See "OilLife" underDriver InformationCenter(DIC) on page5-22andEngineOilLife Systemonpage10-9.
ENGINEOILLOW—ADDOIL
Onsomevehicles, thismessage displayswhentheengineoillevel maybetoolow. Checktheoillevel beforefillingtotherecommended level. If theoilisnotlowand this messengeremainson, takethe vehicle toyourdealerforservice. SeeEngineOilonpage 10-7.
OILPRESSURELOWSTOP ENGINE
Notice: If you drivethe vehicle while the engine oil pressure is low, severe engaged damagemay occur. If a low oil pressure warning appears on the Driver Information Center (DIC), stop the vehicle as soon as possible. Do not drivethe vehicle until the cause of the low oil pressure is corrected. See Engine Oilon page 10-7 form more information.
Thismessagedisplayswhenthe vehicle'sengineoilpressureislow. Theoilpressurelightalsoappears ontheinstrumentcluster.See EngineOilPressureLighton page5-21.
Stopthevehicleimmediately, as enginedamagecanresultfrom drivingavehiclewithlowoil pressure. Havethevehicleserviced byyourdealerassoonaspossible whenthismessageisdisplayed.
EnginePowerMessages ENGINEPOWERISREDUCED
Thismessagedisplaysandachime soundswhenthecoolingsystem temperaturegetstoohotandthe enginefurtherenterstheengine coolantprotectionmode.See EngineOverheatingonpage10-16 forfurtherinformation.
Thismessagealsodisplayswhen thevehicle'senginepoweris reduced.Reducedenginepower canaffectthevehicle'sabilityto accelerate.Ifthismessageison, butthereisnoreductionin performance,proceedtoyour destination.Theperformancemay bereducedthenexttimethevehicle isdriven.Thevehiclemaybedriven atareducedspeedwhilethis messageison,butaccelerationand speedmaybereduced.Anytime thismessagestayson,thevehicle shouldbetakentoyourdealerfor serviceassoonaspossible.
FuelSystemMessages FUELLEVELLOW
Thismessagedisplaysandachime soundsifthefuellevelislow.Refuel as soonaspossible.SeeFuel Gaugeonpage5-11andFuelon page9-37formoreinformation.
TIGHTENGASCAP
Thismessagemaydisplayalong withthecheckenginelightonthe instrumentclusterifthevehicle's fuelcapisnottightenedproperly. SeeMalfunctionIndicatorLampon page5-16.Reinstallthefuelcap fully.SeeFillingtheTankon page9-40.Thediagnosticsystem candetermineifthefuelcaphas beenleftofforimproperlyinstalled. A looseormissingfuelcapallows fueltoevaporateintothe atmosphere.Afewdrivingtripswith thecapproperlyinstalledshould turnthislightandmessageoff.
KeyandLockMessages
REPLACEBATTERYIN REMOTEKEY
ThismessagedisplaysifaRemote KeylessEntry(RKE)transmitter batteryislow.Thebatteryneedsto bereplacedinthetransmitter.See "BatteryReplacement" under RemoteKeylessEntry(RKE) SystemOperationonpage2-2.
LampMessages
AUTOMATICLIGHT CONTROLOFF
Thismessagedisplayswhenthe automaticheadlampsareturnedoff. Thismessageclearsitselfafter 10seconds.
AUTOMATICLIGHT CONTROLON
Thismessagedisplayswhenthe automaticheadlampsareturnedon. Thismessageclearsitselfafter 10seconds.
TURNSIGNALON
Thismessagedisplaysandachime soundsifaturnsignalisleftonfor 1.2km(0.75mi).Movetheturn signallevertotheoffposition.
ObjectDetectionSystem Messages
PARKASSTBLOCKEDSEE OWNERSMANUAL
Thismessagedisplaysifthereis somethinginterferingwiththepark assistsystem.SeeUltrasonic ParkingAssistonpage9-31for moreinformation.
PARKASSISTOFF
Afterthevehiclehasbeenstarted, thismessagedisplaystoremindthe driverthattheURPAsystemhas beenturnedoff.Presstheset/reset buttonorthetripodometerreset stemtoacknowledgethismessage andclearitfromtheDICdisplay.To
turntheURPAsystembackon, see UltrasonicParkingAssiston page9-31.
REARCROSSTRAFFIC ALERTSYSTEMOFF
If the vehicle has the Rear Cross Traffic Alert (RCTA) system, this messaged displays when the RCTA system has been turned off. See Rear Vision Camera (RVC) on page 9-35 and Driver Information Center (DIC) on page 5-22.
SERVICEPARKASSIST
Thismessagedisplaysifthereisa problemwiththeUltrasonicRear ParkingAssist(URPA)system.Do notusethissystemtohelpyou park.SeeUltrasonicParkingAssist onpage9-31formoreinformation. Seeyourdealerforservice.
SERVICESIDEDETECTION SYSTEM
If your vehicle has the Side Blind Zone Alert (SBZA) system and this messaged displays, both SBZA
displayswillremainonindicating thereisaproblemwiththeSBZA system.Ifthesedisplaysremainon aftercontinueddriving,thesystem needsservice.Seeyourdealer.See SideBlindZoneAlert(SBZA)on page9-32formoreinformation.
SIDEBLINDZONEALERT SYSTEMOFF
If your vehicle has the Side Blind Zone Alert (SBZA) system, this messaged displays when the SBZA system has been turned off. See Side Blind Zone Alert (SBZA) on page 9-32 and Driver Information Center (DIC) on page 5-22 form more information.
SIDEDETECTIONSYS TEMPORARILYOFF
If your vehicle has the Side Blind Zone Alert (SBZA) system, this messaged displays when the SBZA system is disabled because the sensor cannot detect vehicles in your blind zone. Thesensorm maybe blocked by mud, dirt, snow, ice,
orslush. This message may also display during heavy rain or dueto roadspray. It may also come on when driving in isolated areas with noguardrails, trees, or road signs and light traffic. Your vehicle does not need service. For cleaning instructions, see "Washing Your Vehicle" in Exterior Care on page 10-72. See Side Blind Zone Alert (SBZA) on page 9-32 form more information.
RideControlSystem Messages
SERVICESTABILITRAK
Thismessagedisplaysifthereisa problemwiththeStabiliTrak® system.Ifthismessageappears,try toresetthesystem.Stop;turnoff theengineforatleast15seconds; thenstarttheengineagain.Ifthis messagestillcomeson,itmeans thereisaproblem.Seeyourdealer forservice.Thevehicleissafeto
drive, however, you donothavethe benefitofStabiliTrak, soreduce yourspeed and drive accordingly.
SERVICETRACTION CONTROL
Thismessagedisplayswhenthere isaproblemwiththeTraction ControlSystem(TCS).Whenth messageisdisplayed,thesystem willnotlimitwheelspin.Adjustyour drivingaccordingly.Seeyourdealer forservice.SeeStabiliTrak ^® System onpage9-27formoreinformation.
TRACTIONCONTROLOFF
Thismessagedisplayswhenthe TractionControlSystem(TCS)is turnedoff.Adjustyourdriving accordingly.SeeStabiliTrak® Systemonpage9-27formore information.Thismessageclears itselfafter10seconds.
TRACTIONCONTROLON
Thismessagedisplayswhenthe TractionControlSystem(TCS)is turnedon.SeeStabiliTrak® System onpage9-27formoreinformation. Thismessageclearsitselfafter 10seconds.
AirbagSystemMessages
SERVICEAIRBAG
Thismessagedisplaysifthereisa problemwiththeairbagsystem. Haveyourdealerinspectthe systemforproblems.SeeAirbag ReadinessLightonpage5-14and AirbagSystemonpage3-22for moreinformation.
SecurityMessages
SERVICETHEFTDETERRENT SYSTEM
Thismessagedisplayswhenthere isaproblemwiththetheft-deterrent system. The vehicle mayormaynot restartsoyoumaywanttotakethe
vehicletoyourdealerbeforeturning offtheengine.SeeImmobilizer Operationonpage2-13formore information.
THEFTATTEMPTED
Thismessagedisplaysifthecontent theft-deterrentsystemhasdetected abreak-inattemptwhileyouwere awayfromyourvehicle.SeeVehicle AlarmSystemonpage2-11for moreinformation.
ServiceVehicleMessages
SERVICEA/C(Air Conditioning)SYSTEM
Thismessagedisplayswhenthe electronicsensorsthatcontrolthe airconditioningandheating systemsarenolongerworking. Havetheclimatecontrolsystem servicedbyyourdealerifyounotice adropinheatingandair conditioningefficiency.
SERVICEPOWERSTEERING
Thismessagedisplayswhena problemisdetectedwiththepower steeringsystem.Whenthismessageisdisplayed,youmay noticethattheeffortrequiredto steerthevehicleincreasesorfeels heavier,butyouwillstillbeableto steerthevehicle.Haveyourvehicle servicedbyyourdealerimmediately.
SERVICEVEHICLES OON
Thismessagedisplayswhena non-emissionsrelatedmalfunction occurs.Havethevehicleserviced byyourdealerassoonaspossible.
STARTINGDISABLED SERVICETHROTTLE
Thismessagedisplayswhenyour vehicle'sthrottlesystemisnot functioningproperly.Haveyour vehicleservicedbyyourdealer.
TireMessages
TIRELOWADDAIRTOTIRE
OnvehicleswiththeTirePressure MonitorSystem(TPMS),this messagedisplayswhenthe pressureinoneormoreofthe vehicle'stiresislow.
ThismessagealsodisplaysLEFT FRT(leftfront),RIGHTFRT(right front),LEFTRR(leftrear), orRIGHTRR(rightrear)toindicate thelocationofthelowtire.
Thelowtirepressurewarninglight willalsocomeon.See Tire PressureLightonpage5-20.
Ifatirepressuremessageappears ontheDIC,stopassoonasyou can.Inflatethetiresbyaddingair untilthetirepressureisequaltothe valuesshownontheTireand LoadingInformationlabel.See Tires onpage10-34,VehicleLoadLimits onpage9-9,and TirePressureon page10-41.
You can receive more than one tire pressure message at a time. To read the other message that may have been sent at the same time, presstheset/reset button or the trip odometer reset stem. The DIC also shows the tire pressure values. See Driver Information Center (DIC) on page 5-22.
SERVICETIREMONITOR SYSTEM
OnvehicleswiththeTirePressure MonitorSystem(TPMS), this messagedisplaysifapartonthe TPMSisnotworkingproperly. The tirepressurelightalsoflashesand thenremainsonduringthesame ignitioncycle.SeeTirePressure Lightonpage5-20.Several conditionsmaycausethismessage toappear.SeeTirePressure MonitorOperationonpage10-44for moreinformation.Ifthewarning comesonandstayson,theremay beaproblemwiththeTPMS.See yourdealer.
TIRELEARNINGACTIVE
Thismessagedisplayswhenthe TirePressureMonitorSystem (TPMS)isrelearningthetire positionsonyourvehicle. Thetire positionsmustberelearnedafter rotatingthetiresorafterreplacinga tireorsensor.See TireRotationon page 10-47, TirePressureMonitor Systemonpage 10-43,and Tire Pressureonpage 10-41formore information.
TransmissionMessages
ALLWHEELDRIVEOFF
If your vehicle has the All-Wheel Drive (AWD) system, this message displays when there is atemporary condition making the AWD system unavailable. The vehicle will run in 2WD. This could be caused by:
- Acompactsparetireonthe vehicle
- AWDsystemoverheat
- Lossofwheelervehiclespeed
5-36 InstrumentsandControls
• Certainothervehicleelectrical conditions
Thismessageturnsoffwhenthe compactsparetireisreplacedbya full-sizetire,thedifferentialfluid coolsortheaboveconditionsareno longerpresentandthewarning messageisreset.Toresetthe warningmessagemanually,turnthe ignitionoffandthenbackonagain after30seconds.Ifthemessage stayson,seeyourdealer.See All-WheelDriveonpage9-24.
SERVICEALLWHEELDRIVE
Thismessagedisplaysifaproblem occurswiththeAll-WheelDrive (AWD)system. Thevehiclewillrun in2WD. Thiscouldbecausedby:
• Anelectronicsproblem
- Wornoutoroverheatedclutch plates
- Variouselectricalissues
If this message appears, stop as soon as possible and turn off the ignition for 30 seconds. Restart the
vehicleandcheckforthemessage ontheDICdisplay.Ifthemessage stilldisplaysorappearsagainwhen youbegindriving,thesystemneeds service.Seeyourdealerrightaway.
SERVICETRANSMISSION
Thismessagedisplayswhenthere isaproblemwiththetransmission. Seeyourdealerforservice.
TRANSMISSIONHOTIDLE ENGINE
Notice: Donotdrivethevehicle while the transmission fluid is overheating and the transmission temperature warning is displayed on the instrument cluster and/or DIC, orthetransmission can be damaged. This could lead to costly repair that would not be covered by the warranty.
Thismessagedisplaysandachime soundsifthetransmissionfluidin thevehiclegetshot. Drivingwiththe transmissionfluidtemperaturehigh cancausedamagetothevehicle.
Stopthevehicleandletitidleto allowthetransmissiontocool. This messageclearswhenthefluid temperaturereachesasafelevel.
VehicleReminder Messages
ICEPOSSIBLEDRIVE WITHCARE
Thismessagedisplayswhenthe outsideairtemperatureiscold enoughtocreateicyroad conditions.Adjustyourdriving accordingly.
VehicleSpeedMessages
SPEEDLIMITEDTOXXXMPH (KM/H)
Thismessagedisplayswhenyour vehiclespeedislimitedto128km/h (80mph)becausethevehicle detectsaprobleminthespeed variableassiststeeringsystem. Haveyourvehicleservicedbyyour dealer.
WasherFluidMessages WASHERFLUIDLOWADD FLUID
Thismessagedisplayswhenthe windshieldwasherfluidislow.Fill the windshieldwasherfluidreservoir as soonaspossible.SeeEngine CompartmentOverviewon page 10-5forthelocationofthe windshieldwasherfluidreservoir. Also,see WasherFluidon page 10-18formoreinformation.
Vehicle Personalization
Yourvehiclemayhave customizationcapabilitiesthataIallow youtoprogramcertainfeaturesto onepreferredsetting.Customization featurescanonlybeprogrammedto onesettingonthevehicleand cannotbeprogrammedtoa preferredsettingfortwodifferent drivers.
Allofthecustomizationoptionsmay notbeavailableonyourvehicle. Onlytheoptionsavailablewillbe displayedontheDIC.
The default settings for the customization features were reset when your vehicle left the factory, but may have been changed from their default states in cethen.
Thecustomizationpreferencesare automaticallyrecalled.
Tochangecustomization preferences, usethefollowing procedure.
EnteringtheFeature SettingsMenu
- Turntheignitiononandplace thevehicleinP(Park).
To avoid excessive rain on the battery, it is recommended that the headlamps are turned off.
2.Pressthecustomizationbutton toenterthefeaturesettings menu.Ifthemenuisnot available,FEATURESETTINGS AVAILABLEINPARKwill display.Beforeenteringthe menu,makesurethevehicleis inP(Park).
FeatureSettingsMenultems
The following are customization feature that allow you to program setting the vehicle:
DISPLAYINENGLISH
Thisfeaturewillonlydisplayifa languageotherthanEnglishhas beenset. Thisfeatureallowsyouto changethelanguageinwhichthe DICmessagesappeartoEnglish.
Pressthecustomizationbuttonuntil thePRESS √TODISPLAYIN ENGLISHscreenappearsonthe DICdisplay.Presstheset/reset buttononcetodisplayallDIC messagesinEnglish.
DISPLAYLANGUAGE
Thisfeatureallowsyoutoselectthe languageinwhichtheDIC messageswillappear.
Pressthecustomizationbuttonuntil theDISPLAYLANGUAGEscreen appearontheDICdisplay.Press theset/resetbuttononcetoaccess thesettingsforthisfeature.Then pressthecustomizationbuttonto scrollthroughthefollowingsettings:
ENGLISH(default):Allmessages willappearinEnglish.
FRANCAIS: All messages will appear in French.
ESPANOL: Allmessages will appear in Spanish.
NOCHANGE: Nochangewillbe madetothisfeature. Thecurrent settingwillremain.
Toselectasetting, presstheset/resetbuttonwhilethedesired settingisdisplayedontheDIC.
AUTODOORLOCK
Thisfeatureallowsyoutoselect whenthevehicle'sdoorswill automaticallylock.SeeAutomatic DoorLocksonpage2-7formore information.
Pressthecustomizationbuttonuntil AUTODOORLOCKappearsonthe DICdisplay.Presstheset/reset buttononcetoaccessthesettings forthisfeature.Thenpressthe customizationbuttontoscroll throughthefollowingsettings:
SHIFTOUTOFPARK(default): Thedoorswillautomaticallylock whenthevehicleisshiftedoutof P(Park).
ATVEHICLESPEED: Thedoors will automatically lock when the vehiclespeed is above 13 km/h (8 mph) forth reese seconds.
NOCHANGE: Nochangewillbe madetothisfeature. Thecurrent settingwillremain.
Toselectasetting, presstheset/resetbuttonwhilethedesired settingisdisplayedontheDIC.
AUTODOORUNLOCK
Thisfeatureallowsyoutoselect whetherornottoturnoffthe automaticdoorunlockingfeature.
Italsoallowsyoutoselectwhich doorsandwhenthedoorswill automaticallyunlock.SeeAutomatic DoorLocksonpage2-7formore information.
Pressthecustomizationbuttonuntil AUTODOORUNLOCKappearson theDICdisplay.Presstheset/reset buttononcetoaccessthesettings forthisfeature.Thenpressthe customizationbuttontoscroll throughthefollowingsettings:
OFF: Noneofthedoorswill automaticallyunlock.
DRIVERATKEYOUT: Only the driverdoorwillunlockwhenthekey istakenoutoftheignition.
DRIVERINPARK: Only the driver door will unlock when the vehicle is shifted into P(Park).
ALLATKEYOUT: Allofthedoors will unlockwhenthekeyistaken outoftheignition.
ALLINPARK(default):Allofthe doorswillunlockwhenthevehicleis shiftedintoP(Park).
NOCHANGE: Nochangewillbe madetothisfeature. The current setting will remain.
Toselectasetting, presstheset/resetbuttonwhilethedesired settingisdisplayedontheDIC.
REMOTEDOORLOCK
Thisfeatureallowsyoutoselectthe typeoffeedbackyouwillreceive whenlockingthevehiclewiththe RemoteKeylessEntry(RKE) transmitter.Youwillnotreceive feedbackwhenlockingthevehicle withtheRKEtransmitterifthedoors areopen.SeeRemoteKeyless Entry(RKE)SystemOperationon page2-2formoreinformation.
Pressthecustomizationbuttonuntil REMOTEDOORLOCKappearson theDICdisplay.Presstheset/reset buttononcetoaccessthesettings forthisfeature.Thenpressthe customizationbuttontoscroll throughthefollowingsettings:
OFF: Therewillbenofeedback whenyoupressthelockbuttonon theRKEtransmitter.
LIGHTSONLY:Theexteriorlamps willflashwhenyoupressthelock buttonontheRKEtransmitter.
HORNONLY: The horn will sound on these second press of the lock button on the RKE transmitter.
HORN&LIGHTS(default): The exteriorlampswillflashwhenyou pressthelockbuttonontheRKE transmitter, and the hornwill sound whenthelockbutton ispressed again within five seconds of the previous command.
NOCHANGE: Nochangewillbe madetothisfeature. Thecurrent settingwillremain.
Toselectasetting, presstheset/resetbuttonwhilethedesired settingisdisplayedontheDIC.
REMOTEDOORUNLOCK
Thisfeatureallowsyoutoselectthe typeoffeedbackyouwillreceive whenunlockingthevehiclewiththe RemoteKeylessEntry(RKE) transmitter.Youwillnotreceive feedbackwhenunlockingthe vehiclewiththeRKEtransmitterif thedoorsareopen.SeeRemote KeylessEntry(RKE)System Operationonpage2-2formore information.
Pressthecustomizationbuttonuntil REMOTEDOORUNLOCKappears ontheDICdisplay.Presstheset/resetbuttononcetoaccessthe settingsforthisfeature.Thenpress thecustomizationbuttontoscroll throughthefollowingsettings:
LIGHTSOFF:Theexteriorlamps willnotflashwhenyoupressthe unlockbuttonontheRKE transmitter.
LIGHTSON(default): The exterior lampswillflashwhenyoupress the unlockbuttonontheRKE transmitter.
NOCHANGE: Nochangewillbe madetothisfeature. Thecurrent settingwillremain.
Toselectasetting, presstheset/resetbuttonwhilethedesired settingisdisplayedontheDIC.
DELAYDOORLOCK
Thisfeatureallowsyoutoselect whetherornotthelockingofthe vehicle'sdoorsandliftgatewillbe delayed.Whenlockingthedoors andliftgatewiththepowerdoorlock switchandadoororthelifgateis open,thisfeaturewilldelaylocking thedoorsandliftgateuntil fivesecondsafterthelastdooris closed.Youwillhearthreechimes tosignalthatthedelayedlocking featureisinuse.Thekeymustbe outoftheignitionforthisfeatureto work.Youcantemporarilyoverride delayedlockingbypassingthe powerdoorlockswitchtwiceorthe
lockbuttonontheRKEtransmitter twice.SeeDelayedLockington page2-7formoreinformation.
Pressthecustomizationbuttonuntil DELAYDOORLOCKappearson theDICdisplay.Presstheset/reset buttononcetoaccessthesettings forthisfeature.Thenpressthe customizationbuttontoscroll throughthefollowingsettings:
OFF: Therewillbenodelayed lockingofthevehicle'sdoors.
ON(default): Thedoorswillnot lockuntilfivesecondsafterthelast doorortheliftgateisclosed.
NOCHANGE: Nochangewillbe madetothisfeature. The current setting will remain.
Toselectasetting, presstheset/resetbuttonwhilethedesired settingisdisplayedontheDIC.
EXITLIGHTING
Thisfeatureallowsyoutoselectthe amountoftimeyouwantthe exteriorlampstoremainonwhenit
isdarkenoughoutside.This happensafterthekeyisturnedfrom ON/RUNtoLOCK/OFF.
Pressthecustomizationbuttonuntil EXITLIGHTINGappearsontheDIC display.Presstheset/resetbutton oncetoaccessthesettingsforthis feature.Thenpressthe customizationbuttontoscroll throughthefollowingsettings:
OFF: The exterior lampswill not turnon.
30SECONDS(default): The exteriorlampswillstayonfor 30seconds.
1MINUTE:Theexteriorlampswill stayonforoneminute.
2MINUTES: The exterior lampswill stay on fortwominutes.
NOCHANGE: Nochangewillbe madetothisfeature. Thecurrent settingwillremain.
Toselectasetting, presstheset/resetbuttonwhilethedesired settingisdisplayedontheDIC.
APPROACHLIGHTING
Thisfeatureallowsyoutoselect whetherornottohavetheexterior lightsturnonbrieflyduringlowlight periodsafterunlockingthevehicle usingtheRemoteKeylessEntry (RKE)transmitter.
Pressthecustomizationbuttonuntil APPROACHLIGHTINGappearson theDICdisplay.Presstheset/reset buttononcetoaccessthesettings forthisfeature.Thenpressthe customizationbuttontoscroll throughthefollowingsettings:
OFF: The exterior light will not turn on when you unlock the vehicle with the RKE transmitter.
ON(default): Ifitisdarkenough outside, the exterior light will turn on briefly when you unlock the vehicle with the RKE transmitter.
Thelightswillremainonfor 20secondsoruntilthelockbutton ontheRKEtransmitterispressed, orthevehicleisnolongeroff.See
RemoteKeylessEntry(RKE) SystemOperationonpage2-2for moreinformation.
NOCHANGE: Nochangewillbe madetothisfeature. Thecurrent settingwillremain.
Toselectasetting, presstheset/resetbuttonwhilethedesired settingisdisplayedontheDIC.
CHIMEVOLUME
Thisfeatureallowsyoutoselectthe volumelevelofthechime.
Pressthecustomizationbuttonuntil CHIMEVOLUMEappearsonthe DICdisplay.Presstheset/reset buttononcetoaccessthesettings forthisfeature.Thenpressthe customizationbuttontoscroll throughthefollowingsettings:
NORMAL: Thechimevolumewill besettoanormallevel.
5-42 InstrumentsandControls
LOUD: Thechimevolumewillbe settoaloudlevel.
NOCHANGE: Nochangewillbe madetothisfeature. Thecurrent settingwillremain.
Thereisnodefaultforchime volume. The volumewillstayatthe lastknownsetting.
Toselectasetting, presstheset/resetbuttonwhilethedesired settingisdisplayedontheDIC.
PARKTILTMIRRORS
If your vehicle has this feature, it allows you to select whether or not the outside mirror(s) will automatically tiltdown when the vehicle is shifted into R (Reverse). See Park Tilt Mirror on page 2-16 form more information.
Pressthecustomizationbuttonuntil PARKTILTMIRRORSappearson theDICdisplay.Presstheset/reset buttononcetoaccessthesettings
forthisfeature.Thenpressthe customizationbuttontoscroll throughthefollowingsettings:
OFF(default):Neitheroutside mirrorwillbetilteddownwhenthe vehicleisshiftedintoR(Reverse).
DRIVERMIRROR: Thedriver outsidemirrorwillbetilteddown whenthevehicleisshiftedinto R(Reverse).
PASSENGERMIRROR: The passengeroutsidemirrorwillbe tiltedownwhenthevehicleis shiftedintoR(Reverse).
BOTHMIRRORS: Thedriverand passengeroutsidemirrorswillbe tiltedownwhenthevehicleis shiftedintoR(Reverse).
NOCHANGE: Nochangewillbe madetothisfeature. Thecurrent settingwillremain.
Toselectasetting, presstheset/resetbuttonwhilethedesired settingisdisplayedontheDIC.
EASYEXITSEAT
If your vehicle has this feature, it allows you to select your preference for the automatic easy exit seat feature. See Memory Seatson page 3-5 form more information.
PressthecustomizationbuttonuntilEASYEXITSEATappearsontheDICdisplay.Presstheset/resetbuttononcetoaccessthesettingsforthisfeature.Thenpressthecustomizationbuttontoscrollthroughthefollowingsettings:
OFF(default): No automaticseat exitrecallwilloccur.
ON: Thedriverseatwillmoveback whenthekeyisremovedfromthe ignition. Thesteeringcolumnwill alsomoveupandforwardon vehicleswiththepowertiltand telescopicsteeringfeature.See SteeringWheelAdjustmenton page5-2formoreinformation.
The automatic ease exit seat movement will only occur on time after the key is removed from the ignition. If the automatic movement has already occurred, and you put the key back in the ignition and remove it again, these at and steering column will stay in the original exit position, unless a memory recall took place prior to removing the key again.
NOCHANGE: Nochangewillbe madetothisfeature. Thecurrent settingwillremain.
Toselectasetting, presstheset/resetbuttonwhilethedesired settingisdisplayedontheDIC.
MEMORYSEATRECALL
If your vehicle has this feature, it allows you to select your preference for her memory seat recall feature. See Memory Seatson page 3-5 form more information.
Pressthecustomizationbuttonuntil MEMORYSEATRECALLappears ontheDICdisplay.Presstheset/resetbuttononcetoaccessthe settingsforthisfeature.Thenpress thecustomizationbuttontoscroll throughthefollowingsettings:
OFF(default): Noremotememory seatrecallwilloccur.
ON: Thedriverseatandoutside mirrorswillautomaticallymoveto thestoreddrivingpositionwhenthe unlockbuttonontheRemote KeylessEntry(RKE)transmitteris pressed. Thesteeringcolumnwill alsomoveonvehicleswiththe powertiltandtelescopicsteering feature. See SteeringWheel Adjustmentpage5-2formore information. See "MemoryRemote Recall" under MemorySeatson page3-5formoreinformationon matchingtransmitterstodriver positions.
NOCHANGE: Nochangewillbe madetothisfeature. Thecurrent settingwillremain.
Toselectasetting, presstheset/resetbuttonwhilethedesired settingisdisplayedontheDIC.
REMOTESTART
If your vehicle has this feature, it allows out to turn theremot start for on. Theremot start feature allows out start the engine from outside of the vehicle using the Remote Keyless Entry (RKE) transmitter. See Remote Vehicle Start on page 2-4 form more information.
Pressthecustomizationbuttonuntil REMOTESTARTappearsonthe DICdisplay.Presstheset/reset buttononcetoaccessthesettings forthisfeature.Thenpressthe customizationbuttontoscroll throughthefollowingsettings:
OFF: Theremotestartfeaturewill bedisabled.
5-44 InstrumentsandControls
ON(default): Theremotestart featurewillbeenabled.
NOCHANGE: Nochangewillbe madetothisfeature. Thecurrent settingwillremain.
Toselectasetting, presstheset/ resetbuttonwhilethedesired settingisdisplayedontheDIC.
FACTORYSETTINGS
Thisfeatureallowsyoutosetallof thecustomizationfeaturesbackto theirfactorydefaultsettings.
Pressthecustomizationbuttonuntil FACTORYSETTINGSappearson theDICdisplay.Presstheset/reset buttononcetoaccessthesettings forthisfeature.Thenpressthe customizationbuttontoscroll throughthefollowingsettings:
RESTOREALL(default): The customizationfeatureswillbesetto theirfactorydefaultsettings.
DONOTRESTORE:The customizationfeatureswillnotbe settotheirfactorydefaultsettings.
Toselectasetting, presstheset/resetbuttonwhilethedesired settingisdisplayedontheDIC.
EXITFEATURESETTINGS
Thisfeatureallowsyoutoexitthe featuresettingsmenu.
Pressthecustomizationbuttonuntil FEATURESETTINGSPRESS √ TOEXITappearsintheDICdisplay. Presstheset/resetbuttononceto exitthemenu.
If you donotexit, pressing the customization button again will return out the beginning of the feature settings menu.
ExitingtheFeature SettingsMenu
Thefeaturesettingsmenuwillbe exitedwhenanyofthefollowing occurs:
• Thevehicleisshiftedoutof P(Park).
• Thevehicleisnolongerin ON/RUN.
- Thetrip/fuelorvehicle informationDICbuttonsare pressed.
• Theendofthefeaturesettings menuisreachedandexited.
• A40-secondtimeperiodhas elapsedwithnoselectionmade.
InstrumentsandControls5-45
UniversalRemote System
SeeRadioFrequencyStatementon page 13-20forinformation regardingPart15oftheFederal CommunicationsCommission(FCC) rulesandIndustryCanada StandardsRSS-GEN/210/220/310.
UniversalRemoteSystem Programming
Ifthevehiclehasthisfeature,you willseethesebuttonswithone indicatorlightnexttotheminthe overheadconsole.
This system provides a way to replace up to three reemote control transmitters used to activate
devicessuchasgaragedoor openers, securitysystems, and homeautomationdevices.
DonotusetheUniversalRemote systemwithanygaragedooropener thatdoesnothavethestopand reversefeature. Thisincludesany garagedooropenermodel manufacturedbeforeApril1,1982.
Readtheinstructionscompletely beforeattemptingtoprogramthe UniversalRemotesystem.Because ofthestepsinvolved,itmaybe helpfultohaveanotherperson availabletoassistwithprogramming theUniversalRemotesystem.
Keeptheoriginalhand-held transmitterforuseinothervehicles aswellasforfutureUniversal Remotesystemprogramming.Itis alsorecommendedthatuponthe saleofthevehicle,theprogrammed UniversalRemotesystembuttons beerasedforsecuritypurposes. See“ErasingUniversalRemote SystemButtons”laterinthis section.
When programmingagaragedoor, parkoutsideofthegarage.Park directlyinlinewithandfacingthe garagedooropenermotor-header gatemotor-head.Besurethat peopleandobjectsareclearofthe garagedoororgatebeing programmed.
It is recommended that an new battery be installed in the hand-held transmitter for quicker and more accurate transmission of the radio-frequency signal.
ProgrammingtheUniversal RemoteSystem
Forquestionsorhelpprogramming theUniversalRemotesystem, call 1-800-355-3515orgoto www.homelink.com.
Programmingagaragedooropener involvestime-sensitive actions, so readtheentireprocedurebefore starting. Otherwise, the device will timeout and the procedure will have to be repeated.
Toprogramuptothreedevices:
-
Holdtheendofthehand-held transmitterabout3to8cm(1to 3in)awayfromtheUniversal Remotesystembuttonswhile keepingtheindicatorlightin view.Thehand-heldtransmitter wassuppliedbythe manufacturerofthegaragedoor openerreceiver (motor-headunit).
-
Atthesametime, press and hold both the hand-held transmitter button and one of the three Universal Remotesystem button to be used to operate the garagedoor. Donot release the Universal Remotesystem button or the hand-held transmitter button until the indicator light changes from a slowly to a rapidly flashing light. You now may release both buttons.
Someentrygatesandgarage dooropenersmayrequire substitutionofStep2withthe procedurenotedin"Gate OperatorandCanadian Programming"laterinthis section.
- Pressandholdforfiveseconds thenewlytrainedUniversal Remotesystembutton(the buttonselectedinStep2)while observingtheindicatorlightand garagedooractivation.
- Iftheindicatorlightstayson continuouslyorthegarage doorstartstomovewhen theUniversalRemote systembuttonispressed andreleased,thenthe programmingiscomplete. Thereisnoneedto continueprogramming Steps4–6.
- IftheUniversalRemote systemindicatorlightblinks rapidlyfortwoseconds, thenturnstoaconstant lightandthegaragedoor doesnotmove, continue withprogramming Steps4–6.
Itmaybehelpfultohave anotherpersonassistwith theremainingSteps4–6.
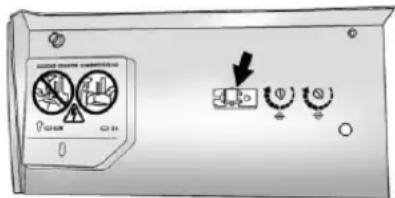
"Learn" or "Smart" Button
-
AfterSteps1–3 have been completed, locatethe "Learn" or "Smart" button insidethegarage onthegaragedooropener receiver (motor-headunit). The name and color of the button may vary by manufacturer.
-
Firmlypressandreleasethe "Learn" or "Smart" button. After pressingthisbutton, you will have 30 secondstocomplete Step6.
-
Immediately return to the vehicle. Firmly press and hold fortwo secondsthe Universal Remotesystembutton, selected in Step2 to control the garage door, and then release it. If the garagedoordoes not move or the lamponthegaragedoor opener receiver (motor-head unit) does not flash, press and hold the same button a second time for two seconds, then release it. Again, if the door does not move or the garage door lamp does not flash, press and hold the same button a third time for two seconds, then release.
TheUniversalRemotesystem shouldnowactivatethe garagedoor.
Toprogramtheremainingtwo UniversalRemotesystembuttons, beginwithStep1of"Programming theUniversalRemoteSystem."
GateOperatorandCanadian Programming
If you have questions or need help programming the Universal Remote system, call 1-800-355-3515 orgo to www.homelink.com.
Canadianradio-frequencylaws requiretransmittersignalstotime outorquitafterseveralsecondsof transmission. This may not belong enough for the Universal Remote system to pickup the sign during programming. Similarly, some U.S. gate operators are manufactured to timeout in the samemanner.
If you live in Canada, or you are having difficulty programming agate operator or aged door opener by using the "Programming the Universal Remote System" procedures, regardless of where you live, replace Step 2 under "Programming the Universal Remote System" with the following:
Continuetopressandholdthe UniversalRemotesystembutton whileyoupressandreleaseevery twoseconds(cycle)thehand-held transmitterbuttonuntilthe frequencysignalhasbeen successfullyacceptedbythe UniversalRemotesystem.The UniversalRemotesystemindicator lightwillflashslowlyatfirstandthen rapidly.ProceedwithStep3under "ProgrammingtheUniversalRemote System"tocomplete.
UniversalRemoteSystem Operation
UsingUniversalRemote
Pressandholdtheappropriate UniversalRemotebuttonforatleast halfofasecond. Theindicatorlight willcomeonwhilethesignalis beingtransmitted.
ErasingUniversalRemote Buttons
Allprogrammedbuttonsshouldbe erasedwhenthevehicleissoldor theleaseends.
Toeraseallprogrammedbuttonson theUniversalRemotedevice:
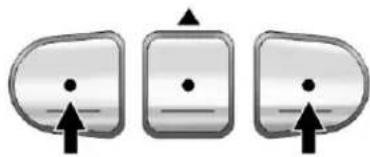
natural_image
Three identical abstract shapes with black dots and arrows, no text or symbols present-
Pressandholddownthetwo outsidebuttonsuntilthe indicatorlightbeginstoflash, after20seconds.
-
Releasebothbuttons.
ReprogrammingaSingle UniversalRemoteButton
Toreprogramanyofthethree UniversalRemotebuttons,repeat theprogramminginstructionsearlier inthissection,beginningwith Step2.
Forhelporinformationonthe UniversalHomeRemoteSystem, callthecustomerassistancephone numberunderCustomerAssistance Offices(U.S.andCanada)on page 13-5orCustomerAssistance Offices(Mexico)onpage 13-5.
Lighting
ExteriorLighting
ExteriorLampControls......6-1
HeadlampHigh/Low-Beam Changer....6-2
Flash-to-Pass......6-2
DaytimeRunningLamps (DRL)/AutomaticHeadlamp System....6-2
DelayedHeadlamps......6-3
AdaptiveForward Lighting(AFL)....6-3
HazardWarningFlashers.....6-4
TurnandLane-Change Signals....6-4
FogLamps......6-4
InteriorLighting
InstrumentPanelIllumination Control....6-5
CourtesyLamps......6-5
DomeLamps......6-5
ReadingLamps......6-6
LightingFeatures
EntryLighting....6-6 DelayedEntryLighting....6-7
DelayedExitLighting......6-7
ParadeDimming......6-7
BatteryLoadManagement....6-7
BatteryPowerProtection.....6-8
ExteriorLighting
ExteriorLampControls
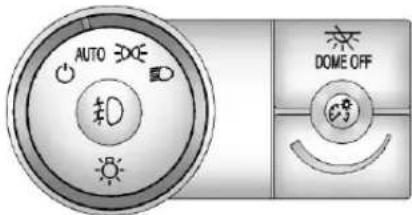
The exterior lamp control is on the instrument panel to the left of the steering wheel.
Therearefourpositions:
(Off): Brieflyturntothisposition toturntheautomaticlightcontroloff oronagain.
AUTO(Automatic): Turnsthe headlampsonautomaticallyat normalbrightness, togetherwiththe following:
- ParkingLamps
6-2Lighting
- Taillamps
- LicensePlateLamps
- InstrumentPanelLights
00(ParkingLamps):Turnsthe parkinglampsontogetherwiththe following:
- Taillamps
- LicensePlateLamps
- InstrumentPanelLights
(DHeadlamps):Turnsthe headlampsontogetherwiththe followinglamps.Awarningchime soundsifthedriverdoorisopened whentheignitionswitchisoffand theheadlampsareon.
- ParkingLamps
- Taillamps
- LicensePlateLamps
- InstrumentPanelLights
D(FogLamps):Turnsonthefog lamps(ifequipped).
SeeFogLampsonpage6-4.
HeadlampHigh/Low-BeamChanger
ID ID (HeadlampHigh/Low-Beam Changer): Pushtheturnsignal leverawayfromyoutoturnthehigh beamson.
Pullthelevertowardyoutoreturnto lowbeams.

This indicator light turnson in the instrument cluster when the high-beam headlamps are on.
Flash-to-Pass
Thisfeatureisusedtosignaltothe vehicleaheadthatyouwant topass.
Iftheheadlampsareofforinthe low-beamposition,pulltheturn signallevertowardyouto momentarilyswitchtohighbeams.
Releasethevertoturnthe high-beamheadlampsoff.
DaytimeRunningLamps (DRL)/Automatic HeadlampSystem
DaytimeRunningLamps(DRL)can makeiteasierforotherstoseethe frontofyourvehicleduringtheday. Fullyfunctionaldaytimerunning lampsarerequiredonallvehicles firstsoldinCanada.
The DRL system makes the low-beam head lamps come on a reduced brightness when the following conditions are met:
• TheignitionisintheON/RUN position.
• The exterior lamp control is in AUTO.
• Theengineisrunning.
WhentheDRLareon,theregular headlamps,taillamps,sidemarker, andotherlampswillnotbeon. The instrumentclusterwillalsonotbelit.
Theheadlampsautomatically changefromDRLtotheregular headlampsdependingonthe darknessofthesurroundings. The otherlampsthatcomeonwiththe headlampswillalsocomeon.
Whenitisbrightenoughoutside, theheadlampswillgooffandthe DRLwillcomeon.
WhentheDRLsareactiveanda turnsignalisoperated,theDRLon thesidetheturnsignalisactivated, willturnoffuntiltheturnsignalis turnedoff.
Theregularheadlampsystem should be turned on when needed.
Donotcoverthelightsensorontop oftheinstrumentpanelbecauseit workswiththeDRL.
LightsOnwithWipers
If the windshieldwipers are activated in daylight with the engine on, and the exterior lamp control is in AUTO, the headlamps, parking lamps, and other exterior lamps come on. The transition time for the lamps coming on varies based on wipers speed. Wh thewipers are not operating, the selampsturnoff.
Movetheexteriorlampcontrolto or ≥ 00 to disable this feature.
DelayedHeadlamps
Delayedheadlampsprovidea periodofexteriorlightingasyou leavetheareaaroundthevehicle. Thisfeatureisactivatedwhenthe headlampsareonduetothe automaticheadlampscontrol feature,andwhentheignitionis turnedoff. Theheadlampsremain onuntiltheexteriorlampcontrolis movedtotheparkinglampsposition oruntilthepre-selecteddelayed headlamplightingperiodhasended.

If the ignition is turned off with the exterior lamp control in the 300 or position, the delayed head lamp cycle will not occur.
Todisablethedelayedheadlamps featureorchangethetimeofdelay, see VehiclePersonalization on page5-37.
AdaptiveForward Lighting(AFL)
VehicleswiththeAdaptiveForward LightingSystem(AFL)have headlampsthatswiveltotheleftor rightwhenmakingaturntoprovide betterlighting.ToenableAFL,set theexteriorlampswitchtothe AUTOposition.Movetheswitchout oftheAUTOpositiontoturnoffthe system.SeeExteriorLampControls onpage6-1.
AFLoperateswhenthevehicle speedisgreaterthan3km/h (2mph).AFLdoesnotoperate whenthetransmissionisin R(Reverse).AFLisnotimmediately
6-4Lighting
operableafterstartingthevehicle; drivingashortdistanceisrequired tocalibratetheAFL.
HazardWarningFlashers
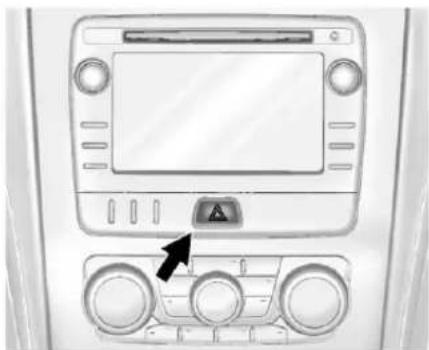
natural_image
Interior view of a car dashboard with control panel and warning symbol (no readable text or labels)△(HazardWarningFlasher):
Pressthisbuttontomakethefront andrearturnsignallampsflashon andoff. Thiswarnsothersthatyou arehavingtrouble. Pressagainto turntheflashersoff.
The turnsignalsdonotworkwhile thehazardwarningflashersareon.
TurnandLane-Change Signals
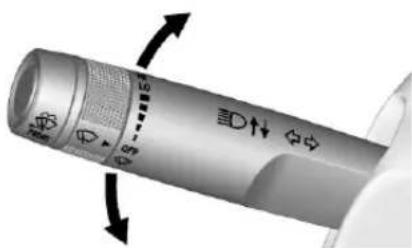
natural_image
Close-up of a handheld device with directional arrows indicating rotation and control buttons (no text or symbols)Movetheturnsignalleverallthe wayupordowntosignalaturn.
Anarrowontheinstrumentcluster flashesinthedirectionoftheturnor lanechange.
Raiseorlowertheleveruntilthe arrowstartstoflashtosignalalane change. Holditthereuntilthelane changeiscompleted. Iftheleveris brieflypressedandreleased, the turnsignalflashestreetimes.
Theleverreturnstoitsstarting positionwheneveritisreleased.
Ifaftersignalingaturnorlane changethearrowflashesrapidlyor doesnotcomeon,asignalbulb maybeburnedout.
Haveanyburnedoutbulbs replaced.Ifabulbisnotburnedout, checkthefuse.SeeFusesand CircuitBreakersonpage 10-28.
TurnSignalOnChime
Ifeitheroneoftheturnsignalsisleft onandthevehiclehasbeendriven morethan1.2km(0.75mi),achime willsound.
FogLamps
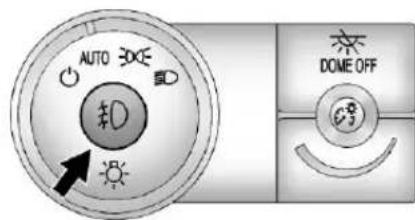
Usethefoglampsforbettervision infoggyormistyconditions.
Thefoglampbuttonisonthe exteriorlampcontroltotheleftof thesteeringcolumn.
D(FogLamps):Pressthisbutton toturnthefoglampsonoroff. Alightcomesonintheinstrument clusterwhenthefoglampsarein use. Theignitionmustbeonforthe foglampstowork.
Whentheheadlampsarechanged tohighbeam, thefoglampsturnoff. Thefoglampscomebackonagain whenthehigh-beamheadlampsare turnedoff.
Somelocalitieshavelawsthat requiretheheadlampstobeon alongwiththefoglamps.
InteriorLighting
InstrumentPanel IlluminationControl
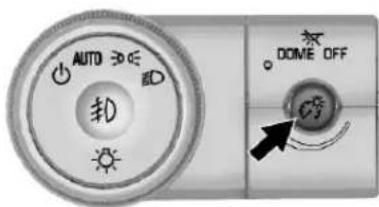
Theinstrumentpanelbrightness knobislocatedontheinstrument paneltotheleftofthesteering column.
(InstrumentPanel Brightness): Pushtheknobinall thewayuntilitextendsoutandthen turntheknobclockwiseor
counterclockwisetobrightenordim thelights.Pushtheknobbackin whenfinished.
CourtesyLamps
The courtesylamps automatically comeonwhenadoorisopened. Thelampscanalsobeturnedon manuallybyfullyturningthe instrumentpanelbrightnesscontrol clockwise.
Thereadinglamps, located on the headliner abovetherearview mirror, can be turnedonoroff independently of the automatic courtesylamps, whenthedoors are closed.
DomeLamps
Thedomelampsareinthe overheadconsoleandabovethe rearseatpassengers.
Thedomelampscomeonwhena doorisopened, unlessthedome lampoverridebuttonispressedin.
6-6Lighting
Thelampscanalsobeturnedon andoffbyturningtheinstrument panelbrightnesscontrolclockwise tothefarthestposition.
DomeLampOverride
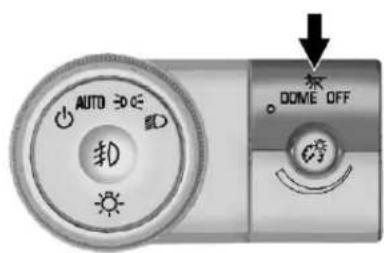
Thedomelampoverridebuttonis nexttotheexteriorlampscontrol.
※DOMEOFF(DomeLamp
Override): Pressthebutton and thedomelampsremainoffwhena doorisopened. Anindicatorlighton thebuttoncomesontoshowthat
thedomelampsareoff.Pressthe buttonagainsothedomelamps comeonwhenadoorisopened.
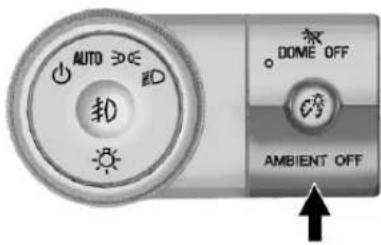
AMBIENTOFF(IfEquipped):
Pressthebuttontoturntheambient lightsoff.Pressthebuttonagainto turnambientlightson.
ReadingLamps
Pressthebuttonneareachlampto turnthemonoroff.
LightingFeatures
EntryLighting
Forvehicleswithcourtesylamps, theycomeonandstayonforaset timewhenever dispressedonthe RemoteKeylessEntry(RKE) transmitter.
Ifadoorisopened, the lampsstay onwhileitisopenandthenturnoff automatically about 20 seconds afterthedoorisclosed. If is pressed and nodoorisopened, the lampsturnoffafterabout 20 seconds.
Entrylightingincludesafeature calledtheaterdimming.Withtheater dimming,thelampsdonotturnoff attheendofthedelaytime. Instead,theyslowlydimandthen goout.Thedelaytimeiscanceledif theignitionkeyisturnedtoON/RUN orthepowerdoorlockswitchis pressed.Thelampswilldim rightaway.
Whentheignitionison, illuminated entryisinactive, which means the courtesylampswillnotcomeon unlessadoorisopened.
DelayedEntryLighting
Delayedentrylightingilluminates theinteriorforaperiodoftimeafter allthedoorshavebeenclosed.
Theignitionmustbeoffordelayed entrylightingtowork.Immediately afterallthedoorshavebeenclosed, thedelayedentrylightingfeature continuestoworkuntiloneofthe followingoccurs:
• TheignitionisinON/RUN.
- Thedoorsarelocked.
• Anilluminationperiodofabout 25secondshaselapsed.
If during the illumination perioda door is opened, the timed illumination period is canceled and the interior lamps remain on.
DelayedExitLighting
Delayedexitlightingilluminatesthe interiorforaperiodoftimeafterthe keyisremovedfromtheignition.
Theignitionmustbeoffordelayed exitlightingtowork. Whenthekey isremoved, interiorillumination activatesandremainsonuntilone ofthefollowingoccurs:
• TheignitionisinON/RUN.
• Thepowerdoorlocksare activated.
• Anilluminationperiodof 20secondshaselapsed.
If during the illumination period a door is opened, the timed illumination period will be canceled and the interior lampswill remain on because a door is open.
ParadeDimming
Thisfeatureautomaticallyprohibits thedimmingoftheinstrumentpanel displaysindaylightwhilethe headlampsareonsothatthe displaysarestillabletobeseen.
BatteryLoad Management
The vehicle has Electric Power Management (EPM) that estimates the battery's temperature and state of charge. It then adjusts the voltage for best performance and extended life of the battery.
Whenthebattery'sstateofcharge islow,thevoltageisraisedslightly toquicklybringthechargebackup. Whenthestateofchargeishigh, thevoltageisloweredslightlyto preventovercharging.Ifthevehicle hasavoltmetergaugeoravoltage displayontheDriverInformation Center(DIC),youmayseethe
6-8Lighting
voltagemoveupordown. This is normal. If there is a problem, an alert will be displayed.
The battery can be discharged at idle if the electrical loads are very high. This is true for all vehicles. This because the generator (alternator) may not be spinning fast enough that lidetoproduce all of the power needed for very high electrical loads.
Ahighelectricalloadoccurswhen severalofthefollowingareon,such as:headlamps,highbeams,fog lamps,rearwindowdefogger, climatecontrolfanathighspeed, heatedseats,enginecoolingfans, trailerloads,andloadspluggedinto accessorypoweroutlets.
EPMworkstoppreventexcessive dischargeofthebattery.Itdoesthis bybalancingthegenerator'soutput andthevehicle'selectricalneeds. Itcanincreaseengineidlespeedto generatemorepowerwhenever needed.Itcantemporarilyreduce thepowerdemandsofsome accessories.
Normally, these actions occur in steps or levels, without being noticeable. In rare cases at the highest level of corrective action, this action may be notice able to the driver. If so, a DIC message might be displayed, such as BATTERY SAVERACTIVE, BATTERY VOLTAGELOW, or LOWBATTERY. If one of these messages displays, it is recommended that the driver reduces the electrical loads as much as possible. See Driver Information Center (DIC) on page 5-22.
BatteryPowerProtection
Thisfeaturehelpspreventthe batteryfrombeingdrained,ifthe interiorcourtesylampsorreading lampsareaccidentallylefton.Ifany oftheselampsarelefton,they automaticallyturnoffafter 10minutes,iftheignitionisoff.The lampswillnotcomebackonagain untiloneofthefollowingoccurs:
• Theignitionisturnedon.
• The exterior lamps controlis turned off, thenon again.
Theheadlampswilltimeoutafter 10minutes,iftheyaremanually turnedonwhiletheignitionison oroff.
Infotainment System
Introduction
Infotainment......7-1
Theft-DeterrentFeature.....7-2
Overview....7-3
Operation....7-3
Radio
AM-FMRadio....7-6
SatelliteRadio....7-9
RadioReception......7-11
Multi-BandAntenna......7-11
AudioPlayers
CDPlayer....7-12
MP3....7-13
Auxiliary Devices......7-17
RearSeatInfotainment
RearSeatAudio(RSA)
System......7-18
RearAudio
Controller(RAC)......7-27
Phone
Bluetooth....7-28
Settings
Settings......7-35
TrademarksandLicense Agreements
TrademarksandLicense
Agreements......7-37
Introduction
Infotainment
Readthefollowingpagesto becomefamiliarwiththe infotainmentsystemfeaturedinthis ownermanual.

WARNING
Takingyoureyesofftheroad fortoolongortoooftenwhile usinganyinfotainmentfeatures cancauseacrashresultingin injuryordeath.Donotgive extendedattentionto infotainmenttaskswhile driving.Focusyourattention ondrivingandlimitglancesto theinstrumentclusterorcenter stackscreens.Usevoice guidancewheneverpossible.
7-2InfotainmentSystem
Theinfotainmentsystemhasbuilt-in featuresintendedtohelpwiththis bydisablingsomefunctionswhen driving.Agrayed-outfunctionisnot availablewhenthevehicleis moving.
Allfunctionsareavailablewhenthe vehicleisparked.Beforedriving:
- Becomefamiliarwiththe infotainmentsystemoperation andbuttonsonthefaceplate.
- Setuptheaudiobypresetting favoritestations, settingthe tone, and adjusting the speakers.
- Setupphonenumbersin advancesotheycanbecalled easilybypassingasingingle buttonorasinglevoice commandforvehiclesequipped withphonecapability.
SeeDefensiveDrivingonpage9-2.
ThevehiclehasRetained AccessoryPower(RAP).WithRAP, theaudiosystemcanbeplayed evenaftertheignitionisturnedoff. SeeRetainedAccessoryPower (RAP)onpage9-18.
The vehicle has abaseradio included in this manual. Seetheseparate infotainment manual for information on the up level radios, audioplayers, phone, navigation system, and voice or speech recognition. There is also information on settings and downloadable applications (if equipped).
Theft-DeterrentFeature
TheftLock ^® is designed to discourage the theft of the vehicle's radiobylearning portion of the Vehicle Identification Number (VIN). Theradiodes not operate if itis stolenormoved to different vehicle.
Overview
Theinfotainmentsystemiscontrolledbyusingthebuttons,touchscreen, steering wheel controls, and voice recognition. See Operation on page 7-3.
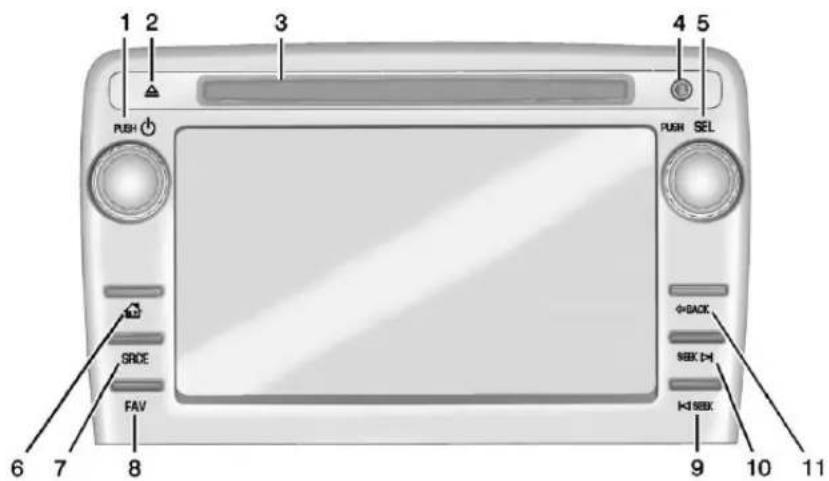
- PUSH/∅(Volume/Power)
- (Eject)
3.CDSlot
4.AUXPort
5.PUSH/SEL(Select)
6. (HomePage)
7.SRCE(Source)
8.FAV(FavoritesMenu)
- KSEEK(Previous/Reverse)
10.SEEK ▷(Next/Forward)
- ←BACK
Operation
InfotainmentControls
(HomePage):Presstogoto theHomePage.See"HomePage" inthissection.
SRCE(Source):Presstochange theaudiosourcetoAM,FM, SiriusXM® (ifequipped),CD,USB, iPod®,orAUX.
FAV(FavoritesMenu):InAM,FM, orSiriusXM,presstodisplayor changethecurrentfavoritepage numberabovethepresetbuttons. Keeppressingtoscrollthroughthe favoritespages.Thestoredstations foreachlistdisplayonthebottomof thescreen.Thenumberofpreset FavoritePagescanbechangedby pressingtheSettingsbuttonona HomePage,thenpressing FavoritesPages,andthenselecting thenumberofFavoritePages.
SEEK(Previous/Reverse):
- AM, FM, SiriusXM (ifequipped): Presstoseektotheprevious strongstation. Pressandhold forScan. Press Kagaintostop thescan.
2.CD,USB:Presstoseektothe beginningofthecurrentor previoustrack.
3.CD,USB:Pressandholdto quicklyreversethroughatrack. Releasethebuttontoreturnto playingspeed.SeeCDPlayer onpage7-12andAuxiliary Devicesonpage7-17.
SEEK ▷(Next/Forward):
- AM, FM, SiriusXM (ifequipped): Presstoseektothenextstrong station. Press and hold for Scan. Press againtostophescan.
2.CD,USB:Presstoseekorskip thenexttrackorprogram.
3.CD,USB:Pressandholdtofast forwardthroughatrack.Release thebuttontoreturntoplaying speed.SeeCDPlayeron page7-12andAuxiliaryDevices onpage7-17.
←BACK:Presstoreturntothe previoussscreeninamenu.
TouchscreenButtons
Touchscreenbuttonsshowvisibly onthescreenwhenavailable.When afunctionisunavailable,thebutton maygray-out.Whenafunctionis selected,thebuttonmayhighlight, oranimate.
HomePage
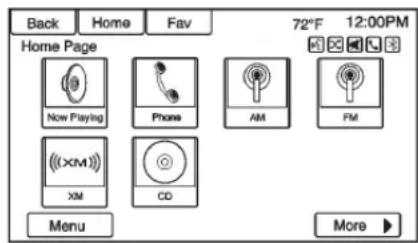
Theinfotainmentsystemdisplaysa HomePagetoaccessallofthe applications. Thecurrentselected sourceisframedwitharedbox outline.
Back: Presstogobacktothe previouspageormenu.
Home:Fromanypage, press to cyclethroughthe HomePagesto startadifferentapplication. The HomePagecanhaveuptothree pageswitheighticonsperpage. Eachofthesethreepagescanbe customizedtocontainyourchoice ofuptoeightperscreen. They may alsobere-orderedoneachscreen totaste.
FAV(Favorites):Presstodisplay thefavoritelistoraddafavorite.
^16 (VoiceRecognition): Pressto beginvoicerecognition. See Bluetoothpage7-28.
Menu: PresstoentertheHome Pagemenu.
More ▶:Presstogotothenext HomePage.
HomePageFeatures
Somefeaturesaredisabledwhen thevehicleismovingandsome iconsmaynotbeactive.
NowPlaying: Presstodisplaythe activesourcepage. Thesources available are AM, FM, XM (if equipped), CD, USB, Bluetooth, or AUX Input.
(Navigation): Presstodisplay theOnStar® Turn-by-Turn Navigation. See OnStarOverview onpage 14-1.
(Phone): Presstodisplaythe Phonemainpage. See Bluetooth page 7-28.
Settings: Presstodisplaythe Settingsmenu.SeeSettings page7-35.
Tone: Presstodisplaythe Tone Settingsmenu. The following may display:
ToneSettings: Presstoadjustthe tonesettings. The following may display:
• EQ:Press◀or▶toadjustthe equalizer.
- Bass:Press+or-toadjust thebass.
- Middle:Press+or-toadjust themiddle.
- Treble:Press+or-toadjustthe treble.
• Balance: PressLtohearmore soundfromtheleftspeakersor Rformoresoundfromtheright speakers. Themiddleposition balancesthesoundbetweenthe leftandrightspeakers.
7-6InfotainmentSystem
- Fade:PressFformoresound fromthefrontspeakersorRfor moresoundfromtherear speakers. Themiddleposition balancesthesoundbetweenthe frontandrearspeakers.
DSPMode:Press ◀or▶toadjust theDSPmode(ifequipped).
Language
Tochangethelanguageofthe screens.See Vehicle Personalizationonpage5-37.
EnglishorMetricUnits
TochangethesccreensfromEnglish ormetric.SeeDriverInformation Center(DIC)onpage5-22.
Radio
AM-FMRadio
PlayingtheRadio
PUSH/⏻(Power/Volume):
• Presstoturntheradioonoroff.
• Turntoincreaseordecreasethe volumeoftheactivesource.
Thesteeringwheelcontrolscan alsobeusedtoadjustthevolume. SeeSteeringWheelControlson page5-3.
AudioSource
ToaccessAM,FM,orSiriusXM ^® if equipped,dooneofthefollowing:
- PresstheAM,FM,orXM(if equipped)screenbutton.
- PresstheSRCEradiobuttonto scrollthroughtheoptions. Asourceribbonwillappearat thebottomofthescreen allowingyoutoselecttheone youwant.
InfotainmentSystemSettings
ToneSettings
Toaccessthetonesettings,press theToneSettingsbuttononthe HomePage.
Toadjustthesettings:
- Bass:Press+or-tochange thelevel.
- Middle:Press+or-tochange thelevel.
- Treble:Press+or-tochange thelevel.
- EQ:Press◀or▶toscroll through the preset EQ options.
- DSPMode:Press◀or▶to scrollthroughthepresetDSP modes.
- Fade:PresstheForRbutton formoresoundfromthefrontor rearspeakers. Themiddle positionbalancethesound betweenthefrontandrear speakers.
• Balance:PresstheLorRbutton formoresoundfromtheleftor rightspeakers. Themiddle positionbalancethesound betweentheleftandright speakers.
FindingaStation
PressSRCEtoselectAM,FM, SiriusXM(ifequipped).
TurnthePUSH/SELknobtofinda radiostation. Toselectapreset station, pressFAVtoscrollthrough thefavoritepagesandthenpressa presetbuttonontheradioorthe screenbutton.
SeekingaStation
Press KSEEKorSEEK to searchforastation. You may also use the Nonthesteeringwheel control (SWC).
AM
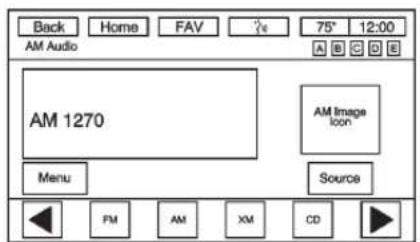
ToaccesstheAMmenupressthe Menuscreenbuttonandthe followingmaydisplay:
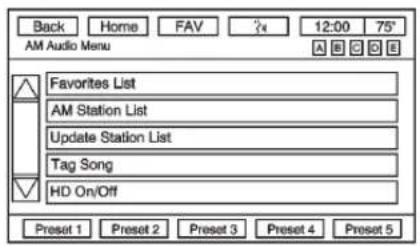
FavoritesList: Presstodisplaythe AMfavoriteslist.
AMStationList: Presstodisplaya listofAMstations.
UpdateStationList: Pressto displaythelistofAMstations. Press refreshtoupdatethelist.
TagSong: Presstotagasongto downloadtoaniPodwhenitis connectedtobepurchasedata latertime.
HDOn/Off: PresstoturntheHD Radioreceiveronoroff. This feature is not available in SiriusXMif equipped.
FM
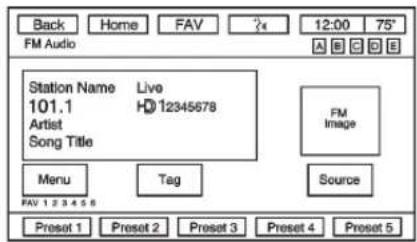
7-8InfotainmentSystem
ToaccesstheFMMenupressthe Menuscreenbuttonandthe followingmaydisplay:
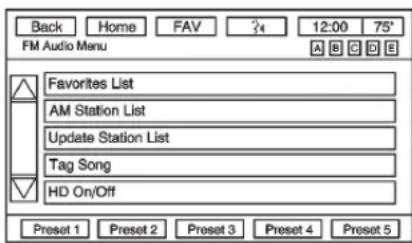
FavoritesList:Presstodisplaythe FMfavoriteslist.
FMStationList: Presstodisplaya listofFMstations.
FMCategoryList:PresstodisplayalistofFMcategories.
UpdateStationList: Pressto displaythelistofFMstations. Press refreshtoupdatethelist.
TagSong: Presstotagasongto downloadtoaniPodwhenitis connectedtobepurchasedata latertime.
HDOn/Off: PresstoturntheHD Radioreceiveronoroff.
SiriusXM(IfEquipped)
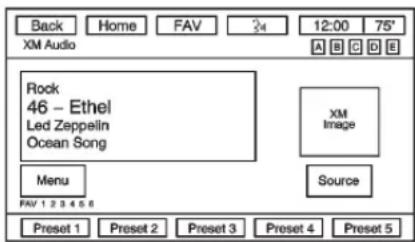
ToaccesstheXMMenupressthe Menuscreenbuttonandthe followingmaydisplay:
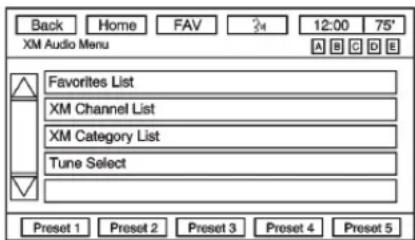
FavoritesList: Presstodisplaythe SiriusXMfavoriteslist.
XMChannelList: Presstodisplay alistofSiriusXMchannels.
XMCategoryList:PresstodisplayalistofSiriusXMcategories.
TuneSelect: If equipped with SiriusXM, press and the following may display:
• Artist: Presstosetanaudioalert whenthecurrentartistisplaying onaSiriusXMchannel.
- Song: Presstosetanaudioalert whenthecurrentsongisplaying onaSiriusXMchannel.
- TuneSelectManager:Press Disable/EnableAllAlertsto enableordisableallalerts. Acheckmarknexttothealert meansitisturnedon.Pressan alerttoturnitoff.PressDelete todeleteanalert.
- AudibleAlert: This feature will give an audio alert when certain artists or songs are available on aspecific station. Presstoturn onoroff.
StoringRadioStationPresets
Upto30presetstationscanbe stored.AM,FM,andSiriusXM(if equipped)canbemixed.
-
From the AM, FM, or Sirius XM mainpage, press and hold any 1-5 buttons or one of the preset screen buttons at the bottom of the screen. After a few seconds, abeepis heard and thenew preset information display on that screen button.
-
Repeatforeachpreset.
Mixed-BandPresets
Eachfavoritepagecanstore fivepresetstations. The presets withinapagecanbefromdifferent radiobands.
Toscrollthroughthepages, press FAVortheFAVscreenbuttononthe topbar. The current pagenumber displays abovethepresetbuttons. The stored stations foreach favorite pagedisplayon the preset buttons.
Tochangethenumberoffavorite pagesdisplayed:
-
PressSettings the HomePage.
-
PressFavoritePages.
-
Selectthenumberofpagesto display.
RecallingaPresetStation
Torecallapresetstationfroma favoritespage,doonethefollowing:
- PresstheFAVscreenbuttonat thetopbartodisplaythepreset pop-up.Pressoneofthepreset screenbuttonstogotothe selectedpresetstation.
- IntheAM,FM,orSiriusXM(if equipped)mainpage,pressone ofthepresetscreenbuttonsto gototheselectedpresetstation.
SatelliteRadio
SatelliteRadio
VehicleswithavalidSiriusXM® satelliteradiosubscriptioncan receiveSiriusXMprogramming.
SiriusXMsatelliteradiohasawide varietyofprogrammingand commercial-freemusic,coastto coast,andindigital-qualitysound. Formoreinformation,see www.siriusxm.comorcall 1-866-635-2349(U.S.)and www.xmradio.caorcall 1-877-209-0079(Canada).
WhenSiriusXMisactive,thestation name,number,categoryname, songtitle,andartistdisplayonthe screen.SiriusXMmayupdatethe backgroundpictureatanytime.
SiriusXMCategories
SiriusXMstationsareorganizedin categories.
AddingorRemovingSiriusXM Categories
Usingthehomepage:
- PresstheSettingsscreenbutton ontheHomePage.
- SelectXMCategories.
- Selectordeselectacategory. Acheckmarkwillindicatethat thecategoryisselected.
Press "ShowAllXMCategories" to restore all Sirius XM categories.
UsingtheXMplayingscreen:
- Pressthe Menuscreenbutton.
- SelectXMCategories.
- Selectordeselectacategory. Acheckmarkwillindicatethat thecategoryisselected.
SiriusXMMessages
XL(ExplicitLanguage
Channels): Thesestations, or any others, can be blocked by request, by calling 1-866-635-2349 (U.S.), and 1-877-209-0079 (Canada).
XMUpdating:Theencryptioncode inthereceiverisbeingupdated.No actionisrequired.
LoadingXM: The audiosystem is acquiring and processing audio and text data. No action is needed.
ChannelOffAir: Thisstationisnot currentlyinservice.
ChannelUnauth: Thisstationis blockedorcannotbereceived.
ChannelUnavailable: This previously assigned station is no longer assigned.
NoArtistInfo: Noartist information is available at this time on this station.
NoTitleInfo:Nosongtitle informationisavailableatthistime onthisstation.
NoCATInfo:Nocategory informationisavailableatthistime onthisstation.
NoInformation: Notextor informational messages are available at thistime on this station.
NoXMSignal: The vehicle maybe inalocation where the Sirius XM signal is being blocked. When the vehicle is moved into an open area, the signal should return.
CATNotFound: There are no stations available for these selected category.
XMRadioID: Iftunedtostation0, thismessagealternateswiththe SiriusXMradioeight-digitradioID label. Thislabelisneededto activatetheservice.
Unknown: If this message is received when tuned to station 0, there could be a receiver fault. Consult with your dealer.
XMNotAvailable: If this message does not clear within a short period of time, there are ever could have a fault. Consult with your dealer.
RadioReception
Frequencyinterferenceandstatic canoccurduringnormalradio receptionifitemssuchasphone chargers,vehicleconvenience accessories,andexternalelectronic devicesarepluggedintothe accessorypoweroutlet.Ifthereis interferenceorstatic,unplugthe itemfromtheaccessorypower outlet.
FM
FMsignalsonlyreachabout16to 65km(10to40mi).Although the radiohasabuilt-inelectroniccircuit that automaticallyworkstoreduce interference, somestaticcanoccur, especiallyaroundtallbuildingsor hills, causingthesoundtofadein andout.
AM
TherangeformostAMstationsis greaterthanforFM,especiallyat night.Thelongerrangecancause stationfrequenciestointerferewith eachother.Staticcanalsooccur
whenthingslikestormsandpower linesinterferewithradioreception. Whenthishappens,tryreducingthe trebleontheradio.
SiriusXMSatelliteRadio Service
SiriusXMSatelliteRadioService providesdigitalradioreception. Tall buildingsorhillscaninterferewith satelliteradiosignals, causing the soundtofadeinandout. In addition, travelingorstandingunder heavyfoliage, bridges, garages, ortunnelsmaycauselossofthe SiriusXMsignalforaperiodoftime.
CellPhoneUsage
Cellphoneusage, such as making or receiving phone calls, charging, or just having the phone on may cause static interference in the radio. Unplug the phone or turn it off if this happens.
Multi-BandAntenna
Themulti-bandantennaislocated ontheroofofthevehicle. Thistype ofantennaisusedwiththeAM/FM radio,aswellasOnStarandthe SiriusXMSatelliteRadioService System,ifthevehiclehasthese features.Keepthisantennaclearof snowandicebuildupforclearradio reception.Ifthevehiclehasa sunroof,theperformanceofthe radiosystemmaybeaffectedifthe sunroofisopen.Loadingitemsonto theroofofthevehiclecaninterfere withtheperformanceoftheradio systemand,ifthevehiclehasthis feature,OnStar.Makesurethe multi-bandantennaisnot obstructed.
AudioPlayers
CDPlayer
TheplayercanbeusedforCD, MP3audio,andVideo.
Withthevehicleon,insertadisc intotheslot,labelsideup. The playerpullsitinandbeginsplaying.
Thesystemiscapableofplaying:
- MostaudioCDs
• CD-R - CD-RW
• MP3orunprotectedWMA formats
Whenplayinganycompatible recordabledisc,thesoundquality canbereducedduetodiscquality, themethodofrecording,thequality ofthemusicthathasbeen recorded,orthewaythedischas beenhandled.
There can be increased skipping, difficulty in recording tracks, difficulty in finding tracks, and/or difficulty in loading and dejecting. If these problems occur, check the disc for damage or try a known good disc.
ToavoiddamagetotheCDplayer:
- Donotusescratchedor damageddiscs.
- Donotapplylabelstodiscs. The labelscouldgetcaughtinthe player.
- Insertonlyonediscatatime.
- Keeptheloadingslotfreeof foreignmaterials, liquids, and debris.
- Useamarkingpentolabelthe topofthedisc.
LoadingandEjectingDiscs
Toloadadisc:
-
Turnthevehicleon.
-
Insertadiscintotheslot, label sideup. The player pulls it in the rest of the way. If the disc is damaged or improperly loaded, there is an error and the disc ejects.
Thediscautomaticallyplaysonce loaded.
Press △toejectadiscfromthe CDplayer.Ifthediscisnotremoved withinashortperiodoftime,itis automaticallypulledbackintothe player.
PlayinganAudioCD
- PresstheDiscscreenbutton on the HomePageorselect thedisc.
-
From the Discscreen, press the Menuscreen button to display themenu options.
-
Presstoselectthedesired option.
OntheDiscmainpageatrack numberdisplaysatthebeginningof eachtrack.Song,Artist,elapsed time,andAlbuminformation displayswhenavailable.
Usethefollowingcontrolstoplay thedisc:
KSEEK:
- Presstoseektothebeginningof thecurrentorprevioustrack. Ifthetrackhasbeenplayingfor lessthaneightseconds, itseeks totheprevioustrack. Iflonger thaneightseconds, thecurrent trackstartsfromthebeginning.
- Pressandholdtofastreverse throughatrack.Releasethe buttontoreturntoplaying speed.Elapsedtimedisplays.
SEEK ▷:
• Presstoseektothenexttrack.
- Pressandholdtofastforward throughatrack.Releasethe buttontoreturntoplaying speed.Elapsedtimedisplays.
PUSH/SEL(Select): Turntothe rightorlefttoselectthenextor previoustrack.
ErrorMessages
IfDiscErrordisplaysand/orthedisc comesout, it could be before one of the following reasons:
- Thedischasaninvalidor unknownformat.
- Thediscisveryhot. Trythedisc againwhenthetemperature returnstonormal.
- Theroadisveryrough.Trythe discagainwhentheroadis smoother.
- Thediscisdirty, scratched, wet, or upsidedown.
• Theairisveryhumid. Try the discagainlater.
• Therewasaproblemwhile burningthedisc.
• Thelabeliscaughtintheplayer.
If the CD is not playing correctly, for any other reason, try a known good CD.
Ifanyerrorcontinues,contactyour dealer.
MP3
PlayinganMP3CD
ToplayanMP3CD, followthesame instructionsas "Playingan AudioCD."
The following guidelines must be met when creating an MP3disc, otherwisetheCDmight not play:
• Samplingrate: 16kHz, 22.05kHz, 24kHz, 32kHz, 44.1kHz, and 48kHz.
- Bitratessupported:8,16,24,32,40,48,56,64,80,96,112,128,144,160,192,224,256,and320kbps.
7-14InfotainmentSystem
• Maximumnumberoffolders: eightfolderswith255filesper folder.
• Maximumof1,000fileson adisc.
- RecordedonaCD-RorCD-RW withamaximumcapacityof 700MB.
- TheArtist/Album/SongTitles/GenreinformationrequiresaCDtobefullyscannedbeforethemusicnavigatorworkswiththesemenus.
MP3Audio
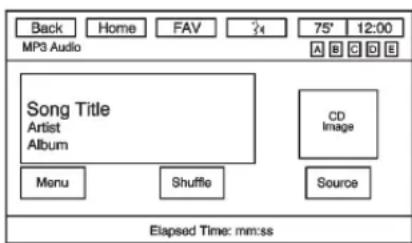
PresstheMenuscreenbuttonwhile thatsourceisactivetoaccessthe CDAudioMenu.
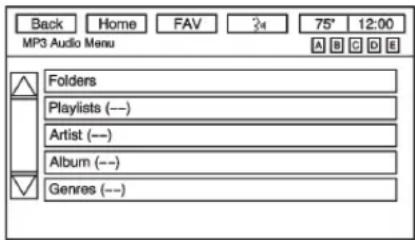
Folders: Presstoviewthefolders storedonthedisc. Selectafolderto viewthelistofallsongsinthat folder. Theremightbeadelay beforethelistdisplays. Selecta songfromthelisttobeginplayback.
Playlists: Presstoviewthe playlistsstoredonthedisc.Selecta playlisttoviewthelistofallsongsin thatplaylist.Theremightbeadelay beforethelistdisplays.Selecta songfromthelisttobegin playback.
Artists: Presstoviewthelistof artistsstoredonthedisc. Selectan artistnametoviewalistofallsongs bytheartist.Theremightbeadelay beforethelistdisplays.Selecta songfromthelisttobeginplayback.
Genres: Presstoviewthegenres. Selectagenretoviewalistofall songsofthatgenre.Selectasong fromthelisttobeginplayback.
Albums: Presstoviewthealbums onthedisc. Selectthealbumto viewalistofallsongsonthealbum. Theremightbeadelaybeforethe listdisplays. Selectasongfromthe listtobeginplayback.
Composers: Presstoviewthe Composersstoredonthedisc. Theremightbeadelaybeforethe listdisplays. The Composersmenu displays. Selectacomposito displayalistofalbumsfromthe composer.
Tracks(SongTitles):Pressto displayalistofallsongsonthe disc.Songsaredisplayedasstored onthedisc.Theremightbeadelay beforethelistdisplays.Tobegin playback,selectasongfromthelist.
RootDirectory
Therootdirectoryistreatedasa folder.Allfilescontaineddirectly undertherootdirectoryare accessedpriortoanyrootdirectory folders.
EmptyFolders
Ifarootdirectoryorfolderisempty orcontainsonlyfolders,theplayer advancestothenextfolderinthe filestructurethatcontainsa compressedaudiofile.Theempty folder(s)arenotdisplayedor numbered.
NoFolder
WhentheCDonlycontains compressedaudiofileswithoutany foldersorplaylists,allfilesare undertherootfolder.
FileSystemandNaming
Thesongtitles, artists, albums, and genres are taken from the file's ID3 tag and are only displayed if present in the tag. If a song title is not
presentintheID3tag,theradio displaysthefilenameasthe trackname.
PreprogrammedPlaylists
Theradiorecognizes preprogrammedplaylists;however, thereisnoeditingcapability. These playlistsaretreatedasspecial folderscontainingcompressed audiosongfiles.
MusicNavigator
Folders
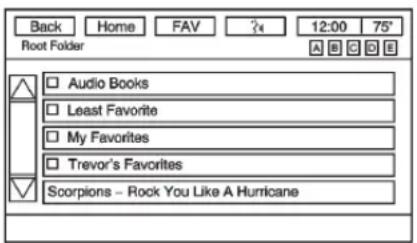
Thefolderstructurecansupportup tofivelevelsofdepth. The folders andthensongswilldisplayin alphabeticalorder.
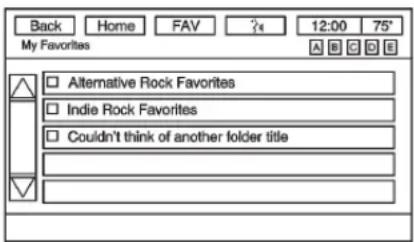
Pressoneoftheoptionsfromthe RootFoldertodisplayotherfolders ofthatoptiontype.Keepressingto displayeachscreenuntilalllevels havebeenreached. Thelastlevel usuallycontainsthedesiredsong toplay.
Playlists
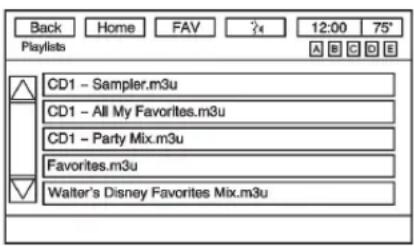
7-16InfotainmentSystem
PressthePlaylistscreenbutton displayedontheRootFoldermenu. ThePlaylistmenudisplays.
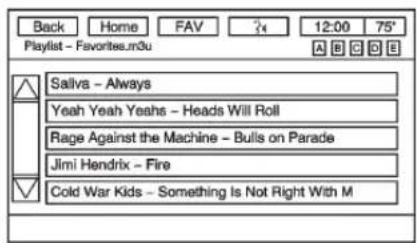
Selectoneoftheoptionslistedon thePlaylistmenu.Alistdisplaying thesongtitles,thenArtists associatedwiththetitlesappear.
Artists
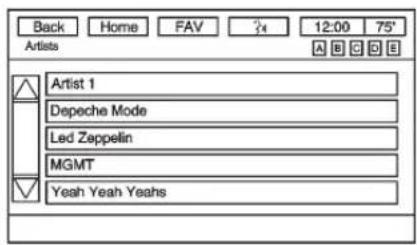
PresstheArtistscreenbutton displayedontheRootFoldermenu. TheArtistmenudisplays.
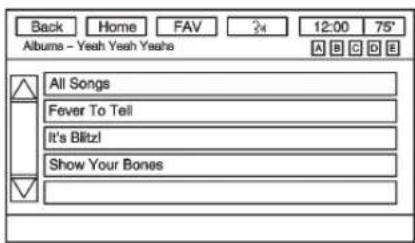
SelectanartistfromtheArtistmenu todisplayalistofalbums.
Albums
SelectanalbumfromtheAlbums menutodisplayalistofsongs. Selectasongfor playback.
Genres
PresstheGenrescreenbutton displayedontheRootFoldermenu. TheGenremenudisplays.
Followthesameinstructionsas givenforArtist.Eachmenu selectionwilleventuallyleadtothe songfor playback.
Tracks
PresstheSongTitlesscreenbutton displayedontheRootFoldermenu. TheSongTitlesmenudisplays. Selectthedesiredsongfor playback.
Composers
PresstheComposersscreenbutton displayedontheRootFoldermenu. TheComposersmenudisplays. Selectacomposertodisplayalist ofAlbumsfromthecomposer.
SelecttheAlbumtodisplayalistof songs.Selectthedesiredsongfor playback.
Auxiliary Devices
The vehicle may have a 3.5 mm (1/8 in) auxiliary input jack on the face plate. For vehicles with a USB port, it is in the instrument panel storage area.
Usingthe3.5mm(1/8in) AuxiliaryInputJack
Thisisnotanaudiooutput;donot plugaheadphonesetintothefront auxiliaryinputjack.Connectan auxiliaryinputdevicesuchasan iPod,laptopcomputer,MP3player, CDplayer,orcassettetapeplayer totheauxiliaryinputjackforuseas anothersourceforaudiolistening.
Driversareencouragedtosetup anyauxiliarydevicewhilethe vehicleisinP(Park).See DefensiveDrivingonpage9-2for moreinformationondriver distraction.
Touseanauxiliaryinputdevice, connecta3.5mm(1/8in)cableto theradio'sfrontauxiliaryinputjack.
PressSRCEtoselectthedevice.
UsingtheUSBPort
ForvehicleswithaUSBport, the connectorisintheinstrumentpanel storagearea. SeeInstrumentPanel Storageonpage4-1.
RadioswithaUSBportcancontrolaUSBstoragedeviceoraniPod usingtheradiobuttonsandknobs. SeeMP3onpage7-13for informationabouthowtoconnect andcontrolaUSBstoragedeviceoraniPod.
USBSupportedDevices
- USBFlashDrives
- PortableUSBHardDrives
• FifthgenerationorlateriPod - iPodnano®
- iPodtouch®
- iPodclassic®
NotalliPodsandUSBdrivesare compatiblewiththeUSBport.
MakesuretheiPodhasthelatest firmwarefromApple ^® forproper operation.iPodfirmwarecanbe updatedusingthelatestiTunes ^® application.Seewww.apple.com/itunes.
ForhelpidentifyingyouriPod, goto www.apple.com/support.
RearSeat Infotainment
RearSeatAudio(RSA) System
The vehicle may have a DVD Rear Seat Entertainment (RSE) system. The RSE system works with the vehicle's audiosystem. The DVD player is part of the frontradio. The RSE system includes a radiowith a DVD player, avideodisplayscreen, audio/videojacks, twowireless headphones, and a remote control. See Operation on page 7-3 form more information on the vehicle's infotainment system.
BeforeDriving
TheRSEisdesignedforrearseat passengersonly. Thedrivercannot safelyviewthevideoscreenwhile drivingandshouldnottrytodoso.
Insevereorextremeweather conditions, the RSEsystem might not work until the temperature is within the operating range. The operating range for the RSE system is above -20^(-4^) or below 60^(140^) . If the temperature of the vehicle is outside of this range, heater cool the vehicle until the temperature is within the operating range of the RSE system.
ParentalControl
TheRSEsystemmayhavea ParentalControlfeature,depending ontheradio.ToenableParental Control,pressandholdtheradio powerbuttonformorethan twosecondstostopallsystem featuressuchas:radio,video screen,RSA,DVDand/orCD.While ParentalControlison,displays.
Whentheradioisturnedbackon, ParentalControlisunlocked.
Headphones
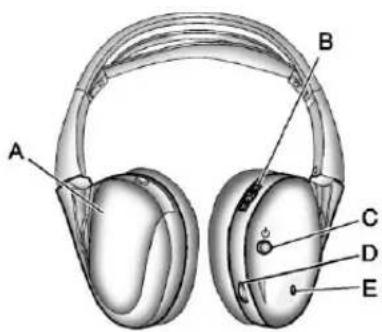
A. Batterycover
B.Channel1or2switch
C.Powerbutton
D. Volumecontrol
E.Powerindicatorlight
TheRSEincludestwo2-channel wirelessheadphonesthatare dedicatedtothissystem.Channel1 isdedicatedtothevideoscreen, whileChannel2isdedicatedtoRSA selections.Theseheadphonesare usedtolistentomediasuchas
CDs,DVDs,MP3/WMAs,DVD-As, radio,anyauxiliarysource connectedtoA/Vjacks,orthe auxiliaryinputjack,ifthevehicle hasthisfeature. Thewireless headphoneshaveapowerbutton, channel1or2switch,andavolume control.Switchtheheadphonesoff whennotinuse.
Pushthepowerbuttontoturnon theheadphones.Anindicatorlight locatedontheheadphonescomes on.Ifthelightdoesnotcomeon, thebatteriesmightneedtobe replaced.Intermittentsoundorstatic ontheheadphonescanalsobean indicationofweakbatteries.See "BatteryReplacement"laterinthis sectionformoreinformation.
Toadjustthevolumeonthe headphones,usethevolumecontrol locatedontherightside.
Infraredtransmittersarelocatedat therearoftheRSEoverhead console.Theheadphonesshutoff automaticallytosavethebattery poweriftheRSEsystemandRSA
areshutofforiftheheadphonesare outofrangeofthetransmittersfor morethanthreeminutes.Movingtoo farforwardorsteppingoutofthe vehicle,cancausetheheadphones tolosetheaudiosignal.
Foroptimalaudioperformance, the headphonesmustbeworncorrectly. Headphonesshouldbewornwith theheadbandoverthetopofthe headforbestaudioreception. The symbolL(Left)appearsonthe outsidebottomedgeoftheearcup andshouldbepositionedontheleft ear. ThesymbolR(Right)appears ontheoutsidebottomedgeofthe earcupandshouldbepositionedontherightear.
Notice: Donotstorethe headphonesinheatordirect sunlight. This could damage the headphones and repairs will not be covered by the warranty. Storage in extreme cold can weaken the batteries. Keep the headphones stored in a cool, dry place.
If the foam ear pads attached to the headphones become worn nor damaged, the pad scan bereplaced separately from the headphones set. Top purchasereplacement ear pads, call 1-888-293-3332, then prompt zero (0), or contact your dealer.
Headphonesshouldbestoredinthe frontfloorconsoleandnotinthe frontseatbackpocket.Headphone damagecanoccurwhenthesecond rowseatsarefoldedforward.
BatteryReplacement
Tochangethebatteriesonthe headphones:
- Turnthescrewtoloosenthe batterydoorlocatedontheleft sideoftheheadphones.Slide thebatterydooropen.
- Replacethetwobatteries in the compartment. Makesure that they are installed correctly, using the diagram on the inside of the battery compartment.
- Replacethebatterydoor and tightenthedoorscrew.
If the headphones are to bestored for along period of time, remove the batteries and keep them in a cool, dry place.
Audio/Video(A/V)Jacks
natural_image
Three circular buttons labeled (A), (B), and (C) on a white background, no text or symbols beyond labels.A. Yellow: VideolInput
B. White: Left Audiolnput
C.Red:RightAudiolnput
TheA/Vjacksarecolorcodedto matchtypicalhomeentertainment systemequipment.
TheA/Vjacks, located on therear of the floor console, allow a doctor videosignal to be connected from an auxiliary devices such as camcorder or video game unit to the RSE system. Adapter connectors or cables (not supplied) might be required to connect the auxiliary device to the A/Vjacks. Refertothemanufacturer's instructions for proper usage.
Powerforauxiliarydevicesisnot suppliedbytheradiosystem.
Tousetheauxiliaryinputsofthe RSEsystem,connectanexternal auxiliarydevicetothecolor-coded A/Vjacksandturnboththeauxiliary deviceandthevideoscreenpower on.IfthevideoscreenisintheDVD playermode,pressingtheAUX (auxiliary)buttonontheremote controlswitchesthevideoscreen fromtheDVDplayermodetothe auxiliarydevice.Theradiocanlisten totheaudiooftheconnected auxiliarydevicebysourcingto auxiliary.SeeAuxiliaryDeviceson page7-17formoreinformation.
HowtoChangetheRSEVideo ScreenSettings
Thescreendisplaymode(normal, full, and zoom), screenbrightness, and setup menulanguage can be changed from the on screensetup menuby using theremote control. To changeasetting:
- Press

2.Use
- Press
□againtoremovethe menufromthescreen.
AudioOutput
AudiofromtheDVDplayeror auxiliaryinputscanbeheard throughthefollowingsources:
- Wirelessheadphones
- Vehiclespeakers
• Vehicle-wiredheadphonejacks ontheRSAsystem,ifthe vehiclehasthisfeature.
The RSEsystemalwaystransmits the audiosignaltothewireless headphones, if there is audio available. See "Headphones" earlier in this section form more information.
TheDVDplayeriscapableof outputtingaudiotothewired headphonejacksontheRSA system,ifthevehiclehasthis feature.TheDVDplayercanbe selectedasanaudiosourceonthe RSAsystem.SeeRearSeatAudio (RSA)Systemonpage7-18for moreinformation.
Whenadeviceisconnectedtothe A/Vjacks,ortheradio'sauxiliary inputjack,ifthevehiclehasthis feature,therearseatpassengers areabletohearaudiofromthe auxiliarydevicethroughthewireless orwiredheadphones.Thefrontseat passengersareabletolistento playbackfromthisdevicethrough thevehiclespeakersbyselecting AUXasthesourceontheradio.
VideoScreen
The videoscreenislocated in the overhead console. Whenthe video screen is not in use, push it up into its locked position.
Tousethevideoscreen:
-
Pushthereleasebuttonlocated ontheoverheadconsole.
-
Movethescreentothedesired position.
IfaDVDDisplayingandthescreen israisedtoitslockedposition,the screenremainson;thisisnormal, andtheDVDcontinuestoplay throughthepreviousaudiosource.
Press ☐ ontheremotecontrolor ejectthedisctoturnoffthescreen.
Theinfraredreceiversforthe wirelessheadphonesandthe remotecontrolarelocatedatthe rearoftheoverheadconsole.
7-22InfotainmentSystem
Notice: Avoiddirectlytouching the videoscreen, asdamagemay occur. See "CleaningtheVideo Screens" laterinthissection for moreinformation.
RemoteControl
Tousetheremotecontrol,aimitat thetransmitterwindowattherearof theoverheadconsoleandpressthe desiredbutton.Directsunlightor verybrightlightcouldaffectthe
abilityoftheRSEtransmitterto receivesignalsfromtheremote control.Iftheremotecontroldoes notseemtobeworking,the batteriesmightneedtobereplaced. See "BatteryReplacement"laterin thissection.Objectsblockingthe lineofsightcouldalsoaffectthe functionoftheremotecontrol.
IfaCDorDVDisintheRadioDVD slot,theremotecontrol ⏻button canbeusedtoturnonthevideo screendisplayandstartthedisc. Theradiocanalssoturnonthevideo screendisplay.SeeOperationon page7-3formoreinformation.
Notice: Storingtheremote controlinahotareaorindirect sunlightcandamageit, and the repairs will not be recovered by the warranty. Storage in extreme cold can weaken the batteries. Keep theremote control stored in a cool, dryplace.
RemoteControlButtons
(Power):Presstoturnthevideo screenonandoff.
(Illumination): Presstoturnthe remotecontrolbacklighton. The backlightautomaticallytimesout aftersevento10secondsifno otherbuttonispressedwhilethe backlightison.
(Title):PresstoreturntheDVD tothemainmenuoftheDVD.This functioncouldvaryforeachdisc.
(MainMenu):Presstoaccess theDVDmenu.TheDVDmenuis differentoneveryDVD.Usethe navigationarrowstomovethe cursoraroundtheDVDmenu.After makingaselectionpresstheenter button.Thisbuttononlyoperates whenusingaDVD.
▲, ▼, ◀, ▶ (Menu Navigation Arrows): Usethearowbuttonsto navigate throughhamenu.
◀(Enter):Presstoselectthe choicethatishhighlightedin anymenu.
□(DisplayMenu):Presstoadjust thebrightness, screendisplaymode (normal, full, or zoom), and display the languagemenu.
(Return): Presstoexitthe currentactivemenuandreturnto thepreviousmenu. Thisbutton operatesonlywhenthedisplay menuoraDVDmenuisactive.
■(Stop):Presstostopplaying, rewinding, orfastforwardingaDVD. Presstwicetoreturntothe beginningoftheDVD.
▶ ||(Play/Pause):Presstostart playingaDVD.PresswhileaDVD isplayingtopauseit.Pressagainto continueplayingtheDVD.
WhentheDVDdisplaying, dependingontheradio, playmay besloweddownbypressing ▶ ||
then▶.TheDVDcontinuesplaying inaslowplaymode.Dependingon
theradio, perform reverseslowplay bypassing ▶ lthen ◀. Tocancel slowplaymode, press ▶ lagain.
(PreviousTrack/Chapter):
Presstoreturntothestartofthe currenttrackorchapter.Pressagain togotothepreviousstrackor chapter.Thisbuttonmightnotwork whentheDVDisplayingthe copyrightinformationorthe previews.
▶(NextTrack/Chapter):Pressto gotothebeginningofthenext chapterortrack.Thisbuttonmight notworkwhentheDVDisplaying thecopyrightinformationorthe previews.
◀(FastReverse):Pressto quicklyreversetheDVDorCD.To stopfastreversingaDVDvideo, press ▶ ||.Tostopfastreversinga DVDaudioorCD,release ◀.This buttonmightnotworkwhenthe DVDdisplayingthecopyright informationorthepreviews.
▶▶(FastForward):Presstofast forwardtheDVDorCD.Tostopfast forwardingaDVDvideo,press ▶ ∥. TostopfastforwardingaDVDaudio orCD,release ▶.Thisbuttonmight notworkwhentheDVDdisplaying thecopyrightinformationorthe previews.
(Audio): Presstochangeaudio tracksonDVDsthathavethis featurewhentheDVDdisplaying. Theformatandcontentofthis functionvaryforeachdisc.
☐(Subtitles): PresstoturnON/OFFsubtitlesandtomovethrough subtitleoptionswhenaDVDis playing. The formatandcontentof this function varyforeachdisc.
AUX(Auxiliary): Presstoswitch thesystembetweentheDVDplayer andanauxiliarysource.
(Camera):Presstochange cameraanglesonDVDsthathave thisfeaturewhenaDVDisplaying. Theformatandcontentofthis functionvaryforeachdisc.
7-24InfotainmentSystem
1through0(NumericKeypad):
Thenumerickeypadprovidesthe capabilityofdirectchapterortrack numberselection.
☒(Clear):Presswithin threesecondsafterenteringa numericselection, toclearall numericalinputs.
≥10(DoubleDigitEntries):Press toselectchapterortracknumbers greaterthannine.Pressthisbutton beforeenteringthenumber.
Iftheremotecontrolbecomeslost ordamaged, anewuniversal remotecontrolcanbepurchased. Ifthishappens,makesurethe universalremotecontrolusesa Toshiba® codeset.
BatteryReplacement
Tochangetheremotecontrol batteries:
- Slidetherearcoverbackonthe remotecontrol.
- Replacethetwobatteries in the compartment. Makesure that they are installed correctly, using the diagram on the inside of the battery compartment.
- Replace the battery cover. If theremote control is best stored for a long period of time, remove the batteries and keep them in a cool, dry place.
TipsandTroubleshootingChart
| ProblemRecommendedAction | |
| Thereisnopower.TheignitionmightnotbeturnedtoON/RUNor | ACC/ACCESSORY. |
| Thepicturedoesnotfillthescreen.Thereareblackbordersonthetopandbottomoronbothsides,orthepicturelooksstretchedout. | Checkthedisplaymodesettingsinthesetupmenubypressingthedisplaymenubuttonontheremotecontrol. |
| Inauxiliarymode,thepicturemovesorscrolls.Checktheauxiliaryinputconnectionsatbothdevices. | |
| Theremotecontroldoesnotwork.Checktomakesurethereisnbobstructionbetweenheremotecontrolandthetransmitterwindow.Checkthebatteriestomakesuretheyarenotdeadorinstalledincorrectly. | |
| Afterstoppingtheplayer,andpushingPlay,sometimestheDVDstartswhereitletoffandsometimesatthebeginning. | Ifthestopbuttonwaspressedonetime,theDVDplayerresumesplayingwheretheDVDwasstopped.Ifthestopbuttonwaspressedtwotimes,theDVDplayerbeginstoplayfromthebeginningoftheDVD. |
| Theauxiliarysourceisrunning,butthereisnopictureorsound. | CheckthattheRSEvideoscreenisintheauxiliarysourcemode.Checktheauxiliaryinputconnectionsatbothdevices. |
TipsandTroubleshootingChart(cont'd)
| ProblemRecommendedAction | |
| Sometimesthewirelessheadphoneaudiocutsoutor buzzes. | Checkforobstructions,lowbatteries,receptionrange,andinterferencefromcellulartelephonetowers,oruseacellulartelephoneinthevehicle.CheckthattheheadphonesareoncorrectlyusingtheL(left)andR(right)ontheheadphones. |
| Theremoteand/ortheheadphonesarelost.Seeyourdealerfor | assistance. |
| TheDVDdisplaying,butthereisnopictureorsound.CheckkthattheRSEvideoscreenissourcedtotheDVD player. | |
DVDDisplayErrorMessages
TheDVDdisplayerrormessage dependsonwhichradiothevehicle has. Thevideoscreenmightdisplay oneofthefollowing:
DiscLoad/EjectError: This messagedisplayswhenthereare discloadorejectproblems.
DiscFormatError: Thismessage displaysifthediscisinsertedwith thedisclabelwrongsideup,orif thediscisdamaged.
DiscRegionError: Thismessage displaysifthediscisnotfroma correctregion.
NoDisclnInserted: Thismessage displaysifnodiscispresentwhen the △EJECTbuttonispressedon theradio.
DVDDistortion
Videodistortioncanoccurwhen operatingcellularphones, scanners, CBradios, GlobalPositionSystems (GPS) ^* , two-wayradios, mobile faxes, orwalkietalkies.
Itmightbenecessarytoturnoffthe DVDplayerwhenoperatingoneof thesedevicesinornearthevehicle.
*ExcludestheOnStar ^® System.
CleaningtheRSEOverhead Console
WhencleaningtheRSEoverhead consolesurface,useonlyaclean clothdampenedwithcleanwater.
CleaningtheVideoScreen
Useonlyacleanclothdampened withcleanwater. Usecarewhen directlytouchingorcleaningthe screen, asdamagecouldresult.
RearAudio Controller(RAC)
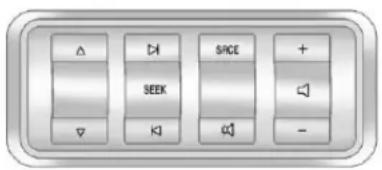
The vehicle may have the Rear AudioController(RAC). Certain radiofunctions can be controlled with RAC.
▽△(Next/Previous):Pressthe downoruparrowstogotothenext ortothepreviousradiostation storedasafavorite.
WhenaCD/DVDisplaying, press thedownoruparrowstogotothe nextorprevioustrackorchapter.
KSEEKD: PresstheSEEK arrowstogotothepreviousorto thenextradiostationwhileinAM, FM, orSiriusXM ^® (ifequipped). PresstheSEEKarrowstogotothe previoussortothenexttrackor chapterwhilesourcedtoaCDor DVDslot.
SRCE(Source): Pressthisbutton toswitchbetweentheradio(AM, FM), SiriusXM(ifequipped), CD, andifthevehiclehasthese features, DVD, frontauxiliary, and rearauxiliary.
(Mute):Pressthisbutton to silencethesystem.Pressthis button again,oranyotherradio button,toturnthesoundon.
+/- (Volume): Presstheplusor minusvolumebuttonstoincreaseor todecreasethevolume.
Phone
Bluetooth
Forvehiclesequipped with Bluetoothcapability, thesystemcan interactwithmanycellphones, allowing:
- Placementandreceiptofcallsin ahands-freemode.
- Sharingofthecellphone's addressbookorcontactlistwith thevehicle.
Tominimizedriverdistraction, beforedriving, and with the vehicle parked:
- Becomefamiliarwiththe featuresofthecellphone. Organizethephonebook and contactlistsclearlyanddelete duplicateorrarelyusedentries. Ifpossible,programspeeddial orothershortcuts.
-
Reviewthecontrolsand operationoftheinfotainment system.
-
Paircellphone(s)tothevehicle. Thesystemmaynotworkwith allcellphones.See"Pairing"in thissectionformoreinformation.
- If the cell phone has voice dialing capability, learntouse that feature to access the address book or contact list. See "Voice Pass-Thru" in this section form more information.
- See "StoringandDeletingPhone Numbers" in this section for more information.

WARNING
When using acellphone, it can be distracting to look to long or too often at the screen of the phone or the infotainment (navigation) system. Taking your eyes off the road to long or too oft could cause a crash resulting in injury or death. Focus your attention on driving.
ABluetoothsystemcanusea Bluetooth-capablecellphonewitha Hands-FreeProfiletomake and receivephonecalls. Thesystem canbeusedwhilethekeyisinthe ON/RUNorACC/ACCESSORY position. TherangeoftheBluetooth systemcanbeupto9.1m(30ft). Notallphonessupportallfunctions, andnotallphonesworkwiththe in-vehicleBluetoothsystem.See www.gm.com/bluetoothformore informationoncompatiblephones.
VoiceRecognition
The Bluetooth system uses voice recognition to interpret voice command stodial phonenumbers and nametags.
For additional information, say "Help" while you are in a voice recognition menu.
Noise: Keepinteriornoiselevelsto a minimum. Thesystemmaynot recognizevoicecommandsifthere istoomuchbackgroundnoise.
WhentoSpeak: Ashorttone soundsafterthesystemresponds indicatingwhenitiswaitingfora voicecommand.Waituntilthetone andthenspeak.
HowtoSpeak: Speak clearly in a calmandnatural voice.
AudioSystem
When using the in-vehicle Bluetooth system, sound comesthrough the vehicle's front audiosystem speakers and overridest the audio system. Usethea audiosystem volumeknob, during acall, to changethe volume level. The adjusted volume level remains in memory for later calls. Toprevent missed calls, a minimum volume level is used if the volume is turned downtoolow.
BluetoothControls
Use the buttons located on the steering wheel to operate the in-vehicle Bluetooth system. See Steering Wheel Controlson page 5-3.
P / (Push To Talk): Press to answerincomingcalls, confirm systeminformation, and start speechrecognition.
/ ▽ (End): Press to end a call, rejectacall, orcancelanoperation.
Pairing
ABluetooth-enabled cellphone must be repaired to the Bluetooth system and then connected to the vehicle before it can be used. See the cell phonemanufacturer's user guide for Bluetooth functions before pairing the cellphone. If a Bluetooth phone is not connected, call will be made using OnStar Hands-Free Calling, if equipped. See OnStar Overview on page 14-1.
PairingInformation
- ABluetoothphonewithMP3 capabilitycannotbepaired to the vehicleasaphoneandan MP3playeratthesametime.
-
Uptofivecellphonescanbe pairedtotheBluetoothsystem.
-
Thepairingprocessisdisabled whenthevehicleismoving.
- Pairingonlyneedstobe completedonce, unless the pairinginformationonthecell phonechangesorthecellphone isdeletedfromthesystem.
- Onlyonepairedcellphonecan beconnectedtotheBluetooth systematatime.
- If multiplepairedcellphones are within range of the system, the system connects to the first available paired cell phone in the order that they were first paired to the system. To connect to a different paired phone, see "Connecting to a Different Phone" later in this section.
PairingaPhone
-
Pressandhold for twoseconds.
-
Say "Bluetooth." This command can be skipped.
7-30InfotainmentSystem
- Say "Pair." Thesystemresponds withinstructionsandafour-digit PersonalIdentificationNumber (PIN). The PINisusedinStep5.
- Start the pairing process on the cellphonethatyouwanttopair. For help with this process, see the cellphonemanufacturer's userguide.
- Locatethedevicenamed "Your Vehicle"inthelistonthecell phone.Followtheinstructions onthecellphonetoenterthe PINprovidedinStep3.Afterthe PINissuccessfullyentered,the systempromptsyoutoprovidea nameforthepairedcellphone. Thisnamewillbeusedto indicatewhichphonesare pairedandconnectedtothe vehicle.Thesystemresponds with "
hasbeen successfullypaired"afterthe pairingprocessiscomplete. - RepeatSteps1–5 topair additional phones.
ListingAllPairedandConnected Phones
Thesystemcanlistallcellphones pairedtoit. Ifapairedcellphone is alsoconnectedtothevehicle, the systemrespondswith "isconnected" afterthatphonename.
- Pressandhold for twoseconds.
- Say "Bluetooth."
- Say "List."
DeletingaPairedPhone
If the phonename you want to delete is unknown, see "Listing All Paired and Connected Phones."
- Pressandhold for twoseconds.
- Say "Bluetooth."
- Say "Delete." Thesystemasks whichphonetodelete.
- Saythenameofthephoneyou wanttodelete.
ConnectingtoaDifferentPhone
Toconnecttoadifferentcellphone, theBluetoothsystemlooksforthe nextavailablecellphoneinthe orderinwhichalltheavailablecell phoneswerepaired.Dependingon whichcellphoneyouwantto connectto,youmayhavetouse thiscommandseveraltimes.
-
Pressandhold for twoseconds.
2.Say"Bluetooth."
3.Say"Changephone." -
Ifanothercellphoneis found,theresponsewillbe "
isnow connected."
• Ifanothercellphoneisnot found, theoriginalphone remainsconnected.
StoringandDeletingPhone Numbers
Thesystemcanstoreupto30 phonenumbersasnametagsinthe Hands-FreeDirectorythatisshared betweentheBluetoothandOnStar systems,ifequipped.
The following commands are used to delete and store phonenumbers.
Store: This command will store a phonenumber, oragroup of numbers as anametag.
DigitStore: This command allows a phonenumbertobestoredasa nametagbyenteringthedigitsone atatime.
Delete: This command is used to delete individual nametags.
DeleteAllNameTags: This commanddeletesallstoredname tagsintheHands-FreeCalling DirectoryandtheOnStar Turn-by-TurnDestinationsDirectory, ifequipped.
Usingthe"Store"Command
- Pressandhold for twoseconds.
2.Say"Store."
- Say the phonenumber group of numbers you want to store all at once with no pauses, then follow the directions given by the system to save an ametag for this number.
Usingthe“DigitStore”Command
Ifanunwantednumberis recognizedbythesystem, say "Clear"atanytimetoclearthelast number.
Tohearallofthenumbers recognizedbythesystem, say "Verify" atanytime.
-
Pressandhold for twoseconds.
-
Say "DigitStore."
-
Sayeachdigit, oneatatime, thatyouwanttostore. After eachdigitisentered, thesystem
repeatsbackthedigititheard followedbyatone. Afterthelast digithasbeenentered, say "Store," and then follow the directions given by the system to save an ametag forth this number.
Usingthe"Delete"Command
- Pressandhold for twoseconds.
2.Say"Delete."
- Saythenametagyouwantto delete.
Usingthe"DeleteAllNameTags" Command
Thiscommanddeletesallstored nametagsintheHands-Free CallingDirectoryandtheOnStar Turn-by-TurnDestinationsDirectory, ifequipped.
Todeleteallnametags:
-
Pressandhold for twoseconds.
-
Say "Deleteallnametags."
ListingStoredNumbers
Thelistcommandwilllistallstored numbersandnametags.
Usingthe"List"Command
- Pressandhold twoseconds.
/for
2.Say"Directory."
-
Say "Hands-FreeCalling."
-
Say "List."
MakingaCall
Callscanbemadeusingthe followingcommands.
DialorCall: Thedialorcall commandcanbeused interchangeablytodialaphone numberorastorednametag.
DigitDial: This command allows a phonenumbertobedialed by entering the digits one at time.
Re-dial: This command is used to dial the last number used on the cell phone.
Using the "Dial" or "Call" Command
- Pressandhold twoseconds.
/112for
-
Say "Dial" or "Call."
-
Saytheentirenumberwithout pausing, or say thenametag.
Onceconnected, thepersoncalled willbeheardthroughtheaudio speakers.
Calling911Emergency
- Pressandhold twoseconds.
/for
- Say "Dial" or "Call."
3.Say"911."
- Say "Dial" or "Call."
Usingthe“DigitDial”Command
Thedigitdialcommandallowsa phonenumbertobedialedby enteringthedigitsoneatatime. Aftereachdigitisentered, the systemrepeatsbackthedigitit heardfollowedbyatone.
Ifanunwantednumberis recognizedbythesystem, say "Clear"atanytimetoclearthelast number.
Tohearallofthenumbers recognizedbythesystem, say "Verify"atanytime.
- Pressandhold twoseconds.
/for
2.Say"DigitDial."
- Sayeachdigit, oneatatime, thatyouwanttodial. After each digitisentered, the system repeats back the digitit heard followed by atone. After the last digit has been entered, say "Dial."
Onceconnected, thepersoncalled willbeheardthroughtheaudio speakers.
Usingthe"Re-dial"Command
- Pressandhold twoseconds.
/for
- Afterthetone, say "Re-dial."
Onceconnected, thepersoncalled willbeheardthroughtheaudio speakers.
ReceivingaCall
When an incoming call is received, the audiosystemmutes and aring tone is heardin the vehicle.
- Press/loanswerthecall.
- Press/▽toignoreacall.
CallWaiting
Callwaitingmustbesupported on thecellphoneandenabledbythe wirelessservicecarrier.
- Press/###toansweran incomingcallwhenanothercall isactive.Theoriginalcallis placedonhold.
- Press/againtoreturn to theoriginalcall.
• Toignoretheincomingcall, no actionisrequired.
- Press/▽todisconnectthe currentcallandswitchtothecall onhold.
Three-WayCalling
Three-way calling must be supported on the cell phone and enabled by the wireless service carrier.
- Whileonacall, press
2.Say"Three-waycall." - Usethedialorcallcommandto dialthenumberofthethirdparty tobecalled.
- Oncethecallisconnected, press Ⓗ/‖tolinkallcallers together.
EndingaCall
Press/▽toendacall.
MutingaCall
During acall, all sounds from inside the vehicle can be muted so that the person on the other end of the call can not hear them.
- Tomuteacall, press 📂, and thensay "Mutecall."
- Tocancelmute, press 📂/1/2, andthensay "Un-mutecall."
TransferringaCall
Audiocanbetransferredbetween theBluetoothsystemandthecell phone.
Thecellphonemustbepaired and connected with the Bluetooth system before acall can be transferred. The connection process cantakeuptotwominutes after the ignitionisturned to ON/RUN.
TransferringAudiofromthe BluetoothSystemtoaCellPhone
During acallwiththeaudiointhe vehicle:
- Press Ⓞ/山
2.Say"TransferCall."
TransferringAudiotothe BluetoothSystemfromaCell Phone
During acallwiththeaudioonthe cellphone, press /w . Theaudio transferstothevehicle. If theaudio does not transfertothevehicle, use theaudiotransferfeature on thecell phone. Seeyourcellphone manufacturer'suserguideformore information.
VoicePass-Thru
Voicepass-thruallowsaccesstothe voicerecognitioncommandsonthe cellphone.Seeyourcellphone manufacturer'suserguidetoseeif thecellphonesupportsthisfeature.
Toaccesscontactsstoredinthecell phone:
- Pressandhold twoseconds.
/lefor
-
Say "Bluetooth." This command can beskipped.
-
Say "Voice." Thesystem responds "OK, accessing
"
Thecellphone'snormalprompt messageswillgothroughtheircycle accordingtothephone'soperating instructions.
DualToneMulti-Frequency (DTMF)Tones
TheBluetoothsystemcansend numbersandthenumbersstoredas nametagsduringacall. Youcan usethisfeaturewhencallinga menu-drivenphonesystem. Accountnumberscanalsobe storedforuse.
SendingaNumberorNameTag DuringaCall
- Press /^2 . Thesystem responds "Ready," followed by atone.
2.Say"Dial."
- Saythenumberornametag tosend.
ClearingtheSystem
Unlessinformationisdeletedoutof their-vehicleBluetoothsystem,it willberetainedindefinitely.This includesallsavednametagsinthe phonebookandphonepairing information.Forinformationonhow todeletethisinformation,seethe previoussection"DeletingaPaired Phone"andtheprevioussections ondeletingnametags.
OtherInformation
TheBluetooth ^® wordmark and logosareowned by the Bluetooth SIG, Inc. and any use of such marks by General Motors is under license. Other trademarks and tradenames are those of their respective owners.
See Radio Frequency Statement on page 13-20 for information regarding Part 15 of the Federal Communications Commission (FCC) rules and Industry Canada Standards RSS-GEN/210/220/310.
Settings
PressSettingstheHomePage toadjustfeaturesandpreferences, suchasTime,Date,Bluetooth DeviceList,VoiceRecognition, FavoritePages,DisplaySettings, NavigationSettings,etc.
- PresstheSettingsscreenbutton ontheHomePage.
- Touch-tapthescrollbaruntilthe desiredoptiondisplays.Select thedesiredsettingstochange.
Afewofthesettingoptionschange thewaythenavigationsystem displaysorreactswhileinuse.
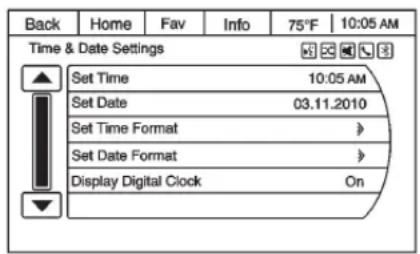
FromtheSettingsmenu, press the SessionorSetDatesettings screenbutton to display the different options for setting the time and date.
BluetoothDeviceList: Pressto displaypaired bluetoothdevices.
VoiceRecognition: Pressto displayvoicerecognitionoptions.
• VoicePromptVolume:Pressto adjustthepromptvolume.
- PromptLength:Presstoselect shortorlongprompts.
FavoritePages: Presstoselect thenumberoffavoritepages displayedonthescreen. Thechoice is 1–6 pages.
DisplaySettings: Presstoadjust thescreensettings.
- The Autosetting adjusts the screenbackground automatically depending on the exterior lighting conditions.
• TheDaysettingbrightensthe mapbackground.
• TheNightsettingdarkensthe mapbackground.
SpeedDependentVolume: Select OFF, Low, Medium, or High sensitivity to automatically adjust the volumetominimize the effects of unwanted background noise that can result from changing road surfaces, drivingspeeds, or open windows. This feature works best at lowervolumes settings where background noise is typically louder than the soundsystem volume.
StartupVolume: Presstosetthe maximumvolumelevelforstartup thatwillbeusedevenifahigher volumehadbeensetwhentheradio wasturnedoff.
RadioFavorites: Presstoselect thenumberofFAVpagestobe usedinthesystem.
Add/RemoveXMCategories: Presstocustomizewhichavailable XMCategoriesaredisplayedand usedinthesystem.
RDSSettings: Presstocustomize stationname and radiotext display options.
SetTime:
- Presstheupordownarrowsto increaseordecreasetheHours, Minutes, AM, PM, or 24hron theclock.
- Pressandholdtoquickly increaseordecreasethetime settings.
- PressOKortheBackscreen buttontosavetheadjustments.
SetDate:
- Presstheupordownarrowsto increaseordecreasetheMonth, Day,andYearsettings.
- Pressandholdtoquickly increaseordecreasethedate settings.
- PressOKortheBackscreen buttonosavetheadjustments.
RadioSettings
PresstheConfigbuttononthe HomePageortheCONFIGbutton onthefaceplatetoenterthemenu options.TurnthePUSH/SELknob ortouch-tapthescrollbartoscroll throughtheavailableoptions.Press thePUSH/SELknoborpressRadio Settingstodisplaytheradiosettings menu.Pressthisfeaturetomake changesforradioinformation displayed,presetpages,Auto VolumeControl,andXMCategories Restore.SeeSatelliteRadioon page7-9(ifequipped),formore informationaboutXMCategories.
TheRadioSettingsare:
PhoneSettings
See Bluetoothpage7-28inthe "Phone" sectionformore informationonphonesettings.
VehicleSettings
See Vehicle Personalization on page5-37.
Display
Mode:PressModetochangethe screenbackground. This setting controlmapcolors.
CalibrateTouchscreen:Pressto displaytheTouchscreenCalibration Screen.
TurnDisplayOff: Presstoturnthe Displayoptionoff.
RearVisionCamera (IfEquipped)
Therearvisioncameracanassist thedriverwhenbackingupby displayingaviewoftheareabehind thevehicle.
flowchart
graph TD
    A["Check Surroundings for Safety"] --> B["Rear Camera Image"]
    B --> C["Warning symbols: 1, 2, 3, 4, 5, 6, 7, 8, 9, 10, 11, 12, 13, 14, 15, 16, 17, 18, 19, 20, 21, 22, 23, 24, 25, 26, 27, 28, 29, 30"]
    style A fill:#f9f,stroke:#333
    style B fill:#ccf,stroke:#333
    style C fill:#cfc,stroke:#333
    style D fill:#fcc,stroke:#333
    style E fill:#ffc,stroke:#333
    style F fill:#cfc,stroke:#333
    style G fill:#fcc,stroke:#333
    style H fill:#cfc,stroke:#333
    style I fill:#fcc,stroke:#333
    style J fill:#cfc,stroke:#333
    style K fill:#fcc,stroke:#333
    style L fill:#cfc,stroke:#333
    style M fill:#fcc,stroke:#333
    style N fill:#cfc,stroke:#333
    style O fill:#fcc,stroke:#333
    style P fill:#cfc,stroke:#333
    style Q fill:#fcc,stroke:#333
    style R fill:#cfc,stroke:#333
    style S fill:#fcc,stroke:#333
    style T fill:#cfc,stroke:#333
    style U fill:#fcc,stroke:#333
    style V fill:#cfc,stroke:#333
    style W fill:#fcc,stroke:#333
    style X fill:#cfc,stroke:#333
    style Y fill:#fcc,stroke:#333
    style Z fill:#cfc,stroke:#333
Animageappearsonthesystem's screensothatthedrivercancheck thesurroundingsforsafety.
flowchart
graph TD
    A["Warning Symbol"] --> B["Rear Camera Image"]
    B --> C["Warning Symbol"]
    B --> D["Warning Symbol"]
    B --> E["Warning Symbol"]
    B --> F["Warning Symbol"]
    B --> G["Warning Symbol"]
    B --> H["Warning Symbol"]
PresstheConfigbuttontoaccess theDisplaysettings.Adjustthe brightnessofthescreenbypassing the-or+screenbutton.SeeRear VisionCamera(RVC)onpage9-35.
Trademarksand LicenseAgreements

Manufacturedunderlicenseunder U.S.Patent#'s:5,451,942; 5,956,674;5,974,380;5,978,762; 6,487,535&otherU.S.and worldwidepatentsissued& pending.DTSandtheSymbolare registeredtrademarksandDTS DigitalSurroundandtheDTSlogos aretrademarksofDTSInc.All RightsReserved.

DIGITAL
Manufacturedunderlicensefrom DolbyLaboratories.Dolbyandthe double-Dsymbolaretrademarksof DolbyLaboratories.
7-38InfotainmentSystem
NOTES
ClimateControls
ClimateControlSystems
DualAutomaticClimateControl
System......8-1
RearClimateControl
System......8-6
RearClimateControlSystem
(withRearSeatAudio).....8-7
AirVents
AirVents....8-8
Maintenance
PassengerCompartmentAir
Filter....8-9
ClimateControlSystems
DualAutomaticClimateControlSystem
Theheating, cooling, and ventilation in the vehicle can be controlled with this system.
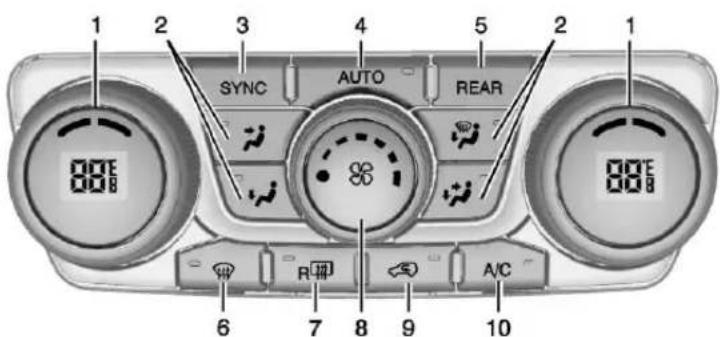
1.DriverandPassengerSide TemperatureControls
-
AirDeliveryModeControls
-
SYNC(Synchronized Temperature)
-
AUTO(AutomaticOperation)
-
REAR(RearClimateControl)
6.Defrost
7.RearWindowDefogger
8.FanControl
-
Recirculation
-
AirConditioning
8-2ClimateControls
DisplayFunction
Eachtimethetemperature,mode, orfancontrolsareadjusted,the climatecontroldisplayshowsthat functionalongwiththeinside temperaturesetting.Theoutside temperatureisdisplayonthe instrumentcluster.
O(On/Off): Turnclockwiseor counterclockwisetoturntheclimate controlsystemonoroff.
Theclimatecontrolsystemwillalso turnonifthedefrost,AUTO,orair conditioningbuttonsarepressed.
AutomaticOperation
AUTO(Automatic): Thesystem automaticallycontrolstheinside temperature, theairdelivery, and thefanspeed.
Touseautomaticmode:
- PresstheAUTObutton.
When AUTOisselected, the current temperature(s) is displayed and the AUTO indicator lightison.
When AUTOisselected, the air conditioning and hairinlet are automatically controlled. The air conditioning run when the outside temperature is over 4°C (40°F). Thesystemis automatically set to outside air, unless it shot outside and then the air in let changestore circulation mode to help quickly cool the vehicle. The recirculation indicator light will come on.
- Set the temperature for the driver and passenger.
Tofindacomfortablesetting, startwitha22°C(73°F) temperaturesettingandallow about20minutesforthesystem toregulate.Usethedriverside orpassengersidetemperature controltoadjustthetemperature settingasnecessary.The systemwillremainatthe selectedsetting.Choosingthe warmestorcoolesttemperatures doesnotcausethevehicleto heatercoolmorequickly.
To avoid blowing cold air in cold weather, the system delays turning on the fan until warm air is available. Turn the fank nob to overridethis delay and select the fanspeed.
TemperatureControl
The driver and passengers side temperature controls are used to adjust the temperature of their coming through the system. The temperature can be adjusted even if the system is turned off since outside a still enter the vehicle, unless there circulation mode is selected. See "Recirculation" later in this section.
DriverSideTemperature
Control: Turnclockwiseor counterclockwisetoincreaseor decreasethedriverside temperature. Thedriverside temperaturedisplaywillshowthe temperaturesetting.
PassengerSideTemperature
Control: Turnclockwiseor counterclockwisetoincreaseor decreasethepassengerside temperature. Thepassengerside displaywillshowthetemperature setting.
SYNC(Synchronized
Temperature): Presstosetthe passengertemperaturetomatchthe drivertemperaturesetting.
ManualOperation
Theairdeliverymodeorfanspeed canbemanuallyadjusted.
(FanControl): Turntheknob clockwiseorcounterclockwiseto increaseordecreasethefanspeed.
Turningthefancontrolknobwhilein automaticcontrolplacesthefan speedundermanualcontrol.
Theairdeliverymoderemainsin automaticcontrol. Thefansetting displaysmomentarilyandthenno longerdisplays.
AirDeliveryModes:Press
,or,tochangethedirectionof theairflowinthevehicle.An indicatorlightcomesoninthe selectedmodebutton.Pressinga modebuttonwhilethesystemisoff changestheairdeliverymode withoutturningthesystemon.

Changing the air delivery mode while automatic control places the system into manual control. The air delivery mode button indicator displays, and the AUTO button indicator light turnoff.
(Vent):Airisdirectedtothe instrumentpaneloutlets.
(Bi-Level):Airisdivided betweentheinstrumentpanel and flooroutlets. Someairisdirected towardsthewindshieldandside windowoutlets. Coolerairis directedtotheupperoutletsand warmerairtotheflooroutlets.
(Floor):Airisdirectedtothe flooroutlets,withsomeoftheair directedtothewindshield,side window,andsecondrowfloor outlets.Inthismode,thesystem usesoutsideair.
(Defog): This mode clear the window soffogormoisture. Air is directed to the windshield, floor outlets, and sidewindowvents. Whent his mode is selected, the system turn soffrecirculation and
runstheairconditioningcompressor unlesstheoutsidetemperatureis lessthan4°C(40°F).Donotdrive thevehicleuntilallthewindowsare clear.
(Defrost): Presstoturnthe defrostonoroff. This mode quickly clearsthowindshieldoffogorfrost. Airisdirectedtothewindshield, sidewindow, and floorvents. In this mode, outside air is pulled inside the vehicle. The air conditioning system runs automatically in this setting, unless the outside temperature is less than 4°C (40°F).
Donotdrivethevehicleuntilallthe windowsareclear.
AirConditioning
A/C(AirConditioning): Pressto turn the air conditioning on and off. An indicator light comes on when A/Cison.
TheA/Cdoesnotworkwhenthe outsidetemperatureisbelow4°C (40°F).IfA/Cispressedthe indicatorflashestreetimesand
turnsofftoshowthattheA/Cmode isnotavailable.IftheA/Cisonand theoutsidetemperaturedrops belowatemperaturewhichistoo coolforairconditioningtobe effective,theA/Cindicatorturnsoff toshowthattheA/Cmodehas beencanceled.
Onhotdays, openthewindows briefly tolethotinsideairescape. This helps reduce the time it takes for the interior of the vehicle to cooldown.
The air conditioningsystem removes moisture from the air, so water might dip under the vehicle while idling or after turning off the engine. This is normal.
Recirculation): Presstoturn therecirculationmodeonoroff. An indicatorlightcomesonwhen recirculationison. Whentheengine isturnedoff,therecirculationmode automaticallyturnsoffandmustbe re-selectedwhentheengineis turnedonagain.
Thismoderecirculatesandhelpsto quicklycooltheairinsidethe vehicle.Itcanbeusedtoprevent outsideairandodorsfromentering thevehicle.
Therecirculationmodecannot be used with floor, defog, or defrosting modes. If recirculation is selected in these modes, the indicator flashes threetimes and turn soff. The air conditioning compressor als o comes on whenthismode is activated. While in recirculation modethes window scan fog whent h eweather iscold and damp. Toclearthefog, select either the defog or defrost mode and increase the fanspeed.
REAR: Presstoturntherear heatingandairconditioningonor off. See Rear Climate Control System on page 8-6 or Rear Climate Control System (with Rear Seat Audio) on page 8-7.
RearWindowDefogger
Therearwindowdefoggerusesa warminggridtoremovefogfromthe rearwindow.
R(RearWindowDefogger): Presstoturntherearwindow defoggeronoroff. Therearwindow defoggerstaysonforabout 10minutes, beforeturningoff. The defoggeralsoturnsoffwhenthe engineisturnedoff. Donotdrivethe vehicleuntilallthewindowsare clear.
Forvehicleswithheatedoutside rearviewmirrors,fogorfrostis clearedfromthesurfaceofthe mirrorwhentherearwindowdefog buttonispressed.
Notice: Donotusearazorblade orsharpobjecttocleartheinside rearwindow.Donotadhere anythingtothedefoggergrid linesintherearglass. These actionsmaydamagetherear defogger.Repairswouldnotbe coveredbyyourwarranty.
Sensors
Thesolarsensorinthedefrostgrille inthemiddleoftheinstrument panel,monitorsthesolarheat.Do notcoverthesolarsensororthe systemwillnotworkproperly.
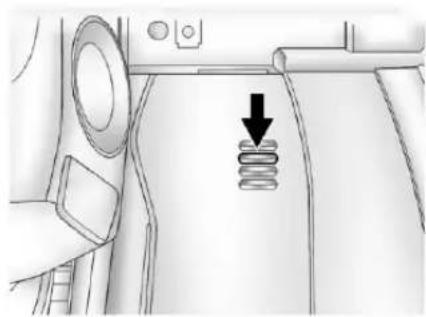
natural_image
Technical line drawing of a mechanical component with a spring and directional arrow (no text or symbols)Theinteriortemperaturesensor, on theinstrumentpaneltotherightof thesteeringcolumn, measuresthe temperatureoftheairinsidethe vehicle.
Thereisalsoanexterior temperaturesensorbehindthefront grille. This sensorreadstheoutside airtemperatureandhelpsmaintain the temperatureinsidethevehicle. Any coveronthefrontofthevehicle could cause a falsereading in the displayed temperature.
Theclimatecontrolsystemusesthe informationfromthesesensorsto maintaincomfortsettingsby adjustingthetemperature,fan speed,andairdeliverymode. The systemmayalsosupplycooleralto thesideofthevehiclefacingthe sun.Therecirculationmodewillalso beusedasneededtomaintaincool outlettemperatures.
RearClimateControlSystem
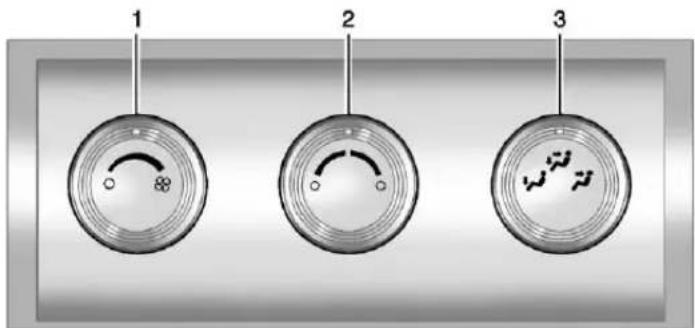
- FanControl
2.TemperatureControl - AirDeliveryModeControl
Forvehicleswiththerearclimate controlsystem,thecontrolsare locatedontherearofthecenter console.Thesystemcanalsobe controlledwiththefrontcontrols.
PresstheREARbuttononthefront climatecontrolsystemtocontrolthe rearclimatecontrolsystem.The REARtextdisplayswhentherear systemison.
SyncMode: Thismodematches therearclimatecontroltothefront climatecontrolsettings.Itcomeson when REARispressed.
IndependentMode: Thismode directsrearseatingairflow accordingtothesettingsoftherear controls.Itcomesonwhenanyrear controlisadjusted.
FanControl: Turnclockwiseor counterclockwisetoincreaseor decreasethefanspeed. Turnthe knobto Ototurnthefanoff.
TemperatureControl: Turn clockwise or counterclockwiseto increase or decrease the airflow temperature.
AirDeliveryModeControl: Turn to the desired mode to change the airflow direction.
Vent :Airisdirectedthrough theoverheadoutlets.
(Bi-Level):Airisdirected throughtherearflooroutlets, as wellastheoverheadoutlets.
J(Floor):Airisdirectedthrough theflooroutlets. Therearsystem flooroutletsarelocatedunderthe thirdrowseats.
RearClimateControlSystem(withRearSeatAudio)
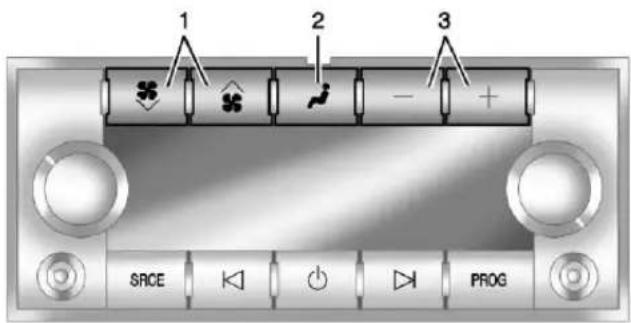
-
FanControl
-
AirDeliveryModeControl
-
TemperatureControl
Forvehicleswiththerearclimate controlsystem,thecontrolsare locatedontherearofthecenter console.
PresstheREARbuttononthefront climatecontrolsystemtocontrolthe rearclimatecontrolsystem. The systemalsoturnsonifanyofthe rearcontrols, except ✪, are pressed. Thedisplayisactivated whentherearsystemison.
Thesystemcanalsobeturnedoff, bypassing 🧑untilthefangoesoff.
SyncMode: Thismodematches therearclimatecontroltothefront climatecontrolsettings.Itcomeson whenREARispressed.
IndependentMode: Thismode directsrearseatingairflow accordingtothesettingsoftherear controls.Itcomesonwhenanyrear controlisadjusted.
and (Fan Control): Press the fanupordownbuttonstoincrease ordecreasethefanspeed.
TemperatureControl:Press+or -toincreaseordecreasetheair temperature. Thetemperature settingswilldisplayin 0-12 increments, goingfromthe coolest(0)tothewarmest(12) setting.
(AirDeliveryModeControl): Presstomanuallychangethe directionoftheairflow.Repeatedly pressthebuttonuntilthedesired modeappearsonthedisplay.
→(Vent):Airisdirectedthrough
theoverheadoutlets.
(Bi-Level):Airisdirected throughtherearflooroutlets,as wellastheoverheadoutlets.
(Floor):Airisdirectedthrough theflooroutlets. Therearsystem flooroutletsarelocatedunderthe thirdrowseats.
AirVents
Usethesliderswitchinthecenterof theoutlet,tochangethedirectionof theairflow.Usetethumbwheel neartheoutlettocontroltheamount ofairflowortoshutofftheairflow.
Keepalloutletsopenwhenever possibleforbestsystem performance.
OperationTips
- Clearawayanyice, snow, orleavesfromtheairinletsat thebaseofthewindshieldthat canblocktheflowofairintothe vehicle.
- Useofnon-GMapprovedhood deflectorscanadverselyaffect theperformanceofthesystem.
- Keepthepathunderallseats clearofobjectstohelpcirculate theairinsidethevehiclemore effectively.
- Iffoggingreoccurswhileinvent orbi-levelmodeswithmild temperaturethroughoutthe vehicle,turnontheair conditionertoreducewindshield fogging.
Maintenance
PassengerCompartment AirFilter
The filter removes dust, pollen, and other airborne irritants from outside air and inside air when in recirculation mode.
Thefiltersshouldbereplacedaspart ofroutinescheduledmaintenance. SeeMaintenanceScheduleon page11-3. To findoutwhattypeof replacementfiltertouse, see MaintenanceReplacementPartson page11-13.
- Opentheglovebox.
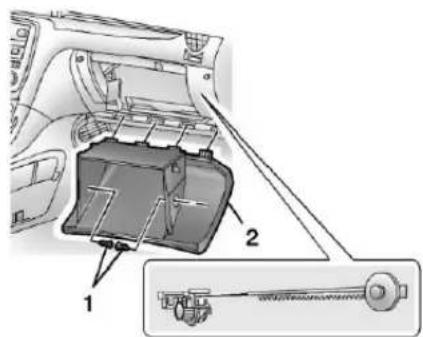
-
Twistthecompartment retainers(1)andpulloutwardto remove.
-
Lowertheinstrumentpanel compartmentassembly(2) beyondthestops.
-
If needed, unsnapthe instrument panel compartment assembly(2) from the instrument panel. When reinstalling, besure the instrument panel compartment dampenerarmisaligned properly to the dampener gear assembly.
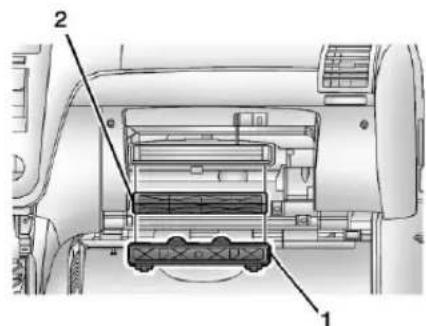
-
Squeezethehousingcover(1) tabstoremove.
-
Removetheoldairfilterfromthe passengercompartmentairfilter housing(2).
-
Installthenewairfilter.
-
Replacethehousingcover.
-
If removed, reinstall the instrument panel compartment assembly.
-
Reinstall the compartment retainers.
Seeyourdealerifadditional assistanceisneeded.
8-10ClimateControls
NOTES
Driving and Operating
DrivingInformation
DistractedDriving....9-2
DefensiveDriving......9-2
DrunkDriving....9-3
ControlofaVehicle......9-3
Braking....9-3
Steering....9-3
Off-RoadRecovery......9-4
LossofControl......9-5
DrivingonWetRoads......9-5
HighwayHypnosis......9-6
HillandMountainRoads.....9-6
WinterDriving....9-7
IftheVehicleIsStuck......9-9
VehicleLoadLimits......9-9
StartingandOperating
NewVehicleBreak-In......9-13
IgnitionPositions......9-14
StartingtheEngine......9-16
EngineHeater......9-17
RetainedAccessory
Power(RAP)......9-18
ShiftingIntoPark......9-18
ShiftingoutofPark......9-19
ParkingoverThings
ThatBurn....9-20
EngineExhaust
EngineExhaust......9-20
RunningtheVehicleWhile
Parked....9-21
AutomaticTransmission
AutomaticTransmission.....9-21
ManualMode....9-23
Tow/HaulMode......9-24
DriveSystems
All-WheelDrive....9-24
Brakes
AntilockBrake
System(ABS)......9-25
ParkingBrake......9-26
BrakeAssist....9-26
HillStartAssist(HSA)......9-27
RideControlSystems
StabiliTrak® System......9-27
CruiseControl
CruiseControl....9-29
ObjectDetectionSystems
UltrasonicParkingAssist....9-31
SideBlindZone
Alert(SBZA)....9-32
RearVision
Camera(RVC)......9-35
Fuel
Fuel....9-37
RecommendedFuel......9-38
GasolineSpecifications.....9-38
CaliforniaFuel
Requirements......9-39
FuelsinForeignCountries...9-39
FuelAdditives......9-39
FillingtheTank......9-40
FillingaPortableFuel
Container....9-41
Towing
GeneralTowing
Information......9-42
DrivingCharacteristicsand
TowingTips......9-42
TrailerTowing....9-45
TowingEquipment......9-47
ConversionsandAdd-Ons
Add-On Electrical
Equipment......9-49
DrivingInformation
DistractedDriving
Distractioncomesinmanyforms andcantakeyourfocusfromthe taskofdriving.Exercisegood judgmentandonotletother activitiesdivertyourattentionaway fromtheroad.Manylocal governmentshaveenactedlaws regardingdriverdistraction.Become familiarwiththelocallawsin yourarea.
Toavoiddistracteddriving,always keepyoureyesontheroad,hands onthewheel,andmindonthedrive.
- Donotuseaphonein demandingdrivingsituations. Useahands-freemethodto placeorreceivenecessary phonecalls.
-
Watchtheroad.Donotread, takenotes,orlookup informationonphonesorother electronicdevices.
-
Designateafrontseat passengertohandlepotential distractions.
- Becomefamiliarwithvehicle featuresbeforedriving,suchas programmingfavoriteradio stationsandadjustingclimate controlandseatsettings. Programalltripinformationinto anynavigationdevicepriorto driving.
- Waituntilthevehicleisparked toretrieveitemsthathavefallen tothefloor.
- Stoporparkthevehicletotend tochildren.
- Keeppetsinanappropriate carrierorrestraint.
- Avoidstressfulconversations whiledriving,whetherwitha passengeroronacellphone.

WARNING
Takingyoureyesofftheroadtoo longortoooftencouldcausea crashresultingininjuryordeath. Focusyourattentionondriving.
RefertotheInfotainmentsection and theinfotainmentmanual for moreinformationonusingthat system, includingpairingandusing acellphone.
DefensiveDriving
Defensivedrivingmeans"always expecttheunexpected."Thefirst stepindrivingdefensivelyistowear thesafetybelt.See SafetyBeltson page3-13.
- Assumethatotherroadusers (pedestrians, bicyclists, and otherdrivers) are going to be careless and make mistakes. Anticipate what they might do and beready.
- Allowenoughfollowingdistance betweenyouandthedriverin frontofyou.
• Focusonthetaskofdriving.
DrunkDriving
Deathandinjuryassociatedwith drinkinganddrivingisaglobal tragedy.

WARNING
Drinkingandthendrivingisvery dangerous.Yourreflexes, perceptions,attentiveness,and judgmentcanbeaffectedbyevenasmallamountofalcohol.You canhaveaserious—oreven fatal—collisionifyoudriveafter drinking.
Donotdrinkanddriveorridewith adriverwhohasbeendrinking. Ridehomeinacab;orifyouare withagroup,designateadriver whowillnotdrink.
ControlofaVehicle
Braking, steering, and accelerating are important factors in helping to control vehicle while driving.
Braking
Brakingactioninvolvesperception timeandreactiontime.Decidingto pushthebrakepedalisperception time.Actuallydoingitis reactiontime.
Averagedriverreactiontimeis about three-quarters of a second. In that time, a vehicle moving at 100 km/h (60 mph) travels 20 m (66 ft), which could be a lot of distance in an emergency.
Helpfulbrakingtipstokeepinmind include:
- Keepenoughdistancebetween youandthevehicleinfront ofyou.
- Avoidneedlessheavybraking.
- Keeppacewithtraffic.
If the engine ever stops while the vehicle is being driven, brake normally but donot pump the brakes. Doings could make the pedal hardertopushdown. If the engine stops, there will become power brake assist but it will be used when the brake is applied. Oncethe power assist is used up, it cantakelongertostop and the brake pedal will be hardertopush.
Steering
VariableEffortSteering
Some vehicles have aesteering system that varies the amount of effort required to osteer the vehicle in relation to the speed of the vehicle.
Theamountofsteeringeffort requiredislessatslowerspeedsto makethevehiclemore maneuverableandeasiertopark.At fasterspeeds,thesteeringeffort increasestoprovideasport-likefeel tothesteering.Thisprovides maximumcontrolandstability.
9-4DrivingandOperating
Ifthevehicleseemshardertosteer thannormalwhenparkingordriving slowly,theremaybeaproblemwith thesystem.Youwillstillhavepower steering,butsteeringwillbestiffer thannormalatslowspeeds.See yourdealerforservice.
HydraulicPowerSteering
If your vehicle has hydraulic power steering, it may require maintenance. See Power Steering Fluidonpage 10-18.
Ifpowersteeringassistislost because the engine stops, or there is a system malfunction, the vehicle can be steered but may require increased effort. See your dealer if there is a problem.
CurveTips
• Takecurvesatareasonable speed.
- Reducespeedbeforeenteringa curve.
- Maintainareasonable,steady speedthroughthecurve.
- Waituntilthevehicleisoutof thecurvebeforeaccelerating gentlyintothestraightaway.
SteeringinEmergencies
- Therearesomesituationswhen steeringaroundaproblemmay bemoreeffectivethanbraking.
- Holdingbothsidesofthe steeringwheelallowsyoutoturn 180degreeswithoutremoving ahand.
• AntilockBrakeSystem(ABS) allowssteeringwhilebraking.
Off-RoadRecovery
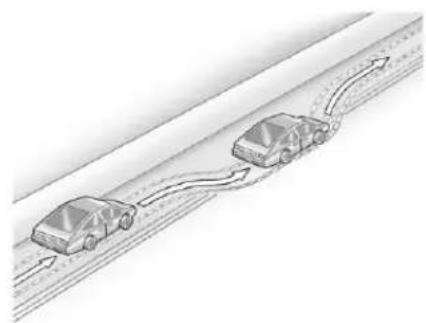
natural_image
Illustration of two cars driving on a road with directional arrows indicating flow (no text or symbols)Thevehicle'srightwheelscandrop offtheedgeofaroadontothe shoulderwhiledriving.Follow thesetips:
- Easeofftheacceleratorand then, if there is nothing in the way, steer the vehicles that it straddle the edge of the pavement.
-
Turnthesteeringwheelabout one-eighthofaturn, until the rightfronttirecontactsthe pavementedge.
-
Turnthesteeringwheeltogo straightdowntheroadway.
LossofControl
Skidding
Therearethreetypesofskidsthat correspondtothevehicle'sthree controlsystems:
- BrakingSkid—wheelsarenot rolling.
• SteeringorCorneringSkid—toomuchspeedorsteeringina curvecausestirestoslipand losecorneringforce. - AccelerationSkid—toomuch throttlecausesthedriving wheelstospin.
Defensivedriversavoidmostskids bytakingreasonablecaresuitedto existingconditions,andbynot overdrivingthoseconditions.But skidsarealwayspossible.
If the vehicle start to slide, follow these suggestions:
- Easeyourfootoffthe acceleratorpedalandsteerthe wayyouwantthevehicletogo. Thevehiclemaystraightenout. Bereadyforasecondskidifit occurs.
- Slowdownandadjustyour drivingaccordingtoweather conditions. Stoppingdistance canbelongerandvehicle controlcanbeaffectedwhen tractionisreducedbywater, snow,ice,gravel,orother materialontheroad. Learnto recognizewarningclues—such asenoughwater,ice,orpacked snowontheroadtomakea mirroredsurface—andslow downwhenyouhaveanydoubt.
- Trytoavoidsuddensteering, acceleration, or braking, including reducing vehiclespeed by shifting to lower gear. Any sudden changes could cause the rest of the vehicle.
Remember: Antilockbrakeshelp avoidonlythebrakingskid.
DrivingonWetRoads
Rainandwetroadscanreduce vehicletraction and affect your ability to stop and accelerate. Always drives slower in the set types of driving conditions and avoid driving through large puddles and deep-standing or flowing water.

WARNING
Wetbrakescancausecrashes. Theymightnotworkaswellina quickstopandcouldcause pullingtooneside.Youcould losecontrolofthevehicle.
Afterdrivingthroughalarge puddleofwateroracar/vehicle wash, lightlyapplythebrake pedaluntilthebrakeswork normally.
(Continued)
WARNING(Continued)
Flowingorrushingwatercreates strongforces.Drivingthrough flowingwatercouldcausethe vehicletobecarriedaway.Ifthis happens,youandothervehicle occupantscoulddrown.Donot ignorepolicewarningsandbe verycautiousabouttryingtodrive throughflowingwater.
Hydroplaning
Hydroplaningisdangerous.Water canbuildupunderthevehicle's tiressotheyactuallyrideonthe water.Thiscanhappeniftheroadis wetenoughandyouaregoingfast enough.Whenthevehicleis hydroplaning,ithaslittleorno contactwiththeroad.
Thereisnohardandfastruleabout hydroplaning. Thebestadviceisto slowdownwhentheroadiswet.
OtherRainyWeatherTips
Besidesslowingdown,otherwet weatherdrivingtipsinclude:
- Allowextrafollowingdistance.
- Passwithcaution.
- Keepwindshieldwiping equipmentingoodshape.
- Keepthewindshieldwasherfluid reservoirfilled.
• Havegoodtireswithproper treaddepth.See Tireson page10-34. - Turnoffcruisecontrol.
HighwayHypnosis
Alwaysbealertandpayattentionto yoursurroundingswhiledriving. Ifyoubecometiredorsleepy,finda safeplacetoparkthevehicle andrest.
Otherdrivingtipsinclude:
- Keepthevehiclewellventilated.
-
Keeptheinterior temperaturecool.
-
Keepyoureyesmoving—scan theroadaheadandtothesides.
- Checktherearviewmirrorand vehicleinstrumentsoften.
HillandMountainRoads
Drivingonsteephillsorthrough mountainsisdifferentthandriving onflatorrollingterrain. Tipsfor drivingintheseconditionsinclude:
- Keepthevehicleservicedandin goodshape.
- Checkallfluidlevelsandbrakes, tires,coolingsystem,and transmission.
- Shifttoalowergearwhengoing downsteeporlonghills.

WARNING
If you donot shift down, the brakes could get so hot that they would not work well. You would then have poor braking over
(Continued)
WARNING(Continued)
nonegoingdownahill.Youcould crash.Shiftdowntolettheengine assistthebrakesonasteep downhillslope.

WARNING
CoastingdownhillinN(Neutral) orwiththeignitionoffis dangerous. Thebrakeswillhave todoalltheworkofslowingdown andtheycouldgetsohotthat theywouldnotworkwell.You wouldthenhavepoorbrakingor evennonegoingdownahill. Steeringmayalsobeaffected whenignitionisoff.Youcould crash.Alwayshavetheengine runningandthevehicleingear whengoingdownhill.
- Stayinyourownlane.Donot swingwideorcutacrossthe centeroftheroad.Driveat speedsthatletyoustayinyourownlane.
- Bealertontopofhills; somethingcouldbeinyourlane (stalledcar,accident).
- Payattentiontospecialroad signs(fallingrocksarea,winding roads,longgrades,passingor no-passingzones)andtake appropriateaction.
WinterDriving
DrivingonSnoworIce
Drivecarefullywhenthereissnow oricebetweenthetiresandthe road,creatinglesstractionorgrip. Weticecanoccuratabout0°C (32°F)whenfreezingrainbeginsto fall,resultinginevenlesstraction. Avoiddrivingonweticeorin freezingrainuntilroadscanbe treatedwithsaltorsand.
Drivewithcaution,whatever the condition.Accelerategently so tractionisnotlost.Acceleratingtoo quicklycausesthewheelstospin andmakesthesurfaceunderthe tiresslick,sothereisevenless traction.
Trynottobreakthefragiletraction. If you accelerate at toofast, the drive wheels will spin and polish the surface under the tire seven more.
TheAntilockBrakeSystem(ABS) improves vehicle stability during hardstopsonslipperyroads, but apply the brakes sooner than when on dry pavement. See Antilock Brake System(ABS) on page 9-25.
Allowgreaterfollowingdistanceon anyslipperyroadandwatchfor slipperyspots.lcypatchescan occuronotherwiseclearroadsin shadedareas.Thesurfaceofa curveoranoverpasscanremainicy whenthesurroundingroadsare clear.Avoidsuddensteering maneuversandbrakingwhile once.
9-8DrivingandOperating
Turnoffcruise control on slippery surfaces.
BlizzardConditions
Beingstuckinsnowcanbea seriousssituation.Staywiththe vehicleunlessthereishelpnearby. Ifpossible,useRoadside Assistance.SeeRoadside AssistanceProgram(Mexico)on page13-7orRoadsideAssistance Program(U.S.andCanada)on page13-11.Togethelpandkeep everyoneinthevehiclesafe:
• Turnonthehazardwarning flashers.
- Tiearedclothtoanoutside mirror.

WARNING
Snowcantrapengineexhaust underthevehicle. This may cause exhaust gas to get inside. Engine exhaust contains carbon monoxide (CO) which
(Continued)
WARNING(Continued)
cannotbeseenorsmelled.Itcan causeunconsciousnessandeven death.
Ifthevehicleisstuckinthesnow:
- Clearawaysnowfromaround thebaseofyourvehicle, especiallyanythatisblocking theexhaustpipe.
- Checkagainfromtimeto timetobesuresnowdoes notcollectthere.
- Openawindowabout5cm (2in)onthesideofthe vehiclethatisawayfromthe windtobringinfreshair.
- Fullyopentheairoutletson orundertheinstrument panel.
- Adjusttheclimatecontrol systemtoasettingthat circulatestheairinsidethe vehicleandsetthefanspeed
(Continued)
WARNING(Continued)
tothehighestsetting.See "ClimateControlSystems" in theIndex.
Formoreinformationabout carbonmonoxide,seeEngine Exhaustonpage9-20.
Tosavefuel, runtheengineforonly shortperiodsasneededtowarm thevehicleandthenshuttheengine offandclosethewindowmostof thewaytosaveheat.Repeatthis untilhelparrivesbutonlywhenyou feelreallyuncomfortablefromthe cold.Movingabouttokeepwarm alsohelps.
Ifittakessometimeforhelpto arrive,nowandthenwhenyourun theengine,pushtheaccelerator pedalslightlysotheengine runs fasterthantheidlespeed.This keepsthebatterychargedtorestart thevehicleandtosignalforhelp withtheheadlamps.Dothisaslittle aspossibletosavefuel.
IftheVehiclesIsStuck
Slowlyandcautiouslyspinthe wheelstofreethevehiclewhen stuckinsand,mud,ice,orsnow.
Ifstucktooseverelyforthetraction systemtofreethevehicle,turnthe tractionsystemoffandusethe rockingmethod.SeeStabiliTrak® Systemonpage9-27.
WARNING
If the vehicle's tiresspinathigh speed, they can explode, and you or others could be injured. The vehicle can overheat, causing an engine compartment fire or other damage. Spin the wheels as little as possible and avoid going above 56 km/h (35 mph).
RockingtheVehicletoGet itOut
Turnthesteeringwheelleftand righttocleartheareaaroundthe frontwheels.Turnoffanytraction
system.Shiftbackandforth betweenR(Reverse)andalow forwardgear,spinningthewheels aslittleaspossible.Toprevent transmissionwear,waituntilthe wheelsstopspinningbeforeshifting gears.Releasetheaccelerator pedalwhileshifting,andpress lightlyontheacceleratorpedal whentetransmissionisingear. Slowlyspinningthewheelsinthe forwardandreversedirections causesarockingmotionthatcould freethevehicle.Ifthatdoesnotget thevehicleoutafterafewtries,it mightneedtobetowedout.Ifthe vehicledoesneedtobetowedout, see TowingtheVehicleon page 10-68.
VehicleLoadLimits
It is very important to know how much weight your vehicle can carry. This weight is called the vehicle capacity weight and includest the weight of all occupants, cargo, and all
nonfactory-installedoptions. Twolabelsonyourvehicleshow howmuchweightitmay properlycarry,theTireand LoadingInformationlabeland theCertification/Tirelabel.
WARNING
Donotloadthevehicleany heavierthantheGross VehicleWeightRating (GVWR), oreitherthe maximumfrontorrearGross AxleWeightRating(GAWR). Thiscancausesystemsto breakandchangethewaythe vehiclehandles. Thiscould causelossofcontrolanda crash. Overloadingcanalso shortenthelifeofthevehicle.
TireandLoadingInformation Label
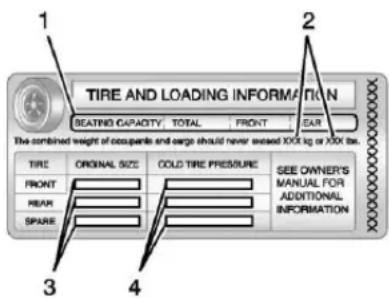
ExampleLabel
Avehicle-specific Tire and Loading Information label is attached to the center pillar (B-pillar). The tire and loading information label shows the number of occupant seating positions (1), and the maximum vehicle capacity weight (2) in kilograms and pounds.
The Tire and Loading Information label also shows the sizeofthe originalequipment tires(3) and there recommended coldtireinflation pressures(4). Formoreinformationontires and inflation see Tireson page 10-34 and TirePressure on page 10-41.
Thereisalsoimportantloading informationonthevehicle Certification/Tirelabel.Ittells youtheGrossVehicleWeight Rating(GVWR)andtheGross AxleWeightRating(GAWR)for thefrontandrearaxle.See "Certification/TireLabel"laterin thissection.
StepsforDeterminingCorrect LoadLimit
- Locatethestatement"The combinedweightof occupantsandcargoshould
neverexceedXXXkgor XXXlbs"onyourvehicle's placard.
-
Determinethecombined weightofthedriverand passengersthatwillberiding inyourvehicle.
-
Subtract the combined weight of the driver and passengers from XXXkgor XXXlbs.
-
Theresultingfigureequals theavailableamountofcargo andluggageloadcapacity. Forexample, ifthe "XXX" amountequals1400lbs and therewillbefive150lb passengersinyourvehicle, theamountofavailablecargo andluggageloadcapacityis 650lbs(1400-750(5x150) =650lbs).
-
Determinethecombined weightofluggageandcargo beingloadedonthevehicle. Thatweightmaynotsafely exceedtheavailablecargo andluggageloadcapacity calculatedinStep4.
- If your vehicle will betowing a trailer, the load from your trailer will be transferred to your vehicle. Consult this manual determine how this reduces the available cargo and luggage load capacity for your vehicle.
See Trailer Towingonpage9-45 for important information on towingatraler, towingsafety rules and trailering tips.
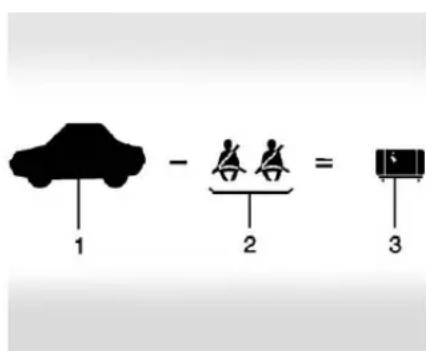
Example1
- VehicleCapacityWeightfor Example1=453kg (1,000lbs).
- SubtractOccupantWeight@68kg(150lbs)×2=136kg (300lbs).
- Available Occupant and Cargo Weight=317kg (700lbs).
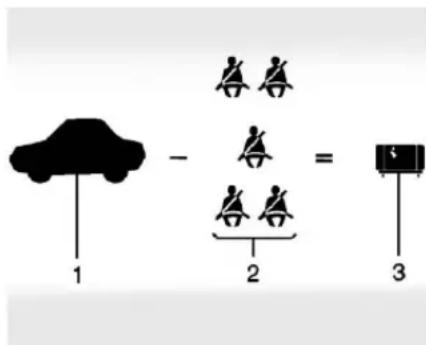
Example2
- VehicleCapacityWeightfor Example2=453kg (1,000lbs).
- SubtractOccupantWeight@68kg(150lbs)×5=340kg (750lbs).
- Available Cargo Weight=113kg(250lbs).
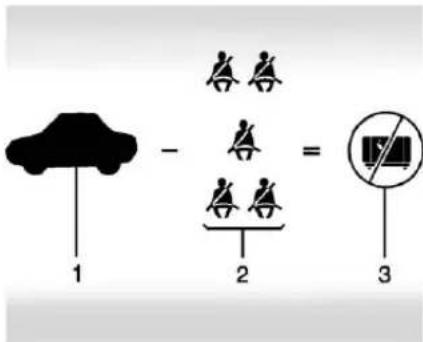
Example3
- VehicleCapacityWeightfor Example3=453kg (1,000lbs).
- SubtractOccupantWeight@91kg(200lbs)×5=453kg (1,000lbs).
- Available Cargo Weight=0kg(0lbs).
Refertoyourvehicle'stireand loadinginformationlabelfor specificinformationaboutyour vehicle'scapacityweightand
seatingpositions. The combined weightofthedriver, passengers, and cargoshouldneverexceed yourvehicle'scapacityweight.
Certification/TireLabel
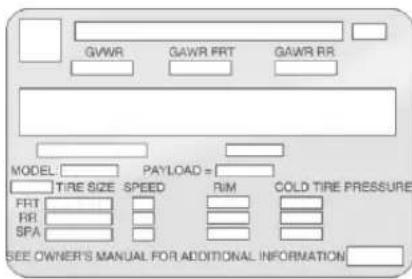
LabelExample
Avehicle-specific Certification/Tirelabelisattachedtothe centerpillar(B-pillar).
Thelabelshowsthegross weightcapacityofyourvehicle. ThisiscalledtheGrossVehicle WeightRating(GVWR).The
GVWRincludestheweightof thevehicle,allooccupants,fuel, andcargo.
The Certification/Tirelabel also tells you the maximum weights for the front and rear axles, called the Gross Axle Weight Rating (GAWR). To find out the actual load on your front and rear axles, you need to go to a weigh station and weigh your vehicle. Your dealer can help you with this. Besuret spread out your loadequally on both sides of the center line.
NeverexceedtheGVWRfor yourvehicleortheGAWRfor eitherthefrontorrearaxle.

WARNING
Donotloadthevehicleany heavierthantheGross VehicleWeightRating
(Continued)
WARNING(Continued)
(GVWR), oreither the maximumfrontorrear Gross AxleWeightRating(GAWR). This can cause system to break and changetheway the vehicle handles. This could cause loss of control and crash. Overloading can also short entelife of the vehicle.
Notice: Overloading the vehicle may caused damage. Repairs would not be recovered by the vehicle warranty. Do not overload the vehicle.
If you put things inside your vehicle—likesuit cases, tools, packages, or anything else, they will go as fast as the vehicle goes. If you havet to port turn quickly, or if there is a crash, they will keep going.
WARNING
Thingsyouputinsidethe vehiclecanstrikeandinjure peopleinasuddenstopor turn, orinacrash.
- Putthingsinthecargo areaofthevehicle.Tryto spreadtheweightevenly.
- Neverstackheavier things,likesuitcases, insidethevehiclesothat someofthemareabove thetopsoftheseats.
- Donotleavean unsecuredchildrestraint inthevehicle.
- Whenyoucarrysomething insidethevehicle,secure itwheneveryoucan.
- Donotleaveaseatfolded downunlessyouneedto.
Starting and Operating
NewVehicleBreak-In
Notice: The vehicle does not need an elaborate break-in. But it will perform better in the long run if you follow these guidelines:
- If you have all-wheel drive, keep your speed at 88 km/h (55 mph) or less for the first 805 km (500 mi).
- Donotdriveatanyone constantspeed, fastorslow, forthefirst805km(500mi). Donotmakefull-throttle starts. Avoiddownshifting to brakeorslowthevehicle.
- Avoidmakinghardstopsfor thefirst322km(200mi)or so.Duringthistimethenew brakeliningsarenotyet brokenin.Hardstopswith newliningscanmean prematurewearandearlier replacement.Followthis breaking-inguidelineevery timeyougetnewbrake linings.
- Donottowatrailerduring break-in.SeeDriving CharacteristicsandTowing Tipsonpage9-42forthe trailertowingcapabilitiesof yourvehicleandmore information.
Followingbreak-in, enginespeed and load can be gradually increased.
IgnitionPositions
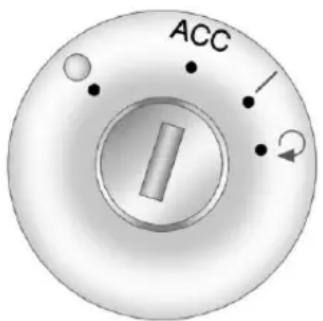
Theignitionswitchhasfourdifferent positions.
InordertoshiftoutofP(Park), the ignitionmustbeinON/RUNorACC/ACCESSORYandthebrakepedal mustbeapplied.
Notice: Using a tool to for the key to turn in the ignition could caused damage to the switch or break the key. Use the correct key, makes sure it is all the way in,
andturnitonlywithyourhand. Ifthekeycannotbeturnedby hand,seeyourdealer.
O(STOPPINGTHEENGINE/LOCK/OFF):Whenthevehicleis stopped,turntheignitionswitchto LOCK/OFFtoturntheengineoff. RetainedAccessoryPower(RAP) willremainactive.SeeRetained AccessoryPower(RAP)on page9-18.
Thispositionlockstheignition, transmission,andthesteering wheelwhenthekeysremoved fromtheignition.Thekeycanbe removedinLOCK/OFF.
Thesteeringcanbindwiththe wheelsturnedoffcenter.Ifthis happens,movethesteeringwheel fromrighttoleftwhileturningthe keytoACC/ACCESSORY.Ifthis doesnotwork,thenthevehicle needsservice.
Donotturntheengineoffwhenthe vehicleismoving. Thiswillcausea lossofpowerassistinthebrake andsteeringsystemsanddisable theairbags.
If the vehicle must be shutoff in an emergency:
- Brakeusingafirmandsteady pressure.Donotpumpthe brakesrepeatedly.Thismay depletepowerassist,requiring increasedbrakepedalforce.
- ShiftthevehicletoN(Neutral). Thiscanbedonewhilethe vehicleismoving. Aftershifting toN(Neutral), firmly apply the brakes and steerthevehicletoa safelocation.
-
Cometoacompletestop, shift toP(Park), and turntheignition toLOCK/OFF. On vehicles with an automatic transmission, the shiftlevermustbeinP(Park) to turntheignitionswitchtothe LOCK/OFF position.
-
Settheparkingbrake. See ParkingBrakeonpage9-26.
WARNING
Turningoffthevehiclewhile movingmaycauselossofpower assistinthebrakeandsteering systemsanddisabletheairbags. Whiledriving,onlyshutthe vehicleoffinanemergency.
If the vehicle cannot be pulled over, and must be hutoff while driving, turn the ignition to ACC/ACCESSORY.
ACC(ACC/ACCESSORY): This is the position in which you can operate the electrical accessories or items plugged into the accessory power outlets. This position unlocks the ignition and steering wheel. Use this position if the vehicle must be pushedortowed.
(ON/RUN): Thispositioncanbe usedtooperatetheelectrical accessoriesandtodisplaysome
instrumentpanelwarning and indicatorlights. This position can also be used for service and diagnostics, and to verify the proper operation of them malfunction indicator lampasm may be required for emission inspection purposes. Theswitch stays in this position when the engine is running. The transmission is all unlocked in this position. If you leave the key in the ACC/ACCESSORY or ON/RUN position with the engine off, the battery could bedrained. You may not be able to start the vehicle if the battery is allowed to drain for an extended period of time.
Ω(START): Thisistheposition that starts the engine. When the engine starts, releasethe key. The ignition switch will return to ON/RUN for driving.
KeyLockRelease
The vehicle has an electronic key lock release system. This system is to prevent ignition key removal unless the shift lever is in P (Park).
The keylock releasewillnotwork if the battery is charged less than 9 - volts, or uncharged. Try charging or jump starting the battery. See Jump Starting on page 10-65.
StartingtheEngine
MovetheshiftlevertoP(Park)or N(Neutral). Theenginewillnotstart inanyotherposition. Torestartthe enginewhenthevehicleisalready moving, useN(Neutral)only.
Notice: Donottrytoshiftto P(Park)ifthevehicleismoving. If youdo, you could damage the transmission. ShifttoP(Park) only when the vehicle is stopped.
Notice: If you add electrical parts or accessories, you could change the way the engine operates. Any resulting damage would not be covered by the vehicle warranty. See Add-On Electrical Equipment on page 9-49.
StartingProcedure
- With your footoff the accelerator pedal, turn the ignition to START. Whenthe engine starts, let go of the key. The idlespeed will slow downasthe engine warms. Do not racethe engine immediately after starting it. Operatethe engine and transmission gently to allow the oil to warm up and lubricate all moving parts.
Thevehiclehasa Computer-ControlledCranking System. Thisfeatureassistsin startingtheengineandprotects components. Iftheignitionkeyis turnedtotheSTARTposition, and thenreleasedwhenthe enginebeginscranking, the enginewillcontinuecrankingfor afewsecondsoruntilthe vehiclestarts. Iftheenginedoes notstartandthekeyisheldin START, crankingwillbestopped after15secondstoprevent crankingmotordamage. To preventgeardamage, this systemalsopreventscrankingif
theengineisalreadyrunning. Enginecrankingcanbestopped byturningtheignitionswitchto theACC/ACCESSORYor LOCK/OFFposition.
Notice:Crankingtheenginefor longperiodsoftime,byreturning thekeytotheSTARTposition immediatelyaftercrankinghas ended,canoverheatanddamage thecrankingmotor,anddrainthe battery.Waitatleast15seconds betweeneachtry,toletthe crankingmotorcooldown.
- If theenginedoesnotstartafter fiveto10seconds, especially in verycoldweather(below-18°C or0°F), it could be flooded with toomuch gasoline. Try pushing the accelerator pedal all the way tothefloor and holding it there asyouhold the key in START forupto a maximum of 15 seconds. Wait at least 15 seconds between each try, to allow the cranking motort o cool down. Whenthe enginestarts, let goof the key and accelerator.
If the vehicle starts briefly but then stops again, repeat these steps. This clear the extra gasoline from the engine. Donot racethe engine immediately after starting it. Operatethe engine and transmission gently until the oil warmsup and lubricates all moving parts.
Notice:Theengineisdesignedto workwiththeelectronicsinthe vehicle.Ifyouaddelectricalparts oraccessories,youcouldchange thewaytheengineoperates. Beforeaddingelectrical equipment,checkwithyour dealer.Ifyoudonot,theengine mightnotperformproperly.Any resultingdamagewouldnotbe coveredbythevehiclewarranty.
EngineHeater
Theenginecoolantheatercan provideeasierstartingandbetter fueleconomyduringengine warm-upincoldweatherconditions atorbelow0°F(-18°C).Vehicles
withanenginecoolantheater shouldbepluggedinatleastfour hoursbeforestarting. Somemodels mayhaveaninternalthermostatin thecordwhichwillpreventengine coolantheateroperationat temperaturesabove0°F(-18°C).
ToUsetheEngineCoolant Heater
- Turnofftheengine.
-
Openthehood and unwrap the electrical cord. The bundled cord is located on the riverside of the engine compartment, between the engine aircleaner and the windshield washer fluid reservoir. See Engine Compartment Overview page 10-5.
-
Plugthecordintoanormal, grounded110-voltACoutlet.
WARNING
Pluggingthecordintoan ungroundedoutletcouldcausean electricalshock.Also,thewrong kindofextensioncordcould overheatandcauseafire.You couldbeseriouslyinjured.Plug thecordintoaproperlygrounded three-prong110-voltACoutlet. Ifthecordwillnotreach,usea heavy-dutythree-prongextension cordratedforatleast15amps.
- Before starting the engine, be suretounplugandstorethe cordasitwasbeforetokeepit awayfrommovingengineparts. If you donot, it could be damaged.
Thelengthoftimetheheatershould remainpluggedindependson severalfactors.Askadealerinthe areawhereyouwillbeparkingthe vehicleforthebestadviceonthis.
RetainedAccessory Power(RAP)
These vehicle accessories can be used for up to 10 minutes after the ignition key is turned off:
- AudioSystem
- PowerWindows
- Sunroof(ifequipped)
Powertothewindowsandsunroof willworkupto10minutesoruntila doorisopened.
Theradiocontinuestoworkfor 10minutesoruntilthedriverdooris opened.
Foranadditional10minutesof operation,closeallthedoorsand turnthekeytoON/RUNandthen backtoLOCK/OFF.
Allthesefeatureswillworkwhenthe keyisintheON/RUNorACC/ACCESSORYpositions.
ShiftingIntoPark
- Holdthebrakepedaldownand settheparkingbrake. See ParkingBrakeonpage9-26for moreinformation.
- MovetheshiftleverintoP(Park) byholdinginthebuttononthe shiftleverandpushingtheshift leverallthewaytowardthefront ofthevehicle.
- Turntheignitionkeyto LOCK/OFF.
- Removethekeyandtakeitwith you. If you can leavethe vehicle with the ignition key in your hand, the vehicle is in P (Park).
LeavingtheVehiclewiththe EngineRunning

WARNING
Itcanbedangeroustoleavethe vehiclewiththeengine running. Itcouldoverheatandcatchfire.
(Continued)
WARNING(Continued)
It is dangerous to get out of the vehicle if the shift lever is not fully in P (Park) with the parking brake firmly set. The vehicle can roll.
Donotleavethevehiclewhenthe engineisrunning.Ifyouhaveleft theengineerunning,thevehicle canmovesuddenly.Youorothers couldbeinjured.Tobesurethe vehiclewillnotmove,evenwhen youareonfairlylevelground, alwayssettheparkingbrakeand movetheshiftlevertoP(Park).
See Shifting Into Parkon page9-18. If you are towing a trailer, see Driving Characteristics and Towing Tipson page9-42.
If you havetoleavethe vehicle with the engineer running, besure the vehicle is in P (Park) and the parking brake is firmly set before you leave it. After you have moved the shift lever into P (Park), hold the
regularbrakepedaldown.Then, seeifyoucanmovetheshiftlever awayfromP(Park)withoutfirst pushingthebutton.
If you can, it mean that the shift lever was not fully locked in P(Park).
TorqueLock
Torquelockiswhentheweightof thevehicleputstoomuchforceon theparkingpawlinthe transmission. This happens when parkingonahillandshiftingthe transmissionintoP(Park)isnot doneproperlyandthenitisdifficult toshiftoutofP(Park). Toprevent torquelock, settheparkingbrake andthenshiftintoP(Park). Tofind outhow, see "ShiftingIntoPark" listedpreviously.
Iftorquelockdoesoccur,your vehiclemayneedtobepushed uphillbyanothervehicletorelieve theparkingpawlpressure,soyou canshiftoutofP(Park).
ShiftingoutofPark
The vehicle is equipped with an electronic shift lock releases system. Theshift lock release is designed to:
- Preventignitionkeyremoval unlesstheshiftleverisin P(Park)withtheshiftlever buttonfullyreleased,and
- Preventmovementoftheshift leveroutofP(Park),unlessthe ignitionisinON/RUNorACC/ACCESSORYandtheregular brakepedalisapplied.
Theshiftlockreleaseisalways functionalexceptinthecaseofan unchargedorlowvoltage(lessthan 9-volt)battery.
If the vehicle has an uncharged battery or a battery with low voltage, trycharging or jump starting the battery. See Jump Starting on page 10-65 for more information.
ToshiftoutofP(Park):
- PlacetheignitioninON/RUN.
- Apply the brake pedal.
- Presstheshiftleverbutton.
- Movetheshiftlevertothe desiredposition.
If you still are unable to shift out of P(Park):
-
Fullyreleasetheshiftlever button.
-
While holding down the brake pedal, presstheshift lever button again.
-
Movetheshiftlevertothe desiredposition.
If you still cannot movetheshift lever from P(Park), see your dealer.
ParkingoverThings ThatBurn

WARNING
Thingsthatcanburncouldtouch hotexhaustpartsunderthe vehicleandignite.Donotpark overpapers,leaves,drygrass, orotherthingsthatcanburn.
EngineExhaust

WARNING
Engineexhaustcontainscarbon monoxide(CO)whichcannot be seenorsmelled.ExposuretoCO cancauseunconsciousnessand evendeath.
Exhaustmayenterthevehicleif:
- The vehicleidlesinareas with poor ventilation (parking garages, tunnels, deep snow that may block under body airflowortail pipes).
• Theexhaustsmellsor soundsstrangeordifferent.
• Theexhaustsystemleaks duetocorrosionordamage. - Thevehicleexhaustsystem has been modified, damaged, or improperly repaired.
(Continued)
WARNING(Continued)
- Thereareholesoropenings inthevehiclebodyfrom damageoraftermarket modificationsthatarenot completelysealed.
Ifunusualfumesaredetectedor ifitissuspectedthatexhaustis comingintothevehicle:
- Driveitonlywiththewindows completelydown.
- Havethevehiclerepaired immediately.
Neverparkthevehiclewiththe engineerunninginanenclosed areasuchasagarageora buildingthathasnofreshair ventilation.
RunningtheVehicle WhileParked
Itisbetternottoparkwiththe engineerunning.
Ifthevehicleisleftwiththeengine running,followtheproperstepsto besurethevehiclewillnotmove. See ShiftingIntoParkonpage9-18 andEngineExhaustonpage9-20.
Ifparkingonahillandpullinga trailer, see DrivingCharacteristics and TowingTipsonpage9-42.
Automatic Transmission
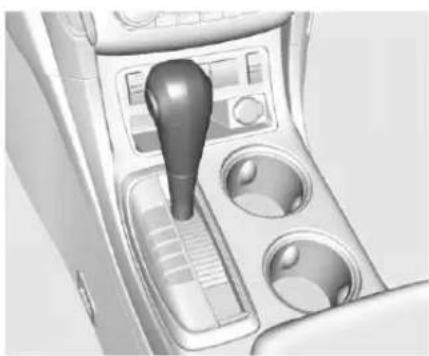
natural_image
Interior view of a car air intake console with handle and control buttons (no text or symbols visible)P(Park): This position locks the frontwheels. It is the best position to use when starting the engine because the vehicle cannot move easily.
WARNING
It is dangerous to get out of the vehicle if the shift lever is not fully in P (Park) with the parking brake firmly set. The vehicle can roll.
Donotleavethevehiclewhenthe engineisrunning.Ifyouhaveleft theengine running,the vehicle can moves suddenly.Youor others could be injured.Tobesure the vehicle will not move, even when you are on fairly level ground, always set the parking brake and movetheshiftlevertoP(Park).
See Shifting Into Parkon page9-18 and Driving Characteristics and Towing Tips on page9-42.
Makesuretheshiftleverisfullyin P(Park)beforestartingtheengine. Thevehiclehasanautomatic transmissionshiftlockcontrol system.WiththeignitioninON/RUN,fullyapplytheregularbrake,
thenpressthebuttononthebackof theshiftleverbeforeshiftingfrom P(Park).Ifyoucannotshiftoutof P(Park),easepressureontheshift lever,thenpushtheshiftleverall thewayintoP(Park)asyou maintainbrakeapplication.Then presstheshiftleverbuttonand movetheshiftleverintoanother gear.See ShiftingoutofParkon page9-19.
R(Reverse):Usethisgearto backup.
Notice: ShiftingtoR(Reverse) while the vehicle is moving forward could damage the transmission. There pairs would not be recovered by the vehicle warranty. Shift to R(Reverse) only after the vehicle is stopped.
Torockthevehiclebackandfortho getoutofsnow,ice,orsandwithout damagingthetransmission,seelf the VehicleIsStuckonpage9-9.
N(Neutral): In this position, the enginedoes not connect with the wheels. Torestart the engine when
thevehicleisalreadymoving,use N(Neutral)only.Also,use N(Neutral)whenthevehicleis beingtowed.
WARNING
Shifting into a drive gear while the engine is running at high speed is dangerous. Unless your foot is firmly on the brake pedal, the vehicle could move very rapidly. You could close control and hit people or objects. Donot shift into a drive gear while the engine is running at high speed.
Notice: ShiftingoutofP(Park) or N(Neutral) with the engine running at high speed may damage the transmission. The repairs would not be covered by the vehicle warranty. Besure the engine is not running at high speed when shifting the vehicle.
D(Drive): This position is for normal driving. It provides the best fueleconomy. If you need more power for passing, and you are:
- Goinglessthan56km/h (35mph), pushtheaccelerator pedalabouthalfwaydown.
- Goingabout56km/h(35mph)or more,pushtheacceleratorall thewaydown.
Notice: If the vehicle seem to accelerate slowly or not shift gears when you go faster, and you continue to driv the vehicle that way, you could damage the transmission. Have the vehicle serviced right away. You can drive in L (Low) when you are driving less than 56 km/h (35 mph) and D (Drive) for higher speeds until then.
Ifthevehicleisstoppedonahill, withyourfootoffthebrakepedal, thevehiclemayroll. Thisisnormal andisduetothetorqueconverter designedtoimprovefueleconomy
andperformance. Usethebraketo holdthevehicleonahill. Donotuse theacceleratorpedal.
L(Low): Thispositiongivesyou accesstogearranges. This provides more engine braking but lower fueleconomy than D(Drive). You can use it on very steep hills, or in deep snowormud. See Manual Modeon page 9-23.
ManualMode
ElectronicRangeSelect (ERS)Mode
ERSmodeallowsyoutochoose the top-gearlimitofthetransmission andthevehicle'sspeedwhile drivingdownhillortowingatrailer. Thevehiclehasanelectronicshift positionindicatorwithinthe instrumentcluster.Whenusingthe ERSmodeanumberwilldisplay nexttotheL,indicatingthecurrent gearthathasbeenselected.
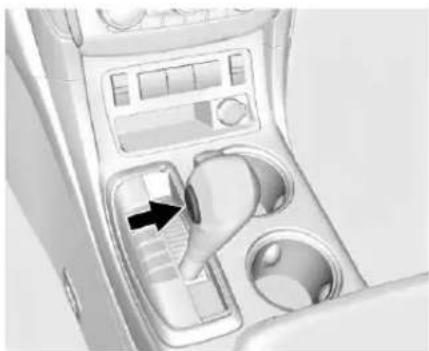
natural_image
Interior view of a car air intake console with control panel and vent slots (no text or symbols visible)Tousethisfeature:
- MovetheshiftlevertoL(Low).
- Pressthe+(Plus)or-(Minus) buttonontheshiftlever, to increaseordecreasethegear rangeavailable.
WhenyoushiftfromD(Drive)to L(Low),thetransmissionwillshiftto apre-determinedlowergearrange. The highest gear available for this pre-determined range is displayed next to the Linthe DIC. See Driver Information Center(DIC) on page 5-22 form more information. The number displayed in the DIC is the
highestgearthatthetransmission willbeallowedtooperatein. This meansthatallgearsbelowthat numberareavailable.Forexample, when4(Fourth)isshownnexttothe L,1(First)through4(Fourth)gears areautomaticallyshiftedbythe vehicle. Thetransmissionwillnot shiftinto5(Fifth)untilthe+(Plus) buttonisusedoryoushiftbackinto D(Drive).
WhileinL(Low), the transmission will prevent shifting to a lower gear range if the engines speed is too high. You have a brief period of time to slow the vehicle. If vehicles speed is not reduced within the time allowed, the lower gear rearrang shift will not be completed. You must further slow the vehicle, then press the - (Minus) button to the desired lower gear range.
AutomaticEngineGradeBrakingis notavailablewhentheERSis active.ItisavailableinD(Drive)for bothnormalandTow/Haulmode.
While using the ERS, cruise control and the Tow/Haul mode can be used. See Tow/Haul Mode following.
Tow/HaulMode
( Tow/Haul ): The vehicle may have a Tow/Haul mode.
Thebuttonislocatedonthe instrumentpanelundertheclimate controls.
Pushthebuttontoactivate the system.Pushitagaintodeactivate thesystem.Youcanusethisfeature toassistwhentowingorhaulinga heavyload.
When Tow/Haulisactivated the Tow/Haulsymbolwillcomeoninthe instrumentcluster.See“Tow/Haul Mode”underDrivingCharacteristics and TowingTipsonpage9-42for moreinformation.
AutomaticEngineGrade Braking
AutomaticEngineGradeBraking assistswhendrivingonadownhill grade. It maintains vehiclespeed by automatically implementing as shift schedule that uses the engine and the transmission to slow the vehicle. Thesystem will automatically command down shift to reduce vehiclespeed, until the brake pedal is no longer being pressed.
While in the Electronic Range Select(ERS)mode, grade braking is deactivated, allowing the driverto select range and limiting the highest gear available. Grade braking is available for normal driving and in Tow/Haul mode.
See Automatic Transmission on page9-21.
DriveSystems
All-WheelDrive
Vehicleswiththisfeaturetransfer enginepower,asrequired,toall fourwheels.Itisfullyautomatic,and adjustsitselfasneededforroad conditions.
When using a compact spare tire on an AWD vehicle, the system automatically detects the compact spare and reduces AWD performance to protect the system. Torest full AWD operation and prevent excessive wear on the system, replace the compact spare with a full-sizetire as soon as possible. See Compact Spare Tire on page 10-64.
Brakes
AntilockBrake System(ABS)
This vehicle has the Antilock Brake System (ABS), an advanced electronic braking system that helps prevent abrakingskid.
Whenthevehiclebeginstodrive away,ABSchecksitself. Amomentarymotororclickingnoise mightbeheardwhilethistestis goingon,anditmightevenbe noticedthatthebrakepedalmoves alittle.Thisisnormal.

If there is a problem with ABS, this warning light stays on. See Antilock Brake System (ABS) Warning Light on page 5-19.
Ifdrivingsafelyonawetroadandit becomesnecessarytoslamonthe brakesandcontinuebrakingto avoidasuddenobstacle,a computersensesthatthewheels areslowingdown.Ifoneofthe wheelsisabouttostoprolling,the computerwillseparatelyworkthe brakesateachwheel.
ABScanchangethebrakepressure toeachwheel, asrequired, faster thananydrivercould. Thiscanhelp yousteeraroundtheobstaclewhile brakinghard.
Asthebrakesareapplied, the computerkeepsreceivingupdates onwheelspeedandcontrols brakingpressureaccordingly.
Remember:ABSdoesnotchange thetimeneededtogetafootupto thebrakepedaloralwaysdecrease stoppingdistance.Ifyougettoo closetothevehicleinfrontofyou, therewillnotbeenoughtimeto applythebrakesifthatvehicle suddenlyslowsorstops.Always leaveenoughroomupaheadto stop,evenwithABS.
UsingABS
Donotpumpthebrakes.Justhold thebrakepedaldownfirmlyandlet ABSwork.YoumightheartheABS pumpormotoroperatingandfeel thebrakepedalpulsate,butthisis normal.
BrakinginEmergencies
ABSallowsyoutosteerandbrake atthesametime.Inmany emergencies,steeringcanhelp morethaneventheverybest braking.
ParkingBrake
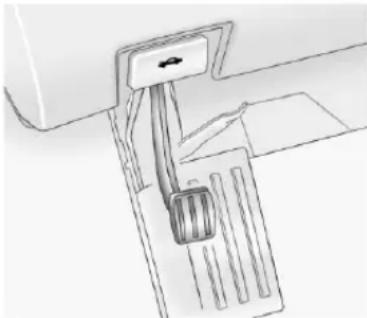
natural_image
Line drawing of a mechanical device with a handle and lever (no text or symbols)Tosettheparkingbrake, hold the regularbrakepedaldown, then pushtheparkingbrakepedaldown.
If the ignition is on, the brake system warning light will come on. See Brake System Warning Light on page 5-18.
Notice: Driving with the parking brake on can over heat the brake system and cause premature wear ordamagetobrakesystem parts. Makes sure that the parking brake is fully released and the brakewarning light is off before driving.
Toreleasetheparkingbrake, hold theregularbrakepedaldown, then pushdownmomentarily on the parkingbrakepedal until you feel the pedal release. Slowly pully our footup off the park brake pedal. If the parking brake is not released when you begint drive, the brake system warning light will be on and achimewills sound warning you that the parking brake is still on.
If you are towing a trailer and are parking on a hill, see Driving Characteristics and Towing Tips on page 9-42.
BrakeAssist
This vehicle has a brake assist feature designed to assist the driver instopping or decreasing vehicle speed in emergency driving conditions. This feature uses the stability system hydraulic brake control module to supplement the power brakesystem under conditions where the driver has quickly and forcefully applied the brake pedalin an attempt quickly stoporslowdown the vehicle. The stability system hydraulic brake control module increases brake pressure at each corner of the vehicle until the ABS activates. Minor brake pedal pulsation or pedalmovement during this time is normal and the drivers should continueto apply the brake pedal as the drivingsituation dictates. The brake assist feature will automatically disengagewhen the brake pedal is released or brake pedal pressure is quickly decreased.
HillStartAssist(HSA)
ThisvehiclehasaHillStartAssist (HSA)feature, whichmaybeuseful whenthevehicleisstoppedona grade. Thisfeatureisdesigned to preventthevehiclefromrolling, eitherforwardorrearward, during vehicledriveoff. Afterthedriver completely stopsandholdsthe vehicleinacompletestandstillona grade, HSAwillbeautomatically activated. During the transition period between whenthedriver releases the brakepedalandstarts to acceleratetodriveoffonagrade, HSAholdsthebrakingpressure to ensure that there is norolling. The brakes will automatically release when the acceleratorpedalis applied within the two-second window. It will not activate if the vehicleisinadrivegear and facing downhill, or if the vehicle is facing uphill and in R (Reverse).
RideControlSystems
StabiliTrak® System
The vehicle has the Stabili Trak system which combines antilock brake, traction, and stability control systems and helpsthedriver maintain directional control of the vehicle in most driving conditions.
When you first start the vehicle and begin to drive away, the system performs several diagnostic checks to ensure there are no problems. The system may be heard or felt while it is working. This is normal and does not mean there is a problem with the vehicle. The system should initialize before the vehicle reaches 32km / h (20mph). In some cases, it may take approximately 3.2 km (2 mi) of driving before the system initializes.
If the system fails to turn on or activate, one of the following messages will be displayed on the Driver Information Center (DIC): SERVICETRACTIONCONTROL,
SERVICESTABILITRAK, the StabiliTraklightwillcomeonand stayandfourchimesareheard. If these conditions are observed, turn the vehicle off, wait 15 seconds, and then turn it back on againtoresetthesystem. If any of these messages still appear on the Driver Information Center (DIC), the vehicles should be taken in for service. For more information on the DIC messages, see Ride Control System Messages on page 5-33.
TheStabiliTraklightwillflashonthe instrumentclusterwhenthesystem isbothonandactivated.
Thesystemmaybeheardorfelt whileitisworking;thisisnormal.

Thetractioncontrolbuttonislocated ontheinstrumentpanel.
Thetractioncontrolpartof StabiliTrakcanbeturnedoffby pressingandreleasingthetraction controlbutton.
Tractioncontrolcanbeturnedonby pressingandreleasingthetraction controlbuttonandtheappropriate TRACTIONCONTROLON messagewillbedisplayed,ifnot automaticallyshutoffforanyother reason.
Whenthetractioncontrolsystemis turnedoff, the appropriate TRACTIONCONTROLOFF messagewillbedisplayedonthe DIC. The vehicle will still have brake-traction control when traction control is off, but will not be able to use the engines speed management
system.See"TractionControl Operation"followingformore information.
Whenthetractioncontrolsystem hasbeenturnedoff, systemnoises maybeheardandfeltasaresultof thebrake-tractioncontrolworking.
Itisrecommendedtoleavethe systemonfornormaldriving conditions,butitmaybenecessary toturnthesystemoffifthevehicle isstuckinsand,mud,ice,orsnow, andyouwantto"rock"thevehicleto attempttofreeit.Itmayalsobe necessarytoturnoffthesystem whendrivinginextremeoff-road conditionswherehighwheelspinis required.SeelftheVehicleIsStuck onpage9-9.
TractionControlOperation
Thetractioncontrolsystemispartof theStabiliTraksystem.Traction controllimitswheelspinbyreducing engine power to the wheels (engine speed management) and by applying the brakes as necessary.
Thetractioncontrolsystemis enabledautomaticallywhenthe vehicleisstarted.Itwillactivateand theStabiliTraklightwillflashifit sensesthatanyofthewheelsare spinningorbeginningtolose tractionwhiledriving.Iftraction controlisturnedoff,onlythe brake-tractioncontrolportionof tractioncontrolwillwork.The enginespeedmanagementwillbe disabled.Inthismode,engine powerisnotreducedautomatically andthedrivenwheelscanspin morefreely.Thiscancausethe brake-tractioncontroltoactivate constantly.
Notice: If the wheel(s) of one axle is allowed to spin excessively while the Stabili Trak ^® , ABS, brake warning lights, and any relevant DIC messages are displayed, the transfer case could be damaged. There pairs would not be recovered by the vehicle warranty. Reduce engine power and donot spin the
wheel(s)excessivelywhilethese lightsandmessagesare displayed.
Thetractioncontrolsystemmay activateondryorroughroadsor underconditionssuchasheavy accelerationwhileturningorabrupt upshifts/downshiftsofthe transmission.Whenthishappens,a reductioninaccelerationmaybe noticed,oranoiseorvibrationmay beheard.Thisisnormal.
Ifcruisecontrolisbeingusedwhen thesystemactivates,theStabiliTrak lightwillflashandcruisecontrolwill automaticallydisengage.Cruise controlmaybereengagedwhen roadconditionsallow.SeeCruise Controlonpage9-29.
StabiliTrakmayalsoturnoff automaticallyifitdeterminesthata problemexistswiththesystem. Iftheproblemdoesnotclearitself afterrestartingthevehicle,seeyour dealerforservice.
CruiseControl
Withcruisecontrol, aspeed of about 40 km/h (25 mph) or more can be maintained without keeping your foot on the accelerator. Cruise controdoes not work at speeds below about 40 km/h (25 mph).
Whenthebrakesareapplied, the cruisecontrolisdisengaged.

WARNING
Cruisecontrolcanbedangerous whereyoucannotdrivesafelyat asteadyspeed.So,donotuse thecruisecontrolonwinding roadsorinheavytraffic.
Cruisecontrolcanbedangerous onslipperyroads. Onsuchroads, fastchangesintiretraction can cause excessivewheelslip, and youcouldlosecontrol. Donotuse cruisecontrolonslipperyroads.
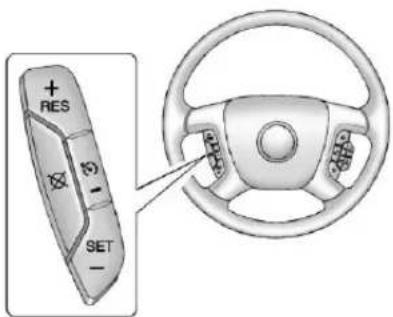
Thecruisecontrolbuttonsare locatedonleftsideofthesteering wheel.
(On/Off): Presstoturncruise controlonandoff. The indicator comesonwhenthecruisecontrol ison.
+RES(Resume/Accelerate): Pressbrieflytomakethevehicle resumetoapreviouslysetspeed, orpressandholdtoaccelerate.
SET-:Presstosetthespeedand activatecruisecontrolortomake the vehicle decelerate.
☒(Cancel): Presstodisengage cruisecontrol withouterasing the setspeedfrommemory.
SettingCruiseControl
If the cruise button is on when not in use, it could get bumped and go into cruise when not desired. Keep the cruise control switch off when cruise is not being used.
Thecruisecontrollightonthe instrumentclustercomesonafter thecruisecontrolhasbeensetto thedesiredspeed.
- Pressthe 📋 buttonoturnthe cruisecontrolsystemon.
- Getuptothespeeddesired.
- PressandreleasetheSET-buttonlocatedonthesteering wheel.
- Take your foot off the accelerator.
ResumingaSetSpeed
If the cruise control lissetata desired speed and then the brakes are applied, the cruise control is disengaged without erasing the set speed from memory.
Oncethevehiclespeedis40km/h (25mph)orgreater,pressthe+RES buttononthesteeringwheel.The vehiclereturnstothepreviouslyset speedandstaysthere.
IncreasingSpeedWhileUsing CruiseControl
If the cruise control system is already activated:
- Pressandholdthe+RESbutton onthesteeringwheeluntilthe desiredspeedisreached,then releaseit.
- Toincreasevehiclespeedin smallincrements, pressthe +RESbuttonbriefly. Eachtime thisisdone, thevehiclegoes about 1.6km/h(1mph) faster.
ReducingSpeedWhileUsing CruiseControl
If the cruise control system is already activated:
- PressandholdtheSET-button onthesteeringwheeluntilthe lowerspeeddesiredisreached, thenreleaseit.
- Toslowdowninsmallamounts, presstheSET-buttonbriefly. Eachtimethisisdone, the vehiclegoesabout1.6km/h (1mph)slower.
PassingAnotherVehicleWhile UsingCruiseControl
Usetheacceleratorpedalto increasevehiclespeed. When you take your footoff the pedal, the vehicle will slow downto the previously set cruisespeed.
UsingCruiseControlonHills
Howwellthecruisecontrolwillwork onhillsdependsuponthevehicle speed,load,andthesteepnessof thehills.Whengingupsteephills, youmighthavetosteponthe acceleratorpedaltomaintainthe vehiclespeed.Whenging downhill,youmighthavetobrakeor shifttoalowergeartokepthe vehiclespeeddown.Whenthe brakesareappliedthecruisecontrol isdisengaged.
EndingCruiseControl
Therearethreewaystoendcruise control:
• Steplightlyonthebrakepedal.
- Pressthe⊗button.
- Toturnoffthecruisecontrol, press 📋-onthesteeringwheel.
ErasingSpeedMemory
Thecruisecontrolsetspeedis erasedfrommemorybypassing 📋-oriftheignitionisturnedoff.
ObjectDetection Systems
UltrasonicParkingAssist
Ifavailable, the Ultrasonic Rear Parking Assist (URPA) system assiststhedriver with parking and avoiding objects while in R (Reverse). URPA operates at speeds less than 8 km/h (5 mph). Thesensorson therear bumper are used to detect objects upto 2.5 m (8 ft) behind the vehicle, and at least 25 cm (10 in) off the ground and below lift gate level.

WARNING
TheURPAsystemdoesnot detectchildren, pedestrians, bicyclists, animals, or objects below the bumper orthataretoo closeortoofar from the vehicle.
(Continued)
WARNING(Continued)
It is not available at speeds greater than 8 km/h (5 mph). To prevent injury, death, or vehicle damage, even with URPA, always check the area around the vehicle and check all mirrors before backing.
HowtheSystemWorks
URPA comeson automatically when the shift lever is moved into R(Reverse). As single tones sounds to indicate the system is working.
URPAoperatesonlyatspeedsless than8km/h(5mph).
Anobstacleisindicatedbyaudible beeps. Theintervalbetweenthe beepsbecomesshorterasthe vehiclegetsclosertotheobstacle. Whenthedistanceislessthan 30cm(12in)thebeepingisa continuoustoneforfiveseconds.
Tobedetected, objectsmustbeat least25cm(10in)offtheground andbelowliftgatelevel. Objects mustalsobewithin2.5m(8ft)from therearbumper. Thisdetection distancemaybelessduringwarmer orhumidweather.
TurningtheSystemOnandOff
Thesystemcanbedisabledthrough theDriverInformationCenter(DIC). See "ParkAssist" underDriver InformationCenter(DIC) on page5-22 formoreinformation.
URPAdefaultstotheonsetting eachtimethevehicleisstarted.
WhentheSystemDoesNot SeemtoWorkProperly
The following messages maybe displayed on the DIC:
SERVICEPARKASSIST: If this message occurs, takethe vehicle to your dealer to repairs the system.
PARKASSTBLOCKEDSEE OWNERSMANUAL: This messagecanoccurunderthe followingconditions:
- The ultrasonicsensors are not clean. Keep the vehicle's rear bumper free of mud, dirt, snow, ice, and slush. For cleaning instructions, see Exterior Care on page 10-72.
- Theparkassistsensors are covered by frostorice. Frostor ice can form around and behind the sensors and may not always be seen; this can occur after washing the vehicle in cold weather. Themessagemay not clear until the frostorice has melted.
- Atrailerwasattachedtothe vehicle,oranobjectwas hangingoutoftheliftgateduring thelastdrivecycle.Oncethe objectisremoved,URPAwill returntonormaloperation.
-
Atowbarisattachedtothe vehicle.
-
Thebumperisdamaged. Take the vehicle to your dealer to repair the system.
- Otherconditions,suchas vibrationsfromajackhammeror thecompressionofairbrakeson averylargetruck,areaffecting systemperformance.
SideBlindZone Alert(SBZA)
Ifavailable, theSideBlindZone Alertsystemisalanechangingaid thatassistsdriverswithavoiding crashesthatoccurwithvehiclesin thesideblindzones.

WARNING
SBZAdoesnotdetectvehicles rapidlyapproachingoutsideofthe sideblindzones,pedestrians, bicyclists,oranimals.Failureto usepropercarewhenchanging lanesmayresultininjury,death,
(Continued)
WARNING(Continued)
orvehicledamage.Before makingalanechange,always checkmirrors,glanceoveryour shoulder,andusetheturn signals.
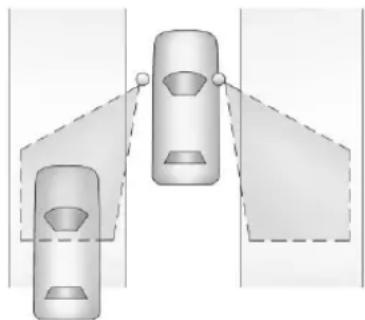
natural_image
Diagram showing two car heads with dashed lines indicating perspective or perspective alignment (no text or symbols)SBZADetectionZones
The SBZAsensorcoversazoneof approximatelyonelaneoverfrom bothsidesofthevehicle,3.5m (11ft).Thiszonestartsateachside mirrorandgoesbackapproximately
5.0m(16ft). The height of the zone is approximately between 0.5m(1.5ft) and 2.0m(6ft) off the ground.
Usecautionwhilechanginglanes whentowingatrailer,astheSBZA detectionzonesthatextendback fromthesidesofthevehicledonot movefurtherbackwhenatraileris towed.
HowtheSystemWorks
TheSBZAsymbollightsupinthe sidemirrorswhenthesystem detectsavehicleinthesideblind zone, indicatingitmaybeunsafeto changelanes. Beforemakingalane change, checktheSBZAdisplay, checkallmirrors, glanceoveryour shoulder, andusetheturnsignals.
LeftSideMirror
Display
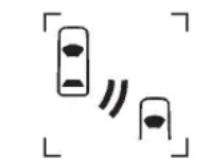
RightSideMirror
Display
Whenthevehicleisstarted, both outsidemirrorSBZAdisplayswill brieflycomeontoindicatethe systemisoperating. Whenthe vehicleismovingforward, theleftor rightsidemirrordisplaywilllightup ifavehicleisdetectedinthatblind zone. Iftheturnsignalisactivated andavehicleisalsodetectedon thesameside, thedisplaywillflash togiveyouextrawarningnotto changelanes.
Atspeedsgreaterthen32km/h (20mph),SBZAdisplaysmaycome onwhenapproachingorpassing othervehicles.SBZAdisplaysmay comeonwhenapassedvehicle remainsinordropsbackintothe detectionzone.SBZAcanbe disabledthroughtheDriver InformationCenter(DIC).SeeDriver InformationCenter(DIC)on page5-22.IfSBZAisdisabledby thedriver,theSBZAmirrordisplays willnotlightup.
WhentheSystemDoesNotSeem ToWorkProperly
MissedAlertscanoccurunder normalcircumstancesandwill increaseinwetconditions. The systemdoesnotneedtobe serviced.SBZAisdesignedto ignorestationaryobjects;however, thesystemmayoccasionallylight upduetoguardrails,signs,trees, shrubs,andotherstationaryobjects. Thisisnormalsystemoperation,the vehicledoesnotneedservice.
IftheSBZAdisplaysdonotlightup whenthesystemisonandvehicles areintheblindzone,thesystem mayneedservice.Takethevehicle toyourdealer.
SBZAdoesnotoperatewhenthe SBZAsensorsintheleftorright cornersoftherearbumperare coveredwithmud,dirt,snow,ice, slush,orinheavyrainstorms.For cleaninginstructions,see"Washing theVehicle"underExteriorCareon page10-72.IftheDICstilldisplays theSIDEDETECTIONSYS
TEMPORARILYOFFmessageafter cleaningthebumper,seeyour dealer.
TheSBZAdisplaysmayremainon ifatrailerisattachedtothevehicle, orabicycleorobjectisextending outtoeithersideofthevehicle.
When SBZA is disabled for any reason other than the driver turning it off, it cannot be turned back on. The SIDEBLINDZONE ALERTON option will not be selectable if the conditions for normal system operation are not met.
SBZAErrorMessages
The following messages may appear in the DIC:
SIDEBLINDZONEALERT SYSTEMOFF: Thismessage indicates that the driver has turned the system off.
SIDEDETECTIONSYS TEMPORARILYOFF:This messageindicatesthattheSBZA systemisdisabledeitherbecause thesensorcannotdetectvehiclesin
yourblindzone,orthevehicleis passingthroughanopenfieldof viewarea,suchasthedesert, wherethereisinsufficientdatafor operation.Thismessagemayalso activateduringheavyrainordueto roadspray.Thevehicledoesnot needservice.Forcleaning,see "WashingtheVehicle"under ExteriorCareonpage 10-72.
SERVICESIDEDETECTION SYSTEM: If this message appears, both SBZA displays will remain on indicating there is a problem with the SBZA system. If these displays remain on after continued driving, the system need service. Take the vehicle to your dealer.
FCCInformation
SeeRadioFrequencyStatementon page 13-20forinformation regardingPart15oftheFederal CommunicationsCommission(FCC) rulesandIndustryCanada StandardsRSS-GEN/210/220/310.
RearVision Camera(RVC)
The vehicle may have an RVC system. Read this entire section before using it.
WARNING
TheRVCsystemdoesnotdisplay children, pedestrians, bicyclists, animals, or any other object located outside the camera's field of view, below the bumper, or under the vehicle. Perceived distances may be different from actual distances. Donot back the vehicle using only the RVC screen, during longer, higher speedbacking maneuvers, or where there could be cross traffic. Failure to use proper care before backing may result in injury, death, or vehicle damage. Always check behind and around the vehicle before backing.
Therearvisioncamerasystemis designedtohelpthedriverwhen backingupbydisplayingaviewof theareabehindthevehicle.When thedrivershiftsthevehicleinto R(Reverse),thevideoimage automaticallyappearsonthe infotainmentscreen.Oncethedriver shiftsoutofR(Reverse),thescreen willgobacktothelastscreenthat hadbeendisplayed,afterdelay.
TurningtheRearVisionCamera SystemOnorOff
Toturntherearvisioncamera systemonoroff:
- ShiftintoP(Park).
- Press the Settingsmenubutton on the Homescreen of the infotainmentsystem.
- Select the Rear Camerascreen button. The Rear Camerascreen displays.
- SelectRearCameradisplayand thenselectONorOFF.
Thedisplayremainsonaftershifting outofR(Reverse)forapproximately 10seconds. Thedisplaycanbe canceledduringthistimeby performingoneofthefollowing:
• Pressahardkeyonthe infotainmentsystem.
- ShiftintoP(Park).
- Reachavehiclespeedof 8km/h(5mph).
Symbols
TheRVCsystemmayhavea featurethatletsthedriverview symbolsontheRVCscreenwhile usingtherearvisioncamera.The UltrasonicRearParkingAssist (URPA)systemmustnotbe disabledtousethecautionsymbols. SeeUltrasonicParkingAssiston page9-31.
Thesymbolsappearwhenanobject hasbeendetectedbytheURPA system. Thesymbolmaycoverthe objectwhenviewingtheRVC screen.
9-36DrivingandOperating
Toturnthesymbolsonoroff:
- ShiftintoP(Park).
- Press the Settingsmenubutton on the Homescreen of the infotainmentsystem.
- Select the Rear Camerascreen button. The Rear Camerascreen displays.
- SelectParkAssistSymbolsand thenselectONorOFF.
RearCrossTrafficAlert(RCTA)
OnvehicleswithRCTA,ared warningtrianglewithanarrowmay alsodisplayontheRVCscreento warnoftrafficcomingfromeither direction. Threebeepswillsound fromthespeakeronthatside. This systemdetectsobjectscomingfrom upto20m(65ft)fromtheleftor rightsidebehindthevehicle.
Usecautionwhilebackingupwhen towingatrailer,astheRCTA detectionzonesthatextendout
fromthebackofyourvehicledonot movefurtherbackwhenatraileris towed.
TheRCTAsystemcanbedisabled throughtheDriverInformation Center(DIC).SeeDriver InformationCenter(DIC)on page5-22.
RearVisionCameraLocation
Thecameraislocatedabovethe licenseplate.
Theareadisplayedbythecamerais limitedanddoesnotdisplayobjects thatareclosetoeithercorneror underthebumper.Thearea displayedcanvarydependingon vehicleorientationorroad conditions.Thedistanceofthe imagethatappearsonthescreen differsfromtheactualdistance.
The following illustrations show the field of view that the camera provides.
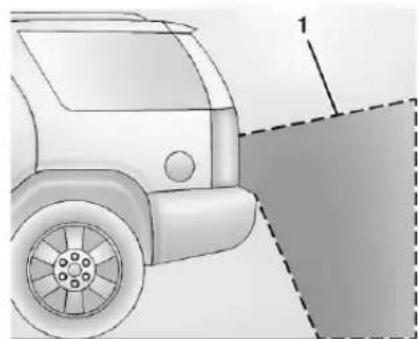
natural_image
Side view of a car with a dashed rectangular area and numbered label '1' (no text or symbols on the car itself)1.Viewdisplayedbythecamera.
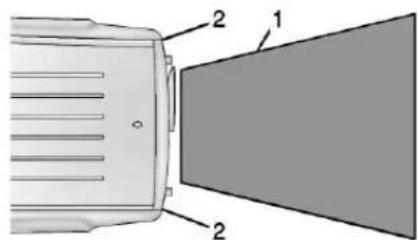
1.Viewdisplayedbythecamera.
2. Corneroftherearbumper.
WhentheSystemDoesNot SeemToWorkProperly
Therearvisioncamerasystem mightnotworkproperlyordisplaya clearimageif:
- TheRVCisturnedoff.See "TurningtheRearCamera SystemOnorOff"earlierinthis section.
- Itisdark.
-
Thesunorthebeamof headlightsisshiningdirectlyinto thecameralens.
-
Ice, snow, mud, or anything else builds upon the cameralens. Cleanthelens, rinse with water, and wipe it with as soft cloth.
- Thebackofthevehicleisinan accident. Theposition and mountingangleofthecamera canchangeorthecameracan beaffected. Besuretohavethe cameraanditspositionand mountinganglecheckedatyour dealer.
- Thereareextremetemperature changes.
Fuel
Useoftherecommendedfuelisan importantpartoftheproper maintenanceofthisvehicle.Tohelp keeptheenginecleanandmaintain optimumvehicleperformance,we recommendtheuseofgasoline advertisedasTOPTIERDetergent Gasoline.
LookfortheTOPTIERlabelonthe fuelpumptoensuregasolinemeets enhanceddetergencystandards developedbyautocompanies.Alist ofmarketersprovidingTOPTIER DetergentGasolinecanbefoundat www.toptiergas.com.TOPTIER gasolineisonlyavailableintheU.S. andCanada.

Detergent Gasoline

Useregularunleadedgasolinewith apostedoctaneratingof87or higher.Iftheoctaneratingisless than87,anaudibleknockingnoise maybeheard.Ifthisoccurs,usea gasolineratedat87octaneor higherassoonaspossible.Ifheavy knockingisheardwhenusinga higheroctaneratedgasoline,the engineneedsservice.
ProhibitedFuels
Gasolinescontainingoxygenates, suchasethersandethanol, aswell asreformulatedgasolinesare availableinsomecities. If these gasolinescomplywith the previouslydescribedspecification, thentheyareacceptabletouse. However, E85(85%ethanol) and otherfuelscontainingmorethan 15%ethanolmustbeusedonlyin flexfuelvehicles.
CAUTION
Donotusefuelcontaining methanol.Itcancorrodemetal partsinthefuelsystemandalso damageplasticandrubberparts. Thatdamagewouldnotbe coveredunderthevehicle warranty.
Somegasolinesthatarenot reformulatedforlowemissionscan containanoctane-enhancing additivecalled methylcyclopentadienylmanganese tricarbonyl(MMT).Donotuse gasolineswithMMTastheycan reducesparkpluglifeandaffect emissioncontrolsystem performance. Themalfunction indicatorlampmayturnon. If this occurs, see your dealer for service.
GasolineSpecifications
Ataminimum, gasolines should meet ASTM specification D4814. Some gasolines contain an octane-enhancing additive called methylcyclopentadienylmanganese tricarbonyl (MMT). Were recommend against the use of gasolines containing MMT. See "Prohibited Fuels" in Fuel Additives on page 9-39.
CaliforniaFuel Requirements
Ifthevehicleiscertifiedtomeet CaliforniaEmissionsStandards,itis designedtooperateonfuelsthat meetCaliforniaspecifications.See theunderhoodemissioncontrol label.Ifthisfuelisnotavailablein statesadoptingCaliforniaEmissions Standards,thevehiclewilloperate satisfactorilyonfuelsmeeting federalspecifications,butemission controlsystemperformancemight beaffectedThemalfunction indicatorlampcouldturnonandthe vehiclemaynotpassasmog-check test.SeeMalfunctionIndicator Lamponpage5-16.Ifthisoccurs, returntoyourauthorizeddealerfor diagnosis.Ifitisdeterminedthatthe conditioniscausedbythetypeof fuelused,repairsmaynotbe coveredbythevehiclewarranty.
FuelsinForeign Countries
Ifplanningtodriveincountries outsidetheU.S.orCanada,the properfuelmightbehardtofind. Checkregionalautocluborfuel retailbrandwebsitesforavailability inthecountrywheredriving.Never useleadedgasoline,fuelcontaining methanol,oranyotherfuelnot recommended.Costlyrepairs causedbyuseofimproperfuel wouldnotbecoveredbythevehicle warranty.
FuelAdditives
Toprovidecleanerair, allgasolines intheUnitedStatesarenow required to contain additives that help prevent engine and fuel system deposits from forming, allowing the emission control system to work properly. In most cases, nothing should have be added to the fuel. However, some gasolines contain only the minimum amount of additive required to meet U.S.
EnvironmentalProtectionAgency regulations. To help keep fuel injectors and intake valve vesclean and avoid problems duetodirty injectors or valves, look for gasoline that is advertised as TOPTIER Detergent Gasoline. Look for the TOPTIER label on the fuel pump to ensure gasolinemeets enhanced detergency standards developed by the autocompanies. A list of marketers providing TOPTIER Detergent Gasoline can be found at www.toptiergas.com.
ForcustomerswhodonotuseTOP TIERDetergentGasolineregularly, onebottleofFuelSystemTreatment PLUS, partnumber88861013, addedtothefueltankatevery engineoilchange, canhelpclean depositsfromfuelinjectorsand intakevalves. GMFuelSystem TreatmentPLUSistheonly gasolineadditiverecommendedby GeneralMotors. Itisavailableat yourdealer.
Gasolinescontainingoxygenates, suchasethersandethanol, and reformulatedgasolinesmightbe availableinyourarea. We recommendthatyouusethese gasolines,iftheycomplywiththe specificationsdescribedearlier. However,E85(85%ethanol)and otherfuelscontainingmorethan 15%ethanolmustnotbeusedin vehiclesthatwerenotdesignedfor thosefuels.
Notice: This vehicle was not designed for fuel that contains methanol. Donotuse fuel containing methanol. It can corrode metal parts in the fuel system and also damage plastic and rubber parts. That damage would not be recovered under the vehicle warranty.
Somegasolinesthatare notreformulatedforlow emissionscancontainan octane-enhancingadditivecalled methylcyclopentadienylmanganese tricarbonyl(MMT);asktheattendant whereyoubuygasolinewhetherthe
fuelcontainsMMT.Werecommend againsttheuseofsuchgasolines. FuelscontainingMMTcanreduce sparkpluglifeandaffectemission controlsystemperformance.The malfunctionindicatorlampmight turnon.Ifthisoccurs,returntoyour dealerforservice.
FillingtheTank

WARNING
Fuelvaporsandfuelfiresburn violentlyandcancauseinjuryor death.
- Tohelpavoidinjuriestoyou andothers,readandfollow alltheinstructionsonthefuel pumpisland.
• Turnofftheenginewhen refueling. - Keepsparks, flames, and smoking materials away from fuel.
(Continued)
WARNING(Continued)
- Donotleavethefuelpump unattended.
- Donotreenterthevehicle whilepumpingfuel.
- Keepchildrenawayfromthe fuelpumpandneverlet childrenpumpfuel.
- Fuelcansprayoutifthefuel capisopenedtooquickly. Thisspraycanhappenifthe tankisnearlyfull, and is more likely in hot weather. Openthefuelcapslowly and waitforany hiss noisetostop then unscrewthecapall theway
Thetetheredfuelcapislocated behindahingedfueldooronthe driversideofthevehicle.
Toopenthefueldoor, pushthe rearwardcenteredgeinandrelease anditwillopen.
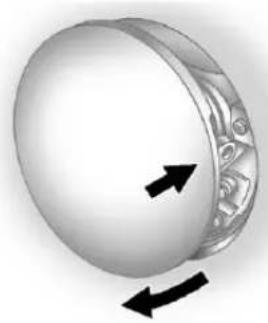
natural_image
3D rendered object with arrow indicators, no visible text or symbolsToremovethefuelcap,turnit slowlycounterclockwise.Thefuel caphasaspringinit;ifthecapis releasedtoosoon,itwillspringback totheright.
Whilerefueling,hangthetethered fuelcapfromthehookonthe fueldoor.
Becarefulnottospillfuel.Donot topofforoverfillthetankandwaita fewsecondsafteryouhavefinished pumpingbeforeremovingthe nozzle.Cleanfuelfrompainted surfacesassoonaspossible.See ExteriorCareonpage10-72.
When replacing the fuel cap, turn it clockwise until it clicks. Makes sure the cap is fully installed. The diagnostics system can determine if the fuel cap has been left for improperly installed. This would allow fuel to evaporate into the atmosphere. See Malfunction Indicator Lampon page 5-16.

WARNING
Ifafirestartswhileyouare refueling, donotremovethe nozzle. Shutofftheflowoffuelby shuttingoffthepumporby notifyingthestationattendant. Leavetheareaimmediately.
Notice:Ifanewfuelcapis needed,besuretogetheright typeofcapfromyourdealer.The wrongtypeoffuelcapmightnot fitproperly,mightcausethe malfunctionindicatorlampto light,andcoulddamagethefuel
tankandemissionssystem.See MalfunctionIndicatorLampon page5-16.
FillingaPortableFuel Container

WARNING
Fillingaportablefuelcontainer whileitisinthevehiclecancause fuelvaporsthatcanigniteeither bystaticelectricityorother means. Youorotherscouldbe badlyburnedandthevehicle couldbedamaged. Always:
• Useapprovedfuel containers.
- Removethecontainerfrom thevehicle,trunk,orpickup bedbeforefilling.
- Placethecontaineronthe ground.
(Continued)
WARNING(Continued)
- Placethenozzleinsidethefill openingofthecontainer beforedispensingfuel, and keepitincontactwiththefill openinguntilfillingis complete.
- Fillthecontainernomore than95%fulltoallowfor expansion.
- Donotsmoke, lightmatches, oruselighterswhile pumpingfuel.
- Avoidusingcellphonesor otherelectronicdevices.
Towing
GeneralTowing Information
Onlyusetowingequipmentthathas beendesignedforthevehicle. Contactyourdealerortrailering dealerforassistancewithpreparing thevehiclefortowingatrailer.Read theentiresectionbeforetowinga trailer.
Fortowingadisabledvehicle,see TowingtheVehicleonpage 10-68. Fortowingthevehiclebehind anothervehiclesuchasamotor home,seeRecreationalVehicle Towingonpage 10-69.
DrivingCharacteristics and TowingTips
DrivingwithaTrailer
Whentowingatraler:
- Becomefamiliarwiththestate andlocallawsthatapply specificallytotrailertowing.
- Donottowatraler during the first 800 km (500 mi), to prevent damagetothe engine, axle or other parts.
- Then, during the first 800 km (500 mi) trailertowing, donot drive over 80 km/h (50 mph) and donot make starts at full throttle.
- ThevehiclecantowinD(Drive) butM(ManualMode)is recommended.SeeManual Modeonpage9-23.Usealower gearifthetransmissionshifts toooften.

WARNING
Whentowingatrailer, exhaust gasesmaycollectattherearof thevehicleandenterifthe liftgate,trunk/hatch,orrear-most windowisopen.
Whentowingatraler:
(Continued)
WARNING(Continued)
- Donotdrivewiththeliftgate, trunk/hatch,orrear-most windowopen.
- Fullyopentheairoutletson orundertheinstrument panel.
- AlsoadjusttheClimate Controlsystemtoasetting thatbringsinonlyoutsideair. See“ClimateControl Systems”inthelIndex.
Formoreinformationabout CarbonMonoxide,seeEngine Exhaustonpage9-20.
Towingatralerrequiresacertain amountofexperience. The combinationyouaredrivingis longerandnotasresponsiveasthe vehicleitself.Getacquaintedwith thehandlingandbrakingoftherig beforesettingoutfortheopenroad.
Beforestarting, checkalltrailerhitch partsandattachments, safety chains, electricalconnectors, lamps, tiresandmirrors. If the trailer has electric brakes, start the combination moving and then apply the trailer brake controller by hand to besure the brakes work.
Duringthetrip, checkoccasionally tobesurethattheloadissecure andthelampsandanytrailer brakesstillwork.
TowingwithaStabilityControl System
Whentowing, the sound of the stability control system might be heard. The system is reacting to the vehicle movement caused by the trailer, which mainly occurs during cornering. This is normal when towing heavier trailers.
FollowingDistance
Stayatleasttwiceasfarbehindthe vehicleaheadasyouwouldwhen drivingthevehiclewithoutatraler.
Thiscanhelptoavoidsituations thatrequireheavybrakingand suddenturns.
Passing
Morepassingdistanceisneeded whentowingatrailer.Because the rigislonger,itisnecessarytogo fartherbeyondthepassedvehicle beforereturningtothelane.
BackingUp
Holdthebottomofthesteering wheelwithonehand. Tomovethe trailertotheleft, moveyourhandto theleft. Tomovethetrailertothe right, moveyourhandtotheright. Alwaysbackupslowlyand, ifpossible,havesomeone guideyou.
MakingTurns
Notice: Making very sharp turns while trailering could cause the trailertocome in contact with the vehicle. The vehicle could be damaged. Avoid making very sharp turns while trailering.
Whenturningwithatrailer,make widerturnsthannormalsothe trailerwillnotstrikesoftshoulders, curbs,roadsigns,treesorother objects.Usetheturnsignalwellin advanceandavoidjerkyorsudden maneuvers.
TurnSignalsWhenTowinga Trailer
The turnsignal indicators on the instrument cluster flash whenever signaling aturnorlane change. Properly hooked up, the trailer lamps also flash, telling other driver the vehicle is turning, changing lanes or stopping.
Whentowingatraler, thearrowson theinstrumentclusterflashforturns evenifthebulbsonthetrailerare burnedout. Checkoccasionally to besurethetrailerbulbsarestill working.
DrivingonGrades
Reducespeedandshifttoalower gearbeforestartingdownalongor steepdowngrade.Ifthe
transmissionisnotshifteddown, the brakesmighthavetobeusedso muchthattheywouldgethotandno longerworkwell.
ThevehiclecantowinD(Drive). Usealowergearifthetransmission shiftstooften.
The Tow/HaulModemaybeusedif thetransmissionshiftstoooften. See Tow/HaulModeonpage9-24.
Whentowingathighaltitudeon steepuphillgrades,enginecoolant boilsatalowertemperaturethanat normalaltitudes.Iftheengineis turnedoffimmediatelyaftertowing athighaltitudeonsteepuphill grades,thevehiclecouldshow signssimilartoengineoverheating. Toavoidthis,lettheengineerun whileparked,preferablyonlevel ground,withthetransmissionin P(Park)forafewminutesbefore turningtheengineoff.Ifthe overheatwarningcomeson,see EngineOverheatingonpage 10-16.
ParkingonHills

WARNING
Parkingthevehicleonahillwith thetrailerattachedcanbe dangerous. If something goes wrong, therigcouldstarttomove. People can be injured, and both the vehicle and the trailer can be damaged. When possible, always parktherigonaflatsurface.
Ifparkingtherigonahill:
- Pressthebrakepedal, butdo notshiftintoP(Park)yet. Turn thewheelsintothecurbif facing downhillorintotrafficifacing uphill.
- Havesomeoneplacechocks underthetrailerwheels.
-
Whenthewheelchocksarein place, releasethebrakepedal untilthechocksabsorbtheload.
-
Reapplythebrakepedal. Then apply the parking brake and shift into P(Park).
- Releasethebrakepedal.
LeavingAfterParkingonaHill
-
Apply and hold the brake pedal while you:
-
Starttheengine.
-
Shiftintoagear.
• Releasetheparkingbrake. -
Letuponthebrakepedal.
- Driveslowlyuntilthetraileris clearofthechocks.
- Stopandhavesomeonepickup andstorethechocks.
MaintenanceWhenTrailer Towing
The vehicle need servicemore often when pulling at trailer. Seethe Maintenance Schedule on page 11-3. Thingsthatare
especiallyimportantintrailer operationareautomatic transmissionfluid,engineoil,axle lubricant,belts,coolingsystemand brakesystem.Inspectthesebefore andduringthetrip.
Checkperiodicallytoseethatall hitchnutsandboltsaretight.
EngineCoolingWhenTrailer Towing
Thecoolingsystemmaytemporarily overheatduringsevereoperating conditions.SeeEngineOverheating onpage10-16.
TrailerTowing
Threeimportantconsiderations havetodowithweight:
• Theweightofthetrailer
• Theweightofthetrailertongue
- Thetotalweightonthevehicle's tires
WeightoftheTrailer
Howheavycanatrailersafelybe?
Speed, altitude, roadgrades, outside temperature, special equipment, and the amount of tongue weight the vehicle can carry must be considered. See "Weight of the Trailer Tongue" later in this section form more information.
Maximum trailerweighttiscalculated assumingonlythedriverisinthe towvehicleandithasallthe requiredtraileringequipment. The weightofadditionaloptional equipment,passengersandcargoin thetowvehiclemustbesubtracted fromthemaximumtrailerweight.
Usethefollowingcharttodetermine howmuchthevehiclecanweigh, baseduponthevehiclemodeland options.
9-46DrivingandOperating
| VehicleMaximumTrailerWeight | *GCWR | |
| Front-WheelDrive907kg(2,000lbs)3402kg(7,500lbs) | ||
| Front-WheelDrive,V92TrailerTowingPackage2041kg | (4,500lbs)4309kg(9,500lbs) | |
| All-WheelDrive907kg(2,000lbs)3493kg(7,700lbs) | ||
| All-WheelDrive,V92TrailerTowingPackage2041kg(4,500lbs)4400kg(9,700lbs) | ||
| *TheGrossCombinationWeightRating(GCWR)isthetotalallowableweightofthecompletelyloadedvehicleand trailerincludinganypassengers,cargo,equipmentandconversions.TheGCWRforthevehicleshouldnotbe exceeded. | ||
Askyourdealerforourtrailering informationoradvice.See CustomerAssistanceOffices(U.S. andCanada)onpage13-5or CustomerAssistanceOffices (Mexico)onpage13-5formore information.
WeightoftheTrailerTongue
Thetongueload(1)ofanytraileris animportantweighttomeasure becauseitafectsthetotalgross weightofthevehicle.TheGross VehicleWeight(GVW)includesthe curbweightofthevehicle,any
cargocarriedinit,andthepeople whowillberidinginthevehicle. Iftherearealotofoptions, equipment,passengersorcargoin thevehicle,itwillreducethetongue weightthevehiclecancarry,which willalsoreducethetrailerweightthe vehiclecantow.Iftowingatrailer, thetongueloadmustbeaddedto theGVWbecausethevehiclewill becarryingthatweight,too.See VehicleLoadLimitsonpage9-9
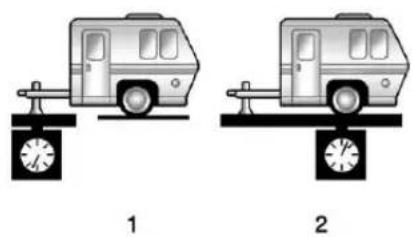
If a weight-carrying hitchora weight-distributing hitch is being used, the trailertongue (1) should weigh 10-15 percent of the total loaded trailer weight (2).
Afterloadingthetrailer, weighthe trailerandthenthetongue, separately, toseeiftheweightsare proper. If they are not, adjustments might be made by moving some items around in the trailer.
Traileringmaybelimitedbythe vehicle'sabilitytocarrytongue weight.Tongueweightcannotcause thevehicletoexceedtheGVWR (GrossVehicleWeightRating)or theRGAWR(RearGrossAxle WeightRating).Theeffectof additionalweightmayreducethe traileringcapacitymorethanthe totaloftheadditionalweight.
It is important that the vehicle does not exceed any of its ratings—GCWR, GVWR, RGWR, Maximum Trailer Rating or Tongue Weight.
Theonlywaytobesureitisnot exceedinganyoftheseratingsisto weighthevehicleandtrailer.
TotalWeightontheVehicle's Tires
Inflatethevehicle'stirestothe upperlimitforcoldtires. These numberscanbefoundonthe Certificationlabelorsee Vehicle LoadLimitsonpage9-9formore information.Donotgooverthe GVWlimitforthevehicle,orthe GAWR,includingtheweightofthe trailertongue.Ifusingaweight distributinghitch,donotgooverthe rearaxlelimitbeforeapplyingthe weightdistributionspringbars.
TowingEquipment Hitches
It is important to have the correct hitchequipment. Crosswinds, large truckgoing by and roughroads are a few reasons why there might hitchis needed.
- Therearbumperonthevehicle isnotintendedforhitches.Do notattachrentalhitchesorother bumper-typehitchestoit.Use onlyaframe-mountedhitchthat doesnotattachtothebumper.
- Willanyholesbemade in the body of the vehicle when the trailer hitch is installed? If so, then besuretoseal the holes when the hitch is removed. If the holes are not sealed, dirt, water, and deadly carbon monoxide (CO) from the exhaust may get into the vehicle. See Engine Exhauston page 9-20.
Weight-DistributingHitchesand WeightCarryingHitches
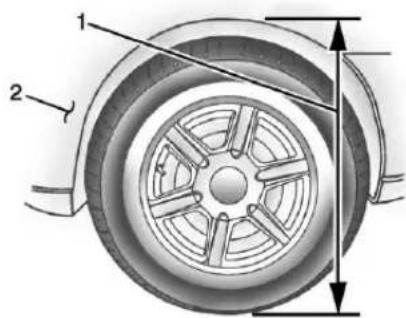
- Body-to-GroundDistance
2.FrontofVehicle
When using a weight-distributing hitch, the hitch must be adjusted so that the distance (1) remains the same both before and after coupling the trail alert to the tow vehicle.
SafetyChains
Alwaysattachchainsbetweenthe vehicleandthetrailer.Crossthe safetychainsunderthetongueof thetrailertohelppreventthetongue fromcontactingtheroadifit becomesseparatedfromthehitch. Alwaysleavejustenoughslackso therigcanturn.Neverallowsafety chainstodragontheground.
TrailerBrakes
Aloaded trailer that weighs more than 450kg (1,000lbs) need to have its own brakes system that is adequate forth the weight of the trailer. Besuretoread and follow the instructions for the trailer brakes so they are installed, adjusted, and maintained properly.
Because the vehicle has an tilock brakes, don't try to tap into the vehicle's hydraulic brakes system. If you do, both brakes systems will not work well, or at all.
TrailerWiringHarness
BasicTrailerWiring
The trailerwiringharness, with a seven-pinconnector, is located at therearofthevehicleandistiedto thevehicle'sframe. Theharness connectorcanbepluggedintoa seven-pinuniversalheavy-duty trailerconnectoravailablethrough yourdealer.
Theseven-wireharnesscontains the followingtrailercircuits:
• Yellow:LeftStop/TurnSignal
- DarkGreen:RightStop/Turn Signal
- Brown:Taillamps
- Black:Ground
• LightGreen:Back-upLamps
• Red/Black:BatteryFeed
• DarkBlue:TrailerBrake*
*The fuseforthiscircuitisinstalled intheunderhoodelectricalcenter, butthewiresarenotconnected. Theyshouldbeconnectedbyyour dealeroraqualifiedservicecenter.
If the back-up lamp circuit is not functional, contact your dealer.
Ifaremote(non-vehicle)batteryis beingcharged,presstheTow/Haul modeswitchlocatedonthecenter consoleneartheclimatecontrols. Thiswillboostthevehiclesystem voltageandproperlycharge the battery.Ifthetraileristoolightfor Tow/Haulmode,turnonthe headlamps(non-HIDonly)asa secondwaytoboostthevehicle systemandchargethebattery.
ElectricTrailerBrakeControl WiringProvisions
These wiring provisions for an electric trailer brake controller are included with the vehicle as part of the trailer wiring package. The instrument panel contains blunt cut wires, abovethe parking brake assembly for the electric trailer brake controller. The harness contains the following wires:
• Red/Black:PowerSupply
• White:BrakeSwitchSignal
- Gray:Illumination
• DarkBlue:TrailerBrakeSignal
- Black:Ground
Theelectrictrailerbrakecontroller shouldbeinstalledbyyourdealeror aqualifiedservicecenter.
Conversionsand Add-Ons
Add-On Electrical Equipment
Notice: Some electrical equipment and damage the vehicle or cause component to not work and would not be covered by the warranty. Always check with your dealer before adding electricalequipment.
Add-onequipmentcandrainthe vehicle's12-voltbattery, evenifthe vehicleisnotoperating.
Thevehiclehasanairbagsystem. Beforeattemptingtoaddanything electricaltothevehicle,see ServicingtheAirbag-Equipped Vehicleonpage3-33andAdding EquipmenttotheAirbag-Equipped Vehicleonpage3-33.
9-50DrivingandOperating
NOTES
VehicleCare
GeneralInformation
GeneralInformation......10-2
CaliforniaProposition 65Warning......10-2
CaliforniaPerchlorate MaterialsRequirements....10-3
Accessories and Modifications....10-3
VehicleChecks
DoingYourOwn ServiceWork......10-3
Hood....10-4
EngineCompartment Overview......10-5
EngineAirCleaner/Filter....10-10
CoolingSystem......10-12
EngineCoolant......10-12
EngineOverheating.....10-16
OverheatedEngine Protection
OperatingMode......10-17
PowerSteeringFluid......10-18
WasherFluid......10-18
Brakes......10-19
BrakeFluid......10-20
Battery....10-22
All-WheelDrive......10-22
StarterSwitchCheck......10-22
AutomaticTransmissionShift LockControlFunction Check......10-23
IgnitionTransmissionLock Check....10-23
ParkBrakeandP(Park) MechanismCheck......10-23
WiperBlade Replacement.....10-24
WindshieldReplacement...10-25
HeadlampAiming
HeadlampAiming......10-25
BulbReplacement
BulbReplacement......10-25
HighIntensityDischarge (HID)Lighting....10-25
Taillamps, TurnSignal, and Stoplamps......10-26
LicensePlateLamp......10-26
ReplacementBulbs.....10-27
ElectricalSystem
HighVoltageDevicesand Wiring....10-27
ElectricalSystem Overload.....10-27
FusesandCircuit Breakers....10-28
EngineCompartmentFuse Block....10-28
InstrumentPanelFuse Block....10-31
WheelsandTires
Tires....10-34
All-SeasonTires......10-35
WinterTires......10-35
SummerTires......10-36
TireSidewallLabeling.....10-36
TireDesignations......10-38
TireTerminology and Definitions....10-39
TirePressure......10-41
TirePressureMonitor System....10-43
10-2 VehicleCare
TirePressureMonitor
Operation......10-44
TireInspection.....10-47
TireRotation.....10-47
WhenItIsTimeforNew
Tires....10-48
BuyingNewTires......10-49
DifferentSizeTiresand
Wheels....10-51
UniformTireQuality
Grading....10-51
WheelAlignmentandTire
Balance....10-53
WheelReplacement......10-53
TireChains....10-54
IfaTireGoesFlat......10-54
TireChanging......10-56
CompactSpareTire.....10-64
JumpStarting
JumpStarting......10-65
Towing
TowingtheVehicle......10-68
Recreational Vehicle
Towing....10-69
AppearanceCare
ExteriorCare....10-72
InteriorCare....10-75
FloorMats.....10-78
GeneralInformation
Forserviceandpartsneeds,visit yourdealer.Youwillreceive genuineGMpartsandGM-trained andsupportedservicepeople.
GenuineGMpartshaveoneof thesemarks:

Genuine

Parts

Accessories
CaliforniaProposition 65Warning
Mostmotorvehicles, including this one, contain and/ormitchemicals known to the State of Californiato
causecancerandbirthdefector otherreproductiveharm.Engine exhaust,manypartsandsystems, manyfluids,andsomecomponent wearby-productscontainand/or emitthesechemicals.
CaliforniaPerchlorate MaterialsRequirements
Certaintypesofautomotive applications,suchasairbag initiators,safetybeltpretensioners, andlithiumbatteriescontainedin RemoteKeylessEntrytransmitters, maycontainperchloratematerials. Specialhandlingmaybenecessary. Foradditionalinformation,see www.dtsc.ca.gov/hazardouswaste/perchlorate.
Accessories and Modifications
Adding non-dealer accessories or making modification to the vehicle can affect vehicle performance and safety, including such things as airbags, braking, stability, ride and
handling, emissionssystems, aerodynamics, durability, and electronicsystemslikeantilock brakes, tractioncontrol, and stability control. These accessories or modifications could devencause malfunctionordamagenotcovered by the vehicle warranty.
Damageetovehiclecomponents resultingfrommodificationsorthe installationoruseofnon-GM certifiedparts,includingcontrol moduleorsoftwaremodifications,is notcoveredunderthetermsofthe vehiclewarrantyandmayaffect remainingwarrantycoveragefor affectedparts.
GMAccessoriesaredesignedto complementandfunctionwithother systemsonthevehicle.Seeyour dealertoaccessorizethevehicle usinggenuineGMAccessories installedbyadealertechnician.
Also, see Adding Equipment to the Airbag-Equipped Vehicle on page 3-33.
VehicleChecks
DoingYourOwn ServiceWork

WARNING
It can be dangerous to work on your vehicle if you don to have the proper knowledge, service manual, tools, or parts. Always follow owner manual procedures and consult the servicemanual for your vehicle before doing any servicework.
If doing some of your own service work, use the proper service manual. It tells you much more about how to servicethe vehicle than this manual can. To order the proper service manual, see Service Publications Ordering Information on page 13-16.
10-4 Vehicle Care
Thisvehiclehasanairbagsystem. Beforeattemptingtodayyourown servicework,seeServicingthe Airbag-EquippedVehicleon page3-33.
Keeparecordwithallpartsreceipts andlistthemileageandthedateof anyserviceworkperformed.See MaintenanceRecordson page11-14.
Notice: Evensmallamounts of contamination can caused damage to vehicles systems. Donotallow contaminantstocontact the fluids, reservoircaps, ordipsticks.
Hood
Toopenthehood:
- Pullthehoodreleasehandle with this symbol on it is located under the instrument panel on the Riverside of the vehicle.
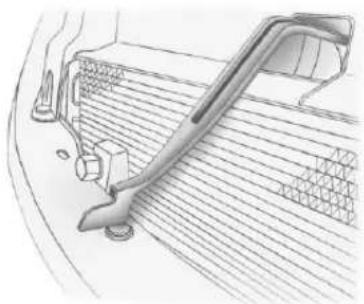
natural_image
Technical line drawing of a mechanical component or tool interacting with a grid-patterned surface (no text or symbols visible)-
Atthefrontofthevehicle, pull uponthebottomcenterofthe grille, and pushthesecondary hoodreleasetotheleft.
-
Afterthelidhasbeenpartially lifted, agasstrutautomatically liftsandholdsthehoodinthe fullyopenposition.
Beforeclosingthehood, besureall fillercapsareonproperly.
Pullthehooddowntoclose. Lower the hooduntiltheliftingpressure of thestrutisreduced. Thenallowthe hoodtofallandlatchintoplace underitsownweight. Check to make sure the hood disclosed. If the hood does not fully latch, gently push the hood down at the front and center until it is completely latched.
EngineCompartmentOverview
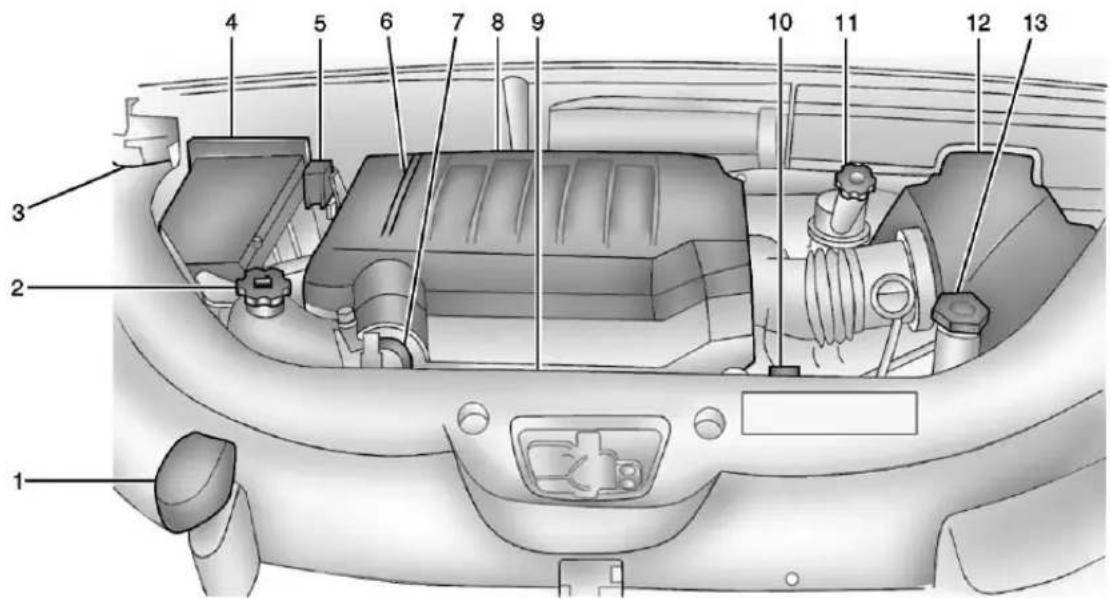
10-6VehicleCare
- RadiatorPressureCap.See CoolingSystemonpage10-12.
- EngineCoolantRecoveryCap. SeeCoolingSystemon page10-12.
- RemoteNegative(−)Terminal. See Jump Starting on page 10-65.
- Engine Compartment Fuse Blockonpage 10-28.
- RemotePositive(+)Terminal. See Jump Starting on page 10-65.
- PowerSteeringReservoir and Cap(UnderEngineCover). See PowerSteeringFluidon page 10-18.
-
EngineOilFillCap. See "When toAddEngineOil" under Engine Oilonpage 10-7.
-
Engine Coveronpage 10-6.
- EngineOilDipstick(Outof View). See "CheckingEngine Oil" under EngineOilon page 10-7.
- Automatic Transmission Fluid Dipstick. See "Checking the Fluid Level" under Automatic Transmission Fluid on page 10-10.
11.BrakeMasterCylinder Reservoir.See"BrakeFluid" underBrakesonpage10-19. - EngineAirCleaner/Filteron page 10-10.
- Windshield Washer Fluid Reservoir. See "Adding Washer Fluid" under Washer Fluid on page 10-18.
EngineCover
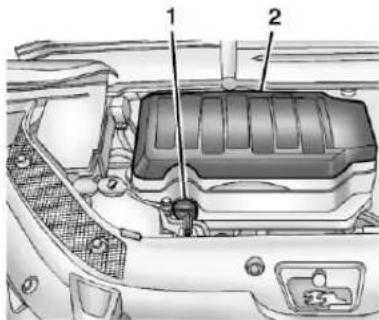
- OilFillCap
- EngineCover
Toremove: - Removetheoilfillcap(1).
- Raisetheenginecover(2) to releaseitfromtheretainers.
- Liftandremovetheengine cover.
- ReverseSteps1–3toreinstall enginecover.
EngineOil
Toensureproperengine performanceandlonglife,careful attentionmustbepaidtoengineoil. Followingthesesimple,but importantstepswillhelpprotect yourinvestment:
- Alwaysuseengineoilapproved totheproperspecificationandof theproperviscositygrade.See "SelectingtheRightEngineOil" inthissection.
- Checktheengineoillevel regularlyandmaintainthe properoillevel.See"Checking EngineOil"and"WhentoAdd EngineOil"inthissection.
- Changetheengineoilatthe appropriatetime.SeeEngineOil LifeSystemonpage10-9.
- Always dispose of engine oil properly. See "What to Dow with Used Oil" in this section.
CheckingEngineOil
Itisagoodideatochecktheengine oillevelateachfuelfill.Inorderto getanaccuratereading,thevehicle mustbeonlevelground.The engineoildipstickhandleisaloop. SeeEngineCompartmentOverview onpage 10-5forthelocationofthe engineoildipstick.
Obtaininganaccurateoillevel readingisessential:
- If the engine has been running recently, turn off the engine and allow several minutes for the oil to drain back into the oil pan. Checking the oil level too soon after engineshutoff will not provide an accurate oil level reading.

WARNING
Theengineoildipstickhandle maybehot;itcouldburnyou. Useatowelorglovetotouchthe dipstickhandle.
- Pulloutthedipstickandcleanit withapapertowelorcloth, then pushitbackinalltheway. Removeitagain, keepingthetip down, andcheckthelevel.
WhentoAddEngineOil
The image contains no discernible text or characters.
If the oil is below the cross-hatched area at the tip of the dipstick, add 1L(1qt) of there recommended oil and then recheck the level. See "Selecting the Right Engine Oil" in this section for an explanation of what kind of oil to use Forengine oil crank case capacity, see Capacities and Specifications on page 12-2.
Notice: Donotaddtoomuchoil. Oil levels above or below the acceptable operating range shown on the dipstick are harmful
totheengine.Ifyoufindthatyou haveanoillevelabovethe operatingrange,i.e.,theengine hassomuchoilthattheoillevel getsabovethecross-hatched areathatshowstheproper operatingrange,theenginecould bedamaged.Youshoulddrain outtheexcessoilorlimitdriving ofthevehicleandseekaservice professionaltoremovethe excessamountofoil.
SeeEngineCompartmentOverview onpage10-5forthelocationofthe engineoilfillcap.
Addenoughoiltoputthelevel somewhereintheproperoperating range.Pushthedipstickalltheway backinwhenthrough.
SelectingtheRightEngineOil
Selectingtherightengineoil dependsonboththeperoil specificationandviscositygrade. SeeRecommendedFluidsand Lubricantsonpage11-12.
Specification
Use and ask for licensed engine oils with the dexos1 ^® approved certification mark. Engine oils meeting therequirements for the vehicles should have the dexos1 approved certification mark. This certification mark indicates that the oil has been approved to the dexos1 specification.

Notice: Failuretousethe recommendedengineoilor equivalentcanresultinengine damagenotcoveredbythe vehiclewarranty. Checkwithyour dealerorserviceprovideron whethertheoilisapprovedtothe dexos1specification.
ViscosityGrade
SAE5W-30 isthebestviscosity grade for the vehicle. Donot use otherviscosity grade oil such as SAE10W-30, 10W-40, or 20W-50.
ColdTemperatureOperation:Inan areaofextremecold,wherethe temperaturefallsbelow-29°C (-20°F),anSAE0W-30oilmaybe used.Anoilofthisviscositygrade willprovideeasiercoldstartingfor theengineatextremelylow temperatures.Whenselectinganoil oftheappropriateviscositygrade, alwaysselectanoilofthecorrect specification.See“Specification” earlierinthissectionformore information.
EngineOilAdditives/Engine OilFlushes
Donotaddanythingtotheoil. The recommended oil with the dexos specification and displaying the dexos certification mark are all that is needed for good performance and engine protection.
Engineoilsystemflushesarenot recommendedandcouldcause enginedamagenotcoveredbythe vehiclewarranty.
WhattoDowithUsedOil
Usedengineoilcontainscertain elementsthatcanbeunhealthyfor yourskinandcouldevencause cancer.Donotletusedoilstayon yourskinforverylong.Cleanyour skinandnailswithsoapandwater, oragoodhandcleaner.Washor properlydisposeofclothingorrags containingusedengineoil.Seethe manufacturer'swarningsaboutthe useanddisposalofoilproducts.
Usedoilcanbeathreattothe environment. If you change your own oil, besuretodrainallthe oil from the filter before disposal. Never dispose of oil by putting it in the trash or pouring it on the ground, intosewers, or intostreams or bodies of water. Recycle it by taking it to a placethat collects used oil.
EngineOilLifeSystem
WhentoChangeEngineOil
This vehicle has a computer system that indicates when to change the engine oil and filter. This is based on a combination of factors which include engine revolutions, engine temperature, and miles driven. Based on driving conditions, the mileage at which an oil change is indicated can vary considerably. For the oil ifesystemtowork properly, the system must be set every time the oil is changed.
Whenthesystemhascalculated thatoillifehasbeendiminished, it indicates thatanoilchangeis necessary. ACHANGEENGINE OILSOONmessage comes on. Changetheolassoonas possible within then next 1000km (600mi). It is possible that, if driving under the best conditions, the oil life system might indicate that an oil change is not necessary for up to a
year.Theengineoilandfiltermust bechangedatleastonceayear and,atthistime,thesystemmust bereset.Yourdealerhastrained servicepeoplewhowillperformthis workandresetthesystem.Itisalso importanttochecktheoilregularly overthecourseofanoildrain intervalandkeepitattheproper level.
If the system is ever reset accidentally, the oil must be changed at 5000 km (3,000 mi) sincethelast oil change. Remembertoreset the oil life system whenever the oil is changed.
HowtoResettheEngineOil LifeSystem
Resetthesystemwheneverthe engineoilischangedsothatthe systemcancalculatethenext engineoilchange.Toresetthe system:
-
TurntheignitiontoON/RUN, withtheengineoff.
-
Pressthevehicleinformation buttonuntilIOILLIFE REMAININGdisplays.
- Pressandholdtheset/reset buttonuntil"100%"isdisplayed. Threechimessoundandthe CHANGEENGINEOILSOON messagegoesoff.
- TurnthekeytoLOCK/OFF. If the CHANGEENGINEOILSOON message comes back on when the vehicle is started, the engine oil life system has not been reset. Repeat the procedure.
AutomaticTransmission Fluid
Itisnotnecessarytocheckthe transmissionfluidlevel. Atransmissionfluidleakistheonly reasonforfluidloss. Ifaleak occurs, takethevehicletothe dealerandhaveitrepairedassoon aspossible.
Changethefluidattheintervals listedinMaintenanceScheduleon page11-3, and besuretousethe transmissionfluidlisted in RecommendedFluidsand Lubricantsonpage11-12.
Notice: Use of the incorrect automatic transmission fluid may damage the vehicle, and the damages may not be recovered by the vehicle warranty. Always use the automatic transmission fluid listed in Recommended Fluids and Lubricantson page 11-12.
Thetransmissionfluidwillnotreach theendofthedipstickunlesssthe transmissionisatoperating temperature.Ifyouneedtocheck thetransmissionfluidlevel,please takethevehicletoyourdealer.
EngineAirCleaner/Filter WhentolnspecttheEngineAir Cleaner/Filter
Inspecttheaircleaner/filteratthe scheduledmaintenanceintervals andreplaceitatthefirstoilchange aftereach80000km(50,000mile) interval.SeeMaintenanceSchedule onpage 11-3.lfdrivingindusty/dirty conditions,inspectthefilterateach engineoilchange.
SeeEngineCompartmentOverview onpage10-5forthelocationofthe engineaircleaner/filter.
HowtoInspecttheEngineAir Cleaner/Filter
Toinspecttheaircleaner/filter, removethefilterfromthevehicle andlightlyshakethefilter(away fromvehicle)toreleaseloosedust anddirt. Ifthefilterremainscovered withdirt, anewfilterisrequired.
Toinspectorreplacetheengineair cleaner/filter:
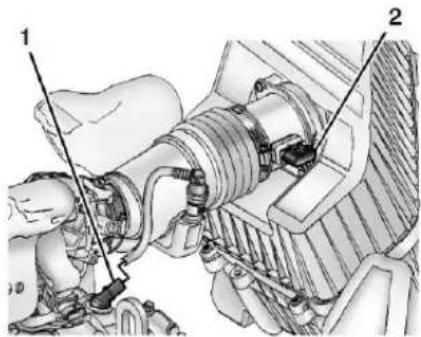
- Ventilation Tube
2.Sensor
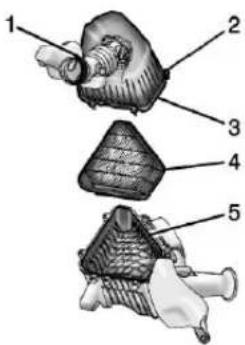
- Clamp
2.Screws
3.HousingCover
4.Filter
5.Base
-
Removetheenginecover.See EngineCoveronpage10-6.
-
Disconnect the coverfitting from the ventilation tube(1).
-
Disconnect the wiring harness connector from the sensor(2).
-
Loosentheoutletductclamp(1).
-
Loosenthesixhousingcover(3) screws(2).
-
Removethehousingcover(3) withoutletduct.
-
Removethefilter(4)andany loosedebristhatmaybefound inthebase(5).
-
Inspectorreplacethefilter(4).
-
ReverseSteps2-6toreinstall thehousingcoverandreconnect theelectricalconnectortothe sensor.
-
Reinstalltheenginecover. See EngineCoveronpage 10-6.
WARNING
Operatingtheenginewiththeair cleaner/filteroffcancauseyouor otherstobeburned.Theair cleanernotonlycleanstheair;it helpstostopflamesiftheengine backfires.Usecautionwhen workingontheengineanddonot drivewiththeaircleaner/filteroff.
Notice: If the aircleaner/filter is off, dirtcaneasilygetinto the engine, which could damage it. Always havethe aircleaner/filter in place when you are driving.
CoolingSystem
Thecoolingsystemallowsthe enginetomaintainthecorrect workingtemperature.
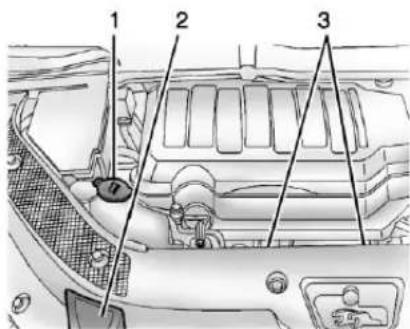
- EngineCoolantRecoveryTank
- RadiatorPressureCap
- EngineCoolingFans(Out ofView)
WARNING
Anelectricenginecoolingfan underthehoodcanstartupeven whentheengineisnotrunning andcancauseinjury.Keep hands,clothing,andtoolsaway fromanyunderhoodelectricfan.
WARNING
Heaterandradiatorhoses, and otherengineparts, can bevery hot. Donottouchthem. If you do, you can be burned.
Donotruntheengineifthereisa leak.Ifyouruntheengine,it couldloseallcoolant.Thatcould causeanenginefire,andyou couldbeburned.Getanyleak fixedbeforeyoudrivethevehicle.
Notice: Using coolantother than DEX-COOL® can cause premature engine, heater core, or radiator corrosion. In addition, the engine coolant could require changing sooner, at 50000 km (30,000 mi) or 24 months, whichever occurs first. Any repairs would not be covered by the vehicle warranty. Always use DEX-COOL (silicate-free) coolant in the vehicle.
EngineCoolant
Thecoolingsysteminthevehicleis filledwithDEX-COOL® engine coolant.SeeMaintenanceSchedule onpage11-3andRecommended FluidsandLubricantson page11-12.
The following explain the cooling system and how to check and add coolant when it is slow. If there is a problem with engine overheating, see Engine Overheating on page 10-16.
WhattoUse

WARNING
Addingonlyplainwaterorsome otherliquidtothecoolingsystem canbedangerous. Plainwater andotherliquids, canboilbefore thepropercoolantmixturewill. Thecoolantwarningsystemisset forthepropercoolantmixture. Withplainwaterorthewrong mixture, theenginecouldgettoo hotbutyouwouldnotgetthe overheatwarning. Theengine couldcatchfireandyouor otherscouldbeburned. Usea 50/50mixtureofclean,drinkable waterandDEX-COOLcoolant.
Usea50/50mixtureofclean, drinkablewaterandDEX-COOL coolant.Ifusingthismixture, nothingelseneedstobeaded.
Thismixture:
• Givesfreezingprotectiondown to -37^(-34^) , outside temperature.
• Givesboilingprotectionupto 129^ C( 265^ F), engine temperature.
• Protectsagainstrustand corrosion.
• Willnotdamagealuminumparts.
• Helpskeep the proper engine temperature.
Notice: If improper coolant mixture, inhibitors, or additives are used in the vehicle cooling system, the engine could overheat and bedamaged. Too much water in them mixture can freeze and crack engine cooling parts. There pairs would not be covered by the warranty. Use only the proper mixture of engine coolant for the cooling system. See Recommended Fluids and Lubricantson page 11-12.
Neverdisposeofenginecoolantby puttingitinthetrash,pourington theground,orintosewers,streams, orbodiesofwater.Havethecoolant changedbyanauthorizedservice center,familiarwithlegal requirementsregardingused coolantdisposal.Thiswillhelp protecttheenvironmentandyour health.
CheckingCoolant
The vehicle must be on a level surface when checking the coolant level.
Checktoseeifcoolantisvisiblein thecoolantrecoverytank.Ifthe coolantinsidethecoolantrecovery tankisboiling,donotdoanything elseuntilcoolsdown.Ifcoolantis visiblebutthecoolantlevelisnotat orabovetheFULLCOLDmark,add a50/50mixtureofclean,drinkable waterandDEX-COOLcoolantatthe coolantrecoverytank,butbesure thecoolingsystemiscoolbefore thisisdone.SeeEngine Overheatingonpage 10-16.

Thecoolantrecoverytankcaphas thissymbolonit.
Whentheengineiscold, thecoolant levelshouldbeatorabovethe FULLCOLDlinemarkedonthe recoverytank.
Whentheengineishot, thelevel could be higher than the FULL COLDline. If the coolant is below the FULL COLD line when the engine is shot, there could be a leak in the cooling system.
Ifthecoolantislow,addthecoolant ortakethevehicletoadealerfor service.
HowtoAddCoolanttothe RecoveryTank
WARNING
Youcanbeburnedifyouspill coolantonhotengineparts. Coolantcontainsethyleneglycol anditwillburniftheengineparts arehotenough.Donotspill coolantonahotengine.
Notice: This vehicle has a specific coolantfill procedure. Failure to follow this procedure could cause the engine to overheat and be severely damaged.
Ifcoolantisneeded,addtheproper DEX-COOLcoolantmixtureatthe coolantrecoverytank.
HowtoAddCoolanttothe Radiator
WARNING
Steamandscaldingliquidsfroma hotcoolingsystemcanblowout andburnyoubadly.Neverturn thecapwhenthecoolingsystem, includingthesurgetankpressure cap,ishot.Waitforthecooling systemandsurgetankpressure captocool.
Ifcoolantisneeded,addtheproper mixturedirectlytotheradiator,but besurethecoolingsystemiscool beforethisisdone.
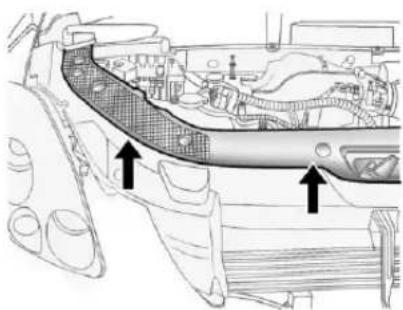
natural_image
Technical line drawing of a car interior showing structural components and highlighted areas (no text or symbols)- Detachthefastenersandliftoff thepanelthatcoversthe radiatorcap.
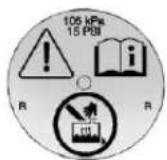
- Removetheradiatorpressure capwhenthecoolingsystem, includingtheupperradiator hose,isnolongerhot.Turnthe pressurecapslowly counterclockwiseaboutone fullturn.
Ifahissisheard, waitforthatto stop. Ahissmeansthereisstill somepressureleftinthe system.
-
Keep turning the pressure cap slowly and remove it.
-
Filltheradiatortothebaseof thefillerneckwiththeproper DEX-COOLcoolantmixture.
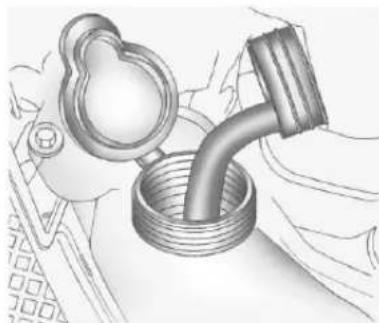
natural_image
Illustration of a hand holding a coiled tube with a valve, no text or symbols present-
Fill the coolant recovery tank to the FULLCOLD mark.
-
Reinstall the capon the coolant recovery tank but leavethe radiator pressure cap off.
7.Starttheengineandletitrun untiltheupperradiatorhose feelswarm.Anytimeduringthis procedure,watchoutforthe enginecoolingfans.
10-16VehicleCare
- If the coolant level inside the radiator filler neck is slow, add more of the proper DEX-COOL coolant mixture through the filler neck until the level is backup to the base of the filler neck.
- Replacethepressurecaptightly. Atanytimeduringthis procedureifcoolantbeginsto flowoutofthefillerneck, reinstallthepressurecap.
Notice: If the pressure cap is not tightly installed, coolant loss and possible engine damage may occur. Besure the cap is properly and tightly secured.
EngineOverheating
The vehicle has several indicators to warn of engine overheating.
Thereisanenginecoolant temperaturegaugeonthe instrumentpanelcluster.See EngineCoolantTemperatureGauge onpage5-12.
The vehicle may also display an ENGINE OVERHEATED IDLE ENGINE and ENGINE OVERHEATED STOP ENGINE message in the Driver Information Center (DIC). See Engine Cooling System Messages on page 5-29.
Youmaydecidenottoliftthehood whenthiswarningappears,but insteadgetservicehelprightaway. SeeRoadsideAssistanceProgram (Mexico)onpage13-7orRoadside AssistanceProgram(U.S.and Canada)onpage13-11.
If youdodecidetoliftthehood, makesurethevehicleisparkedon a levelsurface.
Thenchecktoseeiftheengine coolingfansarerunning.Ifthe engineisoverheating,bothfans shouldberunning.Iftheyarenot, donotcontinuetoruntheengine andhavethevehicleserviced.
Notice: Running the engine without coolant may cause damage or fire. Vehicle damage would not be recovered by the warranty. See Overheated Engine Protection Operating Mode on page 10-17 for information on driving to as safe place in an emergency.
IfSteamIsComingfromthe EngineCompartment

WARNING
Steamfromanoverheatedengine canburnyoubadly,evenify you justopenthehood.Stayaway fromtheengineifyouseeorhear steamcomingfromit.Turnitoff andgeteveryoneawayfromthe vehicleuntilcoolsdown.Wait untilthereisnosignofsteamor coolantbeforeyouopen thehood.
(Continued)
WARNING(Continued)
If you keep driving when the vehicles engine is over heated, the liquids in it can catch fire. You or others could be badly burned. Stop the engine if it over heats, and get out of the vehicle until the engine is cool.
See Overheated Engine Protection Operating Mode on page 10-17 for information on driving to as a safe place in an emergency.
IfNoSteamIsComingfrom theEngineCompartment
Ifanengineoverheatwarningis displayedbutnosteamcanbeseen orheard,theproblemmaynotbe tooserious.Sometimesheengine cangetalittletoohotwhenthe vehicle:
• Climbsalonghillonahotday.
- Stopsafterhigh-speeddriving.
• Idlesforlongperiodsintraffic.
- Towsatraler.
If the overheat warning is displayed with nosignofsteam:
- Turntheairconditioningoff.
- Turntheheaterontothehighest temperatureandtothehighest fanspeed.Openthewindowsas necessary.
- Ifinatrafficjam, shift to N(Neutral); otherwise, shift to the highest gear while driving—D(Drive) or L(Low).
Ifthetemperatureoverheatgaugeis nolongerintheoverheatzoneoran overheatwarningnolonger displays,thevehiclecanbedriven. Continuetodrivethevehicleslow forabout10minutes.Keepasafe vehicledistancefromthecarinfront ofyou.Ifthewarningdoesnotcome backon,continuetodrivenormally. Ifthewarningcontinues,pullover, stop,andparkthevehicle rightaway.
Ifthereisnosignofsteam,idlethe engineforthreeminuteswhile parked.Ifthewarningisstill displayed,turnofftheengineuntil coolsdown.Also,see"Overheated EngineProtectionOperatingMode" nextinthissection.
OverheatedEngine Protection OperatingMode
Thisemergencyoperatingmodelets thevehiclebedriventoasafeplace inanemergencysituation. Ifan overheatedengineconditionexists, anoverheatprotectionmodewhich alternatesfiringgroupsofcylinders helpspreventenginedamage. In thismode, thereisasignificantloss inpowerandengineperformance. Thetemperaturegaugeindicatesan overheatconditionexists. Driving extendeddistancesand/ortowinga trailerintheoverheatprotection modeshouldbeavoided.
Notice: Afterdriving in the overheated engine protection operating mode, to avoid engine damage, allow the engine to cool before attempting any repair. The engine oil will be severely degraded. Repair the cause of coolant loss, changethe oil and reset the oil ifesystem. See Engine Oilon page 10-7.
PowerSteeringFluid
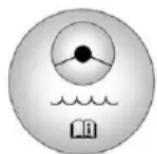
The power steering fluid reservoir is located under the engine cover on the passengers side of the vehicle. See Engine Compartment Overview on page 10-5 for reservoir location.
WhentoCheckPowerSteering Fluid
Itisnotnecessarytoregularly checkpowersteeringfluidunless yoususpectthereisaleakinthe systemoryouhearanunusual noise.Afluidlossinthissystem couldindicateaproblem.Havethe systeminspectedandrepaired.
HowtoCheckPowerSteering Fluid
Tocheckthepowersteeringfluid:
- Turnthekeyoffandletthe enginecompartmentcooldown.
- Removetheenginecover.See EngineCoveronpage10-6.
- Wipethecapandthetopofthe reservoirclean.
- Unscrewthecapandwipethe dipstickwithacleanrag.
- Replacethecapandcompletely tightenit.
- Removethecapagainandlook atthefluidlevelonthedipstick.
Thefluidlevelshouldbe somewherebetweentheMAXand MINlineonthedipstickinroom temperature.Ifthefluidisonor belowtheMINline,addfluidclose totheMAXLine.
WhattoUse
Todeterminewhatkindoffluidto use,seeRecommendedFluidsand Lubricantsonpage11-12.Always usetheproperfluid.
Notice: Use of the incorrect fluid may damage the vehicle and the damages may not be recovered by the vehicle's warranty. Always use the correct fluid listed in Recommended Fluids and Lubricantson page 11-12.
WasherFluid
WhattoUse
Whenaddingwindshieldwasher fluid, besuretoreadthe manufacturer's instructions before use. If the vehicle will be operating in an area where the temperature
mayfallbelowfreezing,useafluid thathassufficientprotectionagainst freezing.
AddingWasherFluid
Whenthewindshieldwasherfluid reservoirislow,aWASHERFLUID LOWADDFLUIDmessagewillbe displayedontheDriverInformation Center(DIC).See WasherFluid Messagesonpage5-37formore information.

Openthecapwiththewasher symbolonit.Addwasherfluiduntil thetankisfull.SeeEngine CompartmentOverviewon page 10-5forreservoirlocation.
Notice
- When using concentrated washer fluid, follow the manufacturer instructions for adding water.
- Donotmixwaterwith ready-to-usewasherfluid. Watercancausethesolution tofreezeanddamagethe washerfluidtankandother partsofthewashersystem.
- Fillthewasherfluidtankonly three-quartersfullwhenitis verycold. This allows for fluidexpansioniffreezing occurs, which could damage the tankifitis completely full.
- Donotuseenginecoolant (antifreeze)inthewindshield washer.ltcandamagethe windshieldwashersystem andpaint.
Brakes
Thisvehiclehasdiscbrakes.Disc brakepadshavebuilt-inwear indicatorsthatmakeahigh-pitched warningsoundwhenthebrakepads arewornandnewpadsareneeded. Thesoundcancomeandgoorbe heardallthetimethevehicleis moving,exceptwhenapplyingthe brakepedalfirmly.

WARNING
Thebrakewearwarningsound meansthatsoonthebrakeswill notworkwell.Thatcouldleadto acrash.Whenthebrakewear warningsoundisheard,havethe vehicleserviced.
Notice:Continuingtodrivewith worn-outbrakepadscouldresult incostlybrakerepair.
Somedrivingconditionsorclimates cancauseabrakesquealwhenthe brakesarefirstappliedorlightly applied. Thisdoesnotmean somethingiswrongwiththebrakes.
Properlytorquedwheelnutsare necessarytohelppreventbrake pulsation.Whentiresarerotated, inspectbrakepadsforwear and evenlytightenwheelnutsinthe propersequencetotorque specificationsinCapacitiesand Specificationsonpage12-2.
Brakeliningsshouldalwaysbe replacedascompleteaxlesets.
BrakePedalTravel
Seeyourdealerifthebrakepedal doesnotreturntonormalheight, orifthereisarapidincreasein pedaltravel. Thiscouldbeasign thatbrakeservicemightbe required.
BrakeAdjustment
Everytimethebrakesareapplied, withorwithoutthevehiclemoving, thebrakesadjustforwear.
ReplacingBrakeSystemParts
Thebrakingsystemonavehicleis complex. Its manypartshavetobe of top quality and workwell together if the vehicle is to have really good braking. The vehicle was designed and tested with top quality brake parts. When part sof the braking system are replaced, besure to get new, approved replacement parts. If this is not done, the brakes might not work properly. Forexample, installing disc brake pad that are wrong for the vehicle, can change the balance between the front and rear brakes—for the worse. The braking performance expected can change in many other ways if the wrong replacement brake parts are installed.
BrakeFluid
Thebrakemastercylinderreservoir is filled with DOT3brakefluidas indicated on the reservoir cap. See Engine Compartment Overview page 10-5 for the location of the reservoir.
Thereareonlytworeasonswhythe brakefluidlevelinthereservoir mightgodown:
- Thebrakefluidlevelgoesdown becauseofnormalbrakelining wear.Whennewliningsare installed,thefluidlevelgoes backup.
- Afluidleakinthebrake hydraulicsystemcanalsocause alowfluidlevel.Havethebrake hydraulicsystemfixed,sincea leakmeansthatsoonerolater thebrakeswillnotworkwell.
Donottopoffthebrakefluid. Addingfluiddoesnotcorrectaleak. Iffluidisaddedwhentheliningsare worn,therewillbetoomuchfluid whennewbrakeliningsare installed.Addorremovebrakefluid, asnecessary,onlywhenworkis doneonthebrakehydraulicsystem.

WARNING
Iftoomuchbrakefluidisadded,it canspillontheengineandburn, iftheengineishotenough.You orotherscouldbeburned,and thevehiclecouldbedamaged. Addbrakefluidonlywhenworkis doneonthebrakehydraulic system.
Whenthebrakefluidfallstoalow level,thebrakewarninglightcomes on.SeeBrakeSystemWarning Lightonpage5-18.
WhattoAdd
UseonlynewDOT3brakefluid fromasealedcontainer.See RecommendedFluidsand Lubricantsonpage11-12.
Alwayscleanthebrakefluid reservoircapandtheareaaround thecapbeforeremovingit. This helpskeepdirtfromenteringthe reservoir.

WARNING
Withthewrongkindoffluidinthe brakehydraulicsystem,the brakesmightnotworkwell.This couldcauseacrash.Alwaysuse theproperbrakefluid.
Notice
- Usingthewrongfluidcan badlydamagebrake hydraulicsystemparts. For example, justafewdropsof mineral-basedoil, such as engineoil, inthebrake hydraulicsystemcan damagebrakehydraulic systempartssobadlythat theywillhavetobereplaced. Donotletsomeoneputin thewrongkindoffluid.
- Ifbrakefluidisspilledonthe vehicle'spaintedsurfaces, thepaintfinishcanbe damaged.Becarefulnotto spillbrakefluidonthe vehicle.Ifyoudo,washitoff immediately.
Battery
Refertothereplacementnumberon theoriginalbatterylabelwhena newbatteryisneeded.

WARNING
Batteryposts,terminals,and relatedaccessoriescontainlead andleadcompounds,chemicals knowntotheStateofCaliforniato causecancerandreproductive harm.Washhandsafterhandling.
VehicleStorage

WARNING
Batterieshaveacidthatcanburn youandgasthatcanexplode. Youcanbebadlyhurtifyouare notcareful.See Jump Startingon page 10-65fortipsonworking aroundabatterywithout gettinghurt.
InfrequentUsage:Removethe black,negative(−)cablefromthe batterytokeepthebatteryfrom runningdown.
ExtendedStorage:Removethe black,negative(−)cablefromthe batteryoruseabatterytrickle charger.
All-WheelDrive
Transfercasefluiddoesnotrequire checkingunlesssthereisafluidleak orunusualnoise.Ifrequired,have thetransfercaseservicedbyyour dealer.
StarterSwitchCheck

WARNING
When you are doing this inspection, the vehicle could moves suddenly. If the vehicle moves, you or others could be injured.
-
Before starting this check, be sure there is enough room around the vehicle.
-
Firmly apply both the parking brake and theregular brake. See Parking Brake on page 9-26.
Donotusetheaccelerator pedal, and bereadytoturnoff theengineimmediatelyifit starts.
- Trytostarttheengineineach gear. The vehicles should start only in P (Park) or N (Neutral). If the vehicle starts in any other position, contact your dealer for service.
AutomaticTransmission ShiftLockControl FunctionCheck

WARNING
When you are doing this inspection, the vehicle could moves suddenly. If the vehicle moves, you or others could be injured.
- Before starting this check, be sure there is enough room around the vehicle. It should be parked on levels surface.
- Firmly apply the parking brake. See Parking Brake on page 9-26.
Bereadytoapplytheregular brakeimmediatelyifthevehicle beginstomove.
- With the engine off, turn the ignition on, but donot start the engine. Without applying the regular brake, try to mov the shiftlever out of P (Park) with normaleffort. If the shift lever moves out of P (Park), contact your dealer for service.
IgnitionTransmission LockCheck
Whileparked, and with the parking brakeset, try to turn the ignition to LOCK/OFFineachshift lever position.
- Theignitionsshouldturnto LOCK/OFFonlywhentheshift leverisinP(Park).
• Theignitionkeyshouldcome outonlyinLOCK/OFF.
Contactyourdealerifserviceis required.
ParkBrakeandP(Park) MechanismCheck

WARNING
Whenyouaredoingthischeck, thevehiclecouldbegintomove. Youorotherscouldbeinjured andpropertycouldbedamaged. Makesurethereisroominfront ofthevehicleincaseitbeginsto roll.Bereadytoapplytheregular brakeatonceshouldthevehicle begintomove.
Parkonafairlysteephill, with the vehiclefacingdownhill. Keeping yourfootontheregularbrake, set theparkingbrake.
- Tochecktheparkingbrake's holdingability:Withtheengine runningandthetransmissionin N(Neutral),slowlyremovefoot pressurefromtheregularbrake pedal.Dothisuntilthevehicleis heldbytheparkingbrakeonly.
10-24VehicleCare
- TochecktheP(Park) mechanism'sholdingability: Withtheengine running, shiftto P(Park). Then releasethe parkingbrake followed by the regularbrake.
Contactyourdealerifserviceis required.
WiperBladeReplacement
FrontWiperBlade
Windshieldwiperbladesshouldbe inspectedforwearorcracking.See Maintenance Scheduleon page 11-3.
Replacementbladescomein differenttypesandareremovedin differentways.Fortheproperty andsize,seeMaintenance ReplacementPartsonpage11-13.
Toreplacethewiperblade assembly:
- Pullthewindshieldwiper assemblyawayfromthe windshield.
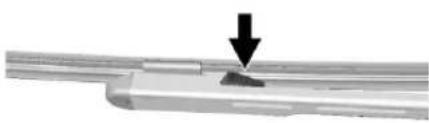
natural_image
Close-up of a metallic mechanical component with a black arrow pointing to a small triangular feature (no text or symbols visible)- Squeezethetabsoneachside ofthewiperbladeassembly and slidetheassemblyofftheendof thewiperarm.
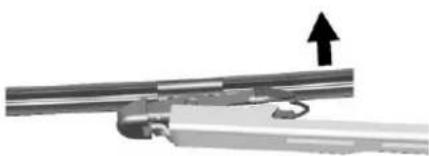
natural_image
Mechanical assembly diagram showing a bracket with an upward arrow indicating motion (no text or symbols present)- Installthenewbladeontothe armconnectorandmakesure thetabsarefullysetinthe lockedposition.
Allowingthewiperbladearmto touchthewindshieldwhenno wiperbladeisinstalledcould damagethewindshield.Any damagethatoccurswouldnot
becoveredbyyourwarranty.Do notallowthewiperbladearmto touchthewindshield.
- Repeatthestepsfortheother blade.
RearWiperBlade
Toreplacetherearwiperblade:
- Pullthewiperbladeassembly awayfromthebackglass. Therearwiperbladewillnotlock inaverticalpositionsocare shouldbeusedwhenpullingit awayfromthevehicle.
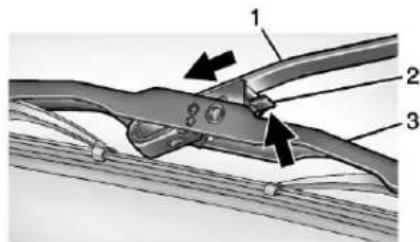
- Pushthereleaselever(2) to disengagethehookandpush thewiperarm(1) outofthe bladeassembly(3).
- Pushthenewbladeassembly securelyinthewiperarmhook untilthereleaseleverclicksinto place.
- Return the wiper armand blade assembly to therest position on the glass.
WindshieldReplacement
The vehicle is equipped with an acoustic windshield. If you ever havetohavethewindshield replaced besuretogetanacoustic windshield so you will continueto havethe benefits an acoustic windshield can provide.
HeadlampAiming
Headlampaimhasbeenpresetand shouldneednofurtheradjustment. Ifthevehicleisdamagedinacrash, theheadlampaimmaybeaffected. Ifadjustmenttotheheadlampsis necessary,seeyourdealer.
BulbReplacement
Forthepropertyofreplacement bulbs, see ReplacementBulbson page 10-27.
Foranybulb-changingprocedure notlisted in this section, contact your dealer.
HighIntensityDischarge (HID)Lighting

WARNING
The high intensity discharge lightingsystem operates at a very high voltage. If you try to service any of the system components, you could be seriously injured. Have your dealer or a qualified technicians servicethem.
AfteranHIDheadlampbulbhas been replaced, thebeammightbea slightly differentshadethanitwas originally. Thisisnormal.
Taillamps, TurnSignal, and Stoplamps
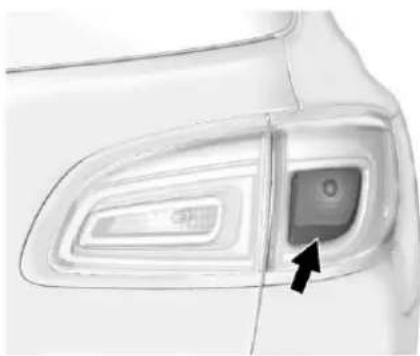
natural_image
Close-up of a car's rear window and side panel, showing a circular light source with an arrow pointing to it (no text or symbols visible)Toreplaceoneofthesebulbs:
- Opentheliftgate.SeeLiftgate onpage2-8.
- Usingasmallflatbladedtool, removethescrewcoversby pryingthemfromthebottom.
-
Removethetwohexscrews holdingthetaillampassembly in place.
-
Pulloutthetaillampassembly.
- Turnthebulbsocket counterclockwiseandpullit straightouttoremoveit.
- Replacethebulb.
- ReverseSteps3-5toreinstall thetaillampassembly. Whenreinstallingthetaillamp assembly, thepinonthetaillamp assemblymustlineupandbe insertedcorrectlyintothe opening.
- Replacethescrewcovers.
LicensePlateLamp
Toreplaceoneofthesebulbs:
- Removethetwopushpins holdingeachofthelicenseplate lampstotheliftgatetrimby unscrewingthem.
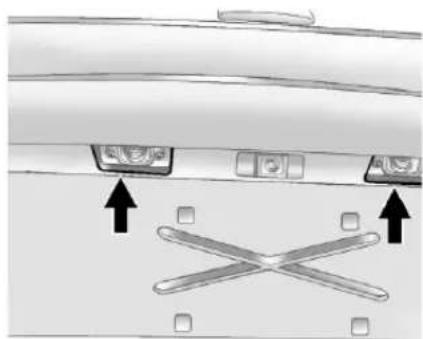
natural_image
Diagram of a car rearview showing two front-mounted sensors and a cross-shaped component, with no visible text or symbols.- Turnandpullthelicenseplate lampforwardthroughtheliftgate trimopening.
- Turnthebulbsocket counterclockwiseandpullthe bulbstraightoutofthesocket.
- Installthenewbulb.
- ReverseSteps1-3toreinstall thelicenseplatelamp.
ReplacementBulbs
| ExteriorLamp | Bulb Number |
| LicensePlateLamp194LL | |
| RearTurnSignal andTaillamps | 7443 (W21/5W) |
Forreplacementbulbsnotlisted here,contactyourdealer.
ElectricalSystem
HighVoltageDevicesand Wiring

WARNING
Exposure to high voltage can cause shock, burns, and even death. The high voltage components in the vehicle can only be serviced by technicians with special training.
Highvoltagecomponentsare identifiedbylabels.Donot remove,open,takeapart, ormodifythesecomponents. Highvoltagecableorwiringhas orangecovering.Donotprobe, tamperwith,cut,ormodifyhigh voltagecableorwiring.
ElectricalSystem Overload
The vehicle has fuses and circuit breaker stop protect against an electrical system overload.
Whenthecurrentelectricalloadis tooheavy, the circuitbreakeropens and closes, protecting the circuit until the current load return to normal or the problem is fixed. This greatly reduces the chance of circuit overload and fire caused by electrical problems.
Fusesandcircuitbreakersprotect powerdevicesinthevehicle.
Replaceabadfusewithanewone oftheidenticalsizeandrating.
Ifthereisaproblemontheroadand afuseneedstobereplaced,the sameamperagefusecanbe borrowed.Choosesomefeatureof thevehiclethatisnotneededtouse andreplaceitassoonaspossible.
HeadlampWiring
Anelectricaloverloadmaycause thelampstogoonandoff,orin somecasestoremainoff.Havethe headlampwiringcheckedrightaway ifthelampsgoonandoffor remainoff.
WindshieldWipers
Ifthewipermotoroverheatsdueto heavysnoworice, the windshield wiperswillstopuntilthemotorcools and will then restart.
Although the circuit is protected from electrical overload, overload dueto heavysnow oricemay cause wiper linkaged damage. Always clear rice and heavysnow from the windshield before using the windshield wipers.
If the overload is caused by an electrical problem and not snow or ice, besure to get it fixed.
FusesandCircuit Breakers
Thewiringcircuitsinyourvehicle areprotectedfromshortcircuitsby acombinationoffuses,circuit breakersandfusiblethermallinks. Thisgreatlyreducesthechanceof firescausedbyelectricalproblems.
Lookatthesilver-coloredband insidethefuse. Ifthebandisbroken ormelted, replacethefuse. Besure youreplaceabadfusewithanew oneoftheidenticalsizeandrating.
Fusesofthesameamperagecan betemporarilyborrowedfrom anotherfuselocation,ifafusegoes out.Replacethefuseassoonas youcan.
EngineCompartment FuseBlock
Theunderhoodfuseblockisinthe enginecompartment,onthe passengersideofthevehicle.
natural_image
Simple icon of a battery with a lightning bolt symbol on top (no text or labels)Liftthecoverforaccesstothefuse/relayblock.
Notice: Spilling liquidon any electrical component on the vehicle may damage it. Always keep the cover on any electrical component.
Toremovefuses, holdtheendof thefusebetweenyourthumbband indexfingerandpullstraightout.
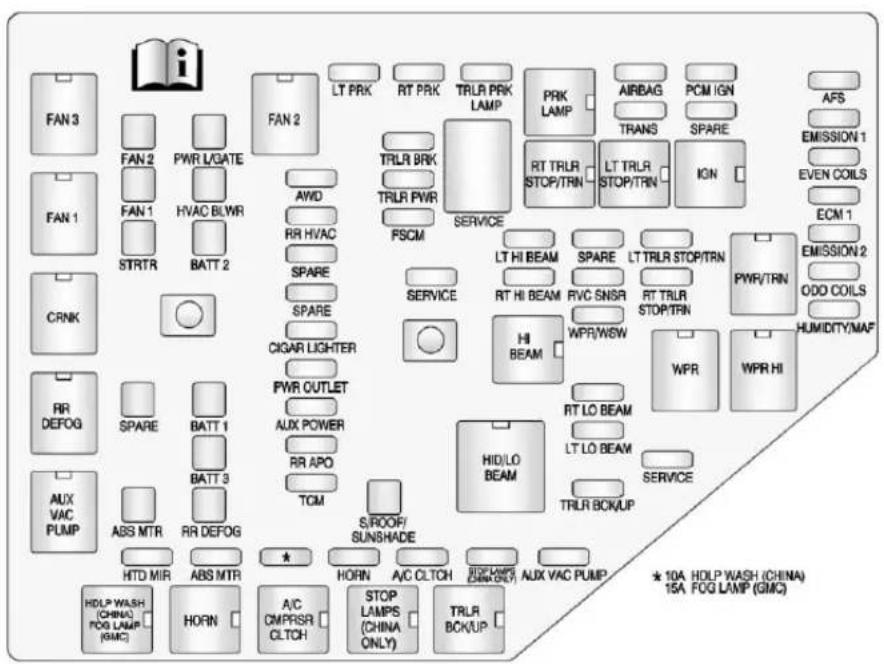
The vehicle may not be equipped with allothefuses, relays, and feature shown.
| FusesUsage | |
| A/CCLTCHA | Conditioning Clutch |
| ABSMTRAntilockBrake System(ABS) Motor | |
| AFSAdaptiveForward LightingSystem | |
| AIRBAGAirbagSystem | |
| AUXPOWERAuxiliaryPower | |
| AUX VACPUMP | Auxiliary VacuumPump |
| AWDAII-Wheel-Drive System | |
| BATT1Battery1 | |
| BATT2Battery2 | |
| BATT3Battery3 | |
| CIGAR LIGHTER | CigaretteLighter |
| ECM1EngineControl Module1 | |
| EMISSION1 | Emission1 |
10-30VehicleCare
| FusesUsage | |
| EMISSION2E | mission2 |
| EVENCOILSE | venInjectorCoils |
| FAN1CoolingFan1 | |
| FAN2CoolingFan2 | |
| *HeadlampWasher(China)/FogLamps(GMC) | |
| FSCMFuelSystemControlModule | |
| HORN Horn | |
| HTDMIRHeatedOutsideRearviewMirror | |
| HUMIDITY/MAF | HumiditySensor/MAFSensor |
| HVACBLWRHeating,Ventilation,andAirConditioningBlower | |
| LTHIBEAMLeftHigh-BeamHeadlamp | |
| FusesUsage | |
| LTLOBEAMLeftLow-BeamHeadlamp | |
| LTPRK | LeftParkingLamp |
| LTTRLR STOP/TRN | TrailerLeftStoplampandTurnSignal |
| ODDCOILSODdInjectorCoils | |
| PCMIGN | PowertrainControlModuleIgnition |
| PWRL/GATE | PowerLiftgate |
| PWR OUTLET | PowerOutlet |
| RRAPO | RearAccessoryPowerOutlet |
| RRDEFOG | RearDefogger |
| RRHVAC | RearClimateControlSystem |
| RTHIBEAM | RightHigh-BeamHeadlamp |
| RTLOBEAM | RightLow-BeamHeadlamp |
| FusesUsage | |
| RTPRK | Right ParkingLamp |
| RTTRLR STOP/TRN | TrailerRight StoplampandTurn Signal |
| RVCSNSR | RegulatedVoltage ControlSensor |
| S/ROOF/ SUNSHADE | Sunroof |
| SERVICE | ServiceRepair |
| SPARE | Spare |
| STOP LAMPS (ChinaOnly) | Stoplamps (ChinaOnly) |
| STRTR | Starter |
| TCM | Transmission ControlModule |
| TRANS | Transmission |
| TRLR BCK/UP | TrailerBack-up Lamps |
| TRLRBRK | TrailerBrake |
| TRLRPRKLAMP | TrailerParkingLamps |
| TRLRPWRTrailerPower | |
| WPR/WSWW | indshieldWiper/Washer |
| RelaysUsage | |
| A/C CMPRSR CLTCH | AirConditioning CompressorClutch |
| AUX VACPUMP | Auxiliary VacuumPump |
| CRNKSwitchedPower | |
| FAN1CoolingFan1 | |
| FAN2CoolingFan2 | |
| FAN3CoolingFan3 | |
| HDLPWASH (CHINA) FOG LAMP(GMC) | HeadlampWasher (China)/Fog Lamps(GMC) |
| RelaysUsage | |
| HIBEAMHigh-BeamHeadlamps | |
| HID/LOBEAM | HighIntensityDischarge(HID)Low-BeamHeadlamps |
| HORNHorn | |
| IGNIgnitionMain | |
| LTTRLRSTOP/TRN | TrailerLeftStoplampandTurnSignalLamp |
| PRKLAMPParkingLamp | |
| PWR/TRN | Powertrain |
| RRDEFOGRearWindowDefogger | |
| RTTRLRSTOP/TRN | TrailerRightStoplampandTurnSignalLamp |
| StopLamps(ChinaOnly) | StopLamps(ChinaOnly) |
| TRLRBCK/UP | TrailerBack-upLamps |
| RelaysUsage | |
| WPR | WindshieldWiper |
| WPRHI | WindshieldWiperHighSpeed |
InstrumentPanel Fuse Block
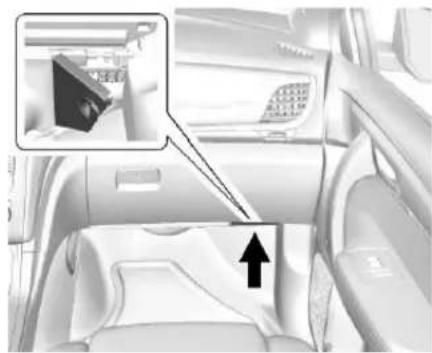
natural_image
Interior view of a car with a backrest seat and side panel, showing a close-up of the window (no visible text or symbols)Theinstrumentpanelfuse blockis undertheinstrumentpanel onthe passengersideofthe vehicle.Pull downonthecover toaccessthe fuseblock.
10-32VehicleCare
![FRT WSW STR WHL ILLUM DR LCK REAR WPR HVAC DRL LO BEAM DRL LO BEAM HTD COOL SEAT • GMC NON HID = LO BEAM • GMC NON HID = HI SHTR • CHEVY = FOG LAMPS • • • • • • • • • • • • • • • • • • • • • • • • • • • • • • • • • • • • • • • • • • • • • • • • • • • • • • • • • • • • • • • • • • • • • • • • • • • • • • • • • • • • • • • /•••/•••• • /•••/•••• • /•••/•••• • /•••/••• • /•••/••• • /•••/••• • /•••/•• • /•••/•• • /•••/•• • /•••/•• • /•••/•• • /•••/•• • /•••/•• • /•••/•• • /•••/•• • /•••/•• • /•••/•• - /••/•/● - /•/●/● - /•/●/● - /•/●/● - /•/●/● - /•/●/● - /•/●/● - /•/●/● - /•/●/● - /•/●/● - /•/●/● - /•/●/● - /•/●/● - /•/●/● - /— - /— - /— - /— - /— - /— - /— - /— - /— - /— - /— - /— - /— - /— - /— - /— - /— - /— - /— - /— - /] - /— - /— - /— - /— - /— - /— - /— - /— - /— - /— - /— - /— - /— - /— - /— - /— - /— - /— - /— - /—](/content/2026/05/1026310/images/8cc446d8bfea6f5a97dfca8ad7dca061c2778460fb4ab67cb2f021cb83321a5d.jpg)
FuseSide
The vehicle may not be equipped with allothefuses, relays, and feature shown.
| FusesUsage | |
| #GMCNONHID=LoBeam | |
| ●GMCNONHID=HighShutter | |
| ●●Chevy=FogLamps | |
| ●●●BuickChina=RearFogLamp | |
| AIRBAGAirbag | |
| AMPAmplifier | |
| BCKUP/STOP | Back-upLamp/Stoplamp |
| BCMBodyControlModule | |
| CNSTRVENT | CanisterVent |
| CTSYCourtesyLamps | |
| DRLCKDoorLocks | |
| FusesUsage | |
| DRL/LOBEAM | DaytimeRunningLampsRelay/LowBeamHeadlampsRelay |
| DSPLYDisplay | |
| EMPTYEmpty | |
| FRTWSWFront | WindshieldWasher |
| HTD/COOLSEAT | Heated/CoolingSeats |
| HVACHeating, Ventilation,andAir Conditioning | |
| INADVPWR INTLAMPS | InadvertentPower/InteriorLightPipe Lamps |
| INFOTMNT/MSM | Infotainment/MemorySeat Module |
| LTTRNSIG | DriverSideTurn Signal |
| PDMPower | Mirrors,LiftgateRelease |
| PWRMODE | PowerMode |
| PWRMIR | PowerMirrors |
| RDORadio | |
| REARWPRR | RearWiper |
| RPA/SBZA/UGDO | RearParkAssist/SideBlindZoneAlert/UniversalGarageDoorOpener |
| RTTRNSIG | PassengerSideTurnSignal |
| STRWHLILLUM | SteeringWheelIllumination |
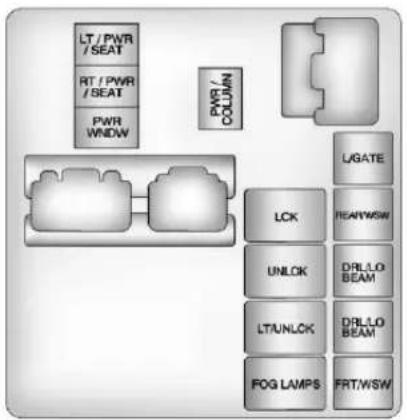
RelaySide
| RelaysUsage | |
| LT/PWR/SEAT | DriverSidePower SeatRelay |
| RT/PWR/SEAT | PassengerSide PowerSeatRelay |
| PWR/WNDWP | PowerWindows Relay |
| PWR/COLUMN | PowerSteering ColumnRelay |
| L/GATELiftgateRelay | |
| LCKPowerLockRelay | |
| REAR/WSWRearWindow WasherRelay | |
| UNLCKPowerUnlock Relay | |
| DRL/LOBEAM | DaytimeRunning LampsRelay/Low BeamHeadlamps Relay |
| LT/UNLCK | DriverSideUnlock Relay |
| DRL/LOBEAM | DaytimeRunningLampsRelay(IfEquipped) |
| FOGLAMPSF | ogLampsRelay(Chevy) |
| FRT/WSWFr | ontWindshieldWasherRelay |
WheelsandTires
Tires
EverynewGMvehiclehas high-qualitytiresmadebya leadingtiremanufacturer.See thewarrantymanualfor informationregardingthetire warrantyandwheretoget service.Foradditional informationrefertothetire manufacturer.

WARNING
- Poorlymaintained and improperly used tires are dangerous.
• Overloadingthetirescan causeoverheatingasa resultoftoomuchflexing. Therecouldbeablowout (Continued)
WARNING(Continued)
andaseriouscrash.See VehicleLoadLimitson page9-9.
- Underinflatedtirespose thesamedangeras overloadedtires. The resultingcrashcould cause serious injury. Checkalltiresfrequently tomaintainthe recommended pressure. Tirepressureshouldbe checkedwhenthetires arecold.
• Overinflatedtiresaremore likelytobecut, punctured, orbrokenbyasudden impact—suchaswhen hittingapothole. Keep tiresattherecommended pressure.
(Continued)
WARNING(Continued)
- Wornoroldtirescan causeacrash. Ifthetread is badly worn, replacethem.
- Replaceanytiresthat havebeendamagedby impactswithpotholes, curbs,etc.
- Improperlyrepairedtires cancauseacrash. Only the dealeroran authorized tireservice centers should repair, replace, dismount, and mountthetires.
- Donotspinthetiresin excessof56km/h (35mph)onslippery surfaceuchassnow, mud,ice,etc.Excessive spinningmaycausethe tirestoexplode.
All-SeasonTires
This vehicle may comewith all-season tires. Thesetires are designed to provide good overall performance on most road surfaces and weather conditions. Original equipment tires designed to GM's specific time performance criteria have a TPC specification code molded onto the sidewall. Original equipment all-season tires can be identified by the last two characters of this TPC code, which will be "MS."
Considerinstallingwintertireson thevehicleiffrequentdrivingon snoworice-coveredroadsis expected. All-seasontiresprovide adequateperformanceformost winterdrivingconditions, butthey maynotofferthesamelevelof tractionorperformanceaswinter tiresonsnoworice-coveredroads. See WinterTiresonpage 10-35.
WinterTires
This vehicle was not, originally, equipped with wintertires. Winter tires are designed for increased traction on snow and ice-covered roads. Consider installing winter tires on the vehicle iff frequent driving on snow or ice-covered roads is expected. See your dealer for details regarding wintertire availability and properties selection. Also, see Buying New Tires on page 10-49.
Withwintertires,theremaybe decreaseddryroadtraction, increasedroadnoise,andshorter treadlife.Afterchangingtowinter tires,bealertforchangesinvehicle handlingandbraking.
Ifusingwintertires:
- Usetiresofthesamebrandand treadtypeonallfourwheel positions.
10-36VehicleCare
- Useonlyradialplytiresofthe samesize, loadrange, and speedratingastheoriginal equipmenttires.
Wintertireswiththesamespeed ratingastheoriginalequipmenttires maynotbeavailableforH,V,W,Y, andZRspeedratedtires. If winter tireswithalowerspeedratingare chosen,neverexceedthetire's maximumspeedcapability.
SummerTires
This vehicle may comewith high performances, summertires. These tires have as special tread and compound that are optimized for maximum dry and wet road performance. This special tread and compound will decrease performance in cold climates, and once and snow. Were recommend installing wintertires on the vehicle iff frequent driving in cold temperatures or on snow or ice covered roads is expected. See Winter Tires on page 10-35.
TireSidewallLabeling
Usefulinformationaboutatireis moldedintoitssidewall. The exampleshowatypical passengervehicletireanda compactsparetiresidewall.
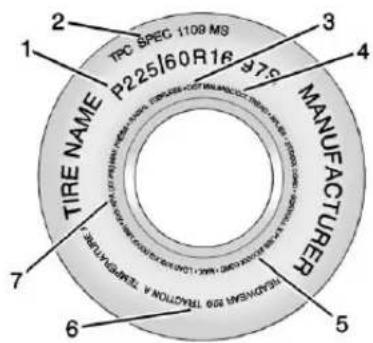
Passenger(P-Metric)TireExample
(1)TireSize: Thetiresizeisa combinationoflettersand numbersusedtodefinea particulartire'swidth,height, aspectratio,constructiontype,
andservicedescription.Seethe "TireSize"illustrationalterinthis section.
(2)TPCSpec(Tire PerformanceCriteria Specification):Original equipmenttiresdesignedto GM'sspecificireperformance criteriahaveaTPCspecification codemoldedontothesidewall. GM'sTPCspecificationsmeetor exceedallfederalsafety guidelines.
(3)DOT(Departmentof Transportation): The DepartmentofTransportation (DOT)codeindicatesthatthe tireisincompliancewiththe U.S.Departmentof TransportationMotorVehicle SafetyStandards.
DOTTireDateof Manufacture: Thelastfour digitsoftheTINindicatethetire manufactureddate. Thefirsttwo
digitsrepresenttheweek (01–52)andthelasttwodigits, theyear.Forexample, thethird weekoftheyear2010would haveafour-digitDOTdate of0310.
(4) TireIdentificationNumber (TIN): The letters and numbers following the DOT (Department of Transportation) code are the TireIdentificationNumber (TIN). The TIN shows the manufacturer and plant code, tiresize, and datethetire was manufactured. The TIN is molded on both sides of the tire, although only onesidem may have the date of manufacture.
(5)TirePlyMaterial :Thetype ofcordandnumberofpliesin thesidewallandunderthetread.
(6)UniformTireQuality Grading(UTQG): Tire manufacturersarerequired to gradetiresbasedonthree
performancefactors:treadwear, traction,andtemperature resistance.Formoreinformation seeUniformTireQuality Gradingonpage 10-51.
(7)MaximumColdInflation LoadLimit :Maximumloadthat canbecarriedandthe maximumpressureneededto supportthatload.
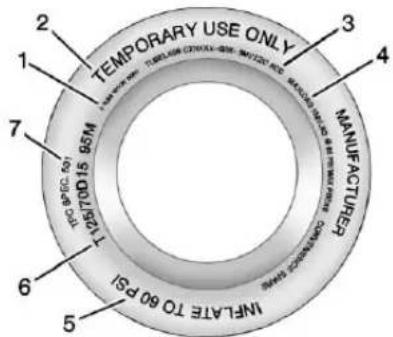
CompactSpareTireExample
(1) Tire Ply Material: Thetype of cord and number of plies in the sidewall and under the thread.
(2)TemporaryUseOnly :The compactsparetireortemporary usetireshouldnotbedrivenat speedsover80km/h(50mph). Thecompactsparetireisfor emergencyusewhenaregular roadtirehaslostairandgone flat.Ifthevehiclehasacompact sparetire,seeCompactSpare Tireonpage10-64andIfaTire GoesFlatonpage10-54.
(3) TireIdentificationNumber (TIN): The letters and numbers following the DOT (Department of Transportation) code are the TireIdentificationNumber (TIN). The TIN shows the manufacturer and plant code, tiresize, and datethetire was manufactured. The TIN is molded on both sides of the tire, although only onesidemay havethedate of manufacture.
(4)MaximumColdInflation LoadLimit :Maximumloadthat canbecarriedandthe maximumpressureneededto supportthatload.
(5) Tire Inflation : The temporary usetire or compact spare tires should be inflated to 420kPa (60psi). Formore information on tire pressure and inflation see Tire Pressure on page 10-41.
(6)TireSize :A combination of letters and numbers define a tire's width, height, aspect ratio, construction type, and service description. The letter Tasthe first character in the tiresize meansthetire is for temporary use only.
(7)TPCSpec(Tire PerformanceCriteria Specification):Original equipmenttiresdesignedto GM'sspecificireperformance
criteriahaveaTPCspecification codemoldedontothesidewall. GM'sTPCspecificationsmeetor exceedallfederalsafety guidelines.
TireDesignations
TireSize
The following is an example of typical passenger vehicle tiresize.
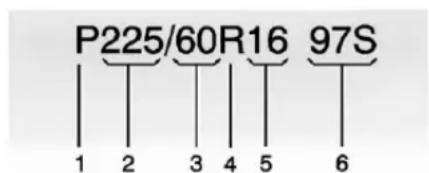
(1) Passenger(P-Metric) Tire:
TheUnitedStatesversionofa metrictiresizingsystem.The letterPasthefirstcharacterin thetiresizemeansapassenger
vehicletireengineeredto standardssetbytheU.S.Tire andRimAssociation.
(2) TireWidth : Thethree-digit number indicate the tresection width in millimeters from sidewall to sidewall.
(3)AspectRatio :Atwo-digit numberthatindicatesthetire height-to-widthmeasurements. Forexample,ifthetiresize aspectratiois60,asshownin item3oftheillustration,itwould meanthatthetire'ssidewallis 60percentashighasitiswide.
(4)ConstructionCode :Aletter codeisusedtoindicatethetype ofplyconstructioninthetire. TheletterRmeansradialply construction;theletterDmeans diagonalorbiasply construction;andtheletterB meansbelted-biasply construction.
(5)RimDiameter:Diameter of the wheelin inches.
(6)ServiceDescription :These charactersrepresenttheload indexandspeedratingofthe tire. Theloadindexrepresents theloadcarryingcapacityatire iscertifiedtocarry. Thespeed ratingisthemaximumspeeda tireiscertifiedtocarryaload.
TireTerminology and Definitions
AirPressure:Theamountof airinsidethetirepressing outwardoneachsquareinch of thetire.Airpressureis expressedinkPa(kilopascal) orpsi(poundspersquareinch).
AccessoryWeight : The combinedweightofoptional accessories. Some examples of optional accessories are automatictransmission, power
steering, powerbrakes, power windows, powerseats, and air conditioning.
AspectRatio :Therelationship ofatire'sheighttoitswidth.
Belt: Arubbercoatedlayer of cords between the plies and the tread. Cords may be made from steel or other reinforcing materials.
Bead: Thetirebead contains steelwireswrapped by steel cordsthathold the tire onto therim.
BiasPlyTire :Apneumatictire inwhichthepliesarelaidat alternateangleslessthan 90degreestothecenterlineof thetread.
ColdTirePressure :The amountofairpressureinatire, measuredinkPa(kilopascal) orpsi(poundspersquareinch)
beforeatirehasbuiltupheat fromdriving.See TirePressure onpage10-41.
CurbWeight : The weight of a motor vehicle with standard and optionalequipment including the maximum capacity off fuel, oil, and coolant, but without passengers and cargo.
DOTMarkings :Acodemolded intothesidewallofatire signifyingthatthetireisin compliancewiththeU.S. DepartmentofTransportation (DOT)MotorVehicleSafety Standards.TheDOTcode includestheTireIdentification Number(TIN),analphanumeric designatorwhichcanalso identifythetiremanufacturer, productionplant,brand,and dateofproduction.
GVWR: Gross Vehicle Weight Rating. See Vehicle Load Limits on page 9-9.
GAWRFRT: Gross Axle Weight Rating for the front axle. See Vehicle Load Limit on page 9-9.
GAWRRR : GrossAxleWeight Ratingfortherearaxle. See VehicleLoadLimitson page9-9.
IntendedOutboardSidewall : Thesideofanasymmetricaltire, thatmustalwaysfaceoutward whenmountedonavehicle.
Kilopascal(kPa) : Thematic unitforairpressure.
LightTruck(LT-Metric)Tire :A tireusedonlightdutytrucksand somemultipurposepassenger vehicles.
LoadIndex : Anassigned numberranging from 1 to 279 that correspond to the load carrying capacity of fatire.
Maximum Inflation Pressure : Themaximum air pressure to which acoldt tire can be inflated. Themaximum air pressure is molded onto the sidewall.
MaximumLoadRating :The loadratingforatireatthe maximumpermissibleinflation pressureforthattire.
MaximumLoadedVehicle Weight: Thesumofcurb weight, accessoryweight, vehiclecapacityweight, and productionoptionsweight.
NormalOccupantWeight :The numberofoccupantsavehicle isdesignedtoseatmultipliedby 68kg(150lb).See VehicleLoad Limitsonpage9-9.
OccupantDistribution : Designatedseatingpositions.
OutwardFacingSidewall :The sideofanasymmetricaltirethat hasaparticularsidethatfaces outwardwhenmountedona vehicle. Thesideofthetirethat containsawhitewall, bears whitelettering,orbears manufacturer,brand,and/or modelnamemoldingthatis higherordeeperthanthesame moldingsontheothersidewall ofthetire.
Passenger(P-Metric)Tire :A tireusedonpassengercarsand somelightdutytrucksand multipurposevehicles.
Recommended Inflation Pressure: Vehicle manufacturer's recommended tireinflation pressureasshown on the tire placard. See Tire Pressure on page 10-41 and Vehicle Load Limit on page 9-9.
RadialPlyTire:Apneumatic tireinwhichtheplycordsthat extendtothebeadsarelaidat 90degreestothecenterlineof thetread.
Rim: Ametalsupportforatire anduponwhichthetirebeads areseated.
Sidewall: Theportionofatire betweenthetreadandthebead.
SpeedRating :An alphanumericcodeassignedto atireindicatingthemaximum speedatwhichatirecan operate.
Traction: Thefrictionbetween thetireandtheroadsurface. Theamountofgripprovided.
Tread: The portion of atire that comes into contact with theroad.
TreadwearIndicators :Narrow bands,sometimescalledwear bars,thatshowacrossthetread ofatirewhenonly1.6mm (1/16in)oftreadremains.See WhenItIs TimeforNew Tires onpage 10-48.
UTQGS(UniformTireQuality GradingStandards) :Atire informationsystemthatprovides consumerswithratingsfora tire'straction,temperature,and treadwear.Ratingsare determinedbytire manufacturersusing governmenttestingprocedures. Theratingsaremoldedintothe sidewallofthetire.SeeUniform TireQualityGradingon page10-51.
VehicleCapacityWeight : The number of designated seating positions multiplied by
68kg(150lb)plustherated cargoload.See VehicleLoad Limitsonpage9-9.
VehicleMaximumLoadonthe Tire:Loadonanindividualtire duetocurbweight,accessory weight,occupantweight,and cargoweight.
VehiclePlacard :Alabel permanentlyattachedtoa vehicleshowingthevehicle capacityweightandtheoriginal equipmenttiresizeand recommendedinflationpressure. See "TireandLoading InformationLabel" under Vehicle LoadLimitsonpage9-9.
TirePressure
Tiresneedthecorrectamountof airpressuretooperate effectively.
Notice: Neithertire underinflation nor overinflationis good. Underinflatedtires, ortires that donothaveenoughair, can result in:
- Tireoverloading and overheating which could lead to ablowout.
• Prematureor irregularwear. - Poorhandling.
- Reducedfueleconomy.
Overinflatedtires, ortiresthat havetoomuchair, can resultin:
- Unusualwear.
- Poorhandling.
- Roughride.
- Needlessdamagefrom roadhazards.
The Tire and Loading Information label on the vehicle indicate the originalequipment tires and the correct cold tire inflation pressures. The recommended pressure is the minimum air pressure needed to support the vehicle's maximum loadcarrying capacity. See Vehicle Load Limit on page 9-9.
Howthevehicleisloaded affectsvehiclehandlingandride comfort.Neverloadthevehicle withmoreweightthanitwas designedtocarry.
WhentoCheck
Checkthetiresonceamonthor more. Donotforgetthecompact spare, if the vehicle has one. The cold compact spare tire pressures should be 420 kPa (60 psi). See Compact Spare Tire on page 10-64.
HowtoCheck
Useagoodqualitypocket-type gaugetochecktirepressure. Propertireinflationcannotbe determinedbylookingatthetire. Checkthetireinflationpressure whenthetiresarecold,meaning thevehiclehasnotbeendriven foratleastthreehoursorno morethan1.6km(1mi).
Removethevalvecapfromthe tirevalvestem.Pressthetire gaugefirmlyontothevalveto getapressuremeasurement. Ifthecoldtireinflationpressure matchestherecommended pressureontheTireand LoadingInformationlabel,no furtheradjustmentisnecessary. Iftheinflationpressureislow, addairuntiltherecommended pressureisreached.Ifthe inflationpressureishigh,press onthemetalsteminthecenter ofthetirevalvetoreleaseair.
Recheckthetirepressurewith thetiregauge.
Return the valvecaps on the valvestemstop prevent leaks and keep out dirt and moisture.
TirePressureMonitor System
The TirePressureMonitorSystem (TPMS) uses radio and sensor technology to check tire pressure levels. The TPMS sensors monitor the air pressure in your tires and transmit tire pressurereading stoa receiver located in the vehicle.
Eachtire, including the spare (if provided), should be checked monthly when cold and inflated to the inflation pressurerecommended by the vehicle manufacturer on the vehicle placardortire inflation pressure label. (If your vehicle has tires of different sizing thanthesize indicated on the vehicle placardor
tireinflationpressurelabel,you shoulddeterminethepropertire inflationpressureforthosetires.)
Asanadded safety feature, your vehicle has been equipped with a tire pressure monitoringsystem (TPMS) that illuminates alowtire pressure telltale when none or more of your tires is significantly under-inflated.
Accordingly, whenthelowtire pressuretelltaleilluminates, you shouldstopandcheckyourtiresas soonaspossible, andinflatethem totheproperpressure. Drivingona significantlyunder-inflatedtire causesthetiretooverheatandcan leadtotirefailure. Under-inflation alsoreducesfuelefficiencyandtire treadlife, andmayaffectthe vehicle'shandlingandstopping ability.
PleasenotethattheTPMSisnota substituteforpropertire maintenance, anditisthedriver's responsibility to maintain incorrect tire pressure, even if under-inflation has
notreachedtheleveltotrigger illuminationoftheTPMSlowtire pressuretelltale.
Yourvehiclehasalsobeen equippedwithaTPMSmalfunction indicatortoindicatewhenthe systemisnotoperatingproperly. TheTPMSmalfunctionindicatoris combinedwiththelowtirepressure telltale.Whenthesystemdetectsa malfunction,thetelltalewillflashfor approximatelyoneminuteandthen remaincontinuouslyilluminated. Thissequencewillcontinueupon subsequentvehiclestart-upsas longasthemalfunctionexists.
Whenthemalfunctionindicatoris illuminated, thesystemmaynotbe abletodetectorsignallowtire pressureasintended. TPMS malfunctionsmayoccurforvariety ofreasons, includingtheinstallation ofreplacementoralternatetiresor wheelsonthevehiclethatprevent theTPMSfromfunctioningproperly. AlwayschecktheTPMSmalfunction telltaleafterreplacingoneormore tiresorwheelsonyourvehicleto
ensure that thereplacement or alternatetiresandwheelsallow the TPMStocontinuetofunction properly.
See TirePressureMonitor Operationonpage 10-44.
FederalCommunications Commission(FCC)Rulesand withIndustryCanada Standards
SeeRadioFrequencyStatementon page13-20forinformation regardingPart15oftheFederal CommunicationsCommission(FCC) RulesandwithIndustryCanada StandardsRSS-GEN/210/220/310.
TirePressureMonitor Operation
This vehicle may have a Tire Pressure Monitor System (TPMS). The TPMS is designed to warn the driver when alow tire pressure condition exists. TPMS sensors are mounted on to each tire and wheel assembly, excluding the spare tire andwheelassembly,ifthevehicle hasone.TheTPMSsensors monitortheairpressureinthetires andtransmitsthetirepressure readingstoareceiverlocatedinthe vehicle.

Whenalowtirepressurecondition isdetected,theTPMSilluminates thelowtirepressurewarninglight locatedontheinstrumentcluster. Ifthewarninglightcomeson,stop assoonaspossibleandinflatethe tirestotherecommendedpressure shownonthetireloading informationlabel.SeeVehicleLoad Limitsonpage9-9.
Amessagetocheckthepressurein aspecifictiredisplaysintheDriver InformationCenter(DIC).Thelow tirepressurewarninglightandthe DICwarningmessagecomeonat
eachignitioncycleuntilthetiresare inflatedtothecorrectinflation pressure.UsingtheDIC,tire pressurelevelscanbeviewed.For additionalinformationanddetails abouttheDICoperationand displaysseeDriverInformation Center(DIC)onpage5-22and Tire Messagesonpage5-35.
Thelowtirepressurewarninglight maycomeonincoolweatherwhen thevehicleisfirststarted,andthen turnoffasthevehicleisdriven. This couldbeanearlyindicatorthatthe airpressureisgettinglowand needstobeinflatedtotheproper pressure.
ATireandLoadingInformationlabel showsthesizeoftheoriginal equipmenttiresandthecorrect inflationpressureforthetireswhen theyarecold.SeeVehicleLoad Limitsonpage9-9,foranexample oftheTireandLoadingInformation labelanditslocation.AlsoseeTire Pressureonpage10-41.
The TPMScanwarnaboutalow tirepressureconditionbutildoes notreplacenormaltire maintenance.See TireInspection onpage 10-47,TireRotationon page 10-47and Tireson page 10-34.
Notice: Tiresealantmaterials are notallthesame. Anon-approved tiresealantcoulddamagethe TPMSsensors. TPMSsensor damagecausedbyusingan incorrecttiresealantisnot coveredbythevehiclewarranty. Alwaysuseonlythe GM-approvedtiresealant availablethroughyourdealeror includedinthevehicle.
TPMSMalfunctionLightand Message
The TPMS will not function properly if one or more of the TPMS sensors are missing or inoperable. When the system detects a malfunction, the low tire warning light flashes for
aboutoneminuteandthenstayson fortheremainderoftheignition cycle.ADICwarningmessage displays.Themalfunctionlightand DICwarningmessagecomeonat eachignitioncycleuntiltheproblem iscorrected.Someoftheconditions thatcancausethesetocome onare:
- Oneoftheroadtireshasbeen replacedwiththesparetire, ifyourvehiclehasone. The sparetiredoesnothavea TPMSsensor. Themalfunction lightandDICmessageshould gooffaftertheroadtireis replacedandthesensor matchingprocessisperformed successfully. See"TPMSSensor MatchingProcess"laterinthis section.
- TheTPMSsensormatching processwasnotdoneornot completedsuccessfullyafter rotatingthetires.The malfunctionlightandtheDIC messagesshouldgooffafter
successfullycompletingthe sensormatchingprocess.See "TPMSSensorMatching Process"laterinthissection.
- OneormoreTPMSsensorsare missingordamaged. The malfunctionlightandtheDIC messageshouldgooffwhenthe TPMSsensorsareinstalledand thesensormatchingprocessis performedsuccessfully.See yourdealerforservice.
- Replacementtiresorwheelsdo notmatchtheoriginalequipment tiresorwheels.Tiresandwheels otherthanthoserecommended couldpreventtheTPMSfrom functioningproperly.SeeBuying NewTiresonpage10-49.
- Operatingelectronicdevicesor beingnearfacilitiesusingradio wavefrequenciessimilartothe TPMScouldcausetheTPMS sensorstomalfunction.
If the TPMS is not functioning properly, it cannot detectorsignala lowtirecondition. Seeyourdealer
forserviceiftheTPMSmalfunction lightandDICmessagecomeson andstayson.
TPMSSensorMatching Process
EachTPMSsensorhasaunique identificationcode. Theidentification codeneedstobematchedtoanew tire/wheelpositionafterrotatingthe tiresorreplacingoneormoreofthe TPMSsensors. TheTPMSsensor matchingprocessshouldalsobe performedafterreplacingaspare tirewitharoadtirecontainingthe TPMSsensor. Themalfunctionlight andtheDICmessageshouldgooff atthenextignitioncycle. The sensorsarematchedtothetire/ wheelpositions, usingaTPMS relearntool, inthefollowingorder: driversidefronttire, passengerside fronttire, passengersidereartire, anddriversiderear. Seeyour dealerforserviceortopurchasea relearntool.
There are two minutes to match the first tire/wheel position, and five minutes overall to match all four tire/wheel positions. If it takes longer, them matching process stops and must be restarted.
The TPMSsensormatching process is outlined below:
- Settheparkingbrake.
- TurntheignitiontoON/RUNwith theengineoff.
- PresstheRemoteKeylessEntry (RKE) transmitter's LOCK and UNLOCK buttons at the same time for approximately five seconds. The hornsounds twicetosignalthereceiver is in relearn mode and TIRE LEARNINGACTIVE message displays on the DIC screen.
- Startwiththedriverside fronttire.
- Placetherelearntoolagainst thetiresidewall, nearthevalve stem. Thenpressthebuttonto activatetheTPMSsensor.
Ahornchirpconfirmsthatthe sensoridentificationcodehas beenmatchedtothistireand wheelposition.
-
Proceed to the passengerside front tire, and repeat the procedure in Step 5.
-
Proceed to the passengerside reartire, and repeat the procedure in Step 5.
-
Proceedtothedriversiderear tire, andrepeattheprocedure in Step5. Thehornsoundstwo timestoindicate the sensor identificationcode has been matched to the driversiderear tire, and the TPMS sensor matching process is no longer active. The TIRELEARNING ACTIVE message on the DIC displayscreengoesoff.
-
TurntheignitiontoLOCK/OFF.
-
Set all four tiresto the recommended air pressure level as indicated on the Tire and Loading Information label.
-
Putthevalvecapsbackonthe valvestems.
TireInspection
Werecommendthatthetires, includingthesparetire,ifthe vehiclehasone,beinspected forsignsofwearordamageat leastonceamonth.
Replacethetireif:
• Theindicatorsatthreeor moreplacesaroundthetire canbeseen.
- Thereiscordorfabric showingthroughthetire's rubber.
- Thetreadorsidewallis cracked, cut, orsnagged deepenoughtoshowcordor fabric.
- Thetirehasabump, bulge, orsplit.
- Thetirehasapuncture, cut, orotherdamagethatcannot berepairedwellbecauseof thesizeorlocationofthe damage.
TireRotation
Tiresshouldberotatedevery 12000km(7,500mi).See MaintenanceScheduleon page11-3.
Tiresarerotatedtoachievea uniformwearforalltires. The firstrotationisthemost important.
Anytimeunusualwearis noticed,rotatethetiresassoon aspossible,checkforpropertire inflationpressure,andcheckfor damagedtiresorwheels.Ifthe unusualwearcontinuesafterthe rotation,checkthewheel
alignment. See When It Is Time for New Tires on page 10-48 and Wheel Replacement on page 10-53.
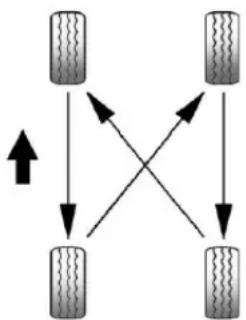
flowchart
graph TD
    A["Vehicle 1"] --> B["Vehicle 2"]
    B --> C["Vehicle 3"]
    C --> D["Vehicle 4"]
    D --> A
    A --> E["Vehicle 5"]
    B --> E
    C --> E
    D --> E
Usethisrotationpatternwhen rotatingthetires.
If the vehicle has a compact spare tire, donot include it in the tirerotation.
Adjustthefrontandreartiresto therecommendedinflation pressureontheTireand
LoadingInformationlabelafter thetireshavebeenrotated.See TirePressureonpage10-41 and VehicleLoadLimitson page9-9.
Resetthe TirePressureMonitor System.See TirePressure MonitorOperation on page 10-44.
Check that all wheel nuts are properly tightened. See "Wheel Nut Torque" under Capacities and Specifications on page 12-2.

WARNING
Rustordirtonawheel, oronthe partstow whichitisfastened, can makewheelnutsbecomeloose aftertime. Thewheel could come off and cause an accident. When changingawheel, remove any rustordirt from places where the
(Continued)
WARNING(Continued)
wheelattachestothevehicle.In anemergency,aclothorapaper towelcanbeused;however,use ascaperorwirebrushlaterto removeallrustordirt.
Lightlycoatthecenterofthe wheelhubwithwheelbearing greaseafterawheelchangeor tirerotationtopreventcorrosion orrustbuild-up.Donotget greaseontheflatwheel mountingsurfaceoronthe wheelnutsorbolts.
Checkthatthesparetire,ifthe vehiclehasone,isstored properly.Push,pull,andthentry torotateorturnthetire.lfit moves,tightenthecable.See TireChangingonpage10-56.
WhenItIsTimeforNew Tires
Factors such as maintenance, temperatures, drivingspeeds, vehicleloading, and road conditions affect the wear rate of the tires.
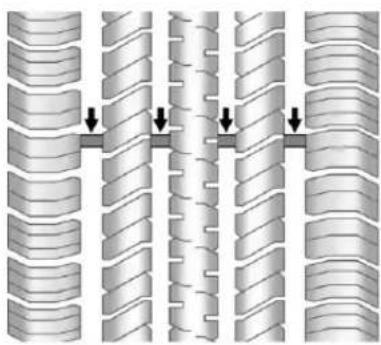
natural_image
Diagram of interlocking cylindrical structures with directional arrows indicating movement or force (no text or symbols)Treadwearindicatorsareonewayto tellwhenitistimefornewtires. Treadwearindicatorsappearwhen thetireshaveonly1.6mm(1/16in) orlessoftreadremaining.See Tire Inspectiononpage 10-47and Tire Rotationonpage 10-47.
Therubberintiresagesovertime. Thisalsoappliestothesparetire, ifthevehiclehasone, evenifitis neverused. Multiplefactors includingtemperatures, loading conditions, andinflationpressure maintenanceaffecthowfastaging takesplace. GMrecommendsthat tires, includingthespareif equipped, bereplacedaftersix years, regardlessoftreadwear. The tiremanufacturerdateisthelast fourdigitsoftheDOTTire IdentificationNumber(TIN)whichis moldedintoonesideofthetire sidewall. Thefirsttwodigits representtheweek(01–52)andthe lasttwodigits, theyear. For example, thethirdweekoftheyear 2010wouldhaveafour-digitDOT dateof0310.
VehicleStorage
Tiresagewhenstorednormally mountedonaparkedvehicle.Park avehiclethatwillbestoredforat leastamonthinacool,dry,clean areaawayfromdirectsunlightto
slowaging. This are should be free of grease, gasoline, or other substance that candeteriorate rubber.
Parkingforanextendedperiodcan causeflatspotsonthetiresthat mayresultinvibrationswhile driving. Whenstoringvehiclefor atleastamonth,removethetiresor raisethevehicletoreducethe weightfromthetires.
BuyingNewTires
GMhasdevelopedandmatched specifictiresforthevehicle.The originalequipmenttiresinstalled werdesignedtomeetGeneral MotorsTirePerformanceCriteria Specification(TPCSpec) systemrating.When replacementtiresareneeded, GMstronglyrecommends buyingtireswiththesameTPC Specrating.
GM's exclusive TPCSpec system considers over a dozen critical specification that impact the overall performance of the vehicle, including brakesystem performance, ride and handling, traction control, and tire pressure monitoring performance. GM's TPCSpec number is molded onto the tire's sidewall near the tiresize. If the tires have an all-season tread design, the TPCSpec number will be followed by MS form mud and snow. See Tire Sidewall Labeling on page 10-36.
GMrecommendsreplacingworn tiresincompletesetsoffour. Uniformtreaddepthonalltires willhelptomaintainthe performanceofthevehicle. Brakingandhandling performancemaybeadversely affectedifallthetiresarenot replacedatthesametime.
If proper rotation and maintenance have been done, all four tiress should wear out at about the same time. See Tire Rotation on page 10-47 for information on propertire rotation. However, if it is necessary to replace only one axleset of worntires, placethe new tires on therearaxle.
Wintertireswiththesamespeed ratingastheoriginalequipment tiresmaynotbeavailableforH, V,W,YandZRspeedrated tires.Neverexceedthewinter tire'smaximumspeedcapability whenusingwintertireswitha lowerspeedrating.

WARNING
Tirescouldexplodeduring improperservice.Attempting tomountordismountatire
(Continued)
WARNING(Continued)
couldcauseinjuryordeath. Onlyyourdealerorauthorized tireservicecentershould mountordismountthetires.

WARNING
Mixingtiresofdifferentsizes, brands,ortypesmaycause lossofcontrolofthevehicle, resultinginacrashorother vehicledamage. Use the correctsize,brand,andtype oftiresonallwheels.

WARNING
Usingbias-plytiresonthe vehiclemaycausethewheel rimflangestodevelopcracks (Continued)
WARNING(Continued)
aftermanymilesofdriving. Atireand/orwheelcouldfail suddenlyandcauseacrash. Useonlyradial-plytireswith thewheelsonthevehicle.
If the vehicle tires must be replaced with atire that does not have a TPCSpec number, make sure they are these sizesize, load range, speed rating, and construction (radial) as the original tires.
Vehiclesthathaveatire pressuremonitoringsystem couldgiveaninaccurate low-pressurewarningifnon-TPC Specratedtiresareinstalled. See TirePressureMonitor Systemonpage10-43.
The Tire and Loading Information label indicates the originalequipment tires on the vehicle. See Vehicle Load Limits on page 9-9.
DifferentSizeTiresand Wheels
Ifwheelsortiresareinstalledthat areadifferentsizethantheoriginal equipmentwheelsandtires,vehicle performance,includingitsbraking, rideandhandlingcharacteristics, stability,andresistancetorollover maybeaffected.Ifthevehiclehas electronicsystemssuchasantilock brakes,rolloverairbags,traction control,electronicstabilitycontrol, orAll-WheelDrive,theperformance ofthesesystemscanalsobe affected.
WARNING
If different-sized wheels are used, theremay not bean acceptable level of performance and safety if tires not recommended forth those wheels are selected. This increases the chance of a crash and serious injury. Only use GM specific wheel and tires systems developed for the vehicle, and havethem properly installed by a GM certified technician.
SeeBuyingNewTireson page10-49andAccessoriesand Modificationsonpage10-3.
UniformTireQuality Grading
Qualitygradescanbefound whereapplicableonthetire sidewallbetweentreadshoulder andmaximumsectionwidth. For example:
Treadwear200TractionAA TemperatureA
The following information relates to the system developed by the United States National Highway Traffic Safety Administration (NHTSA), which gradestires by treadwear, traction, and temperature performance. This applies only to vehicle less sold in the United States. The grades are molded on the sidewall of most passenger cartires. The Uniform Tire Quality Grading (UTQG) system does not apply to depthread, wintertires, compact sparetires, tires with
nominalrimdiameters of 10 to 12 inches (25 to 30 cm), ortosomelimited-production tires.
While the tires available on General Motors passengers cars and light trucks may vary with respect to these grades, they must also conform to federal safety requirements and additional General Motors Tire Performance Criteria (TPC) standards.
All Passenger Car Tires Must Conform to Federal Safety Requirements In Addition To These Grades.
Treadwear
Thetreadweargradeisa comparativeratingbasedonthe wearrateofthetirewhentested undercontrolledconditionsona specifiedgovernmenttest course.Forexample,atire
graded150wouldwearoneand one-half(1½)timesaswellon thegovernmentcourseasatire graded100. Therelative performanceoftiresdepends upontheactualconditionsof theiruse,however,andmay departsignificantlyfromthe normduetovariationsindriving habits,servicepracticesand differencesinroad characteristicsandclimate.
Traction-AA,A,B,C
Thetractiongrades, from highest to lowest, are AA, A, B, and C. Those grades represent the tire's ability to stop on wet pavement as measured under controlled condition on specified government test surfaces of asphalt and concrete. Atiremarked C may have poor traction performance. Warning: The traction grade assigned to histire is based on
straight-aheadbrakingtraction tests, and does not include acceleration, cornering, hydroplaning, or peakaktraction characteristics.
Temperature-A,B,C
ThetemperaturegradesareA (thehighest), B, and C, representing the tire's resistance to the generation of heat and its ability to dissipate heat when tested under controlled condition as specified indoor laboratory test wheel. Sustained hightemperature can cause the material of the tire to degenerate and reduce tire life, and excessiv temperature can lead to sudden tire failure. The grade C corresponds to a level of performance which all passenger cartires must meet under the Federal Motor Safety Standard No. 109. Grades Band Are present higher level sof
performanceonthelaboratory testwheelthanthemminimum requiredbylaw.Warning:The temperaturegradeforthistireis establishedforatirethatis properlyinflatedandnot overloaded.Excessivespeed, underinflation,orexcessive loading,eitherseparatelyorin combination,cancauseheat buildupandpossibletirefailure.
WheelAlignmentandTire Balance
Thetiresandwheelswerealigned andbalancedatthefactoryto providethelongesttirelifeandbest overallperformance.Adjustmentsto wheelalignmentandtirebalancing willnotbenecessaryonaregular basis.However,checkthe alignmentifthereisunusualtire wearorifthevehicleispullingto onesideortheother.Ifthevehicle vibrateswhendrivingonasmooth
road, the tires and wheels might need to be rebalanced. See your dealer for proper diagnosis.
WheelReplacement
Replaceanywheelthatisbent, cracked,orbadlyrustedor corroded.Ifwheelnutskeepcoming loose,thewheel,wheelbolts,and wheelnutsshouldbereplaced. Ifthewheelleaksair,replaceit. Somealuminumwheelscanbe repaired.Seeyourdealerifanyof theseconditionsexist.
Yourdealerwillknowthekindof wheelthatisneeded.
Eachnewwheelshouldhavethe sameload-carryingcapacity, diameter,width,offset,andbe mountedthesamewayastheoneit replaces.
Replacewheels, wheelbolts, wheel nuts, or Tire Pressure Monitor System (TPMS) sensors with new GM originalequipment parts.
WARNING
Using the wrong replacement wheels, wheel bolts, or wheel nutscan be dangerous. It could affect the braking and handling of the vehicle. Tirescan lose air, and cause loss of control, causing a crash. Always use the correct wheel, wheel bolts, and wheel nuts for replacement.
Notice: The wrong wheel can also cause problems with bearing life, brake cooling, speedometer orodometeralibration, headlampaim, bumper height, vehicleground clearance, and tire ortirechain clearance to the body and chassis.
UsedReplacementWheels

WARNING
Replacingawheelwithaused oneisdangerous.Howithas beenusedorhowfarithasbeen drivenmaybeunknown.Itcould failsuddenlyandcauseacrash. Whenreplacingwheels,usea newGMoriginalequipment wheel.
TireChains

WARNING
Donotusetirechains. Thereis notenoughclearance. Tirechains usedonavehiclewithoutthe properamountofclearancecan causedamagetothebrakes, suspension,orothervehicle
(Continued)
WARNING(Continued)
parts. The areadamaged by the tirechains could cause loss of control and acrash.
Useanothertypeoftraction deviceonlyifitsmanufacturer recommendsitforthevehicle's tiresizecombinationandroad conditions.Followthat manufacturer'sinstructions.To avoidvehicledamage,driveslow andreadjustorremovethe tractiondeviceifitcontactsthe vehicle.Donotspinthewheels. Iftractiondevicesareused,install themonthefronttires.
IfaTireGoesFlat
Itisunusualforatiretoblowout whiledriving,especiallyifthetires aremaintainedproperly.See Tires onpage10-34.Ifairgoesoutofa tire,itismuchmorelikelytoleak outslowly.Butifthereeverisa blowout,hereareafewtipsabout whattoexpectandwhattodo:
Ifafronttirefails, theflattire createsadragthatpullsthevehicle towardthatside. Takeyourfootoff theacceleratorpedalandgripthe steeringwheelfirmly. Steerto maintainlaneposition, and then gentlybraketoastop, welloffthe road, if possible.
Arearblowout, particularlyona curve, actsmuchlikeaskid and mayrequirethesamecorrectionas usedinaskid. Stoppressing the acceleratorpedalandsteerto straightenthevehicle. It maybe verybumpyandnoisy. Gentlybrake toastop, wellofftheroad, if possible.

WARNING
Drivingonaflattirewillcause permanentdamagetothetire. Re-inflatingatireafterithasbeen drivenonwhileseverely underinflatedorflatmaycausea blowoutandaseriouscrash. Neverattempttore-inflateatire thathasbeendrivenonwhile severelyunderinflatedorflat. Haveyourdealeroranaauthorized tireservicecenterrepairor replacetheflattireassoonas possible.

WARNING
Liftingvehicleandgettingunder ittodomaintenanceorrepairsis dangerouswithoutthe appropriatesafetyequipmentand training.Ifajackisprovidedwith thevehicle,itisdesignedonlyfor (Continue
WARNING(Continued)
changingaflattire.lfitisusedfor anythingelse,youorotherscould bebadlyinjuredorkilledifthe vehicleslipsoffthejack.lfajack isprovidedwiththevehicle,only useitforchangingaflattire.
Ifatiregoesflat, avoidfurthertire andwheeldamagebydrivingslowly toalevelplace, wellofftheroad, ifpossible. Turnonthehazard warningflashers.SeeHazard WarningFlashersonpage6-4.

WARNING
Changingatirecanbe dangerous. The vehiclecanslip off the jack and rollover or fall causing injury or death. Find a level placeto changethe tire. To help prevent the vehicle from moving:
(Continued)
WARNING(Continued)
- Settheparkingbrakefirmly.
- Putanautomatic transmission in P(Park) or a manual transmission in 1(First) or R(Reverse).
- Turnofftheengineanddo notrestartwhilethevehicle israised.
- Donotallowpassengersto remaininthevehicle.
- Placewheelblockson both sidesofthetireatthe oppositecornerofthetire beingchanged.
Whenthevehiclehasaflattire(2), usethefollowingexampleasa guidetoassistintheplacementof thewheelblocks(1).
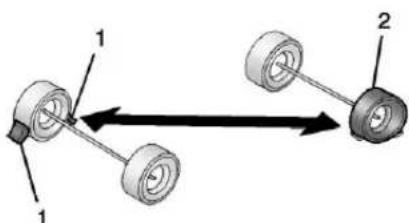
flowchart
graph TD
    A["Component 1"] --> B["Component 2"]
    A --> C["Component 1"]
    B --> D["Component 2"]
    style A fill:#f9f,stroke:#333
    style B fill:#ccf,stroke:#333
    style C fill:#cfc,stroke:#333
- WheelBlock
2.FlatTire
The following information explains how to repair or change atire.
TireChanging
RemovingTools
Thetoolsneededtoremovethe spareirearelocatedinthestorage compartmentonthedriverside,at therearofthevehicle.
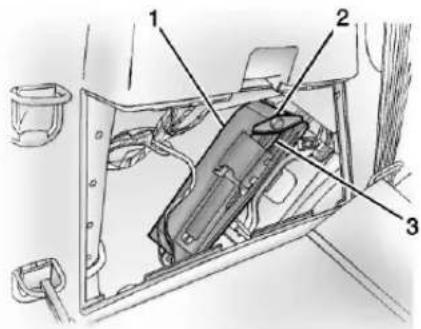
- ToolBag
2.WingBolt
3.Jack
-
Openthejackstorage compartmentbypullingonthe latchtab, locatedtowardtherear ofthevehicle, andpullingthe coveroff.
-
Removethewingbolt(2) by turningitcounterclockwise.
-
Pushthejack(3)upoutofthe holdingbracketandremovethe toolbag(1).
-
Turnthejackonitsside, with the bottomfacingtowardyou.
-
Pullthejackstraightout, bottom first.
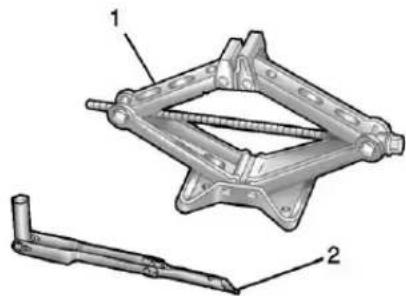
natural_image
Technical illustration of a mechanical clamp assembly with labeled parts (1 and 2), no text or symbols present.-
Jack
-
Wrench(Three-PieceShown, One-PieceSimilar)
Thetoolsyouwillbeusinginclude thejack(1)andwrench(2).
RemovingtheSpareTire
Thecompactsparetireislocated underthevehicle,infrontoftherear bumper.SeeCompactSpare Tire onpage 10-64formoreinformation.
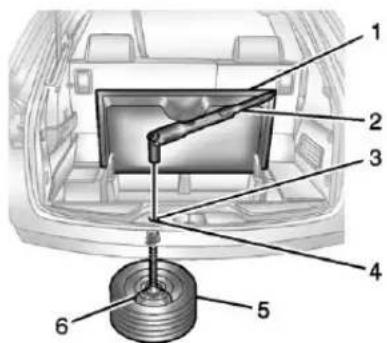
- RearConvenienceCenter
- Wrench(Three-PieceShown, One-PieceSimilar)
3.CarpetCutout
4.HoistShaft -
CompactSpareTire
6.Retainer -
Openthestoragecompartment dooroftheconvenience center(1)thatisnearestthe liftgate.
- Openthecarpetcutout(3)that islocatedthroughtheholeofthe storagecompartment.
- Attachthewrench(2) into the hoistshaft(4).
- Turnthewrench(2) counterclockwisetolowerthe sparetire(5)totheground. Continueturningthewrenchuntil thesparetirecanbepulledout fromunderthevehicle.
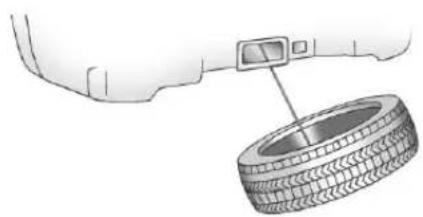
natural_image
Diagram of a car tire mounted on a vehicle, with a digital camera attached to the wheel (no text or symbols present)- Tilttheretainerandslipit throughthewheelopeningto removethesparetirefromthe cable.
6.Turnthewrenchclockwiseto raisethecablebackupafter removingthesparetire. Donotstoreafull-sizeoraflat roadtireunderthevehicle.See "StoringtheSpareTire"and "StoringtheFlatTire"laterinthis section.
RemovingtheFlatTireand InstallingtheSpareTire
- Doasafetycheckbefore proceeding. See Ifa Tire Goes Flatonpage 10-54 form more information.
10-58VehicleCare
- If the vehicle has a wheel cover, loosenthe plastic nut cap with the wheel wrench. They will not come off. Then, using the flat end of the wheel wrench, pry along the edge of the cover until it comes off. Becareful; the edges may be sharp. Donottry to remove the cover with your bare hands.
Storethewheelcoversecurely intherearofthevehicleuntil youhavetheflattirerepairedor replaced.
If the vehicle has a aluminum wheels, removethewheel nut caps using the wheel wrench.
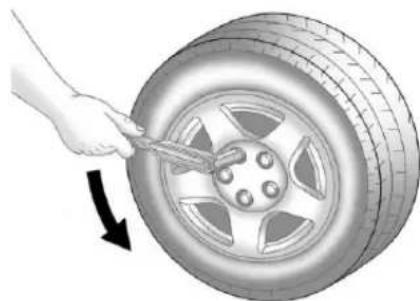
natural_image
Illustration of a hand using a tool to trim a tire, with a black arrow indicating clockwise motion (no text or symbols)- Loosenthewheelnuts—butdo notremovethem—using the wrench. For wheels with a wheel lock key, usethewheellock key between the lock nut and wrench. The key is supplied in the front passenger door pocket.
Notice: If this vehicle has wheel locks and an impact wrench is used to remove the wheel nuts, the lock nutor wheel lock key could be damaged. Donot use an impact wrench to remove the wheel nuts if this vehicle has wheel locks.
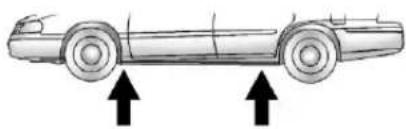
natural_image
Side view of a car with two upward arrows indicating motion or force direction (no text or symbols)- Toidentifytheappropriate jackinglocation, findthetriangle orrectangularnotchabout 30.5cm(12in)fromthefronttire orabout27cm(10.5in)fromthe reartire.
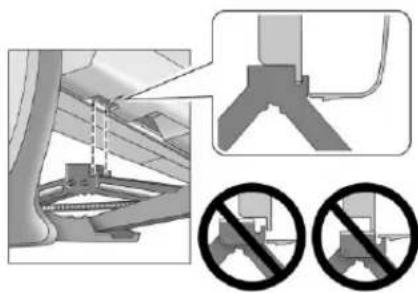
natural_image
Mechanical assembly diagram showing pipe connection and two prohibition symbols (no text or labels)TriangleShown, Without Similar
Thetrianglemaybelocated neareachwheelonthevehicle's exterior.
Notice: If a jack is used to raise the vehicle without positioning it correctly, the vehicle could be damaged. When raising the vehicle on a jack, avoid contact with therear axle control arms.
-
Attachthewrenchtothejack, andturnthewrenchclockwiseto raisethejackhead7.6cm(3in).
-
Donotraisethevehicleyet. Put thecompactsparetirenearyou.
WARNING
Gettingunderavehiclewhenitis liftedonajackisdangerous. Ifthevehicleslipsoffthejack, youcouldbebadlyinjuredor killed.Nevergetunderavehicle whenitissupportedonlyby ajack.
WARNING
Raisingthevehiclewiththejack improperlypositionedcan damagethevehicleandeven makethevehiclefall. To help avoidpersonalinjuryandvehicle damage, besuretofitthejacklift headintotheproperlocation beforeraisingthevehicle.
-
Raisethevehiclebyturningthe wrenchclockwiseinthejack. Raisethevehiclefarenoughoff thegroundsothatthereis enoughroomforthesparetireto fitunderthewheelwell.
-
Remove all the wheel nuts and the flattire.
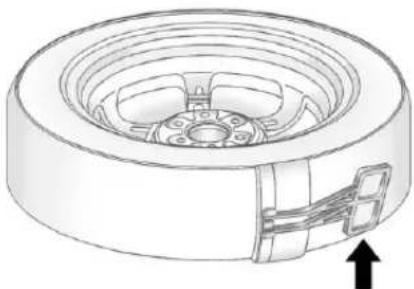
natural_image
Technical line drawing of a mechanical bearing assembly (no text or symbols)- Removetheplasticsparetire heatshieldbypullingtherubber latch. Storetheplasticsparetire heatshield. See "Storingthe SpareTire" laterinthissection formoreinformation.

WARNING
Rustordirtonawheel, oronthe partstow whichitis fastened, can makewheel nuts become loose after time. The wheel could come off and cause an accident. When changing a wheel, remove any rustordirt from places where the wheel attach the vehicle. In an emergency, aclothorapaper towel can be used; however, use ascraper or wire brush laterto remove all rustordirt.

WARNING
Neveruseoilorgreaseonbolts ornutsbecausethenutsmight comeloose. The vehicle's wheel could falloff, causing acrash.
-
Remove any rustordirt from the wheel bolts, mounting surfaces, and spare wheel.
-
Placethesparetire on the wheelmountingsurface.
-
Putthenutsonbyhandby turningthemclockwiseuntilthe wheelisheldagainstthe mountingsurface.Makesure theroundedendistowardthe wheel.
-
Lowerthevehiclebyattaching thewrenchtothejackand turningthewrench counterclockwise. Lowerthe jackcompletely.

WARNING
Wheelnutsthatareimproperlyor incorrectlytightenedcancause thewheelstobecomelooseor comeoff. Thewheelnutsshould betightenedwithatorquewrench (Continued)
WARNING(Continued)
tothepropertorquespecification afterreplacing.Followthetorque specificationsuppliedbythe aftermarketmanufacturerwhen usingaccessorylockingwheel nuts.SeeCapacitiesand Specificationsonpage12-2for originalequipmentwheelnut torquespecifications.
Notice: Improperlytightened wheelnutscanleadtobrake pulsationandrotordamage. To avoidexpensivebrakerepairs, evenlytightenthewheelnutsin thepropersequenceandtothe propertorquespecification. See CapacitiesandSpecificationson page12-2forthewheelnut torquespecification.
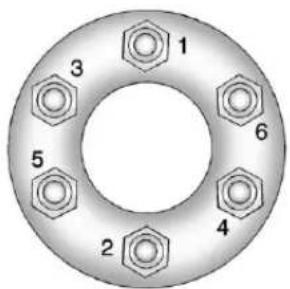
- Tightenthewheelnutsfirmly in acrisscrosssequence, as shown.
Notice: Wheelcoverswillnotfit onthevehicle'scompactspare. Ifyoutrytoputawheelcoveron thecompactspare, thecoveror thesparecouldbedamaged.
StoringtheSpareTire

WARNING
Theunderbody-mountedspare tireneedstobestoredwiththe valvestempointingdown.Ifthe sparetireisstoredwiththevalve stempointingupwards,the secondarylatchwillnotwork properlyandthesparetirecould loosenandsuddenlyfallfromthe vehicle.Ifthishappenedwhen thevehiclewasbeingdriven,the tiremightcontactapersonor anothervehicle,causinginjury anddamagetoitself.Besurethe underbody-mountedsparetireis storedwiththevalvestem pointingdown.

WARNING
Storingajack, atire, orother equipment in the passenger compartment of the vehicle could cause injury. In sudden stop or collision, loose equipment could strike someone. Store all these in the proper place.
Tostorethesparetire:
- Laythecompactsparetirenear therearofthevehiclewiththe valvestemdown.
- Reinstall the plasticsparetire heat shield on the compact spare tire.
3.Slidetheableretainerthrough thecenterofthewheelandstart toraisethecompactsparetire. Makesuretheretainerisfully seatedacrosstheundersideof thewheel.
10-62VehicleCare
- Whenthecompactsparetireis almostinthestoredposition, turnthetiresothevalveis towardtherearofthevehicle.
Thispositionhelpswhen checkingtheairpressureinthe compactsparetire.
- Raisethetirefullyagainstthe undersideofthevehicle. Continueturningthewrenchuntil youfeelmorethantwoclicks. Thisindicatesthatthecompact sparetireissecureandthe cableistight. Thesparetire hoistcannotbeovertightened.
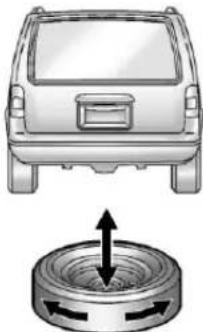
natural_image
Illustration of a car rear view and its internal mechanical component with directional arrows (no text or symbols)- Makesurethetireisstored securely.Push, pull, and thentry to turn the tire. If the tire removes, usethewrench to eight the cable.
StoringtheFlatTire
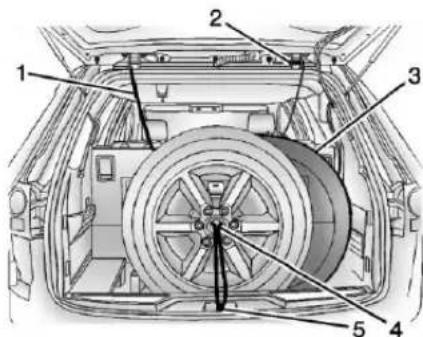
1.Cable
2.LiftgateHinges
-
Spare Tire Heat Shield
-
CenteroftheWheel
-
DoorStriker
-
Removethecablepackagefrom thejackstoragearea.
-
Removethesmallcentercapby tappingthebackofthecapwith theextensionoftheshaft,ifthe vehiclehasaluminumwheels.
-
Puttheflattireintherear storageareawiththevalvestem pointingtowardtherearofthe vehicle.
- Pull the cable (1) through the door striker (5), the center of the wheel (4), and the plastics spare tire heat shield (3), as shown.
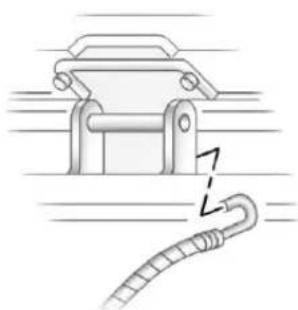
natural_image
Diagram of a mechanical clamp or bracket with a hanging cable, no text or symbols present- Hookthecableontotheoutside portionoftheliftgatehinges(2).
-
Hooktheotherendofthecable ontotheoutsideportionofthe liftgatehingeontheothersideof thevehicle.
-
Pullonthecabletomakesureit issecure.
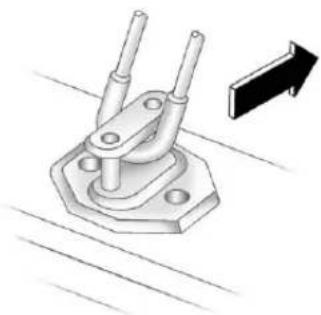
natural_image
Mechanical component with two rods mounted on a hexagonal base, showing a right-pointing arrow (no text or symbols)- Makesurethemetaltubeis centeredatthestriker. Push the tubetowardthefrontofthe vehicle.
- Closetheliftgateandmakesure itislatchedproperly.
StoringtheTools
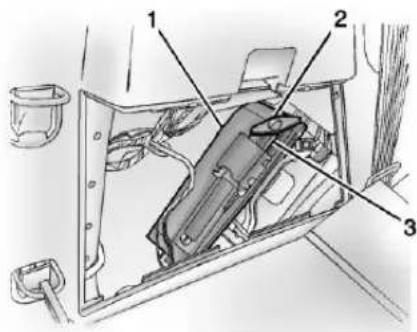
- ToolBag
2.WingBolt
3.Jack
Putbackalltoolsastheywere storedinthejackstorage compartmentandputthe compartmentcoverbackon.
- Ensure that the bottom of the jack is facing toward you.
-
Replacethetoolbag(1).
-
Turnthejack(3)onitssideand placedownontheholding bracket.
- Reinstallthewingbolt(2) by turningclockwise.
- Toreplacethecover, lineupthe tabatthefrontofthecoverwith thenotchinthecoveropening. Pushthecoverinplaceand makesurethattherearclipsare intheslotsandpushthecover closed.
Storethecentercaportheplastic bolt-onwheelcoversuntilafullsize tireisputbackonthevehicle.When youreplacethecompactsparewith afull-sizetire,reinstallthebolt-on wheelcoversorthecentercap. Hand-tightenthemoverthewheel nuts,usingthewrench.
CompactSpareTire
WARNING
Drivingwithmorethanone compactsparetireatatimecould resultinlossofbrakingand handling. Thiscouldleadtoa crashandyouorotherscouldbe injured. Useonlyonecompact sparetireatatime.
If this vehicle has a compact spare tire, it was fully inflated when new; however, it can lose airovertime. Check the inflation pressure regularly. It should be 420 kPa (60 psi).
Stopassoonaspossibleandcheck thatthesparetireiscorrectly inflatedafterbeinginstalledonthe vehicle. Thecompactsparetireis designedfortemporaryuseonly. Thevehiclewillperformdifferently withthesparetireinstalledanditis recommendedthatthevehicle speedbelimitedto80km/h (50mph).Toconservethetreadof thesparetire,havethestandardtire repairedorreplacedassoonas convenientandreturnthesparetire tothestoragearea.
Notice: Whenthecompactspare is installed, donottakethe vehiclethroughanautomaticcar washwithguiderails. The compactsparecangetcaughton therailswhichcandamagethe tire, wheel, and otherpartsofthe vehicle.
Donotusethecompactspareon othervehicles.
Donotmixthecompactsparetireor wheelwithotherwheelsortires. Theywillnotfit.Keepthesparetire anditswheeltogether.
PerformanceoftheAll-Wheel Drive(AWD)systemwillbe automaticallyreducedtoprotectthe systemwhenusingthecompact spare.TorestoretheAWDand preventexcessiveewearonthe clutchintheAWD,replace the compactsparetirewithafull-size tireassoonaspossible.
Notice: Tirechains will not fit the compact spare. Using them can damage the vehicle and the chains. Donot usetirechainson the compact spare.
JumpStarting
Formoreinformationaboutthe vehiclebattery,seeBatteryon page10-22.
Ifthevehiclebatteryhasrundown, youmaywanttouseanother vehicleandsomejumpercablesto startyourvehicle.Besuretouse thefollowingstepstodoitsafely.

WARNING
Batteriescanhurtyou. They can be dangerous because:
• They contain acid that can burn you.
• Theycontaingasthatcan explodeorignite.
• They contain enough electricity to burn you.
If you donot follow these steps exactly, some or all of these things can hurt you.
Notice: Ignoring the seven steps could result in costly damage to the vehicle that would not be covered by the warranty.
Trying to start the vehicle by pushing or pulling it will not work, and it could damage the vehicle.
- Check the other vehicle. It must have a 12-volt battery with a negative ground system.
Notice: Only use vehicle that has a 12-voltsystem with a negative ground for jump starting. If the other vehicle does not have a 12-voltsystem with a negative ground, both vehicles can be damaged.
- Getthevehiclescloseenough sothejumpercablescanreach, butbesurethevehiclesarenot touchingeachother. If they are, it could cause a ground connection you donot want. You would not be able to start your vehicle, and the bad grounding could damage the electrical systems. To avoid the possibility of the vehicles rolling, set the parking brake firmly on both vehicles involved in the jump start procedure. Put an automatic transmission in P (Park) or a manual transmission in Neutral before setting the parking brake. If one of the vehicles is a four-wheel-drive vehicle, besure the transfer case is not in Neutral.
Notice:Ifanyaccessoriesareleft onorpluggedinduringthejump startingprocedure,theycouldbe damaged.Therepairswouldnot recoveredbythevehicle warranty.Wheneverpossible,
turnofforunplugallaccessories oneithervehiclewhenjump startingthevehicle.
-
Turnofftheignitiononboth vehicles. Unplugunnecessary accessoriespluggedinto the cigarettelighterortheaccessory poweroutlets. Turnofftheradio andallampsthatarenot needed. Thiswillavoidsparks andhelpsavebothbatteries. Anditcouldsavetheradio!
-
Open the hoods and loc at the positive(+)and negative(-) terminal allocations on the other vehicle. Your vehicle has a remote positive(+) and are remote negative(-) jump starting terminal. See Engine Compartment Overview page 10-5 for the terminal locations.

WARNING
Usingamatchnearabatterycan causebatterygastoexplode. Peoplehavebeenhurtdoingthis, andsomehavebeenblinded. Useaflashlightifyouneedmore light.
Besurethebatterieshave enoughwater. Youdonotneedto addwatertotheACDelco® battery (orbatteries) installed in yournewvehicle. Butifabattery hasfillercaps, besuretheright amountoffluidisthere. Ifitislow, addwatertotakecareofthat first. If youdonot, explosivegas could be present.
Batteryfluidcontainsacidthat canburnyou.Donotgetiton you.Ifyouaccidentallygetitin youreyesoronyourskin,flush theplacewithwaterandget medicalhelpimmediately.
WARNING
Fansorothermovingengine partscaninjureyoubadly.Keep yourhandsawayfrommoving partsoncetheengineisrunning.
- Check that the jumpercables do nothavelooseormissing insulation. If they do, you could get shock. The vehicles could be damaged too.
Beforeyouconnectthecables, herearesomebasicthingsyou shouldknow.Positive(+)willgo topositive(+)ortoaremote positive(+)terminalifthevehicle hasone.Negative(-)willgotoa heavy, unpaintedmetalengine partortoaremotenegative(-) terminalifthevehiclehasone.
Donotconnectpositive(+)to negative(-)oryouwillgeta shortthatwoulddamagethe batteryandmaybeotherparts too.Anddonotconnectthe negative(-)cabletothe negative(-)terminalonthedead batterybecausethiscancause sparks.
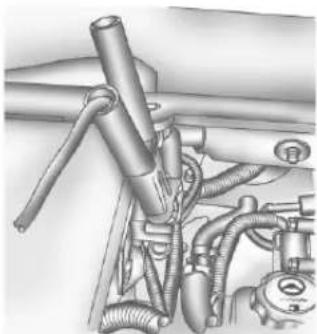
natural_image
Mechanical assembly diagram showing hoses and components (no text or labels)- Connecttheredpositive(+) cabletothepositive(+)terminal ofthedeadbattery.
Usearemotepositive(+) terminalifthevehiclehasone.
- Donotlettheotherendtouch metal. Connectittothe positive(+)terminalofthegood battery. Usearemote positive(+)terminalifthevehicle hasone.
8.Nowconnecttheblack negative(-)cabletothe negative(-)terminalofthegood battery.Usearemote negative(-)terminalifthe vehiclehasone.
Donotlettheotherendtouch anythinguntilthenextstep. The otherendofthenegative(-) cabledoesnotgotothedead battery.Itgoestoaheavy, unpaintedmetalenginepart, ortoaremotenegative(-) terminalonthevehiclewiththe deadbattery.
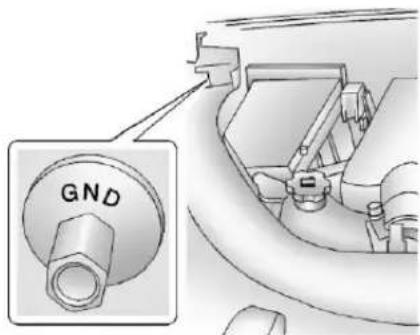
- Connect the other end of the negative (-) cable at least 45 cm (18 in) away from the dead battery, but not a re engine part that move.
Theelectricalconnectionisjust asgoodthere,andthechance ofsparksgettingbacktothe batteryismuchless.
Yourvehiclehasaremote negative(−)terminalforthis purpose.
-
Now start the vehicle with the good battery and run the engine for awhile.
-
Trytostartthevehiclethathad thedeadbattery.lfitwillnot startafterafewtries, it probablyneedsservice.
Notice: If the jumpercables are connected or removed in the wrong order, electrical shorting may occur and damage the vehicle. There pairs would not be covered by the vehicle warranty. Always connect and remove the jumpercables in the correct order, makingsure that the cables donottouche achother or other metal.
JumperCableRemoval
Reversethesequenceexactlywhen removingthejumpercables.
Towing
TowingtheVehicle
Notice: Incorrectly towinga disabled vehicle may cause damage. The damage would not be covered by the vehicle warranty. Donotlashorhook to the chassis components including the front and rear subframes, suspension control arms and links during towing and recovery of a disabled vehicle or to secure the vehicle to a flatbed car carrier. Use the proper nylon strapharnesses around the tires to secure the flatbed car carrier.
Havethevehicletowedonaflatbed carcarrierorawheellifttowtruck. Ifawheellifttowtruckisused, the drivewheels cannot contact the roadwhilethevehicleisbeing towed. Awheeldollymustbeused toliftalldrivewheelsofftheground.
Consultyourdealerora professionaltowingserviceifthe disabledvehiclemustbetowed.
Totowthevehiclebehindanother vehicleforrecreationalpurposes, suchasbehindamotorhome,see "RecreationalVehicleTowing" following.
Recreational Vehicle Towing
Recreationalvehicletowingmeans towingthevehiclebehindanother vehicle—suchasbehinda motorhome. Thetwomostcommon typesofrecreationalvehicletowing areknownasdinghytowingand dollytowing. Dinghytowingis towingthevehiclewithallfour wheelsontheground. Dollytowing istowingthevehiclewithtwo wheelsonthegroundandtwo wheelsuponadeviceknownasa dolly.
Herearesomeimportantthingsto considerbeforerecreationalvehicle towing:
- Whatisthetowingcapacity of thetowingvehicle? Besureto readthetowvehicle manufacturer's recommendations.
- Whatisthedistancethatwillbe travelled?Somevehicleshave restrictionsonhowfarandhow longtheycanbetowed.
- Isthepropertowingequipment goingtobeused? Seeyour dealerortraileringprofessional foradditionaladviceand equipmentrecommendations.
- Isthevehiclereadytobe towed?Justaspreparingthe vehicleforalongtrip,makesure thevehicleispreparedtobe towed.
DinghyTowing
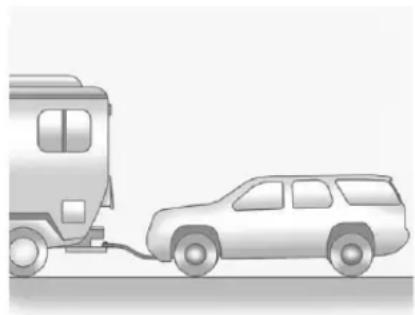
natural_image
Illustration of a car being connected to a bus, no text or symbols presentIf the vehicle is front-wheel-drive, it can beeding hytowed from the front. These vehicles may also be towed by putting the front wheelsona dolly. See "Dolly Towing" later in this section.
If the vehicle is all-wheel-drive, it can be inghytowed from the front. These vehicles can also be towed by placing them on a platform trailer with all four wheel soff of the ground. These vehicles cannot be towed using adolly.
Forvehiclesbeingdinghytowed, thevehicleshouldberunatthe beginningofeachdayandateach RVfuelstopforaboutfiveminutes. Thiswillensureproperlubricationof transmissioncomponents.Reinstall thefusetostartthevehicle.
Totowthevehiclefromthefront withallfourwheelsontheground:
- Position the vehicletobetowed, shift the transmission to P(Park), and turn the ignition to LOCK/OFF.
- Secure the vehicle to the towing vehicle.
- Settheparkingbrake.
- TurntheignitiontoACC/ACCESSORY.
-
Shift the transmission to N(Neutral).
-
Topreventthebatteryfrom drainingwhilethevehicleis beingtowed,removethe15amp ECMfuseandthe15amp Onstarfuse.Theseareinthe batterycompartmentbehindthe passengerseatonthefloor. Also,removethe50ampBATT1 fusefromtheunderhoodfuse blockandstoreallfusesina safelocation.SeeEngine CompartmentFuseBlockon page 10-28.
-
Releasetheparkingbrake. Notice: If the vehicle isistowed without performing each of the steps listed under "Dinghy Towing," the automatic transmission could be damaged. Besure to follow all step so the dinghytowing procedure prior to and after towing the vehicle.
Notice: If 105km/h (65mph) is exceeded whiletowing the vehicle, it could bedamaged. Never exceed 105km/h (65mph) whiletowing the vehicle.
Oncethedestinationisreached:
- Settheparkingbrake.
- Reinstallthefuses.
3.Shiftthetransmissionto P(Park),turntheignitionto LOCK/OFFandremovethekey fromtheignition. - Disconnect the vehicle from the towing vehicle.
Notice: Donottowavehicle with thefrontdrivewheelson the groundifoneofthefronttiresis acompactsparetire. Towing with twodifferenttiresizes on the frontofthevehiclecan cause severedamageto the transmission.
DollyTowing(All-Wheel-Drive Vehicles)
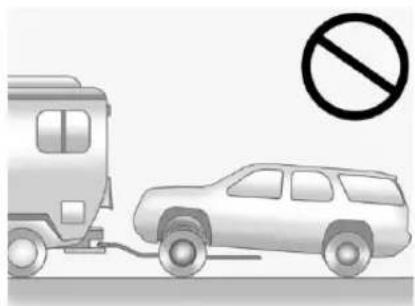
natural_image
Illustration of a car being charged with a bus, no text or symbols presentAll-wheel-drive vehicles must not be towed with twowheels on the ground. Toproperly to these vehicles, they should be placed on a platform trailer with all four wheels off of the ground ordering hytowed from the front.
DollyTowing
(Front-Wheel-Drive
VehiclesOnly)
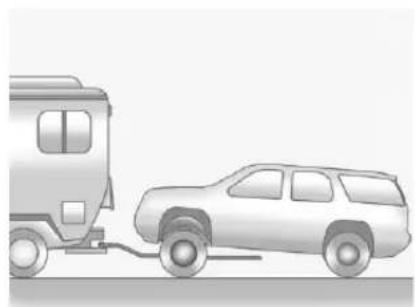
natural_image
Illustration of a car being towed from a vehicle (no text or symbols)Totowafront-wheel-drive vehicle from the front with twowheelson the ground:
-
Putthefrontwheelsonadolly.
2.MovetheshiftlevertoP(Park). -
Settheparkingbrake.
- Clampthesteeringwheelina straight-aheadpositionwitha clampingdevicedesignedfor towing.
- Removethekeyfromthe ignition.
- Securethevehicletothedolly.
- Releasetheparkingbrake.
TowingtheVehicleFrom theRear
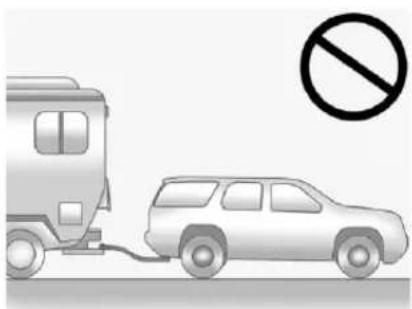
natural_image
Illustration of a van connected to a car with a no-smoking symbol (no text or labels)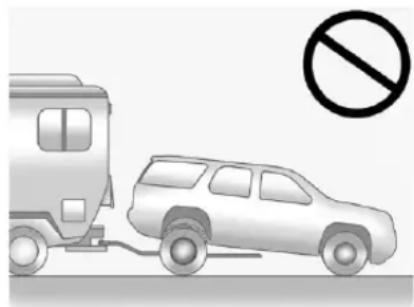
natural_image
Illustration of a car being pulled by a train, with a no-smoking symbol nearby (no text or labels)Notice: Towing the vehicle from therearcould damage it. Also, repairs would not be covered by the vehicle warranty. Never have the vehicle towed from therear.
Donottowthevehiclefromtherear.
AppearanceCare
ExteriorCare
Locks
Locksarelubricatedatthefactory. Useade-icingagentonlywhen absolutelynecessary, and havethe locksgreasedafterusing. See RecommendedFluidsand Lubricants.
WashingtheVehicle
Topreservethevehicle'sfinish, washitoftenandoutofdirect sunlight.
Notice: Donotuse petroleum-based, acidic, or abrasive cleaning agents as theycandamagethevehicle's paint, metal, or plastic parts. If damage occurs, it would not be covered by the vehicle's warranty. Approved cleaning product scan be obtained from your dealer.
Followallmanufacturer directionsregardingcorrect productusage,necessarsafety precautions,andappropriate disposalofanyvehiclecare product.
Notice: Avoid using high-pressure washes closer than 30cm(12in) to the surface of the vehicle. Use of power washers exceeding 8,274kPa (1,200 psi) can result in damage or removal of paint and decals.
Rinsethevehiclewell, before washing and after, to remove all cleaning agents completely. If they are allowed today on the surface, they could stain.
Drythefinishwithasoft, clean chamoisoranall-cottontowel to avoidsurfacescratchesandwater spotting.
FinishCare
Applicationofaftermarketclearcoat sealant/waxmaterialsisnot recommended.Ifpaintedsurfaces aredamaged,seeyourdealerto havethedamageassessed and repaired.Foreignmaterialssuchas calciumchlorideandothersalts,ice meltingagents,roadoilandtar,tree sap,birddroppings,chemicalsfrom industrialchimneys,etc.,can damagethevehicle'sfinishifthey remainonpaintedsurfaces.Wash thevehicleassoonaspossible. Ifnecessary,usenon-abrasive cleanersthataremarkedsafefor paintedsurfacestoremoveforeign matter.
Occasionalhandwaxingormild polishingsshouldbedonetoremove residuefromthepaintfinish.See yourdealerforapprovedcleaning products.
Donotapplywaxesorpolishesto uncoatedplastic, vinyl, rubber, decals, simulatedwood, or flatpaint as damage can occur.
Notice: Machine compounding or aggressive polishing on a basecoat/clearcoat paint finish may damage it. Use only non-abrasivewaxes and polishes that are made for abasecoat/ clearcoat paint finish on the vehicle.
Tokeep the paint finish looking new, keep the vehiclegaragedor covered whenever possible.
ProtectingExteriorBrightMetal Parts
Regularlycleanbrightmetalparts withwaterorchromepolishon chromeorstainlesssteeltrim, ifnecessary.
Foraluminum, never use autoor chromepolish, steam, or caustic soaptoclean. A coating of wax, rubbed to a high polish, is recommended for all bright metal parts.
CleaningExteriorLamps/LensesandEmblems
Useonlylukewarmorcoldwater,a softcloth,andacarwashingsoap tocleanexteriorlamps,lensesand emblems.Followinstructionsunder "WashingtheVehicle"inthis section.
WindshieldandWiperBlades
Cleantheoutsideofthewindshield withglasscleaner.
Cleanrubberbladesusingalint-free clothorpapertowelsoakedwith windshieldwasherfluidoramild detergent.Washthewindshield thoroughlywhencleaningthe blades.Bugs,roadgrime,sap,and abuildupofvehiclewash/wax treatmentsmaycausewiper streaking.
Replacethewiperbladesiftheyare wornordamaged. Damagecanbe causedbyextremedusty conditions, sand, salt, heat, sun, snow, andice.
Weatherstrips
Applysiliconegreaseon weatherstripstomakethemlast longer,sealbetter,andnotstickor squeak.Lubricateweatherstrips onceayear.Blackmarksfrom rubbermaterialonpaintedsurfaces canberemovedbyrubbingwitha cleancloth.SeeRecommended FluidsandLubricantson page11-12.
Tires
Useastiffbrushwithtirecleanerto cleanthetires.
Notice: Using petroleum-based tiredressing product on the vehicle may damage the paint finish and/or tires. When applying atiredressing, always swipe off any overspray from all painted surfaces on the vehicle.
WheelsandTrim—Aluminum orChrome
Useasoft, cleancloth with mild soap and watertocleanthewheels. After rinsing thoroughly with clean water, dry with asoft, cleantowel. Awax may then be applied.
Notice: Chromewheels and other chrometrimmay bedamaged if the vehicle is not washed after driving on roadsthath have been sprayed with magnesium, calcium, or sodium chloride. These chlorides are used on roads for condition such as the same time. Always wash the chromewith soap and water after exposure.
Notice: To avoid surface damage, do not use strong soaps, chemicals, abrasive polishes, cleaners, brushes, or cleaners that contain acidental aluminum chrome-plated wheels. Use only approved cleaners. Also, never drive vehicle with aluminum chrome-plated wheel through an
automaticcarwashthatuses siliconecarbidetirecleaning brushes. Damagecouldoccur andtherepairswouldnotbe coveredbythevehiclewarranty.
Steering, Suspension, and ChassisComponents
Visually inspect the front and rear suspension and steering system for damaged, loose, or missing parts or sign of wear. Inspect the power steering for proper hook-up, binding, leaks, cracks, chafing, etc. Visually check constant velocity joints, rubber boots, and axle seals for leaks.
BodyComponentLubrication
Lubricateallkeylockcylinders, hoodhinges, liftgatehinges, and the steelfueldoorhingeunless the componentsareplastic. Applying siliconegreaseonweatherstrips withacleanclothwillmakethem lastlonger, sealbetter, andnotstick orsqueak.
UnderbodyMaintenance
Useplainwatertoflushdirtand debrisfromthevehicle'sunderbody. Yourdealeroranunderbodycar washingsystemcandothis.Ifnot removed,rustandcorrosioncan develop.
SheetMetalDamage
If the vehicle is damaged and requires sheet metal repair or replacement, makes sure the body repair shop applies anti-corrosion material to parts repaired or replaced to restore corrosion protection.
Original manufacturer replacement partswill providethe corrosion protectionwhile maintaining the vehicle warranty.
FinishDamage
Quicklyrepairminorchipsand scratcheswithtouch-upmaterials availablefromyourdealertoavoid
corrosion. Largerareasoffinish damagecanbecorrectedinyour dealer'sbodyandpaintshop.
ChemicalPaintSpotting
Airbornepollutantscanfallupon andattackpaintedvehiclesurfaces causingblotchy, ring-shaped discolorations, and small, irregular darkspotsetched into the paint surface.
InteriorCare
Topreventdirtparticleabrasions, regularlycleanthevehicle'sinterior. Immediatelyremoveanysoils. Note thatnewspapersordarkgarments thatcantransfercolortohome furnishingscanalsopermanently transfercolortothevehicle's interior.
Useasoftbristlebrushtoremove dustfromknobsandcrevicesonthe instrumentcluster.Usingamild soapsolution,immediatelyremove
handlotions, sunscreen, and insect repellent from all interiors surfaces or permanent damage may result.
Yourdealermayhaveproductsfor cleaningtheinterior.Usecleaners specificallydesignedforthe surfacesbeingcleanedtoprevent permanentdamage.Applyall cleanersdirectlytothecleaning cloth.Donotspraycleanersdirectly onanyswitchesorcontrols. Cleanersshouldberemoved quickly.Neverallowcleanersto remainonthesurfacebeing cleanedforextendedperiods oftime.
Cleanersmaycontainsolventsthat canbecomeconcentratedinthe interior.Beforeusingcleaners,read andadheretoallsafetyinstructions onthelabel.Whilecleaningthe interior,maintainadequate ventilationbyopeningthedoorsand windows.
Topreventdamage, donotclean theinteriorusingthefollowing cleanersortechniques:
- Neverusearazororanyother sharpobjecttoremoveasoil fromanyinteriorsurface.
- Neveruseabrushwithstiff bristles.
- Neverrubanysurface aggressivelyorwithexcessive pressure.
- Donotuselaundrydetergentsor dishwashingsoapswith degreasers. For liquid cleaners, use approximately 20 drops per 3.78L (1gal) of water. Aconcentrated soapsolution will leave a residuethat creates streaks and attracts dirt. Donot uses solution that contain strong or caustic soap.
- Donotheavilysaturatethe upholsterywhencleaning.
- Donotusesolventsorcleaners containingsolvents.
InteriorGlass
Toclean, useaterryclothfabric dampenedwithwater. Wipedroplets leftbehindwithacleandrycloth. Commercialglasscleanersmaybe used, if necessary, aftercleaning theinteriorglasswithplainwater.
Notice: Topreventscratching, neveruseabrasivecleanerson automotiveglass. Abrasive cleanersoraggressivecleaning maydamagetherearwindow defogger.
Notice: Cleaning the windshield with water during the first three to six months of ownership will reduce tendency to fog.
SpeakerCovers
Vacuumaroundaspeakercover gently, so that the speaker will not be damaged. Cleanspot with just water and mild soap.
CoatedMoldings
Coatedmoldingsshouldbecleaned.
- When lightly soiled, wipewith a spongeorsoftlint-freecloth dampened with water.
- Whenheavilysoiled,usewarm soapywater.
Fabric/Carpet/Suede
Startbyvacuumingthesurface usingasoftbrushattachment.Ifa rotatingbrushattachmentisbeing usedduringvacuuming,onlyuseit onthefloorcarpet.Beforecleaning, gentlyremoveasmuchofthesoil aspossibleusingoneofthe followingtechniques:
• Gentlyblotliquidswithapaper towel. Continueblottinguntilno moresoilcanberemoved.
- Forsolidsoils, removeasmuch aspossibleprioritovacuuming.
Toclean:
- Saturateacleanlint-free colorfastclothwithwaterorclub soda. Microfiberclothis recommendedtopreventlint transfertothefabricorcarpet.
- Remove excess moisture by gently wringing until water does not drip from the cleaning cloth.
- Startontheoutsideedgeofthe soilandgentlyrubtowardthe center.Foldthecleaningclothto acleanareafrequentlyto preventforcingthesoilintothe fabric.
- Continue gently rubbing the soiled area until there is no longer any color transfer from the soil to the cleaning cloth.
- If the soil is not completely removed, use a mild soap solution followed only by club soda or plain water.
If the soil is not completely removed, it may be necessary to use a commercial upholstery
cleanerospotlifter. Testasmall hiddenareaforcolorfastnessbefore usingacommercialupholstery cleanerospotlifter.Ifring formationoccurs,cleantheentire fabricorcarpet.
Following the cleaning process, a papertowel can be used to blot excess moisture.
CleaningHighGlossSurfaces and VehicleInformation and RadioDisplays
Forvehicleswithhighgloss surfacesorvehicledisplays,usea microfiberclothtowipesurfaces. Beforewipingthesurfacewiththe microfibercloth,useasoftbristle brushtoremovedirtthatcould scratchthesurface.Thenusethe microfiberclothbygentlyrubbingto clean.Neverusewindowcleaners orsolvents.Periodicallyhandwash themicrofiberclothseparately, usingmildsoap.Donotusebleach orfabricsoftener.Rinsethoroughly andairdrybeforenextuse.
Notice: Donotattachadevice with asuctioncuptothedisplay. This may caused damage and would not be recovered by the warranty.
InstrumentPanel, Leather, Vinyl, and Other Plastic Surfaces
Useasoftmicrofibercloth dampenedwithwatertoremove dustandloosedirt. For more thoroughcleaning, useasoft microfibercloth dampenedwitha mildsoapsolution.
Notice: Soakingorsaturating leather, especially perforated leather, as well as other interior surfaces, may cause permanent damage. Wipe excess moisture from thesesurfaces after cleaning and allow them today naturally. Never use heat, steam, spotlifters, or spotremovers. Do not use cleaner that contain silicone or wax-based products. Cleaners containing these solvent scan permanently change
theappearanceandfeelofleather orsofttrimandarenot recommended.
Donotusecleanersthatincrease gloss,especiallyontheinstrument panel. Reflectedglarecandecrease visibilitythroughthewindshield undercertainconditions.
Notice: Use of air fresheners may cause permanent damage to plastics and painted surfaces. If an air freshener comes in contact with any plastic or painted surface in the vehicle, blot immediately and clean with a soft cloth dampened with a mild soapsolution. Damage caused by air fresheners would not be covered by the vehicle warranty.
CargoCoverand ConvenienceNet
Washwithwarmwaterandmild detergent.Donotusechlorine bleach.Rinsewithcoldwater,and thendrycompletely.
CareofSafetyBelts
Keepbeltscleananddry.

WARNING
Donotbleachordyesafetybelts. Itmayseverelyweakenthem. In acrash, they might not be able to provide adequate protection. Cleansafetybeltsonly with mild soap and lukewarmwater.
FloorMats

WARNING
Ifafloormatisthewrongsizeor isnotproperlyinstalled,itcan interferewiththepedals. Interferencewiththepedalscan causeunintendedacceleration and/orincreasedstopping distancewhichcancauseacrash andinjury.Makesurethefloor matdoesnotinterferewiththe pedals.
Usethefollowingguidelinesfor properfloormatusage.
- Theoriginalequipmentfloor matsweredesignedforyour vehicle. If thefloormatsneed replacing, it is recommended that GMcertifiedfloormatsbe purchased. Non-GMfloormats may not fit properly and may interferewith the accelerator or brake pedal. Always check that thefloormats donot interfere with the pedals.
- Usethefloormatwiththe correctsideup.Donotturn itover.
- Donotplaceanythingontopof theriversidefloormat.
• Useonlyasinglefloormaton theriverside. - Donotplaceonefloormaton topofanother.
ButtonRetainer
Floormatswithabutton-type retainer.
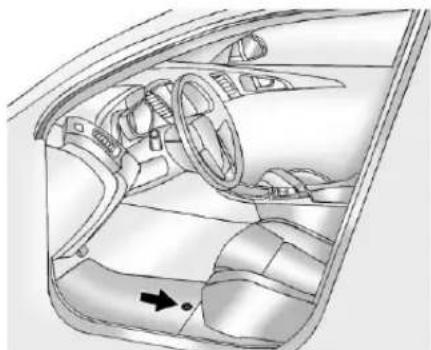
natural_image
Interior view of a car dashboard and steering wheel (no text or symbols visible)RemovingandReplacingthe FloorMat
- Pullupontherearofthematto unlockandremove.
-
Reinstall the floormat by lining up the floormat openings over the carpet retainers and snapping to position.
-
Makesurethefloormatis properlysecured and verify that it does not interfere with the pedals.
KnobRetainer
Floormatswithaknobretainer.
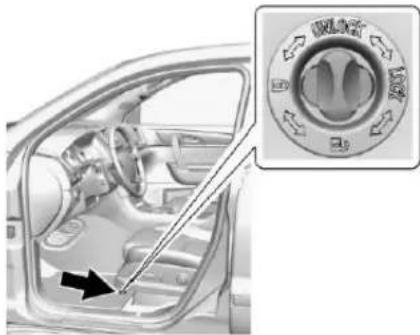
natural_image
Interior view of a car showing the dashboard and steering wheel (no text or symbols visible)RemovingandReplacingthe FloorMat
- Turntheknobuntilitisaligned withtheslotinthefloormat grommet.
- Pulluponthefloormat.
- Centertheslotinthefloormat grommetwiththeknobonthe floorandsetintoposition.
- Turntheknobuntilitis perpendicularartotheslotinthe grommettolockthematin place.
- Makesurethefloormatis properlysecured and verify that it does not interfere with the pedals.
10-80VehicleCare
NOTES
Service and Maintenance
GeneralInformation
GeneralInformation......11-1
MaintenanceSchedule
MaintenanceSchedule......11-3
SpecialApplicationServices
SpecialApplication
Services....11-8
Additional Maintenance and Care
AdditionalMaintenance
andCare....11-9
RecommendedFluids, Lubricants,andParts
RecommendedFluidsand
Lubricants......11-12
MaintenanceReplacement
Parts......11-13
MaintenanceRecords
MaintenanceRecords.....11-14
GeneralInformation
Yourvehicleisanimportant investment. Thissectiondescribes therequiredmaintenanceforthe vehicle. Followthischeduletohelp protectagainstmajorrepair expensesresultingfromneglector inadequatemaintenance.Itmay alsohelptomaintainthevalueof thevehicleifitissold.Itisthe responsibilityoftheownertohave allrequiredmaintenanceperformed.
Yourdealerhastrainedtechnicians who can perform required maintenance using genuine replacement parts. They have up-to-datetools and equipment for fast and accurated diagnostics. Many dealers have extended evening and Saturday hours, courtesy transportation, and online scheduling to assist with service needs.
Yourdealerrecognizesthe importanceofproviding competitivelypricedmaintenance andrepairservices.Withtrained technicians,thedealeristheplace forroutinemaintenancesuchasoil changesandtirerotationsand additionalmaintenanceitemslike tires,brakes,batteries,andwiper blades.
Notice: Damagecaused by improper maintenance can lead to costly repairs and may not be covered by the vehicle warranty. Maintenance intervals, checks, inspections, recommended fluids, and lubricants are important to keep the vehicle in good working condition.
The Tire Rotation and Required Services are theresponsibility of the vehicle owner. It is recommended to have your dealer perform these services every 12000 km/7,500 mi. Proper vehicle maintenance help to keep the vehicle in good working condition, improves fueleconomy, and reduces vehicle emissions.
11-2ServiceandMaintenance
Becauseofthewaypeopleuse vehicles,maintenanceneedsvary. Theremayneetobemore frequentchecksandservices.The AdditionalRequiredServices-Normalareforvehiclesthat:
- Carrypassengersandcargo withinrecommendedlimitson the Tire and Loading Information label. See Vehicle Load Limits on page 9-9.
- Aredrivenonreasonableroad surfaceswithinlegaldriving limits.
- Usetherecommendedfuel.See RecommendedFuelon page9-38.
Refertotheinformationinthe MaintenanceScheduleAdditional RequiredServices-Normalchart.
The Additional Required Services-Severe are for vehicle sthatare:
• Mainlydriveninheavycitytraffic inhotweather.
• Mainlydriveninhillyor mountainousterrain.
• Frequentlytowingatrailer.
• Usedforhighspeedor competitivedriving.
• Usedfortaxi, police, ordelivery service.
Refertotheinformationinthe MaintenanceScheduleAdditional RequiredServices-Severechart.

WARNING
Performingmaintenanceworkcan bedangerousandcancause seriousinjury.Perform maintenanceworkonlyifthe requiredinformation,propertools, andequipmentareavailable. Iftheyarenot,seeyourdealerto haveatrainedtechniciandothe work.SeeDoingYourOwn ServiceWorkonpage 10-3.
Maintenance Schedule
OwnerChecksandServices
AtEachFuelStop
- Checktheengineoillevel.See EngineOilonpage10-7.
OnceaMonth
- Checkthetireinflation pressures. See TirePressureon page 10-41.
• Inspectthetiresforwear. See TireInspectiononpage10-47. - Checkthewindshieldwasher fluidlevel.See WasherFluidon page10-18.
EngineOilChange
WhentheCHANGEENGINEOIL SOONmessagedisplays,havethe engineoilandfilterchangedwithin thenext1000km/600mi.lfdriven underthebestconditions,the engineoillifesystemmightnot indicateetheneedforvehicleservice formorethanayear.Theengineoil andfiltermustbechangedatleast onceayearandtheoillifesystem mustbereset.Yourtraineddealer techniciancanperformthiswork. Iftheengineoillifesystemisreset accidentally,servicethevehicle within5000km/3,000misincethe lastservice.Resettheoillife systemwhentheoilischanged. SeeEngineOilLifeSystemon page 10-9.
TireRotationandRequired ServicesEvery12000km/7,500mi
Rotatethetires, if recommended for the vehicle, and perform the followingservices. See Tire Rotationonpage 10-47.
- Checkengineoillevelandoil lifepercentage.Ifneeded, changeengineoilandfilter,and resetoillifesystem.SeeEngine Oilonpage10-7andEngineOil LifeSystemonpage10-9.
- Checkenginecoolantlevel.See EngineCoolantonpage10-12.
- Checkwindshieldwasherfluid level. See WasherFluidon page 10-18.
- Visuallyinspectwindshieldwiper bladesforwear,cracking, orcontamination.SeeExterior Careonpage10-72.Replace wornordamagedwiperblades. SeeWiperBladeReplacement onpage10-24.
11-4ServiceandMaintenance
- Checktireinflationpressures. See TirePressureon page10-41.
• Inspecttirewear. See Tire Inspectiononpage10-47.
• Visuallycheckforfluidleaks. - Inspectengineaircleanerfilter. SeeEngineAirCleaner/Filteron page10-10.
- Inspectbrakesystem.
- Visuallyinspectsteering, suspension, and chassis components for damaged, loose, or missing parts or sign of wear. See Exterior Care on page 10-72.
-
Checkrestraintsystem components.SeeSafetySystem Checkonpage3-20.
-
Visuallyinspectfuelsystemfor damageorleaks.
- Visuallyinspectexhaustsystem andnearbyheatshieldsfor looseordamagedparts.
• Lubricatebodycomponents.See ExteriorCareonpage10-72. - Checkstarterswitch.SeeStarter SwitchCheckonpage10-22.
- Checkautomatictransmission shiftlockcontrolfunction.See AutomaticTransmissionShift LockControlFunctionCheckon page10-23.
-
Checkignitiontransmissionlock. SeeIgnitionTransmissionLock Checkonpage10-23.
-
Checkparkingbrakeand automatictransmissionpark mechanism.SeeParkBrakeand P(Park)MechanismCheckon page10-23.
- Checkacceleratorpedalfor damage, higheffort, orbinding. Replace if needed.
- Visually inspect gas strut for signsofwear, cracks, or other damage. Check the hold open ability of the strut. See your dealer if service is required.
- Inspectsunrooftrackandseal, ifequipped. See Sunroofon page2-19.
| Maintenance ScheduleAdditional RequiredServices - Normal | 12 000 km/7,500 mi | 24 000 km/15,000 mi | 36 000 km/22,500 mi | 48 000 km/30,000 mi | 60 000 km/37,500 mi | 72 000 km/45,000 mi | 84 000 km/52,500 mi | 96 000 km/60,000 mi | 108 000 km/67,500 mi | 120 000 km/75,000 mi | 132 000 km/82,500 mi | 144 000 km/90,000 mi | 156 000 km/97,500 mi | 168 000 km/105,000 mi | 180 000 km/112,500 mi | 192 000 km/120,000 mi | 204 000 km/127,500 mi | 216 000 km/135,000 mi | 228 000 km/142,500 mi | 240 000 km/150,000 mi |
| Rotate tires and perform RequiredServices. Check engine oil level andoil life percentage. Change engine oiland filter, if needed. | √ | √ | √ | √ | √ | √ | √ | √ | √ | √ | √ | √ | √ | √ | √ | √ | √ | √ | √ | √ |
| Replace passenger compartment airfilter. (1) | √ | √ | √ | √ | √ | √ | ||||||||||||||
| Inspect evaporative control system. (2) | √ | √ | √ | |||||||||||||||||
| Replace engine air cleaner filter. (3) | √ | √ | √ | |||||||||||||||||
| Replace spark plugs. Inspect sparkplug wires. | √ | |||||||||||||||||||
| Change automatic transmission fluid, Ifequipped. If filter is serviceable,change filter. | √ | |||||||||||||||||||
| Change transfer case fluid, if equippedwith AWD. (4) | √ | |||||||||||||||||||
| Drain, flush, and fill engine coolingsystem. (5) | √ | |||||||||||||||||||
| Visually inspect accessory drive belts. (6) (7) | √ | |||||||||||||||||||
| Replace brake fluid. (6) | √ |
11-6ServiceandMaintenance
Footnotes—Maintenance ScheduleAdditionalRequired Services—Normal
(1)Oreverytwoyears,whichever comesfirst.Morefrequent replacementmaybeneededifthe vehicleisdriveninareaswithheavy traffic,areaswithpoorairquality, orareaswithhighdustlevels. Replacementmayalsobeneededif thereisareductioninairflow, excessivewindowfogging,orodors.
(2)Checkallfuelandvaporlines andhosesforproperhook-up, routing,andcondition.Checkthat thepurgevalve,ifthevehiclehas one,worksproperly.Replaceas needed.
(3)Oreveryfouryears,whichever comesfirst.
(4) Donotdirectlypowerwash the transfercaseoutputseals. High pressurewatercanovercomethe sealsandcontaminatethetransfer casefluid. Contaminatedfluidwill decreasethelifeofthetransfer caseandshouldbereplaced.
(5)Oreveryfiveyears,whichever comesfirst.SeeCoolingSystemon page10-12.
(6)Orevery10years,whichever comesfirst.
(7)Inspectforfraying,excessive cracking,ordamage;replace, ifneeded.
| Maintenance ScheduleAdditional RequiredServices – Severe | 12 000 km/7,500 mi | 24 000 km/15,000 mi | 36 000 km/22,500 mi | 48 000 km/30,000 mi | 60 000 km/37,500 mi | 72 000 km/45,000 mi | 84 000 km/52,500 mi | 96 000 km/60,000 mi | 108 000 km/67,500 mi | 120 000 km/75,000 mi | 132 000 km/82,500 mi | 144 000 km/90,000 mi | 156 000 km/97,500 mi | 168 000 km/105,000 mi | 180 000 km/112,500 mi | 192 000 km/120,000 mi | 204 000 km/127,500 mi | 216 000 km/135,000 mi | 228 000 km/142,500 mi | 240 000 km/150,000 mi |
| Rotate tires and perform RequiredServices. Check engine oil level andoil life percentage. Change engine oiland filter, if needed. | √ | √ | √ | √ | √ | √ | √ | √ | √ | √ | √ | √ | √ | √ | √ | √ | √ | √ | √ | √ |
| Replace passenger compartment airfilter. (1) | √ | √ | √ | √ | √ | √ | ||||||||||||||
| Inspect evaporative control system. (2) | √ | √ | √ | |||||||||||||||||
| Replace engine air cleaner filter. (3) | √ | √ | √ | |||||||||||||||||
| Change automatic transmission fluid, ifequipped. If filter is serviceable,change filter. | √ | √ | √ | |||||||||||||||||
| Change transfer case fluid, if equippedwith AWD. (4) | √ | √ | √ | |||||||||||||||||
| Replace spark plugs. Inspect sparkplug wires. | √ | |||||||||||||||||||
| Drain, flush, and fill engine coolingsystem. (5) | √ | |||||||||||||||||||
| Visually inspect accessory drive belts. (6) (7) | √ | |||||||||||||||||||
| Replace brake fluid. (6) | √ |
Footnotes—Maintenance ScheduleAdditionalRequired Services—Severe
(1)Oreverytwoyears,whichever comesfirst.Morefrequent replacementmaybeneededifthe vehicleisdriveninareaswithheavy traffic,areaswithpoorairquality, orareaswithhighdustlevels. Replacementmayalsobeneededif thereisareductioninairflow, excessivewindowfogging,orodors.
(2) Checkallfuelandvaporlines and hosesforproperhook-up, routing, and condition. Check that the purgevalve, if the vehicle has one, works properly. Replace as needed.
(3)Oreveryfouryears,whichever comesfirst.
(4) Donotdirectlypowerwash the transfercaseoutputseals. High pressurewatercanovercomethe sealsandcontaminatethetransfer casefluid. Contaminatedfluidwill decreasethelifeofthetransfer caseandshouldbereplaced.
(5)Oreveryfiveyears, whichever comesfirst. See CoolingSystemon page 10-12.
(6)Orevery10years,whichever comesfirst.
(7) Inspect for fraying, excessive cracking, ordamage; replace, if needed.
SpecialApplication Services
- SevereCommercialUse VehiclesOnly:Lubricatechassis componentsevery5000km/3,000mi.
• Haveunderbodyflushingservice performedonceayear.
Additional Maintenance and Care
Yourvehicleisanimportant investmentandcaringforitproperly mayhelptoavoidfuturecostly repairs.Tomaintainvehicle performance,additional maintenanceservicesmaybe required.
It is recommended that your dealer perform theseservices—their trained dealer technicians know your vehiclebest. Your dealer can also performathorough assessment with a multi-point inspection to recommend when your vehicle may need attention.
The followinglistisintendedto explaintheservicesandconditions tolookforthatmayindicate servicesarerequired.
Battery
The battery-supplies power to start the engine and operate any additionalelectrical accessories.
• To avoid break-downor failure to start the vehicle, maintain a battery with full cranking power.
- Traineddealertechnicianshave thediagnosticequipmenttotest thebatteryandensurethatthe connectionsandcablesare corrosion-free.
Belts
- Beltsmayneedreplacingifthey squeakorshowsignsof crackingorsplitting.
- Traineddealertechnicianshave accesstotoolsandequipment toinspectthebeltsand recommendadjustmentor replacementwhennecessary.
Brakes
Brakesstopthevehicleandare crucialtosafedriving.
- Signsofbrakewearmayinclude chirping,grinding,orsquealing noises,ordifficultystopping.
- Traineddealertechnicianshave accesstotoolsandequipment toinspectthebrakesand recommendqualityparts engineeredforthevehicle.
Fluids
Properfluidlevelsandapproved fluidsprotectthevehicle'ssystems andcomponents.See RecommendedFluidsand Lubricantsonpage11-12forGM approvedfluids.
• Engineoilandwindshield washerfluidlevelsshouldbe checkedateveryfuelfill.
- Instrumentclusterlightsmay comeontoindicatethatfluids maybelowandneedtobe filled.
Hoses
Hosestransportfluidsandshould beregularlyinspectedtoensure thattherearenocracksorleaks. Withamulti-pointinspection,your dealercaninspectthehosesand adviseifreplacementisneeded.
Lamps
Properlyworkingheadlamps, taillamps, and brakelamps are important to see and beseen on theroad.
- Signsthattheheadlampsneed attentionincludedimming,failure tolight,cracking,ordamage. Thebrakelampsneedtobe checkedperiodicallytoensure thattheylightwhenbraking.
- Withamulti-pointinspection, yourdealercancheckthelamps andnoteanyconcerns.
ShocksandStruts
Shocksandstrutshelpaidincontrol forasmootherride.
- Signsofwearmayinclude steeringwheelvibration,bounce/swaywhilebraking,longer stoppingdistance,oruneven tirewear.
- Aspartofthemulti-point inspection, traineddealer technicianscanvisuallyinspect theshocksandstrutsforsigns ofleaking, blownseals, ordamage, and can advise whenserviceisneeded.
Tires
Tiresneedtobeproperlyinflated, rotated, and balanced. Maintaining the tirescansavemoney, fuel, and can reduce the risk of tirefailure.
• Signsthatthetiresneedtobe replacedincludethreeormore visibletreadwearindicators;cord orfabricshowingthroughthe
rubber; cracksorcutsinthe treadorsidewall; orabulgeor splitinthetire.
- Traineddealertechnicianscan inspectandrecommendtheright tires. Yourdealercanalso providetire/wheelbalancing servicestoensuresmooth vehicleoperationatallspeeds. Yourdealersellsandservices namebrandtires.
VehicleCare
Tohelpkeepthevehiclelookinglike new, vehiclecareproductsare availablefromyourdealer. For informationonhowtocleanand protectthevehicle'sinteriorand exterior, seeInteriorCareon page 10-75 and ExteriorCareon page 10-72.
WheelAlignment
Wheelalignmentiscriticalfor ensuringthatthetiresdeliver optimalwearandperformance.
- Signsthatthealignmentmay needtobeadjustedinclude pulling,impropervehicle handling,orunusualtirewear.
- Yourdealerhastherequired equipmenttoensureproper wheelalignment.
Windshield
Forsafety, appearance, and the bestviewing, keep the windshield clean and clear.
- Signsofdamageinclude scratches,cracks,andchips.
- Traineddealertechnicianscan inspectthewindshield and recommendproperreplacement ifneeded.
WiperBlades
Wiperbladesneedtobecleaned and keptingoodconditionto provideaclearview.
- Signsofwearincludestreaking, skippingacrossthewindshield, andwornorsplitrubber.
- Traineddealertechnicianscan checkthewiperbladesand replacethemwhenneeded.
RecommendedFluids,Lubricants,andParts
RecommendedFluidsandLubricants
| UsageFluid/Lubricant | |
| EngineOilUseonlyengine | billicensedtothedexos1specification,orequivalent,of theproperSAEviscositygrade.ACDelcodexos1SyntheticBlendis recommended.SeeEngineOilonpage 10-7. |
| EngineCoolant50/50mixture | ofclean,drinkablewateranduseonlyDEX-COOLCoolant.SeeEngineCoolantonpage 10-12. |
| HydraulicBrakeSystemDOT3HydraulicBrakeFluid(GMPartNo.88862806,in Canada88863462). | |
| WindshieldWasherAutomotive | windshieldwasherfluidthatmeetsregionalfreezeprotection requirements. |
| HydraulicPowerSteeringSystemDEXRON | ®-VIAutomaticTransmissionFluid. |
| AutomaticTransmissionDEXRON | ®-VIAutomaticTransmissionFluid. |
| CarrierAssembly—Differential(Rear DriveModule)andTransferCase (PowerTransferUnit) | SAE75W-90SyntheticAxleLubricant(GMPartNo.88900401,in Canada89021678). |
| KeyLockCylindersMulti-Purpose | seLubricant,Superlube(GMPartNo.12346241,in Canada10953474). |
| HoodLatchAssembly,Secondary Latch,Pivots,SpringAnchor,and ReleasePawl | LubriplateLubricantAerosol(GMPartNo.89021668,in Canada89021674)orlubricantmeetingrequirementsofNLGI#2, CategoryLBorGC-LB. |
| HoodandDoorHingesMulti-Purpose | Lubricant,Superlube(GMPartNo.12346241,in Canada10953474). |
| WeatherstripConditioningWeather | StripLubricant(GMPartNo.3634770,inCanada10953518)or DielectricSiliconeGrease(GMPartNo.12345579,inCanada10953481). |
MaintenanceReplacementParts
Replacementpartsidentifiedbelowbyname, partnumber, orspecification can be obtained from your dealer.
| PartGMPartNumberACDelcoPartNumber | ||
| EngineAirCleaner/Filter15278634A3083C | ||
| EngineOilFilter89017525PF63 | ||
| PassengerCompartmentAirFilter | 20958479 | CF179C |
| SparkPlugs | 12622561 | 41-109 |
| WiperBlades | ||
| Front Driver – 62.5 cm (24.6 in) | 15254805 | — |
| Front Passenger – 53.0 cm (20.8 in) | 15254804 | — |
| Rear – 30.0 cm (11.8 in) | 25820122 | — |
11-14ServiceandMaintenance
MaintenanceRecords
After the scheduled services are performed, record the date, odometer reading, who performed the service, and the type of services performed in the boxes provided. Retain all maintenance receipts.
| Date | Odometer Reading | ServicedByServices | Performed |
11-16ServiceandMaintenance
| Date | Odometer Reading | ServicedByServices | Performed |
TechnicalData
VehicleIdentification
VehicleIdentification
Number(VIN)......12-1
ServicePartsIdentification
Label.....12-1
VehicleData
Capacitiesand
Specifications......12-2
EngineDriveBeltRouting...12-4
VehicleIdentification
VehicleIdentification Number(VIN)


Thislegalidentifierisinthefront corneroftheinstrumentpanel, on theleftsideofthevehicle.Itcanbe seenthroughthewindshieldfrom outside. TheVINalsoappearson theVehicleCertificationandService Partslabelsandcertificatesoftitle andregistration.
Engineldentification
TheeighthcharacterintheVINis theenginecode. Thiscode identifiesthevehicle'sengine, specifications, and replacement parts. See "EngineSpecifications" under Capacities and Specifications on page 12-2 for the vehicle's enginecode.
ServiceParts IdentificationLabel
Thislabel, ontheinsideoftheglove box, hasthefollowinginformation:
• VehicleIdentification Number(VIN).
- Modeldesignation.
- Paintinformation.
• Productionoptionsandspecial equipment.
Donotremovethislabelfromthe vehicle.
VehicleData
CapacitiesandSpecifications
The following approximate capacities are given in metric and English conversions. See Recommended Fluids and Lubricantsonpage11-12formoreinformation.
| Application | Capacities | |
| MetricEnglish | ||
| AirConditioningRefrigerantFortheairconditioningsystemrefrigeranttypeandchargeamount,seetherefrigerantlabelunderthehood.Seeyourdealerformoreinformation. | ||
| CoolingSystem10.8L11.4qt | ||
| EngineOilwithFilter6.0L6.4qt | ||
| FuelTank83.3L 22.0gal | ||
| TransmissionFluid*(DrainandRefill) | 5.0L5.3qt | |
| TransferCaseFluid | 1.0L1.0qt | |
| WheelNutTorque | 190N•m | 140lbft |
| *See Automatic Transmission Fluid on page 10-10 for information on checking fluid level. | ||
| Allcapacitiesareapproximate.Whenadding,besuretofilltotheapproximatelevel,asrecommendedinthismanual.Recheckfluidlevelafterfilling. | ||
EngineSpecifications
| EngineVINCodeTr | TransmissionSparkPlugGap | |
| 3.6LV6EngineDAutomatic0.95-1 | 10mm(0.037- |
12-4 TechnicalData
EngineDriveBeltRouting
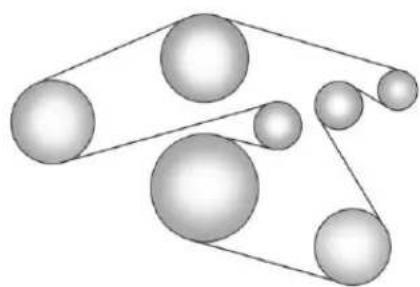
natural_image
Abstract diagram of interconnected spheres with connecting lines, no text or symbols presentCustomer Information
CustomerInformation
CustomerSatisfaction
Procedure(U.S.and
Canada)....13-2
CustomerSatisfaction
Procedure(Mexico)......13-4
CustomerAssistanceOffices
(U.S.andCanada)......13-5
CustomerAssistanceOffices
(Mexico)....13-5
CustomerAssistanceforText
Telephone(TTY)Users(U.S.
andCanada)......13-6
OnlineOwnerCenter......13-6
GMMobilityReimbursement
Program(U.S.and
Canada)....13-7
Roadside Assistance Program
(Mexico)....13-7
Roadside Assistance
Program(U.S.and
Canada)....13-11
SchedulingService
Appointments(U.S.and
Canada)....13-12
CourtesyTransportation
Program(U.S.and
Canada)....13-13
CollisionDamageRepair
(U.S.andCanada)......13-14
ServicePublications
Ordering Information.....13-16
ReportingSafetyDefects
Reporting Safety Defectsto
theUnitedStates
Government......13-17
ReportingSafetyDefectsto theCanadian
Government......13-18
Reporting Safety Defectsto
GeneralMotors......13-18
VehicleDataRecordingand Privacy
VehicleDataRecordingand
Privacy....13-19
EventDataRecorders.....13-19
OnStar ^® 13-20
InfotainmentSystem......13-20
RadioFrequency
Identification(RFID)......13-20
RadioFrequency
Statement......13-20
CustomerInformation
Customer Satisfaction Procedure(U.S. and Canada)
Yoursatisfactionandgoodwillare importanttoyourdealerandto Buick.Normally,anyconcernswith thesalestransactionorthe operationofthevehiclewillbe resolvedbyyourdealer'ssalesor servicedepartments.Sometimes, however,despitethebestintentions ofallconcerned,misunderstandings canoccur.Ifyourconcernhasnot beenresolvedoyoursatisfaction, thefollowingstepsshouldbetaken:
STEPONE: Discuss your concern with a member of dealership management. Normally, concerns can be quickly resolved at that level. If them matter has already been reviewed with the sales, service, or parts manager, contact the owner of your dealership or the general manager.
STEPTWO: If after contacting a member of dealership management, it appears your concern cannot be resolved by your dealership without further help, in the U.S., call 1-800-521-7300. In Canada, contact General Motors of Canada Customer Care Centre 1-800-263-3777 (English) or 1-800-263-7854 (French).
Weencourageyoutocallthe toll-freenumberinordertogivethe inquirypromptattention.Havethe followinginformationavailableto givetheCustomerAssistance representative:
- VehicleIdentification Number(VIN). This is available from the vehicleregistration or title, or the plate at the top of the instrument panel and visible through the windshield.
• Dealershipnameandlocation.
• Vehicledeliverydate and presentmileage.
When contacting Buick, remember that your concern will likely be resolved at a dealer's facility. That is why wesuggest following Step One first.
STEPTHREE—U.S.Owners: BothGeneralMotorsandyour dealerarecommittedtomaking sureyouarecompletely satisfied withthenewvehicle. However, if you continue to remain unsatisfied after following the procedure outlined in Steps One and Two, you can file with the Better Business Bureau (BBB) AutoLine ^® Program toenforce your rights.
TheBBBAutoLineProgramisan out-of-courtprogramadministered bytheCouncilofBetterBusiness Bureaustosettleautomotive disputesregardingvehiclerepairsor theinterpretationoftheNewVehicle LimitedWarranty.Althoughyoumay berequiredtoresorttothisinformal disputeresolutionprogrampriorto filingacourtaction,useofthe programisfreeofchargeandyour casewillgenerallybeheardwithin
40days.Ifyoudonotagreewiththe decisiongiveninyourcase,you mayrejectitandproceedwithany othervenueforreliefavailable toyou.
YoumaycontacttheBBBAutoLine Programusingthetoll-free telephonenumberorwritethemat thefollowingaddress:
BBBAutoLineProgram CouncilofBetterBusinessBureaus, Inc. 4200WilsonBoulevard Suite800 Arlington,VA22203-1838
Telephone:1-800-955-5100 www.dr.bbb.org/goauto
Thisprogramisavailableinall 50statesandtheDistrictof Columbia.Eligibilityislimitedby vehicleage,mileage,andother factors.GeneralMotorsreserves therighttochangeeligibility limitationsand/ordiscontinueits participationinthisprogram.
STEPTHREE—Canadian
Owners: Intheeventthatyoudo notfeelyourconcernshavebeen addressedafterfollowingthe procedureoutlinedinStepsOne andTwo, GeneralMotorsofCanada Limitedwantsyoutobeawareofits participationinano-charge Mediation/Arbitrationprogram. GeneralMotorsofCanadaLimited hascommittedtobindingarbitration ofownerdisputesinvolving factory-relatedvehicleservice claims. Theprogramprovidesfor thereviewofthefactsinvolvedby animpartialthirdpartyarbiter,and mayincludeaninformalhearing beforethearbiter. Theprogramis designedsothattheentiredispute settlementprocess,fromthetime youfileyourcomplainttothefinal decision,shouldbecompletedin approximately70days. Webelieve ourimpartialprogramoffers advantagesovercourtsinmost jurisdictionsbecauseitisinformal, quick,andfreeofcharge.
For further information concerning eligibility in the Canadian Motor Vehicle Arbitration Plan (CAMVAP), call toll-free 1-800-207-0685, or call the General Motors Customer Care Centre, 1-800-263-3777 (English), 1-800-263-7854 (French), or writeto:
Mediation/ArbitrationProgram c/oCustomerCareCentre GeneralMotorsofCanadaLimited MailCode:CA1-163-005 1908ColonelSamDrive Oshawa,OntarioL1H8P7
The inquiry should be accompanied by the Vehicle Identification Number(VIN).
CustomerSatisfaction Procedure(Mexico)

Garantía PLUS
DidyougettheWarrantyExtension Plan?Thisplanisrecommendedby GeneralMotorstosupplementthe warrantyincludedwiththenew vehiclepurchase.
Seeyourdealerfordetails.
CustomerAssistance Procedure
Ownersatisfactionandgoodwillare veryimportanttoyourdealerand GeneralMotors.
Normally, any problem with the transaction, sale, or usage of the vehicle must be handled by your dealers sales or serviced departments.
However, were cognizethat despite the good intention of all parties involved, sometimes a misunderstanding may occur.
If you have a problem that has not been satisfactorily handled through then normal means, we suggest the following steps:
STEPONE
Explainyourcasetoyourdealer serviceagent,servicemanager, dealersalesagent,orsales manager,dependingonyourcase.
Makesurethattheyhaveall necessaryinformation.Theyare interestedinyourcontinual satisfaction.
STEPTWO
If you are not satisfied, please contact the general manager your dealership owner to ask for their help. If they are not able to resolve your case, ask them to contact the right people at General Motors for support, if needed.
STEPTHREE
If your case is not resolved in reasonable amount to time by your dealer, please call the General Motors Customer Assistance Center (CAC) and provide the following information:
- Name
- Address
- Phonenumber
- Modelyear
- Brand
• VehicleIdentification Number(VIN) - Mileage
- Deliverydate
• Descriptionoftheproblem - Dealershipname
- Dealershipaddress
See Customer Assistance Offices (U.S. and Canada) on page 13-5 or Customer Assistance Offices (Mexico) on page 13-5.
CustomerAssistance Offices(U.S.andCanada)
Buickencouragescustomerstocall thetoll-freenumberforassistance. However,ifacustomerwishesto writeore-mailBuick,theletter shouldbeaddressedto:
UnitedStatesandPuertoRico
BuickCustomerAssistanceCenter P.O.Box33136 Detroit, MI48232-5136 www.Buick.com
1-800-521-7300 1-800-832-8425(ForText Telephonedevices(TTYs)) RoadsideAssistance: 1-800-252-1112
From U.S. Virgin Islands: 1-800-496-9994
Canada
General Motors of Canada Limited Customer Care Centre, Mail Code: CA1-163-005 1908 Colonel Sam Drive Oshawa, Ontario L1H8P7 www.gm.ca
1-800-263-3777(English) 1-800-263-7854(French) 1-800-263-3830(ForText Telephonedevices(TTYs)) RoadsideAssistance: 1-800-268-6800
AllOverseasLocations
PleasecontactthelocalGeneral MotorsBusinessUnit.
CustomerAssistance Offices(Mexico)
TocontacttheCustomerAssistance Center(CAC), usethephone numberslisted in this section. Customerassistance is available Monday through Friday, 08:00 to 20:00 hours, and Saturdays from 09:00 to 15:00 hours.
Alle-mailinquiriestotheCustomer AssistanceCenter(CAC)shouldbe sentto:cac.buick@gm.com.
Mexico
01-800-466-0818
UnitedStatesandCanada
1-800-521-7300
CostaRica
00-800-052-1005
Guatemala
1-800-999-5252
Panama
00-800-052-0001
DominicanRepublic
1-888-751-5301
EISalvador
800-6273
Honduras
800-0122-6101
CustomerAssistancefor TextTelephone(TTY) Users(U.S.andCanada)
Toassistcustomerswhoaredeaf, hardofhearing,orspeech-impaired andwhouseTextTelephones (TTYs),BuickhasTTYequipment availableatitsCustomerAssistance Center.AnyTTYusercan communicatewithBuickbydialing: 1-800-832-8425.TTYusersin Canadacandial1-800-263-3830.
OnlineOwnerCenter
OnlineOwnerExperience (U.S.)my.buick.com
The Buickonlineowner experience is a one-stop resourcethat allows interaction with Buick and keeps important vehicle-specific information in one place.
MembershipBenefits
(VehicleInformation): Downloadownermanualsandview vehicle-specificichow-tovideos.
(MaintenanceInformation): Viewmaintenanceschedules, required alerts, OnStaronboard vehicle diagnostic information, and scheduleservice appointments.
☑(ServiceHistory):View printabledealer-recordedservice recordsandself-recordedservice records.
(PreferredDealer Information): Selectapreferred dealerandviewdealerlocation, maps, phonenumbers, andhours.
(WarrantyTracking Information): Trackthevehicle's warrantyinformation.
(RecallInformation): View activerecallsorsearchbyVehicle IdentificationNumber(VIN). See VehicleIdentificationNumber(VIN) onpage 12-1.
(OtherAccountInformation): ViewGMCard, SiriusXMSatellite radio, and OnStaraccount information.
(LiveChatSupport): Chatlive with online help representatives. Visit my. buick.com to registry your vehicle.
BuickOwnerCentre(Canada) buickowner.ca
TakeatriptotheBuickOwner Centre:
- Chatlivewithonlinehelp representatives.
• UsetheVehicleToolssection. - Accessthirdpartyenthusiast sitesandsocialmedianetworks.
- Locateownerresourcessuchas lease-end,financing,and warrantyinformation.
- Retrieveyourfavoritearticles, quizzes,tipsandmultimedia galleriesorganizedintothe FeaturesandAutoCare Sections.
- Downloadtheownermanualfor yourvehicle,quicklyandeasily.
• FindtheBuick-recommended maintenanceservicesforyour vehicle.
GMMobility ReimbursementProgram (U.S.andCanada)
GM MOBILITY
This program is available to qualified applicants for cost reimbursement of eligible aftermarket adaptive equipment required for the vehicle, such as hand controls or a wheelchair/ scooter lift for the vehicle.
Formoreinformationonthelimited offer,visitwww.gmmobility.comor calltheGMMobilityAssistance Centerat1-800-323-9935.Text Telephone(TTY)users,call 1-800-833-9935.
GeneralMotorsofCanadaalsohas aMobilityProgram.Call 1-800-GM-DRIVE(463-7483)for details.TTYuserscall 1-800-263-3830.
Roadside Assistance Program(Mexico)
Asanewowner,yourvehicleis automaticallyenrolledinthe RoadsideAssistanceprogram.The servicesareavailableatnocost underthetermsandconditionsof theprogram.TheRoadside Assistanceprogramisnotpartof, orincluded,inthecoverage providedbythenewvehiclelimited warranty.
Roadside Assistance provides assistance to the driver and passengers while driving the vehicle within your city of residence or on any passableroad in Mexico, the United States, and Canada.
Servicesaresubjecttothe limitationsdescribedinthefollowing pages.Programcoveragevariesby country.
Roadside Assistance is available 24 hours, day, 365 days of the year.
This program expires two years from the date of the invoice for the vehicle, regardless of vehicle mileage and changes in vehicle ownership.
Formoreinformationaboutthe renewalofthisprogramattheend ofitsterm,contacttheBuick CustomerAssistanceCenterat 01-800-466-0818.
ServicesProvided
- FlatTireChange:Ifunableto changeaflattire,Roadside Assistancewillprovidetowing servicetothenearestauthorized Buickdealership.Itisthe owner'sresponsibilityforthe repairorreplacementofthetire.
13-8 Customer Information
Thisserviceislimitedtothe transferofthevehicletothe repairfacility.
• EmergencyFuelDelivery: Deliveryofenoughfuelforthe vehicletogettothenearest servicestation.
- Lock-OutService:Serviceto unlockthevehicleifyouare lockedout.
- BatteryJumpStart:Serviceto jumpstartadeadbattery.
• *EmergencyMessages: Transmissionofurgentphone messages.
• *EmergencyCalls:Callfor emergencyservices.
- *DealershipLocation Assistance:Information regardingaddressesand telephonenumbersforBuick dealers.
- EmergencyTowing: Towtothe nearestdealerforwarranty serviceifthevehiclecannot be driven.
If the vehicle is involved in an accident during the commission of acrime, administrative violation, or breach of traffic regulations, Roadside Assistance will not provide service. When the vehicle is not accessible to be towed, all maneuvers required to access it will beat the owner's expense.
Ifthevehicleisinanothercity outsideofyourresidence, RoadsideAssistanceislimited to movingthevehicletothe nearestdealer.Ifyouwouldlike thevehiclemovedtoadifferent dealer,youwillbeaskedto coverthedifferenceincostat thetimeofthemove.
If the vehicle cannot be received by the nearest Buick dealer due to scheduling conflicts, the vehicle will be taken to as safe, place where it will remain for up to 48 hours until it can be taken to the dealer. If the storage costs exceed the amount authorized, the owner is responsible to pay the difference at the time of service. Contact Roadside Assistance form more information on authorized amounts.
- *Triplnterruption: Thisservice is provided if you are prevented from further usage of your vehicle while traveling and it is not possible for the nearest Buickdealership to repair the vehicle the someday, requiring the vehicle to stay at the dealership for an nightormore.
If this happens, in addition to the previously listed services and prior to confirmation by the dealership, you are entitled to choose one of the following alternatives, within the limit of existing Roadside Assistance program guidelines. If the costs exceed the amount authorized for these services, you must pay the difference at the time of service.
Roadside Assistance will coordinate hotel accommodations for all vehicle travelers foruptotwonights.
Arentalcarwillbeprovidedfor uptotwodaysandthevehicle mustbereturnedtoitsoriginal destination,excludingvehicles withacarryingcapacitygreater than3.5tons.
Complimentary Transportation: If you prefer to continue your trip to the intended destination or return to your place of residence, and the trip requires more than eight hours driving on theroad, transportation for the driver and passengers by first class bus or coach commercial airlinewill be provided to a location chosen by Roadside Assistance, depending on availability at the chosen destination. Restrictions apply based on vehicle specifications.
If you are on the road, taxi servicetothenearest bus station or airport will be provided.
- *Complimentary TransportationforVehiclePick Up:Transportationtopickup yourvehicleafterrepairsare complete.Oncethedealerhas reportedthatthevehiclehas beenrepaired,Roadside Assistancewillprovidebusor commercialairlineone-way service(subjecttoavailability) forthepersondesignatedbyyou tocollectyourvehicleatthe dealership'slocationifyouorthe designatedpersonarenotinthe sametownorcityasthe dealership.
*Theseservicesarenotprovidedfor U.S.orCanadaresidents.All servicesprovidedintheU.S.and Canadaareattheowner'sexpense andwillbereimbursedbyRoadside Assistance.
ServicesNotIncludedinRoadside Assistance
RoadsideAssistancedoesnot coverorreimburseservicesforthe following:
• Eventscausedbyfraudorbad faithbythedriver.
- Vehicleimmobilizationsituations duetoamajorforceor unforeseencircumstances, such as naturalphenomenaofan extraordinarynature, earthquakes, volcaniceruptions, andothercyclonicstorms.
- Vehicleimmobilizationsituations arising from car accidents caused by the driver of the vehicle or third parties. This means any occurrence that causes physical injury to the occupants and/or the vehicle caused by external forces.
- Actsofterrorism, riotoruproar, armedforcesorpoliceactions which preventtimelydelivery of assistance services.
- Foodservice,beverages, telephonecalls,orotherextra costs.Accommodationcosts applyonlytoMexicoperthe termsandconditionsofthe RoadsideAssistanceprogram.
- Anydamagetothevehicle withoutintent,derivedfromthe servicesprovided.
- Costoftowingatrailerwhen choosingaBuickdealerthatis nearesttothetemporarystorage facilityforthedisabledvehicle.
- Costofallmaneuversrequired toaccessthevehiclewhenitis notavailabletobetowed.
- Costoffuelprovided.
Routinevehiclerepaircostsarenot coveredbytheRoadside Assistanceprogram.Formore information,seeyournewvehicle warranty.
ContactingRoadsideAssistance
RoadsideAssistanceservicesareof nocosttoyouandavailable 24hoursaday,365daysayear. Costsareonlyincurredinsituations thatexceedthelimitsofthe program,someofwhicharelisted previouslyinthissection.
TocontactRoadsideAssistanceby phone, usethefollowingnumbers:
Mexico
01-800-466-0818
UnitedStates
1-866-466-8197
Canada
1-800-268-6800
Roadside Assistance Program(U.S.and Canada)
For U.S.-purchased vehicles, call 1-800-252-1112; (TextTelephone (TTY): 1-888-889-2438).
For Canadian-purchased vehicles, call 1-800-268-6800.
Serviceisavailable24hoursaday, 365daysayear.
CallingforAssistance
WhencallingRoadsideAssistance, havethefollowinginformation ready:
- Yourname,homeaddress,and hometelephonenumber.
• Telephonenumberofyour location. -
Locationofthevehicle.
• Model, year, color, and license platenumberofthevehicle. -
Odometerreading, Vehicle IdentificationNumber(VIN), and deliverydateofthevehicle.
• Descriptionoftheproblem.
Coverage
Servicesareprovidedupto6years/110000km(70,000mi),whichever comesfirst.
IntheU.S.,anyonedrivingthe vehicleiscovered.InCanada,a persondrivingthevehiclewithout permissionfromtheownerisnot covered.
RoadsideAssistanceisnotapartof theNewVehicleLimitedWarranty. BuickandGeneralMotorsof CanadaLimitedreservetherightto makeanychangesordiscontinue theRoadsideAssistanceprogramat anytimewithoutnotification.
BuickandGeneralMotorsof CanadaLimitedreservetherightto limitservicesorpaymenttoan ownerordriveriftheydecidethe
claimsaremadetoooften,orthe sametypeofclaimismademany times.
ServicesProvided
• EmergencyFuelDelivery: Deliveryofenoughfuelforthe vehicletogettothenearest servicestation.
- Lock-OutService:Serviceto unlockthevehicleifyouare lockedout.Aremoteunlockmay beavailableifyyouhave OnStar®.Forsecurityreasons, thedrivermustpresent identificationbeforethisservice isgiven.
- EmergencyTowfromaPublic RoadorHighway:Towtothe nearestBuickdealerfor warrantyservice,orifthevehicle wasinacrashandcannotbe driven.Assistanceisalsogiven whenthevehicleisstuckin sand,mud,orsnow.
13-12 Customer Information
- FlatTireChange:Serviceto changeaflattirewiththespare tire. Thesparetire, ifequipped, mustbeingoodconditionand properlyinflated. Itistheowner's responsibilityfortherepairor replacementofthetireifitisnot coveredbythewarranty.
- BatteryJumpStart: Serviceto jumpstartadeadbattery.
ServicesNotIncludedin RoadsideAssistance
- Impoundtowingcausedby violationofanylaws.
- Legalfines.
- Mounting, dismounting, or changing of snowtires, chains, or other traction devices.
- Towingorservicesforvehicles drivenonanon-publicroador highway.
ServicesSpecificto Canadian-PurchasedVehicles
- Fueldelivery:Reimbursement isapproximately\$5Canadian. Dieselfueldeliverymaybe restricted.Propaneandother fuelsarenotprovidedthrough thisservice.
- Lock-OutService: Vehicle registration is required.
-
TriplInterruptionBenefitsand Assistance:Mustbeover 250kilometersfromwhereyour tripwasstartedtoqualify. General Motors of Canada Limited requires pre-authorization, original detailedreceipts, andacopy of therepairorders.Once authorization has been received, the Roadside Assistance advisor will help you make arrangements and explain how to receive payment.
-
AlternativeService:If assistancecannotbeprovided rightaway,theRoadside Assistanceadvisormaygive permissiontogetlocal emergencyroadservice.Youwill receivepayment,upto\$100, aftersendingtheoriginalreceipt toRoadsideAssistance. Mechanicalfailuresmaybe covered,howeveranycostfor partsandlaborforrepairsnot coveredbythewarrantyarethe ownerresponsibility.
SchedulingService Appointments(U.S.and Canada)
Whenthevehiclerequireswarranty service,contactyourdealer and requestanappointment.By schedulingaserviceappointment andadvisingtheserviceconsultant ofyourtransportationneeds,your dealercanhelpminimizeyour inconvenience.
If the vehicle cannot be scheduled into the serviced department immediately, keep driving it until it can be scheduled for service, unless, of course, the problem is safety related. If it is, please call your dealership, let them know this, and ask for instructions.
If your dealer requests you to bring the vehicle for service, you are urged todos to easily in the work day as possible to allow for same-day repair.
Courtesy Transportation Program(U.S.and Canada)
Toenhanceyourownership experience,weandourparticipating dealersareproudtoofferCourtesy Transportation,acustomersupport programforvehicleswiththe Bumper-to-Bumper(BaseWarranty CoverageperiodinCanada), extendedpowertrain,and/or hybrid-specificwarrantiesinboth theU.S.andCanada.
SeveralCourtesyTransportation optionsareavailabletoassistin reducinginconveniencewhen warrantyrepairsarerequired.
Courtesy Transportation is not a part of the New Vehicle Limited Warranty. A separate booklet entitled "Limited Warranty and Owner Assistance Information" furnished with each new vehicle provides detailed warranty coverage information.
TransportationOptions
Warrantyservicecangenerallybe completedwhileyouwait.However, ifyouareunabletowait,GMhelps tominimizeinconvenienceby providingseveraltransportation options.Dependingonthe circumstances,yourdealercanoffer oneofthefollowing:
ShuttleService
Shuttleserviceisthepreferred meansofofferingCourtesy Transportation.Dealersmayprovide shuttleservicetogetyoutoyour
destinationwithminimalinterruption ofyourdailyschedule. This includes one-wayorround-tripshuttleservice withinreasonabletimeanddistance parametersofyourdealer'sarea.
PublicTransportationorFuel Reimbursement
If the vehiclerequires overnight warranty repairs, and public transportation is used instead of your dealer's shuttleservice, the expense must be supported by original receipts and can only be up to them maximum amount allowed by GM for shuttleservice. In addition, for U.S. customers, should you arrangetransportation through a friend or relative, limited reimbursement for reasonable fuel expenses may be available. Claim amount should reflect actual costs and be supported by original receipts. See your dealer for information regarding the allowance amounts for reimbursement off fuel or other transportation costs.
CourtesyRentalVehicle
Yourdealermayarrangetoprovide youwithacourtesyrentalvehicleor reimburseyouforarentalvehicle thatyouobtainifthevehicleiskept foranovernightwarrantyrepair. Rentalreimbursementwillbelimited andmustbesupportedbyoriginal receipts. Thisrequiresthatyousign andcompletearentalagreement andmeetstate/provincial,local,and rentalvehicleproviderrequirements. Requirementsvaryandmayinclude minimumagerequirements, insurancecoverage,creditcard,etc. Youareresponsibleforfuelusage chargesandmayalsobe responsiblefortaxes,levies,usage fees,excessivemileage,orrental usagebeyondthecompletionofthe repair.
Itmaynotbepossibletoprovide a likevehicleasacourtesyrental.
Additional Program Information
Allprogramoptions,suchasshuttle service,maynotbeavailableat everydealer.Pleasecontactyour dealerforspecificinformationabout availability.AllCourtesy Transportationarrangementswillbe administeredbyappropriatedealer personnel.
General Motors reserve theright to unilaterally modify, change, or discontinue Courtesy Transportation at any time and to resolve all question of claim eligibility pursuant to the terms and conditions described herein at its solediscretion.
CollisionDamageRepair (U.S.andCanada)
If the vehicle is involved in collision and it is damaged, have the damage repaired by a qualified technician using the proper equipment and quality replacement parts. Poorly performed collision
repairsdiminishthevehicleresale value, and safetyperformance can be compromised in subsequent collisions.
CollisionParts
GenuineGMCollisionpartsarenew partsmadewiththesamematerials andconstructionmethodsasthe partswithwhichthevehiclewas originallybuilt.GenuineGM Collisionpartsarethebestchoiceto ensurethatthevehicle'sdesigned appearance,durability,andsafety arepreserved.TheuseofGenuine GMpartscanhelpmaintaintheGM NewVehicleLimitedWarranty.
Recycledoriginalequipmentparts mayalsobeusedforrepair. These partsaretypicallyremovedfrom vehiclesthatweretotallossesin priorcrashes.Inmostcases,the partsbeingrecycledarefrom undamagedsectionsofthevehicle. ArecycledoriginalequipmentGM partmaybeanacceptablechoiceto maintainthevehicle'soriginally designedappearanceandsafety
performance;however,thehistoryof thesepartsisnotknown.Suchparts arenotcoveredbytheGMNew VehicleLimitedWarranty,andany relatedfailuresarenotcoveredby thatwarranty.
Aftermarketcollisionpartsarealso available. Thesearemadeby companiesotherthanGMandmay nothavebeentestedforthevehicle. Asaresult, thesepartsmayfit poorly, exhibitprematuredurability/corrosionproblems, and may not performproperly insubsequent collisions. Aftermarketpartsarenot covered by the GMNewVehicle Limited Warranty, and any vehicle failurerelatedtosuchpartsisnot covered by that warranty.
RepairFacility
GMalsorecommendsthatyou chooseacollisionrepairfacilitythat meetsyourneedsbeforeyouever needcollisionrepairs. Yourdealer mayhaveacollisionrepaircenter withGM-trainedtechniciansand state-of-the-artequipment,orbe
abletorecommendacollisionrepair centerthathasGM-trained techniciansandcomparable equipment.
InsuringtheVehicle
ProtectyourinvestmentintheGM vehiclewithcomprehensiveand collisioninsurancecoverage.There aresignificantdifferencesinthe qualityofcoverageaffordedby variousinsurancepolicyterms. Manyinsurancepoliciesprovide reducedprotectiontotheGM vehiclebylimitingcompensationfor damagerepairsthroughtheuseof aftermarketcollisionparts.Some insurancecompanieswillnot specifyaftermarketcollisionparts. Whenpurchasinginsurance,we recommendthatyouensurethatthe vehiclewillberepairedwithGM originalequipmentcollisionparts. Ifsuchinsurancecoverageisnot availablefromyourcurrent insurancecarrier,considerswitching toanotherinsurancecarrier.
If the vehicle is leased, the leasing company may require you to have insurance that ensures repairs with Genuine GM Original Equipment Manufacturer (OEM) parts or Genuine Manufacturer replacement parts. Read the lease carefully, as you maybe charged at the end of the lease for poor quality repairs.
IfaCrashOccurs
Iftherehasbeenaninjury,call emergencyservicesforhelp.Donot leavethesceneofacrashuntilall mattershavebeentakencareof. Movethevehicleonlyifitsposition putsyouindanger,oryouare instructedtomoveitbyapolice officer.
Giveonlythenecessaryinformation topoliceandotherpartiesinvolved inthecrash.
Foremergencytowingsee RoadsideAssistanceProgram (Mexico)onpage13-7orRoadside AssistanceProgram(U.S.and Canada)onpage13-11.
Gatherthefollowinginformation:
- Drivername, address, and telephonenumber.
• Driverlicensenumber. - Ownername, address, and telephonenumber.
• Vehiclelicenseplatenumber.
• Vehiclemake, model, and modelyear.
• VehicleIdentification Number(VIN).
• Insurancecompanyandpolicy number. - Generaldescriptionofthe damagetotheothervehicle.
Choose areputablerepairfacility that uses quality replacement parts. See "CollisionParts" earlier in this section.
If the airbag has inflated, see What Will You See after an Airbag Inflates? on page 3-27.
ManagingtheVehicleDamage RepairProcess
Intheeventthatthevehiclerequires damagerepairs, GM recommends thatyoutakeanactiveroleinits repair. If you have apre-determined repair facility of choice, takethe vehicle there, or have it towed there. Specify to the facility that any required replacement collision parts be originalequipment parts, either new Genuine GM parts or recycled original GM parts. Remember, recycled partswill not be covered by the GM vehicle warranty.
Insurancepaysthebillfortherepair, butyoumustlivewiththerepair. Dependingonyourpolicylimits, yourinsurancecompanymay initiallyvaluetherepairusing aftermarketparts.Discussthiswith therepairprofessional,andinsiston GenuineGMparts.Remember, ifthevehicleisleased,youmaybe obligatedtohavethevehicle repairedwithGenuineGMparts, evenifyourinsurancecoverage doesnotpaythefullcost.
Ifanotherparty'sinsurance companyispayingfortherepairs, youarenotobligatedtoaccepta repairvaluationbasedonthat insurancecompany'scollisionpolicy repairlimits,asyouhaveno contractuallimitswiththatcompany. Insuchcases,youcanhavecontrol oftherepairandpartschoicesas longasthecoststayswithin reasonablelimits.
ServicePublications OrderingInformation
ServiceManuals
ServiceManualshavethediagnosis andrepairinformationonthe engines,transmission,axle, suspension,brakes,electrical, steering,body,etc.
ServiceBulletins
ServiceBulletinsgiveadditional technicalserviceinformation neededtoknowledgeablyservice GeneralMotorscarsandtrucks.
Eachbulletincontainsinstructions toassistinthediagnosis and serviceofthevehicle.
OwnerInformation
Ownerpublicationsarewritten specificallyforownersandintended toprovidebasicoperational informationaboutthevehicle.The OwnerManualincludesthe MaintenanceScheduleforall models.
In-Portfolio: IncludesaPortfolio, OwnerManual, and Warranty Manual.
RETAILSELLPRICE: \$35.00(U.S.) plushandlingand shippingfees.
WithoutPortfolio:Owner Manualonly.
RETAILSELLPRICE: \$25.00(U.S.) plushandlingand shippingfees.
CurrentandPastModels
TechnicalServiceBulletinsand Manualsareavailableforcurrent andpastmodelGMvehicles.
ORDERTOLLFREE: 1-800-551-4123Monday–Friday 8:00AM–6:00PMEasternTime
ForCreditCardOrdersOnly (VISA-MasterCard-Discover), see Helm, Inc. at: www.helminc.com.
Orwriteto:
Helm, Incorporated Attention: CustomerService 47911 HalyardDrive Plymouth, MI48170
Pricesaresubjecttochangewithout noticeandwithoutincurring obligation.Allowampletimefor delivery.
All listed prices are quoted in U.S. funds. Make checks payable in U.S. funds.
ReportingSafety Defects
ReportingSafetyDefects totheUnitedStates Government
If you believethat your vehicle has a defect which could cause acrashor could cause injury or death, you should immediately inform the National Highway Traffic Safety Administration (NHTSA) in addition to notifying General Motors.
IfNHTSAreceivessimilar complaints, itmayopenan investigation, and if it find that as safety defect exists in a group of vehicles, it may order are recall and remedycampaign.
13-18 Customer Information
However, NHTSA cannot become involved in individual problems between you, your dealer, or General Motors.
TocontactNHTSA,youmaycall theVehicleSafetyHotline toll-freeat1-888-327-4236 (TTY:1-800-424-9153);goto http://www.safercar.gov;or writeto:
Administrator, NHTSA 1200 New Jersey Avenue, S.E. Washington, D.C. 20590
Youcanalsoobtainother informationaboutmotor vehiclesafetyfrom http://www.safercar.gov.
ReportingSafetyDefects totheCanadian Government
IfyouliveinCanada, and you believethatthevehiclehasasafety defect, notify TransportCanada immediately, and notify General Motors of Canada Limited. Call Transport Canada at 1-800-333-0510 or writeto:
TransportCanada RoadSafetyBranch 80rueNoel
Gatineau, QCJ8Z0A1
ReportingSafetyDefects toGeneralMotors
InadditiononotifyingNHTSA(or TransportCanada)inasituationlike this,pleasenotifyGeneralMotors.
Call1-800-521-7300, orwrite:
BuickCustomerAssistanceCenter P.O.Box33136 Detroit, MI48232-5136
InCanada, call 1-800-263-3777 (English) or 1-800-263-7854 (French), or write:
General Motors of Canada Limited Customer Care Centre, Mail Code: CA1-163-005 1908 Colonel Sam Drive Oshawa, Ontario L1H8P7
VehicleData Recordingand Privacy
The vehicle has a number of computer that record information about the vehicle's performance and how it is driven. Forexample, the vehicle uses computer module to monitor and control engine and transmission performance, to monitor the conditions for airbag deployment and deploy them in crash, and, if equipped, to provide antilock braking to help the driver control the vehicle. These modules may stored at to help the dealer technicians servic the vehicle. Some modules may also stored data about how the vehicle is operated, such as rate off fuel consumption or averages speed. These modules may retain personal preferences, such as radiopresets, seat positions, and temperatures settings.
EventDataRecorders
Thisvehicleisequippedwithan eventdatarecorder(EDR).The mainpurposeofanEDRisto record,incertaincrashornear crash-likesituations,suchasanair bagdeploymentorhittingaroad obstacle,datathatwillassistin understandinghowavehicle's systemsperformed.TheEDRis designedtorecorddatarelatedto vehicledynamicsandsafety systemsforashortperiodoftime, typically30secondsorless.The EDRinthisvehicleisdesignedto recordsuchdataas:
• Howvarious systems in your vehicle were operating;
- Whetherornotthedriverand passengersafetybeltswere buckled/fastened;
- Howfar(ifatall)thedriverwas depressingtheacceleratorand/orbrakepedal;and,
• Howfastthevehiclewas traveling.
Thesedatacanhelpprovidea betterunderstandingofthe circumstancesinwhichcrashesand injuriesoccur.NOTE:EDRdataare recordedbyyourvehicleonlyifa non-trivialcrashsituationoccurs;no dataarerecordedbytheEDRunder normaldrivingconditionsandno personaldata(e.g.,name,gender, age,andcrashlocation)are recorded.However,otherparties, suchaslawenforcement,could combinetheEDRdatawiththetype ofpersonallyidentifyingdata routinelyacquiredduringacrash investigation.
ToreaddatarecordedbyanEDR, specialequipmentisrequired,and accesstothevehicleortheEDRis needed.Inadditiontothevehicle manufacturer,otherparties,suchas lawenforcement,thathavethe specialequipment,canreadthe informationiftheyhaveaccessto thevehicleortheEDR.
GMwillnotaccessthisdataor shareitwithothersexcept:withthe consentofthevehicleowneror,
ifthevehicleisleased,withthe consentofthelessee;inresponse toanofficialrequestbypoliceor similargovernmentoffice;aspartof GM'sdefenseoflitigationthrough thediscoveryprocess;or,as requiredbylaw.DatathatGM collectsorreceivesmayalsobe usedforGMresearchneedsormay bemadeavailabletoothersfor researchpurposes,whereaneedis shownandthedataisnottiedtoa specificvehicleorvehicleowner.
OnStar®
Ifthevehicleisequippedwith OnStar® andhasanactive subscription,additionaldatamaybe collectedthroughtheOnStar system. Thisincludesinformation aboutthevehicle'soperation;about collisionsinvolvingthevehicle;the useofthevehicleanditsfeatures; and,incertainsituations,the locationandapproximateGPS speedofthevehicle.Refertothe
OnStarTermsandConditionsand PrivacyStatementontheOnStar website.
InfotainmentSystem
If the vehicle is equipped with a navigation system as part of the infotainment system, use of the system may result in the storage of destinations, addresses, telephone numbers, and other trip information. Seethe infotainment manual for information on stored data and for deletion instructions.
RadioFrequency Identification(RFID)
RFIDtechnologyisusedinsome vehiclesforfunctionssuchastire pressuremonitoringandignition systemsecurity,aswellasin connectionwithconveniences such asRemoteKeylessEntry(RKE) transmittersforremotedoorlocking/unlockingandstarting,and in-vehicletransmittersforgarage dooropeners.RFIDtechnologyin
GMvehiclesdoesnotuseorrecord personalinformationorlinkwithany otherGMsystemcontaining personalinformation.
RadioFrequency Statement
This vehicle hassystems that operate on radio frequency that comply with Part 15 of the Federal Communications Commission (FCC) rules and with Industry Canada Standards RSS-GEN/210/220/310.
Operationissubjecttothefollowing twoconditions:
- Thedevicemaynotcause harmfulinterference.
- The device must accept any interference received, including interference that may cause undesired operation of the device.
Changesormodificationstoanyof thesesystemsbyotherthanan authorizedservicefacilitycouldvoid authorizationtousethisequipment.
OnStar
OnStarOverview
OnStarOverview......14-1
OnStarServices
Emergency......14-2
Security......14-2
Navigation....14-2
Connections......14-3
Diagnostics......14-5
OnStarAdditionallInformation
OnStarAdditional
Information......14-5
OnStarOverview



Ifequipped, this vehicle has a comprehensive, in-vehiclesystem that can connect to alive Advisor for Emergency, Security, Navigation, Connection, and Diagnostic Services.
TheOnStarsystemstatuslightis nexttotheOnStarbuttons.Ifthe statuslightis:
• SolidGreen:Systemisready.
- FlashingGreen:Onacall.
• Red:Indicatesaproblem.
Press 🟢 on/orcall1-888-4-ONSTAR (1-888-466-7827)tospeaktoan Advisor.
Press 📞 to:
• Makeacall, endacall, oransweranincomingcall.
- GiveOnStarHands-FreeCalling voicecommands.
- GiveOnStarTurn-by-Turn Navigationvoicecommands. RequirestheavailableDirections andConnectionsserviceplan.
Press on toconnecttoalive
Advisorto:
- Verifyaccountinformationor updatecontactinformation.
• Getdrivingdirections. Requires the available Directions and Connectionsserviceplan. - ReceiveOn-Demand Diagnosticsforacheckofthe vehicle'skeyoperatingsystems.
- ReceiveRoadsideAssistance.
PresstheOnStarEmergency button 📄 togetapriority connectiontoanEmergency Advisoravailable24/7to:
• Gethelpforanemergency.
- BeaGoodSamaritanor respondtoanAMBERAlert.
• Getcrisisassistance and evacuation routes.
OnStarServices
Emergency
WithAutomaticCrashResponse, thebuilt-insystemcanautomatically connecttohelpinmostcrashes, evenifhelpcannotberequested.
Press toconnecttoan EmergencyAdvisor.GPS technologyisusedtoidentifythe vehiclelocationandcanprovide criticalinformationtoemergency personnel.TheAdvisorisalso trainedtooffercriticalassistancein emergencysituationsbeforefirst respondersarrive.
Security
OnStarprovidesserviceslikeStolen VehicleAssistance, Remotelgnition Block, and Roadside Assistance, ifthevehicleisequipped. OnStar can unlock the vehicle doors remotely, if it is equipped with
automaticdoorlocks, and can help policelocatethevehicleifitis stolen.
Navigation
OnStarnavigationrequiresthe DirectionsandConnections serviceplan.
Press on to received directions or havethemsent to the vehicle navigationscreen, if equipped. Destinations can also be forwarded to the vehicle from MapQuest.com. The On Starmapping database is continuously updated. For coverage maps, see www.onstar.com (U.S.) www.onstar.ca (Canada).
Turn-by-TurnNavigation
- Press 📊 toconnecttoalive Advisor.
- Requestdirections.
- Directions are downloaded to the vehicle.
- Follow the voice-guided commands.
UsingVoiceCommands DuringaPlannedRoute
CancelRoute
-
Press 📋. Systemresponds: "OnStarready," thenatone. Say "Cancelroute." System responds: "Doyouwantto canceldirections?"
-
Say "Yes." Systemresponds: "OK,requestcompleted,thank you,goodbye."
RoutePreview
-
Press 📋. Systemresponds: "OnStarready," thenatone.
-
Say "Routepreview." System respondswiththenextthree maneuvers.
-
Say "Goodbye." Exitsvoice commands.
Repeat
-
Press 📋. Systemresponds: "OnStarready," thenatone.
-
Say "Repeat." System responds with the last direction given, then respond with "OnStarready," then at one.
-
Say "Goodbye." Exitsvoice commands.
GetMyDestination
-
Press 📋. Systemresponds: "OnStarready," thenatone.
-
Say "Getmydestination." Systemrespondswithaddress andthedistancetothe destination, thenrespondswith "OnStarready," thenatone.
-
Say "Goodbye." Exitsvoice commands.
OtherNavigationServices AvailablefromOnStar
OnStareNav:Allowssubscribers tosenddestinationsfrom MapQuest.comtotheirTurn-by-Turn Navigationorscreen-based navigationsystem.Whenready,the directionswillbedownloadedtothe vehicle.
DestinationDownload:Press thenrequesttheAdvisorto downloadaddirectionsto the navigationsysteminthevehicle. Afterthecallends,pressthe"Go" buttononthenavigationscreento begindrivingdirections.
Destinationscanalsobe downloadedonthego. For informationabouteNav, Destination Download, and coveragemapssee www.onstar.com(U.S.), www.onstar.ca(Canada).
Connections
OnStarHands-FreeCallingallows callstobemadeandreceivedfrom thevehicle. Thevehiclecanalsobe controlledfromacellphonethrough theOnStarRemoteLinkmobileapp. Forcoveragemaps,see www.onstar.com(U.S.), www.onstar.ca(Canada).
Hands-FreeCalling
- Press 📄. Systemresponds: "OnStarready."
14-4OnStar
- Say "Call." Systemresponds: "Pleasesaythenameornumber tocall."
- Saytheentirenumberwithout pausing,includinga"1"andthe areacode.Systemresponds: "OKcalling."
Calling911Emergency
- Press 📋. Thesystemresponds "OnStarReady," followed by atone.
- Say "Call." Thesystemresponds "Pleasesaythenameornumber tocall."
- Say "911" without pausing. The system responds "911."
- Say "Call." Thesystemresponds "OK, dialing911."
RetrieveMyNumber
- Press 📋. Systemresponds: "OnStarready."
- Say "Mynumber." System responds: "YourOnStar Hands-FreeCallingnumberis."
EndaCall
Press 📋. Systemresponds: "Call ended."
StoreaNameTagforSpeed Dialing
- Press 📋. Systemresponds: "OnStarready."
- Say "Store." Systemresponds: "Pleasesaythenumberyou wouldliketostore."
- Saytheentirenumberwithout pausing.Systemresponds: "Pleasesaythenametag."
- Pickanametag.System responds: "Abouttostore
.DoesthatsoundOK?" - Say "Yes" or say "No" to try again. Systemresponds: "OK, storing
.
PlaceaCallUsingaStored Number
- Press 📋. Systemresponds: "OnStarready."
- Say "Call
" System responds: "OK, calling "
VerifyMinutesandExpiration
Press 📋 and say "Minutes" then "Verify" to check how many minutes remain and their expiration date.
OnStarMobileApp
DownloadtheOnStarRemoteLink mobileapptoselectApple,Android and BlackBerrydevicestocheck vehiclefuellevel,oillife,ortire pressure;tostartthevehicle(if equipped)orunlockit;ortoconnect toanOnStarAdvisor.ForOnStar RemoteLinkinformationand compatibility,seewww.onstar.com (U.S.),www.onstar.ca(Canada).
Diagnostics
OnStarVehicleDiagnosticswill performvehiclecheckevery month.Itwillchecktheengine, transmission,antilockbrakes,and majorvehiclesystems.Italso checksthetirepressures,ifthe vehicleisequippedwiththeTire PressureMonitoringSystem.Ifa diagnosticscheckisneeded
betweene-mails, press 📄, andan Advisorcanrunacheck.
OnStarAdditional Information
TransferringService
Press on torequestaccounttransfer eligibilityinformation.TheAdvisor canassistincancelingorremoving accountinformation.IfOnStar receivesinformationthatvehicle ownershiphaschanged,OnStar maysendavoicemessagetthe vehicle,requestingupdatedaccount information.
ReactivationforSubsequent Owners
Press and follow the prompt to speak to an Advisor as soon as possible after acquiring the vehicle. The Advisor will update vehicle records and will explain the OnStar service offers and options available.
HowOnStarServiceWorks
AutomaticCrashResponse, EmergencyServices,CrisisAssist, StolenVehicleAssistance,Vehicle Diagnostics,RemoteDoorUnlock, RoadsideAssistance,Turn-by-Turn Navigation,andHands-FreeCalling areavailableonmostvehicles.Not allOnStarservicesareavailable everywhereoronallvehicles.For moreinformation,afulldescription ofOnStarservices,system limitations,andOnStartermsand conditions:
• IntheU.S.seewww.onstar.com (U.S.)orcall1-888-4-ONSTAR. (1-888-466-7827).
• InCanadaseewww.onstar.ca (Canada)orcall 1-888-4-ONSTAR. (1-888-466-7827).
• TTY1-877-248-2080.
- Press on tospeakwithan Advisor.
OnStarservicesrequireavehicle electricalsystem,wirelessservice, andGPSsatellitetechnologiestobe availableandoperatingforfeatures tofunctionproperly.Thesesystems maynotoperateifthebatteryis dischargedordisconnected.
OnStarservicecannotworkunless yourvehicleisinaplacewhere OnStarhasanagreementwitha wirelessserviceproviderforservice inthatarea,andthewireless serviceproviderhascoverage, networkcapacity,reception,and technologycompatiblewithOnStar service.Serviceinvolvinglocation informationaboutthevehiclecannot workunlessGPSsignalsare available,unobstructed,and compatiblewiththeOnStar hardware.OnStarservicemaynot workiftheOnStarequipmentisnot properlyinstalledorithasnotbeen properlymaintained.Ifequipmentor softwareisadded,connected, ormodified,OnStarservicemaynot work.Otherproblemsbeyondthe controlofOnStarmayprevent
servicesuchashills,tallbuildings, tunnels,weather,electricalsystem designandarchitectureofthe vehicle,damagetothevehicleina crash,orwirelessphonenetwork congestionorjamming.
SeeRadioFrequencyStatementon page13-20forinformation regardingPart15oftheFederal CommunicationsCommission(FCC) rulesandIndustryCanada StandardsRSS-GEN/210/220/310.
ServicesforPeoplewith Disabilities
Advisorsprovideservicestohelp subscriberswithphysicaldisabilities andmedicalconditions.
Press on forhelpwith:
- Locatingagasstationwithan attendanttopumpgas.
• Findingahotel,restaurant,etc., thatmeetsaccessibilityneeds.
• Providingdirectionstothe closesthospitalorpharmacyin urgentsituations.
TTYUsers
OnStarhastheabilityto communicatetothedeaf, hard-of-hearing,orspeech-impaired customerswhileinthevehicle.The availabledealer-installedTTY systemcanprovidein-vehicle accesstoalloftheOnStarservices, exceptVirtualAdvisorandOnStar Turn-by-TurnNavigation.
OnStar.com(U.S.)orOnStar.ca (Canada)
Thewebsiteprovidesaccessto accountinformation, allows managementoftheOnStar subscription,andviewingofvideos ofeachservice.Getsubscription planpricingandsignupforOnStar VehicleDiagnostics.Clickonthe "MyAccount"tabonthehome page.Thewebsitenavigationand servicesprovidedmayvaryby country.
OnStarPersonalIdentification Number(PIN)
APINisneededtoaccesssomeof theOnStarservices,likeRemote DoorUnlockandStolenVehicle Assistance.Youwillbepromptedto changethePINthefirsttimewhen speakingwithanAdvisor.To changetheOnStarPIN,callOnStar andprovidetheAdvisorwiththe currentnumber.
Warranty
OnStarequipmentmaybe warrantedaspartoftheNew VehicleLimitedWarranty. The manufacturerofthevehicle furnishesdetailedwarranty information.
Languages
The vehicle can be programmed to respond in English, Frenchor Spanish. Press 🟢 and askan Advisor. Advisors can speak English, Frenchor Spanish.
PotentialIssues
OnStarcannotperformRemote DoorUnlockorStolenVehicle Assistanceafterthevehiclehas beenoffcontinuouslyforfivedays. Afterfivedays, OnStarcancontact RoadsideAssistanceanda locksmithtohelpgainaccesstothe vehicle.
GlobalPositioning System(GPS)
- ObstructionoftheGPScan occurinlargecitywithtall buildings;inparkinggarages;aroundairports;intunnels, underpasses,orparking garages;orinanareawithvery densetrees.IfGPSsignalsare notavailable,theOnStarsystem shouldstilloperatetocall OnStar.However,OnStarcould havedifficultyidentifyingthe exactlocation.
- Inemergency situations, OnStar canusethelaststoredGPS locationtosendtoemergency responders.
- A temporary lossof GPScan causelossof the ability to send a Turn-by-Turn Navigation route. The Advisormay give averbal route or may ask for a callback after the vehicle is driven into an open area.
CellularandGPSAntennas
Avoidplacingitemsoverornearthe antennatopreventblockingcellular andGPSsignalreception.Cellular receptionisrequiredforOnStarto sendremotesignalstothevehicle.
UnabletoConnecttoOnStar Message
If there is limited cellular coverage or the cellular network has reached maximum capacity, this message may come on. Press ☑ to try the call again or try again after driving a few miles into another cellular area.
VehicleandPowerIssues
OnStarservicesrequireavehicle electricalsystem,wirelessservice, andGPSsatellitetechnologiestobe availableandoperatingforfeatures tofunctionproperly. Thesesystems maynotoperateifthebatteryis dischargedordisconnected.
Add-on Electrical Equipment
TheOnStarsystemisintegrated intotheelectricalarchitectureofthe vehicle.Donotaddanyelectrical equipment.SeeAdd-OnElectrical Equipmentonpage9-49.Added electricalequipmentmayinterfere withtheoperationoftheOnStar systemandcauseittonotoperate.
Privacy
ThecompleteOnStarPrivacy Statementmaybefoundat www.onstar.com(U.S.), orwww.onstar.ca(Canada). Privacy-sensitiveusersofwireless communicationsarecautionedthat theprivacyofanyinformationsent viawirelesscellularcommunications cannotbeassured. Thirdparties mayunlawfullyinterceptoraccess transmissionsandprivate communicationswithoutconsent.
OnStar-libcurlandunzip acknowledgments
CertainOnStarcomponentsinclude libcurlandunzipsoftware.Below arethenoticesandlicenses associatedwiththissoftware:
libcurl:
COPYRIGHTANDPERMISSION NOTICE
Copyright(c)1996-2010, Daniel Stenberg, daniel@haxx.se. Allrightsreserved.
Permissiontouse, copy, modify, and distributethissoftwareforany purposewithorwithoutfees herebygranted, providedthatthe abovecopyrightnoticeandthis permissionnoticeappearinall copies.
THESOFTWAREISPROVIDED "ASIS,"WITHOUTWARRANTYOF ANYKIND,EXPRESSOR IMPLIED,INCLUDINGBUTNOT LIMITEDTOTHEWARRANTIES OFMERCHANTABILITY,FITNESS FORAPARTICULARPURPOSE ANDNONINFRINGEMENTOF THIRDPARTYRIGHTS.INNO EVENTSHALLTHEAUTHORSOR COPYRIGHTHOLDERSBE LIABLEFORANYCLAIM, DAMAGESOROTHERLIABILITY, WHETHERINANACTIONOF CONTRACT,TORTOR OTHERWISE,ARISINGFROM, OUTOFORINCONNECTION WITHTHESOFTWAREORTHE USEOROTHERDEALINGSIN THESOFTWARE.
Exceptascontainedinthisnotice, thenameofacopyrightholdershall notbeusedinadvertisingor otherwisetopromotethesale,use orotherdealingsinthisSoftware withoutpriorwrittenauthorizationof thecopyrightholder.
unzip:
Thisisversion2005-Feb-10 of theInfo-ZIPcopyrightandlicense. The definitive version of this document should be available at ftp://ftp.info-zip.org/pub/infozip/license.html indefinitely.
Copyright(c)1990-2005Info-ZIP.All rightsreserved.
Forthepurposesofthiscopyright andlicense, "Info-ZIP"isdefinedas thefollowingsetofindividuals:
MarkAdler, JohnBush, KarlDavis, HaraldDenker, Jean-MichelDubois, Jean-loupGailly, HunterGoatley, Ed Gordon, IanGorman, Chris Herborth, DirkHaase, GregHartwig, RobertHeath, JonathanHudson, PaulKienitz, DavidKirschbaum, JohnnyLee, OnnovanderLinden, IgorMandrichenko, SteveP.Miller, SergioMonesi, KeithOwens, GeorgePetrov, GregRoelofs, Kai UweRommel, SteveSalisbury, DaveSmith, StevenM.Schweda,
ChristianSpieler, CosminTruta, AntoineVerheijen, PaulvonBehren, RichWales, MikeWhite
Thissoftwareisprovided“asis,” withoutwarrantyofanykind, expressorimplied.Innoeventshall Info-ZIPoritscontributorsbeheld liableforanydirect,indirect, incidental,specialorconsequential damagesarisingoutoftheuseofor inabilitytousethissoftware.
Permissionisgrantedtoanyoneto usethissoftwareforanypurpose, includingcommercialapplications, andtoalteritandredistributeit freely,subjecttothefollowing restrictions:
-
Redistributionsofsourcecode mustretaintheabovecopyright notice, definition, disclaimer, and thislistofconditions.
-
Redistributionsinbinaryform (compiledexecutables) must reproduce the above copyright notice, definition, disclaimer, and this list of conditions in documentation and/or other
materialsprovidedwiththe distribution. Thesoleexception tothisconditionis redistribution ofastandardUnZipSFXbinary (includingSFXWiz)aspartofa self-extractingarchive;thatis permittedwithoutinclusionof thislicense,aslongasthe normalSFXbannerhasnot beenremovedfromthebinaryor disabled.
- Alteredversions—including, but notlimitedto, portstonew operating systems, existing ports with new graphical interfaces, and dynamic, shared, or static library versions—must be plainly marked as such and must not be misrepresented as being the original source. Such altered versions also must not be misrepresented as being Info-ZIP releases—including, but not limited to, labeling of the altered versions with thenames "Info-ZIP" (or any variation thereof, including, but not limited to, different capitalizations),
14-10OnStar
"PocketUnZip," "WiZ" or "MacZip" without the explicit permission of Info-ZIP. Such altered versions are further prohibited from misrepresentative use of the Zip-Bugs or Info-ZIPe-mail addresses or of the Info-ZIPURL(s).
- Info-ZIPretainstherighttouse thenames "Info-ZIP," "Zip," "UnZip," "UnZipSFX," "WiZ," "PocketUnZip," "PocketZip," and "MacZip" for its own source and binary releases.
A
Accessoriesand
Modifications......10-3
AccessoryPower......9-18
AdaptiveForward
Lighting(AFL)......6-3
Add-On Electrical
Equipment......9-49
Additional Information
OnStar ^® 14-5
Adjustments
Lumbar, FrontSeats......3-4
AirCleaner/Filter,Engine.....10-10
AirFilter, Passenger
Compartment......8-9
AirVents....8-8
AirbagSystem
Check....3-34
HowDoesanAirbag
Restrain?......3-27
PassengerSensing
System......3-29
WhatMakesanAirbag
Inflate?......3-27
AirbagSystem(cont'd)
WhatWillYouSeeafteran
AirbagInflates?......3-27
WhenShouldanAirbag
Inflate?......3-26
WhereAretheAirbags?......3-24
Airbags
AddingEquipmenttothe
Vehicle....3-33
PassengerStatusIndicator...5-15
ReadinessLight......5-14
ServicingAirbag-Equipped
Vehicles....3-33
SystemCheck....3-22
Alarm
VehicleSecurity......2-11
All-WheelDrive......10-22,9-24
AM-FMRadio....7-6
Antenna
Multi-band....7-11
AntilockBrake
System(ABS)....9-25
WarningLight....5-19
AppearanceCare
Exterior.....10-72
Interior......10-75
ArmrestStorage......4-2
AssistanceProgram,
Roadside......13-7,13-11
AudioController,
Rear(RAC)....7-27
AudioPlayers......7-12
CD....7-12
MP3....7-13
AudioSystem
RadioReception......7-11
RearSeat(RSA)......7-18
Theft-DeterrentFeature......7-2
Automatic
DimmingMirrors......2-16
DoorLocks......2-7
Transmission......9-21
TransmissionFluid......10-10
AutomaticTransmission
ManualMode....9-23
ShiftLockControl
FunctionCheck......10-23
Auxiliary
Devices....7-17
i-2INDEX
B
Battery....10-22
JumpStarting.....10-65
LoadManagement......6-7
PowerProtection......6-8
VoltageandCharging
Messages......5-28
BladeReplacement,Wiper...10-24
Bluetooth....7-28
Brake
SystemWarningLight......5-18
Brakes....10-19
Antilock....9-25
Assist....9-26
Fluid....10-20
Parking....9-26
SystemMessages......5-28
Braking....9-3
Break-In, NewVehicle......9-13
BulbReplacement......10-27
FogLamps....6-4
HeadlampAiming......10-25
Headlamps....10-25
BulbReplacement(cont'd)
HighIntensityDischarge (HID)Lighting....10-25
LicensePlateLamps.....10-26
Taillamps, TurnSignal, andStoplamps.....10-26
BuyingNewTires......10-49
C
Calibration....5-5
California
FuelRequirements......9-39
PerchlorateMaterials Requirements......10-3
Warning......10-2
Camera,RearVision......9-35
CanadianVehicleOwners......iii
Capacitiesand
Specifications....12-2
CarbonMonoxide
EngineExhaust......9-20
Liftgate....2-8
WinterDriving....9-7
Cargo
Cover......4-3
ManagementSystem......4-3
Tie-Downs....4-3
Cautions, Danger, and
Warnings......iv
CDPlayer....7-12
CenterConsoleStorage......4-2
Chains,Tire......10-54
ChargingSystemLight......5-15
Check
EngineLight....5-16
Ignition
TransmissionLock......10-23
ChildRestraints
InfantsandYoung
Children....3-37
LowerAnchorsand
TethersforChildren......3-43
OlderChildren....3-35
Securing....3-50,3-52
Systems....3-40
CircuitBreakers......10-28
Cleaning
ExteriorCare......10-72
InteriorCare....10-75
ClimateControlSystems
DualAutomatic....8-1
Rear....8-6,8-7
Clock....5-6
Cluster,Instrument......5-10
CollisionDamageRepair.....13-14
CompactSpareTire......10-64
Compass....5-5
Connections
OnStar ^® .....14-3
ControlofaVehicle......9-3
ConvenienceNet......4-4
ConvexMirrors....2-14
Coolant
Engine....10-12
Engine Temperature
Gauge....5-12
Engine Temperature
WarningLight......5-20
CoolingSystem......10-12
EngineMessages......5-29
CourtesyLamps......6-5
CourtesyTransportation
Program....13-13
Cover
Cargo....4-3
Engine....10-6
CruiseControl......9-29
Light....5-22
Messages......5-28
Cupholders......4-1
CustomerAssistance......13-6
Offices....13-5
TextTelephone(TTY)
Users....13-6
CustomerInformation
ServicePublications
Ordering Information.....13-16
CustomerSatisfaction
Procedure......13-2,13-4
D
DamageRepair,Collision.....13-14
Danger,Warnings, and
Cautions......iv
DataRecorders,Event......13-19
DaytimeRunningLamps/
AutomaticHeadlamp
System......6-2
DefensiveDriving....9-2
DelayedEntryLighting ......6-7
DelayedExitLighting......6-7
DelayedHeadlamps......6-3
DelayedLocking....2-7
Devices
Auxiliary....7-17
Diagnostics
OnStar ^® 14-5
DistractedDriving....9-2
DomeLamps....6-5
Door
AjarMessages 5-28
DelayedLocking......2-7
Locks....2-6
PowerLocks....2-7
DriveBeltRouting,Engine.....12-4
DriveSystems
All-WheelDrive.....10-22,9-24
DriverInformation
Center(DIC)......5-22
Driving
Characteristicsand
TowingTips....9-42
Defensive....9-2
Drunk....9-3
ForBetterFuelEconomy.....1-20
i-4INDEX
Driving(cont'd)
HighwayHypnosis......9-6
HillandMountainRoads......9-6
IftheVehicleisStuck......9-9
LossofControl......9-5
Off-RoadRecovery......9-4
VehicleLoadLimits......9-9
WetRoads......9-5
Winter....9-7
DualAutomaticClimate
ControlSystem......8-1
E
Electrical Equipment,
Add-On....9-49
ElectricalSystem
EngineCompartment
FuseBlock......10-28
FusesandCircuit
Breakers......10-28
InstrumentPanelFuse
Block....10-31
Overload....10-27
Emergency
OnStar ^® 14-2
Engine
AirCleaner/Filter......10-10
CheckandServiceEngine
SoonLight......5-16
CompartmentOverview......10-5
Coolant....10-12
CoolantTemperature
Gauge....5-12
CoolantTemperature
WarningLight......5-20
CoolingSystem......10-12
CoolingSystemMessages...5-29
Cover......10-6
DriveBeltRouting......12-4
Exhaust......9-20
Heater....9-17
OilLifeSystem......10-9
OilMessages......5-30
OverheatedProtection
OperatingMode......10-17
Overheating....10-16
PowerMessages......5-31
PressureLight......5-21
RunningWhileParked......9-21
Starting....9-16
EntryLighting......6-6
Equipment, Towing......9-47
EventDataRecorders.....13-19
Extender, Safety Belt......3-20
ExteriorLampControls......6-1
F
Features
Memory....1-7
Filter,
EngineAirCleaner......10-10
Flash-to-Pass......6-2
Flashers,HazardWarning......6-4
FlatTire....10-54
Changing....10-56
FloorMats....10-78
Fluid
AutomaticTransmission....10-10
Brakes....10-20
PowerSteering......10-18
Washer....10-18
FogLamps
BulbReplacement......6-4
FoldingMirrors....2-15
FrontFogLamp
Light....5-22
FrontSeats
HeatedandVentilated......3-7
Fuel....9-37
Additives....9-39
EconomyDriving......1-20
FillingaPortableFuel
Container....9-41
FillingtheTank......9-40
ForeignCountries......9-39
GasolineSpecifications......9-38
Gauge....5-11
Recommended......9-38
Requirements, California.....9-39
SystemMessages......5-31
Fuses
EngineCompartment
FuseBlock......10-28
FusesandCircuit
Breakers.....10-28
InstrumentPanelFuse
Block....10-31
G
GarageDoorOpener......5-45
Programming......5-45
Gasoline
Specifications....9-38
Gauges
EngineCoolant
Temperature......5-12
Fuel....5-11
Odometer....5-11
Speedometer....5-11
Tachometer....5-11
Voltmeter....5-13
WarningLightsand
Indicators......5-9
GeneralInformation
ServiceandMaintenance.....11-1
Towing....9-42
VehicleCare....10-2
GloveBox....4-1
GMMobilityReimbursement
Program....13-7
H
HazardWarningFlashers......6-4
HeadRestraints....3-2
Headlamps
AdaptiveForward
Lighting(AFL)......6-3
Aiming....10-25
BulbReplacement......10-25
DaytimeRunningLamps/
AutomaticHeadlamp
System......6-2
Delayed....6-3
Flash-to-Pass......6-2
HighIntensityDischarge
(HID)Lighting......10-25
High-BeamOnLight......5-21
High/LowBeamChanger.....6-2
HeatedandVentilatedFront
Seats......3-7
HeatedMirrors....2-16
Heater
Engine....9-17
i-6INDEX
HighVoltageDevicesand
Wiring......10-27
High-BeamOnLight......5-21
HighwayHypnosis......9-6
HillandMountainRoads......9-6
HillStartAssist(HSA)......9-27
Hood....10-4
Horn....5-3
HowtoWearSafetyBelts
Properly....3-14
|
IgnitionPositions......9-14
IgnitionTransmissionLock
Check....10-23
Immobilizer......2-13
InfantsandYoungChildren,
Restraints....3-37
Infotainment......7-1
InfotainmentSystem......13-20
InstrumentCluster......5-10
InstrumentPanel
StorageArea......4-1
Introduction......iii
J
JumpStarting......10-65
K
KeyandLockMessages......5-32
KeylessEntry
Remote(RKE)System......2-2
Keys......2-1
L
Labeling,TireSidewall......10-36
Lamps
Courtesy......6-5
Dome....6-5
ExteriorControls......6-1
LicensePlate......10-26
MalfunctionIndicator......5-16
Messages......5-32
Reading......6-6
Lap-ShoulderBelt......3-15
LATCHSystem
ReplacingPartsaftera
Crash....3-50
LATCH, LowerAnchorsand
TethersforChildren......3-43
Liftgate
CarbonMonoxide......2-8
Lighting
AdaptiveForward......6-3
DelayedEntry......6-7
DelayedExit......6-7
Entry......6-6
IlluminationControl......6-5
ParadeDimming......6-7
Lights
AirbagReadiness......5-14
AntilockBrakeSystem
(ABS)Warning......5-19
BrakeSystemWarning......5-18
ChargingSystem......5-15
CruiseControl....5-22
EngineCoolant
TemperatureWarning......5-20
EngineOilPressure......5-21
Flash-to-Pass......6-2
FrontFogLamp....5-22
High-BeamOn....5-21
High/LowBeamChanger......6-2
SafetyBeltReminders......5-13
Security......5-21
Lights(cont'd)
StabiliTrak® Indicator......5-19
TirePressure....5-20
Tow/HaulMode......5-19
Locks
AutomaticDoor......2-7
DelayedLocking......2-7
Door....2-6
LockoutProtection......2-7
PowerDoor....2-7
Safety....2-8
LossofControl....9-5
LowerAnchorsandTethers forChildren(LATCH
System)....3-43
LumbarAdjustment......3-4
FrontSeats......3-4
M
Maintenance
Records......11-14
MaintenanceSchedule
RecommendedFluids
andLubricants......11-12
MalfunctionIndicatorLamp....5-16
ManualMode....9-23
MemoryFeatures......1-7
MemorySeats......3-5
Messages
AirbagSystem......5-34
BatteryVoltageand
Charging....5-28
BrakeSystem......5-28
DoorAjar....5-28
EngineCoolingSystem......5-29
EngineOil....5-30
EnginePower......5-31
FuelSystem......5-31
KeyandLock....5-32
Lamp....5-32
ObjectDetectionSystem.....5-32
RideControlSystem......5-33
Security......5-34
ServiceVehicle......5-34
Tire....5-35
Transmission......5-35
Vehicle....5-27
VehicleReminder......5-36
VehicleSpeed......5-36
WasherFluid......5-37
Mirrors
AutomaticDimming......2-16
AutomaticDimming
Rearview....2-16
Convex....2-14
Folding....2-15
Heated....2-16
ParkTilt 2-16
Power......2-15
MonitorSystem, Tire
Pressure....10-43
MP3....7-13
Multi-bandAntenna....7-11
N
Navigation
OnStar ^® 14-2
Net, Convenience......4-4
NewVehicleBreak-In......9-13
O
ObjectDetectionSystem
Messages......5-32
ObjectDetection, SideBlind
ZoneAlert(SBZA) .....9-32
Odometer....5-11
i-8INDEX
Off-Road
Recovery......9-4
Oil
Engine....10-7
EngineOilLifeSystem......10-9
Messages......5-30
PressureLight......5-21
OlderChildren,Restraints.....3-35
OnlineOwnerCenter......13-6
OnStar®
System, InBrief......1-21
OnStar® Additional
Information......14-5
OnStar® Connections......14-3
OnStar® Diagnostics......14-5
OnStar® Emergency......14-2
OnStar® Navigation......14-2
OnStar® Overview......14-1
OnStar® Security......14-2
Operation, Infotainment
System....7-3
Ordering
ServicePublications......13-16
Outlets
Power....5-7
OverheatedEngine
Protection
OperatingMode......10-17
Overheating,Engine......10-16
Overview, Infotainment
System......7-3
P
ParadeDimming......6-7
Park
ShiftingInto......9-18
ShiftingOutof......9-19
TiltMirrors....2-16
Parking
Assist, Ultrasonic....9-31
Brake....9-26
BrakeandP(Park)
MechanismCheck......10-23
OverThingsThatBurn.....9-20
PassengerAirbagStatus
Indicator....5-15
PassengerCompartmentAir
Filter......8-9
PassengerSensingSystem...3-29
PerchlorateMaterials
Requirements, California.....10-3
Personalization
Vehicle....5-37
Phone
Bluetooth....7-28
Power
DoorLocks....2-7
Mirrors....2-15
Outlets......5-7
Protection,Battery......6-8
RetainedAccessory(RAP)...9-18
SeatAdjustment......3-3
SteeringFluid......10-18
Windows....2-17
Pregnancy, Using Safety
Belts....3-20
Privacy
RadioFrequency
Identification(RFID)......13-20
Program
CourtesyTransportation....13-13
Proposition65Warning,
California....10-2
R
RadioFrequency Identification(RFID)......13-20 Statement......13-20
Radios AM-FMRadio....7-6 Reception....7-11 Satellite....7-9
ReadingLamps......6-6
RearAudio Controller(RAC)......7-27
RearClimateControl System......8-6,8-7
RearSeatAudio(RSA) System......7-18 RearSeatEntertainmentSystem RearSeatAudio(RSA)......7-18
RearSeats....3-8 RearVisionCamera(RVC)....9-35 RearWindowWasher/Wiper....5-4
RearviewMirrors AutomaticDimming.....2-16
RecliningSeatbacks......3-4 Recommended
Fuel....9-38
Recommended Fluids and Lubricants....11-12 Records Maintenance....11-14
Recreational Vehicle Towing....10-69
ReimbursementProgram, GMMobility....13-7
RemoteKeylessEntry(RKE) System......2-2
RemoteVehicleStart......2-4
ReplacementBulbs.....10-27
ReplacementParts Airbags....3-35 Maintenance....11-13
ReplacingAirbagSystem.....3-35
ReplacingLATCHSystem PartsafteraCrash......3-50
ReplacingSafetyBelt SystemPartsafteraCrash...3-21
Reporting Safety Defects Canadian Government.....13-18 General Motors.....13-18 U.S. Government.....13-17
Restraints WheretoPut......3-41
RetainedAccessory Power(RAP)....9-18
RideControlSystems Messages......5-33
Roads Driving, Wet....9-5
Roadside Assistance Program....13-7, 13-11
Roof Sunroof....2-19
RoofRackSystem......4-4
Rotation, Tires.....10-47
Routing,EngineDriveBelt.....12-4
RunningtheVehicleWhile Parked....9-21
S
SafetyBelts....3-13 Care....3-21 Extender....3-20 HowtoWearSafetyBelts Properly....3-14 Lap-ShoulderBelt....3-15 Reminders....5-13 ReplacingafteraCrash ....3-21 UseDuringPregnancy....3-20
i-10INDEX
SafetyDefectsReporting
CanadianGovernment.....13-18
GeneralMotors......13-18
U.S.Government.....13-17
SafetyLocks......2-8
SafetySystemCheck......3-20
SatelliteRadio....7-9
SchedulingAppointments.....13-12
Seats
HeadRestraints......3-2
HeatedandVentilatedFront...3-7
LumbarAdjustment, Front.....3-4
Memory....3-5
PowerAdjustment, Front.....3-3
Rear....3-8
RecliningSeatbacks......3-4
ThirdRowSeat......3-10
SecuringChild
Restraints....3-50,3-52
Security
Light....5-21
Messages......5-34
OnStar ^® 14-2
Vehicle....2-11
VehicleAlarm....2-11
Service
Accessories and Modifications....10-3
DoingYourOwnWork......10-3
EngineSoonLight......5-16
MaintenanceRecords.....11-14
Maintenance, General Information....11-1
PartsIdentificationLabel.....12-1
PublicationsOrdering Information....13-16
SchedulingAppointments...13-12
VehicleMessages......5-34
ServicingtheAirbag......3-33
Settings......7-35
ShiftLockControlFunction Check, Automatic Transmission....10-23
Shifting IntoPark....9-18
OutofPark....9-19
SideBlindZoneAlert......9-32
Signals, Turnand Lane-Change....6-4
SpareTire Compact.....10-64
Specificationsand
Capacities....12-2
Speedometer....5-11
StabiliTrak
IndicatorLight......5-19
System......9-27
StartAssist,Hills......9-27
StartVehicle,Remote......2-4
StarterSwitchCheck......10-22
StartingtheEngine......9-16
Steering....9-3
Fluid,Power......10-18
WheelAdjustment......5-2
WheelControls....5-3
StorageAreas
Armrest......4-2
CargoCover......4-3
CargoManagementSystem...4-3
CenterConsole......4-2
ConvenienceNet......4-4
GloveBox....4-1
InstrumentPanel......4-1
RoofRackSystem......4-4
StuckVehicle....9-9
SunVisors......2-19
Sunroof....2-19
Symbols......iv
System
Infotainment......13-20,7-1
RoofRack......4-4
T
Tachometer....5-11
Taillamps
TurnSignaland
Stoplamps....10-26
TextTelephone(TTY)Users...13-6
Theft-DeterrentSystems.....2-13
Immobilizer....2-13
Third-RowSeats......3-10
Time....5-6
Tires
BuyingNewTires......10-49
Chains....10-54
Changing....10-56
CompactSpare......10-64
Designations......10-38
DifferentSize......10-51
IfaTireGoesFlat......10-54
InflationMonitorSystem....10-44
Inspection......10-47
Messages......5-35
Tires(cont'd)
PressureLight......5-20
PressureMonitorSystem...10-43
Rotation.....10-47
SidewallLabeling......10-36
Terminologyand
Definitions......10-39
UniformTireQuality
Grading....10-51
WheelAlignmentandTire
Balance....10-53
WheelReplacement......10-53
WhenItIsTimeforNew
Tires....10-48
Winter....10-35
Tow/HaulMode....9-24
Tow/HaulModeLight......5-19
Towing
DrivingCharacteristics......9-42
Equipment......9-47
GeneralInformation......9-42
Recreational Vehicle......10-69
Trailer....9-45
Vehicle 10-68
Trailer
Towing....9-45
Transmission
Automatic....9-21
Fluid, Automatic.....10-10
Messages......5-35
TransportationProgram,
Courtesy....13-13
TurnandLane-Change
Signals......6-4
U
UltrasonicParkingAssist.....9-31
UniformTireQuality
Grading.....10-51
UniversalRemoteSystem.....5-45
Operation....5-48
Programming......5-45
UsingThisManual......iv
V
Vehicle
AlarmSystem 2-11
CanadianOwners......iii
Control 9-3
Identification
Number(VIN)......12-1
LoadLimits....9-9
i-12INDEX
Vehicle(cont'd)
Messages......5-27
Personalization......5-37
ReminderMessages......5-36
RemoteStart......2-4
Security......2-11
SpeedMessages......5-36
Towing....10-68
VehicleCare
TirePressure......10-41
Ventilation,Air......8-8
Visors....2-19
VoltageDevicesand
Wiring......10-27
VoltmeterGauge......5-13
W
Warning
BrakeSystemLight......5-18
WarningLights, Gauges, and
Indicators......5-9
Warnings......iv
CautionsandDanger......iv
HazardFlashers......6-4
WasherFluid......10-18
Messages......5-37
Wheels
AlignmentandTire
Balance....10-53
DifferentSize......10-51
Replacement......10-53
WhenItIsTimeforNew
Tires....10-48
WheretoPuttheRestraint ....3-41
Windows....2-17
Power......2-17
Windshield
Replacement......10-25
Wiper/Washer....5-3
Winter
Driving....9-7
WinterTires....10-35
WiperBladeReplacement....10-24
Wipers
RearWasher....5-4
Wiring, High Voltage
Devices......10-27

- 2013BuickEnclaveOwnerManual
- CanadianVehicleOwners
- UsingthisManual
- Danger,Warnings, and Cautions
- WARNING
- Symbols
- VehicleSymbolChart
- D:FogLamps
- InBrief
- InstrumentPanel
- InitialDriveInformation
- VehicleFeatures
- PerformanceandMaintenance
- InitialDrive Information
- RemoteKeylessEntry (RKE)System
- RemoteVehicleStart StartingtheVehicle
- CancelingaRemoteStart
- DoorLocks
- Liftgate
- PowerLiftgate
- 1-6InBrief
- Windows
- SeatAdjustment PowerSeats
- 1-8InBrief
- ThirdRowSeats
- HeatedandVentilated Seats
- :lfavailable,presstocoolthe
- HeadRestraint Adjustment
- CanadaandMexico
- 1-10InBrief
- MirrorAdjustment
- ExteriorMirrors
- FoldingMirrors
- InteriorMirror
- Adjustment
- SteeringWheel Adjustment
- PowerTiltWheel
- InteriorLighting
- DomeLamps
- DomeLampOverride
- AMBIENTOFF(IfEquipped):
- 1-12InBrief
- ReadingLamps
- ExteriorLighting
- D:Usetoturnonoroffthefog lamps(ifequipped).
- WindshieldWiper/Washer
- WindshieldWasher
- RearWindowWiper/Washer
- Transmission
- ElectronicRangeSelect (ERS)Mode
- Radio(s)
- StoringRadioStationPresets
- SetDate:
- SatelliteRadio
- SiriusXMSatelliteRadio Service
- PortableAudioDevices
- Bluetooth®
- SteeringWheelControls
- CruiseControl
- InfotainmentSystem
- UltrasonicParkingAssist
- 1-18InBrief
- PowerOutlets
- UniversalRemoteSystem
- Sunroof
- ManualSunshade
- Performance and Maintenance
- StabiliTrak® System
- TirePressureMonitor
- 1-20InBrief
- EngineOilLifeSystem
- ResettingtheOilLifeSystem
- DrivingforBetterFuel Economy
- Roadside Assistance Program
- OnStar®
- Keys, Doors, and Windows
- KeysandLocks
- Doors
- VehicleSecurity
- InteriorMirrors
- Roof
- Keys
- RemoteKeylessEntry (RKE)SystemOperation
- WithRemoteStartandPower LiftgateShown, WithoutSimilar
- ProgrammingTransmittersto theVehicle
- BatteryReplacement
- RemoteVehicleStart
- StartingtheEngineUsing RemoteStart
- ExtendingEngineRunTime
- ConditionsinWhichthe RemoteStartWillNotWork
- WARNING(Continued)
- DelayedLocking
- AutomaticDoorLocks
- LockoutProtection
- SafetyLocks
- ManualLiftgate
- Notice: To avoid damaggeto the liftgateorliftgateglass, make sure the area above and behind the liftgate is clear before opening it.
- PowerLiftgateTouchPad
- ObstacleDetectionFeatures
- ManualOperationofPower Liftgate
- VehicleAlarmSystem
- TestingtheAlarm
- Immobilizer
- ImmobilizerOperation
- ConvexMirrors
- PowerMirrors
- SideBlindZoneAlert(SBZA)
- ResettingthePowerFoldaway Mirrors
- HeatedMirrors
- AutomaticDimming Mirror
- ParkTiltMirrors
- AutomaticDimming RearviewMirror
- CleaningtheMirror
- PowerWindows
- UplevelShown,BaseSimilar
- Express-Up/Express-Down Windows
- ProgrammingthePower Windows
- Anti-PinchFeature
- SunVisors
- Express-open/Express-close:
- 2-20Keys, Doors, and Windows
- Seatsand Restraints
- HeadRestraints
- FrontSeats
- RearSeats
- SafetyBelts
- AirbagSystem
- ChildRestraints
- 3-2 Seats and Restraints
- PowerSeatAdjustment
- 3-4 Seats and Restraints
- Toadjusttheseatback:
- 3-6 Seats and Restraints
- StoringMemoryPositions
- MemoryRemoteRecall
- EasyExitPositions
- HeatedandVentilated FrontSeats
- 3-8 Seats and Restraints
- RemoteStartHeatedSeats
- EnteringandExitingthe ThirdRow
- ReturningtheSeattothe SeatingPosition
- RecliningtheSeatbacks
- FoldingtheSeatback
- 3-10 Seats and Restraints
- AdjustingtheSeats
- RemovingtheThirdRowSeats
- 3-12 Seats and Restraints
- InstallingtheThirdRowSeats
- 3-14 Seats and Restraints
- QuestionsandAnswersAbout SafetyBelts
- HowtoWearSafetyBelts Properly
- Lap-ShoulderBelt
- 3-16SeatsandRestraints
- ShoulderBeltHeightAdjuster
- SafetyBeltPretensioners
- 3-18 Seats and Restraints
- RearSafetyBeltComfort Guides
- 3-20SeatsandRestraints
- SafetyBeltUseDuring Pregnancy
- SafetyBeltExtender
- SafetySystemCheck
- SafetyBeltCare
- ReplacingSafetyBelt SystemPartsaftera Crash
- 3-24SeatsandRestraints
- WhereAretheAirbags?
- WhenShouldanAirbag Inflate?
- WhatMakesanAirbag Inflate?
- HowDoesanAirbag Restrain?
- WhatWillYouSeeafter anAirbagInflates?
- 3-28SeatsandRestraints
- PassengerSensing System
- 3-30 Seats and Restraints
- IftheOnIndicatorIsLitfora ChildRestraint
- IftheOffIndicatorIsLitforan Adult-SizeOccupant
- AdditionalFactorsAffecting SystemOperation
- Servicingthe Airbag-EquippedVehicle
- AddingEquipmenttothe Airbag-EquippedVehicle
- AirbagSystemCheck
- ReplacingAirbagSystem PartsafteraCrash
- ChildRestraints OlderChildren
- 3-36SeatsandRestraints
- Q: Whatistheproperway to wearsafetybelts?
- InfantsandYoung Children
- 3-38SeatsandRestraints
- { WARNING
- Q: Whatarethedifferenttypes of add-onchildrestraints?
- 3-40SeatsandRestraints
- Rear-FacingInfantSeat
- Forward-FacingChildSeat
- BoosterSeats
- SecuringanAdd-OnChild RestraintintheVehicle
- SecuringtheChildwithinthe ChildRestraint
- WheretoPutthe Restraint
- 3-42SeatsandRestraints
- LowerAnchorsand TethersforChildren (LATCHSystem)
- LowerAnchors
- TopTetherAnchor
- ReplacingLATCHSystem PartsAfteraCrash
- SecuringChildRestraints (RearSeat)
- 3-52SeatsandRestraints
- SecuringChildRestraints (FrontPassengerSeat)
- 3-54SeatsandRestraints
- Storage
- StorageCompartments
- AdditionalStorageFeatures
- RoofRackSystem
- Storage Compartments
- InstrumentPanelStorage
- GloveBox
- Cupholders
- 4-2Storage
- AdditionalStorage Features
- CargoCover
- CargoTie-Downs
- CargoManagement System
- 4-6Storage
- NOTES
- Instruments and Controls
- Controls
- WarningLights, Gauges, and Indicators
- InformationDisplays
- VehicleMessages
- 5-2 InstrumentsandControls
- VehiclePersonalization
- Horn
- Compass
- CompassZone
- CompassVariance(Zone) Procedure
- CompassCalibration
- CompassCalibrationProcedure
- Clock
- SetTime:
- PowerOutlet120Volt AlternatingCurrent
- WarningLights, Gauges,and Indicators
- InstrumentCluster
- Speedometer
- Odometer
- Tachometer
- 5-12 InstrumentsandControls
- SafetyBeltReminders
- DriverSafetyBeltReminder Light
- PassengerSafetyBelt ReminderLight
- AirbagReadinessLight
- PassengerAirbagStatus Indicator
- ChargingSystemLight
- Malfunction IndicatorLamp
- Maintenancetest.See AccessoriesandModificationson page10-3.
- EmissionsInspection and Maintenance Programs
- BrakeSystemWarning Light
- MetricEnglish
- AntilockBrakeSystem (ABS)WarningLight
- Tow/HaulModeLight
- StabiliTrak® Indicator Light
- EngineCoolant TemperatureWarning Light
- TirePressureLight
- WhentheLightIsOnSteady
- WhentheLightFlashesFirstand ThenIsOnSteady
- EngineOilPressureLight
- SecurityLight
- High-BeamOnLight
- FrontFogLampLight
- CruiseControlLight
- DriverInformation Center(DIC)
- DICButtons
- Vehicle Information Menu Items
- OILLIFE
- SIDEBLINDZONEALERT
- PARKASSIST
- REARCROSSTRAFFICALERT
- UNITS
- FRONTIRESorREARTIRES
- COMPASSZONESETTING
- COMPASSRECALIBRATION
- BlankDisplay
- Trip/FuelMenultems
- TRIPAandTRIPB
- 5-26InstrumentsandControls
- RANGE
- AVG(Average)ECONOMY
- TIMER
- FUELUSED
- AVG(Average)SPEED
- BatteryVoltage and ChargingMessages
- BATTERYSAVERACTIVE
- SERVICEBATTERY CHARGINGSYSTEM
- BrakeSystemMessages SERVICEBRAKESYSTEM
- CruiseControlMessages
- CRUISESETTOXXX
- DoorAjarMessages DRIVERDOOROPEN
- HOODOPEN
- LEFTREARDOOROPEN
- LIFTGATEOPEN
- PASSENGERDOOROPEN
- POWERLIFTGATEOFF
- RIGHTREARDOOROPEN
- EngineCoolingSystem Messages
- ENGINEHOTA/C(Air Conditioning)OFF
- ENGINEOVERHEATEDIDLE ENGINE
- ENGINEOVERHEATEDSTOP ENGINE
- EngineOilMessages CHANGEENGINEOILSOON
- ENGINEOILLOW—ADDOIL
- OILPRESSURELOWSTOP ENGINE
- EnginePowerMessages ENGINEPOWERISREDUCED
- FuelSystemMessages FUELLEVELLOW
- TIGHTENGASCAP
- KeyandLockMessages
- REPLACEBATTERYIN REMOTEKEY
- LampMessages
- AUTOMATICLIGHT CONTROLOFF
- AUTOMATICLIGHT CONTROLON
- TURNSIGNALON
- ObjectDetectionSystem Messages
- PARKASSTBLOCKEDSEE OWNERSMANUAL
- PARKASSISTOFF
- REARCROSSTRAFFIC ALERTSYSTEMOFF
- SERVICEPARKASSIST
- SERVICESIDEDETECTION SYSTEM
- SIDEBLINDZONEALERT SYSTEMOFF
- SIDEDETECTIONSYS TEMPORARILYOFF
- RideControlSystem Messages
- SERVICESTABILITRAK
- SERVICETRACTION CONTROL
- TRACTIONCONTROLOFF
- TRACTIONCONTROLON
- AirbagSystemMessages
- SERVICEAIRBAG
- SecurityMessages
- SERVICETHEFTDETERRENT SYSTEM
- THEFTATTEMPTED
- ServiceVehicleMessages
- SERVICEA/C(Air Conditioning)SYSTEM
- SERVICEPOWERSTEERING
- SERVICEVEHICLES OON
- STARTINGDISABLED SERVICETHROTTLE
- TireMessages
- TIRELOWADDAIRTOTIRE
- SERVICETIREMONITOR SYSTEM
- TIRELEARNINGACTIVE
- TransmissionMessages
- ALLWHEELDRIVEOFF
- 5-36 InstrumentsandControls
- SERVICEALLWHEELDRIVE
- SERVICETRANSMISSION
- TRANSMISSIONHOTIDLE ENGINE
- VehicleReminder Messages
- ICEPOSSIBLEDRIVE WITHCARE
- VehicleSpeedMessages
- SPEEDLIMITEDTOXXXMPH (KM/H)
- WasherFluidMessages WASHERFLUIDLOWADD FLUID
- Vehicle Personalization
- EnteringtheFeature SettingsMenu
- FeatureSettingsMenultems
- DISPLAYINENGLISH
- DISPLAYLANGUAGE
- AUTODOORLOCK
- AUTODOORUNLOCK
- REMOTEDOORLOCK
- REMOTEDOORUNLOCK
- DELAYDOORLOCK
- EXITLIGHTING
- APPROACHLIGHTING
- CHIMEVOLUME
- 5-42 InstrumentsandControls
- EASYEXITSEAT
- MEMORYSEATRECALL
- REMOTESTART
- 5-44 InstrumentsandControls
- FACTORYSETTINGS
- EXITFEATURESETTINGS
- ExitingtheFeature SettingsMenu
- InstrumentsandControls5-45
- UniversalRemote System
- UniversalRemoteSystem Programming
- ProgrammingtheUniversal RemoteSystem
- "Learn" or "Smart" Button
- GateOperatorandCanadian Programming
- UniversalRemoteSystem Operation
- UsingUniversalRemote
- ErasingUniversalRemote Buttons
- ReprogrammingaSingle UniversalRemoteButton
- Lighting
- LightingFeatures
- ExteriorLampControls
- 6-2Lighting
- HeadlampHigh/Low-BeamChanger
- Flash-to-Pass
- DaytimeRunningLamps (DRL)/Automatic HeadlampSystem
- LightsOnwithWipers
- DelayedHeadlamps
- AdaptiveForward Lighting(AFL)
- 6-4Lighting
- △(HazardWarningFlasher):
- TurnSignalOnChime
- D(FogLamps):Pressthisbutton toturnthefoglampsonoroff. Alightcomesonintheinstrument clusterwhenthefoglampsarein use. Theignitionmustbeonforthe foglampstowork.
- InstrumentPanel IlluminationControl
- CourtesyLamps
- 6-6Lighting
- EntryLighting
- DelayedEntryLighting
- DelayedExitLighting
- ParadeDimming
- BatteryLoad Management
- 6-8Lighting
- BatteryPowerProtection
- Infotainment System
- Introduction
- Radio
- AudioPlayers
- RearSeatInfotainment
- Phone
- Settings
- TrademarksandLicense Agreements
- Infotainment
- 7-2InfotainmentSystem
- Theft-DeterrentFeature
- Overview
- Operation
- InfotainmentControls
- SEEK(Previous/Reverse):
- SEEK ▷(Next/Forward):
- TouchscreenButtons
- HomePageFeatures
- 7-6InfotainmentSystem
- Language
- EnglishorMetricUnits
- AM-FMRadio
- PlayingtheRadio
- PUSH/⏻(Power/Volume):
- AudioSource
- InfotainmentSystemSettings
- ToneSettings
- FindingaStation
- SeekingaStation
- 7-8InfotainmentSystem
- SiriusXM(IfEquipped)
- Mixed-BandPresets
- RecallingaPresetStation
- SiriusXMCategories
- AddingorRemovingSiriusXM Categories
- SiriusXMMessages
- XL(ExplicitLanguage
- RadioReception
- FM
- AM
- CellPhoneUsage
- Multi-BandAntenna
- CDPlayer
- LoadingandEjectingDiscs
- PlayinganAudioCD
- KSEEK:
- SEEK ▷:
- ErrorMessages
- MP3
- PlayinganMP3CD
- 7-14InfotainmentSystem
- RootDirectory
- EmptyFolders
- NoFolder
- FileSystemandNaming
- PreprogrammedPlaylists
- MusicNavigator
- 7-16InfotainmentSystem
- Genres
- Composers
- Auxiliary Devices
- Usingthe3.5mm(1/8in) AuxiliaryInputJack
- UsingtheUSBPort
- USBSupportedDevices
- RearSeat Infotainment
- RearSeatAudio(RSA) System
- BeforeDriving
- ParentalControl
- Headphones
- Audio/Video(A/V)Jacks
- HowtoChangetheRSEVideo ScreenSettings
- AudioOutput
- VideoScreen
- 7-22InfotainmentSystem
- RemoteControlButtons
- (PreviousTrack/Chapter):
- 7-24InfotainmentSystem
- 1through0(NumericKeypad):
- DVDDisplayErrorMessages
- DVDDistortion
- CleaningtheRSEOverhead Console
- CleaningtheVideoScreen
- RearAudio Controller(RAC)
- Bluetooth
- VoiceRecognition
- AudioSystem
- BluetoothControls
- Pairing
- PairingInformation
- PairingaPhone
- 7-30InfotainmentSystem
- ListingAllPairedandConnected Phones
- DeletingaPairedPhone
- ConnectingtoaDifferentPhone
- StoringandDeletingPhone Numbers
- Usingthe"Store"Command
- Usingthe“DigitStore”Command
- Usingthe"Delete"Command
- Usingthe"DeleteAllNameTags" Command
- ListingStoredNumbers
- Usingthe"List"Command
- MakingaCall
- Using the "Dial" or "Call" Command
- Calling911Emergency
- Usingthe“DigitDial”Command
- Usingthe"Re-dial"Command
- ReceivingaCall
- CallWaiting
- Three-WayCalling
- EndingaCall
- MutingaCall
- TransferringaCall
- TransferringAudiofromthe BluetoothSystemtoaCellPhone
- TransferringAudiotothe BluetoothSystemfromaCell Phone
- VoicePass-Thru
- DualToneMulti-Frequency (DTMF)Tones
- SendingaNumberorNameTag DuringaCall
- ClearingtheSystem
- OtherInformation
- RadioSettings
- PhoneSettings
- VehicleSettings
- Display
- RearVisionCamera (IfEquipped)
- Trademarksand LicenseAgreements
- DIGITAL
- 7-38InfotainmentSystem
- ClimateControls
- ClimateControlSystems
- AirVents
- Maintenance
- DualAutomaticClimateControlSystem
- 8-2ClimateControls
- DisplayFunction
- AutomaticOperation
- TemperatureControl
- DriverSideTemperature
- PassengerSideTemperature
- SYNC(Synchronized
- ManualOperation
- AirDeliveryModes:Press
- AirConditioning
- RearWindowDefogger
- Sensors
- RearClimateControlSystem
- RearClimateControlSystem(withRearSeatAudio)
- OperationTips
- PassengerCompartment AirFilter
- 8-10ClimateControls
- Driving and Operating
- DrivingInformation
- StartingandOperating
- EngineExhaust
- AutomaticTransmission
- DriveSystems
- Brakes
- RideControlSystems
- ObjectDetectionSystems
- Fuel
- Towing
- ConversionsandAdd-Ons
- DistractedDriving
- DefensiveDriving
- DrunkDriving
- ControlofaVehicle
- Braking
- Steering
- VariableEffortSteering
- 9-4DrivingandOperating
- HydraulicPowerSteering
- CurveTips
- SteeringinEmergencies
- Off-RoadRecovery
- LossofControl
- Skidding
- DrivingonWetRoads
- Hydroplaning
- OtherRainyWeatherTips
- HighwayHypnosis
- HillandMountainRoads
- WinterDriving
- DrivingonSnoworIce
- 9-8DrivingandOperating
- BlizzardConditions
- IftheVehiclesIsStuck
- RockingtheVehicletoGet itOut
- VehicleLoadLimits
- ExampleLabel
- StepsforDeterminingCorrect LoadLimit
- Example3
- Certification/TireLabel
- LabelExample
- Notice: Overloading the vehicle may caused damage. Repairs would not be recovered by the vehicle warranty. Do not overload the vehicle.
- Starting and Operating
- NewVehicleBreak-In
- KeyLockRelease
- StartingtheEngine
- StartingProcedure
- EngineHeater
- ToUsetheEngineCoolant Heater
- RetainedAccessory Power(RAP)
- ShiftingIntoPark
- LeavingtheVehiclewiththe EngineRunning
- TorqueLock
- ShiftingoutofPark
- ParkingoverThings ThatBurn
- RunningtheVehicle WhileParked
- Automatic Transmission
- ManualMode
- Tow/HaulMode
- AutomaticEngineGrade Braking
- All-WheelDrive
- AntilockBrake System(ABS)
- UsingABS
- BrakinginEmergencies
- ParkingBrake
- BrakeAssist
- HillStartAssist(HSA)
- TractionControlOperation
- SettingCruiseControl
- ResumingaSetSpeed
- IncreasingSpeedWhileUsing CruiseControl
- ReducingSpeedWhileUsing CruiseControl
- PassingAnotherVehicleWhile UsingCruiseControl
- UsingCruiseControlonHills
- EndingCruiseControl
- ErasingSpeedMemory
- ObjectDetection Systems
- HowtheSystemWorks
- TurningtheSystemOnandOff
- WhentheSystemDoesNot SeemtoWorkProperly
- PARKASSTBLOCKEDSEE OWNERSMANUAL: This messagecanoccurunderthe followingconditions:
- SideBlindZone Alert(SBZA)
- SBZADetectionZones
- WhentheSystemDoesNotSeem ToWorkProperly
- SBZAErrorMessages
- FCCInformation
- RearVision Camera(RVC)
- TurningtheRearVisionCamera SystemOnorOff
- 9-36DrivingandOperating
- RearCrossTrafficAlert(RCTA)
- RearVisionCameraLocation
- ProhibitedFuels
- CAUTION
- GasolineSpecifications
- CaliforniaFuel Requirements
- FuelsinForeign Countries
- FuelAdditives
- FillingtheTank
- FillingaPortableFuel Container
- GeneralTowing Information
- DrivingCharacteristics and TowingTips
- DrivingwithaTrailer
- TowingwithaStabilityControl System
- FollowingDistance
- Passing
- BackingUp
- MakingTurns
- TurnSignalsWhenTowinga Trailer
- DrivingonGrades
- ParkingonHills
- Ifparkingtherigonahill:
- LeavingAfterParkingonaHill
- MaintenanceWhenTrailer Towing
- EngineCoolingWhenTrailer Towing
- TrailerTowing
- WeightoftheTrailer
- 9-46DrivingandOperating
- WeightoftheTrailerTongue
- TotalWeightontheVehicle's Tires
- TowingEquipment Hitches
- Weight-DistributingHitchesand WeightCarryingHitches
- SafetyChains
- TrailerBrakes
- TrailerWiringHarness
- BasicTrailerWiring
- ElectricTrailerBrakeControl WiringProvisions
- Conversionsand Add-Ons
- Add-On Electrical Equipment
- 9-50DrivingandOperating
- VehicleCare
- GeneralInformation
- VehicleChecks
- HeadlampAiming
- BulbReplacement
- ElectricalSystem
- WheelsandTires
- 10-2 VehicleCare
- JumpStarting
- AppearanceCare
- CaliforniaProposition 65Warning
- CaliforniaPerchlorate MaterialsRequirements
- Accessories and Modifications
- DoingYourOwn ServiceWork
- 10-4 Vehicle Care
- Hood
- 10-6VehicleCare
- EngineCover
- EngineOil
- CheckingEngineOil
- WhentoAddEngineOil
- SelectingtheRightEngineOil
- Specification
- ViscosityGrade
- EngineOilAdditives/Engine OilFlushes
- WhattoDowithUsedOil
- WhentoChangeEngineOil
- HowtoResettheEngineOil LifeSystem
- AutomaticTransmission Fluid
- EngineAirCleaner/Filter WhentolnspecttheEngineAir Cleaner/Filter
- HowtoInspecttheEngineAir Cleaner/Filter
- CoolingSystem
- EngineCoolant
- WhattoUse
- Thismixture:
- CheckingCoolant
- HowtoAddCoolanttothe RecoveryTank
- Notice: This vehicle has a specific coolantfill procedure. Failure to follow this procedure could cause the engine to overheat and be severely damaged.
- HowtoAddCoolanttothe Radiator
- 10-16VehicleCare
- EngineOverheating
- IfNoSteamIsComingfrom theEngineCompartment
- OverheatedEngine Protection OperatingMode
- PowerSteeringFluid
- WhentoCheckPowerSteering Fluid
- HowtoCheckPowerSteering Fluid
- WasherFluid
- AddingWasherFluid
- Notice
- BrakePedalTravel
- BrakeAdjustment
- ReplacingBrakeSystemParts
- BrakeFluid
- WhattoAdd
- Battery
- VehicleStorage
- StarterSwitchCheck
- AutomaticTransmission ShiftLockControl FunctionCheck
- IgnitionTransmission LockCheck
- ParkBrakeandP(Park) MechanismCheck
- 10-24VehicleCare
- WiperBladeReplacement
- FrontWiperBlade
- RearWiperBlade
- WindshieldReplacement
- HighIntensityDischarge (HID)Lighting
- Taillamps, TurnSignal, and Stoplamps
- LicensePlateLamp
- HighVoltageDevicesand Wiring
- ElectricalSystem Overload
- HeadlampWiring
- WindshieldWipers
- FusesandCircuit Breakers
- EngineCompartment FuseBlock
- 10-32VehicleCare
- DRL LO BEAM
- Tires
- All-SeasonTires
- WinterTires
- Ifusingwintertires:
- 10-36VehicleCare
- SummerTires
- TireSidewallLabeling
- TireDesignations
- TireSize
- Passenger(P-Metric) Tire:
- TireTerminology and Definitions
- TirePressure
- WhentoCheck
- HowtoCheck
- TirePressureMonitor System
- FederalCommunications Commission(FCC)Rulesand withIndustryCanada Standards
- TirePressureMonitor Operation
- TPMSMalfunctionLightand Message
- TPMSSensorMatching Process
- TireInspection
- Replacethetireif:
- TireRotation
- WhenItIsTimeforNew Tires
- BuyingNewTires
- DifferentSizeTiresand Wheels
- UniformTireQuality Grading
- Treadwear200TractionAA TemperatureA
- Treadwear
- Traction-AA,A,B,C
- Temperature-A,B,C
- WheelAlignmentandTire Balance
- WheelReplacement
- UsedReplacementWheels
- TireChains
- IfaTireGoesFlat
- TireChanging
- RemovingTools
- RemovingtheSpareTire
- RemovingtheFlatTireand InstallingtheSpareTire
- 10-58VehicleCare
- TriangleShown, Without Similar
- StoringtheSpareTire
- 10-62VehicleCare
- CompactSpareTire
- JumperCableRemoval
- TowingtheVehicle
- Recreational Vehicle Towing
- ExteriorCare
- Locks
- WashingtheVehicle
- FinishCare
- ProtectingExteriorBrightMetal Parts
- CleaningExteriorLamps/LensesandEmblems
- WindshieldandWiperBlades
- Weatherstrips
- WheelsandTrim—Aluminum orChrome
- Steering, Suspension, and ChassisComponents
- BodyComponentLubrication
- UnderbodyMaintenance
- SheetMetalDamage
- FinishDamage
- ChemicalPaintSpotting
- InteriorCare
- InteriorGlass
- SpeakerCovers
- CoatedMoldings
- Fabric/Carpet/Suede
- Toclean:
- CleaningHighGlossSurfaces and VehicleInformation and RadioDisplays
- InstrumentPanel, Leather, Vinyl, and Other Plastic Surfaces
- CargoCoverand ConvenienceNet
- CareofSafetyBelts
- FloorMats
- ButtonRetainer
- RemovingandReplacingthe FloorMat
- KnobRetainer
- Service and Maintenance
- 11-2ServiceandMaintenance
- Maintenance Schedule
- OwnerChecksandServices
- AtEachFuelStop
- OnceaMonth
- EngineOilChange
- TireRotationandRequired ServicesEvery12000km/7,500mi
- 11-4ServiceandMaintenance
- 11-6ServiceandMaintenance
- Footnotes—Maintenance ScheduleAdditionalRequired Services—Normal
- Footnotes—Maintenance ScheduleAdditionalRequired Services—Severe
- SpecialApplication Services
- Additional Maintenance and Care
- Belts
- Fluids
- Hoses
- Lamps
- ShocksandStruts
- WheelAlignment
- Windshield
- WiperBlades
- RecommendedFluids,Lubricants,andParts
- MaintenanceReplacementParts
- 11-14ServiceandMaintenance
- MaintenanceRecords
- TechnicalData
- VehicleIdentification
- VehicleData
- VehicleIdentification Number(VIN)
- Engineldentification
- ServiceParts IdentificationLabel
- CapacitiesandSpecifications
- 12-4 TechnicalData
- Customer Information
- CustomerInformation
- ReportingSafetyDefects
- VehicleDataRecordingand Privacy
- Customer Satisfaction Procedure(U.S. and Canada)
- STEPTHREE—Canadian
- CustomerSatisfaction Procedure(Mexico)
- CustomerAssistance Procedure
- STEPONE
- STEPTWO
- STEPTHREE
- CustomerAssistance Offices(U.S.andCanada)
- UnitedStatesandPuertoRico
- Canada
- AllOverseasLocations
- CustomerAssistance Offices(Mexico)
- Mexico
- UnitedStatesandCanada
- CostaRica
- Guatemala
- Panama
- DominicanRepublic
- EISalvador
- Honduras
- CustomerAssistancefor TextTelephone(TTY) Users(U.S.andCanada)
- OnlineOwnerCenter
- OnlineOwnerExperience (U.S.)my.buick.com
- MembershipBenefits
- BuickOwnerCentre(Canada) buickowner.ca
- GMMobility ReimbursementProgram (U.S.andCanada)
- GM MOBILITY
- Roadside Assistance Program(Mexico)
- ServicesProvided
- 13-8 Customer Information
- ServicesNotIncludedinRoadside Assistance
- ContactingRoadsideAssistance
- UnitedStates
- Roadside Assistance Program(U.S.and Canada)
- CallingforAssistance
- Coverage
- 13-12 Customer Information
- ServicesNotIncludedin RoadsideAssistance
- ServicesSpecificto Canadian-PurchasedVehicles
- SchedulingService Appointments(U.S.and Canada)
- Courtesy Transportation Program(U.S.and Canada)
- TransportationOptions
- ShuttleService
- PublicTransportationorFuel Reimbursement
- CourtesyRentalVehicle
- Additional Program Information
- CollisionDamageRepair (U.S.andCanada)
- CollisionParts
- RepairFacility
- InsuringtheVehicle
- IfaCrashOccurs
- ManagingtheVehicleDamage RepairProcess
- ServicePublications OrderingInformation
- ServiceManuals
- ServiceBulletins
- OwnerInformation
- CurrentandPastModels
- ReportingSafety Defects
- ReportingSafetyDefects totheUnitedStates Government
- 13-18 Customer Information
- ReportingSafetyDefects totheCanadian Government
- ReportingSafetyDefects toGeneralMotors
- VehicleData Recordingand Privacy
- EventDataRecorders
- RadioFrequency Identification(RFID)
- RadioFrequency Statement
- OnStar
- OnStarOverview
- OnStarServices
- OnStarAdditionallInformation
- Press 📞 to:
- Press on toconnecttoalive
- Emergency
- Security
- Navigation
- Turn-by-TurnNavigation
- UsingVoiceCommands DuringaPlannedRoute
- CancelRoute
- RoutePreview
- Repeat
- GetMyDestination
- OtherNavigationServices AvailablefromOnStar
- Connections
- Hands-FreeCalling
- 14-4OnStar
- RetrieveMyNumber
- EndaCall
- StoreaNameTagforSpeed Dialing
- PlaceaCallUsingaStored Number
- VerifyMinutesandExpiration
- OnStarMobileApp
- Diagnostics
- OnStarAdditional Information
- TransferringService
- ReactivationforSubsequent Owners
- HowOnStarServiceWorks
- ServicesforPeoplewith Disabilities
- Press on forhelpwith:
- TTYUsers
- OnStar.com(U.S.)orOnStar.ca (Canada)
- OnStarPersonalIdentification Number(PIN)
- Warranty
- Languages
- PotentialIssues
- GlobalPositioning System(GPS)
- CellularandGPSAntennas
- UnabletoConnecttoOnStar Message
- VehicleandPowerIssues
- Privacy
- OnStar-libcurlandunzip acknowledgments
- libcurl:
- unzip:
- 14-10OnStar
- A
- i-2INDEX
- B
- C
- D
- i-4INDEX
- E
- F
- G
- H
- i-6INDEX
- |
- J
- K
- L
- M
- N
- O
- i-8INDEX
- P
- R
- S
- i-10INDEX
- T
- U
- V
- i-12INDEX
- W
Brand : Buick
Model : Roadmaster (1995)
Category : Automobile