
CSP6911 - Loudspeaker PHILIPS - Free user manual and instructions
Find the device manual for free CSP6911 PHILIPS in PDF.


| Product Type | Car Stereo Speakers |
| Model | CSP6911 |
| Speaker Type | 16x24cm (6x9") 3-Way Triaxial |
| RMS Power | 50W |
| Peak Music Power | 300W |
| Sensitivity | 90 dB/W/m |
| Frequency Response | 28 - 32,000 Hz |
| Impedance | 4 ohms |
| Magnet Mass | 12.6 oz |
| Mounting Depth | 78 mm |
| Installation Options | Door (front or rear) or Rear Tray |
| Included Accessories | Speakers (×2), Grille nets with frames (×2), Speaker wires (×2), Screws (×8), Shrapnel clips (×8) |
| Cleaning | Use a soft, damp cloth; avoid alcohol, chemicals, or household cleaners |
| Safety Precautions | Do not exceed peak power; keep magnetic media (credit cards, tapes) away from speakers; use only supplied mounting hardware; turn off ignition before installation |
| Registration | Register at www.philips.com/welcome for full support |
Frequently Asked Questions - CSP6911 PHILIPS
User questions about CSP6911 PHILIPS
0 question about this device. Answer the ones you know or ask your own.
Ask a new question about this device
Download the instructions for your Loudspeaker in PDF format for free! Find your manual CSP6911 - PHILIPS and take your electronic device back in hand. On this page are published all the documents necessary for the use of your device. CSP6911 by PHILIPS.
USER MANUAL CSP6911 PHILIPS
Always there to help you
Register your product and get support at www.philips.com/welcome

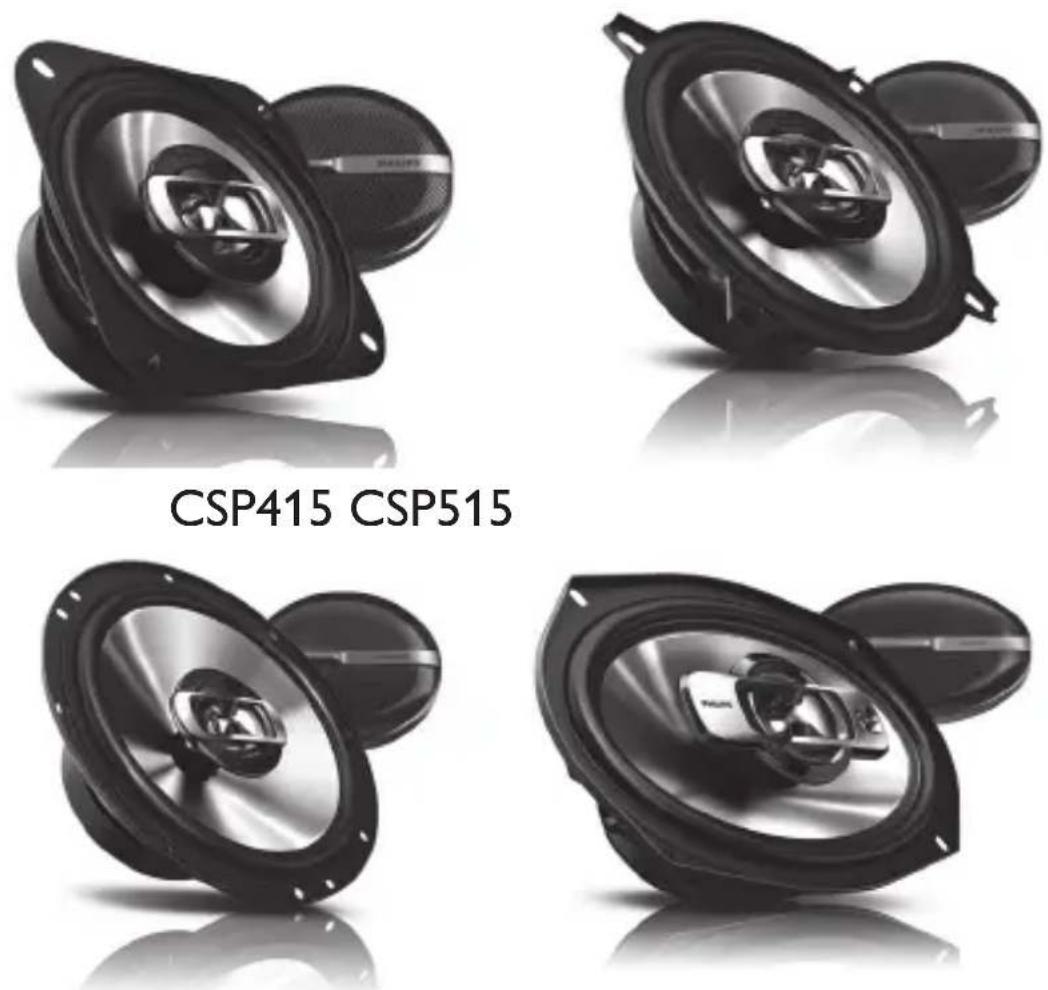
CSP6911CSP615
User manual
PHILIPS
Contents
1 Important 2
Safety 2
Notice 2
2 Your car stereo speakers 3
Introduction 3
What's in the box 3
3 Installation 3
Option 1: Mount on door (front or rear) 4
Option 2: Mount on rear tray 7
4 Product information 7
5 Troubleshooting 8
1 Important
Safety
- Read and understand all instructions before you use the apparatus. If damage is caused by failure to follow instructions, the warranty does not apply.
- Use only the supplied mounting hardware for a safe and secure installation.
- Do not continuously use the speaker system beyond the peak power handling capacity.
- Keep credit cards, watches, recorded tapes etc. with magnetic coding away from the speaker system to prevent damage caused by the magnets in the speakers.
- Clean the apparatus with soft, damp cloth. Never use substances such as alcohol, chemicals or household cleaners on the apparatus.
Notice
This product complies with the radio interference requirements of the European Community.

Environmental information
All unnecessary packaging has been omitted. We have tried to make the packaging easy to separate into three materials: cardboard (box), polystyrene foam (buffer) and polyethylene (bags, protective foam sheet.) Your system consists of materials which can be recycled and reused if disassembled by a specialized company. Please observe the local regulations regarding the disposal of packaging materials, exhausted batteries and old equipment.
Any changes or modifications made to this device that are not expressly approved by WOOX Innovations may void the user's authority to operate the equipment.
2013 © WOOX Innovations Limited. All rights reserved.
Specifications are subject to change without notice. WOOX reserves the right to change products at any time without being obliged to adjust earlier supplies accordingly.
2 Your car stereo speakers
Congratulations on your purchase, and welcome to Philips! To fully benefit from the support that Philips offers, register your product at www.philips.com/welcome.
Introduction
With the speakers, you can enjoy high power music with vivid sound.
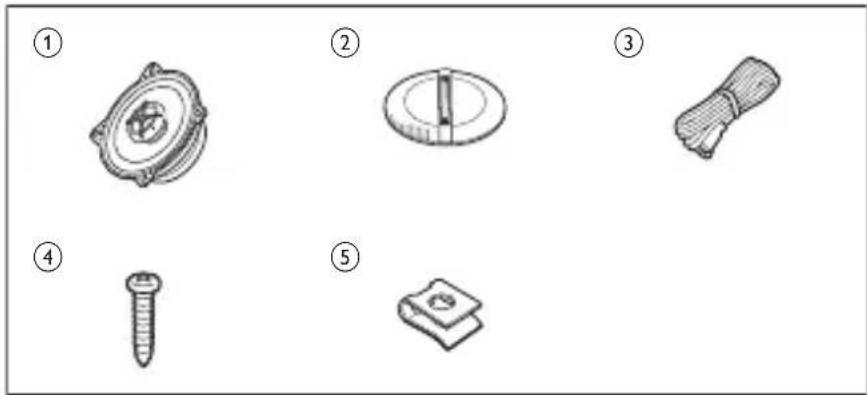
What's in the box
Check and identify the contents of your package:
① Speakers (×2)
② Grille net + Frame (×2)
③ Speaker wire (×2)
④ Screw (×8)
⑤ Shrapnel (×8)
3 Installation
A depth of at least 46mm is required to mount the speaker. Measure the depth of the area where you are to mount the speaker, and ensure that the speaker does not obstruct any other components of the car.
Option 1: Mount on door (front or rear)
You can mount the speakers on the front/rear door of your car.

natural_image
Simple line drawing of a magnifying glass with labeled parts (no text or symbols)
Note
Make sure that nothing obstructs around the mounting location of the door.
A hole for mounting may already be cut out of the inner panel of the door (front or rear). In this case, you need to modify the board only.
Ensure that the speaker terminals, frame or magnet do not interfere with any inner parts, such as the window mechanism in the door (when you open or close the window), etc. Also ensure that the speaker grille does not touch any inner fittings, such as the window cranks, door handles, arm rests etc.
1 Turn off the car ignition key.
- If the power is on, the click noise generated by the connection may damage the speakers.
2 Cut out the mounting template from the packing box.
3 Paste the template on the location selected for mounting the speaker.
4 Mark the cut-off hole and the 4 bolt holes.

natural_image
Illustration of a handheld electric drill with a circular target and probe (no text or symbols)5 Cut out the marked area and drill the bolt holes.

natural_image
Line drawing of a car interior showing seat, dashboard, and steering wheel (no text or symbols)6 Remove the grille net.

7 Strip the speaker wires and connect them to the amplifier.
- Black wire: connect to “-” (negative) terminal
- Black (white lined): connect to “+” (positive) terminal

◆Match the “left”, “right”, “+” and “-” terminals correctly. Revised polarity may degrade sound quality.
- Two 4-ohm speakers, wired in stereo, present a 8 ohm load to each channel of the amplifier. Most two channel amplifiers work well in this configuration. However, if two 4-ohm speakers, wired in parallel to a bridged two -channel amplifier, present a 2-ohm mono load to the amplifier. Most 2-channel amplifiers do not support 2-ohm mono operation! Amplifier damage may result!
8 Mount on the speaker as shown below.

natural_image
Technical line drawing of a door frame with internal components and exploded view (no text or symbols)9 Press and insert the edges of the grille net.


Tip
•The speaker grille can be mounted without the grille net, if you like.
Option 2: Mount on rear tray
You can also mount the speakers into the surface of the rear tray. Follow the steps in section “Option 1: Mount in door” to mount the speakers into the rear tray:

natural_image
Line drawing of a car backseat with seat covers and overhead display screens (no text or symbols)4 Product information

Note
Product information is subject to change without prior notice.
| Model CSP415 CSP515 | ||
| Speaker type 10cm 2-way coaxial speaker | 13cm, 2-way coaxial speaker | |
| RMS power (Watts) 30W 35W | ||
| Peak music power (Watts) 150W 180W | ||
| Sensitivity (dB/W/m) 88dB 89dB | ||
| Frequency response (Hz) 50-30kHz 45-30kHz | ||
| Impedance (ohms) | 4 ohms | 4 ohms |
| Magnet mass (Oz) | 4.4Oz | 6.4Oz |
| Mounting depth (mm) | 46mm | 47mm |
| Model | CSP615 | CSP6911 |
| Speaker type | 16.5cm, 2-way coaxial speaker | 16x24cm, 3-way triaxial speaker |
| RMS power (Watts) | 40W 50W | |
| Peak music power (Watts) | 210W | 300W |
| Sensitivity (dB/W/m) | 90dB | 90dB |
| Frequency response (Hz) | 40-30kHz | 28-32kHz |
| Impedance (ohms) | 4 ohms | 4 ohms |
| Magnet mass (Oz) | 7.6Oz | 12.6Oz |
| Mounting depth (mm) | 58mm | 78mm |
5 Troubleshooting
To keep the warranty valid, never try to repair the system yourself. If you encounter problems when using this apparatus, go to the web site (www.philips.com/welcome). When you contact Philips, ensure that the apparatus is nearby and the model number and serial number are available.

2013 © WOOX Innovations Limited.
All rights reserved.
This product was brought to the market by WOOX Innovations Limited or one of its affiliates, further referred to in this document as WOOX Innovations, and is the manufacturer of the product. WOOX Innovations is the warrantor in relation to the product with which this booklet was packaged. Philips and the Philips Shield Emblem are registered trademarks of Koninklijke Philips N.V.
CSP415\515\615\6911_00_UM_V3.2

- Always there to help you
- User manual
- PHILIPS
- Contents
- Important 2
- Your car stereo speakers 3
- Installation 3
- Product information 7
- Troubleshooting 8
- Important
- Safety
- Notice
- Environmental information
- Your car stereo speakers
- Introduction
- What's in the box
- Installation
- Option 1: Mount on door (front or rear)
- Note
- Mount on the speaker as shown below.
- Tip
- Option 2: Mount on rear tray
- Product information
- Troubleshooting
Brand : PHILIPS
Model : CSP6911
Category : Loudspeaker