
go1984 Enterprise Edition - Photo/Video Software Intellinet - Free user manual and instructions
Find the device manual for free go1984 Enterprise Edition Intellinet in PDF.


| Product Type | Photo/Video Software |
| Brand | Intellinet |
| Model | go1984 Enterprise Edition |
| Version | Enterprise Edition |
| Compatibility | Windows 10/11, macOS 11+, Linux (Ubuntu 20.04+) |
| System Requirements (Minimum) | Intel Core i5, 8 GB RAM, 2 GB free disk space, OpenGL 3.3 |
| Key Features | Batch photo editing, 4K video export, AI-based enhancement, cloud storage integration |
| Supported Input Formats | JPEG, PNG, TIFF, RAW (CR2, NEF, ARW), MP4, MOV, AVI |
| Supported Output Formats | JPEG, PNG, TIFF, PDF, MP4, MOV, GIF |
| Language Support | English, French, German, Spanish, Chinese, Japanese |
| License Type | Perpetual with optional subscription for updates |
| Installation Method | Download from official website, activation key required |
| Maintenance & Updates | Free updates for 1 year, extendable via subscription |
| Security | Encrypted data transfer, optional two-factor authentication |
| Spare Parts & Reparability | Not applicable (software); reinstall from backup or download |
| Technical Support | Email support, knowledge base, community forum |
| Dimensions (Digital) | ~500 MB download size |
Frequently Asked Questions - go1984 Enterprise Edition Intellinet
User questions about go1984 Enterprise Edition Intellinet
0 question about this device. Answer the ones you know or ask your own.
Ask a new question about this device
Download the instructions for your Photo/Video Software in PDF format for free! Find your manual go1984 Enterprise Edition - Intellinet and take your electronic device back in hand. On this page are published all the documents necessary for the use of your device. go1984 Enterprise Edition by Intellinet.
USER MANUAL go1984 Enterprise Edition Intellinet
natural_image
Close-up grayscale illustration of a human eye with visible iris and pupil (no text or symbols)logiware
Alfred-Mozer-Str. 42
D-48527 Nordhorn
Germany
Telephone (+49)(0)5921 7139925
Telefax (+49)(0)5921 7139929
go1984
http://www.go1984.com
logiware

Alfred-Mozer-Str. 42
D-48527 Nordhorn
Germany
Telephone (+49)(0)5921 7139925
Telefax (+49)(0)5921 7139929
1 Introduction....1
2 Editions ...... 2
3 Installation....3
4 Launching the program 8
5 Entering the license code....10
6 Basic setup 13
Adding a camera.... 14
IP camera.... 14
PTZ camera.... 18
Webcam (USB).... 23
Capture card.... 24
Recording 25
Calculating memory requirements.... 28
Memory management.... 29
Scene generation.... 30
Pre-/Post alarm.... 31
Access time period.... 32
Export 33
Motion detection 34
Http event 39
Notification.... 45
Sound 46
E-mail 47
FTP 48
LAN-Broadcast.... 50
External program.... 54
ISDN 55
Scheduler 56
7 User management 60
8 Webserver 62
Configuration 63
Interface 65
iPhone Client 68
J2ME Client 70
DynDNS 73
Clustermode.... 76
9 Image Center....79
10 Additional settings 83
Camera 83
Startup settings 86
HTTP Proxy 87
SMTP server configuration 88
Translation 90
11 Event management....91
12 Appendix 95
POP3/SMTP-Server 95
13 Masthead 96
1 Introduction
go1984 is software designed for professional and hassle-free monitoring by closed circuit TV (CCTV). It sets a new benchmark in the industry: it is simple to use, packed with features and available at an affordable price.
go1984 features everything you'll ever need to carry out professional CCTV surveillance, including:
• Live monitoring
- Recording (timer-controlled, motion-triggered or permanent)
• Control of PTZ cameras
- Notification options: acoustic, by e-mail or by voice call via ISDN
- Remote access via network or the Internet
- Calendar functions
The software works as a so-called "hybrid system", which means it is capable of processing digital network cameras as well as analog video sources via video servers or capture cards. Companies with analog video technology can use the software to assist the "smart transition" to the digital world while integrating their existing hardware. go1984 thus makes an important contribution to protecting your investments.
go1984 supports the hardware of many well-known manufacturers such as, for instance: Axis, Sony, JVC, Panasonic, Mobotix, Logitech, Intellinet and many others.
The following figure illustrates the connectivity options provided by go1984:
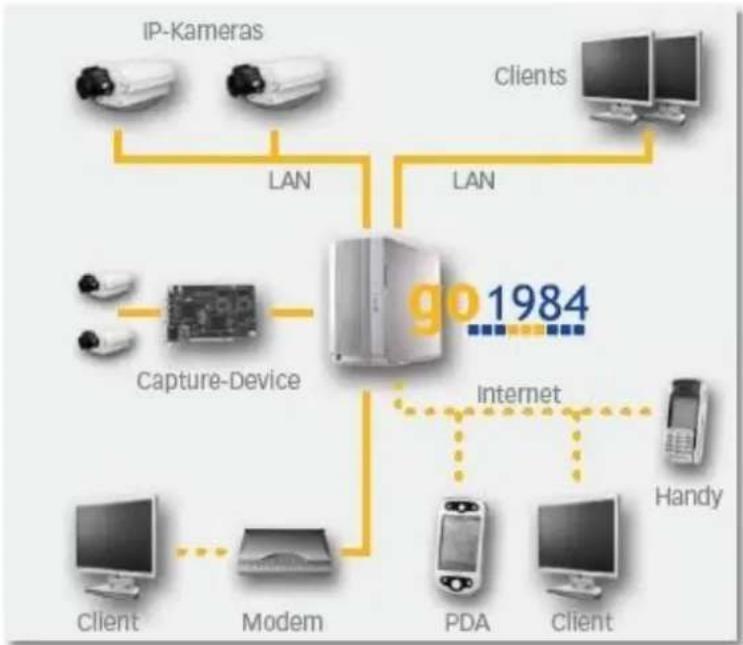
flowchart
graph TD
    A["IP-Kameras"] -->|LAN| B["Central Device"]
    C["Clients"] -->|LAN| B
    D["Capture-Device"] -->|LAN| B
    E["Client"] --> F["Modem"]
    G["PDA"] --> H["Internet"]
    I["Client"] --> H
    J["Handy"] --> H
    B -->|1984| K["Central Device"]
    style B fill:#f9f9f9,stroke:#333
2 Editions
go1984 is available in various editions. The following figure highlights the differences.
| go1984 features | |||
| Standard | Pro | Enterprise | |
| Supports | |||
| IP-cameras | unlimited | unlimited | |
| Supports | |||
| Direct-X sources | √ | √ | √ |
| User administration | √ | √ | √ |
| Webserver-sessions | 1 | 2 | unlimited |
| Pre-alarm recording | √ | √ | √ |
| Post-alarm recording | √ | √ | √ |
| Recording capacity | unlimited | unlimited | unlimited |
| Ring storage | √/- | √/- | √/√ |
| Archive access intervals | √ | ||
| Cluster-server | √ | √ | √ |
| Cluster-client | √ | ||
| Program start in case of alarm | √ | ||
| Telephone call in case of alarm | √ | √ | √ |
| Event-management | static | static | variable |
| I/O controlling | √ | √ | |
| Scheduler | √ | √ | √ |
3 Installation
Installing go1984 is a matter of minutes even for users unfamiliar with the program. An unregistered version of the software can be tested for 30 days with all its functions. An uninstaller is included in the download so that you can remove go1984 immediately from your computer if you are not happy with the program.
To start the installation, click on the following icon:

First choose the language you want for the installation process.
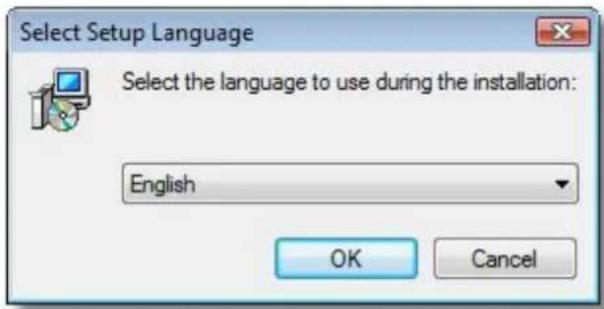
You will now be taken step by step through the installation process for go1984. You can accept the default settings and continue in the installation process by clicking on the "Next >" button where applicable.

If you prefer to install to a different directory or hard-drive, please select the corresponding option in the following dialog.

Then select the components to be installed. You can choose the go1984 client as well as go1984 (see "LAN Broadcast" section).

The installation routine will automatically create an entry labeled go1984 in your Windows start menu. If you prefer a different name, you can change it at this point.
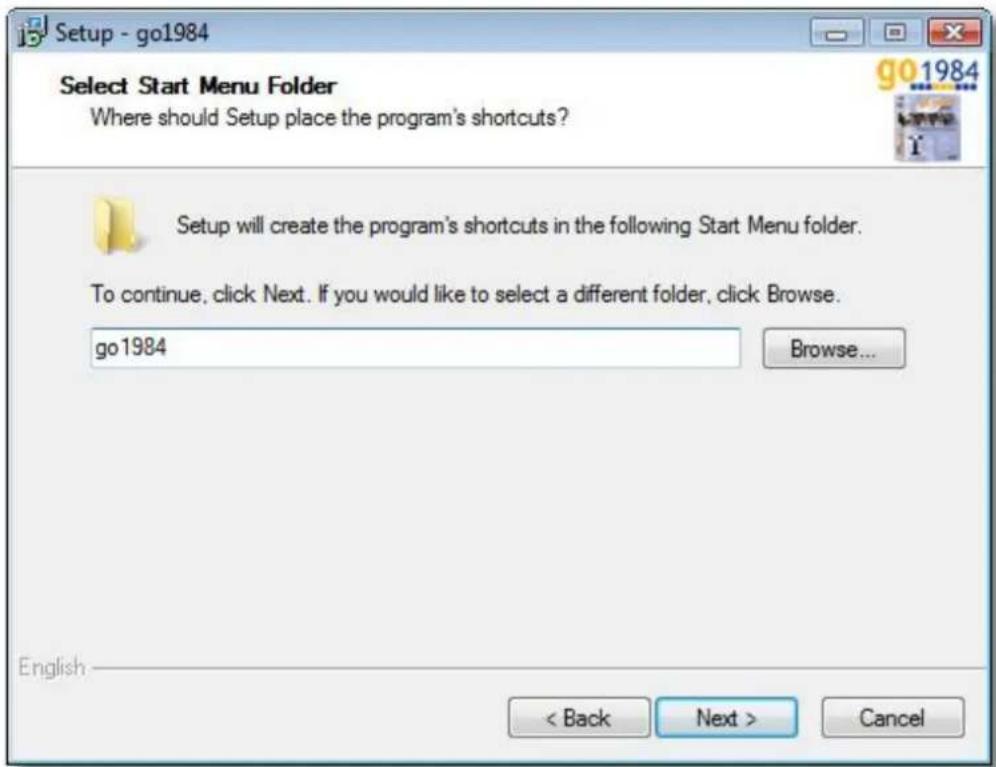
All settings needed for the installation processes are now available. By clicking on the "Install" button, the installation will be completed and the required files will be copied to your hard-drive.

The installation of go1984 has now been completed. The installation routine is closed when you click on the "Finish" button. You can choose to have go1984 launched directly afterwards.
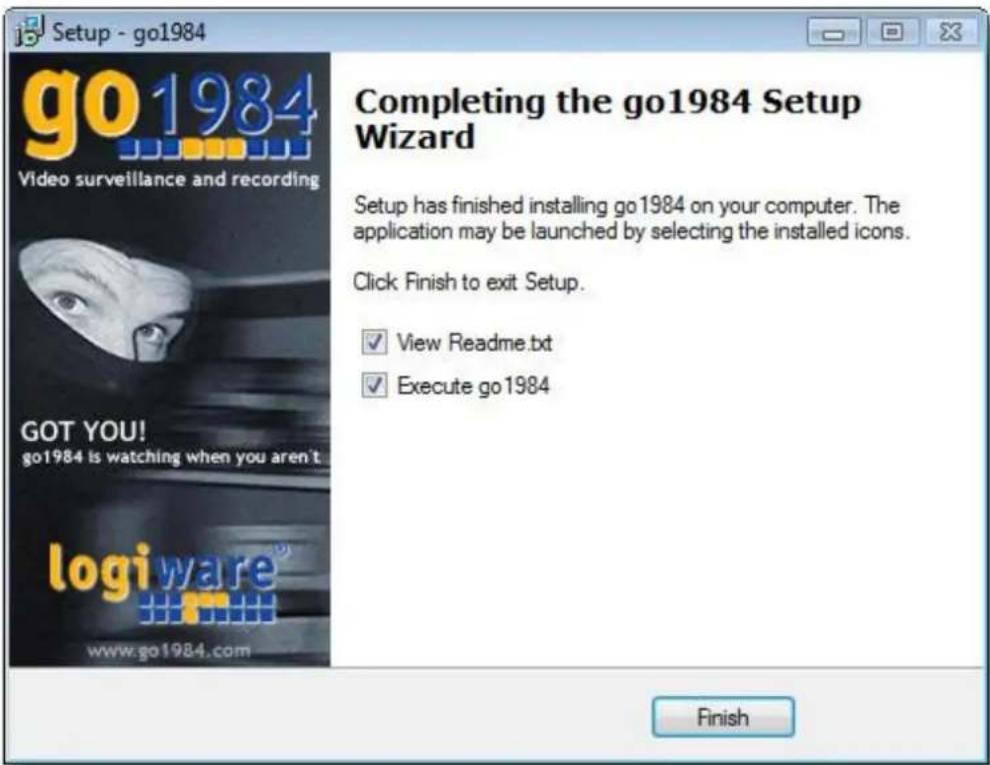
In the Enterprise edition go1984 can be installed as a service. To do this, you start the program on a one-off basis via the command line using the parameter "-install".

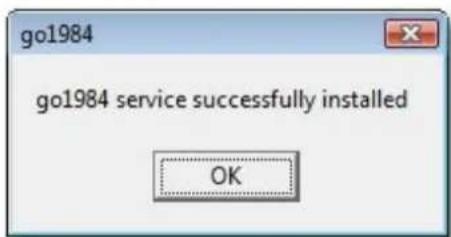
A message will appear indicating that the service has been successfully installed.
4 Launching the program
After installing go1984, there are various ways to launch it.
1. Launch using the Windows quick start bar

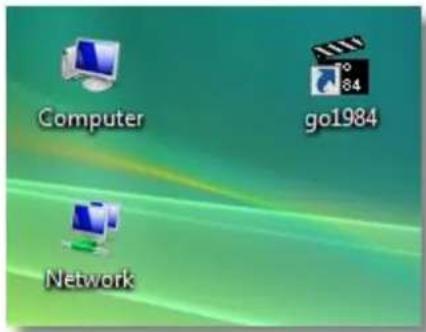
2. Launch using the desktop
3. Launch using the start menu
Select: Start → All Programs → go1984 → go1984

4. Autostart
If you want go1984 to be launched automatically when your computer is switched on, please activate the option shown in the following diagram. If you are going to run go1984 in service mode (see "Installation" section), deactivate this option so that go1984 service will then be launched automatically.


Note:
Most Windows programs are shut down completely when you close the program window. go1984 is only hidden and continues to run in the background.
While the program is running, the go1984 symbol is displayed in the task bar near the time. You can use it to shut the program down completely or to bring it back to the foreground. Clicking on the icon with the right mouse key will open the corresponding menu.


5 Entering the license code
go1984 runs as a demo version after being installed. In order to make go1984 function without any time or feature restrictions, you need to enter the activation data you purchased into the appropriate fields.

Please take care to transfer the data exactly as you received them by e-mail or on the license card. You will sometimes find a numerical input for the name or place in the activation data. If this is the case, enter the specified numerical sequence.
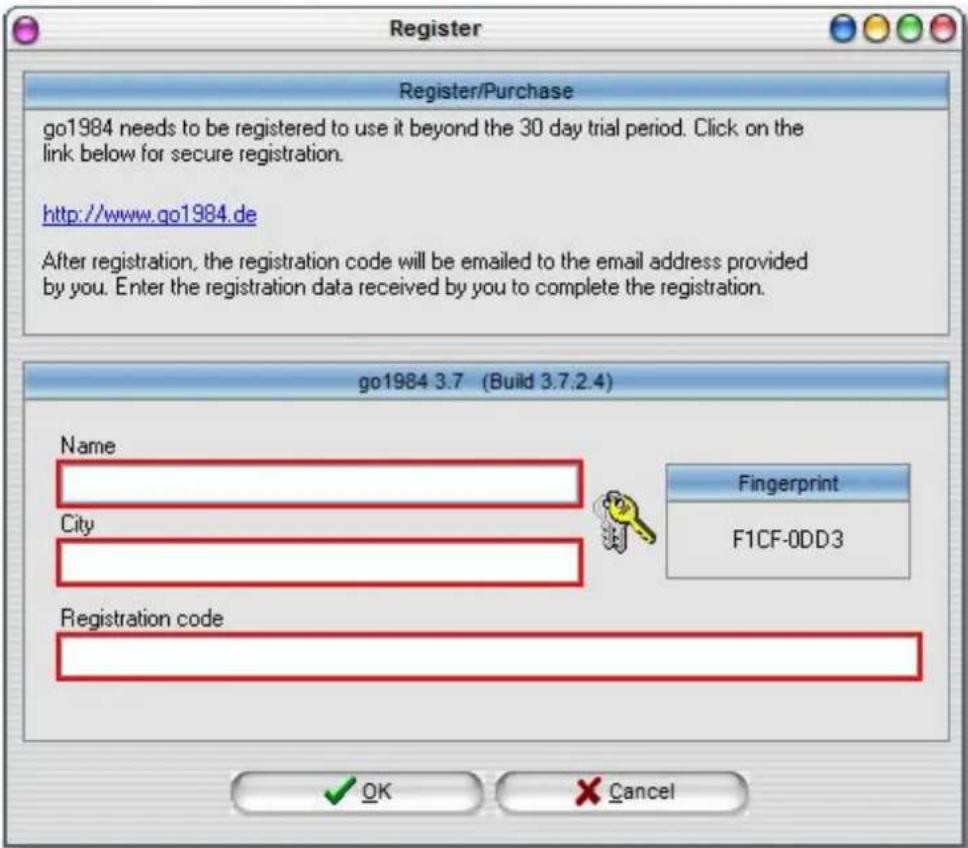
If activation fails, please check whether you entered the data correctly. In 99,9% of all cases, typing or transcription errors are the reason for activation failing.
If you have purchased a license extension or an update to a higher edition, click on "Input upgrade key" to enter the new activation data.
Upgrade
The installed license code allows you to download and install new releases of go1984 in the same edition until
4/25/2008
You must enter an upgrade code, if you want to use a higher edition, or if you want to renew the subscription of your edition.
Enter upgrade code ...

Note:
You must always enter the data for the full version first. You can then input the update or upgrade key after this (for instance, after reinstalling your operating system or moving to a new system).
6 Basic setup
In order to use go1984, one or more image sources are required. The following sources can be used:
- IP cameras
• Capture cards and TV cards - Webcams (USB)
This section explains how to integrate cameras or other image sources into go1984. It also provides information on how to configure recording, on the integrated motion detection feature and on the notification options. We'll be working on the basis of a "typical" case, for which the pre-defined, automatic program settings are sufficient.
If you wish to make further changes or improvements to go1984, please refer to the section "Additional settings".
6.1 Adding a camera
6.1.1 IP camera
To add an IP camera, select the entry "IP cameras" in the go1984 explorer.

You now have two options for adding a new camera.
1. Camera picture
A list is displayed showing you pictures of all the available cameras, arranged in alphabetical order. You can use a filter to conveniently restrict the search for the model you want. You can use characters and numerics in any combination. For instance, the text "allnet" will list all the cameras that include this combination of letters in their name.

Similarly, a numeric combination such as "210" or an alphanumeric filter such as "210a" can be input as search terms.
If you select the "Ptz" checkbox you can limit your search to cameras with PTZ support.

You then double-click on the picture of the camera model you want to add.

2. Selection list
If you click on the "Add camera" button a list appears of the supported camera providers you can choose from.
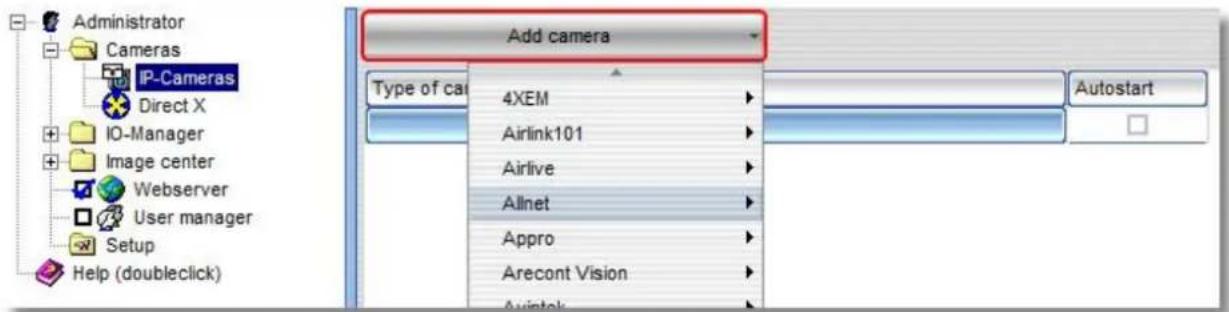
You simply choose the model of camera you want from the list.
In both cases, the following dialog box appears.
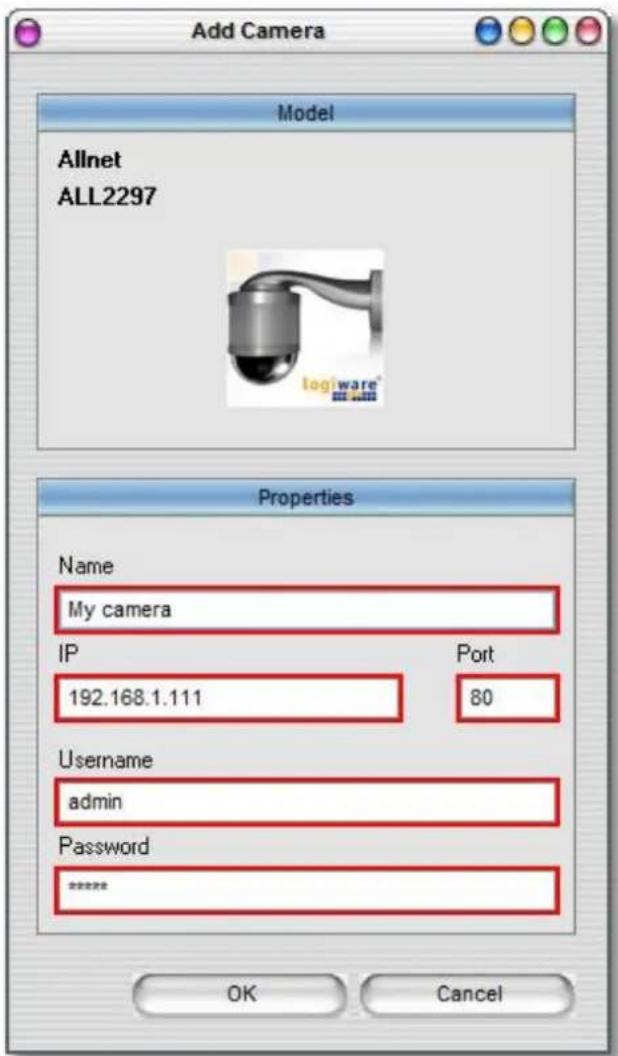
You should set the following parameters in it:
| Name | Give the camera a unique nickname which can be used for it in go1984. |
| IP | Enter the camera's IP address or host name here. If you have not yet assigned the camera an IP address, refer to the camera manufacturer's documentation. |
| Port | If a camera port other than the default port "80" is being used, you can change this here. |
| Username | If authentication is required to access the camera, enter your username here. |
| Password | Enter your password here for the authentication process mentioned above. Refer to your camera manual for details of the default passwords. |
Finally, click on "OK" to confirm your details.
The camera you've added will now appear in the branch "IP cameras" of the go1984 explorer. The basic setup of the camera has now been concluded. go1984 has automatically activated motion detection and recording for this image source. As standard, cameras only record when there is a detected motion. If you want to record images permanently, simply deactivate the motion detection option by clicking on the "Motion detection" option box.


Note:
In the case of IP cameras that do not support simultaneous MJPEG and MPEG4 (dual streaming), or where only MPEG4 streaming is activated by default, MJPEG or Dual Streaming must be specifically selected in the camera settings (e.g. Allnet, Intellinet).
The section "Additional settings" provides information on how to edit further camera parameters such as resolution, frame refresh rates or panning.
6.1.2 PTZ camera
If the IP camera which has been added is a PTZ camera (PTZ = Pan/Tilt/Zoom), you can easily operate this via go1984.

Note:
If the camera's live image appears but you cannot use the PTZ control, check the settings for "Host", "Port", "Username" and "Password" under "Video" → "PTZ settings" to see that they are correct.
![Administrator Cameras IP-Cameras My camera PTZ camera Video Motion detection Recording Alarm management Direct X IO-Manager Image center Webserver User manager Setup Help (doubleclick) PTZ: PTZ camera Zoomslider Live image Properties PTZ properties Log Apply Host 192.168.1.138 Port 80 Username admin Password ****** Recoverytime 300 Uri /command/ptzf.cgi? Min Pan -170 Max Pan 170 Min Tilt -90 Max Tilt 30 Min Zoom 0 Max Zoom 100 Min Focus 0 Max Focus 100 Min Iris 0 Max Iris 100 Mirror Pan 0 Mirror Tilt 0 640x480 4.2 fps 11:15:43 A 11:15:24 A Sony SNC-RZ25P [TSonyCamera] \Administrator\Cameras\IP-Cameras\PTZ camera\Video](/content/2026/05/1023780/images/f59e16d377f2a121ff7c6707194ace6abfbc4dde258a56e80f54f4c92ffca158.jpg)
There are different camera control options depending on the camera model:
1. Via the arrow keys

2. Via the slider

3. Via "click and drag"
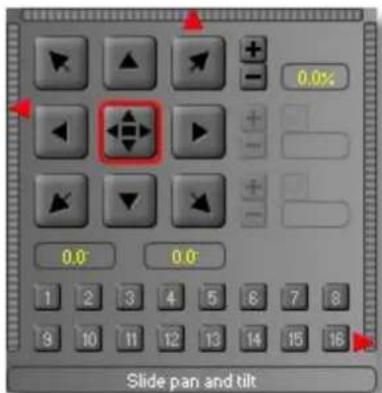
Click on the button in the centre and hold the mouse button down. Now move the mouse crosshair within the PTZ field to move the camera to the position you want, which also allows you to use the pan and tilt functions comfortably:
4. Via "Ctrl" + mouse-click in the live image
If the live image is visible and the camera name highlighted, you can also control the camera using the Ctrl key and clicking inside the live image. In order to control the camera zoom, go across the image with the mouse and move the mouse scroll wheel. These functions are also supported in an image center display.
![Administrator Cameras IP-Cameras My camera PTZ camera Video Motion detection Recording Alarm management Direct X IO-Manager Image center Webserver User manager Setup Help (doubleclick) PTZ: PTZ camera 0.0% 140.0 0.0 79467 Original image from source device is used. Use labelling, rotating and quality from the source 640x480 3.5 fps 11:56:49 A 11:56:03 A Sony SNC-RZ25P [TSonyCamera] \Administrator\Cameras\IP-Cameras\PTZ camera](/content/2026/05/1023780/images/df1f0751a3a3bb32faae6ee2f9efee099c093201caa00dbc7869f7e63c1948de.jpg)
5. Via "Area zoom"
If the camera being used supports an area a frame can be created in the image by holding the Ctrl key down, which is then highlighted. You need to select the camera name again to do this. This function is also supported in an image center display.
Preset-Positions
You can save up to 16 camera positions for each camera. To do this, simply click on the position you want.

Then enter a position description:
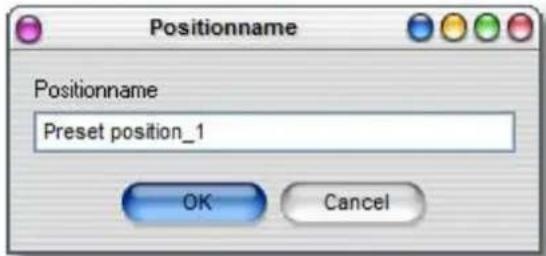
The new position is now displayed in color and can be accessed by clicking on it.
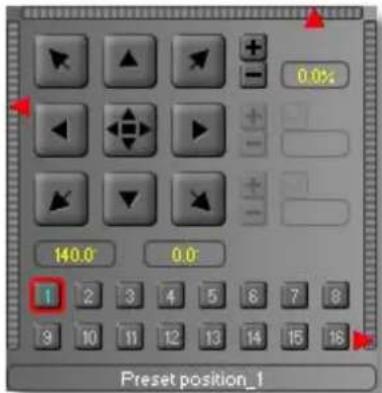
If you want the position to be displayed at certain times, you can link it via a right-click to a scheduler created beforehand. You can in fact link the position to any signal.
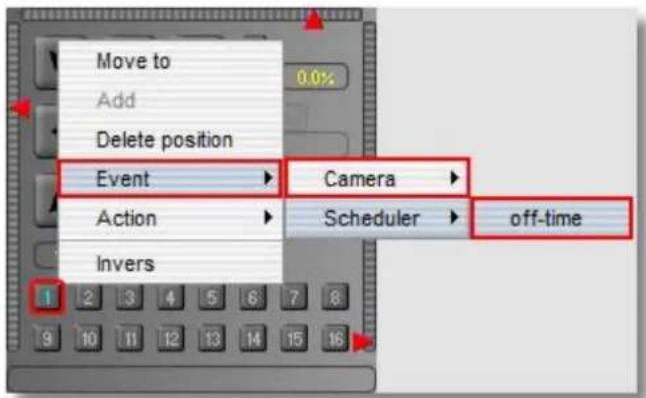
If you right-click on a saved position it can be deleted again:


Note:
Sometimes administrator rights are required to be able to save or delete positions for the camera.
6.1.3 Webcam (USB)
In order to be able to use your USB webcam in go1984, first install all the necessary drivers according to the camera manufacturer's instructions. Once the camera is available as a DirectX device in Windows, you can integrate it into go1984. For this, you first need to activate DirectX support. To do so, select the option as indicated in the diagram. At the next program launch, go1984 will search your computer for available DirectX devices and display them under " DirectX" in the go1984 explorer.

You now have the option of editing certain parameters such as the frame rate or the resolution.
![Administrator Cameras IP-Cameras My camera Video Motion detection Recording Alarm management Direct X Microsoft LifeCam VX-1000 01 Video Motion detection Recording Alarm management IO-Manager Image center Webserver User manager Setup Help (doubleclick) Pause between two frames 100 ms [10.0 fps] RGB 320x240, 24 bits 230400 Byte 230400 Φ Byte 26/65 = 40 % dropped frames PTZ 320x240 4.9 fps 14:03:55 14:03:55 Microsoft LifeCam VX-1000 \Administrator\Cameras\Direct X\Microsoft LifeCam VX-1000 01\Video](/content/2026/05/1023780/images/0249b5b7725d9870f2a666b8045ce647c98d4013bf0b3779c4b704dfd55c5401.jpg)
6.1.4 Capture card
Capture cards are physically installed into the PC and convert analog image signals into digital signals. Start by installing the card in your computer and installing all required drivers as indicated by the card manufacturer's instructions. Most single channel capture cards based on the BT878 chip can be used. Usually, only the first channel of multichannel cards can be used in go1984. In addition, go1984 supports the following four channel cards:
- Spectra8 by ITuner
• Videum4400 by Winnov
After you've installed your capture card successfully, it will be available to you as a DirectX device. The next steps are the same as in the description for webcams (USB).
6.2 Recording
Recordings are automatically sorted by month to the respective camera in the go1984 explorer. If you wish to view the recordings, select the "Recordings" entry of the respective camera in the go1984 explorer. You'll be shown a list of all the months for which scenes are available.
Monthly overview
Selecting a month will take you to the monthly overview. Days are listed vertically, times of day horizontally. Each scene is represented as a little red mark in this overview. Moving the mouse pointer over the marks calls up a quick preview of the corresponding scene. You can open the selected scene for viewing by double-clicking on it.
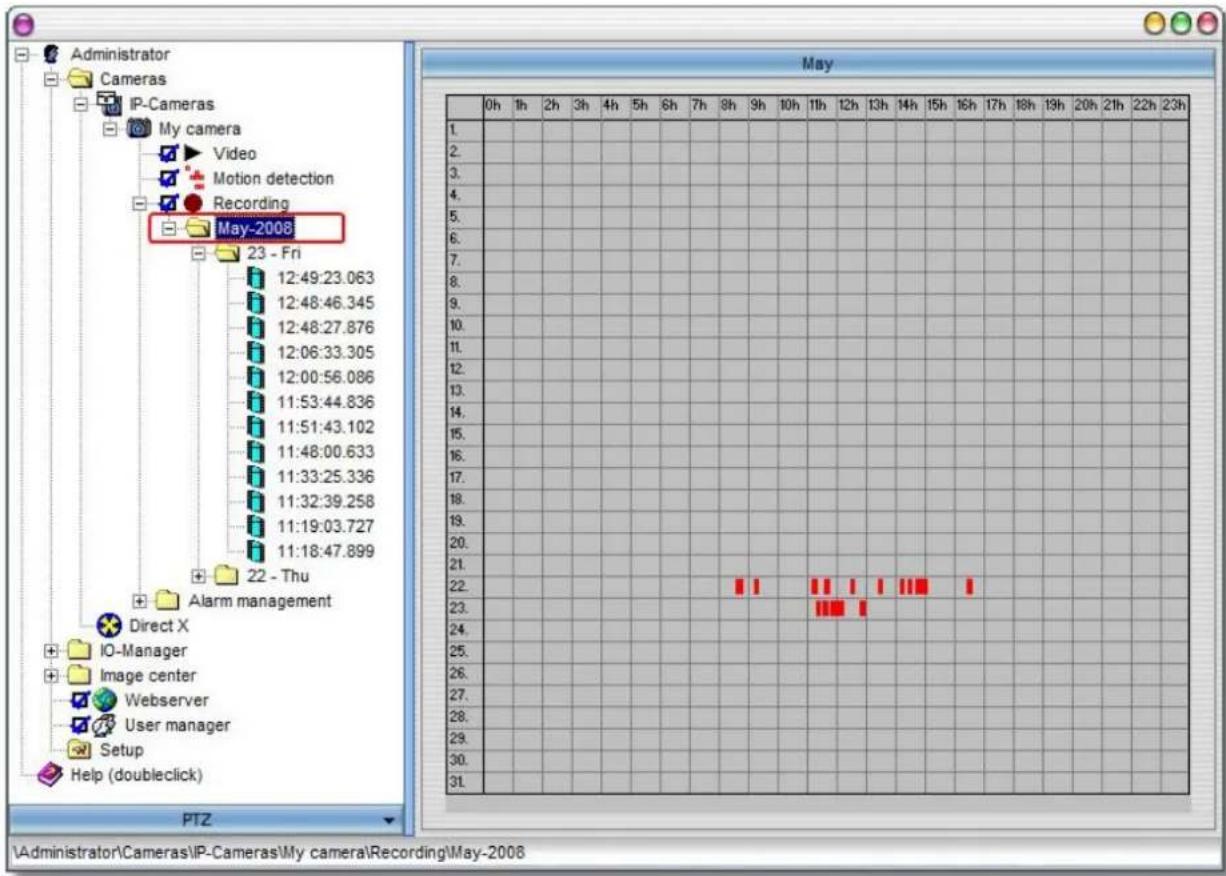
Daily overview
If you wish to view the recordings for a specific day, select the day in the go1984 explorer as described below. You'll be provided with an overview over the scenes recorded on that day. Here, too, moving the mouse pointer over a scene will display a preview. Open the selected scene for viewing by double-clicking on it.
![Administrator Cameras IP-Cameras My camera Video Motion detection Recording May-2008 23 - Fri 22 - Thu 16:27:25.705 16:25:10.268 14:56:21.823 14:50:35.880 09:13:52.109 09:12:35.843 Alarm management Direct X IO-Manager Image center Webserver User manager Setup Help (doubleclick) PTZ Preview Speed Timer 0.5 x 1 x 2 x 4 x 8 x Pause 100 ms Width 160 16:27:32 [36/70] 16:25:16 [24/47] 14:56:25 [18/35] 14:50:39 [18/34] 09:13:57 [28/54] 09:12:46 [25/49] \Administrator\Cameras\P-Cameras\My camera\Recording\May-2008\22 - Thu](/content/2026/05/1023780/images/3517fb1287b85c4ae0ac08171b2af720e39f62aa9a947e66072367167d4db3fc.jpg)
In addition, you have the option of changing the playback speed of the preview mode and of defining the width of the preview scenes.
Scene playback
You have two different modes available when you come to play back individual scenes.

Loop mode:
the scene that is currently selected will be re-run at the end of the scene.

Endless mode:
all the scenes recorded on the camera are played back in sequence in chronological order.
![Administrator Cameras IP-Cameras My camera Video Motion detection Recording May-2008 23 - Fri 22 - Thu 16:27:25.705 16:25:10.268 14:56:21.823 14:50:35.880 09:13:52.109 09:12:35.843 Alarm management Direct X IO-Manager Image center Webserver User manager Setup Help (doubleclick) Play Speed [14/34] 1242 KByte Pause 100 ms PTZ: PTZ camera 5/22/2008 2:50:38 PM.719 \Administrator\Cameras\IP-Cameras\My camera\Recording\May-2008\22 - Thu\14:50:35.880](/content/2026/05/1023780/images/773808e9f6fb986cdd83e428b6e8fe2dd4a2af70f11eb8302e8395b97cab827e.jpg)
6.2.1 Calculating memory requirements
One of the most frequently asked questions is: how much hard-drive space will the recordings use? There's no simple answer to the question because many factors play a role. These include:
• The number of cameras (AK)
• The number of frames per second (FPS)
• The image size (KB)
• The amount of compression
- Whether recording is permanent or motion-triggered
In order to get a rough idea of memory requirements in the case of permanent recording, use the following rule of thumb: You can usually assume the image size (KB) to be about 25-30 kilobytes.
AK \* FPS \* KB = kilobytes/second
This will give you the approximate number of kilobytes needed per second recorded. Multiplying by 3600 gives you an idea of the number of kilobytes needed per hour.
Please note that go1984 uses intelligent ring storage management to contribute significantly to efficient memory management. In many cases, it makes sense in any case to use motion-triggered recording, which reduces memory requirements substantially.
6.2.2 Memory management
go1984 includes efficient ring storage. This enables you to optimize available hard-drive space allocation to the cameras, thereby ensuring that there is always enough memory space available for new recordings. go1984 is able to delete the oldest recordings automatically after the allotted memory has been used up. You can also select individual recording directories per camera.
The following criteria specifically apply for automatically deleting scenes. If more than one criterion is relevant, the first criterion to be met will apply in each case:
| the used disk space exceeds this value: | in this case, you can allocate each camera a disk space quota. When this option is activated, the oldest scenes are automatically deleted when the quota is exceeded. |
| the scene is older than: | when this option is activated the scenes for each camera are automatically deleted when the scene is older than the duration specified in days. |
| disk space is less than: | the oldest scenes are automatically deleted when a quota for the remainder of the disk space is exceeded. This value applies across all the cameras which are recording on the same partition/hard drive and if changed, it is automatically set for all the cameras on this partition/hard drive. |
![Administrator Cameras IP-Cameras My camera Video Motion detection Recording Alarm management Direct X IO-Manager Image center Webserver User manager Setup Help (doubleclick) Storage Scene creation Pre/Post recording Access periods Log Recording directory C:\ProgramData\logware gmbh\go1984\Storage\My_camera Delete scenes automatically, if the used disk space exceeds this value: Storage size 0.63 GByte the scene is older then Age 180 Days disk space is less then disk space 50.0 MByte 4.21 GByte 22.6 MByte n=6 200.4 kByte 1.0 s PTZ 640x480 4.8 fps 12:23:15 PI 12:18:33 PI Axis Camera 207 [TAxisCamera] \Administrator\Cameras\P-Cameras\My camera\Recording](/content/2026/05/1023780/images/41bf380562be0fbda78eba4dca59c6966ef7bf48be6987f737592b70a89b082d.jpg)
6.2.3 Scene generation
go1984 can aggregate recordings made during a certain interval to so-called scenes. This makes it much easier to find them later. The concept used is quite simple. Any scene that has already begun will be continued if less time than defined in the field "Time interval" has passed. If more time has passed, a new scene is generated. You can also define that a new scene should be generated as soon as the scene file becomes larger than the value entered into the field "File size" or if the current scene is longer than the value entered into the field "Duration".
The following criteria specifically apply for generating scenes. Once again, if more than one criterion is relevant, the first criterion to be met is decisive:
| no motion was detected for this time interval: | if the time between two recordings triggered by motion detection is less than specified here, the scene already begun is continued. But if this time is exceeded a new scene is generated.The same applies if the recording is triggered by a signal other than internal motion detection (e.g. by a camera's digital input signal or by an http event). |
| the size of the scene file is greater than: | a new scene is generated if the current scene exceeds the size specified here. |
| the duration of the scene is longer than: | if the scene duration specified here is exceeded a new scene is generated. If scenes are recorded by default only when there is a detected motion, the scene generated in this case will usually cover a longer period than specified under this point. |

6.2.4 Pre-/Post alarm
Usually, motion-triggered recording begins the instant a motion has been detected. However, it is sometimes desirable to extend the recording by a few seconds before or after the event. To do so, simply enter the desired number of seconds into the appropriate fields and then activate the function using the corresponding button. go1984 uses your computer's random access memory (RAM) for this feature. In order to avoid too much memory being reserved, you have the option of restricting the size to a maximum value.

6.2.5 Access time period
Access to the recordings can be limited individually per user in the user management. Among other things, you can permit full access, no access, or access to a specified time period. This is where you can define the time periods valid for this camera.

Afterwards, simply select which time periods are available for the user in the user management.

6.2.6 Export
Recordings are saved in a proprietary format. However, the scenes recorded may be exported in AVI format or individual images in JPEG format.

When you are exporting to AVI format, you will be offered the codecs available on your system to choose from when it comes to video compression.

6.3 Motion detection
go1984 includes high-performance motion detection based on an optimized image difference process. When motion detection is triggered, the so-called "Motion" signal is activated for this camera. This signal can be used, for instance, to begin recording, to launch an FTP upload or to trigger an alarm.
The image is split for this purpose into 8x8 pixel segments which are each analyzed for motion. This means that with a resolution of 640x480 pixels, for instance, 4,800 segments must be analyzed for each individual image.
The threshold specifies what the minimum percentage of segments needs to be where motion is detected in relation to the whole image so that a motion is indicated. For instance, in the case of a VGA resolution of 640x480 pixels with a threshold of 1.5%, the figure will be 72 segments.

You should reduce the threshold if you want the motion detection facility to be more sensitive.
Motion areas are highlighted in the live image with red squares. As soon as the actual value exceeds the specified threshold, the motion signal is triggered. The specified threshold (yellow) and current actual value (green or red) are graphically represented by two colored bars in the program to make adjustments easier for you. The actual value bar changes from green to red if a motion has been detected. The circle in the "Motion" field also turns red.
You'll be shown the live image from the camera, with motion areas being marked by red rectangles. As soon as the actual value surpasses the specified limit value, the motion signal is triggered. The specified limit value (yellow) and the current actual value (green or red) are graphically represented by two colored bars in the program in order to make adjustment easier for you. The actual value bar changes from green to red if a motion has been detected. The circle in the "Motion" field also lights up in red.

flowchart
graph LR
    A["Black bar"] --> B["Yellow bar"]
    C["Green bar"] --> D["Yellow bar"]
    E["Motion where the threshold is exceeded"] --> F["Blue arrow pointing right"]
    G["Bewegung"] --> H["Red circle"]
It often makes sense to exclude certain areas of the camera image from motion detection. In order to do so, you can draw any kind of mask over the image. Various tools are available for doing so. The mask is displayed on the screen transparently for control purposes. Grayed out areas will be excluded from now on.
![Administrator Cameras IP-Cameras My camera Video Motion detection Recording Alarm management Direct X IO-Manager Image center Webserver User manager Setup Help (doubleclick) Motion Threshold 1.5% 0.9% Histogram RGB & brightness Mask Properties PTZ 640x480 4.8 fps 9:58:25 AM 9:58:25 AM Axis Camera 207 [TAxisCamera] \Administrator\Cameras\IP-Cameras\My camera\Motion detection](/content/2026/05/1023780/images/50e1ad2526abc3b363ce9236d8a15607fcff99706eed3fc8f22f5e67579e13d2.jpg)
Tools for drawing masks:
| Pen for freehand drawing of masks | |
| Rectangle tool for drawing masks | |
| Eraser for deleting masks | |
| Show or hide camera image | |
| — | Line width 1 |
| — | Line width 2 |
| — | Line width 3 |
| — | Line width 4 |
| Invert mask | |
| Load mask | |
| Save mask | |
| Delete mask |
For normal purposes, motion detection settings do not need to be adjusted more than described above. If the default values don't work perfectly for your needs, you'll find additional setup options on the "Properties" tab.
![Administrator Cameras IP-Cameras My camera Video Motion detection Recording Alarm management Direct X IO-Manager Image center Webserver User manager Setup Help (doubleclick) Motion Threshold 1.5% 4.6% Histogram RGB & brightness Mask Properties Analyse every frame number 2 Threshold Automatic Max: motion share 30 % Delayed detection 0.0 s Noise suppression 7.0 Manual Idle signal after 5.0 s Segment threshold 2.00 % Suppress motion signal, if Motion value is greater then 90.00 % Brightness is less then 0.20 % PTZ 640x480 5.1 fps 10:04:24 A 9:58:47 AM Axis Camera 207 [TAxisCamera] \Administrator\Cameras\IP-Cameras\My camera\Motion detection](/content/2026/05/1023780/images/c734dcbaf107517961f50a22f3366f83183dbabed3f9bacdcb97b8f083cc937c.jpg)
The analyzed segments are sorted in ascending order in the bar chart according to detected motion intensity. The maximum motion share indicates which percentage is relevant to the analysis. The segments before this are excluded.

histogram
| Individual segments sorted | Max. motion share | | -------------------------- | ----------------- | | 1 | 7.3% | | 2 | 30% | | 3 | 30% | | 4 | 30% | | 5 | 30% | | 6 | 30% | | 7 | 30% | | 8 | 30% | | 9 | 30% | | 10 | 30% | | 11 | 30% | | 12 | 30% | | 13 | 30% | | 14 | 30% | | 15 | 30% | | 16 | 30% | | 17 | 30% | | 18 | 30% | | 19 | 30% | | 20 | 30% | | 21 | 30% | | 22 | 30% | | 23 | 30% | | 24 | 30% | | 25 | 30% | | 26 | 30% | | 27 | 30% | | 28 | 30% | | 29 | 30% | | 30 | 30% | | 31 | 30% | | 32 | 30% | | 33 | 30% | | 34 | 30% | | 35 | 30% | | 36 | 30% | | 37 | 30% | | 38 | 30% | | 39 | 30% | | 40 | 30% | | 41 | 30% | | 42 | 30% | | 43 | 30% | | 44 | 30% | | 45 | 30% | | 46 | 30% | | 47 | 30% | | 48 | 30% | | 49 | 30% | | 50 | 30% | | Note: The actual values may vary due to the random nature of the data generation. The provided values are just an example. |If the motion intensity of individual segments (red bar) now exceeds the green line in the relevant area (yellow), the detected motion is highlighted in the relevant segment (red rectangle in the live image).
The green line originates from the factors "Noise suppression" and "Max. motion share".
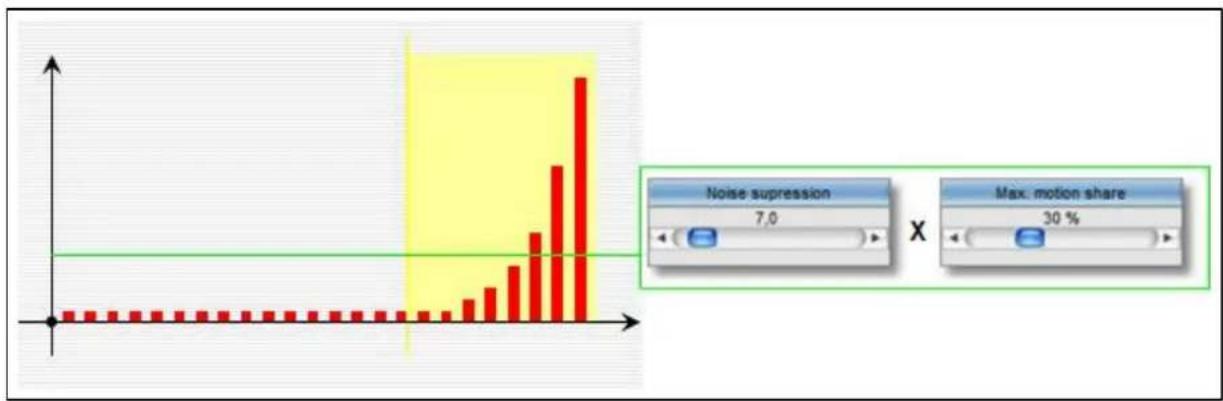
bar
| Category | Value | | -------------------- | ----- | | Noise suppression | 7.0 | | Max. motion share | 30% |The reduction in noise suppression along with the increase in the max. motion share therefore result in a higher level of sensitivity in terms of motion detection.
You will also find the following set-up options:
| Analyze only every xth frame | motion detection is highly processor-intensive due to the image decompression required. |
| Delayed detection | delay in seconds until the motion signal is triggered. This may, for instance, be a sensible option for an e-mail alert in order to send a relevant image. |
| Idle signal after | duration in seconds until the idle signal is triggered. For further information, refer to the "Event management" section. |
| Motion value is greater than | This control enables you to avoid motion detection being triggered by rapid, extreme lighting changes such as the interior lighting being switched on or auto-iris adjustment by cameras etc. |
| Brightness is less than | Some cameras tend to produce noisy pictures under bad lighting conditions, which can lead to motion detection being triggered. This control enables you to turn off motion detection for images generated at less than the specified basic brightness. |
| Threshold: Automatic | go1984 always tries to provide the best settings for the segment threshold independently. |
| Threshold: Manual | analysis of each individual segment without the above-mentioned extended, adaptively operating settings being taken into consideration for the segment threshold. This option is recommended only in exceptional cases. |
6.4 Http event
Many of the current network cameras or even external network-enabled motion detectors nowadays offer integrated motion detection and the facility to notify third-party systems of any movement detected via an http message.
In the Enterprise edition of go1984 the motion detection facility of these devices can be used via the http event. This may be a particularly sensible solution on performance grounds where there are a large number of cameras.
You will find this function under the IO-Manager. You can add a new event by clicking on the relevant button.
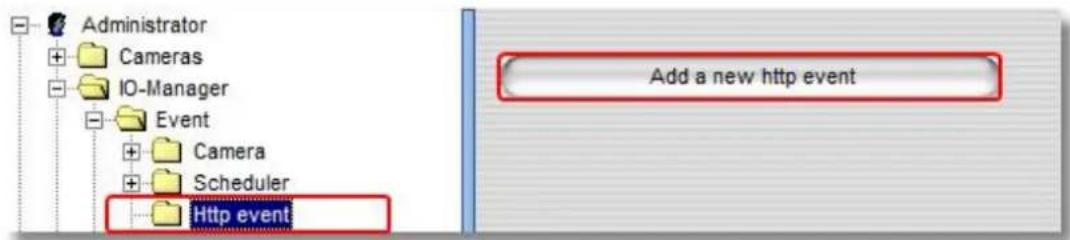
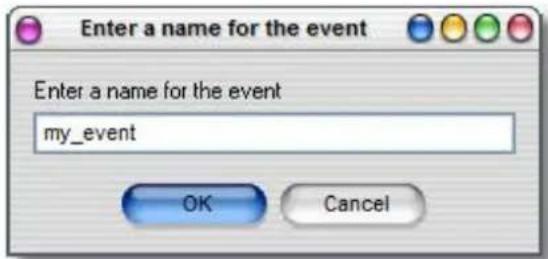
Enter the name you want to give the event.
The new signal is now available and can be activated or deactivated via the shown URLs.

The other settings are now applied directly via the web interface of the camera or motion detector. Take as an example the settings for an axis camera shown below.
First of all, the go1984 server is created as an "event server".

You can check the connection directly using the "Test" button.
Event Server Setup

HTTP Server
| Name: | go1984_Server | ||
| URL: | http://192.168.1.63:81/external | ||
| User name: | Administrator | Password: | ********** |
| Proxy address: | Proxy port: | ||
| Proxy user name: | Proxy password: | ||
| Test | |||
| Test the connection to the specified HTTP server | Test | ||
| OK Cancel | |||
Events can now be defined accordingly at the start and end of the movement:
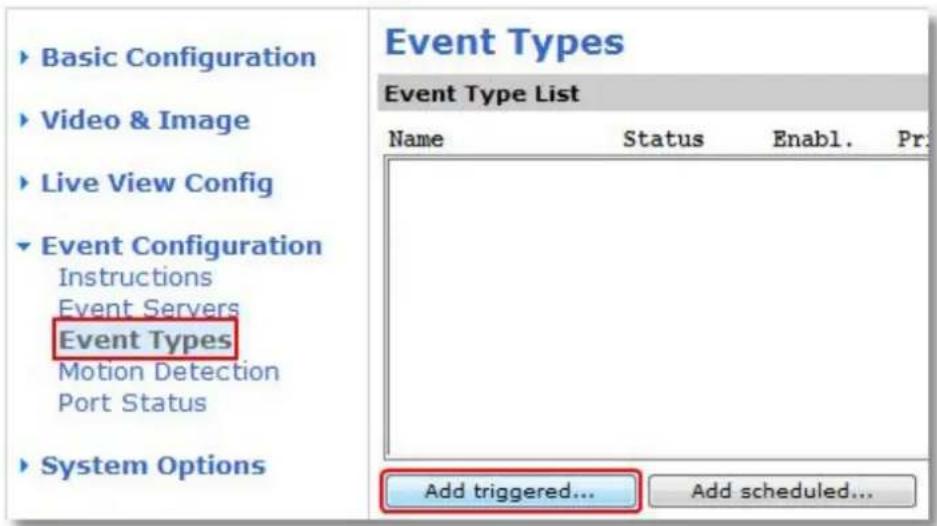
Enter the "On-URL" parameter under "User-defined parameters" for the event at the start of the motion: name=my_event&active=1

Then add a "MotionEnd" event which will be triggered at the end of the motion. Enter the following parameters for this event: name=my_event&active=0
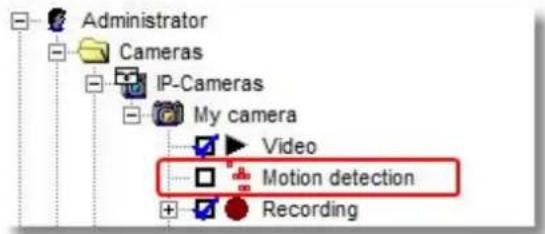
Then you must link the recording in go1984, which is linked by default to go1984 motion detection, to the http event.

If you are not going to continue using the go1984 motion detection function any more or as an alarm function, for instance, you can now deactivate it.

Note:
Sometimes you need to still change the values for the pre- and post-alarm so that the recorded scenes cover the overall period you want.

6.5 Notification
go1984 can use various channels to notify you in case of an alarm. They are:
- Playing an audio file via a sound card
- Sending an e-mail with or without an image attached
- Uploading one or several images via FTP
- Sending an image to the go1984 client via UDP Broadcast
- Launching an external program
- Calling a telephone number and playing an audio file (ISDN card required)

Note:
All notification types need to be activated first. Clicking on the options field of the respective option switches on the corresponding function.
If the desired option is grayed out, there are some settings that must be provided beforehand because the option makes no sense without them. For instance, the option "Telephone call" makes no sense if a telephone number has not been provided.

6.5.1 Sound
go1984 can play a freely selectable audio file in .wav format via your sound card in case of a notification. Simply choose the corresponding file using the dialog.
![Administrator Cameras IP-Cameras My camera Video Motion detection Recording Alarm management Sound Notification FTP-Upload LAN-Broadcast Call EXE Phone call Direct X IO-Manager Image center Views Screens Webserver User manager Setup Help (doubleclick) PTZ Select a sound file C:\Program Files\go1984\Sounds\Motion.wav 00:00:03 640x480 3.1 fps 3:07:39 PM 2:56:27 PM Axis Camera 207 [TAxisCamera] \Administrator\Cameras\IP-Cameras\My camera\Alarm management\Sound](/content/2026/05/1023780/images/2836a5a98a231a1b77346f3dc021244258cdc29057c329e491e45ced86d3fa46.jpg)
To prevent too many notifications from being sent, you can set a rest period. This means that only when at least the specified time has elapsed since the last playback can the sound file be played again.

Please also refer to the general notes on activating notification functions in the section on notifications.
6.5.2 E-mail
In order to enable e-mail sending from go1984, a so-called SMTP server (see reference) first needs to be specified. If this has already been done, you can continue here directly.
Select the entry "Notification" in the go1984 explorer. You can now enter one or several recipients (separated by semicolons) into the field E-mail address. Adjust the subject line if you wish. The variable "%cameraname%" is automatically replaced by the name of the camera triggering the alarm when an e-mail is sent.
![Administrator Cameras IP-Cameras My camera Video Motion detection Recording Alarm management Sound Notification FTP-Upload LAN-Broadcast Call EXE Phone call Direct X IO-Manager Image center Webserver User manager Setup Help (doubleclick) PTZ Email notifications Log Email addresses (Use ; to separate): Subject: Motion detected on %Cameraname% Attach image to the mail SMTP properties ... 00:01:00 320x240 12.3 fps 12:26:20 PI 12:21:23 PI Axis Camera 207 [TAxisCamera] \Administrator\Cameras\P-Cameras\My camera\Alarm managementNotification](/content/2026/05/1023780/images/5e2458e098533b1eb572087cba6a152c9b945995b07bbf0980144554d97709e3.jpg)
Once again you have the option to set a rest period which must elapse between sending two e-mails, by clicking on the clock icon. Simply click on the clock icon and then set the rest period you want.

Please also refer to the general notes on activating notification functions in the section on notifications.

Note:
The Action button is linked by default to the go1984 motion detection function. If you want to send a meaningful image as an attachment when a movement is detected, you must sometimes increase the "Delayed detection" value under "Motion detection" → "Settings".
The delayed detection will obviously have an impact on recordings too. But you can balance out this delay simply by increasing the pre-alarm value accordingly.
6.5.3 FTP
If you wish the images from a camera to be sent to an FTP server in addition to being stored locally, complete the following dialog.
First, enter the login data for your FTP server:
| FTP server | Domain name or IP of your FTP server, e.g. ftp.online.com |
| Port | FTP port, almost always "21" |
| FTP user ID | Username for logging on to the FTP server |
| FTP password | Password for logging on to the FTP server |
| FTP directory | FTP server subdirectory where you want the images to be saved |
| Passive mode | If your FTP server cannot be run in the active mode, select this option |
| Keep connection | After uploading an image, the connection to the FTP server is kept open. If you prefer the connection to be shut, deactivate this option. |
You can also choose to resize images before saving them on the FTP server. Activate this option and define the new size of the image using the corresponding fields.
Finally, you can define under which names to save the file(s) on the FTP server:
| Simple filename | The file name is the name you enter into the field |
| Datetime filename | The file name includes the time of day. The constant part of the file name has to be enclosed in quotation marks. Formatting is carried out according to the following key:yyyy Yearmm Monthdd Dayhh Hournn Minutess Secondzzz Millisecond |
| Rotating number filename | Enter the beginning of the file name into the field. A number is automatically added onto the end of the name; it is increased by one after each successful upload. After the counter reaches the defined value, it is reset to 1. Older images are then overwritten. |
| Upload as "*.tmp" and rename if finished | If you have problems uploading the files to your ftp server, you can have the images uploaded with the extension ".tmp" at first. After the upload has been successfully completed, the files are renamed to the "real" file name. |
![Administrator Cameras IP-Cameras My camera Video Motion detection Recording Alarm management Sound Notification FTP-Upload LAN-Broadcast Call EXE Phone call Direct X IO-Manager Image center Views Screens Webserver User manager Setup Help (doubleclick) FTP - server data FTP server : Port : 21 FTP user ID : FTP password : FTP directory : / Passive mode Keep connection Resize sourceimage to new size Width Height Active 320 240 FTP filename Simple filename go1984.jpg Datetime filename "go_"yyyy-mm-dd_hh-nn-ss_zzzz".jpg" Rotating number filename ( sample0024.jpg ) go1984_ 20 Upload as "*.tmp" and rename if finished PTZ 640x480 4.9 fps 3:12:39 PM 2:56:27 PM Axis Camera 207 [TAxisCamera] \Administrator\Cameras\IP-Cameras\My camera\Alarm management\FTP-Upload](/content/2026/05/1023780/images/400e7f63b1968c56a894bb421221adc8fe24ba764650a36d3c600f3c20df4ecd.jpg)
The Action button is linked by default to the "NewImage" signal (see also "Event management" section). This means that the FTP upload is activated every time a new camera image is generated. In this case too you have the option to set a rest period by clicking on the clock icon. This means that only when the period specified between two transmissions to your FTP server has elapsed can a new upload operation be launched. This then allows you to have the FTP upload operation simply carried out at a set interval.
Please also refer to the general notes on activating notification functions in the section on notifications.
6.5.4 LAN-Broadcast
In the event of an alarm, go1984 can notify any users on the LAN via UDP Broadcast. If the go1984 client has been installed and is active, users will be notified about the movement detected on a camera via popup and/or an acoustic signal.

Note:
The go1984 client should not be confused with the go1984 desktop client. Unlike the latter, it is not suitable for permanent live monitoring via one or more cameras or for recording images from them.
You can install the go1984 client on another computer by running the go1984 setup and only ticking the "go1984 Client" option box.

The broadcast client can then be launched via the Windows Start menu.

Now activate LAN Broadcast for the cameras you want.
![Administrator Cameras IP-Cameras My camera Video Motion detection Recording Alarm management Sound Notification FTP-Upload LAN-Broadcast Call EXE Phone call Direct X IO-Manager Image center Views Screens Webserver User manager Setup Help (doubleclick) PTZ 640x480 3.9 fps 2:39:22 PM 2:38:18 PM Axis Camera 207 [TAxisCamera] Boradcast properties UDP-Port 7801 Packet size 1000 Byte Administrator\Cameras\P-Cameras\My camera\Alarm management\LAN-Broadcast](/content/2026/05/1023780/images/36485c2343970464d376600540e26aae135bb7be0c5ac6072598392264db7ca5.jpg)
You also again have the option here to set a rest period by clicking on the clock icon. This means that only when at least the specified period between two broadcasts has elapsed can a new notification be sent.
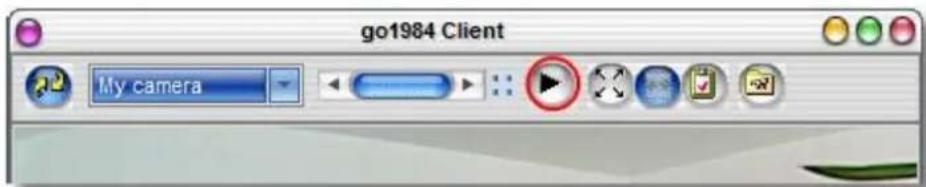
Please also refer to the general notes on activating notification functions in the section on notifications. If a motion is detected you will be informed via popup from now on. The last images transmitted can be replayed by clicking on the "Play" button.
You can also apply other settings on the broadcast client.

| Popup on new image | go1984 client appears in front when any motion is detected |
| Startup minimized | go1984 client is minimized on start-up |
| Play sound on new image | Choose whether and with which sound file you would like to be notified if a motion is detected |
| Notify again after | Minimum period which must elapse before the next time you are notified |
| Number of buffered snapshots | Number of buffered images (max. "100") |
| Select Skin | Choose one of the available skins |

Note:
Most Windows programs are shut down completely when you close the program window. The go1984 Client is only hidden and continues to run in the background.
While the program is running, the go1984 Client symbol is displayed in the task bar near the time. You can use it to shut the program down completely or to bring it back to the foreground. Clicking on the icon with the right mouse key will open the corresponding menu.


The following functions are also available.
| Show StatusBar | this displays/hides the status bar with additional information such as resolution, notification time, image size in the bottom section of the go1984 client window |
| Show Toolbar | this displays/hides the go1984 client toolbar |
| Stretch | this expands the image in the visible area (stretches) |
| Setup ... | this opens the dialog box for advanced settings |
| Show | this brings the go1984 client to the front again |
| Hide | this minimizes the go1984 client |
| Exit | this exits the go1984 client |
6.5.5 External program
go1984 offers you the option of launching an external program in case of a notification. In this case, the image that triggered the notification can first be saved on the hard-drive. In this way, special tasks can be carried out for which go1984 itself is not suitable.
To set up the feature, select the program you want to launch and the launch type. You can choose to have the image that triggered the notification saved on the hard-drive first, and can freely define the drive and the directory for this purpose.
![Administrator Cameras IP-Cameras My camera Video Motion detection Recording Alarm management Sound Notification FTP-Upload LAN-Broadcast Call EXE Phone call Direct X IO-Manager Image center Views Screens Webserver User manager Setup Help (doubleclick) PTZ Call external program Programfile: Call style Show Hide Minimize Maximize Save image before call as: 640x480 5.1 fps 3:14:48 PM 2:56:27 PM Axis Camera 207 [TAxisCamera] \Administrator\Cameras\IP-Cameras\My camera\Alarm management\Call EXE](/content/2026/05/1023780/images/424a66c153896b9a1f7492355e755e5212b0459935c385b9ef65cd76cf641e27.jpg)
Here, too, you have the option of defining a rest time by clicking on the clock symbol. A program is only launched if the defined time has elapsed between two program launches.

Please also refer to the general notes on activating notification functions in the section on notifications.
6.5.6 ISDN
In case of an alarm, go1984 can make a telephone call using an existing ISDN card. Once the connection is set up, the program plays a freely definable audio file to the person being called. Please enter the telephone numbers using only numeric digits. Other signs or spaces can disrupt the function.
You can record your own audio files using the Windows "Audiorecorder". Please make sure you've set the right format:
• PCM 8,000kHz; 16 Bit; Mono
![Administrator Cameras IP-Cameras My camera Video Motion detection Recording Alarm management Sound Notification FTP-Upload LAN-Broadcast Call EXE Phone call Direct X IO-Manager Image center Views Screens Webserver User manager Setup Help (doubleclick) PTZ 640x480 4.9 fps 3:15:57 PM 2:56:27 PM Axis Camera 207 [TAxisCamera] Phone call Log Phone numbers Calling party: 059217139925 Called party number: 01721234567 Select a soundfile C:\Program Files\go1984\CapiWav\Info.wav Audio format must be [PCM 8,000 kHz; 16 Bit; Mono] Reset CAPI Cancel call 00:05:00 Administrator\Cameras\P-Cameras\My camera\Alarm management\Phone call](/content/2026/05/1023780/images/d136e6afd021f7f9fc267ca7c5e8599a7ac79c4996bb37489e8ea6a8e43d19dc.jpg)
In order to avoid being notified too often by calls, you can define a rest time that has to elapse between calls. To do so, click on the clock icon and set the desired rest time on it.
Please also refer to the general notes on activating notification functions in the section on notifications.
6.6 Scheduler
go1984 provides the option of executing certain functions such as recording or notifying only at certain times. You can define as many schedulers as you like, which can then be linked to the corresponding functions. In order to create a new scheduler, select the option "Scheduler" in the go1984 explorer.

You can give each scheduler a unique name.
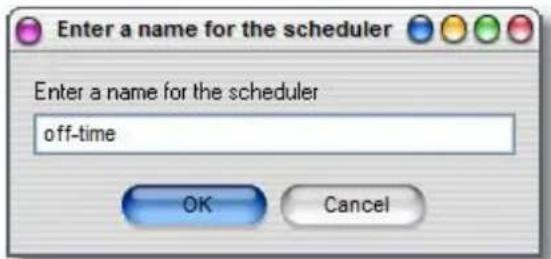
Afterwards, define the active and inactive times for each day. Simply select the desired times using the mouse (keep left mouse button pressed). The active part will be shaded in green. You can copy any day's settings to a different day using drag & drop. Simply use the mouse to drag the name of the day (Monday, Tuesday, etc.) to a different day. Furthermore, you have the possibility of saving the completed scheduler to a file or loading it. This is a useful feature when setting up several similar schedulers.

You can also use the scheduler to turn various camera functions on or off automatically. The mouse pointer changes to the following symbol when held over linkable functions: 📄. Clicking with the right mouse button opens the menu for creating and editing links. Use the "Event → Scheduler → ..." entry to select one of the existing schedulers, which will then turn the selected function on or off.


Note:
If certain functions need to be active at exactly opposite times (in this case, for instance, opening hours), you do not necessarily need to create an extra scheduler. If you right-click again on a scheduler link you can reverse the scheduler.
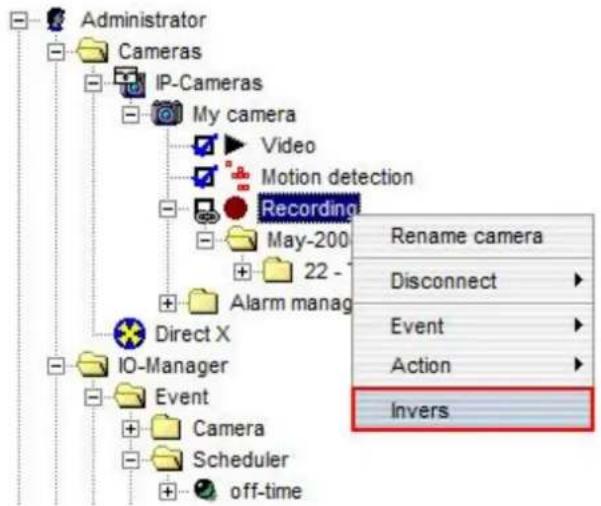
Under the "Holiday planner" tab you have the option to define days that should be processed separately. These definitions have a higher priority than specified week schedulers. In many countries public holidays are already pre-determined and can be changed or removed as required. You can also add via the calendar additional days for the current year or for each year.
Make sure that the holiday planner is not activated by default, as specified holidays will continue to be ignored. You activate this function by selecting the "Active" checkbox.
![Week planner Holiday planner Holiday 0 1 2 3 4 5 6 7 8 9 10 11 12 13 14 15 16 17 18 19 20 21 22 23 24 25 26 27 28 29 30 31 Active Oktober, 2008 So Mo Di Mi Do Fr Sa 1 2 3 4 5 6 7 8 9 10 11 12 13 14 15 16 17 18 19 20 21 22 23 24 25 26 27 28 29 30 31 01.01** -> 01.01.2004 [Every year] 05.01** -> 01.05.2004 [Every year] 10.03** -> 03.10.2004 [Every year] 12.25** -> 25.12.2004 [Every year] 12.26** -> 26.12.2004 [Every year] Add Add for every year Delete Load from template Save as template](/content/2026/05/1023780/images/a2f0e1aa0fc672aee5fea58b73e27f746e6014ac552aafdfd16bd58ca235d7e6.jpg)
7 User management
User management allows you to allocate individual authorizations for access to the program interface, the web interface, recordings, and PTZ camera control. Directly after installation, user management is not activated, i.e. all functions are accessible without entering a username or password. Activate user management by clicking on the corresponding option field.

After activating the user management, access is only allowed after entering a valid username. go1984 creates a predefined, non-deletable Administrator account which always owns all access rights. This account can be used without a password at first. However, you should define a password as soon as possible by editing the Administrator account.
Username : Administrator
Password : [blank]

The "User" column displays all existing users. Use the three buttons to create, edit or delete users. Please note that a newly created user has no rights by default. In order to edit a user's right, first select the user. Afterwards, use the "Access rights" column to allow or deny the desired options. You can also change several users' rights in a single step. To do so, first select the first user, then press the CTRL-key on your keyboard and hold it while selecting one or several users from the list.
Access rights are subdivided into the following areas:
| Cameras |  | Access to live feed, PTZ control, recording period | |
| General |  | Deletion of scenes | |
| Treeview | 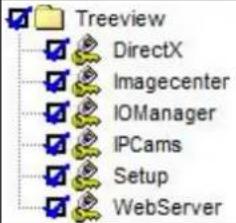 | Access to IO functions, webserver settings, camera settings | |
| Web |  | Access to the different browser views | |
Don't forget to save the edited settings using the "Save" button.

Note:
If new cameras are integrated after a user is created, the right to access the cameras must be granted explicitly to the user that has been previously created.
8 Webserver
go1984 provides an integrated webserver that is accessible from local networks and the Internet using TCP/IP. The server makes it possible to access the live feed and recordings using the Internet Explorer. Controlling PTZ cameras is also possible. What's makes the feature special are the HTML templates, which permit a completely customizable design of appearances and functions. Use the examples provided to adapt them to your own needs. You'll find the templates in the following directory:
where

8.1 Configuration
go1984 is delivered with predefined webs that can be called up using an Internet browser. Every web is saved in its own subdirectory. The root web directory can be specified. In addition, the available bandwidth can be limited. go1984 analyzes your computer's network configuration and displays all IP addresses to which the webserver responds. It is also possible to make the computer accessible via the Internet using a dynamic domain name.

The web interface addresses the available cameras using a so-called index. This is a consecutive series of numbers which you can use to define in which order the cameras are displayed on the web interface.

You can also view information regarding the currently active and inactive connections to the webserver. For instance, the display indicates the session ID, the starting time, the time to automatic disconnection in case of inactivity, the username and so on.

8.2 Interface
Call up the web interface in your browser by using the following URL:
http://ip:port
Replace the variables as follows:
| ip | by the IP address or domain name of the computer running go1984 |
| port | by the port defined in the webserver configuration (default is 80) |
You will then end up at the web server homepage where you can choose the web and transmission quality that you want ("high" or "low"). You will also find the option to install the go1984 desktop client:

You can also access the web you want directly:
http://ip:port/web
Replace the variables as follows:
| ip | by the IP address or domain name of the computer running go1984 |
| port | by the port defined in the webserver configuration (default is 80) |
| web | by the directory name of the web. The following webs are predefined as examples:javatreeactivexjavascriptpdaiPhone |
In the tree web you can also specify the camera or view you want directly:
...?view=x" (1=2x2, 2=3x3 etc.) or ...?camera=cameraname
The complete URL could look something like this:

The web interface shown in the diagram will then be displayed in your browser.

If you've activated the user management, you'll first be shown a login request requiring you to enter a valid username and password.
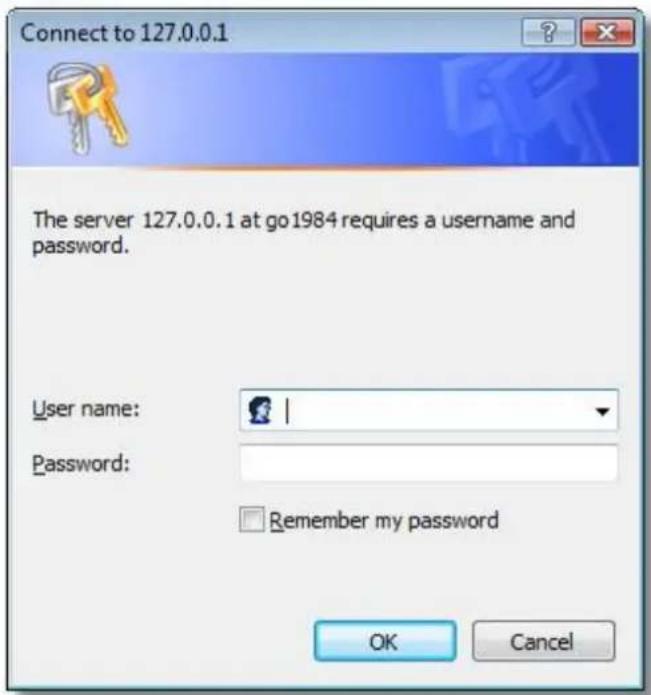

Note:
In order for all example webs to run correctly, you may have to modify your browser's security settings. If you have no Java Virtual Machine installed, you can download it free of charge at the following URL:
http://www.java.com
If you wish to use ActiveX-based webs, allow the following security settings:
- Run ActiveX elements which are safe for scripting
- Run ActiveX PlugIns and controls
- Download unsigned ActiveX controls
• Active scripting
If you wish to use Java-based webs, allow the following security settings:
- Scripting of Java Applets
• Active scripting
8.3 iPhone Client
The go1984 web server provides a special interface for the iPhone. This offers you the chance to access the go1984 server via the go1984 iPhone client. You can also establish a connection to the go1984 server both via a WLAN and via GPRS/Edge. This provides you with access to live images from all the cameras on the go1984 web server which you have the relevant access rights for.
Call up the web interface in your browser by using the following URL:
http://ip:port
Replace the variables as follows:
| ip | by the IP address or domain name of the computer running go1984 |
| port | by the port defined in the webserver configuration (default is 80) |
To change camera, select one from the camera list.

Each camera gives you access to the entire recordings archive. You can use this simply to browse through the scenes available for a particular day or select another day. To help you find the relevant scene quickly, a preview is displayed for each recording. When you select the scene you want it starts playing.

If it is a PTZ camera you can insert transparent buttons next to the relevant camera so that you can pan, tilt and zoom the camera via the touch-sensitive display.

8.4 J2ME Client
You can also use a cellular phone with Java capability supporting the MIDP2.0 standard to access go1984. More specifically, you can
• view motion-controlled live images
- switch between the different cameras
• control PTZ cameras
Your cellphone has to be configured in such a way that the computer on which go1984 is running is accessible via the Internet. To this end, you can connect using the CSD, GPRS or UMTS standards. If your cellphone is not pre-configured for Internet access, please refer to your cellphone's instruction booklet for the correct settings or contact your network provider. In addition, the go1984 computer has to be accessible via the Internet using a static Internet IP address or a dynamic domain name.
Install the go1984 applet according to your cellphone's instruction booklet. You'll find the required JAD/JAR files in the following directory:
<InstallDir>\web\wap\ota\

The following fields need to be completed:
| Host | IP address or dynamic hostname of your go1984 computer |
| Username | Username as defined in the user management |
| Password | Password as defined in the user management |
| Bandwidth | Maximum bandwidth in bytes/second |
| Startup camera | [Optional] Name of the camera that is automatically displayed after the connection has been set up |

After you've completed all fields and confirmed them, you can build up a connection to the go1984 server by pressing "Connect". The image from the camera is displayed. The connection to the server is maintained. In order to minimize costs, a new image is only sent to the cellphone if a motion has been detected. Press the "More" key to display a list of the available cameras to which you can also switch. If the selected camera is a PTZ camera, you can control it using the numbers keys:
| 2 | Up |
| 8 | Down |
| 4 | Left |
| 6 | Right |
| 1 | Zoom out |
| 3 | Zoom in |
| * | Preset mode on/off. When you press this key, the letter "P" is displayed at the bottom right of the screen. You can now control predefined/preset positions of the PTZ camera using the numbers keys 1...9. Press the * key again to resume manual control. |

8.5 DynDNS
In order to make go1984 accessible via the Internet, you need to have either a static Internet IP address or a dynamic domain name. The latter can be set up free of charge using the DynDns.org service. Use the following link to set up an account:
https://www.dyndns.org/account/create.html
Complete the selected fields to create an account. After submitting the form, you'll receive a confirmation at the e-mail address you provided. Click on the link in the e-mail to confirm your account.
Now you can log onto the service using your username and password in order to set up a domain name.

Click on the "Services" link, then on "Dynamic DNS" and finally on "Get Started".
All you need to do is complete the Hostname field. Choose a hostname that is easy to remember and distinctive. If you like, you can select a different extension for your domain name using the drop-down menu indicated. Ignore all the other fields and simply click on the [Add Host] button. If the hostname you've chosen is no longer available, choose a different one.

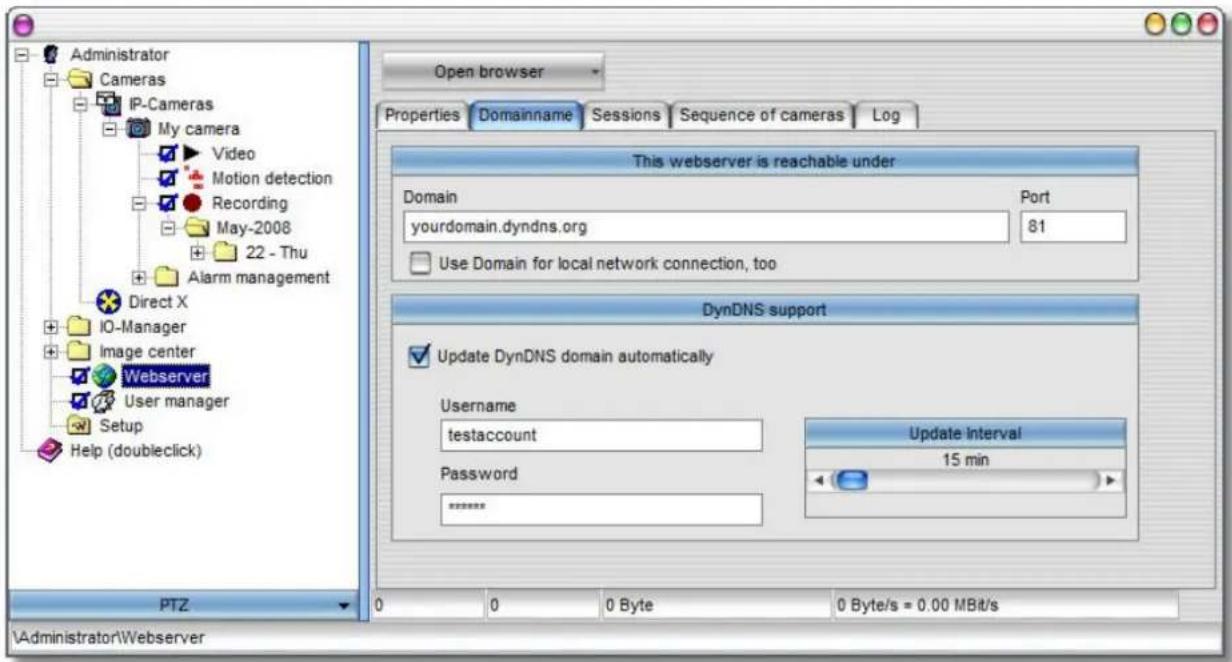
go1984 can now automatically update the domain name. Initiate the process by providing the domain name you've chosen, your username and password, and by selecting the option "Automatically update DynDNS Domain". Now you'll be able to access your computer from the Internet using the dynamic domain name.
8.6 Clustermode
In the Enterprise edition of go1984 any cameras that have been integrated on a remote computer into another go1984 Standard, Pro or Enterprise version can be added as "cluster cameras".
This offers benefits in terms of:
- Network load: images can only be transmitted when a motion is detected; the camera on the cluster client is almost in standby mode
- Performance: it may also be sensible to set up a cluster system for load distribution. The cluster server or servers will then take over motion detection while the cameras on a central cluster client are brought together.
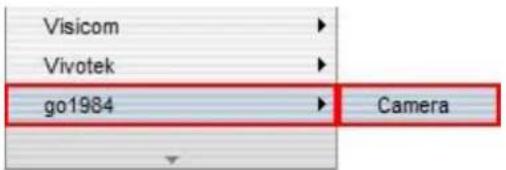
A new cluster camera is created on the cluster client in the same way as adding an IP camera. This means that you select the "IP cameras" option in go1984 Explorer. Then choose the camera "go1984 Camera" from the selection list.
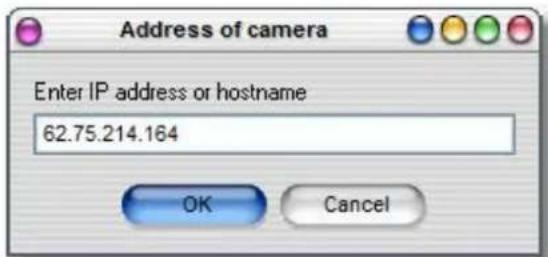
Now specify the IP address or host name under which the go1984 cluster server can be accessed.
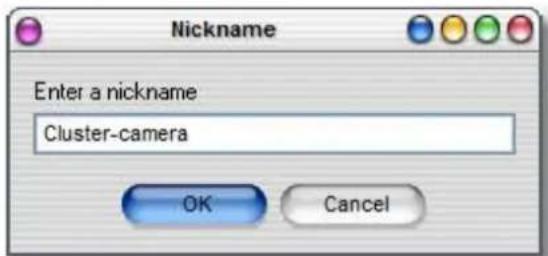
The next step is for you to give the camera a unique nickname which can be used for it in go1984.
If the user manager is active on the cluster server you must enter a valid username/password combination for authentication.
![Login[Cluster-camera] Username Password Remember username and password OK Cancel](/content/2026/05/1023780/images/aad622bce0068e86406c823d4a357da61e79a672a2d4bf8f968875196ecd226c.jpg)
You must then enter the name of the cluster server camera in the "Camera" field which you intend to access. You can also determine via the "Motion" parameter whether images should be transmitted permanently (Motion = "0") or only when motion is detected (Motion = "1"). If you intend to transmit the image in a different resolution or compression level to that of the original image due to a small amount of bandwidth being available, you can set this via the parameters "Width" and "Height" or "CompressionLevel". A compression level of "100" corresponds to the image's original quality.
![Administrator Cameras IP-Cameras Cluster-camera Video Motion detection Recording Alarm management Direct X IO-Manager Image center Webserver User manager Setup Help (doubleclick) Live image Properties Log Apply Host 62.75.214.164 Port 80 Username guest Password ****** Fifosize 1 Dropframes 1 Imagetimeout 15000 Uri /query/mjpeg Camera Server Motion 1 Width 320 Height 240 CompressionLevel 20 PTZ 320x240 0 fps 2:46:18 PM 2:46:18 PM go1984 Camera [Tgo1984Camera] \Administrator\Cameras\IP-Cameras\Cluster-camera\Video](/content/2026/05/1023780/images/9652d6fecce29adc05731bf57e400ec42592c70754a80358d472ef28e5fec749.jpg)
You can see in the screen below that no images are transmitted as long as there is no kind of movement ("0 fps"). The cluster camera is therefore almost in standby mode. The motion detection function can now be deactivated. Then every relevant image transmitted is recorded.
![Administrator Cameras IP-Cameras Cluster-camera Video Motion detection Recording Alarm management Direct X IO-Manager Image center Webserver User manager Setup Help (doubleclick) Live image Properties Log Pause between two frames 200 ms [5.0 fps] PTZ 320x240 0 fps 2:46:18 PM 2:46:18 PM go1984 Camera [Tgo1984Camera] \Administrator\Cameras\IP-Cameras\Cluster-camera\Video](/content/2026/05/1023780/images/73e3d5f149452591890e1edb0e26a385c790606ca1ea088a16beeab7b5a2447f.jpg)

Note:
A web server session is initiated on the cluster client for every active cluster camera. If the cluster server being used is a Pro edition one, a maximum of two cameras can be operated in this way. With a Standard edition server a maximum of one camera can be operated like this (see "Editions" → "Webserver sessions").
9 Image Center
The Image Center is a flexible tool for viewing one or several cameras on a screen. The camera arrangement is controlled using so-called views. go1984 provides numerous templates suitable for different resolutions.
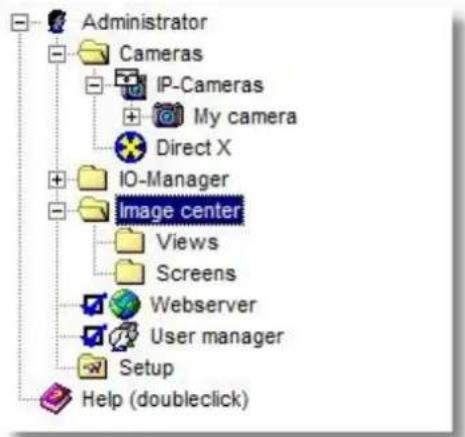
First, define a view by selecting the appropriate one from the list of available templates. Double-clicking on it creates a new view that you need to provide with a unique name.
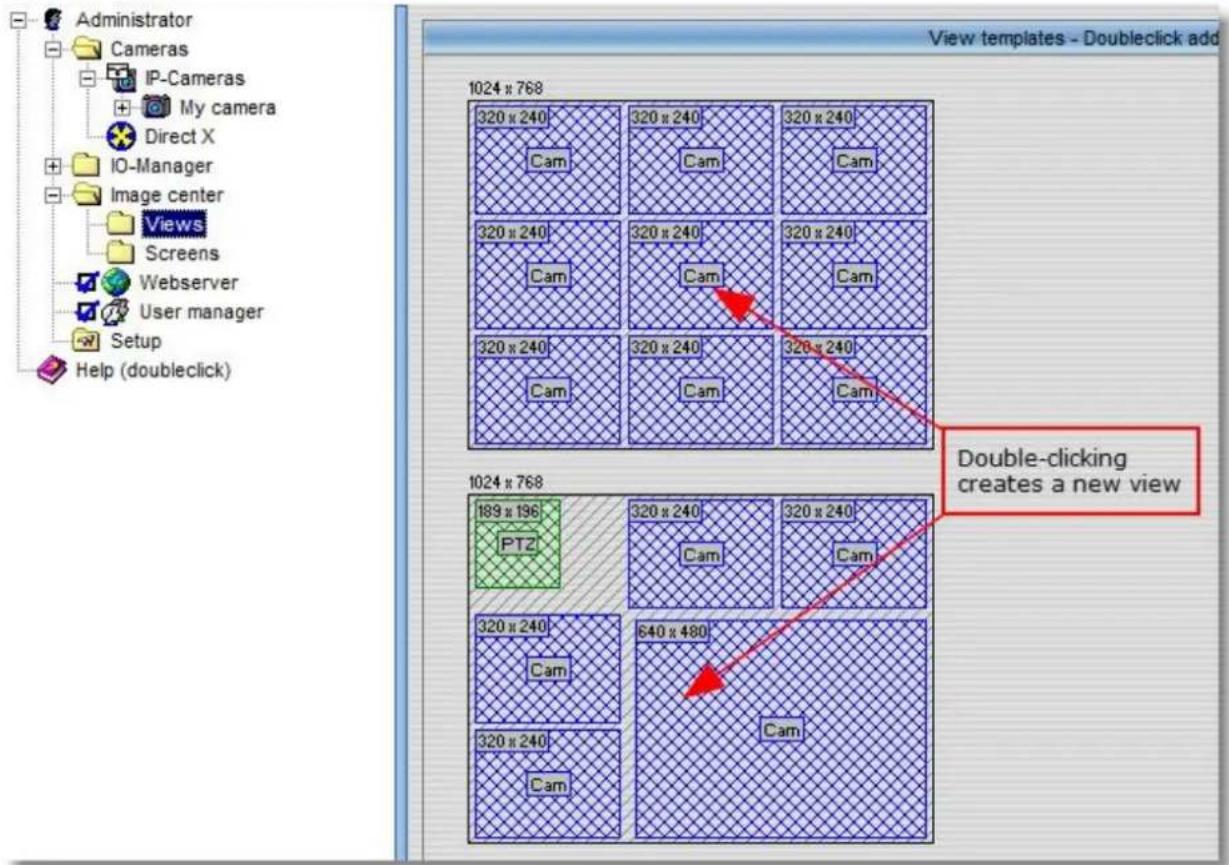
You'll now be shown the newly created view in the go1984 explorer, in which one or several placeholders are defined which will be replaced by the camera images later on. To link a placeholder to a camera, click on it using the right mouse button. This calls up a menu with a list of all available cameras. Select a camera from the list. You also have the option of placing a graphic behind the entire view.
![Administrator Cameras IP-Cameras My camera Direct X IO-Manager Image center Views My view Screens Webserver User manager Setup Help (doubleclick) PTZ My view [1024 x 768] Background image x=59,y=51 PaintBox 320 x 240 Disconnect My camera Cam 320 x 240 320 x 240 320 x 240 Administrator\image center\Views\My view](/content/2026/05/1023780/images/bdc4ea5510f34c4ca008b230aa42b3cad52c2760fe891c162f88e52396133868.jpg)
You can define as many views as you like, which can then be displayed simultaneously on various monitors or sequentially on a single monitor. Next, select the "Screens" entry from the go1984 explorer in order to generate such a representation. First, click on the "Create a new screen" button. A "Screen" can contain one or more views. Use the button to select and add the desired views to the list of "Views for this screen". If you've added several views, go1984 can automatically switch between them at certain intervals.
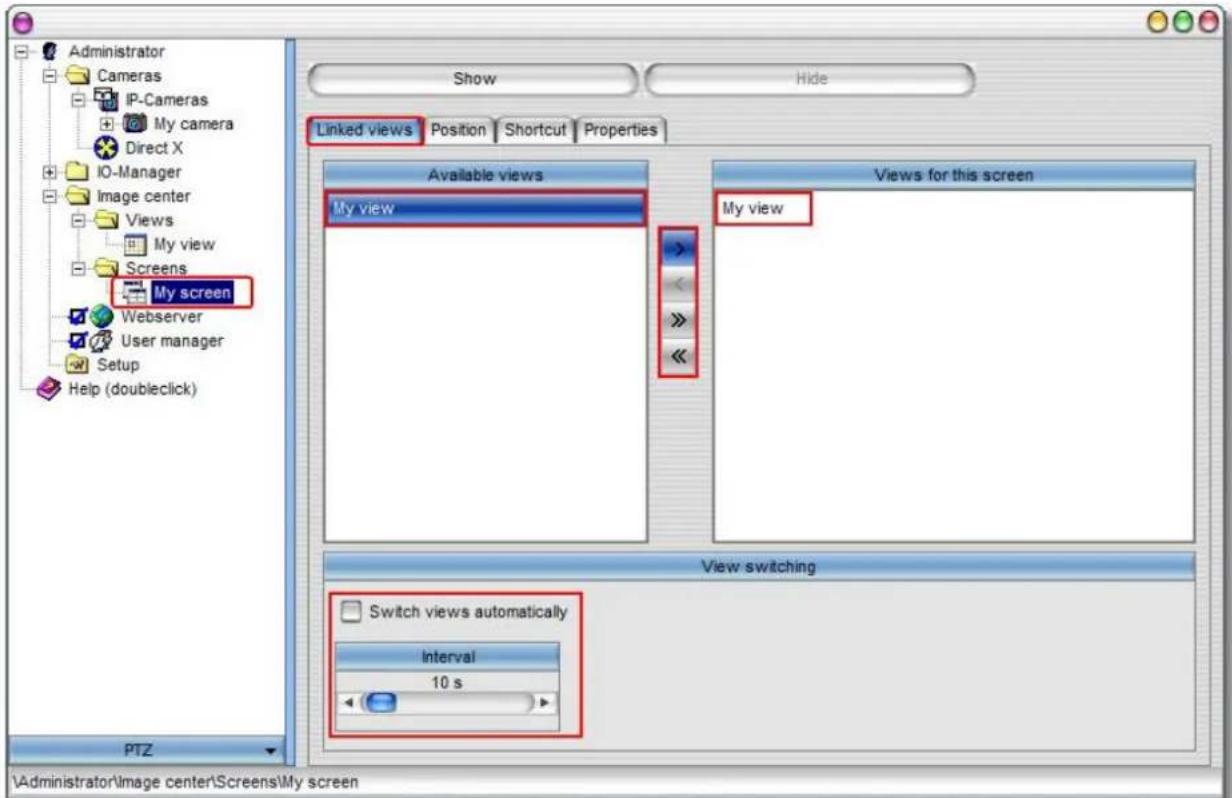
You can modify additional settings such as "Position", "Keyboard shortcuts" or "Properties" using the corresponding entries.
Clicking on the "Show" button displays the preset "Screen".
Defining customized views
If the views supplied don't match up with your expectations, you can add more templates in a simple manner.
You will find the definitions for the views (*.ini) under the go1984 installation folder in the "Template" directory. You can edit these using a simple text editor or you can add more vi
The definitions describe the following in detail:
| [Size] | size of the whole view |
| [No.] | numbering of the objects contained: these may be specifically- "PaintBox" a placeholder for the camera image- "PTZ" a placeholder for the PTZ field for acontrollable camera |
![[Size] Width=800 Height=600 [1] Object=PTZ Left=16 Top=12 Width=189 Height=196 [2] Object=PaintBox Left=352 Top=12 Width=320 Height=240](/content/2026/05/1023780/images/163776bda2f469883f7617560631be7c0c08cebf6bfb9c7d4554817966c8e907.jpg)

Note:
The new template will only be available after you have restarted go1984.
10 Additional settings
10.1 Camera
In order to modify other camera settings, please select the camera in the go1984 explorer. You now have the option of influencing image processing.

Note regarding IP cameras:
The 📂 button carries out a special function. While it is activated, the original *.jpg image from the IP cameras is used in go1984; modifications such as rotating, mirroring or adding text are not possible. In this way, go1984 can run at its optimum performance level. Wherever possible, try to apply camera settings in the camera itself which make further modifications by go1984 unnecessary. If your camera is not able to do this, deactivate the 📂 button and apply the settings in go1984.
![Administrator Cameras IP-Cameras My camera Video Motion detection Recording Alarm management PTZ camera Direct X IO-Manager Image center Webserver User manager Setup Help (doubleclick) PTZ: PTZ camera Image Caption JPG quality 70 % My camera [23/05/2008 09:09:10] 13406 320x240 10.4 fps 9:09:10 AM 9:06:17 AM Axis Camera 207 [TAxisCamera] \Administrator\Cameras\IP-Cameras\My camera](/content/2026/05/1023780/images/e5ab14738888e9cea5d3cbe3e8681f1bc3a341e77d85bcbf97b0a9d93cb0b29d.jpg)
If you want the image to be captioned, use the [Caption] tab. This function is also only available when the button is not activated.

Fit image to visible area (expand)
Maintain image proportions
Use original image from camera (for best performance)
Flip image horizontally
Flip image vertically
Rotate image by 90°
Rotate image by 180°
Rotate image by 270°
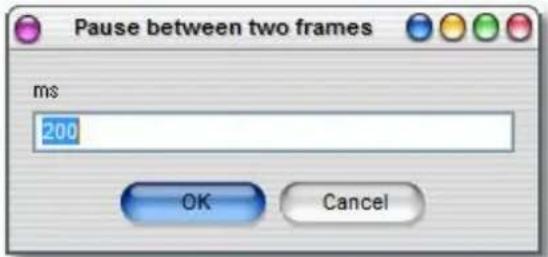
You set the image record pause using the following sliders. The default setting is 200 ms, i.e. 5 images per second (fps). In order to avoid increasing the network load and memory requirements unnecessarily, you should in this case set the actual value required rather than the highest possible value. In most cases, using higher image refresh rates hardly results in scenes with greater information content.
![Administrator Cameras IP-Cameras My camera Video Motion detection Recording Alarm management Live image Properties Log Pause between two frames 200 ms [5,0 fps]](/content/2026/05/1023780/images/c00665a2d01f0e97d4ce682c81bd0bfa77a90cf0647d8dc1189e567045768e5b.jpg)
As with many other sliders, you also have the option here to specify for your own convenience the value you want in an additional window which opens when you double-click on [Pause between two frames].
Some additional information about the camera is displayed at the bottom of the screen.
![Used disk space Resolution 0 Time stamp 352x288 1,2 fps 16:49:09 16:44:00 LevelOne FCS-1010 [TLevel1Camera] Frames/sec Last motion time Type of camera](/content/2026/05/1023780/images/e802ceeb9e27a8936b3428f4a25ba2185c45356758c696b5d213711e27784ae2.jpg)
10.2 Startup settings
You can choose to launch go1984 minimized. In this case, the application will not be visible at first. Only the little go1984 program icon will appear next to the system clock. Double-clicking on the icon will open the application interface. As a further option, you can set go1984 to be launched automatically when Windows is started. If you are operating go1984 in service mode (see "Installation" section), deactivate this option as the go1984 service is then automatically started. If you don't like the selected standard skin, you can choose a different one.
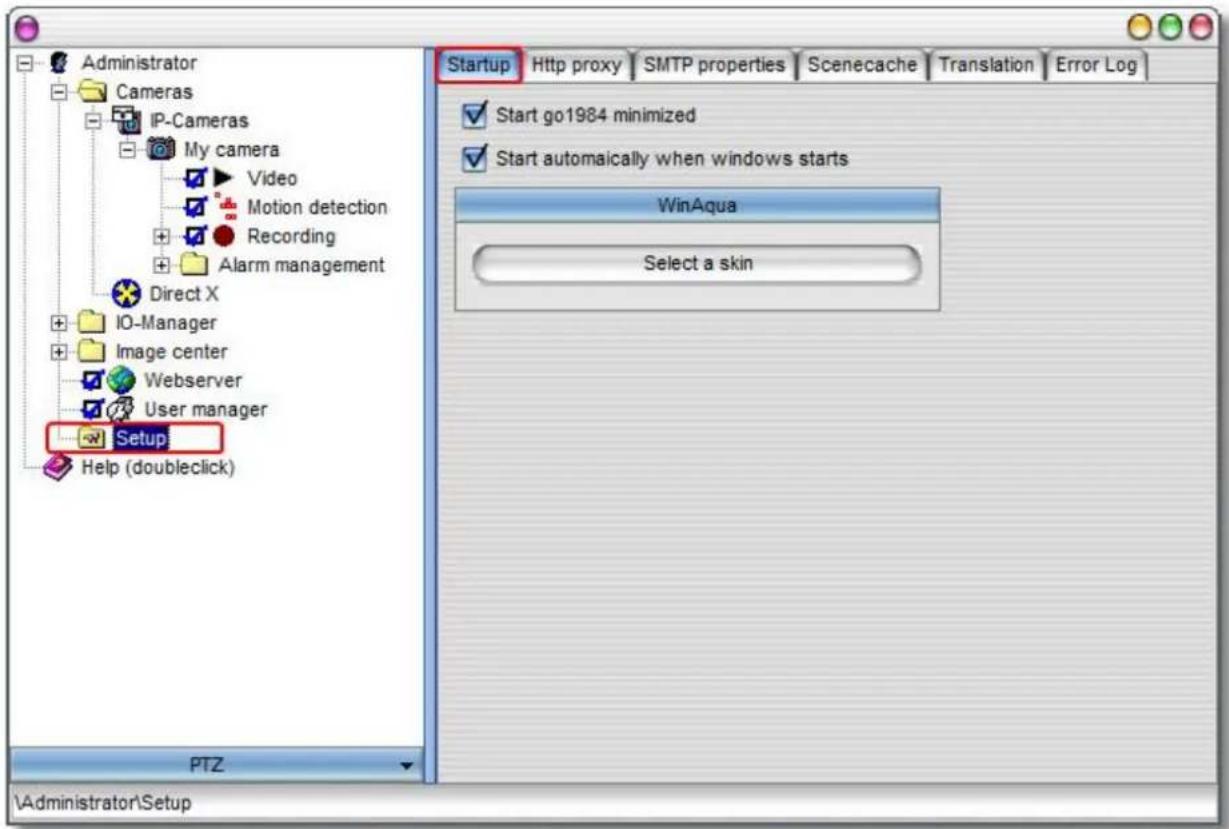
10.3 HTTP Proxy
If a proxy server is required for the HTTP protocol in your network, define the necessary settings here. Ask your network administrator for the correct settings.

10.4 SMTP server configuration
In order to enable e-mail sending from go1984, a so-called SMTP server first needs to be entered; this only has to be done once. Outgoing e-mails are sent to this server and ultimately to the recipient. Your provider can supply you with the settings required to configure the SMTP server. Alternatively, you can obtain the information from your e-mail program (Outlook, Outlook Express etc.). A list of the most common servers is supplied in the appendix.
![Administrator Cameras IP-Cameras My camera Video Motion detection Recording Alarm management Sound Notification FTP-Upload LAN-Broadcast Call EXE Phone call Direct X IO-Manager Image center Webserver User manager Setup Help (doubleclick) Email notification Log Email addresses (Use ; to seperate): Subject: Motion detected on %Cameraname% Attach image to the mail SMTP properties ... PTZ 00:01:00 320x240 12.3 fps 12:26:20 PI 12:21:23 PI Axis Camera 207 [TAxisCamera] \Administrator\Cameras\IP-Cameras\My camera\Alarm management\Notification](/content/2026/05/1023780/images/a77129a49d4b432d17290ea33f66d7bfef107e43c13057fe3923fcd4d26cf35e.jpg)
In most cases, it is sufficient to complete the fields shown in the diagram. If go1984 is still not able to send e-mails, check the settings or test using the "POP3-before-SMTP" authentication method. To do so, please complete the "POP3 access data" block.
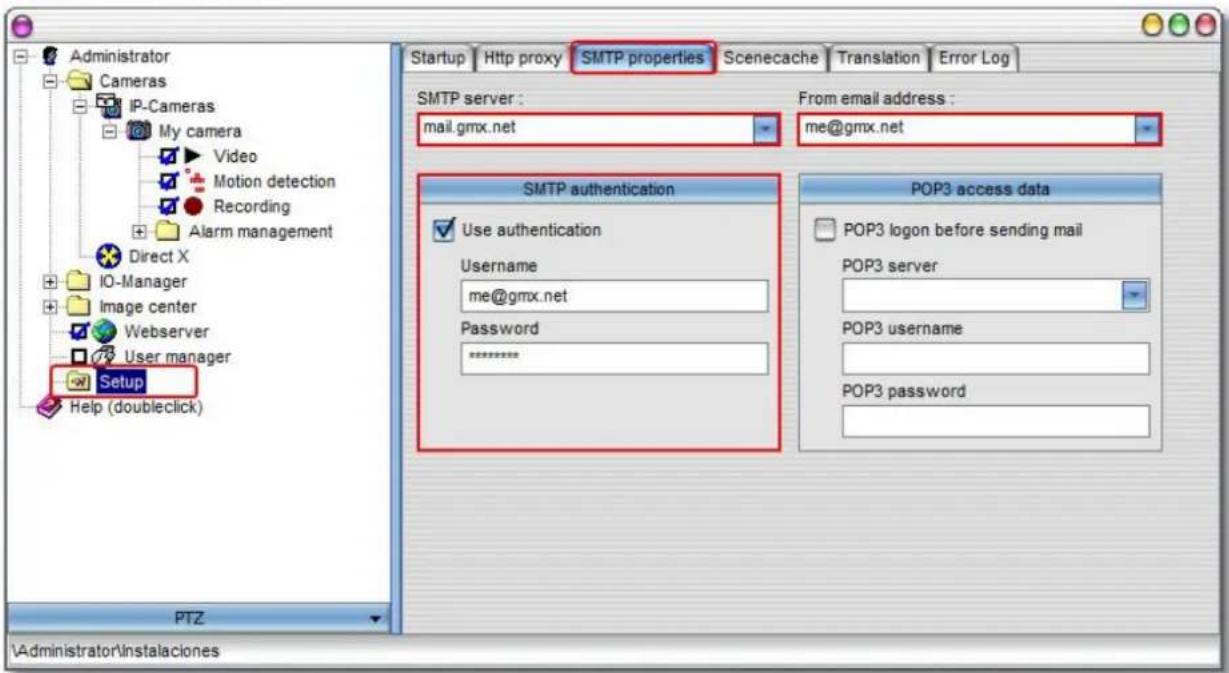
10.5 Translation
It is possible to integrate new languages for the interface. The following table shows the available languages.

If you wish to create a new language option, right-click on a free column in the table. Select an existing language as a template. A dialog box appears requesting you to enter a name for the new language (e.g. Spanish). Use the existing languages to translate terms line by line into the new language. After completing the translation, the newly created language option is immediately available.

11 Event management
go1984 includes a highly flexible event management option, which permits go1984 to be individually configured. Various input and output signals are available. These signals can be supplied to go1984 by cameras, schedulers or plug-ins.
Every input signal can be linked to one or more actions. The most important signals are automatically linked to standard actions after go1984 is installed. For instance, motion detection is linked to recording and notifications of the respective camera. However, you have the choice of changing these links.
The following output signals (Actions) are available (depending on camera type):

Output1, □Output2, ...

This output signal can be used to switch a camera's digital output (if available) on or off. It can be used for applications such as controlling a door-opener, for instance.

Note:
An IP camera's digital inputs or outputs are not supplied as standard. They must be explicitly activated when required, in other words, set from "0" to "1".
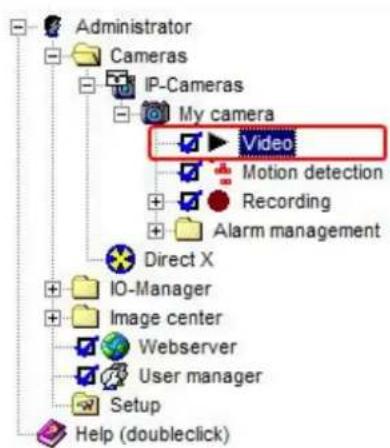

The following input signals (Events) are available:
| Signal | is activated when... |
| Active | the camera is active, which means that the option box next to the "Video" option is ticked. |
| Darkness | the brightness of the camera image is very low (see Motion detection → Settings → "Brightness is less than"). |
| Error | the camera reports an error or is not available. |
| Idle | no further motion has been detected for the value "Motion detection" → "Settings" → "Delayed detection". |
| Input1, Input2, ... | the camera's digital input is being closed. |
| Motiondetector | a movement is detected. |
| MotionOverload | the motion level is very high (see Motion detection → Settings → "Motion value is greater than"). |
| NewImage | a new image is transmitted from the camera. |
| PreRecording | pre-recording is active. |
| Recording | images are being recorded at that moment. |
| SceneActive | a new scene is recorded and the interval specified without movement which must elapse before the next scene is generated (see "Scene generation" → "No motion was detected for this time interval") has not yet expired. |
| Scheduler | thescheduler is in the green range. |
| Http event | thethttp event is currently active. |
The different input signals are grouped in the program's IO Manager. LEDs are depicted to the left of the signals. The LEDs may indicate the following status:

Signal on

Signal off

Signal is deactivated and therefore not available (default setting for camera inputs and camera outputs)
You can view the different signals from the cameras in the IO Manager under the "Event" entry. It also shows you which signal has been linked to which action.

flowchart
graph TD
    A["IO-Manager"] --> B["Event"]
    B --> C["Camera"]
    C --> D["My camera"]
    D --> E["Active"]
    D --> F["Darkness"]
    D --> G["Error"]
    D --> H["Idle"]
    D --> I["Input1"]
    C --> J["Motiondetector"]
    J --> K["Recording [My camera"]]
    J --> L["Play sound [My camera"]]
    J --> M["Email notification [My camera"]]
    J --> N["LAN-Broadcast [My camera"]]
    J --> O["Call external program [My camera"]]
    J --> P["Phone call [My camera"]]
    C --> Q["MotionOverload"]
    Q --> R["NewImage"]
    R --> S["FTP upload [My camera"]]
    R --> T["PreRecording"]
    R --> U["Recording"]
    R --> V["SceneActive"]
    C --> W["Scheduler"]
    W --> X["off-time"]
    W --> Y["Http event"]
    Y --> Z["my_event"]
You can create links anywhere the mouse pointer changes to the following symbol: Clicking on the icon with the right mouse key will open the links menu. The following example illustrates the process.
Example:
An IP camera's digital input has been linked to a doorbell. Whenever a visitor rings the bell, the camera is supposed to start recording. To set up this event, first choose a camera in the go1984 explorer and then select the "Record" option.

The various settings available for go1984's recording function are shown. The Action button is near the bottom. The button is linked to go1984's internal motion detecting after installation. You can now change this link, mapping it to the camera's digital input. Click on the button with the right mouse key to open the menu. Afterwards, select "Input1" as an input signal, as shown in the diagram. After you've defined this setting, the camera will start recording as soon as the contact at the camera's digital input is closed.


Note:
Please note that a single input signal can also be linked to several different actions.
In the example above, for instance, you could have the same signal trigger e-mail notification in addition to recording. Furthermore, a camera's signals are also available for all other cameras. In the example, the input signal from a single camera could be used to control the recording function of all cameras.
12 Appendix
12.1 POP3/SMTP-Server
A list of the most common POP3/SMTP servers:
All company and/or product names are trademarks and/or registered trademarks or brands of the respective manufacturers. We reserve the right to make technical changes and assume no responsibility for errors or omissions.
- Introduction
- Editions
- Installation
- Launching the program
- Launch using the Windows quick start bar
- Launch using the desktop
- Launch using the start menu
- Autostart
- Note:
- Entering the license code
- Upgrade
- 4/25/2008
- Basic setup
- Adding a camera
- IP camera
- Camera picture
- Selection list
- PTZ camera
- Via the arrow keys
- Via the slider
- Via "click and drag"
- Via "Ctrl" + mouse-click in the live image
- Via "Area zoom"
- Preset-Positions
- Webcam (USB)
- Capture card
- Recording
- Monthly overview
- Daily overview
- Scene playback
- Calculating memory requirements
- AK \* FPS \* KB = kilobytes/second
- Memory management
- Scene generation
- Pre-/Post alarm
- Access time period
- Export
- Motion detection
- Http event
- Event Server Setup
- Notification
- All notification types need to be activated first. Clicking on the options field of the respective option switches on the corresponding function.
- Sound
- FTP
- LAN-Broadcast
- External program
- ISDN
- Scheduler
- User management
- Webserver
- Configuration
- Interface
- iPhone Client
- J2ME Client
- DynDNS
- Clustermode
- Image Center
- Defining customized views
- Additional settings
- Camera
- Note regarding IP cameras:
- Startup settings
- HTTP Proxy
- SMTP server configuration
- Translation
- Event management
- Example:
- Appendix
- POP3/SMTP-Server
Brand : Intellinet
Model : go1984 Enterprise Edition
Category : Photo/Video Software