
Diga DMR-EX72S - DVD Recorder PANASONIC - Free user manual and instructions
Find the device manual for free Diga DMR-EX72S PANASONIC in PDF.
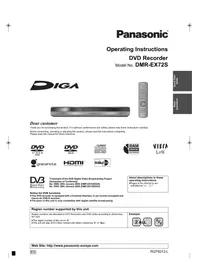


| Product Type | DVD Recorder with Hard Disk Drive |
| Brand | Panasonic |
| Model | Diga DMR-EX72S |
| Dimensions (W x H x D) | 430 x 69 x 300 mm (16.9 x 2.7 x 11.8 inches) |
| Weight | Approx. 4.5 kg (9.9 lbs) |
| Power Supply | AC 220-240 V, 50 Hz |
| Power Consumption | Approx. 45 W (Standby: 0.5 W) |
| Hard Disk Drive Capacity | 160 GB |
| Recording Media | DVD-RAM, DVD-R, DVD-RW, DVD+R, DVD+RW, CD-R, CD-RW |
| Playback Media | DVD-Video, DVD-R/RW, DVD+R/RW, CD, CD-R/RW, MP3, JPEG, DivX |
| Video Recording Format | MPEG-2 (DVD-Video standard) |
| Audio Recording Format | Dolby Digital, Linear PCM |
| Inputs | Antenna (RF), Composite Video & Audio (RCA), S-Video, DV (i.LINK) |
| Outputs | HDMI, Component Video, Composite Video, Audio (RCA), Digital Audio Optical, RF Loopout |
| Recording Features | Timer recording, One-touch recording, Chase Play, Flexible Recording modes (XP, SP, LP, EP) |
| Editing Features | Chapter creation, Title deletion, Playlist editing, DivX playback support |
| Security Features | Parental lock (rating level), Disc lock |
| Maintenance | Clean lens with soft, dry cloth; avoid liquids; clean casing with mild detergent |
| Spare Parts & Repairability | Remote control, power cord available; repair by qualified service center |
| General Information | Supports Progressive Scan, 1080p upscaling via HDMI, G-Code for easy programming |
Frequently Asked Questions - Diga DMR-EX72S PANASONIC
User questions about Diga DMR-EX72S PANASONIC
0 question about this device. Answer the ones you know or ask your own.
Ask a new question about this device
Download the instructions for your DVD Recorder in PDF format for free! Find your manual Diga DMR-EX72S - PANASONIC and take your electronic device back in hand. On this page are published all the documents necessary for the use of your device. Diga DMR-EX72S by PANASONIC.
USER MANUAL Diga DMR-EX72S PANASONIC
Operating Instructions
DVD Recorder
Model No. DMR-EX72S


Dear customer
Thank you for purchasing this product. For optimum performance and safety, please read these instructions carefully.
Before connecting, operating or adjusting this product, please read the instructions completely.
Please keep this manual for future reference.








Trademark of the DVB Digital Video Broadcasting Project Declaration of Conformity
No. 6568, 28th January 2009 (DMR-EX72SEGK)
No. 6569, 28th January 2009 (DMR-EX72SEGS)
About descriptions in these operating instructions
- Pages to be referred to are indicated as "→ ○○".
Notice for DVB functions
- This DVD recorder is equipped with a Common Interface. It can receive encrypted and free-to-air DVB-S services.
- The tuner in this unit is only compatible with digital satellite broadcasting.
Region number supported by this unit
Region numbers are allocated to DVD Recorders and DVD-Video according to where they are sold.
• The region number of this unit is "2". - The unit will play DVD-Video marked with labels containing "2" or "ALL".
Example:


Web Site: http://www.panasonic-europe.com
CAUTION!
THIS PRODUCT UTILIZES A LASER. USE OF CONTROLS OR ADJUSTMENTS OR PERFORMANCE OF PROCEDURES OTHER THAN THOSE SPECIFIED HEREIN MAY RESULT IN HAZARDOUS RADIATION EXPOSURE. DO NOT OPEN COVERS AND DO NOT REPAIR YOURSELF. REFER SERVICING TO QUALIFIED PERSONNEL.
WARNING:
TO REDUCE THE RISK OF FIRE, ELECTRIC SHOCK OR PRODUCT DAMAGE.
- DO NOT EXPOSE THIS APPARATUS TO RAIN, MOISTURE, DRIPPING OR SPLASHING AND THAT NO OBJECTS FILLED WITH LIQUIDS, SUCH AS VASES, SHALL BE PLACED ON THE APPARATUS.
- USE ONLY THE RECOMMENDED ACCESSORIES.
- DO NOT REMOVE THE COVER (OR BACK); THERE ARE NO USER SERVICEABLE PARTS INSIDE. REFER SERVICING TO QUALIFIED SERVICE PERSONNEL.
CAUTION!
- DO NOT INSTALL OR PLACE THIS UNIT IN A BOOKCASE, BUILT-IN CABINET OR IN ANOTHER CONFINED SPACE. ENSURE THE UNIT IS WELL VENTILATED. TO PREVENT RISK OF ELECTRIC SHOCK OR FIRE HAZARD DUE TO OVERHEATING, ENSURE THAT CURTAINS AND ANY OTHER MATERIALS DO NOT OBSTRUCT THE VENTILATION VENTS.
- DO NOT OBSTRUCT THE UNIT'S VENTILATION OPENINGS WITH NEWSPAPERS, TABLECLOTHS, CURTAINS, AND SIMILAR ITEMS.
- DO NOT PLACE SOURCES OF NAKED FLAMES, SUCH AS LIGHTED CANDLES, ON THE UNIT.
- DISPOSE OF BATTERIES IN AN ENVIRONMENTALLY FRIENDLY MANNER.
CAUTION
Danger of explosion if battery is incorrectly replaced. Replace only with the same or equivalent type recommended by the manufacturer. Dispose of used batteries according to the manufacturer's instructions.
THIS UNIT IS INTENDED FOR USE IN MODERATE CLIMATES.
This product may receive radio interference caused by mobile telephones during use. If such interference is apparent, please increase separation between the product and the mobile telephone.
The socket outlet shall be installed near the equipment and easily accessible. The mains plug of the power supply cord shall remain readily operable. To completely disconnect this apparatus from the AC Mains, disconnect the power supply cord plug from AC receptacle.

| DANGER | -VISIBLE AND INVISIBLE LASER RADIATION WHEN OPEN. AVOID DIRECT EXPOSURE TO BEAM. FDM 21 CFR/Class D |
| CAUTION | -CLASS 39 VIBLE AND INVISIBLE LASER RADIATION WHEN OPEN. AVOID EXPOSURE TO THE BEAM. ICD6065-1 +A2/Class 39 |
| ATTENTION | -RAVONNEMENT LASER VIBLE ET INVISIBLE, CLASS 38 EN CAS DUVERITURE, EVITER UNNE EXPOSITION AU PASSEAU. |
| FORSIGHTIO | -SYNJG OG USYNI IS LASERSTRALING KLASSE 39 NAR LAGET AT UNGAT AT UNGAT FOR CHINA 41 NAR |
| VARO | -AMTNESISA OLET ALTIMNA LUKOWAN 39 NAYVAJAK NAYMANTONA LASERSTRALYA, VARO ALTIMUNISTA SATEELLE |
| VARNING | -KLSS 38 SYN IG OCH OSYNI IS LASERSTRALING NAR DENNA DI, BIPONI UNIVI ONIONNING STRAIL 39 WENN ANDECAUNG GEOFFE ONINT DEM STRAH, ASUSE ZEN |
| VORSICHT | -DICTRISH AND NOVOCHTRALING KLASSE 39 WENN ANDECAUNG GEOFFE ONINT DEM STRAH, ASUSE ZEN |
| 注意 | -打开可见可见及不可听见激光辐射。避免光束照射。 |
| 注意 | -ここを聞くと可视及び不可转让くださいが出来ます。 |
| -ピームを見ずに、無たたりないでください。 VQL1/70 |
(Inside of product)
Included accessories

Please check and identify the supplied accessories. (Product numbers correct as of May 2009. These may be subject to change.)
□ 1 Remote control

(N2QAYB000336)
□ 1 AC mains lead

For use with this unit only. Do not use it with other equipment.
Also, do not use cords for other equipment with this unit.
□ 2 Batteries

for remote control
The remote control information
Batteries
- Insert the poles (+ and -) so to match in the remote control.
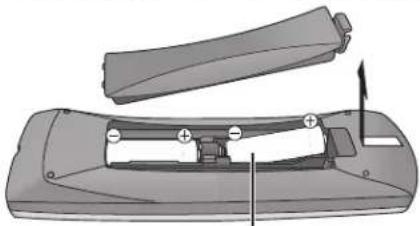
R6/LR6, AA
- Use alkaline or manganese batteries.
- Do not mix old and new batteries.
- Do not use different types at the same time.
- Do not heat or expose to flame.
- Do not leave the battery(ies) in an automobile exposed to direct sunlight for a long period of time with doors and windows closed
- Do not take apart or short circuit.
- Do not attempt to recharge alkaline or manganese batteries.
- Do not use batteries if the covering has been peeled off.
Mishandling of batteries can cause electrolyte leakage which can damage items the fluid contacts and may cause a fire.
Remove if the remote control is not going to be used for a long period of time. Store in a cool, dark place.
Remote control operations (=> 4)
Use

The distance and angles are approximate.
Getting started
Included accessories 2 The remote control information 2
Quick Start Guide
Control reference guide 4 Easy access to various functions — FUNCTION MENU Display .... 5 STEP 1 Connection ...... 6 STEP 2 Inserting the CAM (Conditional Access Module) and Smart Card 7 STEP 3 Channel reception settings and TV aspect settings....8 STEP 4 Setting the CI (Common Interface)....9 HDD and disc information 10 USB memory information.... 12 Media handling (Disc/USB memory) 13 Regarding DivX® files, Music files and still pictures (JPEG) 14 HDD (Hard disk drive) handling care. 15 Unit care. 15
Basic operations
Watching digital broadcasts 16 Select the station from Channel List 16 To show Teletext....16 Playing recorded video contents /Playing play-only discs.... 18 Recording television programmes 19 Timer recording 20 Deleting titles.... 21
Advanced operations
Notes for recording.... 22 Advanced recording 23 Recording modes and approximate recording times 23 When the format confirmation screen is displayed 23 When removing a recorded disc 23 Flexible Recording 24 Playing while you are recording 24 Recording broadcasts from external equipment ..... 25 Making timer recordings on the television. 25 Linked timer recordings with external equipment EXT LINK....25
Copying from a video cassette recorder.... 26
Manual recording 26
DV automatic recording (DV Auto Rec) 26
Advanced timer recording 27
Manually programming timer recordings....27
To cancel recording when recording has already begun ..... 27
To release the unit from recording standby 27
Relief Recording 27
Auto Renewal Recording 28
Check, change or delete a programme. 28
Language for digital broadcast with multi-audio or multi-subtitle 28
Notes on timer recording....28
Operations in the TV Guide system 29
Selecting the programme from the desired programme type
or category 29
Searching for the programme in the TV Guide list . . . . . . . . . . 30
TV Guide data download 30
Advanced playback. 31
Operation during play 31
Selecting recorded programmes (titles) to play — DIRECT NAVIGATOR 32
Switching the DIRECT NAVIGATOR appearance 32
To sort the titles for easy searching 32
To play grouped titles HDD 32
To edit the group of titles HDD 32
Playing music 33
To play music CD 33
To play music recorded on HDD....33
Useful functions during music play 33
Playing DivX, Music files and still pictures (JPEG) . . . 34
Showing the menu screen 34
Playing DivX video contents 34
Playing Music files 36
Playing still pictures 36
Useful functions during still picture play 37
Linked operations with the TV
(VIERA Link "HDAVI ControlTM"/Q Link) 38
Easy control only with VIERA remote control 39
Convenient functions 40
FUNCTION MENU Display 40
To pause the TV programme you are watching —Pause Live TV 40
Editing
Entering text....41
Editing titles/chapters....42
Creating, editing and playing playlists ..... 44
Editing still pictures and music 46
Copying
Copying titles or playlists....48
Copy [Video (HDD to DVD)] 49
Copying using the copying list - Advanced Copy 50
Copying a finalised DVD-R, DVD-R DL, DVD-RW
(DVD-Video format), +R and +R DL 51
Copying Video (MPEG2) from a video equipment....52
Copying still pictures 53
Copying using the copying list 53
Copying still pictures on the USB memory .....54
Copying music to HDD 55
About the Gracenote® Database 55
Copying music from a CD 55
Copying music from a USB memory or
CD-R/CD-RW/DVD-R/DVD-R DL 55
To update the Gracenote® Database. 56
Setting menus
Using on-screen menus/Status message ..... 57
HDD and disc management 59
Common procedures 59
Setting the protection. 59
Providing a name for a disc ....59
Deleting all titles and playlists—Delete all titles .....60
Deleting all the contents—Format....60
Selecting the background style—Top Menu 61
Selecting whether to show the Top Menu first
—Auto-Play Select....61
Enabling discs to be played on other equipment—Finalise .... 61
Creating Top Menu—Create Top Menu 61
Changing the unit's settings 62
Common procedures 62
Tuning 62
Disc 65
Picture 66
Sound 66
Display 67
Connection....67
Others 68
Other Settings 70
Television operation....70
Child Lock 70
Reference
Additional connections....71
Connecting a television with AUDIO/VIDEO or S VIDEO terminals....71
Connecting a VCR with AUDIO/VIDEO
or S VIDEO terminals .....71
Connecting a television with
COMPONENT VIDEO terminals 71
Connecting an amplifier with a digital input terminal .....72
Connecting a stereo amplifier 72
Connecting with an HDMI compatible television and receiver. . . 72
Connecting a television and VCR or Set Top Box 73
Frequently asked questions....74
Messages 76
Troubleshooting guide 78
Specifications 84
Glossary 85
Safety precautions 86
Index Back Cover
Remote control
Instructions for operations are generally described using the remote control.

① Turn the unit on (⇒ 8) ② Select drive [HDD or DVD] (→ 18, 19) Drive changes each time you press [DRIVE SELECT]. ③ Select channels and title numbers, etc./Enter numbers ④ To delete unwanted recorded titles, timer programmes, still pictures or music (⇒ 21, 28, 47) ⑤ Basic operations for recording and play ⑥ Show digital channel information (⇒ 17)/Programme information within TV Guide screen (⇒ 29)/Show status messages (⇒ 58) ⑦ Selection/OK, Frame-by-frame (→ 31) ⑧ Show DIRECT NAVIGATOR (→ 32, 42) ⑨ Show OPTION menu (→ 30, 42) - for playing or editing titles and still pictures, etc. - for searching for programmes
⑩ Colour buttons
- for switching the Channel List view (→ 16)
- for switching the Teletext function (→ 17)
- for TV Guide operations (→ 29)
- for switching the DIRECT NAVIGATOR screen (→ 32, 33, 36)
- for switching VIDEO/Playlists (→ 50)
- for deactivating timer programme (→ 27)
- for selecting character type when entering text* (→ 41)
- for tuning settings (→ 62)
⑪ Recording functions
•[● REC] Start recording (→ 19)
•[REC MODE] Change recording mode (→ 19)
•[EXT LINK] Linked timer recordings with external equipment
(→ 25)
• [● DIRECT TV REC] Direct TV Recording (→ 38)
⑫ Show Teletext information (→ 16)
⑬ Show DVB Subtitle (⇒ 16)
⑭ Transmit the remote control signal
⑮ Television operations (→ 70)
⑯ Channel select/Change pages in the TV Guide system (⇒ 16, 19, 29)
⑰ Show Channel List (⇒ 16)
⑱ Input select (AV1, AV2, AV3 or DV) (→ 26)
⑲ Show Timer Recording screen (→ 27)
⑳ Exit the menu screen
②1 Show the TV Guide screen (→ 20, 29)
②2 Show FUNCTION MENU (→ 40)
By using the FUNCTION MENU you may access the main functions (Playback, Recording, etc.) quickly and easily.
②3 Return to previous screen
②4 Create chapter (⇒ 31)
②5 Skip approx. 1 minute forward (→ 31)
②6 Skip the specified time (→ 31)
⑳ Show on-screen menu (⇒ 57)
Menu for disc playback and changing DVB multi audio or DVB subtitle etc.
* Only when "Language" is set to other than "Česky" or "Slovenčina" in "Display" of the Setup menu
The unit's display

① Disc indicator
② Digital broadcast indicator
Lights when the unit is receiving digital broadcast.
③ Copying indicator
④ USB port indicator
⑤ Linked timer recordings with external equipment indicator
① Disc indicator ② Digital broadcast indicator Lights when the unit is receiving digital broadcast. ③ Copying indicator ④ USB port indicator ⑤ Linked timer recordings with external equipment indicator
⑥ Timer recording indicator
⑦ Drive [HDD or DVD] indicator
⑧ Main display section indicator
⑨ Remote control visual feedback
This flashes when it is operated by the remote control.
⑩ Recording/Playback indicator

Main unit
① Standby/on switch (⏻/l) (⇒ 8) Press to switch the unit from on to standby mode or vice versa. In standby mode, the unit is still consuming a small amount of power. ② Disc tray (→ 13) ③ Connection for digital video (DV) camcorder (⇒ 26) ④ USB port (⇒ 13) ⑤ Display (→ 4) ⑥ Connection for VCR, camcorder etc. (→ 26, 71) ⑦ Open/Close disc tray (→ 13) ⑧ Channel select (⇒ 16, 19) ⑨ Start recording (⇒ 19)/Specify a time to stop recording (⇒ 19) ⑩ Stop (⇒ 19, 31) ⑪ Start play (⇒ 18) ⑫ Remote control signal sensor (⇒ 2)
Rear panel terminals (⇒ 6, 7, 71, 72, 73)
Easy access to various functions — FUNCTION MENU Display
"FUNCTION MENU" automatically appears when you turn the power on. (When "FUNCTION MENU Display" is set to "On" in the Setup menu) You can access the main function quickly and easily.
![graph TD A["1 Select a function. Selectable items are displayed on the right."] --> B["2 Select an item. Press [OK"]] B --> C["30:00 SP"] C --> D["Playback"] C --> E["Recording"] C --> F["Delete"] C --> G["Copy"] C --> H["View"] C --> I["Others"] C --> J["Drive Select"] C --> K["OK"] C --> L["RETURN…](/content/2026/05/1021228/images/76f77b61ff190dc605c897ef29ab306e09a44eb2ccdbc337b14863fb39395354.jpg)
| 1 Playback | Select when you wish to playback the contents. The DIRECT NAVIGATOR screen or menu screen etc. will be displayed. |
| Video (⇒ 18, 32)DivX (⇒ 34)Picture (⇒ 36)Music (⇒ 36)Top Menu (⇒ 18)Menu (⇒ 18) | |
| 2 Recording | Select the recording method.The TV Guide or Timer Recording screen will be displayed. |
| TV Guide (⇒ 20, 29)Timer Recording (⇒ 20, 27) | |
| 3 Delete | Select the title or file type you wish to delete. The DELETE Navigator screen will be displayed. |
| Video (⇒ 21)Picture (⇒ 47)Music (⇒ 47) | |
| 4 Copy | Select the copy method. |
| Video (HDD to DVD) (⇒ 49)Advanced Copy (⇒ 50)Copy Music CD (⇒ 55)Copy Music (⇒ 55) | |
| 5 View | Select to watch digital satellite broadcasts with the tuner of this unit."View" is displayed in the FUNCTION MENU when this unit is connected with the TV that supports "HDAVI Control 2" or later.(⇒ 38) |
| 6 Others | Select and execute a function other than those above, such as recording or setting. |
| Playlists (⇒ 44)Flexible Rec (⇒ 24)DV Auto Rec (⇒ 26)HDD Management (⇒ 59)DVD Management (⇒ 59)Setup (⇒ 62) | |
| 7 Drive Select | Change which drive is used. |
| HDDDVDUSB |
Note
If you do not need to display FUNCTION MENU when turning the unit on, set "FUNCTION MENU Display" to "Off" in the Setup menu 67).
STEP 1 Connection
Using a 21-pin Scart cable
- You can use a variety of Q Link functions by connecting the unit to a Q Link compatible television (⇒ 38).
- You can enjoy high-quality viewing by connecting the unit to an RGB compatible television (⇒ 86).
Required setting
"AV1 Output" in the Setup menu (→ 68)
- Before connection, turn off all equipment and read the appropriate operating instructions.
- Confirm connections not listed below with your dealer.
- Refer to "Additional connections" (→ 71) for connection using other terminals and connection with other equipment.
When the unit is not to be used for a long time
To save power, unplug it from the household mains socket. This unit consumes a small amount of power, even when it is turned off
[approx. 0.9 W ("Power Save" is set to "On")]
Connecting a television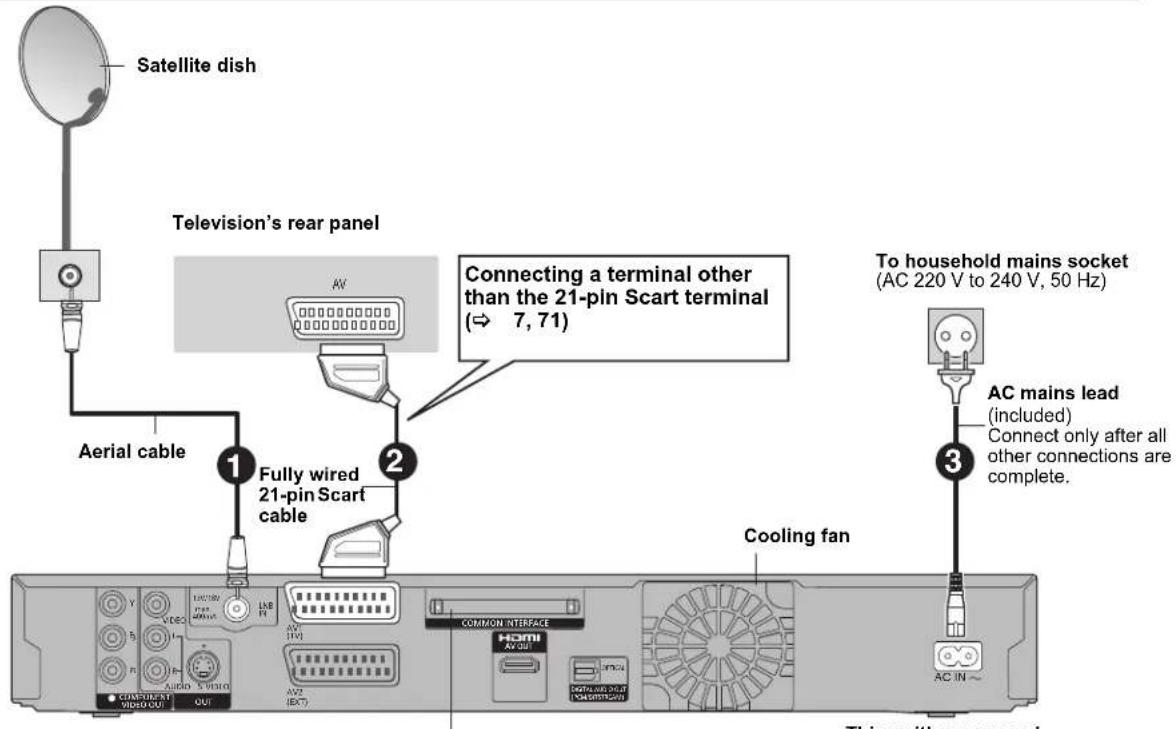
Common Interface (CI) slot
In order to view or record TV services, you
must insert a certified CAM and Smart Card
into this slot.
- Insert the CAM before connecting a fully
wired 21-pin Scart cable with this unit.
(⇒ 7)
This unit's rear panel
Connect the unit directly to the television
If you connect the unit through an AV selector or video cassette recorder to the television, the video signal will be affected by copyright protection systems and the picture may not be shown correctly.
- When connecting to a television with a built-in VCR
Connect to the input terminals on the television side if there are both television and VCR input terminals.
DO NOT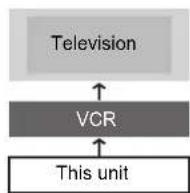
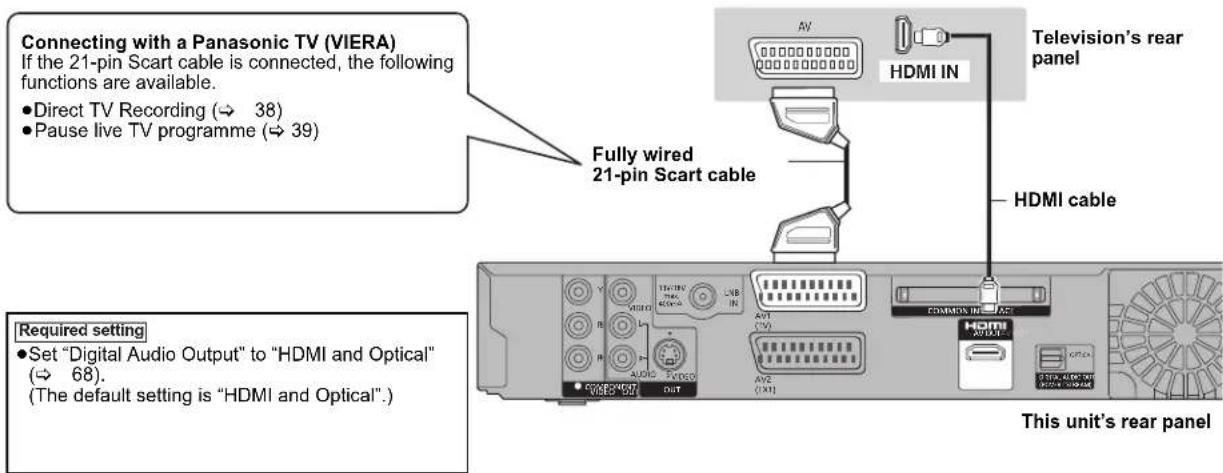
You can enjoy high-quality picture by adding the HDMI cable connection to the 21-pin Scart cable connection between this unit and your TV.
Connecting to a TV with an HDMI (High Definition Multimedia Interface) cable
When connected to an HDMI compatible unit, an uncompressed digital audio and video signal is transmitted. You can enjoy high quality, digital video and audio with just one cord. When connecting to an HDMI-compatible HDTV (High Definition Television), the output can be switched to 1080p, 1080i or 720p HD video.
- This unit incorporates HDMI™ (V.1.3a with Deep Colour) technology.
- Video sources converted to 1920×1080 resolution, while of high quality, will exhibit somewhat lower subjective image resolution than true, native 1080p full-HD sources. See dealer for details.
- Please use High Speed HDMI Cables that have the HDMI logo (as shown on the cover).
- When setting video output to "1080p", please use the HDMI cables 5.0 meters or less.
Regarding VIERA Link "HDAVI Control™" function
When connecting with a Panasonic TV (VIERA) or a receiver equipped with the "HDAVI Control" function, linked operations would be possible. [⇒ 38, Linked operations with the TV (VIERA Link "HDAVI Control™/Q Link)] •Non-HDMI-compliant cables cannot be utilised. - It is recommended that you use Panasonic's HDMI cable. Recommended part number:
RP-CDHG10 (1.0 m), RP-CDHG15 (1.5 m), RP-CDHG20 (2.0 m), RP-CDHG30 (3.0 m), RP-CDHG50 (5.0 m), etc.
Note
- If you are connecting to a TV that is only compatible with 2 channel audio output, audio with 3 channels or more will be down mixed (=> 85) and output as 2 channels, even if connecting with an HDMI cable. (Some discs cannot be down mixed.)
- You cannot connect this unit to DVI devices that are incompatible with HDCP.
For units compatible with HDCP (High-Bandwidth Digital Content Protection) copyright protection that are equipped with a digital DVI input terminal (PC monitors, etc.):
Depending on the unit, images may not be displayed properly or at all when connecting with a DVI/HDMI switching cable. (Audio cannot be output.)
STEP 2 Inserting the CAM (Conditional Access Module) and Smart Card
You need a Conditional Access Module together with a valid Smart Card and a subscription with the corresponding broadcaster.
The Smart Card is inserted in the commercially available Conditional Access Module (CAM).
When a CAM with a certified Smart Card is inserted, TV service scrambling is automatically cancelled and the service can be viewed or recorded.

■ Password query
When you turn the unit on after inserting the card, depending on the card provider, a password may be demanded.
1 Enter the 4-digit code with the numbered buttons.
Delete an incorrect number with [DELETE *]. 2 Confirm your password with [OK].
Note
- Disconnect the fully wired 21-pin Scart cable from this unit before you insert or remove the CAM.
- Set this unit to standby mode before you insert or remove the CAM. Remove the CAM slowly.
- Do not insert the CAM and Smart Card upside down.
- For more details, see the manual of the CAM and Smart Card, or check with the broadcaster.
- The Common Interface supports the modules according to DVB Specification for encryption systems as for example Cryptoworks, Viaccess, Nagravision, Conax or Irdeto.
STEP 3 Channel reception settings and TV aspect settings

1 Turn on the television and select the appropriate AV input to suit the connections to this unit.
2 Press [⏻] to turn the unit on.
●Country setting screen appears on the television.
3 Press [▲, ▼] to select the country and press [OK].

"Automatic Search" searches for all satellites at all 4 LNBs. All currently available TV and radio stations are saved. (It will take some time.)
A message "Store this satellite?" is displayed after the search is completed. Select "Yes" and press [OK].
- The following screen is displayed, and the search starts again.

- Once the search is completed, the TV screen is displayed. Auto-Setup is completed. (go to Step 5)
When "Germany" or "Austria" is selected: "Program Search (Auto-Setup)" will be displayed. (go to Step 4)
4 Press [▲, ▼] to select "Quick Setup" and press [OK].

"Quick Setup" searches for Astra 19.2°E at all 4 LNBs. A predefined choice of TV and radio stations is saved.

- TV screen is displayed after the search is completed. Auto-Setup is completed.
5 Press [▲, ▼] to select "On" or "Off" and press [OK] when the "Power Save" setting menu appears.

- On: It will go into the Power Save mode when the unit is in standby condition.
- Off: It is possible to start quickly from the standby mode. (Quick Start mode)
The features of the power save function when the unit is in standby mode are as below.
| Power Save | On ※1 | Off |
| Power consumption | Approx. 0.9 W | Approx. 13 W |
| Startup time | Not Quick | Quick ※2 |
| Watching the picture (e.g. Pay TV) from the device connected to AV2 | Cannot do | Can do |
1 "FL Display" is set to "Automatic" in the Setup menu. (⇒ 67) 2 It is possible to startup and start recording within several seconds. - Depending on the type of TV or the connected terminal, it may take time to display the screen.
If the TV aspect setting screen appears on the television.
Press [▲, ▼] to select the TV aspect and press [OK].
•16:9: When connected to a 16:9 widescreen television - Pan & Scan:
When connected to a 4:3 aspect television, side picture is trimmed for 16:9 picture (→ 85).

- Letterbox:
When connected to a 4:3 aspect television. 16:9 picture is shown in the letterbox style (⇒ 85).

When television picture appears, setup is complete.
To stop partway
Press [RETURN]
■ If the clock setting menu appears Set the clock manually (→ 69). ■ To confirm that stations have been tuned correctly (→ 62) ■ To restart setup (→ 62)
■ To change the on-screen menu language from German to English
① While stopped, press [FUNCTION MENU]. ② Press [▲, ▼] to select "Weit. Funktionen" and press [OK]. ③ Press [▲, ▼] to select "Setup" and press [OK]. ④ Press [▲, ▼] to select "Display" and press [▶]. ⑤ Press [▲, ▼] to select "Sprachauswahl" and press [OK]. ⑥ Press [▲, ▼] to select "English" and press [OK]. ⑦ Press [EXIT].
STEP 4 Setting the CI (Common Interface)

1 Press [FUNCTION MENU]. 2 Press [▲, ▼] to select "Others" and press [OK]. 3 Press [▲, ▼] to select "Setup" and press [OK]. 4 Press [▲, ▼] to select "Connection" and press [▶].

5 Press [▲, ▼] to select "Common Interface" and press [OK].
The features that appear on screen are dependent on the contents of the inserted CAM and Smart Card. Follow the on-screen instructions.
- On-screen operation guide may not correspond to the remote control buttons.
To return to the previous screen
Press [RETURN]
To exit the screen
Press [EXIT].
- For more information about TV service, please contact your service provider.
Note
- Other settings on the card, e.g. changing the password, can be adjusted in the Setup menu.
- Depending on the card, in some cases its use together with this unit may be limited or not possible.
HDD and discs you can use for recording and play (○: Possible, -: Impossible)
| Disc typeStandard symbol | Logo Data | that can be recorded and played | Rewritable Play on other players*1 | Recording 16:9 aspect picture*2 | Copy-once recording (CPRM) | ||
| Hard disk drive (HDD)HDD | - | VStill picture Music | i | ○ | -○ | d e | ○ o |
| DVD-RAMRAM |  | Video Still picture | ○ | ○ | ○CPRM (→ 85) compatible discs only. | ||
| DVD-R before finalisationDVD-V after finalisation(Video only) |  | Video*4or Still picture*4 | -○ | ○ | - | ||
| DVD-R DL*3-R DL before finalisationDVD-V after finalisation |  R DL R DL | Video - ○ | ○ | - | |||
| DVD-RW-RW(V) before finalisationDVD-V after finalisation |  R R | Video ○ | ○ | ○ | - | ||
| +R +R before finalisationDVD-V after finalisation | - | Video | - | ○ | -(4:3 aspect) | - | |
| +R DL*3+R DL before finalisationDVD-V after finalisation | - | Video | - | ○ | -(4:3 aspect) | - | |
| +RW+RW | - | Video | ○ | ○ | -(4:3 aspect) | - | |
×1 -R -R DL -RW(V) +R +R DL Finalisation is needed for playback on other equipment (⇒ 61). RAM can be played back on Panasonic DVD recorders and DVD-RAM compatible DVD players. -R DL, +R DL or +RW can be played back only on equipment compatible with these discs. ×2 For further information (→ 22, Notes for recording) =3 -R DL +R DL You cannot directly record to these discs (→ right). -4 Videos and still pictures cannot be mixed on one disc. - RAM -RW(V) +R +R DL +RW To use a new disc, formatting is necessary (⇒ 60). - +RW If the disc failed to play on other equipment, we recommend you create top menu (⇒ 61). - Use of Panasonic discs is recommended. For available recording times for different discs under different recording modes, see "Recording modes and approximate recording times" (⇒ 23). - Formatting and/or recording/initializing constraints may prevent you from playing or recording certain discs. - Please see specifications (→ 84) for compatible disc versions and recording speeds.
■ Recording format
This unit records video in the following formats.
DVD Video Recording format HDD RAM
This is a recording method which allows you to record and edit television broadcasts and so on.
- You can delete unwanted parts of a title, create playlists, etc.
- The broadcasts that allow "One time only recording" can be recorded to a CPRM compatible disc.
DVD-Video format -R -R DL -RW(V)
This recording method is the same as commercially available DVD-Video.
- The broadcasts that allow "One time only recording" cannot be recorded even if using a CPRM compatible disc.
- After finalising the disc, you can play the disc on DVD players and other equipment.
+VR (+R/+RW Video Recording) format +R +R DL +RW
This is a method for recording moving pictures to +R/+RW discs. You can playback such discs recorded in this method in a similar way as contents recorded in the DVD-Video format.
- The broadcasts that allow "One time only recording" cannot be recorded.
- After finalising the disc or creating the top menu, you can play the disc on DVD players and other equipment.
Note
●+R discs recorded with this unit and +R discs recorded with another Panasonic DVD Recorder may be incompatible. However, discs that are finalised are compatible and can be played. - This unit cannot record NTSC signals to discs that already have PAL signal recordings. (However, both types of programmes can be recorded onto the HDD.) - You may not be able to record depending on the condition of the discs and you may not be able to play due to the condition of the recording.
You cannot directly record to a DVD-R DL and +R DL disc on this unit.
Record to the HDD and then copy to the disc.
When playing DVD-R DL (Dual Layer, single-sided) and +R DL (Double Layer, single-sided)
DVD-R DL (Dual Layer, single-sided) and +R DL (Double Layer, single-sided) discs have two writable layers on one side. If there is not enough space on the first layer to record a programme, the remainder is recorded on the second layer. When playing a title recorded on both layers, the unit automatically switches between layers and plays the title in the same way as a normal programme. However, video and audio may momentarily cut out when the unit is switching layers.
DVD-R DL![graph TD A["Second recordable layer"] --> B["The available space"] B --> C["First recordable layer"] C --> D["Title 1"] C --> E["Title 2"] D --> F["(Inner section of the disc)"] E --> G["(Outer section of the disc)"] F --> H["Playback direction"] G --> I["+R DL"] style A fill:#f9f,stroke:#333 style…](/content/2026/05/1021228/images/3a1025d07733d97f0ac304fda78332c01bd4fa7b98f8ec0d0c4b6d3ea894dd6d.jpg)
Play-only discs
| Disc type | Logo | Standard symbol | Uses |
DVD-Video DVDHigh quality movie and music discs  VIDEO VIDEO | |||
| DVD-RW (DVD Video Recording format) |  | -RW(VR) DVD-RW video recorded on another DVD recorderYou can play programmes that allow One time only recording if they have been recorded onto a CPRM compatible disc.By formatting (⇒ 60) the disc, you can record onto it in DVD-Video format.It may be necessary to finalise the disc on the equipment used for recording. | |
| DVD-R DVD-R DL |   R R R DL R R R DL | DivX/MP3/WMA/JPEG | •DVD-R and DVD-R DL with video recorded in DivX•DVD-R and DVD-R DL with music recorded in MP3/WMA•DVD-R and DVD-R DL with still pictures recorded in JPEG |
| CD CD |  | Recorded audio and music (including CD-R/RW*) | |
 | JPEG | •CD-R and CD-RW with video recorded in DivX•CD-R and CD-RW with music recorded in MP3/WMA•CD-R and CD-RW with still pictures recorded in JPEG | |
| Video CD VCD |  | •Recorded music and video (including CD-R/RW*) | |
| SVCD |  | ||
* Close the session after recording. Play may be impossible on some discs due to the condition of the recording. - The producer of the disc can control how discs are played. So you may not always be able to control play as described in these operating instructions. Read the disc's instructions carefully. - Operation and sound quality of CDs that do not conform to CD-DA specifications (copy control CDs, etc.) cannot be guaranteed.
Discs that cannot be played
• 2.6 and 5.2 GB DVD-RAM, 12 cm • 3.95 and 4.7 GB DVD-R for Authoring - DVD-R, DVD-R DL, DVD-RW, +R, +R DL recorded on another unit and not finalised (⇒ 85). • Discs recorded with AVCHD format. - DVD-Video with a region number other than "2" or "ALL" • DVD-Audio - Blu-ray, HD DVD • DVD-ROM, +R (8 cm), CD-ROM, CDV, CD-G, Photo CD, CVD, SACD, MV-Disc, PD
Types of disc or title recorded on HDD for the type of connected TV
When you use the discs recorded either PAL or NTSC, or playback a title recorded on HDD using PAL or NTSC, refer to this table. (○: Possible to view, —: Impossible to view)
| TV type Disc/Titles recorded on HDD | Yes/No | |
| Multi-system TV PAL | ○ | |
| NTSC ○ | ||
| PAL TV | PAL | ○ |
| NTSC | ○*1(PAL60) | |
| NTSC TV | PAL | - |
| NTSC | ○*2 | |
1 If your television is not equipped to handle PAL 525/60 signals the picture will not be shown correctly. *2 Select "NTSC" in "TV System" (⇒ 67). - When playing back a disc or title recorded on the HDD, ensure that you match the "TV System" setting to the disc or title (PAL or NTSC) (⇔ 67).
USB memories you can use on this unit
| Compatible USB memories | USB memories which are defined as USB mass storage class, and digital cameras that use PTP protocol:– USB memories that support USB 1.0/1.1 and USB 2.0 Full Speed/High Speed.•USB memories of up to 128 GB can be used.•USB memories that support bulk only transfer.CBI (Control/Bulk/Interrupt) is not supported.•Digital Cameras which require additional programme installation when connected to a PC are not supported.•MTP (Media Transport Protocol) device is not supported.•A multi-port USB card reader is not supported. | ||
| Format FAT16 and FAT32 file systems are supported.•UDF/NTFS/exFAT file system is not supported.•Depending on the sector size, some files may not work.•Only the first partition on USB memories with multi-partition is supported. | |||
| Indicated in these instructions by USB | |||
| Data that can be played or copied(○: Possible, -: Impossible) | |||
| File format DivX MP3/WMA Still pictures (JPEG) | |||
| Playing ○ | ○ | ○ | |
| Copying to HDD - ○ | ○ | ||
| Instructions You can play DivX files recordedwith a computer onto the USBmemory (⇒ 34). | You can play and copy to HDDMP3/WMA files recorded with acomputer onto the USB memory(⇒ 36, 55). | You can play and copy to HDD orDVD-RAM still pictures recordedwith a computer onto the USBmemory (⇒ 36, 54). | |
- Despite meeting the conditions mentioned above, there may be USB memories that cannot be used for this unit.
- If a Panasonic digital video camera with HDD etc. is connected to this unit's USB port, you can copy the SD Video recorded with the camera to this unit's HDD or DVD-RAM.
Note
- This unit's USB port does not support bus-powered USB device.
Inserting discs
① Press [▲ OPEN/CLOSE] to open the tray.
- Cartridge disc Insert label-up.

Insert label-up with the arrow facing in.
② Press [▲ OPEN/CLOSE] to close the tray.
Automatic drive select function
RAM [Only for discs with the write-protect tab on the cartridge set to "PROTECT" (⇒ 59, Cartridge-protection)]
DVD-V VCD
- If the unit is recording to the HDD or stopped, it automatically switches to the DVD drive when a disc is inserted.
- If you eject a disc and close the disc tray, the HDD drive is automatically selected.
Note
- When using 8 cm DVD-RAM, or 8 cm DVD-R, remove the disc from the cartridge.
- RAM It is not possible to record or play continuously from one side of a double sided disc to the other. You will need to eject the disc and turn it over.
- RAM When using cartridge discs with the write-protect tab in the protect position (⇒ 59), play automatically starts when inserted in the unit.
Inserting, removing the USB memory
Inserting the USB memory
- Before inserting any USB memory to this unit, ensure that the data stored therein has been backed up.
- Check the orientation of the USB connector and insert it straight in.
- Insert an USB device while the unit is stopped, so the "USB device" screen is displayed. Select an item and press [OK]
to switch to the USB-related operations (⇒ 34, 54).
Removing the USB memory
- Complete all USB-related operations and pull the USB memory straight out.
- If a USB memory being accessed is pulled out, then the data may be damaged.

Disc care
■ How to hold a disc
Do not touch the recorded surface.
DO DO NOT

■ Concerning non-cartridge discs
Be careful about scratches and dirt.
■ If there is dirt or condensation on the disc
Wipe with a damp cloth and then wipe dry.
DO DO NOT

■ Handling precautions
- Do not attach labels or stickers to discs. (This may cause disc warping and un-balanced rotation, rendering it unusable.)
- Write on the label side of the disc only with a soft, oil-based felt pen. Do not use ballpoint pens or other hard writing implements.
- Do not use record cleaning sprays, benzine, thinner, static electricity prevention liquids or any other solvent.
- Do not use scratch-proof protectors or covers.
- Do not drop, stack, or impact discs. Do not place objects on them.
- Do not use the following discs:
– Discs with exposed adhesive from removed stickers or labels (rental discs, etc.). – Discs that are badly warped or cracked. – Irregularly shaped discs, such as heart shapes.
- Do not place in the following areas:
- In direct sunlight.
- In very dusty or humid areas.
- Near a heater.
- Locations susceptible to significant difference in temperature (condensation can occur).
- Where static electricity or electromagnetic waves occur.
- To protect discs from scratches and dirt, return them to their cases or cartridges when you are not using them.

The manufacturer accepts no responsibility and offers no compensation for loss of recorded or edited material due to a problem with the unit or recordable media, and accepts no responsibility and offers no compensation for any subsequent damage caused by such loss.
Examples of causes of such losses are:
- A disc recorded and edited with this unit is played in a DVD Recorder or computer disc drive manufactured by another company.
- A disc used as described above and then played again in this unit.
- A disc recorded and edited with a DVD Recorder or computer disc drive manufactured by another company is played in this unit.
Regarding DivX® files, Music files and still pictures (JPEG)
DivX
| Playable media | -R -R DL CD USB |
| File format | DivX●Files must have the extension".DIVX", ".divx", ".AVI" or ".avi".  |
| Number of folders | Maximum number of folders recognizable: 300 folders(including the root folder) |
| Number of files | Maximum number of files recognizable*1: 200 files |
| Support version | Certified to the DivX Home Theater Profile.Video- Number of stream: Up to 1- Codec: DIV3, DIV4, DIVX, DV50-Picture size: 32 x 32 to 720 x 576-FPS (Frame Per Second): Up to 30 fpsAudio- Number of stream: Up to 8- Format: MP3, MPEG, Dolby Digital-Multi channel: Dolby Digital is possible. MPEG multi is 2 ch conversion. |
MP3/WMA
| Playable media | HDD -R -R DL CD USB |
| File format MP3●Files must have the extension ".mp3" or ".MP3".WMA (Windows Media-formatted file)●Files must have the extension ".wma" or ".WMA". | |
| Number of folders (groups or albums) | Maximum number of folders (groups or albums) recognizable: 300 folders (groups or albums)(including the root folder) |
| Number of files (tracks) | Maximum number of files (tracks) recognizable<1: 3000 files (tracks) |
| Bit rates (MP3) | 32 kbps to 320 kbps |
| Sampling frequency (MP3) | 16 kHz/22.05 kHz/24 kHz/32 kHz/44.1 kHz/48 kHz |
| For WMA This unit is compatible with Windows Media Audio 9 (WMA9). | |
| ID3 tagsWMA tags | compatible (HDD USB) |
- If there is a large amount of still picture data etc. within a MP3/WMA file, play may not be possible.
Still pictures (JPEG 2 )
| Playable media | HDD RAM -R -R DL CD USB |
| File format File format: JPEG●Files must have the extension ".jpg" or ".JPG". | |
| Number of pixels | Between 34×34 and 6144×4096(Sub sampling is 4:2:2 or 4:2:0) |
| Number of folders*3 | -R -R DL CD USB Maximum number of foldersrecognizable: 300 foldersHDD RAM This unit can handle a maximum of 300 folders |
| Number of files*3 | -R -R DL CD USB Maximum number of filesrecognizable*1: 3000 filesHDD RAM This unit can handle a maximum of 3000 files |
| MOTION JPEG PROGRESSIVE JPEG | Not supported |
*1 Total number of recognizable file including MP3, WMA, JPEG, DivX and other types of files is 4000. 2 It may take a few moments for still pictures to display. *3 When there are many files and/or folders, some files may not display or be playable.
-R -R DL CD
- Compatible formats: ISO9660 level 1 or 2 (except for extended formats) and Joliet
- This unit is compatible with multi-session/border (except for DVD-R DL), but reading or play of the disc may take time if there are a lot of sessions.
- Operation may take time to complete when there are many files (tracks) and/or folders (groups or albums) and some files (tracks) may not display or be playable.
- English alphabet and Arabic numerals are displayed correctly. Other characters may not be displayed correctly.
- The display order on this unit may differ from how the order is displayed on a computer.
- Depending on how you create the disc (writing software), files (tracks) and folders (groups or albums) may not play in the order you numbered them.
- This unit is not compatible with packet-write format.
- Depending on the recording conditions, the disc may not be played.
- This unit is not compatible with copy-protected, Lossless, Professional, Voice and Multiple Bit Rate (MBR) for WMA
- This unit is not compatible with WMA files protected with digital rights management (DRM).
HDD RAM
- Compatible formats: DCF 4 compliant (Content recorded on a digital camera, etc.) 34 Design rule for Camera File system: unified standard established by Japan Electronics and Information Technology Industries Association (JEITA).
■ Structure of folders displayed by this unit You can play Music files (MP3/WMA) and still pictures (JPEG) on this unit by making folders as shown below. However depending on the method of writing data (writing software), play may not be in the order you numbered the folders.
Structure of WMA/MP3 folders
-R -R DL CD USB
Prefix with 3-digit numbers in the order you want to play them.
- The file name extension of WMA files will be ".wma".
e.g. Structure of MP3 folders![graph TD Root["Root"] --> A["001 (folder=group)"] A --> B["001.mp3 (file=track)"] A --> C["002.mp3"] A --> D["003.mp3"] Root --> E["002"] E --> F["001.mp3"] E --> G["002.mp3"] E --> H["003.mp3"] Root --> I["003"] I --> J["001.mp3"] I --> K["002.mp3"] I --> L["003.mp3"] I --> M["004.mp3"] Root --> N[…](/content/2026/05/1021228/images/12468002416a36a3f35dc5ce5e0ed3e831e021af3ff2d92f57a948b5ea10c709.jpg)
Structures of still picture folders
-R -R DL CD USB
Files inside a folder are displayed in the order they were updated or taken.
![graph TD A["Root"] --> B["002 Folder"] A --> C["003 Folder"] A --> D["004 Folder"] B --> E["P0000001.jpg"] B --> F["P0000002.jpg"] C --> G["P0000003.jpg"] C --> H["P0000004.jpg"] C --> I["P0000005.jpg"] D --> J["P0000006.jpg"] D --> K["P0000007.jpg"] D --> L["P0000008.jpg"] D --> M["P0000009.jpg"] D…](/content/2026/05/1021228/images/f2fe7c599c063eb29b772c7e1994dfbfda629b8328a12312d009b4e80e360ce7.jpg)
RAM
The following can be displayed on this unit.
***: Numbers XXX: Letters *1 Still pictures on the root folder can also be displayed. *2 Folders can be created on other equipment. However, these folders cannot be selected as a copying destination. - If a folder name or file name has been input using other equipment, the name may not be displayed properly or you may not be able to play or edit the data.
Root

HDD (Hard disk drive) handling care
The HDD is a high precision recording instrument and because of its long recording capability and high speed operation it is a very special device that is easily susceptible to damage.
As a basic rule, save important content to a disc as backup.
■ The HDD is a device that is not built to withstand vibration/shock or dust
Depending on the setup environment and handling of the HDD some content may become damaged and play and recording may no longer be possible. Especially during operation, do not subject the unit to any vibration, shock, or remove the AC mains lead from the household mains socket. In the event of a power failure during recording or play, the content may be damaged.
■ The HDD is a temporary storage device
The HDD is not an everlasting storage device for recorded content. Use the HDD as a temporary storage place for one-off viewing, editing, or copying. It is recommended to save the recorded content on a disc or to keep the original data or CDs that they were copied from.
■ Immediately save (backup) all content as soon as you feel there may be a problem with the HDD
If there is an irregularity within the HDD, repetitive strange sounds or problems with picture (block noise, etc.) may result. Using the HDD in this condition may worsen the problem and in the worst case the HDD may no longer be usable. As soon as you notice this type of problem, copy all content to disc and request service. Recorded content (data) on a HDD that has become unusable is unrecoverable.
- When the unit is turned on or off, there may be an unexpected sound. This does not indicate a problem with this unit.
■ Setup precautions
- Do not place in an enclosed area where the rear cooling fan and the cooling vents on the side are covered up.
- Place the unit on a surface that is flat and not subject to vibration or impact.
- Do not place on anything that generates heat like a video cassette recorder, etc.
- Do not place in an area often subject to temperature changes.
- Place in an area where condensation does not occur. Condensation is a phenomenon where moisture forms on a cold surface when there is an extreme
change in temperature. Condensation may cause internal damage to the unit.

- Conditions where condensation may occur
- When there is an extreme change in temperature (moving from a very hot location to a very cold location, or vice versa, or when subjected to an air conditioner or when cooled air directly impacts the unit). When the HDD (warms during operation) is subjected to cold air, condensation may form on the inside of the HDD and may cause damage to the HDD heads, etc. - When there is high humidity or a lot of steam in the room. - During the rainy season.
In the above situation, without turning the unit on, let the unit adjust to the room temperature and wait 2–3 hours until condensation is gone.
■ Cigarette smoke etc. causes malfunction or breakdown
The unit may breakdown if cigarette smoke or bug spray/vapor, etc. gets inside the unit.
■ While operating
- Do not move the unit or subject to vibration or impact. (The HDD may become damaged.)
- Do not remove the AC mains lead from the household mains socket, or flip the power breaker switch. While the unit is on, the HDD is rotating at high speed. Sound or movement due to rotation is normal.
■ When moving the unit
① Turn the unit off. (Wait until "BYE" disappears from the display.) ② Remove the AC mains lead from the household mains socket. ③ Move only after the unit has come to a complete stop (approx. 2 minutes) in order to avoid subjecting to vibration and shock. (Even after turning the unit off, the HDD continues operating for a short time.)
■ HDD recording time remaining
This unit records using a VBR (Variable bit rate) data compression system to vary recorded data segments to match video data segments which may cause differences in the displayed amount of time and space remaining for recording.
If the remaining amount of time is insufficient, delete any unwanted titles to create enough space before you start recording. (Deleting a playlist will not increase the amount of time.)
■ Indemnity concerning recorded content
Panasonic does not accept any responsibility for damages directly or indirectly due to any type of problems that result in loss of recording or edited content (data), and does not guarantee any content if recording or editing does not work properly. Likewise, the above also applies in a case where any type of repair is made to the unit (including any other non-HDD related component).
Unit care
The precision parts in this unit are readily affected by the environment, especially temperature, humidity, and dust. Cigarette smoke also can cause malfunction or breakdown.
To clean this unit, wipe with a soft, dry cloth.
- Never use alcohol, paint thinner or benzine to clean this unit.
- Before using chemically treated cloth, carefully read the instructions that came with the cloth.
Observe the following points to ensure continued listening and viewing pleasure.
Dust and dirt may adhere to the unit's lens over time, making it impossible to record or play discs.
Use the DVD lens cleaner (not included) about once every year, depending on frequency of use and the operating environment.
Carefully read the lens cleaner's instructions before use.
DVD lens cleaner: RP-CL720E
- This lens cleaner may not be for sale depending on the region.
Do not place the unit on amplifiers or equipment that may become hot.
The heat can damage the unit.
DO NOT
Note
Do not obstruct the rear panel's internal cooling fan.
Before moving the unit, ensure the disc tray is empty. Failure to do so will risk severely damaging the disc and the unit.

Select the channel
1 Turn on the television and select the appropriate AV input to suit the connections to this unit. 2 Press [⏻] to turn the unit on. 3 Press [∧ ∨ CH] to select the channel.
Every time you change the station, digital channel information appears automatically.

- You can also select the channel with the numbered buttons.
Select the station from Channel List
Selection of channel is made easy by creating a Favourite of the channels you watch often. (⇒ 62, Favourites Edit)
1 Press [LIST].
Channel List is displayed.

①: Encrypted stations are marked with a key symbol in the corresponding table. ②: Preview of the selected channel is displayed. ③: Titles of the current programme and next programme are displayed.
2 Press the "Blue" button to select the "Favourite Select".
The "Favourite Select" changes in the following order: All Channels → TV → Radio → created Favourites (⇔ 62, Favourites Edit) → All Channels
3 Press [▲, ▼] to select the station and press [OK].
- It is possible to select the station with the numbered buttons too.
4 Press [OK] again.
Image of the selected station is displayed.
To sort the stations in alphabetical order:
Press the "Red" button to change the sorting mode.
- For alphabetical sorting mode, skip backwards or forwards by a letter with [◀, ▶].
To switch to the Multi Video screen:
① Press the "Yellow" button. - The additionally available channels of the selected station are displayed. ② Press [▲, ▼] to select the channel and press [OK]. ③ Press [OK] again. - Press the "Yellow" button to return to the Channel List. * Only for stations broadcasting in Multi Video.
Note
- Alphabetical sorting of the created Favourites is not possible in the Channel List.
- It is possible to display the Channel List while watching the television by pressing [OK].
- The Channel List is not displayed while recording, except with High-Speed Copy.
- Timer Recordings of Multi Video stations always record the main channel.
To show DVB Subtitle
When "Subtitle" appears in digital channel information (→ 17)
Press [STTL]
- Press again to hide the subtitle.
- Programmes are recorded with subtitle when you record them with the subtitle displayed (→ 19). ●Language of the DVB Subtitle can be changed. (→ 17)
To show Teletext
You can enjoy Teletext broadcasting, including news, weather forecasts and subtitles, if this service is provided by the broadcasters. - You can check if the programme has Teletext information. "TXT" is indicated on the digital channel information (→ 17).
Basic Teletext viewing
1 While viewing the programme
Press [TEXT]
Teletext screen appears.

2 Follow the on-screen instructions.
You can use the numbered buttons, the cursor buttons [▲, ▼] and the coloured buttons.
Using Teletext conveniently
After performing step 1 (⇒ 16, right column)
Press [OPTION] and press the corresponding colour button.
| Reveal hidden dataE? | Displays the hidden messages. (e.g., quiz page answers)Press the “Red” button.Press the “Red” button again to hide messages. |
| Change the screen sizeE÷ | You can change the Teletext screen size.Press the “Green” button.Each press of the “Green” button changes the display.(Normal)![PANASONIC Diga DMR-EX72S - Press [OPTION] and press the corresponding colour button. - 1](/content/2026/05/1021228/images/e9c63f9d7118994a6076ee0476b88a12282211952d585551455eeffb1fcc2d4d.jpg) |
| View temporarily a TV programme while the Teletext screen is being displayedEX | Press the “Yellow” button.App whe is cc ![PANASONIC Diga DMR-EX72S - Press [OPTION] and press the corresponding colour button. - 2](/content/2026/05/1021228/images/b068158e8d5d2f05650d0ba2be2c36adb2f6d046abb598b888d823422bd5a523.jpg) Press the “Yellow” button again to return to the update page. Press the “Yellow” button again to return to the update page. |
| View sub pageED | If there are one or more sub pages, then the corresponding sub pages can be displayed.1 Press the “Blue” button.![PANASONIC Diga DMR-EX72S - Press [OPTION] and press the corresponding colour button. - 3](/content/2026/05/1021228/images/66200de6c8773eddc21e7bbc6365ac4f89c9deed47ce0f2927696d853e1d32ce.jpg) 2 Enter a 4-digit number of the desired sub page with the numbered buttons.Sub page is displayed. 2 Enter a 4-digit number of the desired sub page with the numbered buttons.Sub page is displayed.![PANASONIC Diga DMR-EX72S - Press [OPTION] and press the corresponding colour button. - 4](/content/2026/05/1021228/images/9f98ba718a1c7f0943defbbb125e06cec86f17a6068260a6a021a71ab06b6501.jpg) You can also select the sub page with [◀, ▶].It may take some time for searching, during which time you can watch TV (→ above). You can also select the sub page with [◀, ▶].It may take some time for searching, during which time you can watch TV (→ above). |
Note
●The Teletext data received may not be displayed appropriately. - If a lot of Teletext information is available, then it may take a while to be displayed. - Characters of the Teletext can be changed with "Teletext Character Set" in "Display" of the Setup menu. (⇒ 67)
To select a language for DVB multi audio or DVB subtitle
When there are multiple audio or subtitle in the current channel, you can select a language.
1 Press [DISPLAY]. 2 Press [▲, ▼] to select the "Sound" menu or "Other" menu and press [▶]. 3 Press [▲, ▼] to select “DVB Multi Audio” or “DVB Subtitle” and press [▶].
e.g., DVB Multi Audio

4 Press [▲, ▼] to select the language.
Digital channel information
While stopped
Press [STATUS] to show the information screen.

To switch information of the current programme and the next programme
Press [◀, ▶].
To show detailed information about the programme
Press [STATUS] again (only when info is displayed).
To hide the information screen
Press [STATUS] once or twice.
Signal Quality
No Signal: The digital broadcast signal is not being received.
No Service: No broadcasts are currently available.
If "No Signal" is displayed:
- Adjust the position and direction of the satellite dish.
- Check that the current digital broadcast channel is correctly broadcasting.
Note
You can also select the other channel when the information screen is displayed by pressing [▲, ▼] and [OK].
Playing recorded video contents/Playing play-only discs
Refer to "Advanced playback" (=> 31) for detail information.

Preparation
- Turn on the television and select the appropriate AV input to suit the connections to this unit.
- Turn on this unit.
1 Press [DRIVE SELECT] to select the HDD or DVD drive.
The HDD or DVD indicator lights up on the unit's display.
2 If you selected the DVD drive:
Press [▲ OPEN/CLOSE] on the main unit to open the tray and insert a disc.
- Press the button again to close the tray.
3 Press [▶] (PLAY).
HDD RAM -R -R DL -RW(V) +R +R DL +RW -RW(VR) Play starts from the most recently recorded title.
DVD-V VCD
Play starts from the point specified by the disc.
CD
Play starts from the beginning of the disc.
Menu operation for other types of contents:
- DivX (⇒ 34) ●MP3/WMA (⇒ 36) ● Still pictures (JPEG) (⇒ 36) ●Music on HDD (⇒ 33) ●Music CD (→ 33)
Note
- During recording, timer recording standby, or EXT LINK standby, this unit cannot play discs or titles that do not match the "TV System" (⇔ 67) setting. It is recommended that "TV System" (PAL/NTSC) be set to match the discs or titles before playing them.
- Depending on the disc, it may take time for the menu screen, pictures, sound, etc. to start.
- The producer of the disc can control how discs are played. So you may not always be able to control play as described in these operating instructions. Read the disc's instructions carefully.
■ When a menu screen appears on the television
DVD-V
Press [▲, ▼, ◀, ▶] to select the item and press [OK]. - Some items can also be selected using the numbered buttons. - If you are instructed to press the "ENTER" button by the menu screen or the disc's instruction document, press [OK].
VCD
Press the numbered buttons to select the item.
e.g., 5: [0] ⇒ [5] 15: [1] ⇒ [5]
• To return to the menu screen
DVD-V
1 Press [OPTION].
2 Press [▲, ▼] to select "Top Menu" or "Menu" and press [OK].
VCD
Press [RETURN]
Note
Discs continue to rotate while menus are displayed. Press [■] when you have finished playback to protect the unit's motor, your television screen and so on.
Recording television programmes
Refer to "Notes for recording" (=> 22) and "Advanced recording" (=> 23) for detailed information.

HDD RAM -R -RW(V) +R +RW
- RAM -RW(V) +R +RW To use a new disc, formatting is necessary.
- When recording a digital radio broadcast or a digital broadcast that is not being received correctly, the digital channel information (=> 17) is also recorded and remains visible during playback.
Preparation
- Turn on the television and select the appropriate AV input to suit the connections to this unit.
- Turn on this unit.
1 Press [DRIVE SELECT] to select the HDD or DVD drive.
The HDD or DVD indicator lights up on the unit's display.
2 If you selected the DVD drive
Press [▲ OPEN/CLOSE] on the main unit to open the tray and insert a disc.
- Press the button again to close the tray.
3 Press [∧ ∨ CH] to select the channel.
![To select with the numbered buttons: e.g., 5: [0] ⇒[0] ⇒[0] ⇒[5] 15: [0] ⇒[0] ⇒[1] ⇒[5] 115: [0] ⇒[1] ⇒[1] ⇒[5] 1115: [1] ⇒[1] ⇒[1] ⇒[5]](/content/2026/05/1021228/images/3ddd14f9c65d46978a52f576ae1ac05bf509a6eb58e25dd8b9ad538f14768747.jpg)
4 Press [REC MODE] to select the recording mode (XP, SP, LP or EP).
- Recording modes and approximate recording times (→ 23)
![PANASONIC Diga DMR-EX72S - Press [REC MODE] to select the recording mode (XP, SP, LP or EP). - 1](/content/2026/05/1021228/images/a5accba374ef3581b1f6a91dc70c4b23f628f223a4a03d9b8a2123ae9fc58f02.jpg)
- To record sound using LPCM (XP mode only): Set the "Audio Mode for XP Recording" to "LPCM" in the Setup menu (⇒ 66).
5 Press [● REC] to start recording.
![PANASONIC Diga DMR-EX72S - Press [● REC] to start recording. - 1](/content/2026/05/1021228/images/5c2503b3760588e0739da2b43fee1e22b7d98fd9fdc5985188acac303489b0aa.jpg)
Recording will take place on open space on the HDD or on disc. Data will not be overwritten.
- You cannot change the channel or recording mode during recording.
- You can record while the unit is in standby for timer recording. However, once the time for the timer recording to begin is reached, any recording taking place will stop and the timer recording will begin.
- USB It is not possible to record on a USB memory.
- Video will not be recorded to DVD-R discs which include JPEG images.
■ To pause recording
Press [11].
Press again to restart recording.
You can also press [● REC] to restart.
Title is not split into separate titles.
■ To stop recording
Press [■].
- From the start to the end of the recording is called one title.
- -R -RW(V) +R +RW It takes about 30 seconds for the unit to complete recording management information after recording finishes. In order to play DVD-R, DVD-RW (DVD-Video format) and +R (recorded with this unit) on other DVD players, it is necessary to finalise them (⇔ 61). In order to play +RW on other players, we recommend you to create a top menu. (⇒ 61)
When recording digital broadcast with subtitle or multiple audio
If a programme to record has subtitle or multiple audio, you can record with subtitle or selected audio.
To record with subtitle
Before start recording, press [STTL] to show the subtitle
If the programme has multiple subtitles, select the desired language. (→ 17)
- Subtitle cannot be switched after recording.
To record with the selected audio
Before start recording, select the desired language for audio (→ 17).
To specify a time to stop recording— One Touch Recording
HDD RAM -R -RW(V) +R +RW
During recording
Press [● REC] on the main unit to select the recording time.
- You can specify up to 4 hours later. The unit display changes as shown below: OFF 0:30 → OFF 1:00 → OFF 1:30 → OFF 2:00
Counter (cancel) ← OFF 4:00 ← OFF 3:00
- This does not work during timer recordings (⇒ 20, 27) or while using Flexible Recording (⇒ 24).
- The unit turns off automatically after the time to stop recording is reached.
To cancel
Press [● REC] on the main unit several times until the counter appears.
- The time to stop recording is cancelled; however, recording continues.
To stop recording
Press [■].
Timer recording
Refer to "Advanced timer recording" (⇒ 27–30) for detailed information.

See also "Notes for recording" (⇒ 22).
Depending on the type of disc used for recording or the type of broadcast, there may be restrictions on the title you are trying to record.
HDD RAM -R -RW(V) +R +RW
- You can enter up to 32 programmes up to a month in advance. (Each daily or weekly programme is counted as one programme.)
RAM -RW(V) +R +RW
- To use a new disc, formatting is necessary.
Note
You cannot switch subtitles during timer recording.
Preparation
- Turn on the television and select the appropriate video input to suit the connections to this unit.
- If recording to DVD, insert a disc that you can use for recording (⇒ 10, 13).
- Make sure that the clock settings are correct (⇒ 69).
Using the TV Guide system to make timer recordings
TV Guide system provides programme information only from the digital satellite broadcasts station displayed on the television like a TV programme magazine.
Days and contents of the displayed TV Guide are set to optimal by the Country Setting. When the "TV Guide Type" in the Setup menu is changed, the stations displayed in the TV Guide are also changed. (⇔ 69)
Note
- TV Guide does not work if the clock is not set correctly.
- If the unit is disconnected from the AC mains, all programme data are not updated.
- Depending on the region or language etc., the TV Guide screen may be different to the actual screen.
- When "No TV Guide data available. Please download TV Guide data by "TV Guide Update Search Now" in Setup." message is displayed instead of the TV Guide, execute the "TV Guide Update Search Now" in the Setup menu. (→ 69)
1 Press [GUIDE].

2 Press [▲, ▼, ◀, ▶] to select the future programme and press [OK].
- If "Selection Screen" is displayed, press [▲, ▼] to select "Rec." and press [OK].
![PANASONIC Diga DMR-EX72S - Press [▲, ▼, ◀, ▶] to select the future programme and press [OK]. - 1](/content/2026/05/1021228/images/efb9715f4854754f7525c587b4c766528b59b7f84949c8cd6cf590f1a3bf42d7.jpg)
- Confirm the programme (start and end time) by using a TV magazine, etc. and make corrections if necessary using [▲, ▼, ◀, ▶] (⇒ 27, left column, step 3).
3 Press [OK].
The timer programme is stored and the timer icon is displayed.
![PANASONIC Diga DMR-EX72S - Press [OK]. - 1](/content/2026/05/1021228/images/d298c8dd6fe3c37409299b0d2bcc7abfb16c027d66a4e6b6050ab4ccae6f14aa.jpg)
“◎” lights on the unit’s display to indicate timer recording standby has been activated. Repeat steps 2–3 to programme other recordings. Press [◎] to turn the unit off.
Note
- If "NTSC" has been selected for "TV System" (→ 67), the TV Guide system cannot be used.
- If setting timer recording using the TV Guide system, the start recording time and finish recording time can be set to a margin of up to 10 minutes. (⇒ 65, Start Recording Time, Finish Recording Time)
■ To cancel a timer recording on the TV Guide screen
① Press [▲, ▼, ◀, ▶] to select the programme in the TV Guide and press [OK]. "Selection Screen" appears. ② Press [▲, ▼] to select "Delete" and press [OK]. ③ Press [◀, ▶] to select "Yes" and press [OK]. ("⊕" in the TV Guide disappears.)
■ To cancel recording when recording has already begun (→ 27)
■ To release the unit from recording standby (→ 27)
■ Notes on timer recording (→ 28)

HDD RAM -R -R DL -RW(V) +R +R DL +RW
(You cannot delete items on finalised discs.)
- A title cannot be restored once it is deleted. Make certain before proceeding.
- You cannot delete while recording or copying.
Preparation
- Press [DRIVE SELECT] to select the HDD or DVD drive. • RAM Release protection (→ 59, Setting the protection).
■ Available disc space after deleting
- HDD RAM The space deleted becomes available for recording.

- -RW(V) +RW Available recording space increases only when the last recorded title is deleted.


This space becomes available for recording after all the later recorded titles are deleted.
- -R -R DL +R +R DL Available space does not increase even after the contents are deleted.
Using the DELETE Navigator to delete
1 While stopped
Press [FUNCTION MENU].
2 Press [▲, ▼] to select "Delete" and press [OK]. 3 Press [▲, ▼] to select "Video" and press [OK].

4 Press [▲, ▼, ◀, ▶] to select the title and press [Ⅱ].
A check mark is displayed. Repeat this step until you select all necessary items. - Press [11] again to cancel.
To show other pages
Press [◀◀, ▶▶] to show other pages.
You can confirm the titles, that you have selected using the option menu. - Refer to option menu operations for the "Title View" (⇒ 42, step 4).
5 Press [OK].
6 Press [◀, ▶] to select "Delete" and press [OK].
The title is deleted.
To return to the previous screen
Press [RETURN]
To exit the screen
Press [EXIT].
Deleting during play
1 While playing
Press [DELETE *].
2 Press [◀, ▶] to select "Delete" and press [OK].
The title is deleted.
Notes for recording
| Selecting Audio and Subtitles for Recording | Broadcast in multi-channel sound or subtitle:You can select the audio or subtitle language when receiving audio or subtitle in multi-channel broadcast ["Multi Audio" or "Subtitle" appears at the bottom of digital channel information display (⇒ 17)].• You cannot change audio or subtitles upon completion of the recording.When recording, you can turn the subtitles on or off by pressing [STTL E] Please note that on-screen indications, such as "Subtitles On", can also be recorded. | 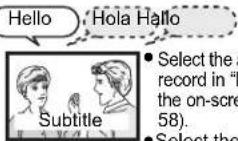 audio that you want to DVB Multi Audio" in en menu (⇒ 17,-select the subtitle you want to record in "DVB Subtitle" in the on-screen menu. (⇒ 17,58) audio that you want to DVB Multi Audio" in en menu (⇒ 17,-select the subtitle you want to record in "DVB Subtitle" in the on-screen menu. (⇒ 17,58) |
| About the aspect when recording a programme | HDD RAM (When "Rec for High Speed Copy" is set to "On")R-RW(V)If "Aspect for Recording" in the Setup menu is set to "Automatic" (The default setting is "4:3" ⇒ 65), the programme will be recorded in the original aspect used when recording started (including when recording started at a commercial, etc.). If recorded with a different aspect, select the correct aspect ("16:9" or "4:3").However, in the following case, programme will be recorded in 4:3.•R-RW(V) Programme recorded using "EP" or "FR (recordings 5 hours or longer)" recording modes will be recorded in 4:3 aspect. | 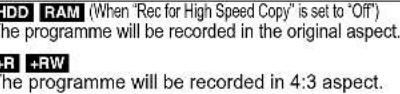  |
| When you want to copy titles in high speed mode from the HDD to DVD-R, etc. | -R-R DL-RW(V)+R+R DL+RWSet "Rec for High Speed Copy" to "On" before recording to the HDD.(The default setting is "On". ⇒ 65)You can copy titles in high speed mode (max. speed is 75X*); however, the audio and aspect settings (⇒ above) are necessary before recording to the HDD.* Depending on the disc, max. speed may vary.Record to the HDD:XWXZ]In the following cases, high speed mode does not work.+R+R DL+RW Titles recorded in "EP" mode and "FR (recordings 5 hours or longer)" mode+R+R DL+RW Titles recorded in 16:9 aspect-R-R DL-RW(V) Titles recorded in 16:9 aspect using "EP" mode or "FR" (recordings 5 hours or longer) mode | |
| When recording the "One time only recording" broadcasts | It is not possible to record the broadcasts that allow "One time only recording" onto DVD-R, DVD-RW, +R, +RW or 8 cm DVD-RAM discs. Use the HDD or CPRM (⇒ 85) compatible DVD-RAM.RAM CPRM compatible discs only.   (○: Can do, -: Cannot do)*One time only recording" titles can only be transferred from the HDD to CPRM compatible DVD-RAM (They are deleted from the HDD). They cannot be copied.Even when copying to videotape the title may not be copied correctly because of the copy guard.You cannot copy a playlist created from "One time only recording" titles. (○: Can do, -: Cannot do)*One time only recording" titles can only be transferred from the HDD to CPRM compatible DVD-RAM (They are deleted from the HDD). They cannot be copied.Even when copying to videotape the title may not be copied correctly because of the copy guard.You cannot copy a playlist created from "One time only recording" titles. | |
| Playing the disc on other DVD players | -R-R DL-RW(V)+R+R DLThe disc must be finalised after recording or copying (⇒ 61).It is necessary to finalise DVD-R, etc. on this unit after recording or copying titles to them. You can then play them as a commercially sold DVD-Video. However, the discs become play-only and you can no longer record or copy.* You can record and copy again if you format DVD-RW.   +RW If the disc failed to play on other equipment, we recommend you create top menu (⇒ 61). +RW If the disc failed to play on other equipment, we recommend you create top menu (⇒ 61). | |
| Recording to DVD-R DL and +R DL | You cannot directly record to a DVD-R DL and +R DL disc on this unit.Record to the HDD and then copy to the disc. | |
- It is not possible to record to both the HDD and the DVD drive simultaneously.
Advanced recording
Recording modes and approximate recording times
Depending on the content being recorded, the recording times may become shorter than indicated. (The times provided on this chart are an estimate.)
| Recording Mode HDD | (160 GB) | DVD-RAM DVD-R | DVD-RW +R +RW (4.7 GB) | DVD-R DL*3 (8.5 GB) | +R DL*3 (8.5 GB) | |
| Single-sided (4.7 GB) | Double-sided*1 (9.4 GB) | |||||
| XP (High picture quality recording mode) | 35 hours 1 hour | 2 hours 1 hour | 1 hour 45 min. 1 hour 45 min. | |||
| SP (Standard recording mode) | 70 hours 2 hours | 4 hours 2 hours | 3 hours 35 min. | 3 hours 35 min. | ||
| LP (Long recording mode) | 140 hours 4 hours | 8 hours 4 hours | 7 hours 10 min. | 7 hours 10 min. | ||
| EP (Extra long recording mode)*4 | 279 hours (209 hours*2) | 8 hours (6 hours*2) | 16 hours (12 hours*2) | 8 hours (6 hours*2) | 14 hours 20 min. (10 hours 45 min.*2) | |
| FR (Flexible Recording Mode)*4 | 279 hours maximum | 8 hours maximum | 8 hours maximum for one side | 8 hours maximum | 14 hours 20 min. | Approximately 9 hours with video quality equivalent to LP mode. |
*1 It is not possible to record or play continuously from one side of a double-sided disc to the other. *2 When "Recording time in EP mode" is set to "EP (6Hours)" in the Setup menu (→ 65). The sound quality is better when using "EP (6Hours)" than when using "EP (8Hours)". *3 You cannot record directly to DVD-R DL and +R DL discs with this unit. The table shows the recording time when copying. +R DL You cannot copy in "EP" or "FR (recordings 5 hours or longer)" mode. *4 When recording to the HDD in "EP" or "FR (recordings 5 hours or longer)" mode, you cannot perform high-speed copy to +R, +R DL or +RW discs. - RAM When recording to DVD-RAM using "EP (8Hours)" mode, play may not be possible on DVD players that are compatible with DVD-RAM. Use "EP (6Hours)" mode if playback may be on other equipment.
HDD
- You can record up to 499 titles on HDD. (When continuously recording for long durations, titles are automatically divided every 8 hours.)
RAM -R -RW(V)
- You can record up to 99 titles on one disc.
+R +RW
- You can record up to 49 titles on one disc.
FR (Flexible Recording Mode)
You can set FR (Flexible Recording) mode when copying or programming timer recordings. The unit automatically selects a recording rate between XP and EP (8Hours) that will enable the recordings to fit in the remaining disc space with the best possible recording quality. For example with a 90-minute recording to an unused DVD-RAM, the picture quality is adjusted to between "XP" and "SP". - When recording to the HDD, picture quality is automatically adjusted to precisely fit a copied title on a 4.7 GB disc. - All the recording modes from XP to EP appear in the display.
When the format confirmation screen is displayed
RAM -RW(V) +R +R DL +RW
When you insert a new disc or a disc recorded on a computer or other equipment, a format confirmation screen is displayed. Format the disc to use it. However, all the recorded contents are deleted.

Press [◀, ▶] to select "Yes" and press [OK].
To format a disc
"Deleting all the contents—Format" (⇒ 60)
When removing a recorded disc
-R -R DL -RW(V) +R +R DL
The following screen appears when you have not processed the disc for play on other equipment.

■ To finalise the disc
Press [● REC] on the main unit.
- You cannot stop this process once you have started it.
- If you want to set the background, play menu select or provide a disc name, select "Top Menu" (→ 61), "Auto-Play Select" (→ 61) or "Disc Name" (→ 59) in "DVD Management" before finalising.
■ To open the tray without disc finalisation
Press [▲ OPEN/CLOSE] on the main unit.
Flexible Recording
(Recording that fits the remaining disc space)
HDD RAM -R -RW(V) +R +RW
The unit sets the best possible picture quality that fits the recording within the remaining disc space. The recording mode becomes FR mode.
■ Using "Flexible Rec" is convenient in these kinds of situations.
RAM -R -RW(V) +R +RW
- When the amount of free space on the disc makes selecting an appropriate recording mode difficult
- When you want to record a long programme with the best picture quality possible
HDD
- When you want to record a title to HDD so that it can then be copied to fit one 4.7 GB disc perfectly
- You do not need to edit the recorded title, or change the recording mode when copying, to fit the disc space.
e.g., Recording a 90-minute programme to disc
If you select XP mode, the programme will not fit one disc.


If you try to record a 90-minute programme in XP mode, only the first 60 minutes will fit on the disc and the 30-minute balance will not get recorded.
Another disc is necessary.
If you select SP mode, the programme will fit one disc.

However there will be 30 minutes remaining disc space.
If you select "Flexible Rec" the programme will fit one disc perfectly.

Necessary space for recording
Preparation
- Select the channel or the external input to record.
- Press [DRIVE SELECT] to select the HDD or DVD drive.
1 Press [FUNCTION MENU].
2 Press [▲, ▼] to select "Others" and press [OK].
3 Press [▲, ▼] to select "Flexible Rec" and press [OK].
![PANASONIC Diga DMR-EX72S - Press [▲, ▼] to select "Flexible Rec" and press [OK]. - 1](/content/2026/05/1021228/images/6a61316aa1c632820bfcf5eff4d50cef3787283f90736fe882405f22710b9062.jpg)
Maximum recording time This is the maximum recording time in EP (8Hours) mode.
4 Press [◀, ▶] to select "Hour" and "Min." and press [▲, ▼] to set the recording time.
- You can also set the recording time with the numbered buttons.
- You cannot record more than 8 hours.
5 When you want to start recording
Press [▲, ▼, ◀, ▶] to select "Start" and press [OK].
To exit the screen without recording, press [RETURN].
To stop recording partway, press [■].
To show the remaining time, press [STATUS].
e.g., HDD
Remaining time of recording

Playing while you are recording
HDD RAM
Playing from the beginning of the title you are recording—Chasing playback
Press [▶] (PLAY) during recording.
There is no sound output while searching forward or backward.
To stop play
Press [■].
To stop recording
2 seconds after play stops, press [■].
To stop timer recording
2 seconds after play stops
1 Press [■].
2 Press [◀, ▶] to select "Stop Recording" and press [OK].
Playing a title previously recorded while recording—Simultaneous rec and play
- You can also change the drive and play while recording. Press [DRIVE SELECT].
1 Press [DIRECT NAVIGATOR] during recording.
2 Press [▲, ▼, ◀, ▶] to select a title and press [OK].
- There is no sound output while searching forward or backward.
To stop play
Press [■].
To exit the DIRECT NAVIGATOR screen
Press [DIRECT NAVIGATOR].
To stop recording/To stop timer recording
After play stops
1 Press [DIRECT NAVIGATOR] to exit screen.
2 Press [■].
3 If the recording stop confirmation screen is displayed, press [◀, ▶] to select "Yes" or "Stop Recording" and press [OK].
Note
"Chasing playback" and "Simultaneous rec and play" can only be used with programmes of the same encoding system (PAL/NTSC).
Recording broadcasts from external equipment
HDD RAM -R -RW(V) +R +RW
See also "Notes for recording" (⇒ 22).
Making timer recordings on the television
HDD
To make a timer recording with your television, connect to a television with a Q Link function (⇒ 38) that you can use for setting timer recordings using a fully wired 21-pin Scart cable (⇒ 6).
1 Make timer programming on the TV.
2 Turn off this unit.
The start and end of recording is controlled by the TV. ●The titles are recorded to the HDD.
To stop recording
Press [■].
Note
- When this unit is in EXT LINK standby ("EXT-L" is shown on the unit's display), recording from television does not start.
- Programmes are recorded as one title on this unit when the end time of the earlier timer recording and the start time of the later timer recording are close to each other. To divide the titles, go to "Divide Title" (⇒ 43).
Linked timer recordings with external equipment — EXT LINK
To record programmes from digital satellite receiver using timer programming
Preparation
- Make sure you connect the AV2 input terminal of this unit to the Scart terminal of a VCR or a Set Top Box with a 21-pin Scart cable (73).
- Set "AV2 Input" to match the connected equipment in the Setup menu (⇒ 68).
- Set "Ext Link" to match the connected equipment in the Setup menu (→ 68).
1 Make timer programming on the external equipment.
2 Press [DRIVE SELECT] to select the HDD or DVD drive.
If you selected the DVD drive, insert a disc (⇒ 13).
3 Press [EXT LINK].
The unit turns off and "EXT-L" lights on the unit's display to indicate timer recording standby has been activated.
To cancel the external control
Press [EXT LINK] to stop recording or to cancel linked timer recording standby.
- In order to prevent accidental operation, press [EXT LINK] to cancel the setting after recording is finished.
Note
- This function does not work when "TV System" is set to "NTSC" in the Setup menu (⇒ 67).
- This function does not work with some equipment. Refer to the equipment's operating instructions.
- The beginnings of recordings may not be recorded correctly in some cases.
- Programmes are recorded as one title on this unit when the end time of the earlier timer recording and the start time of the later timer recording are close to each other. HDD RAM To divide the titles, go to "Divide Title" (→ 43).
- When this unit is in EXT LINK standby ("EXT-L" is shown on the unit's display), the TV Guide data cannot be downloaded.
- While the unit is in EXT LINK standby mode or recording, video picture is from the AV2 input terminal irrespective of "AV1 Output" setting (⇒ 68).
- During EXT LINK standby mode or recording, playback is only available from the drive performing the recording.
- When "EXT-L" lights on the unit's display, Direct TV Recording is unavailable.
- While the unit is in EXT LINK standby mode or recording, most operations on this unit are prohibited ([▲ OPEN/CLOSE], [cbl] etc.). When you operate, press [EXT LINK] to cancel EXT LINK standby mode or recording (This unit turns on and "EXT-L" disappears.).
Copying from a video cassette recorder
e.g., Connecting to the AV3 or DV input terminals on the front
- Turn off the unit and other video equipment before connecting.

If the audio output of the other equipment is monaural
Connect to L/MONO on the AV3 input terminals at the front.
21 The S VIDEO terminal achieves a more vivid picture than the VIDEO terminal.
×2 Connect to terminals of the same colour
When recording from the unit's DV terminal
- Select the type of audio recording from "Audio Mode for DV Input" in the Setup menu (⇒ 66).
- When recording from DV equipment (e.g., digital video camcorder), you can record audio/video recordings from DV tape only.
- When "Rec for High Speed Copy" (⇒ 65) is set to "On" and you make a copy, the copy will be made using the picture size selected in "Aspect for Recording" (⇒ 65) of the Setup menu.
About the aspect when recording a programme (⇒ 22)
Note
- If it becomes time for a timer recording to start while copying, the recording will start and the copying will stop.
- If video is copied from another piece of equipment to this unit, then the video quality will be degraded.
Manual recording
HDD RAM -R -RW(V) +R +RW
Preparation
- Press [DRIVE SELECT] to select the HDD or DVD drive.
- Press [REC MODE] to select the recording mode.
- When the output signal from the external equipment is NTSC, change the "TV System" to "NTSC" in the Setup menu (⇒ 67). This unit cannot record NTSC signals to discs that already have PAL signal recordings. (However, both types of programmes can be recorded onto the HDD.)
- To reduce noise in input from a video cassette recorder, set "Input NR" to "On" in the on-screen menu (⇒ 57).
- Check the time on the unit is correct.
1 While stopped
Press [INPUT SELECT] to select the input channel for the equipment you have connected.
e.g., If you have connected to AV3 input terminals, select "AV3".
2 Start play on the other equipment.
3 When you want to start recording
Press [● REC].
Recording starts.
To skip unwanted parts
Press [11] to pause recording. (Press again to restart recording.)
To stop recording
Press [■]
Almost all videos and DVD-Video on sale have been treated to prevent illegal copying. Any software that has been so treated cannot be recorded using this unit.
- Using Flexible Recording (→ 24), you can record the content of a video cassette (approx. 1–8 hours) to a 4.7 GB disc with the best possible quality of recording without wasting disc space.
RQT9313
DV automatic recording (DV Auto Rec)
HDD RAM -R -RW(V) +R +RW
HDD RAM When the "DV Auto Rec" function is used, programmes are recorded as a title while at the same time chapters are created at each break in the images and the playlist is created automatically.
Preparation
1 Turn off the main unit and DV equipment, then connect the equipment with the unit's DV input terminal (→ left). 2 Turn on the main unit. - When the output signal from the external equipment is NTSC, change the "TV System" to "NTSC" in the Setup menu (→ 67).
1 Turn on the DV equipment, and pause play at the point you want recording to start.
The following screen appears.

- When the screen is not displayed
After performing step 1
1 Press [DRIVE SELECT] to select the HDD or DVD drive. 2 Press [FUNCTION MENU].
3 Press [▲, ▼] to select "Others" and press [OK].
4 Press [▲, ▼] to select "DV Auto Rec" and press [OK].
⇒ Go to step 3 (⇒ below)
2 Press [◀, ▶] to select "Rec to HDD" or "Rec to DVD" and press [OK].
3 Press [REC MODE] to select the recording mode.
4 Press [◀, ▶] to select "Rec" and press [OK].
Recording starts.
When recording finishes
The confirmation screen appears. Press [OK] to finish DV automatic recording.
To stop recording
Press [■].
Note
- Only one piece of DV equipment (e.g., digital video camcorder) can be connected to the unit via the DV input terminal.
- It is not possible to operate the unit from the connected DV equipment.
- The DV input on this unit is for use with DV equipment only. (It cannot be connected to a computer, etc.) The DV equipment name may not be shown correctly.
- Depending on the DV equipment, the images or audio may not be input properly.
- The date and time information on the tape of the DV equipment will not be recorded.
- You cannot record and play simultaneously.
If the DV automatic recording function does not work properly, check the connections and DV equipment settings, and turn the unit off and back on.
If that does not work, follow the instructions for manual recording (see left).
Advanced timer recording
HDD RAM -R -RW(V) +R +RW
- You can enter up to 32 programmes up to a month in advance. (Each daily or weekly programme is counted as one programme.)
RAM -RW(V) +R +RW
- To use a new disc, formatting is necessary.
Note
You cannot switch subtitles during timer recording.
Preparation
- Turn on the television and select the appropriate video input to suit the connections to this unit.
- If recording to DVD, insert a disc that you can use for recording (⇒ 10, 13).
- Make sure that the clock settings are correct (→ 69).
Manually programming timer recordings
1 Press [PROG/CHECK].
![PANASONIC Diga DMR-EX72S - Press [PROG/CHECK]. - 1](/content/2026/05/1021228/images/17ce4411065a34a86e1a9a9bbb86e69b76c27d29147182465e006636ba39165e.jpg)
2 Press [▲, ▼] to select "New Timer Programme" and press [OK].
3 Press [▶] to move through the items and change the items with [▲, ▼].
![PANASONIC Diga DMR-EX72S - Press [▶] to move through the items and change the items with [▲, ▼]. - 1](/content/2026/05/1021228/images/2eefeb2b35773ed6f2f06cc28e28a3eeb50e28fba6c620ef92383bcb89f99e38.jpg)
- When "Channel" is selected, you can press the "Blue" button to change the category [e.g., TV, Radio, Favourite (⇒ 62)] and then press [▲, ▼] to select the channel you want to record.
- Press and hold [▲, ▼] to alter the Start (Start time) and Stop (Finish time) in 30-minute increments.
- You can also set Channel (Programme position/TV Station Name), Date, Start (Start time), and Stop (Finish time) with the numbered buttons.
- Date
![graph TD A["Date: Current date up to one month later minus"] --> B["↓↑"] B --> C["one day"] D["Daily timer: SUN-SAT→MON-SAT→MON-FRI"] --> E["↓↑"] E --> F["Weekly timer: SUN→----SAT"]](/content/2026/05/1021228/images/3bae3d8312a5f5bc14ee52f55eafdfc99862ed68f34ce8fac6dd28828d806f17.jpg)
Titles recorded using the same daily or weekly timer are bundled and displayed as a "group" in the DIRECT NAVIGATOR screen (⇒ 32) except when using Auto Renewal Recording.
- You can also press [DRIVE SELECT] to select the recording drive. When the recording drive is "DVD" and there is not enough remaining space, recording automatically switches to the "HDD" (⇔ right).
- You can also press [REC MODE] to change the recording mode.
• HDD RENEW (Auto Renewal Recording) (⇒ 28) ON ↔ OFF
- Programme Name
Press [◀, ▶] to select "Programme Name" and press [OK]. (⇒ 41, Entering text)
• STTL (Subtitles)
AUTO ↔ OFF
When the "Channel" column is set in AV1, AV2 or AV3, this setting is unavailable.
You can also press [STTL] to switch "STTL" setting. When there are multiple languages, select the subtitle (→ 63, DVB Preferred Language).
4 Press [OK].
The timer programme is stored and the timer icon is displayed.
![PANASONIC Diga DMR-EX72S - Press [OK]. - 1](/content/2026/05/1021228/images/6f4ff78570aace28e11f3f5f7d1e42014a1085352a228218266bc5dfddb1316d.jpg)
“◎” lights on the unit’s display to indicate timer recording standby has been activated.
![PANASONIC Diga DMR-EX72S - Press [OK]. - 2](/content/2026/05/1021228/images/4d22cc80b1e937647bbc231f885e33150618863addfe4b5f10503926e0471fc1.jpg)
Check to make sure "OK" is displayed (→ 28).
Repeat steps 2–4 to programme other recordings. Press [⏻] to turn the unit off.
To cancel recording when recording has already begun
1 While the unit is on
Press [■].

2 Press [◀, ▶] to select "Stop Recording" and press [OK].
If you stop a timer recording, it will be cancelled. However, if you have set a weekly or daily timer recording, the recording will start from the next time the timer recording is set.
To release the unit from recording standby
Even when the unit is turned off, you can display the timer recording list by pressing [PROG/CHECK].
1 Press [PROG/CHECK].
2 Press [▲, ▼] to select the programme and press the "Red" button.
- The timer icon “②” (→ 28) disappears from the timer recording list.
- You cannot cancel timer recording standby mode as long as even one timer icon “④” (→ 28) remains in the timer recording list.
- Press the "Red" button again to activate timer recording standby.
Relief Recording
When the recording drive is "DVD" and there is not enough remaining space, recording automatically switches to the "HDD". If there is no disc in the tray or the disc cannot be recorded on or when timer recording starts while copying, the recording drive will be altered to the HDD.
- The DIRECT NAVIGATOR shows which programmes were relief-recorded ("Is displayed.) (⇒ 32).
- If the time remaining on the HDD is insufficient, as much of the programme as possible will be recorded onto the HDD.
Auto Renewal Recording
HDD
If you record a programme onto HDD repeatedly every day or every week using timer recording, the unit will record the new programme over the old one.
This function can be used only when weekly or daily recording is selected.
1 Press [PROG/CHECK]. 2 Press [▲, ▼] to select the programme and press [OK]. 3 Press [◀, ▶] to select "RENEW" column. 4 Press [▲, ▼] to select "ON" and press [OK].

Note
- If a programme set for Auto Renewal Recording is protected or while playback is taking place from the HDD, or while copying, the programme will not be overwritten. Instead the programme set for recording will be saved as a separate programme, and this programme will be the one to be overwritten when the next Auto Renewal Recording takes place.
- Playlists made from programmes that were set for Auto Renewal Recording are deleted along with auto renewal.
- When there is not enough space on the HDD, the programme may not be recorded completely.
Check, change or delete a programme
- Even when the unit is turned off, you can display the timer recording list by pressing [PROG/CHECK].
Press [PROG/CHECK].
Ⓐ Icons
④ Timer recording standby is activated.
● This programme is currently recording.
Programmes are overlapped. Recording of the programme with the later start time starts when the earlier programme finishes recording.
- You stopped a daily or weekly timer recording. The icon disappears the next time the timer programme starts recording.
The disc was full so the programme failed to record.
The programme was copy-protected so it was not recorded.
The programme did not complete recording because the disc is dirty or some other reason.
Timer programmes set to Auto Renewal Recording (see above).
Titles that have been rerouted to the HDD (Displayed while recording.)
HDD Recording drive is set to HDD
DVD Recording drive is set to DVD
⑧ Message displayed in the "Drive space" line
OK: Displayed if the recording can fit in the remaining space.
→ (Date): For recordings made daily or weekly, the display will show until when recordings can be made (up to a maximum of one month from the present time) based on the time remaining on the disc.
! : It may not be possible to record because:
● there is not enough space left.
● the number of possible titles has reached its maximum.
- programmes are overlapped.
● The timer programme is deactivated.
Relief: Timer programmes that will be recorded to the HDD.
© Channel name, programme name and other information are displayed.
■ To change a programme
Press [▲, ▼] to select the programme and press [OK]. (⇒ 27, left column, step 3)
■ To delete a programme
Press [▲, ▼] to select the programme and press [DELETE *].
You can also delete a programme with the following steps:
1 Press [▲, ▼] to select the programme and press [OPTION].
2 Press [▲, ▼] to select "Delete" and press [OK].
■ To exit the timer recording list, press [PROG/CHECK].
Note
- Programmes that failed to record are deleted from the timer recording list at 4 a.m. two days later.
Language for digital broadcast with multi-audio or multi-subtitle
In timer recording of digital broadcast with multi-audio or multi-subtitle, audio and subtitle language to be recorded will follow the setting of "DVB Preferred Language" in the Setup menu (⇒ 63).
Notes on timer recording
- When a timer recording is set, DVDs that were recorded using a different TV system (PAL/NTSC) cannot be played unless the TV system is changed in the Setup menu (see page 67) or the timer recording has completed or has been cancelled.
- Timer recordings are activated regardless of whether the unit is turned on or off.
- Timer recordings begin when the set time is reached even while playing.
- Timer recordings do not begin while editing or copying in normal speed mode (see page 48).
- If the unit is turned on when timer recording begins, it remains turned on after recording finishes. It does not turn off automatically. You can turn the unit off during timer recording.
- When you programme successive timer recordings to start immediately one after the other, the unit cannot record the part at the beginning of the later programmes.

Operations in the TV Guide system
Press [GUIDE] to switch between Landscape view and Portrait view.
Landscape view

■ To change channels
Landscape view
Press [▲, ▼] to select a channel.
Portrait view
Press [◀, ▶] to select a channel.
The TV Guide list appears for this channel.
To view a programme list for another day
Jump ahead 24 hours
Press the "Green" button to jump ahead by one day.
Jump back 24 hours
Press the "Red" button.
You can only jump back to the current date. Past information
cannot be viewed.
To browse through the TV Guide list
Press [∧ ∨ CH]
To see programme information
(Programmes with the symbol)
Press [STATUS ①]
Additional information (programme name, programme duration,
broadcast time, description) is available for these programmes.
Press [▲, ▼] to scroll up and down.
To show other pages
Press [CH ∧] (Previous) or [v CH] (Next).
Press [STATUS] again to return to the programme list.
■ When the TV Guide displays the empty TV Guide list

- The "empty" field
- Some digital broadcast may not send programme information. - Set the timer recording manually ( ⇒ 27).
- Programme information may be displayed when the setting of the "TV Guide Type" in the Setup menu is changed. (→ 69)
Selecting the programme from the desired programme type or category
This function lets you display a TV Guide list sorted by programme type (e.g. Movies, Sport) or category (e.g. TV).
1 From the desired programme type
Press the "Yellow" button to display the list of programme type.
From the desired category
Press the "Blue" button to display the list of categories.
2 Press [▲, ▼] to select the desired item.
![PANASONIC Diga DMR-EX72S - Press [▲, ▼] to select the desired item. - 1](/content/2026/05/1021228/images/a27a0a873cf535607fdd3820f040908151f040e897aee13a20a358aacb7eefc8.jpg)
3 Press [OK].
●A list appears with all programmes of the selected item.
- When you select the Landscape view, the unit displays programmes in grey that do not belong to the selected programme type.

e.g., Programme type, "News" is selected in step 2 of Landscape view.
Note
The broadcasters allocate individual programmes to topic areas. This function does not work properly unless the information which distinguishes the programme type and categories sent from broadcast stations is correct.
4 Press [▲, ▼, ◀, ▶] to select the programme and press [OK].
When "Timer Recording" screen appears. (→ 20, Timer recording, step 3)
When "Selection Screen" screen appears.
- "View" → 16, Watching digital broadcasts
-"Rec." ⇒ 20, Timer recording
- "Delete" → Timer recordings can be cancelled.
Press [◀, ▶] to select "Yes" and press [OK].
The timer icon disappears.
To return to the previous TV Guide list before you have selected the programme type or categories
Select "All Types" of the programme type and "TV" of the categories in step 2 above.
To return to the previous screen
Press [RETURN]
To exit the screen
Press [EXIT].
Searching for the programme in the TV Guide list
You can search programmes from the TV Guide list based on title information.
Searching by entering words
By entering words, you can search for programmes from the TV Guide list using the programme information.
1 Press [OPTION]. 2 Enter the word you would like to search for and set.
Entry method ⇒ 41, Entering text

3 Press [▲, ▼] to select "Simplified Search" or "Detailed Search" and press [OK].
Simplified Search:
It searches the programme names only. Detailed Search:
It searches all the information on the programmes. It might take more time to search the desired programme.

Search results appear.
4 Press [▲, ▼, ◀, ▶] to select the programme and press [OK].
When "Timer Recording" screen appears. (→ 20, Timer recording, step 3)
When "Selection Screen" screen appears.
-"View" ⇒ 16. Watching digital broadcasts
-“Rec.” ⇒ 20, Timer recording
- "Delete" ⇒ Timer recordings can be cancelled.
Press [◀, ▶] to select "Yes" and press [OK]. The timer icon disappears.
To return to the previous screen
Press [RETURN]
- It may return to the TV Guide screen.
To exit the screen
Press [EXIT].
Searching using programme information of titles recorded to the HDD
HDD
You can search for programmes using programme information of titles recorded to the HDD.
Preparation
Press [DRIVE SELECT] to select the HDD drive.
1 During play or while stopped
Press [DIRECT NAVIGATOR].
When "VIDEO" is not selected, press the "Red" button to select "VIDEO".

2 Press [▲, ▼, ◀, ▶] to select the title.
3 Press [OPTION].
4 Press [▲, ▼] to select "Find Titles" and press [OK].
5 Press [■] (Set).
- When searching using a word other than the title name, enter a different word. (→ 41, Entering text)
6 Press [▲, ▼] to select "Simplified Search" or "Detailed Search" and press [OK].
- Refer to "Searching for the programme in the TV Guide list" (⇒ left) for more information about "Simplified Search" and "Detailed Search".
7 Press [▲, ▼, ◀, ▶] to select the programme and press [OK].
When the "Timer Recording" screen appears. (⇒ 20, Timer recording, step 3)
When the "Selection Screen" appears.
- "View" ⇒ 16, Watching digital broadcasts
- "Rec." ⇒ 20, Timer recording
- "Delete" ⇒ Timer recordings can be cancelled.
Press [◀, ▶] to select "Yes" and press [OK]. The timer icon disappears.
To return to the previous screen
If you press [RETURN], the unit may return to the DIRECT NAVIGATOR screen.
To exit the screen
Press [EXIT].
TV Guide data download
• TV Guide is downloaded under the following conditions: - Download automatically while TV Guide is displayed. (Only when the "TV Guide Type" of the Setup menu is set to "Others") - Download automatically in standby mode if "TV Guide Download in Standby" is set to "On" in the Setup menu (⇒ 69)
- When the message "No TV Guide data available. Please download TV Guide data by "TV Guide Update Search Now" in Setup." is displayed instead of the TV Guide, execute "TV Guide Update Search Now" in the Setup menu. (Only when the "TV Guide Type" of the Setup menu is set to "Astra 19.2"E only") (⇒ 69)
Operation during play
| ●Depending on the media, some operations may not be possible. | |
| Stop | Press [■].The stopped position is memorized.Resume play functionPress [▶] (PLAY) to restart from this position.Stopped position●If [■] is pressed several times, the position is cleared in some cases.●The position is cleared if the tray is opened.●CD VCD and MP3/WMA/DivX: The position is cleared if the unit is turned off. |
| Pause | Press [■].Press [■] again or [▶] (PLAY) to restart play. |
| Search | Press [◀◀] or [▶▶].●The speed increases up to 5 steps. (+R+R DL +RW up to 3 steps)●Press [▶] (PLAY) to restart play.●Audio is heard during first level search forward.CD and MP3/WMA: Audio is heard during all levels of search.DivX: Audio is not heard during all levels of search. |
| Skip | During play or while paused, press [◀◀] or [▶▶].Skip to the title, chapter or track you want to play.●Each press increases the number of skips.●DivX: Press [◀◀] to return to the beginning of the title currently playing. |
| Starting from a selected title | Press the numbered buttons.Play starts from the selected title, chapter or track.●HDD and DivXe.g.,5: [0] ⇒ [0] ⇒ [5]15: [0] ⇒ [1] ⇒ [5]●MP3/WMAe.g.,5: [0] ⇒ [0] ⇒ [0] ⇒ [5]15: [0] ⇒ [0] ⇒ [1] ⇒ [5]●Other discsInput a 2-digit numbere.g.,5: [0] ⇒ [5]15: [1] ⇒ [5]This works only when stopped (the screen on the right is displayed on the television) with some discs.●VCD (with playback control)If you press the numbered buttons while stopped (the above screen is displayed on the television) you can cancel PBC. (Elapsed play time appears on the unit's display.) |
| Quick View | Press and hold [▶] (PLAY/×1.3).Play speed is quicker than normal.●Press again to return to normal speed. |
| Slow-motion | While paused, press [◀◀] or [▶▶].The speed increases up to 5 steps.●Press [▶] (PLAY) to restart play.●VCD Forward direction [▶▶] only.●The unit will pause if slow-motion play is continued for approximately 5 minutes (excluding DVD-V VCD). |
| Frame-by-frame | While paused, press [◀] (◀■) or [▶] (■■).Each press shows the next frame.●Press and hold to change in succession forward or backward.●Press [▶] (PLAY) to restart play.●VCD Forward direction [▶] (■■) only. |
| Skipping the specified time (Time Slip)HDD RAM-R -R DL-RW(V) +R+R DL(This function does not work with finalised discs.)+RW -RW(VR) | 1 Press [TIME SLIP].2 Press [▲, ▼] to select the time and press [OK].Play skips the specified time.◆Each time you press [▲, ▼], the time increases [▲] or decreases [▼] by 1-minute intervals. (Press and hold for 10-minute intervals.)This automatically disappears after approximately 5 seconds. To show the screen again press [TIME SLIP] again.[IMAGE] |
| Manual SkipHDD RAM-R -R DL-RW(V) +R+R DL(This function does not work with finalised discs.)+RW -RW(VR) | Press [MANUAL SKIP].Each time you press, play restarts approximately 1 minute later. |
| Create Chapter(→ 42, Chapter)HDD RAM | Press [CREATE CHAPTER].Chapters are divided at the point pressed.◆Press [|◀◀, ►▶|] to skip to the start of a chapter.◆Chapters cannot be created during EXT LINK standby. |
Advanced
operations
Selecting recorded programmes (titles) to play—DIRECT NAVIGATOR
HDD RAM -R -R DL -RW(V) +R +R DL +RW -RW(VR)
You can quickly find the recorded titles and easily play them. You can also sort the titles or edit the Groups of titles.
1 Press [DIRECT NAVIGATOR].
HDD RAM When "VIDEO" is not selected, press the "Red" button to select "VIDEO".
2 Press [▲, ▼, ◀, ▶] to select the title and press [OK].
You can also select titles with the numbered buttons (All Titles screen only).
| e.g., HDD | ||
| 5: | [0] ⇒ [0] ⇒ [5] | 15: [0] ⇒ [1] ⇒ [5] |
| 115: | [1] ⇒ [1] ⇒ [5] | |
| e.g., | RAM | -R | -R DL | -RW(V) | +R | +R DL | +RW | -RW(VR) |
| 5: | [0] ⇒ [5] | 15: | [1] ⇒ [5] | |||||
To show other pages
Press [▲, ▼, ◀, ▶] to select "Previous" or "Next" and press [OK]. (Thumbnail Display only)
- You can also press [◀◀, ▶▶] to show other pages.
To exit the screen
Press [DIRECT NAVIGATOR].
DIRECT NAVIGATOR screen icons
![Currently recording. Title protected. Title that was not recorded due to recording protection × Title cannot be played [When copying a title to the HDD, or when data is damaged etc.] Titles that have been rerouted to the HDD (→ 27, Relief Recording) Title with "One time only recording" restriction (…](/content/2026/05/1021228/images/e4a4b0277b801309b186249a74c7ae1c49d4089cf62211993411856597d13a3f.jpg)
Switching the DIRECT NAVIGATOR appearance
"Grouped Titles"/"All Titles" HDD
"Table Display"/"Thumbnail Display"
① While the DIRECT NAVIGATOR screen is displayed, press [OPTION].
② Press [▲, ▼] to select the item and press [OK].
e.g.,

Grouped Titles screen
Two or more titles recorded in the daily/weekly timer recording mode are bundled and displayed as one item.

(in Thumbnail Display)
Select the item marked with and press [OK] to display the bundled titles.
All Titles screen
Displays all titles.

(in Thumbnail Display)
To sort the titles for easy searching
HDD (All Titles screen in Table Display only)
This function is convenient when searching for one title to playback from many titles.
① Press [OPTION].
② Press [▲, ▼] to select "Sort" and press [OK].
③ Press [▲, ▼] to select the item and press [OK]. If you select an item other than "No."
- The DIRECT NAVIGATOR screen will reappear after playback of the selected title has finished. (You cannot play titles continuously.)
- Skip and Time Slip will only function with the title currently being played back.
- If you exit the DIRECT NAVIGATOR screen, or switch to another DIRECT NAVIGATOR screen, the sort will be cancelled.
To play grouped titles HDD
① Press [▲, ▼, ◀, ▶] to select the group and press [OK]. ② Press [▲, ▼, ◀, ▶] to select the title and press [OK].
To edit the group of titles HDD
HDD (Grouped Titles screen only)
① Press [▲, ▼, ◀, ▶] to select a title or a group and press [■■]. A check mark is displayed. Repeat this step until you select all necessary titles.
- Press [ÍI] to cancel.
② Press [OPTION].
③ Press [▲, ▼] to select the option and press [OK].
Create Group:
Press [◀, ▶] to select "Create" and press [OK]. Selected titles are bundled to form a group.
Release Grouping:
Press [◀, ▶] to select "Release" and press [OK]. - When a group of titles has been selected, all the titles in the group are released. - When a title in a group has been selected, the title is released from the group.
■ Regarding the group name
The name of the first title in the group is used as the group name.
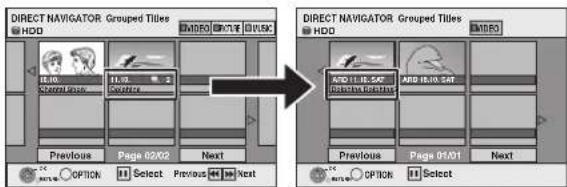
To change the group name
1 Press [▲, ▼, ◀, ▶] to select the group and press [OPTION]. 2 Press [▲, ▼] to select "Edit" and press [OK]. 3 Press [▲, ▼] to select "Enter Title Name" and press [OK]. 4 Enter the name. (⇒ 41, Entering text) - Even if the group name is changed, the title names in the group will not be changed.
Note
This function is only available for Videos and not available for music or still pictures.
To play music CD
Preparation
Press [DRIVE SELECT] to select the DVD drive.
1 Insert a music CD.
The menu is automatically displayed.

2 Press [▲, ▼] to select "Play Music" and press [OK].
The unit starts accessing the Gracenote® Database (→ 55) and searches for the title information.

If search results indicate that multiple titles were found, press [▲, ▼] to select the appropriate title and press [OK].
3 Press [▲, ▼] to select the track and press [OK].
You can also select the track with the numbered buttons.
e.g.,
5: [0] → [5]
15: [1] → [5]
To exit the screen
Press [DIRECT NAVIGATOR].
Playback continues
To play music recorded on HDD
Copying music to HDD (→ 55)
Preparation
Press [DRIVE SELECT] to select the HDD drive
1 Press [DIRECT NAVIGATOR].
When "MUSIC" is not selected, press the "Yellow" button to select "MUSIC".
2 Press [▲, ▼] to select the album and press [OK].
You can also select the album with the numbered buttons.
e.g.
5: [0] → [0] → [5]
15: [0] → [1] → [5]
115: [1] → [1] → [5]
3 Press [▲, ▼] to select the track and press [OK].
You can also select the track with the numbered buttons.
e.g.
5: [0] → [0] → [0] → [5]
15: [0] → [0] → [1] → [5]
115: [0] → [1] → [1] → [5]
1115: [1] → [1] → [1] → [5]
To return to the previous screen
Press [RETURN]
To exit the screen
Press [DIRECT NAVIGATOR].
Note
- You cannot play music tracks on HDD while recording or copying.
Useful functions during music play
| Operations during play | |
| Stop | Press [■].The stopped position is memorized.Press [▶] (PLAY) to restart from this position.●If [■] is pressed several times, the position is cleared. |
| Pause | Press [■].Press [■] again or [▶] (PLAY) to restart play. |
| Search | Press [◀◀] or [▶▶].The speed increases up to 5 steps.Press [▶] (PLAY) to restart play. |
| Skip | During play or while paused, press [◀◀] or [▶▶].Skip to the track you want to play.●Each press increases the number of skips. |
| Repeat PlayHDD | You can select the item which you want to repeat.While playing1 Press [OPTION].2 Press [▲, ▼] to select “Repeat Play Setting” and press [OK].3 Press [▲, ▼] to select the item and press [OK].●Select “Off” to cancel repeat play. |
| SortHDD | You can change the order of the Album View alphabetically.While Album View screen is displayed1 Press [OPTION].2 Press [▲, ▼] to select “Sort” and press [OK].3 Press [▲, ▼] to select “Album Name” and press [OK].To cancel the sorted screenPress [▲, ▼] to select “No.” and press [OK]. |
| PropertiesHDD CD | While Track View screen is displayed1 Press [OPTION].2 Press [▲, ▼] to select “Properties” and press [OK].●To exit the Properties screen, press [OK]. |
Advanced
operations
Showing the menu screen
-R -R DL CD
1 Insert the disc.
2 If the disc contains different file types
e.g., CD

Press [▲, ▼] to select the item and press [OK].
Otherwise, Press [DIRECT NAVIGATOR].
USB
1 Insert the USB memory.

You can also display this screen with the following steps.
① Press [FUNCTION MENU]. ② Press [▲, ▼] to select "Drive Select", and press [OK]. ③ Press [▲, ▼] to select "USB", and press [OK].
2 Press [▲, ▼] to select the item and press [OK].
■ Changing the file type to play
-R -R DL CD USB
1 Press [RETURN] several times to exit the menu.
2 Press [FUNCTION MENU].

3
-R -R DL CD
①Press [▲, ▼] to select "Playback" and press [OK]. ② Press [▲, ▼] to select file type and press [OK].
USB
① Press [▲, ▼] to select "Drive Select" and press [OK]. ② Press [▲, ▼] to select "USB" and press [OK]. ③ Press [▲, ▼] to select the item and press [OK].
Playing DivX video contents
-R -R DL CD USB ABOUT DIVX VIDEO:
DivX® is a digital video format created by DivX, Inc. This is an official DivX Certified device that plays DivX video. You can play DivX video contents recorded with a computer onto DVD-R, DVD-R DL, CD-R/CD-RW and USB memory.
1 Show DivX Menu screen.
(⇒ left, Showing the menu screen)

- Files are treated as titles.
2 Press [▲, ▼] to select the title and press [OK].
Play starts on the selected title. - You can also select the title with the numbered buttons.
e.g., 5: [0] → [0] → [5] 15: [0] → [1] → [5]
To stop playing Press [■].
To show other pages Press [◀◀, ▶▶].
To exit the screen Press [DIRECT NAVIGATOR].
Note
●Picture sizes set at the recording time may prevent the unit from showing pictures in the adequate aspect. You may be able to adjust the aspect through the TV. ●Successive play is not possible - Playback is not possible if recording is performed on the HDD drive or the DVD drive.
Using the tree screen to find a folder
1 While the file list is displayed Press [▶] while a title is highlighted to display the tree screen.
F: Selected folder no./Total folder no. including DivX title.

You cannot select folders that contain no compatible files.
2 Press [▲, ▼] to select a folder and press [OK]. The file list for the folder appears.
To return to the previous screen Press [RETURN]
Regarding DivX VOD content
ABOUT DIVX VIDEO-ON-DEMAND:
This DivX® Certified device must be registered in order to play DivX Video-on-Demand (VOD) content.
First generate the DivX VOD registration code for your device and submit it during the registration process. [Important: DivX VOD content is protected by a DivX DRM (Digital Rights Management) system that restricts playback to registered DivX Certified devices. If you try to play DivX VOD content not authorized for your device, the message "Authorisation Error." will be displayed and your content will not play.]
Learn more at www.divx.com/vod.
Display the unit's registration code.
(→ 69, "DivX Registration" in "Others" tab)

8 alphanumeric characters
- After playing DivX VOD content for the first time, another registration code is then displayed in "DivX Registration". Do not use this registration code to purchase DivX VOD content. If you use this code to purchase DivX VOD content, and then play the content on this unit, you will no longer be able to play any content that you purchased using the previous code.
- If you purchase DivX VOD content using a registration code different from this unit's code, you will not be able to play this content. ("Authorisation Error." is displayed.)
Regarding DivX content that can only be played a set number of times
Some DivX VOD content can only be played a set number of times. When you play this content, the remaining number of plays is displayed. You cannot play this content when the number of remaining plays is zero. ("Rental Expired." is displayed.)
When playing this content
●The number of remaining plays is reduced by one if
- you press [⏻].
- you press [■]
- you press [DIRECT NAVIGATOR].
- you press [|◀◀] or [◀◀, ▶▶] etc. and arrive at another content or the start of the content being played.
– timer recording starts on the HDD
- you press [DRIVE SELECT] to change the drive.
- Resume functions do not work.
About DivX Subtitle Text display
You can display subtitles text recorded onto the DivX video disc on this unit.
This function has no relation to the subtitles specified in DivX standard specifications and has no clear standard. Depending on the methods used to create the file, the following functions may not work.
■ Displaying DivX Subtitle Text
1 While playing, press [DISPLAY].
- DivX video files that do not display "Text" or the subtitle number do not contain subtitles text.
Subtitles text cannot be displayed.
2 Press [▲, ▼] to select "Disc" and press [▶].
3 Press [▲, ▼] to select "Subtitle" and press [▶].
4 Press [▲, ▼] to select "On" and press [▶].
5 Press [▲, ▼] to select "Text" or the subtitle number.
- If the subtitles text are not displayed correctly, try changing the language settings (see below).
■ DivX Subtitle Text language settings
After playing back a DivX video file containing subtitles text
1 While stopped
Press [FUNCTION MENU].
2 Press [▲, ▼] to select "Others" and press [OK].
3 Press [▲, ▼] to select "Setup" and press [OK].
4 Press [▲, ▼] to select "Disc" and press [▶].
5 Press [▲, ▼] to select "Settings for Playback" and press [OK].
6 Press [▲, ▼] to select "DivX Subtitle Text" and press [OK].
7 Press [▲, ▼] to select "Latin 1", "Latin 2", or "Cyrillic" then press [OK]. (⇒ 65)
To exit the screen
Press [EXIT].
■ Types of subtitles text file that can be displayed
Subtitles text that satisfy the following conditions can be displayed on this unit.
- File format: MicroDVD, SubRip, or TMPlayer
- File extension: ".SRT", ".srt", ".SUB", ".sub", ".TXT", or ".txt"
- The DivX video file and subtitles text file are inside the same folder, and the file names are the same except for the file extensions.
- If there are more than one subtitles text files inside the same folder, they are displayed in the following order of priority: ".srt", ".sub", ".txt".
■ Limitations of this unit
- In the following situations, the subtitles cannot be displayed as recorded. Furthermore, depending on the methods used to create the file or the state of the recording, only parts of the subtitles may be displayed, or the subtitles may not be displayed at all.
- When special text or characters are included in the subtitles text. - When the file size is larger than 256 KB.
- When characters with styling specified are included in the subtitle data.
– Codes that specify the character style within files are displayed as subtitle characters.
- When data with a different format exists within the subtitle data.
- If the file name of the DivX video file is not displayed correctly on the menu screen (the file name is displayed as “_”), the subtitles text may not be displayed correctly.
- Depending on the disc, the subtitles text cannot be displayed when search and other such operations are being performed.
Playing Music files
-R -R DL CD USB
You can play MP3/WMA files recorded with a computer onto a DVD-R, DVD-R DL, CD-R/CD-RW and USB memory.
- You cannot play MP3 or WMA files on the USB memory while recording or copying.
1 Show MP3&WMA Menu screen.
(→ 34, Showing the menu screen)
Selected group
G: Group No.
T: Track No. in the group TOTAL:
Track No./Total tracks in all groups
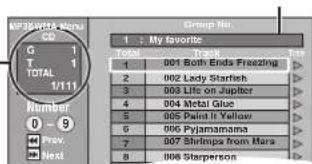
- Files are treated as tracks and folders are treated as groups.
2 Press [▲, ▼] to select the track and press [OK].
Play starts on the selected track.
- “☐” indicates the track currently playing.
- You can also select the track with the numbered buttons.
e.g., 5: [0] ⇒ [0] ⇒ [0] ⇒ [5]
15: [0] ⇒ [0] ⇒ [1] ⇒ [5]
To stop playing
Press [■].
To show other pages
Press [◀◀, ▶▶▶].
To exit the screen
Press [DIRECT NAVIGATOR].
Using the tree screen to find a group
1 While the file list is displayed
Press [▶] while a track is highlighted to display the tree screen.
Selected group No. /Total groups
If the group has no track, “—” is displayed as group number.

2 Press [▲, ▼, ◀, ▶] to select a group and press [OK].
The file list for the group appears.
To return to the previous screen
Press [RETURN]
Playing still pictures
HDD RAM -R -R DL CD USB
- You cannot play still pictures while recording or copying.
1 Show Album View screen.
-R -R DL CD USB
(→ 34, Showing the menu screen)
HDD RAM
While stopped
1 Press [DRIVE SELECT] to select the drive.
2 Press [DIRECT NAVIGATOR].
When "PICTURE" is not selected, press the "Green" button to select "PICTURE".
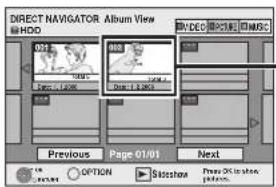
Album View screen
Regarding Album View screen → below
DIRECT NAVIGATOR screen icons

Picture and folder protected

Album that has not yet been viewed (HDD RAM)
To show other pages
Press [▲, ▼, ◀, ▶] to select "Previous" or "Next" and press [OK].
- You can also press [◀◀, ▶▶] to show other pages.
2 Press [▲, ▼, ◀, ▶] to select the album and press [OK].
You can also select album with the numbered buttons.
e.g.,
5: [0] ⇒ [0] ⇒ [5]
15: [0] ⇒ [1] ⇒ [5]
e.g., HDD
3 Press [▲, ▼, ◀, ▶] to select the still picture and press [OK].
You can also select still pictures with the numbered buttons. e.g.,
5: [0] ⇒ [0] ⇒ [0] ⇒ [5] 115: [0] ⇒ [1] ⇒ [1] ⇒ [5] 15: [0] ⇒ [0] ⇒ [1] ⇒ [5] 1115: [1] ⇒ [1] ⇒ [1] ⇒ [5]
- Press [◀, ▶] to display the previous or next still picture.
- Useful functions during still picture play (→ 37)
To return to the Album View screen or Picture (JPEG) View screen
Press [RETURN]
To exit the screen
Press [DIRECT NAVIGATOR].
■ Regarding Album View screen
Still pictures copied from USB memories are grouped by the shooting date in the HDD or DVD-RAM.
You can arrange these still pictures and create an album (→ 46).
HDD RAM
Grouped by date

Number of pictures/Shooting date
Album

Shooting date/Number of pictures/Album name
- Depending on the digital camera, the editing software on the PC etc., the information about the recording date may not be displayed. In this case, the date will appear as [---.---].
Useful functions during still picture play
| Start Slideshow Slideshow Setting | You can display still pictures one by one at a constant interval.While the Album View screen is displayed1 Press [▲, ▼, ◀, ►] to select the album.2 P re s s [ ►](PLAY).You can also start Slideshow with the following steps.While the Album View screen is displayed1 Press [OPTION].2 Press [▲, ▼] to select "Slideshow Setting" and press [OK].3 Set required settings and press [▲, ▼, ◀, ►] to select "Set" and then press [OK].4 Press [▲, ▼, ◀, ►] to select the desired album and press [OPTION].5 Press [▲, ▼] to select "Start Slideshow" and press [OK].●To change the display interval1 Press [▲, ▼] to select "Display interval" in step 3).2 Press [◄, ►] to select the desired interval ("Normal", "Long" or "Short").●Repeat Play1 Press [▲, ▼] to select "Repeat Play" in step 3).2 Press [◄, ►] to select "On" or "Off".■ Slideshow with musicYou can add music to Slideshow.1 Press [▲, ▼] to select "Soundtrack" in step 3. (→ above)2 Press [◄, ►] to select "On".3 Press [▲, ▼] to select "Select Soundtrack" and press [OK].4 Press [▲, ▼] to select the storage location of soundtrack and press [OK].5 Press [▲, ▼] to select an album for soundtrack and press [OK].6 Press [▲, ▼, ◀, ►] to select "Set" and then press [OK].7 Go to step 4. (→ above)Note●Music albums on HDD and on USB memory can be used as the slideshow Soundtrack. However, when selecting still images on USB memory for the slideshow, music albums on the USB memory cannot be used as the soundtrack. (Even if a music album on USB memory is selected, the music is not played.) | |
| Rotate RIGHT Rotate LEFT | While playing1 Press [OPTION].2 Press [▲, ▼] to select "Rotate RIGHT" or "Rotate LEFT" and press [OK].●Rotation information will not be stored.-R -R DL CD USB Still pictures- When disc or album is protected- When played on other equipment- When copying pictures- When changing date |  |
| Zoom in Zoom out | While playing1 Press [OPTION].2 Press [▲, ▼] to select "Zoom in" and press [OK].●To return the picture to its original size, press [▲, ▼] to select "Zoom out" in step 2 and press [OK].●When zooming in, the picture may be cut off.●The enlargement information will not be stored.●The "Zoom in/Zoom out" function is only available for still pictures smaller than 640 × 480 pixels. | |
| Properties | While playing e.g., HDDPress [STATUS 1]twice.To exit the picture properties screenPress [STATUS 1]. | 18:53:50 11.10.Folder - Picture No. 103 - 0006Date 10.10.2009 No. 3/9Shooting date |
Linked operations with the TV (VIERA Link "HDAVI Control™"/Q Link)
You can enjoy linked operations with the TV and receiver by using "HDAVI Control" or Q Link.
What is VIERA Link "HDAVI Control"?
VIERA Link "HDAVI Control" is a convenient function that offers linked operations of this unit, and a Panasonic TV (VIERA) or receiver under "HDAVI Control". You can use this function by connecting the equipment with the HDMI cable. See the operating instructions for connected equipment for operational details.
- VIERA Link "HDAVI Control", based on the control functions provided by HDMI which is an industry standard known as HDMI CEC (Consumer Electronics Control), is a unique function that we have developed and added. As such, its operation with other manufacturers' equipment that supports HDMI CEC cannot be guaranteed.
- This unit supports "HDAVI Control 4" function. "HDAVI Control 4" is the newest standard (current as of December, 2008) for Panasonic's HDAVI Control compatible equipment. This standard is compatible with Panasonic's conventional HDAVI equipment.
- Please refer to individual manuals for other manufacturers' equipment supporting VIERA Link function.
Preparation
1 Connect this unit to your TV using an HDMI cable and a fully wired 21-pin Scart cable (⇒ 7), or to your receiver using an HDMI cable (⇒ 72). 2 Set "VIERA Link" to "On" (⇒ 68). (The default setting is "On".)
3 Set the "HDAVI Control" operations on the connected equipment (e.g., TV).
- Set the input channel on VIERA to suit the terminal to be used as "HDAVI Control".
4 Turn on all "HDAVI Control" compatible equipment and select this unit's input channel on the connected TV so that the "HDAVI Control" function works properly. Also when the connection or settings are changed, repeat this procedure.
What is Q Link?
Q Link is a convenient function that offers linked operations of this unit and a Panasonic TV. You can use this function by connecting the equipment with a fully wired 21-pin Scart cable.
Preparation
- Connect this unit to your TV with a fully wired 21-pin Scart cable (see 6).
For your reference
The following systems from other manufacturers have similar function to Q Link from Panasonic.
For details, refer to your television's operating instructions or consult your dealer.
●Q Link (registered trademark of Panasonic) ●DATA LOGIC (registered trademark of Metz) ● Easy Link (registered trademark of Philips) ●Megalogic (registered trademark of Grundig) • SMARTLINK (registered trademark of Sony)
What you can do with "HDAVI Control" and Q Link
VIERA Link Q Link
Easy playback
When the TV is on and the following operations are performed, the TV's input will automatically switch to HDMI input mode (VIERA Link) or AV input mode (Q Link) and the TV displays the corresponding action. (Picture or sound may not be available for the first few seconds.)
Press [FUNCTION MENU] 2 , [▶] (PLAY), [DIRECT NAVIGATOR], [GUIDE], [PROG/CHECK] etc.
Power on link
When the TV is off and the following operations are performed, the TV will automatically turn on and display the corresponding action. (Picture or sound may not be available for the first few seconds.)
Press [FUNCTION MENU]*2, [▶] (PLAY), [DIRECT NAVIGATOR], [GUIDE], [PROG/CHECK], etc.
• DVD-V, CD, VCD, SVCD, and MP3/WMA
The TV is automatically turned on when you insert the discs.
Power off link
When you set the TV to standby mode, the unit is also automatically set to standby mode. The unit is automatically set to standby mode even if the FUNCTION MENU, etc. is displayed during playback or when the unit is set to a timer recording.
Even if the TV is set to standby mode, the unit will not be set to standby mode at the same time when recording, copying, finalising, etc. - When this unit is connected to an "HDAVI Control" compatible Panasonic receiver with an HDMI cable, the receiver will also turn off. About the Standby Power Save function 4 Even with "Power Save" set to "Off" ( → 69) (Quick Start mode), this unit turns to "Power Save" states ( → 8) when Power off link works, so it is possible to reduce the power consumption while this unit is in standby mode. - "Standby Power Save" setting is required to be activated on the TV. - When turning this unit on or off without using Power off link function, this unit will not turn to "Power Save" states.
Direct TV Recording ※1
This function allows you to immediately start recording the programme that you are viewing on the TV. ●Depending on the TV type connected with this unit, this function may not work.
Press and hold [● DIRECT TV REC] for 1 second.
Recording starts.
•The titles are recorded to the HDD.
To stop recording
Press [■].
- If you switch TV channels while using Direct TV Recording, the Direct TV Recording stops.
- When "EXT-L" lights on the unit's display (→ 25), Direct TV Recording is unavailable.
×1 VIERA Link This function is available with the TV that supports "HDAVI Control 3" or later. 2 This button is available only when this unit is on. 23 When this button is pressed, the playback image is not immediately displayed on the screen and it may not be possible to watch the contents from where playback started.
In this case, press [◀◀] or [◀◀] to go back to where playback started.
VIERA Link This function is available with the TV that supports "HDAVI Control 4".
Note
● These functions may not work normally depending on the equipment condition. - About "HDAVI Control" function, read the manual of the connected equipment (e.g., TV) too.
Easy control only with VIERA remote control
VIERA Link
If you connect this unit to the TV that supports "HDAVI Control 2" or later with an HDMI cable, you can enjoy using more convenient functions. You can operate this unit using buttons on the TV remote control.
The buttons that you can use for this unit vary depending on the TV. For details, refer to the operating instructions of the TV. Use the remote control supplied with this unit if you cannot operate this unit using buttons on the TV remote control.
- The operation of this unit may be interrupted when you press incompatible buttons on the TV remote control.
- The TV displays the TV tuner's picture when the linked operation is finished.
Using the FUNCTION MENU to operate this unit ※1
Refer to the TV operating instructions for operating the TV.
1 Display this unit's "FUNCTION MENU" using the TV remote control.
- If this unit is set to standby mode, it will automatically turn on.
2 Select the item you want to operate with the TV remote control, and press [OK].
- About the FUNCTION MENU Display (=> 5, 40, 67).
Pause live TV programme 2
You can pause the TV programme you are watching and resume later by temporarily saving it on the HDD. This is useful when you have to briefly stop watching TV to run an errand.
If you stop the Pause Live TV function, then the TV programme temporarily saved on the HDD will be deleted.
Refer to the TV operating instructions for operating the TV.
1 When you want to pause the TV programme
Turn on the "Pause Live TV" function using the TV remote control.
●This unit turns on automatically.
2 When you want to resume
Display the Control Panel (=> below) and press [OK].
●The TV programme resumes.
To stop Pause Live TV
1 Press [▼] while the Control Panel is displayed.
2 Press [◀, ▶] to select "Yes" and press [OK].
(⇒ 40, To pause the TV programme you are watching—Pause Live TV)
Using the OPTION menu window to operate this unit *1
By using the TV remote control, you can play discs using the "Control Panel" (⇔ below) and display the Top Menu for DVD-Video.
1 Press [OPTION].
e.g.,
![PANASONIC Diga DMR-EX72S - Press [OPTION]. - 1](/content/2026/05/1021228/images/1ee9c9b763c9b8d5684ece02163b035582e5410449334ca6fa27c9e553ea6160.jpg)
Note
You cannot use the OPTION menu while the Top Menu for DVD-Video is displayed and while DVD-Video is being copied.
2 Select an item then press [OK].
| Channel List | Channel List is displayed (⇒ 16) |
| Switch to TV Displayed when watching digital satellite broadcasts with the tuner of this unit. Select to return to the TV picture. | |
| Control Panel | Control Panel is displayed (⇒ below). |
| FUNCTION MENU | FUNCTION MENU is displayed (⇒ above). |
| Top Menu DVD-V | Top menu is displayed (⇒ 18). |
| Menu DVD-V | Menu is displayed (⇒ 18). |
| Drive Select Select the HDD or DVD drive | |
| Rotate RIGHT (JPEG) Rotate LEFT (JPEG) | Rotate the still picture (⇒ 37). |
| Zoom in (JPEG) Zoom out (JPEG) | Enlarge or shrink the still picture (⇒ 37). |
■ Using the Control Panel
Using the Control Panel, you can operate search backward, search forward, stop, etc., with the TV remote control. Select "Control Panel" and press [OK] in step 2 of "Using the OPTION menu window to operate this unit *1" (⇒ above).
The Control Panel is displayed (→ right).
- When playing a title or DVD-Video, etc.
- [▲]: Pause, [▼]: Stop, [◀]: Search backward, [▶]: Search forward, [OK]: Play, [EXIT]: Exit the Control Panel.
● While playing still pictures
- [▼]: Stop, [◀]: View previous picture, [▶]: View next picture, [EXIT]: Exit the Control Panel.
Control Panel

81 This function is available with the TV that supports “HDAVI Control 2” or later. 82 This function is available with the TV that supports “HDAVI Control 3” or later.
■ When you want to leave the TV on and set only this unit to standby mode
Press [⏻] on this unit's remote control and set to standby mode.
■ When not using "HDAVI Control"
Set "VIERA Link" in the Setup menu to "Off" (⇒ 68).
FUNCTION MENU Display
By using the FUNCTION MENU you may access the main functions quickly and easily.
If "FUNCTION MENU Display" is set to "On" in the Setup menu, FUNCTION MENU automatically appears when you turn the power on. (⇔ 67)
1 Press [FUNCTION MENU].
Functions displayed depend on the selected drive or type of disc.

2 Press [▲, ▼] to select a function and press [OK].
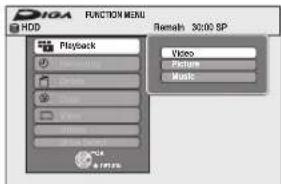
- If you press [RETURN] you can return to the previous screen.
3 Press [▲, ▼] to select an item and press [OK].
- Refer to "Easy access to various functions — FUNCTION MENU Display" about each function. (⇒ 5)
To exit the FUNCTION MENU Press [FUNCTION MENU].
To pause the TV programme you are watching—Pause Live TV
You can pause the TV programme you are watching using this unit's tuner and resume later by temporarily saving it on the HDD. This is useful when you have to briefly stop watching TV to run an errand. If you stop the Pause Live TV function, then the TV programme temporarily saved on the HDD will be deleted.
1 Turn on the television and select the appropriate AV input to suit the connections to this unit.
2 Turn on this unit and press [∧ ∨ CH] to select the channel.
3 When you want to pause the TV programme Press [11].
This icon indicates that Pause Live TV is working. You can turn off this icon (⇒ 67, Pause Live TV Icon).
4 When you want to resume
Press [▶] (PLAY)
- The programme is saved on the HDD in SP recording mode (⇒ 23) regardless of the recording mode and the drive selected before starting saving.
- At least 1 hour up to 8 hours of TV programmes can be temporarily saved on the HDD. (This may vary depending on the HDD free space.)
Operation during Pause Live TV
| Search | Press [◀◀, ▶▶]. |
| Pause | Press [■].●Press [▶] (PLAY) to restart. |
| Quick View | Press and hold [▶] (PLAY/×1.3).●Press again to return to the normal speed. |
| Slow-motion | While paused, press [◀◀] or [▶▶].The speed increases up to 5 steps.●Press [▶] (PLAY) to restart play. |
| Stop Pause Live TV | 1 Press [■].2 Press [◀, ▶] to select “Yes” and press [OK]. |
Note
- The Pause Live TV function automatically stops when a timer recording starts.
●The Pause Live TV function does not work
- when the clock is not set
- while recording
- while timer recording
- while EXT LINK recording, etc.
●Audio or Subtitle cannot be switched during resume play.
- The first 30 minutes is deleted every 30 minutes after the HDD is full or the saving lasts 8 hours.
- The Pause Live TV function stops automatically 24 hours after started.
- "DVB Multi Audio" and "DVB Subtitle" of on-screen menu cannot be switched during Pause Live TV.
HDD RAM -R -R DL -RW(V) +R +R DL +RW
You can give names to recorded titles, etc.
Also, you can search desired programmes on TV Guide by entering key words. (Free Word Search/Find Titles) ( ⇒ 30)
The maximum number of characters:
HDD RAM Characters
| Title (HDD RAM) | 64 (44 ° ) |
| Playlist (HDD RAM) | 64 |
| Album of still pictures 36 | |
| Album (CD/MP3/WMA) (HDD) | 4 |
| Track (CD/MP3/WMA) (HDD) | 4 |
| Artist (CD/MP3/WMA) (HDD) | 4 |
| Disc (RAM) | 6 |
Title name for timer recording
| -R | -R DL | -RW(V) | +R | +R DL | +RW | Characters |
| Title | 44 | |||||
| Disc | 40 | |||||
| Broadcast | Characters | |||||
| Favourite 1–4 | 14 | |||||
Note
If a name is long, parts of it may not be shown in some screens.
1 Show Enter Name screen etc.
Title (timer recording)
Select "Programme Name". (→ 27, Manually programming timer recordings, step 3)
Free Word Search
Press [OPTION]. (→ 30, "Searching by entering words", step 2)
Find Titles
Select "Find Titles". (→ 30, "Searching using programme information of titles recorded to the HDD", step 4)
Title
Select "Enter Title Name". (⇒ 42, step 4)
Playlist
Select "Enter Name". (⇒ 45, step 5)
Album of still pictures
Select "Enter Album Name". (→ 46, Editing still pictures (JPEG), step 3)
Album (CD/MP3/WMA) (HDD)
Select "Enter Album Name". (→ 47, Editing music, step 3)
Track (CD/MP3/WMA) (HDD)
Select "Enter Track Name". (→ 47, Editing music, step 3)
Artist (CD/MP3/WMA) (HDD)
Select "Enter Artist Name". (→ 47, Editing music, step 3)
Disc
Select "Disc Name". (→ 59, Providing a name for a disc, step 1)
Favourite 1–4
Press the "Red" button. (→ 62, To change the name of a Favourite in the "Favourite" column, step ②)
Name field: shows the text you have entered

Press the "Red" button or "Green" button to select character type and press [OK].
"Standard Characters": (→ left, Alphabet characters, etc.) "Other Characters": (→ below, Umlaut characters, accented characters, etc.)
- Character type cannot be changed when the "Language" in "Display" in the Setup menu is set to "Česky" or "Slovenčina".

2 Press [▲, ▼, ◀, ▶] to select a character and press [OK].
Repeat this step to enter other characters.
• To delete a character
Press [▲, ▼, ◀, ▶] to select the character in the name field and press [■]. (The selected characters are deleted.)
- Using the numbered buttons to enter characters
e.g., entering the letter "R"
① Press [7] to move to the 7th row.
② Press [7] twice to highlight "R".
0 ③ Press [OK].
0 • To enter a space
0 Press [DELETE *] and press [OK].

3 Press [■] (Set).
To end partway
Press [RETURN]
Text is not added.
■ To add a name to the list
You can add frequently used names and recall them later. Maximum number of added names: 20
Maximum number of characters per name: 44 After entering the name (steps 1-2).
1 Press [▲, ▼, ◀, ▶] to select "Add to List" and press [OK]. • You can also press [▶▶] to select "Add to List".
2 Press [◀, ▶] to select "Add" and press [OK]. -Press [RETURN] to cancel.
■ To recall an added name
1 Press [▲, ▼, ◀, ▶] to select "Name List" and press [OK]. • You can also press [◀◀] to select "Name List".
2 Press [▲, ▼, ◀, ▶] to select the name to be recalled and press [OK].
■ To delete an added name
1 Press [▲, ▼, ◀, ▶] to select "Name List" and press [OK]. • You can also press [◀◀] to select "Name List".
2 Press [▲, ▼, ◀, ▶] to select the name to be deleted.
3 Press [OPTION] to show "Delete Name" and press [OK]. 4 Press [◀, ▶] to select "Delete" and press [OK].
5 Press [RETURN]
For your reference
If you enter a long name, only part of it is shown in the Top Menu after finalisation (⇒ 61). When entering a title name, the name that will appear in the Top Menu can be previewed in "Top Menu Preview" window.

Editing titles/chapters
HDD RAM
-R -R DL -RW(V) +R +R DL (You cannot edit finalised discs.)
+RW -RW(VR)
Chapter
Each section between the division points becomes a chapter.

HDD RAM You can change the order of chapters and create a playlist ( ⇒ 44).
"Chapter Creation" in the Setup menu ( ⇒ 65)
"Automatic":
Detects changes (special mute points like the start and the end of the programme) in the scene during recording and sets chapter start points on them automatically.
- Depending on the programme to be recorded or the Recording Mode, the chapter start points may not be created correctly.
"5 minutes":
Sets chapter start points automatically during recording at approximately 5-minute interval.
●The maximum number of items on a disc:
HDD
- Titles: 499
– Chapters: Approx. 1000 per title
(Depends on the state of recording.)
RAM -R -R DL -RW(V) +R +R DL +RW
- Titles: 99 (+R +R DL +RW 49 titles)
- Chapters: Approx. 1000 (+R +R DL +RW Approx. 254)
(Depends on the state of recording.)
Note
- Once deleted, divided or partially deleted, recorded content cannot be restored to its original state. Make certain before proceeding.
- You cannot edit during recording or copying, etc.
- Restricted recording information remains even after editing (e.g. dividing a title etc).
- +R +R DL Each time you edit a title the information is saved to the free space on the disc. If you do this numerous times, the amount of free space decreases.
We recommend that you edit on the HDD and then copy to disc.
Editing titles/chapters and playing chapters
You can modify (remove unnecessary parts, divide, etc.) recorded programmes.
Preparation
- Turn on the television and select the appropriate AV input to suit the connection to this unit.
- Turn the unit on.
- Press [DRIVE SELECT] to select the drive containing the recorded title to be edited.
- RAM Release protection (→ 59, Setting the protection).
1 During play or while stopped
Press [DIRECT NAVIGATOR].
HDD RAM When "VIDEO" is not selected, press the "Red" button to select "VIDEO".
2 Press [▲, ▼, ◀, ▶] to select the title.

Title View screen
To show other pages
Press [▲, ▼, ◀, ▶] to select "Previous" or "Next" and press [OK].
- You can also press [|◀◀, ▶▶] to show other pages.
Multiple editing
Select with [▲, ▼, ◀, ▶] and press [■]. (Repeat.)
A check mark appears. Press [11] again to cancel.
3 Press [OPTION].
4 Press [▲, ▼] to select the operation and press [OK].
- If you select "Edit", press [▲, ▼] to select the operation and press [OK].
![graph TD A["Delete"] --> B["Properties"] B --> C["Edit"] D["Enter Title Name"] --> E["Set up Protection"] D --> F["Cancel Protection"] D --> G["Partial Delete"] D --> H["Change Thumbnail"] D --> I["Divide Title"] J["Find Titles"] --> K["Searching using programme information of titles recorded to the…](/content/2026/05/1021228/images/15f28711285ed6fde6de6137fec29953129658fb171696c06f799fd45fe3145c.jpg)
■ If you select "Chapter View"
5 Press [▲, ▼, ◀, ►] to select the chapter.
To start play ⇒ Press [OK].
To edit ⇒ Step 6.
Chapter View screen![PANASONIC Diga DMR-EX72S - Press [▲, ▼, ◀, ►] to select the chapter. - 1](/content/2026/05/1021228/images/7b1a11f7ab973cc3350a4aa638482c0f4da152328495760fb503bdba70fc3563.jpg)
• To show other pages/Multiple editing (→ above)
6 Press [OPTION], then [▲, ▼] to select the operation and press [OK].
![graph LR A["Delete Chapter"] --> B["Create Chapter"] B --> C["Combine Chapters"] C --> D["Title View"] D --> E["Refer to "Chapter operations" (→ 43)."]](/content/2026/05/1021228/images/0c854fe6632666071c66832bf2e2424c4c57381ed5ceec408115e2b2923df34b.jpg)
- You can go back to Title View.
To return to the previous screen
Press [RETURN]
To exit the screen
Press [DIRECT NAVIGATOR].
Title operations
| After performing steps 1-4 (⇒ 42) | |
| Delete* HDD RAM -R -R DL -RW(V) +R +R DL +RW | Press [◀, ▶] to select “Delete” and press [OK].• Once deleted, the recorded contents are lost and cannot be restored. Make certain before proceeding.• The available recording space on DVD-R, DVD-R DL, +R or +R DL does not increase when you delete titles.• Available recording space on DVD-RW (DVD-Video format) and +RW increases only when the last recorded title is deleted. It does not increase if other titles are deleted (⇒ 21). |
| Properties HDD RAM -R -R DL -RW(V) +R +R DL +RW -RW(VR) | Information (e.g., time and date) is shown.• Press [OK] to exit the screen. ![PANASONIC Diga DMR-EX72S - Press [OPTION], then [▲, ▼] to select the operation and press [OK]. - 2](/content/2026/05/1021228/images/c465bbe5eb6887bb27a6813e957b5da331fdfd7b2aefd72ffcd47195580ac104.jpg) |
| Enter Title Name HDD RAM -R -R DL -RW(V) +R +R DL +RW | You can give names to recorded titles.(⇒ 41, Entering text)• HDD Even if the group name is changed, the title names in the group will not be changed. |
| Set up Protection* Cancel Protection* HDD RAM +R +R DL +RW | If set, this will protect the title from accidental deletion.Press [◀, ▶] to select “Yes” and press [OK].The lock symbol appears when the title is protected. ![PANASONIC Diga DMR-EX72S - Press [OPTION], then [▲, ▼] to select the operation and press [OK]. - 3](/content/2026/05/1021228/images/969eecdafd6f5f82fe41cd76cb2606ba488641d34418e66681d24d75047cc3dc.jpg) |
| Partial Delete HDD RAM(⇒ below, For your reference) | You can remove unnecessary part of the recording.1 Press [OK] at the start point and end point of the section you want to delete.2 Press [▲, ▼] to select “Finish” and press [OK].• Select “Next” and press [OK] to delete other sections.3 Press [◀, ▶] to select “Delete” and press [OK]. ![PANASONIC Diga DMR-EX72S - Press [OPTION], then [▲, ▼] to select the operation and press [OK]. - 4](/content/2026/05/1021228/images/e0b4d865982c39e055cd8197d6dfdcdd2392906e8f8e001a0b3fc38b6706f43b.jpg) |
| Change Thumbnail HDD RAM -R -R DL -RW(V) +R +R DL +RW(⇒ below, For your reference) | You can change an image to be shown as the thumbnail picture in the Title View.1 Press [▶] (PLAY) to start play.2 Press [OK] when the image you want to use as a thumbnail is shown.To change the thumbnailRestart play and press [▲, ▼] to select “Change”, then press [OK] at the point you want to change.3 Press [▲, ▼] to select “Finish” and press [OK]. ![PANASONIC Diga DMR-EX72S - Press [OPTION], then [▲, ▼] to select the operation and press [OK]. - 5](/content/2026/05/1021228/images/d6cdaf86f6633a99ea61adcee26d4019edc4f77d175d4dcd676e4638eb85a638.jpg) |
| Divide Title HDD RAM(⇒ below, For your reference) | You can divide a title into two.1 Press [OK] at the point you want to divide the title.2 Press [▲, ▼] to select “Finish” and press [OK].3 Press [◀, ▶] to select “Divide” and press [OK].To confirm the division pointPress [▲, ▼] to select “Preview” and press [OK]. (The unit plays 10 seconds before and after the division point.)To change the division pointRestart play and press [▲, ▼] to select “Divide”, then press [OK] at the point where you want to divide the title.Note• The divided titles retain the title name and CPRM property (⇒ 85) of the original title.• Video and audio just before and after the dividing point may momentarily cut out.• HDD Divided titles form a group of titles. ![PANASONIC Diga DMR-EX72S - Press [OPTION], then [▲, ▼] to select the operation and press [OK]. - 6](/content/2026/05/1021228/images/314b2de3083fe3a72c96efe72c1bd8b2d311c48c9c4cbef5833835a57ecfb412.jpg) |
* Multiple editing is possible.
Chapter operations
| After performing steps 1–6 (⇒ 42) | |
| Delete Chapter※HDD RAM | Press [◀, ▶] to select “Delete” and press [OK].●Once deleted, the recorded contents are lost and cannot be restored. Make certain before proceeding.●Select “Combine Chapters” (⇒ below) when you only want to delete the division point between chapters.(The recorded contents will not be deleted.) |
| Create ChapterHDD RAM(⇒ below, For your reference) | Select the point where you want to start a new chapter while viewing the title.1 Press [OK] at the point you want to divide.●Repeat this step to divide at other points.2Press [▲, ▼] to select “Finish” and press [OK].![PANASONIC Diga DMR-EX72S - Press [OPTION], then [▲, ▼] to select the operation and press [OK]. - 7](/content/2026/05/1021228/images/a49bda4f7e9c0ed9c95ff205b8d7b997aeb3175ac0eac1cf11750a4443f5612b.jpg) |
| Combine ChaptersHDD RAM | Press [◀, ▶] to select “Combine” and press [OK].●The selected chapter and following chapter are combined. |
* Multiple editing is possible. For your reference
- Use Search (⇒ 31), Time Slip (⇒ 31) to find the desired point.
- To find the desired point correctly, use Slow-motion (⇒ 31) and Frame-by-frame (⇒ 31).
- To skip to the start or end of a title/chapter, press [|◀◀] (start) or [▶▶|] (end).
Creating, editing and playing playlists
You can arrange the chapters (⇒ 42) to create a playlist.
![graph TD A["Title"] --> B["Chapter"] B --> C["Title"] C --> D["Chapter"] D --> E["Title"] F["Playlist"] --> G["Chapter"] G --> H["Chapter"] H --> I["Title"]](/content/2026/05/1021228/images/c469f0dafe41a87fe7c3890fd0029a2f8143e946076427ed75998d97d2b073ee.jpg)
Copying (→ 48) a playlist will create a title.
- Playlists are not recorded separately so this doesn't use much capacity.
- Editing chapters in a playlist does not modify the source titles and source chapters.
- You cannot create or edit playlists while recording or copying.
HDD RAM
•The maximum number of items on a disc:
- Playlists: 99
– Chapters in playlists: Approx. 1000
(Depends on the state of recording.)
- If you exceed the maximum numbers of items for a disc, all the items entered will not be recorded.
Creating playlists
HDD RAM
Preparation
- Turn on the television and select the appropriate AV input to suit the connection to this unit.
- Turn the unit on.
- Press [DRIVE SELECT] to select the drive containing the recorded title to be edited. • RAM Release protection (→ 59, Setting the protection).
- You cannot create or edit a playlist while recording or while copying.
- Playlists must be made in accordance with the encoding system currently selected in "TV System" (→ 67).
1 While stopped
Press [FUNCTION MENU].
2 Press [▲, ▼] to select "Others" and press [OK]. 3 Press [▲, ▼] to select "Playlists" and press [OK].

4 Press [▲, ▼, ◀, ▶] to select "Create" and press [OK].

5 Press [◀, ▶] to select the source title and press [▼].
- Press [OK] to select all the chapters in the title, then skip to step 7.

6 Press [◀, ▶] to select the chapter you want to add to a playlist and press [OK].
Press [▲] to cancel.

- You can also create a new chapter from the source title. Press [OPTION] to select "Create Chapter" and press [OK] (⇒ 43, Create Chapter).
7 Press [◀, ▶] to select the position to insert the chapter and press [OK].

- Press [▲] to select other source titles. - Repeat steps 6–7 to add other chapters.
8 Press [RETURN]
All the selected scenes become the playlist.
To return to the previous screen
Press [RETURN]
To exit the screen
Press [EXIT].
Editing and playing playlists/chapters
HDD RAM
-RW(VR) (Play only)
1 While stopped
Press [FUNCTION MENU].
2 Press [▲, ▼] to select "Others" and press [OK].
3 Press [▲, ▼] to select "Playlists" and press [OK].
4 Press [▲, ▼, ◀, ▶] to select the playlist.
To start play → Press [OK].
To edit → Step 5.

Playlist View screen
• To show other pages/Multiple editing (→ 42)
5 Press [OPTION], then [▲, ▼] to select the operation and press [OK].
- If you select "Edit", press [▲, ▼] to select the operation and press [OK].
![graph TD A["Chapter View"] --> B["Delete"] A --> C["Properties"] A --> D["Edit"] A --> E["Create"] E --> F["Copy"] F --> G["Enter Name"] F --> H["Change Thumbnail"] G --> I["Refer to "Playlist operations""]](/content/2026/05/1021228/images/c07496b04292e468a20a8bfc876084cde3f82008e923aeae670a8ce2573b8d31.jpg)
■ If you select "Chapter View"
6 Press [▲, ▼, ◀, ▶] to select the chapter.
To start play → Press [OK].
To edit → Step 7.
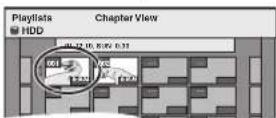
Chapter View screen
• To show other pages/Multiple editing (→ 42)
7 Press [OPTION], then [▲, ▼] to select the operation and press [OK].

- You can go back to Playlist View.
To return to the previous screen
Press [RETURN]
To exit the screen
Press [EXIT].
Playlist operations After performing steps 1–5 (→ left)
| Delete※ HDD RAM | Press [◀, ▶] to select “Delete” and press [OK]. Once deleted, the playlists are lost and cannot be restored. Make certain before proceeding. |
| Properties HDD RAM -RW(VR) | Playlist information (e.g., total time and date) is shown. •Press [OK] to exit the screen. |
| Create HDD RAM | (⇨ 44, Creating playlists, Step 5-8) |
| Copy※ HDD RAM | Press [◀, ▶] to select “Copy” and press [OK]. •The copied playlist becomes the newest one in the playlist view screen. |
| Enter Name HDD RAM | You can give names to playlists. (⇨ 41, Entering text) |
| Change Thumbnail HDD RAM | (⇨ 43, Change Thumbnail) |
* Multiple editing is possible.
Chapter operations
HDD RAM
After performing steps 1–7 (=> left) - Editing chapters in a playlist does not modify the source titles and source chapters.
| Add Chapter | (⇒ 44, Creating playlists, Step 5-7) |
| Move Chapter | Press [▲, ▼, ◀, ►] to select the position to insert the chapter and press [OK]. |
| Create Chapter | (⇒ 43, Create Chapter) |
| Combine Chapters | (⇒ 43, Combine Chapters) |
| Delete Chapter※ | (⇒ 43, Delete Chapter)The playlist itself is deleted if you delete all the chapters in it. |
* Multiple editing is possible.

Editing still pictures (JPEG)
HDD RAM -R (JPEG)
- You can edit pictures and albums.
- You cannot edit still pictures recorded on DVD-R DL, CD-R/CD-RW and USB memory.
- You cannot edit still pictures recorded on finalised DVD-R.
Preparation
- Press [DRIVE SELECT] to select the HDD or DVD.
- RAM Release protection (→ 59, Setting the protection).
1 Press [DIRECT NAVIGATOR].
HDD RAM When "PICTURE" is not selected, press the "Green" button to select "PICTURE".
2 Editing an album:
Select the album to be edited and press [OPTION].
- When you want to create an album using "Create Album", press [OPTION] without selecting an album.
Editing a still picture:
① Select the album that contains the still picture to edit and press [OK]. ② Select the still pictures to edit and press [OPTION].
To show other pages Press [▲, ▼, ◀, ▶] to select "Previous" or "Next" and press [OK]. ● You can also press [◀◀, ▶▶] to show other pages. Multiple editing Select with [▲, ▼, ◀, ▶] and press [■]. (Repeat.) A check mark appears. Press [■] again to cancel.
3 Press [▲, ▼] to select the operation and press [OK].
■ To edit the album
![graph TD A["Start Slideshow"] --> B["Slideshow Setting"] B --> C["Add Pictures"] B --> D["Create Album"] B --> E["Edit Album"] B --> F["Copy to DVD"] B --> G["VIDEO/MUSIC"] H["Delete Album"] --> I["Change Date"] H --> J["Set up Protection"] H --> K["Cancel Protection"] style A fill:#f9f,stroke:#333…](/content/2026/05/1021228/images/2242e98d0250e7aeab9bb72259f6ce5f79517bce05ac2c904f76fa1881e352e6.jpg)
Album (still picture) and picture operation (→ right)
■ To edit still picture

To return to the previous screen
Press [RETURN]
To exit the screen
Press [DIRECT NAVIGATOR].
Album (still picture) and picture operation
| After performing steps 1-3 (⇒ left) | |
| DeletePicture*DeleteAlbum*HDD-R (JPEG)RAM | Press [◀, ▶] to select “Delete” and press [OK].●Once deleted, the recorded contents are lost and cannot be restored. Make certain before proceeding.●When deleting an album, files other than the still picture files inside the album will also be deleted. (This does not apply to folders under the album concerned.)●-R Available space does not increase even after pictures are deleted. |
| ChangeDate*HDD RAM | You can change the date of the picture.1 Press [◀, ▶] to select the item and press [▲, ▼] to change.2 Press [OK]. |
| EnterAlbumNameHDD RAM | You can give names to albums.(⇒ 41, Entering text)●Album names input using this unit may not be displayed on other equipment. |
| Set upProtection*CancelProtection*HDD RAM | If set, this will protect the still picture or album from accidental deletion.Press [◀, ▶] to select “Yes” and press [OK].The lock symbol appears when the still picture or album is protected.●Even if the protection setting is used by this unit to protect an album, the album may be deleted by another unit. |
| PropertiesHDD RAM -R-R DL CDUSB | Information (e.g., image size and file size) is shown.●To exit the Properties screen, press [OK]. |
| AddPicturesCreateAlbumHDD RAM | 1 Press [◀, ▶] to select “Start” or “Yes” and press [OK].2 Press [▲, ▼, ◀, ▶] to select the album that contains the still picture you want to add and press [OK].3 Press [▲, ▼] to select the item and press [OK].●If “Select pictures to copy” is selected: Select the still picture you want to add and press [OK].●If “Copy all pictures” is selected: All the still pictures in the album will be copied.4 Press [◀, ▶] to select “Yes” or “No” and press [OK].●If you want to continue copying, select “Yes” and go to step 2.Only for “Create Album”5 Press [◀, ▶] to select “Yes” or “No” and press [OK].●If “Yes” is selected: You can give names to albums. (⇒ 41, Entering text)●If “No” is selected: The album name is automatically given. |
| Copy toDVD*HDDCopy toHDD*RAM | For copy to DVD-RAM or HDDPress [◀, ▶] to select “Start” and press [OK].For copy to DVD-RPress [◀, ▶] to select “Copy & Finalise” or “Copy Only” and press [OK].●Use blank discs or unfinalised discs on which JPEG images are recorded with this unit. |
* Multiple editing is possible. [Change Date: Only when the "Picture (JPEG) View" screen is displayed]
Note
- Timer recordings do not start when performing "Change Date", "Copy to DVD", "Copy to HDD", "Add Pictures" or "Create Album".
RAM
"Add Pictures" is available only for the folders conforming to DCF.
Editing music
HDD
Preparation
Press [DRIVE SELECT] to select the HDD drive.
1 Press [DIRECT NAVIGATOR].
When "MUSIC" is not selected, press the "Yellow" button to select "MUSIC".
2 Editing an album:
Press [▲, ▼] to select the album and press [OPTION].
Editing a track:
① Press [▲, ▼] to select the album and press [OK]. ② Press [▲, ▼] to select the track and press [OPTION].
3 Press [▲, ▼] to select the operation and press [OK].
■ To edit the album (Music)
![graph TD A["Delete Album"] --> B["Enter Album Name"] B --> C["Repeat Play Setting"] C --> D["Track View"] D --> E["Sort"] E --> F["VIDEO/PICTURE"] F --> G["Selecting recorded programmes (titles) to play—DIRECT NAVIGATOR (⇒ 32)"] F --> H["Playing still pictures (⇒ 36)"] style A fill:#f9f,stroke:#333…](/content/2026/05/1021228/images/c58cb690e1938b9cb066b1e1305843531dd820343eeea964245ea44a767d9aa9.jpg)
■ To edit the track (Music)
![graph TD A["Delete Track"] --> B["Album and track operation (=> below)"] C["Properties"] --> B D["Enter Track Name"] --> B E["Enter Artist Name"] --> B F["Repeat Play Setting"] --> B G["Album View"] --> H["You can go back to Album View"] I["Useful functions during music play (=> 33)"] --> J](/content/2026/05/1021228/images/b7702e30aac241ee9abd15efaed7b2b9b88ef4389cc1c1ebfe275ecc224cd010.jpg)
To return to the previous screen
Press [RETURN]
To exit the screen
Press [DIRECT NAVIGATOR].
Album and track operation
After performing steps 1-3 (=> above)
| Delete Album Delete Track | Press [◀, ▶] to select “Delete” and press [OK].●Once deleted, the recorded contents are lost and cannot be restored. Make certain before proceeding. |
| Enter Album Name Enter Track Name | You can give names to albums and tracks.(⇨ 41, Entering text) |
| Enter Artist Name You can edit the artist name of the track.(⇨ 41, Entering text) | |
Note
- When the timer recording starts, editing music stops on the way.
Deleting still pictures and music using DELETE Navigator
HDD RAM -R (JPEG)
1 While stopped
Press [FUNCTION MENU].
2 Press [▲, ▼] to select "Delete" and press [OK].
3 Press [▲, ▼] to select "Picture" or "Music".
4 Press [OK].
5 Deleting an album
Press [▲, ▼, ◀, ▶] to select the item and press [DELETE *].
Deleting a still picture or track
① Press [▲, ▼, ◀, ▶] to select the album which contains the still picture or track to delete and press [OK]. ② Press [▲, ▼, ◀, ▶] to select the still picture or track and press [OK].
You can confirm the item that you have selected using the option menu.
- Refer to option menu operations for the "Album View" (→ 46, step 3).
- Refer to option menu operations for the "Picture (JPEG) View" (→ 46, step 3).
- Refer to option menu operations for the "Album View (Music)" (→ left, step 3).
- Refer to option menu operations for the "Track View (Music)" (→ left, step 3).
To show other pages [Album (still picture) and still picture only]
Press [◀◀, ▶▶▶] to show other pages.
Multiple deleting [Album (still picture) and still picture only]
Select with [▲, ▼, ◀, ▶] and press [■■]. (Repeat.) A check mark appears. Press [■■] again to cancel.
6 Press [◀, ▶] to select "Delete" and press [OK].
To return to the previous screen
Press [RETURN]
To exit the screen
Press [EXIT].
Copying titles or playlists
| Copy [Video (HDD to DVD)] Advanced Copy | ||||
| Features Easy copying from HDD to DVD with no difficult settings. | Make a copy list and then copy.You can set the unit to copy titles or playlists in the way you want. | |||
| Copy direction | HDD → DVD | ○ | ○ | |
| DVD → HDD | - | ○RAM -RW(VR) +RDWDVD-V (Only from a finalised disc) | ||
| High speed mode copy*1 | ○ ○ | DVD-V You cannot perform high-speed copy with finalised discs.+RW You cannot perform high-speed copy from +RW to HDD. | ||
| Changing recording mode | - | ○*2 | ||
| Finalise*3 | -R -R DL -RW(V) +R +R DLAutomatically finalised | -R -R DL -RW(V) +R +R DLCan be selected | ||
| High speed mode | Normal speed mode | High speed mode | ||
| Copying playlists*4 | - | - | ○ | |
| Are chapters maintained? | ○ | -*5 | ○ | |
| Are thumbnails maintained? | ○ | -*6 | ○*7 | |
| Recording and Playing while Copying | - | - | ○*8 | |
*1 To high speed copy titles (or playlists created from those titles), set "Rec for High Speed Copy" to "On" before recording to the HDD (The default setting is "On". See page 65). However in the following cases, copying to DVD-R, DVD-R DL, DVD-RW (DVD-Video format), +R, +R DL and +RW using the high speed mode does not work.
- When arranging multiple titles for copying, if any titles are recorded with "Rec for High Speed Copy" to "Off", then you cannot perform with high-speed copy.
● Playlists created from titles using a variety of recording modes or multiple titles using FR recording mode.
- Playlists mixed with a variety of audio types (Dolby Digital and LPCM, etc.).
- Titles that contain many deleted segments.
• +R +R DL +RW Titles recorded in "EP" mode and "FR (recordings 5 hours or longer)" mode. (Displayed ▶▶!)
• +R +R DL +RW Titles recorded in 16:9 aspect
- -R -R DL -RW(V) Titles recorded in 16:9 aspect using "EP" mode or "FR" (recordings 5 hours or longer) mode
*2 If you select a recording mode with better picture quality than the original, the picture quality does not improve. (However it does prevent against degradation of picture quality.)
+R DL You cannot copy in "EP" or "FR (recordings 5 hours or longer)" mode.
*3 You cannot select "Top Menu" or "Auto-Play Select".
If you want to set auto-play select or the background colour, select "Top Menu" or "Auto-Play Select" in "DVD Management" before copying (⇒ 61).
4 You cannot copy playlists with a play time more than 8 hours.
When you copy a playlist, it will become a title in the destination drive.
25 RAM -R DL +R DL +RW : One title becomes one chapter
-R -RW(V) +R : Chapters are created automatically (-R -RW(V) about 5 minutes +R about 8 minutes) when finalising after copying the disc.
6 Thumbnails return to the default position.
7 When copying playlists, the thumbnails may not reflect changes made to them.
*8 Possible only with titles on the HDD
(However it is not possible when copying with automatic finalisation.)
- You cannot perform chasing play or edit, etc. while copying
- You cannot play a playlist while copying titles with "One time only recording" restriction (→ 22).
- Still pictures or music cannot be played.
■ Approximate copying times (Max. speed)
(excludes time required to write data management information)
| HDD | 5X Speed DVD-RAM | 12X Speed DVD-R ※1 | 4X Speed DVD-R DL ※2 | 4X Speed DVD-RW ※3 | 8X Speed +R ※4 | 4X Speed +R DL ※2 | 4X Speed +RW | ||||||||
| Recording Mode | Recorded | ||||||||||||||
| XP | 1 hour | Required time | Speed | Required time | Speed | Required time | Speed | Required time | Speed | Required time | Speed | Required time | Speed | Required time | Speed |
| 12 min. | 5x | 5 min. 46 s. | 10x | 15 min. | 4x | 15 min. | 4x | 8 min. 20 s. | 7x | 15 min. | 4x | 15 min. | 4x | ||
| SP | 6 min. | 10x | 2 min. 30 s. | 24x | 7 min. 30 s. | 8x | 7 min. 30 s. | 8x | 3 min. 45 s. | 16x | 7 min. 30 s. | 8x | 7 min. 30 s. | 8x | |
| LP | 3 min. | 20x | 1 min. 21 s. | 44x | 3 min. 45 s. | 16x | 3 min. 45 s. | 16x | 1 min. 53 s. | 32x | 3 min. 45 s. | 16x | 3 min. 45 s. | 16x | |
| EP (6H) | 2 min. | 30x | 58 s. | 62x | 2 min. 30 s. | 24x | 2 min. 30 s. | 24x | |||||||
| EP (8H) | 1 min. 30 s. | 40x | 48 s. | 75x | 1 min. 53 s. | 32x | 1 min. 57 s. | 31x | |||||||
- The above rated value indicates the fastest time and speed required for copying 1 hour title from HDD to each disc in the above list supporting High-Speed copying. The amount of time and speed may vary depending on the conditions such as the area on where information is written or unique feature on the disc. 1 In this unit, copying with 16X Speed DVD-R disc will be performed at the same speed as 12X Speed DVD-R disc takes. 2 In this unit, copying with 8X Speed discs, DVD-R DL and +R DL, will be performed at the same speed as 4X Speed discs, DVD-R DL and +R DL, take. 3 In this unit, copying with 6X Speed DVD-RW disc will be performed at the same speed as 4X Speed DVD-RW disc takes. 4 In this unit, copying with 16X Speed +R disc will be performed at the same speed as 8X Speed +R disc takes.
Note
- When recording or playing while copying, the unit may not use the maximum recording speed.
- Depending on the condition of the disc, the unit may not copy using the maximum speed.
Regarding copying to DVD-R DL (single-sided, Dual Layer) and +R DL (single-sided, Double Layer)
When not copying in high speed mode, titles are temporarily copied at normal speed to the HDD and then copied at high speed to DVD-R DL and +R DL. The titles that were temporarily copied to the HDD are then deleted.
You cannot copy to DVD-R DL and +R DL in the following cases.
- When there is not enough free space on the HDD. (When copying to a new blank disc, if you intend to fill a new disc when copying to it, the equivalent of up to 4 hours of free space in SP mode is needed on the HDD.)
- When the number of titles recorded to the HDD and the number of titles to be copied to the DVD-R DL and +R DL is greater than 499 in total.
When playing a title recorded on both layers, video and audio may momentarily cut out when the unit is switching layers. ( ⇒ 10)
Regarding copying of the broadcasts that allow "One time only recording"
You can copy a recorded title to a CPRM ( ⇒ 85) compatible DVD-RAM, however, the title is deleted from the HDD.
- Titles or playlists cannot be copied from DVD-RAM to the HDD.
- Titles will not be copied if they are protected (⇒ 43).
- You cannot copy playlists created from "One time only recording" titles.
- Titles with recording limitations and playlists cannot be registered on the same copying list.
Before copying
Speed and recording mode when copying
| HDD ↔ RAM : High speed | |||||||
| HDD → -R | -R | -R DL | -RW(V) | +R | +R DL | +RW | : Refer to the following table. |
| Rec for High Speed Copy (⇒ 65) | Copy speed |
| Only titles recorded with “Rec for High Speed Copy” set to “On”.* | High speed |
| Only titles recorded with “Rec for High Speed Copy” set to “Off”. | Normal speed |
| When making a copy of multiple titles that were recorded with “Rec for High Speed Copy” set to “On” and “Off”. |
In the following cases, even if "Rec for High Speed Copy" is set to "On", copy will perform at normal speed. - +R +R DL +RW When the copying source was recorded in "EP" or "FR (recordings 5 hours or longer)" mode. - When the copy destination (disc) does not have enough space. - When the title aspect for the copying source and "Aspect for Recording" (⇒ 65) do not match. - When the title aspect for the copying source is 16:9:
- +R +R DL +RW
-R -R DL -RW(V) copying source was recorded in "EP" or "FR (recordings 5 hours or longer)" mode.
Note
- Titles and playlists recorded using a different encoding system (PAL or NTSC) from the TV system currently selected on the unit cannot be copied.
- -R Video (Titles or playlists) cannot be copied to a disc with still pictures (JPEG) already recorded on it.
- -R Still images cannot be copied to a DVD-R disc with video already recorded on it.
Preparation
- Insert a disc that you can use for copying (⇒ 10, 13).
- Confirm that there is enough remaining disc space.
Copy [Video (HDD to DVD)]
DVD-R, DVD-R DL, DVD-RW (DVD-Video format), +R and +R DL are automatically finalised (=> 85). After finalising, the discs become play-only and you can also play them on other DVD equipment. However, you can no longer record or edit.
HDD → RAM -R -R DL -RW(V) +R +R DL +RW
(You cannot copy to finalised discs.)
When copying in normal speed, recording mode will be set to FR. (However, if there is still not enough space after setting to FR mode, copy will not be performed.)
1 While stopped
Press [FUNCTION MENU].
2 Press [▲, ▼] to select "Copy" and press [OK]. 3 Press [▲, ▼] to select "Video (HDD to DVD)" and press [OK].

4 Press [▲, ▼] to select the title you want to copy and press [■].
A check mark is displayed. Repeat this step until you select all necessary items.
- Press [ÍI] again to cancel.
To show other pages
Press [◀◀, ▶▶] to show other pages.
5 Press [OK].
6 After you start copying DVD-R, DVD-R DL, DVD-RW (DVD-Video format), +R and +R DL discs, they become play-only and you can no longer record or edit. Press [◀, ▶] to select "Start" and press [OK].
Copy starts.
To return to the previous screen, press [RETURN].
■ To stop copying (⇒ 50) ■ COPY Navigator/Copying list icons and functions (⇒ 51) ■ To check the properties of a title and sort COPY Navigator
1. Press [▲, ▼] to select the title and press [OPTION].

2. Press [▲, ▼] to select "Properties" or "Sort" and press [OK].
Properties:
The name, recording date, channel, etc. of the selected title are shown.
Sort (All Titles screen only):
Press [▲, ▼] to select the item and press [OK].
This changes the way that titles are displayed. You can select to display titles by No., channel, recording date, day, recording start time, and title name. (You cannot select this item if a title has a check mark.)
If you close the COPY Navigator screen, the display order is cancelled.
Note
- When copying titles in high speed mode to high speed recording compatible DVD-RAM 5X, DVD-R 8X, +R 8X or +RW 4X, the sound of the disc rotating becomes louder than normal. If you want copy to perform more quietly, select "Normal (Silent)" in "DVD Speed for High Speed Copy" in the Setup menu (⇒ 65).
- If you register multiple titles, they are copied in order from the title at the top of the screen and not in the order you registered them. To change the order that titles are copied, create a copying list and then copy the contents of the list (⇔ 50).
Copying using the copying list—Advanced Copy
HDD ↔ RAM +RW -RW(VR) → HDD
HDD → -R -R DL -RW(V) +R +R DL
You can order titles and playlists as desired for copying to disc.
See also "Before copying" (⇒ 49).
1 While stopped
Press [FUNCTION MENU].
2 Press [▲, ▼] to select "Copy" and press [OK].
3 Press [▲, ▼] to select "Advanced Copy" and press [OK].

- If you are not going to change the registered list, press [▼] several times (⇒ step 7).
4 Set the copy direction.
- If you are not going to change the copying direction, press [▼] (⇒ step 5).
① Press [▲, ▼] to select "Copy Direction" and press [▶].
② Press [▲, ▼] to select "Source" and press [OK].
③ Press [▲, ▼] to select the drive and press [OK]. If you select "HDD", "Destination" is automatically set to "DVD", or vice versa.
④ Press [◀] to confirm.
5 Set the recording mode.
- If you are not going to change the recording mode, press
[▼] (⇒ step 6).
① Press [▲, ▼] to select "Copy Mode" and press [▶].
② Press [▲, ▼] to select "Recording Mode" and press [OK].
③ Press [▲, ▼] to select the mode and press [OK].
④ Press [◀] to confirm.
6 Register titles and playlists for copy.
- If you are going to copy a registered list without making any changes to it (⇒ step 7).
① Press [▲, ▼] to select "Create List" and press [▶].

② Press [▲, ▼] to select "New item" and press [OK].
③ Press the "Red" button to select "VIDEO" or press the "Green" button to select "Playlists".
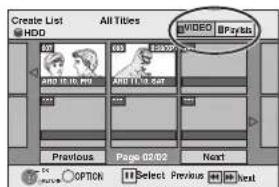
④ Press [▲, ▼, ◀, ▶] to select the title or playlist and press [■■].
A check mark is displayed. Repeat this step until you select all necessary items.
- Press [11] again to cancel.
- The items will be copied in the order of the copying list. If you want to specify the order, repeat selecting one item at a time.
- When you switch between the "VIDEO" and "Playlists" tab, the check mark is cancelled.
- When copying to a disc using high speed mode,
-R -R DL -RW(V) : only items indicated with "▶▶▶" or " " can be registered.
+R +R DL +RW : only items indicated with "▶" can be registered.
• To show other pages (⇒ below)
⑤ Press [OK].
• To edit the copying list (⇒ 51)
You cannot start copying when the value of the "Size" (→ 51) exceeds 100% ("Destination Capacity:" is not sufficient).
⑥ Press [◀] to confirm.
7 Press [▲, ▼] to select "Start Copying" and press [OK].
When copying titles in high speed mode to high speed recording compatible DVD-RAM 5X, DVD-R 8X, +R 8X or +RW 4X, the sound of the disc rotating becomes louder than normal.
If you want copy to perform more quietly, select "Normal (Silent)" in "DVD Speed for High Speed Copy" in the Setup menu (→ 65).
8 Press [◀, ▶] to select "Yes" and press [OK] to start copying. HDD → -R -R DL -RW(V) +R +R DL
Press [◀, ▶] to select "Copy & Finalise" or "Copy Only" and press [OK].
- If "Copy & Finalise" is selected
After finalising, the discs become play-only and you can also play them on other DVD equipment. However, you can no longer record or edit.
To show other pages
Press [▲, ▼, ◀, ▶] to select "Previous" or "Next" and press [OK].
- You can also press [◀◀, ▶▶] to show other pages.
■ To stop copying
Press and hold [RETURN] for 3 seconds.
(You cannot stop while finalising)
When High-speed copying
All titles that have completely copied at the point cancelled are copied.
When Normal Speed copying
Copies until the point cancelled. However as for titles with "One time only recording" restriction, only titles that have completely copied at the point cancelled are copied to the disc. Titles that are cancelled before the copy is complete are not copied and remain on the HDD.
- -R DL +R DL If copy is cancelled during the step while temporarily copying to the HDD, then nothing will be copied. However, if copy is cancelled during the step while copying to disc from the HDD, then only titles completely copied at the point cancelled are copied.
Even if the title was not copied to the DVD-R, DVD-R DL, DVD-RW (DVD-Video format), +R, +R DL or +RW, the amount of remaining writable disc space becomes less.
■ To return to the previous screen
Press [RETURN \$]
■ Recording and playing while copying
You can record and play using the HDD while high speed copying. (Only when high speed copying without finalising)
- Still pictures and music recorded on the HDD cannot be played. Press [OK] to cancel the screen display.
• To confirm the current progress
Press [STATUS 1]
Note
- Timer recordings executed while copying are recorded to the HDD regardless of the recording drive settings. (Only when high speed copying without finalising)
RQT9313
COPY Navigator/Copying list icons and functions
COPY Navigator/Copying list indicators

Titles and playlists that can be copied in high speed mode to DVD-R, DVD-R DL,
DVD-RW (DVD-Video format), +R, +R DL, +RW

Titles and playlists that can be copied in high speed mode to DVD-R, DVD-R DL.
DVD-RW (DVD-Video format)
(However, titles and playlists cannot be copied in high speed mode to +R, +R DL, +RW)
+R DL is displayed, but copy cannot be performed.

Title with "One time only recording" restriction (→ 22, When recording the "One time only recording" broadcasts)

Titles deleted from the HDD by "One time only recording" restriction after copying. (→ 22, When recording the "One time only recording" broadcasts) Title or playlist contains still picture(s)
●Still picture(s) cannot be copied
N (NTSC)
(PAL)
Title or playlist recorded using a different encoding system from that of the TV system currently selected on the unit.
- Titles and playlists displaying these marks cannot be selected.
Data size of each registered item

Size:
Data size recorded to the copy destination
- When copying at normal speed, the total data size will change according to the recording mode.
- The total data size shown may be larger than the sum of the data sizes for each registered item, because of data management information being written to the copy destination, etc.
To play DVD-R, DVD-R DL, DVD-RW (DVD-Video format), +R and +R DL on other players, it is necessary to finalise them after copy.
To edit the copying list
Select the item in step 6-⑤ (→ 50)
① Press [OPTION].
② Press [▲, ▼] to select the operation and press [OK].
Delete All:
Delete all items registered on the copying list. Press [◀, ▶] to select "Yes" and press [OK].
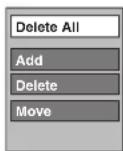
Add:
Add new items to the copying list.
1 Press [▲, ▼, ◀, ▶] to select the title or playlist and press [■]. A check mark is displayed. Repeat this step until you select all necessary items.
- Press [11] again to cancel.
2 Press [OK].
Delete:
Delete the selected items.
Press [◀, ▶] to select "Yes" and press [OK].
Move:
Move selected items or change the order of items on the copying list. Press [▲, ▼] to select the destination and press [OK].
To cancel all registered copying settings and lists
After performing steps 1–3 (⇒ 50)
1 Press [▲, ▼] to select "Cancel All" and press [OK]. 2 Press [◀, ▶] to select "Yes" and press [OK].
- The settings and lists may be cancelled in the following situations.
- When a title, still picture, etc. has been recorded or deleted at the copy source
- When steps have been taken, for instance, to turn off the unit, open the tray, change the copy direction, etc.
Copying a finalised DVD-R, DVD-R DL, DVD-RW (DVD-Video format), +R and +R DL
DVD-V → HDD
You can copy the content of finalised DVD-R, DVD-R DL, DVD-RW (DVD-Video format), +R, and +R DL to the HDD and re-edit. While playing a disc, the content being played is copied to the HDD according to the set time.
- If you perform search, frame-by-frame or pause while copying, that portion of title is not recorded.
- When "Rec for High Speed Copy" (⇔ 65) is set to "On" and you make a copy, the copy will be made using the picture size selected in "Aspect for Recording" (⇔ 65) of the Setup menu.
●Operations and on screen displays during copy are also recorded.
- Almost all DVD-Video on sale have been treated to prevent illegal copying, and cannot be copied.
●The following cannot be copied: Video CD, Audio CD and so on.
Preparation
- Insert the finalized disc (see 13).
After performing steps 1–5 ("Format" is automatically set to "DVD-Video") (see 50, Copying using the copying list – Advanced Copy)
1 Set "Copy Time".
- If you are not going to change the setting (see step 2). ① Press [▲, ▼] to select "Copy Time" and press [▶]. ② Press [▲, ▼] to select "Time Setting" and press [OK].
- Setting the unit to copy all the content on the disc ③ Press [▲, ▼] to select "Off" and press [OK].
④ Press [◀] to confirm. Copy will continue until there is not enough available recording space on the HDD.
- Setting the unit to copy according to the set time ③ Press [▲, ▼] to select "On" and press [OK]. ④ Press [▲, ▼] to select "Copy Time" and press [OK].

⑤ Press [◀, ▶] to select "Hour" and "Min." and press [▲, ▼] to set the recording time.
⑥ Press [OK].
⑦ Press [◀] to confirm.
Copying to the HDD continues for the set time even after the content being played finishes.
- Set a few minutes longer than the source title, in order to include the operation time before play begins.
- You can also set the recording time with the numbered buttons.
2 Press [▲, ▼] to select "Start Copying" and press [OK].
Press [◀, ▶] to select "Yes" and press [OK] to start copying. The disc top menu is displayed.
- Disc play automatically begins from title 1 when "Title 1" is selected from the "Auto-Play Select" menu when finalising the disc (=> 61).
3 When the top menu is displayed
Press [▲, ▼, ◀, ▶] to select the title you want to start copying, and press [OK].

While playing in order, all the titles after the selected title are recorded until the set time. (After the last title on the disc has finished playing the top menu is recorded until the set time is reached.)
To return to the previous screen
Press [RETURN]
To stop copying
Press [■]
You can also press and hold [RETURN] for 3 seconds to stop copying.
- If stopped partway, copying will be up to that point.
Note
- The screen on the right is recorded at the beginning.
- The content is recorded as 1 title from the start of copy to the end.
- If play does not begin automatically or if the top menu does not display automatically, press [▶] (PLAY) to start.
- Even if you copy a high quality video/audio DVD, the original picture and audio quality cannot be exactly replicated.
- If you want to copy a title from a finalized DVD-RW (DVD Video Recording format), create a copy list and then copy (see page 50, Copying using the copying list - Advanced Copy).

Copying Video (MPEG2) from a video equipment
Motion pictures encoded in the MPEG2 format, which have been taken by a Panasonic digital video camera with HDD etc, can be copied from the camera's HDD to this unit's HDD or DVD-RAM. (All the recordings on the same date become a title.)
- You cannot playback SD Video in the camera's HDD with this unit. You must copy the files to the HDD or a DVD-RAM.
- You cannot playback or record while copying SD Video.
![graph TD A["Video (MPEG2)"] --> B["USB Cable"] C["VIDEO"] --> D["HDD"] D --> E["DVD-RAM"] E --> F["USB Cable"]](/content/2026/05/1021228/images/cbf49dd60e19a77ba0e3d44586b744a763ba4ca2fc539e961e418d8bb69cc982.jpg)
* DVD Video Recording format
Preparation
1 Turn on both this unit and the camera.
2 Connect the camera to this unit with USB cable.
3 Select the appropriate mode that makes the camera ready for data transfer (such as "PC CONNECT") on the camera.
- Refer to the camera's operating instructions for detail.
The display below automatically appears when you connect the camera to this unit.
Press [▲, ▼] to select "Copy Video (MPEG2)" and press [OK]. Then go to step 7 on page 50.
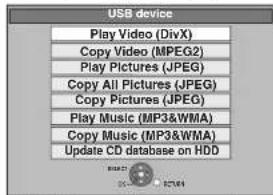
- SD Video on the camera is automatically registered on the copy list.
- If there are no SD Video on the camera, "Copy Video (MPEG2)" is not displayed.
Copying still pictures
- You cannot copy pictures recorded to DVD-R, DVD-R DL or CD-R/CD-RW.
Copying using the copying list

1 While stopped
Press [FUNCTION MENU].
2 Press [▲, ▼] to select "Copy" and press [OK].
3 Press [▲, ▼] to select "Advanced Copy" and press [OK].

- If you are not going to change the registered list, press [▼] several times (⇒ step 7).
4 Set the copy direction.
- If you are not going to change the copying direction, press [▼] (→ step 5).
① Press [▲, ▼] to select "Copy Direction" and press [▶]. ② Press [▲, ▼] to select "Source" and press [OK].
③ Press [▲, ▼] to select the drive and press [OK].
④ Press [▲, ▼] to select "Destination" and press [OK].
⑤ Press [▲, ▼] to select the drive and press [OK].
The same drive as the copy source can be selected.
⑥ Press [◀] to confirm.
5 Set the copy mode.
- If you are not going to change the recording mode, press [▼] (⇒ step 6).
① Press [▲, ▼] to select "Copy Mode" and press [▶]. ② Press [▲, ▼] to select "Format" and press [OK].
③ Press [▲, ▼] to select "PICTURE" and press [OK].
"Recording Mode" is automatically set to "High Speed".
④ Press [◀] to confirm.
6 Register still pictures for copy.
- If you are going to copy a registered list without making any changes to it (⇒ step 7).
You can register still pictures or still picture folders.
- Still pictures and folders cannot be registered on the same list.

■ To register individual still pictures
① Press [▲, ▼] to select "Create List" and press [▶]. ② Press [▲, ▼] to select "New item" and press [OK].
③ Press [▲, ▼, ◀, ▶] to select the still picture and press [■]. A check mark is displayed. Repeat this step until you select all necessary items.
- Press [11] again to cancel.
- The items will be copied in the order of the copying list. If you want to specify the order, repeat selecting one item at a time.
• To show other pages (⇒ right)
• To select another folder (⇒ 54)
④ Press [OK].
• To edit the copying list (⇒ 54)
⑤ Press [◀] to confirm.
■ To register on a folder by folder basis
① Press [▲, ▼] to select "Create List" and press [▶]. ② Press [▲, ▼] to select "Picture/Folder" and press [OK].

③ Press [▲, ▼] to select "Folder" and press [OK].
④ Press [▲, ▼] to select "New item" and press [OK].
⑤ Press [▲, ▼] to select the folder and press [■]
A check mark is displayed. Repeat this step until you select all necessary items.
- Press [11] again to cancel.
- The items will be copied in the order of the copying list. If you want to specify the order, repeat selecting one item at a time.
• To show other pages (⇒ below)
⑥ Press [OK].
• To edit the copying list (⇒ 54)
⑦ Press [◀] to confirm.
7 Press [▲, ▼] to select "Start Copying" and press [OK].
- Only when copying individual still pictures.

When specifying another folder as the copying destination, select "Folder".

8 Press [◀, ▶] to select "Yes" and press [OK] to start copying.
9 For copy to DVD-R
Press [◀, ▶] to select "Copy & Finalise" or "Copy Only" and press [OK].
To stop copying
Press and hold [RETURN] for 3 seconds.
To return to the previous screen
Press [RETURN]
Note
- The sequence in which the still pictures are registered on the copy list may not be the same at the copy destination.
- If still pictures are already contained inside the copy destination folder, the new still pictures are recorded following the existing still pictures.
- If the space on the destination drive runs out or the number of files/folders to be copied exceeds the maximum (⇒ 14), copying will stop partway through.
- You cannot copy the information about the picture rotation.
- -R Video (Titles or playlists) cannot be copied to a disc with still pictures (JPEG) already recorded on it.
- -R Still images cannot be copied to a DVD-R disc with video already recorded on it.
To show other pages
Press [▲, ▼, ◀, ▶] to select "Previous" or "Next" and press [OK].
- You can also press [◀◀, ▶▶] to show other pages.
■ To edit the copying list
Select the item in step 6-④ (for a still picture) or 6-⑥
(for a folder) (⇒ 53)
① Press [OPTION].
② Press [▲, ▼] to select the operation and press [OK].

Delete All:
Delete all items registered on the copying list.
Press [◀, ▶] to select "Yes" and press [OK].
Add:
Add new items to the copying list.
1 Press [▲, ▼, ◀, ▶] to select the still picture or folder and press [■].
A check mark is displayed. Repeat this step until you select all necessary items.
- Press [11] again to cancel.
2 Press [OK].
Delete:
Delete the selected items.
Press [◀, ▶] to select "Yes" and press [OK].
To cancel all registered copying settings and lists
After performing steps 1–3 (→ 53, Copying using the copying list)
1 Press [▲, ▼] to select "Cancel All" and press [OK].
2 Press [◀, ▶] to select "Yes" and press [OK].
- The settings and lists may be cancelled in the following situations. - When a title or still picture has been recorded or deleted at the copy source
- When steps have been taken, for instance, to turn off the unit, open the tray, change the copy direction, etc.
■ To select another folder
After performing step 6-② (⇒ 53, To register individual still pictures)
① Press [▲, ▼, ◀, ▶] to select "Folder" and press [OK].
② Press [▲, ▼] to select the folder and press [OK].

You can also select folders with the numbered buttons.
e.g.
5: amp; [0] ⇒ [0] ⇒ [5] 1 5: amp; [0] ⇒ [1] ⇒ [5] 1 1 5: amp; [1] ⇒ [1] ⇒ [5]
- The still pictures of different folders cannot be registered on the same list.
Copying still pictures on the USB memory
Copying all the still pictures
USB → HDD
1 While stopped
Insert the USB memory (⇒ 13).
The menu is automatically displayed

2 Press [▲, ▼] to select "Copy All Pictures (JPEG)" and press [OK].
![PANASONIC Diga DMR-EX72S - Press [▲, ▼] to select "Copy All Pictures (JPEG)" and press [OK]. - 1](/content/2026/05/1021228/images/a96b38c5b54960bda76f0ff3cb6d1d55a2058e7edfa0d19e9b42ae968733dce8.jpg)
3 Press [◀, ▶] to select "Copy" and press [OK].
Copying using the copying list
USB → HDD RAM
1 While stopped Insert the USB memory (⇒ 13). The menu is automatically displayed. (⇒ above)
2 Press [▲, ▼] to select "Copy Pictures (JPEG)" and press [OK].
![PANASONIC Diga DMR-EX72S - Press [▲, ▼] to select "Copy Pictures (JPEG)" and press [OK]. - 1](/content/2026/05/1021228/images/74cbbb648cd1cf0a9fb5c86a74babb434fbaa308350128e8daeacae1a480f18b.jpg)
3 Perform steps 4 - 8 on "Copying using the copying list" (⇒ 53)
To stop copying
Press and hold [RETURN] for 3 seconds.
Note
- Copy Mode is fixed at "PICTURE High Speed".
- The structure of folders on the USB memory may not be the same at the copy destination.
- If the space on the destination drive runs out or the number of files/folders to be copied exceeds the maximum (⇒ 14), copying will stop partway through.
- You cannot copy the information about the picture rotation.
- Still pictures copied from USB memories are grouped by the shooting date in the HDD or DVD-RAM.
Copying music to HDD
You can store the following formats of music data in this unit's HDD.
Music CD (CD-DA)
When copying music CDs, this unit makes access to the internal Gracenote® Database to obtain title information. The album name, track name and artist name are assigned automatically allowing you find the track easily when playing back.
MP3/WMA
You can copy MP3 or WMA files from the USB memory or CD-R/CD-RW/DVD-R/DVD-R DL.
About the Gracenote® Database
The Gracenote® Database is a database used to search and retrieve CD title information.
When a CD is inserted or recording from a CD begins, the unit will automatically search for and obtain information about the inserted CD.
The Gracenote® Database comes pre-installed on this unit, so titles and artist information can be obtained. Please note however that the newest CD titles, etc. may not be registered yet to the internal database. This unit has an internal database containing information for approximately 350,000 album titles.
You can update the internal database (see page 56).
If there are CDs with very similar title information, then the incorrect title information may be obtained. If no title suggestions are found, then track name, album name and artist name will be blank. In these cases, enter the CD title information manually, after recording to the HDD has completed.
Copying music from a CD
CD → HDD
All tracks on the music CD (CD-DA) are recorded on the HDD. (Cannot record track-by-track.)
● One CD is recorded on the HDD as one album. ● Audio quality: LPCM ● The maximum number of albums on HDD: 300
(Depends on the remaining capacity.) If titles or pictures are recorded, then the number of albums that can be recorded will be reduced.
Preparation
Press [DRIVE SELECT] to select the DVD drive.
1 Insert a music CD.
The menu is automatically displayed.
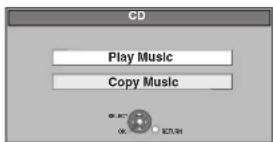
2 Press [▲, ▼] to select "Copy Music" and press [OK].
The unit starts accessing the Gracenote® Database and searches for the title information.

If search results indicate that multiple titles were found, press [▲, ▼] to select the appropriate title and press [OK].
3 Press [◀, ▶] to select "Copy" and press [OK].
Recording starts.
To stop recording
Press and hold [RETURN] for 3 seconds.
- If the recording is cancelled, then no tracks on the CD will be recorded.
To return to the previous screen
Press [RETURN]
Note
●While recording, no other operations can be performed. Timer recordings will not proceed. - Tracks recorded on the HDD cannot be transferred to a disc or USB memory. - CDs which have SCMS (Serial Copy Management System) restrictions cannot be recorded to the HDD.
Copying music from a USB memory or CD-R/CD-RW/DVD-R/DVD-R DL
-R -R DL CD USB (MP3/WMA) → HDD
You can copy MP3 or WMA files recorded on USB memory or CD-R/CD-RW/DVD-R/DVD-R DL to the HDD by file or folder.
●One folder is recorded on the HDD as one group. - The maximum number of albums * on HDD: 300 The maximum number of tracks on HDD: 3000 (Depends on the remaining capacity.) If titles or pictures are recorded, then the number of albums * that can be recorded will be reduced. * Folders with music files (groups) copied to the HDD will be treated as albums.
1 While stopped
Insert the USB memory or CD-R/CD-RW/DVD-R/DVD-R DL
(⇒ 13).
The menu is automatically displayed.
e.g., USB

2 Press [▲, ▼] to select "Copy Music (MP3&WMA)" and press [OK].
"Copy Direction" and "Copy Mode" are automatically set to "USB→HDD", "DVD→HDD" or "CD→HDD" and "MUSIC High Speed", respectively.
3 Register MP3 or WMA files for copy.
- If you are going to copy a registered list without making any changes to it (⇒ step 4).
You can register MP3/WMA files or folders. - MP3/WMA files and folders cannot be registered on the same list.

■ To register individual MP3/WMA files
① Press [▲, ▼] to select "Create List" and press [▶]. ② Press [▲, ▼] to select "New item" and press [OK]. ③ Press [▲, ▼] to select the folder and press [OK]. ④ Press [▲, ▼] to select the MP3/WMA file and press [■].
A check mark is displayed. Repeat this step until you select all necessary items.
- Press [11] again to cancel.
- The items will be copied in the order of the copying list. If you want to specify the order, repeat selecting one item at a time.
⑤ Press [OK]. • To edit the copying list (⇒ 56) ⑥ Press [◀] to confirm.
■ To register on a folder by folder basis
① Press [▲, ▼] to select "Create List" and press [▶]. ② Press [▲, ▼] to select "Track / Folder" and press [OK].

③ Press [▲, ▼] to select "Folder" and press [OK]. ④ Press [▲, ▼] to select "New item" and press [OK]. ⑤ Press [▲, ▼] to select the folder and press [■]. A check mark is displayed. Repeat this step until you select all necessary items.
- Press [11] again to cancel.
- The items will be copied in the order of the copying list. If you want to specify the order, repeat selecting one item at a time.
⑥ Press [OK].
• To edit the copying list (⇒ below)
⑦ Press [◀] to confirm.
4 Press [▲, ▼] to select "Start Copying" and press [OK].
- For individual files only When specifying an existing folder as the copying destination
① Press [▲, ▼] to select "Folder" and press [OK]. ② Press [▲, ▼] to select the folder and press [OK].
When creating a new folder as the copying destination ① Press [◀, ▶] to select "Yes" and press [OK]. ② Enter the folder name (⇒ 41, Entering text).
5 Press [◀, ▶] to select "Yes" and press [OK] to start copying.
To stop copying
Press and hold [RETURN] for 3 seconds.
To return to the previous screen Press [RETURN]
Note
- The sequence in which the MP3/WMA files are registered on the copy list may not be the same at the copy destination.
- If MP3/WMA files are already contained inside the copy destination folder, the new MP3/WMA files are recorded following the existing MP3/WMA files.
■ To edit the copying list
Select the item in step 3-⑤ (for a MP3/WMA file) (→ 55, Copying music from a USB memory or CD-R/CD-RW/DVD-R/DVD-R DL) or 3-⑥ (for a folder) (→ above). ① Press [OPTION]. ② Press [▲, ▼] to select the operation and press [OK].

Delete All:
Delete all items registered on the copying list. Press [◀, ▶] to select "Yes" and press [OK].
Add:
Add new items to the copying list.
1 Press [▲, ▼] to select the MP3/WMA file or folder and press [■]. A check mark is displayed. Repeat this step until you select all necessary items. ●Press [■■] again to cancel. 2 Press [OK].
Delete:
Delete the selected items. Press [◀, ▶] to select "Yes" and press [OK].
To cancel all registered copying settings and lists
After performing steps 1–2 (→ 55, Copying music from a USB memory or CD-R/CD-RW/DVD-R/DVD-R DL)
1 Press [▲, ▼] to select "Cancel All" and press [OK]. 2 Press [◀, ▶] to select "Yes" and press [OK].
- The settings and lists may be cancelled in the following situations. - When a file has been recorded or deleted at the copy source - When steps have been taken, for instance, to turn off the unit, remove the USB memory, open the tray, change the copy direction, etc.
Note
- If the space on the destination drive runs out or the number of files/folders to be copied exceeds the maximum (⇒ 14), copying will stop partway through.
To update the Gracenote® Database
To update the database with information on CDs that were recently released, follow the instructions below.
■ Preparing the update data
1 Visit the following website.
http://panasonic.net/pavc/support/gn/
2 Download the data to your USB memory.
- USB memory 1 GB or larger is required.
- Refer to the instruction on the website for more information.
■ Updating the database on this unit
3 Turn on this unit
4 Insert the USB memory ( ⇒ 13).
The menu is automatically displayed.

5 Press [▲, ▼] to select "Update CD database on HDD" and press [OK].
6 Press [◀, ▶] to select "Update" and press [OK].
- Updating takes up to 20 minutes.
- Do not disconnect the USB memory and the AC mains lead while updating.
- Once started, you cannot cancel updating.
A message appears when updating is finished.
7 Press [OK].
Note
- Timer recordings do not start while updating.
- Updating overwrites the internal database forcibly regardless of whether the data in the USB memory is the latest or not. Make sure you download the latest version from the website.
- Some of the CD title information in the database may be deleted after updating the database.
- No name will be assigned after copying a CD to HDD if the CD title information of the CD is not registered in the database. Even if the CD title information of that CD is added to the database by updating later, the information will not be assigned to the track/album already copied on the HDD. (The names will be still blank.)
- Depending on the situation of Panasonic or Gracenote, upgrading the Gracenote® Database and providing it through the Web may be discontinued without notice.

Using on-screen menus
Common procedures
1 Press [DISPLAY].
| Disc | Soundtrack | 1 | Digital 2/0 ch |
| Play | Subtitle | Off | |
| Picture | Audio channel | LR | |
| Sound | |||
| Other | |||
Menu Item Setting
- Depending on the condition of the unit (playing, stopped, etc.) and disc contents, there are some items that you cannot select or change.
2 Press [▲, ▼] to select the menu and press [▶].
3 Press [▲, ▼] to select the item and press [▶].
4 Press [▲, ▼] to select the setting.
- Some items can be changed by pressing [OK].
To clear the on-screen menus
Press [DISPLAY].
Disc menu—Setting the disc content
Soundtrack*
HDD RAM -R -R DL -RW(V) +R +R DL +RW -RW(VR)
The disc's audio attributes appear.
DVD-V
Select the audio and language (→ right, Audio attribute,
Language)
VCD (SVCD) and DivX
Select the soundtrack number.
●Soundtrack numbers are displayed even when there is only one
audio type.
Subtitle*
DVD-V
Turn the subtitle on/off and select the language (→ right.
Language)
HDD RAM -R -R DL -RW(V) +R +R DL +RW -RW(VR) (Only
discs that contain subtitle on/off information)
Turn the subtitle on/off
- Subtitle on/off information cannot be recorded using this unit.
VCD (SVCD) and DivX
Turn the subtitle on/off and select "Text" or the subtitle number.
- "Text" or subtitle numbers are displayed even if there are not
multiple subtitles.
Angle※ DVD-V
Change the number to select an angle.
Audio channel HDD RAM -RW(VR) VCD and DivX
Change audio during playback.
LR/L/R
Source Select (DivX)
•Automatic:
The constructing method of the DivX contents is
automatically distinguished and output.
- Interlace
Select when the disc contents were recorded using interlace.
-Progressive:
Select when the disc contents were recorded using
progressive
PBC (Playback control ⇒ 85) VCD
Indicates whether menu play (playback control) is on or off.
× With some discs, you may only be able to make changes using the menus (⇒ 18) on the disc.
- The display changes according to the disc content. You cannot change when there is no recording.
Audio attribute
LPCM/D Digital/DTS/MPEG:
k (kHz)
b (bit)
ch (channel):
Signal type
Sampling frequency
Number of bits
Number of channels
Language
ENG: English
FRA: French
DEU: German
ITA: Italian
ESP: Spanish
NLD: Dutch
SVE: Swedish
NOR: Norwegian
DAN: Danish
POR: Portuguese
RUS: Russian
JPN: Japanese
CHI: Chinese
KOR: Korean
MAL: Malay
VIE: Vietnamese
THA: Thai
POL: Polish
CES: Czech
SLK: Slovak
HUN: Hungarian
FIN: Finnish
*: Others
Play menu—Change the play sequence
This function works only when the elapsed play time is displayed. Select the item for repeat play. Depending on the disc, the items that can be selected will differ.
Repeat Play
•All
- Chapter
- Group
- PL (Playlist)
•Title
- Track
CD VCD
HDD RAM -R -R DL
+RW DVD-V -RW(VR)
MP3/WMA (except USB)
HDD RAM -RW(VR)
HDD RAM -R -R DL -RW(V) +R +R DL
+RW DVD-V -RW(VR)
CD VCD and MP3/WMA (except USB)
Select "Off" to cancel.
Picture menu—Change the picture quality
Playback NR
Reduces noise and picture degradation.
Progressive* (⇒ 85)
Select "On" to enable progressive output.
Select "Off" if the picture is stretched horizontally.
Transfer: [When "Progressive" (→ above) is set to "On".]
Select the method of conversion for progressive output to suit the type of title being played (⇒ 85, Film and video).
When the output signal is PAL
(When the tray is opened, the setting will return to "Auto".)
•Auto:
Automatically detects the film and video content, and appropriately converts it.
•Video:
Select when using "Auto", and the content is distorted.
Select when using "Auto", and the content is distorted.
Select this if the edges of the film content appear jagged or rough when "Auto" is selected. However, if the video content is distorted as shown in the illustration to the right, then select "Auto".
Select this if the edges of the film content appear jagged or rough when "Auto" is selected. However, if the video content is distorted as shown in the illustration to the right, then select "Auto".

•Auto 1 (normal):
•Auto 2:
•Video:
Automatically detects the film and video content, and appropriately converts it.
-Video:
Automatically detects the film and video
content, and appropriately converts it
In addition to "Auto 1", automatically detects film contents with different frame rates and appropriately converts it.
Select when using "Auto 1" and "Auto 2", and the content is distorted.
Input NR
Reduces the noise while recording.
•Automatic:
Noise reduction only works on picture input from a video tape.
• On:
Noise reduction works for input video.
• Off:
Noise reduction is off. You can record the input signal as it is.
* Only when you have set "Progressive" to "On" in the Setup menu ( ⇒ 67).
Sound menu—Change the DVB multi audio and sound effect
DVB Multi Audio
If more than one audio channel is output, you can set the desired channel before recording.
• DVB Multi Audio cannot be selected during playback or recording. - Depending on the broadcast, the items that can be selected will differ.
• English • Italian • Polish * "Original" is displayed when the original language is available in a broadcast.
Dialogue Enhancer
HDD RAM -R -R DL -RW(V) +R +R DL +RW DVD-V -RW(VR) and DivX
(Dolby Digital, 3-channel or over only, including a centre channel)
The volume of the centre channel is raised to make dialogue easier to hear.
Other menu—Change the DVB Subtitle and display position
DVB Subtitle
You can set the desired subtitles if more than one subtitle track can be selected.
- DVB Subtitle cannot be selected during playback or recording.
- Depending on the broadcast, the items that can be selected will differ.
- English • Italian
- Polish
• German • Czech • Slovak
- French • Hungarian • Original *
* "Original" is displayed when the original language is available in a broadcast.
Position
1-5:
The higher the setting, the lower the on-screen menu moves.
Status messages
Press [STATUS i].
The display changes each time you press the button.
![graph TD A["Selected drive status/type of disc or USB memory"] --> B["HDD"] B --> C["REC"] C --> D["PLAY"] D --> E["1"] E --> F["Das Erste"] F --> G["L R"] G --> H["DVD REC"] H --> I["Recording drive/Copy progress indicator"] I --> J["Title number and elapsed time during play/Recording mode"] J -->…](/content/2026/05/1021228/images/6e5581277e370ce31d3f7b8d71e6080170b2fadf16e720089d3f7e4c2b116f4a.jpg)
HDD and disc management
HDD RAM -R -R DL -RW(V) +R +R DL +RW -RW(VR)
Common procedures
Preparation
- Press [DRIVE SELECT] to select the drive.
1 While stopped
Press [FUNCTION MENU].
2 Press [▲, ▼] to select "Others" and press [OK].

3 Press [▲, ▼] to select "HDD Management" or "DVD Management" and press [OK].
e.g., RAM![DVD Management DVD-RAM Titles 11 Used 0:22 Romain 5:38 [EP] Disc Name Disc Protection Off Delete all titles Format Disc](/content/2026/05/1021228/images/9dbd4974c663794d181dc8e22f9d88a2b15216ad3e0c71fc3ebf29c6283d7d73.jpg)
- When HDD has been selected, "Delete all titles" and "Format HDD" are displayed.
Setting the protection
RAM
Preparation
- Press [DRIVE SELECT] to select the DVD drive.
After performing steps 1–3 (⇔ left)
1 Press [▲, ▼] to select "Disc Protection" and press [OK].
2 Press [◀, ▶] to select "Yes" and press [OK].
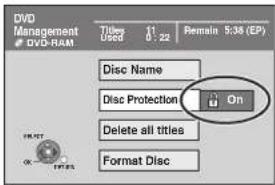
The lock symbol appears closed when the disc is write-protected.
To return to the previous screen
Press [RETURN]
To exit the screen
Press [EXIT].
Cartridge protection
For a DVD-RAM with a cartridge
- With the write-protect tab in the protect position, playback automatically starts when inserted in the unit.

Providing a name for a disc
RAM -R -R DL -RW(V) +R +R DL +RW
You can provide a name for each disc.
Preparation
- Press [DRIVE SELECT] to select the DVD drive.
- RAM: Release protection (→ above, Setting the protection).
After performing steps 1–3 (⇒ left)
1 Press [▲, ▼] to select "Disc Name" and press [OK].
(⇒ 41, Entering text)
- The disc name is displayed in the DVD Management window.
- -R -R DL -RW(V) +R +R DL With a finalized disc, the name is displayed on the Top Menu.
- +RW The disc name is displayed only if you play the disc on other equipment after creating the top menu.
![PANASONIC Diga DMR-EX72S - Press [▲, ▼] to select "Disc Name" and press [OK]. - 1](/content/2026/05/1021228/images/aa4c7863431cfcf0de5500563f238a4d76a16718cdae710058b261fac52ecc7f.jpg)
![PANASONIC Diga DMR-EX72S - Press [▲, ▼] to select "Disc Name" and press [OK]. - 2](/content/2026/05/1021228/images/add136b96e5b5fb12797d66f4b2a74fa1abcd462b5f409d2bd6c61debf673dad.jpg)
Note
- -R Once a name is provided to a disc, it is not possible to record still images to that disc.
To return to the previous screen
Press [RETURN]
To exit the screen
Press [EXIT].
Deleting all titles and playlists—Delete all titles
HDD RAM
Preparation
- Press [DRIVE SELECT] to select the HDD or DVD drive.
- RAM Release protection (→ 59, Setting the protection).
After performing steps 1–3 (→ 59, Common procedures)
1 Press [▲, ▼] to select "Delete all titles" and press [OK]. 2 Press [◀, ▶] to select "Yes" and press [OK]. 3 Press [◀, ▶] to select "Start" and press [OK]. A message appears when finished. 4 Press [OK].
To return to the previous screen
Press [RETURN]
To exit the screen
Press [EXIT].
Note
- Once deleted, the recorded contents are lost and cannot be restored. Make certain before proceeding.
- Deleting all video titles will result in all playlists also being deleted.
- Still picture data (JPEG), music data or computer data cannot be deleted.
- Delete does not work if one or more titles are protected.
Deleting all the contents—Format
HDD RAM -RW(V) +RW -RW(VR)
+R +R DL (New disc only)
Preparation - Press [DRIVE SELECT] to select the HDD or DVD drive. • RAM Release protection (→ 59, Setting the protection).
Note
Formatting deletes all contents (including computer data), and they cannot be restored. Check carefully before proceeding. The contents are deleted when you format a disc even if you have set protection.
After performing steps 1–3 (⇒ 59, Common procedures)
1 Press [▲, ▼] to select "Format HDD" or "Format Disc" and press [OK]. 2 Press [◀, ▶] to select "Yes" and press [OK]. 3 Press [◀, ▶] to select "Start" and press [OK].
A message appears when formatting is finished.
Note
- Formatting normally takes a few minutes; however, it may take up to a maximum of 70 minutes (RAM).
- Do not disconnect the AC mains lead while formatting. This can render the disc unusable.
4 Press [OK].
Note
- When a disc has been formatted using this unit, it may not be possible to use it on any other equipment.
- -R -R DL CD Formatting cannot be performed.
- You can format DVD-RW only as DVD-Video format on this unit.
To return to the previous screen
Press [RETURN]
To exit the screen
Press [EXIT].
Selecting the background style—Top Menu
-R -R DL -RW(V) +R +R DL +RW
You can select the background that will be displayed as the DVD-Video top menu after finalising or creating Top Menu (+RW).
Preparation
Press [DRIVE SELECT] to select the DVD drive.
After performing steps 1–3 (⇒ 59, Common procedures)
1 Press [▲, ▼] to select "Top Menu" and press [OK].
2 Press [▲, ▼, ◀, ▶] to select the background and press [OK].

- You can change thumbnails displayed in the top menu. (→ 43, Change Thumbnail)
- -R This function cannot be used for discs with still images recorded on them.
Selecting whether to show the Top Menu first—Auto-Play Select
-R -R DL -RW(V) +R +R DL +RW
You can select whether to show the top menu after finalising.
Preparation
Press [DRIVE SELECT] to select the DVD drive.
After performing steps 1–3 (⇒ 59, Common procedures)
1 Press [▲, ▼] to select "Auto-Play Select" and press [OK].
2 Press [▲, ▼] to select "Top Menu" or "Title 1" and press [OK].
Top Menu: The top menu appears first.
Title 1: The disc content is played without displaying the top menu.
- -R This function cannot be used for discs with still images recorded on them.
Enabling discs to be played on other equipment—Finalise
-R -R DL -RW(V) +R +R DL
Make selections from "Top Menu" and "Auto-Play Select" (⇒ above) before finalising the disc.
Preparation
Press [DRIVE SELECT] to select the DVD drive.
After performing steps 1–3 (⇒ 59, Common procedures)
1 Press [▲, ▼] to select "Finalise" and press [OK].
2 Press [◀, ▶] to select "Yes" and press [OK].
3 Press [◀, ▶] to select "Start" and press [OK].
A message appears when finalising is finished.
Note
- You cannot cancel finalising.
● Finalising takes up to 15 minutes.
(-R DL +R DL Finalising takes up to 60 minutes.)
- Do not disconnect the AC mains lead while finalising. This will render the disc unusable.
4 Press [OK].
Note
When finalising a high-speed recording compatible disc, it may take longer than displayed on the confirmation screen (approximately four times).
After finalising
- -R -R DL +R +R DL The disc becomes play-only and you can no longer record or edit.
- -RW(V) You can record and edit the disc after formatting (⇒ 60) although it becomes play-only after finalising.
- When copying in high speed, chapters will be replicated.
- -R -RW(V) +R Chapters are created automatically (-R -RW(V) about 5-minute * +R about 8-minute *), if – the titles were directly recorded to the disc. – the titles were copied using any mode other than the high speed mode. * This time varies greatly depending on the condition and mode of recording.
- There is a pause of several seconds between titles and chapters during play.
| Before finalising | After finalising | |
| Recording/Editing/Entering name ○ - Play on other players | - | ○ |
- You cannot finalise discs recorded on other manufacturer's equipment.
- If you finalise discs recorded on Panasonic equipment other than this unit, the background selected as "Top Menu" may not be displayed.
- Discs finalised on this unit may not be playable on other players due to the condition of the recording.
Visit Panasonic's homepage for more information about DVDs. http://www.panasonic-europe.com
Creating Top Menu—Create Top Menu
+RW
+RW discs contain no Top Menu data. Top Menu is a convenient function. We recommend you create the menu before playing a +RW disc on other equipment.
You cannot use the Top Menu for playing on this unit.
Make selections from "Top Menu" and "Auto-Play Select" (=> left) before creating top menu.
Preparation
Press [DRIVE SELECT] to select the DVD drive.
After performing steps 1–3 (<= 59, Common procedures)
1 Press [▲, ▼] to select "Create Top Menu" and press [OK].
2 Press [◀, ▶] to select "Yes" and press [OK].
3 Press [◀, ▶] to select "Start" and press [OK].
Creating Top Menu starts. You cannot cancel creating. Creating Top Menu can take a few minutes.
4 Press [OK].
Note
- You can record or edit discs after creating the Top Menu. But the created menu is deleted when you record or edit disc. In such cases, create the Top Menu again by using "Create Top Menu".
To return to the previous screen
Press [RETURN]
To exit the screen
Press [EXIT].
Changing the unit's settings
You can change the unit's settings using Setup menu.
- The settings remain intact even if you switch the unit to standby.
Common procedures
1 While stopped
Press [FUNCTION MENU].
2 Press [▲, ▼] to select "Others" and press [OK]. 3 Press [▲, ▼] to select "Setup" and press [OK].
Tabs Menus Options
4 Press [▲, ▼] to select the tab and press [▶]. 5 Press [▲, ▼] to select the menu and press [OK]. 6 Press [▲, ▼] to select the option and press [OK].
To return to the previous screen
Press [RETURN]
To exit the screen
Press [EXIT]
Tuning
Favourites Edit
You can create four Favourites of channels for making viewing and recording easier. Editing these Favourites does not affect the channel setting itself.
- Timer recording may not work correctly if you edit the Favourite during timer recording standby.
Press the "Green" button to select the Favourite.

To add channels to a Favourite
① Press the "Blue" button to select the channel type.
- Every time you press the button, you change between: TV→TV encrypted→Radio→Radio encrypted→TV.
- Encrypted channels are marked with the key symbol in the corresponding table.
- The channels can be sorted in numerical or alphabetical order with the "Red" button.
② Press [▲, ▼] to select the channel in the left column and press the "Yellow" button.
- Repeat steps ① – ② to add other channels.
③ Press [OK] to save the Favourite.
To change the order of channels in a Favourite
① Press [▶]. ② Press [▲, ▼] to select the channel in the "Favourite" column to move and press the "Green" button. ③ Press [▲, ▼] to select the new position of the channel and press the "Green" button. - Repeat steps ② – ③ to move other channels. ④ Press [OK] to save the Favourite.
To delete channels from a Favourite
① Press [▶]
② Press [▲, ▼] to select the channel in the "Favourite" column and press the "Yellow" button. - Repeat this step to delete other channels. - Press the "Blue" button to delete all channels from the Favourite. ③ Press [OK] to save the Favourite. Deleting a channel from a Favourite does not affect the channel itself. You can still select the channel from the left column.
To change the name of a Favourite in the "Favourite" column
① Press [▶]
② Press the "Red" button.
(→ 41, Entering text)
* When the station name in the left column is highlighted
Signal Condition
You can check the quality and strength of digital broadcast signals. Realign the aerial if you are receiving a poor signal.
Press [▲, ▼] to select "Signal Condition" and press [OK].
The quality and strength of the signal are shown.
Press [∧ ∨ CH] to select the channel.

Signal Quality
Below 2 (display red):
The signal quality is so poor that there may be interference in the pictures and sound.
2-5 (display orange):
The signal quality is basically adequate, but brief interference in the pictures and sound is possible in isolated case.
Over 5 (display green):
Optimum picture and sound quality.
Signal Strength
The display for signal strength is grey. "0" means signal strength 0%, "10" means signal strength 100%.
If the signal is too strong, the display will change from grey to red. Reduce the signal amplification at your aerial.
- When the signal is weak:
- adjust the position and direction of the satellite dish. - check that the current digital broadcast channel is correctly broadcasting.
Auto-Setup Restart
You can restart auto channel setting if setup ( → 8) fails for some reason.
When the confirmation screen appears
Press [◀, ▶] to select "Yes" and press [OK].
You can also use the following method to restart Auto Setup. When the unit is on and stopped
Press and hold [v CH] and [CH ∧] on the main unit until the Country setting screen appears.
All the settings except for the ratings level, ratings password, clock settings and remote control code return to the factory preset. The timer recording programmes are also cancelled.
Note
- Stored tuning data is erased and overwritten by new tuning data when the "Auto-Setup Restart" is executed.
DVB Preferred Language
Press [▲, ▼] to select "DVB Preferred Language" and press [OK].
You can select up to 2 different subtitles and audio tracks to be used when audio and subtitles digital broadcasts are received. Select the order of priority.
If the selected language is not available, then the language included in the broadcast programme is selected.
Multi-Audio *1
[English] [German] [Italian] [French]
[Czech] [Hungarian] [Polish] [Slovak]
[Original] 4
Multi-Audio (alternative)
[English] [German] [Italian] [French]
[Czech] [Hungarian] [Polish] [Slovak]
[Original] *2
Subtitle *1
[English] [German] [Italian] [French]
[Czech] [Hungarian] [Polish] [Slovak]
[Original] *2
Subtitle (alternative)
[English] [German] [Italian] [French]
[Czech] [Hungarian] [Polish] [Slovak]
*1 The default language will be the same as the language of the country selected in the Country Setting of Auto-Setup.
*2 The language specified as "Original" by the broadcast channel.
Advanced Setup
In Advanced Setup, you can set up additional satellites and make adjustments to your satellite system.
To receive several satellites with one dish, e.g. Astra 19.2°E and Hot Bird 13°E, you need a Multifeed dish combined with a DiSEqC switch between the receiver of your dish (LNB) and the DVD Recorder. Your dish must be equipped with two offset universal LNBs.
■ Satellite Configuration
Preparation
1 Press [▲, ▼] to select "Advanced Setup" and press [OK]. 2 Press [▲, ▼] to select "Satellite Configuration" and press [OK].
Setting up the DiSEqC/LNBs
① Press [▲, ▼] to select "DiSEqC/LNBs" and press [▶].

② Press [▲, ▼] to select "DiSEqC" and press [OK].
[Auto] Automatic search for LNB and DiSEqC switch [Mini DiSEqC] Up to 2 LNBs can be controlled.
[DiSEqC] Up to 4 LNBs can be controlled.
[No] Compatible with Single LNB
③ Press [▲, ▼] to select "Number of LNBs" and press [OK].
•[1] to [4] can be set up.
- One LNB is default (LNB A). You need one LNB for each satellite you want to receive.
④ Press [▲, ▼] to select "Switching Voltage" and press [OK].
- It is Voltage for horizontal and vertical polarisation switching.
[13/18 V] Standard setting
[14/19 V] The voltage can be increased to 14/19 V for long cable distances or multiswitch type.
Add Satellite
① After setting "DiSEqC/LNBs", press [▲, ▼] to select "LNB A" to "LNB D" and press [▶].
- As an example, if "Number of LNBs" is set to "1", only "LNB A" can be selected.

② Press [▲, ▼] to select "Add Satellite" and press [OK]. Select "Yes" when "Start scan?" is displayed. Search for the digital satellite station that can be received by the selected LNB will start.

③ Select "Yes" by pressing [◀, ▶] when the confirmation message asking to save the setting is displayed, and then press [OK].

When Universal LNB is not used:
① Press [▲, ▼] to select "LNB Freq. Low" and press [OK].
② Press [▲, ▼] to select the corresponding LNB frequency for "LNB Freq. Low" and press [OK].
③ Press [▲, ▼] to select "LNB Freq. High" and press [OK].
④ Press [▲, ▼] to select the corresponding LNB frequency for "LNB Freq. High" and press [OK].
- If you cannot find the LNB frequency corresponding to your system, select "---- MHz (User Def.)" and enter the value using the numbered buttons, then press [OK].
- The LNB converts the signals from the satellite into a corresponding frequency range for the DVB-S receiver.
- The standard setting for LNB Freq. Low is "9750 MHz (Universal)" and for LNB Freq. High is "10600 MHz (Universal)".
LNB Freq. Low
[9750 MHz (Universal)] [10000 MHz] [10250 MHz]
[10600 MHz] [10750 MHz] [---- MHz (User Def.)]
LNB Freq. High
[9750 MHz] [10000 MHz] [10250 MHz]
[10600 MHz (Universal)] [10750 MHz]
[---- MHz (User Def.)]
Delete Satellite
① Press [▲, ▼] to select the required LNB and press [▶].
② Press [▲, ▼] to select "Delete Satellite" and press [OK]. Select "Yes" when the confirmation message is displayed and press [OK].
The satellite is deleted. Deleting the satellite and corresponding stations can take some time.
●Together with the satellite, the TV Guide data are also deleted.
■ Add Transponder / Channel
There are several transponders on one satellite. Each transponder can transmit several TV and radio programmes and data in parallel. You can obtain the satellite, transponder and programme data from each particular station provider or on the internet.
Preparation
1 Press [▲, ▼] to select "Advanced Setup" and press [OK]. 2 Press [▲, ▼] to select "Add Transponder / Channel" and press [OK]. 3 Press [▲, ▼] to select the satellite and press [▶].

Add Transponder
① Press [▲, ▼] to select "Transponder Frequency" and press [OK]. ② Enter value with numbered buttons and then press [OK]. ③ Press [▲, ▼] to select "Polarisation", "Symbol Rate" and "FEC", press [OK] and then perform necessary setup.
Polarisation
[Horizontal] [Vertical]
- Polarisation indicates whether the transponder transmits the satellite signal horizontally or vertically.
Symbol Rate
[22000 ksym/s] [27500 ksym/s] [28000 ksym/s]
[30000 ksym/s] [---- ksym/s (User Def.)]
●Data flow transmission rate from the satellite to the dish.
FEC (forward error correction)
[Auto] [1/2] [2/3] [3/4] [5/6] [7/8]
The transmitted signal contains redundant data which allows the receiver to detect and correct errors. With the [Auto] setting, the unit selects error correction.
④ Press [▲, ▼] to select "Add Transponder", and then press [OK]. - The search for the entered transponder and all its stations begins. ●The found transponder is stored. ⑤ Press [OK] when the message disappears.
Channel Data
If you want to add just one single station of a transponder, first enter the transponder data as described left.
① Press [▲, ▼] to select "Channel Data" and press [OK].

② Press [▲, ▼] to select the following PID and press [OK].
The data flow from the satellite consists of many data packages. Each data package has an identification number describing the contents of the package.
Video PID Package ID No. for video data.
Audio PID Package ID No. for audio data, e.g. audio for various languages.
PCR PID Package ID No. for programme clock reference.
AC3 PID Package ID No. for Dolby Surround.
③ Enter value with numbered buttons and then press [OK]. ④ Press [▲, ▼] to select "Add Channel" and press [OK]. The search for the required station begins.
■ Delete Transponder
① Press [▲, ▼] to select "Advanced Setup" and press [OK]. ② Press [▲, ▼] to select "Delete Transponder" and press [OK].

③ Press [▲, ▼] to select the satellite and press [OK]. ④ Press [◀, ▶] to select "Yes". ●The transponder is deleted. - Together with the transponder, the TV Guide data are also deleted.
Disc
(All factory default settings are indicated with underlined text.)
Settings for Playback
- Press [OK] to show the following settings.
Ratings
Set a ratings level to limit DVD-Video play.
Follow the on-screen instructions. Enter a 4-digit password with
the numbered buttons when the password screen is shown.
Do not forget your password.
Setting ratings (When level 8 is selected)
[8 No Limit] All DVD-Video can be played.
[1 to 7] Prohibits play of DVD-Video with corresponding ratings recorded on them.
[0 Lock All] Prohibits play of all DVD-Video.
- Changing settings (When level 0 to 7 is selected)
[Unlock Recorder] [Change Password]
[Change Level] [Temporary Unlock]
Soundtrack*
[English] [German] [French] [Italian]
[Spanish] [Dutch] [Czech] [Slovak]
[Original] The original language of each disc will be selected.
[Other * * * * ]*2
Subtitle
[Automatic] If the language selected for "Soundtrack" is not available, subtitles of that language will automatically appear if available on that disc.
[English] [German] [French] [Italian]
[Spanish] [Dutch] [Czech] [Slovak]
[Other * * * * ]*2
Menus
[English] [German] [French] [Italian]
[Spanish] [Dutch] [Czech] [Slovak]
[Other * * * * ]*2
DivX Subtitle Text
Select a suitable item according to the language used for DivX Subtitle Text (=> 35). If DivX Subtitle Text is not displayed properly, change the selection.
- This item is displayed only after playing back a DivX file with Subtitle text.
[Latin 1] [Latin 2] 3 [Cyrillic]
×1 The default language will be same as the language of the country selected in the Country Setting of Auto-Setup.
52 [Other ××××] Enter a code (=> 75) with the numbered buttons. When the selected language is not available on the disc, the default language is played. There are discs where you can only switch the language from the menu screen (=> 18).
3 When “Česká republika” or “Slovensko” is selected in the Country Setting of Auto-Setup
DVD-V
Choose the language for audio, subtitle and disc menus.
● Some discs start in a certain language despite any changes you make here.
Settings for Recording
- Press [OK] to show the following settings.
Recording time in EP mode
Select the maximum number of hours for recording in EP mode (→ 23, Recording modes and approximate recording times).
[EP (6Hours)] You can record for 6 hours on an unused 4.7 GB disc.
[EP (8Hours)] You can record for 8 hours on an unused 4.7 GB disc.
- The sound quality is better when using "EP (6Hours)" than when using "EP (8Hours)".
Aspect for Recording
Sets the aspect ratio when recording or copying.
[Automatic] The programme will be recorded in the original aspect used when recording started (including when recording started at a commercial, etc.). [16:9] [4:3]
- When recording or copying to the HDD or DVD-RAM with "Rec for High Speed Copy" set to "Off", programme will be recorded in the original aspect ratio.
- In the following cases, even when set to "Automatic" or "16:9", recordings will be made or copied in 4:3.
-R -R DL -RW(V) When the recording mode is set to "EP" or "FR (recordings 5 hours or longer)" mode.
- When recording or copying to a +R, +R DL and +RW. High-speed copy does not work for the titles recorded in 16:9 even if they were recorded with "Rec for High Speed Copy" set to "On".
Chapter Creation
Set the automatic Chapter Creation method. (→ 42)
[Automatic] [5 minutes]
[Off] No chapter start points are set.
Rec for High Speed Copy
You can copy recorded titles from the HDD to DVD-R, DVD-R DL, DVD-RW (DVD-Video format), +R, +R DL and +RW using high speed mode. However, screen size, etc. is restricted.
We recommend turning the setting "Off" if high speed copy to DVD-R, etc. is not necessary when recording a programme.
This setting is effective when recording from a television programme or external equipment (including DV equipment), or when copying from a finalised DVD-Video disc.
[On] You can high-speed copy to DVD-R, etc. Press
[◀, ▶] to select "Yes" and press [OK].
- Recordings are made using the aspect ratio set in "Aspect for Recording" (=> above).
- Select the type of audio in advance from "Bilingual Audio Selection" (<= 66).
- You are no longer able to switch the audio when watching a programme on an input channel on the TV connected to this unit (e.g., AV1, etc).
[Off]
DVD Speed for High Speed Copy
Select the speed of high-speed copying (When using high-speed copy compatible DVD-RAM 5X, DVD-R 8X, +R 8X or +RW 4X discs).
[Maximum]
[Normal (Silent)] The noise generated by this unit is less than when "Maximum" is selected, however the time required for copying will double (approximately).
Start Recording Time
This function sets the timer recording to start earlier than the TV Guide time.
[1 min earlier] [3 min earlier] [5 min earlier]
[10 min earlier] [Off ____]
Finish Recording Time
This function sets the timer recording to stop later than the TV Guide time.
[1 min later] [3 min later] [5 min later]
[10 min later] [Off]
Picture
(All factory default settings are indicated with underlined text.)
Comb Filter
Select the picture sharpness when recording.
The setting is fixed with "On" if you set "TV System" to "NTSC" (=> 67).
[On] Pictures become clear and vivid. Normally, use this setting.
[Off] Select it when recording noisy pictures.
Still Mode
Select the type of picture shown when you pause play (→ 85, Frames and fields).
[Automatic]
[Field] Select if jittering occurs when "Automatic" is selected. (The picture is coarser.)
[Frame] Select if small text or fine patterns cannot be seen clearly when "Automatic" is selected. (The picture is clearer and finer.)
Seamless Play
Select the play mode between playlist chapter segments and partially deleted titles.
[On] The chapters in playlists are played seamlessly. This does not work when there are several audio types included on the playlist and when using Quick View (PLAY×1.3). Additionally, the positioning of chapter segments may change slightly.
[Off] The points where chapters in playlists change are played accurately, but the picture may freeze for a moment.
Sound
(All factory default settings are indicated with underlined text.)
Dynamic Range Compression
DVD-V (Dolby Digital only)
Change the dynamic range for late night viewing
[On] [Off ]
Bilingual Audio Selection
When recording bilingual programmes from equipment connected to the DV IN terminal of this unit, select whether to record the main or secondary audio type.
Digital Audio Output
Change the settings when you have connected equipment through this unit's DIGITAL AUDIO OUT terminal (⇒ 72).
- Press [OK] to show the following settings.
PCM Down Conversion
Select how to output audio with a sampling frequency of 96 kHz.
- Signals are converted to 48 kHz despite the settings below if the signals have a sampling frequency of over 96 kHz, or the disc has copy protection.
[On] Signals are converted to 48 kHz. (Choose when the connected equipment cannot process signals with a sampling frequency of 96 kHz.)
[Off] Signals are output as 96 kHz. (Choose when the connected equipment can process signals with a sampling frequency of 96 kHz.)
Dolby Digital®
Select how to output the signal.
Select "Bitstream" if the connected equipment decodes the signal.
Select "PCM" if this unit decodes the signal and outputs it as 2 channels.
- Not making the proper settings may result in noise.
[Bitstream] When connected to equipment with a built-in Dolby Digital decoder.
[PCM] When connected to equipment without a built-in Dolby Digital decoder.
DTS*
Select how to output the signal.
Select "Bitstream" if the connected equipment decodes the signal.
Select "PCM" if this unit decodes the signal and outputs it as 2 channels.
- Not making the proper settings may result in noise.
[Bitstream] When connected to equipment with a built-in DTS decoder.
[PCM] When connected to equipment without a built-in DTS decoder.
MPEG※
Select how to output the signal.
Select "Bitstream" if the connected equipment decodes the signal. Select "PCM" if this unit decodes the signal and outputs it as 2 channels.
- Not making the proper settings may result in noise.
[Bitstream] When connected to equipment with a built-in MPEG decoder.
[PCM] When connected to equipment without a built-in MPEG decoder.
* Refer to the operating instructions for connected devices to verify whether or not they can decode each of the audio formats.
Audio Mode for XP Recording
Choose the audio type when recording or copying with XP mode.
[Dolby Digital] (⇒ 85) [LPCM] (⇒ 85)
- The picture quality of LPCM recordings may be lower than that of normal XP mode recordings.
- The audio recording becomes Dolby Digital even if you selected LPCM when using a recording mode other than XP.
Audio Mode for DV Input
You can select the kind of audio when recording from the unit's DV input terminal (⇒ 26).
[Stereo 1] Records audio (L1, R1).
[Stereo 2] Records added audio such as narration (L2, R2) subsequent to original recording.
[Mix] Records both Stereo 1 and Stereo 2.
- When recording bilingual broadcast, select the type of audio in advance from "Bilingual Audio Selection" (⇒ left).
2 ]
Display
(All factory default settings are indicated with underlined text.)
Language
Choose the language for these menus and on-screen messages.
[English] [Deutsch] [Français] [Italiano]
[Česky] [Slovenčina]
On-Screen Messages
Choose the approximate time until the digital channel information screen (→ 17) disappears automatically.
The length of time the control panel (⇒ 39) is displayed can also be changed, but "Off" does not work.
[Off] (The digital channel information is not displayed.)
[3 sec.] [5 sec.] ____ [7 sec.] [10 sec.]
FL Display
Changes the brightness of the unit's display.
This setting is fixed with "Automatic" if you set "Power Save" (⇒ 8) to "On".
[Bright] [Dim]
[Automatic] The display turns dark during play and disappears when the unit is turned off. When Power Save settings (⇒ 69) are "On", power consumption while in standby mode is reduced.
Pause Live TV Icon
Select "Off" if you do not want the unit to show the on-screen icon while using the Pause Live TV function.
[On] [Off]
Screen Saver
[On] When this unit is not operated for approximately 5 minutes while the screen is being displayed, the screen saver is displayed. To return to the previous screen, press [OK].
[Off]
Teletext Character Set
Select Teletext language.
[West] English, French, German, Greek, Italian, Spanish, Swedish, Turkish, etc.
[East1] Czech, English, Estonian, Lettish, Rumanian, Russian, Ukrainian, etc.
[East2] 2 Czech, Hungarian, Lettish, Polish, Rumanian, Slovak, etc.
FUNCTION MENU Display
[On] When the unit is turned on, FUNCTION MENU will be displayed. (→ 5)
[Off]
21 The default language will be the same as the language of the country selected in the Country Setting of Auto-Setup. *2 When "Česká republika" or "Slovensko" is selected in the Country Setting of Auto-Setup
Connection
(All factory default settings are indicated with underlined text.) Depending on the connected equipment, some items may be shaded in grey on the display and cannot be selected, or you may not be able to change the settings.
TV Aspect
Set to match the type of television connected.
[16:9] When connected to a 16:9 widescreen television.
[Pan & Scan]
When connected to a 4:3 aspect television, side picture is trimmed for 16:9 picture.
[Letterbox]
When connected to a 4:3 aspect television. 16:9 picture is shown in the letterbox style.


Progressive
You can enjoy progressive video by connecting this unit's COMPONENT VIDEO OUT terminals to an LCD/plasma television or LCD projector compatible with progressive scan. This setting is fixed with "Off" if you set "AV1 Output" to "RGB 1 (without component)" or "RGB 2 (without component)".
[On] [Off ____]
Note
- When connected to a regular television (CRT: Cathode ray tube) or a multi system television using PAL mode, even if it is progressive compatible, progressive output can cause some flickering. Turn off "Progressive" if you are concerned about it (⇔57). ●Picture will not be displayed correctly if connected to an incompatible television.
TV System
Change the setting to match the equipment you are connecting with, or to match the title when there are both PAL and NTSC titles on the HDD.
[PAL]
- Select when connecting to a PAL or Multi-system television. Titles recorded using NTSC are played as PAL 60.
- Select to record television programmes and PAL input from other equipment.
- HDD: Select when playing a PAL input title recorded on the HDD.
- Select when connecting to an NTSC television. Television programmes cannot be recorded properly.
- Select to record NTSC input from other equipment.
- HDD: Select when playing an NTSC input title recorded on the HDD.
Note
- This unit cannot record NTSC signals to discs that already have PAL signal recordings. (However, both types of programmes can be recorded onto the HDD.)
- If "NTSC" has been selected, the TV Guide system cannot be used.
- During recording, timer recording standby, or EXT LINK standby, this unit cannot play discs or titles that do not match the "TV System" (PAL/NTSC) setting. It is recommended that "TV System" be set to match the discs or titles before playing them.
To change the setting all at once (PAL ↔ NTSC)
While stopped, keep pressing [■] and [▲ OPEN/CLOSE] on the main unit at the same time for 5 or more seconds.
HDMI Settings
- Press [OK] to show the following settings.
HDMI Video Format
You can only select items compatible with the connected equipment. This setting normally does not need to be changed. However, if you are concerned about output picture quality, it may be improved by changing the setting.
- To enjoy High Quality Video up-converted to 1080p, you need to connect the unit directly to a 1080p compatible HDTV. If this unit is connected to an HDTV through other equipment, it must also be 1080p compatible.
[576i/480i] [576p/480p] [720p] [1080i]
[1080p] When setting video output to "1080p", we recommend using High Speed HDMI Cables that have the HDMI logo (as shown on the cover) and are less than 5 meters to prevent video distortion, etc.
[Automatic] Automatically selects the output resolution best suited to the connected television (1080p, 1080i, 720p, 576p/480p or 576i/480i).
Aspect for 4:3 Video
To play a 4:3 title when connected with an HDMI cable, set how to show pictures on a 16:9 widescreen television.
[4:3] Picture output expands left or right.

[16:9] Picture is output as original aspect with side panels.
Digital Audio Output
[HDMI and Optical]
[Optical Only]
Select when this unit is connected to an amplifier with an optical digital audio cable and connected to a TV with an HDMI cable and you want to enjoy the highest quality of audio from discs (=> 72).
VIERA Link
Set to use "HDAVI Control" function when connected with an HDMI cable to a device that supports "HDAVI Control".
[On]
[Off] Select when you do not want to use "HDAVI Control".
AV1 Output
Set according to the terminal of the connected TV. Select "Video (with component)" or "S Video (with component)" for component output (progressive output).
If this unit is connected with an HDMI cable, you cannot select "RGB 1 (without component)" or "RGB 2 (without component)".
[Video (with component)]
Select when a TV that can receive a composite signal is connected.
[S Video (with component)] Select when a TV that can receive an S Video signal is connected.
[RGB 1 (without component)] Select when a TV that can receive an RGB signal is connected. If you always would like to view the picture from the unit in RGB signal, select this mode. The TV screen will automatically switch to display the picture from the unit when the unit is turned on.
[RGB 2 (without component)] Select when a TV is connected that can receive an RGB signal. If you would like to switch to display the picture from the unit only when playback or viewing menus, select this mode.
AV2 Settings
Set to match the connected equipment.
- Press [OK] to show the following settings
AV2 Input
Set to "RGB / Video" or "RGB" when receiving or recording RGB output from external equipment.
[RGB / Video] [RGB] [Video] [S Video]
Ext Link
This setting cannot be made when the "TV System" is set to "NTSC" (→ 67).
[Ext Link 1] When a digital satellite receiver which transmits a special control signal recordings via the 21-pin Scart cable is connected. Start and stop timings of recording are controlled by the control signal.
[Ext Link 2] When external equipment with a timer function is connected.
When it turns on, recording starts.
When it turns off, recording stops.
Common Interface
This indicates how to cancel the broadcast scrambling, conduct a card number inquiry when the broadcast cannot be received, CI status, etc. (→ 7, 9) Follow the on-screen instructions.
Others
(All factory default settings are indicated with underlined text.)
Remote Control
Change the remote control code on the main unit and the remote control (the two must match) if you place other Panasonic products close together.
[DVD 1] [DVD 2] [DVD 3]
Use "DVD 1", the factory set code, under normal circumstances.
① Press [▲, ▼] to select the code ("DVD 1", "DVD 2" or "DVD 3") and press [OK].

To change the code on the remote control
② While pressing [OK], press and hold the numbered button ([1], [2] or [3]) for more than 5 seconds.
③ Press [OK].
■ When the following indicator appears on the unit's display
The unit's remote control code
Change the code on the remote control to match the main unit's (→ step ②).

Note
Executing "Shipping Condition" in the Setup menu returns the main unit code to "DVD 1". Change the remote control code to 1 (⇒ step ②).
Clock
This unit usually obtains time and date information from digital broadcasts and automatically corrects the time several times a day. However, if the time is not set correctly, use the settings listed in the method below.
① Press [▲, ▼] to select "Off" of "Automatic" and press [OK].
Time offset → below
② Press [◀, ▶] to select the item you want to change.
The items change as follows:
Hour←→Minute←→Second←→Day←→Month←→Year
③ Press [▲, ▼] to change the setting.
You can also use the numbered buttons for setting.
④ Press [OK] when you have finished the settings.
The clock starts.
Note
If a TV station transmits a time setting signal, and when "Automatic" in the Clock setting menu is set to "On", the automatic time correction function checks the time and if necessary it is adjusted several times every day.
■ To change the time offset
When the time is not correct, set "Time offset" (from -3h to +3h).
1 Press [▲, ▼] to select "On" of "Automatic" and press [OK] in step ①.
Auto clock setting starts. This takes a few minutes.
"Automatic clock setting completed." screen is displayed.
2 Press [▶].
3 Press [▲, ▼] to select the correct time offset and press [OK].
4 Press [RETURN]
Setting for Standby
- Press [OK] to show the following settings.
Power Save
[On] Power consumption is minimized when the unit is turned to standby (see page 84).
[Off] This sets to Quick Start Mode.
- Refer to the chart for the Power Save function features (see page 8) when the unit is turned off.
Auto Standby
Set the time to automatically turn the unit off. After the unit has finished operating, the unit will be turned off once the set time has passed.
[2 hours] [4 hours] [6 hours]
[Off] The unit will not be automatically turned off.
DivX Registration
You need this registration code to purchase and play DivX Video-on-Demand (VOD) content (see page 35).
System Update
In order to update this unit's software, the TV Guide download, and to support system changes made by broadcasts, this unit periodically performs software updates.
Press [OK] to show the following settings.
- Update data and TV Guide download information are sent by an unscheduled digital broadcast. In order to receive these updates, you must be able to receive digital broadcasts.
- An update will take approximately 60 minutes. While the update is in progress, "SW-DL" appears on the unit's display. You cannot operate the unit until the update is complete. Removing the AC mains lead while the update is in progress may damage the unit.
- TV Guide download will take approximately 60 minutes. While the TV Guide download is in progress, "GUIDE" appears on the unit's display. The TV Guide download can be interrupted by switching on the unit.
TV Guide Download in Standby
[On] When you set this unit to standby mode, TV Guide data is downloaded automatically.
[Off]
- To select the time to download in standby mode (see below, TV Guide/Software search period)
Software Update in Standby
[On] When you set this unit to standby mode, software updates are downloaded automatically.
[Off]
- To select the time to download in standby mode (see below, TV Guide/Software search period)
TV Guide/Software search period
Selects the time to automatically perform TV Guide download and updates when the unit is set to standby mode. This can only be set when "TV Guide Download in Standby" and "Software Update in Standby" is set to "On".
- If there is a programmed recording set for the time you have selected, the programmed recording will be given priority.
[Automatic]
[14:00–18:00] [18:00–22:00] [22:00–02:00]
The unit will give priority to searching for TV Guide download and update data at midnight.
Software Update Search Now
Start the search for new software manually.
A new software version is announced by a message. Do not turn your unit off during the update. This could result in the loss of data. A message shows that the update has finished.
- If applicable update data is found, press [◀, ▶] to select "Yes" and press [OK].
TV Guide Update Search Now
Start the search for new TV Guide data manually.
Do not turn your unit off during the update. This could result in the loss of data. A message shows that the update has finished.
- It can be performed only when the "TV Guide Type" ( ⇒ below) is set to "Astra 19.2°E only".
TV Guide Type
Type of the TV Guide is setup.
[Astra 19.2°E only] *1
Astra 19.2°E is a TV Guide system for Germany and Austria, where the TV Guide data is sent through Astra 19.2°E. TV Guide for up to 14 days of 50 major stations preset in this unit will be displayed.
[Others] *2
"Others" is a TV Guide system for areas other than Germany and Austria, where the TV Guide data is sent through other satellites (not Astra 19.2°E), which will display TV Guide for up to 7 days.
*1 When "Deutschland" or "Österreich" is selected in the Country Setting of Auto-Setup
*2 When "Schweiz", "Suisse", "Svizzera", "Česká republika" or "Slovensko" is selected in the Country Setting of Auto-Setup
Initialize
- Press [OK] to show the following settings.
Shipping Condition ※1,※2
All the settings except for the ratings level, ratings password, and clock settings return to the factory preset.
[Yes] [No ____]
Default Settings ※1,※2
All the settings other than the tuning settings, clock settings, country settings, language settings, disc language settings, ratings level, ratings password, remote control code, return to the factory presets.
[Yes] [No ____]
*1 The timer recording programmes are also cancelled.
※2 Recording on the HDD will not be deleted.
Television operation
You can configure the remote control TV operation buttons to turn the television on/off, change the television input mode, select the television channel, and change the television volume.
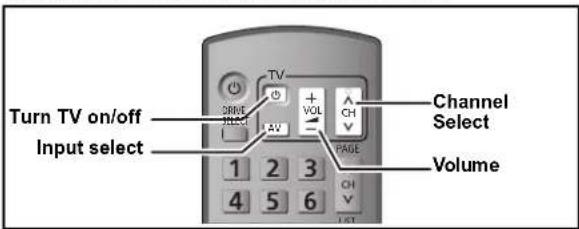
1. Point the remote control at the television.
While pressing [☐ TV], enter the code with the numbered buttons.
e.g., 01: [0] ⇒ [1] 10: [1] ⇒ [0]
Manufacturer and Code No.
| Brand Code | Brand Code | ||
| Panasonic 01/02/03/04 METZ 05 | 28 | ||
| AIWA | 35 | MITSUBISHI | 05/19/20/47 |
| AKAI | 27/30 | MIVAR | 24 |
| BEJING | 33 | NEC | 36 |
| BEKO | 05/71/72/73/74 | NOBLEX | 33 |
| BENQ | 58/59 | NOKIA | 25/26/27/60/61 |
| BP | 09 | NORDMENDE | 10 |
| BRANDT | 10/15 | OLEVIA | 45 |
| BUSH | 05 | ONWA | 30/39/70 |
| CENTREX | 66 | ORION | 05 |
| CHANGHONG 69 | PEONY | 49/69 | |
| CURTIS | 05 | PHILCO | 41/48/64 |
| DAEWOO | 64/65 | PHILIPS | 05/06/46 |
| DESMET | 05 | PHONOLA | 05 |
| DUAL | 05 | PIONEER | 37/38 |
| ELEMIS | 05 | PROVIEW | 52 |
| FERGUSON | 10/34 | PYE | 05 |
| FINLUX | 61 | RADIOLA | 05 |
| FISHER | 21 | SABA | 10 |
| FUJITSU | 53 | SALORA | 26 |
| FUNAI | 63/67 | SAMSUNG | 32/42/43/65/68 |
| GOLDSTAR | 05/50/51 | SANSUI | 05 |
| GOODMANS 05 | SANYO | 21/54/55/56 | |
| GRADIENTE | 36 | SCHNEIDER | 05/29/30 |
| GRUNDIG | 09 | SEG | 05/69/75/76/77/78 |
| HIKONA | 52 | SELECO | 05/25 |
| HITACHI | 05/22/23/40/41 | SHARP 18 | |
| INNO HIT | 05 | SIEMENS | 09 |
| IRRADIO | 30 | SINUDYNE | 05 |
| ITT | 25 | SONY | 08 |
| JINGXING | 49 | TCL | 31/33/66/67/69 |
| JVC | 17/30/39/70 | TELEFUNKEN | 10/11/12/13/14 |
| KDS | 52 | TEVION | 52 |
| KOLIN | 45 | TEX ONDA | 52 |
| KONKA | 62 | THOMSON | 10/15/44 |
| LG | 05/50/51 | TOSHIBA | 16/57 |
| LOEWE | 07/46 | WHITEWESTINGHOUSE | 05 |
| MAG | 52 | YAMAHA | 18/41 |
RQT9313
2. Test by turning on the television and changing channels.
- Repeat the procedure until you find the code that allows correct operation.
- If your television brand is not listed or if the code listed for your television does not allow control of your television, this remote control is not compatible with your television.
Note
- If your television brand has more than one code listed, select the one that allows correct operation.
Child Lock
The Child Lock deactivates all buttons on the unit and remote control. Use it to prevent other people from operating the unit.
Press and hold [OK] and [RETURN ↩]
simultaneously until "X"
"HOLD" appears on the unit's display.
![PANASONIC Diga DMR-EX72S - Press and hold [OK] and [RETURN ↩] - 1](/content/2026/05/1021228/images/bdb7f61a4f0651bf27d389b4bc6ec5ebca63ec34687e1b1037f6fcaee36c5800.jpg)
If you press a button while the Child Lock is on, "X HOLD" appears on the unit's display and operation is impossible.
To cancel the Child Lock
Press and hold [OK] and [RETURN] simultaneously until "X HOLD" disappears.
Connecting a television with AUDIO/VIDEO or S VIDEO terminals
The S VIDEO OUT terminal achieves a more vivid picture than the VIDEO OUT terminal. (Actual results depend on the television.)
- Connect to terminals of the same colour.
Television's rear panel
This unit's rear panel
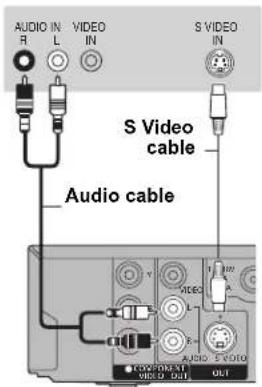
This unit's rear panel
Connecting a VCR with AUDIO/VIDEO or S VIDEO terminals
The S VIDEO terminal achieves a more vivid picture than the VIDEO terminal. (Actual results depend on the television.)
- Connect to terminals of the same colour.
This unit's front panel
VCR's rear panel
This unit's front panel
VCR's rear panel
Connecting a television with COMPONENT VIDEO terminals
Television's rear panel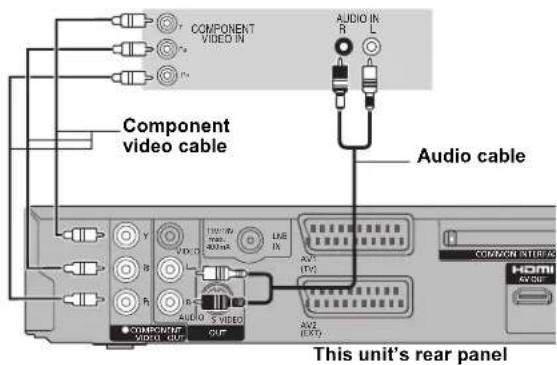
COMPONENT VIDEO terminals can be used for either interlace or progressive output (see page 85) and provide a purer picture than the S VIDEO OUT terminal.
Connect to terminals of the same colour.
Required setting
"Progressive" setting in the Setup menu (see page 67)
If you have a regular television (CRT: cathode ray tube)
Progressive output may cause some flickering, even if it is progressive compatible. Turn off "Progressive" if you are concerned about it. This is the same for multi system televisions using PAL mode.
![graph LR A["This unit"] -->|COMPONENT VIDEO OUT| B["CRT"] B -->|COMPONENT VIDEO IN| C["Progressive output"] style A fill:#f9f,stroke:#333 style B fill:#ccf,stroke:#333 style C fill:#cfc,stroke:#333](/content/2026/05/1021228/images/24ccf2956ec3a87e4beecb34c53f95a2025d5eadf496664ad62d0610de4d6ec8.jpg)
Connecting an amplifier with a digital input terminal
To enjoy multi-channel surround sound DVD-Video, connect an amplifier with Dolby Digital, DTS and MPEG decoders.
Required setting
"Digital Audio Output" in the Setup menu (see page 66)
- When this unit is connected to an amplifier with an optical digital audio cable and connected to a television with an HDMI cable, you can enjoy the highest quality of audio from the disc by setting "Digital Audio Output" to "Optical Only" in the Setup menu (see page 68). In this case audio is only output from the amplifier not the television.
- Before purchasing an optical digital audio cable (not included), check the terminal shape of the connected equipment.
- You cannot use DTS Digital Surround decoders not suited to DVD.
Amplifier's rear panel. Optical digital audio cable. Do not bend sharply when connecting.
Connecting a stereo amplifier
- Connect to terminals of the same colour.
Amplifier's rear panel
This unit's rear panel
Connecting with an HDMI compatible television and receiver
When connected to an HDMI compatible unit, an uncompressed digital audio and video signal is transmitted. You can enjoy high quality, digital video and audio with just one cord. When connecting to an HDMI-compatible HDTV (High Definition Television), the output can be switched to 1080p, 1080i or 720p HD video.
- Video sources converted to 1920×1080 resolution, while of high quality, will exhibit somewhat lower subjective image resolution than true, native 1080p full-HD sources. See dealer for details.
- Please use High Speed HDMI Cables that have the HDMI logo (as shown on the cover).
- When setting video output to "1080p", please use the HDMI cables 5.0 meters or less.
Regarding VIERA Link "HDAVI Control™" function
When connecting with a Panasonic TV (VIERA) or a receiver equipped with the "HDAVI Control" function, linked operations would be possible. [⇒ 38, Linked operations with the TV (VIERA Link "HDAVI Control"/Q Link)]
• Non-HDMI-compliant cables cannot be utilised. - It is recommended that you use Panasonic's HDMI cable. Recommended part number:
RP-CDHG10 (1.0 m), RP-CDHG15 (1.5 m), RP-CDHG20 (2.0 m), RP-CDHG30 (3.0 m), RP-CDHG50 (5.0 m), etc.

Note
- If you are connecting to a TV that is only compatible with 2 channel audio output, audio with 3 channels or more will be down mixed (=> 85) and output as 2 channels, even if connecting with an HDMI cable. (Some discs cannot be down mixed.)
- You cannot connect this unit to DVI devices that are incompatible with HDCP.
For units compatible with HDCP (High-Bandwidth Digital Content Protection) copyright protection that are equipped with a digital DVI input terminal (PC monitors, etc.):
Depending on the unit, images may not display properly or at all when connecting with a DVI/HDMI switching cable. (Audio cannot be output.)
Connecting a television and VCR or Set Top Box
Frequently asked questions
Refer to the following items if you have any doubts about unit operations.
Set up
Can this unit receive or record High Definition (HD) broadcasts?
No, this unit cannot receive or record High Definition (HD) broadcasts.
Can this unit receive or record a programme broadcasted in Dolby Digital 5.1?
No, this unit cannot receive or record a programme broadcasted in Dolby Digital 5.1 ch, but can receive or record the same programme in MPEG AUDIO 2ch, which is broadcasted simultaneously.
What equipment is necessary to play multi channel surround sound?
You cannot playback multi-channel sound on this unit without other equipment. You must connect this unit with an HDMI cable or an optical digital cable to an amplifier with a built-in (Dolby Digital, DTS or MPEG) decoder. (→ 72)
Are the headphones and speakers directly connected to the unit?
➢ You cannot directly connect them to the unit. Connect through the amplifier etc. (→ 72)
The television has a Scart terminal and component video input terminal. Which should I connect with?
If you have a regular television (CRT: cathode ray tube) we recommend using the Scart terminal. You can enjoy high-quality RGB video from this unit by connecting to an RGB compatible television. If you have an LCD/plasma television or LCD projector compatible with progressive scan, connect through the component video terminals for high-quality progressive video. If you have a CRT television or a multi system television using PAL mode that is compatible with progressive scan, we cannot recommend progressive output as some flickering can occur. (→ 6, 71)
Is my television progressive output compatible?
All Panasonic televisions that have 576 (625)/50i · 50p, 480 (525)/60i · 60p input terminals are compatible. Consult the manufacturer if you have another brand of television.
Disc
Can I play DVD-Video and Video CDs bought in another country?
You cannot play DVD-Video if their region number does not include "2" or "ALL". Refer to the disc's jacket for more information. (→ Cover)
Can a DVD-Video that does not have a region number be played?
The DVD-Video region number indicates the disc conforms to a standard. You cannot play discs that do not have a region number. You also cannot play discs that do not conform to a standard.
Please tell me about disc compatibility with this unit.
This unit records and plays DVD-RAM, DVD-R, DVD-RW (DVD-Video format), +R, and +RW, and plays DVD-RW (DVD Video Recording format). However you cannot directly record to a DVD-R DL or +R DL disc on this unit (playback and copy are possible). (→ 10–11) This unit also records and plays high speed recording compatible DVD-R, DVD-R DL, DVD-RW, +R, +R DL, +RW discs.
Please tell me about CD-R and CD-RW compatibility with this unit.
This unit plays CD-R/CD-RW discs which have been recorded in one of the following standards: CD-DA, Video CD, SVCD (conforming to IEC62107), DivX, MP3, WMA and still pictures (JPEG). (⇒ 11, 14) You cannot write to a CD-R or CD-RW with this unit.
Recording
Can I record from a commercially purchased video cassette or DVD?
Most commercially sold video cassettes and DVD are copy protected; therefore, recording is usually not possible.
Can DVD-R, DVD-R DL, DVD-RW (DVD-Video format), +R, +R DL and +RW recorded on this unit be played on other equipment?
You can play on compatible equipment such as DVD players after finalising the disc on this unit. However, depending on the condition of the recording, the quality of the disc and capabilities of the DVD player, play may not be possible. If you play a DVD-R DL, +R DL or +RW, use compatible equipment.
Can a digital audio signal from this unit be recorded to other equipment?
You can record if using the PCM signal. When recording DVD, change the "Digital Audio Output" settings to the following in the Setup menu. (→ 66) - PCM Down Conversion: On - Dolby Digital/DTS/MPEG: PCM However, only as long as digital recording from the disc is permitted and the recording equipment is compatible with a sampling frequency of 48 kHz. You cannot record MP3 or WMA signals.
Can I high speed copy to a disc?
Yes, you can. (When "Rec for High Speed Copy" was set to "On" before recording the programme.) Depending on the disc type, the maximum speed varies. (⇒ 48)
TV Guide USB
Is it possible to programme a recording, with a start and end time that are different from the TV Guide system?
You can manually change the start and end time of programmes in the Timer Recording menu. (→ 27) If setting timer recording using the TV Guide system, the start recording time and finish recording time can be set to a margin of up to 10 minutes. (⇒ 65, Start Recording Time, Finish Recording Time)
Can I receive TV Guide system data via a connected Set Top Box?
No, only via the built-in tuner. To perform timer recordings with a connected Set Top Box, please use the External Link feature or your unit's manual timer programming. (→ 25, 27)
How can I cancel a Timer programming?
➢ Press [PROG/CHECK] and select the desired entry and then press [DELETE *]. (⇒ 28)
What happens when I unplug the unit from the household mains socket?
The TV Guide data will not be updated. If the unit is disconnected from the household mains socket for a longer period of time, the TV Guide data will be lost. ➢ Clock setting will be erased and timer recording will not work.
What can or cannot be done using the USB port on this unit?
You can play DivX, MP3, WMA or still picture (JPEG) files on a USB memory. (→ 34) ➢ You can copy still pictures (JPEG) files on a USB memory to the HDD or DVD-RAM. (→ 54) ➢ You can copy MP3 or WMA files on a USB memory to the HDD. (⇒ 55) You can connect a video equipment and copy SD Video to the HDD or DVD-RAM. (→ 52) Data on the HDD or a disc cannot be transferred to a USB memory. Data on a USB memory cannot be edited or a USB memory cannot be formatted on this unit. Some USB memories cannot be used with this unit. (⇒ 12)
Music
What will happen if I try to record the same CD multiple times?
➢ New album will be made following the existing album.
Can I transfer the music tracks from HDD to the disc or USB memory?
No, you cannot.
Language code list Enter the code with the numbered buttons.
| Abkhazian: 6566 | Catalan: 6765 | Gujarati: 7185 | Lingala: 7678 | Rhaeto-Romance: | Tamil: 8465 |
| Afar: 6565 | Chinese: 9072 | Hausa: 7265 | Lithuanian: 7684 | 8277 | Tatar: 8484 |
| Afrikaans: 6570 | Corsican: 6779 | Hebrew: 7387 | Macedonian: 7775 | Romanian: 8279 | Telugu: 8469 |
| Albanian: 8381 | Croatian: 7282 | Hindi: 7273 | Malagasy: 7771 | Russian: 8285 | Thai: 8472 |
| Amharic: 6577 | Czech: 6783 | Hungarian: 7285 | Malay: 7783 | Samoan: 8377 | Tibetan: 6679 |
| Arabic: 6582 | Danish: 6865 | Icelandic: 7383 | Malayalam: 7776 | Sanskrit: 8365 | Tigrinya: 8473 |
| Armenian: 7289 | Dutch: 7876 | Indonesian: 7378 | Maltese: 7784 | Scots Gaelic: 7168 | Tonga: 8479 |
| Assamese: 6583 | English: 6978 | Interlingua: 7365 | Maori: 7773 | Serbian: 8382 | Turkish: 8482 |
| Aymara: 6589 | Esperanto: 6979 | Irish: 7165 | Marathi: 7782 | Serbo-Croatian: 8372 | Turkmen: 8475 |
| Azerbaijani: 6590 | Estonian: 6984 | Italian: 7384 | Moldavian: 7779 | Shona: 8378 | Twi: 8487 |
| Bashkir: 6665 | Faroese: 7079 | Japanese: 7465 | Mongolian: 7778 | Sindhi: 8368 | Ukrainian: 8575 |
| Basque: 6985 | Fiji: 7074 | Javanese: 7487 | Nauru: 7865 | Singhalese: 8373 | Urdu: 8582 |
| Bengali; Bangla: 6678 | Finnish: 7073 | Kannada: 7578 | Nepali: 7869 | Slovak: 8375 | Uzbek: 8590 |
| French: 7082 | Kashmiri: 7583 | Norwegian: 7879 | Slovenian: 8376 | Vietnamese: 8673 | |
| Bhutani: 6890 | Frisian: 7089 | Kazakh: 7575 | Oriya: 7982 | Somali: 8379 | Volapük: 8679 |
| Bihari: 6672 | Galician: 7176 | Kirghiz: 7589 | Pashto, Pushto: 8083 | Spanish: 6983 | Welsh: 6789 |
| Breton: 6682 | Georgian: 7565 | Korean: 7579 | Persian: 7065 | Sundanese: 8385 | Wolof: 8779 |
| Bulgarian: 6671 | German: 6869 | Kurdish: 7585 | Polish: 8076 | Swahili: 8387 | Xhosa: 8872 |
| Burmese: 7789 | Greek: 6976 | Laotian: 7679 | Portuguese: 8084 | Swedish: 8386 | Yiddish: 7473 |
| Byelorussian: 6669 | Greenlandic: 7576 | Latin: 7665 | Punjabi: 8065 | Tagalog: 8476 | Yoruba: 8979 |
| Cambodian: 7577 | Guarani: 7178 | Latvian, Lettish: 7686 | Quechua: 8185 | Tajik: 8471 | Zulu: 9085 |
On the television
| Authorisation Error. | ●You are trying to play the DivX VOD content that was purchased with a different registration code. You cannot play the content on this unit. (DivX) (⇒ 35) |
| Cannot finish recording completely.Copy-protect signal was detected. | ●The programme was copy-protected. |
| Disc is full, or maximum number of titles are recorded. Cannot finish recording completely. | ●The HDD or disc may be full.●The maximum number of programme has been exceeded. (⇒ 23)●[Even if you delete recorded content from the DVD-R, DVD-R DL, +R or +R DL there is no increase in disc space. Available space on DVD-RW (DVD-Video format) and +RW increases only when the last recorded title is deleted.] (⇒ 21, 43, 60)●Use a new disc. |
| Cannot record.Maximum number of titles exceeded. | |
| Cannot playback.TV system is different from the setting.To playback, please change the TV System in Setup. | ●You tried to play a title recorded using a different encoding system from that of the TV system currently selected on the unit.Alter the "TV System" setting on this unit to suit. (⇒ 67) |
| Cannot play on this unit. | ●You tried to play a non-compatible image. (⇒ 14) |
| No Disc ●The disc may be upside down. | |
| No folders. | ●There is no compatible folder in this unit. (⇒ 14) |
| Not enough space in the copy destination. | ●Create space by deleting any unnecessary items. (⇒ 21, 43, 47, 60)●Delete one or more items registered on the copy list to ensure that the "Destination Capacity:" is not exceeded. (⇒ 51, 54, 56) |
| This is a non-recordable disc. | ●The disc may be dirty or scratched. (⇒ 13)●The unit cannot record on the disc you inserted. Insert a DVD-RAM or unfinalised DVD-R, DVD-RW (DVD-Video format), +R or +RW. (⇒ 10)●You inserted an unformatted DVD-RAM, DVD-RW, +R, +R DL or +RW. (⇒ 60)●You cannot directly record to a DVD-R DL and +R DL disc on this unit. Record to the HDD and then copy to the disc. |
| Unable to format. | |
| This disc is not formatted properly.Format it using DVD Managementin FUNCTION MENU. | |
| Not enough space on HDD. Space of 4 hours(in SP mode ) is necessary.Maximum number of titles is recorded on HDD.Please delete unwanted titles. | ●-R DL +R DL It is not possible to copy when there is not enough free space on the HDD or when the total number of the recorded titles on the HDD and the titles to be copied are greater than 499.Delete unwanted titles from the HDD. (⇒ 21) |
| Rental Expired. | ●The DivX VOD content has zero remaining plays. You cannot play it. (DivX) (⇒ 35) |
| ⊗ ●The operation is prohibited by the unit or disc. |
On the unit's display
The following messages or service numbers appear on the unit's display when something unusual is detected during startup and use.
| DVD □("□" stands for a number.) | ●The remote control and main unit are using different codes. Change the code on the remote control. Press and hold [OK] and the indicated number button at the same time for more than 5 seconds. (⇒ 68) |
| GUIDE | ●TV Guide data is being downloaded. (⇒ 69) |
| HARD ERR* | ●If there is no change after turning the unit on and off, consult the dealer where the unit was purchased. |
| NoERAS ●You cannot delete items on this disc.The disc may be damaged. Use a new disc. | |
| NoREAD | ●The disc is dirty or badly scratched. The unit cannot record, play, or edit. (⇒ 13)●This message may appear when the DVD lens cleaner has finished cleaning.Press [▲ OPEN/CLOSE] on the main unit to eject the disc. (⇒ 15) |
| NoWRIT ●You cannot write to this disc.The disc may be damaged. Use a new disc. | |
| PLEASE WAIT* | ●There was a power failure or the AC plug was disconnected while the unit was on. The unit is carrying out its recovery process. This process restores the unit to normal operation. The unit is not broken. Wait until the message disappears. |
| PROG FULL* | ●There are already 32 timer programmes. Delete unnecessary timer programmes. (⇒ 28) |
| REMOVE | ●The USB device is drawing too much power. Remove the USB device. |
| SP 35:50LP 151h"SP","LP" and the numbers are examples. | ●Available space on the HDD or disc.The example "SP 35:50" is displayed when less than 100 hours are available and the example "LP 151h" is displayed when over 100 hours are available."SP" and "LP" are recording modes, "35:50" means "35 hours 50 minutes" and "151h" means "151 hours". |
| SW-DL | ●The unit is performing a software update. (⇒ 69) |
| UNFORMAT* | ●You inserted an unformatted DVD-RAM, DVD-RW, +RW, an unused +R, +R DL or DVD-RW (DVD-Video format) that has been recorded on other equipment.Format the disc to use it.However all the recorded contents on the disc are deleted. (⇒ 60) |
| UNSUPPORT* | ●You have inserted a disc the unit cannot play or record on. (⇒ 10-11)●You tried to operate with a non-compatible USB memory. (⇒ 12) |
| F74 | ●The HDMI connection could not be authenticated due to a transfer malfunction.Consult the dealer where the unit was purchased. |
| F75 | ●The HDMI connection could not be authenticated due to an internal data malfunction.Consult the dealer where the unit was purchased. |
| U50 | ●The aerial cable might be short-circuited. Disconnect the aerial cable from the unit and check the cable and connection. (⇒ 6, 73) |
| U59 ●The unit is hot. | The unit switches to standby for safety reasons. Wait for about 30 minutes until the message disappears.Select a position with good ventilation when installing the unit. Do not block the cooling fan on the rear of the unit. |
| U61 | ●(When a disc is not inserted) Displays when a malfunction has occurred during recording, playback or copy. This is displayed when the unit is in the recovery process to return to normal operation; it is not broken. Once the display clears you can use the unit again. |
| U76 | ●HDMI cannot be output because this unit is connected to a model that does not support copyright protection. |
| U80U81U99 | ●The unit fails to operate properly. Press [∅/l] on the main unit to switch the unit to standby mode.Now press [∅/l] on the main unit again to turn the unit on. |
| U88 | ●(When a disc is inserted) Displays when there was something unusual detected with the disc while recording, playback or copy. This is displayed when the unit is in the recovery process to return to normal operation; it is not broken. Once the display clears you can use the unit again. (⇒ 78) |
| H□□ or F□□ | ●There is something unusual. (The service number displayed after H and F depends on the unit's condition.)●Check the unit using the troubleshooting guide. If the service number does not disappear, do the following.(⇒ 78-83)1. Disconnect the plug from the household mains socket, wait a few seconds, then reconnect it.2. Press [∅/l] to turn the power on. (The unit may be fixed.)If the service number does not disappear despite after doing the above, request service from the dealer. Inform the dealer of the service number when requesting service. |
| X HOLD ●The Child Lock function is activated.Press and hold [OK] and [RETURN ≈] at the same time until "X HOLD" disappears. (⇒ 70) | |
* The messages are alternately displayed.
Troubleshooting guide
Before requesting service, make the following checks. If you are in doubt about some of the check points, or if the solutions indicated in the chart do not solve the problem, consult your dealer for instructions.
The following do not indicate a problem with this unit:
● Regular disc rotating sounds. ●Poor reception due to atmospheric conditions. - Image disturbance during search. - Interruptions in reception due to periodic satellite broadcasting breaks. - Operations are slow to respond when "Power Save" is set to "On". ● Operations do not work due to a poor-quality disc. (Try again using a Panasonic disc.) - The unit freezes due to one of its safety devices being activated. (Press and hold [⏻/l] on the main unit for 10 seconds.) - When the unit is turned on or off, there may be an unexpected sound.
Power
No power.
The unit does not turn on pressing [⏻].
Insert the AC mains lead securely into a known active household mains socket. (6, 73)
Linked timer recordings with external equipment is in recording standby ("EXT-L" on the unit's display blinks when [☐] is pressed). Press [EXT LINK] to cancel the recording standby. (⇒ 25)
The unit switches to standby mode.
One of the unit's safety devices is activated. Press [∅/I] on the main unit to turn the unit on.
The power is turned off automatically.
If you connected this unit to a "HDAVI Control" compatible TV with an HDMI cable, or connected this unit to a Q Link-compatible TV with a fully wired 21-pin Scart cable, this unit will be automatically set to standby mode when the TV is set to standby mode. (→ 38)
This unit turns off when the TV input is switched.
If connected with an HDAVI Control 4 compatible TV (VIERA) with the "Intelligent Auto Standby" setting activated on the TV, when switching the TV input, the unit will be automatically turned to standby. For details please read the operating instructions of the TV.
Displays
The display is dim.
➢ Change "FL Display" in the Setup menu. (→ 67)
"0:00" is flashing on the unit's display.
Set the clock. (→ 69)
The time recorded on the disc and the available time shown do not add up.
The displayed time of this unit is different from the actual recording time or MP3/WMA recording time.
➢ Times shown may disagree with actual times. Available recording space on DVD-RW (DVD-Video format) or +RW increases only when the last recorded title is deleted. It does not increase if other titles are deleted. Even if you delete recorded content from the DVD-R, DVD-R DL, +R or +R DL, there is no increase in disc space.
More disc space than the actual recording time is used after recording or editing the DVD-R, DVD-R DL, +R or +R DL 200 times or more. While searching, the elapsed time may not display correctly.
The clock is not correct.
Under adverse reception conditions, etc., the automatic time correction function may not work. In this case, "Automatic" is automatically turned to "Off". If re-setting the Auto Clock Setting does not work, set the time manually. (→ 69)
Compared to the actual recorded time, the elapsed time displayed is less. (Only when recording in NTSC)
The displayed recording/play time is converted from the number of frames at 29.97 frames (equal to 0.999 seconds) to 1 second. There will be a slight difference between the time displayed and the actual elapsed time (e.g., actual 1 hour elapsed time may display as approximately 59 minutes 56 seconds). This does not affect the recording.
"U88" is displayed and the disc cannot be ejected.
The unit is carrying out the recovery process. Do the following to eject the disc. 1 Press [∅/l] on the main unit to switch the unit to standby. If the unit doesn't switch to standby, press and hold [∅/l] on the main unit for about 10 seconds. The unit is forcibly switched to standby. 2 While the unit is off, press and hold [■] and [CH ^] on the main unit at the same time for about 5 seconds. Remove the disc.
TV screen and video
Television reception worsens after connecting the unit.
This can occur because the signals are being divided between the unit and other equipment. It can be solved by using a signal booster, available from audio-visual suppliers. If it is not solved by using a signal booster, consult the dealer.
The digital channel information or control panel does not appear.
Select the length of time (3–10 sec.) in the "On-Screen Messages" in the Setup menu. (⇒ 67) The digital channel information will not appear during playback or recording. The control panel is only displayed when connected to a TV supporting "HDAVI Control 2" or later. (⇒ 39)
Some functions of DVB-S do not work.
The unit does not necessarily support all DVB-S functions such as MHP (Multimedia Home Platform) etc. New functions introduced by broadcasters cannot be guaranteed to work.
Screen size is wrong.
Use the television to change the aspect. If your television does not have that function, set "Progressive" in the Picture menu to "Off". (57) ➢ Check the settings for "TV Aspect" in the Setup menu. (→ 67) If you connect an HDMI cable, set "Aspect for 4:3 Video" to "16:9" in the Setup menu. (→ 68)
The recorded title's screen size is wrong.
Set "Rec for High Speed Copy" to "On", and set the "Aspect for Recording" to "4:3". (⇒ 65) 16:9 aspect programmes are recorded in 4:3 aspect in the following cases. - -R -R DL -RW(V) If you recorded or copied using "EP" or "FR (recordings 5 hours or longer)" recording mode. - If you recorded or copied to a +R, +R DL or +RW. - If you recorded with the "Aspect for Recording" set to "4:3" in the Setup menu. When you want to record 16:9 programme in the same aspect, set "Rec for High Speed Copy" to "On", and set the "Aspect for Recording" to "16:9". (→ 65) By setting "Aspect for Recording" to "Automatic", there is a chance that the recording will be made using the wrong aspect. Match the aspect settings to the broadcast when recording. (⇒ 65) It may be possible to adjust the display mode on the TV. Refer to your television's operating instructions.
Picture does not appear during timer recording.
Timer recordings work regardless of whether the unit is on or off. To confirm that the timer recording will work properly, turn the unit on.
The screen changes automatically.
When "Screen Saver" in the Setup menu is set to "On", the display may automatically switch to screen saver mode if there is no operation for 5 minutes or more. (See page 67) Press [OK] to return to the previous screen.
There is a lot of after-image when playing video.
Set "Playback NR" in the Picture menu to "Off". (See page 57)
When playing DVD-Video using progressive output, one part of the picture momentarily appears to be doubled up.
Set "Progressive" in the Picture menu to "Off". This problem is caused by the editing method or material used on DVD-Video, but should be corrected if you use interlace output. (See page 57)
There is no apparent change in picture quality when adjusted with the Picture menu in the on-screen menus.
The effect is less perceivable with some types of video.
The images from this unit do not appear on the television.
Picture is distorted.
Make sure that the television is connected to the AV1 terminal, VIDEO OUT terminal, S VIDEO OUT terminal, COMPONENT VIDEO OUT terminals, or HDMI terminal on this unit. (See pages 6, 7, 71, 72, 73) Make sure that the television's input setting (e.g., AV 1) is correct. Progressive output is set to on but the connected television is not progressive compatible. Press and hold [■] and [▶] (PLAY) on the main unit at the same time for more than 5 seconds to cancel this setting. The setting will change to interlace. The unit's "TV System" setting differs from the TV system used by the disc now playing. While stopped, keep pressing [■] and [▲ OPEN/CLOSE] on the main unit for 5 or more seconds. The system switches from PAL to NTSC or vice versa. (See page 67) When this unit is connected with an HDMI cable, use a disc that matches this unit's TV system. Picture may not be seen when more than 4 devices are connected with HDMI cables. Reduce the number of connected devices.
The picture is distorted during play, or video will not play correctly.
You may be playing a TV programme recorded with poor reception or unfavourable weather conditions. The picture may be distorted or a black screen may appear briefly between recorded titles in the following situations: – between titles recorded with different recording modes. – between scenes recorded with different aspect ratios. – between scenes recorded with different resolutions. – between playlist chapters.
Sound
No sound.
Low volume.
Distorted sound.
Cannot hear the desired audio type.
Check the connections and the "Digital Audio Output" settings. Check the input mode on the amplifier if you have connected one. (→ 6, 7, 66, 68, 71, 72, 73) ➢ Audio may not be output due to how files were created. (DivX) ➢ Audio may not be heard when more than 4 devices are connected with HDMI cables. Reduce the number of connected devices. The sound effects will not work when the bitstream signal is output from the HDMI AV OUT terminal or the OPTICAL DIGITAL AUDIO OUT terminal. To output audio from a device connected with an HDMI cable, set "Digital Audio Output" to "HDMI and Optical" in the Setup menu. (⇒ 68)
Depending on the connected equipment, the sound may be distorted if this unit is connected with an HDMI cable.
Cannot switch audio.
You cannot switch the audio in the following cases. - When a DVD-R, DVD-R DL, DVD-RW (DVD-Video format), +R, +R DL or +RW disc is in the disc tray while DVD drive is selected. - When the recording mode is XP and "Audio Mode for XP Recording" is set to "LPCM". (⇒ 66) - When "Rec for High Speed Copy" is set to "On". (The default setting is "On"). (→ 65) The amplifier is connected using an optical digital cable or an HDMI cable. You cannot switch the audio if "Dolby Digital" is set to "Bitstream". Set "Dolby Digital" to "PCM" or connect using audio cables. (⇒ 66, 72) There are discs for which audio cannot be changed because of how the disc was created.
Operation
Cannot operate the television.
The remote control doesn't work.
➢ Change the manufacturer code. Some televisions cannot be operated even if you change the code. (⇒ 70) The remote control and main unit are using different codes. Change the code on the remote control. (→ 68)
Press and hold [OK] and the indicated number button at the same time for more than 5 seconds.

The batteries are depleted. Replace them with new ones. (⇒ 2) You are not pointing the remote control at the main unit's remote control signal sensor during operation. (→ 2) Coloured glass may obstruct the signal reception/transmission. Don't place the signal sensor in direct sunlight or in areas that may be subject to sunlight exposure. It may be necessary to set the code on the remote control again after changing the batteries. (→ 68) It may be necessary to set the manufacturer code again after changing the batteries. (⇒ 70) The child lock function is activated. (⇒ 70)
The unit is on but cannot be operated.
➢ Recording drive or playback drive has not been selected properly. (→ 18, 19) Some operations may be prohibited by the disc. The unit is hot ("U59" appears on the display). Wait for "U59" to disappear. One of the unit's safety devices may have been activated. Reset the unit as follows: 1 Press [∅/l] on the main unit to switch the unit to standby. If the unit doesn't switch to standby, press and hold [∅/l] on the main unit for about 10 seconds. The unit is forcibly switched to standby. Alternatively, disconnect the AC mains lead, wait one minute, then reconnect it. 2 Press [∅/l] on the main unit to switch it on. If the unit still cannot be operated, consult the dealer.
Cannot eject disc.
The unit is recording. Linked timer recordings with external equipment is in recording standby ("EXT-L" on the unit's display blinks when [☐] is pressed). Press [EXT LINK] to cancel the recording standby. (→ 25) The unit may have a problem. While the unit is off, press and hold [■] and [CH ∧] on the main unit at the same time for about 5 seconds. Remove the disc and consult the dealer. If the Child Lock function is activated, above operation does not work. Cancel the Child Lock function. (→ 70)
Startup is slow.
Set "Power Save" to "Off" in the Setup menu. (→ 69) If connected with an HDAVI Control 4 compatible TV (VIERA) with the "Standby Power Save" setting activated on the TV, even with "Power Save" set to "Off", when the TV is in Standby mode, the unit may take some time to startup. Startup takes time in the following situations: - A disc other than a DVD-RAM is inserted. - The clock is not set. - Immediately after a power failure or the AC mains lead is connected. - When the unit is connected with an HDMI cable.
Recording, timer recording and copying
Cannot record. Cannot copy.
You haven't inserted a disc or the disc you inserted cannot be recorded on. Insert a disc the unit can record onto. (→ 10) The disc is unformatted. Format the disc. RAM -RW(V) +R +R DL +RW (⇔ 60) The write-protect tab on the cartridge is set to PROTECT, or the disc is protected with DVD Management. (⇒ 59) Some programmes have limitations on the number of times they can be recorded (CPRM). (→ 85)
You cannot record when there is not enough space or when the number of titles has reached its limit. Delete unwanted titles or use a new disc. (→ 21, 43, 60) You cannot directly record to a DVD-R DL or +R DL disc on this unit.
Record to the HDD and then copy to the disc.
-R DL +R DL In the following situations, you cannot copy. Delete unnecessary titles from the HDD and then copy. (→ 21, 43, 60)
- If there is not enough space available on the HDD (If you will copy titles from the HDD to a blank disc and fill the entire disc, HDD disc space equivalent to 4 hours of SP mode recording is necessary).
- If the number of recorded titles and the number of titles to be copied has exceeded 499.
You cannot record and copy on finalised discs. However, you can record and copy again if you format DVD-RW.
Due to peculiarities of DVD-R, DVD-R DL, DVD-RW (DVD-Video format), +R, +R DL and +RW you may be unable to record onto them if you either insert and remove the disc or switch the unit on and off while a disc is loaded, a total of fifty times.
DVD-R, DVD-R DL, DVD-RW (DVD-Video format), +R, +R DL and +RW recorded on this unit may not be recordable on other Panasonic DVD Recorders.
This unit cannot record NTSC signals to discs that already have PAL signal recordings. (However, both types of programmes can be recorded onto the HDD.) Play of discs recorded with both PAL and NTSC on another unit is not guaranteed.
Some broadcasts are copyright protected.
Cannot record from external equipment.
➢ Check that the connection is correct. (→ 26, 73) Select the input channel ("AV2", "AV3" or "DV") for the equipment you have connected.
Timer recording does not work properly.
The timer programme is incorrect or different timer programme times overlap. Correct the programme. (→ 28) The programme is not in timer recording standby. (The timer icon "◎" in the timer recording list is not on.) (→ 27) Set the clock. (⇒ 69) The programme information in the TV Guide system may not be correct. It is recommended to modify the start and end times to allow a margin of a few minutes. (⇒ 27)
Timer recording does not stop even when [■] is pressed.
When using the linked timer recording with external equipment, press [EXT LINK]. ("EXT-L" disappears.) (→ 25) If you start recording immediately after turning on the unit while "Power Save" is set to "Off" in the Setup menu (Quick Start mode), you cannot then stop recording for a few seconds.
The timer programme remains even after recording finishes.
The timer programme remains if set to daily or weekly.
A part or whole of a recorded title has been lost.
If there is a power failure or the plug is disconnected from the household mains socket while recording or editing, the title may be lost or the HDD/disc may become unusable. You will have to format the disc (HDD RAM -RW(V) +RW) or use a new disc. We cannot offer any guarantee regarding lost programmes or discs. (→ 60)
The programme name and the recorded title do not match.
There was a programme change after timer recording was set, but the recorded title still has the old programme name.
Cannot copy to a DVD-R, etc. disc using the high speed mode.
When recording to the HDD, set "Rec for High Speed Copy" to "On" in the Setup menu. (The default setting is "On"). (→ 65) In the following cases, high speed mode does not work, even if the titles were recorded with "Rec for High Speed Copy" set to "On". - +R, +R DL, +RW If recorded in "EP" or "FR" (recordings 5 hours or longer) mode. - +R, +R DL, +RW If recorded in 16:9 aspect. - -R, -R DL, -RW(V) If recorded in 16:9 aspect using "EP" mode or "FR" (recordings 5 hours or longer) mode. +R, +R DL, +RW Titles recorded on other Panasonic DVD recorders with "Rec for High Speed Copy" set to "On", and then copied to the HDD on this unit may not copy to +R, +R DL or +RW discs with high-speed copy.
When copying, it takes a long time even when high speed mode is selected.
Use a disc that is compatible with high speed recording. Even if the disc is high speed recording compatible, the maximum speed may not be possible due to the condition of the disc. It takes longer than normal to copy many titles. ➢ You cannot high speed copy to DVD-R titles longer than 6 hours when using other Panasonic DVD Recorders that are not compatible with EP (8Hours) mode recording.
An unusually loud sound is coming from the rotating DVD-R, etc.
When recording or high speed copying to a DVD-R, DVD-R DL, DVD-RW (DVD-Video format), +R, +R DL and +RW the sound of the disc rotating may be louder than normal, however, this is not a problem.
The DV automatic recording function does not work.
If images cannot be recorded or if the recording is aborted, check the connections and DV equipment settings. (→ 26) You cannot start recording until the images from the DV equipment appear on the television. ➢ Recording may not be performed as desired if the time codes on the tape in the DV equipment are not successive. ➢ Depending on the equipment, the DV automatic recording may not operate properly. The audio/video recordings are recorded on other than a DV tape. (→ 26)
Play
Play fails to start even when [▶] (PLAY) is pressed.
Play starts but then stops immediately.
➢ Insert the disc correctly with the label facing up. (⇒ 13) ➢ The disc is dirty. (⇒ 13) ➢ You tried to play a blank disc or a disc unplayable on this unit. (⇒ 10–11) ➢ You tried to play a +RW that needs to be finalized on the equipment used for recording. You may be able to copy a "One time only recording" title that was recorded to DVD-RAM using a different Panasonic DVD Recorder to this unit's HDD, but play is not possible due to copyright protection. When recording to DVD-RAM using "EP (8Hours)" mode, play may not be possible on DVD players that are compatible with DVD-RAM. In this case use "EP (6Hours)" mode. (→ 65) You cannot play discs during DV automatic recording. If playing DivX VOD content, refer to the homepage where you purchased it. (DivX) (→ 35) Make sure that the TV is turned on. If the menu or messages are displayed, follow the on-screen instructions.
Audio and video momentarily pause.
This occurs between playlist chapters. This occurs between chapters and with partially deleted titles on finalized DVD-R, DVD-R DL, DVD-RW (DVD-Video format), +R, +R DL, and +RW that have been copied using the high speed mode. This occurs as scenes change during Quick View.
R DL +R DL When playing a title recorded on both layers, the unit automatically switches between layers and plays the title in the same way as a normal programme. However, video and audio may momentarily cut out when the unit is switching layers. (⇒ 10)
DVD-Video is not played.
You have set a ratings level to limit DVD-Video play. Change this setting. (⇒ 65) ➢ Ensure disc is for the correct DVD-Video region number, and is not defective. (⇒ Cover)
Alternative soundtrack and subtitles cannot be selected.
The languages are not recorded on the disc.
You may not be able to use the on-screen menus to change the soundtrack and subtitles on some discs. Use the disc's menus to make changes. (⇒ 18)
No subtitles.
Subtitles are not recorded on the disc. ➢ Turn the subtitles on and select "Text" or the subtitle number. (⇒ 57)
Angle cannot be changed.
➢ Angles can only be changed during scenes where different angles are recorded.
You have forgotten your ratings password. You want to cancel the ratings level.
The ratings level returns to the factory preset. While the disc tray is open, press [DRIVE SELECT] to select the DVD drive, then press and hold [● REC] and [▶] (PLAY) on the main unit at the same time for 5 or more seconds ("INIT" will appear on the unit's display).
Quick View does not work.
This does not work when audio is other than Dolby Digital. This does not work when recording is in XP or FR mode.
The resume play function does not work.
Memorized positions are cancelled when: press [■] several times, open the disc tray, turn off the unit (CD, VCD, USB), or if a recording or timer recording was executed.
The Video CD picture does not display properly.
When connecting to a multi-system TV, select "NTSC" in "TV System" in the Setup menu. (See page 67)
When connecting to a PAL TV, the lower part of the picture cannot be displayed correctly during search.
Time Slip, Manual Skip, etc. do not work.
These functions do not work with finalized discs. Time Slip does not work when the unit's "TV System" settings are different from the title recorded on the disc. (See page 67)
It takes time before play starts.
This is normal on DivX video. (DivX)
Picture stops.
Picture may stop if the DivX files are greater than 2 GB. (DivX)
Cannot see the beginning of the title played.
(If connecting to a TV that supports VIERA Link with an HDMI cable) When [▶] (PLAY) is pressed on this unit's remote control, you may not be able to see the beginning of the title played until the picture is displayed on the TV. Using [◀◀], return to the beginning of the title.
Edit
Available disc space does not increase even after deleting a title.
Available disc space does not increase after deleting on DVD-R, DVD-R DL, +R or +R DL. (→ 21) ➢ Disc space increases only when the last recorded title is deleted on DVD-RW (DVD-Video format) and +RW. The disc space does not increase when any other titles are deleted.
Cannot edit.
You may not be able to edit on the HDD if there is no available space. Delete any unwanted titles to create empty space. (→ 21)
Cannot format.
The disc is dirty. Wipe with a damp cloth and then wipe dry. (→ 13) ➢ You tried formatting a disc that you may not be able to use in this unit. (→ 10–11)
Cannot create chapters. Cannot mark the start point or the end point during “Partial Delete” operation.
The unit writes the chapter division information to the disc when you turn it off or remove the disc. The information is not written if there is an interruption to the power before this. These operations are not possible with still pictures. You cannot set points if they are too close to each other. You cannot set an end point before a start point.
Cannot delete chapters.
When the chapter is too short to delete, use "Combine Chapters" to make the chapter longer. (→ 43)
Cannot create a playlist.
You cannot select all the chapters at once in a title if the title also includes still pictures. Select them individually.
Music
Tracks could not be copied to the HDD.
If there are copyright protected tracks such as SCMS restrictions, they will not be copied. Recording from CDs that do not conform to CD-DA specifications (copy control CDs, etc.) cannot be guaranteed. Bonus tracks may not be copied.
The ID3 tag of an MP3 file or the WMA tag of a WMA file is not completely displayed.
Only the track name (HDD USB) and artist name (HDD) can be displayed with this unit.
Still pictures
Cannot display DIRECT NAVIGATOR screen.
This screen cannot be displayed during recording or copying, or while the unit is standing by for linked timer recording with external equipment.
Still pictures (JPEG) do not playback normally.
The images that were edited on the PC, such as Progressive JPEG etc., may not playback. (→ 14)
USB
The contents of the USB memory cannot be read.
Remove the USB memory from the USB port and then insert it again. If this does not solve the problem, turn off and turn on the unit again. Check that the USB memory is inserted correctly. (→ 13) The format of the USB memory or of its contents is not compatible with the unit. (The contents on the USB memory may be damaged.) (⇒ 12, 14) The USB memory contains a folder structure and/or file extensions that are not compatible with this unit. (→ 14) Turn off and then turn on the unit again. USB memories connected using a USB extension cable or a USB hub may not be recognised by this unit. Some USB memories cannot be used with this unit. (→ 12) If inserted during playback, recording or copying etc., the USB memory may not be recognised by this unit.
TV Guide
The TV Guide System does not receive any data.
Check whether the clock is properly set. (⇒ 69) If signal quality is bad (ghost images or limited reception), the TV Guide system may not be able to receive any data.
"No Data" is displayed for some or all stations.
Some stations are not supported by the TV Guide system. Programme the Timer recording manually. (→ 27)
The TV Guide information is not displayed properly.
There was a programme change. Check the current programme, e.g. on the Web site for the TV Guide system provider or station provider.
The TV Guide data transfer was interrupted.
The TV Guide system shows the data that was received up to the interruption. The programme information may be incomplete.
The TV Guide data is not updated.
The unit must be in standby mode in order to update the data. If the unit is in EXT LINK mode (EXT-L lights up in the display), then the data update may also not work. Make sure that the time is set correctly. ➢ Check whether "Off" is set under "TV Guide Download in Standby" and change the setting in the Setup menu. (⇒ 69)
There are stations that are not displayed on the TV Guide.
It may be displayed by changing the "TV Guide Type" in the Setup menu. (⇒ 69)
Digital broadcast
Digital broadcasts cannot be received.
The dish may not be pointing in the direction of the satellite, or the direction of the dish may have changed due to strong winds or vibration. If problem persists consult your local TV aerial installer. ➢ Reception may be disturbed in bad weather.
Picture regularly breaks up on some channels. "No Signal" message is displayed.
➢ Check "Signal Condition". If "Signal Quality" or "Signal Strength" is displayed in red or constantly changing, check aerial. If problem persists consult your local TV aerial installer. (⇒ 62) ➢ Check that the aerial and satellite dish cable are designed for DVB. ➢ Interference (known as impulse noise) from household appliances such as light switches, fridges etc. may cause picture break up and/or audio distortion. Use a high quality quad shielded coaxial cable fly lead between this unit and dish wall socket to minimise impulse noise pickup. If problem persists consult your local TV aerial installer. ▶ Check aerial connection. ➢ Check the reception capacity of the satellite dish. The dish must be large enough for good reception. There must not be any hindrances in the way which could impair reception, e.g. twigs, leaves, snow. The receiver (LNB) of the satellite dish must be suitable for digital reception.
Picture or sound very infrequently breaks up on some or all channels.
Electrical atmospheric interference caused by local or distant lightning storms or heavy rain with wind in "leafy" locations may cause pictures to break up and audio to mute or distort momentarily.
Impulse noise interference from an infrequently used electrical appliance, or a passing vehicle or lawn mower with a "noisy" ignition system. The reception capacity of the satellite dish is not sufficient.
Teletext screen does not appear.
➢ Teletext screen does not appear unless the programme has teletext information (→ 16).
VIERA Link
VIERA Link doesn't work.
➢ Check the HDMI cable connection. Check that "HDMI" is displayed on the front display when the power for the main unit is set to On. Make sure that "VIERA Link" is set to "On". (→ 68) ➢ Check the "HDAVI Control" settings on the connected device. Some functions may not work if depending on the version of "HDAVI Control" of the connected equipment. This unit supports "HDAVI Control 4" functions. If the connection for the equipment connected with HDMI was changed, or if there was a power failure or the plug was removed from the household mains socket, "HDAVI Control" may not work. In this case, perform the following operations. 1 When the HDMI cable is connected to all equipment with the power on, turn the TV (VIERA) on again. 2 Change the TV (VIERA) settings for the "HDAVI Control" function to off, and then set to on again. (For more information, see the VIERA operating instructions.) 3 Switch the VIERA input to HDMI connection with this unit, and after this unit's screen is displayed check that "HDAVI Control" is working.
The operation on this unit (music playback etc.) is interrupted.
The operation on this unit may be interrupted when you press buttons on the TV remote control that do not work for VIERA Link functions.
To reset this unit
To return all the settings other than the main ones to the factory preset
Select "Yes" in "Shipping Condition" in the Setup menu. All the settings except for the ratings level, ratings password and clock settings return to the factory preset. The timer recording programmes are also cancelled. (→ 69) Select "Yes" in "Default Settings" in the Setup menu. All the settings other than the tuning settings, clock settings, country settings, language settings, disc language settings, ratings level, ratings password, remote control code, return to the factory presets. The timer recording programmes are also cancelled. (→ 69) ➢ Press and hold [v CH] and [CH ∧] on the main unit until the country setting screen or the DVB Auto Setup screen appears. All the settings except for the ratings level, ratings password, remote control code and clock settings return to the factory preset. The timer recording programmes are also cancelled.
To reset the ratings level settings
While the disc tray is open, press [DRIVE SELECT] to select the DVD drive, then press and hold [● REC] and [▶] (PLAY) on the main unit at the same time for 5 or more seconds.
To restore the unit if it freezes due to one of the safety devices being activated
Press and hold [∅/l] on the main unit for 10 seconds. (The settings remain.)
Other
After performing an update, you can no longer receive broadcasts.
Depending on the content of the update, some settings may have returned to the preset values. Fix the settings again.
Specifications
Recording system DVD-RAM : DVD Video Recording format
DVD-R : DVD-Video format
DVD-R DL (Dual Layer) : DVD-Video format
DVD-RW : DVD-Video format
[Non-Text]
+R DL (Double Layer)
+RW
Recordable discs
DVD-RAM: 2X SPEED (Ver. 2.0).
2-3X SPEED (Ver. 2.1), 2-5X SPEED (Ver. 2.2)
DVD-R: 1X SPEED (Ver. 2.0), 1-4X SPEED (Ver. 2.0),
1-8X SPEED (Ver. 2.0), 1-16X SPEED (Ver. 2.1)
DVD-R DL (Dual Layer): 2-4X SPEED (Ver. 3.0), 2-8X SPEED (Ver. 3.0)
DVD-RW: 1X SPEED (Ver. 1.1), 1-2X SPEED (Ver. 1.1),
2-4X SPEED (Ver. 1.2), 2-6X SPEED (Ver. 1.2)
+R: 2.4X SPEED (Ver. 1.0), 2.4-4X SPEED (Ver. 1.1),
2.4-8X SPEED (Ver. 1.2), 2.4-16X SPEED (Ver. 1.3)
+R DL: 2.4X SPEED (Ver. 1.0), 2.4-8X SPEED (Ver. 1.1)
+RW: 2.4X SPEED (Ver. 1.1), 2.4-4X SPEED (Ver. 1.2)
Recording time Maximum 8 hours (using 4.7 GB disc)
XP: Approx. 1 hour, SP: Approx. 2 hours
LP: Approx. 4 hours, EP: Approx. 6 hours/8 hours
Maximum Approx. 279 hours with 160 GB HDD (EP 8 hours mode)
XP: Approx. 35 hours, SP: Approx. 70 hours
LP: Approx. 140 hours, EP: Approx. 209 hours/279 hours
Playable discs
DVD-RAM: DVD Video Recording format
DVD-R: DVD-Video format, MP3 *1, WMA*1, JPEG*1, DivX*1
DVD-R DL (Dual Layer): DVD-Video format,
MP3 *1, WMA *1, JPEG *1, DivX *1
DVD-RW: DVD-Video format, DVD Video Recording format
+R, +R DL (Double Layer), +RW
DVD-Video, CD-Audio (CD-DA), Video CD, SVCD *2
CD-R/CD-RW: CD-DA *1, Video CD *1, SVCD *1 *2, MP3 *1, WMA *1,
JPEG *1, DivX *1
Internal HDD capacity 160 GB
Optical pick-up System with 1 lens, 2 integration units
(662 nm wavelength for DVDs, 780 nm wavelength for CDs)
LASER specification
Class 1 LASER Product (Pickup)
Wavelength:
CD
780 nm wavelength
DVD
662 nm wavelength
Laser power:
No hazardous radiation is emitted with the safety protection
Audio
Recording system: Dolby Digital 2ch, Linear PCM (XP mode)
Audio in: AV1/AV2 (21 pin), AV3 (pin jack)
Input level: Standard: 0.5 Vrms, Full scale: 2.0 Vrms at 1 kHz
Input impedance: More than 10 kΩ
Audio out: AV1/AV2 (21 pin), Audio Out (pin jack)
Output level: Standard: 0.5 Vrms, Full scale: 2.0 Vrms at 1 kHz
Output impedance: Less than 1 kΩ
Digital audio out: Optical terminal (PCM, Dolby Digital, DTS, MPEG)
HDMI Output
19 pin type A: 1 pc
HDMI™ (V.1.3a with Deep Colour)
- This unit supports "HDAVI Control 4" function.
Video
Video system:
SECAM (only input)/PAL colour signal, 625 lines, 50 fields
NTSC colour signal, 525 lines, 60 fields
Recording system:
MPEG2 (Hybrid VBR)
Video in (PAL/SECAM/NTSC):
AV1/AV2 (21 pin), AV3 (pin jack) 1 Vp-p 75 Ω, termination
S-Video in (PAL/SECAM/NTSC):
AV2 (21 pin), AV3 (S terminal) 1 Vp-p 75 Ω, termination
RGB in (PAL): AV2 (21 pin) 0.7 Vp-p 75 Ω, termination
Video out (PAL/NTSC):
AV1/AV2 (21 pin), Video Out (pin jack) 1 Vp-p 75 Ω, termination
S-Video out (PAL/NTSC):
AV1 (21 pin), S-Video Out (S terminal) 1 Vp-p 75 Ω, termination
RGB out (PAL/NTSC):
AV1 (21 pin) 0.7 Vp-p (PAL) 75 Ω, termination
Component video output (NTSC 480p/480i, PAL 576p/576i)
Y: 1.0 Vp-p 75 Ω, termination
PB: 0.7 Vp-p 75 Ω, termination
PR: 0.7 Vp-p 75 Ω, termination
Television system
Tuner System:
Antenna receive frequency: 950 MHz to 2150 MHz
Input level: -65 dBm to -25 dBm
Input impedance: Nominal 75 Ω
Step frequency: 500 kHz
Audio: 2ch analogue, downmixed
RF converter output:
Not provided
LNB input: F shape terminal female, power supply 13 V/18 V
max. 400 mA
(switchable to 14 V/19 V for antenna length compensation)
DiSEqC: Version 1.0 or Tone burst A/B, 22 kHz 0.65 Vp-p
DV input
IEEE 1394 Standard, 4 pin : 1 pc
USB port
Type A : 1 pc
USB standard: USB 2.0 High Speed
Format: FAT16, FAT32
Video (SD Video) 3
Codec: MPEG 2 (SD-Video Entertainment Video Profile)
File Format: SD-Video format conforming
CI (Common Interface) Slot 1 slot for CAM with Type I and Type II
PC Card package
Others
Region code: #2
Operating temperature: 5 °C to 40 °C
10 % to 80 % RH (no condensation)
Power supply: AC 220 V to 240 V, 50 Hz
Power consumption: Approx. 46 W
Dimensions (W×H×D): 430 mm×59 mm×286 mm
Mass: Approx. 3.7 kg
Power consumption in standby mode:
Approx. 0.9 W ("Power Save" is set to "On")
Approx. 13 W ("Power Save" is set to "Off")
Note
Specifications are subject to change without notice.
*1 Finalising is necessary for compatible playback.
*2 Conforming to IEC62107
This unit is not compatible with "Chaoji Video CD" available on the market including CVD, DVCD and SVCD that do not conform to IEC62107.
*3 Video Recording conversion and transfer is possible from
Panasonic digital video camera with HDD etc, to HDD or DVD-RAM disc.
After Video Recording conversion and transfer to HDD or DVD-RAM disc, the playback is possible.
Glossary
Bitstream
This is the digital form of multi-channel audio data (e.g., 5.1 channel) before it is decoded into its various channels.
CPRM (Content Protection for Recordable Media)
CPRM is technology used to protect broadcasts that are allowed to be recorded only once. Such broadcasts can be recorded only with CPRM compatible recorders and discs.
Decoder
A decoder restores the coded audio signals on DVDs to normal. This is called decoding.
Deep Colour
This unit incorporates HDMITM (V.1.3a with Deep Colour) technology that can reproduce greater colour gradation (4096 steps) when connected to a compatible TV. You can enjoy exceptionally rich, natural-looking colours, with smooth, detailed gradation and minimal colour banding. [A lower colour gradation (256 steps), without Deep Colour, will be reproduced if connected to a TV which does not support Deep Colour. The unit will automatically set appropriate output to suit the connected TV.]
DiSEqC (Digital Satellite Equipment Control)
Digital Satellite Equipment Control is a control system for selecting several LNBs at one input.
DivX
DivX is a popular media technology created by DivX, Inc. DivX media files contain highly compressed video with high visual quality that maintains a relatively small file size.
Dolby Digital
This is a method of coding digital signals developed by Dolby Laboratories. Apart from stereo (2-channel) audio, these signals can also be multi-channel audio. A large amount of audio information can be recorded on one disc using this method. When recording on this unit Dolby Digital (2 channel) is the default audio.
Down-mixing
This is the process of remixing the multi-channel audio found on some discs into two channels. It is useful when you want to listen to the 5.1-channel audio recorded on DVDs through your television's speakers. Some discs prohibit down-mixing and this unit can then only output the front two channels.
Drive
In the instance of this unit, this refers to the hard disk (HDD) and disc (DVD). These perform the reading and writing of data.
DTS (Digital Theater Systems)
This surround system is used in many movie theaters. There is good separation between the channels, so realistic sound effects are possible.
Dynamic range
Dynamic range is the difference between the lowest level of sound that can be heard above the noise of the equipment and the highest level of sound before distortion occurs. Dynamic range compression means reducing the gap between the loudest and softest sounds. This means you can listen at low volumes but still hear dialogue clearly.
Film and video
DVD-Videos are recorded using either film or video. This unit can determine which type has been used, then uses the most suitable method of progressive output.
Film: Recorded at 25 frames per second (PAL discs) or 24 frames per second (NTSC discs). (NTSC discs recorded at 30 frames per second as well.) Generally appropriate for motion picture films. Video: Recorded at 25 frames/50 fields per second. (PAL discs) or 30 frames/60 fields per second (NTSC discs). Generally appropriate for TV drama programmes or animation.
Finalise
A process that makes play of a recorded CD-R, CD-RW, DVD-R, etc. possible on equipment that can play such media. You can finalise DVD-R, DVD-R DL, DVD-RW (DVD-Video format), +R, +R DL on this unit.
After finalising, the disc becomes play-only and you can no longer record or edit. However, finalised DVD-RW can be formatted for recording again.
Folder
This is a place on the hard disk or disc where groups of data are stored together. In the case of this unit, it refers to the place where still pictures (JPEG and MPEG2) and MPEG 2 are stored.
Formatting
Formatting is the process of making media such as DVD-RAM recordable on recording equipment. You can format DVD-RAM, DVD-RW (only as DVD-Video format), +RW and the HDD or unused +R and +R DL on this unit. Formatting permanently deletes all contents.
Frames and fields
Frames refer to the single images that constitute the video you see on your television. Each frame consists of two fields.

- A frame still shows two fields, so there may be some blurring, but picture quality is generally better.
- A field still shows less picture information so it may be rougher, but there is no blurring.
HDD (Hard disk drive)
This is a mass data storage device used in computers, etc. A disk with a surface that has been treated with magnetic fluid is spun and a magnetic head is brought in close proximity to facilitate the reading and writing of large amounts of data at high speed.
HDMI (High-Definition Multimedia Interface)
Unlike conventional connections, it transmits uncompressed digital video and audio signals on a single cable. This unit supports high-definition video output [720p (750p), 1080i (1125i), 1080p (1125p)] from HDMI AV OUT terminals. To enjoy high-definition video a high definition compatible television is required.
JPEG (Joint Photographic Experts Group)
This is a system used for compressing/decoding colour still pictures. If you select JPEG as the storage system on digital cameras, etc., the data will be compressed to 1/10–1/100 of its original size. The benefit of JPEG is less deterioration in picture quality considering the degree of compression.
LNB (Low Noise Block - converter)
This is attached to the satellite dish, which will amplify the weak signal that was received, lower the frequency, and input into the tuner.
LPCM (Linear PCM)
These are uncompressed digital signals, similar to those found on CDs.
MPEG2 (Moving Picture Experts Group)
A standard for efficiently compressing and expanding colour video. MPEG2 is a compression standard used for DVD and satellite based digital broadcasting. This unit records programmes using MPEG2. SD Video files shot with a Panasonic SD video camera, etc. can be copied to the HDD or a DVD-RAM disc.
MP3 (MPEG Audio Layer 3)
An audio compression method that compresses audio to approximately one tenth of its size without any considerable loss of audio quality.
Pan&Scan/Letterbox
In general, DVD-Video are produced with the intention that they be viewed on a widescreen television (16:9 aspect ratio), so images often don't fit regular (4:3 aspect ratio) televisions. Two styles of picture, "Pan & Scan" and "Letterbox", deal with this problem.
Pan & Scan: The sides are cut off so the picture fills the screen.
Letterbox: Black bands appear at the top and bottom of the picture so the picture itself appears in an aspect ratio of 16:9.


Playback control (PBC)
If a Video CD has playback control, you can select scenes and information with menus.
(This unit is compatible with version 2.0 and 1.1.)
Progressive/Interlace
The PAL video signal standard has 576 (or 625) interlaced (i) scan lines, whereas progressive scanning, called 576p (or 625p), uses twice the number of scan lines. For the NTSC standard, these are called 480i (or 525i) and 480p (or 525p) respectively.
Using progressive output, you can enjoy the high-resolution video recorded on media such as DVD-Video.
Your television must be compatible to enjoy progressive video. Panasonic televisions with 576 (625)/50i · 50p, 480 (525)/60i · 60p input terminals are progressive compatible.
Protection
You can prevent accidental deletion by setting writing protection or deletion protection.
Glossary
RGB
This refers to the three primary colours of light, red (R), green (G), and blue (B) and also the method of producing video that uses them. By dividing the video signal into the three colours for transmission, noise is reduced for even higher quality images.
Sampling frequency
Sampling is the process of converting the heights of sound wave (analog signal) samples taken at set periods into digits (digital encoding). Sampling frequency is the number of samples taken per second, so larger numbers mean more faithful reproduction of the original sound.
Signal Quality
This is the guide for checking the aerial direction. The numbered values displayed do not indicate the strength of the signal, but the quality of the signal (the signal to noise ratio, or "S/N"). The channels you can receive are affected by weather conditions, seasons, time (day/night), region, length of the cable that is connected to the aerial, etc.
Thumbnail
This refers to a miniature representation of a picture used to display multiple pictures in the form of a list.
Transponder
The signals of a broadcasting station are received by a transponder on a satellite. The transponder converts them to frequencies and sends them to satellite dishes near the ground. A transponder can broadcast several TV and radio programmes or data in parallel.
WMA
WMA is a compression format developed by Microsoft Corporation. It achieves the same sound quality as MP3 with a file size that is smaller than that of MP3.
1080i
In one high definition image, 1080 (1125) alternating scan lines pass every 1/50th of a second to create an interlace image. Because 1080i (1125i) more than doubles current television broadcasts of 480i (525i), the detail is much clearer and creates a more realistic and rich image.
1080p
In one high definition image, 1080 (1125) scan lines pass at the same time every 1/50th of a second to create a progressive image. Since progressive video does not alternate scan lines like interlace, there is a minimal amount of screen flicker.
720p
In one high definition image, 720 (750) scan lines pass at the same time every 1/50th of a second to create a progressive image. Since progressive video does not alternate scan lines like interlace, there is a minimal amount of screen flicker.
Safety precautions
Placement
Set the unit up on an even surface away from direct sunlight, high temperatures, high humidity, and excessive vibration. These conditions can damage the cabinet and other components, thereby shortening the unit's service life.
Do not place heavy items on the unit.
Voltage
Do not use high voltage power sources. This can overload the unit and cause a fire.
Do not use a DC power source. Check the source carefully when setting the unit up on a ship or other place where DC is used.
AC mains lead protection
Ensure the AC mains lead is connected correctly and not damaged. Poor connection and lead damage can cause fire or electric shock. Do not pull, bend, or place heavy items on the lead.
Grasp the plug firmly when unplugging the lead. Pulling the AC mains lead can cause electric shock.
Do not handle the plug with wet hands. This can cause electric shock.
Foreign matter
Do not let metal objects fall inside the unit. This can cause electric shock or malfunction.
Do not let liquids get into the unit. This can cause electric shock or malfunction. If this occurs, immediately disconnect the unit from the power supply and contact your dealer.
Do not spray insecticides onto or into the unit. They contain flammable gases which can ignite if sprayed into the unit.
Service
Do not attempt to repair this unit by yourself. If sound is interrupted, indicators fail to light, smoke appears, or any other problem that is not covered in these instructions occurs, disconnect the AC mains lead and contact your dealer or an authorized service centre. Electric shock or damage to the unit can occur if the unit is repaired, disassembled or reconstructed by unqualified persons.
Extend operating life by disconnecting the unit from the power source if it is not to be used for a long time.
Information for Users on Collection and Disposal of Old Equipment and used Batteries

These symbols on the products, packaging, and/or accompanying documents mean that used electrical and electronic products and batteries should not be mixed with general household waste.
For proper treatment, recovery and recycling of old products and used batteries, please take them to applicable collection points, in accordance with your national legislation and the Directives 2002/96/EC and 2006/66/EC.
By disposing of these products and batteries correctly, you will help to save valuable resources and prevent any potential negative effects on human health and the environment which could otherwise arise from inappropriate waste handling.
For more information about collection and recycling of old products and batteries, please contact your local municipality, your waste disposal service or the point of sale where you purchased the items.
Penalties may be applicable for incorrect disposal of this waste, in accordance with national legislation.
For business users in the European Union
If you wish to discard electrical and electronic equipment, please contact your dealer or supplier for further information.
[Information on Disposal in other Countries outside the European Union]
These symbols are only valid in the European Union. If you wish to discard these items, please contact your local authorities or dealer and ask for the correct method of disposal.

Note for the battery symbol (bottom two symbol examples):
This symbol might be used in combination with a chemical symbol. In this case it complies with the requirement set by the Directive for the chemical involved.
Manufactured under license from Dolby Laboratories. Dolby and the double-D symbol are trademarks of Dolby Laboratories.
Manufactured under license under U.S. Patent #s: 5,451,942; 5,956,674; 5,974,380; 5,978,762; 6,487,535 & other U.S. and worldwide patents issued & pending. DTS and DTS 2.0 + Digital Out are registered trademarks and the DTS logos and Symbol are trademarks of DTS, Inc. © 1996-2008 DTS, Inc. All Rights Reserved.
This product incorporates copyright protection technology that is protected by U.S. patents and other intellectual property rights. Use of this copyright protection technology must be authorized by Macrovision, and is intended for home and other limited viewing uses only unless otherwise authorized by Macrovision. Reverse engineering or disassembly is prohibited.
DiSEqC™ is a trademark of EUTELSAT.
Plays DivX® video
DivX® is a registered trademark of DivX, Inc., and is used under license.
HDMI, the HDMI logo and High-Definition Multimedia Interface are trademarks or registered trademarks of HDMI Licensing LLC.
HDAVI Control™ is a trademark of Panasonic Corporation.
Windows Media and the Windows logo are trademarks or registered trademarks of Microsoft Corporation in the United States and/or other countries.
This product is protected by certain intellectual property rights of Microsoft Corporation and third parties. Use or distribution of such technology outside of this product is prohibited without a license from Microsoft or an authorized Microsoft subsidiary and third parties.
Gracenote® Corporate Description
Music recognition technology and related data are provided by Gracenote®. Gracenote is the industry standard in music recognition technology and related content delivery. For more information visit www.gracenote.com.
Gracenote® Proprietary Legends
CD and music-related data from Gracenote, Inc., copyright © 2000–2009 Gracenote. Gracenote Software, copyright © 2000–2009 Gracenote. This product and service may practice one or more of the following U.S. Patents: #5,987,525; #6,061,680; #6,154,773, #6,161,132, #6,230,192, #6,230,207, #6,240,459, #6,330,593, and other patents issued or pending. Some services supplied under license from Open Globe, Inc. for U.S. Patent: #6,304,523.
Gracenote and CDDB are registered trademarks of Gracenote. The Gracenote logo and logotype, and the "Powered by Gracenote" logo are trademarks of Gracenote.

gracenote.
Gracenote® End-User License Agreement
USE OF THIS PRODUCT IMPLIES ACCEPTANCE OF THE TERMS BELOW.
This application or device contains software from Gracenote, Inc. of Emeryville, California ("Gracenote"). The software from Gracenote (the "Gracenote Software") enables this application to perform disc and/or file identification and obtain music-related information, including name, artist, track, and title information ("Gracenote Data") from online servers or embedded databases (collectively, "Gracenote Servers") and to perform other functions. You may use Gracenote Data only by means of the intended End-User functions of this application or device.
You agree that you will use Gracenote Data, the Gracenote Software, and Gracenote Servers for your own personal non-commercial use only. You agree not to assign, copy, transfer or transmit the Gracenote Software or any Gracenote Data to any third party. YOU AGREE NOT TO USE OR EXPLOIT GRACENOTE DATA, THE GRACENOTE SOFTWARE, OR GRACENOTE SERVERS, EXCEPT AS EXPRESSLY PERMITTED HEREIN.
You agree that your non-exclusive license to use the Gracenote Data, the Gracenote Software, and Gracenote Servers will terminate if you violate these restrictions. If your license terminates, you agree to cease any and all use of the Gracenote Data, the Gracenote Software, and Gracenote Servers. Gracenote reserves all rights in Gracenote Data, the Gracenote Software, and the Gracenote Servers, including all ownership rights. Under no circumstances will Gracenote become liable for any payment to you for any information that you provide. You agree that Gracenote, Inc. may enforce its rights under this Agreement against you directly in its own name.
The Gracenote service uses a unique identifier to track queries for statistical purposes. The purpose of a randomly assigned numeric identifier is to allow the Gracenote service to count queries without knowing anything about who you are. For more information, see the web page for the Gracenote Privacy Policy for the Gracenote service.
The Gracenote Software and each item of Gracenote Data are licensed to you "AS IS."
Gracenote makes no representations or warranties, express or implied, regarding the accuracy of any Gracenote Data from in the Gracenote Servers. Gracenote reserves the right to delete data from the Gracenote Servers or to change data categories for any cause that Gracenote deems sufficient. No warranty is made that the Gracenote Software or Gracenote Servers are error-free or that functioning of Gracenote Software or Gracenote Servers will be uninterrupted. Gracenote is not obligated to provide you with new enhanced or additional data types or categories that Gracenote may provide in the future and is free to discontinue its services at any time.
GRACENOTE DISCLAIMS ALL WARRANTIES EXPRESS OR IMPLIED, INCLUDING, BUT NOT LIMITED TO, IMPLIED WARRANTIES OF MERCHANTABILITY, FITNESS FOR A PARTICULAR PURPOSE, TITLE, AND NON-INFRINGEMENT. GRACENOTE DOES NOT WARRANT THE RESULTS THAT WILL BE OBTAINED BY YOUR USE OF THE GRACENOTE SOFTWARE OR ANY GRACENOTE SERVER. IN NO CASE WILL GRACENOTE BE LIABLE FOR ANY CONSEQUENTIAL OR INCIDENTAL DAMAGES OR FOR ANY LOST PROFITS OR LOST REVENUES.
Index
Adjust the audio quality
(Sound menu) 58
Adjust the picture quality
(Picture menu) 57
Album (Music)
Edit 47
Play 33
Album (Still picture)
Edit 46
Play 36
Angle ....
Aspect 8
Audio
Digital broadcast
(DVB Multi Audio) ..... 17, 19, 58, 63
Auto Renewal Recording
AV2 Settings
Change Thumbnail
Channel
Select 16
Chapter 31,42
Chapter Creation 42,65
Chasing playback 24
Child Lock 70
Cleaning
Disc 13
Lens 15
Main unit 15
Clock Settings
Common Interface 7,9,68
Connection
Aerial 6
Amplifier, receiver 72
Common Interface 7
DV input terminal 26
HDMI 7,72
Television 6,7,71-73
Video cassette recorder 71,73
Copy
Music 55
SD Video 52
Still picture 53
Title/Playlist 48
Copy (playlist)
Country setting 8
CPRM 85
Create Chapter 31,43
Create playlists 44
Delete
Album (Music) 47
Album (Still picture) 46
All titles 60
Chapter 43, 45
Playlist 45
Still picture 46
Title 43
Track 47
Digital Audio Output settings .... 66, 68
Digital broadcast
Digital channel information ..... 17
DVB Multi Audio ..... 17, 19, 58, 63
DVB Subtitle ..... 17, 19, 58, 63
Recording 19
Select the channel 16
System Update 69
Timer 20
DIRECT NAVIGATOR
Direct TV Recording
Discs 10–11
DiSEqC 85
Display
Digital channel information ..... 17
Status messages 58
Divide Title
DivX 14,34-35,85
DV automatic recording
DVB Multi Audio
DVB Preferred Language 63
Record with selected audio 19
Select audio 17,58
DVB Preferred Language
63
DVB Subtitle
DVB Preferred Language 63
Record with subtitle 19
Select subtitle 17,58
Show subtitle 16
Edit
Chapter 42
Music on HDD 47
Playlist 45
Still picture 46
Title 42
Enabling discs to be played on other
ise 61
Favourite
inalise 61,85
Flexible Recording 24
Format 60,85
FR (Flexible Recording Mode) ..... 23
FUNCTION MENU Display ..... 5, 40, 67
Gracenote® database
55
HDAVI Control ..... 7, 38–39, 68, 72
HDMI 7,68,72,85
High Speed Copy 65
Initialize 69
JPEG 14,36,37
Language
Code list 75
Disc menu 65
On-screen 67
Soundtrack 57,65
Subtitle 57,65
Linked timer recordings with external
equipment—EXT LINK 25,68
LNB 63,85
LPCM 66,85
Manual Skip 31
Menu
DivX 34-35
Music 36
Setup 62
Mode
Recording 23
Still Mode 66
Music 36
Copy 55
Edit 47
Play 36
Music on HDD
Copy 55
Edit 47
Play 33
Name
Album (Music) 47
Album (Still picture) 46
Disc 59
Entering text 41
Favourite 62
Playlist 45
Title 27,43
On-screen
Language 67
Partial Delete
Pause Live TV 40
VIERA 39
Playlist
Power Save 69
Progressive 57, 67, 85
Properties
Music on HDD 33
Playlist 45
Still picture 37, 46
Title 43
Protection
Album (Still picture) 46
Cartridge 59
Disc 59
Still picture 46
Title 43
Q Link
Quick View 31
Ratings level 65
Recording 19
Aspect 22,65
Auto Renewal 28
Direct TV Recording 38
DV automatic recording 26
External Link 25
Flexible Recording 24
Mode 23
Notes 22
Relief 27
Timer 20, 27–30
Relief Recording 27
Remote control code 68
Repeat Play 33,57
Resume play function 31
Screen Saver 67
Select channel 16
Setup menu 62
Signal Condition 62
Simultaneous rec and play 24
Slideshow 3
Smart Card
Soundtrack 57
Still picture
Copy 53
Edit 46
Play 36
Subtitle
Disc 57
DivX Subtitle Text 35
DVB Subtitle 17, 19, 58, 63
Switch the audio/subtitles on the disc
(Disc menu) 57
System Update 69
Teletext 16
Time Slip 31
Timer recording 20, 27–30
Transponder 64
Tuning 62–64
TV Guide 20, 29, 69
TV System (PAL/NTSC) 67
USB
Copy (Music) 55
Copy (SD Video) 52
Copy (Still picture) 54
Insert 13
Play 34
Supported formats 12
VIERA Link 7,38-39,68,72

Environment friendly printed on chlorine free bleached paper.
Panasonic Corporation
Web Site: http://panasonic.net
Pursuant to at the directive 2004/108/EC, article 9(2)
Panasonic Testing Centre
Panasonic Marketing Europe GmbH
Winsbergring 15, 22525 Hamburg, Germany
*RQT9313-L*
En


- OPERATING INSTRUCTIONS
- DVD RECORDER
- MODEL NO. DMR-EX72S
- DEAR CUSTOMER
- NOTICE FOR DVB FUNCTIONS
- REGION NUMBER SUPPORTED BY THIS UNIT
- CAUTION
- WARNING
- INCLUDED ACCESSORIES
- THE REMOTE CONTROL INFORMATION
- BATTERIES
- USE
- GETTING STARTED
- QUICK START GUIDE
- BASIC OPERATIONS
- ADVANCED OPERATIONS
- EDITING
- COPYING
- SETTING MENUS
- REFERENCE
- REMOTE CONTROL
- THE UNIT'S DISPLAY
- EASY ACCESS TO VARIOUS FUNCTIONS — FUNCTION MENU DISPLAY
- NOTE
- STEP 1 CONNECTION
- USING A 21-PIN SCART CABLE
- COMMON INTERFACE (CI) SLOT
- CONNECT THE UNIT DIRECTLY TO THE TELEVISION
- WHEN CONNECTING TO A TELEVISION WITH A BUILT-IN VCR
- CONNECTING TO A TV WITH AN HDMI (HIGH DEFINITION MULTIMEDIA INTERFACE) CABLE
- REGARDING VIERA LINK "HDAVI CONTROL™" FUNCTION
- STEP 2 INSERTING THE CAM (CONDITIONAL ACCESS MODULE) AND SMART CARD
- PASSWORD QUERY
- STEP 3 CHANNEL RECEPTION SETTINGS AND TV ASPECT SETTINGS
- STEP 4 SETTING THE CI (COMMON INTERFACE)
- RECORDING FORMAT
- DVD VIDEO RECORDING FORMAT HDD RAM
- DVD-VIDEO FORMAT -R -R DL -RW(V)
- VR (+R/+RW VIDEO RECORDING) FORMAT +R +R DL +RW
- YOU CANNOT DIRECTLY RECORD TO A DVD-R DL AND +R DL DISC ON THIS UNIT
- WHEN PLAYING DVD-R DL (DUAL LAYER, SINGLE-SIDED) AND +R DL (DOUBLE LAYER, SINGLE-SIDED)
- DISCS THAT CANNOT BE PLAYED
- TYPES OF DISC OR TITLE RECORDED ON HDD FOR THE TYPE OF CONNECTED TV
- INSERTING DISCS
- DVD-V VCD
- INSERTING, REMOVING THE USB MEMORY
- INSERTING THE USB MEMORY
- REMOVING THE USB MEMORY
- DISC CARE
- HOW TO HOLD A DISC
- CONCERNING NON-CARTRIDGE DISCS
- IF THERE IS DIRT OR CONDENSATION ON THE DISC
- HANDLING PRECAUTIONS
- REGARDING DIVX® FILES, MUSIC FILES AND STILL PICTURES (JPEG)
- R -R DL CD
- HDD RAM
- STRUCTURE OF FOLDERS DISPLAYED BY THIS UNIT YOU CAN PLAY MUSIC FILES (MP3/WMA) AND STILL PICTURES (JPEG) ON THIS UNIT BY MAKING FOLDERS AS SHOWN BELOW. HOWEVER DEPENDING ON THE METHOD OF WRITING DATA (WRITING SOFTWARE), PLAY MAY NOT BE IN THE ORDER YOU NUMBERED THE FOLDERS
- STRUCTURE OF WMA/MP3 FOLDERS
- R -R DL CD USB
- STRUCTURES OF STILL PICTURE FOLDERS
- RAM
- HDD (HARD DISK DRIVE) HANDLING CARE
- THE HDD IS A DEVICE THAT IS NOT BUILT TO WITHSTAND VIBRATION/SHOCK OR DUST
- THE HDD IS A TEMPORARY STORAGE DEVICE
- IMMEDIATELY SAVE (BACKUP) ALL CONTENT AS SOON AS YOU FEEL THERE MAY BE A PROBLEM WITH THE HDD
- SETUP PRECAUTIONS
- CIGARETTE SMOKE ETC. CAUSES MALFUNCTION OR BREAKDOWN
- WHILE OPERATING
- WHEN MOVING THE UNIT
- HDD RECORDING TIME REMAINING
- INDEMNITY CONCERNING RECORDED CONTENT
- UNIT CARE
- DO NOT PLACE THE UNIT ON AMPLIFIERS OR EQUIPMENT THAT MAY BECOME HOT
- SELECT THE CHANNEL
- SELECT THE STATION FROM CHANNEL LIST
- TO SHOW DVB SUBTITLE
- TO SHOW TELETEXT
- BASIC TELETEXT VIEWING
- USING TELETEXT CONVENIENTLY
- PRESS [OPTION] AND PRESS THE CORRESPONDING COLOUR BUTTON
- TO SELECT A LANGUAGE FOR DVB MULTI AUDIO OR DVB SUBTITLE
- DIGITAL CHANNEL INFORMATION
- PLAYING RECORDED VIDEO CONTENTS/PLAYING PLAY-ONLY DISCS
- PREPARATION
- PRESS [DRIVE SELECT] TO SELECT THE HDD OR DVD DRIVE
- IF YOU SELECTED THE DVD DRIVE
- PRESS [▶] (PLAY)
- CD
- WHEN A MENU SCREEN APPEARS ON THE TELEVISION
- DVD-V
- VCD
- TO RETURN TO THE MENU SCREEN
- RECORDING TELEVISION PROGRAMMES
- HDD RAM -R -RW(V) +R +RW
- PRESS [∧ ∨ CH] TO SELECT THE CHANNEL
- PRESS [REC MODE] TO SELECT THE RECORDING MODE (XP, SP, LP OR EP)
- PRESS [● REC] TO START RECORDING
- TO PAUSE RECORDING
- PRESS [11]
- TO STOP RECORDING
- PRESS [■]
- WHEN RECORDING DIGITAL BROADCAST WITH SUBTITLE OR MULTIPLE AUDIO
- TO RECORD WITH SUBTITLE
- TO RECORD WITH THE SELECTED AUDIO
- TO SPECIFY A TIME TO STOP RECORDING— ONE TOUCH RECORDING
- PRESS [● REC] ON THE MAIN UNIT TO SELECT THE RECORDING TIME
- TO CANCEL
- TIMER RECORDING
- RAM -RW(V) +R +RW
- USING THE TV GUIDE SYSTEM TO MAKE TIMER RECORDINGS
- PRESS [GUIDE]
- PRESS [▲, ▼, ◀, ▶] TO SELECT THE FUTURE PROGRAMME AND PRESS [OK]
- PRESS [OK]
- TO CANCEL A TIMER RECORDING ON THE TV GUIDE SCREEN
- TO CANCEL RECORDING WHEN RECORDING HAS ALREADY BEGUN (→ 27)
- TO RELEASE THE UNIT FROM RECORDING STANDBY (→ 27)
- NOTES ON TIMER RECORDING (→ 28)
- AVAILABLE DISC SPACE AFTER DELETING
- USING THE DELETE NAVIGATOR TO DELETE
- DELETING DURING PLAY
- NOTES FOR RECORDING
- ADVANCED RECORDING
- RECORDING MODES AND APPROXIMATE RECORDING TIMES
- HDD
- RAM -R -RW(V)
- R +RW
- FR (FLEXIBLE RECORDING MODE)
- WHEN THE FORMAT CONFIRMATION SCREEN IS DISPLAYED
- RAM -RW(V) +R +R DL +RW
- TO FORMAT A DISC
- WHEN REMOVING A RECORDED DISC
- R -R DL -RW(V) +R +R DL
- TO FINALISE THE DISC
- TO OPEN THE TRAY WITHOUT DISC FINALISATION
- FLEXIBLE RECORDING
- USING "FLEXIBLE REC" IS CONVENIENT IN THESE KINDS OF SITUATIONS
- RAM -R -RW(V) +R +RW
- PRESS [FUNCTION MENU]
- PRESS [▲, ▼] TO SELECT "OTHERS" AND PRESS [OK]
- PRESS [▲, ▼] TO SELECT "FLEXIBLE REC" AND PRESS [OK]
- PRESS [◀, ▶] TO SELECT "HOUR" AND "MIN." AND PRESS [▲, ▼] TO SET THE RECORDING TIME
- WHEN YOU WANT TO START RECORDING
- PLAYING WHILE YOU ARE RECORDING
- PRESS [▶] (PLAY) DURING RECORDING
- TO STOP PLAY
- TO STOP TIMER RECORDING
- PLAYING A TITLE PREVIOUSLY RECORDED WHILE RECORDING—SIMULTANEOUS REC AND PLAY
- PRESS [DIRECT NAVIGATOR] DURING RECORDING
- PRESS [▲, ▼, ◀, ▶] TO SELECT A TITLE AND PRESS [OK]
- TO EXIT THE DIRECT NAVIGATOR SCREEN
- TO STOP RECORDING/TO STOP TIMER RECORDING
- RECORDING BROADCASTS FROM EXTERNAL EQUIPMENT
- MAKING TIMER RECORDINGS ON THE TELEVISION
- MAKE TIMER PROGRAMMING ON THE TV
- TURN OFF THIS UNIT
- LINKED TIMER RECORDINGS WITH EXTERNAL EQUIPMENT — EXT LINK
- MAKE TIMER PROGRAMMING ON THE EXTERNAL EQUIPMENT
- PRESS [EXT LINK]
- TO CANCEL THE EXTERNAL CONTROL
- COPYING FROM A VIDEO CASSETTE RECORDER
- MANUAL RECORDING
- DV AUTOMATIC RECORDING (DV AUTO REC)
- ADVANCED TIMER RECORDING
- MANUALLY PROGRAMMING TIMER RECORDINGS
- PRESS [PROG/CHECK]
- PRESS [▲, ▼] TO SELECT "NEW TIMER PROGRAMME" AND PRESS [OK]
- PRESS [▶] TO MOVE THROUGH THE ITEMS AND CHANGE THE ITEMS WITH [▲, ▼]
- DATE
- PROGRAMME NAME
- STTL (SUBTITLES)
- TO CANCEL RECORDING WHEN RECORDING HAS ALREADY BEGUN
- WHILE THE UNIT IS ON
- PRESS [◀, ▶] TO SELECT "STOP RECORDING" AND PRESS [OK]
- TO RELEASE THE UNIT FROM RECORDING STANDBY
- PRESS [▲, ▼] TO SELECT THE PROGRAMME AND PRESS THE "RED" BUTTON
- RELIEF RECORDING
- AUTO RENEWAL RECORDING
- CHECK, CHANGE OR DELETE A PROGRAMME
- Ⓐ ICONS
- ⑧ MESSAGE DISPLAYED IN THE "DRIVE SPACE" LINE
- TO CHANGE A PROGRAMME
- TO DELETE A PROGRAMME
- TO EXIT THE TIMER RECORDING LIST, PRESS [PROG/CHECK]
- LANGUAGE FOR DIGITAL BROADCAST WITH MULTI-AUDIO OR MULTI-SUBTITLE
- NOTES ON TIMER RECORDING
- OPERATIONS IN THE TV GUIDE SYSTEM
- TO CHANGE CHANNELS
- TO VIEW A PROGRAMME LIST FOR ANOTHER DAY
- TO BROWSE THROUGH THE TV GUIDE LIST
- TO SEE PROGRAMME INFORMATION
- WHEN THE TV GUIDE DISPLAYS THE EMPTY TV GUIDE LIST
- SELECTING THE PROGRAMME FROM THE DESIRED PROGRAMME TYPE OR CATEGORY
- FROM THE DESIRED PROGRAMME TYPE
- PRESS [▲, ▼] TO SELECT THE DESIRED ITEM
- PRESS [▲, ▼, ◀, ▶] TO SELECT THE PROGRAMME AND PRESS [OK]
- SEARCHING FOR THE PROGRAMME IN THE TV GUIDE LIST
- SEARCHING BY ENTERING WORDS
- SEARCHING USING PROGRAMME INFORMATION OF TITLES RECORDED TO THE HDD
- TV GUIDE DATA DOWNLOAD
- SELECTING RECORDED PROGRAMMES (TITLES) TO PLAY—DIRECT NAVIGATOR
- HDD RAM -R -R DL -RW(V) +R +R DL +RW -RW(VR)
- PRESS [DIRECT NAVIGATOR]
- PRESS [▲, ▼, ◀, ▶] TO SELECT THE TITLE AND PRESS [OK]
- TO SHOW OTHER PAGES
- TO EXIT THE SCREEN
- SWITCHING THE DIRECT NAVIGATOR APPEARANCE
- GROUPED TITLES"/"ALL TITLES" HDD
- GROUPED TITLES SCREEN
- ALL TITLES SCREEN
- TO SORT THE TITLES FOR EASY SEARCHING
- HDD (ALL TITLES SCREEN IN TABLE DISPLAY ONLY)
- TO PLAY GROUPED TITLES HDD
- TO EDIT THE GROUP OF TITLES HDD
- HDD (GROUPED TITLES SCREEN ONLY)
- CREATE GROUP
- RELEASE GROUPING
- REGARDING THE GROUP NAME
- TO CHANGE THE GROUP NAME
- TO PLAY MUSIC CD
- INSERT A MUSIC CD
- PRESS [▲, ▼] TO SELECT "PLAY MUSIC" AND PRESS [OK]
- PRESS [▲, ▼] TO SELECT THE TRACK AND PRESS [OK]
- TO PLAY MUSIC RECORDED ON HDD
- PRESS [▲, ▼] TO SELECT THE ALBUM AND PRESS [OK]
- SHOWING THE MENU SCREEN
- USB
- PLAYING DIVX VIDEO CONTENTS
- R -R DL CD USB ABOUT DIVX VIDEO
- USING THE TREE SCREEN TO FIND A FOLDER
- REGARDING DIVX VOD CONTENT
- ABOUT DIVX VIDEO-ON-DEMAND
- DISPLAY THE UNIT'S REGISTRATION CODE
- REGARDING DIVX CONTENT THAT CAN ONLY BE PLAYED A SET NUMBER OF TIMES
- ABOUT DIVX SUBTITLE TEXT DISPLAY
- DISPLAYING DIVX SUBTITLE TEXT
- WHILE PLAYING, PRESS [DISPLAY]
- DIVX SUBTITLE TEXT LANGUAGE SETTINGS
- TYPES OF SUBTITLES TEXT FILE THAT CAN BE DISPLAYED
- LIMITATIONS OF THIS UNIT
- PLAYING MUSIC FILES
- SHOW MP3&WMA MENU SCREEN
- USING THE TREE SCREEN TO FIND A GROUP
- WHILE THE FILE LIST IS DISPLAYED
- PRESS [▲, ▼, ◀, ▶] TO SELECT A GROUP AND PRESS [OK]
- PLAYING STILL PICTURES
- HDD RAM -R -R DL CD USB
- SHOW ALBUM VIEW SCREEN
- PRESS [▲, ▼, ◀, ▶] TO SELECT THE ALBUM AND PRESS [OK]
- PRESS [▲, ▼, ◀, ▶] TO SELECT THE STILL PICTURE AND PRESS [OK]
- TO RETURN TO THE ALBUM VIEW SCREEN OR PICTURE (JPEG) VIEW SCREEN
- REGARDING ALBUM VIEW SCREEN
- LINKED OPERATIONS WITH THE TV (VIERA LINK "HDAVI CONTROL™"/Q LINK)
- WHAT IS VIERA LINK "HDAVI CONTROL
- WHAT IS Q LINK
- FOR YOUR REFERENCE
- WHAT YOU CAN DO WITH "HDAVI CONTROL" AND Q LINK
- VIERA LINK Q LINK
- EASY PLAYBACK
- POWER ON LINK
- POWER OFF LINK
- DIRECT TV RECORDING ※
- PRESS AND HOLD [● DIRECT TV REC] FOR 1 SECOND
- EASY CONTROL ONLY WITH VIERA REMOTE CONTROL
- VIERA LINK
- USING THE FUNCTION MENU TO OPERATE THIS UNIT ※
- PAUSE LIVE TV PROGRAMME
- USING THE OPTION MENU WINDOW TO OPERATE THIS UNIT
- PRESS [OPTION]
- SELECT AN ITEM THEN PRESS [OK]
- USING THE CONTROL PANEL
- CONTROL PANEL
- FUNCTION MENU DISPLAY
- PRESS [▲, ▼] TO SELECT A FUNCTION AND PRESS [OK]
- PRESS [▲, ▼] TO SELECT AN ITEM AND PRESS [OK]
- TO PAUSE THE TV PROGRAMME YOU ARE WATCHING—PAUSE LIVE TV
- TURN ON THE TELEVISION AND SELECT THE APPROPRIATE AV INPUT TO SUIT THE CONNECTIONS TO THIS UNIT
- TURN ON THIS UNIT AND PRESS [∧ ∨ CH] TO SELECT THE CHANNEL
- WHEN YOU WANT TO PAUSE THE TV PROGRAMME PRESS [11]
- WHEN YOU WANT TO RESUME
- HDD RAM -R -R DL -RW(V) +R +R DL +RW
- SHOW ENTER NAME SCREEN ETC
- TITLE (TIMER RECORDING)
- FREE WORD SEARCH
- FIND TITLES
- TITLE
- PLAYLIST
- ALBUM OF STILL PICTURES
- ALBUM (CD/MP3/WMA) (HDD)
- TRACK (CD/MP3/WMA) (HDD)
- ARTIST (CD/MP3/WMA) (HDD)
- DISC
- FAVOURITE
- PRESS [▲, ▼, ◀, ▶] TO SELECT A CHARACTER AND PRESS [OK]
- TO ENTER A SPACE
- PRESS [■] (SET)
- TO END PARTWAY
- TO ADD A NAME TO THE LIST
- TO RECALL AN ADDED NAME
- TO DELETE AN ADDED NAME
- EDITING TITLES/CHAPTERS
- CHAPTER
- CHAPTER CREATION" IN THE SETUP MENU ( ⇒ 65)
- RAM -R -R DL -RW(V) +R +R DL +RW
- EDITING TITLES/CHAPTERS AND PLAYING CHAPTERS
- DURING PLAY OR WHILE STOPPED
- PRESS [▲, ▼, ◀, ▶] TO SELECT THE TITLE
- MULTIPLE EDITING
- PRESS [▲, ▼] TO SELECT THE OPERATION AND PRESS [OK]
- IF YOU SELECT "CHAPTER VIEW
- PRESS [▲, ▼, ◀, ►] TO SELECT THE CHAPTER
- PRESS [OPTION], THEN [▲, ▼] TO SELECT THE OPERATION AND PRESS [OK]
- CREATING, EDITING AND PLAYING PLAYLISTS
- CREATING PLAYLISTS
- EDITING AND PLAYING PLAYLISTS/CHAPTERS
- EDITING STILL PICTURES (JPEG)
- EDITING AN ALBUM
- SELECT THE ALBUM TO BE EDITED AND PRESS [OPTION]
- TO EDIT THE ALBUM
- TO EDIT STILL PICTURE
- EDITING MUSIC
- TO EDIT THE ALBUM (MUSIC)
- TO EDIT THE TRACK (MUSIC)
- ALBUM AND TRACK OPERATION
- DELETING STILL PICTURES AND MUSIC USING DELETE NAVIGATOR
- HDD RAM -R (JPEG)
- WHILE STOPPED
- PRESS [▲, ▼] TO SELECT "DELETE" AND PRESS [OK]
- PRESS [▲, ▼] TO SELECT "PICTURE" OR "MUSIC
- DELETING AN ALBUM
- PRESS [◀, ▶] TO SELECT "DELETE" AND PRESS [OK]
- COPYING TITLES OR PLAYLISTS
- APPROXIMATE COPYING TIMES (MAX. SPEED)
- REGARDING COPYING TO DVD-R DL (SINGLE-SIDED, DUAL LAYER) AND +R DL (SINGLE-SIDED, DOUBLE LAYER)
- REGARDING COPYING OF THE BROADCASTS THAT ALLOW "ONE TIME ONLY RECORDING
- BEFORE COPYING
- SPEED AND RECORDING MODE WHEN COPYING
- R +R DL +RW
- COPY [VIDEO (HDD TO DVD)]
- HDD → RAM -R -R DL -RW(V) +R +R DL +RW
- PRESS [▲, ▼] TO SELECT THE TITLE YOU WANT TO COPY AND PRESS [■]
- PROPERTIES
- COPYING USING THE COPYING LIST—ADVANCED COPY
- COPY NAVIGATOR/COPYING LIST ICONS AND FUNCTIONS
- SIZE
- TO EDIT THE COPYING LIST
- DELETE ALL
- ADD
- DELETE
- MOVE
- TO CANCEL ALL REGISTERED COPYING SETTINGS AND LISTS
- COPYING A FINALISED DVD-R, DVD-R DL, DVD-RW (DVD-VIDEO FORMAT), +R AND +R DL
- DVD-V → HDD
- SET "COPY TIME
- PRESS [▲, ▼] TO SELECT "START COPYING" AND PRESS [OK]
- WHEN THE TOP MENU IS DISPLAYED
- TO RETURN TO THE PREVIOUS SCREEN
- TO STOP COPYING
- COPYING VIDEO (MPEG2) FROM A VIDEO EQUIPMENT
- COPYING STILL PICTURES
- COPYING USING THE COPYING LIST
- TO SELECT ANOTHER FOLDER
- COPYING STILL PICTURES ON THE USB MEMORY
- COPYING ALL THE STILL PICTURES
- USB → HDD
- PRESS [▲, ▼] TO SELECT "COPY ALL PICTURES (JPEG)" AND PRESS [OK]
- PRESS [◀, ▶] TO SELECT "COPY" AND PRESS [OK]
- USB → HDD RAM
- PRESS [▲, ▼] TO SELECT "COPY PICTURES (JPEG)" AND PRESS [OK]
- PERFORM STEPS 4 - 8 ON "COPYING USING THE COPYING LIST" (⇒ 53)
- COPYING MUSIC TO HDD
- MUSIC CD (CD-DA)
- MP3/WMA
- ABOUT THE GRACENOTE® DATABASE
- COPYING MUSIC FROM A CD
- CD → HDD
- PRESS [▲, ▼] TO SELECT "COPY MUSIC" AND PRESS [OK]
- COPYING MUSIC FROM A USB MEMORY OR CD-R/CD-RW/DVD-R/DVD-R DL
- R -R DL CD USB (MP3/WMA) → HDD
- INSERT THE USB MEMORY OR CD-R/CD-RW/DVD-R/DVD-R DL
- PRESS [▲, ▼] TO SELECT "COPY MUSIC (MP3&WMA)" AND PRESS [OK]
- REGISTER MP3 OR WMA FILES FOR COPY
- TO REGISTER INDIVIDUAL MP3/WMA FILES
- TO REGISTER ON A FOLDER BY FOLDER BASIS
- PRESS [◀, ▶] TO SELECT "YES" AND PRESS [OK] TO START COPYING
- TO UPDATE THE GRACENOTE® DATABASE
- PREPARING THE UPDATE DATA
- UPDATING THE DATABASE ON THIS UNIT
- USING ON-SCREEN MENUS
- COMMON PROCEDURES
- PRESS [DISPLAY]
- MENU ITEM SETTING
- DISC MENU—SETTING THE DISC CONTENT
- AUDIO ATTRIBUTE
- LANGUAGE
- PLAY MENU—CHANGE THE PLAY SEQUENCE
- REPEAT PLAY
- PICTURE MENU—CHANGE THE PICTURE QUALITY
- PLAYBACK NR
- INPUT NR
- SOUND MENU—CHANGE THE DVB MULTI AUDIO AND SOUND EFFECT
- DVB MULTI AUDIO
- DIALOGUE ENHANCER
- OTHER MENU—CHANGE THE DVB SUBTITLE AND DISPLAY POSITION
- DVB SUBTITLE
- POSITION
- STATUS MESSAGES
- PRESS [STATUS I]
- HDD AND DISC MANAGEMENT
- PRESS [▲, ▼] TO SELECT "HDD MANAGEMENT" OR "DVD MANAGEMENT" AND PRESS [OK]
- SETTING THE PROTECTION
- CARTRIDGE PROTECTION
- FOR A DVD-RAM WITH A CARTRIDGE
- PROVIDING A NAME FOR A DISC
- PRESS [▲, ▼] TO SELECT "DISC NAME" AND PRESS [OK]
- DELETING ALL TITLES AND PLAYLISTS—DELETE ALL TITLES
- DELETING ALL THE CONTENTS—FORMAT
- HDD RAM -RW(V) +RW -RW(VR)
- SELECTING THE BACKGROUND STYLE—TOP MENU
- R -R DL -RW(V) +R +R DL +RW
- SELECTING WHETHER TO SHOW THE TOP MENU FIRST—AUTO-PLAY SELECT
- ENABLING DISCS TO BE PLAYED ON OTHER EQUIPMENT—FINALISE
- AFTER FINALISING
- CREATING TOP MENU—CREATE TOP MENU
- RW
- CHANGING THE UNIT'S SETTINGS
- TUNING
- FAVOURITES EDIT
- TO ADD CHANNELS TO A FAVOURITE
- TO CHANGE THE ORDER OF CHANNELS IN A FAVOURITE
- TO DELETE CHANNELS FROM A FAVOURITE
- TO CHANGE THE NAME OF A FAVOURITE IN THE "FAVOURITE" COLUMN
- SIGNAL CONDITION
- SIGNAL QUALITY
- SIGNAL STRENGTH
- AUTO-SETUP RESTART
- DVB PREFERRED LANGUAGE
- ADVANCED SETUP
- SATELLITE CONFIGURATION
- ADD SATELLITE
- ADD TRANSPONDER / CHANNEL
- ADD TRANSPONDER
- POLARISATION
- SYMBOL RATE
- CHANNEL DATA
- DELETE TRANSPONDER
- SETTINGS FOR PLAYBACK
- RATINGS
- SOUNDTRACK
- SUBTITLE
- MENUS
- DIVX SUBTITLE TEXT
- SETTINGS FOR RECORDING
- RECORDING TIME IN EP MODE
- ASPECT FOR RECORDING
- CHAPTER CREATION
- REC FOR HIGH SPEED COPY
- DVD SPEED FOR HIGH SPEED COPY
- [MAXIMUM]
- START RECORDING TIME
- FINISH RECORDING TIME
- PICTURE
- COMB FILTER
- STILL MODE
- SEAMLESS PLAY
- SOUND
- DYNAMIC RANGE COMPRESSION
- BILINGUAL AUDIO SELECTION
- DIGITAL AUDIO OUTPUT
- PCM DOWN CONVERSION
- DOLBY DIGITAL®
- DTS
- MPEG※
- AUDIO MODE FOR XP RECORDING
- AUDIO MODE FOR DV INPUT
- DISPLAY
- ON-SCREEN MESSAGES
- FL DISPLAY
- PAUSE LIVE TV ICON
- SCREEN SAVER
- TELETEXT CHARACTER SET
- CONNECTION
- TV ASPECT
- PROGRESSIVE
- TV SYSTEM
- TO CHANGE THE SETTING ALL AT ONCE (PAL ↔ NTSC)
- HDMI SETTINGS
- HDMI VIDEO FORMAT
- ASPECT FOR 4:3 VIDEO
- AV1 OUTPUT
- [VIDEO (WITH COMPONENT)]
- AV2 SETTINGS
- AV2 INPUT
- EXT LINK
- COMMON INTERFACE
- OTHERS
- WHEN THE FOLLOWING INDICATOR APPEARS ON THE UNIT'S DISPLAY
- CLOCK
- TO CHANGE THE TIME OFFSET
- SETTING FOR STANDBY
- POWER SAVE
- AUTO STANDBY
- DIVX REGISTRATION
- SYSTEM UPDATE
- TV GUIDE DOWNLOAD IN STANDBY
- SOFTWARE UPDATE IN STANDBY
- TV GUIDE/SOFTWARE SEARCH PERIOD
- SOFTWARE UPDATE SEARCH NOW
- TV GUIDE UPDATE SEARCH NOW
- TV GUIDE TYPE
- INITIALIZE
- SHIPPING CONDITION ※1,※
- DEFAULT SETTINGS ※1,※
- TELEVISION OPERATION
- POINT THE REMOTE CONTROL AT THE TELEVISION
- TEST BY TURNING ON THE TELEVISION AND CHANGING CHANNELS
- CHILD LOCK
- PRESS AND HOLD [OK] AND [RETURN ↩]
- TO CANCEL THE CHILD LOCK
- CONNECTING A TELEVISION WITH AUDIO/VIDEO OR S VIDEO TERMINALS
- CONNECTING A VCR WITH AUDIO/VIDEO OR S VIDEO TERMINALS
- CONNECTING A TELEVISION WITH COMPONENT VIDEO TERMINALS
- CONNECTING AN AMPLIFIER WITH A DIGITAL INPUT TERMINAL
- CONNECTING A STEREO AMPLIFIER
- CONNECTING WITH AN HDMI COMPATIBLE TELEVISION AND RECEIVER
- FREQUENTLY ASKED QUESTIONS
- SET UP
- CAN THIS UNIT RECEIVE OR RECORD HIGH DEFINITION (HD) BROADCASTS
- CAN THIS UNIT RECEIVE OR RECORD A PROGRAMME BROADCASTED IN DOLBY DIGITAL
- WHAT EQUIPMENT IS NECESSARY TO PLAY MULTI CHANNEL SURROUND SOUND
- ARE THE HEADPHONES AND SPEAKERS DIRECTLY CONNECTED TO THE UNIT
- THE TELEVISION HAS A SCART TERMINAL AND COMPONENT VIDEO INPUT TERMINAL. WHICH SHOULD I CONNECT WITH
- IS MY TELEVISION PROGRESSIVE OUTPUT COMPATIBLE
- CAN I PLAY DVD-VIDEO AND VIDEO CDS BOUGHT IN ANOTHER COUNTRY
- CAN A DVD-VIDEO THAT DOES NOT HAVE A REGION NUMBER BE PLAYED
- PLEASE TELL ME ABOUT DISC COMPATIBILITY WITH THIS UNIT
- PLEASE TELL ME ABOUT CD-R AND CD-RW COMPATIBILITY WITH THIS UNIT
- RECORDING
- CAN I RECORD FROM A COMMERCIALLY PURCHASED VIDEO CASSETTE OR DVD
- CAN DVD-R, DVD-R DL, DVD-RW (DVD-VIDEO FORMAT), +R, +R DL AND +RW RECORDED ON THIS UNIT BE PLAYED ON OTHER EQUIPMENT
- CAN A DIGITAL AUDIO SIGNAL FROM THIS UNIT BE RECORDED TO OTHER EQUIPMENT
- CAN I HIGH SPEED COPY TO A DISC
- TV GUIDE USB
- IS IT POSSIBLE TO PROGRAMME A RECORDING, WITH A START AND END TIME THAT ARE DIFFERENT FROM THE TV GUIDE SYSTEM
- CAN I RECEIVE TV GUIDE SYSTEM DATA VIA A CONNECTED SET TOP BOX
- HOW CAN I CANCEL A TIMER PROGRAMMING
- WHAT HAPPENS WHEN I UNPLUG THE UNIT FROM THE HOUSEHOLD MAINS SOCKET
- WHAT CAN OR CANNOT BE DONE USING THE USB PORT ON THIS UNIT
- MUSIC
- WHAT WILL HAPPEN IF I TRY TO RECORD THE SAME CD MULTIPLE TIMES
- CAN I TRANSFER THE MUSIC TRACKS FROM HDD TO THE DISC OR USB MEMORY
- ON THE UNIT'S DISPLAY
- TROUBLESHOOTING GUIDE
- THE FOLLOWING DO NOT INDICATE A PROBLEM WITH THIS UNIT
- POWER
- NO POWER
- THE UNIT SWITCHES TO STANDBY MODE
- THE POWER IS TURNED OFF AUTOMATICALLY
- THIS UNIT TURNS OFF WHEN THE TV INPUT IS SWITCHED
- DISPLAYS
- THE DISPLAY IS DIM
- IS FLASHING ON THE UNIT'S DISPLAY
- THE TIME RECORDED ON THE DISC AND THE AVAILABLE TIME SHOWN DO NOT ADD UP
- THE CLOCK IS NOT CORRECT
- COMPARED TO THE ACTUAL RECORDED TIME, THE ELAPSED TIME DISPLAYED IS LESS. (ONLY WHEN RECORDING IN NTSC)
- U88" IS DISPLAYED AND THE DISC CANNOT BE EJECTED
- TV SCREEN AND VIDEO
- TELEVISION RECEPTION WORSENS AFTER CONNECTING THE UNIT
- THE DIGITAL CHANNEL INFORMATION OR CONTROL PANEL DOES NOT APPEAR
- SOME FUNCTIONS OF DVB-S DO NOT WORK
- SCREEN SIZE IS WRONG
- THE RECORDED TITLE'S SCREEN SIZE IS WRONG
- PICTURE DOES NOT APPEAR DURING TIMER RECORDING
- THE SCREEN CHANGES AUTOMATICALLY
- THERE IS A LOT OF AFTER-IMAGE WHEN PLAYING VIDEO
- WHEN PLAYING DVD-VIDEO USING PROGRESSIVE OUTPUT, ONE PART OF THE PICTURE MOMENTARILY APPEARS TO BE DOUBLED UP
- THERE IS NO APPARENT CHANGE IN PICTURE QUALITY WHEN ADJUSTED WITH THE PICTURE MENU IN THE ON-SCREEN MENUS
- THE IMAGES FROM THIS UNIT DO NOT APPEAR ON THE TELEVISION
- PICTURE IS DISTORTED
- THE PICTURE IS DISTORTED DURING PLAY, OR VIDEO WILL NOT PLAY CORRECTLY
- NO SOUND
- LOW VOLUME
- DISTORTED SOUND
- CANNOT HEAR THE DESIRED AUDIO TYPE
- CANNOT SWITCH AUDIO
- OPERATION
- CANNOT OPERATE THE TELEVISION
- THE REMOTE CONTROL DOESN'T WORK
- THE UNIT IS ON BUT CANNOT BE OPERATED
- CANNOT EJECT DISC
- STARTUP IS SLOW
- RECORDING, TIMER RECORDING AND COPYING
- CANNOT RECORD. CANNOT COPY
- CANNOT RECORD FROM EXTERNAL EQUIPMENT
- TIMER RECORDING DOES NOT WORK PROPERLY
- TIMER RECORDING DOES NOT STOP EVEN WHEN [■] IS PRESSED
- THE TIMER PROGRAMME REMAINS EVEN AFTER RECORDING FINISHES
- A PART OR WHOLE OF A RECORDED TITLE HAS BEEN LOST
- THE PROGRAMME NAME AND THE RECORDED TITLE DO NOT MATCH
- CANNOT COPY TO A DVD-R, ETC. DISC USING THE HIGH SPEED MODE
- WHEN COPYING, IT TAKES A LONG TIME EVEN WHEN HIGH SPEED MODE IS SELECTED
- AN UNUSUALLY LOUD SOUND IS COMING FROM THE ROTATING DVD-R, ETC
- THE DV AUTOMATIC RECORDING FUNCTION DOES NOT WORK
- PLAY
- PLAY FAILS TO START EVEN WHEN [▶] (PLAY) IS PRESSED
- PLAY STARTS BUT THEN STOPS IMMEDIATELY
- AUDIO AND VIDEO MOMENTARILY PAUSE
- DVD-VIDEO IS NOT PLAYED
- ALTERNATIVE SOUNDTRACK AND SUBTITLES CANNOT BE SELECTED
- NO SUBTITLES
- ANGLE CANNOT BE CHANGED
- YOU HAVE FORGOTTEN YOUR RATINGS PASSWORD. YOU WANT TO CANCEL THE RATINGS LEVEL
- QUICK VIEW DOES NOT WORK
- THE RESUME PLAY FUNCTION DOES NOT WORK
- THE VIDEO CD PICTURE DOES NOT DISPLAY PROPERLY
- TIME SLIP, MANUAL SKIP, ETC. DO NOT WORK
- IT TAKES TIME BEFORE PLAY STARTS
- PICTURE STOPS
- CANNOT SEE THE BEGINNING OF THE TITLE PLAYED
- EDIT
- AVAILABLE DISC SPACE DOES NOT INCREASE EVEN AFTER DELETING A TITLE
- CANNOT EDIT
- CANNOT FORMAT
- CANNOT CREATE CHAPTERS. CANNOT MARK THE START POINT OR THE END POINT DURING “PARTIAL DELETE” OPERATION
- CANNOT DELETE CHAPTERS
- CANNOT CREATE A PLAYLIST
- TRACKS COULD NOT BE COPIED TO THE HDD
- THE ID3 TAG OF AN MP3 FILE OR THE WMA TAG OF A WMA FILE IS NOT COMPLETELY DISPLAYED
- STILL PICTURES
- CANNOT DISPLAY DIRECT NAVIGATOR SCREEN
- STILL PICTURES (JPEG) DO NOT PLAYBACK NORMALLY
- THE CONTENTS OF THE USB MEMORY CANNOT BE READ
- TV GUIDE
- THE TV GUIDE SYSTEM DOES NOT RECEIVE ANY DATA
- NO DATA" IS DISPLAYED FOR SOME OR ALL STATIONS
- THE TV GUIDE INFORMATION IS NOT DISPLAYED PROPERLY
- THE TV GUIDE DATA TRANSFER WAS INTERRUPTED
- THE TV GUIDE DATA IS NOT UPDATED
- THERE ARE STATIONS THAT ARE NOT DISPLAYED ON THE TV GUIDE
- DIGITAL BROADCAST
- DIGITAL BROADCASTS CANNOT BE RECEIVED
- PICTURE REGULARLY BREAKS UP ON SOME CHANNELS. "NO SIGNAL" MESSAGE IS DISPLAYED
- PICTURE OR SOUND VERY INFREQUENTLY BREAKS UP ON SOME OR ALL CHANNELS
- TELETEXT SCREEN DOES NOT APPEAR
- VIERA LINK DOESN'T WORK
- THE OPERATION ON THIS UNIT (MUSIC PLAYBACK ETC.) IS INTERRUPTED
- TO RESET THIS UNIT
- TO RETURN ALL THE SETTINGS OTHER THAN THE MAIN ONES TO THE FACTORY PRESET
- TO RESET THE RATINGS LEVEL SETTINGS
- TO RESTORE THE UNIT IF IT FREEZES DUE TO ONE OF THE SAFETY DEVICES BEING ACTIVATED
- OTHER
- AFTER PERFORMING AN UPDATE, YOU CAN NO LONGER RECEIVE BROADCASTS
- SPECIFICATIONS
- RECORDABLE DISCS
- PLAYABLE DISCS
- INTERNAL HDD CAPACITY 160 GB
- LASER SPECIFICATION
- AUDIO
- HDMI OUTPUT
- VIDEO
- TELEVISION SYSTEM
- DV INPUT
- USB PORT
- GLOSSARY
- BITSTREAM
- CPRM (CONTENT PROTECTION FOR RECORDABLE MEDIA)
- DECODER
- DEEP COLOUR
- DISEQC (DIGITAL SATELLITE EQUIPMENT CONTROL)
- DIVX
- DOLBY DIGITAL
- DOWN-MIXING
- DRIVE
- DTS (DIGITAL THEATER SYSTEMS)
- DYNAMIC RANGE
- FILM AND VIDEO
- FINALISE
- FOLDER
- FORMATTING
- FRAMES AND FIELDS
- HDD (HARD DISK DRIVE)
- HDMI (HIGH-DEFINITION MULTIMEDIA INTERFACE)
- JPEG (JOINT PHOTOGRAPHIC EXPERTS GROUP)
- LNB (LOW NOISE BLOCK - CONVERTER)
- LPCM (LINEAR PCM)
- MPEG2 (MOVING PICTURE EXPERTS GROUP)
- MP3 (MPEG AUDIO LAYER 3)
- PAN&SCAN/LETTERBOX
- PLAYBACK CONTROL (PBC)
- PROGRESSIVE/INTERLACE
- PROTECTION
- RGB
- SAMPLING FREQUENCY
- THUMBNAIL
- TRANSPONDER
- WMA
- I
- P
- SAFETY PRECAUTIONS
- PLACEMENT
- VOLTAGE
- AC MAINS LEAD PROTECTION
- FOREIGN MATTER
- SERVICE
- INFORMATION FOR USERS ON COLLECTION AND DISPOSAL OF OLD EQUIPMENT AND USED BATTERIES
- GRACENOTE
- USE OF THIS PRODUCT IMPLIES ACCEPTANCE OF THE TERMS BELOW
- INDEX
- PANASONIC CORPORATION
- WEB SITE: HTTP://PANASONIC.NET
Brand : PANASONIC
Model : Diga DMR-EX72S
Category : DVD Recorder