
530i Sedan (2004) - Automobile BMW - Free user manual and instructions
Find the device manual for free 530i Sedan (2004) BMW in PDF.


| Product Type | Automobile - BMW 530i Sedan (2004) |
| Overall Length | Approx. 4841 mm (190.6 in) |
| Overall Width (including mirrors) | Approx. 1846 mm (72.7 in) |
| Overall Height | Approx. 1468 mm (57.8 in) |
| Curb Weight (approx.) | 1540 kg (3395 lbs) |
| Engine Type | 3.0L inline-6 cylinder, gasoline |
| Maximum Output | 225 hp (168 kW) at 5900 rpm |
| Fuel Tank Capacity | Approx. 70 L (18.5 US gal) |
| Fuel Requirement | Unleaded gasoline, up to 10% ethanol |
| Transmission | 6-speed manual or optional 6-speed automatic (Steptronic) |
| Drivetrain | Rear-wheel drive |
| Main Safety Systems | Airbags (front, side, head), ABS, DSC, DBC, active head restraints |
| Parking Assistance | Park Distance Control (PDC) with acoustic and visual warnings |
| Climate Control | Automatic climate control with separate left/right temperature zones |
| Infotainment | iDrive Control Center with 6.5-inch display, navigation*, radio, CD player/ changer |
| Voice Command | Voice command system for navigation, entertainment, and phone |
| Lighting | Xenon low beams (optional), automatic headlight control, adaptive head lights* |
| Wheels and Tires | 17-inch alloy wheels, 225/50 R17 tires (summer or winter) |
| Service Intervals | Oil change every 15,000 miles or as indicated by service display |
| Warranty | New Vehicle Limited Warranty, Rust Perforation Limited Warranty, Emissions warranties |
Frequently Asked Questions - 530i Sedan (2004) BMW
User questions about 530i Sedan (2004) BMW
0 question about this device. Answer the ones you know or ask your own.
Ask a new question about this device
Download the instructions for your Automobile in PDF format for free! Find your manual 530i Sedan (2004) - BMW and take your electronic device back in hand. On this page are published all the documents necessary for the use of your device. 530i Sedan (2004) by BMW.
USER MANUAL 530i Sedan (2004) BMW
Owner's Manual for Vehicle

Contents
A to Z
525i 530i 545i
Congratulations, and thank you for choosing a BMW.
Thorough familiarity with your vehicle will provide you with enhanced control and security when you drive it. We therefore have this request:
Please take the time to read this Owner's Manual and familiarize yourself with the information that we have compiled for you before starting off in your new vehicle. It contains important data and instructions intended to assist you in gaining maximum use and satisfaction from your BMW's unique range of technical features. The manual also contains information on maintenance designed to enhance operating safety and contribute to maintaining the value of your BMW throughout an extended service life.
This Owner's Manual should be considered a permanent part of this vehicle. It should stay with the vehicle when sold to provide the next owner with important operating, safety and maintenance information.
This manual is supplemented by a Service and Warranty Information Booklet for US models or a Warranty and Service Guide Booklet for Canadian models.
We wish you an enjoyable driving experience.
BMW AG
Reprinting, including excerpts, only with the
written consent of BMW AG, Munich.
Order No. 01 41 0 157 647
US English VIII/03 5 10
Printed in Germany
Printed on environmentally friendly paper,
bleached without chlorine, suitable for recycling.
Contents
The fastest way to find specific topics is to use the index, refer to page 202.
Using this Owner's Manual
4 Notes
7 Reporting safety defects
At a glance
10 Cockpit
16 Control Center
20 Voice command system
Controls
26 Opening and closing
36 Adjustments
45 Transporting children safely
49 Driving
65 Everything under control
76 Technology for comfort, convenience and safety
87 Lamps
90 A congenial climate
96 Practical interior accessories
Driving tips
106 Things to remember when driving
Navigation
114 Starting navigation system
116 Destination entry
123 Destination guidance
127 What to do if ...
Entertainment
130 On/off, tone
134 Radio
141 CD Compact Disc
144 CD changer
Communications
150 Telephoning
161 TeleService, BMW Assist
Mobility
168 Refueling
170 Wheels and tires
177 Under the hood
181 Maintenance
183 Rules and regulations
184 Replacing components
190 Giving and receiving assistance
Reference
198 Technical data
202 Everything from A to Z
Notes
Using this Owner's Manual
We have made every effort to ensure that you are able to find what you need in this Owner's Manual as quickly as possible. The fastest way to find specific topics is to use the detailed index at the back of the manual. If you wish to gain an initial overview of your vehicle, you will find this in the first chapter.
Should you want to sell your BMW some day, please remember to hand over the Owner's Manual as well; it is an important component of your vehicle.
Additional sources of information
Should you have any other questions, your BMW center will be glad to advise you at any time.
You can find information on BMW, e.g. technology, on the Internet at www.bmwusa.com.
Symbols used
Indicates precautions that must be followed precisely in order to avoid the possibility of personal injury and serious damage to the vehicle.
◀ Marks the end of a specific item of information.
Contains information that will assist you in gaining the optimum benefit from your vehicle and enable you to care more effectively for your vehicle.
Refers to measures that can be taken to help protect the environment.
* Indicates special equipment, country-specific equipment and optional extras when available.
"..." Identifies Control Display texts used to select individual functions.
Symbols on vehicle components
i Indicates that you should consult the relevant section of this Owner's Manual for information on a particular part or assembly.
The individual vehicle
On purchasing your BMW, you have decided in favor of a model with individualized equipment and features. This Owner's Manual describes the entire array of options and equipment available with a specific BMW model.
Please bear in mind that the manual may contain information on accessories and equipment that you have not specified for your own vehicle. Sections describing options and special equipment are marked by asterisks * to assist you in identifying possible differences between the descriptions in this manual and your own vehicle's equipment.
Should your BMW be equipped with features or accessories not described in this manual, please consult the enclosed supplementary manual(s).
Editorial notice
BMW pursues a policy of continuous, ongoing development that is conceived to ensure that our vehicles continue to embody the highest quality and safety standards combined with advanced, state-of-the-art technology. For this reason, the features described in this Owner's Manual may differ from those on your vehicle. Nor can errors and omissions be entirely ruled out. You are therefore asked to appreciate that no legal claims can be entertained on the basis of the data, illustrations or descriptions in this Owner's Manual.
For your own safety
Fuels

Use unleaded gasoline only. Fuels containing up to and including
10% ethanol or other oxygenates with up to 2.8% oxygen by weight – that is, 15% MTBE or 3% methanol plus an equivalent amount of co-solvent – will not void the applicable warranties with respect to defects in materials or workmanship. Field experience has indicated significant differences in fuel quality – volatility, composition, additives, etc. – among gasolines offered for sale in the United States and Canada. The use of poor-quality fuels may result in driveability, starting and stalling problems, especially under certain environmental conditions such as high ambient temperature and high altitude.
Should you encounter driveability problems which you suspect could be related to the fuel you are using, we recommend that you respond by switching to a recognized high-quality brand.
Failure to comply with these recommendations may result in unscheduled maintenance.
Follow the relevant safety rules when you are handling gasoline.
Maintenance and repair

Advanced technology, e.g. the use of modern materials and high-performance electronics, requires specially adapted maintenance and repair methods. Therefore, only have corresponding work on your BMW carried out by a BMW center or a workshop that works according to BMW repair procedures with correspondingly trained personnel. If work is carried out improperly there is a danger of consequential damage and the related safety risks.
Parts and accessories

For your own safety, use genuine parts and accessories approved by BMW.
When you purchase accessories tested and approved by BMW and Genuine BMW Parts, you simultaneously acquire the assurance that they have been thoroughly tested by BMW to ensure optimum performance when installed on your vehicle. BMW warrants these parts to be free from defects in material and workmanship. BMW will not accept any liability for damage resulting from installation of parts and accessories not approved by BMW. BMW cannot test every product made by other manufacturers to verify if it can be used on a BMW safely and without risk to either the vehicle, its operation, or its occupants.
Genuine BMW Parts, BMW Accessories and other products approved by BMW, together with professional advice on using these items, are available from all BMW centers.
Installation and operation of non-BMW approved accessories such as alarms, radios, amplifiers, radar detectors, wheels, suspension components, brake dust shields, telephones – including operation of any portable phone from within the vehicle without using an externally mounted antenna – or transceiver equipment, for instance, CBs, walkie-talkie, ham radio or similar accessories, may cause extensive damage to the vehicle, compromise its safety, interfere with the vehicle's electrical system or affect the validity of the BMW Limited Warranty. Consult your BMW center for additional information.

Maintenance, replacement, or repair of the emission control devices and systems may be performed by any automotive repair establishment or individual using any certified automotive part.
Service and warranty
We recommend that you read this publication thoroughly.
Your BMW is covered by the following warranties:
▶ New Vehicle Limited Warranty
▶ Rust Perforation Limited Warranty
▶ Federal Emissions System Defect Warranty
▶ Federal Emissions Performance Warranty
▶ California Emission Control System Limited Warranty.
Detailed information about these warranties is listed in the Service and Warranty Information Booklet for US models or in the Warranty and Service Guide Booklet for Canadian models.
Reporting safety defects
The following only applies to vehicles owned and operated in the US.
If you believe that your vehicle has a defect which could cause a crash or could cause injury or death, you should immediately inform the National Highway Traffic Safety Administration NHTSA in addition to notifying BMW of North America, LLC, P.O. Box 1227, Westwood, New Jersey 07675-1227, Telephone (800) 831-1117.
If NHTSA receives similar complaints, it may open an investigation, and if it finds that a safety defect exists in a group of vehicles, it may order a recall and remedy campaign. However, NHTSA cannot become involved in individual problems between you, your dealer, or BMW of North America, LLC.
To contact NHTSA, you may either call the Auto Safety Hotline toll-free at 1-800-424-9393 (or 366-0123 in Washington, D.C. area) or write to: NHTSA, U.S. Department of Transportation, Washington, D.C. 20590. You can also obtain other information about motor vehicle safety from the Hotline.

At a glance
This overview of buttons, switches and displays is intended to serve as a source of orientation in your vehicle's operating environment. The section will also assist you in becoming acquainted with the control concepts and options available for operating the various systems.
Cockpit
All around the steering wheel: controls and displays
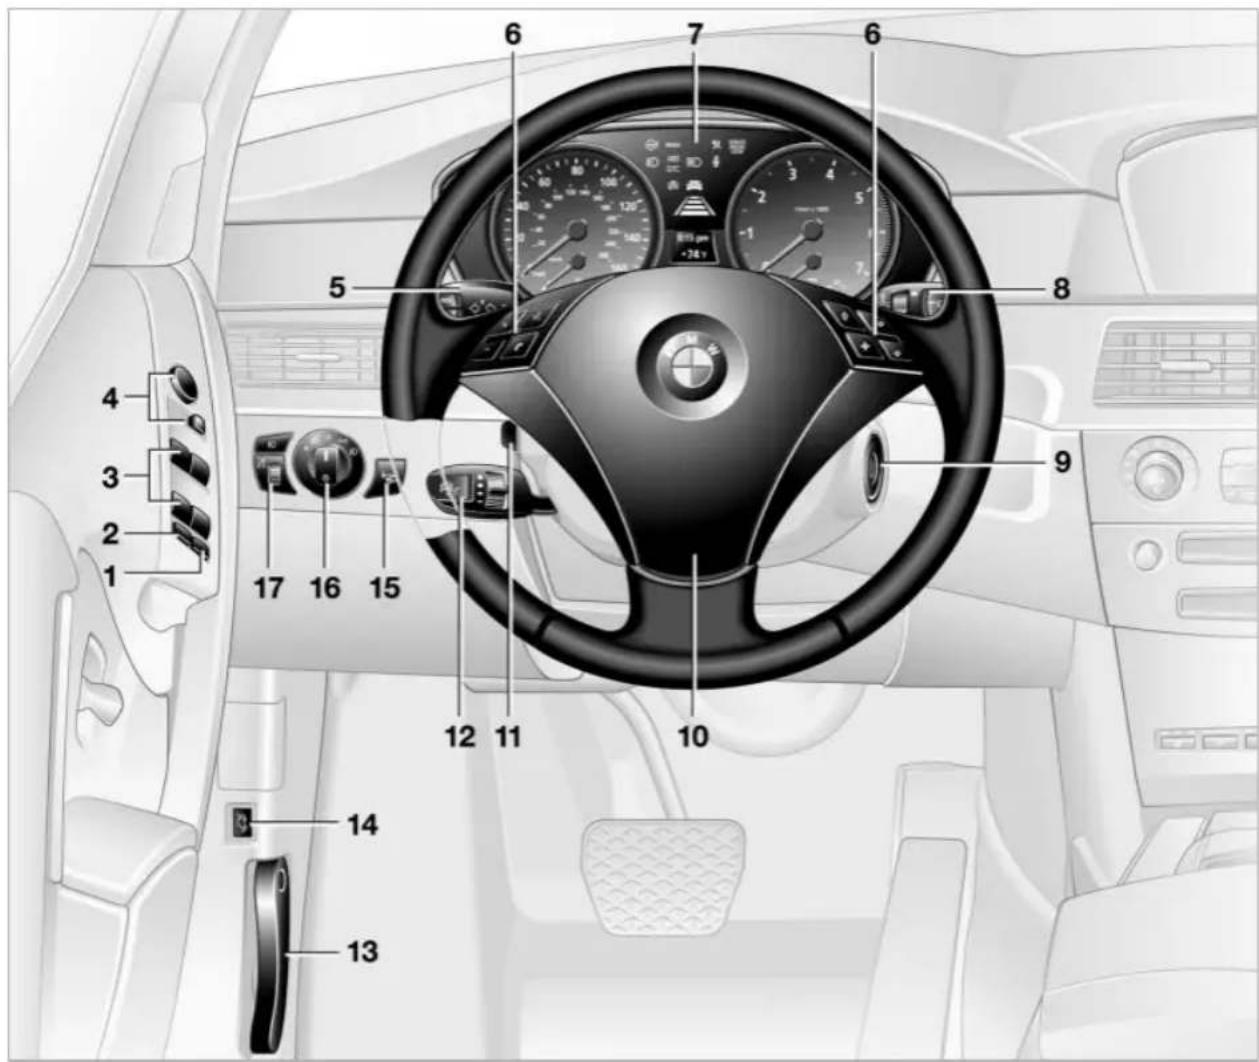
1 Roller sun blind for rear window 97
2 Rear window safety switch 34
3 Electric power windows 33
4 Adjusting exterior mirrors 42
5

Turn signal indicators 56

High beams, headlamp flasher 88
CHECK Check Control 68

Computer 70

Standing lamps 88
6 Buttons on steering wheel

Portable phone*:
Accepting a call
▷ Start calling
▷ Ending call.

Volume
Voice command system.

Fast forward/reverse:
Radio
Press briefly: change station
Press longer: manual tuning or automatic search scan
CD
Press briefly: select track
Press longer: fast forward/reverse.

Individually programmable, refer to page 44.

Individually programmable, refer to page 44
▶ Voice instructions for navigation.
7 Instrument cluster 12
8

Windshield wipers 57

Rain sensor 57
9 Ignition lock 49
10 Horn: the entire surface
11

Steering wheel heater 44

Steering wheel adjustment 43
12

Cruise control 58

Active cruise control 59
13 Opening the hood 177
14 Opening the luggage compartment lid 31
15

Head-Up Display 85
16 Parking lamps and low beams 87
17

Instrument lighting 88

Front fog lamps 89
Instrument cluster
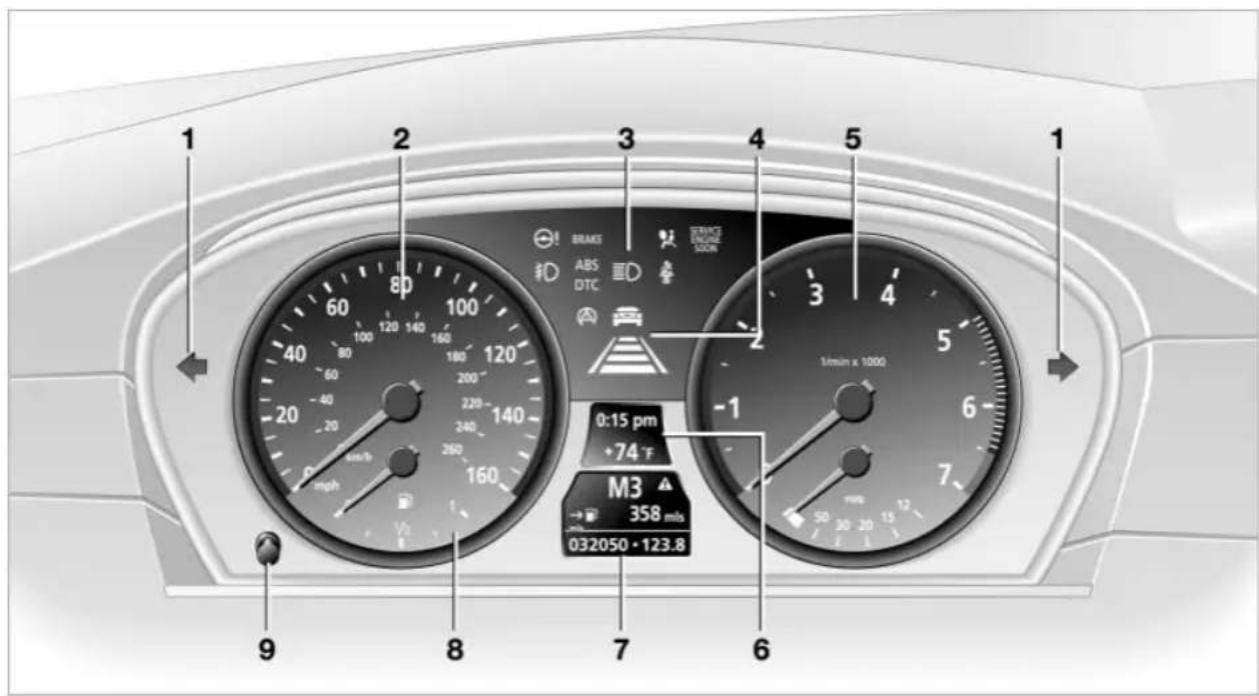
1 Indicator lamps for turn signal indicators 13
2 Speedometer with display of speed for
▶ Cruise control 58 or
Active cruise control 59
3 Indicator and warning lamps 13
4 Display for active cruise control 60
5 Tachometer with variable advance warning field and Energy Control 65
6 Display for
▷ Indicator and warning lamps of the Check Control 68
▶ Speed of the cruise control 58
Desired speed for active cruise control 60
Clock/date 65
Outside temperature 65
7 Display for
▶ Automatic transmission 54
Sequential manual transmission 53
Computer 70
Date and remaining distance for service requirement 66
▶ Trip odometer/odometer 65
▷ Check Control message present 68
8 Fuel gauge 66
9 To set trip odometer to zero and reset for service requirement display 65
Indicator and warning lamps
Technology that monitors itself
The indicator and warning lamps identified by the ● symbol are subjected to an operation check each time you switch on the ignition or start the engine. They each light up once for different periods of time.
When a malfunction occurs in a monitored system, the corresponding lamp will either fail to go out when the engine is started, or it will come on again during normal driving. For information on how you should respond when this happens, please refer to the pages indicated.

Turn signal indicators 56
Active steering ● 82
Handbrake/brake fluid, brake hydraulics/DBC Dynamic Brake Control ● 50/180/79

Handbrake/brake fluid, brake hydraulics/DBC Dynamic Brake Control for Canadian models
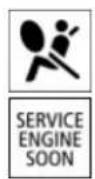
Airbags ● 83
Service Engine Soon ● 183 If the indicator lamp comes on either continuously or intermittently, this indicates a fault in the emissions-related electronic systems. Although the vehicle remains operational, you should have the systems checked by your BMW center at the earliest possible opportunity.

Service Engine Soon indicator lamp for Canadian models.
Front fog lamps 89
ABS Antilock Brake System ● 77

DTC Dynamic Traction Control 79
High beams/headlamp flasher 88
Please fasten safety belt ● 40

DSC Dynamic Stability Control ● 78
Check Gas Cap 168 lamp for US models
Colors
The indicator and warning lamps can light up in different colors and combinations. The following section explains the significance of the individual colors as well as how you should respond when they appear.
Red:
Stop immediately
or
important reminder
Red and yellow:
Continue driving moderately
Yellow:
Have checked soon
or
for your information
Green or blue: For your information.
Indicator and warning lamps of the Check Control
Other indicator and warning lamps appear in display 6 of the instrument cluster as necessary, accompanied by supplementary text on the Control Display, refer to Check Control, page 68.
Comfort area: controls and displays

NV02862CMA
1 Microphone for
▶ Telephone/portable phone 151
▷ Voice command system 20
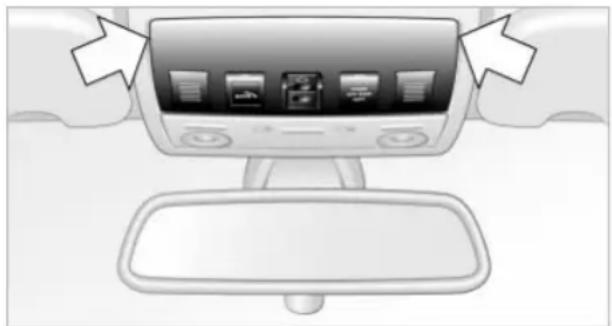
2 Reading lamps 89
3 Starting emergency call 190
4 Interior lamps 89
5 Glass roof, electric 34
6 Front passenger's airbag indicator lamp 84
7 Control Display 16
displays for menu guidance
8 Hazard warning flashers
9 Central locking system 30
10 Automatic climate control 90
TEMP
Temperature setting, left/right 91
AUTO
Automatic air distribution and supply 91

Cooling function 91

Automatic recirculated-air control AUC 91
MAX
Maximum cooling 91
REST !!!
Residual heat mode 92
OFF
To switch off automatic climate control 92

Air volume 91

Defrost windows 91

Rear window defroster 90
11 Button for
▶ Station scan/track search 130
CD player 141
CD changer 145
12 Ejecting
▶ Navigation CD/DVD 114
Audio CD 130
13 Drive for navigation CD/DVD 114
14 Drive for audio CD 130
15 Switching audio sources on/off and adjusting the volume 130
16 Center console switching center

Heated seats 41

Active seat ventilation 42

Active seat 42

PDC Park Distance Control 76
DSC
DSC Dynamic Stability Control 78
17 Controller 16
Horizontal movement in four directions, turn or press
18 Activating voice command system 20
19 Open start menu 17
Control Center
The Control Center groups the functions of a large number of switches. This means that these functions can be operated from a central position. The following section provides an introduction to the principle of the menu guidance. How you control the individual functions is described in the context of the relevant equipment.
Controls

1 Controller: you navigate through the menus of the Control Center and make adjustments by turning, pressing and moving it to the left, right, forwards or backwards
2 Opening the start menu from any menu item
3 Control Display
When you turn the controller, you feel a clicking. This helps you to select the desired menu item.

To avoid posing an unnecessary hazard due to inattention, both to your own vehicle's occupants and to other road
users: never attempt to use the controls or make entries unless traffic and road conditions allow.
Menu overview
You can call up all the functions in the Control Center using five menu items.
Communication
Portable phone*
BMW Assist* or TeleService*.
Navigation or onboard information
▶ Navigation system*
Onboard information, e.g. for display of the average fuel consumption.
Entertainment
Radio
CD.
Climate
Air distribution
Seat air conditioning*
▷ Independent ventilation*.
Menu item i
▶ Switching off the Control Display
▶ Traffic information
▶ Sound and display settings
▶ Settings for your vehicle, e.g. Key Memory
▶ Display of the maintenance requirement and dates for statutory emission and vehicle inspections.
Menu guidance
As of ignition key position 1, the following message appears on the Control Display:
Warning!
Use this system only when traffic conditions permit. Safe vehicle operation is the driver's responsibility. For further details see owner's manual.
Accept
Confirm the message by pressing the controller; the start menu is opened.
Start menu
![graph TD A["Communication"] --> B["Climate"] A --> C["Entertainment"] D["Navigation"] --> E["Climate"] D --> F["Entertainment"] G["User Interface"] --> H["User Interface"] I["User Interface"] --> J["User Interface"]](/content/2026/05/1019018/images/b1c0e5be09bc7d7d859c359a53b42b52fd2844ed568ad4e53b987d158c19c451.jpg)
In ignition key position 2:
Via the start menu, you can open four menus by moving the controller to the left, right, forwards or backwards. Pressing the controller opens the i menu.
Calling up the start menu:
MENU
Press button.
Opening the start menu from the i menu:
MENU
Press the button twice.
Displays on the Control Display
A menu
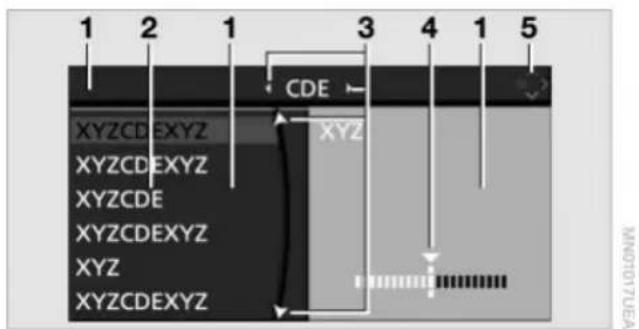
1 In menus, you can change fields to select the menu items they contain or to make adjustments. The active field is brighter than the others
2 Menu items are usually grouped in horizontal or vertical lists
3 Arrows indicates that other menu items can be selected in lists, but these are not visible at the moment
4 Adjustments are displayed in diagrams or as numbers
5 A symbol indicates the last selected menu item of the start menu

Communication
Navigation or
onboard information
Entertainment
Climate
i menu
Status information
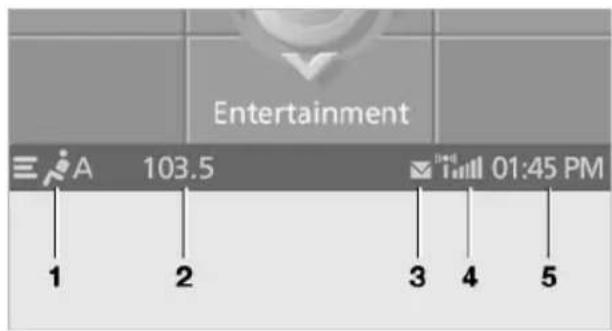
1 Manual or automatic air distribution for driver and passenger side
2 Display for Entertainment:
Radio and CD or

Entertainment off
Display for telephone:
Name of network operator with display for roaming:

Roaming active
3 SMS received
4 Reception of portable phone network and emergency call possible
SOS: emergency call possible
no display: emergency call not possible
5 Current time
If information is issued by the Check Control or inputs are made using the voice command system, a text message appears here on the Control Display.
Assistance window*

While you are operating whatever functions you like using the Control Center, you can obtain the following additional information in the assistance window:
▶ Short help and supplementary information texts for selected menu entries
The computer or trip computer
The travel route in vehicles with navigation system
The current position.
To select the display in the assistance window:
- Move the controller to the right to switch to the assistance window and press the controller

- Select the menu item and press the controller.
Switching Control Display on/off
To switch off the Control Display:
- Open the start menu
- Open the menu by pressing the controller

- Select "Display off" and press the controller.
The status informations continue to be displayed.
To switch on the Control Display:
Press the controller.
Selecting menu items and making adjustments
![graph TD A["Step 1: Directional Control"] --> B["Step 2: Rotation"] B --> C["Step 3: Directional Control"] C --> D["Step 4: Rotation"] D --> E["Step 5: CDE"]](/content/2026/05/1019018/images/542e8819f428091cc3c645d873dfe9964c649b6fd195938133d8112e8b6e33e8.jpg)
1 To select individual menu items: turn the controller. The marking moves. Menu items shown in white can be selected
2 To activate menu items selected with the marking: press the controller. In the current field, new menu items are displayed or a function is executed
3 To change the current field: move the controller to the left, right, forwards or backwards and let go

If you hold the controller for longer than approx. 2 seconds in one position, the menu that lies in that direction will be opened.
4 To select menu items, cf. 1: turn the controller. The marking moves
5 To make adjustments: turn the controller. A graphical display, numerical values or text displays change. The adjustment is adopted if you change the field or switch into another menu
Voice command system*
The concept
The voice command system allows you to control operation of various vehicle systems without ever removing your hands from the steering wheel.
The menu items on the Control Display serve as voice commands for the equipment that can be operated using the voice command system. This means you can open these menu items using the voice command system instead of with the controller.
The voice command system transforms your oral commands into control signals for the selected systems and provides support in the form of instructions or questions.
Precondition
If the language of the voice command and Control Display do not match, change the language of the Control Display, refer to page 74.
Symbols used

...< Identifies voice commands.
»...« Identifies instructions generated by the voice command system.
Voice commands
Activating voice command system

Briefly press the button on the steering wheel or in the center console.
If voice command is to come from the passenger side:
Press the button in the center console for a longer period.

This symbol on the Control Display and an acoustic message indicate that you can enter voice commands.

The text or numbers that the voice command system has registered will appear at this position on the Control Display.
This symbol appears on the Control Display when you can enter additional voice commands.
If there are no other voice commands, operate the equipment using the Control Center.
Canceling voice command system
Press the button on the steering wheel or in the center console
or

Cancel>.
While notes are being recorded, canceling is only possible using one of the buttons.
Voice commands
You can have the system list the possible voice commands:

Options<.
In addition to the commands described in this Owner's Manual, alternative commands are often possible for the same functions, e.g.:

Radio on< or >Switch on radio<.
You can use short commands to make it easier to run certain functions.
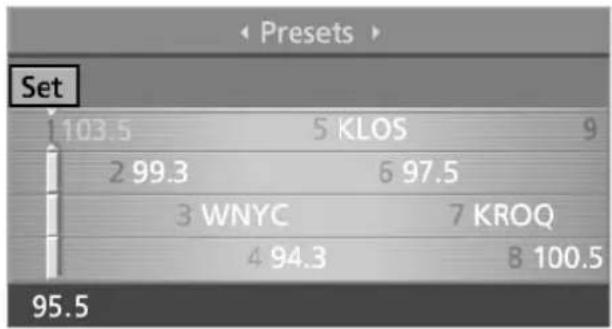
An example: selecting a radio station
-
Switch on radio
-
Press the button on the steering wheel or in the center console

- »Entertainment«. The system issues: »Entertainment«

NATIONAL

-
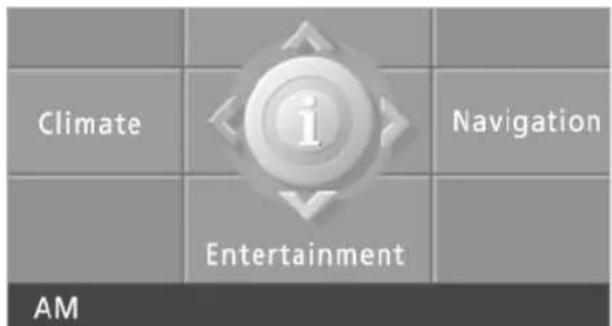
AM< The system issues:
AM<<
83081010N/W

- Select the station, e.g.:
▷ >Frequency 95 Point 5<.
The system issues:95.5<<.
MUNDUSDUER
Notes

Do not use the voice command system in emergency situations. In stress situations, voice and pitch can change. Instead, use the emergency call button near the interior rearview mirror.

At the time of going to press, the voice command system was available in English. Other languages are currently not available.
The telephone can also be operated using voice control, refer to page 157.
Important for voice commands
Issue the commands fluently and at normal volume, avoiding excessing emphasis and pauses.
The voice command system uses a special hands-free microphone located in the front of your vehicle's headliner. On vehicles with telephone, two vehicle microphones are fitted. Although the system is designed to filter out ambient noise, you can help ensure that your commands will be understood by observing the following instructions:
Keep the doors, windows and glass roof closed to prevent interference from ambient noise
Avoid other sources of noise in the vehicle while speaking, and ask other vehicle occupants to refrain from talking while you are using the system
Without a telephone, the vehicle microphone is directed at the driver. This means that the system might not be able to register the voices of other vehicle occupants properly.


Controls
This chapter is intended to provide you with information for complete control of your vehicle. Its extensive array of features and accessories, both for driving and for your own safety, comfort and convenience, are described here.
Opening and closing
The key set

1 Central keys with remote control. They specify the functions of the Key Memory. In the process individual functions of your vehicle can behave differently depending on the key used, see further below.
You can mark the keys with remote control using the color-coded decals you received on taking delivery of the vehicle
Each central key with remote control is equipped with an extended-life battery, which is automatically recharged in the ignition lock each time you drive the vehicle.
If you have any central keys with remote control that are not used on a regular basis, you should therefore remember to recharge these units by using them to drive the vehicle for an extended period at least once a year, refer to page 29.
2 Spare key for storage in a safe place, such as in your wallet.
This key cannot be used to open the locks for the luggage compartment lid and glove compartment. This is an advantage in a hotel, for example. The key is not intended for constant use
Key Memory
How the system functions
Doubtless you have often reflected on how great it would be if you could configure your vehicle's various adjustment settings to meet your own personal requirements. BMW has designed several freely selectable options into the vehicle during its development. You can set these as desired via the Control Center.
You can have up to four different basic settings adjusted for four different persons for the specific keys. The only requirement is that each person uses his or her own central key with remote control.
Additional keys are available at your BMW center.
When your vehicle is unlocked with the remote control, the vehicle recognizes the individual user by means of a data exchange with the key, and makes adjustments accordingly.
To differentiate

Color-coded decals are provided to help you distinguish the individual central keys with remote control with their different settings.
Examples of Key Memory functions
▶ Automatic adjustment of the electric driver's seat
▶ Locking the vehicle after moving off
When unlocking with the remote control, either unlock only the driver's door or the entire vehicle
▶ Activating optical warning for Park Distance Control PDC
Setting the volume.
Central locking system
The concept
The central locking system is ready for operation whenever the driver's door is closed. This simultaneously engages and releases the locks on the following:
Doors
Luggage compartment lid
▶ Fuel filler door.
The central locking system can be operated from the outside
▶ via the remote control
▶ via the driver's door lock
and from inside via the button for the central locking system.
When the system is locked from inside, the fuel filler door remains unlocked, refer to page 30.
The anti-theft system is automatically activated whenever you operate the central locking system from outside the vehicle. It prevents the doors from being unlocked using the safety lock buttons or door handles. The alarm system is armed/disarmed at the same time.
In the event of an accident, the central locking system automatically unlocks the vehicle. In addition, the hazard warning flashers and interior lamps come on.
Opening and closing: from outside
Using the remote control
The remote control provides two additional functions for the central locking system:
▶ Switching on the interior lamps, refer to page 28.
You can also use this function to locate your vehicle in parking garages etc.
Opening the luggage compartment lid, refer to page 28.
The luggage compartment lid opens, regardless of whether it was previously locked or unlocked.
In addition, the remote control offers you another function:
▷ Panic mode In case of danger, you can trigger an alarm.
When you lock/unlock the vehicle, you simultaneously activate/deactivate the anti-theft system, arm/disarm the alarm system, and switch the interior lamps on/off.
Protect the remote control against unauthorized use by handing over only the spare key, for example when using hotel valet parking.
Because any persons or animals left unattended in a parked vehicle could lock the doors from the inside, you should always keep the remote control with you; this precaution ensures that you will remain able to unlock the vehicle from the outside at all times.
Unlocking
Press the ↗ button.
You can set which doors are to be unlocked for each specific key:
Control Center, for principle details, refer to page 16:
- Open the menu
-
Select "Vehicle settings" and press the controller
-
Select "Door locks" and press the controller
- Select "Central locking" and press the controller

- Select "Lock button" and press the controller
- Select the doors and press the controller:
"All doors"
▶ "Driver's door only"
Press the button twice to unlock the entire vehicle after the driver's door.
RV displays the selected doors.
Convenience opening mode
Press and hold the button. The windows and the glass roof open.
Locking and securing
Press the button.
Switching on the interior lamps
If the vehicle is locked, press the LOCK button.
Switching off the tilt alarm sensor and interior motion sensor
Press the button once again directly after locking.
For more detailed information, refer to page 33.
Panic mode
By pressing and holding the button for more than approx. two seconds, you can trigger the alarm system in response to any impending danger.
To switch off the alarm: press any of the buttons.
Opening the luggage compartment lid
Press the button.
The luggage compartment lid opens, regardless of whether it was previously locked or unlocked.
During opening, the luggage compartment lid pivots upward and to the rear. Ensure that adequate clearance is available before opening.
Before and after a trip, ensure that the luggage compartment lid has not been opened unintentionally.
A locked luggage compartment lid is also locked again after closing.
Setting the confirmation signals
You can have various confirmation signals programmed into the system to verify that the vehicle has been unlocked or locked securely.
Control Center, for principle details, refer to page 16:
- Open the menu
- Select "Vehicle settings" and press the controller
- Select "Door locks" and press the controller
- Select "Confirmation" and press the controller
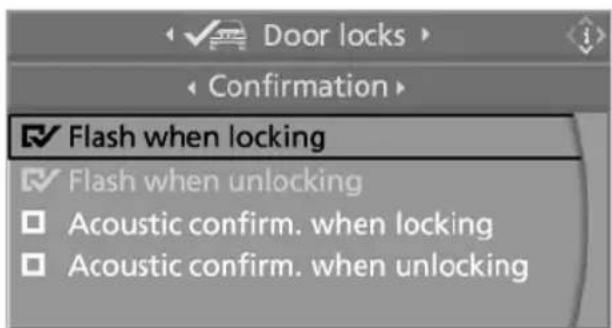
- Select the desired signal and press the controller.
indicates the signals switched on.
Malfunctions
External systems or devices may cause local interference in the functions of the remote control.
Should the remote control fail to operate owing to interference of this kind, you can respond by using the central key to unlock your vehicle at one of the doors.
In the event of a system malfunction, please contact your BMW center, which is also your source for replacement keys.
When it is no longer possible to lock the vehicle via the remote control, the battery is discharged. Use this remote control during an extended drive; this will recharge the battery, refer to page 26.
For US owners only
The transmitter and receiver units comply with part 15 of the FCC/Federal Communication Commission regulations. Operation is governed by the following:
FCC ID: LX8766S
LX8766E
LX8CAS
Compliance statement:
This device complies with part 15 of the FCC Rules. Operation is subject to the following two conditions:
This device may not cause harmful interference, and
this device must accept any interference received, including interference that may cause undesired operation.

Any unauthorized modifications or changes to these devices could void the user's authority to operate this equipment.
Using the door lock
MV01592CM4

Do not lock the vehicle when persons are inside, as the vehicle cannot be locked from inside.
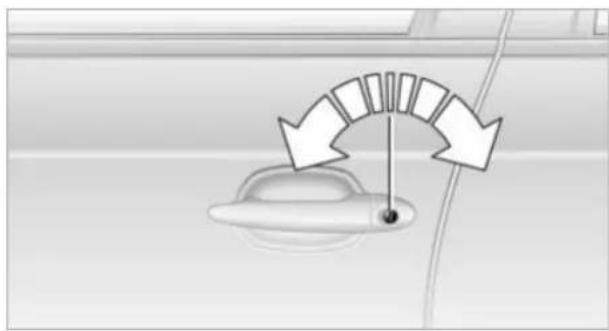
One turn of the key in the driver's door lock unlocks the driver's door only.
Turning the key a second time unlocks all of the remaining doors, the luggage compartment lid and the fuel filler door.
Convenience operation
You also have the option of operating the windows and the glass roof from the driver's door lock.
To open:
With the door closed, turn the key to the unlock position and hold it there
To close:
With the door closed, turn the key to the lock position and hold it there.

Watch during the closing process to be sure that no one is injured. Releas-
ing the key stops the operation.
Manual operation
In the event of an electrical malfunction
You can turn the key all the way to the right or left in the door lock to lock or unlock the driver's door.
Opening and closing: from inside

You can operate the central locking system with this button when the front doors are closed. This only unlocks or locks the doors and luggage compartment lid, but not secured. Also, the fuel filler door remains unlocked to allow refueling.
You can also make the following settings for each specific key:
The central locking system automatically locks the vehicle as soon as you drive off
The central locking system automatically locks the vehicle after a short time when no door has been opened.
Control Center, for principle details, refer to page 16:
- Open the menu
- Select "Vehicle settings" and press the controller
- Select "Door locks" and press the controller
- Select "Central locking" and press the controller

- Select "Lock after driving off" or "Relock door if not opened" and press
the controller.
RV displays the selected setting.
Unlocking and opening the doors
Either unlock the doors together with the button for the central locking system and then pull the door handle above the armrest or
pull the door handle twice at each individual door: the first pull unlocks the door, the second pull opens it.
Locking
Use the central locking button to lock all of the doors simultaneously, or
press down the individual safety lock buttons. To prevent you from being locked out, the open driver's door cannot be locked using the safety lick button.
Because any persons or animals left unattended in a parked vehicle could lock the doors from the inside, you should always keep the remote control with you; this precaution ensures that you will remain able to unlock the vehicle from the outside at all times.
Luggage compartment lid
Opening from inside

Press the button: the luggage compartment lid opens unless it has been secured.

During opening, the luggage compartment lid pivots upward and to the rear. Ensure that adequate clearance is available before opening.
Opening from outside

Press the button: the luggage compartment lid opens.

During opening, the luggage compartment lid pivots upward and to the rear. Ensure that adequate clearance is available before opening.
MV01648CMAA
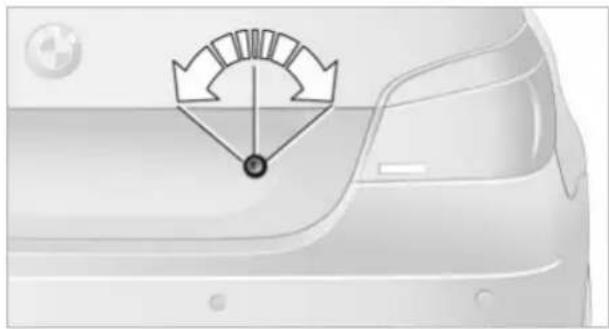
Only the central keys with remote control, refer to page 26, match the luggage compartment lock.
Securing separately
Turn the central key with remote control in the lock of the luggage compartment lid beyond a resistance point to the right and withdraw it from a horizontal position.
This locks the luggage compartment lid and disconnects it from the central locking system.
If you then only hand over the spare key, refer to page 26, no access is possible via the luggage compartment lid. This is an advantage in a hotel, for example.
Double-unlocking, manual operation
Turn the central key to the left as far as it will go: the luggage compartment lid opens.

If you use the key to unlock the luggage compartment lid while the alarm system is armed, the alarm will be triggered. Switching off the alarm, refer to page 32.
Emergency release

This lever releases the luggage compartment lid from inside the luggage compartment.
Closing

The handle recesses on the interior trim of the luggage compartment lid make it easier to pull down.

To avoid injuries, be sure that the travel path of the luggage compart-lid is clear when it is closed, as with losing procedures.

Operate the vehicle only when the luggage compartment lid is completely closed. Otherwise, exhaust fumes could penetrate the interior of the vehicle. ◀ If special circumstances should make it absolutely necessary to operate the vehicle with the compartment open:
- Close all windows and the glass roof
- Adjust the automatic climate control to supply a high air volume, refer to page 91.
Alarm system
The concept
The vehicle alarm system responds:
When a door, the hood, or the luggage compartment lid is opened
To movement in the vehicle interior: interior motion sensor
To changing the vehicle's tilt if someone attempts to steal the wheels or tow the vehicle
To interruption of battery voltage.
The system responds to unauthorized vehicle entry and attempted theft by simultaneously activating:
An acoustic alarm, which lasts for a period of approx. 30 seconds
The hazard warning flashers for approx. 5 minutes
The high beams, which flash on and off in the same rhythm.
Arming and disarming the alarm system
When you lock or unlock the vehicle, either with the remote control or at the door lock, the alarm system is armed or disarmed at the same time.
The system indicates that it has been correctly armed by switching on the hazard warning flashers for a single cycle and by emitting an acoustic signal.
You can also open the luggage compartment lid with the system armed using the button on the remote control, refer to page 28. When you close the lid, it is secured again.
Switching off the alarm
▶ Unlock the vehicle using the remote control, refer to page 27
Or turn the ignition key to position 1.
▷ Unlock the vehicle using the remote control, refer to page 27 ▷ Or turn the ignition key to position 1.
Indicator lamp displays

The indicator lamp beneath the interior mirror flashes continuously: the system is armed
If the indicator lamp flashes during arming: doors, engine hood or luggage compartment lid are not properly closed. Even if you do not close the alerted area, the system begins to monitor the remaining areas, and the indicator lamp flashes continuously after approx. 10 seconds. However, the interior motion sensor is not activated
If the indicator lamp goes out on dis- arming: no manipulation or attempted intrusions have been detected in the period since the system was armed
If the indicator lamp flashes on disarming until the key is inserted in the ignition lock, but for approx. 5 minutes at the most: your vehicle has been manipulated in the meantime.
Following triggering of an alarm, the indicator lamp will flash continuously.
Avoiding unintentional alarms
The tilt alarm sensor and interior motion sensor may be switched off at the same time. You can do this to prevent a false alarm from being triggered in garages with elevator ramps, for instance, or when the vehicle is transported by trailer or train:
Lock, i.e. arm twice. Press the button on the remote control twice in succession, refer to page 27, or lock twice with the key, refer to page 30.
The indicator lamp lights up briefly and then flashes continuously. The tilt alarm sensor and the interior motion sensor are switched off as long as the system is armed.
Interior motion sensor
In order for the interior motion sensor to function properly, the windows and glass roof must be completely closed.
However, switch the interior motion sensor off, refer to Avoiding unintentional alarms, if
▶ children or animals are to remain in the vehicle
the windows or glass roof are to remain open.
Windows
Opening and closing windows

As of ignition key position 1:
Press the switch up to the resistance point:
The window continues to move downward as long as you continue to hold the switch
Briefly press the switch beyond the resistance point:
The window moves downward automatically. Press the switch again to stop the opening movement.
You can close the windows in the same manner by pulling the switch.
After switching off the ignition
You can still operate the windows:
In the radio position for a longer time
For approx. 1 minute in position 0 or with the ignition key removed.
To open, press the switch beyond the resistance point.

When leaving the vehicle parked, always remove the central key with the control from the ignition lock and the doors; this precaution prevents ren from operating the power wins and injuring themselves etc.
For information on using the convenience operation mode at the door lock or with the remote control, refer to page 28 or 29.
Safety feature
If the closing force rises beyond a pre-defined threshold during closing, the system will immediately stop moving the window prior to lowering it slightly.

Despite this safety feature you should always inspect the window's travel path prior to closing it, as the safety system might fail to detect certain kinds of obstructions, such as very thin objects, and the window would continue closing.
Pulling the switch beyond the resistance point and holding it limits the response of the safety feature.
Under these conditions the window will respond to forces beyond a defined threshold by only opening several inches/millimeters.
If you again pull the switch past the resistance point and hold it in position within a period of roughly 4 seconds, the safety feature is deactivated.
Safety switch

With the safety switch, you can prevent the rear windows from being opened or closed via the switches in the rear passenger area, by children, for example. The indicator lamp lights up when this safety feature is activated.

Press the safety switch whenever children are riding in the rear of the
vehicle. Careless use of the power windows can lead to injury.

You can deactivate the function again as of ignition key position 1.
Accessories in the window area
After installing any accessory – such as a clamp-on antenna for a portable phone – within the window's travel range, you will need to have the system reinitialized for use under the new conditions. Please contact your BMW center for assistance.
Glass roof, electric*

To prevent injuries, exercise care when closing the glass roof and keep it in your field of vision until it is shut.
When leaving the vehicle, always remove the remote control and close the doors to prevent children from operating the glass roof and injuring themselves, etc.
Raising, opening, closing

As of ignition key position 1, press the switch, or slide it in the desired direction up to the resistance point.
After switching off the ignition
You can still operate the roof:
In the radio position for a longer time
For approx. 1 minute in position 0 or with the ignition key removed.
The headliner insert slides back somewhat when you raise the glass roof. When the glass roof is opened the headliner retracts with it.

Do not use force to close the head-liner insert with the glass roof in its raised position, as damage to the mechanism could result.
For information on using the convenience operation mode at the door lock or with the remote control, refer to page 28 or 29.
Automatic* opening and closing
Briefly press the switch past the resistance point and then release it.
In addition, the following movements are also automatic:
With the glass roof open, move the switch towards 'Raise': the glass roof moves to the end position of 'Raise'
With the glass roof raised, move the switch towards 'Open': the glass roof moves to the end position of 'Open'.
Press the switch again in any direction to stop the glass roof.
Safety feature
If the glass roof encounters resistance when closing from roughly the center of the roof opening or when closing from the raised position, the closing action is interrupted and the glass roof reopens a little.

Despite this safety feature, you should always inspect the glass roof's travel range prior to closing it, as the safety feature might fail to detect certain kinds of obstructions, such as very thin objects, and the glass roof would continue closing. Pressing the switch beyond the resistance point and holding it limits the response of the safety feature. The glass roof only opens a short distance.
If you again press the switch past the resistance point and hold it in position within a period of roughly 2 seconds, the safety feature is deactivated.

When you close the glass roof, it will slow down as it approaches the end
of its travel path; this is to allow the safety feature to respond more precisely to any obstructions encountered in this critical area.
Following interruptions in electrical power supply
Following interruptions in electrical power supply, for instance, when the battery is disconnected, it is possible that the glass roof will extend to its raised position, but fail to respond to other commands. Should this occur, please have the glass roof reinitialized at your BMW center.
Manual operation
In the event of an electrical malfunction, you can operate the glass roof manually:
MVO2701CM4
- Fold the cover downwards

MV02718CMAA
2. Insert the Allen wrench supplied with the onboard tool kit, refer to page 184, in the opening provided. Turn to slide the glass roof in the desired direction.
Adjustments
Sitting safely
The ideal sitting position can make a vital contribution to relaxed, fatigue-free driving. The sitting position of the occupants plays an important role together with the safety belts and airbags in an accident. To ensure that the safety systems operate with optimal efficiency, we strongly urge you to observe the instructions contained in the following section.
For additional information on transporting children safely, refer to page 45.
Sitting safely with airbags

Always maintain an adequate distance between yourself and the airbags. Always hold the steering wheel by its rim with hands at the 9 o'clock and 3 o'clock positions, to minimize the risk of injuries to your hands and arms in the event of airbag deployment.
No one and nothing is to come between the airbags and the seat occupant.
Do not use the cover of the front airbag on the front passenger side as a storage area. Make sure that the front passenger is correctly seated and does not rest feet or legs on the instrument panel, otherwise leg injuries can occur if the knee and front airbag are triggered.
Never let an occupant's head rest near or on a side airbag because the inflating airbag could cause a serious or fatal injury.
Even if you adhere to all the instructions injuries resulting from contact with airbags cannot be fully excluded, depending on the circumstances. The ignition and inflation noise may provoke a mild hearing loss in extremely sensitive individuals. This effect is usually only temporary.
For airbag locations and additional information on airbags, refer to page 83.
Sitting safely with safety belts
Fasten your safety belt before starting any trip. Airbags complement the safety belt as an additional safety device, but they do not represent a substitute.
Your vehicle has five seats that are all equipped with a safety belt.

At all times, occupants should sit upright and be properly restrained – infants and small children in appropriate child-restraint systems; larger children and adults using the safety belts.
Expectant mothers should always wear their safety belts, taking care to position the lap belt against the lower hips, where it will not exert pressure against the abdominal area.
Never allow more than one person to wear a single safety belt. Never allow infants or small children to ride in a passenger's lap. Do not route the belt across your neck, or run it across sharp edges. Be sure that the belt does not become caught or jammed. Avoid twisting the belt while routing it firmly across the hips and shoulder. Do not allow the belt to rest against hard or fragile objects. Otherwise, in the event of a frontal impact, a loose lap belt could slide over your hips, leading to abdominal injury.
Avoid wearing clothing that prevents the belt from fitting properly and pull the lap belt periodically to readjust the tension across your shoulder in order to avoid a reduction in the retention effect of the safety belt.
For instructions on operating safety belts, refer to page 40.
Seats
Note before adjusting

Never attempt to adjust your seat while the vehicle is moving. The seat
could respond with unexpected move-
ment, and the ensuing loss of vehicle control could lead to an accident.
On the front passenger side as well, do not tilt the backrest too far toward the rear while driving. Failure to observe this precaution can prevent the belt from providing effective protection against injury, as the passenger could slide under the belt in an accident.
Make sure that the footwell behind the driver's and front passenger's seat is empty and unobstructed. If you fail to do so, any persons or objects behind the seat could be injured or damaged by a rearward movement of the seat.
Please observe the information on damage to safety belts provided on page 41 and the information on the active head restraints on page 40.
Seat adjustment

To ensure that the safety systems continue to provide optimized protection, please observe the adjustment instructions on page 36.

1 Forward/backward
2 Height
3 Angle

4 Backrest
Comfort seat* adjustment
In addition to the electric power seat functions, several other adjustment options are available with the comfort seat:

MYD28290MA
1 Backrest width
By adjusting the backrest width, you can increase or reduce lateral support
2 Shoulder support
You can use the adjustable upper back-rest for supplementary support in the shoulder region. This provides a relaxed driving position and helps relieve stress on the shoulder muscles

Make corrections in the forward/backward adjustment of the seat sure that the safety belt still fits against your body. If you do not is, the protection provided by the y belt may be reduced.
3 Thigh support
Adjust the thigh support until the ideal support is provided for the thigh
4 Lumbar support, see below
Sports seat* adjustment
In addition to the seat cushion, on the sports seat you can adjust the thigh support 3, see above.
Easy entry/exit*
The backrest width automatically moves as high up and far forward as possible to ease driver entry and exit before then returning to the standard or stored memory setting.
This automatic feature is governed by the driver's door and the ignition lock.
Lumbar support* adjustment

You can also adjust the contours of the backrest to obtain additional support in the lumbar region.
The upper hips and spinal column receive supplementary support to help you maintain a relaxed, upright sitting position.
Press the front/rear of the switch to strengthen or weaken the curvature
Press the upper/lower end of the switch to strengthen the curvature at the top or bottom.
Seat, mirror and steering wheel memory*

You can store and select two different adjustment settings for the driver's seat, exterior mirrors and steering wheel.
The adjustment of the lumbar support is not stored in the memory.
Storing
- Turn the ignition key to position 1 or 2
-
Set the desired seat, exterior mirror and steering-wheel positions
-
Press the MEMORY button:
The indicator lamp in the button lights up - Press the desired memory button 1 or 2:
The indicator lamp goes out.
Calling up a stored setting

Do not call up a position from the memory while the vehicle is moving.
Otherwise there is a risk of accident from unexpected movement of the seat or steering wheel.
Convenience mode
- Open the driver's door after unlocking or turn the ignition key to position 1
- Briefly press the desired memory button 1 or 2.
The system immediately cancels the adjustment procedure when you press one of the seat adjustment buttons or use one of the memory buttons.
When the respective last driver's seat, exterior mirror and steering-wheel position is called up can be set for each key.
Control Center, for principle details, refer to page 16:
- Open the menu
- Select "Vehicle settings" and press the controller
- Select "Door locks" and press the controller
- Select "Central locking" and press the controller
- Select "Last seat position" and press the controller

- Select "After unlocking" or "After door is opened" and press the controller.
R displays the selected setting.

When using this Key Memory feature, always make sure that the footwell
behind the driver's seat is empty and unobstructed. If you fail to do so, any persons or objects behind the seat could be injured or damaged by a rearward movement of the seat.
Safety feature
- Close the driver's door and turn the ignition key to position 0 or 2
- Press the desired memory button 1 or 2 and maintain pressure until the adjustment process has been completed.
If the M MEMORY button is pressed accidentally:
Press the button a second time, the indicator lamp goes out.
Passenger-side exterior mirror tilt function*
Automatic curb monitor

- Select the exterior mirror on the driver side with the switch
- When you engage reverse gear or selector-lever position R, the exterior
mirror on the front passenger side tilts downward slightly. This allows the driver to see the area immediately adjacent to the vehicle – such as a curb – when parking, etc.
You can also deactivate this automatic function: push the mirror selector switch to the passenger's mirror position.
Head restraints

Head restraints reduce the risk of spinal injury in the event of an accident.
Adjust the head restraints so that they are centered roughly at the level of your ears.
Front seats: adjusting the height
You can adjust the height of the head restraints electrically.
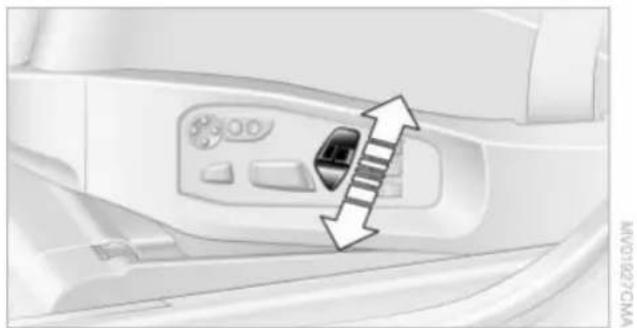
Front seats: adjusting the angle
Swivel the head restraint.
With the comfort seat, you use the shoulder support to set the distance to the back of the head.
Comfort seat
Setting the side extensions

You can fold the side extensions on the head restraint forward for increased lateral support.
Front head restraints, active*
The comfort seats are equipped with an active head restraint.
When necessary, the system will respond to a rear impact by automatically triggering the active head restraints.

To ensure that the active head restraints afford maximum protection, and to avoid unnecessary risks to personal safety, we request that you read and comply with the following:
Adjust the head restraints so that they are centered roughly at the level of your ears
Do not install seat or head-restraint covers
▶ Never use the head restraints as supports for suspending objects of any kind, such as clothes hangers. Refrain from mounting accessories on either the seat or the head restraint.
Rear seats: adjusting the height
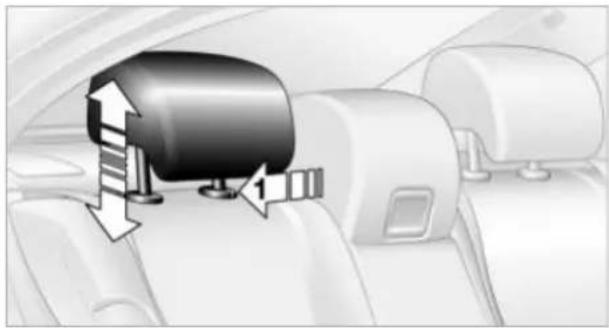
Upwards: by pulling
Downwards: press the button, arrow 1, and press the head restraint downwards.
Safety belts
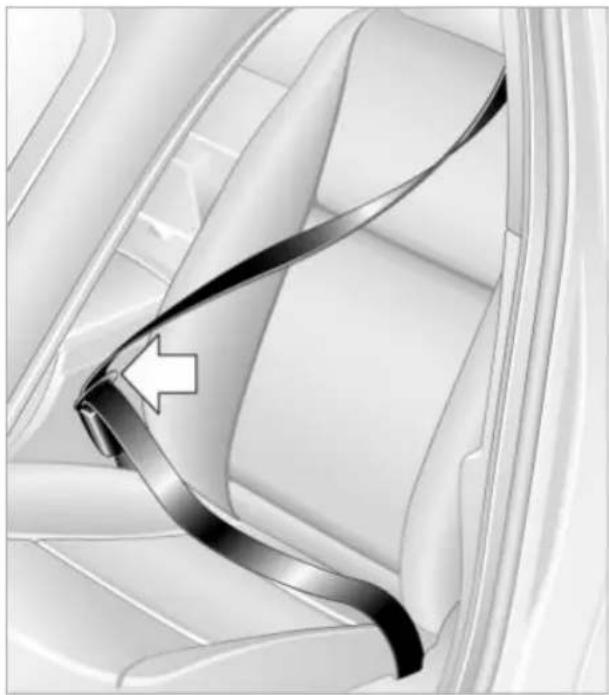
Fastening
Make sure you hear the latch plate engage in the belt buckle.

Please fasten safety belts warning lamp:
Lights up until the driver and front passenger have fastened their seat belts. Depending on the model, a signal* sounds or a message* appears on the Control Display at the same time.
The warning is also issued when the driver or front passenger removes his or her safety belt while driving.

The warning can also be issued when objects are laid on the front passenger seat.
Releasing
- Press the red button in the belt buckle
- Hold the belt firmly
- Guide the belt into its reel.
The upper shoulder strap's anchorage point will be in the correct position for seat occupants of every build if the seat is correctly adjusted, refer to page 36.
The two rear safety belt buckles integrated in the rear seat are for passengers sitting on the left and right. The belt buckle embossed with the word CENTER is intended exclusively for use by passengers riding in the center position.
Damage to safety belts

If the safety belts are damaged or stretched in an accident: have the entire belt system, including the tensioning mechanisms, replaced at your BMW center. Have the belt anchorage points inspected for damage at the same time.
Failure to observe this precaution may prevent the safety belts from effectively providing optimal protection when needed.
Heated seats*
Front
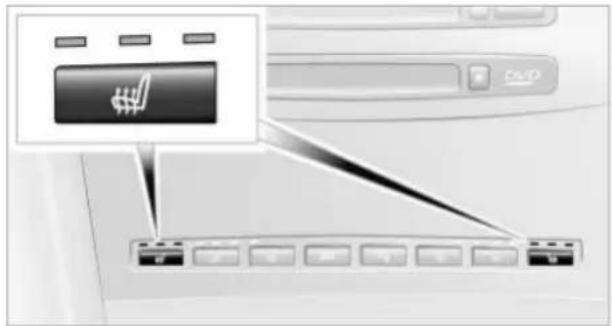
MVG2751CMMA
The system regulates the temperatures of the seat cushion and backrest.
The temperature setting progresses one step through its control sequence each time you press the button.
To switch off:
Maintain pressure on the button for several seconds.
Rear

MVO19330MA
The operating concept is the same as for the front heated seats.
Temperature distribution at the front
It is possible to select a temperature-distribution pattern, providing different levels of heating for the seat cushion and the back-rest according to your wishes.
Control Center, for principle details, refer to page 16:
- Open "Climate"
- Select "Seat heater distribution" and press the controller

- Move the controller to the left or right to select "Driver" or "Passenger"
- Turn the controller. The adjustment is adopted; the field can be changed.
Active seat ventilation*

The system progresses one step through the control sequence each time you press the button.
To switch off:
Maintain pressure on the button for several seconds.

Use level 3 to cool the passenger compartment rapidly, for instance, when heat accumulates in the vehicle. After a short time, there is an automatic return to level 2 to prevent undercooling of the occupant's back.
Active seat*
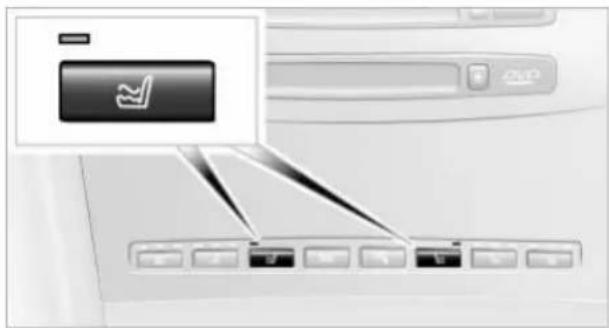
MAYOZI53CMIA
The seat cushion is actively varied by alternately raising and lowering the right and left half of the seat cushion. This reduces muscular tension and fatigue to help prevent lower back pain.
Center console:
To activate, press the button; the indicator lamp lights up.
If you switch off the active seat, it can take up to 1 minute before the two halves of the seat cushion have returned to their initial position.
Mirrors
Adjusting exterior mirrors

MM066920NN
Arm rest in the driver's door:
1 4-way adjustment
2 To select mirror for adjustment

To prevent the exterior mirrors on this vehicle from being damaged, always fold them in by hand before entering an automatic car wash.
You can also adjust the mirrors manually by pressing against the outer edges of their lenses.
Storing the mirror positions, refer to Seat, mirror and steering wheel memory on page 38.

The mirror on the passenger's side features a lens with a more convex surface than the mirror installed on the driver's side. When estimating the distance between yourself and other traffic, bear in mind that the objects reflected in the mirror are closer than they appear. This means that estimations of the distance to following traffic should not be regarded as precise.
Self-defrosting mirrors
Both exterior mirrors are automatically heated in ignition key position 2.
Interior rearview mirror

To reduce the dazzle effect of following vehicles at night, turn the knob beneath the mirror.
Interior and exterior mirrors, automatic dimming feature*
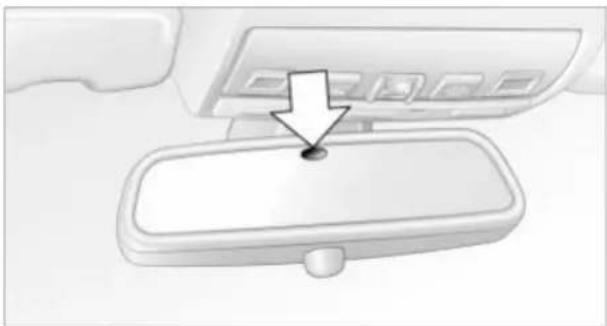
These mirrors automatically respond to ambient light and headlamp glare from following vehicles by automatically dimming through an infinitely-variable range. There are two photocells located in the interior rearview mirror for this purpose. One is integrated within the mirror's lens, while the other is located at an offset position on the rear of the mirror housing.
The mirrors automatically revert to their clear, undimmed mode whenever you engage reverse gear or place the selector lever into position R.

For trouble-free operation, keep the photocells clean and do not cover the between the interior rearview mirror the windshield. Do not attach any kind lockers on the windshield in front of the or.
Steering wheel adjustment

Do not adjust the steering wheel while the vehicle is moving. There is a risk cident from unexpected movement.

The steering wheel can be adjusted in any of four directions by pressing the appropriate end of the button.
Storing steering wheel positions, refer to Seat, mirror and steering wheel memory on page 38.
Automatic steering wheel adjustment
In conjunction with seat, mirror and steering wheel memory.
The steering wheel automatically moves as high up and far forward as possible to ease driver entry and exit before then returning
to the standard position or stored memory setting.
This automatic feature is governed by the driver's door and the ignition lock.
Steering wheel heater*

The steering wheel heater operates when the ignition is on.
Press the button to activate or deactivate this system.
The indicator lamp within the button lights up when the steering wheel heater is in operation.
Programming button function


Depending on your vehicle's equipment, you can assign an individual function to each of the two programmable function buttons* on the steering wheel for each specific key. This feature then provides you with quick access to this function, allowing you to control it without undue distraction from road and traffic conditions.
Control Center, for principle details, refer to page 16:
- Open the menu
- Select "Vehicle settings" and press the controller
- Select "Steering wheel buttons" and press the controller

MND1026UEA
A list with different functions is displayed:
"Navigation"
Switching voice instructions on/off
"Air recirculation on / off"
In this mode, you can block the supply of outside air, refer to AUC Automatic recirculated-air control on page 91
▶ "Mute on / off"
Mutes the audio sources
"Screen on / off"
Switches the Control Display on/off
"Next entertainment source"
Next audio source
"Head-Up Display"
Switches the Head-Up Display
on/off
▶ "Horn"
- Select the desired function and press the controller.

NOTEDUUA
- If appropriate, select a button and press the controller.
You can select the displayed function using the button.
Transporting children safely
The right place for children
Children always in the rear
Accident research shows that the safest place for children in a vehicle is in the rear seat.
Older children should be tightly secured with a safety belt, after they have outgrown a booster seat that is appropriate for their age, height and weight.
A child sitting in the rear seat and not properly restrained may place his or her head on or near the airbag, if so equipped. For example, a child — even though belted — may fall asleep with his or her head against the side airbag. It may be difficult for a driver to ensure that children in the rear seat will remain properly positioned at all times and do not place their heads on or near the side airbag. Therefore, we recommend that the rear side airbags, if provided, be deactivated if you plan to transport children in the rear seat.
Deactivating the rear seat side airbags
The rear seat side airbags may already have been deactivated by a BMW center. Labels in the rear door opening should indicate the status of your rear seat side airbags. If you are uncertain of their status, or wish to have the airbags activated or deactivated, please contact your BMW center.
Child-restraint system in the rear

Children under 13 years of age and children less than 5 ft/150 cm tall
should always ride in the rear and the restraint systems should be secured with the vehicle's safety belts.
Younger children should be secured in an appropriate forward-facing child-restraint system that has first been properly restrained. We strongly urge you to carefully read and comply with the instructions
for installation and use provided by the child restraint's manufacturer whenever you use such a device.
All rear sitting positions in your vehicle meet the recommendations of SAE J1819, an industry-recommended practice for securing child-restraint systems in motor vehicles.
Exception for the front passenger seat
Should it become necessary to use a child-restraint system on the front passenger seat, the airbags on the passenger's side must be deactivated. The passenger airbag indicator lamp above the interior rearview mirror must light up continuously. Otherwise, the front passenger airbags remain active and there is considerable risk of injury to children if the airbags are triggered, even with a child-restraint system. In this case, children should be seated in the rear and the system should be checked at your BMW center.
Never install a rearward-facing child-restraint system in the front passenger seat of this vehicle if the passenger airbag is not deactivated. If you do so, the child could be severely injured when the airbag is triggered.
Your vehicle is equipped with an airbag supplemental restraint system for the front passenger. Because the backrest on any rearward-facing child-restraint system – of the kind designed for infants under 1 year and 20 lbs./9 kg – would be within the airbag's deployment range, you should never mount such a system in the front passenger seat, since the impact of the airbag against the child restraint's backrest could lead to serious or fatal injuries.
More information on automatic deactivation of the front passenger airbags, refer to page 83.
Installing child-restraint systems
Before installing any child-restraint system or child seat, read the following:

Observe the child-restraint system manufacturer's instructions for installation and use. Otherwise the degree of protection can be reduced.
Following an accident, have all parts of the affected vehicle safety-belt system checked and, if necessary, replaced by a BMW center.
Commercially-available child-restraint systems are designed to be secured with a lap belt or with the lap belt portion of a combination lap/shoulder belt. Improperly or inadequately installed restraint systems can increase the risk of injury to children. Always read and follow the instructions that come with the system.
Child seat security

All of the rear belt retractors and the front passenger's safety belt can be locked for mounting and securing child-restraint systems.
Information regarding this is located near the buckle latch of each safety belt.
To lock the safety belt
Pull the entire length of the belt from the belt retractor. Allow the reel to retract the belt somewhat and engage the buckle, then tighten the belt against the child-restraint system. The retraction mechanism is now locked.
To unlock the safety belt
Release the buckle, remove the child-restraint system and allow the belt retractor to reel the belt completely in.
Child-restraint system with tether strap
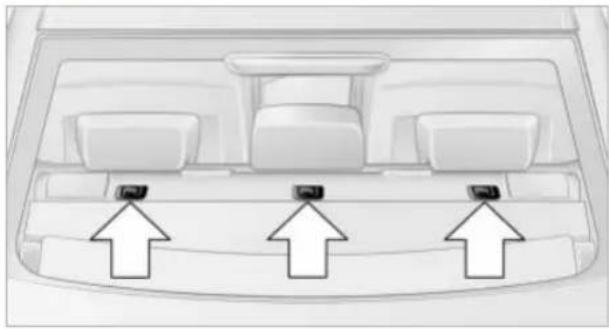
NV02766CMA
If you use a child-restraint system with a tether strap, three additional tether anchorage points have been provided, refer to the arrows in the illustration. Depending on the location selected for sitting in the rear passenger area, attach the tether strap to the corresponding anchorage point to secure the child-restraint system, as shown in the illustration below.

NVOZT280MA
Each sitting position is fitted with a head restraint.
Outer seating positions:
Lift the head restraint and pass the tether strap between the head restraint and the seat back. It is recommended to readjust the head restraint into the lowest possible position.
Center seating position:
Pull the center armrest forward somewhat to guide the tether strap through the opening. Then reengage the center armrest.

Adjust the tether strap according to the child-restraint manufacturer's
instructions.
LATCH child-restraint fixing
LATCH: Lower Anchor and Tethers for CHildren.
The rear outer sitting positions are provided with anchors for a LATCH child-restraint fixing.

To fit the LATCH child-restraint fixing, follow the operating and safety
instructions of the manufacturer.
Access to anchorage points on the basic seat

The illustrations show the left rear seat as an example. The outer anchorage points for the LATCH child-restraint fixing are identified by small flags.

Canadian models only:
The anchorage points for the LATCH child-restraint fixing are identified by buttons.
Installation guide
The installation guide makes it easier to fit the LATCH child-restraint fixing and at the same time protects the surface of the seats.

The installation guide is available at your BMW center. Always observe all
instructions for installation and use provided by the child-restraint's manufacturer.
-
Engage the center safety belt into the belt buckle
-
Pull the belt away from the area of the child-restraint fixing

MAYOCHOEMA
- Firmly press the installation guide into the gap between the upholstery on seat and backrest, continuing until the two funnel-shaped guides snap into place in the LATCH support braces in the seat.
Pull the installation guides to remove.
Access to anchorage points on the rear seat with through-loading system

MAYOYBECMA
The illustration shows the right rear seat as an example.
The anchorage points for the LATCH child-restraint fixing are located behind the protective caps.
Before fitting the child-restraint fixing, remove the LATCH protective caps.
- Engage the center safety belt into the belt buckle
- Pull the belt away from the area of the child-restraint fixing.
On journeys

If side airbags are fitted in the rear, make sure that children do not lean out of the child's seat towards the door panels. Otherwise severe injuries can be caused if the side airbags are triggered.
Child safety locks for the rear doors

MVO1965CMVA
Slide down the safety lever on the rear doors:
The relevant door can now be opened from the outside only.
Driving
Ignition lock

0 Steering locked
The key can only be inserted or removed in this position.
After removing the key, turn the steering wheel slightly until it locks.

Vehicles with automatic transmission: only move the selector lever from
position P with the engine running. To turn the key back to position 0 or to remove it, first place the selector lever in position P: Interlock.
1 Steering unlocked
A slight steering wheel movement often makes it easier to turn the key from 0 to 1. Individual current consumers are ready for operation.
2 Ignition switched on
All vehicle systems are ready for operation.
3 Start engine
Starting the engine

Do not run the engine in closed rooms, as otherwise the inhaling of
toxic exhaust gases can cause unconsciousness and death. The exhaust gases contain carbon monoxide, an odorless and colorless, but highly toxic gas. Never leave an unattended vehicle with the engine running, as such a vehicle represents a potential safety hazard.
Do not allow the engine to warm up by leaving it running while the vehicle remains stationary. Instead, begin to drive immediately at a moderate engine speed.
When starting the engine, do not press the accelerator pedal.
Your BMW is equipped with the convenience starting feature. Here, it is sufficient to turn the ignition key only briefly to position 3 'Start engine' and to let go of it right away. The system responds by automatically engaging the starter for a certain period and allowing it to run until the engine starts, after which it then disengages automatically. The automatic starting mode will not operate or will be canceled if the battery voltage is low. The engine can be started by jump-starting, refer to page 192.
Press the accelerator pedal halfway down when starting if
the engine fails to start on the first attempt, for instance, if it is very hot or cold
the engine is started at very low temperatures, as of approx. +5 °F/-15°C, at high altitudes over approx. 3,300 ft/1,000 m.
Avoid frequent starting in quick succession or repeated start attempts in which the engine does not start. Otherwise, the fuel is not burned or inadequately burned and there is a danger of overheating and damaging the catalytic converter.
Manual transmission
- Apply the handbrake
- Gearshift lever in idle position
- Press the clutch pedal
- Start the engine.

Before leaving the vehicle with the engine running, place the gearshift
lever in idle position and apply the hand-brake.
Never leave an unattended vehicle with the engine running, as such a vehicle represents a potential safety hazard.
Automatic transmission
- Press the brake pedal
- Place the selector lever in position P or N
- Start the engine.

To prevent the vehicle from rolling, always select position P or N and engage the handbrake before leaving the vehicle with the engine running.
Never leave an unattended vehicle with the engine running, as such a vehicle represents a potential safety hazard.
Sequential manual transmission SMG
- Press the brake pedal
- Place the selector lever in the idle position N
- Start the engine.

If the engine does not start, engage the last gear selected, refer to Display in the instrument cluster, and return the selector lever to the idle position N.

Before leaving the vehicle with the engine running, place the selector lever in position N and apply the hand-brake.
Never leave an unattended vehicle with the engine running, as such a vehicle represents a potential safety hazard.
Switching off engine

Do not remove the ignition key while the vehicle is rolling, as otherwise the steering wheel lock would engage while steering.
When leaving the vehicle, always remove the ignition key and lock the steering.
When parking on downward inclines, apply the handbrake.
Manual transmission
Turn the ignition key to position 1 or 0.
Automatic transmission
- Engage selector-lever position P
- Turn the ignition key to position 1 or 0.
Sequential manual transmission SMG
If the selector lever is in position R or in the sequential mode and you turn the ignition key to position 1 or 0, the gear remains engaged automatically.
If the selector lever is in the idle position N and you turn the ignition key to position 1 or 0, an acoustic signal and the flashing gear indicator in the display reminds you that the vehicle is not secured against rolling away.
The warning stops sounding after approx. 9 seconds.

When parking on downward inclines, apply the handbrake. Engaging a gear is not sufficient to secure the vehicle from rolling away under certain circumstances.
Handbrake
The handbrake is primarily intended to prevent the vehicle from rolling while parked; it brakes the rear wheels.
Indicator lamp

The indicator lamp lights up with the handbrake applied, and an acoustic signal also sounds when
starting off.

Indicator lamp for Canadian models.
Applying
The lever locks into place automatically; the indicator lamp in the instrument cluster lights up in ignition key position 2.
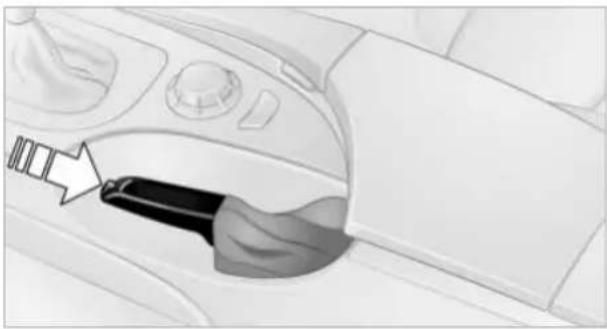
Releasing
Pull slightly upwards, press the button and lower the lever.

If exceptional circumstances should make it necessary to engage the handbrake while the vehicle is in motion, do not pull it too strongly. In doing so, continuously press the button of the handbrake lever.
Strong application of the handbrake can lead to overbraking of the rear axle and associated 'fishtailing' of the vehicle rear end.
The brake lamps do not light up when the handbrake is applied.
Vehicles with manual or SMG transmission: When parking on inclines, apply the hand-brake, as under certain circumstances even engaging the first or reverse gear might not secure the vehicle against moving.
Vehicles with automatic transmission:
Place selector lever in position P.

To prevent corrosion and one-sided braking action, occasionally apply the handbrake lightly when the vehicle is slowly coming to a standstill if the traffic conditions are suitable.
Manual transmission
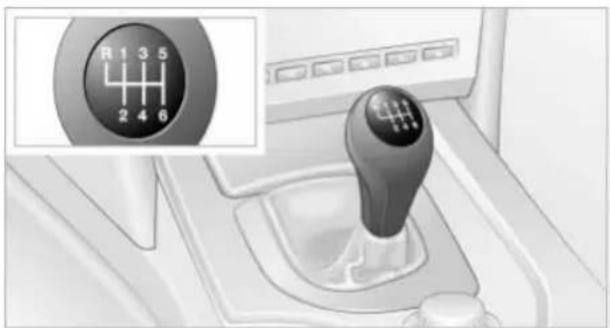
MV02954CMA

While shifting gear in the 5th/6th gear level, make sure that you press the gearshift lever to the right to prevent inadvertently selecting a gear in the 3rd/4th gear level. On inclines, do not hold the vehicle with the clutch; use the handbrake. Holding with the clutch causes high clutch wear.
Reverse gear
Select R only when the vehicle is completely stopped. When pressing the gear-shift lever to the left, overcome some resistance.
The backup lamps automatically come on in ignition key position 2.
Sequential manual transmission SMG*
The concept
The Sequential manual transmission SMG is an automated manual transmission in which an electro-hydraulic system handles the clutching and gear changes.
You operate the SMG using the selector lever in the center console and two shift paddles on the steering wheel.
It provides you with the following functions:
Sequential mode: manual mode
▶ Drive mode: automatic mode
▷ Choice between two drive programs: Normal, Sport, refer to page 54
▶ Operating reliability with protection against incorrect gearshifts
▶ Automatic upshifts and downshifts in the Drive mode
▶ Automatic downshifts with minimum engine speed
▶ Kickdown function in the Drive mode
▶ Acceleration assistant, refer to page 54.
Selector-lever positions

The current selector-lever position is displayed on the center console.
R: Reverse gear
N: Neutral, idle
Position for forward driving with one-touch functions:
Sequential mode
+: manual upshifts
-: manual downshifts
D: Drive mode.
The SMG is operational in ignition key position 2.

Idle is automatically engaged if the driver's door is opened with the
engine running and neither pedals, shift paddles nor the selector lever are operated.
This is signaled by an acoustic signal and the flashing gear indicator. The gear display N appears in the instrument cluster. A driving position can only be selected with the driver's door closed.
When the vehicle is unlocked, a buzzing sound in the area of the transmission signals that the system is ready for operation.
Shiftlock
For your safety a driving position can only be engaged from the selector lever position N with the vehicle stationary with the brake pedal depressed.
Observe the following when driving

Start off quickly on slopes. Do not hold the vehicle on a hill by pressing
the accelerator, but apply the handbrake instead. Otherwise overheating can occur in the area of the transmission.
R Reverse
Select R only when the vehicle is completely stopped.
N Neutral: idle
Engage prior to every engine start, refer also to page 50.
Sequential mode
After every engine start, as soon as the selector lever is brought into a forward gear position and the brake is pressed, the sequential mode is activated.
The gear is changed using the shift paddles or selector lever.
Driving off is also possible in second gear, e.g. when there is snow on the roadway.
D Drive mode
In the Drive mode, all forward gears are shifted automatically.
To switch from the sequential to Drive mode: briefly press the selector lever to the right towards D.
For rapid acceleration, e.g. overtaking, press the accelerator pedal as far down as it will go – kickdown.
Kickdown:
The kickdown mode provides maximum acceleration.
Press the accelerator pedal beyond the full-throttle resistance point.
To return to the sequential mode: briefly press the selector lever back to the right
towards D or change the current gear using the shift paddles or selector lever.
Gear changes
Using selector lever
To shift up, briefly press the selector lever towards +
To shift down, briefly press towards —.
Using shift paddles on steering wheel

To shift up, pull one of the shift paddles
To shift down, press.
You accelerate from higher gears, e.g. when overtaking, by shifting down manually.
In the following situations, the SMG in the sequential mode assists you:
Upshifts and downshifts are executed only when they will result in a plausible combination of engine and vehicle speed; thus, for example, a downshift that would cause the engine to overrev will not be executed by the system
When the vehicle is stopped, the transmission automatically downshifts into first gear
Shortly before dropping below a gear-dependent minimum speed, the transmission downshifts automatically even without your intervention.
Display in the instrument cluster
Gear display

MVO2950CMMA
RN123456
D1 D2 D3 D4 D5 D6
The gear currently selected, the selected shifting mode and, if applicable, malfunctions are displayed in the instrument cluster.
Malfunctions
Indicator lamp

If the indicator lamp lights up, a malfunction has occurred in the transmission system.
While it will remain still possible to move the selector lever to any desired position, the transmission will revert to operation in its default mode with only a limited number of forward gears.
If this happens, avoid extreme engine loads and consult the nearest BMW center.
Warning tone
In case of overheating in the area of the transmission, an acoustic signal indicates that you should stop or start off quickly if possible so that the system can cool down again.
Information on jump-starting and towing begins on page 192.
Dynamic Driving Control
With Dynamic Driving Control, you can choose between a standard and a sport program.
Sport program
The engine responds more spontaneously to accelerator pedal movements
The steering becomes more direct and provides even better road contact.
In addition, with SMG and an automatic transmission:
The shifting times are shorter
The engine speed range is used optimally in the Drive mode.
Activating the Sport program
In ignition key position 2.
Press the SPORT button.
The LED in the button lights up.
With an automatic transmission:
Activating the Dynamic Driving Control activates the Sport program of the automatic transmission. This makes moving the selector lever form D to M/S unnecessary.
Deactivating the Sport program
Press the SPORT button again. The LED in the button goes out
Acceleration assistant with SMG
The acceleration assistant enables optimized vehicle acceleration at racing car level on road surfaces with good adhesion.
Do not use the acceleration assistant too often, as otherwise components will wear prematurely.
- Activate the Sport program
- Press the DSC button, refer to page 79, for longer than three seconds
- Press the accelerator pedal down fully – kickdown. The ideal starting-off engine speed is set.
To maintain driving stability, drive with the DSC on whenever possible.
Information on jump-starting and towing begins on page 192.
Automatic transmission with Steptronic*
While you can drive as with any conventional automatic transmission, you also enjoy the option of shifting manually, refer to page 55.
If you move the selector lever from position D to the left into gearshift gate M/S, this activates the sports-style shift programs of the automatic transmission. As soon as you move the selector lever slightly towards + or -, the Steptronic shifts gear and manual operation is activated. If you wish to use the automatic function again, move the selector lever to the right into position D.
Selector-lever positions
PRNDM/S + -
Possible displays
P R N D D S M1 M2 M3 M4 M5 M6
Changing the selector-lever positions
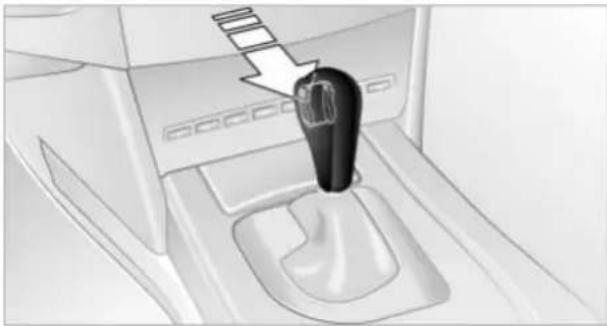
An interlock prevents inadvertent gear-shifts into selector-lever positions R and P. To cancel the interlock, press the button on the front of the selector lever knob, refer to arrow.
Press the brake pedal before shifting out of P or N; the shift command will not be executed unless the brake is applied: Shiftlock.
To prevent the vehicle from creeping after you select a driving position, maintain pressure on the brake pedal until you are ready to start.
To prevent the vehicle from rolling, always select position P and engage the handbrake before leaving the vehicle with the engine running.
Never leave an unattended vehicle with the engine running, as such a vehicle represents a potential safety hazard.
P Parking
Select P only when the vehicle is completely stopped. The rear wheels are blocked.
R Reverse
Select R only when the vehicle is completely stopped.
N Neutral
Select N only if your journey is interrupted for a long period.
D Drive – automatic driving position
Position for normal vehicle operation. All forward gears are available.
Under normal operating conditions, fuel consumption is lowest when driving in position D.
Kickdown
A kickdown provides you with maximum acceleration and the maximum road speed in position D.
Press the accelerator pedal beyond the full-throttle resistance point.
M/S manual operation and Sport program

NVO29H60MA
Shifting from D into M/S activates the Sport program and this is indicated with DS in the gear display. This position is recommended if a performance-oriented driving style is desired.
The first time the selector lever is even slightly touched, the automatic transmission shifts from the Sport program into manual operation.
If you start to move the selector lever towards +, the transmission shifts upwards; moving it towards - it shifts downwards. The gear display shows M1 through M6.
Upshifts and downshifts are executed only when they will result in a plausible combination of engine and vehicle speed; thus, for example, a downshift that would cause the engine to overrev will not be executed by the system. The selected gear appears briefly in the instrument cluster, followed by the current gear.
To obtain maximum acceleration, for passing maneuvers, etc., during operation in the manual mode, use the kickdown or downshift manually.
Shifting from M/S to the selector-lever positions P, R and N is only possible by going through D.
Malfunctions
Indicator lamp

If the indicator lamp lights up, a malfunction has occurred in the transmission system.
While it will remain still possible to move the selector lever to any desired position, the transmission will revert to operation in its default mode with only a limited number of forward gears.
If this happens, avoid extreme engine loads and consult the nearest BMW center.
Information on jump-starting and towing begins on page 192.
Turn signal indicators/headlamp flasher
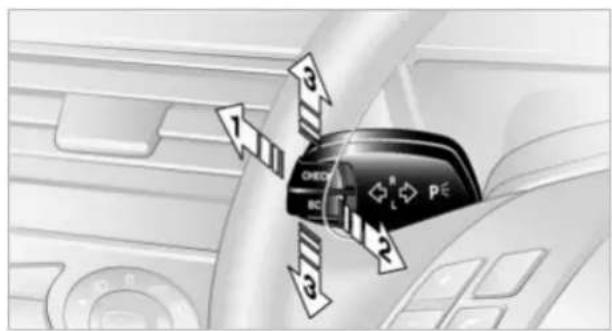
1 High beams: blue indicator lamp
2 Headlamp flasher: blue indicator lamp
3 Turn signal indicators: the green indicator lamp flashes, accompanied by a periodic clicking from the turn signal indicator relay
Using turn signal indicators
Move the lever beyond the resistance point. It then returns to the center position when released. Press the lever as far as the resistance point to switch off the turn signal indicators.
If the flashing indicator lamp and the clicking from the relay are both faster than normal, this indicates that one of the turn signal indicator bulbs is defective.
Signaling briefly
Press the lever up to but not beyond the resistance point. It then returns to the center position when released.
Triple turn signal activation
Press the lever as far as the resistance point; the turn signal indicators flash three times. You can activate or deactivate this function.
Control Center, for principle details, refer to page 16:
- Open the menu
- Select "Vehicle settings" and press the controller
- Select "Lighting" and press the controller

- Select "Triple turn signal activation" and press the controller.
R is displayed when triple turn signal is activated.
Wiper system

1 Normal wiper speed: briefly press once. The system automatically reverts to operation in the intermittent mode whenever the vehicle stops. Fast wiper speed: briefly press twice or press beyond the resistance point. The system automatically reverts to operation in the standard wipe mode whenever the vehicle stops
2 To switch off wipers or for brief wipe
3 To activate/deactivate rain sensor
4 To clean windshield and headlamps
5 To adjust rain sensor sensitivity level
The lever automatically returns to its initial position when released.
Cleaning the windshield and headlamps*
The system sprays washer fluid against the windshield and activates the wipers for a brief period.
When the vehicle lighting system is switched on, the headlamps are also cleaned at regular and appropriate intervals.

Do not use the washers if there is any danger that the fluid will freeze on the windshield. If you do so, your vision could be obscured. To avoid freezing, use a washer fluid antifreeze, refer to Washer fluid.
Avoid activating the washer when the reservoir is empty, as damage to the pump could result.
Windshield washer nozzles
The windshield washer nozzles are automatically heated in ignition key position 2.
Rain sensor
The rain sensor controls windshield wipe operation depending on the amount of rain. The rain sensor is located on the windshield, directly in front of the interior rear-view mirror.
Activating the rain sensor

MAYO435CMA
As of ignition key position 1, briefly press the button. The indicator lamp in the button lights up. The wipers will always respond by completing at least one sweep of the windshield.
Adjusting rain sensor sensitivity level Turn the serrated dial 5.
Deactivating the rain sensor
Briefly press the button again. The indicator lamp goes out.
The rain sensor is automatically deactivated when you switch off the ignition.

Deactivate the rain sensor when passing through an automatic car wash. Failure to do so could result in damage caused by undesired wiper activation.
Washer fluid

Washer fluid antifreeze is flammable. Always keep it well away from sparks and open flames, and store it in tightly closed containers well out of the reach of
children. Always observe the instructions for use provided on the containers.
Washer fluid reservoir
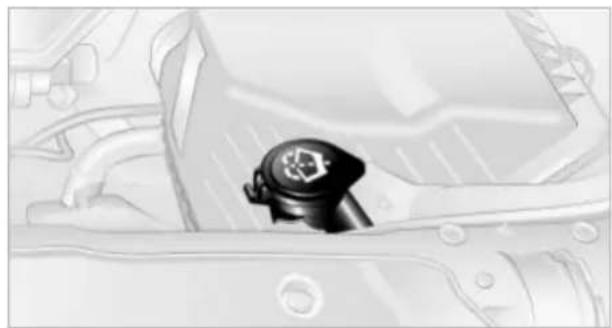
Capacity: approx. 3.2 US quarts/3 liters for the windshield washer system or approx. 5.3 US quarts/5 liters in conjunction with headlamp washer system.
Fill with water and – if required – with a washer antifreeze, according to manufacturer's recommendations.

In order to keep to the mixture ratio, mix the washer fluid before filling.
Cruise control*
The concept
The cruise control is available for use at speeds of approx. 20 mph/30 km/h and higher. The vehicle maintains and stores the speed that you set using the lever mounted on the steering column.

Do not use the cruise control when driving on winding roads, in heavy traffic or in poor road conditions – e.g. snow, rain, ice, loose road surface – that do not permit a constant speed.
One lever for all functions

NOTICE:CMAA
1 Maintaining and storing speed, accelerating
Press the lever up to the resistance point: The current speed is maintained and stored. The display 1 in the speedometer indicates this regulated speed, refer to page 59. Every time you briefly press the lever, the vehicle's speed increases by roughly 1 mph/1 km/h.
Press the lever for longer:
The vehicle accelerates without pressure on the accelerator pedal. The system maintains and stores your current speed as soon as you release the lever.
Press the lever beyond the resistance point:
Speed is increased by 5 mph/10 km/h.
The vehicle may accelerate beyond the regulated speed on steep downhill stretches where the engine's braking effect alone may not be sufficient to slow the vehicle. Speed can drop on uphill grades if the engine output is insufficient.
2 Maintaining and storing speed, decelerating
Pull the lever up to the resistance point: Functions same as 1, only the vehicle speed is reduced.
3 Interrupting cruise control
With the cruise control active, briefly press the lever up or down.
In addition, cruise control is interrupted automatically
▷ when you apply pressure to the brake pedal
when you press the clutch or engage position N of the automatic transmission
when the DSC system is in active operation.
4 Recalling stored speed
Press button 4 briefly: the vehicle accelerates to and maintains the last speed stored.
Deactivating system
When the ignition is switched off, the system is deactivated and the stored speed is deleted.
Displays in the instrument cluster

1 Stored desired speed display
2 Digital speed display.
Appears briefly when you select your desired speed.
Active cruise control*
The concept
With active cruise control you can select a desired speed which is not only automatically maintained when driving on open roadways, but also varied to maintain a selected distance setting as slower traffic is encountered.
Active cruise control is a technological advance over the familiar cruise control and is a welcome relief from the constant adjustment of speed that can accompany driving in traffic on freeways or other high-speed thoroughfares. Especially on longer trips, the system can reduce fatigue and tension, while increasing your enjoyment of driving. Please use it safely and responsibly.
In addition to holding a steady cruising speed, if you do encounter slower vehicles ahead, active cruise control will, within the scope of given possibilities, adjust your vehicle's speed automatically so that you can flow with the traffic without frequent intervention by the driver. If, for example, while cruising at the selected speed, you begin to approach a slower vehicle ahead of you in the same lane, the system will reduce your vehicle's speed to the same as that of the vehicle ahead to maintain your selected distance setting between your vehicle and the vehicle ahead. There are four settings for distance, which is additionally speed-dependent. Based on your selected distance setting, the system automatically decreases the throttle setting and lightly applies the brakes if necessary. The vehicle brake lamps will automatically illuminate to signal a following driver to take action. In addition, it may be necessary for the vehicle to downshift to maintain the distance setting selected. If the vehicle ahead speeds up or when the lane ahead becomes clear, your vehicle will accelerate to the speed you have selected by increasing the throttle setting and shifting gears as needed.

Active cruise control is not and must not be used as a collision avoidance/ing system.

Since this active cruise control system is a new technology and operates recently from conventional cruise control systems which you may be accustomed, are strongly urged to read all of the systems relating to this system before use. Special attention to the information contained in the Things to know about the cruise control section in this manual planning on page 62.
Displays in the instrument cluster

1 Stored desired speed display
2 Detected vehicle display. Lights up when vehicle driving ahead is detected
3 Selected distance to vehicle driving ahead
4 Digital speed display.
Appears briefly when you select your desired speed.

The system is activated. The display appears as soon as you activate the system and no vehicle is detected driving ahead.

Vehicle detected. The display 2 lights up yellow when a vehicle is detected driving ahead.
The system requests you to intervene by braking or with an evasive maneuver. The display 2 flashes red and a signal sounds. The active cruise con-
trol cannot automatically restore the distance to the vehicle driving ahead. You will find more detailed information on page 64.

Automatic intervention by ABS or DSC, or you actuate the handbrake while driving. The display 2 flashes yellow. The active cruise control now only intervenes by braking.
Operating the active cruise control

1 Activate system,
store and increase desired speed
2 Activate system,
store and decrease desired speed
3 Deactivate system
4 With system deactivated:
Briefly press the button to recall the
stored speed and distance
With system activated:
Increase desired speed by 5 mph/
10 km/h with each press of the button
5 Select distance to vehicle driving ahead. You can choose from four available distance settings. You will find more detailed information on page 62.
Adjust your desired speed to the traffic conditions and remain ready to brake at all times. Great differences in speed to the vehicles driving ahead, e.g. when quickly approaching a truck or when another vehicle swerves into your lane, cannot be compensated for by the system.
Activate system

From approx. 20 mph/30 km/h you can activate the system by pressing the lever forward or pulling it back:
The current driving speed is stored as a desired speed and briefly displayed in the instrument cluster, see below.
1 Desired speed store and increase
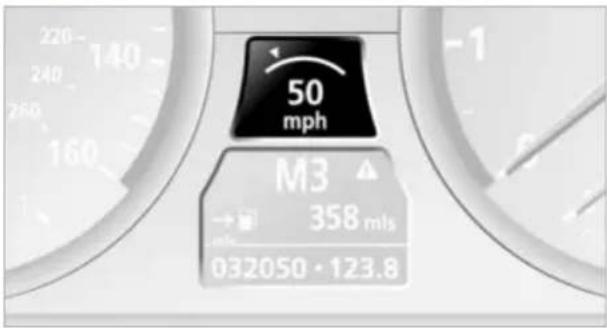
Press the lever forward:
The system adopts and stores your current speed as a desired speed. The speedometer indicates this speed.
Subsequently pressing forward increases the desired speed to the next 5-mile place/10 km/h.
Each time the lever is pressed forward again, the desired speed is increased by another 5 mph/10 km/h until a maximum of 110 mph/180 km/h is reached. The speed then displayed is stored and reached on a clear road.

If the system cannot be activated, the display ACC --- mph/km/h briefly
appears in the instrument cluster. The system may have been automatically deactivated, refer to Deactivate system, or a malfunction has occurred.
To call up Check Control messages, refer to page 68.
2 Desired speed store and decrease
Pull back the lever:
The current driving speed is rounded off to the next 5-mile place/10 km/h, displayed and stored.
Each time the lever is pulled back again, the desired speed is decreased by another 5 mph/10 km/h until the minimum speed of 20 mph/30 km/h is reached. The speed then displayed is stored and reached on a clear road.
3 Deactivate system
Press the lever up or down while the system is active. The displays in the instrument cluster disappear. You can use the system again as required.
In addition, the system is deactivated automatically:
When you apply pressure to the brake pedal
When you select the automatic transmission's/SMG's neutral range N
With the manual transmission idling
When you deactivate the DSC Dynamic Stability Control
When you actuate the parking brake during driving
When the system reduces the speed to below 20 mph/30 km/h due to a traffic situation.

The system deactivates automatically when the speed is set to below
20 mph/30 km/h. A gong sounds and a message appears on the Control Display.
The active intervention of the driver is required.
When you switch off the ignition, the stored desired speed is deleted.
4 Resume to stored desired speed and distance setting
Press button 4:
The displays appear in the instrument cluster. The system is reactivated and uses the last stored desired speed and distance setting.
4 Fine adjustment of desired speed
In the activated state, the desired speed increases by 1 mph/1 km/h each time button 4 is pressed briefly.
5 Select distance

You can choose from four distance steps.
▶ Rotary switch downward: Decrease distance.
▶ Rotary switch upward: Increase distance.
The selected distance is displayed in the instrument cluster.

Distance 1
Distance 2

Distance 3
This distance is always set when the system is used for the first time after starting the engine.

Distance 4
Use good judgment to select the appropriate following distance given road conditions, traffic, applicable laws and driving recommendations for safe following distance.
Things to know about active cruise control

As with conventional cruise control systems, active cruise control in no way diminishes or substitutes for the driver's own personal responsibility, alertness and awareness in adjusting speed, braking or otherwise controlling the vehicle. The driver should decide when to use the system on the basis of road, traffic, visibility, and weather conditions. Active cruise control is intended for use on highway-type roadways where traffic is moving relatively smoothly. Do not use this system in city driving; heavy traffic such as during
rush hour; on curvy, winding roads, slippery roads or roads with sharp curves such as highway off-ramps; during inclement weather such as snow, strong rain or fog; or when entering interchanges, service/parking areas or toll booths. It is also important to regulate your vehicle's speed and distance setting within applicable legal limits. Always be ready to take action or apply the brakes if necessary, especially when the system is actively following a vehicle in front of you.
Always remember that the range and ability of the system does have physical limitations. It will not apply the brakes or decelerate your vehicle when there is a slow-moving vehicle, stopped vehicle or stationary object ahead of you, as for example, at a traffic light or a parked vehicle. Also, the system does not react to oncoming traffic, pedestrians or other type of potential traffic such as a rider on horseback. It is also possible that the system may not detect smaller moving objects such as motorcycles or bicycles. Be especially alert when encountering any of these situations as the system will neither automatically brake, nor provide a warning to you. Also, be aware that every decrease in the distance setting allows your vehicle to come closer to a vehicle in front of you and requires a heightened amount of alertness.
If while your vehicle is actively following a vehicle in front of you and the vehicle ahead speeds up or the lane ahead becomes clear, then your vehicle will accelerate to the speed you have selected. Be aware that changing to a clear, unobstructed lane will also result in your vehicle accelerating.
Be certain to deactivate the system when you pull into an exit lane for a highway off-ramp.
Also, vehicles traveling in a staggered manner on a highway may cause a delay in the system's reaction to a vehicle in front of you or may cause the system to react to a vehicle actually in the lane next to you. Always be ready to take action or apply the brakes if necessary.
Active cruise control can only decelerate the vehicle to approx. 20 mph/30 km/h. If the system reduces vehicle speed below 20 mph/30 km/h or if DSC/ABS is engaged while driving, the system will automatically deactivate.
Remember, the system cannot stop your vehicle. In addition, the system is deactivated whenever the driver applies the vehicle brakes, shifts the transmission from drive/D to neutral/N, or deactivates
DSC. After any deactivation, the system will no longer automatically activate the vehicle brakes, which means the driver must intervene and resume manual braking. You should then reactivate the system only when you are fully aware of the prior speed and distance settings.
Active cruise control may brake when you reduce the stored desired speed; however, the driver must constantly monitor traffic and intervene if necessary.
When you switch off the engine or ignition, active cruise control is fully switched off, too, and any settings you have selected are canceled.
Behavior in curves

VNOBEXPION
Because of the limited range of the system, it is possible that in curves or on the peaks and valleys of hilly roads, a vehicle ahead may be recognized late, or not at all. Therefore, it is up to the driver to select a speed that is prudent in view of the curves and terrain of the roadway.

MAGG225CHMA
In approaching a curve, it is possible that active cruise control would react briefly to a vehicle in the adjacent lane. In addition, the system can sense if your vehicle is in a curve and may not accelerate. If your vehicle decelerates in either case, you can
choose to overcome the deceleration by briefly pressing the accelerator pedal.
Driver interventions
Anytime the driver presses down on the accelerator pedal, any automatic braking action by the system is interrupted until the pedal is fully released. After doing this, release the accelerator and the system again controls your cruising speed and distance setting. While driving with activated system, resting your foot on the accelerator pedal will cause the system not to brake even if necessary. Be certain that floormats or other objects on the vehicle floor do not interfere with movement of the accelerator pedal.
While active cruise control is capable of braking your vehicle automatically when you approach a slower vehicle ahead, it is important to be aware that the ability of the system to apply the brakes is also limited, if you are driving down a steep grade or when you reduce your desired speed sharply. The system cannot stop your vehicle. It uses only a portion of braking system capacity and does not utilize the full capacity of the vehicle braking system. Therefore, the system cannot decrease your speed for large differences in speed between your vehicle and the vehicle ahead. Examples: during emergency braking, when you approach a vehicle traveling at a much lower speed than your own speed such as approaching a toll booth or when a much slower vehicle cuts in front of you at close range.

Whenever active cruise control recognizes a situation that requires driver braking because the system capacity has been reached or has been exceeded,
the system alerts the driver by flashing this symbol in the instrument cluster and sounding a signal.
Swerving vehicles

www.essc.com
When a vehicle moves from an adjacent lane into your lane, active cruise control will not recognize this vehicle until it is fully in your lane ahead of your vehicle.
Malfunctions
If there is a malfunction, the indicator lamp symbol is displayed in the instrument cluster. Please note any supplementary information that appears on the Control Display.
The build-up of foreign material, e.g., snow, ice, dirt, road debris, etc., can lead to reduced detection performance of active cruise control. You should check the sensor under the front bumper and clean it as necessary prior to driving your vehicle. If the sensor becomes covered by foreign material or has a malfunction, it is possible that the sensor will no longer be able to detect vehicles in front of you. After the system recognizes that the sensor is no longer functional, a message is displayed on the Control Display and an acoustic signal is emitted.
Everything under control
Odometer, outside temperature display, clock
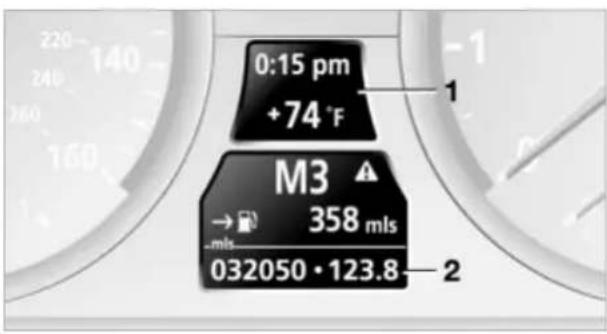
When the ignition is switched off you can briefly activate the time, outside temperature and odometer displays by pressing the button at the lower left of the instrument cluster.
1 Outside temperature display, clock, date
The outside temperature and the time are display as of ignition key position 1.
You can change the measurement unit °C/°F in the i menu, refer to Measurement units on page 74.
To call up the date:
Briefly press the Check button on the turn indicator lever, refer to page 69.
Setting the time and date, refer to page 74.
Ice warning
A warning signal sounds when the outside temperature falls to roughly +37.5°F/+3°C; this is accompanied by a message.

Please bear in mind that the ice warning does nothing to alter the fact that
black ice may be present on roads at temperatures higher than +37.5°F/+3°C, e.g. on bridges and shaded roads.
2 Odometer and trip odometer
To set the trip odometer to zero:
Press the button at the lower left of the instrument cluster.
Tachometer

MVOZ436CMA
The white-striped advance warning field, arrow 1, changes depending on the engine temperature. The segments disappear in sequence as the engine warms to its normal operating temperature.
Avoid allowing the engine speed to rise as far as the advance warning field whenever possible.
Engine speeds in the red warning field, arrow 2, must be avoided.
In this range, the fuel supply is interrupted to protect the engine.
Energy Control/Current fuel consumption
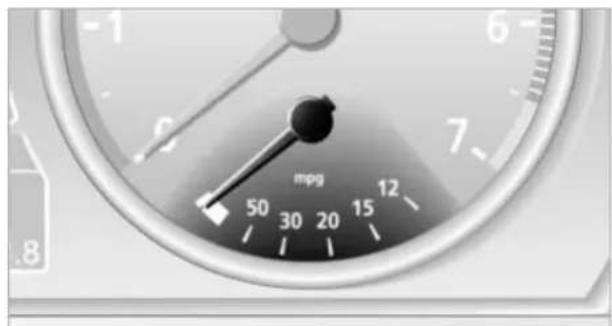
Displays the current fuel consumption. This allows you to see whether your current driving style is conducive to fuel economy with minimum exhaust emissions.
Fuel gauge

After the reserve quantity has been reached, a message appears for a short time on the Control Display; the range is shown in the computer. Below a range of approx. 30 miles/50 km, the message remains on the Control Display, and the range is displayed.
Fuel tank capacity: approx. 18.5 gallons/70 liters, of which approx. 2.1 gallons/8 liters reserve. You can find information on Refueling on page 168.
If the tilt of the vehicle varies for a longer period, when you are driving in mountainous areas, for example, the indicator may fluctuate slightly.

Refuel well before the tank is empty, as otherwise engine functions will not be ensured and damage can occur if you drive down to the last drop.
Service requirement display and display of legally prescribed inspections
In the instrument cluster
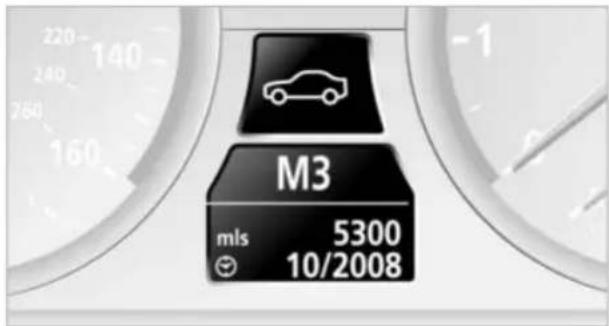
The remaining distance to be driven, the date for the next maintenance as well as the date entered for the state emission or vehicle inspection are displayed briefly as of ignition key position 2, if the date is imminent.
Your Service Advisor will determine your vehicle's current service requirements by reading out the data stored in the vehicle key.
On the Control Display
You can view additional information on service and maintenance procedures using the Control Center.
Control Center, for principle details, refer to page 16:
- Open the menu
- Select "Service" and press the controller
- Select "Service requirements" and press the controller
- Select "Status" and press the controller.

The display shows a list of selected service and maintenance procedures, as well as legally prescribed official inspections.
Symbols

The service deadline has already passed.

The deadline for service or an official inspection is approaching. Please
contact your BMW center for an appointment.

No service is currently required. If you desire, certain maintenance opera-
tions can be carried out at the next service.
You can request more detailed information on every entry.
Select the entry and press the controller.

To exit the menu:
Select and press the controller
Entering dates for state emission and vehicle inspections

Make sure the date in the Control Center is always set correctly, refer to page 74, as otherwise the effectiveness of Condition Based Service CBS is not ensured.
Control Center, for principle details, refer to page 16:
- Open the menu
- Select "Service" and press the controller
- Select "Service requirements" and press the controller
- "Select Status" and press the controller

- Select "Emission inspect." or "State inspection" and press the controller
- Select "Set service date" and press the controller. The month is highlighted
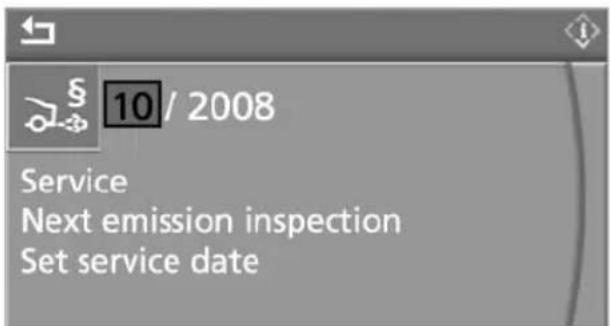
- Turn the controller to make the adjustment
- Press the controller to accept the setting. The year is highlighted
- Turn the controller to make the adjustment
- Press the controller to apply the setting. The date entry is stored.
To exit the menu:
Select and press the controller
Check Control
Display of a message

1 means that a Check Control message is present
2 Information and malfunction reports on systems are indicated by an illuminated indicator or warning lamp symbol

At the same time, a gong sounds and a text message appears on the Control Display.
Messages are assigned one of two priority ratings:
Priority 1
These messages and malfunction reports are signaled by a gong. If a number of malfunctions occur simultaneously, they are displayed in succession. These messages cannot be deleted, and they remain on the display until the problem is corrected. Supplementary information can also appear on the Control Display.

V309010N/W
These supplementary messages are intended to assist you in assessing the severity of malfunctions; they provide you with the information you need to decide on the best way to respond.
To exit the menu:
Select and press the controller.
Priority 2
These status messages and malfunction reports are indicated by the gong and displayed for approx. 20 seconds.

NV02709CMIA
To hide a displayed message: briefly press the CHECK button on the turn signal indicator lever.
Check Control symbol and information on the Control Display
Depending on the status of the monitored systems, various symbols are displayed on the Control Display:

No malfunctions are present in the monitored systems.

One or several faults have occurred in the monitored systems.

Depending upon how serious the problem is, a supplementary mes-
sage may also appear on the Control Display.
The symbols also indicate the status of the service requirement display, refer to page 67.
Calling up stored messages on the Control Display
Using the CHECK button
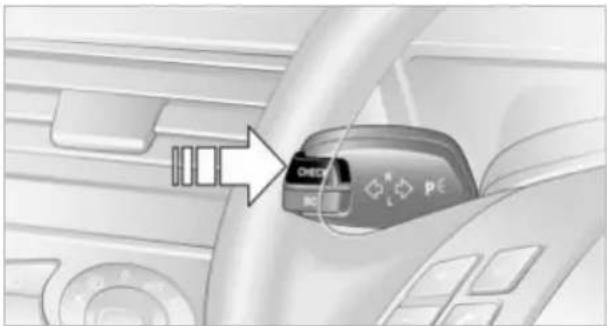
- Press the button longer: The first stored message is displayed
- Briefly press the button: Another message is displayed each time the button is briefly pressed.
Using the Control Center
Control Center, for principle details, refer to page 16:
MENU
- Open the start menu by pressing the button
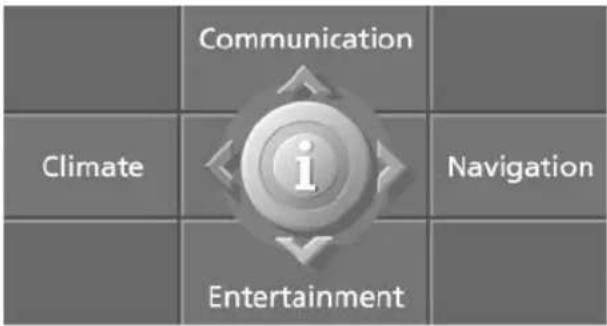
- Open the menu by pressing the controller
- Select "Service" and press the controller
- Select "Check Control messages" and press the controller. The stored messages appear on the display

VERES800N/W
- Select the desired message and press the controller.
The display disappears automatically after a short time.
To close the display immediately: Select and press the controller
Displays after completion of trip
Malfunction reports generated during the trip are shown consecutively when you switch off the ignition.
If applicable, the message "Parking lamps on!" appears at the end of a trip when you open the driver's door.
In addition, a gong sounds:
As long as the display has not disappeared, you can view the messages again. Press the CHECK button for approx. 2 seconds. If several messages are present, you can continue to press the CHECK button to view them in succession.
The Check Control function
▶ cancels itself automatically after a brief period
can be canceled by again pressing the CHECK button for approx. 2 seconds.
MINOOSSUEA
Computer

To select functions:
As of ignition key position 1, you can use the BC button in the turn signal indicator lever to call up computer information in the instrument cluster.
A new function appears each time you press the BC button briefly.
Displays in the instrument cluster

The display sequence:
Cruising range
Average speed
Average fuel consumption.
Cruising range
Displays the estimated cruising range available with the remaining fuel. The system calculates the cruising range based on operating conditions and the amount of fuel remaining in the tank. The basis for the calculations is the average fuel consumption over the preceding 20 miles/30 km.

Always refuel as soon as possible once your cruising range falls to
below 30 miles/50 km, as otherwise engine functions are not ensured and damage can occur.
Refueling is only registered by the computer for fuel amounts above approx.
1.3 gallons/5 liters.
Average fuel consumption
The average fuel consumption is calculated for the time during which the engine is running.
You can use the Control Display to view your fuel consumption rate over two different distances, refer to Computer or Trip computer.
To reset the average fuel consumption to zero: press the BC button in the turn signal indicator lever for approx. 2 seconds.
Average speed
Periods with the vehicle parked and the engine switched off are not included in the calculations of average speed.
To reset the average speed to zero: press the BC button in the turn signal indicator lever for approx. 2 seconds.
Displays on the Control Display
You can also call up the computer via the Control Center, for principle details, refer to page 16:
MENU
- Open the start menu by pressing the button

- Move the controller to the right to open "Navigation".
On vehicles without navigation: open "Car Data"
- Select "Car Data" and press the controller.
You have two possibilities to display information of the computer:
Computer
▶ Trip computer
It is best to use this for driving on vacation, as when you reset the values to zero, all the functions are reset together and then restart.
Computer
Select "Onboard info" and press the controller.

Estimated time of arrival at destination. Manually enter a distance in the computer or a destination in the navigation system, see below or refer to page 116
Cruising range
Distance to destination.
Manually enter a distance in the computer or a destination in the navigation system, see below or refer to page 116
Average speed
Average fuel consumption.
Trip computer
Select "Trip computer" and press the controller

MINO0972UEB
Departure time
Driving time
Distance traveled
Average speed
Average fuel consumption.
To switch the trip computer on/off and reset values to zero:
- Select "Set" and press the controller
- Select the desired menu item and press the controller.
Entering a distance manually
Control Center, for principle details, refer to page 16:
- Open "Navigation".
On vehicles without navigation: open "Car Data" - Select "Car Data" and press the controller
- Select "Onboard info" and press the controller

NOTEDUERA
- Select "Distance to destin." and press the controller
- Turn the controller to select the distance to your destination
- Press the controller to apply the setting.

With the destination guidance switched on, the distance is entered natically.
Assistance window for computer and trip computer
You can display the computer or the trip computer in the assistance window.
Control Center, for principle details, refer to page 16:
- Move the controller to the right to switch to the assistance window and press the controller

- Select the menu item and press the controller:
▶ "Onboard info"
▷ "Trip computer".
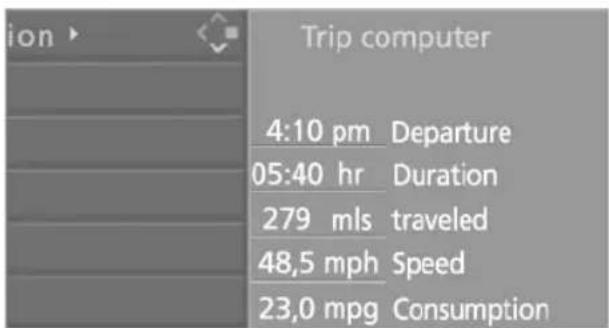
Speed limit
You can enter a speed and a Check Control message indicates when you have reached this speed. This enables you, for example, to receive warnings if you exceed a speed limit in an urban area.
You are only warned of reaching this speed a second time if you again drive at least 3 mph/5 km/h slower.
Adjusting, changing
Control Center, for principle details, refer to page 16:
- Open "Navigation". On vehicles without navigation: open "Car Data"
- Select "Car Data" and press the controller
- Select "Limit" and press the controller

- Select the speed and press the controller
- Turn the controller to select the desired speed
- Press the controller to apply the setting.
Switching on or off
Control Center, for principle details, refer to page 16:
- Open "Navigation". On vehicles without navigation: open "Car Data"
- Select "Car Data" and press the controller
- Select "Limit" and press the controller
- Select "On" and press the controller. R is displayed with the speed limit switched on.
Adopting your current speed as the limit
Control Center, for principle details, refer to page 16:
- Open "Navigation". On vehicles without navigation: open "Car Data"
-
Select "Car Data" and press the controller
-
Select "Limit" and press the controller
- Select "Select current speed" and press the controller. The system adopts your current speed as the limit.
Stopwatch
Control Center, for principle details, refer to page 16:
- Open "Navigation". On vehicles without navigation: open "Car Data"
- Select "Car Data" and press the controller
- "Select Stopwatch" and press the controller.

Starting and stopping
Select "Start" and press the controller. The stopwatch starts at the displayed time
Select "Reset" and press the controller. The stopwatch is reset to 0 and starts
Select "Stop" and press the controller. This stops the timer.
Taking an intermediate time reading
Select "Interim time" and press the controller. This intermediate time appears below the ongoing primary stopwatch count.
All of the remaining functions remain available at all times while the stopwatch is running. The stopwatch continues operation in the background.
Changing settings
Brightness
The brightness of the display is automatically adapted to the ambient lighting conditions. However, you can change the standard setting for each specific key.
Control Center, for principle details, refer to page 16:
MENU
- Open the start menu by pressing the button
![graph TD A["Communication"] --> B["Climate"] B --> C["Entertainment"] C --> D["Navigation"]](/content/2026/05/1019018/images/69e9e32e978b3a2c5a57839177f51166c0265f56bab5049e547f6faa5773ab46.jpg)
- Open the menu by pressing the controller
- Select "Display settings" and press the controller
- Select "Brightness" and press the controller

- Turn the controller to make the adjustment
- Move the controller forwards to adopt the set value.
Measurement units
You can change the measurement units for consumption, distances, temperature and pressure for each specific key.
- Open the menu
- Select "Display settings" and press the controller
- Select "Units" and press the controller
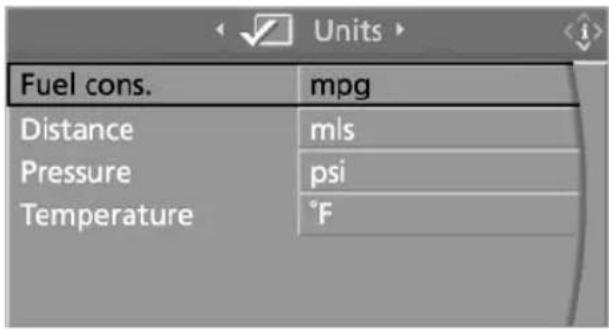
- Select the menu item to be adjusted and press the controller
- Select the desired measurement unit and press the controller.
Language
The language on the Control Center can be set for each specific key.
Control Center, for principle details, refer to page 16:
- Open the i menu
- Select "Display settings" and press the controller
- Select "Languages" and press the controller
- Select "Text language" and press the controller. You can select a different language for the text displays
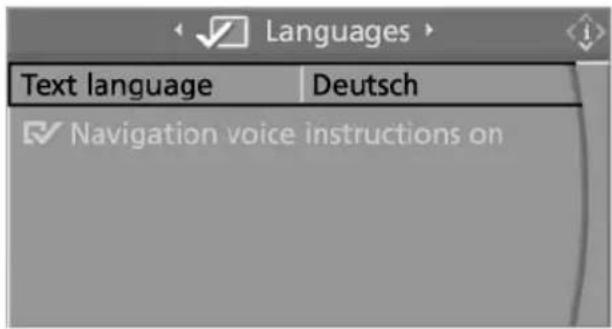
- Select the desired language and press the controller.
Setting the time
Control Center, for principle details, refer to page 16:
- Open the i menu
- Select "Display settings" and press the controller
- Select "Time" and press the controller

- Select "Set time" and press the controller. The first time setting is highlighted
- Turn the controller to make the adjustment
- Press the controller to apply the setting. The next adjustment is highlighted
- Make the remaining adjustments. After the last adjustment, the time is stored.
Changing the display format
The display mode of the clock can be set for each specific key.
- Select "Time format" and press the controller
- Select the desired format and press the controller.
Switching on the reminder function*
Select "Hour memo" and press the controller.
R is displayed with the reminder function switched on.
You will hear three tones just before each full hour.
Setting the date
Control Center, for principle details, refer to page 16:
- Open the i menu
- Select "Display settings" and press the controller
- Select "Date" and press the controller

- Select "Set date" and press the controller. The first section of the date display is highlighted, here the day
- Turn the controller to make the adjustment
- Press the controller to apply the setting. The next adjustment is highlighted
- Make the remaining adjustments. After the last adjustment, the date is stored.
Changing the display format
The display mode of the date can be set for each specific key.
- Select "Date format" and press the controller
- Select the desired format and press the controller.
Technology for comfort, convenience and safety
PDC Park Distance Control*
The concept
The PDC assists you when you are parking. Signal tones indicate the current distance to an object behind or in front of your vehicle. Four ultrasonic sensors in both the bumpers monitor the distance to the nearest object. The sensors at the front and at the two rear corners have a range of approx. 1.64 ft/50 cm; the rear middle sensors have approx. 5 ft/1.50 m.

PDC is a parking aid that can indicate objects when they are approached by, as is usually the case when parking. Avoid approaching an object at high speed, as otherwise the physical circumstances would mean that the system warning was too late.
Automatic function
In ignition key position 2, the system automatically assumes operational status after a few seconds each time you engage reverse gear or selector-lever position R.

Wait this short period before reversing.
Manual activation
Press the button, the indicator lamp lights up.
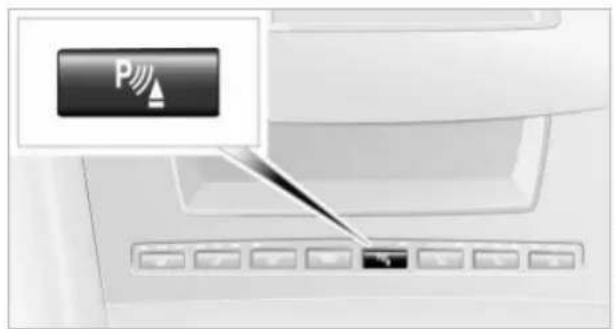
Manual deactivation
Press the button again; the indicator lamp goes out.
Automatic deactivation
The system is automatically deactivated once the vehicle travels approx. 165 ft/50 m or exceeds a speed of roughly 20 mph/30 km/h; the indicator lamp goes out. You can reactivate the system manually as needed.
Signal tones
The signal indicating the distance to the nearest obstacle is directional. Thus, an object detected to the left rear of the vehicle will be indicated by a signal tone from the left rear speaker, etc. As the distance between vehicle and object decreases, the intervals between the tones become shorter. The signal tone becomes continuous once the distance to the nearest object falls to below roughly 1 ft/30 cm.
The warning signal is canceled after approx. 3 seconds when the distance to an object remains constant during this time, if you are moving parallel to a wall, for instance.
Malfunctions
The indicator lamp within the button flashes and a message appears on the Control Display. Please note any supplementary information that appears there.
Switch the system off and have the cause of the malfunction corrected by your BMW center.
PDC with visual warning*
You also enjoy the option of having the system show distances to objects on the Control Display for the specific key in use. The Control Display will also indicate the pres-
ence of objects in green before they are close enough to generate a signal tone. Control Center, for principle details, refer to page 16:
MENU
- Open the start menu by pressing the button
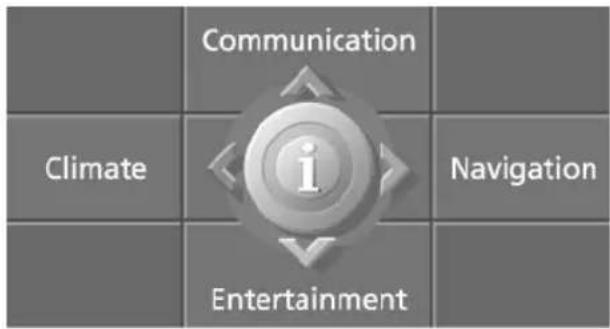
- Open the menu by pressing the controller
- Select "Vehicle settings" and press the controller
- Select "PDC" and press the controller

- Select "Monitor display on" and press the controller.
R is displayed with the PDC image switched on.
The display then appears on the Control Display as soon as PDC is automatically activated.
The previous display automatically reappears after the system is deactivated.
Limits of the system
Even with PDC, final responsibility for estimating the distance between the vehicle and any obstructions always remains with the driver. Even when sensors
are involved, there is a blind spot in which objects cannot be detected. The system is also subject to the physical limits that apply to all forms of ultrasonic measurement, such as those encountered with thin and wedge-shaped objects, etc. Low objects already displayed, e.g. a curb, can also disappear from the detection area of the sensors again before a continuous tone sounds.
Loud noises from outside and inside your vehicle may prevent you from hearing the PDC signal tone.
Keep the sensors clean and free of ice or snow in order to ensure that they will continue to operate effectively. Do not apply high pressure spray to the sensors for a prolonged period of time. Keep the spray at least 4 in/10 cm away from the sensors.
Driving stability control/ABS Antilock Brake System
Your BMW is equipped with an extended array of systems designed to enhance and maintain vehicle stability under extreme conditions. The following section describes these functions based on ABS and DSC.
The concept
ABS enhances active safety by preventing the wheels from locking under braking.
The ABS is operational every time you start the engine. ABS includes the functions CBC Cornering Brake Control and EBV Electronic Brake Force Distribution.
In case of malfunction
ABS If the indicator lamp lights up in yellow, this indicates that ABS has been deactivated in response to a system malfunction. Conventional braking efficiency remains available without limitations. Please have the system inspected at your BMW center.
CBC Cornering Brake Control
CBC is a supplement to ABS. It provides further enhancements in vehicle stability and steering response during lane changes and cornering at high rates of lateral acceleration.
EBV Electronic Brake Force Distribution
EBV controls the brake system's application pressure at the rear wheels to ensure stable deceleration.
In case of malfunction

If the brake system warning lamp lights up in red, appearing together with the yellow indicator lamps for ABS and DSC:
The driving stability control has failed.
If all three lamps light up yellow: Fault in the driving stability control.
The EBV electronic brake-force distribution is active.
While you may continue, you should remember to proceed cautiously and drive defensively while avoiding full brake applications.
Please have the system checked at the nearest BMW center.
If a message appears on the Control Display, please note the supplementary information.
You can find more information on the Check Control starting on page 68.

Indicator and warning lamps for Canadian models.
Driving stability control/DSC Dynamic Stability Control
The concept
DSC maintains vehicle stability, even in critical driving situations.
The DSC is operational every time you start the engine. DSC includes the functionality of the DTC Dynamic Traction Control and DBC Dynamic Brake Control, refer to page 79.
The system optimizes vehicle stability during acceleration and when starting from a full stop, as well as optimizing traction. The system recognizes any tendency for the vehicle to assume an unstable attitude such as oversteer or understeer; it then counteracts this tendency with a combination of graduated reductions in engine torque and selective braking intervention at individual wheels. DSC provides optimal stability within the limits defined by the laws of physics.
Indicator lamps

The indicator lamp in the instrument cluster goes out soon after you start the engine.
If the indicator lamp flashes:
DSC is regulating the drive and braking forces.
If the indicator lamp lights up permanently: DSC has been switched off using the button.

If the indicator lamp and the brake warning lamp light up permanently: Malfunction in DSC, DTC and DBC.
When the system is off, the stability maintenance functions described above are no longer available. The vehicle will remain completely operational, however, without DSC.
Please respond to any malfunctions by referring the problem to your BMW center.

Indicator and warning lamps for Canadian models.

DTC Dynamic Traction Control
In special driving states, e.g. in deep snow, DTC ensures maximum forward momentum. The gain in forward momentum also involves a reduction in driving stability. DTC is active up to 45 mph/70 km/h.
Activating DTC
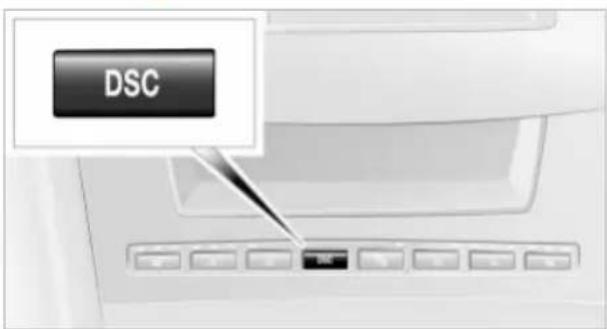

Press the DSC button briefly; the DTC indicator lamp in the instrument cluster lights up permanently.
You may find it useful to briefly activate DTC under the following special circumstances:
When rocking the vehicle and starting off in deep snow or on loose road surfaces
When ascending snow-covered hills, and when driving in deep or on hard-packed snow
When driving with snow chains.

When DTC is active, DSC provides only limited system response up to a speed of approx. 45 mph/70 km/h. Control intervention for stability-enhancement is reduced.
Deactivating DTC again
Press the DSC button again; the DTC indicator lamp in the instrument cluster goes out. DSC is available once again without restriction.
Deactivating DSC

Press the DSC button for at least 3 seconds; the DSC indicator lamp in the instrument cluster lights up permanently. DSC is deactivated.
Deactivating DSC automatically deactivates DTC as well. The systems for enhancing stability and traction are deactivated, and there is no active braking intervention or torque control.
A message appears on the Control Display. Please note any supplementary information that appears there.

To maintain optimal stability, drive with the system on whenever possi-
ble.
Reactivating DSC
Press the DSC button again briefly; the indicator lamp in the instrument cluster goes out. DSC is now activated.

The laws of physics cannot be repealed, even with DSC. An appro- the driving style always remains the responsibility of the driver. Therefore, do reduce the additional safety margin by taking risks.
Do not make any modifications to the DSC system. Never allow anyone other than authorized professional technicians to carry out service or repairs on the DSC system.
DBC Dynamic Brake Control
When you apply the brakes rapidly, this system automatically produces the maximum braking force boost and thus helps to achieve the shortest possible braking dis-
tance during panic stops. This system exploits all of the benefits provided by ABS.
Do not reduce the pressure on the brake pedal for the duration of the brake application. When the brake pedal is released, DBC is deactivated.

In the event of a malfunction, the warning lamp in the instrument cluster lights up yellow.
Have the system checked and repaired at your BMW center as soon as possible.
Please note any information that appears on the Control Display.

Warning lamp for Canadian models.
Active roll stabilization*
The concept
Active roll stabilization minimizes body roll and optimizes vehicle stability during cornering and evasive maneuvers.
Dynamic stabilizers at the front and rear axles form the basis for active roll stabilization. Suspension compliance adapts to suit driving conditions, varying from performance-oriented during cornering to smooth and comfort-oriented when the vehicle is proceeding in a straight line.
The system assumes operational status each time you start the engine.
Driving with active roll stabilization
During vehicle operation, the system continuously runs through closed-loop control cycles lasting only fractions of a second.
In case of malfunction

The symbol in the instrument cluster lights up and a message appears on the Control Display.
Please note any supplementary information that appears there.
You can find more information on the Check Control starting on page 68.
If the active roll stabilization system is deactivated in response to malfunction, please remember to adapt your speed accordingly, especially in curves.
The suspension will be noticeably softer and the vehicle will display a greater tendency to tilt during cornering and in cross-winds.
If a message stating that you should stop appears on the Control Display in addition to the red symbol, stop immediately and switch off the engine. In this case the oil level in the reservoir may have dropped below the minimum, possibly owing to a leak in the hydraulic system.
Please note any supplementary information that appears on the Control Display.
Flat Tire Monitor
The concept
The Flat Tire Monitor keeps track of the inflation pressures in the four fitted tires as you drive. The system provides an alert whenever the inflation pressure drops significantly in relation to the pressure in another tire.
The check of the tire inflation pressure is based on monitoring the relative speeds of the wheels. A flat tire is detected and reported on the basis of a deviation in certain speed ratios.
Functional requirement
So that the Flat Tire Monitor can learn the correct inflation pressure, please perform the following:
- Check the inflation pressures in all tires
- Compare with the inflation pressure table on page 170 and correct if necessary
- Initialize the system.
Limits of the system
The Flat Tire Monitor cannot indicate sudden severe tire damage caused by outside factors and does not detect a
natural, even pressure drop in all four tires.
In the following situations, on the other hand, there can be delays in detecting tire pressure losses, and even system failure:
When you are driving on snow-covered or slippery road surfaces
If you are using a sports driving style: slip on the drive wheels, high lateral acceleration
False alarms and undetected loss of pressure may occur when you are driving with snow chains fitted
When you are driving with the compact wheel, the Flat Tire Monitor is unable to function.
Initializing the system

Perform the initialization immediately after correcting the inflation pressure,
after changing a tire or changing a wheel or all wheels. A drive is necessary for this purpose.
Control Center, for principle details, refer to page 16:
-
Before beginning driving, start the engine, but do not drive off
-
Open the i menu
-
Select "Vehicle settings" and press the controller
-
Select "FTM" and press the controller

- Select "Set tire pressure" and press the controller
- Select "Yes" and press the controller
- Drive off.
The message "Initializing" is displayed.
It takes a few minutes before the Flat Tire Monitor can detect and report a flat tire. After the initialization is completed, the message "Active" is displayed.
If a flat tire is detected during initialization, a message appears on the Control Display.

When driving with snow chains or with the compact wheel, do not initial-
ize the system.
Flat tire
Indicator lamp

The symbol in the instrument cluster lights up in red and a simultaneous message appears on the
Control Display. In addition, an acoustic signal sounds.
Please note any supplementary information that appears on the Control Display. You can find more information on the Check Control starting on page 68.
-
Reduce speed and stop the vehicle carefully. Avoid sudden braking and steering maneuvers
-
Identify damaged tire

If identification is not possible, contact your BMW center.
- Replace the damaged wheel, refer to Changing a tire on page 187.
Vehicles with run-flat tires:
- Cautiously reduce the vehicle speed to below 50 mph/80 km/h. Avoid sudden braking and steering maneuvers. Do not exceed a vehicle speed of 50 mph/80 km/h

Due to the reinforcement on the edges of the run-flat tires, inflation sure loss can not usually be recog- from the outside, refer to Run-flat on page 175.
- To continue driving, comply with the instructions for driving with damaged tires on page 175.
System malfunctions
Indicator lamp

The symbol in the instrument cluster lights up yellow and a message appears on the Control Display.
Please contact your BMW center.
Please note any supplementary information that appears on the Control Display.
Active steering*
The concept
The active steering is a system that actively varies the steering angle of the front wheels in relation to the steering wheel movements.
When you are driving in the low road speed range, e.g. in a town or when parking, the steering angle is reinforced, i.e. the steering becomes very direct and significantly improves the handling capability of your BMW.
In the higher road speed range, on the other hand, the steering angle is reduced, also optimizing the handling capability.
In critical situations, the system can make targeted changes to the steering angle provided by the driver and thus stabilize the vehicle before the driver intervenes.
Indicator lamp

The indicator lamp lights up permanently: malfunction in the system. Please have the system inspected
at your BMW center.
Conventional steering efficiency remains available without limitations.
Brake Force Display
The Brake Force Display indicates the intensity with which you are applying your brakes to drivers of following vehicles.

MVOZBZTOMA
The display consists of two stages:
Normal braking:
The brake lamps in the tail assemblies and the high-mount brake lamp on top of the rear window light up during braking
▶ Heavy braking and braking with ABS: The tail lamps also light up with the same intensity as the standard brake lamp units to enhance the warning effect of the brake lamps.
Airbags

NZZZHCMMA
The following airbags are located under the marked covers:
1 Front airbags for driver and front passenger
2 Head airbags in front and rear
3 Side airbags in front and rear
Protective effect
The front airbags help protect the driver and front passenger by responding to frontal impacts in which safety belts alone cannot provide adequate restraint. When needed, the head and side airbags help provide protection in the event of side impact. The relevant side airbag helps to restrain the side upper body area. The relevant head airbag helps to support the head and provides protection against objects entering the vehicle.
The airbags are deliberately not triggered in every impact situation, e.g. less severe accidents, certain roll-over conditions, or rear-end collisions.

The rear seat side airbags may already have been deactivated by a
BMW center. Labels in the rear door opening should indicate the status of your rear seat side airbags. If you are uncertain of their status, or wish to have the airbags activated or deactivated, please contact your BMW center.
For information on the correct sitting position, refer to page 36.

Do not apply adhesive materials to the cover panels of the airbags, cover
them or modify them in any other way. Do not attempt to remove the airbag reten-
tion system from the vehicle. Never modify or tamper with either the wiring or the individual components in the airbag system.
This category includes the upholstery in the center of the steering wheel, on the instrument panel, the side trim panels on the doors and the roof pillars along with the sides of the headliner. Do not attempt to remove or dismantle the steering wheel. Do not touch the individual components directly after the system has been triggered, because there is a danger of burns. If you note any indication of system malfunction, if you desire to have an airbag deactivated, or if the airbag retention system is triggered in response to an accident, you should always entrust all inspection, repair and dismantling operations to your BMW center.
Unprofessional attempts to service the system could lead to failure in an emergency or undesired airbag activation, either of which could result in personal injury.
To ensure compliance with official safety regulations, please also entrust disposal of airbag generators to a BMW center.
Airbag warning information is also provided on the sun visors.
Automatic deactivation of the front passenger airbags
Your BMW has a seat occupation detection system. By evaluating the weight on the front passenger's seat, the system detects whether or not the seat is occupied by a child in the child-restraint system or an adult.
When a child is seated in the child-restraint system or with an empty seat, the front and side airbags are automatically deactivated on the passenger's side
When an adult is traveling in the front seat, the front and side airbags remain active on the passenger side.

Although not desired, it can occur in the case of heavier children that the front passenger airbags remain active or in the case of very light adults or young persons that the front passenger airbags are deactivated.
The state of the front passenger airbags is shown with the telltale lamp, refer to indicator lamps in the following. In this case transport the corresponding persons on the rear seat.
Except when persons to be transported, do not increase the load on the front passenger seat with additional items. Do not fit seat covers, seat cushion padding, ball mats or other items to the front passenger seat unless they are specifically recommended by BMW. Do not place any items under the seat. Otherwise, the function of the seat occupation detection could be impaired.
Indicator lamps
Operational readiness of airbag system
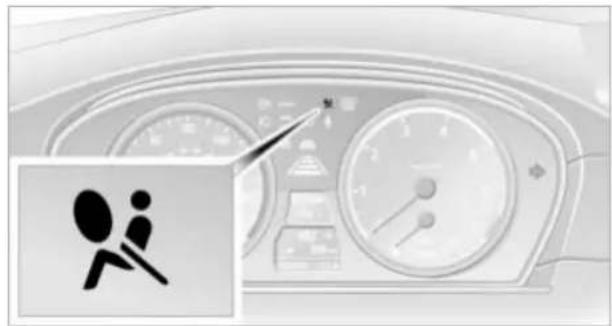
The airbag indicator lamp in the instrument cluster indicates the operational readiness of the entire airbag system and the safety belt tensioners as of ignition key position 1.
The indicator lamp goes out after a few seconds.

MVOZT8GMA
The telltale lamp above the interior rearview mirror indicates whether the front-passenger airbag system is activated or deactivated as of ignition key position 1.

The telltale lamp refers exclusively to the front-passenger airbag system.
The telltale lamp goes out after a few seconds.
The front passenger airbags are active, e.g. when transporting an adult
The telltale lamp lights up continuously. The front passenger airbags are deactivated, e.g. when transporting a child in the child-restraint system or when the seat is unoccupied.
For more information on the operating principle of the front passenger airbag system and seat occupation detection, refer to Automatic deactivation of the front passenger airbags.
Airbag system malfunction

A system malfunction could prevent the system from responding in the expected manner to an impact occurring within its normal response range.
Please have the airbag system inspected immediately at a BMW center.

There is a fault in the airbag system if the airbag indicator lamp in the instrument cluster behaves as fol-
lows:
▶ Indicator lamp does not light up as of ignition key position 1
It remains on continuously
Indicator lamp lights up while the vehicle is being driven.
Head-Up Display*
The concept
The Head-Up Display can be used to project important information into the field of vision of the driver, e.g. instructions of the navigation system. You can assimilate this information without taking your eyes off the road.
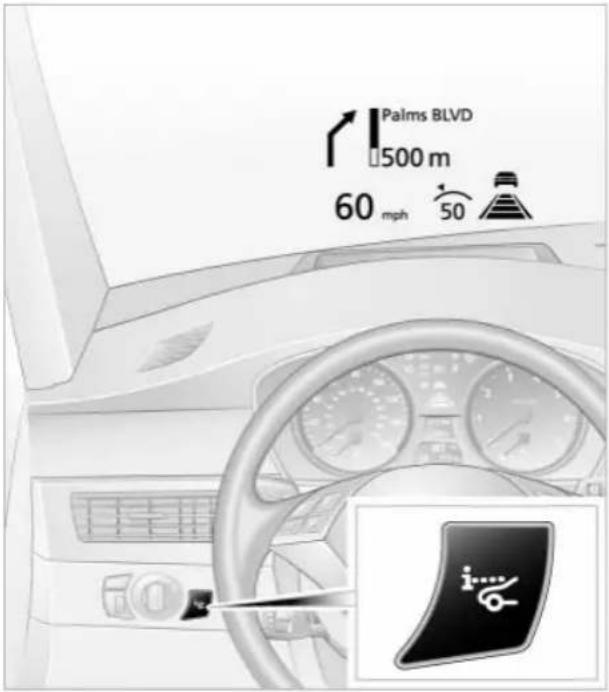
Switching on/off
In ignition key position 2:
Press button 2 to activate or deactivate this system.

1 Instructions of the navigation system
2 Cruise control or
Active cruise control
3 Speed
The Head-Up Display can also be activated and deactivated with the two programmable function buttons on the steering wheel. Programming button functions, refer to page 44.
Specifying selected displays
You can specify which information is to appear in the Head-Up Display for a specific key.
Make all entries with the vehicle stationary. If you are inattentive, you may be in violation of the law, and can endanger vehicle occupants and other road users. Control Center, for principle details, refer to page 16:
MENU
- Open the start menu by pressing the button.
![graph TD A["Communication"] --> B["Climate"] B --> C["Entertainment"] C --> D["Navigation"] D --> A](/content/2026/05/1019018/images/337abf0a6c9d48776209503b4cf032ccbcdab87c198d8cfc2a880022f7aa7409.jpg)
- Open the menu by pressing the controller
- Select "Display settings" and press the controller
- Select "HUD selection" and press the controller
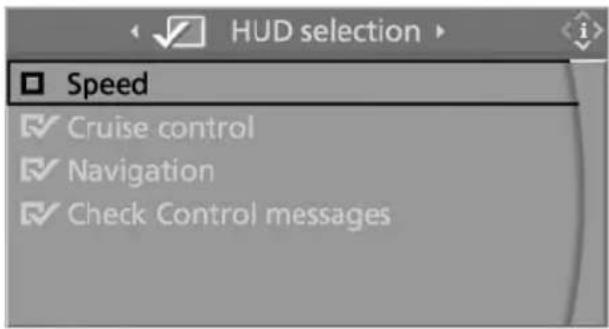
- Select the desired information of the Head-Up Display and press the controller.
The information is shown on the Head-Up Display.
Setting the brightness
The brightness of the display is automatically adapted to the ambient lighting conditions. However, you can change the base setting for each specific key.
With the low beams switched on, the brightness can also be set with the adjustment wheel of the instrument lighting.
Control Center, for principle details, refer to page 16:
- Open the menu
- Select "Display settings" and press the controller
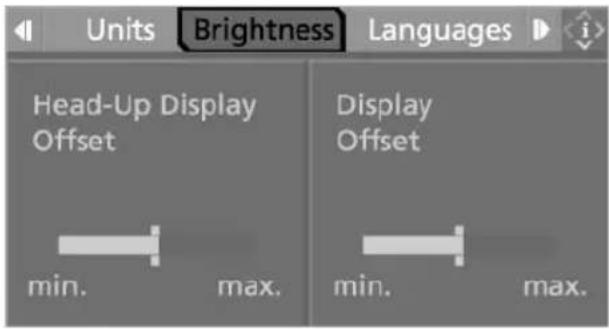
- Select "Brightness" and press the controller
- Move the controller to the left to select "Head-Up Display"
- Turn the controller. The adjustment is adopted; the field can be changed.
Malfunctions
In certain cases the recognizability of the Head-Up Display may be reduced:
By wearing sunglasses with certain polarization filters
By disadvantageous sitting positions
By objects on the cover of the Head-Up Display
By wet road surfaces and disadvantageous lighting conditions.
If the image is distorted, please have the base setting checked at a BMW center.
Care instructions
You can find everything you need to know on this topic by consulting the separate Caring for your vehicle brochure.

Only clean the cover of the Head-Up Display with a soft, lint-free cloth or with a display cleaning cloth, as otherwise damage may result.
Lamps
Parking lamps/low beams

Parking lamps

With the switch in this position, the front, rear and side vehicle lighting is switched on. You can use the side
marker lamps for parking. For lighting on one side for parking as an additional feature, refer to page 88.
Low beams

When you switch off the ignition with the headlamps on, the head-lamps go out, and only the parking
lamps remain on.
Pathway lighting
After parking the vehicle and switching off the headlamps, operating the headlamp flasher activates the low beams. You can set the duration using the Control Center or deactivate the function.
Control Center, for principle details, refer to page 16:
- Open the i menu
- Select "Vehicle settings" and press the controller
- Select "Lighting" and press the controller

NINDIGUEVA
- Select "Pathway lighting" and press the controller
- Turn the controller to select the corresponding duration
- Press the controller to apply the setting.
Lights on warning
If you turn the ignition key to position 0, an acoustic signal sounds when you open the driver's door for a few seconds to remind you that the light has not yet been switched off. At the same time a message appears on the Control Display.
Daytime driving lamps*
If desired, the light switch can remain in the low beam position:
When you switch off the ignition, the exterior lighting goes out.
Always observe all applicable laws governing the use of daytime driving lamps.
You can switch on the parking lamps when needed using the standard procedure described under Parking lamps.
Automatic headlamp control*

When you set the switch to this position, the system activates and switches on and off the low beams
in response to changes in ambient light conditions, for instance, in a tunnel, at dawn and dusk, and in rain and snow. The LED next to the symbol is illuminated when the low beams are on.
Following automatic activation, the vehicle's external lighting remains on when you switch on the fog lamps.
The automatic headlamp control cannot serve as a substitute for your personal judgment in determining when the lamps should be switched on in response to ambient lighting conditions. For example, the system cannot detect fog. To avoid safety risks, you should always switch on the lamps manually under these conditions.
Adaptive Head Light*
The concept
Adaptive Head Light is a variable headlamp control system that enables dynamic illumination of the road surface. Depending on the steering angle and other assumptions, the light from the headlamp follows the course of the road.
Activating Adaptive Head Light

In ignition key position 2, turn the light switch to the position 'Automatic headlamp control', refer to page 87.

When reversing, the Adaptive Head Light is inactive; when the vehicle is stationary, it is only active in one direction.
In case of malfunction
The LED above the symbol for automatic headlamp control flashes. Please have the system inspected at your BMW center.
Instrument lighting

NMG2864CMMA
Turn the serrated dial to adjust the illumination intensity.
High beams/standing lamps

NOTED CHINA
1 High beams: blue indicator lamp
2 Headlamp flasher: blue indicator lamp
3 Standing lamps
Standing lamps, left or right*
You also enjoy the option of lighting up just one side of your vehicle when parking. When using this function, comply with national regulations:
With the ignition switched off, press the lever in the desired direction 3, past the resistance point.
Fog lamps

Always observe all applicable laws governing the use of fog lamps.
To disconnect, briefly press the button again.

The parking lamps or low beams must be switched on for the fog lamps to operate. The green indicator lamp in the instrument cluster lights up whenever the fog lamps are on.
The fog lamps are switched off whenever the high beams are switched on.

If the automatic headlamp control is activated, the low beams will come on automatically when you switch on the fog lamps.
Interior lamps
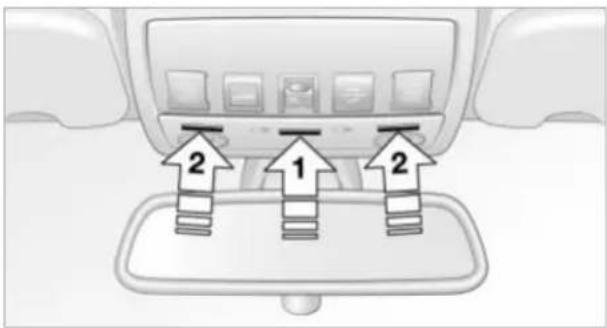
The interior lamps operate automatically.
Switching the interior lamps on and off manually
Briefly press button 1.
If you want the interior lamps to remain off continuously, maintain pressure on the button for approx. 3 seconds.
To revert to normal operation, press the button briefly.
Control of the footwell lamps, door entry lighting and courtesy lamps* is also automatic.
Reading lamps
Reading lamps are provided in the front and rear adjacent to the interior lamps. You can switch them on and off using the buttons 2 located next to the lamps.

To avoid discharging the battery, all of the vehicle's interior lamps are auto-cally switched off approx. 15 minutes the ignition is switched off.
Light-emitting diodes LEDs
Light-emitting diodes installed behind translucent lenses serve as the light source for many of the controls and displays in your vehicle. These light-emitting diodes, which operate using a concept similar to that applied in conventional lasers, are officially designated as Class 1 light-emitting diodes.

Do not remove the covers, and never stare into the unfiltered light several s, as irritation of the retina could t.
A congenial climate

1 Airflow directed toward the windshield and side windows
2 Air to the upper body.
The serrated dials allow you to open and close the air supply vent outlets through an infinitely-variable range. The levers change the direction of the air flow. You can find more information on adjusting for draft-free ventilation on page 94
3 Air to footwell
4 Temperature, left side of passenger compartment
5 Maximum cooling
6 Defrosting windows and removing condensation
7 Air volume
8 Switching off automatic climate control
9 Switching cooling function on and off manually
10 Temperature, right side of passenger compartment
11 Residual heat mode
12 Automatic air distribution and volume
13 Outside air/AUC Automatic recirculated-air control/Recirculated air
14 Indicator lamp for independent ventilation
▶ Activation time set: The indicator lamp lights up
▶ Independent ventilation switched on:
The indicator lamp flashes
15 Rear window defroster
16 Air grill for interior temperature sensor, please keep clear and unobstructed
All other setting options for the automatic climate control can be found in the "Climate" menu and in the i menu on the Control Display, as of page 92.
The current setting for air distribution is displayed on the Control Display.
A congenial climate
To use the automatic function, press the AUTO button. Select an interior temperature you find pleasant.
The following section contains more detailed information on the available setting options.
The cooling function is only possible with the engine running.
Automatic air distribution and supply

The AUTO program adjusts the air distribution to the wind-shield and side windows,
towards the upper body and footwell as well as the air volume, while also using your preselected temperature setting as the basis for adjusting the interior climate to adapt to external influences: summer, winter.
The cooling function comes on automatically when you select the AUTO program. At the same time, a condensation sensor controls the program in such a way that window condensation is prevented as far as possible.
Adjusting temperature

You can turn to select the desired temperatures for the driver and passenger sides. The figures on the display provide a general indication of interior temperature. A pleasant adjustment is 72° F/ 22° C. When you start the vehicle, the system ensures that the selected temperature is achieved as quickly as possible. It then maintains this temperature, regardless of the season.
Defrosting windows and removing condensation

This program quickly removes ice and condensation from the windshield and front side win-
dows.
Adjusting the air volume manually

You can adjust the air volume by turning. You can reactivate the automatic mode for the air volume with the AUTO button.
Switching cooling function on and off manually

The cooling function cools and dehumidifies the incoming air before also reheating it as
required, according to the temperature setting. Depending on the weather, the wind-shield may fog over briefly when the engine is started.
The cooling function comes on automatically when you select the AUTO program.
Maximum cooling
This program quickly provides maximum cooling.
The system switches to the recirculated-air mode and the
air flows at maximum air volume only from the vent outlets for the upper body area. For this reason you should ensure that these vent outlets are open before selecting this program.
Outside air/AUC Automatic recirculated-air control/Recirculated air

You can respond to unpleasant odors or pollutants in the immediate environment by tempo-
rarily suspending the supply of outside air. The system then recirculates the air currently within the vehicle. AUC executes this function automatically.
Press the button repeatedly to run through the following control sequence:
- Indicator lamps off: outside air flows in - Right indicator lamp on, AUC mode: the system detects pollutants in the outside air and responds by blocking the supply of outside air when required. The system then recirculates the air currently within the vehicle.
Depending upon air quality requirements, in the automatic mode the system alternates between its outside-air and recirculated-air modes
Left indicator lamp on, recirculated-air mode: the supply of outside air is permanently blocked. The system then recirculates the air currently within the vehicle.

If condensation starts to form on the inside window surfaces during operation in the recirculated-air mode, you should switch it off while also increasing the air volume as required.
The recirculated-air mode should not be used over a sustained longer period of time, as the air quality inside the vehicle deteriorates continuously.
Residual heat mode

The system uses the warmth stored in the engine to heat the interior when the ignition is off, for instance, while the vehicle is stopped at a school to pick up a child.
You can adjust the automatic climate control settings in ignition key position 1.

Provided that the engine has warmed to its normal operating temperature and the battery is charged, you can use this function for up to 15 minutes after switching off the ignition. The LED within the button lights up to confirm compliance with these conditions.
Switching automatic climate control off

The air volume, the heater and the cooling function are all switched off. You can restart the automatic climate control by pressing any of its buttons
except the REST button.
Settings using the Control Center
You can make the settings for each specific key.
Control Center, for principle details, refer to page 16:
- Turn the ignition key to position 2
MENU
- Open the start menu by pressing the button
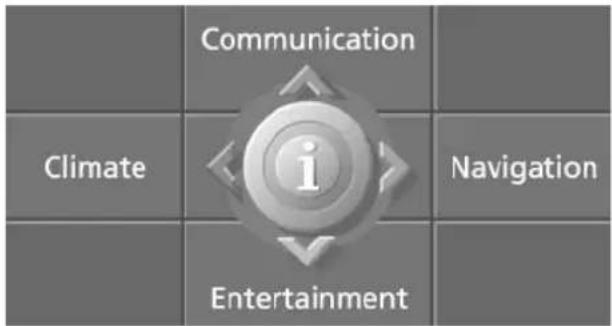
- Move the controller to the left to open "Climate".
You can set the following:
Air distribution, separate settings for driver and front passenger
▶ Addition of cooler air for the upper body area.
Automatic air distribution
-
Select "Vent settings" and press the controller
-
Select "AUTO" and press the controller.
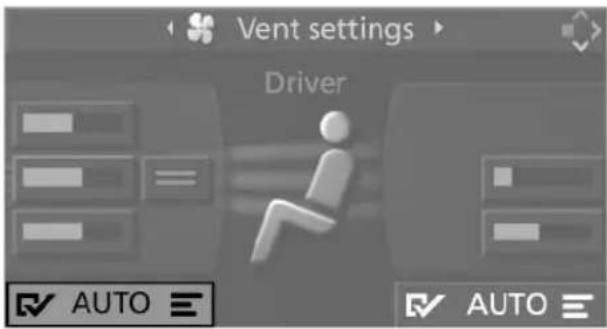
R is displayed with automatic air distribution.
The program handles adjustment of the air distribution, separately for the driver and passenger side.
To switch on the automatic air distribution for the front passenger: Move the controller to the right.
Manual air distribution
You can combine your air distribution yourself and also set the air temperature for the upper body area individually.
-
Select "Vent settings" and press the controller
-
Select "AUTO" and press the controller. ☐ is displayed with manual air distribution
-
Select the desired field by moving the controller and turn the controller to adjust the air distribution.
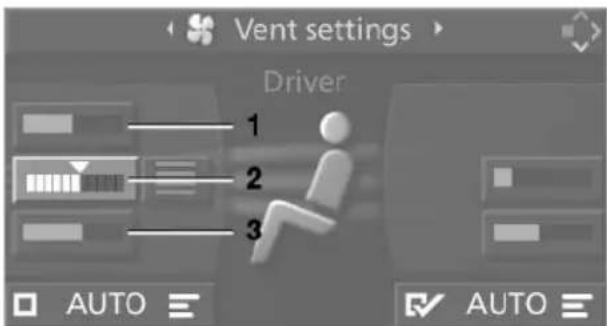
1 Airflow directed toward the windshield and side windows, driver's side only
2 Air to the upper body. You can also individually adjust the air temperature of the vent outlets for the upper body area
3 Air to footwell
To select the passenger area: Move the controller to the right.
Adjusting temperature for the upper body

4 Setting the addition of cool air from the air vent outlets for the upper body area
Setting the intensity of the AUTO program
To meet your individual needs, you can weaken or strengthen the intensity of the automatic climate control.
- Turn the ignition key to position 1 Control Center, for principle details, refer to page 16:
- Open the i menu
- Select "Vehicle settings" and press the controller
- Select "Climate control" and press the controller
- "Automatic programs"
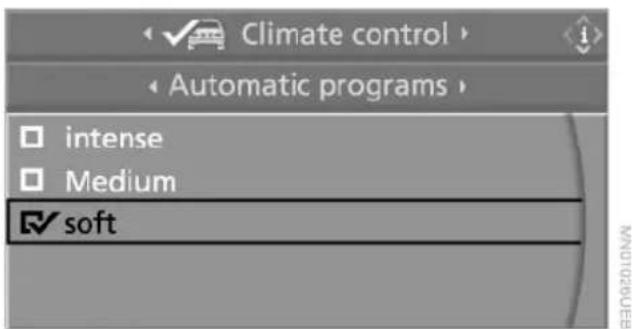
- Select the desired intensity and press the controller.
Front ventilation

You can adjust the vent outlets for the upper body to suit your personal requirements.
You can use the serrated dials 1 to open and close the vent outlets through an infinitely-variable range, while the levers 2 allow you to adjust the airflow direction.
Ventilation for cooling
Adjust the vent outlets to direct the flow of cool air in your direction, for instance, if the interior has become too warm, etc.
Draft-free ventilation
Set the vent outlets so that the air flows past you and is not directed straight at you. You can also individually adjust the air temperature of the vent outlets for the upper body area using the Control Center.
Rear ventilation

The serrated dial 1 allows you to open and close the vents through an infinitely-variable range.
Serrated dial 2:
Turn towards blue: colder.
Turn towards red: warmer.
You can adjust the airflow direction using the levers 3.
Independent ventilation*
The independent ventilation blows air into the passenger compartment to lower interior temperatures.
System operation is controlled using the Control Center. You can set two different times for the system to start.
The system remains on for 30 minutes. It can also be switched on and off directly. Since the system uses a substantial amount of electrical current, you should refrain from activating it twice in succession without allowing the battery to be recharged in normal operation between use.
The independent ventilation system is available for preprogrammed operation at outside temperatures above approx. 59°F/15°C and for direct activation at any temperature, but is not operational when the vehicle is underway.
The air enters the passenger compartment through the vent outlets in the instrument cluster, which can be adjusted for both direction and airflow. These vent outlets must be open for the system to operate.
Switching on and off directly
- Turn the ignition key to position 1
Control Center, for principle details, refer to page 16: - Open "Climate"
- Select "Independent ventilation" and press the controller
- Select "Automatic venting" and press the controller

- Select "Independent ventilation" and press the controller.
R is displayed with the independent ventilation switched on.
Setting the activation time
- Turn the ignition key to position 1
Control Center, for principle details, refer to page 16: - Open "Climate"
- Select "Independent ventilation" and press the controller
- Select "Activation time" and press the controller

You can preselect two activation times.

Maintain a time of at least 31 minutes between the first and the second
switch-on time.
- Move the controller to the left or right to select "Time 1" or "Time 2"
- Select the time and press the controller. The first time setting is highlighted
- Turn the controller to make the adjustment
-
Press the controller to apply the setting. The next adjustment is highlighted
-
Make the remaining adjustments. After the last adjustment, the time is stored.
Activating the activation time
- Turn the ignition key to position 1
Control Center, for principle details, refer to page 16: - Open "Climate"
- Select "Independent ventilation" and press the controller
- Select "Activation time" and press the controller

MN01055UEA
- Move the controller to the left or right to select "Time 1" or "Time 2" and press the controller.
R is displayed with activated switch-on time.
The independent ventilation is only available for activation within the subsequent 24 hours. Thereafter, the time must be reactivated.
Practical interior accessories
Integrated universal remote control*
The concept
The integrated universal remote control replaces up to three different hand-held transmitters for various remote-controlled equipment such as door openers and house alarm systems. The integrated universal remote control registers and stores signals from the original hand-held transmitters.
The signal of an original hand-held transmitter can be programmed on one of the three memory buttons 1. Following that, each of the devices can be actuated with the appropriately programmed memory button 1. The indicator lamp 2 flashes to confirm transmission of the signal.
If the vehicle is sold, the memory of the buttons 1 should be cleared, refer to page 97.

To prevent possible damage or injury, before programming or using the integrated universal remote control, always inspect the immediate area to make certain that no people, animals or objects are within the travel range of the device. Also, comply with the safety precautions of the original hand-held transmitter.
Checking the compatibility

If you see this symbol on the packaging or in the manual supplied with the original hand-held transmitter, it is safe to assume that it is compatible with the integrated universal remote control.

If you have additional questions, please consult your BMW center or call 1-800-355-3515.
You can also visit these websites: www.bmwusa.com or www.homelink.com.
HomeLink is a registered trademark owned by Johnson Controls, Inc.
Programming

MVO2127CMVA
1 Memory buttons
2 Indicator lamp
Fixed-code hand-held transmitter
- Turn the ignition key to position 2
- When using for the first time: Press both outer buttons 1 for approx. 20 seconds until the indicator lamp 2 flashes. The three memory buttons 1 are cleared
- Hold the original hand-held transmitter at a distance of approx. 2 in/5 cm to 8 in/20 cm to the memory buttons 1
The required distance between the hand-held transmitter and the memory buttons 1 depends on the relevant system of the original hand-held transmitter used.
- Simultaneously press the transmit button on the original hand-held transmitter and the desired memory button 1 on the integrated universal remote control. Initially, the indicator lamp 2 flashes slowly. Release both buttons as soon as the indicator 2 lamp flashes rapidly. If the indicator lamp 2 does not flash rapidly after approx. 15 seconds, change the distance
- To program other original hand-held transmitters, repeat steps 3 and 4.
The corresponding memory button 1 is now programmed with the signal of the original hand-held transmitter.
The equipment can be used as of ignition key position 2.
If the device cannot be used even after repeated programming, check whether the original hand-held transmitter is equipped with an alternating-code system. Here, either read the instructions for the original hand-held transmitter or hold down the programmed memory button 1 of the integrated universal remote control. If the indicator lamp 2 on the integrated universal remote control flashes rapidly for a short time then lights up for approx. 2 seconds, this indicates that the original hand-held transmitter uses an alternating-code system. In the case of an alternating-code system, program the memory buttons 1 as described at Alternating-code hand-held transmitters.
Alternating-code hand-held transmitters
To program the integrated universal remote control, consult the operating instructions for the equipment to be set. You will find information there on the possibilities for synchronization.
When programming hand-held transmitters that employ an alternating code, please observe the following supplementary instructions:

Programming will be easier with the aid of a second person.
- Park your vehicle within the range of the remote-controlled device
- Program the integrated universal remote control as described above at Fixed-code hand-held transmitters
- Locate the button at the receiver of the equipment to be set, e.g. on the drive
- Press the button on the receiver of the device you want to set up. After step 4, you have approx. 30 seconds for step 5
- Press the programmed memory button 1 of the integrated universal remote control three times.
The corresponding memory button 1 is now programmed with the signal of the original hand-held transmitter.

If you have any additional questions, please contact your BMW center.
Clearing the memory buttons
Press both outer buttons 1 of the integrated universal remote control for approx. 20 seconds until the indicator lamp 2 flashes. All memory buttons will be cleared.
The memory of individual memory buttons 1 cannot be cleared.
Roller sun blinds*
Roller sun blind for rear window

To actuate as of ignition key position 1, briefly press the button in the driver's door.
Roller sun blinds for rear side windows
Pull the roller sun blind at the loop and hook up to the bracket.
Glove compartment
Opening

Pull the handle. The light in the glove compartment switches on.
Closing
Fold the cover up.

To prevent injury in the event of an accident, close the glove box immediafter use.
Locking
Lock with a central key. Unlocking is also only possible with a central key.

If you only hand over the spare key, e.g. in a hotel for valet parking, refer age 26, the glove compartment cannot be opened.
Rechargeable flashlight
The flashlight is located on the left side of the glove compartment.
It features integral overload protection, so it can be left in its holder continuously.

Be sure that the flashlight is switched off when it is inserted into its holder.
Failure to comply with this precaution could lead to overcharging and damage.
Center armrest
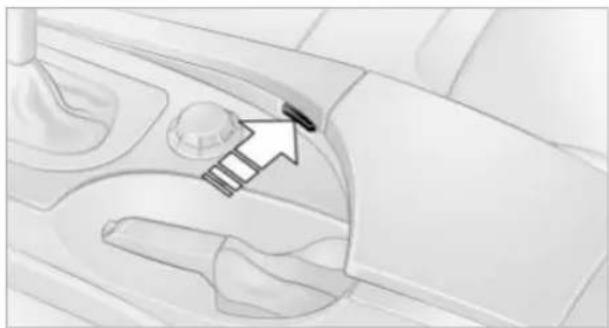
MAYO:9840MA
A storage compartment is located in the armrest between the front seats.
To open the cover:
Press the button. The cover opens and can be folded upwards.
The mat within the compartment can be removed for cleaning.
Depending on the version, the storage compartment can contain a folding tray or a telephone cradle*.
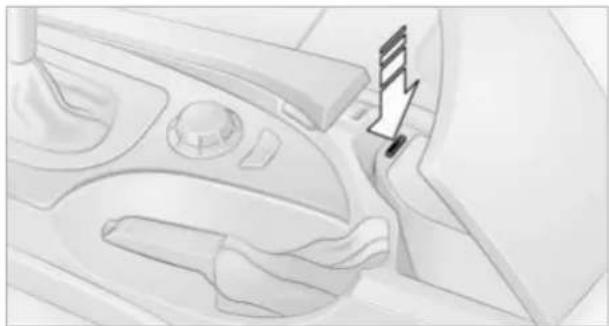
MVO1986CMMA
To open the tray:
Press the button and fold the cover upwards.
The folding tray and telephone cradle* can be folded upwards to enable use of the lower area of the storage compartment.
Ventilating storage compartment in the front armrest
-
Fold the folding tray or telephone cradle* upwards
-
Open or close the slider in the storage compartment.

Depending on the automatic climate control setting, the temperature
within the storage compartment may be
higher than in the rest of the interior. Close the vent as required.
Adjustments
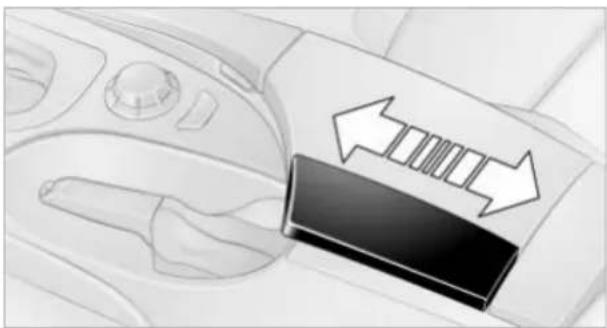
Slide the center armrest into the desired position.
Storage compartments
Storage compartment on center console between the front seats
Open by pressing the cover back.
Other compartments
There are other compartments in the doors as well as in the front and rear center console.
Storage nets are located on the backrests of the front seats.
Clothes hooks

When suspending clothing from the hooks ensure that it will not obstruct the driver's vision. Do not hang heavy objects on the hooks. If you do so, they could cause personal injury to occupants during braking or evasive maneuvers.
Beverage holders

To open:
Briefly press the button.

Do not place containers made of glass in the beverage holders. This
would lead to an increased risk of injury in the event of an accident.
To close:
Press the cover in the center and push in the beverage holder.
Ashtray, front
Opening
Slide back the cover.
Emptying

Press the ashtray forwards: it rises and can be removed.
On vehicles with the non-smoking package, the insert is removed in the same way.
Cigarette lighter, front

In ignition key position 2, press in the lighter.
The lighter can be removed as soon as it jumps back out.

Hold or touch the hot cigarette lighter by the knob only. Holding or touching
it in other areas could result in burns.
Always remove the ignition key when you leave the vehicle so that, e.g., children are unable to use the lighter and burn themselves.
Lighter socket
The socket can be used to plug in hand flashlights, car vacuum cleaners, etc., with power ratings of up to approx. 200 W at 12 V. Avoid damaging the socket due to inserting plugs of different shapes or sizes.
Ashtray, rear

Emptying
Press the entire cover down. The ashtray rises for removal.
Cigarette lighter, rear

Refer to Cigarette lighter, front.
NVO:9862MA
Sockets
In front passenger footwell

Access to the socket:
Fold the cover upwards.
NEW2769CMA
In the luggage compartment

Access to the socket:
Fold the cover upwards.
NOTED/CHA
Rear center armrest

1 Storage compartment: pull upwards
2 To open the beverage holder: press and open the cover
With the center armrest folded down, you have a better view towards the rear.
Fold down rear seat*

- Open the buckle of the middle safety belt in the rear and insert the belt tongue at the end of the belt in the mounting on the back shelf
- Push the corresponding head restraint down as far as it will go, refer to page 40

- To unlock, pull the corresponding lever in the luggage compartment
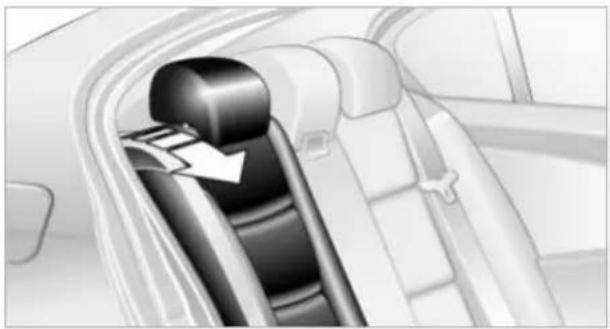
MVO1992CMIA
- The unlocked rear seat back moves forward slightly. Place your hand in the gap and fold downwards.
When you fold back the backrest, make sure that the retainer engages properly. If it is not properly engaged, transported cargo could enter the vehicle during braking or evasive maneuvers and endanger the vehicle occupants.
The lashing eyes in the luggage compartment provide you with a means of attaching luggage nets* or flexible straps for securing suitcases and luggage, refer to page 109.
Ski bag*
Designed for safe, convenient transport of up to four pairs of standard skis or up to two snowboards.
The ski bag itself plus the additional capacity provided by the luggage compartment make it possible to transport skis with a length of up to 6.9 ft/2.10 m. When skis of 6.9 ft/2.10 m in length are loaded, the ski bag will tend to contract, reducing its overall capacity.
Loading
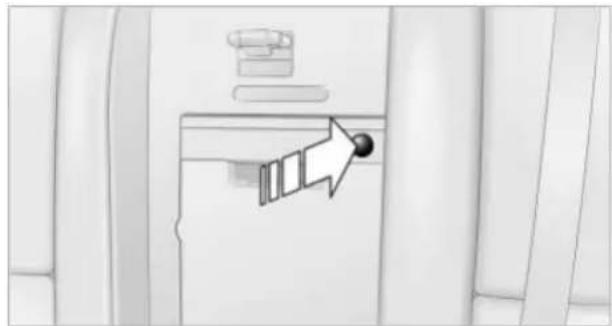
- Pull down the center armrest, press the button and open the cover
- Press the button again; the cover in the luggage compartment opens. If you press the button firmly the first time, this also opens the cover in the luggage compartment
- Extend the ski bag between the front seats and fill it. The zipper allows more convenient access to stored objects and can also be left open to allow the ski bag to dry

- Insert the belt tongue of the ski bag belt in the center safety belt buckle.
Please ensure that the skis are clean before loading them into the bag. Take care to avoid damage from sharp edges.
Securing the load

MVO2062CMA
Secure the bag's contents by tightening down the strap at the buckle.
Secure the ski bag in this way. If you fail to do so, it could move around and endanger occupants during braking or evasive maneuvers.
To store the ski bag, perform the above steps in reverse order.
Removing the ski bag
The ski bag can be completely removed to clean it and to use other inserts.
Your BMW center will be glad to provide you with more detailed information on the various items of equipment.

NV02236CM4
Pull the handle forwards and remove the ski bag upwards, then close the cover in the luggage compartment.
Do not position cargo at the opening. If you do, it can endanger the passengers during braking or evasive maneuvers. Always close off the passage with an insert, as otherwise objects from the luggage compartment can enter into the passenger compartment.
Driving tips
This section is designed to provide you with extra support by supplying information useful in dealing with specific driving and operating conditions.
Things to remember when driving
Break-in procedures
To ensure that your vehicle continues to provide optimized economy of operation throughout an extended service life, we request that you devote careful attention to the following section.
Engine and differential
Up to 1,200 miles/2,000 km:
You should attempt to vary both vehicle and engine speeds. Until the break-in period has been completed, you should also refrain from exceeding an engine speed of 4,500 rpm or a driving speed of 100 mph/160 km/h.
Always obey all official speed limits.
Avoid full-throttle operation and use of the transmission's kickdown mode during these initial miles.
Once you have driven 1,200 miles/2,000 km, the engine and vehicle speeds can be gradually increased.
You should also comply with these break-in procedures should the engine or differential need to be replaced at a later point.
Sequential manual transmission SMG
Do not use the acceleration assistant during the break-in period.
Tires
Due to technical factors associated with their manufacture, tires do not achieve their full traction potential until after an initial break-in period. Therefore, drive reservedly during the first 200 miles/300 km.
Brake system
Brakes require an initial break-in period of approx. 300 miles/500 km to achieve optimized contact and wear patterns between brake pads and rotors.
Clutch
The function of the clutch is only at its optimized level after a distance driven of approx. 300 miles/500 km. During this break-in period, engage the clutch gently.
General driving notes
High temperatures
Extreme temperatures occur at the catalytic converter on this and every catalyst-equipped vehicle. Do not remove the heat shields installed adjacent to various sections of the exhaust system, and never apply undercoating to them. When driving, standing at idle and while parking take care to avoid possible contact between the hot exhaust system and any highly flammable materials such as hay, leaves, grass, etc. Such contact could lead to a fire, and with it the risk of serious property damage as well as personal injury.
Parking the vehicle
Condensation forms in the air conditioner system during operation, and then exits under the vehicle. Traces of condensed water under the vehicle are thus normal.
Before driving into the car wash
Fold in the exterior mirrors, refer to page 42, as otherwise they could be damaged due to the width of the vehicle.
Hydroplaning
When driving on wet or slushy roads, reduce road speed. If you do not, a wedge of water can form between tires and road surface. This phenomenon is referred to as hydroplaning, and is characterized by a partial or complete loss of contact between the tires and the road surface, ultimately undermining your ability to steer and brake the vehicle.
The risk of hydroplaning increases as the tread depth of the tires decreases, refer also to Tire tread on page 173.
Water on the road

Do not drive through water on the road if it is deeper than 1 ft/30 cm, and then only at walking speed at the most. Otherwise, the vehicle's engine, the electrical systems and the transmission may be damaged.
Brakes
Your BMW is equipped with ABS as standard. The best way to achieve optimized response from the ABS is to apply maximum pressure to the brake pedal during emergency: panic stops. Since the vehicle maintains steering responsiveness, you can nevertheless avoid possible obstacles with a minimum of steering effort.
Pulsation at the brake pedal combines with sounds from the hydraulic circuits to indicate to the driver that ABS is in its active mode.

Do not drive with your foot resting on the brake pedal. Even light but consistent pedal pressure can lead to high temperatures, brake wear and possibly even brake failure.
Driving in wet conditions
While driving in wet conditions and in heavy rain, it is a good idea to apply light pressure to the brake pedal every few miles. Monitor traffic conditions to ensure that this maneuver does not endanger other road users. The heat generated in this process helps dry the pads and rotors to ensure that full braking efficiency will then be available when you need it.
Hills
You can retain full and unimpaired braking efficiency by downshifting to a gear in which only minimal brake applications are needed when descending long or steep downhill stretches.
You can further enhance the engine's braking effect by selecting a lower gear in the automatic transmission's manual mode, downshifting as far as first gear on extremely steep stretches, refer to pages 50 and 55. This strategy helps you avoid placing excessive loads on the brake system.

Never drive with the clutch pressed or allow the vehicle to coast with the transmission in Neutral – or with the engine switched off – there is no engine braking when the transmission is in Neutral, and no power-assist for brakes and steering when the engine is not running.
Never allow floor mats, carpets or any other objects to protrude into the area around the accelerator and brake pedals and obstruct their movement.
Corrosion on the brake rotors
When the vehicle is driven only occasionally, during extended periods when the vehicle is not used at all, and in operating conditions where brake applications are less frequent, there is an increased tendency for corrosion to form on rotors, while contaminants accumulate on the brake pads. This occurs because the minimum pressure which must be exerted by the pads during brake applications to clean the rotors is not reached.
Should corrosion form on the brake rotors, the brakes will tend to respond with a pulsating effect that even extended application will fail to cure.
Brake pads

The brake pad wear warning lamp lights up and a message appears on the Check Control. Please note any supplementary information that appears there.

Warning lamp for Canadian models.
The brake pads have reached their minimum pad thickness. Have them replaced at your BMW center as soon as possible.
For your own safety: use only brake pads that BMW has approved for your particular vehicle model. As BMW cannot assess the suitability of other brake pads for use on your vehicle, we are unable to assume continued responsibility for the vehicle's operating safety if non-approved pads are installed.
Mobile communication in the vehicle
BMW recommends using mobile communication devices, e.g. portable phones, in the interior of the vehicle with a suitable external antenna. Otherwise, the vehicle electronics and mobile communication device can influence one another.
Loading
To avoid loading the tires beyond their approved carrying capacity, never overload the vehicle. Overloading can lead to overheating and increases the rate at which damage develops inside the tires. The ultimate result can assume the form of a sudden air loss.
Determining loading limit

- Locate the following statement on the driver's door pillar*:
The combined weight of occupants and cargo should never exceed XXX kg or YYY lbs, as otherwise the vehicle may be damaged and unstable driving conditions may result.
-
Determine the combined weight of the driver and passengers that will be riding in your vehicle
-
Subtract the combined weight of the driver and passengers from XXX kilograms or YYY pounds
- The resulting figure equals the available amount of cargo and luggage load capacity.
For example, if the XXX amount equals 1,400 lbs. and there will be five 150-lbs. passengers in your vehicle, the amount of available cargo and luggage load capacity is 650 lbs.: 1,400 lbs. minus 750 lbs. = 650 lbs. - Determine the combined weight of luggage and cargo being loaded on the vehicle. That weight must not exceed the available cargo and luggage load capacity calculated in step 4
- If your vehicle will be towing a trailer, part of the load from your trailer will be transferred to your vehicle. Consult the manual for transporting a trailer to determine how this may reduce the available cargo and luggage load capacity of your vehicle.
Load
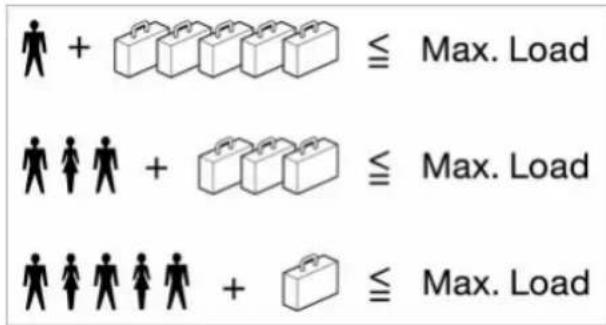
The permitted load is the total of the weight of occupants and cargo/luggage. The greater the weight of occupants, the less cargo/luggage can be transported.
Stowing cargo

Load heavy cargo as far forward and as low as possible, placing it directly behind the bulkhead behind the rear seats
▶ Cover sharp edges and corners
For very heavy cargo when the rear seat is not occupied, secure each safety belt in the opposite buckle.
Securing the load

Use the luggage net* or securing straps to hold down small and lightweight luggage and cargo
Heavy-duty cargo straps* for securing larger and heavier objects are available at your BMW center. Lashing eyes mounted in the corners of the luggage compartment are used to secure this load securing equipment, refer to illustration
Please observe the special instructions supplied with the heavy-duty cargo straps.

Always position and secure the load correctly. If you do not, it can even endanger the passengers during braking or evasive maneuvers.
Never exceed either the approved gross
vehicle weight or either of the approved axle loads, refer to page 200, as excessive loads can pose a safety hazard, and may also place you in violation of freeway safety laws.
You should never transport heavy or hard objects unsecured in the passenger compartment, as they could fly around and even pose a safety hazard to the vehicle's occupants during abrupt braking or evasive maneuvers.
Roof-mounted luggage rack*
Anchorage points
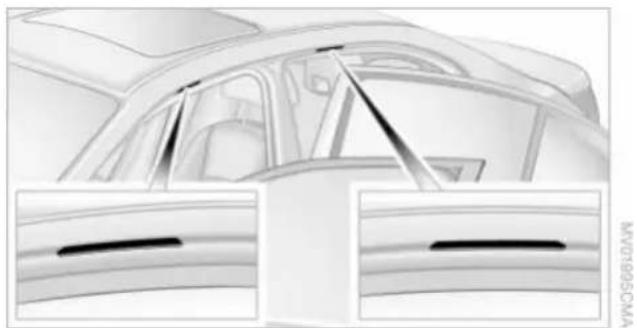
The anchorage points are located within the door openings.
A special rack system is available as an option for your BMW. Please comply with the precautions included with the installation instructions.
Because roof racks raise the vehicle's center of gravity when loaded, they have a major effect on its handling and steering response.
You should therefore always remember not to exceed the approved roof weight, the approved gross vehicle weight or the axle loads when loading the rack.
You can find the specified weights in the Technical data section on page 200.
Make sure that the load is not too heavy, and that it does not extend outward to beyond the limits of the loading surface. Always load the heaviest pieces first – at the bottom. Be sure that adequate clearance is maintained for raising the glass
roof, and that objects do not project into the opening path of the luggage compartment lid.
Secure roof-mounted cargo correctly and securely to prevent it from shifting or being lost during the trip.
Drive smoothly. Avoid sudden acceleration and braking maneuvers. Take corners gently.

Navigation
This section contains various examples that illustrate how the navigation system provides you with reliable guidance to your destination.
Starting navigation system*
Your navigation system can use satellites to ascertain the precise position of your vehicle and guide you reliably to any destination you enter.
Navigation CD/DVD
In your navigation computer, you can use special navigation CDs/DVDs.
To ensure that your vehicle's navigation system has access to the latest highway network information, always load the most recent CD/DVD version.
Navigation CDs/DVDs are available at your BMW center.
Inserting the navigation CD/DVD

- Insert the navigation CD/DVD with the labeled side up
- Allow eight seconds for the system to scan the data from the CD/DVD.
Removing the navigation CD/DVD
In the center console:
- Press the button

The CD/DVD is ejected from the navigation computer
- Remove the CD/DVD.
Opening the navigation
Enter data only when the vehicle is stationary, and always obey the traffic regulations and road signs in the event of any contradiction between traffic and road conditions and the instructions issued by the navigation system. If you do not observe this precaution, you may be in violation of the law, and can endanger vehicle occupants and other road users.
Control Center, for principle details, refer to page 16:
MENU
- Open the start menu by pressing the button
![graph TD A["Communication"] --> B["Climate"] B --> C["Entertainment"] C --> D["Navigation"]](/content/2026/05/1019018/images/08b551223f35b79bfe587e32ca09e8740709ea200ba7d3c9674e6a66a5969a7d.jpg)
- Move the controller to the right to open "Navigation"

- Select "Navigation" and press the controller
Display in assistance window
You can have the route or current position displayed in the assistance window in such a way that it remains visible even if you switch to another menu.
- Move the controller to the right to switch to the assistance window and press the controller

- Select the desired view of the route and press the controller:
"Map, facing north"
"Map, dir. of travel"
"Map, arrow display"
▶ "Current position".
The contents of the assistance window is continually updated as you drive.
Displaying position
Control Center, for principle details, refer to page 16:
- Select "Navigation" and press the controller
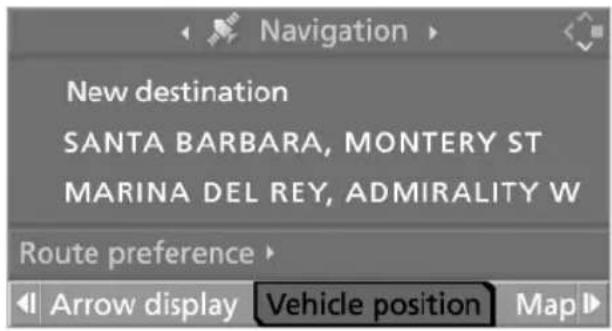
- Select "Vehicle position" and press the controller.

You can call up the current position of your BMW. If the navigation system is unable to identify a town or city, your current map coordinates will appear.
To exit the menu:
Select ← and press the controller.
Destination entry
In entering your destination you can select from among the following options:
▶ Entering a destination manually, see below
▶ Selecting destination via information, refer to page 118
▶ Selecting from among recent destinations, refer to page 119
▶ Selecting destination from address book, refer to page 120.
After selecting your destination you can proceed to start the destination guidance system, refer to page 123.

Enter data only when the vehicle is stationary, and always obey the traffic regulations and road signs in the event of any contradiction between traffic and road conditions and the instructions issued by the navigation system. If you do not observe this precaution, you may be in violation of the law, and can endanger vehicle occupants and other road users.
Entering a destination manually
The system supports the wordmatch principle to make it easier for you to enter the names of streets or towns. This enables input of different spellings and supplements your input automatically so that stored names can be adopted as destinations as quickly as possible, refer to page 122.
Control Center, for principle details, refer to page 16:
- Select "Navigation" and press the controller

MINOTOSUEA
- Select "New destination" and press the controller
Select "Enter address" and press the controller.
Note the following special features:
If you do not enter a street, the system will guide you to the downtown area of a town or city
Depending on the data stored on your navigation CD/DVD, you can also enter the house or building number on some streets
You can skip the entry of country and locality if the current entries are being retained for your new destination
Destination input using the Control Center differs from destination entry using the voice command system.
Select the country of the destination
When the name of a country appears in white letters on the Control Display, this indicates that data for more than one country is stored on the map CD/DVD.

- Select "Country" or the displayed country and press the controller.
A list of available countries appears in the display
- Select the country of destination and press the controller.
Entering city of destination or zip code
In order to be able to start the destination guidance, at least the city of destination or its zip code must be entered.
- Select "City" or the displayed city and press the controller

- To enter the zip code:
Select digits individually and press the controller.
The corresponding city of destination is supplemented.
To enter the city of destination:
Select the first starting letters and press the controller.
A list of all towns/cities starting with this letter appears on the Control Display
- If necessary, enter other letters.
The list gradually grows smaller each time you enter a new letter.
To enter blanks:
Select _ and press the controller.
To delete the last letter:
Select ← and press the controller
- Select the city name from the list and press the controller.
Entering street, house number and intersection
- Select "Street" or the displayed street and press the controller

- For instructions on entry, refer to Entering city of destination.
After the street you can also enter the intersection or the house number.
The procedure for entering intersections is basically the same as that used for streets.
Entering house number, e.g. "194":
- Select "House number" and press the controller
- To enter "194":
Select digits individually and press the controller.
To delete the last letter or digit:
Select and press the controller
- Select the house number shown on the Control Display and press the controller.
If all of the house numbers on a street are not stored on the navigation CD/DVD, a selection list with number ranges is displayed. The option for entering house numbers will not be offered if no house numbers are stored for the selected street on your navigation CD/DVD.
If destination guidance is not to be started immediately, the destination can be accepted as one of the recent destinations, refer to page 119:
Select "Add to destination list" and press the controller.
Starting destination guidance with manual destination entry
Select "Start guidance" and press the controller.
Destination guidance starts immediately.
Map-guided destination selection
Assume that you only know the general position of your destination's street or locality. Then the system offers you maps in which you can use the target cursor to limit the destination and then adopt it into the destination guidance.
Control Center, for principle details, refer to page 16:
- Select "Navigation" and press the controller
- Select "New destination" and press the controller
- Select "Input map" and press the controller.

A map section is displayed on the Control Display around the first destination from the destination list, even if the destination guidance is switched off
- Push the controller in the desired direction to localize your destination. The controller can be moved to the left, right, forward, back and also diagonally.
The destination is detected for scales under 0.5 mls/1 km
- Press the controller to display the selected city of destination and a list of additional menu items:

- Select the desired menu item and press the controller:
▶ ← closes "Input map"
"Start route guidance" switches the destination guidance on
"Show current position" places the position back in the center of the map
"Show destination position" places a selected city of destination in the center of the map
"Proceed" switches back to "Input map".
Selecting destination using information
You can obtain a display of selected destinations for certain cities or countries and adopt them into the destination guidance, e.g. hotels, sights or hospitals.
Control Center, for principle details, refer to page 16:
- Select "Navigation" and press the controller
- Select "New destination" and press the controller
- Select "Information" and press the controller
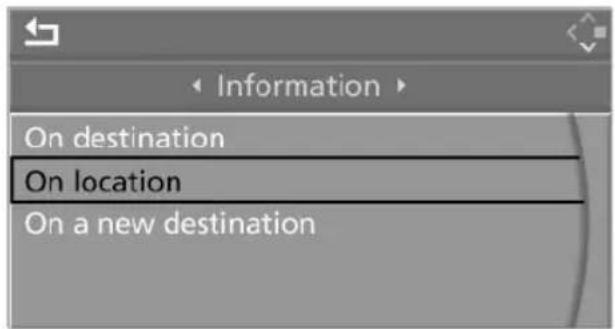
- Select the city or country and press the controller:
▶ "On destination"
▶ "On location"
"On a new destination"
The display for entering a city
appears on the Control Display.
Select the desired city and press the
controller
- Select the desired type of destination, such as "Hotels and restaurants" and press the controller.
The Control Display shows
an alphabetical list of all entries in the selected destination category
for the location, a list sorted by distance with a maximum of ten destinations
-
Select a destination and press the controller
-
Select a menu item:
To adopt the address into the destination list:
Select "Select as destination" and press the controller.
The destination guidance is switched on
To set up a telephone connection: Select "Call" and press the controller.
To exit the menu:
Select and press the controller.
Recent destinations
The system stores the last 20 destinations entered.
Control Center, for principle details, refer to page 16:

MNO0542UEA
→● indicates the current destination.
- Select a destination and press the controller
- The selected destination can be edited:
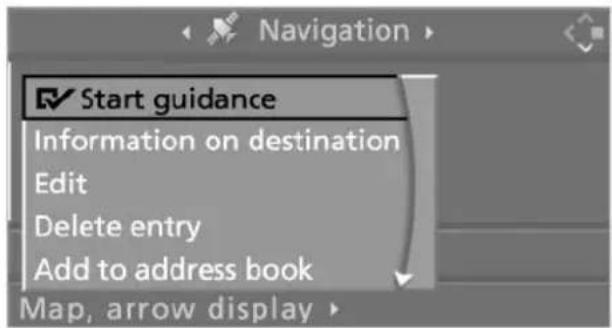
MNO0863UEA
To start the destination guidance: Select "Start guidance" and press the controller. 📁 displayed with the destination guidance switched on
To display information on the destination:
Select "Information on destination"
and press the controller
To edit the entry:
Select "Edit" and press the controller, for operation, refer to Entering city of destination or zip code, page 117
To delete the entry:
Select "Delete entry" and press the controller
To delete all entries:
Select "Delete list" and press the controller; destination guidance is switched off
To store the entry: Select "Add to address book" and press the controller.
Address book
Calling up the address book
Control Center, for principle details, refer to page 16:

Select "Address book" and press the controller.
Storing destinations in the address book
To make it even easier to enter frequently required destinations, the system lets you store approx. 100 destinations in the address book.
Control Center, for principle details, refer to page 16:
- Enter the destination manually, refer to page 116, and press the controller

- Select "Add to address book" and press the controller.
The entry is assigned to a name that can be changed. For operation, refer to Entering a destination manually, page 116
- Select "Store address" and press the controller. The entry is stored in the address book.
Selecting destinations from the address book
Control Center, for principle details, refer to page 16:
- Select "Address book" and press the controller.

The stored entries are listed on the Control Display
- Select the entry and press the controller.
To start the destination guidance: Select "Start guidance" and press the controller.
Editing destinations from the address book
You can change the name of an entry.
Control Center, for principle details, refer to page 16:
- Select "Address book" and press the controller
- Select the entry and press the controller
- Select "Edit address" and press the controller.
The given name can be changed. For operation, refer to Entering a destination manually, page 116.
Deleting individual destinations from the address book
Control Center, for principle details, refer to page 16:
- Select "Address book" and press the controller
- Select the entry and press the controller
- Select "Delete address" and press the controller.
Deleting all destinations from the address book
Control Center, for principle details, refer to page 16:
- Open the menu
- Select "Vehicle settings" and press the controller
- Select "Delete data" and press the controller
- Select "Delete address book" and press the controller
- Select "Yes" and press the controller.
Route selection
You can specify your route more precisely by choosing certain route criteria.
Changing route criteria
Control Center, for principle details, refer to page 16:
- Select "Navigation" and press the controller
- Select "Route preference" and press the controller.

The various possibilities are listed on the Control Display

MINOTOCUEA
- Select the route criteria and press the controller:
▷ "Fastest route"
Shortest time using combination of smallest possible distance and sections where fast driving is possible
▶ "Shortest route"
Shortest distance without consideration of the time
"Avoid freeways / tolls"
Freeways are avoided where possible
▶ "With freeways"
Freeways and major traffic arteries are given priority
- If necessary, select an additional route criterion and press the controller:
"Avoid tollroads"
Tollroads are avoided where possible
"Avoid ferries"
Ferries are avoided where possible
▷ "Dynamic route"
The route is planned around or through traffic obstructions.
R displays the selected route criteria.
To close the list:
Select and press the controller.
The navigation system relies on specific rules to determine your route. These vary according to the different kinds of roads stored on the map CD/DVD. As a result, the routes recommended by the navigation system may not always be the same ones that you would choose based on personal experience.
You can change the selected route as often as you like, both when entering your destination and at any time while the system is guiding you to it – the system revises its travel recommendations accordingly.
Wordmatch principle
The system supports the wordmatch principle to make it easier for you to enter the names of streets or towns. The system runs ongoing checks, comparing your destination entries with the data stored on the navigation CD/DVD as the basis for instant response. The user benefits include:
Names of specific locations can also vary from the official versions provided that the spelling of the entry corresponds to a standard form used in another country
Example:
Instead of 'München', you can also enter the English spelling 'Munich' or the Italian spelling 'Monaco'
When you are entering the names of towns and streets the system will complete them automatically as soon as enough letters are available to ensure unambiguous identification
The system only accepts name entries beginning with letters that are stored on the navigation CD/DVD. The system will not accept nonexistent names and addresses.
Destination guidance
Starting the destination guidance
Control Center, for principle details, refer to page 16:
- Select "Navigation" and press the controller

- Select a destination and press the controller

- Select "Start guidance" and press the controller. R displayed with the destination guidance switched on.
→● indicates the current destination.
After the route has been calculated, destination guidance is indicated by arrows or a route map on the Control Display.
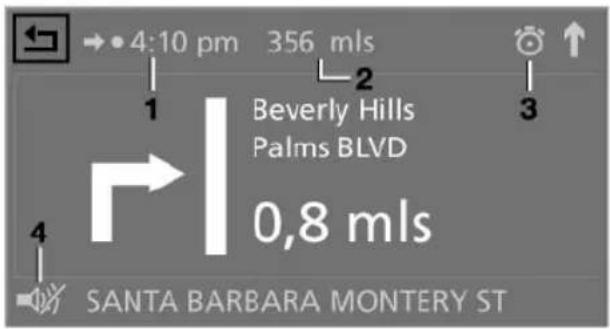
MINO1067UEA
1 Time of arrival
2 Distance to destination
3 Route criteria
4 Voice instructions switched on/off
During destination guidance, you can operate other equipment using the Control Center at any time. You are informed of a required change in direction by means of spoken announcements in good time prior to every intersection.
To exit the menu: Select and press the controller.
Displaying route
You have the option of displaying various views of the route.
Switching to directional arrow mode
To switch to directional arrow mode:
- Select "Navigation" and press the controller

MND104UEA
- Select "Map, arrow display" and press the controller.
Selecting display of route map
You can also select a map showing your travel route while the system is guiding you to your destination.
- Select "Navigation" and press the controller
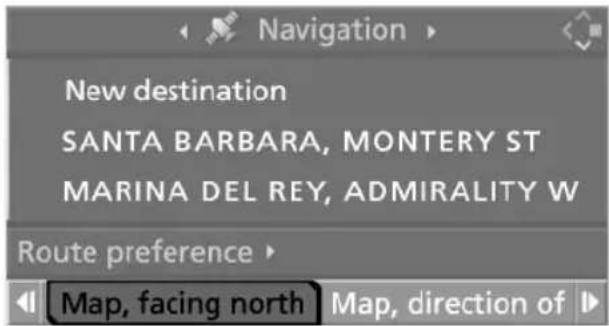
- Select "Map, facing north" and press the controller.
Changing scale
Turn the controller.
The map scale appears on the Control Display.
Altering display direction
At scales of less than 300 miles/500 km, you enjoy the option of deciding whether to orient the map to north or toward your current direction of travel. From 300 miles/500 km, the map always points toward north.
Select "Map, facing north" or "Map, direction of travel" and press the controller.
Displaying towns and streets of the route
You can have streets and towns on your route displayed whenever the destination guidance is active.
The distances remaining to be traveled on each individual road, directional arrows and traffic jam reports are also displayed.
Control Center, for principle details, refer to page 16:

MoodstueA
Select "Route list" and press the controller. If the system has not yet completely defined the travel route, "..." will appear in the list.
To exit the menu:
Select and press the controller.
Destination guidance through voice instructions
Switching voice instructions on/off
The setting is made in dependence on a specific key.
Control Center, for principle details, refer to page 16:
- Open the menu
- Select "Display settings" and press the controller
- Select "Languages" and press the controller

83061010N/A
- Select "Navigation voice instructions on" and press the controller. ▼ displayed with the voice instructions switched on
or press

or press

on the steering wheel for a longer period.
Programming button functions, refer to page 44.
Repeating an instruction
To repeat the last voice instruction:

or press

on the steering wheel briefly.
Programming button functions, refer to page 44.
Suppressing voice instructions
To prevent the navigation system from interrupting other audio sources, such as a news program or traffic bulletin, you can deactivate the voice instructions.
During an instruction, press

or press

on the steering wheel briefly.
Programming button functions, refer to page 44.
Adjusting volume
You can adjust the volume of the voice instructions for each specific key:
- To repeat the last voice instruction, if required:

or press

on the steering wheel briefly.
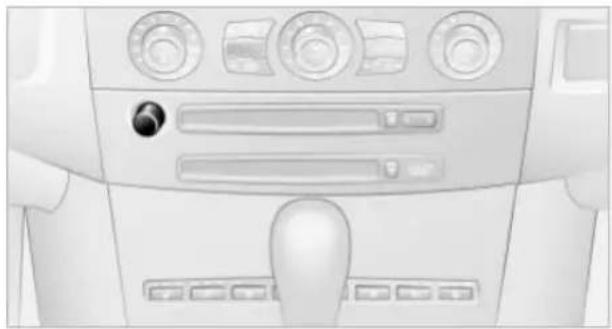
NVOZI60MA
- Turn the button during an instruction to select the desired volume.
The navigation system's voice guidance will continue to issue instructions at this volume level, even if the radio is set to minimum volume.
Blocking sections of a route
During destination guidance you can revise the navigation system's route recommendations to avoid particular stretches of road. Enter the number of miles/kilometers that you want to travel before returning to the original route.
Control Center, for principle details, refer to page 16:

MODOFTUEA
-
Select "New route" and press the controller
-
Turn the controller to enter the desired number of miles/kilometers and press the controller.
To exit from the menu without changing the route:
Select and press the controller
- "Calculate" is used to recalculate the route.
Traffic information
Calling up traffic information
Control Center, for principle details, refer to page 16:

- Select "Traffic Info" and press the controller.
A list of the current traffic obstructions appears on the Control Display - If appropriate, select an entry and press the controller.
Detailed information on the traffic obstruction is listed.
To exit the menu:
Select and press the controller.
Bypass traffic congestion
- Select "Detour" and press the controller
- Select "Yes" and press the controller.
The navigation system determines a new route that bypasses the traffic congestion and then returns to the original route.
Terminating/continuing destination guidance
Control Center, for principle details, refer to page 16:
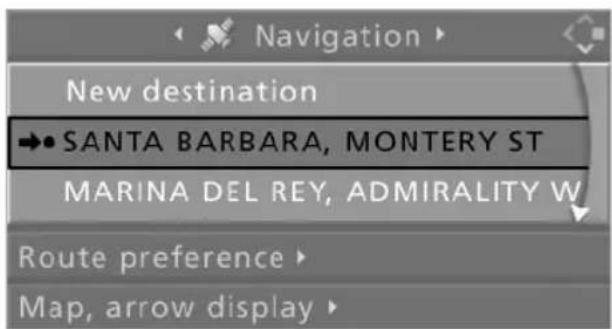
→● indicates the current destination.
- Select the current destination and press the controller
- Select "Start guidance" and press the controller. □s displayed when the destination guidance is terminated.
The system suspends active destination guidance, including voice instructions, until reactivated.
When you park the vehicle before reaching the entered destination, upon restarting you will see the question "Continue guidance to dest.?" "Yes" switches the destination guidance on again.
This menu item cannot be selected using the voice command system.
What to do if ...
What to do if ...
you request the current position of your vehicle, but do not receive a precise display?
The system is unable to receive enough GPS signals at your current position owing to obstructions, your position is not yet available on your navigation CD/DVD, or the system is in the process of calculating your position. As a rule, portable communications GSM/GPS reception is guaranteed under a clear sky
the destination guidance does not adopt a destination?
The data of the destination is not stored on the navigation CD/DVD that is loaded. Select a destination that is as close as possible to the original
the destination guidance does not adopt an address without the street name?
On the navigation CD/DVD, no downtown area can be determined for the city or town entered. Enter any street, or a destination such as the railway station etc., then start the destination guidance
you want to enter a destination for the destination guidance system, but it is not possible to select the letters for your desired entry?
The destination data is not recorded on the navigation CD/DVD that is loaded. In this case, the system will not offer you any letters to choose from. Select a destination that is as close as possible to the original
the system stops furnishing directions on which way to turn as you approach intersections?
You are driving in an area that has not yet been completely recorded on the navigation CD/DVD. Instead of an arrow indicating a turn, you will see an arrow which indicates the general direction of
your planned route. Or you have left the recommended route and the system requires a few seconds to calculate a new recommended route
the battery has been disconnected? It will take approx. 15 minutes for the system to resume operation.

On/off, tone
Depending on the equipment options you have chosen, the following audio sources are available:
Radio Business
CD player
CD changer.
The following section summarizes the common controls and setting options for the audio sources. Thereafter, the individual audio sources are described in detail.
Controls
The audio sources can be operated using:
The center console
The Control Center
▶ Buttons on the steering wheel, refer to page 11.
Operation using the center console
The layout of the buttons can vary depending on your vehicle's equipment.
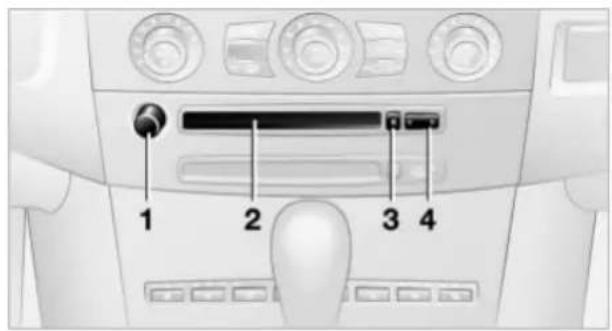
1 To operate audio sources
Press: switching on/off.
The system selects the last audio source used, radio or CD
▶ Turn: adjusting volume
2 Drive for audio CD
3 Eject CD
4 Station scan/track search
Change the station
▶ Select music track for CD
Operation using the Control Center
Control Center, for principle details, refer to page 16:
MENU
- Open the start menu by pressing the button
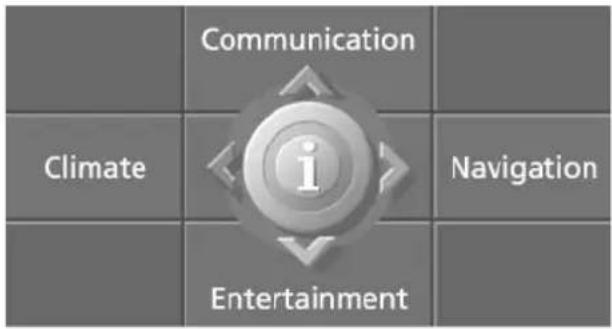
- Move the controller backwards to open "Entertainment".

"FM" and "AM"
Selecting waveband, storing and calling up stations
"WB"
Opening Weather Band station
"SAT"
Selecting satellite radio
"CD"
Selecting CD player or CD changer
"Set"
Updating stations with best reception, storing stations, setting the tone, playing stations or tracks.
Operating temperatures

The system is configured for operating temperatures of 5°F/-15°C to
140°F/+60°C. Outside this temperature range, malfunctions can occur.
Care instructions
You can find everything you need to know on this topic by consulting the separate Caring for your vehicle brochure.
Switching on/off
Press button 1, refer to page 130.
Adjusting the volume
Adjusting the volume for audio sources
The setting is made in dependence on a specific key.
Turn button 1 until the desired volume has been reached.
Tone control
You can change the following tone settings in dependence on a specific key:
Treble
Bass
Balance: Right/left volume balance
Fader:
Front/rear volume balance
▶ Speed volume: Raises the volume with increasing speed
LOGIC7 spatial sound*: Improvement in spatial acoustics in all frequency ranges
Equalizer*: Setting individual frequency ranges to include spatial acoustics
▷ Reset:
Resets the tone settings to their standard default settings.
Changing tone
Control Center, for principle details, refer to page 16:
MENU
- Open the start menu by pressing the button

- Open the menu by pressing the controller

- Select "Entertainment settings" and press the controller
- Select "Audio" and press the controller. The tone settings can also be selected if you have opened "Entertainment": Select "Set" and then "Audio" and press the controller each time.
MINOO536UEA
MND0951UEB
Treble and bass
- Select "Treble / Bass" and press the controller
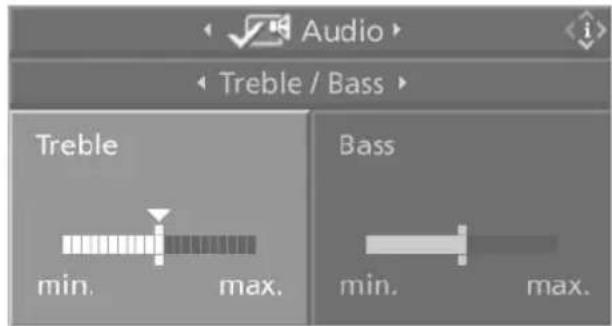
- Move the controller to the left or right to select "Treble" or "Bass"
- Turn the controller. The adjustment is adopted; the field can be changed.
Balance and fader
- Select "Balance / Fader" and press the controller
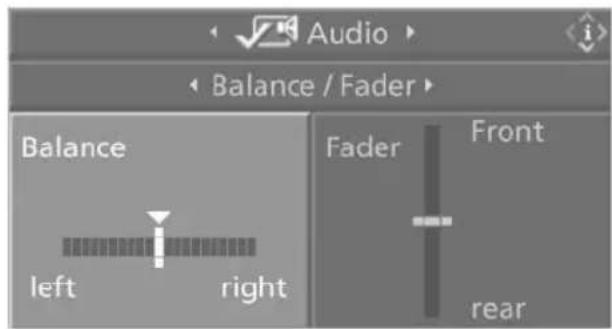
- Move the controller to the left or right to select "Balance" or "Fader"
- Turn the controller. The adjustment is adopted; the field can be changed.
Speed-dependent volume
- Select "Speed volume" and press the controller

- Turn the controller to make the adjustment
- Press the controller. The adjustment is adopted; the field can be changed.
Spatial sound effect Professional LOGIC7*
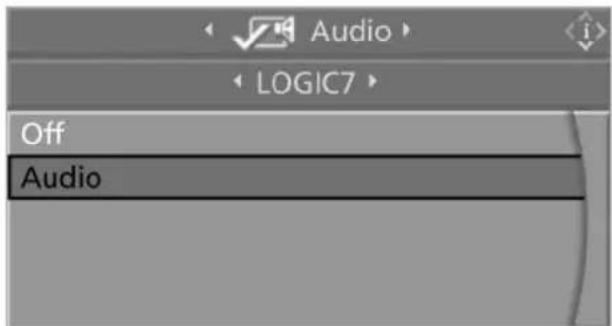
- Select "LOGIC7" and press the controller
- Select "Audio" and press the controller. LOGIC7 spatial sound is switched on.
To switch off LOGIC7 spatial sound: Select "Off" and press the controller.
LOGIC7 and the LOGIC7 logo are registered trade marks of Lexicon, Inc., a company of the Harman International Group.
Equalizer*
- Select "Equalizer" and press the controller

- Move the controller to the left or right to select the desired frequency range
- Turn the controller. The adjustment is adopted; the field can be changed.
Resetting the tone settings
You can reset all tone settings except "Speed volume" to the standard default settings.
- Open the i menu
- Select "Entertainment settings" and press the controller
- Select "Audio" and press the controller

- Select "Reset" and press the controller.
MINO1021UEB
Radio
Your radio provides reception of the FM and AM wavebands.
Listening to the radio
To switch on the radio:

Press the button.
Control Center, for principle details, refer to page 16:
MENU
- Open the start menu by pressing the button
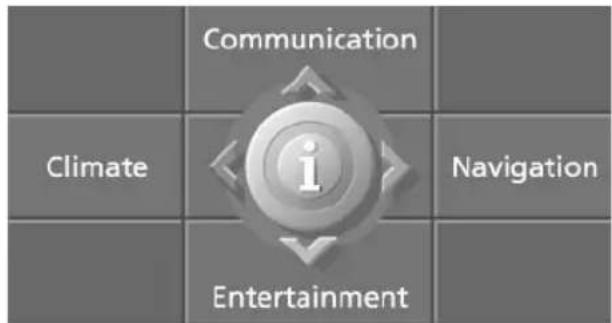
- Move the controller backwards to open "Entertainment"
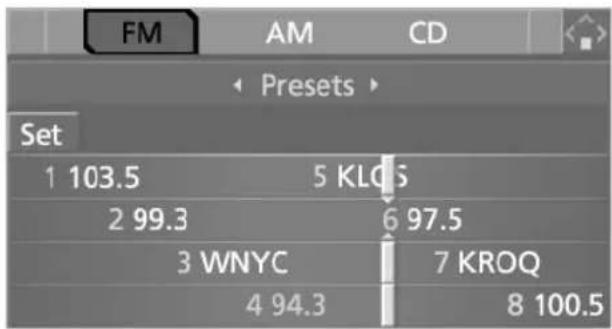
MINOO57OUERA
- Select "FM" or "AM" and press the controller. Stations are shown on the Control Display on the basis of various selection criteria, e.g. "Presets"

MODO5J2UEA
- Change stations by turning the controller.
If no station is displayed, update the stations with the best reception, refer to page 135.
You can choose from the following selection criteria:
Autostore: The six strongest stations, refer to page 135
"Presets": Twelve stations you have previously stored, refer to page 136.
To switch between the different selection criteria of stations:
- Move the controller forwards to change the field

- Select the selection criterion and press the controller.
Changing stations using buttons in the center console

Press to the desired direction briefly. The system switches to the next station.
Scanning and selecting stations
The scan search feature automatically plays a brief sample from each station in the selected waveband.
Control Center, for principle details, refer to page 16:
- Select "FM" or "AM" and press the controller
- Press the controller to display a list of additional menu items

- Select "Scan" and press the controller. The scan search starts
- Select a station: Press the controller again, select
"Scan" and press the controller.
This cancels the scan search, and the radio remains on the current station.
Buttons in the center console:
- To start scan:

Press for longer.
The scan search starts.
- To select a station:

Press.
Manual station selection
You look for a certain frequency.
Control Center, for principle details, refer to page 16:
- Select "FM" or "AM" and press the controller
- Move the controller forwards to change the field
- Select "Manual" and press the controller
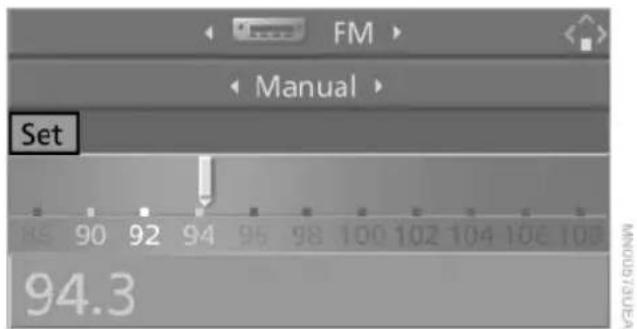
- Turn the controller until the desired frequency is selected.
Updating the stations with the best reception
If you are on a longer journey and leave the transmission range of the stations originally set, you can update the list of stations with the best reception from the AM or FM waveband.
Control Center, for principle details, refer to page 16:
- Select "FM" or "AM" and press the controller
- Move the controller forwards to change the field
- Select "Autostore" of the desired wave-band and press the controller
- Press the controller to display a list of additional menu items

- Select "Autostore" and press the controller.
The list of stations with the best reception is updated; the frequencies of the stations are displayed.
Manual tuning
You can listen to stations that are received in addition to those displayed.
Control Center, for principle details, refer to page 16:
- Select "FM" or "AM" and press the controller
- Move the controller forwards to change fields
- Select "Manual" and press the controller
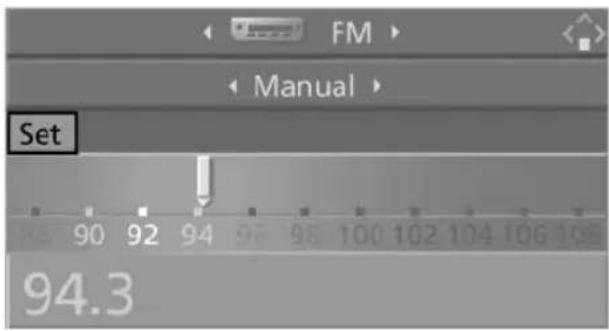
Buttons in the center console:
- To start scan:

Maintain pressure on the button for several seconds.
The scan mode begins with the currently selected frequency.
The system plays a brief sample from each radio station.
To stop the station scan at the desired frequency or station:

Press button.
Storing stations
The setting is made in dependence on a specific key.
Control Center, for principle details, refer to page 16:
- Select "FM" or "AM" and press the controller
- Move the controller forwards to change the field
-
Select the selection criterion and press the controller
▷ "Manual"
Autostore of the waveband -
Select the desired station
- Press the controller to display a list of additional menu items

- Select "Store" and press the controller. "Presets" is displayed
- Turn the controller until the desired memory location is selected.
The number of the memory location appears beside the name or frequency of the station.
Press the controller to store the station.
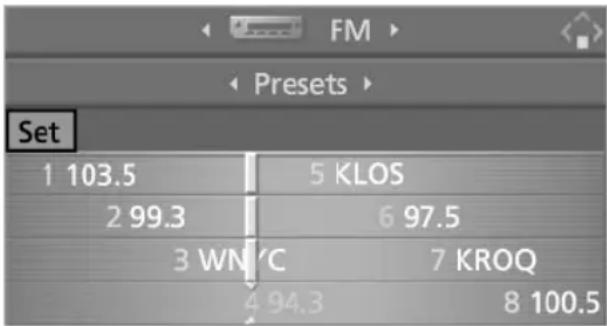
The previous selection criterion is displayed again after a short time.
Radio Data System RDS
The Radio Data System RDS broadcasts additional information in the FM waveband. RDS stations have the following properties:
In the case of broadcasting networks that transmit over a number of frequencies, there is an automatic switch to the frequency with the best reception quality
If the reception conditions are good, the station names are shown on the Control Display. If the reception is weak or disrupted, it can take some time before the station names appear.
Weather Band*
Weather Radio is a service of the National Oceanic and Atmospheric Administration – NOAA – of the U.S. Department of Commerce. Weather messages are repeated every four to six minutes and are routinely revised every one to three hours, or more frequently if needed. Most of the stations operate 24 hours daily. During severe weather, National Weather Service forecasters can interrupt the routine weather broadcasts and substitute special warning messages. If you have a question concerning NOAA Weather Radio, please contact your nearest National Weather Service Office, or write to National Weather Service – Attn: W/OM11–, National Oceanic and Atmospheric Administration, 1325 East-West Highway Silver Spring, MD. 20910.
Selecting Weather Band
Control Center, for principle details, refer to page 16:
- Select "WB" and press the controller

- Select the Weather Band station and press the controller.
The Weather Band station may not be available in some regions.
Satellite radio*
You can receive up to 100 different channels with high tone quality.
You can listen to one of these channels free of charge at any time to obtain a first impression. The channel is marked with R.
To listen to additional channels of your choice, you must have these channels activated.

You may experience signal drops and muting events related to this new
technology.
Activating channels
Control Center, for principle details, refer to page 16:
MENU
- Open the start menu by pressing the button

- Move the controller backwards to open "Entertainment"

- Select "SAT" and press the controller

MODOGSTUEA
- To enable, select "Call Sirius" and press the controller
- Turn the ignition key to position 0 and wait at least 5 minutes.
Selecting and storing channel

MODOSEUEA
- Select "SAT" and press the controller. Channels are shown on the Control Display on the basis of various criteria
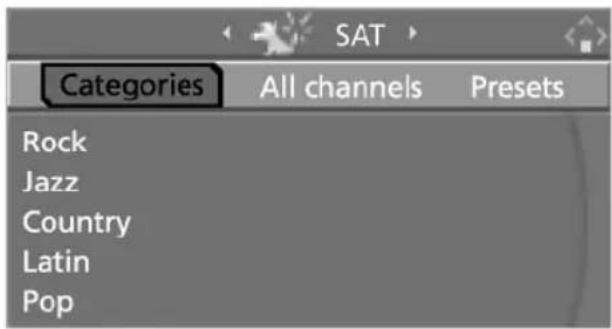
NOTICEA
- Select the menu item and press the controller:
"Presets": Up to twelve channels you have stored
▶ "All channels"
"Categories": All channels by category, e.g. news, jazz

- If "Categories" was selected: Select the desired category and press the controller. The channels of this category are displayed
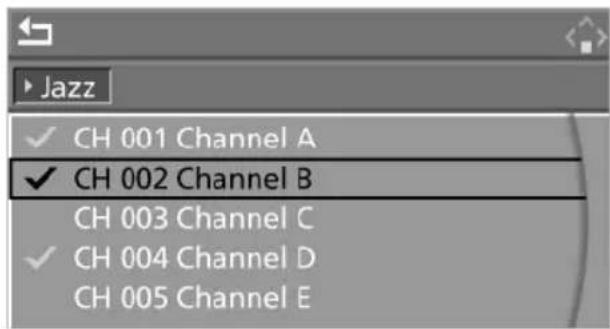
- Select a channel marked with this symbol
- Press the controller to display a list of additional menu items

- Select "Play" and press the controller.
Additional information
The name of the channel and additional information on the current track are displayed, e.g. the name of the artist.
NOTI:UEA

NOZZUEN
1 Artist
2 Track
3 Album
Storing channel
- Select desired channel
- Press the controller to display a list of additional menu items
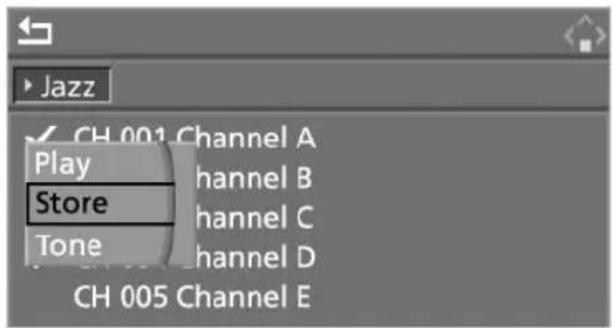
NOTICEA
- Select "Store" and press the controller. "Presets" is displayed

NOTICEVA
- Turn the controller to select a memory location and press the controller.
The channel is stored; the previous criterion appears after a short time.
Changing channel using buttons in the center console

Press to the desired direction briefly.
The system switches to the next channel.
Notes
When there is a signal blockage or the transmission is suspended momentarily for more than 4 seconds, a message appears on the Control Display.

Service may be interrupted or unavailable for specific reasons such as environmental or topographic conditions and others that Satellite Radio cannot directly control.
Signal may not be available under tunnels, in parking garages, next to tall buildings, nearby trees with dense foliage, nearby mountains or other possible strong sources of radio interference.
Service should resume normally after the source of signal unavailability has been cleared.
CD Compact Disc
Listening to CDs

Insert the CD.
Playback starts automatically.
Hold CDs by the edges; do not touch the reflecting CD memory surface.
To start playback when there is already a CD in the drive:
Control Center, for principle details, refer to page 16:
MENU
- Open the start menu by pressing the button

- Move the controller backwards to open "Entertainment"
- Select "CD" and press the controller
- On vehicles with a CD changer, select "CD" and press the controller.
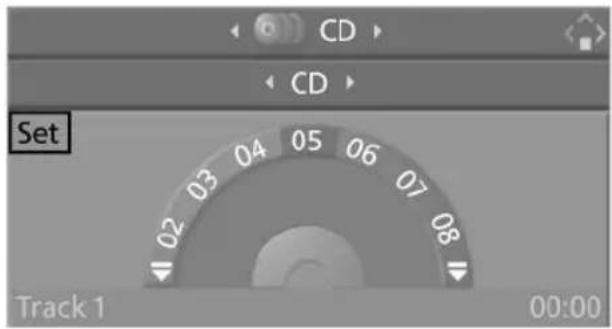
MND1024UEB
To eject the CD:

Press the button in the center console.
The CD/DVD emerges slightly from the drive.
Selecting a track
Buttons in the center console:
Select the direction:

Press the button repeatedly, continuing until you reach the desired track.
The CD will start play at the track selected. The track is displayed on the Control Display.
Control Center, for principle details, refer to page 16:

NOTIFICATION
Select a track by turning the controller.
Repeating a track
Control Center, for principle details, refer to page 16:

- Select "Set" and press the controller to display a list of additional menu items
- Select "Repeat" and press the controller.
The selected track on the CD is repeated.
To cancel the repetition:
Press the controller, select "Repeat" and press the controller
▶ Select another function using the Control Center.
Sampling and selecting tracks, scan
The system automatically plays a brief sample from each of the tracks on the CD, one after the other.
Control Center, for principle details, refer to page 16:
- Select "Set" and press the controller to display a list of additional menu items
- Select "Scan" and press the controller
- Select track:
Press the controller again, select "Scan" and press the controller.
The Scan function is interrupted and the track continues playing from the point at which it was interrupted.
Random play sequence
The music tracks on the CD are played in a random sequence.
Control Center, for principle details, refer to page 16:
- Select "Set" and press the controller to display a list of additional menu items
- Select "Random" and press the controller.
To cancel the random mode:
Press the controller, select "Random" and press the controller
▶ Select another function using the Control Center.
Fast forward/reverse
Buttons in the center console:
- Select the direction:

Press and hold the button. The tracks can be heard, but the tone is distorted
- To interrupt the fast forward/reverse function, release the button.
The CD will start play at the point selected.
The track is displayed on the Control Display, refer to page 18.
Malfunctions

The BMW CD player is a Class 1 laser product. Do not operate the system if the cover is damaged, otherwise severe eye damage can result.
Always refer repair and maintenance operations to qualified technicians.
With self-recorded CDs, labels applied later can become detached during play-back due to the development of heat and cause irreparable damage to the device.

CDs with copy protection devices cannot be played on your CD player or only with certain restrictions. These CDs differ from the CD Audio Standard Red Book, on the basis of which all CD players and changers are designed. In this case, please contact the CD dealer or manufacturer.
You may experience playback problems, such as skips, when using CDs that you have copied at home.
If the display fails to detect a CD that you have loaded in the drive, check to ensure that the CD has been inserted correctly and inspect it for signs of defects.
High levels of humidity inside the system can condense on the laser's scan lens and temporarily prevent it from reading the CD.
CD changer*
CD magazine
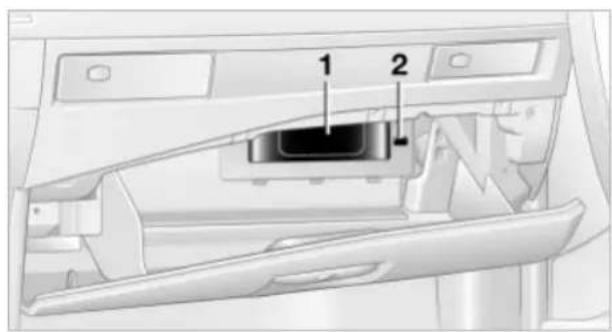
The BMW CD changer for six CDs is installed in the glove compartment.
Removing the CD magazine
To load or remove CDs from the CD magazine you must first remove it from the CD changer:
- Press button 2
- The CD magazine 1 is ejected and can be removed.
Loading/removing CDs from the CD magazine

When loading or removing CDs, remember to grasp them on the edge, taking care to avoid touching the reflecting CD memory surface.
Loading: Insert the CD in a CD slot with the desired number with the label side on top.
Removing CDs: Pull out the desired drawer, refer to arrow, and remove the corresponding CD.
Inserting the CD magazine
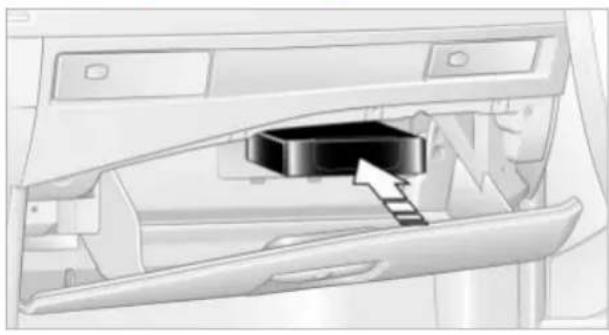
NVO2541CMMA
Ensure that the arrow symbol is pointing upwards toward the CD changer and slide the magazine all the way in.
The CD changer automatically reads in the loaded CDs and is then ready for operation.
Listening to CDs
- Insert the CD magazine
Control Center, for principle details, refer to page 16:
MENU
- Open the start menu by pressing the button
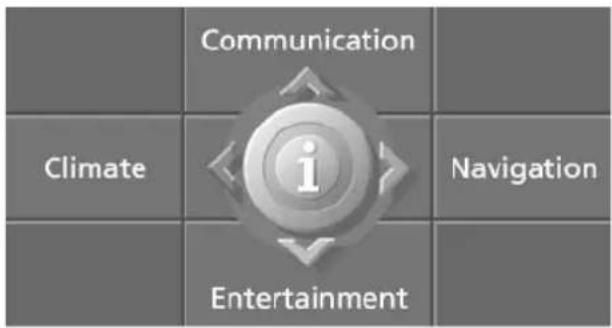
VENDERSOON
- Move the controller backwards to open "Entertainment"
- Select "CD" and press the controller. The CD magazine's load status is indicated on the Control Display
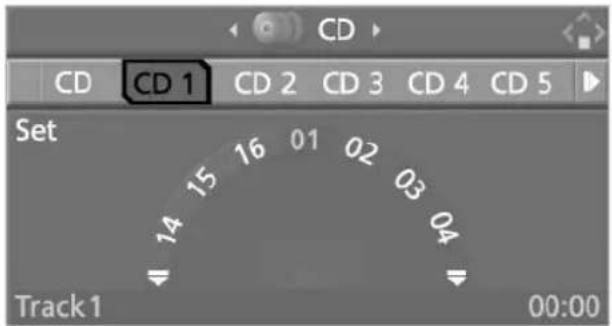
- Select the CD and press the controller. The system will continue play at the point on the CD at which play was interrupted. At the end of the last track, the next CD will be selected.
If new CDs have been placed in the CD magazine, playback starts with the lowest CD, e.g. CD 1, track 1.
Selecting a track
Buttons in the center console:
Select the direction:

Press the button repeatedly, continuing until you reach the desired track on the current CD.
The CD will start play at the track selected. The track is displayed on the Control Display.
Control Center, for principle details, refer to page 16:
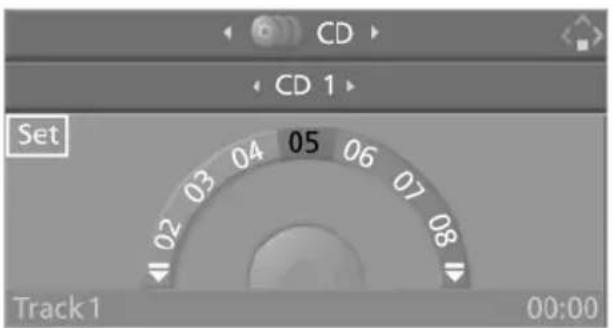
Select a track by turning the controller.
Repeating a track
Control Center, for principle details, refer to page 16:

MINTO2UEB
- Select "Set" and press the controller to display a list of additional menu items
- Select "Repeat" and press the controller.
The current track on the CD is repeated.
To cancel the repetition:
Press the controller, select "Repeat" and press the controller
▶ Select another function using the Control Center.
Sampling and selecting tracks, scan
The system automatically plays a brief sample from each of the tracks on the current CD, one after the other.
Control Center, for principle details, refer to page 16:
- Select "Set" and press the controller to display a list of additional menu items
- Select "Scan" and press the controller
- Select track:
Press the controller again, select "Scan" and press the controller.
The Scan function is interrupted and the track continues playing from the point at which it was interrupted.
Random play sequence
In this mode, the music tracks on the current CD are played in a random sequence.
Control Center, for principle details, refer to page 16:
- Select "Set" and press the controller to display a list of additional menu items
- Select "Random" and press the controller.
To cancel the random mode:
Press the controller, select "Random" and press the controller
▶ Select another function using the Control Center.
Fast forward/reverse
Buttons in the center console:
- Select the direction:

Press and hold the button. The tracks can be heard, but the tone is distorted
- To interrupt the fast forward/reverse function, release the button. The system will continue play at the point on the CD at which the button was released.
The track is displayed on the Control Display, refer to page 18.
Malfunctions
The BMW CD changer is a Class 1 laser product. Do not operate the system if the cover is damaged, otherwise severe eye damage can result.
Always refer repair and maintenance operations to qualified technicians.
With self-recorded CDs, labels applied later can become detached during play-back due to the development of heat and cause irreparable damage to the device.
CDs with copy protection devices cannot be played on your CD changer or only with certain restrictions. These CDs differ from the CD Audio Standard Red Book, on the basis of which all CD players and changers are designed. In this case, please contact the CD dealer or manufacturer.
You may experience playback problems, such as skips, when using CDs that you have copied at home.
If the display fails to detect a CD that you have loaded in the magazine, check to ensure that the CD has been inserted correctly and inspect it for signs of defects.
High levels of humidity inside the system can condense on the laser's scan lens and temporarily prevent it from reading the CD.

Communications
This chapter summarizes how you operate your BMW portable phone via the Control Center or voice control and how you use BMW Assist or TeleService.
Telephoning
Safety notice
For your own safety
A car phone makes life more convenient in many ways, and can even save lives in an emergency. While you should consult your portable phone's separate Owner's Manual for a detailed description of safety precautions and information, we request that you direct your particular attention to the following:
Adjustments
To avoid posing a danger to yourself and other road users, never adjust the system settings unless your vehicle is completely stationary.
Using the phone in your vehicle
Using a portable phone to make and receive calls while driving is now illegal in virtually every country in the world. Always use your hands-free unit, or stop your vehicle in an area where you will not pose a safety hazard to other road users.
Vehicles and portable phones
Do not use your phone from within a garage, or near an open hood. The air in these areas could contain fuel vapors, and the portable phone might generate sparks that could result in burns. This same precaution applies to open luggage compartment lids on vehicles equipped for operation using natural gas or hydrogen, and to all vehicles with luggage compartment-mounted batteries.
Antenna
When using the phone, ensure that all persons in the area are at least 20 in/50 cm from the antenna. Never use your BMW portable phone if the antenna is damaged. Contact between your skin and a damaged antenna can result in minor
burns.
If the antenna is damaged, have it replaced immediately.
Special environmental conditions
Always switch off your BMW portable phone in areas where blasting work is being conducted with explosives. The phone signals could potentially act as a high-frequency transmitter and set off explosions.
Always switch off your BMW portable phone in areas where an increased explosion danger is present. This category includes filling stations along with fuel and chemical storage depots, etc., and all areas in which the air can contain fuel, chemicals or metal particles. Under these conditions, your BMW portable phone could conceivably generate sparks that could lead to a fire or explosion. Always observe all legal regulations governing the use of portable phones in the vicinity of filling stations, chemical factories and other areas where an explosion potential exists. Never use the BMW portable phone in aircraft; do not use this portable phone in hospitals, care centers or at other locations where medical equipment may be in operation, such as accident sites, etc. Your service provider can furnish you with more detailed information on legal regulations governing the use of your phone.
Medical equipment
Portable phones can generate interference capable of preventing hearing aids and cardiac pacemakers from operating correctly. If you or any occupant of the vehicle will be using such equipment, consult a physician or the manufacturer of the equipment to determine whether it is adequately shielded against high-frequency energy.
Batteries

Never attempt to disassemble your BMW portable phone or its battery.
Use only approved battery types – the wrong battery can destroy your portable phone.
To avoid possible short circuits, after removing a battery you should never allow it to come into contact with metallic surfaces of any kind.
Disposing of used batteries

Return used batteries to a recycling collection point or to your BMW cen-
ter.
Care instructions
You can find useful information on caring for your portable phone in the separate portable phone Owner's Manual and in the separate Caring for your vehicle brochure.
Controls
You can operate the BMW portable phone* using:
The steering wheel, refer to page 11
The Control Center, refer to page 152
The voice control, refer to page 157.
You can use the car phone via the hands-free unit for BMW Assist calls.
The Control Display indicates which telephone you are using to establish a connection.
Telephoning with the car phone: BMW Assist calls
You can use the car phone via the hands-free unit for BMW Assist calls.

The car phone must have been enabled prior to initial use. In this connection, please contact your BMW center.
Starting the BMW portable phone*
Before starting off, place the BMW portable phone in the cradle. If you are making a call using the car phone, you can only use the BMW portable phone once you have terminated this call.
Inserting the portable phone

MVO2825CMVA
- Press button 1
- If necessary, remove the protective cap from the antenna connector on the rear of the portable phone
- Insert the portable phone with the antenna fully retracted
- Press the cradle downwards.
Removing the portable phone
Press button 1.

For information on operating your portable phone, please consult the
separate Owner's Manual.
Hands-free unit

MAYOBA24CHA
The hands-free microphones are located on the headlining.
The hands-free unit is activated whenever you establish or receive a call using:
The buttons on the steering wheel
The Control Center
Voice control.
To continue a call on the portable phone using hands-free unit:
Insert the portable phone with the lid opened in the cradle.
To continue a call on the hands-free unit using the portable phone:
Take the portable phone with the lid opened out of the cradle.
The call is ended as soon as you take the phone from the cradle with a closed lid.
Volume adjustment
You can adjust the volume for the hands-free unit for each individual key:
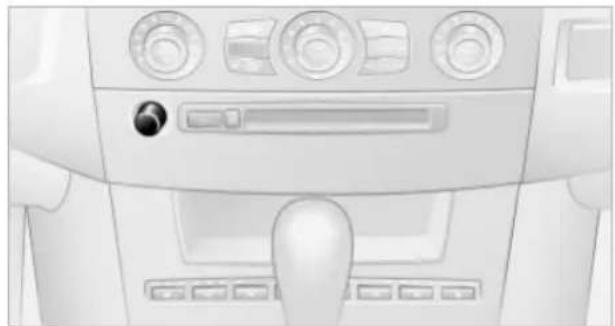
Turn the button during a call to select the desired volume.
The hands-free unit will remain at this volume level, even if the other audio sources are set to minimum volume.
Operation using the Control Center
You can use the following functions via the Control Center:
Enter unlock code with portable phone engaged
▷ Dial phone number
▷ Phone book with portable phone engaged
Top-8 with portable phone engaged
▷ Repeat dialing
▶ Display accepted calls
▶ Display missed calls
▷ Text messages/SMS with portable phone engaged.
Control Center, for principle details, refer to page 16:
- Turn the ignition key to position 2
MENU
- Open the start menu by pressing the button
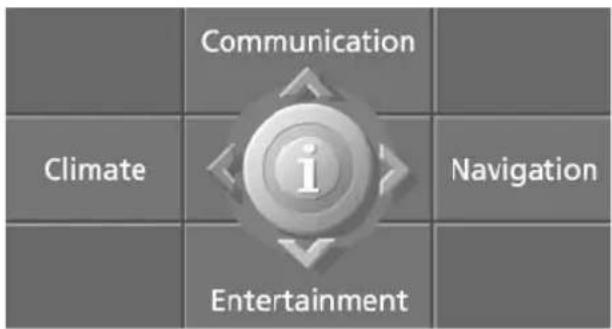
- Move the controller forwards to open "Communication".
Entering unlock code
If, after placing the BMW portable phone in the cradle, you are requested by a message from the Control Display to enter the unlock code:

- Select "Phone" and press the controller
- To enter the unlock code: select digits individually and press the controller. Each digit of the unlock code is displayed on the Control Display with an asterisk.
To delete the last digit:
Turn the controller to the right to select
← and press the controller

- Select "Confirm unlock code" and press the controller.
Receiving calls
If you have the phone number of the caller stored in the phone book and the phone number is transmitted, the name of the entry is displayed.
Accepting a call

Select "Accept" and press the controller.
Rejecting a call
Select "Reject" and press the controller. The caller is diverted to your mailbox if this has been activated.
Making a call
Dialing a phone number
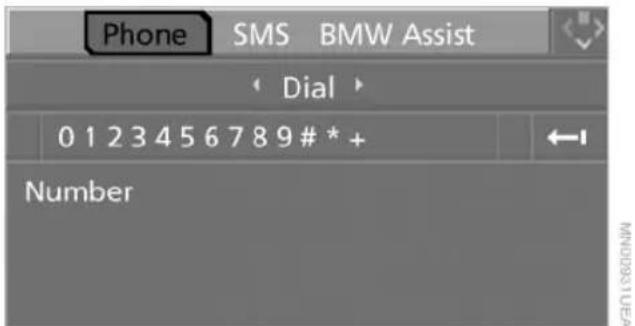
- Select "Phone" and press the controller
- Select "Dial" and press the controller
- To enter the phone number: select digits individually and press the controller. Always enter the complete phone number consisting of national dialing code, area code, and phone number.
To delete the last digit:
Move the controller to the right to select
← and press the controller

- Select "Dial number" and press the controller.
Ending call
- Select the phone number and press the controller
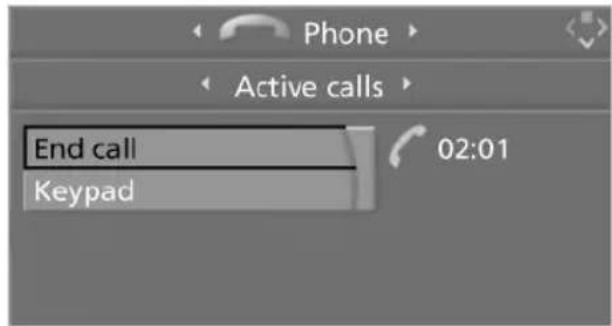
- Select "End call" and press the controller.
Phone book
After placing the portable phone in the cradle, the phone book is transferred from the portable phone into the vehicle. Loading the phone book can take several minutes. The phone book is available as long as the portable phone is engaged.
Dialing from the phone book
- Select "Phone" and press the controller

- Select "A - Z" and press the controller: The entries of the phone book of the portable phone are displayed on the Control Display; they are sorted alphabetically.
To run a targeted search for an entry, select the first letter of the entry and press the controller.
The first entry that starts with this letter is displayed

MODOZUEA
- Select the desired entry and press the controller
- Select "Call" and press the controller. The system dials the number.
If different phone numbers are stored in the portable phone under one name, e.g. office and home, the name is shown once for each phone number.
To display the phone numbers:
- Select "Edit" and press the controller
- Select and press the controller.
Adding digits to phone numbers
You can add other digits to a phone number stored in the phone book, e.g. to call a specific extension:
- Select "Phone" and press the controller
- Select "A - Z" and press the controller
- Select the desired entry and press the controller
- Select "Edit" and press the controller
- To supplement the phone number: Select digits individually and press the controller
- Select "Dial number" and press the controller.
Lists
Your phone can store phone numbers you have dialed and missed calls in lists. If the caller is entered in the phone book, the name of the entry is displayed instead of the phone number.
You can select the desired subscriber from the list and establish the connection.
Four lists are available:
"Top 8".
The eight numbers that you call most frequently from the list "A - Z" are automatically stored in the "Top 8" list. The number called most often appears at the top of the list
▷ "Redial".
The last eight phone numbers you have dialed are automatically stored. The last number dialed is at the top of the list
▷ "Received calls".
The phone numbers of the eight calls last accepted are stored if the phone number of the caller is transmitted
"Missed calls".
The phone numbers of the last eight calls not accepted are stored if the phone number of the caller is transmitted.
Dialing from a list
To select an entry and establish a connection:
- Select "Phone" and press the controller

- Select the list and press the controller:
"Top 8", with the portable phone engaged
▷ "Redial"
▷ "Received calls"
"Missed calls"

MNDQ56UEA
- Select the desired entry and press the controller
- Select "Call" and press the controller. The system dials the number.
Deleting individual entries
- Select the desired entry from the list and press the controller

MOOGUSUEA
- Select "Delete" and press the controller. The entry is deleted.
Deleting the entire list
- Select an entry from the list and press the controller
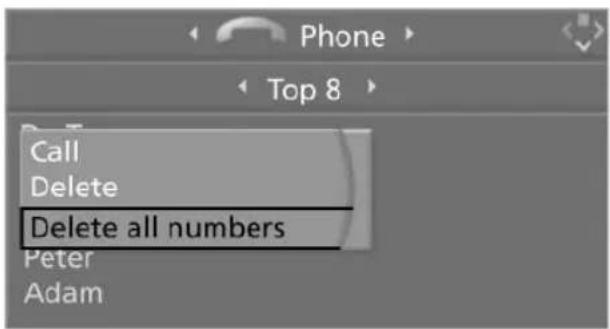
MOODUUA
- Select "Delete all numbers" and press the controller. The list is deleted.
Touch tone dialing
Touch tone numbers are required for access to network services or to control devices, e.g. remote querying on an answering machine.
This function can only be used during an existing connection.
- To establish a connection
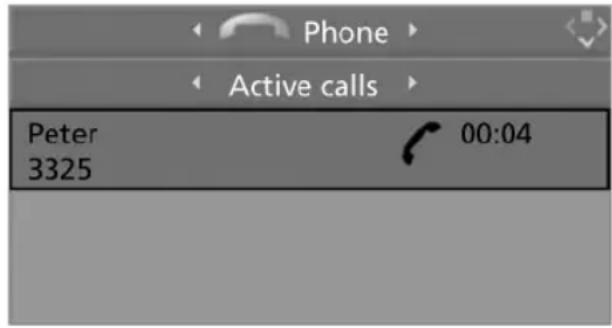
- Press the controller
- Select "Keypad" and press the controller

- Select the desired digits and press the controller.
Each digit is sent immediately.
Text messages/SMS
Text messages/SMS are displayed as long as the portable phone is engaged.
The symbol ☐ the Control Display shows that you have received a new text message. It goes out as soon as there are no longer any unread text messages.
The number of text messages that can be stored depends on the memory capacity of your BMW portable phone.
Displaying text messages/SMS
- Select "SMS" and press the controller. The list of received text messages is displayed on the Control Display. The symbol 📧 indicates unread text messages
- Select the desired text message and press the controller.
The text message is displayed.

To close the text message:
Move the controller forwards to select and press the controller.
Calling the sender
- Select the desired text message and press the controller. The text message is displayed
- Select "Options" and press the controller
- Select "Call sender" and press the controller. The selected sender is called.
Deleting text messages/SMS
- Select the desired text message and press the controller. The text message is displayed
- Select "Options" and press the controller
- Select "Delete" and press the controller. The text message of the portable phone is deleted.
Operation by voice control*
The concept
You can operate your phone without having to remove your hands from the steering wheel. The system operates on the basis of voice commands that you will learn easily after using them a few times. In addition, you are also supported by instructions or questions.
Symbols used

...< Identifies voice commands.
»...« Identifies instructions generated by the voice command system.
Voice commands
In ignition key position 2:
- Briefly press the button on the steering wheel.
A sound signal indicates operating readiness
- Speak voice commands.
To have the system list the voice commands possible in each case:

Help<.
Canceling operation via voice control
Briefly press the button on the steering wheel or

Cancel<.
In dialogs where text of any kind can be spoken, e.g. a name, canceling is only possible using the button. This is automatically interrupted when an incoming call is received.
Voice commands
In addition to the commands described in this Owner's Manual, alternative commands are often possible for the same functions, e.g.:

Dial name< or >Name<.
Digits from zero to nine are understood.
You can say each digit individually or group them into a sequence of three to five digits to accelerate the input.
Dialing a phone number – an example
Start the dialog:
Briefly press the button on the steering wheel.
Voice command Response
| »Dial number« | »Please say the number« |
| e.g. »201 12 34 56 7« | »201 12 34 56 7. Continue?« |
| »Dial« | »Dialing number« |
Volume adjustment
You can adjust the volume for the instructions from the voice control for each specific key:

Turn the button during an instruction to select the desired volume.
The voice control will continue to issue instructions at this volume level, even if the other audio sources are set to minimum volume.
First steps
Switching on portable phone

Switch on phone<.
Entering unlock code
You can protect your BMW portable phone against misuse with a four-digit unlock code.

-
Input Unlock Code'. The dialog for entering the unlock code is opened
-
Speak unlock code
-
Send Unlock Code<.
Correcting unlock code
After the sequence of digits has been repeated by the system, the unlock code can be corrected.

-
Correct number< The block of digits is deleted
-
Say the new unlock code on request
-
Send Unlock Code<.
Deleting unlock code

'Delete number'.
Canceling the operation

Cancel<.
Making a call
Dialing a phone number

-
Dial number(. The dialog for establishing a telephone connection is opened
-
Say the phone number. For telephone calls abroad, say
Plus< and then the country code
-
Dial<. The connection to the desired subscriber is established.
Correcting the phone number
After the last spoken sequence of digits has been repeated by the system, you can delete this sequence of digits.

Correct number< The digits are deleted.
The command 'Correct number' can be repeated as often as you like.
Deleting input
'Delete' is used to delete all the digits entered so far.
Voice phone book
You can create a voice phone book with up to 50 phone numbers and names. The names and phone numbers in the voice phone book are independent of the memory of your BMW portable phone.
Storing an entry
An entry always consists of a name and phone number.

-
Save name<.
The dialog for storing a name is called up - Say the name and repeat entry upon request.
The duration of the name in the phone book must not exceed approx. 2 seconds - Say the phone number upon request
- To save the phone number: 'Save'.
Selecting an entry
The connection to the phone number of the selected entry is established

-
Dial name<.
The dialog for selecting an entry is opened
-
Say the name on request
-
Confirm the prompt with >Yes<.
Reading out and selecting entries
You can have all the entries of your voice phone book read out in the order of input and select a certain entry to establish a connection:

-
Read phonebook<.
The dialog for reading the phone book is called up
-
Dial number< when the desired entry is read out.
Repeat dialing
'Redial' dials the last phone number dialed.
Deleting an entry
You can delete any entry from the voice phone book.

-
Delete name<.
The dialog for deleting an entry is called up
-
Say the name on request
-
Confirm the prompt with >Yes<.
Deleting all entries
'Delete phonebook' deletes all entries in the phone book.

-
Delete phonebook<.
The dialog for deleting phone book is called up
-
Confirm the prompt with >Yes<
-
Confirm the repeated prompt with 'Yes'.
Notes

The voice commands were available in English on going to print. Other lan-
guages are currently not available.
Important for voice input
Issue the commands fluently and at normal volume, avoiding excessive emphasis and pauses.
On vehicles with a phone, two microphones are installed near the interior rearview mirror of your vehicle. Although the system is designed to filter out ambient noise, you can help ensure that your commands will be understood by observing the following instructions:
Keep the doors, windows and glass roof closed to prevent interference from ambient noise
Avoid other sources of noise in the vehicle while speaking, and ask other vehicle occupants to refrain from talking while you are using the system.
TeleService*, BMW Assist *
TeleService
TeleService opens up a new dimension for communication with BMW Service. The car phone can be used to transmit data on the service status of your vehicle or on legally prescribed inspections directly to your BMW center. This is the same data that is stored for CBS Condition Based Service in the ignition key. Your BMW center can then contact you, and you can make an appointment that suits you while you are still on the road. Your advantage here is that your BMW center can prepare in advance for the required maintenance work. The TeleService functions are country-specific. The data on the service status of your vehicle or on legally required inspections is transmitted on a country-specific basis either automatically before they fall due or simultaneously when you call any service partner you have chosen. Your BMW center will be glad to provide more detailed information.
BMW Assist
BMW Assist is available to you if you have ordered this option at your BMW center or BMW customer information. This provides you with other services in addition to TeleService.
Many functions of BMW Assist depend on the individually agreed contract.
The subscriber agreement must be completed successfully before using the BMW Assist services.
Requirements
The telephone is registered in a portable phone network that can transmit the services.
To transmit position data, the navigation system must be able to determine the position. In order to enable and update
TeleServices or BMW Assist, a GPS signal must be present.

To avoid posing an unnecessary hazard, both to your own vehicle's occupants and to other road users: never attempt to make adjustments while operating the vehicle.
Enabling TeleService or BMW Assist
For you to be able to use the services of TeleService or BMW Assist, these must be enabled:
Control Center, for principle details, refer to page 16:
MENU
- Open the start menu by pressing the button

- Open the menu by pressing the controller
- Select "Communication interface" and press the controller
- Select "BMW Service settings" and press the controller
- Move the controller forwards to change the field

- Select "Service Status" and press the controller
- Select "Enable services" and press the controller.
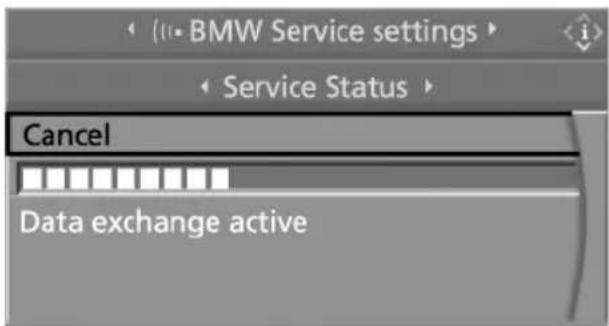
TeleService and, if applicable, BMW Assist is enabled; data exchange with the service center starts. Leave the ignition switched on.
Enabling takes a few minutes. The status is displayed on the Control Display. If you open another menu, the enable process continues to run in the background.
RV displays the registered services.
Services offered
Automatic Service Notification*
The data on the service status of your vehicle or on legally prescribed inspections is transmitted automatically directly to your BMW center prior to the due date.
You can check the current status of the Automatic Service Notification.
Control Center, for principle details, refer to page 16:
- Open the menu
- Select "Service" and press the controller
- Select "Service requirements" and press the controller
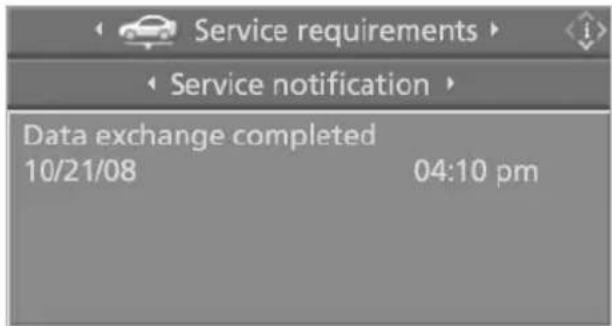
- Select "Service notification" and press the controller.
NOTICE
Setting up contact to Roadside Assistance of the BMW Group
You can contact Roadside Assistance of the BMW Group should you require help in the event of a breakdown.
Control Center, for principle details, refer to page 16:
- Open the menu
- Select "Service" and press the controller
- Select "BMW Service" and press the controller
- Move the controller forwards to change the field

- Select "Roadside Assistance" and press the controller. The current vehicle position is displayed
BEIJING00NW

- Select "Start service" and press the controller.
In some countries, with BMW Assist enabled, the data of the CBS Condition Based Service and your position are transmitted simultaneously.
Voice communication to the Roadside Assistance service is set up.
Setting up contact to your BMW center or the BMW Customer Relations
You can contact your BMW center, e.g. to arrange a service appointment.
For information related to your vehicle, call the BMW Customer Relations.
Control Center, for principle details, refer to page 16:
- Open the i menu
- Select "Service" and press the controller
- Select "BMW Service" and press the controller
- Move the controller forwards to change the field

- Select the desired service and press the controller
To establish contact to BMW Service:
"Service Request"
BMW Service will call you back at the specified phone number, e.g. to make an appointment for service
To establish voice contact to the BMW Hotline:
"Customer Relations"
- Select "Start service" and press the controller.
Contact to the desired service will be established.
In some countries, with TeleService or BMW Assist enabled, the data of the Condition Based Service CBS are transmitted simultaneously.
BMW Info*
You can obtain information on important and useful new services and features.
Control Center, for principle details, refer to page 16:
- Open "Communication"
- Select "BMW Assist" and press the controller
- Move the controller forwards to change the field
- Select "BMW Info" and press the controller
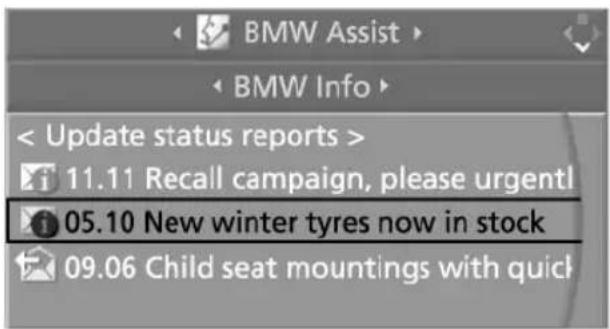
- Display new messages: Select "Update status reports" and press the controller. The messages are transferred
- Select the desired message and press the controller.
If you have received a message with a telephone number or an address, you can forward this to your portable phone or navigation system.
New messages are announced via SMS.
For more detailed information, refer to page 156.
Info Plus*
This information service supplies you with a whole range of current, interesting information on request.
You can have telephone numbers and addresses transferred and directly dial the telephone number or copy the address to the destination guidance of the navigation system.
This option provides you with a current information service, e.g. in the following areas:
Information on businesses e.g. florist, doctor
Accommodations e.g. hotels, motels
Mobility
e.g. filling stations, airports, car rental,
BMW dealers
▶ Eating and drinking e.g. restaurants, cafés, bars
Current information e.g. movies playing, events.
Control Center, for principle details, refer to page 16:
- Open "Communication"
- Select "BMW Assist" and press the controller
- Move the controller forwards to change the field
- Select "Where to go?" and press the controller

MORIQUERA
- If appropriate, select a message and press the controller.
Display new message
Select "New data request" and press the controller.
You will be connected with an employee of the BMW Information Service. The desired information and the corresponding address can be requested by phone. These will be shown on the Control Display and can be copied to the portable phone or navigation system, e.g. telephone number or address of a hotel. Reservations can be made at many hotels directly by the BMW Information Service.
Adapting TeleService or BMW Assist
Displaying and updating services
If one of the following conditions is met, you should update the services of the TeleService or BMW Assist:
▶ You have changed the scope of the contractually agreed services
The range of services of the offered services has been extended.
To update the services:
Control Center, for principle details, refer to page 16:
- Open the menu
- Select "Communication interface" and press the controller
-
Select "BMW Service settings" and press the controller
-
Move the controller forward to change the field
-
Select "Service Status" and press the controller.
You will be informed about the current scope of TeleService or BMW Assist.
RV displays the registered services

- Select "Update services" and press the controller.
Roaming
To align the services supported by home and foreign providers automatically, enable roaming:
- Open the menu
- Select "Communication interface" and press the controller
- Select "BMW Service settings" and press the controller
- Move the controller forwards to change the field
- Select "Profile" and press the controller
- Select "Roaming" and press the controller. ▼ displayed when roaming is enabled.
Please note that additional costs can arise if you are located abroad.
Terminating services
If you terminate the services, your vehicle will not be equipped to contact the BMW Assist call center. When an emergency call is started, the telephone connection to the general emergency number is established.
Control Center, for principle details, refer to page 16:
- Open the menu
- Select "Communication interface" and press the controller
- Select "BMW Service settings" and press the controller
- Move the controller forwards to change the field
- Select "Service Status" and press the controller
- Select "Terminate services" and press the controller.
TeleService or BMW Assist is disabled in the vehicle. This does not involve any contractual termination.
Automatic Service Notification can be disabled separately; consult your BMW center.
Enable TeleService and, if applicable BMW Assist again to re-establish the connection.
Displaying vehicle data
You can obtain a display of some of the selected data of your individual vehicle.
Control Center, for principle details, refer to page 16:
- Open the menu
- Select "Communication interface" and press the controller
- Select "BMW Service settings" and press the controller
- Move the controller forwards to change the field

- Select "Profile" and press the controller.
NOTICE

Mobility
This section helps you maintain your mobility by supplying important information on vital topics including fuels and lubricants, wheels and tires, service, maintenance and how to deal with any problems that may occur.
Refueling
Fuel filler door

Always switch off the engine before refueling. If you do not, fuel cannot be filled into the tank and a message on the Control Display will appear.
To open and close: press the rear edge of the fuel filler door.
Manual release

In the event of an electrical defect in the system, you can release the fuel filler door manually:
- In the luggage compartment, raise the floor mat and the cover located beneath it
- Open the snap fasteners of the right side panel and take off the side panel
- Pull the knob with the gas pump symbol.
Always observe all applicable precautions and regulations when handling fuels. Never carry spare fuel containers in your vehicle. Whether empty or full, these
containers can leak, cause an explosion, or lead to fire in the event of a collision.
Simple and environmentally friendly

When handling fuels always observe any safety guidelines posted at the service station.
Put the filler cap in the bracket attached to the fuel filler door.
When refueling, insert the filler nozzle completely into the filler pipe. Lifting the filler nozzle during refueling
▶ results in premature pump shutoff
can lead to reduced efficiency in the fuel-vapor recovery system.
The fuel tank is full when the filler nozzle clicks off the first time.
Closing the fuel filler cap: Fit the cap and turn it clockwise until you clearly hear a click.
Close the fuel filler cap carefully after refueling, until a click is heard. While closing, be sure not to squeeze the strap which is fastened to the cap. A loose or missing cap will activate the message Check Gas Cap on the Control Display.
Fuel tank capacity: approx. 18.5 gallons/70 liters, of which approx. 2.1 gallons/8 liters reserve.
Never attempt to continue driving until the tank is completely empty, as engine functions could be affected, and the vehicle could sustain damage as a result.
Fuel specifications
The engine uses lead-free gasoline only.
Required fuel:
Premium Unleaded Gasoline,
min. 91 AKI.
AKI = Anti Knock Index.

Do not use leaded fuels. The use of leaded fuels will cause permanent
damage to the system's oxygen sensor and
the catalytic converter.
Wheels and tires
Tire inflation pressure
Information for your safety
It is not merely the tire's service life, but also driving comfort and – to a great extent – driving safety that depend on the condition of the tires and the maintenance of the specified tire pressure.

Check and if necessary adjust tire inflation pressures regularly, also on the compact wheel, at least every two weeks and before beginning a longer trip. If you fail to observe this precaution you may be driving on tires with incorrect tire pressures, a condition that cannot only compromise your vehicle's driving stability, but also lead to tire damage and the risk of an accident.
Do not drive with deflated, i.e. flat tires, except run-flat tires. A flat tire will seriously impair your vehicle's handling and braking response. Attempts to drive on a flat tire can lead to loss of control over the vehicle.
Checking the pressure
Only check tire inflation pressure when the tires are cold. This means after a maximum of 1.25 miles/2 km driving or when the vehicle has been parked for at least 2 hours. When tires are warm, the tire inflation pressure increases.
After correcting the inflation pressure(s), always reinitialize the Flat Tire Monitor, refer to page 81.
Inflation pressure for original tires

MAYOZG20CMAA
The inflation pressures for your standard tires are visible on the door post when you open the driver's door.
Inflation pressure for other tire sizes
The tables on the next pages provide all the correct inflation pressures for the specified tire sizes at ambient temperature.

For correct identification of the right tire inflation pressure for your tires, observe the specifications for the corresponding tire size.
525i/530i
Tire size Pressure specifications in psi/kPa
| All pressure specifications in the table are indicated in psi/ kilopascal with cold tires. Cold = ambient temperature |  |  |
| 225/50 R 17 94 V M+S | 29/200 35/240 36/250 44/300 | |
| 225/50 R 17 94 W | ||
| 245/40 R 18 93 W | ||
| 225/55 R 16 95 Q,T,H M+S | ||
| 225/50 R 17 94 Q,T,H M+S | ||
| Only 525i: | ||
| 225/55 R 16 95 V M+S | ||
| 225/55 R 16 95 V | ||
| 245/45 R 17 95 W | 29/200 32/220 33/230 41/280 | |
| 245/45 R 17 95 V M+S | ||
| Front: 245/40 R 18 93 W 29/200 - 36/250 - | ||
| Rear: 275/35 R 18 95 W - 32/220 | - 41/280 | |
| Front: 245/35 R 19 89 Y | 29/200 - 33/230 - | |
| Rear: 275/30 R 19 92 Y - 32/220 | - 41/280 | |
| Compact wheel: T 135/80 R 17 102 M | 61/420 | |
| More details on the permitted load and weights can be found on page 200. | ||
545i
Tire size Pressure specifications in psi/kPa
| All pressure specifications in the table are indicated in psi/ kilopascal with cold tires. Cold = ambient temperature | 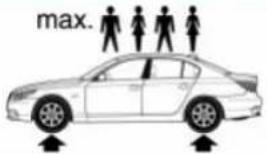 |  |
| 225/50 R 17 94 V M+S | 32/220 38/260 38/260 45/310 | |
| 225/50 R 17 94 W | ||
| 245/40 R 18 93 Y | ||
| 225/50 R 17 94 Q,T,H M+S | ||
| 245/45 R 17 95 W | 29/200 35/240 35/240 42/290 | |
| 245/45 R 17 95 V M+S | ||
| Front: 245/40 R 18 93 Y 32/220 - 38/260 - Rear: 275/35 R 18 95 Y - 35/240 - 42/290 | ||
| Front: 245/35 R 19 89 Y 32/220 - 38/260 - Rear: 275/30 R 19 92 Y - 35/240 - 42/290 | ||
| Compact wheel: T 135/80 R 17 102 M | 61/420 | |
| More details on the permitted load and weights can be found on page 200. | ||
Tire identification marks
Knowledge of the labeling on the side of the tire makes it easier to identify and choose the right tires.
Tire size
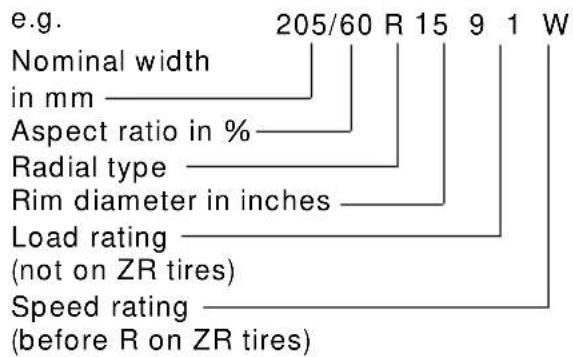
Speed letter
| Q= up to 100 mph160 km/h |
| T = up to 118 mph190 km/h |
| H = up to 131 mph210 km/h |
| V = up to 150 mph/240 km/h |
W = up to 167 mph/270 km/h
Y = up to 186 mph/300 km/h
Tire Identification Number
Tires with DOT codes meet the guidelines of the U.S. Department of Transport. DOT code:
![graph TD A["Manufacturer code for tire make"] --> B["Tire size and tire design"] B --> C["Tire age"] D["DOT xxxx xxx 3602"] --> E["..."]](/content/2026/05/1019018/images/e1290003e672c63e0e5635e9be73771801e5de96f395e880bf04c015d4453c80.jpg)
Tire age
The date of manufacture of the tires is marked on the tires themselves: DOT ... 3603 means that the tire was made in the 36th week of 2003. BMW recommends that you replace all tires after 6 years at the latest, indepen-
dently of the fact that tires can reach an age of 10 years.
Uniform Tire Quality Grading
Quality grades can be found where applicable on the tire sidewall between tread shoulder and maximum section width. For example:
Treadwear 200 Traction AA
Temperature A
DOT Quality Grades
Treadwear
Traction AA A B C
Temperature A B C

All passenger car tires must conform to Federal Safety Requirements in
addition to these grades.
Treadwear
The treadwear grade is a comparative rating based on the wear rate of the tire when tested under controlled conditions on a specified government test course.
For example, a tire graded 150 would wear one and one-half (1 1/2 ) times as well on the government course as a tire graded 100.
The relative performance of tires depends upon the actual conditions of their use, however, and may depart significantly from the norm due to variations in driving habits, service practices and differences in road characteristics and climate.
Traction
The traction grades, from highest to lowest, are AA, A, B, and C.
Those grades represent the tire's ability to stop on wet pavement as measured under controlled conditions on specified government test surfaces of asphalt and concrete. A tire marked C may have poor traction performance.

The traction grade assigned to this tire is based on straight-ahead brak-
ing traction tests, and does not include acceleration, cornering, hydroplaning, or peak traction characteristics.
Temperature
The temperature grades are A – the highest – B, and C, representing the tire's resistance to the generation of heat and its ability to dissipate heat when tested under controlled conditions on a specified indoor laboratory test wheel.
Sustained high temperature can cause the material of the tire to degenerate and reduce tire life, and excessive temperature can lead to sudden tire failure. The grade C corresponds to a level of performance which all passenger car tires must meet under the Federal Motor Vehicle Safety Standard No. 109. Grades B and A represent higher levels of performance on the laboratory test wheel than the minimum required by law.

The temperature grade for this tire is established for a tire that is properly inflated and not overloaded. Excessive speed, underinflation, or excessive loading, either separately or in combination, can cause heat buildup and possible tire failure.
RSC – Run-flat tires
You will recognize run-flat tires by a circular symbol containing the letters RSC on the side of the tire, refer to page 175.
M+S
Winter and all-season tires.
These have better winter properties than summer tires.
Tire condition
Inspect your tires frequently for treadwear, signs of damage and for foreign objects lodged in the tread. Check the tread depth.
Tire tread
The tread depth should not drop below 0.12 in/3 mm, although, for example, European legislation only specifies a minimum tread depth of 0.063 in/1.6 mm. At tread depths below 0.12 in/3 mm there is an increased risk of high-speed hydroplaning,
even when only small amounts of water are present on the road surface.
As winter tires display a noticeable loss in their ability to cope with cold-weather driving conditions once the tread wears to below 0.16 in/4 mm, to ensure continued safety you should always have such tires replaced.

Wear indicators at the tread-groove base, refer to arrow, are distributed over the tire's circumference and are marked on the side of the tire with TWI – Tread Wear Indicator. These indicators signal at a tread depth of 0.063 in/1.6 mm that the legal wear limit has been reached.
Tire damage
Unusual vibrations encountered during normal vehicle operation can indicate tire failure or some other vehicle defect. This can, for example, be caused by driving over curbs. These kinds of problems may also be signaled by other changes in vehicle response, such as a strong tendency to pull to the left or right. Should this occur, respond by immediately reducing your speed. Carefully proceed – or have your vehicle towed – to the nearest BMW center or tire dealer to have the wheels or tires inspected. Tire damage, extending to sudden and complete loss of pressure in extreme cases, can pose a potentially lethal safety hazard for the vehicle's occupants and other road users alike.
Replacing wheels/tires
Unprofessional attempts by laymen to service tires can lead to damage and accidents. Have this work performed by skilled professionals only. The technicians at your BMW center will be glad to assist you with the required professional knowledge and specialized equipment.
The correct combination of wheels and tires is another vital factor in ensuring reliable operation of various vehicle systems such as ABS and DSC.
Have the wheel and tire assemblies balanced every time either a wheel or a tire is replaced.
BMW does not recommend the use of retreaded tires, as otherwise driving safety may be reduced. Possible variations in the design and the age – which could be substantial – of the carcasses can lead to unusually rapid wear.
The right wheels and tires
BMW recommends that you use only wheel and tire combinations that BMW has tested and approved for your particular vehicle. Variations in factors such as manufacturing tolerances mean that even wheels and tires with identical official size ratings could actually have different dimensions than the approved units – these differences could lead to body contact, and with it the risk of severe accidents. If non-approved wheels and tires are used, BMW cannot evaluate their suitability, and therefore cannot be held liable for driving safety.
To maintain good handling and vehicle response, use only tires of a single tread configuration from a single manufacturer. After a flat tire, always remember to have the specified wheel and tire combination remounted on the vehicle as soon as possible.
Recommended tire brands
BMW tests certain tire brands for each tire size, classifies them as road-safe and
approves them. You can find out about these at specialized dealers or at your BMW center. Observe any country-specific regulations, e.g. on making a corresponding entry in the vehicle documents.
The factory-mounted tires have been specially selected to provide optimized performance when installed on your vehicle; if properly cared for, they will provide a combination of safety and excellent ride comfort.
Run-flat tires
If your BMW is equipped with run-flat tires, refer to Run-flat tires, only use these tires, as in the event of a breakdown there is no spare wheel available.
Special characteristics of winter tires
BMW recommends winter tires for use in cold winter driving conditions. Although all-season M+S tires provide better winter traction than summer tires, they generally fail to provide the same levels of cold-weather performance as winter tires.
When switching to winter tires, observe the descriptions at Tire condition and Replacing wheels/tires, refer to pages 173 and 174.
Run-flat tires
If your BMW is equipped with run-flat tires, refer to Run-flat tires. Your BMW center will advise you if you wish to replace the tires of your BMW or wish to switch from summer to winter tires or vice versa.
If you switch from summer to winter tires, or vice versa, use run-flat tires, as in the event of a flat there is no spare wheel available.
Observing speed ratings

Never exceed the maximum speed for which the winter tires are rated.
Unprofessional attempts by laymen to service tires can lead to damage and accidents. Have this work performed by skilled professionals only. The technicians at your BMW center will be glad to assist you with the required professional knowledge and specialized equipment.
Storage
Always store wheels and tires in a cool, dry place with as little exposure to light as possible. Always protect tires against all contact with oil, grease and fuels. Do not exceed the maximum tire inflation pressure indicated on the side wall of the tire.
Run-flat tires*
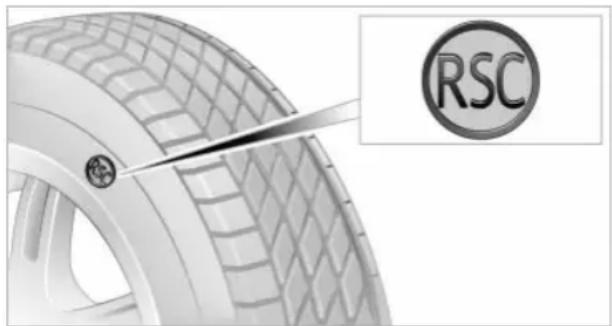
MVO1907MA
You will recognize run-flat tires by a circular symbol containing the letters RSC on the side of the tire. Run-flat tires consist of self-contained tires and special rims. The tire reinforcement ensures that the tire retains some residual safety in the event of pressure drop and driving remains possible to a restricted degree.

If you switch from summer to winter tires, or vice versa, use run-flat tires,
as in the event of a breakdown there is no spare wheel available. In this case, BMW recommends that you consult your BMW center. Your BMW center is qualified to handle run-flat tires and equipped with the necessary special tools.
Continuing driving with a damaged tire
Driving on run-flat tires can continue, depending on the vehicle load and the severity of the tire damage, at a maximum speed of 50 mph/80 km/h.
In the case of complete tire pressure loss, 0 psi/0 kPa, or obvious tire damage, you
can estimate the possible distance for continued driving on the basis of the following guide values:
With low load: 1 to 2 persons without luggage: Approx. 155 miles/250 km
With medium load: 2 persons, luggage compartment full, or 4 persons without luggage: Approx. 90 miles/150 km
With full load: 4 persons or more, luggage compartment full: Approx. 30 miles/50 km.

Drive reservedly and do not exceed a speed of 50 mph/80 km/h. With inflation pressure loss, the driving characteristics change, for example reduced track stability on braking, extended braking distance, and altered self-steering characteristics.
For safety reasons, BMW recommends that you do not have damaged run-flat tires repaired and that you consult your BMW center in this case.
Snow chains*
BMW only tests certain snow chains, classifies them as road-safe and approves them. Consult your BMW center for more information. BMW recommends only using these approved, narrow-link snow chains. These snow chains are approved exclusively for use on summer or winter tires in pairs on the rear wheels.
Observe the manufacturer's instructions when installing snow chains.
Do not exceed a vehicle speed of 30 mph/50 km/h with the chains mounted.

After mounting snow chains, do not activate the Flat Tire Monitor.
When you are driving with snow chains, it can be beneficial to switch off DSC briefly, refer to page 78.
Under the hood
Hood
Unlocking

Pull the lever located under the left side of the instrument panel.
Never attempt to perform any service or repair operations on your vehicle without the required, professional technical training. When you are unfamiliar with the service procedures and precautions, always have any required work carried out at your BMW center. Unprofessional attempts at service and repair, and the incorrect handling of parts and materials that can occur during such attempts, constitute a potential safety hazard, both for the vehicle's occupants and for other road users.
Opening

Press the release handle and open the engine hood.
Closing

Close the hood from a height of approx. 16 in/40 cm with momentum. It must be clearly heard to engage.
Observe the same precautions that apply to all closing operations by ensuring that the hood's travel range is clear and unobstructed before allowing the hood to fall into position.
If you see any signs that the hood is not completely closed while driving your vehicle, you should stop at once and close it securely.
Engine compartment

1 Filler neck for engine oil, refer to Topping up engine oil
2 Brake fluid reservoir, located beneath the microfilter cover, refer to page 180
3 Starting-aid terminal, refer to page 192
4 Dipstick for engine oil, refer to Checking the oil level. The dipstick is further toward the rear on the 545i
5 Washer fluid reservoir of the headlamp and windshield cleaning systems, refer to page 57
6 Expansion tank for coolant, refer to page 179
Engine oil
Checking oil level
- Park the vehicle on a level surface
- Switch the engine off after it has reached normal operating temperature
-
After approx. 5 minutes, pull the dipstick 4 out and wipe it off with a clean lint-free cloth, paper towel, or similar material
-
Carefully push the dipstick all the way into the guide tube and pull it out again
- The oil should extend to between the two marks on the dipstick.
As is the case with fuel economy, the rate at which the engine uses oil is strongly influenced by driving style and operating conditions.

The oil quantity between the two marks on the dipstick is approx. 1.6 US quarts/1.5 liters. Do not fill beyond the upper mark on the dipstick. Excess oil can damage the engine.
Adding engine oil

Wait until the level has dropped to just above the lower mark or a message appears on the Control Display before adding oil.

BMW engines are designed to operate without additives, and their use could even lead to damage in some cases. This also applies to the automatic transmission, the differential and the power steering system.
Recommendation: have oil changes performed only by your BMW center.

Continuous exposure to used oil has caused cancer in laboratory testing. For this reason, any skin areas that come into contact with oil should be thoroughly washed with soap and water.
Store oil, grease, etc., well out of the reach of children; always observe all warning labels on the containers.

Always observe all applicable rules and regulations for environmental section when disposing of used oil.
Specified engine oils
The quality of the engine oil selected has critical significance for the operation and service life of an engine. BMW approves only specific oils after confirming their suitability for use in its vehicles with extensive testing.
Use only approved BMW High Performance Synthetic Oil.
If you are unable to obtain BMW High Performance Synthetic Oil, you can add small amounts of another synthetic oil between oil changes. Use only oils with the API SH specification or higher.

Ask your BMW center for details concerning the specific BMW High Perance Synthetic Oil or synthetic oils have been approved.
You can also call BMW of North America at 1-800-831-1117 or visit this website: www.bmwusa.com to obtain this information.
Viscosity ratings
Viscosity is the oil flow rating as defined in SAE classes.
The selection of the correct SAE class depends on the climatic conditions in the area where you typically drive your BMW.

Approved oils are in SAE classes 5W-40 and 5W-30.
These oils may be used for driving in all ambient temperatures.
Coolant

Do not add coolant to the cooling system when the engine is hot. Escaping an ant can cause burns.
Antifreeze and anticorrosion agents are hazardous to health. Always store these agents in tightly-closed original containers kept well away from the reach of children. Antifreeze and anticorrosion agents are flammable. Therefore, do not pour over hot engine parts, as otherwise they could catch fire and cause burns.
Always observe the instructions for use provided on the containers.

Always observe all applicable rules and regulations for environmental action when disposing of used anti-e and anticorrosion agents.
Checking coolant level

Correct coolant level with the engine cold, approx. +68°F/20°C:
- Turn the cap of the expansion tank counterclockwise to allow any accumulated pressure to escape, then continue turning to open
- The coolant level is correct when the coolant extends to between the MIN and MAX marks on the filler neck, refer to the diagram adjacent to the filler neck
- If the coolant is low, slowly add coolant up to the specified level – do not overfill.
Brake fluid

The symbol lights up and a message appears on the Control Display: the brake-fluid level in the container is too low.
The brake fluid reservoir is located under the microfilter housing trim panel on the driver's side of the vehicle. To have brake fluid added to the system, or to have the source of any brake fluid loss traced and rectified, please contact your BMW center, which can also supply the factory-approved - DOT 4 - brake fluids.

Brake fluid is hygroscopic: it absorbs moisture from the atmosphere over course of time.
To ensure that the brake system continues to provide safe and reliable performance, remember to have the brake fluid changed every 2 years at the latest, refer to page 66 and to the Service and Warranty Information Booklet for US models or the Warranty
and Service Guide Booklet for Canadian models.
Brake fluid is toxic and also damages vehicle paintwork. Always store these agents in tightly-closed original containers kept well away from the reach of children.
Do not spill the fluid and do not refill the brake fluid reservoir to beyond the MAX mark. Should it come into contact with hot engine components, the brake fluid could ignite and cause personal injury in the form of burns.

Always observe all applicable rules and regulations for environmental action when disposing of used brake

Warning lamp for Canadian models.
Brake hydraulic systems
A low brake-fluid level combined with longer-than-usual pedal travel could be a sign that one of the brake system's hydraulic circuits has failed.

Proceed to the nearest BMW center. Remember that pedal travel may be increased, and there may also be a substantial increase in the amount of pedal pressure required to brake the vehicle.
Please adapt your driving style accordingly.
Maintenance
The BMW Maintenance System

The BMW Maintenance System is designed to ensure that your vehicle will continue to furnish consistent reliability combined with optimal safety. The service schedule also includes operations related to the vehicle's comfort and convenience features, such as replacement of the filters for the inside air. The ultimate objective is to ensure economical maintenance by providing the ideal service for your vehicle.
Should the day come when you decide to sell your BMW, you will find that a complete dealer service history is an asset of inestimable value.
CBS Condition Based Service
CBS is a more advanced version of the Service Interval Display. Sensors combine with highly-specialized algorithms to supply service information that reflects your vehicle's actual operating conditions more precisely than ever before.
The system now provides individual displays of the times or distances remaining until the deadlines for specific service operations as well as legally prescribed inspections:
Engine oil
Brakes: separate for front and rear
Brake fluid
▶ Spark plugs
▶ Vehicle check
Depending on national regulations: legally prescribed inspections.
CBS monitors both current and upcoming service requirements. Your vehicle stores this information continuously in the ignition key while the vehicle is being driven. You should therefore hand over to the BMW Service Advisor the key you last used to drive when you take your vehicle for service. After accessing the data stored in the vehicle key, your BMW Service Advisor is able to suggest precisely the right array of service procedures for your own individual vehicle.
By letting you define a service and maintenance regimen that reflects your own individual requirements, Condition Based Service builds the basis for trouble-free driving.
You can find more detailed information on the service requirement display on page 66.

Make sure the date in the Control Center is always set correctly, refer to
page 75, as otherwise the effectiveness of Condition Based Service CBS is not ensured.
Service and Warranty Information Booklet for US models and Warranty and Service Guide Booklet for Canadian models
Please consult your Service and Warranty Information Booklet for US models and Warranty and Service Guide Booklet for Canadian models for additional information on service requirements.

Have service and repair operations performed at your BMW center.
Take the time to ensure that these service procedures are confirmed by entries in your vehicle's Service and Warranty Information Booklet for US models and Warranty and Service Guide Booklet for Cana-
dian models. These entries verify that your vehicle has received the specified regular maintenance, and may also be required when submitting warranty claims.
Care
You can find everything you need to know on this topic by consulting the separate Caring for your vehicle brochure.
Rules and regulations
California Proposition 65 Warning
California laws require us to issue the following warning:

Engine exhaust and a wide variety of automobile components and parts, including components found in the interior furnishings in a vehicle, contain or emit chemicals known to the State of California to cause cancer and birth defects and reproductive harm. In addition, certain fluids contained in vehicles and certain products of component wear contain or emit chemicals known to the State of California to cause cancer and birth defects or other reproductive harm.
Battery posts, terminals and related accessories contain lead and lead compounds. Wash your hands after handling.
Used engine oil contains chemicals that have caused cancer in laboratory animals.
Always protect your skin by washing thoroughly with soap and water.
OBD connector

The Onboard Diagnostic OBD interface socket is located on the left of the driver's side under the instrument panel and under a cover.
The cover has the letters OBD on it.
The purpose of the OBD system is to ensure proper operation of the emission control system for the vehicle's lifetime.
The system monitors emissions-related components and systems for deterioration and malfunction.

An illuminated indicator lamp informs you of the need for service, not of the need to stop the vehicle.
However, the systems should be checked by your BMW center at the earliest possible opportunity.

Indicator lamp for Canadian models.
Under certain conditions, the indicator will blink or flash. This indicates a rather severe level of engine misfire. When this occurs, you should reduce speed and consult the nearest BMW center as soon as possible. Severe engine misfire over only a short period of time can seriously damage emissions control components, especially the catalytic converter.

When the fuel filler cap is not properly tightened, the OBD system can detect the vapor leak and the indicator lamp will light up. If the filler cap is subsequently tightened, the indicator lamp should go out within a few days.
Replacing components
Onboard tool kit

The onboard tool kit is located in the luggage compartment lid.
Loosen the wingnut to open.
Windshield wiper blades
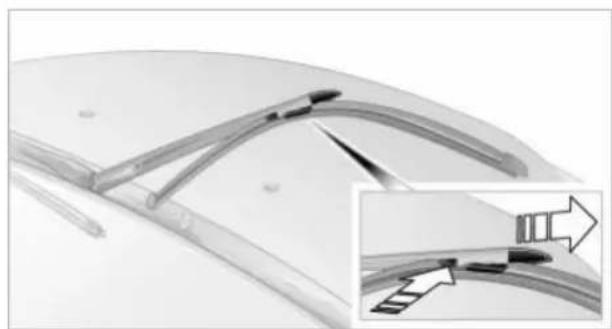
To replace, fold the wiper arm up and hold. Press the catches together while pushing the wiper blade out of the front.
Lamps and bulbs
The lamps and bulbs are essential factors contributing to the safety of your vehicle. Therefore, comply fully with the following instructions during bulb replacement. If you are not familiar with the specified procedures, have the replacements carried out at your BMW center.

Never touch the glass of new bulbs with your bare fingers, as even minute units of contamination will burn into the bulb's surface and reduce its service life. Use a clean cloth, napkin, etc., or hold the bulb by its metal socket.
In the case of bulbs where the replacement is not described, please consult your BMW center.
You can obtain a selection of replacement bulbs at your BMW center.

To prevent short circuits, before working on any electrical system,
equipment or accessory you should always switch it off and disconnect the cable from the battery's negative terminal before starting.
To avoid possible injury or equipment damage when changing bulbs, observe any instructions provided by the bulb manufacturer.

When maintaining the headlamps, please comply with the instructions in
the separate Caring for your vehicle brochure.
Headlamps
The illustration shows the left-hand side of the engine compartment.

1 Cover cap for low beams
2 Cover cap for high beams
Turn the cover cap to the left and remove.

Always wear gloves and eye protection – the atmosphere within the H7
bulb is pressurized. Failure to observe this precaution can lead to personal injury should the bulb be damaged.

For checking and adjusting headlamp aim, please contact your BMW cen-
ter.
Halogen low beams
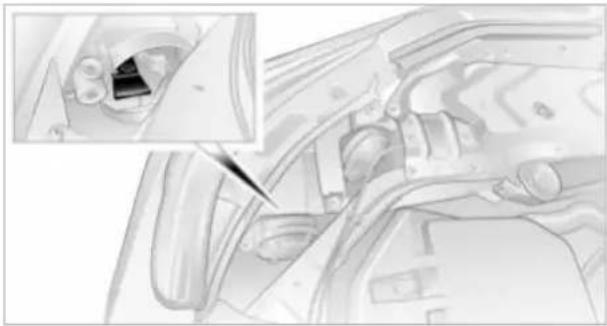
H7 bulb, 55 Watts
- Turn the bulb holder to the left and remove
- Remove and replace the bulb.
Halogen high beams

H7 bulb, 55 Watts
- Turn the bulb holder to the left and remove
- Remove and replace the bulb.
Parking and standing lamps

Bulb 5 Watts, W 5 W
- Turn the cover cap for low beams or high beams to the left and remove
- Pull the bulb holder out
- Remove and replace the bulb.
Xenon lamps*
The service life of these bulbs is very long and the probability of a failure is very low, provided that they are not switched on and off an unusual number of times. In the unlikely event that one of these lamps should fail, you can respond by switching on your fog lamps and proceeding carefully, where allowed by law.

To avoid the risk of potentially fatal injuries: owing to the extremely high voltages at which these units operate, service work on the xenon lighting system should always be entrusted to qualified personnel.
Parking and standing lamps
Please contact a BMW center in case of a malfunction.
Turn signal indicators, front
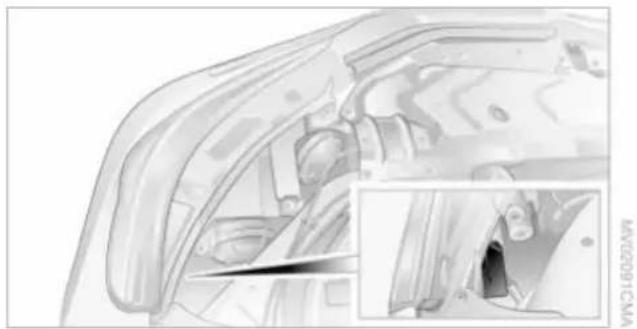
Bulb 21 Watts, PY 21 W
- Turn the bulb holder to the left and remove
- Apply gentle pressure to the bulb while turning it to the left for removal and replacement.
Side-mounted turn signal indicators
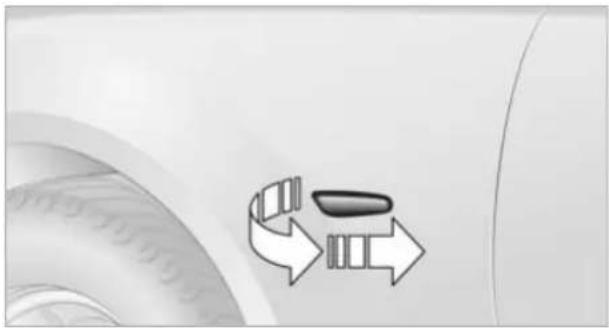
Bulb 5 Watts, W 5 W
- Press against the front edge of the lamp with the tip of your finger, then push it to the rear and release the detent at the front
- Turn the lamp 90° and remove
- Turn the bulb holder to the left and remove
- Extract the bulb for replacement.
Side marker lamps, front and rear
Please contact your BMW center for replacement.
Tail lamps
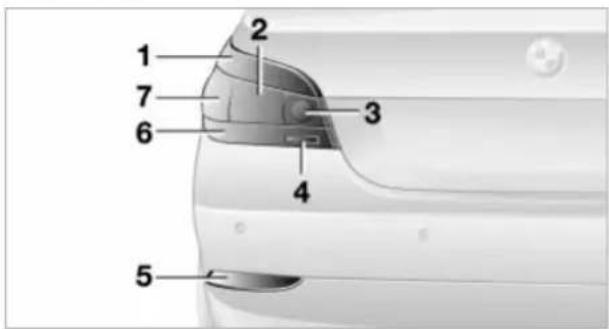
1 Turn signal indicators
2 Tail and brake lamp
3 Tail lamp
4 Backup lamps
5 Reflector
6 Reflector
7 Standing, tail and brake lamp
▶ Backup lamps: Bulb 16 Watts, W 16 W
Other lamps: Bulb 21 Watts, P 21 W
Center brake lamp
This lamp uses LED technology for operation. Please contact a BMW center in case of a malfunction.
Lamps in the fender

The illustration shows the recess on the left side of the luggage compartment.
All the bulbs are integrated in a central bulb holder.
- Remove the side panel
- Unclip the bulb holder and remove
- Backup lamps:
Remove and replace the bulb.
Other bulbs:
Apply gentle pressure to the bulb while turning it to the left for removal and replacement.
Lamps in the luggage compartment lid

License plate lamp
Bulb 5 Watts, C 5 W
- Insert a screwdriver in the slot and press to the left, refer to arrows; this unlocks the lamp
- Remove the lamp and replace the bulb.
Changing a wheel

Safety measures in the event of a breakdown or wheel change:
Park the vehicle as far away as possible from moving traffic and on firm ground.
Switch on the hazard warning flashers.
Lock the steering wheel in straight-ahead setting of the wheels. Apply the handbrake and engage first gear, reverse gear or selector lever to position P.
Have all vehicle occupants get out of the vehicle and ensure that they remain outside the immediate area in a safe place, such as behind a guardrail.
If a warning triangle or portable hazard warning lamp is required, set it up on the roadside at an appropriate distance from the rear of the vehicle.
Comply with all safety guidelines and regulations.
Change the wheel only on a level, firm surface which is not slippery.
The vehicle or the jack could slip to the side if you attempt to raise the vehicle on a soft or slippery surface such as snow, ice, tiles, etc.
Position the jack on a firm support surface. Do not use a wooden block or similar object as a support base for the jack, as this would prevent it from extending to its full support height and reduce its load-carrying capacity.
To avoid serious or fatal injury: never lie under the vehicle, and never start the engine while it is supported by the jack.
What you will need
To avoid rattling noises later on, note the positions of the tools before removing them, then return them to their initial positions after completing work.

MVO2034CMIA
1 Chock
2 Vehicle jack
3 Lug wrench
are located in the tool space in the rim of the compact wheel. Raise the floor mat and the cover beneath it. Take out the required tool(s). After using the tools, return them to the storage space.
Compact wheel*

MVO2073CMAA
- Unscrew the wing nut 1
- Remove the disk 2 to the side
- Take out the tool brackets 3
- Remove the compact wheel.
Procedure
-
Read carefully and comply with the safety precautions on left-hand column
-
To secure the vehicle against movement:
Place the wheel chock behind the front wheel on the side opposite the side being raised. If the vehicle is parked on a downward slope, place the chock in front of the wheel. If the wheel must be changed on a surface with a more severe slope, take additional precautions to secure the vehicle from rolling
- Loosen the lug bolts 1/2 a turn

-
Set up the jack beneath the jacking point closest to the flat tire. Ensure that the entire surface of the jack's base is in firm contact with the ground and that the jack itself is standing completely vertical, not tilted, and that the fitting on the top of the jack will align with the rectangular recess on the vehicle when you raise it, refer to illustration
-
Jack the vehicle up until the wheel you are changing is raised from the ground
-
Unscrew the lug bolts and remove the wheel
-
Remove accumulations of mud or dirt from the mounting surfaces of the wheel and hub. Clean the lug bolts
-
Position the new wheel or compact wheel. Secure the wheel by turning at least two lug bolts into opposite bolt holes
-
Screw in the remaining lug bolts. Tighten all the bolts securely in a diagonal pattern
-
Lower the jack and remove it from beneath the vehicle
-
Tighten the lug bolts in a diagonal pattern
-
Check and correct the tire inflation pressure at the earliest opportunity.
Protect valve stems and valve stem seal caps against dirt and contamination. Dirt in valve stems is a frequent source of gradual air loss.
After mounting the wheel or correcting the inflation pressure, reinitialize the Flat Tire Monitor, refer to page 81.
The vehicle jack is designed for changing wheels only. Do not attempt to raise another vehicle model with it or to raise any load of any kind. To do so could cause accidents and personal injury.
To ensure safety, always have the lug bolts checked with a calibrated torque wrench as soon as possible to ensure that they are tightened to the specified torque.
The tightening torque is 120 Nm.
Reverse the removal sequence to store the wheel and tools in the vehicle.
When you mount wheels other than Genuine BMW light-alloy wheels, different lug bolts may also be required.
Always have damaged tires replaced and the wheel and tire assembly rebalanced at the earliest possible opportunity.
Driving with the compact wheel
Drive reservedly and do not exceed a speed of 50 mph/80 km/h.
The driving characteristics change, for example reduced track stability on braking, extended braking distance, and altered self-steering characteristics in the limit range. In conjunction with winter tires, these characteristics are more pronounced.
Only one compact wheel may be mounted. You should fit wheels and
tires of the original size as quickly as possible.
Battery
Battery care
The battery is 100% maintenance-free, i.e., the electrolyte will last for the life of the battery when the vehicle is operated in a temperate climate.
For all questions that regard the battery, please consult your BMW center.
Charging the battery
Only charge the battery in the vehicle via the terminals in the engine compartment with the engine off. Connections, refer to Jump-starting on page 192.
Disposal

Return used batteries to a recycling point or your BMW center. Maintain the battery in an upright position for transport and storage. Always restrain the battery to prevent it from tipping over during transport.
Fuses

Never attempt to repair a blown fuse, and do not replace a defective fuse with a substitute of another color or amperage rating, as this could lead to a circuit overload, ultimately resulting in a fire in the vehicle.
Spare fuses, plastic tweezers and details of the fuse assignment are located in the compartment for the onboard tool kit, refer to page 184.
In the glove compartment

Turn the two snap fasteners outwards. Fold the cover forwards or remove.
In the luggage compartment

MAYOY122CMVA
Raise the floor mat and the cover beneath it. Undo the screw connection of the right side panel and pull out the panel.
Giving and receiving assistance
Starting an emergency call*
Conditions for an emergency call:
The car phone is logged on to a portable phone network
The emergency call system is operable.
To start an emergency call:

- To open the cover flap: Briefly press the cover flap
- Press the button for at least 2 seconds. The indicator lamp in the button lights up. As soon as the voice connection to the general emergency number has been set up, the indicator lamp flashes.
If conditions allow, remain in the vehicle until the connection has been established. You will then be able to provide a detailed description of the situation.
In vehicles where BMW Assist is enabled, the phone system will automatically establish contact with the BMW Assist emergency call center. If the current position of your vehicle can be determined, this is transferred to the BMW Assist emergency call center.
Activating BMW Assist, refer to page 161.
If the navigation system fails, the current position of the vehicle is not transmitted.
If the indicator lamp flashes, but you are unable to hear the emergency call center through the hands-free system, this could indicate, for instance, that the hands-free system is no longer operational. However, the emergency call center can still hear you.
For technical reasons, the emergency call cannot be guaranteed under unfavorable conditions.
Under certain conditions, an emergency call is started automatically immediately after a severe accident. The automatic emergency call is not affected by the button being pressed.
Warning triangle*

The warning triangle is conveniently stored in the onboard tool kit mounted on the inside of the luggage compartment lid.

Comply with legal requirements requiring you to carry a warning triangle in the vehicle.
First-aid kit*

You will also find the first-aid kit in the onboard tool kit's container.

Some of the articles contained in the first-aid kit have a limited service life. For this reason, check the expiration dates of each of the items regularly, and replace any whose expiration dates have passed. You can find replacements in any pharmacy.
Comply with legal requirements requiring you to carry a first-aid kit in the vehicle.
Roadside Assistance
The Roadside Assistance of the BMW Group offers you assistance in the event of a breakdown around the clock, also at weekends and on public holidays.
The phone numbers of the Roadside Assistance control center in your home country can be found in the BMW Dealer Directory. In the case of vehicles with BMW Assist or TeleService, you can call the Roadside Assistance of the BMW Group directly via the Control Center, refer to page 162.
Jump-starting
When your battery is discharged you can use two jumper cables to start your vehicle with power from the battery in a second vehicle. You can also use the same method to help start another vehicle. Use only jumper cables with fully-insulated clamp handles.

To avoid the risk of potentially fatal injury, always avoid all contact with electrical components while the engine is running. Carefully adhere to the following sequence, both to prevent damage to one or both vehicles, and to guard against possible personal injuries.
Preparing
- Check whether the battery of the other vehicle has a voltage of 12 Volts and approximately the same capacitance in Ah. This information can be found on the battery
- Switch off the engine of the support vehicle
- Switch off any consumer units in both vehicles.

There must not be any contact between the bodies of the two vehicles, as otherwise there is a danger of short circuits.
Connecting the jumper cables

To avoid personal injury from sparks, always observe this sequence when ecting jumper cables.

MVO2179GMA
On your BMW, the so-called starting-aid terminal in the engine compartment serves as the battery positive terminal, refer also to Engine compartment overview on page 178. The symbol + is embossed on the cover.
- Open the cover of the BMW starting-aid terminal. To do so, pull the tab
- Attach one end of the jumper cable plus/+ to the positive terminal of the battery or a starting-aid terminal of the vehicle providing assistance
- Attach the second end of the cable to the positive terminal of the battery or to a starting-aid terminal of the vehicle to be started

AVOC12BCMA
Your BMW has a special nut as body ground or negative pole.
-
Attach one end of the jumper cable minus/– to the negative terminal of the battery or to an engine or body ground of the vehicle providing assistance
-
Attach the second end of the cable to the negative terminal of the battery or to the engine or body ground of the vehicle to be started.
Starting the engine
- Start the engine on the support vehicle and allow it to run for several minutes at a fast idle
- Start the engine on the other vehicle in the usual way.
If the first start attempt is not successful, wait a few minutes before another attempt in order to allow the discharged battery to recharge - Let the engines run for a few minutes
- Disconnect the jumper cables by reversing the connection sequence.
If required, have the battery inspected and recharged at your BMW center.

Never use spray fluids to start the engine.
Towing

Always observe all applicable towing laws and regulations.
Towing with a commercial tow truck

▶ Use a wheel lift or flatbed carrier
Do not tow with sling-type equipment.

Never allow passengers to ride on a towed vehicle for any reason.
Towing with raised front axle
Vehicles with automatic transmission:
- Towing speed: Maximum 45 mph/70 km/h
- Towing distance: Maximum of 90 miles/150 km.
Vehicles with Sequential manual transmission SMG
With the ignition switched on, engage the selector lever position N, then switch off the ignition again.
Tow fitting
The threaded tow fitting is stored in the tool kit mounted on the inside of the luggage compartment lid, refer to page 184, and should always remain in the vehicle. It can be screwed to the front or rear of the vehicle.
Access to tow sockets
Front

MAYI595CMAA
Rear

MVO1596CMVA
Press the arrow symbol to push out the cover.

Only use the tow fitting carried in the vehicle and screw it in firmly as far as it will go. Only use the tow fitting for towing on roads. Follow these instructions; otherwise the tow fitting can come loose and lead to damage to the vehicle.
Never attempt to tow or tie down the vehicle using suspension components, as this could lead to damage that might ultimately result in an accident.

Reference
This is where to look to find information on any desired topic as quickly as possible. This chapter includes the section with technical information as well as the manual's index.
Technical data
Engine specifications
| 525i 530i | |||
| Displacement | cu in/cm 3 | 152.2/2,494 | 181.8/2,979 |
| Number of cylinders | 6 | 6 | |
| Maximum output | hp | 184 | 225 |
| at engine speed | rpm | 6,000 | 5,900 |
| Maximum torque | lb ft/Nm | 175/237 | 214/290 |
| at engine speed | rpm | 3,500 | 3,500 |
| Compression ratio | 10.5 | 10.2 | |
| Stroke | in/mm | 2.95/75.0 | 3.53/89.6 |
| Bore | in/mm | 3.31/84.0 | 3.31/84.0 |
| Fuel-injection system | Digital electronic engine-management system | ||
| 545i | ||
| Displacement | cu in/cm3 268.4/4,398 | |
| Number of cylinders | 8 | |
| Maximum output | hp | 325 |
| at engine speed | rpm | 5,900 |
| Maximum torque | lb ft/Nm | 330/448 |
| at engine speed | rpm | 3,600 |
| Compression ratio ε | 10.0 | |
| Stroke | in/mm | 3.26/82.7 |
| Bore | in/mm | 3.60/92.0 |
| Fuel-injection system | Digital electronic engine-management system | |
Dimensions
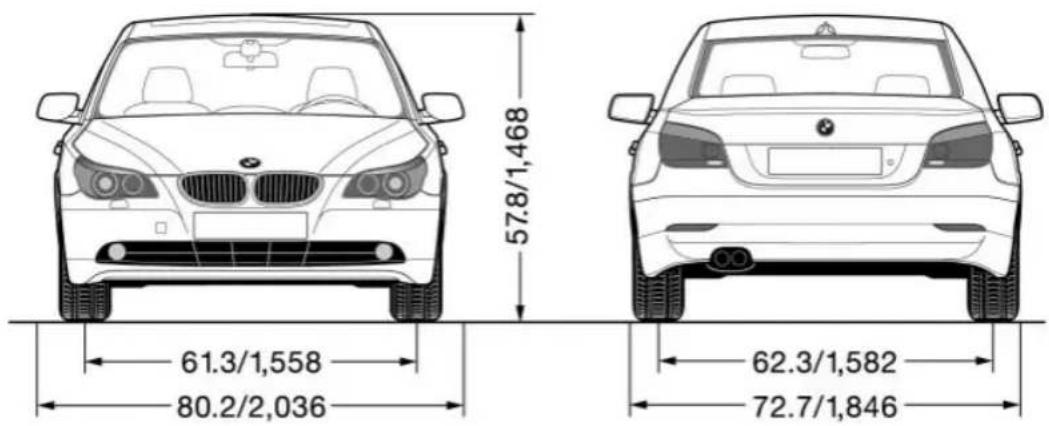

All dimensions in inch/mm. Minimum turning circle dia.: 37.5 ft/11.44 m
Weights
| 525i 530i | |||
| Curb weight | Ibs./kg | ||
| with manual transmission | 3,428/1,555 | 3,472/1,575 | |
| with automatic transmission | 3,450/1,565 | 3,494/1,585 | |
| Approved gross weight | Ibs./kg | ||
| with manual transmission | 4,530/2,055 | 4,575/2,075 | |
| with automatic transmission | 4,552/2,065 | 4,597/2,085 | |
| Load Ibs./kg 1,102/500 1,102/500 | |||
| Approved front axle load | Ibs./kg 2,161/980 2,227/1,010 | ||
| Approved rear axle load | Ibs./kg 2,601/1,180 2,601/1,180 | ||
| Approved roof load capacity | Ibs./kg 220/100 220/100 | ||
| Luggage compartment volume cu ft/l | 18.4/520 18.4/520 | ||
| 545i | ||
| Curb weight | Ibs./kg | |
| with manual transmission | 3,803/1,725 | |
| with automatic transmission | 3,814/1,730 | |
| Approved gross weight | Ibs./kg | |
| with manual transmission | 4,905/2,225 | |
| with automatic transmission | 4,916/2,230 | |
| Load Ibs./kg 1,103/500 | ||
| Approved front axle load | Ibs./kg 2,403/1,090 | |
| Approved rear axle load | Ibs./kg 2,679/1,215 | |
| Approved roof load capacity | Ibs./kg | 220/100 |
| Luggage compartment volume cu ft/l | 18.4/520 | |
Never exceed either the approved axle loads or the gross vehicle weight.
Capacities
| Notes | |||
| Fuel tank | gal/liters | approx. 18.5/70 | Fuel quality: page 169 |
| Reserve | gal/liters | approx. 2.1/8 | |
| Window and headlamp washer system | quarts/liters | approx. 3.2/3 For details: page 57 | |
| Engine with oil filter renewal | BMW High Performance Synthetic Oil. | ||
| 525i/530i | quarts/liters | 6.9/6.5 | Oil grades: page 179 |
| 545i | quarts/liters | 8.5/8.0 | |
| Manual, automatic transmission and differential | – Lifetime fluid, no fluid change required | ||
Everything from A to Z
Index
A
ABS Antilock Brake System 77
-indicator lamp 77
Acceleration assistant 54
Accessories, refer to Your individual vehicle 5
"Activation time" for independent ventilation 95
Active cruise control 59
- malfunctions 64
Active head restraints, front 40
Active roll stabilization 80
Active seat 42
Active seat ventilation 42
Active steering 82
Adaptive Head Light 88
"Address book" for navigation 120
Address for navigation
-deleting 120
-entering 116
-selecting 120
"Add to address book" for navigation 120
"Add to destination list" 118
Adjusting temperature for upper body 93
Adjusting the thigh support 37
"After door is opened" 39
"After unlocking" 39
Airbags 83
-indicator lamp 84
- sitting safely 36
Air circulation, refer to Recirculated air 91
Air distribution
- automatic 91
- individual 93
Air flow, refer to Air volume 91
Airing, refer to Ventilation 94
"Air recirculation on / off" 44
Air vent outlets of automatic climate control 90
Air volume 91
AKI, refer to Fuel specifications 169
Alarm system 32
- avoiding unintentional alarms 33
All around the steering wheel 10
"All channels" 138
"All doors" 28
All-season tires, refer to Winter tires 175
"AM", wave- band 130, 134
Antenna for portable phone 150
Antifreeze
-coolant 179
- washer fluid 57
Anti-theft system 27
Anti-trapping mechanism
-glass roof 35
-windows 34
Approved axle loads, refer to Weights 200
Approved gross vehicle weight, refer to Weights 200
Arrival time, refer to Computer 71
Ashtray
-front 99
- rear 100
Assistance window 18
Assisting systems, refer to DSC Dynamic Stability Control 78
AUC Automatic recirculated-air control 91
"Audio" 131
Audio 130
- adjusting the tone 131
- controls 130
-switching on/off 130
- volume 131
Audio systems, refer to Tone control 131
Automatic
– air distribution 91
- air volume 91
-cruise control 58, 59
- storing stations 135
Automatic car wash, refer to Caring for your vehicle brochure
Automatic climate control 90
- automatic air distribution 91
- settings using the Control Center 92
-switching off 92
Automatic curb monitor 39
Automatic headlamp control 87
"Automatic programs" 93
Automatic recirculated-air control AUC 91
Automatic steering wheel – adjustment 43
Automatic transmission with Steptronic 54
-indicator lamp 56
- interlock 49
- selector lever interlock 55
- shiftlock 55
- sport program 55
- starting the engine 50
- towing 193
AUTO program, refer to Automatic air distribution and volume 91
"Autostore" on the radio 136
"AUTO" with automatic climate control 93
Average fuel consumption 70
- setting the units 74
Average speed 70
"Avoid ferries" for navigation 121
"Avoid freeways / tolls" for navigation 121
Avoiding unintentional alarms 33
"Avoid tollroads" for navigation 121
Axle loads, refer to Weights 200
"A - Z" 154
B
Backrests, refer to Seats 36
Backrest width adjustment 37
Backup lamps, refer to Reverse gear 51
-replacing the bulbs 186
"Balance", audio system 132
Balance, refer to Tone control 131
"Bass", audio system 132
Bass, refer to Tone control 131
Battery 188
-in the remote control 26
-jump-starting 192
Belts, refer to Safety belts 36, 40
Beverage holders 99
Black ice, refer to Ice warning 65
Blocking sections of a route for navigation 125
Blower, refer to Air volume 91
BMW Assist 161
-enabling 161
– services offered 162
"BMW Info" 163
BMW Maintenance System 181
"BMW Service settings" 161
Bore, refer to Engine data 198
Bottle holder, refer to Beverage holders 99
Brake Assistant, refer to DBC Dynamic Braking Control 79
Brake fluid 180
-indicator lamp 180
-level 180
-replacing 180
Brake force display 82
Brake hydraulic systems 180
Brake lamps, replacing the bulbs 186
Brake pads 107
- breaking-in procedure 106
Brake pedal, refer to Brakes 107
Brake rotors 107
Brakes 107
- ABS 77
- brake fluid 180
- breaking-in procedure 106
-handbrake 50
Brake system 106
- brake-fluid level 180
- brake pads 107
- breaking-in procedure 106
- disc brakes 107
-indicator lamp 13, 107
Breakdown services, refer to Roadside Assistance 191
Break-in procedures 106
-brakes 106
- clutch 106
-differential 106
- engine 106
Brightness on the Control Display 73
Bulbs and lamps
-replacing the bulbs 184
Buttons on steering wheel 11
C
California Proposition 65 Warning 183
"Call" 154
Call
-accepting 153
- display accepted 154
-ending 154
-inabsence154
-starting 153
Calling
- from phone book 154
– from the Top 8 list 154
- redialing 154
Calling up traffic information 126
"Call sender" 156
"Call Sirius" 138
Can holder, refer to Beverage holders 99
Capacities 201
Car battery, refer to Battery 188
Car care, refer to Caring for your vehicle brochure
Car-care products, refer to Caring for your vehicle brochure
Cargo, securing 109
Cargo area
- locking separately 31
Caring for artificial leather, refer to Caring for your vehicle brochure
Caring for leather, refer to Caring for your vehicle brochure
Caring for light-alloy wheels, refer to Caring for your vehicle brochure
Caring for plastic, refer to Caring for your vehicle brochure
Caring for the carpet, refer to Caring for your vehicle brochure
Caring for the vehicle finish, refer to Caring for your vehicle brochure
Car jack
-jacking points 188
Car keys, refer to Central keys with remote control 26
Car phone 151
- installation location, refer to Center armrest 98
– refer to Portable phone 150
– refer to separate Owner's Manual
Car radio, refer to Radio 134
Car wash 106
– refer also to Caring for your vehicle brochure
Catalytic converter, refer to High temperatures 106
"Categories" 138
CBC Cornering Brake Control 78
CBS Condition Based Service 181
"CD" 130
CD changer 144
- adjusting the tone 131
- controls 130
– fast forward/reverse 146
- installation location 144
- listening to a CD 144
- playing a track 145
- random order 146
- repeating a track 145
-selecting track 145
-switching on/off 130
-volume 131
CD for navigation 114
CD player 141
- adjusting the tone 131
- controls 130
-fast forward/reverse 142
- playing a track 142
- random order 142
- repeating a track 142
-selecting tracks 141
-switching on/off 130
- volume 131
Center armrest 98
Center console, refer to Comfort area 14
Central keys with remote control 26
"Central locking" 38
Central locking system 27
– from inside vehicle 30
- from outside vehicle 27
Changes, technical, refer to Parts and accessories 6
Changing a wheel 187
Changing selector-lever positions 55
Changing the direction display for navigation 124
Changing the language on the Control Display 74
Changing the measurement units on the Control Display 74
Changing wheels 174
CHECK button 69
Check Control 68
"Check Control messages" 69
Check Gas Cap 168
Checking the air pressure, refer to Tire inflation pressure 170
Child's seat 45
Child-restraint fixing LATCH 47
Child restraints 45
Child-restraint system 45
Child-safety lock 48
Chock 187
Chrome parts, care, refer to Caring for your vehicle brochure
Cigarette lighter 100
Circulation of air, refer to Recirculated-air mode 91
"City" for destination entry 117
Cleaning, refer to Caring for your vehicle brochure
Cleaning headlamps
- washer fluid 57
Cleaning windshield 57
"Climate" 41
Clock 65
- 12/24 hour mode 74
- setting the time and date 74
Closing
- from inside 30
- from outside 27
Cockpit 10
Comfort area 14
Comfort seat 37
"Communication" 152
"Communication interface" 161
Compact Disc
– refer to CD changer 144
– refer to CD player 141
Compact wheel
– inflation pressure 171
- wheel change 187
Compression ratio, refer to Engine data 198
Computer 70
-clock, 12/24 hour mode 74
– displays on the Control Display 70
Condition Based Service CBS 181
"Confirmation" 28
Confirmation signals for vehicle locking 28
"Confirm unlock code" 153
Connecting a vacuum cleaner, refer to Lighter socket 100
Consumption display
– refer to average fuel consumption 70
Consumption indicator
– refer to Energy Control 66
"Continue guidance to dest.?" 126
Control Center 16
- adjusting the brightness 73
- assistance window 18
- automatic climate control 92
- changing settings 73
- changing the menu page 19
– confirming selection or entry 19
- display, menus 16
– language selection 74
- lists 19
- menu item selection 19
-selecting units of measure and display format 74
- setting time and date 74
- status information 18
- symbols 17
Control Display 16
Controller, refer to Control Center 16
Controls, audio systems 130
Controls, refer to Cockpit 10
Convenience operation
-glass roof 28
-windows 28
Convenience start, refer to Starting the engine 49
Coolant 179, 180
-level 180
Cooling, maximum 91
Cornering Brake Control 78
"Country" for destination entry 117
Country of destination for navigation 116
Courtesy lighting 89
Cruise control 58
- active cruise control 59
-indicator lamp 11
Cruising range 70
Cup holder, refer to Beverage holders 99
Curb weight, refer to Weights 200
Current fuel consumption 66
"Current position" 115
"Customer Relations" 163
Cylinders, refer to Engine data 198
D
Dashboard, refer to Cockpit 10
Data 198
-capacities 201
-dimensions 199
- engine 198
- weights 200
Date 65
- calling up 65
- display format 75
- setting 75
Daytime driving lamps 87
DBC Dynamic Brake Control 79
-indicator lamp 79
Decommissioning the vehicle, refer to Caring for your vehicle brochure
Defect
- automatic transmission 56
- door lock 29
- luggage compartment lid 31
- Sequential manual transmission SMG 53
Defrosting the windshield, refer to Defrosting windows 91
Defrosting windows and removing condensation 91
Defrost position, refer to Defrosting windows 91
"Delete address book" for navigation 121
"Delete all numbers" on the portable phone 155
"Delete data" for navigation 121
"Delete" for portable phone 155
Deleting the destination address 120
Destination for navigation
- entry 116
– recent destinations 119
-selecting via map 118
-selecting with information 118
-storing 120
Destination guidance 123
- changing specified route 121
- interrupting voice instructions 125
-selecting a new route 125
- terminating/continuing 126
- volume of voice instructions 125
"Detour" 126
"Dial number" 153
Digital clock 65
Dimensions 199
Dipstick for engine oil 178
Directional indicators, refer to Turn signal indicators 56
Direction announcements, refer to Voice instructions 124
Direction instructions, refer to Voice instructions 124
Directory, refer to Phone book 154
Directory for navigation, refer to Address book 120
Disc brakes 107
Displacement, refer to Engine data 198
Display lighting 88
Displays
– refer to Cockpit 10
– refer to Control Display 17
– refer to Instrument
cluster 12
Displays on the wind
refer to Head-Up Display 85
Disposal
- brake fluid 180
-coolant 179
- engine oil 179
- vehicle battery 189
Distance, refer to Computer 71
Distance cruise control, refer to Active cruise control 59
"Distance to destin." 71
Distance to destination, refer to Computer 71
Distance warning, refer to Park Distance Control 76
Divided rear seat back, refer to Fold down rear seat 101
Door entry lighting 89
Door keys 26
Door lock 29
"Door locks" 28
Doors
– manual operation 29
- remote control 28
DOT Quality Grades 173
Draft-free ventilation 94
"Driver" 42
"Driver's door only" 28
Driving light, refer to Parking lamps/low beams 87
Driving notes 106 Driving stability control 78
Driving tips, refer to Driving notes 106
206
Dry air, refer to Cooling function 91
Drying the air, refer to Cooling function 91
DSC Dynamic Stability Control 78
-indicator lamp 78
DTC Dynamic Traction Control 79
-indicator lamp 79
DVD for navigation 114
Dynamic Brake Control 79
-indicator lamp 79
Dynamic Driving Control 54
"Dynamic route" for navigation 121
Dynamic Stability Control 78
-indicator lamp 78
Dynamic Traction Control 79
-indicator lamp 79
E
EBV Electronic Brake Force Distribution 78
"Edit" on the portable phone 154
Electrical malfunction
-door lock 29
- luggage compartment lid 31
Electrical power windows, refer to Windows 33
Electronic Brake Force Distribution EBV 78
Electronic Stability Program ESP, refer to DSC Dynamic Stability Control 78
Emergency assistance, refer to Roadside Assistance 191
Emergency call 190
Emergency operation to Manual operation
[Non-Text]
Emergency release of luggage compartment lid from luggage compartment's interior 32
Emergency services, refer to Roadside Assistance 191
"Emission inspect." 67, 67
"Enable services" 162
"End call" 154
Energy-conscious driving, refer to Energy Control 66
Energy Control 66
Engine
- breaking-in procedure 106
-data 198
- speed 198
-starting 49
Engine compartment 178
Engine coolant 179
Engine hood 177
Engine oil
- adding 179
-checking the oil level 178
– prescribed oils 179
Engine output, refer to Engine data 198
Engine speed 198
"Enter address" 116
Entering destination 117
Entering house number or intersection 117
Entering switch-on times of independent ventilation/heating 95
Entering the address 116
Entering the intersection 117
Entering the town/city for navigation 117
Entering zip code for navigation 117
"Entertainment" 130
"Entertainment settings" 131
"Equalizer" 133
"Equalizer", audio systems 131
206
206
206
206
206
Or
Or
Or
Or
Or
206 Or
206 Or
206 Or
206 Or
206
206
206
206
206
206
206
206
206
206
206
206
206
206
206
206
206
206
206
206
206
206
206
206
206
206
206
206
206
206
206
206
206
206
[Non-Text]
206
206
206
206
206
206
206
206
ESP Electronic Stability Program, refer to DSC Dynamic Stability Control 78
Exhaust system, refer to High temperatures 106
Exterior mirrors 42
- automatic dimming feature 43
F
"Fader", audio systems 132
Failure messages, refer to Check Control 68
False alarms, refer to Avoiding unintentional alarms 33
False alarms with the Flat Tire Monitor 80
Fastening safety belts, refer to Safety belt
-indicator lamp 40
"Fastest route" for navigation 121
Fastest route for navigation 121
First aid, refer to First aid kit 191
First aid kit 191
Fitting for towing 193
Flashlight, refer to Rechargeable flashlight 98
Flash when locking/unlocking 28
Flat tire
-compact wheel 187
- Flat Tire Monitor 81
– refer also to Changing a wheel 187
– refer also to Tire condition 173
- run-flat tires 81, 175
Flat Tire Monitor 80
- false alarms 80
-indicator lamp 81
- initializing the system 81
- malfunctions 82
Floods, refer to Water on the road 107
"FM", waveband 130, 134
FM, waveband 134
Fog lamps 89
-indicator lamp 89
Fold down rear seat 101
Folding rear seat back 101
Footwell lamps 89
Forward, fast
- CD changer 146
- CD player 142
For your own safety 6
Front airbags 83
Front armrest 98
Front head restraints 40
Front seat adjustment 36
Front-to-rear adjustment in Audio mode 132
"FTM" 81
Fuel 169
- display 66
- quality 169
- tank volume 66
Fuel clock, refer to Fuel gauge 66
Fuel display, refer to Fuel gauge 66
– releasing in the event of electrical malfunction 168
Fuel specifications 169
Fuses 189
G
Garage door opener, refer to Integrated universal remote control 96
Gasoline, refer to Fuel quality 169
Gasoline display, refer to Fuel gauge 66
Gear changes, refer to Automatic transmission with Steptronic 55
Gear display 54
Gearshift lever
- automatic transmission with Steptronic 55
- manual transmission 51
- Sequential manual transmission SMG 51
General car care, refer to Caring for your vehicle brochure
General driving notes 106
Glass roof, electrical 34
- closing in the event of an electrical defect 35
-convenience operation 29
- remote control 28
Glove compartment 98
-lighting 98
GPS navigation, refer to Navigation system 114
Grilles of the automatic climate control 90
Gross vehicle weight, refer to Weights 200
H
Halogen lamps 185
Handbrake 50
-indicator lamp 50
Hands-free unit 151
Hazard warning flashers 14
Head airbags 83
Headlamp control, automatic 87
Headlamp flasher 56
Headlamps 87
– care, refer to Caring for your vehicle brochure
-replacing the bulbs 185
Headlamp washers 57
Head Light, refer to Adaptive Head Light 88
Head restraints 39
-front 39
-front,active 40
- rear 40
"Head-Up Display" 44
Head-Up Display 85
Heated mirrors 43
Heated rear window 91
Heated seats 41
Heated steering wheel 44
"Heated steering wheel on / off" 44
Heater, rear window 91
Heating 90
-mirrors 43
- steering wheel 44
Heating while stopped 92
Heavy cargo, refer to Stowing cargo 109
Height, refer to Dimensions 199
Height adjustment
- head restraints 39
-seats 37
- steering wheel 43
High beams 88
- headlight flasher 88
-indicator lamp 13
-replacing the bulbs 185
Hills 107
Holder for beverages 99
"Horn" 44
Horn 10
"Hour memo" 75
"House number" for destination entry 117
Hydraulic brake assistant, refer to DBC 79
Hydroplaning 106, 174
I
Ice warning 65
iDrive, refer to Control Center 16
Ignition key 26
Ignition key positions, refer to Ignition lock 49
Ignition lock 49
Independent ventilation
– switching on and off directly 94
Independent ventilation/heating
-entering switch-on times 95
-preselecting switch-on times 95
Indicator/warning lamp
- active steering 82
-airbags 84
- Flat Tire Monitor 81
-front fog lamps 11
- overview 13
- safety belt warning 40
Individual air distribution 93
Individual button assignment options on steering wheel 44
Individual settings, refer to Key Memory 26
Inflation pressure, refer to Tire inflation pressure 170
"Information" for navigation 118
Information for navigation
-on a different city 118
-on city of destination 118
-on current position 118
"Information on destination" 119
"Input map" 118
Installation location
- CD changer 144
– navigation computer 114
- portable phone 151
Instructions for navigation system, refer to Voice instructions 124
Instrument cluster 12
Instrument combination, refer to Instrument cluster 12
Instrument lighting 88
Instrument panel, refer to Instrument cluster 10
Integrated universal remote control 96
Interesting destination 118
"Interim time" 73
Interior lamps 89
- remote control 28
Interior mirror, refer to Interior rearview mirror 43
Interior motion sensor 33
-switching off 28
Interior rearview mirror 43
- automatic dimming feature 43
Interlock, refer to Steering locked 49
Intermittent mode of the wipers 57
J
Jacking points 188
Joystick, refer to Control Center 16
Jump-starting 192
K
Key Memory 26
"Keypad" 156
Keys 26
Key set, refer Central keys with remote control 26
Kickdown 55
Knock control 169
L
Lamps and bulbs 184
"Languages" 74
"Languages" for navigation 124
Lashing eyes, refer to Securing the load 109
"Last seat position" 38
LATCH child-restraint fixing 47
LEDs light-emitting diodes 89
Length, refer to Dimensions 199
Letter symbol on portable phone 156
License plate light
-replacing the bulbs 186
Light-emitting diodes LEDs 89
Lighter 100
- socket 100
"Lighting" 56, 87
Lighting
-instruments 88
- of the vehicle, refer to Lamps 87
Lighting of the instruments, refer to Instrument lighting 88
Lights, refer to Parking lamps/low beams 87
Lights on warning 87
Light switch 87
Limit speed, refer to Limit 72
Loading
-securing the load 109
-stowing cargo 109
- vehicle 108
"Lock after driving off" 30
"Lock button" 28
Locking
- from inside 30
- from outside 28
Locking and unlocking doors
- from inside 30
- from outside 27
- setting confirmation signals 28
"LOGIC7", audio systems 132
Low beams 87
- automatic 87
-replacing the bulbs 185
Lower back support, refer to Lumbar support 38
Lug bolts 188
-wrench 187
Luggage compartment 31
-capacity 200
- locking separately 31
- opening/closing, refer to Luggage compartment lid 31
- opening from the inside 31
- opening from the outside 31
- opening with remote control 28
- socket 100
-volume 200
Luggage compartment lid 31
– emergency release from inside luggage compartment 32
- locking separately 31
- manual operation 31
- opening from the inside 31
- opening from the outside 31
- opening with remote control 28
- unlocking manually 31
Luggage rack, refer to Roof-mounted luggage rack 109
Lumbar support 38
LW, waveband 134
M
M+S tires, refer to Winter tires 175
Maintenance, refer also to Service and Warranty Information Booklet for US models or Warranty and Service Guide Booklet for Canadian models
Maintenance system 181
Malfunction
- automatic transmission 56
- Sequential manual transmission SMG 53
Malfunction warnings, refer to Check Control 68
Manually controlled recirculated air 91
"Manual" on the radio 135
Manual operation
-door lock 29
- luggage compartment lid 31
Manual operation with automatic transmission 55
Manual release, refer to Manual operation
Manual station tuning 135
Manual transmission 51
"Map, arrow display" 123
"Map, direction of travel" 124
"Map, facing north" 124
Maximum cooling 91
Maximum roof weight 200
Maximum speed
-for winter tires 175
- with compact wheel 188
Memory
– refer to Key Memory 26
– refer to Seat, mirror and steering wheel memory 38
Menus, refer to Control Center 16
Message list of traffic information 126
Microphone for hands-free system 151
Mirrors 42
- automatic curb monitor 39
-dimming feature 43
-heating 43
– memory, refer to Seat, mirror and steering wheel memory 38
"Missed calls" 155
Missed calls 154
Mobile communications in the vehicle 108
Mobile Service, refer to Roadside Assistance 191
Monitor, refer to Control Center 16
"Monitor display on" 77
Monitoring inflation pressure, refer to Flat Tire Monitor 80
Multifunction switch
– refer to Turn signal indicators/headlamp flasher 56
– refer to Wiper/washer system 57
Music track
– find 142, 145
"Mute on / off" 44
MW, waveband 134
N
"Navigation" 44, 114
Navigation, refer to Navigation system 114
Navigation CD/DVD 114
Navigation computer, installation location 114
Navigation destination
-manual entry 116
Navigation system 114
- address book 120
-current position 115
-destination guidance in assistance window 115
-destination input 116
-destination list 119
- entering a destination manually 116
- navigation CD/DVD 114
– recent destinations 119
- route display 123
- route list 124
– selecting destination using information 118
-selecting route criteria 121
-starting 114
- starting destination guidance 123
– switching off, refer to Terminating/continuing destination guidance 126
- terminating/continuing destination guidance 126
- voice instructions 124
- volume adjustment 125
"Navigation voice instructions on" 124
Neck support, refer to Head restraints 39
"New destination" 116, 118
"New route" 125
"Next entertainment source" 44
North alignment of map for navigation 124
Nozzles, refer to Windshield washer nozzles 57
"Number" on portable phone 153
O
OBD connector 183
Octane numbers, refer to Fuel quality 169
Odometer 65
Oil
- additives 179
-capacity 201
-dipstick 178
– specified engine oils 179
Oil change interval, refer to Service requirement display 66
Oil consumption 178
Oil level 178
Old batteries, refer to Disposal 189
"On a new destination" for navigation 119
"Onboard info" 71
Onboard monitor, refer to Control Center 16
Onboard tool kit 184
"On destination" 119
"On location" 119
Opening and closing
- from inside 30
- from outside 27
- using the door lock 29
- using the remote control 27
Operation via voice for portable phone 157
- adjusting volume 158
-canceling 157
- correcting phone number 158
- correcting unlock code 158
-dialing phone number 158
-entering unlock code 158
- placing a call 158
- redialing 159
-switching on phone 158
- voice commands 157
- voice phone book 158
Orientation menu, refer to Start menu 17
Output, refer to Engine data 198
Outside air, refer to Recirculated-air mode 91
Outside temperature display 65
- changing the measurement unit 74
-in the computer 74
P
Panic mode 28
Park Distance Control PDC 76
Parking
- vehicle 50
Parking aid, refer to Park Distance Control PDC 76
Parking brake, refer to Handbrake 50
Parking lamp
-replacing the bulbs 185
Parking lamps/low beams 87
-replacing the bulbs 185
"Parking lamps on!" 69
Parts and accessories, refer to Your individual vehicle 5
"Passenger" 42
Passenger-side mirror tilt function 39
"Pathway lighting" 87
Pathway lighting 87
"PDC" 77
PDC Park Distance Control 76
"Phone" 152
Phone book 152
Phone numbers
– deleting in the phone book 155
-dialing 153
- most recent numbers 154
– selecting in the phone book 154
- Top-8 154
Please fasten safety belt warning lamp 41
Portable phone
- accepted calls 154
-adjusting volume 152
- calling 153
-call termination 154
- controlling with the buttons on the steering wheel 11
- entering unlock code 152
- hands-free system 151
- installation location, refer to Center armrest 98
- missed calls 154
- phone book 154
- redialing 154
– refer to separate Owner's Manual
- SMS 156
- Top-8 154
-touch tone redialing 156
Portable phone, refer to separate Owner's Manual
Portable phone battery 151
Portable phone codes 152
Portable phone in vehicle 108
Portable phones, use in the interior, refer to Mobile communications in the vehicle 108
Position
- displaying 115
"Presets" on the radio 134, 138
Pressure, tires 170
Pressure monitoring, tires 80
"Profile" 165
Programming button function 44
Programming buttons on steering wheel 44
R
Radio
- adjusting the tone 131
- autostore 135
- controls 130
-play station 135
-satellite radio 138
– selecting the waveband 130, 134
-station search 136
-station selection 134
- station with the best reception 135
-store station 136
-switching on/off 130
- volume 131
-Weather Band 137
Radio-control key, refer to Central key with remote control 26
Rain sensor 57
"Random", random sequence generator 142, 146
Random play
- CD changer 146
- CD player 142
Reading lamps 89
Rear armrest 101
Rear center armrest 101
Rear head restraints 40
Rear lamps
-replacing the bulbs 186
Rear seat back, folding 101
Rear seats
- folding backrests 101
- head restraint adjustment 40
- heating 41
Rear ventilation 94
Rearview mirror 42
Rear window blind, refer to Roller sun blinds 97
Rear window safety switch 34
"Received calls" 155
Receiving level of portable phone, refer to Status information 18
Recent destinations 119
Recent portable phone numbers 154
Reception
- quality 137
– radio stations 137
- regional program 135
Recirculated air 91
Reclining seat, refer to Backrest 37
Recording times, refer to Stopwatch 73
"Redial" for portable phone 155
Redialing with portable phone 154
Refueling 168
"Relock door if not opened" 30
Remaining distance 71
Remote control 26
-garage-door opener 96
- luggage compartment lid 28
- malfunctions 29
"Repeat" on the radio 142, 145
Replacement fuses 189
Replacement keys 29
Replacement of wheels 174
Replacing bulbs, refer to Lamps and bulbs 184
Replacing wheels/tires 174
Reporting an accident refer to Starting an emergency call 190
Reporting safety defects 7
Reserve warning, refer to Fuel gauge 66
"Reset" for stopwatch 73
Residual heat 92
Restraint systems, refer to Safety belts 40
Reverse, fast
- CD changer 146
- CD player 142
Reverse gear
- automatic transmission with Steptronic 55
-manual transmission 51
- Sequential manual transmission SMG 52
Right/left balance adjustment in audio mode 132
"Roadside Assistance" 162
Roadside Assistance 191
"Roaming" 165
Roller sun blinds 97
Roof-mounted luggage rack 109
Route 123
- changing 121
- display 123
- list 124
- map cancellation 123
- map display 124
-new 125
-selecting 121
-selecting criteria 121
Route announcements, refer to Voice instructions 124
Route guidance, refer to Destination guidance 123
"Route list" for navigation 124
Route map 123
Route selection 121
Run-flat tires 175
- continuing driving with a damaged tire 175
- flat tire 81
– tire inflation pressure 175
-tire replacement 174
S
Safety belts 36, 40
- damage 41
- sitting safely 36
- warning lamp 40
Safety belt tensioners, refer to Safety belts 36, 40
Safety feature
-glass roof, electrical 35
-windows 34
Safety lock buttons 30
Safety systems 78
- ABS Antilock Brake System 77
-airbags 83
- safety belts 40
Satellite radio 138
-activating 138
-selecting channel 138
-storing channel 138
"SAT" for radio 138
Scan
- CD changer 145
- CD player 142
- radio 136
"Scan", playing stations 135
"Scan", playing tracks 142, 145
Screen, refer to Control Display 16
"Screen on / off" 44
"Seat heater distribution" 41
Seats 36
- adjusting comfort seat 37
- adjusting sports seat 37
-adjusting the seats 37
- heating 41
– memory, refer to Seat, mirror and steering wheel memory 38
- sitting safely 36
- storing the setting 38
- ventilation, refer to Active seat ventilation 42
Securing cargo, refer to Cargo 109
Securing the load 102
"Select as destination" 119
Select "BMW Service" 162
"Select current speed" 73
Selecting a new route for navigation system 125
Selecting audio sources 130
Selecting new scale for navigation system display 124
Selecting route 121
Selecting "Route preference" 121
Selection options with navigation system 121
Selector lever
- automatic transmission with Steptronic 55
- Sequential manual transmission SMG 52
Selector lever lock, refer to Changing selector-lever positions 55
Selector-lever positions
- automatic transmission with Steptronic 55
- manual transmission 51
- SMG Sequential manual transmission 52
Sequential manual transmission SMG 51
"Service" 66, 162
Service, refer to Roadside Assistance 191
Service Interval Display 66
"Service notification" 162
"Service Request" 163
"Service requirements" 66, 162
"Service Status" 162
"Set date" 75
"Set service date" 67
Setting road-speed limit 72
Settings
- changing on the Control Display 73
- configuring, refer to Key Memory 26
Setting the time, refer to Preselecting switch-on times 95
Shifting gears with automatic transmission with Steptronic 55
Shiftlock, refer to Changing selector-lever positions 55
"Shortest route" for navigation 121
Shortest route for navigation 121
Shoulder support 37
"Show current position" 118
"Show destination position" 118
Side airbags 83
Side marker lamps, replacing the bulbs 186
Side turn signal indicators, replacing the bulbs 186
Side window blind, refer to Roller sun blinds 97
Sitting safely
- with airbags 36
- with safety belts 36
Ski bag 101
Sliding/tilt sunroof, refer to Glass roof, electric 34
SMG Sequential manual transmission 51
"SMS" 156
Snow chains 176
Socket
– for Onboard Diagnosis interface 183
-in front passenger footwell 100
-in luggage compartment 100
– refer to Lighter socket 100
SOS, refer to Starting an emergency call 190
Sound control, refer to Tone control 131
Spare fuses 189
Spare key 26
Spare wheel, refer to Compact wheel 187
Special oils, refer to Specified engine oils 179
Specified engine oils 179
Speed
- winter tires 175
- with compact wheel 188
Speed-dependent volume 132
Speedometer 12
"Speed volume", audio systems 132
Sport program
– Dynamic Driving Control 54
Sports seat 37
Stability control, refer to Driving stability control 77
Standard default settings, audio systems 133
Standing lamps 88
"Start" for stopwatch 73
"Start guidance" 118
Starting, refer to Starting the engine 49
Starting assistance, refer to Jump-starting 192
Starting destination guidance 123
Starting difficulties
- at very low temperatures 49
Starting the engine 49
Start menu on the Control Display 17
"Start service" 163
Start-up difficulties
-jump-starting 192
Station, refer to Radio 134
"Status" 66
Status 67
Status of this Owner's Manual at time of printing 5
Steering wheel 11
- adjustment 43
- buttons on the steering wheel 11
- heating 44
- individual button assignment options 44
- memory 38
"Steering wheel buttons" 44
Steering with variable ratio, refer to Active steering 82
Steptronic, refer to Automatic transmission with Steptronic 54
"Stop" for stopwatch 73
"Stopwatch" 73
Stopwatch 73
Storage compartments 99
"Store address" for navigation 120
"Store" on the radio 136
Storing sitting position, refer to Seat, mirror and steering wheel memory 38
Storing tires 175
Straps, refer to Loading 109
"Street" for destination entry 117
Stroke, refer to Engine data 198
Summer tires, refer to Wheels and tires 170
Sun blinds 97
SW, waveband 134
Switches, refer to Cockpit 10
Switching off engine 50
Switching off the tilt alarm sensor 28
Switching on/off
- audio 130
- CD changer 130
- CD player 130
-cooling function 91
– navigation voice instructions 124
- portable phone 151
- radio 130
Swiveling headlamps, refer to Adaptive Head Light 88
Symbols 4
T
Tachometer 65
Tail lamps
-replacing the bulbs 186
Target cursor for navigation 118
Technical data 198
Telematic 161
Telephone, refer to Portable phone 150
TeleService 161
-enabling 161
– services offered 162
Temperature display
- ice warning 65
- outside temperature 65
- setting the units 74
"Terminate services" 165
"Text language" 74
The BMW Maintenance System 181
Tightening torque, refer to Tightening lug bolts 188
Tilt function, passenger-side mirror 39
"Time" 74
"Time 1" for independent ventilation 95
"Time 2" for independent ventilation 95
Timer, refer to Preselecting switch-on time 95
Tire pressure monitoring, refer to Flat Tire Monitor 80
Tire Quality Grading 173
Tires
- age 172
- changing 174
- condition 173
- damage 174
- flat 187
-inflation pressure 170
- pressure monitoring 80
-replacing 187
- run-flat 175
-size 172
-tread 173
- wear indicators 174
Tone control 131
Tone on locking/unlocking 28
Tools, refer to Onboard tool kit 184
"Top 8" for portable phone 155
Torque 198
-lug bolts 188
Touch tone dialing 156
Tow fitting 193
Towing
– with automatic transmission 193
– with sequential manual transmission SMG 193
Towing eye 193
Tow sockets for tow fitting 194
Tracks
– random play sequence 142, 146
– sample scan 142, 145
Track width, refer to Dimensions 199
Traction Control System, refer to DSC 78
Transmission
- automatic transmission with Steptronic 54
- manual transmission 51
- Sequential manual transmission SMG 51
Transporting children safely 45
Transport securing device, refer to Securing the load 109
Tread depth, refer to Tire tread 173
"Treble", audio systems 132
"Trip computer" 72
Trip computer 71
Trip-distance counter, refer to Trip odometer 65
"Triple turn signal activation" 56
Trip odometer 65
Trunk lid, refer to Luggage compartment lid 31
Turning circle, refer to Dimensions 199
Turn signal indicators 56
-replacing the bulbs 185
U
Underbody protection, refer to Caring for your vehicle brochure
Uniform Tire Quality Grading 173
"Units" 74
Units
- average fuel consumption 74
- temperature 74
Universal garage-door opener, refer to Integrated universal remote control 96
Universal remote control 96
Unlock code 152
Unlocking
- engine hood 177
- from inside 30
- from outside 27
"Update services" 165
V
Valve stem seal caps 188
Vehicle
-battery188
– care, refer to Caring for your vehicle brochure
- dimensions 199
- loading 108
- parking 50
- washing, refer to Caring for your vehicle brochure
- weights 200
Vehicle jack 187
Vehicle position 115
"Vehicle settings" 38
Ventilation 94
-draft-free 94
-front 94
- rear 94
Ventilation while parked 94
"Vent settings" 92
Vents of the automatic climate control 90
Voice command system 20
Voice instructions for navigation system 124
-muting 125
- repeating 125
-switching on/off 124
-volume 125
Voice phone book 158
Volume 130
- audio sources 130
- portable phone 152
-speed-dependent 132
- voice instructions 125
Volume of the luggage compartment 200
W
Warning and indicator lamps 13
Warning messages, refer to Check Control 68
Warning triangle 191
Washer fluid 57
- content of the reservoir 58
- reservoir of the cleaning systems 58
Water on the road, floods 107
Waveband 134
"WB" 130, 137
Wear indicators in the tires 174
Weights 200
Wheelbase, refer to Dimensions 199
Wheel changes 187
Wheels and tires 170
"Where to go?" 164
Width, refer to Dimensions 199
Windows 33
- convenience opening 28
– convenience operation 29
- safety switch 34
Windshield washer system 57
- washer fluid 57
-washer nozzles 57
Windshield wipers 57
- blade replacement 184
Winter tires 175
- speed limit selection 72
- storage 175
Wiper blade replacement 184
Wiper system 57
"With freeways" for navigation 121
Wordmatch principle for navigation 122
Working in the engine compartment 177
Wrenches/screwdrivers, refer to Onboard tool kit 184
X
Xenon lamps 185
-replacing the bulbs 185
Refueling
To ensure that you always have all the essential data at hand when refueling, we recommend that you fill in the following tables with the specifications and information that apply to your vehicle. Consult the index for individual specifications.
Fuel
Designation
Please enter your preferred fuel here.
Engine oil
Quality
The oil quantity between the two marks on the dipstick is approx. 1.6 US quarts/1.5 liter.
Tire inflation pressures
| Summer tiresFront Rear | Winter tiresFront Rear | |
| Up to 4 persons | ||
| 5 persons or 4 plus luggage |

- CONTENTS
- A TO Z
- 525I 530I 545I
- USING THIS OWNER'S MANUAL
- AT A GLANCE
- CONTROLS
- DRIVING TIPS
- NAVIGATION
- ENTERTAINMENT
- COMMUNICATIONS
- MOBILITY
- REFERENCE
- NOTES
- ADDITIONAL SOURCES OF INFORMATION
- SYMBOLS USED
- SYMBOLS ON VEHICLE COMPONENTS
- THE INDIVIDUAL VEHICLE
- EDITORIAL NOTICE
- FOR YOUR OWN SAFETY
- FUELS
- MAINTENANCE AND REPAIR
- PARTS AND ACCESSORIES
- SERVICE AND WARRANTY
- REPORTING SAFETY DEFECTS
- COCKPIT
- 6 BUTTONS ON STEERING WHEEL
- 7 INSTRUMENT CLUSTER 12
- 9 IGNITION LOCK 49
- INSTRUMENT CLUSTER
- INDICATOR AND WARNING LAMPS
- TECHNOLOGY THAT MONITORS ITSELF
- COLORS
- INDICATOR AND WARNING LAMPS OF THE CHECK CONTROL
- COMFORT AREA: CONTROLS AND DISPLAYS
- CONTROL CENTER
- MENU OVERVIEW
- COMMUNICATION
- NAVIGATION OR ONBOARD INFORMATION
- CLIMATE
- MENU ITEM I
- MENU GUIDANCE
- WARNING
- ACCEPT
- MENU
- DISPLAYS ON THE CONTROL DISPLAY
- SWITCHING CONTROL DISPLAY ON/OFF
- SELECTING MENU ITEMS AND MAKING ADJUSTMENTS
- VOICE COMMAND SYSTEM
- THE CONCEPT
- PRECONDITION
- VOICE COMMANDS
- CANCELING VOICE COMMAND SYSTEM
- AN EXAMPLE: SELECTING A RADIO STATION
- IMPORTANT FOR VOICE COMMANDS
- OPENING AND CLOSING
- THE KEY SET
- KEY MEMORY
- HOW THE SYSTEM FUNCTIONS
- TO DIFFERENTIATE
- EXAMPLES OF KEY MEMORY FUNCTIONS
- CENTRAL LOCKING SYSTEM
- OPENING AND CLOSING: FROM OUTSIDE
- USING THE REMOTE CONTROL
- UNLOCKING
- CONVENIENCE OPENING MODE
- LOCKING AND SECURING
- SWITCHING ON THE INTERIOR LAMPS
- SWITCHING OFF THE TILT ALARM SENSOR AND INTERIOR MOTION SENSOR
- PANIC MODE
- OPENING THE LUGGAGE COMPARTMENT LID
- SETTING THE CONFIRMATION SIGNALS
- MALFUNCTIONS
- FOR US OWNERS ONLY
- CONVENIENCE OPERATION
- MANUAL OPERATION
- OPENING AND CLOSING: FROM INSIDE
- UNLOCKING AND OPENING THE DOORS
- LOCKING
- LUGGAGE COMPARTMENT LID
- OPENING FROM INSIDE
- OPENING FROM OUTSIDE
- SECURING SEPARATELY
- DOUBLE-UNLOCKING, MANUAL OPERATION
- EMERGENCY RELEASE
- CLOSING
- ALARM SYSTEM
- ARMING AND DISARMING THE ALARM SYSTEM
- SWITCHING OFF THE ALARM
- INDICATOR LAMP DISPLAYS
- AVOIDING UNINTENTIONAL ALARMS
- INTERIOR MOTION SENSOR
- WINDOWS
- OPENING AND CLOSING WINDOWS
- AFTER SWITCHING OFF THE IGNITION
- SAFETY FEATURE
- SAFETY SWITCH
- ACCESSORIES IN THE WINDOW AREA
- GLASS ROOF, ELECTRIC
- RAISING, OPENING, CLOSING
- AUTOMATIC* OPENING AND CLOSING
- FOLLOWING INTERRUPTIONS IN ELECTRICAL POWER SUPPLY
- ADJUSTMENTS
- SITTING SAFELY
- SITTING SAFELY WITH AIRBAGS
- SITTING SAFELY WITH SAFETY BELTS
- SEATS
- NOTE BEFORE ADJUSTING
- SEAT ADJUSTMENT
- COMFORT SEAT* ADJUSTMENT
- SPORTS SEAT* ADJUSTMENT
- EASY ENTRY/EXIT
- LUMBAR SUPPORT* ADJUSTMENT
- SEAT, MIRROR AND STEERING WHEEL MEMORY
- STORING
- CALLING UP A STORED SETTING
- CONVENIENCE MODE
- PASSENGER-SIDE EXTERIOR MIRROR TILT FUNCTION
- HEAD RESTRAINTS
- FRONT SEATS: ADJUSTING THE HEIGHT
- FRONT SEATS: ADJUSTING THE ANGLE
- COMFORT SEAT
- SETTING THE SIDE EXTENSIONS
- FRONT HEAD RESTRAINTS, ACTIVE
- REAR SEATS: ADJUSTING THE HEIGHT
- SAFETY BELTS
- FASTENING
- RELEASING
- DAMAGE TO SAFETY BELTS
- HEATED SEATS
- TEMPERATURE DISTRIBUTION AT THE FRONT
- ACTIVE SEAT VENTILATION
- ACTIVE SEAT
- MIRRORS
- ADJUSTING EXTERIOR MIRRORS
- SELF-DEFROSTING MIRRORS
- STEERING WHEEL ADJUSTMENT
- AUTOMATIC STEERING WHEEL ADJUSTMENT
- STEERING WHEEL HEATER
- PROGRAMMING BUTTON FUNCTION
- TRANSPORTING CHILDREN SAFELY
- THE RIGHT PLACE FOR CHILDREN
- CHILDREN ALWAYS IN THE REAR
- DEACTIVATING THE REAR SEAT SIDE AIRBAGS
- CHILD-RESTRAINT SYSTEM IN THE REAR
- EXCEPTION FOR THE FRONT PASSENGER SEAT
- INSTALLING CHILD-RESTRAINT SYSTEMS
- TO LOCK THE SAFETY BELT
- TO UNLOCK THE SAFETY BELT
- OUTER SEATING POSITIONS
- CENTER SEATING POSITION
- LATCH CHILD-RESTRAINT FIXING
- ACCESS TO ANCHORAGE POINTS ON THE BASIC SEAT
- INSTALLATION GUIDE
- ACCESS TO ANCHORAGE POINTS ON THE REAR SEAT WITH THROUGH-LOADING SYSTEM
- ON JOURNEYS
- CHILD SAFETY LOCKS FOR THE REAR DOORS
- DRIVING
- IGNITION LOCK
- 0 STEERING LOCKED
- 1 STEERING UNLOCKED
- 2 IGNITION SWITCHED ON
- 3 START ENGINE
- STARTING THE ENGINE
- MANUAL TRANSMISSION
- AUTOMATIC TRANSMISSION
- SEQUENTIAL MANUAL TRANSMISSION SMG
- SWITCHING OFF ENGINE
- HANDBRAKE
- INDICATOR LAMP
- APPLYING
- REVERSE GEAR
- SHIFTLOCK
- OBSERVE THE FOLLOWING WHEN DRIVING
- R REVERSE
- N NEUTRAL: IDLE
- SEQUENTIAL MODE
- D DRIVE MODE
- GEAR CHANGES
- USING SELECTOR LEVER
- USING SHIFT PADDLES ON STEERING WHEEL
- DISPLAY IN THE INSTRUMENT CLUSTER
- GEAR DISPLAY
- WARNING TONE
- DYNAMIC DRIVING CONTROL
- SPORT PROGRAM
- ACTIVATING THE SPORT PROGRAM
- DEACTIVATING THE SPORT PROGRAM
- ACCELERATION ASSISTANT WITH SMG
- AUTOMATIC TRANSMISSION WITH STEPTRONIC
- SELECTOR-LEVER POSITIONS
- POSSIBLE DISPLAYS
- CHANGING THE SELECTOR-LEVER POSITIONS
- P PARKING
- N NEUTRAL
- D DRIVE – AUTOMATIC DRIVING POSITION
- KICKDOWN
- M/S MANUAL OPERATION AND SPORT PROGRAM
- TURN SIGNAL INDICATORS/HEADLAMP FLASHER
- USING TURN SIGNAL INDICATORS
- SIGNALING BRIEFLY
- TRIPLE TURN SIGNAL ACTIVATION
- WIPER SYSTEM
- CLEANING THE WINDSHIELD AND HEADLAMPS
- WINDSHIELD WASHER NOZZLES
- RAIN SENSOR
- ACTIVATING THE RAIN SENSOR
- ADJUSTING RAIN SENSOR SENSITIVITY LEVEL TURN THE SERRATED DIAL 5
- DEACTIVATING THE RAIN SENSOR
- WASHER FLUID
- WASHER FLUID RESERVOIR
- CRUISE CONTROL
- ONE LEVER FOR ALL FUNCTIONS
- 1 MAINTAINING AND STORING SPEED, ACCELERATING
- 2 MAINTAINING AND STORING SPEED, DECELERATING
- 3 INTERRUPTING CRUISE CONTROL
- 4 RECALLING STORED SPEED
- DEACTIVATING SYSTEM
- ACTIVE CRUISE CONTROL
- DISPLAYS IN THE INSTRUMENT CLUSTER
- OPERATING THE ACTIVE CRUISE CONTROL
- ACTIVATE SYSTEM
- 1 DESIRED SPEED STORE AND INCREASE
- 2 DESIRED SPEED STORE AND DECREASE
- 3 DEACTIVATE SYSTEM
- 4 RESUME TO STORED DESIRED SPEED AND DISTANCE SETTING
- 4 FINE ADJUSTMENT OF DESIRED SPEED
- 5 SELECT DISTANCE
- THINGS TO KNOW ABOUT ACTIVE CRUISE CONTROL
- DRIVER INTERVENTIONS
- SWERVING VEHICLES
- EVERYTHING UNDER CONTROL
- ODOMETER, OUTSIDE TEMPERATURE DISPLAY, CLOCK
- 1 OUTSIDE TEMPERATURE DISPLAY, CLOCK, DATE
- ICE WARNING
- 2 ODOMETER AND TRIP ODOMETER
- TACHOMETER
- ENERGY CONTROL/CURRENT FUEL CONSUMPTION
- FUEL GAUGE
- SERVICE REQUIREMENT DISPLAY AND DISPLAY OF LEGALLY PRESCRIBED INSPECTIONS
- ON THE CONTROL DISPLAY
- SYMBOLS
- ENTERING DATES FOR STATE EMISSION AND VEHICLE INSPECTIONS
- CHECK CONTROL
- PRIORITY 1
- PRIORITY 2
- CHECK CONTROL SYMBOL AND INFORMATION ON THE CONTROL DISPLAY
- CALLING UP STORED MESSAGES ON THE CONTROL DISPLAY
- USING THE CONTROL CENTER
- DISPLAYS AFTER COMPLETION OF TRIP
- COMPUTER
- CRUISING RANGE
- AVERAGE FUEL CONSUMPTION
- AVERAGE SPEED
- TRIP COMPUTER
- ENTERING A DISTANCE MANUALLY
- ASSISTANCE WINDOW FOR COMPUTER AND TRIP COMPUTER
- SPEED LIMIT
- ADJUSTING, CHANGING
- SWITCHING ON OR OFF
- ADOPTING YOUR CURRENT SPEED AS THE LIMIT
- STOPWATCH
- STARTING AND STOPPING
- TAKING AN INTERMEDIATE TIME READING
- CHANGING SETTINGS
- BRIGHTNESS
- MEASUREMENT UNITS
- LANGUAGE
- SETTING THE TIME
- CHANGING THE DISPLAY FORMAT
- SWITCHING ON THE REMINDER FUNCTION
- SETTING THE DATE
- TECHNOLOGY FOR COMFORT, CONVENIENCE AND SAFETY
- PDC PARK DISTANCE CONTROL
- AUTOMATIC FUNCTION
- MANUAL ACTIVATION
- MANUAL DEACTIVATION
- AUTOMATIC DEACTIVATION
- SIGNAL TONES
- PDC WITH VISUAL WARNING
- LIMITS OF THE SYSTEM
- DRIVING STABILITY CONTROL/ABS ANTILOCK BRAKE SYSTEM
- IN CASE OF MALFUNCTION
- CBC CORNERING BRAKE CONTROL
- EBV ELECTRONIC BRAKE FORCE DISTRIBUTION
- DRIVING STABILITY CONTROL/DSC DYNAMIC STABILITY CONTROL
- INDICATOR LAMPS
- DTC DYNAMIC TRACTION CONTROL
- DEACTIVATING DTC AGAIN
- REACTIVATING DSC
- DBC DYNAMIC BRAKE CONTROL
- ACTIVE ROLL STABILIZATION
- DRIVING WITH ACTIVE ROLL STABILIZATION
- FLAT TIRE MONITOR
- FUNCTIONAL REQUIREMENT
- INITIALIZING THE SYSTEM
- FLAT TIRE
- SYSTEM MALFUNCTIONS
- ACTIVE STEERING
- BRAKE FORCE DISPLAY
- AIRBAGS
- PROTECTIVE EFFECT
- AUTOMATIC DEACTIVATION OF THE FRONT PASSENGER AIRBAGS
- OPERATIONAL READINESS OF AIRBAG SYSTEM
- AIRBAG SYSTEM MALFUNCTION
- LOWS
- HEAD-UP DISPLAY
- SWITCHING ON/OFF
- SPECIFYING SELECTED DISPLAYS
- SETTING THE BRIGHTNESS
- CARE INSTRUCTIONS
- LAMPS
- PARKING LAMPS/LOW BEAMS
- PARKING LAMPS
- LOW BEAMS
- PATHWAY LIGHTING
- LIGHTS ON WARNING
- DAYTIME DRIVING LAMPS
- AUTOMATIC HEADLAMP CONTROL
- ADAPTIVE HEAD LIGHT
- ACTIVATING ADAPTIVE HEAD LIGHT
- INSTRUMENT LIGHTING
- HIGH BEAMS/STANDING LAMPS
- STANDING LAMPS, LEFT OR RIGHT
- FOG LAMPS
- INTERIOR LAMPS
- SWITCHING THE INTERIOR LAMPS ON AND OFF MANUALLY
- READING LAMPS
- LIGHT-EMITTING DIODES LEDS
- A CONGENIAL CLIMATE
- AUTOMATIC AIR DISTRIBUTION AND SUPPLY
- ADJUSTING TEMPERATURE
- DEFROSTING WINDOWS AND REMOVING CONDENSATION
- ADJUSTING THE AIR VOLUME MANUALLY
- SWITCHING COOLING FUNCTION ON AND OFF MANUALLY
- MAXIMUM COOLING
- OUTSIDE AIR/AUC AUTOMATIC RECIRCULATED-AIR CONTROL/RECIRCULATED AIR
- RESIDUAL HEAT MODE
- SWITCHING AUTOMATIC CLIMATE CONTROL OFF
- SETTINGS USING THE CONTROL CENTER
- AUTOMATIC AIR DISTRIBUTION
- MANUAL AIR DISTRIBUTION
- ADJUSTING TEMPERATURE FOR THE UPPER BODY
- SETTING THE INTENSITY OF THE AUTO PROGRAM
- FRONT VENTILATION
- VENTILATION FOR COOLING
- DRAFT-FREE VENTILATION
- REAR VENTILATION
- INDEPENDENT VENTILATION
- SWITCHING ON AND OFF DIRECTLY
- SETTING THE ACTIVATION TIME
- ACTIVATING THE ACTIVATION TIME
- PRACTICAL INTERIOR ACCESSORIES
- INTEGRATED UNIVERSAL REMOTE CONTROL
- CHECKING THE COMPATIBILITY
- FIXED-CODE HAND-HELD TRANSMITTER
- ALTERNATING-CODE HAND-HELD TRANSMITTERS
- CLEARING THE MEMORY BUTTONS
- ROLLER SUN BLINDS
- ROLLER SUN BLINDS FOR REAR SIDE WINDOWS
- GLOVE COMPARTMENT
- OPENING
- RECHARGEABLE FLASHLIGHT
- CENTER ARMREST
- VENTILATING STORAGE COMPARTMENT IN THE FRONT ARMREST
- STORAGE COMPARTMENTS
- STORAGE COMPARTMENT ON CENTER CONSOLE BETWEEN THE FRONT SEATS
- OTHER COMPARTMENTS
- CLOTHES HOOKS
- ASHTRAY, FRONT
- CIGARETTE LIGHTER, FRONT
- LIGHTER SOCKET
- ASHTRAY, REAR
- EMPTYING
- CIGARETTE LIGHTER, REAR
- SOCKETS
- IN FRONT PASSENGER FOOTWELL
- IN THE LUGGAGE COMPARTMENT
- REAR CENTER ARMREST
- FOLD DOWN REAR SEAT
- SKI BAG
- LOADING
- SECURING THE LOAD
- REMOVING THE SKI BAG
- THINGS TO REMEMBER WHEN DRIVING
- BREAK-IN PROCEDURES
- ENGINE AND DIFFERENTIAL
- TIRES
- BRAKE SYSTEM
- CLUTCH
- GENERAL DRIVING NOTES
- HIGH TEMPERATURES
- PARKING THE VEHICLE
- BEFORE DRIVING INTO THE CAR WASH
- HYDROPLANING
- WATER ON THE ROAD
- BRAKES
- DRIVING IN WET CONDITIONS
- HILLS
- CORROSION ON THE BRAKE ROTORS
- BRAKE PADS
- MOBILE COMMUNICATION IN THE VEHICLE
- STOWING CARGO
- ROOF-MOUNTED LUGGAGE RACK
- ANCHORAGE POINTS
- STARTING NAVIGATION SYSTEM
- NAVIGATION CD/DVD
- REMOVING THE NAVIGATION CD/DVD
- OPENING THE NAVIGATION
- DISPLAY IN ASSISTANCE WINDOW
- DISPLAYING POSITION
- DESTINATION ENTRY
- ENTERING A DESTINATION MANUALLY
- SELECT THE COUNTRY OF THE DESTINATION
- ENTERING CITY OF DESTINATION OR ZIP CODE
- ENTERING STREET, HOUSE NUMBER AND INTERSECTION
- STARTING DESTINATION GUIDANCE WITH MANUAL DESTINATION ENTRY
- MAP-GUIDED DESTINATION SELECTION
- SELECTING DESTINATION USING INFORMATION
- RECENT DESTINATIONS
- ADDRESS BOOK
- CALLING UP THE ADDRESS BOOK
- STORING DESTINATIONS IN THE ADDRESS BOOK
- SELECTING DESTINATIONS FROM THE ADDRESS BOOK
- EDITING DESTINATIONS FROM THE ADDRESS BOOK
- DELETING INDIVIDUAL DESTINATIONS FROM THE ADDRESS BOOK
- DELETING ALL DESTINATIONS FROM THE ADDRESS BOOK
- ROUTE SELECTION
- CHANGING ROUTE CRITERIA
- WORDMATCH PRINCIPLE
- DESTINATION GUIDANCE
- STARTING THE DESTINATION GUIDANCE
- DISPLAYING ROUTE
- SWITCHING TO DIRECTIONAL ARROW MODE
- SELECTING DISPLAY OF ROUTE MAP
- CHANGING SCALE
- ALTERING DISPLAY DIRECTION
- DISPLAYING TOWNS AND STREETS OF THE ROUTE
- DESTINATION GUIDANCE THROUGH VOICE INSTRUCTIONS
- SWITCHING VOICE INSTRUCTIONS ON/OFF
- REPEATING AN INSTRUCTION
- SUPPRESSING VOICE INSTRUCTIONS
- ADJUSTING VOLUME
- BLOCKING SECTIONS OF A ROUTE
- TRAFFIC INFORMATION
- CALLING UP TRAFFIC INFORMATION
- BYPASS TRAFFIC CONGESTION
- TERMINATING/CONTINUING DESTINATION GUIDANCE
- WHAT TO DO IF
- ON/OFF, TONE
- OPERATION USING THE CENTER CONSOLE
- OPERATION USING THE CONTROL CENTER
- OPERATING TEMPERATURES
- ADJUSTING THE VOLUME
- ADJUSTING THE VOLUME FOR AUDIO SOURCES
- TONE CONTROL
- CHANGING TONE
- TREBLE AND BASS
- BALANCE AND FADER
- SPEED-DEPENDENT VOLUME
- SPATIAL SOUND EFFECT PROFESSIONAL LOGIC7
- EQUALIZER
- RESETTING THE TONE SETTINGS
- RADIO
- LISTENING TO THE RADIO
- CHANGING STATIONS USING BUTTONS IN THE CENTER CONSOLE
- SCANNING AND SELECTING STATIONS
- MANUAL STATION SELECTION
- UPDATING THE STATIONS WITH THE BEST RECEPTION
- MANUAL TUNING
- STORING STATIONS
- RADIO DATA SYSTEM RDS
- WEATHER BAND
- SELECTING WEATHER BAND
- SATELLITE RADIO
- ACTIVATING CHANNELS
- SELECTING AND STORING CHANNEL
- ADDITIONAL INFORMATION
- STORING CHANNEL
- CHANGING CHANNEL USING BUTTONS IN THE CENTER CONSOLE
- CD COMPACT DISC
- LISTENING TO CDS
- SELECTING A TRACK
- REPEATING A TRACK
- SAMPLING AND SELECTING TRACKS, SCAN
- RANDOM PLAY SEQUENCE
- FAST FORWARD/REVERSE
- CD CHANGER
- CD MAGAZINE
- REMOVING THE CD MAGAZINE
- LOADING/REMOVING CDS FROM THE CD MAGAZINE
- INSERTING THE CD MAGAZINE
- TELEPHONING
- SAFETY NOTICE
- USING THE PHONE IN YOUR VEHICLE
- VEHICLES AND PORTABLE PHONES
- ANTENNA
- SPECIAL ENVIRONMENTAL CONDITIONS
- MEDICAL EQUIPMENT
- BATTERIES
- DISPOSING OF USED BATTERIES
- TELEPHONING WITH THE CAR PHONE: BMW ASSIST CALLS
- STARTING THE BMW PORTABLE PHONE
- INSERTING THE PORTABLE PHONE
- REMOVING THE PORTABLE PHONE
- HANDS-FREE UNIT
- VOLUME ADJUSTMENT
- ENTERING UNLOCK CODE
- RECEIVING CALLS
- REJECTING A CALL
- MAKING A CALL
- ENDING CALL
- PHONE BOOK
- DIALING FROM THE PHONE BOOK
- ADDING DIGITS TO PHONE NUMBERS
- LISTS
- DIALING FROM A LIST
- DELETING INDIVIDUAL ENTRIES
- DELETING THE ENTIRE LIST
- TOUCH TONE DIALING
- TEXT MESSAGES/SMS
- DISPLAYING TEXT MESSAGES/SMS
- CALLING THE SENDER
- DELETING TEXT MESSAGES/SMS
- OPERATION BY VOICE CONTROL
- CANCELING OPERATION VIA VOICE CONTROL
- DIALING A PHONE NUMBER – AN EXAMPLE
- FIRST STEPS
- SWITCHING ON PORTABLE PHONE
- CORRECTING UNLOCK CODE
- DELETING UNLOCK CODE
- CANCELING THE OPERATION
- DIALING A PHONE NUMBER
- CORRECTING THE PHONE NUMBER
- DELETING INPUT
- VOICE PHONE BOOK
- STORING AN ENTRY
- SELECTING AN ENTRY
- READING OUT AND SELECTING ENTRIES
- REPEAT DIALING
- DELETING AN ENTRY
- DELETING ALL ENTRIES
- IMPORTANT FOR VOICE INPUT
- TELESERVICE*, BMW ASSIST
- TELESERVICE
- BMW ASSIST
- REQUIREMENTS
- ENABLING TELESERVICE OR BMW ASSIST
- SERVICES OFFERED
- AUTOMATIC SERVICE NOTIFICATION
- SETTING UP CONTACT TO ROADSIDE ASSISTANCE OF THE BMW GROUP
- SETTING UP CONTACT TO YOUR BMW CENTER OR THE BMW CUSTOMER RELATIONS
- BMW INFO
- INFO PLUS
- DISPLAY NEW MESSAGE
- ADAPTING TELESERVICE OR BMW ASSIST
- DISPLAYING AND UPDATING SERVICES
- ROAMING
- TERMINATING SERVICES
- DISPLAYING VEHICLE DATA
- REFUELING
- FUEL FILLER DOOR
- MANUAL RELEASE
- SIMPLE AND ENVIRONMENTALLY FRIENDLY
- FUEL SPECIFICATIONS
- WHEELS AND TIRES
- TIRE INFLATION PRESSURE
- INFORMATION FOR YOUR SAFETY
- CHECKING THE PRESSURE
- INFLATION PRESSURE FOR OTHER TIRE SIZES
- 525I/530I
- 545I
- TIRE IDENTIFICATION MARKS
- TIRE SIZE
- SPEED LETTER
- TIRE IDENTIFICATION NUMBER
- TIRE AGE
- UNIFORM TIRE QUALITY GRADING
- DOT QUALITY GRADES
- TREADWEAR
- TRACTION
- TEMPERATURE
- RSC – RUN-FLAT TIRES
- M+S
- TIRE CONDITION
- TIRE TREAD
- TIRE DAMAGE
- REPLACING WHEELS/TIRES
- THE RIGHT WHEELS AND TIRES
- RECOMMENDED TIRE BRANDS
- RUN-FLAT TIRES
- SPECIAL CHARACTERISTICS OF WINTER TIRES
- OBSERVING SPEED RATINGS
- STORAGE
- CONTINUING DRIVING WITH A DAMAGED TIRE
- SNOW CHAINS
- UNDER THE HOOD
- HOOD
- ENGINE COMPARTMENT
- ENGINE OIL
- CHECKING OIL LEVEL
- ADDING ENGINE OIL
- SPECIFIED ENGINE OILS
- VISCOSITY RATINGS
- COOLANT
- CHECKING COOLANT LEVEL
- BRAKE FLUID
- BRAKE HYDRAULIC SYSTEMS
- MAINTENANCE
- THE BMW MAINTENANCE SYSTEM
- CBS CONDITION BASED SERVICE
- SERVICE AND WARRANTY INFORMATION BOOKLET FOR US MODELS AND WARRANTY AND SERVICE GUIDE BOOKLET FOR CANADIAN MODELS
- CARE
- RULES AND REGULATIONS
- CALIFORNIA PROPOSITION 65 WARNING
- OBD CONNECTOR
- REPLACING COMPONENTS
- ONBOARD TOOL KIT
- WINDSHIELD WIPER BLADES
- LAMPS AND BULBS
- HEADLAMPS
- HALOGEN LOW BEAMS
- HALOGEN HIGH BEAMS
- PARKING AND STANDING LAMPS
- XENON LAMPS
- TURN SIGNAL INDICATORS, FRONT
- SIDE-MOUNTED TURN SIGNAL INDICATORS
- BULB 5 WATTS, W 5 W
- SIDE MARKER LAMPS, FRONT AND REAR
- TAIL LAMPS
- CENTER BRAKE LAMP
- LAMPS IN THE FENDER
- LAMPS IN THE LUGGAGE COMPARTMENT LID
- LICENSE PLATE LAMP
- CHANGING A WHEEL
- WHAT YOU WILL NEED
- COMPACT WHEEL
- PROCEDURE
- DRIVING WITH THE COMPACT WHEEL
- BATTERY
- BATTERY CARE
- CHARGING THE BATTERY
- DISPOSAL
- FUSES
- IN THE GLOVE COMPARTMENT
- GIVING AND RECEIVING ASSISTANCE
- STARTING AN EMERGENCY CALL
- WARNING TRIANGLE
- FIRST-AID KIT
- ROADSIDE ASSISTANCE
- JUMP-STARTING
- PREPARING
- CONNECTING THE JUMPER CABLES
- TOWING
- TOWING WITH RAISED FRONT AXLE
- VEHICLES WITH AUTOMATIC TRANSMISSION
- VEHICLES WITH SEQUENTIAL MANUAL TRANSMISSION SMG
- TOW FITTING
- ACCESS TO TOW SOCKETS
- TECHNICAL DATA
- DIMENSIONS
- EVERYTHING FROM A TO Z
- INDEX
- A
- B
- C
- D
- E
- F
- G
- H
- I
- J
- K
- L
- M
- N
- O
- P
- R
- S
- T
- U
- V
- W
- X
- FUEL
Brand : BMW
Model : 530i Sedan (2004)
Category : Automobile