DC1400 HD Pro Light Set - Camera SEALIFE - Free user manual and instructions
Find the device manual for free DC1400 HD Pro Light Set SEALIFE in PDF.


| Product Type | Underwater Digital Camera Set |
| Brand | SeaLife |
| Model | DC1400 HD Pro Light Set |
| Image Sensor | 1/2.33" CCD, 14 Megapixels |
| Lens | 5x Optical Zoom, 4.7-23.5mm (26-130mm equivalent) |
| Aperture | F2.8 (Wide) - F6.5 (Tele); at 5x Zoom F6.5 - F18.6 |
| Focus Range | Normal: 15cm-Inf (Wide), 60cm-Inf (Tele); Macro: 5cm-Inf; Super Macro: 2.5cm-Inf |
| Shutter Speed | 2 - 1/2000 sec |
| ISO Sensitivity | Auto, 64, 100, 200, 400, 800, 1600, 3200 |
| LCD Monitor | 3.0" Full Color TFT, 230K Pixels |
| Recording Media | 32MB Internal Memory (23MB available), SD/SDHC up to 32GB |
| Video Resolution | HD 1280x720p (30fps), VGA 640x480 (30fps), QVGA 320x240 (30fps) |
| Flash Effective Range | Land: 3.0m; Underwater: 0.3m |
| Power Supply | Rechargeable Lithium-ion Battery (3.7V, Model SL7014) |
| Camera Dimensions (WxHxD) | 96.9 x 58 x 18 mm (without protruding parts) |
| Camera Weight | Approx. 16g (without battery and memory card) |
| Depth Rating (Housing) | 200 feet (60 meters) |
| Housing Weight | 333g (housing only), 472g (with camera) |
| Housing Material | Rubber Overmolded Polycarbonate |
| Included Accessories | Underwater Housing, USB Cable, AV Cable, AC Adapter, Li-ion Battery, Flash Link Optical Cable Adapter, Cleaning Brush, Lens Cloth, Moisture Muncher Capsules, Camera Strap, Pouch |
Frequently Asked Questions - DC1400 HD Pro Light Set SEALIFE
User questions about DC1400 HD Pro Light Set SEALIFE
0 question about this device. Answer the ones you know or ask your own.
Ask a new question about this device
Download the instructions for your Camera in PDF format for free! Find your manual DC1400 HD Pro Light Set - SEALIFE and take your electronic device back in hand. On this page are published all the documents necessary for the use of your device. DC1400 HD Pro Light Set by SEALIFE.
USER MANUAL DC1400 HD Pro Light Set SEALIFE
SeaLife DC1400 Underwater Camera
Instruction Manual
Go to www.sealife-cameras.com/service/manuals.html for ENGLISH, FRANÇAIS, DEUTSCH, ITALIANO, ESPAÑOL and NEDERLANDS versions
READ THIS FIRST
Trademark Information
■ Microsoft® and Windows® are U.S. registered trademarks of Microsoft Corporation.
■ Microsoft® and Windows® are U.S. registered trademarks of Microsoft Corporation.
■ Pentium® is a registered trademark of Intel Corporation.
■ Macintosh is a trademark of Apple Computer, Inc.
■ SD TM and SDHC TM are trademarks.
■ SeaLife® is a registered trademark of Pioneer Research.
Product Information
■ Product design and specifications are subject to change without notice.
This includes primary product specifications, software, software drivers, and user's manual. This User Manual is a general reference guide for the product.
■ The illustrations in this manual are for the purpose of explanation and may differ from the actual design of your camera.
■ The manufacturer assumes no liability for any errors or discrepancies in this user manual.
SAFETY INSTRUCTIONS
Read and understand all Warnings and Cautions before using this product. Warnings
Continued use under the following conditions may cause fire or electric shock. Contact your local authorized SeaLife dealer for repair service if the product is damaged.
If foreign objects or water have entered the camera, turn the power off and remove the battery.

If the camera has fallen or its case has been damaged, turn the power off and remove the battery.

Do not disassemble, change or repair the camera.

Use the supplied AC adapter only with the indicated power supply voltage.

Do not use the camera in areas near water, rain, snow, high humidity, sand, dirt or combustible gas* unless it is properly sealed in the waterproof housing provided.

* Warning - the camera inside the waterproof housing IS NOT certified to be intrinsically safe. Using the camera in an environment containing combustible gases may result in explosion or fire.
Keep the battery out of the reach of children.
The battery might cause poisoning. If any part of the battery is accidentally swallowed, immediately consult a physician.

Cautions
Do not fire the flash close to anyone's eyes.
This might cause damage to the person's eyesight.

Do not subject the LCD monitor to impact.
This might damage the glass on the screen or cause the internal fluid to leak. If the internal fluid enters your eyes or comes into contact with your body or clothes, rinse with fresh water. If the internal fluid has entered your eyes, consult a physician to receive treatment.

A camera is a precision instrument. Do not drop it, strike it or use excessive force when handling the camera.
This might cause damage to the camera.

Do not remove the battery immediately after long period of continuous use.
The battery becomes hot during use. Touching a hot battery might cause burns.

Do not wrap the camera or place it in cloth or blankets.
This might cause heat to build up and deform the case, resulting in fire. Use the camera in a well-ventilated place.

Do not leave the camera in places where the temperature may rise significantly, such as inside a car.
This might adversely affect the case or the parts inside, resulting in fire.

Before you move the camera, disconnect cords and cables.
Failure to do this might damage cords and cables, resulting in fire and electric shock.

Notes on Battery Usage
When you use the battery, carefully read and strictly observe the Safety Instructions and the notes described below:
■ Use only the specified battery (3.7V) provided with the camera.
■ Extremely cold environments can shorten the battery life and reduce camera performance.
■ When you are using a new rechargeable battery or a rechargeable battery that has not been used for an extended period of time, it may affect the number of images that can be captured. Therefore, to maximize its performance and lifetime, we recommend that you fully charge the battery and discharge it for at least one complete cycle before use.
■ The battery may feel warm after a long period of continuous use of the camera or the flash. This is normal and not a malfunction.
■ The camera may feel warm after a long period of continuous use. This is normal and not a malfunction.
If the battery is not to be used for a long period of time, remove it from the camera to prevent leakage or corrosion and store it after no battery power is left. Stored for a long time in a fully charged condition, its performance may be impaired.
■ Always keep the battery terminals clean.
■ There is a risk of explosion if the battery is replaced by an incorrect type.
■ Dispose of used battery according to your local recycling laws.
■ To prevent short-circuiting or fire, keep the battery away from other metal objects when carrying or storing.

This symbol mark [crossed-out wheeled bin] indicates separate collection of waste batteries in the EU countries. The batteries provided with this product shall not be treated as household waste. Please use the return and collection systems available in your country for the disposal of the waste batteries. If a chemical symbol is printed beneath the symbol mark, this chemical symbol means that the batteries contains a heavy metal at a certain concentration. It is indicated as follows: Hg: mercury, Cd: cadmium, Pb: lead.
Important Notes on Waterproof Function and Waterproof Housing
- Read and understand the instructions contained in this manual before using underwater.
The inner camera is not waterproof or shock protected. Seal the camera inside the waterproof housing in areas of water, rain, snow, high humidity, sand, dirt or combustible gas*.
* Warning - the camera inside the waterproof housing IS NOT certified to be intrinsically safe. Using the camera in an environment containing combustible gases may result in explosion or fire.
■ Follow these important O-ring care instructions or the waterproof housing may leak.
* Do not lubricate o-ring.
* Inspect and clean O-ring and O-ring contact surfaces for sand, hair and other debris before every use. Clean O-ring and O-ring contact surfaces with cleaning brush provided.
* Inspect O-ring and O-ring contact surfaces for damage (cuts, scratches, tears, cracks, dents and any other imperfections.) Replace O-ring or have waterproof housing serviced if the O-ring or O-ring contact surfaces become damaged.
* Do not use underwater housing if O-ring or O-ring contact surfaces are damaged.
* Make sure O-ring is completely seated into O-ring groove before sealing housing.
* Make sure the O-ring is not twisted when seated in the O-ring groove.
* Carefully follow O-ring removal and installation instructions contained on page 67 of this manual.
* Replace O-ring every year to ensure proper seal. Only use approved SeaLife O-ring designed for the DC1400 (Item # SL72017). Replacement O-rings are available at your local authorized SeaLife dealer, or online at www.sealifepartsdirect.com (USA Only).
■ Carefully close lid and latch to seal housing and make sure there are no obstructions that prevent housing from closing or sealing properly.
■ Soak and rinse waterproof housing in fresh water for about 2 minutes after underwater use or if the housing becomes dirty.
* Press each button several times to clean out any saltwater, sand or dirt that may be trapped under the buttons.
* Use clean, soft cloth to dry housing.
* Store camera and housing only after careful cleaning and when totally dry.
■ Do not let any moisture or dirt get inside housing when opening. This may result in damage to the inner camera.
■ Make sure that you and the waterproof housing are completely dry before opening the waterproof door or changing the batteries or the SD memory card.
■ Avoid opening housing in wet, sandy or humid environments. It is recommended to open and load the housing in dry cool air, such as inside an air conditioned room. This will prevent water or humidity from being trapped inside the housing, which may cause fogging to occur or damage the inner camera.
■ Avoid getting sunscreen or suntan oil on the camera as it may cause discoloration of the surface. If any oil gets on the camera, wash it off immediately with warm water.
The waterproof function does not apply to the camera's accessories.
■ Do not exceed the depth rating of 60m (200ft.) or the housing may become damaged and leak.
The camera may sink if dropped in water, so be sure to attach the strap to your wrist or buoyancy control device (BCD) when using the camera in or near water.
■ Store housing at room temperature in a clean and dry place.
■ Do not expose housing to direct sunlight for prolonged periods of time.
■ Do not store housing in extreme high temperatures, such as the trunk of your car.
- Keep the housing unlatched when storing for more than 3 months.
CONTENTS
11 INTRODUCTION
11 Overview
12 Package Contents
13 GETTING TO KNOW YOUR CAMERA
13 Front View
13 Rear View
14 LCD Monitor Display
18 GETTING STARTED
18 Preparation
19 Charging the Battery
20 Speed Scrolling and Menu Navigation
21 Initial Settings
22 Choosing the Language / Formating Memory Card
23 CAPTURE MODE
23 Capturing Images (Taking Pictures)
24 Setting the Focus
25 About Easy Set-up Mode
26 Setting the Scene Mode
29 About External Flash Modes
31 About Dive and Snorkel Modes
33 Recording a Subject onto an Existing Background Image
34 Combining Shots of Two People into a Single Image
35 Taking and Combining Panoramic Pictures
36 About Spy Mode
37 HD VIDEO MODE
37 Recording Video Clips
38 Playing Back Video Clips
39 PLAYBACK MODE
39 Playing Back Still Images
40 Removing Red-eye
40 Dynamic Lighting Feature
41 Attaching Voice Memos
41 Playing back voice memo
42 Protecting Images
43 Canceling the Protection
44 Erasing Images and Video Clips in Playback Mode
45 MENU OPTIONS
45 Capture Menu
50 Setting Manual White Balance (WB)
51 Video Menu
53 Playback Menu
55 Setup Menu
58 TRANSFERRING FILES TO YOUR COMPUTER
58 Downloading Your Files
59 EDITING SOFTWARE
60 SPECIFICATIONS (INNER CAMERA ONLY)
61 APPENDIX
61 Possible number of shots (still image)
61 Possible recording time / sec (video clip)
62 UNDERWATER HOUSING INSTRUCTIONS
63 MUST DO for underwater housing:
65 Maintaining a waterproof seal
66 Quick waterproof test (before you depart on your dive trip)
67 HOW TO INSTALL AND REMOVE O-RING
69 HOW TO OPEN AND CLOSE WATERPROOF HOUSING
71 INSTALLING THE FLASH LINK OPTICAL CABLE ADAPTER
73 HOW TO SET-UP THE WATERPROOF HOUSING
75 USING AND CLEANING THE UNDERWATER HOUSING AND CAMERA
77 GREAT UNDERWATER PICTURES MADE EASY
79 TROUBLESHOOTING GUIDE
83 HOUSING SPECIFICATIONS
INTRODUCTION
Overview
Thank you for purchasing the SeaLife DC1400 digital underwater camera. This is not your ordinary land camera in a waterproof housing. The SeaLife camera includes special onboard software and exposure programs that have been developed through extensive underwater testing and research to ensure bright, colorful underwater pictures and video. It is equipped with the latest digital technology which means the camera is automatic and easy to use.
The SeaLife waterproof housing is constructed from the finest materials to ensure long-lasting and reliable performance. It’s fully rubber armored body offers superior shock protection. The durable polycarbonate underbody can withstand underwater pressure down to 200ft/60m. It’s large shutter button and wide-spread controls ensures a sure-grip and easy handling, even with dive gloves on. All metallic parts are made of high-grade stainless steel to survive the punishing saltwater and marine environment.
If you do not already own an underwater strobe, you may consider purchasing this important accessory to add color and brightness to your underwater pictures. The seemingly dark and colorless underwater world is actually bursting with magical, vibrant colors - you [and your camera] just need a light to see it. You will be amazed at the great underwater pictures you can take with the addition of the SeaLife Digital Pro Flash (item # SL961). Please visit your local dive shop or www.sealife-cameras.com for more information about the SeaLife flash.
There are so many more features and benefits that you will surely enjoy. All of us at SeaLife hope to exceed your expectations with this new camera. Happy diving!

UW picture taken with SeaLife Digital Pro Flash

UW picture taken without SeaLife Digital Pro Flash

Picture of SeaLife camera with Digital Pro Flash
Package Contents
Carefully unpack your camera and ensure that you have the following items:
Common Product Components (with item #):
■ Digital Camera (SL72001)
■ Underwater Housing (SL114) with lanyard (SL72070)
■ Instruction manual (SL72025) and Quick Guide (SL72024)
USB cable (SL18130)
■ AV cable (SL18131)
■ Camera strap (item # not available)
■ Camera pouch (SL70090)
■ AC power adapter (SL72032)
■ International plug adapters (SL19003)
■ Rechargeable lithium-ion battery (SL7014)
■ Flash Link optical cable adapter (SL72052)
■ Moisture Muncher capsules / 2-pack sample (SL2522)
■ Cleaning brush (SL256) and lens cloth (SL25210)
Common (Optional) Accessories:
■ SD/SDHC memory card (Recommend 16GB Class 6 SDHC memory card)
■ Spare battery (Item # SL7014)
■ SeaLife Digital Pro Flash (SL961)
■ Moisture Muncher capsules 10-pack (SL911)
■ SeaLife 3-in1 U/W Photo-Video Dive Light (SL980)

NOTE
■ Accessories and components may vary by retailer.
■ Visit your local SeaLife dealer or www.sealife-cameras.com for a complete listing of accessories.
GETTING TO KNOW YOUR CAMERA
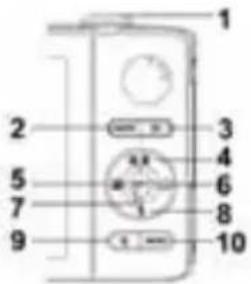
Front View

- Zoom lever (Menu scrolling lever)
- Flash
- ON/OFF Power button
- Status LED
- Self-timer LED
- Microphone
- Lens
Rear View
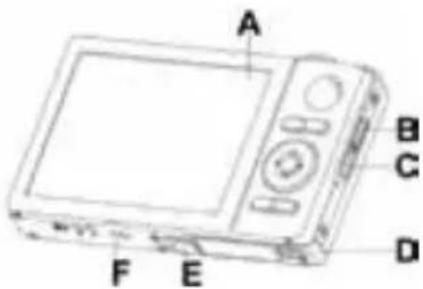
A. LCD monitor
B. USB and AV OUT terminal
C. Strap Holder
D. Battery / Memory card cover
E. Tripod socket
F. Speaker
| Item | Function | ||
| Capture Mode Video | Video Mode Playback Mode | ||
| 1. | Shutter button(Set button when in menu) | Record button(Set button when in menu) | Still Image: Zoom in on pictureVideo Clip Start/stop video clip |
| 2. | Mode button:Select video or picture mode | Mode button:Select video or picture mode | Return to capture mode |
| 3. | Playback mode Playback mode | Return to capture mode | |
| 4. | Focus Focus Next 10 image | ||
| 5. | Compensation> | -- | Previous image |
| 6. | Self timer Self timer Next image | ||
| 7. | SET: opens scene mode selection screen | -- | Still image: Records/Plays voice memo (if “Voice Memo” is activateVideo clip: Play/Pause video clip |
| 8. | Flash -- Previous 10 image | ||
| 9. | -- | -- | Delete |
| 10. | Capture menu | Video menu | Playback Menu |
LCD Monitor Display Capture mode

- Zoom status
- Available number of shots
- Image Stab.
- Storage media
[ INT ] Internal memory (no card)
[ ] SD/SDHC memory card
- Battery condition
[ ] Full battery power
[ ] Medium battery power
[ ] Low battery power
[ ] No battery power
- Focus setting
[ AUTO ] Auto
[ ] AF Tracking
[ ] Face Detect
[ ] Macro
[ ] Super Macro
[∞] Infinity
- Flash mode
[5A] Auto
[ ] Flash On
[5] Flash Off
[50] Red-eye
[4S] Slow Sync
[52] Pre-flash
[选] Macro Flash(Ext Flash Auto mode only)
[4▲] Far Flash (Ext Flash Auto mode only)
-
[ ] Exposure compensation (It can not be used in below modes: Tv, Av, Intelligent Scene, Smile Detection, Skin Soften, De-blemish, Portrait Man & Portrait Lady.)
[ ] Backlight correction (It can only be used in Skin Soften, De-blemish, Portrait Man and Portrait Lady.) -
Self-timer & Self-portrait icon
[ OFF ] Off
[ ] Self-portrait
[∅2] 2 sec.
[∅] 10 sec.
[10-2] 10+2 sec.
-
[ ] Histogram
-
Image size resolution
[14] 4288 x 3216
[8] 3264 × 2448
[4] 2304 × 1728
[2] 1600 × 1200
[ VGA ] 640 x 480
-
Set key: SCN hint icon
-
Main focus area
-
Date and time
-
Quick shot
-
Capture mode icon
[ ] Single
[SPY] Spy mode
[ ] Continuous
[ A ] AEB (Auto Exposure Bracketing)
[ ] Album Shot
[ ] Burst
[ ] Cont.flash
[ ] Pre-shot
[ ] Coupl.shot
[图标] Burst 30fps
- White balance
[ AUTO ] Auto
[ - ] Incand.
[ ] Ext. Flash
[ ] BluWtr <25ft/8m
[ ] BluWtr >25ft/8m
[ ] GrnWtr <25ft/8m
[ ] GrnWtr > 25ft/8m
[1] Fluoresc.1
[2] Fluoresc.2
[ ] Daylight
[ ] Cloudy
[ ] Manual WB
- Image quality
[ ] Fine
[ ] Standard
[ ] Economy
19.ISO
[ISO AUTO] Auto
[ISO 100] ISO 100
[ISO 200] ISO 200
[ISO 400] ISO 400
[ISO 800] ISO 800
[ISO 1600] ISO 1600
[ISO 3200] ISO 3200
-
Slow shutter warning
-
Mode icon / Scene mode
[ ] Program AE
[ ] Dive
[ ] Snorkel
[ ] Ext Flash Auto
[ ] Ext Flash Manual
[ ] Ext Light
[ ] Ext Flash + Light
[ ] Auto
[SCN] Intelligent Scene
[ ] Smile Detection
[ ] Anti-shake
[ ] Skin Soften
[ ] De-blemish
[ ] Portrait Man
[ ] Portrait Lady
[ ] Landscape
[ ] Sports
[ ] Night Portrait
[ ] Night Scene
[ ] Candlelight
[ ] Fireworks
[ ] Text
[ ] Sunset
[ ] Sunrise
[ ] Splash Water
[ ] Flow Water
[ ] Snow
[ ] Beach
[ ] Pets
[ ] Natural Green
[ Tv ] Tv (Shutter Speed Priority)
[Av] Av (Aperture Priority)
- Zoom status
- Storage media
- Battery condition
- Focus setting
- Flash off
- Self-timer icon
-
Video resolution
-
Elapsed time / Available recording time
- Main focus area
- Date and time
- Video quality
12.Audio off - Mode icon

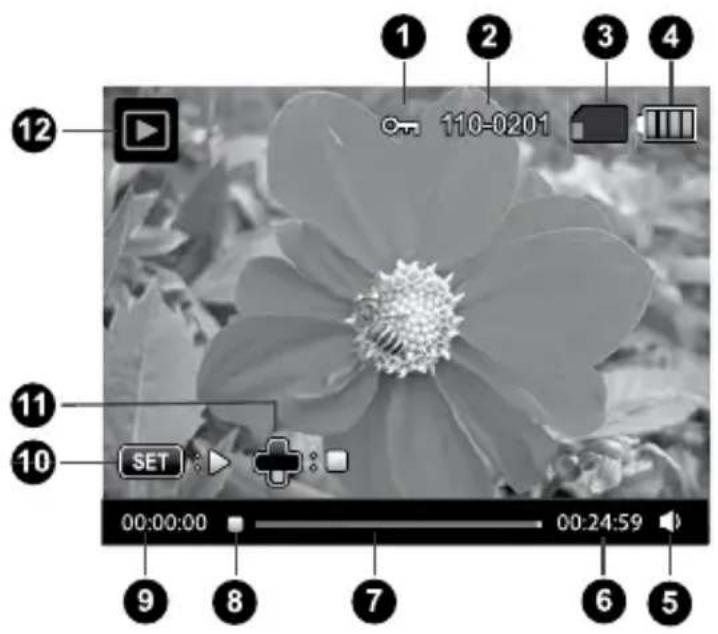
Playback mode - Video playback
- Protect icon
- Folder / File number
- Storage media
- Battery condition
- Volume mode
-
Total recorded time
-
Video status bar
- Video condition icon
- Elapsed time
- Set key: Play / Pause hint icon
- Down key: Stop hint icon
- Mode icon
GETTING STARTED
Preparation
-
Attach the camera strap. [Important: Camera strap must be removed when using camera inside the waterproof housing]
-
Open the battery/memory card cover.
-
Insert the supplied battery with correct orientation as shown.
-
Insert an SD/SDHC memory card (Sold separately).
- The camera has 32MB internal memory (23MB available for image storage), but you can load an SD/SDHC memory card to expand the camera's memory capacity. - Be sure to format the memory card with this camera before its initial usage. Refer to page 22 for instructions on how to format the memory card.
- Close the battery/memory card cover and make sure it is locked securely.


NOTE
■ To prevent valuable data from being accidentally erased from an SD/SDHC memory card, you can slide the write protect tab (on the side of the SD/SDHC memory card) to "LOCK".
■ To save, edit, or erase data on an SD/SDHC memory card, you must unlock the card.
■ To prevent damaging of an SD/SDHC memory card, be sure to turn off the power when inserting or removing the SD/SDHC memory card. If inserting or removing the SD/SDHC memory card with the power on, the camera will automatically turn off.

Charging the Battery
The battery is not fully charged at the time of purchase. Fully charge the battery and discharge it for at least one complete cycle before use to maximize its performance and lifetime.
- Connect camera to USB-AC adapter with USB cable.
- Insert the plug into a wall outlet.
- Camera display will show two selections: "PC" or "Charge". Select "Charge" and press the Set button.
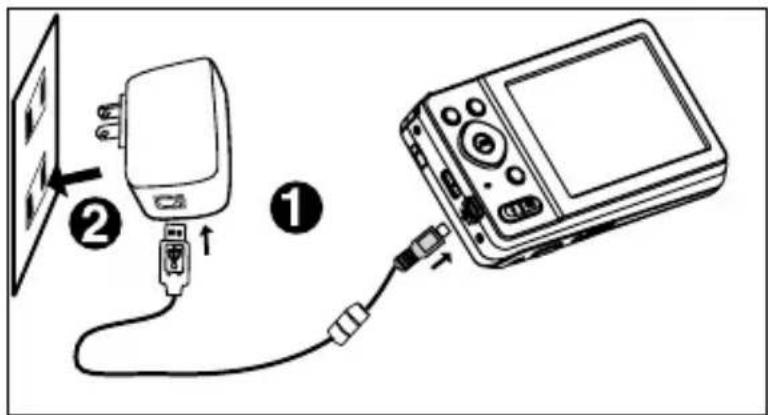
| Status LED | Description |
| Green (blinks slowly) | Charging normally |
| Green (Steady on) | Charging finished |
| Green (blinks quickly) | Error |
* Note: The Green status light will turn off approximately 12 hours after charging is complete.
Speed Scrolling and Menu Navigation
There are two ways to navigate the menus:
I. Speed scrolling
When the Menu is open, use the Zoom lever to scroll through the menus and the shutter button to set the camera. This is how you adjust the camera settings when the camera is inside the underwater housing.
- Press the Menu button.
- Turn the zoom lever right [ ] to scroll down or right through the menu.
- Turn the zoom lever left [ ] to scroll up or left through the menu.
- The Shutter button functions like the Set button when the Menu is open - Press the Shutter button to confirm the setting.
II. Navigation button scrolling
This is the traditional method for scrolling through the menu. When the Menu is open, use the Nav button to scroll through the menus and press the Set button to confirm your selection. You can use traditional Nav button scrolling or Speed Scrolling when the camera is NOT inside the underwater housing.
- Press the Menu button.
- Use the Nav button to move up, down, left and right through the menus.
- Press the Set button to confirm the setting.
VERY IMPORTANT:
■ Whenever the instruction manual refers to ▲ / ▼ / ◀/ ▶, you can use the zoom lever or navigation button.
■ Whenever the instruction manual refers to the SET button, you can use the Shutter or Set button.
Initial Settings
Setting the Date and Time
Follow these steps to set the correct date and time.
- Press the MENU button.
- Select [Setup] with the ▲ / ▼ buttons and press the SET button.
- Select [Date/Time] with the ▲ / ▼ buttons, and press the SET button.
- Select the date format with the ▲ / ▼ buttons, and press the SET button.
- Select the item's field with the ◀ / ▶ buttons and adjust the value for the date and time with the ▲ / ▼ buttons.
■ The time is displayed in 24-hour format.
■ After confirming all settings are correct, press the SET button.
- To exit from the [Setup] menu, press the MENU button.
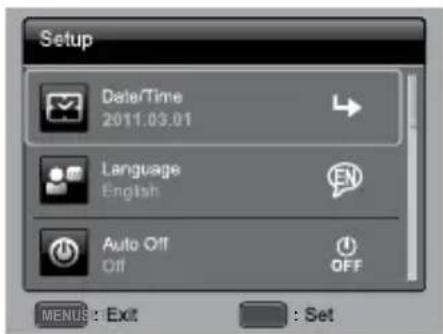
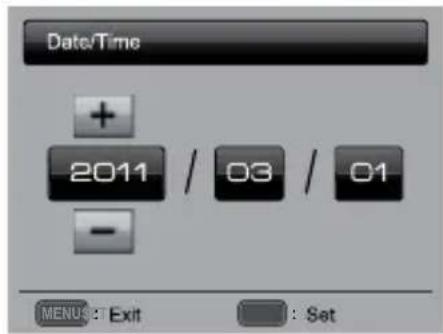

NOTE
■ When you are in the Date/Time menu, you can also use the zoom lever to increase or decrease the time/date values and use the Shutter button to set the value.
Choosing the Language
Specify in which language menus and messages are to be displayed on the LCD monitor.
- Press the MENU button.
- Select [Setup] menu with the ▲ / ▼ buttons and press the SET button.
-
Select [Language] with the ▲ / ▼ buttons and press the SET button.
-
Select the displayed language with the ▲ / ▼ / ◀ / ▶ buttons and press the SET button.
■ The setting will be stored.
- To exit from the [Setup] menu, press the MENU button
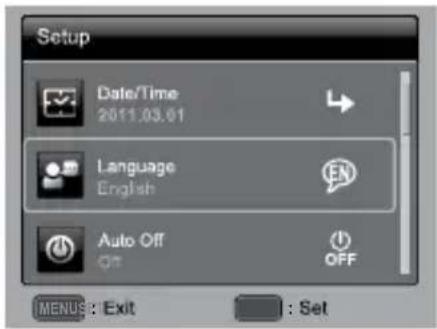
Formatting the Memory Card or Internal Memory
This utility formats the internal memory (or memory card) and erases all stored images and data.
- Press the MENU button.
- Select [Setup] at the end of the menu with the ▲ / ▼ buttons and push the SET button.
- Select [Format] with the ▲ / ▼ buttons, then press the SET button.
-
Select [Yes] with the ◀/▶ buttons, and press the SET button.
■ To cancel formatting, select [No] and press the SET button. -
To exit from the [Setup] menu, press the Menu button.
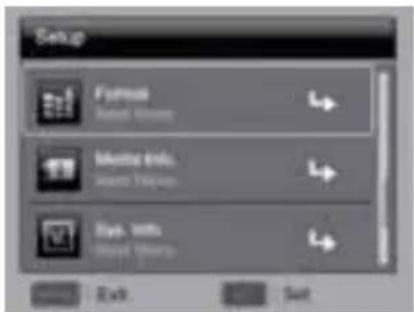


NOTE
■ You should format the memory card before its initial usage or after the card has been used in another camera or SD card device.
■ Formatting the memory card WILL ERASE all images and data on the card.
CAPTURE MODE
Capturing Images (Taking Pictures)
Your camera is equipped with a 3" full color LCD monitor to help you compose images, playback recorded images/video clips or adjust menu settings.
-
Press the ON/OFF button to turn the power on.
-
Press the MODE button and set the camera to Capture mode (not Video mode).
-
Compose your image in the LCD monitor.
■ Turn the zoom lever right to zoom in on the subject, and enlarge the subject on the LCD monitor.
■ Turn the zoom lever left to zoom out on the subject, and provide a wider angle image.
- Press the shutter button.
- Pressing the shutter button down halfway automatically focuses and adjusts the exposure, and pressing the shutter button down fully captures the images.
■ The focus area frame turns green when the camera is in focus and the exposure is calculated.
■ When the focus or exposure is not suitable, the frame of the focus area turns red.


NOTE
■ Avoid using zoom while underwater to take pictures of subjects at far away distances. For best underwater pictures, keep your subjects within 2 m / 6 ft shooting distance.
If the focus area frame is red, the light conditions or contrast may be too low. Try again until focus frame is green, or try focussing on a subject with higher contrast located at equal distance to the shooting subject.
■ The Flash icon on the LCD display flashes on and off when the flash is charging. When the flash icon is solid, the camera is ready.
Setting the Focus
The camera uses an auto focus lens system.
You can select among the six focus settings described below.
Press the [ ] button and the ◀/▶ buttons to select the desired focus mode.
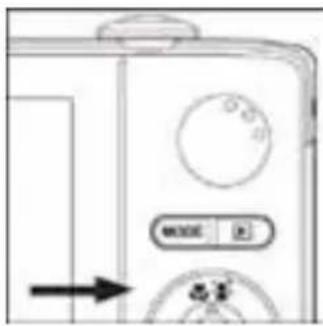

The table below will help you choose the appropriate focus mode:
| Focus mode Description | |
| [ AUTC ] Auto Focus | Select this setting and the camera will automatically focus from approximately 6in (15cm) to infinity. In Tele zoom the range is 2ft (60cm) to infinity. |
[  ] Macro ] Macro | For close-up pictures between 2 inches (5cm) to infinity. In Tele zoom the range is 2 ft (60cm) to infinity. |
| [ ∞ ] Infinity | Locks the camera to the infinity focus point (3ft/90cm to infinity). This setting is ideal for action shots or shooting in low light conditions when the auto focus does not accurately focus on the desired subject. |
| [ [3023] ] AF Tracking | For taking pictures of moving subjects. Lock on a desired subject by aiming the camera so the subject is in the focus frame, then push the [▼] / FLASH button. The focus frame automatically tracks the subject movement. Press the shutter button down fully to take the picture. The focus frame will blink red if the camera fails to recognize the subject. The AF Tracking feature will not accurately track the subject if there a multiple subjects identical to each other, like a school of fish. |
| [ [0277] ] Face Detect | Face detection can identify and focus on a human face in the image. If more than one face is detected, the primary face will be identified with a white frame, and secondary faces with a gray frame. If the camera cannot detect any faces, there will be no frame shown on the screen. Press the shutter button halfway down to lock the focus. When the primary face is in focus, the white frame turns green (red if not in focus). Press the shutter button down fully to take the picture. |
| [ [2846] ] Super Macro | For super close-up pictures from 1" (2.5cm) to infinity. The optical zoom will increase by 3 steps and lock (disabled). |
About Easy Set-up Mode
The Easy Set-up mode is a fast and easy way to set the camera for underwater or land photography. Select Easy Set-up option located in the capture menu. Then, select the best choice from a series of options depending on the shooting condition and the accessories you are using.
- Press the Menu button and select Easy Set-up:

- Select Underwater or Land.


- Select the camera configuration you are using.

- Select Snorkeling or Diving.
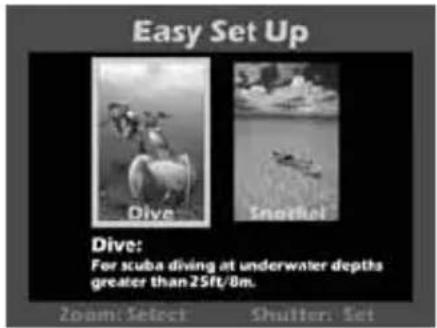
- The camera is now correctly set - That Was Easy!

SETTING THE SCENE MODE
"Scene modes" are pre-programmed camera settings to automatically give you the best picture possible under specific shooting conditions. You can use the Easy Set-up mode described on the previous page, or select among the following 33 scene modes.
- Press the MENU button and select Scene Mode using the down button (or zoom lever) and push the SET (or shutter button).
- Select the desired scene mode with the ◀ / ▶ / ▼ / ▲ buttons (or zoom lever), and press the SET button (or shutter button).
- Compose the image and press the shutter button.
| Scene mode | Description | |
 | Program AE | Select this mode when you want to set parameters manu other than the shutter speed and the aperture value. |
 | Auto | Select this mode when you want to capture images witho having to set special functions or manual adjustments. |
 | Dive | Underwater mode with color correction ideal for diving at depths greater than 25ft / 8m. When using camera WITHOUT underwater flash or light accessories. |
 | Snorkel | Underwater mode with color correction ideal for snorkel-ing or diving at depths less than 25ft / 8m. When using camera WITHOUT underwater flash or light accessories. |
 | Ext Flash Auto | Underwater mode with automatic exposure program when using SeaLife external flash accessory. |
 | Ext Flash Manual | Underwater mode with manual exposure controls when using SeaLife external flash accessory. |
 | Ext Light | Underwater mode with auto exposure program when using SeaLife photo-video light accessory. |
 | Ext Flash + Light | Underwater mode with auto exposure program when using SeaLife external flash accessory AND photo-video light combination. |
 | TV | Select this mode when you want to capture fast mov-ing subjects in fast shutter speed, or capture still subjects in slow shutter speed. |
| Scene mode | Description |
| Intelligent Scene | Select this mode when you want the camera to select an ideal shooting mode according to environment automatically. Not for underwater use. |
| Smile Detection | Select this mode to automatically capture an image when a smiling face is detected. |
| Anti-shake | Select this mode when you want to minimize the influences of hand shaking when capturing an image. |
| Panorama PanCapture | Select this mode when you want the camera to combine pictures in the camera automatically. |
| Skin Soften | Select this mode when you want the camera to reduce artifacts on faces. |
| De-blemish | Select this mode when you want the camera to reduce obvious blemishes and big spots on faces. |
| Portrait Man | Select this mode when you want to capture an image that makes a man stand out against a blurred background. |
| Portrait Lady | Select this mode when you want to capture an image that makes a lady stand out against a blurred background. |
| Landscape | Select this mode when you want to capture an image with infinity focus, hard sharpness and high saturation. |
| Sports | Select this mode when you want to capture fast-moving subjects. |
| Night Portrait | Select this mode when you want to capture people with an evening or night scene background. |
| Night Scene | Select this mode when you want to capture dark scenes such as night views. |
| Candlelight | Select this mode when you want to capture photos of candlelight scene, without spoiling the ambience. |
| Fireworks | Select this mode when you want to capture fireworks clearly with optimal exposure. The shutter speed becomes slower, so using a tripod is recommended. |
| Text | Select this mode when you want to capture an image that contains black and white subjects like printed documents. |
| Sunset | Select this mode when you want to capture a sunset. This mode helps keep the deep hues in the scene. |
| Sunrise | Select this mode when you want to capture a sunrise. This mode helps keep the deep hues in the scene. |
| Splash Water | Select this mode when you want to capture photos of splashing water. |
| Flow Water | Select this mode when you want to capture the soft flowing water. |
| Snow | Select this mode when you want to capture clear snow scenes without darkened subjects and bluish tint. |
| Beach | Select this mode when you want to capture bright beach scenes and sunlit water surfaces. |
| Pets | Select this mode when you want to capture your pets. Shoot from their eye level. |
| Natural Green | Select this mode when you want to capture the green scenery background such as forest. This mode helps to brighten the colors. |
Taking Images with Intelligent Scene mode
In this Intelligent Scene mode, the camera can sense the ambient conditions and automatically select the ideal shooting mode. Not for underwater use.
- Press the MODE button, and set the camera mode to [ ] , and press the SET button.
- Select [Intelligent Scene] with the ◀ / ▶ / ▼ / ▲ buttons, and press the SET button.
- The camera can automatically select best mode for the shooting scene from [Auto] / [Landscape] / [Backlight] / [Portrait] / [Night] / [Night Portrait] / [Macro].
- Compose the image, and press the shutter button down fully
About External Flash and External Light Modes
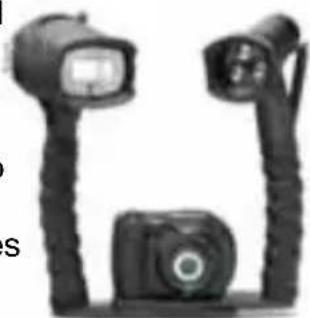
If you are using the SeaLife Digital Pro Flash (SL961) and/or Photo-Video Light accessories (sold separately), set the camera to one of the following Scene modes:
[ ] – Ext Flash Auto or Ext Flash Manual modes. When using one or two Digital Pro Flashes, but NOT the Photo-Video Light, set the Scene mode to Ext Flash Auto. The camera automatically adjusts the image exposure and white balance resulting in sharp, colorful underwater pictures. The camera is pre-programmed to account for the additional flash power resulting in optimal image exposure and brightness. The camera’s flash will always fire, which automatically triggers the Digital Pro Flash through the optical cable connection. For advanced underwater photographers who want to manually control the aperture and shutter speed, set the scene mode to Ext Flash MNL. Refer to the Digital Pro Flash instruction manual for more details on connecting and operating the flash.
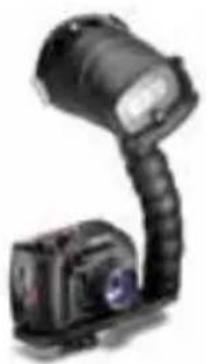
[ ] – Ext Light mode. When using one or two Photo-Video Lights, set the Scene mode to Ext Light. The camera automatically adjusts the image exposure and white balance resulting in sharp, colorful underwater pictures and video. The camera’s default setting is set to Flash Off, which is recommended to prevent backscatter. Refer to the Photo-video instruction manual for more details on connecting and operating the light.
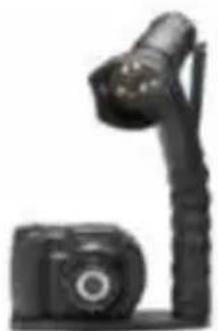
[ ] - Ext Flash + Light mode. When using one Digital Pro Flash in combination with one Photo-Video Light, set the Scene mode to Ext Flash+Light. This mode functions just like Ext Flash Auto mode, but uses a different white balance for video mode

NOTE
■ To set the camera to one of the above scene modes, use the Easy Setup mode (described on page 25), or manually set the Scene mode menu (described on page 26.)
Exposure adjustment when the camera is in Ext Flash Mode:
| Icon | Scene mode Description | |
 | Ext FlashAuto AND ExtFlash + Light modes | Automatic exposure control with external flash.In order to achieve proper image exposure, press the [ ] flash button to switch between one of the following three exposure settings:[Blank] - This is the default setting ideal for most underwater pictures.[ ]Macro Flash: This exposure setting is ideal for close-up shooting distances inside of 3ft (1m) or make the picture less bright.[ ]Far Flash: This exposure setting is ideal for shooting distances beyond 6ft (2m) shooting distance or to make the picture brighter. |
 | Ext Flash Manual | Manually set camera's aperture and shutter speed for desired exposure effect.To make manual adjustments:1. Press the FLASH [ ] button once and the aperture value appears on the LCD monitor.2. Use the ◀ / ▶ buttons (or zoom lever) to increase or decrease the aperture value.3. Press the Set (or Shutter) button and the shutter speed value appears on the LCD monitor.4. Use the ◀ / ▶ buttons (or zoom lever) to increase or decrease the shutter speed value.5. Press the Set (or Shutter) button again to exit the adjustment screen. The aperture and shutter speed value appear on the LCD monitor. |
About Dive and Snorkel Modes
The Dive and Snorkel Scene Modes are used to capture underwater pictures and video when NOT using the optional external flash accessory. Dive mode is ideal for scuba diving below 25ft/8m depth. Snorkel mode is ideal for underwater pictures above 25ft/8m depth. The camera will make color corrections to compensate for the loss of red colors typical in underwater photography.
To set Dive mode:
- Press the MENU button.
- Select [Scene mode] with the ▲ / ▼ buttons (or zoom lever) and press the SET (or Shutter) button.
- Select DIVE mode with the ▲ / ▼ buttons (or zoom lever) and press SET (or Shutter) button.
To set SNORKEL mode:
- Press the MENU button.
- Select [Scene mode] with the ▲ / ▼ buttons (or Zoom lever) and press the SET (or Shutter) button.
- Select SNORKEL mode with the ▲ / ▼ buttons (or Zoom lever) and press SET (or Shutter) button.
In Dive and Snorkel modes, you can fine-tune the color correction depending on the water color and depth. These color correction options are located in the White Balance Menu. The default white balance setting for Dive mode is Blue Water > 25ft/8m. The default white balance setting for Snorkel mode is Blue Water < 25ft/8m. To select Dive or Snorkel modes, follow the Easy Setup mode described on page 25. You can also set the camera to Dive or Snorkel modes under the Scene mode menu.
Underwater white Balance settings
- BluWtr<25ft (Blue Water less than 25ft depth). This mode is ideal for snorkeling or shallow diving in "blue" water.
- BluWtr>25ft (Blue Water greater than 25ft depth). This mode is ideal for deeper diving in "blue" water.
- GrnWtr<25ft (Green Water less than 25ft depth). This mode is ideal for snorkeling or shallow diving in “greener” water with higher algae content.
- GrnWtr>25ft (Green Water greater than 25ft depth). This mode is ideal for deeper diving in “greener” water with higher algae content.
To change the color correction (White Balance):
- Press the MENU button.
- Select [White Balance] with the ▲ / ▼ buttons (or Zoom lever) and press the SET (or Shutter) button.
- Select between BluWtr<25ft, BluWtr>25ft, GrnWtr<25ft or GrnWtr>25ft with the ▲ / ▼ buttons (or Zoom lever) depending on your type of water conditions and press SET (or Shutter) button.

NOTE
■ The underwater color correction feature should only be used for non-flash photography.
■ When the camera is in Dive and Snorkel mode, the scene displayed on the LCD display will appear red in color when you are on land. This is normal and will appear different when you are underwater.
■ The underwater color correction feature will not work during night time diving or depths greater than 50ft / 15m depending on the amount of available light.
For best UW pictures, keep the camera's flash OFF when in Dive or Snorkel mode. If light conditions are too dark, we recommend using the SeaLife Digital Pro Flash (item SL961 - optional accessory).
Recording a Subject onto an Existing Background Image (Pre Shot mode)
Pre-Shot helps you get the background you want when asking someone else to take a picture for you. Basically, Pre-Shot is a two-step process.
- Push the Mode button to select [Capture mode] (not video mode).
a. Press the MENU button.
b. Select [Function] with the ▶ button.
c. Select [Capture Mode] with the ▲ / ▼ button, and press the SET button.
d. Select [Pre-Shot] with the ▲ / ▼ button, and press the SET button.
e. Press the MENU button to exit from the menu screen.
- Compose the background you want on the screen, and then press the shutter button to temporarily record it as a reference image.
This operation causes a semi-transparent image of the background to appear on the screen, but the displayed image is not actually saved in camera memory.
-
Now you can stand in front of the background and ask someone else to take your picture, using the semi-transparent background on the screen as a composition guide.
-
After composing the final image (using the semi-transparent background as a guide), the person with the camera should press the shutter button to record.
Note that the semi-transparent background image temporarily recorded in step 2 is for composition purposes only. The final image contains only what is in front of the camera when the shutter button is pressed in step 4.
Remember, you can use the Zoom lever to scroll the menu and Shutter button to Set the camera.
Combining Shots of Two People into a Single Image (Couple Shot Capture mode)
This mode lets you record images of two people and combine them into a single image. This makes it possible for you to include yourself in group images, even when there is no one else around to record the image for you.
- Press the Mode button to select [Capture Mode] (not video mode).
a. Press the MENU button.
b. Select [Function] with the ▶ button.
c. Select [Capture Mode] with the ▲ / ▼ button, and press the SET button.
d. Select [Coupl.shot] with the ▲ / ▼ button, and press the SET button.
e. Press the MENU button to exit from the menu screen.
- Align the focus frame on the screen with the subject you want on the left side of the image.
- Press the shutter button to record the left side of the image.
- Next compose the subject you want in the right side of the image, taking care to align the background with the semi-transparent image of the background of the first image, which is shown on the screen.
- When everything is aligned correctly, record the right side of the image. Remember, you can use the Zoom lever to scroll the menu and Shutter button to Set the camera.
Taking and Combining Panoramic Pictures
Pictures are manually shot, and the camera automatically combines pictures in the camera.
- Press the MODE button, and set the camera mode to [Picture mode], and press the SET button.
- Select [Panorama PanCapture] with the ◀ / ▶ / ▲ / ▼ buttons and press the SET button.
-
Select the photographic direction with the ◀ / ▶ buttons.
-
Shoot the first image.
■ The next image appears beside the previous image.
-
Orient the camera so that the second frame overlaps a small portion of the photographic subject of the first image and press the shutter button to capture the next image.
-
Follow the same steps to capture subsequent images in the sequence.
-
After the third picture is taken, the pictures are automatically combined.
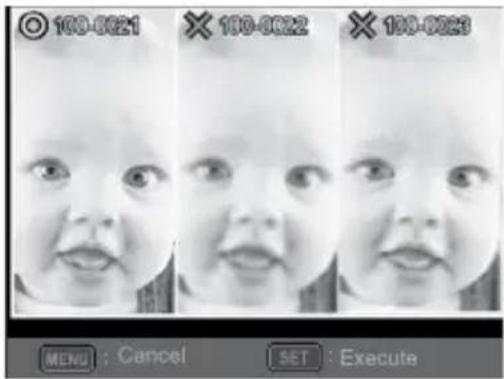
Find Blur Function
The “Find Blur” scene mode will capture 3 pictures and select the sharpest picture with the least amount of blur. This scene mode is not intended for underwater pictures. The “Find Blur” scene mode will capture 3 pictures and select the sharpest picture with the least amount of blur. This scene mode is not intended for underwater pictures.
-
Press the MODE button, and set the camera mode to [Picture mode].
-
Press the MENU button, and select [Find Blur] icon with the ▲ / ▼ buttons. Set "Find Blur" on.
-
Press the shutter button to return to preview display.
-
Press the shutter button down fully to capture your image.
-
Press the SET (Execute) button to save the best image.
■ Press the MENU (Cancel) button to save all images
About Spy Mode
This mode is used to capture continuous images at a preselected time interval. This mode is useful for taking a sequence of images, like a sunrise or sunset, and later selecting the best image. It is also useful for taking a series of pictures without being discovered by the subject, like Garden Eels or a bird's nest with an egg hatching. A compact tripod accessory is helpful to keep the camera aimed at the subject. Spy mode is not available when recording video.
-
Press the MENU button, and select [Capture mode] with the ▲ / ▼ buttons (or Zoom lever), and press the SET (or Shutter) button.
-
Select [Spy] with the ◀/▶ buttons (or Zoom lever), and press the SET (or Shutter) button.
-
Select the desired time interval with the ◀ / ▶ buttons (or Zoom lever) and press the SET (or Shutter) button.
-
Press the MENU button to exit the menu.
-
Aim the camera at the desired subject or scene. It is preferred to use a compact tripod, so the camera is steady and remains aimed at the subject.
-
Press the shutter button and the camera will start capturing images at the pre-selected set time interval.
-
The LCD display will now turn off to save battery power. The camera will continue to take images at the preselected time interval, until:


a. Pressing the shutter button again.
b. The memory is full.
c. The battery is empty.

NOTE
■ When using the SPY shooting mode underwater, it is helpful to have a waterproof tripod that can stabilized the camera. We recommend using the Gorillapod SLR. For more information, please visit: www.joby.com/products/gorillapod/slr/
HD VIDEO MODE
Recording HD Video Clips
This mode allows you to record continuous video with sound in 1280x720 (720p HD), 640x480 (VGA) or 320x240 (QVGA) pixel formats.
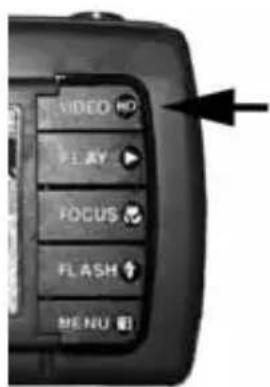
- Press the Mode button [or UW housing Video button] to select Video mode [ ]
- Compose the image.
- Press the shutter button.
■ The recording of the video clip will start.
■ Pressing the shutter button one more time will end the recording of the video clip.
■ The recording time depends on the storage size and the subject of the image to be recorded.
The zoom function cannot be used during video recording. The camera will auto focus at the subject when pushing the shutter button to start recording. Once video recording has started, the auto focus is locked.


NOTE
- When recording a video clip, the flash and "10+2 sec." self-timer function cannot be used.
If the write speed of your SD/SDHC memory card is not fast enough for recording video clips in the currently selected quality, the video recording will stop. In this case, select a video quality lower than the current one or purchase a SD/SDHC card with a faster read-write speed.
Playing Back Video Clips
You can play back recorded video clips on the camera.
- Press the [ ▶ ] button.
■ The last image appears on the screen.
-
Select the desired video clip with the ◀ / ▶ buttons (or Zoom lever).
-
Press the SET (or Shutter) button to start playing video clip.
A press of the ▶ / ◀ buttons (or Zoom lever) during playback allows fast forward play / fast reverse play.
■ To stop video playback, press the ▼ (or Flash) button.
This stops playback and returns to the start of the video clip.
■ To pause video playback, press the SET (or Shutter) button.
This pauses video playback.
To cancel pause, press the SET (or Shutter) button again.

NOTE
■ Video clips cannot be displayed rotated or enlarged.
In low light conditions or night time, use the SeaLife Photo-Video Light accessory (Item SL980 - sold separately).
■ Windows Media player or QuickTime Player is recommended to play back the video clip on your computer.
■ QuickTime Player is a free media player available at www.apple.com; and compatible with Mac and Windows computers.
For more information about the operation of the media player, refer to its respective help documentation.
PLAYBACK MODE
Playing Back Still Images
You can play back the still images on the LCD monitor.
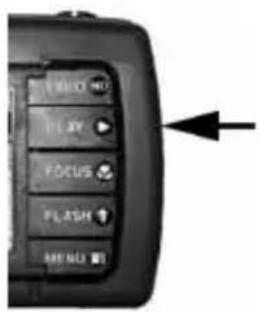
- Press the [ ▶ ] button.
■ The last image appears on the screen.
- The images can be displayed in forward or reverse sequence with the ◀/▶ buttons (or Zoom lever).
■ To view the previous image, press the button (or turn Zoom lever left).
■ To view the next image, press the▶ button (or turn Zoom lever right).
- Push the shutter button to enlarge the center of the image. Each push of the shutter button increases the zoom by one step: 2X - 3X - 4X and back to 1X normal view.
■ Use the ◀ / ▶/ ▲ / ▼ buttons to see other enlarged parts of the picture. This function is not available when the camera is sealed inside the underwater housing.


NOTE
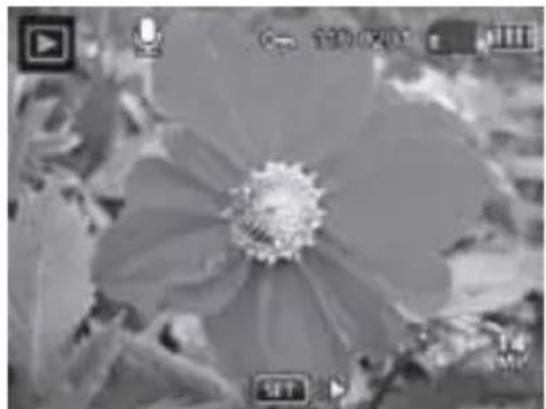
■ An [icon] icon is displayed with images which have an audio memo recorded.
■ Press the SET (or Shutter) button to playback the voice memo data.
Removing Red-eye
You can use this function to remove the red-eye effect after an image is taken.
- Press the [ ▶ ] button.
- Select the image that you want to edit with the ◀/▶ buttons (or Zoom lever).
- Press the MENU button.
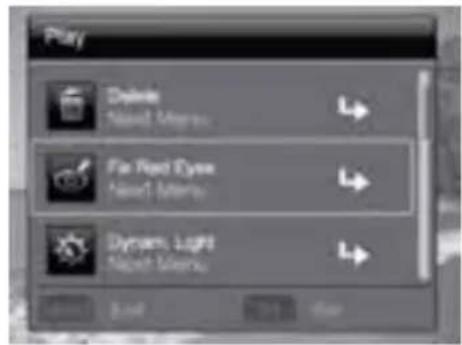
- Select [Fix Red Eyes] with the ▲ / ▼ buttons (or Zoom lever), and press the SET (or Shutter) button.
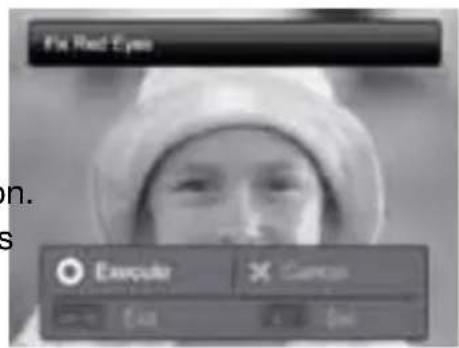
- Select [Yes] with the ◀/▶ buttons (or Zoom lever), and press the SET (or Shutter) button.
- View the changes on the corrected image.
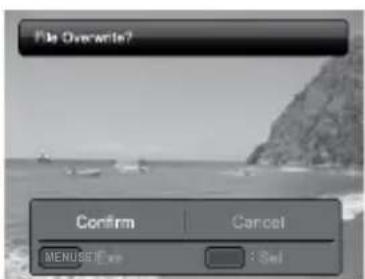
- To save your corrected image, select [Confirm] with the ◀ / ▶ buttons (or Zoom lever), and press the SET (or Shutter) button.
■ When this process ends, this replaces the original image with the corrected image.
Dynamic Lighting Feature
This feature compensates for the unfavorable lighting conditions by brightening underexposed areas and balancing overexposed areas.
-
Press the [button.. The last image appears on the screen.
-
Select the image that you want to edit with the ◀/▶ buttons (or zoom lever).
-
Press the MENU button.
-
Select [Dynam. Light.] with the ▲ / ▼ buttons (or zoom lever), and press the SET (or shutter) button.
-
Select [High] or [Low] with the ◀ / ▶ buttons, and press the SET (or shutter) button.
-
View the changes on the corrected image.
-
To save your corrected image, select [Confirm] with the ◀ / ▶ buttons (or zoom lever), and press the SET (or shutter) button.
■ When this process ends, this replaces the original image with the corrected image

Attaching Voice Memos
A maximum of 30 seconds of audio can be recorded as a memo for captured still images. The voice memo can be recorded only once.
- Press the [ ▶ ] button.
■ The last image appears on the screen.
- Select the image to which you want to attach the voice memo with the
◀ / ▶ buttons (or Zoom lever).
-
Press the MENU button.
-
Select [Voice Memo] with the ▲ / ▼ buttons (or Zoom lever), and press the Set (or Shutter) button.
-
Press the Set (or Shutter) button.
■ [ ] is displayed on the screen and recording starts.
- To stop recording a voice memo as it is being recorded, press the Set (or Shutter) button again.
■ ] icon is displayed with images that have been recorded with a voice memo.

NOTE
■ RE-REC mode can only be used for the recorded and selected file, and it can record voice memo repeatedly to replace the previous recordings.
Playing back voice memo
A press of the SET (or Shutter) button displays [ ] and plays back the voice memo. Voice memo is only available for still images, not video clips.
Protecting Images
Set the data to read-only to prevent images from being erased by mistake.
- Press the [ ▶ ] button.
- Select the image that you want to protect with the ◀ / ▶ buttons (or Zoom lever).
-
Press the MENU button.
-
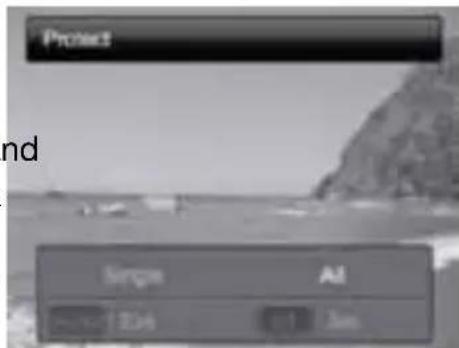
Select [Protect] with the ▲ / ▼ buttons (or Zoom lever), and press the SET (or Shutter) button.
-
Select [Single] or [All] with the ◀ / ▶ buttons (or Zoom lever), and press the SET (or Shutter) button.
-
Select [Set] with the ◀/▶ buttons (or Zoom lever), and press the SET (or Shutter) button.

■ Protection is applied to the image and the camera returns to the playback mode.
■ The protect icon[φm] is displayed with protected images.
When [All] has been selected, [Oπ] is displayed with all the images.
Canceling the Protection
To cancel protection for only one image, display the image on which you want to remove the image protection.
- Press the [▶] button.
-
Select the image that you want to protect with the ◀/▶ buttons (or Zoom lever).
-
Press the MENU button.
-
Select [Protect] with the ▲ / ▼ buttons (or Zoom lever) from the playback menu, and press the SET (or Shutter) button.
-
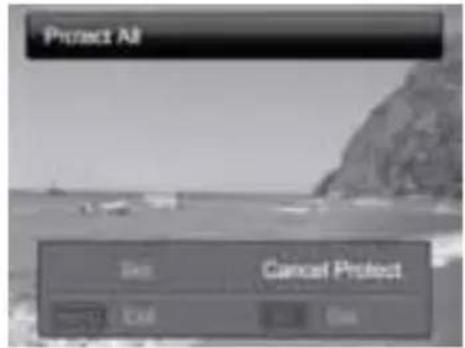
Select [Single] or [All] with the ◀/▶ buttons (or Zoom lever), and press the SET (or Shutter) button.
-
Select [Cancel Protect] with the ◀ / ▶ buttons (or Zoom lever), and press the SET (or Shutter) button.
■ The removal of image protection is executed and the camera returns to the playback mode.

NOTE
■ Formatting an SD/SDHC memory card overrides protection, and erases all images regardless of their protected status.
Erasing Images and Video Clips in Playback Mode
- Press the [ ▶button.
■ The last image or video clip will be displayed on the screen.
- Select the image / video you want to erase with the ◀/▶ buttons (or Zoom lever).
- Press the MENU button.
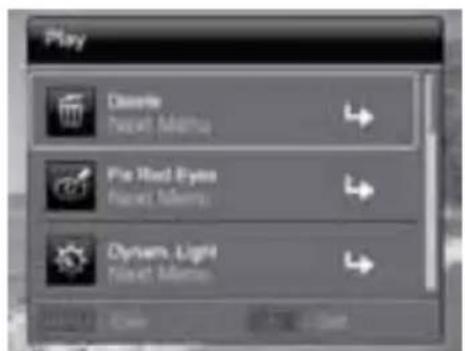
- Select [Delete] with the ◀ / ▶ buttons (or Zoom lever), and press the SET (or Shutter) button.
■ [Single]: Erases the selected image or video.
[All]: Erases all of the images / videos except for the protected files.
- Select [Yes] with the ◀ / ▶buttons (or Zoom lever), and press the SET (or Shutter) button.
■ To not erase, select [No], and press the SET (or Shutter) button.


NOTE
■ Deleting an image will not affect sequential image numbering. For example, if you delete image number 240, the next captured image will be numbered 241 even though 240 no longer exists. In other words, an image-number is retired when an image is deleted and will not be reused or reassigned to another subsequently captured image.
MENU OPTIONS
Capture Menu
This menu is for the basic settings to be used when capturing still images.
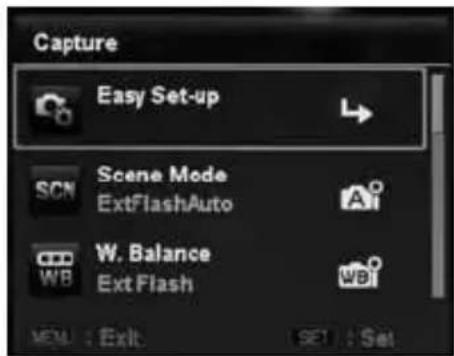

- Press the Mode button and select [ ]
- Press the MENU button to enter the capture menu.
- Select the desired option item with the ▲ / ▼ buttons (or zoom lever), and press the SET (or Shutter) button to enter its respective menu.
- Select the desired setting with the press the SET (or Shutter) button. ◀/▶ buttons (or Zoom lever), and
- To exit from the menu, press the MENU button.
Easy Set-up
This is a step-by-step set-up which helps you to set the correct scene mode for land or underwater use. Simply follow the on-screen guide. As you become more familiar with the camera, you may also set-up the camera's Scene mode manually using the complete menu options. See page 25 for more information.
Scene Mode
"Scene modes" are pre-programmed camera settings to automatically give you the best possible picture under specific shooting conditions. Select from 33 different scene modes in accordance with the shooting conditions. For more information about Scene Modes, please refer to page 26 of this manual.
Size
This sets the size of the image that will be captured.
* [14]288 x 3216
* [ 3264 x 2448
* [4]2304 x 1728
* [201600 × 1200
* [VGA640 x 480
ISO
This sets the sensitivity for capturing images. When the sensitivity is raised (and the ISO figure is increased), photography will become possible even in dark locations, but the more pixelated (grainier) the image will appear.
* Auto / 64 / 100 / 200 / 400 / 800 / 3200
Quality
This sets the quality (compression) at which the image is captured. A higher quality setting will result in less compression and larger image files.
* [ ]Fine
* [ ]Standard
* [ ] Economy
White Balance
This sets the white balance for a variety of lighting conditions and permits images to be captured that approach the conditions that are seen by the human eye.
* [ AUTO Auto
* [BluWtr<25ft (Blue Water less than 25ft depth). This mode is ideal for shallow diving in "blue" water.
* [ ]BluWtr>25ft (Blue Water greater than 25ft depth). This mode is ideal for deeper diving in "blue" water.
* [ ] GrnWtr<25ft (Green Water less than 25ft depth). This mode is ideal for snorkeling or shallow diving in “greener” water with higher algae content.
[ ] GrnWtr>25ft (Green Water greater than 25ft depth). This mode is ideal for deeper diving in “greener” water with higher algae content.
* [ ] Ext Flash WB. Use this white balance setting for underwater pictures when shooting with the external flash accessory
* [ ] Incandescent
* [ ] Fluorescent 1
* [ 2 ] Fluorescent 2
* [ ⚙ ] Daylight
* [ ]Cloudy
* [ Manual (See page 50 for details about setting manual white balance.)
Sharpness
This sets the sharpness of the image that will be captured.
* Hard / Standard / Soft
Color
This sets the color of the image that will be captured.
* Standard / Vivid / Sepia / (B & W) / Red / Green / Blue / Yellow / Purple
Saturation
This sets the saturation of the image that will be captured.
* High / Standard / Low
Metering
This sets the metering method for calculating the exposure.
* Center: Averages the light metered from the entire frame, but gives greater weight to the subject matter at the center. This is the recommended setting for most pictures.
* Spot: A very small portion of the center of the screen is measured to calculate the correct exposure.
* Average: The entire area of the screen is measured, and the exposure is calculated.
Image Stab.
This function minimizes the motion blur caused by hand “shake” or movement when you capture an image. It is recommended to keep the image stabilization OFF to save battery power unless taking pictures in low light without flash.
* On / Off
Capture Mode
This sets the recording method at the time of capturing images.
* [ ■1 ] Single: Captures one image at a time.
* [ ] SPY: For continuous pictures at set time intervals. (See page 36)
* [ ■ ] Continuous: Permits continuous capture of up to 3 images.
* [ A ] Auto Exposure Bracketing (AEB): Permits 3 consecutive images in the order of standard exposure, underexposure and overexposure compensation.
* [ ] Cont.flash: Permits continuous capture of up to 3 images with flash.
* [ ] Burst: Permits continuous photography while keeping the shutter button pressed down. As long as you hold the shutter button pressed, pictures are captured until the memory capacity is exhausted.
* [ ] Pre-Shot: Pre-shot helps you get the background you want, even if you need to ask someone else to record the image for you. Basically, Pre-shot is a two-step process. Select a background by 1st shot, the image shown on display will be transparent, then take the 2nd shot on the basis of 1st image. Image of 1st shot is only a guiding tool, it won't be saved on SD card.
* [ ] Coupl.shot: This mode lets you record images of two people and combine them into a single image. This makes it possible for you to include yourself in group images, even when there is no one else around to record the image for you.
* [ ] Album Shot: Creates an album-like layout to combine 3 shots into a single image.
* [ ] Burst 30fps: Permits continuous capture of up to 30 images in the resolution 640 x480 within a few seconds.

NOTE
In [Continuous], [AEB], [Burst], [Cont.flash], [Pre-Shot], [Coupl.shot] and [Album Shot] capture mode, the [Voice Memo] is automatically fixed at [Off].
Quick Shot
When the Quick Shutter is set to ON and you quickly press the shutter button down fully, the camera takes image without using auto focus. The auto focus will be locked to the last focus setting used before turning on Quick Shot.
However, if you power the camera off and on when Quick Shot is enabled, the auto focus will be locked to infinity.
* On / Off
Digital Zoom
This sets whether or not to use digital zoom at the time of photography.
* On / Off
Find Blur
For information about the "Find Blur" setting, please refer to page 35.
* On / Off
Date Print
The date of recording can be printed directly on the still images. This function must be activated before the image is captured.
* On / Off
Date Print
Refer to the "Setup" section in this manual for details. See page 25.
Setting Manual White Balance (WB)
The surrounding light may affect the color balance of your pictures or videos. For example, if a halogen light illuminates a white wall, the wall will have a yellow cast, while in fact it should be white. Underwater pictures tend to be more blue, because the water filters out red colors. The camera's white balance menu includes settings that compensate for different lighting conditions found on land or underwater. You can also manually set the camera's white balance if the options found in the white balance menu are not suitable. A digital camera needs to find a reference point which represents white. It will then calculate all the other colors based on this white point.
To manually set the camera's white balance, select “Manual WB” located at the bottom of the White Balance menu. Select “New WB” and press the Set or Shutter button. Turn the Zoom lever and select “Yes”. Hold the white slate (sold separately at your local dive dealer) about 10in /25cm in front of the camera lens, so it fills up the picture frame displayed on the LCD. Hold the white slate at a slight angle in the direction of the light source or sun.


* Press the SET (or Shutter) button to execute the Manual WB. Do not use Manual WB with flash photography. Reset Manual WB when changing depths or light conditions. Select "Use Data" if you want to use the last Manual WB setting saved to the camera. Push and hold the Menu button for about 4 seconds, as a shortcut to access the Manual white balance setting screen.
Video Menu
This menu is for the basic settings to be used when recording video clips.
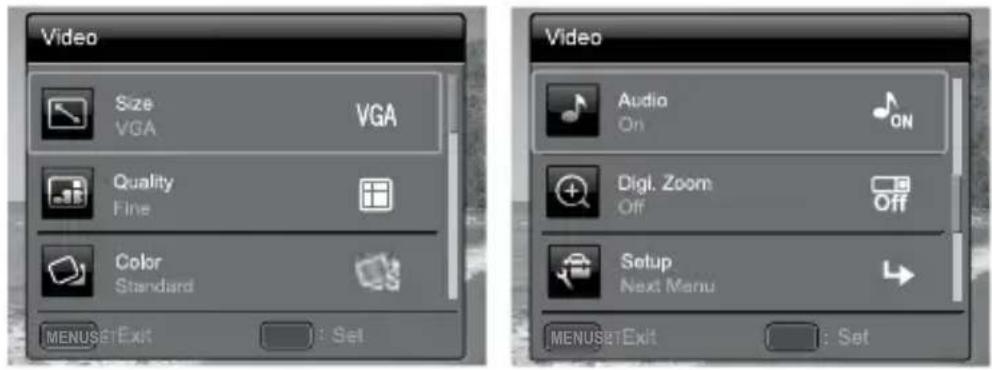
- Press the MODE [video] button and set the camera [ ]
- Press the MENU button to enter the Video menu.
- Select the desired option item with the ▲ / ▼ buttons (or Zoom lever), and press the SET (or Shutter) button to enter its respective menu.
- Select the desired setting with the ◀ / ▶ buttons (or Zoom lever), and press the SET (or Shutter) button.
- To exit from the menu, press the MENU button.
White Balance
Refer to pages 46-47 of this manual titled "White Balance" in Capture Menu for further details.
Size
This sets the size of the video clip that will be captured.
* [ HD ] 1280 x 720p
* [ VGA ] 640 x 480
* [ Q-VGA ] 320 × 240
Quality
This sets the quality (compression) at which the video clip is captured.
* [ 田 ] Fine
* [ ] Standard
Color
This sets the color of the video clip that will be captured.
* Standard / Vivid / Sepia / B&W / Red / Green / Blue / Yellow / Purple
Audio
This sets whether or not to record audio at the time of video recording.
* On / Off
Digital Zoom
Refer to section in this manual titled “Digital Zoom” in Capture Menu for further details.
Setup
Refer to the "Setup" section in this manual for details. See page 25.
Playback Menu
In the [▶mode, choose which settings are to be used for playback.


- Press the [ ▶ ] button.
- Press the MENU button.
- Select the desired option item with the ▲ / ▼ buttons (or Zoom lever), and press the SET (or Shutter) button to enter its respective menu.
- Select the desired setting with the ◀/▶ buttons (or Zoom lever), and press the SET (or Shutter) button.
- To exit from the menu, press the MENU button.
Delete
Refer to page 44 of this this manual titled "Erasing Images" for further details.
Fix Red Eyes
Refer to page 40 of this manual titled "Removing Red-eye" for further details.
Slide Show
This function enables you to playback your still images automatically in order one image at a time.
* 3 sec. / 5 sec. / 10 sec.
Dynam. Light. (Dynamic Lighting)
Refer to page 40 of this manual titled “Dynamic Lighting Feature” for further details.
Rotate
If you wish to rotate a still image 90 degrees to the right, select +90°; if you wish to rotate it 90 degrees to the left, select -90°. Video clips cannot be rotated.
* +90° / -90°
Protect
Refer to page 42 of this manual titled “Protecting Images” for further details.
Voice Memo
Refer to page 41 of this manual titled “Attaching Voice Memos” for further details.
Resize
Resizes a previously saved image. Resizing replaces the original image with the changed image. It is only possible to resize to a smaller size.
Quality Change
Changes the quality (compression) of a recorded image. Compresses images down to half of their size or less, overwrites old size images with newly compressed images. It is only possible to reduce the image quality/size, never to increase it.
Copy to Card
Allows you to copy your files from the camera's internal memory to an SD/SDHC memory card. Of course, you can only do this if you have a memory card installed and some files in internal memory. All files remain in the internal memory, even after copy to the SD/SDHC memory card from the internal memory.
* Yes / No
Setup Menu
Set your camera's operating environment.
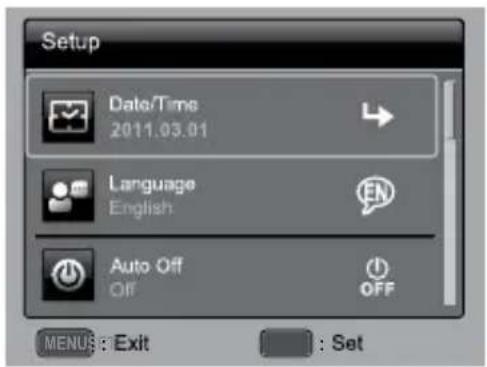
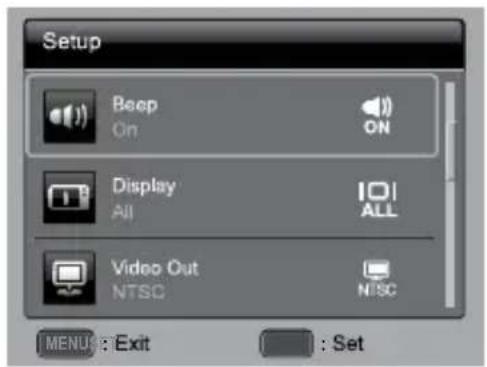
- Press the Mode button to [ ] or [ ], or press the [button.
- Press the MENU button. Select the [Setup] menu with the ◀/▶ buttons (or Zoom lever), and press the SET (or Shutter) button.
- Select the desired option item with the ▲ / ▼ buttons (or Zoom lever), and press the SET (or Shutter) button to enter its respective menu.
- Select the desired setting with the ◀ / ▶ buttons (or Zoom lever), and press the SET (or Shutter) button.
- To exit from the menu, press the MENU button.
Date/Time
Refer to page 21 of this manual titled "Setting the Date and Time" for further details.
Language
Refer to page 22 of this manual titled “Choosing the Language” for further details.
Auto Off
If no operation is performed for a specific period of time, the power to the camera is automatically turned off. This feature is useful for reducing battery usage.
* Off / 1 Min. / 2 Min. / 3 Min.
Beep
This sets whether or not to mute the camera sound each time you press the camera's buttons.
* On / Off
Display
This sets the image information display state.
* Standard / All / Off
Video Out
This sets your camera to match the system of the equipment that you are going to connect to the camera.
* PAL/NTSC
Fr. No. Reset
This creates a new folder. The captured images are recorded to the newly created folder from number 0001.
* Yes / No
Light Freq.
This camera supports different lighting frequencies: 50 Hz and 60 Hz. When photographing under fluorescent lighting, select the correct frequency setting depending in your local area's voltage. In most parts of the world this is 50 Hertz (Hz), although in the Americas it is typically 60 Hz. Places that use 50 Hz frequency tend to use 220-240 Voltage (V), and those that use 60 Hz tend to use 100-120 V.
* 50 Hz / 60 Hz
LCD Bright.
Select a brightness level for the LCD monitor.
* Standard / Bright
Format
Refer to page 22 of this manual titled “Formatting the Memory Card or Internal Memory” for further details.
Media Info.
This displays the free capacity of the internal memory or the memory card.
System Info.
This displays the firmware version of the camera.
Sys. Reset
This returns all basic settings to the camera's default settings. The time setting will not be reset.
* Yes / No
TRANSFERRING FILES TO YOUR COMPUTER
System Requirement (Minimum requirements)
| Windows Macintosh | |
| ■ Pentium III 1GHz or higher■ Windows XP/Vista/7■ 512MB RAM■ 150MB hard disk space■ Available USB port | ■ PowerPC G3/G4/G5■ OS 10.3.9 or later■ 256MB RAM (512 MB + recommended)■ 128MB hard disk space■ Available USB port |
Downloading Your Files
- Connect the camera to your computer with the USB cable.
- Turn on your camera.
- Select [PC] using the ▲ / ▼ buttons and press the SET button.
- From the Windows desktop, double click on "My Computer".
- Look for a new "removable disk" icon.
This “removable disk” is actually the memory (or memory card) in your camera. Typically, the camera will be assigned drive letter “e” or higher.
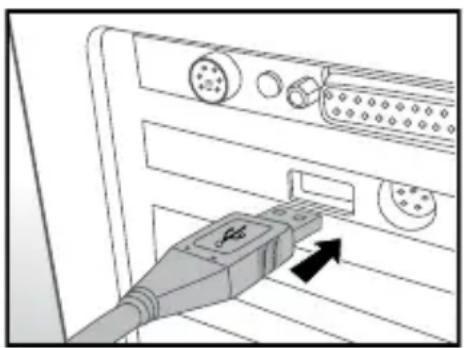
- Double click on the removable disk and locate the DCIM folder.
- Double click on the DCIM folder to open it to find more folders.
■ Your recorded images and video clips will be inside these folders.
- Copy & Paste or Drag-N-Drop image and video files to a folder on your computer.
Mac users: Double-click the “untitled” or “unlabeled” disk drive icon on your desktop. iPhoto may automatically launch.
EDITING SOFTWARE
Almost every computer already includes photo editing software, like Windows Photo Gallery or Mac iPhoto, which allows you to open, organize and edit your pictures. If your computer does not include any photo editing software, you may want to purchase one.
Here are some links to popular photo editing software that you can purchase. Many offer free trial versions:
Google Picasa: www.picasa.google.com Adobe Photoshop (Elements): www.adobe.com Arcsoft: www.arcsoft.com Ulead: www.ulead.com
SPECIFICATIONS (INNER CAMERA ONLY)
| Item Description | |
| Image sensor 1/2 | 33” CCD sensor (14 megapixels) |
| Image resolution | |
| 14M (4288X3216), 8M (3264 x 2448), 4M (2304x1728), 2M (1600 x 1200), VGA (640 x 480) | |
| HD(1280x720p)/30fps, VGA(640x480)/30fps, QVGA(320x240)/30fps | |
| LCD monitor 3.0” | full color TFT LCD (230K pixels) |
| Recording media | 32MB internal memory (20MB available for image storage)Supports SD/SDHC memory card up to 32GB (optional) |
| File format JPEG | DCF, EXIF 2.2, Motion JPEG (AVI) |
| Lens 5x optical zoom lensAperture: F2.8 / F7.9 (at 5X zoom = F6.5 / F18.6)Focal length: 4.70mm - 23.5mm (equivalent to 26mm - 130mm on a 35mm camera) | |
| Focus Range Normal | Wide: 15cm~Inf (6in to infinity)Tele: 60cm~Inf (2ft to infinity)Macro: Wide: 5cm~Inf.(2 inches to infinity)Tele: 60cm~Inf (2ft to infinity)Super Macro (Zoom locked at +3 steps and disabled): 2.5cm~Inf. (1 inch to infinity) |
| Shutter speed 2~ | 1/2000 Sec. |
| Digital zoom 6x (Capture mode)4x (Playback mode) | |
| Flash effective range | Land: 3.0m / 10ftUnderwater: 0.3M / 1ft |
| Terminals 2-in-1 terminalAV OUTUSB 2.0 compliant | |
| Power supply Rechargeable Lithium-ion battery (3.7V) | |
| Dimensions Approx. | 96.9x 58 x 18 mm (without protruding parts) |
| Weight Approx. | 16g (without battery and memory card) |
* Design and specifications are subject to change without notice.
APPENDIX
Possible number of shots (still image)
The table shows the approximate shots that you can capture at each setting based on the capacity of the internal memory and the SD/SDHC memory card.
| Size | Quality | Internal Memory | SD/SDHC memory card capacity | |||||
| 1GB | 2GB | 4GB SDHC | 8GB SDHC | 16GB SDHC | 32GB SDHC | |||
| 14 \ 4288 x 3216 | 6 | 280 | 571 | 1122 | 2285 | 4598 | 9224 | |
| 9 | 402 | 818 | 1608 | 3272 | 6585 | 13211 | ||
| 13 | 555 | 1130 | 2219 | 4518 | 9090 | 18236 | ||
| 8 \ 3264 x 2448 | 9 | 412 | 839 | 1649 | 3356 | 6754 | 13548 | |
| 13 | 588 | 1197 | 2352 | 4787 | 9633 | 19325 | ||
| 19 | 805 | 1638 | 3218 | 6549 | 13178 | 26435 | ||
| 4 \ 2304 x 1728 | 15 | 662 | 1348 | 2647 | 5387 | 10840 | 21745 | |
| 22 | 939 | 1910 | 3750 | 7633 | 15359 | 30811 | ||
| 31 | 1294 | 2633 | 5171 | 10523 | 21173 | 42474 | ||
| 2 \ 1600 x 1200 | 26 | 1093 | 2224 | 4368 | 8890 | 17887 | 35882 | |
| 37 | 1555 | 3164 | 6213 | 12644 | 25442 | 51036 | ||
| 51 | 2122 | 4316 | 8476 | 17249 | 34706 | 69619 | ||
| VGA640 x 480 | 87 | 3591 | 7303 | 14340 | 29183 | 58716 | 99999 | |
| 121 | 4979 | 10127 | 19884 | 40466 | 81418 | 99999 | ||
| 160 | 6542 | 12208 | 23970 | 48780 | 99999 | 99999 | ||
Possible recording time / sec (video clip)
| Size | Quality | Internal Memory | SD/SDHC memory card capacity | |||||
| 1GB | 2GB | 4GB SDHC | 8GB SDHC | 16GB SDHC | 32GB SDHC | |||
| HD1280 x 720 | Fine | 0:00:08 | 0:06:04 | 0:12:21 | 0:24:16 | 0:49:23 | 1:39:22 | 3:19:20 |
| Standard | 0:00:09 | 0:06:49 | 0:13:53 | 0:27:16 | 0:55:31 | 1:51:42 | 3:44:05 | |
| VGA640 x 480 | Fine | 0:00:10 | 0:07:35 | 0:15:25 | 0:30:17 | 1:01:38 | 2:04:01 | 4:08:48 |
| Standard | 0:00:19 | 0:13:34 | 0:27:36 | 0:54:12 | 1:50:18 | 3:41:57 | 7:25:13 | |
| O-VGA320 x 240 | Fine | 0:00:32 | 0:22:25 | 0:45:36 | 1:29:33 | 3:02:15 | 6:06:42 | 12:15:36 |
| Standard | 0:00:48 | 0:33:16 | 1:07:40 | 2:12:53 | 4:30:26 | 9:04:08 | 18:11:31 | |
* The table above shows the approximate maximum recording times. These are the total times for all clips. A video recording will stop automatically when a video clip becomes approx. 4GB or 25 minutes.
* We recommend a memory card of at least 10MB/Sec write speed to prevent auto stop or unexpected results. If you experience an error using a slower SD/SDHC memory card, you can set your camera's video recording to QVGA (320 x 240) and standard quality.
* SDHC Class6 or above is required for HD movie recording.
UNDERWATER HOUSING INSTRUCTIONS
Important: Please carefully read and understand these instructions before using camera and housing underwater.
DC1400

Front view of underwater housing
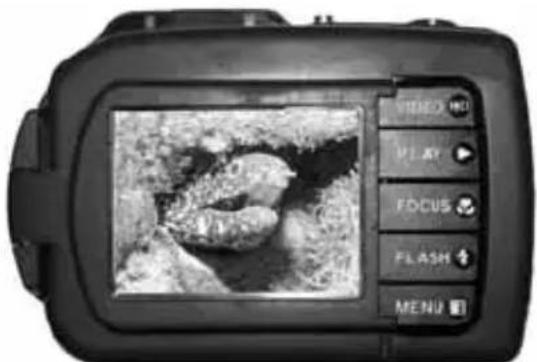
Rear view of underwater housing
SeaLife DC1400 Underwater Housing:
■ Depth rated and tested to 200 ft. (60m).
■ Fully rubber armored for added shock protection.
■ Soft rubber grips.
■ Fully-multi coated optical glass lens port for high light transmission.
■ Accessory mount for attaching SeaLife Digital Pro Flash and/or Photo-Video Light accessories.
■ Large shutter button and wide spread buttons for easy control with dive gloves.
MUST DO for underwater housing:
- Read and understand the instructions contained in this manual before using underwater.
- Do not exceed the depth rating of 60m (200ft.) or the housing may leak.
- Follow these important O-ring care instructions or the waterproof housing may leak.
- Do not lubricate o-ring.
■ Inspect and clean O-ring and O-ring contact surfaces for sand, hair and other debris before every use. Clean O-ring and O-ring contact surfaces with cleaning brush provided.
■ Inspect O-ring and O-ring contact surfaces for damage (cuts, scratches, tears, cracks, dents and any other imperfections.) Replace O-ring or have waterproof housing serviced if the O-ring or O-ring contact surfaces become damaged. Do not use underwater housing if O-ring or O-ring contact surfaces are damaged. Replacement O-rings are available at your local authorized SeaLife dealer.
■ Make sure O-ring is completely seated into O-ring groove before sealing housing. O-ring must not be twisted when seated in the O-ring groove. Carefully follow O-ring removal and installation instructions contained in this manual.
- Replace O-ring every year to ensure proper seal. Only use approved SeaLife O-ring designed for the DC1400.
■ Soak and rinse waterproof housing in fresh water after each use. Use clean, soft cloth to dry housing. Store camera and housing only after careful cleaning and when totally dry.
- Carefully close lid and latch to seal housing.
■ Make sure O-ring is seated in its groove when sealing the housing.
■ Make sure there are no obstructions that prevent housing from sealing properly.
- Never let any moisture or dirt get inside housing when opening.
■ Avoid opening housing wet or humid environments. Best is to open and load the housing in dry cool air, such as inside an air conditioned room. This will prevent water or humidity from veing trapped inside the housing, which may cause fogging to occur or damage the inner camera.
-
For great underwater pictures you need:
-
Clear water conditions, control your buoyancy before taking pictures, get as close as possible to subject (ideal distance is 2ft to 6ft/ 0.6m to 2m).
■ Use SeaLife Digital Pro Flash (SL961 - optional accessory) to enhance colors and reduce backscatter. -
Store housing at room temperature in a clean and dry place.
■ Do not expose housing to direct sunlight for prolonged periods of time.
■ Do not store housing in extreme high temperatures, such as the trunk of your car.
Open view of waterproof housing
The housing door uses one O-ring to form a waterproof seal.
IMPORTANT: Do NOT lubricate O-ring
Insert Moisture Muncher capsule here (SL911)
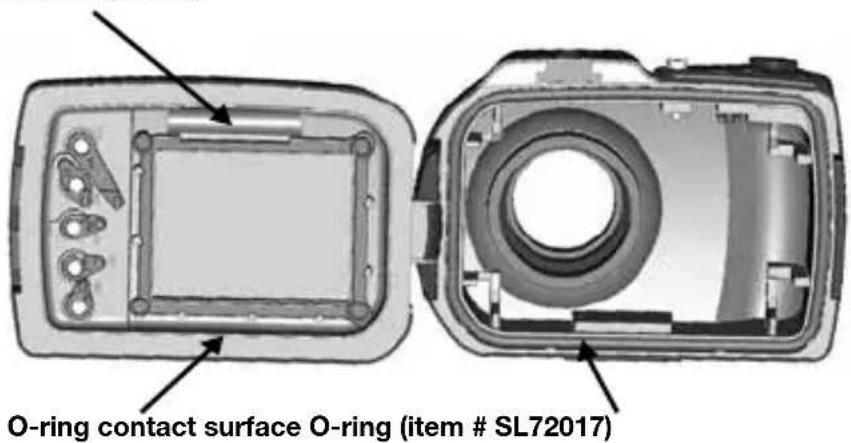
Important: Carefully clean and inspect O-ring and O-ring contact surfaces before each underwater use in accordance with instructions provided in this manual.
If O-ring needs to be replaced, contact your local authorized SeaLife dealer for spare parts, or visit www.sealifepartsdirect.com to order parts (USA only)
Maintaining a waterproof seal
Every SeaLife housing is tested for quality and a waterproof seal. It is your responsibility to properly care for the O-ring and O-ring contact surfaces to maintain a waterproof seal. Carefully follow these important O-ring care instructions. Not following these care instructions may cause the waterproof housing to leak and void your warranty.
- Carefully inspect O-ring and O-ring contact surfaces for damage (cuts, scratches, tears, cracks, dents and any other imperfections.) before every use. Rub finger along O-ring and O-ring contact surfaces to inspect for damage. Replace O-ring or have waterproof housing serviced if the O-ring or O-ring contact surfaces are damaged. Do not use underwater housing if O-ring or O-ring contact surfaces are damaged. Replacement O-rings (SL72017) are available at your local authorized SeaLife dealer, or online at www.sealifepartsdirect.com (USA only).

Inspect and replace O-ring if damaged: A=Cut, B=Tear, C=Dent 2. Carefully inspect and clean O-ring and O-ring contact surfaces for sand, hair and other debris before every use. Clean o-ring and o-ring contact surfaces with cleaning brush provided.
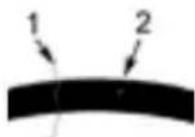
Inspect and clean O-ring and O-ring contact surface for hair (#1) and Sand or debris (#2)
Clean O-ring and O-ring contact surfaces with brush provided.

-
Make sure O-ring is completely seated into O-ring groove before sealing housing. O-ring must not be twisted when seated in the o-ring groove. See page 67 on instructions on how to install and remove O-ring.
-
Replace O-ring every year to ensure proper seal. Only use approved SeaLife O-ring (item #SL72017) designed for the DC1400. Replacement O-rings are available at your local authorized SeaLife dealer, or visit www.sealifepartsdirect.com to order online (USA only).
5. After each use underwater:
a. Soak sealed housing in fresh water for about 15 minutes. Most dive boats offer special fresh water buckets specifically for underwater photo equipment. DO NOT put camera housing in fresh water designed for other dive equipment, like dive mask, because that water may contain detergents which are harmful to the housing.
b. Press all the control buttons several times while waterproof housing is soaking to clean out any salt water, sand or dirt that has accumulated during usage.
c. Use clean, soft cloth to dry housing. Store camera and housing only after careful cleaning and when totally dry.
Quick waterproof test (before you depart on your dive trip)
Place the sealed housing without camera inside in a tub of cold water for about one hour. Place a soft weight on top of the housing to keep it submerged. Carefully dry housing before opening it to inspect for a leaks. If the housing leaks, carefully inspect O-ring or replace O-ring as described above. Repeat the above test. If housing still leaks contact your local authorized SeaLife Dealer for repair service.
HOW TO INSTALL AND REMOVE O-RING
To Install O-ring:
Important: The O-ring and O-ring groove must be completely clean before installing O-ring.
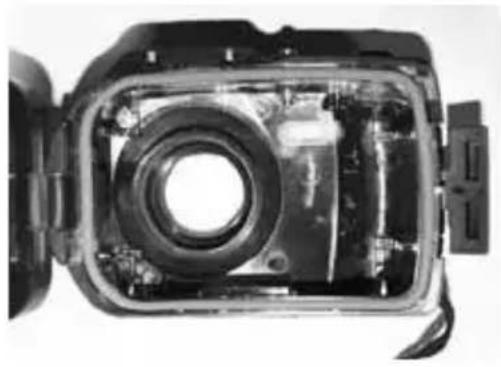
Step 1: Lay the O-ring over the O-ring groove making sure the O-ring is not twisted. Orient the O-ring with the more rounded corners on the hinge side of the housing.
Step 2: Push the O-ring down into the groove. The O-ring should be evenly seated in the groove..

Step 3: Carefully close housing to firmly seat O-ring and open housing again to inspect that O-ring is completely seated into groove. Do NOT grease the O-ring.
To Remove O-ring:
Step 1: Push O-ring along groove until it lifts.
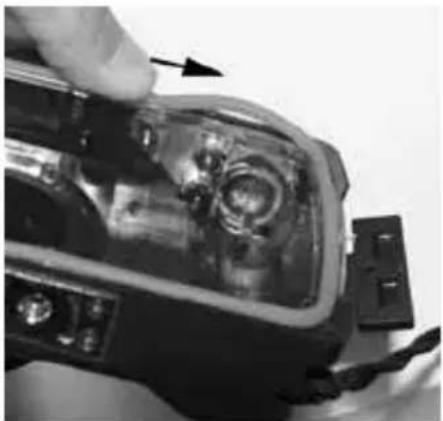
Step 2: Gently lift and remove O-ring from its groove.

HOW TO OPEN AND CLOSE WATERPROOF HOUSING
Step 1: Push in locking tab to open latch.
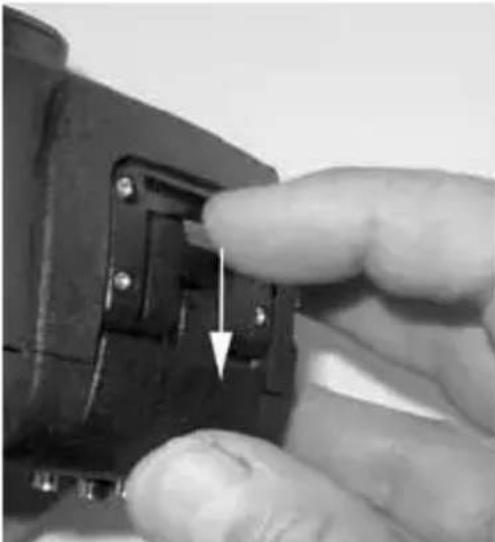
Step 2: Open latch all the way to lift and release latch from housing.

Step 3: Open Housing as shown so inner camera does not fall out.
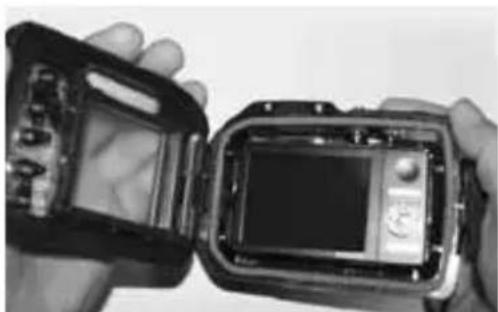
Step 4: Close housing and push down on latch as shown to firmly seat latch into housing.

Step 5: Push down latch until locking tab clicks into place.

INSTALLING THE FLASH LINK OPTICAL CABLE ADAPTER
The Flash Link adapter (SL72052) included with your camera connects the Flash Link optical cable to the DC1400 camera housing. This adapter is only needed when using the SeaLife external flash accessory. Optical cables (item SL962) and Digital Pro Flash, (SL961) are optional accessories sold separately. For more information about these accessories, please contact your local SeaLife dealer or visit www.sealife-cameras.com.
Step 1: Push the optical cable into one of the grooves so it's locked firmly into position. The end of the cable must be directed at the camera's flash but should not stick out beyond the adapter. The adapter has two grooves, so you can add another cable when using two flashes.
Step 2: Attach the Flash Link adapter around the lens and push down until it locks firmly into place. There are two small locking mechanisms located on the outer edge of the adapter that should lock in to the camera housing. Make sure the adapter is oriented so it is aligned with the recessed flash window.
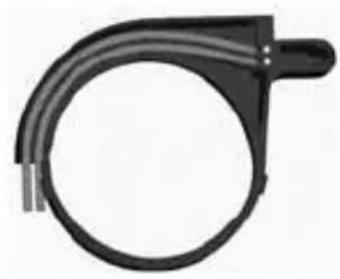

Step 3: Once the cable and adapter is firmly attached, run the cables along the bottom of the flash base and up the flash arm. The cables should be secured to the flash arm using the Velcro ties provided with your flash accessory.
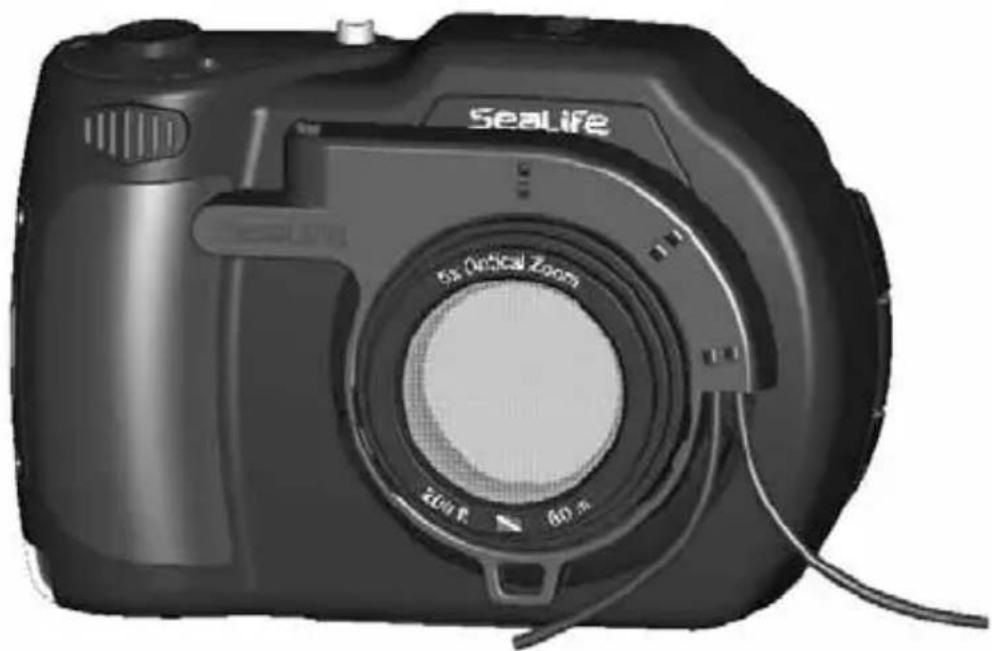

NOTE
If using two Flash Links, attach other cable in second groove and follow above instructions.
- Secure optical cable to Flash arm using Velcro® ties (included External Flash accessory).
■ Refer to Flash Link optical cable instruction manual for more details and troubleshooting tips.
HOW TO SET-UP THE WATERPROOF HOUSING
Set up camera
- Insert fully charged lithium battery into camera.
- Clean camera lens with dry, clean cotton swab.
- Remove camera strap since this will prevent the camera from correctly seating itself inside the housing.
- Use the Easy Set-Up, located in the Capture menu, to guide you through the correct land or underwater camera settings. See page 25 for more information.
- You can also manually set camera to Sea or Snorkel mode (when not using External Flash accessory) or External Flash mode (If using External Flash accessory). See page 31 for detailed instructions on how to set camera to Sea, Snorkel or External Flash modes.
Set up housing

Opening and loading of the housing should be done in a dry environment such as in an air-conditioned room to prevent trapping moist air in the housing which can cause the housing to fog while underwater.
- Open the housing by pushing in small locking tab and lift latch up. Do not extend housing lid beyond its stop point or damage may occur to the hinge area.
- Carefully inspect O-ring for damage and make sure O-ring is firmly seated in its groove. If O-ring is damaged and requires replacement, contact your local authorized SeaLife dealer.
- Clean the housing glass lens port using clean, dry cotton cloth. It is recommended to apply anti-fog solution to the inside surface of the housing lens port.
- Carefully insert camera into housing. Make sure camera is clean and dry.
-
Insert one Moisture Muncher anti-fog (item #SL911) desiccant capsules into special slot inside housing. As the desiccant absorbs moist air, it turns from blue to light pink. Replace desiccant capsule when color changes to light pink.
-
Carefully clean O-ring and O-ring contact surfaces with cleaning brush provided. O-ring must not be wet when sealing housing, allow these areas to dry.

O-ring must be absolutely clean of all hair, sand or other small particles.
- Do not allow any water droplets to get inside housing. This may cause the inside of the housing to fog.
- Close housing lid tightly. Make sure there are no obstructions that prevent the housing from closing. Make sure lid is tightly pressed into housing.
- Close housing latch. Make sure the lid is pressed evenly against the housing body look for obvious gaps which indicates something is trapped. The housing may leak if the lid is not evenly against the housing when closed. It is normal to see a small even gap between the housing lid and body.
- Avoid exposing housing to direct sunlight for prolonged periods of time. This may promote internal fogging.
Test camera and housing
- Press the small power button on the top of the housing to turn camera power on.
- Press the large shutter button on the outside of the housing to take a test picture.
- The power or shutter button should have a smooth action and return to its original resting position after pressing. It is normal to feel some resistance when pressing the power and shutter button. If buttons do not return to their normal position, soak the sealed housing in fresh water for a few minutes and press the buttons several times.
- Press the power button to turn camera power off. It is recommended to leave camera power off until you're ready to use camera to preserve battery power.
Before Entering Water
- Most dive operations will have a water tub for underwater cameras. Use this tub to test the camera for leaks before entering the water.
- Hold housing underwater for about 15 seconds with the lens pointing upwards. Lift the housing out of the water keeping the lens pointing up and look at LCD display window for any water drops.
- If no leaks are detected, repeat step 2 but hold the camera underwater for about 2 minutes and inspect.
- If you detect any leaks, carefully dry and open the housing and inspect the O-ring seal in accordance with the instructions on page 62.

NOTE
If no water tub is available, perform the above test immediately after entering the water.
USING AND CLEANING THE UNDERWATER HOUSING AND CAMERA
Entering the water with waterproof housing
Important: Always obey dive safety rules as a priority.
- Do not jump into the water with the housing in your hand. Have someone hand it to you after you have entered the water.
- For tips on taking pictures, see "Great Underwater Pictures Made Easy" on page 77 or visit the SeaLife website www.sealife-cameras.com for an online guide to underwater photography.
After using housing underwater
- Before entering dive boat, hand the housing to someone on the boat.
- Make sure the sealed housing is placed in a fresh water tub available on most dive boats. Press each button a few times to rinse out the salt water trapped under the buttons. This will clean the salt water from the housing and prevents the salt water from drying on the housing and O-ring. Never let water dry on the camera housing. Salt crystals can damage the O-ring, lens and attract moisture. Dry housing with clean soft towel after removing from fresh water tub.
- Do not expose camera and housing to direct sunlight – keep in a shaded area or under a dry towel.
- It is not recommended to remove camera from housing while on the dive boat. Allowing humid air to enter the housing may cause fogging.
- If you must open the housing while on the dive boat, make sure you and the housing are perfectly dry before opening the housing. Do not allow the inside of the housing or the camera to get wet.
Cleaning housing after use
- The sealed housing must be thoroughly cleaned with fresh water and dry before opening.
- Before opening housing, everything, including your hands, head and surrounding area must be totally dry. Have a dry towel handy.
- After opening the housing, clean the camera, O-ring area and all inside and outside parts with a clean, dry cotton cloth.
Prepare housing for storage
- Before storing the housing and camera, remove batteries, SD card and keep in a clean dry area. Make sure the housing and any accessories are clean and dry before storage.
- Never store camera or housing in direct sunlight or in a dark damp area.
GREAT UNDERWATER PICTURES MADE EASY
Taking underwater pictures is much different that taking land pictures. Here are the most important tips to taking great pictures underwater:
1. Crystal Clear water.
Crystal Clear water is essential for good underwater pictures. Tiny particles floating in the water cause low visibility and poor picture quality. Avoid stirring up the sandy bottom with your fins. These floating particles cause small spots to appear in your picture, known as “backscatter.” Try to limit your shooting distance to 1/10 of the water visibility. For example, if the visibility is 60 feet (18 m), you should keep your shooting distance to within 6 feet (1.8m). Using the SeaLife Digital Pro Flash will reduce the “backscatter” effect. If you are not using the external flash accessory, Keep the camera’s onboard flash turned OFF.
2. Stay within the ideal shooting distance of 2 to 6 feet.
The ideal shooting distance is between 2 to 6 feet (0.6 to 1.8 meters). This distance will result in detailed, colorful pictures. Remember that light does not travel very far underwater, so the closer you are to your subject the more colorful the pictures will be. For best most colorful pictures, we advise using the optional SeaLife Digital Pro Flash (item # SL961).
3. Move calmly and control your buoyancy before taking a picture.
It is very hard to take good pictures when you are moving. Look around for great picture opportunities. First, position yourself at the best angle and neutralize your buoyancy. Second, use the LCD monitor to perfectly frame your subject, check your shooting distance and keep the camera steady. Third, be calm and patient: Sometimes you have to wait a little bit so the fish that were frightened away, come back. Don't chase the fish, let the fish come to you.

Always be in control of your buoyancy before taking pictures and observe all safe-diving rules.
- Shoot many pictures of the same subject - If you don't like it, delete it - later.
One of the great advantages of digital cameras is that you can review and delete pictures later, so shoot several pictures of the same subject. One of the best ways to learn underwater photography is from your good pictures and bad pictures.
- Use the SeaLife Flash Accessories to enhance color and brightness.
Water filters out light and red/yellow colors resulting in darker, blue images. The SeaLife DC1400 Dive and Snorkel mode setting will correct for lost colors, but is only effective to a depth of about 50ft/15m, depending available sunlight and water visibility, The most effective way to compensate for lost colors is by using artificial light, like the SeaLife Digital Pro Flash. The Flash easily mounts to the bottom of the housing. The flexible arm allows you to direct the flash at the subject. Even two flashes can be mounted onto the housing for an evenly illuminated and shadow-free image. This system blocks the built-in flash and prevents backscatter. The flexible flash arms allow quick adjustments of the flash.
- Visit the SeaLife website for updated tips an advice.
Any updates to the manual or additional tips and advice can be found on the SeaLife website at www.sealife-cameras.com.
- Ask your local SeaLife dive dealer about underwater photography courses.
Most SeaLife dive dealers offer underwater photography courses which includes hands-on training as well as many helpful tips and techniques to underwater photography.
TROUBLESHOOTING GUIDE
Refer to the symptoms and solutions listed below before sending the camera for repairs. Any updates may be found on the SeaLife website at www.sealife-cameras.com. Look for “Technical Updates” section. If the problem persists, contact your local SeaLife dealer for service.
| Symptom Cause | Solutions / Corrective Actions | |
| The power does not come on. | The battery is not inserted correctly. | Insert the battery correctly. |
| The battery is exhausted. | Recharge the battery. | |
| The battery runs out quickly. | The battery is not fully charged. The battery is not used for an extended period of time after being charged. | Fully charge the battery and discharge it for at least one complete cycle before use to maximize its performance and lifetime. |
| The battery or camera feels warm | Long period of continuous use of the camera of the flash. | |
| Even if I press the shutter button, the camera does not take a picture. | The shutter button is not pressed all the way down. | Press the shutter button all the way down. |
| The memory card does not have any free capacity. | Insert a new memory card, or delete unwanted files. | |
| The flash is charging. Wait | until the status LED is green. | |
| The memory card is write-protected. | Remove the write-protection. | |
| Images do not appear on the LCD monitor. | LCD monitor is dark. Adjust | the brightness of the LCD monitor in the menu. |
| Although it is set to auto focus, it does not focus. | The lens is dirty. Wipe clean | with a soft, dry cloth or lens paper. |
| The distance to the subject is smaller than the effective range. | Get your subject within the effective focus range. | |
| Low light condition | user external photo-video light to illuminate subject | |
| The contents on the memory card cannot be played back. | You played back a memory card that was not formatted by this camera. | Insert a memory card that was formatted on this camera. |
| Files cannot be deleted. | The file is protected. Cancel protection. | |
| The memory card is write-protected. | Remove the write-protection. | |
| Even when the camera's buttons are pressed, it does not operate. | The battery is running low. | Recharge the battery. |
| The date and time are wrong. | The correct date and time is not set. | Set the correct date and time. |
| Cannot download images to computer. | The free space on the hard disk in your computer may be insufficient. | Check whether the hard disk has space for running Windows, and if the drive for loading image files has a capacity at least that of the memory card inserted in the camera. |
| No power supply. Use an AC power adapter. | ||
Troubleshooting for underwater photography
| Symptom Cause | Solutions / Corrective Actions | |
| Image not sharp Focus setting not correct See page | 22 for information on correct focus setting | |
| Low water visibility Minimize shooting distance in low visibility waters | ||
| Too far away from subject | ||
| Dirty lens Inspect and clean lens | ||
| Picture grainy (pixilated) | Low light conditions Use SeaLife Digital Pro Flash Accessory in low light conditions or deeper depths | |
| Blue or green pictures Water absorbs red and yellow colors | Set camera to Sea Mode and select the appropriate white balance setting | |
| Use SeaLife Digital Pro Flash Accessory in low light conditions or deeper depths | ||
| Picture too bright (over exposed) when using external flash accessory. | Camera setting not optimized | Select Ext Flash Auto mode. |
| Select “macro Flash” [Press the flash button] to darken the picture exposure level. | ||
| Reduce external flash accessory brightness by rotating brightness control knob clockwise. | ||
| Relflective subjects Move | farther away from highly reflective subjects that are white or silver in color. | |
| Picture too dark (under exposed) when using external flash accessory. | Camera setting not optimized | Select Ext Flash Auto mode. |
| Select “Far Flash” [Press the flash button] to brighten the picture exposure level. | ||
| Increase external flash accessory brightness by rotating brightness control knob counter-clockwise. | ||
| Other troubles? | Please refer to online troubleshooting guide for updates at www.sealife-cameras.com. | |
HOUSING SPECIFICATIONS
Underwater Housing:
Depth: Individual depth tested to 200' (60m)
Controls: Control buttons to access all camera functions - Power, Mode (video), Shutter, Zoom, Playback, Menu, Flash, Focus. The Zoom lever can be used to scroll through menus and the Shutter button functions like the Set button when the menu is open.
O-ring: Silicone (item # SL72017)
Lens port: Fully multi-coated optical glass lens port with snap-on ring to adapt accessory lenses.
Tripod Mount: Standard 1/4-20 tripod threads to adapt accessories.
Lanyard: Padded lanyard with swiveled attachment clip
Hardware: Marine Grade Stainless Steel metal hardware, or aircraft-grade aluminum (cover plates)
Material: Rubber overmolded polycarbonate housing.
Weight: 333 grams (11.7 ounces) Housing only without inner camera 472 grams (16.6 ounces) Housing and inner camera
Size: 3.5"H x 5.5"W x 3.4"D inches 8.9cm x 14cm x 8.6cm
Operating Temp.: 33 degrees F to 110 degrees F
Storage Temp.: -20 degrees F to +140 degrees F
Specifications subject to change without notice.


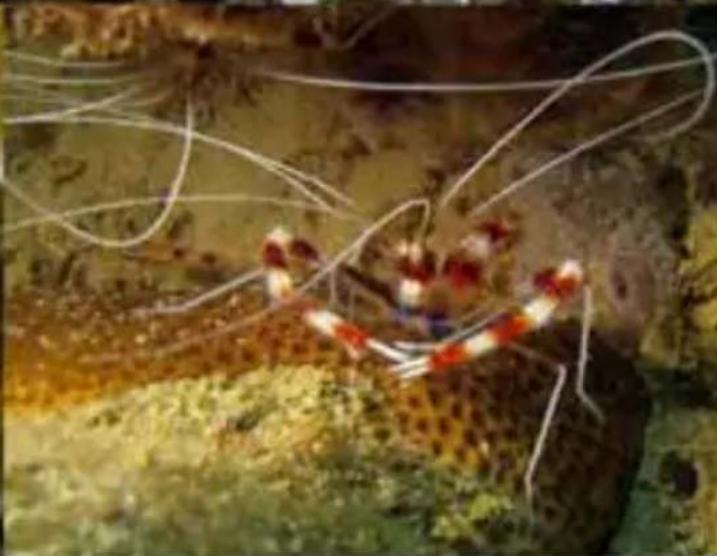
SL72025
Revised January 2012
Photos taken with SeaLife DC1400 Pro
Flash Set at Anse Chastanet, St. Lucia
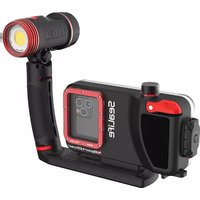
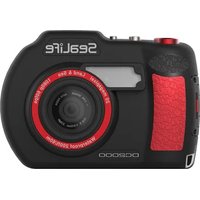
- SEALIFE DC1400 UNDERWATER CAMERA
- INSTRUCTION MANUAL
- READ THIS FIRST
- TRADEMARK INFORMATION
- PRODUCT INFORMATION
- SAFETY INSTRUCTIONS
- CAUTIONS
- NOTES ON BATTERY USAGE
- IMPORTANT NOTES ON WATERPROOF FUNCTION AND WATERPROOF HOUSING
- CONTENTS
- 11 INTRODUCTION
- 13 GETTING TO KNOW YOUR CAMERA
- 18 GETTING STARTED
- 23 CAPTURE MODE
- 37 HD VIDEO MODE
- 39 PLAYBACK MODE
- 45 MENU OPTIONS
- 58 TRANSFERRING FILES TO YOUR COMPUTER
- 59 EDITING SOFTWARE
- 60 SPECIFICATIONS (INNER CAMERA ONLY)
- 61 APPENDIX
- 62 UNDERWATER HOUSING INSTRUCTIONS
- 67 HOW TO INSTALL AND REMOVE O-RING
- 69 HOW TO OPEN AND CLOSE WATERPROOF HOUSING
- 71 INSTALLING THE FLASH LINK OPTICAL CABLE ADAPTER
- 73 HOW TO SET-UP THE WATERPROOF HOUSING
- 75 USING AND CLEANING THE UNDERWATER HOUSING AND CAMERA
- 77 GREAT UNDERWATER PICTURES MADE EASY
- 79 TROUBLESHOOTING GUIDE
- 83 HOUSING SPECIFICATIONS
- INTRODUCTION
- OVERVIEW
- PACKAGE CONTENTS
- COMMON PRODUCT COMPONENTS (WITH ITEM #)
- COMMON (OPTIONAL) ACCESSORIES
- GETTING TO KNOW YOUR CAMERA
- LCD MONITOR DISPLAY CAPTURE MODE
- PLAYBACK MODE - VIDEO PLAYBACK
- GETTING STARTED
- PREPARATION
- CHARGING THE BATTERY
- SPEED SCROLLING AND MENU NAVIGATION
- SPEED SCROLLING
- NAVIGATION BUTTON SCROLLING
- VERY IMPORTANT
- INITIAL SETTINGS
- SETTING THE DATE AND TIME
- CHOOSING THE LANGUAGE
- FORMATTING THE MEMORY CARD OR INTERNAL MEMORY
- CAPTURE MODE
- CAPTURING IMAGES (TAKING PICTURES)
- SETTING THE FOCUS
- ABOUT EASY SET-UP MODE
- SETTING THE SCENE MODE
- TAKING IMAGES WITH INTELLIGENT SCENE MODE
- ABOUT EXTERNAL FLASH AND EXTERNAL LIGHT MODES
- ABOUT DIVE AND SNORKEL MODES
- TO SET DIVE MODE
- TO SET SNORKEL MODE
- UNDERWATER WHITE BALANCE SETTINGS
- TO CHANGE THE COLOR CORRECTION (WHITE BALANCE)
- RECORDING A SUBJECT ONTO AN EXISTING BACKGROUND IMAGE (PRE SHOT MODE)
- COMBINING SHOTS OF TWO PEOPLE INTO A SINGLE IMAGE (COUPLE SHOT CAPTURE MODE)
- TAKING AND COMBINING PANORAMIC PICTURES
- FIND BLUR FUNCTION
- ABOUT SPY MODE
- HD VIDEO MODE
- RECORDING HD VIDEO CLIPS
- PLAYING BACK VIDEO CLIPS
- PLAYBACK MODE
- PLAYING BACK STILL IMAGES
- REMOVING RED-EYE
- DYNAMIC LIGHTING FEATURE
- ATTACHING VOICE MEMOS
- NOTE
- PLAYING BACK VOICE MEMO
- PROTECTING IMAGES
- CANCELING THE PROTECTION
- ERASING IMAGES AND VIDEO CLIPS IN PLAYBACK MODE
- MENU OPTIONS
- CAPTURE MENU
- EASY SET-UP
- SCENE MODE
- SIZE
- ISO
- QUALITY
- WHITE BALANCE
- SHARPNESS
- COLOR
- SATURATION
- METERING
- IMAGE STAB
- QUICK SHOT
- DIGITAL ZOOM
- FIND BLUR
- DATE PRINT
- SETTING MANUAL WHITE BALANCE (WB)
- VIDEO MENU
- AUDIO
- SETUP
- PLAYBACK MENU
- DELETE
- FIX RED EYES
- SLIDE SHOW
- DYNAM. LIGHT. (DYNAMIC LIGHTING)
- ROTATE
- PROTECT
- VOICE MEMO
- RESIZE
- QUALITY CHANGE
- COPY TO CARD
- SETUP MENU
- DATE/TIME
- LANGUAGE
- AUTO OFF
- BEEP
- DISPLAY
- VIDEO OUT
- FR. NO. RESET
- LIGHT FREQ
- LCD BRIGHT
- FORMAT
- MEDIA INFO
- SYSTEM INFO
- SYS. RESET
- TRANSFERRING FILES TO YOUR COMPUTER
- DOWNLOADING YOUR FILES
- EDITING SOFTWARE
- APPENDIX
- POSSIBLE NUMBER OF SHOTS (STILL IMAGE)
- UNDERWATER HOUSING INSTRUCTIONS
- SEALIFE DC1400 UNDERWATER HOUSING
- MUST DO FOR UNDERWATER HOUSING
- OPEN VIEW OF WATERPROOF HOUSING
- MAINTAINING A WATERPROOF SEAL
- AFTER EACH USE UNDERWATER
- QUICK WATERPROOF TEST (BEFORE YOU DEPART ON YOUR DIVE TRIP)
- HOW TO INSTALL AND REMOVE O-RING
- HOW TO OPEN AND CLOSE WATERPROOF HOUSING
- INSTALLING THE FLASH LINK OPTICAL CABLE ADAPTER
- HOW TO SET-UP THE WATERPROOF HOUSING
- SET UP CAMERA
- SET UP HOUSING
- TEST CAMERA AND HOUSING
- BEFORE ENTERING WATER
- USING AND CLEANING THE UNDERWATER HOUSING AND CAMERA
- ENTERING THE WATER WITH WATERPROOF HOUSING
- AFTER USING HOUSING UNDERWATER
- CLEANING HOUSING AFTER USE
- PREPARE HOUSING FOR STORAGE
- GREAT UNDERWATER PICTURES MADE EASY
- CRYSTAL CLEAR WATER
- STAY WITHIN THE IDEAL SHOOTING DISTANCE OF 2 TO 6 FEET
- MOVE CALMLY AND CONTROL YOUR BUOYANCY BEFORE TAKING A PICTURE
- TROUBLESHOOTING GUIDE
- HOUSING SPECIFICATIONS
- UNDERWATER HOUSING
Brand : SEALIFE
Model : DC1400 HD Pro Light Set
Category : Camera