
Action Woodwinds - Logiciel photo/vidéo NATIVE INSTRUMENTS - Free user manual and instructions
Find the device manual for free Action Woodwinds NATIVE INSTRUMENTS in PDF.


| Product Type | Virtual instrument for Kontakt (Kontakt Player required) |
| License Type | License for one user, installable on up to 3 computers |
| Platform Compatibility | Windows 10+ (64-bit), macOS 11+ (Intel and Apple Silicon), VST2/VST3/AU/AAX |
| Storage Space Required | Approximately 15 GB free disk space |
| RAM Requirement | 8 GB recommended (16 GB for large projects) |
| Sample Content | Full woodwind ensemble: clarinets, English horns, oboes, flutes, bassoons, contrabass clarinets, etc. |
| Playable Range | C2 to A6 on MIDI keyboard, with keyswitches C0 and above |
| Key Features | Themes, Phrases, Single Articulations, Module Editor, Scaler, Arpeggio modes, Mixer with multiple mic positions, Effects (EQ & Reverb), MIDI export |
| Theme System | 10 pairs of Phrases per Theme, assignable to keyswitches; save/load User Themes |
| Phrase Editor | Step-by-step editing of Modules (single notes, rhythms, diatonic/chromatic figures, trills, runs, falls, crescendos) |
| Play Modes | Melodic, Arpeggio, Custom |
| Articulations | Staccato, Staccatissimo, Marcato, Sustain, Half-tone Trills, Whole-tone Trills |
| Dynamic Control | Assignable MIDI CC (default modulation wheel), blends between velocity layers |
| Mixer | Multiple microphone positions (Close, Room, etc.), per-channel pan, level, solo, mute, send to reverb, and output routing |
| Global Effects | 3-band Equalizer, Convolution Reverb with multiple space presets |
| MIDI Export | Record and drag-and-drop MIDI to DAW, separate tracks for High and Low Ensembles |
| Scaler | Scale constraint engine with root note and scale type selection, maps to white keys |
| Snapshots (Presets) | Factory and User Snapshots (.nksn files), save/load full instrument state |
| Installation | Via Native Access (Native Instruments installer) |
| Manual | PDF user manual (43 pages, English) included |
Frequently Asked Questions - Action Woodwinds NATIVE INSTRUMENTS
User questions about Action Woodwinds NATIVE INSTRUMENTS
0 question about this device. Answer the ones you know or ask your own.
Ask a new question about this device
Download the instructions for your Logiciel photo/vidéo in PDF format for free! Find your manual Action Woodwinds - NATIVE INSTRUMENTS and take your electronic device back in hand. On this page are published all the documents necessary for the use of your device. Action Woodwinds by NATIVE INSTRUMENTS.
USER MANUAL Action Woodwinds NATIVE INSTRUMENTS
- Installation and setup .... 4
Installing Action Woodwinds using Native Access 4
Loading Action Woodwinds in Kontakt 4
-
Action Woodwinds overview 5
-
Playing Action Woodwinds 7
Selecting Phrases from the MIDI keyboard 7
Controlling the dynamics 8
Mapping MIDI controls 8
- Snapshots 9
Snapshots overview 9
Loading a Snapshot 9
Saving a User Snapshot 10
Deleting a User Snapshot 11
- Main page 12
Themes 12
Theme header 13
Theme Browser 13
Theme Browser tags 15
User Themes 15
User Theme tools 16
Saving a User Theme 16
Editing a User Theme 17
Importing User Themes 17
Scaler 17
Phrases 18
Phrase Slots 18
Phrase Browser 19
Phrase Browser tags 21
User Phrases 21
User Phrase tools 22
Saving a User Phrase 22
Editing a User Phrase 22
Importing User Phrases 23
Keyswitches 23
Changing keyswitches 24
Playing with keyswitches 24
Single Articulations 24
- Editor page 26
Ensemble selector 27
Phrase Notation 27
Step Edit tools 28
Step Copy tools 29
Module Browser 29
Envelope 31
Play modes 32
Melodic mode 32
Arpeggio mode 32
Custom mode 32
- Mixer page 34
Ensemble selector 34
Mixer 35
Global Effects 36
-
Settings panel 38
-
MIDI export 39
-
Credits ...... 40
1. Disclaimer
The information in this document is subject to change without notice and does not represent a commitment on the part of Native Instruments GmbH. The software described by this document is subject to a License Agreement and may not be copied to other media. No part of this publication may be copied, reproduced or otherwise transmitted or recorded, for any purpose, without prior written permission by Native Instruments GmbH, hereinafter referred to as Native Instruments.
"Native Instruments", "NI" and associated logos are (registered) trademarks of Native Instruments GmbH.
All other trademarks are the property of their respective owners and use of them does not imply any affiliation with or endorsement by them.
Document authored by Nicolas Sidi, Jan Ola Korte
Software version: 1.0 (03/2024)
2. Welcome to Action Woodwinds
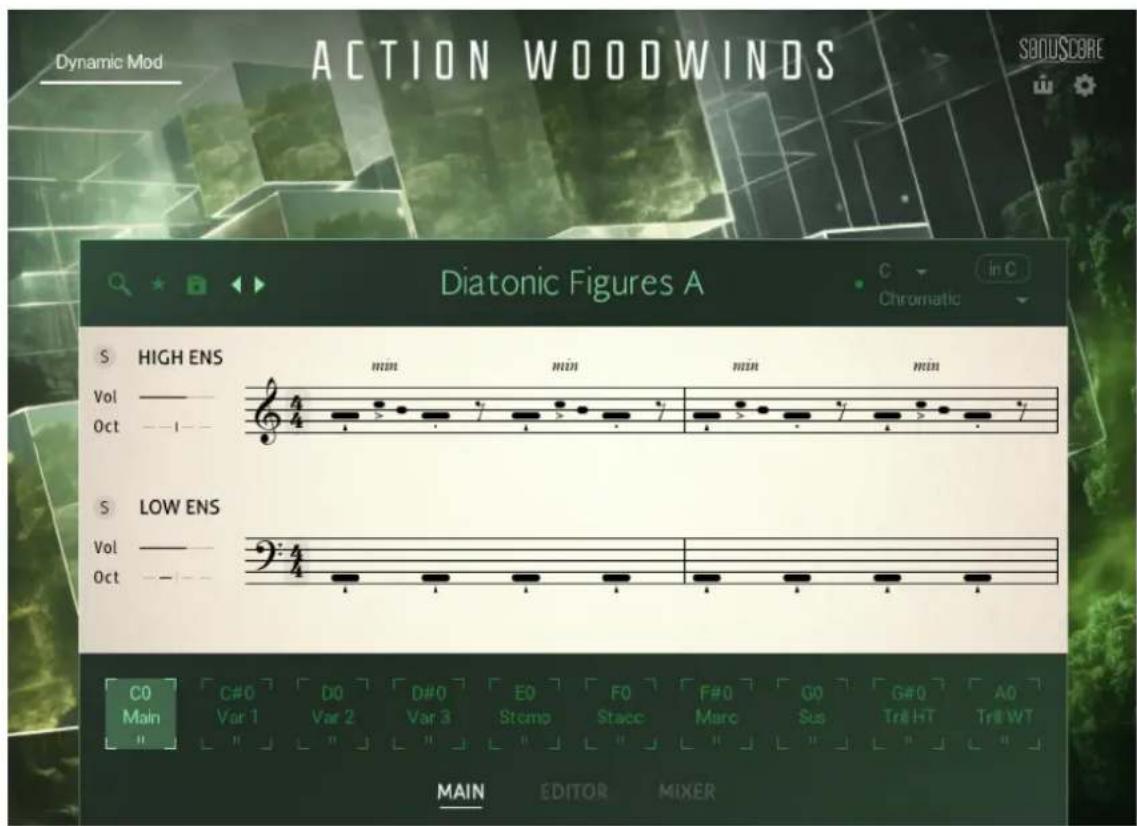
Action Woodwinds provides the lively sound of a full woodwind ensemble, from the vibrant tones of clarinets, English horns, oboes, and flutes to the deep resonance of bassoons, contrabass clarinets, and beyond.
Explore the extensive collection of innovative orchestral phrases, edit them to your taste, or build your own from scratch using the flexible Modules. Chop, duplicate, and refine Modules to create trills, crescendos, falls, and runs that elevate your scores.
You can also play note sequences in real time using a range of articulations. Tailor your sound with multiple mic positions and controls for both high and low ensembles, then export your performance as a MIDI file to use with other instruments in your DAW.
This document shows you how to install and setup Action Woodwinds and describes all features in detail, starting with the overview.
We hope you enjoy Action Woodwinds!
Document Conventions
In this document the following formatting is used to highlight useful information:
Italics Indicates paths to locations on your hard disk or other storage devices.
Bold Highlights important names, concepts, and software interface elements.
[Brackets] References keys on the computer keyboard.

Denotes a single step instruction.

Denotes the expected result when following instructions.
The following three icons denote special types of information:

The light bulb icon indicates a useful tip, suggestion, or interesting fact.

The information icon highlights essential information in a given context.

The warning icon alerts you of potential risks and serious issues.
3. Installation and setup
Before making music with Action Woodwinds, you must install and set up the necessary software. Follow these instructions to get started.
Installing Action Woodwinds using Native Access
Native Access is where you will install the software for Action Woodwinds. If you are new to Native Instruments, you will first have to create your Native ID. To learn more about Native Access, visit our support page.
- Download and install Native Access here.
- Create a Native ID if you do not yet have one.
- Login to Native Access using your Native ID.
-
Click the Available tab.
-
Click Install for the following products:
-
Action Woodwinds
- Kontakt or Kontakt Player
→ The software is installed automatically.

If the software is already installed, click the Updates tab and install available updates before proceeding.
Loading Action Woodwinds in Kontakt
Once installed, you can start using Action Woodwinds in Kontakt. Action Woodwinds is not an independent plug-in, so you first need to open an instance of Kontakt or Kontakt Player:
- Open Kontakt as a plug-in in your host software (DAW) or as a stand-alone application.
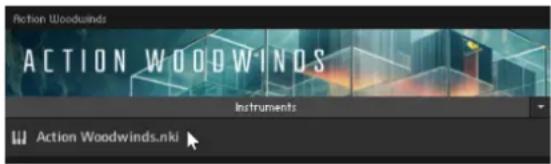
- Locate Action Woodwinds in the Browser, on the left side of the user interface.
- Click Instruments to open the product's content.
- Double-click the Action Woodwinds.nki file to load the instrument.

If you are new to Kontakt and want more information, visit Kontakt Player and Kontakt.
4. Action Woodwinds overview
This chapter introduces the main controls and areas of Action Woodwinds.
When you first open Action Woodwinds, you see the Main page along with a set of global controls:
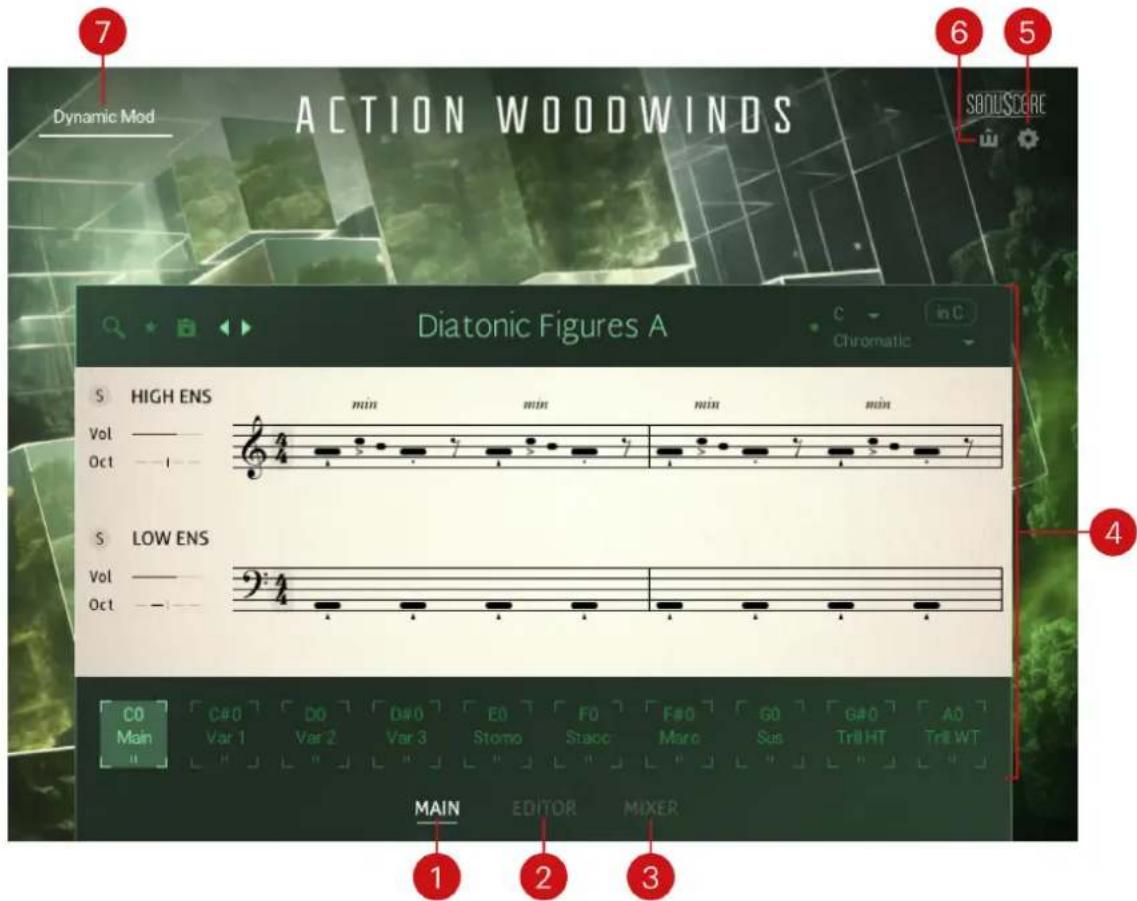
- MAIN: Opens the Main page, which lets you to select and configure your Themes and Phrases. For more information, refer to Main page.
- EDITOR: Opens the Editor page, which allows you to customize and edit the different Phrases used for playing. For more information, refer to Editor page.
- MIXER: Opens the Mixer page, where you can adjust the overall sound of the Ensemble by mixing signals from different microphone positions and applying effects. For more information, refer to Mixer page.
- Central area: This is the biggest part of the instrument and it displays the various pages of parameters and Browsers. By default, it shows the Main page (depicted above).
- Settings: Opens the Settings panel, which contains global settings affecting the dynamic modulation, note release time, and tempo of your sequences. For more information, refer to Settings panel.
-
MIDI Export: Lets you to record a sequence and export the MIDI data generated by Action Woodwinds to MIDI tracks in your DAW. For more information, refer to MIDI export.
-
Dynamic Mod: Lets you adjust the dynamics of your sequences. By default, this control is assigned to the modulation wheel of your MIDI keyboard. For more information on dynamic modulation and other playing functions, refer to Playing Action Woodwinds.
5. Playing Action Woodwinds
Action Woodwinds is designed to be played using a MIDI keyboard:
- You can press any key between C2 and A6 to trigger the current Phrases at the corresponding pitch. Phrases are automatically synchronized to the tempo of your DAW, or to the tempo of Kontakt / Kontakt Player if running in stand-alone mode.
- You can select other Phrases directly from your keyboard, enabling orchestral scoring in an immediate manner.
- You can adjust the dynamics of your sequence using the modulation wheel (or another MIDI control).
- You can control your instrument remotely or record automation by mapping MIDI controls to its parameters.

You can also remap the trigger keys onto the desired scale by activating the Scaler.
Selecting Phrases from the MIDI keyboard
You can build sequences by selecting different Phrases directly from your MIDI keyboard. To facilitate this, a range of MIDI notes have been configured as keyswitches to trigger the Phrases. Starting from C0, ten keyswitches are assigned to a combination of high and low Phrases or Articulations. In most cases, the keyswitches from E0 to G#0 are assigned to single independently playable Articulations.
On Kontakt's on-screen keyboard as well as on the Light Guide of your Kontrol keyboard, the keyswitches are displayed in red while the range of playable keys (trigger keys) are displayed in blue:

The Kontakt on-screen keyboard displaying the active keyswitches (in red), trigger keys (in blue), and solo keyswitches (in yellow)
▶ To select a Phrase using your MIDI keyboard, press the corresponding keyswitch. You can switch between Phrases at any time, enabling you to change a sequence during playback without missing a beat.

You can select the same Phrase in the user interface by clicking its keyswitch at the bottom of the Main and Editor pages.
In addition, two solo keyswitches allow you to focus on either Ensemble:
▶ To hear only the Phrase played by the Low or High Ensemble, press the solo keyswitch A-1 or B-1 (in yellow).

For more information on keyswitches, refer to Keyswitches.
Controlling the dynamics
The Dynamic Mod setting gives you control over the dynamics of your sequence. It smoothly blends between different velocity layers based on recordings. You can use this to add dynamic expression and realistic phrasing to your compositions. By default, Dynamic Mod is mapped to the modulation wheel (CC #1) on your MIDI keyboard.

You can change this default mapping to another MIDI CC in the Settings panel.
To adjust the dynamics of the sequence from your MIDI keyboard:
- Hold a note on your keyboard to play a sequence.
- Move the modulation wheel up and down. Moving the modulation wheel up makes the sequence more intense while moving it down makes it more gentle.
→ The dynamics of your sequence follow the movements of the modulation wheel.
The Dynamic Mod slider in the upper left corner of the instrument shows the dynamic value while you are playing:
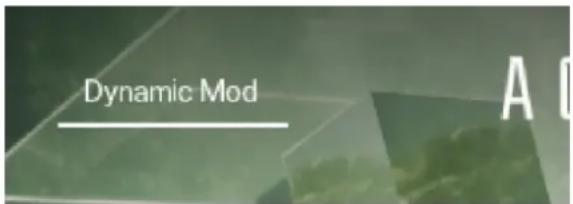
You can also adjust the dynamics of your sequence by clicking and dragging the Dynamic Mod slider horizontally.
Mapping MIDI controls
You can use your MIDI keyboard or MIDI controller to control Action Woodwinds externally and record automation.
To map a knob or fader on your MIDI device to a control in Action Woodwinds:
- Ensure that the MIDI output from your device is routed to the instance of Kontakt or Komplete Kontrol you are using.
- Right-click the desired control in the Action Woodwinds user interface.
- Click Learn MIDI CC Automation.
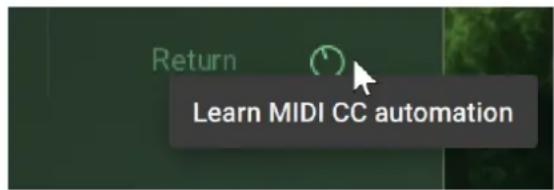
- Turn the desired knob or move the desired fader on your MIDI device.
→ The knob or fader is mapped to the control in Action Woodwinds.
6. Snapshots
Snapshots are Kontakt's underlying file format for instrument presets. They offer a quick and convenient way of browsing for new sounds and saving custom presets. When a User Snapshot is saved, all parameter adjustments and instrument settings are stored within the preset. Using Snapshots, you can create your own preset sounds, save them in the .nksn file format and use them in other projects, across computers or even share them with other users.
Snapshots overview
Snapshots contain the parameters and controls:
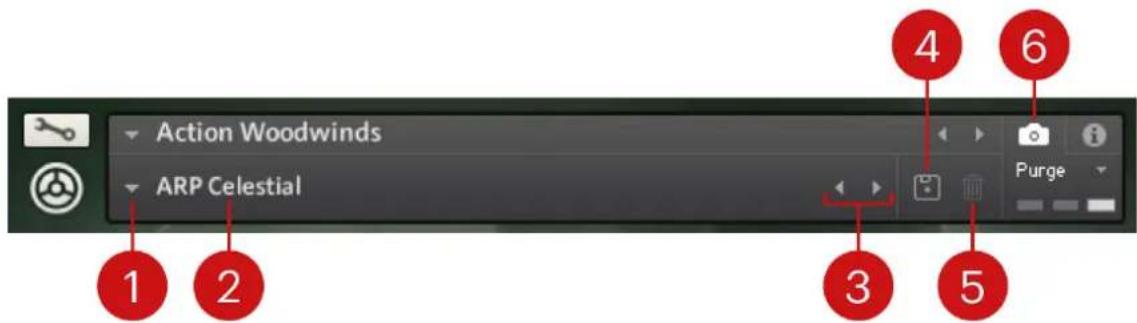
- Load Snapshot: Opens the Snapshot menu where you can load a Snapshot from the Factory or User library. For more information, refer to Loading a Snapshot.
- Snapshot Name: Displays the name of the currently selected Snapshot.
- Snapshot Previous/Next (<> icons): Allows you to quickly browse and load Snapshots. Pressing an arrow icon will load the previous or next Snapshot in the selected category. If no Snapshot is active, the first Snapshot on the list will be loaded. For more information, refer to Loading a Snapshot.
- Save Snapshot (floppy disk icon): Allows you to save changes made to a sound. When a User Snapshot is saved, the macros settings, parameter controls, and sequence are stored within it and can be accessed at any time via the User library. For more information, refer to Saving a User Snapshot.
- Delete Snapshot (bin icon): Deletes the currently selected Snapshot from the User library. You can only delete User Snapshots and not Factory Snapshots. For more information, refer to Deleting a User Snapshot.
- Snapshot View (camera icon): Provides access to the Snapshot features described above; saving, loading, browsing, and deleting. When Snapshot View is selected, configuration settings and features relating to the Info View are replaced in the display.
Loading a Snapshot
Snapshots are loaded from the drop-down menu in the top header of the instrument. You can also use the arrows to the left of the floppy disk icon to load the previous or next preset.
To load and browse Snapshots using the arrow icons:
-
Click the Snapshot View (camera icon) to open Snapshot view.
-
Click the arrow icons (<> ) in the Snapshot header to browse through the Snapshots list.
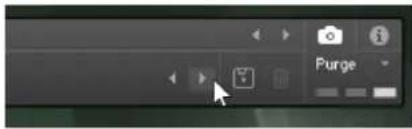
→ The previous or next Snapshot will load immediately each time an arrow icon is clicked.
To load a Snapshot from the library:
- Click the Snapshot View (camera icon) to open Snapshot view.
- Click the arrow icon next to the Snapshot name field to open the Snapshot menu.
- Select the Factory category to load a Factory preset, or select the User category to load one of your own Snapshots.
- Select an instrument category, if available.
- Select a Snapshot to load it.
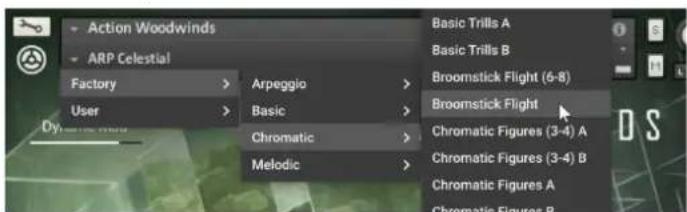
→ The loaded Snapshot is displayed in the instrument header.

The User category will not appear until you have first saved a Snapshot.
Saving a User Snapshot
Snapshots can be saved at any time while you are working on them. When a Snapshot is saved, all parameters and controls are also saved.
To save a Snapshot:
- Click the Snapshot View button (camera icon) to open Snapshot view.
- Click the Save button (floppy disk icon).
- Enter a name for your new Snapshot in the Save dialog box.
- Click Save to finish the process and close the dialog box.
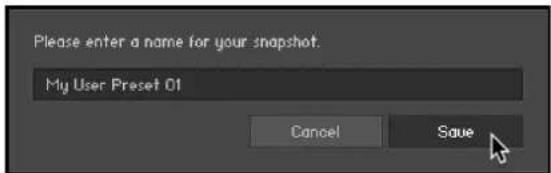
→ Your Snapshot .nksn file is saved to the User Snapshot Library. It appears in the User Snapshot list.
To overwrite a Snapshot:
-
Click the Snapshot View button (camera icon) to open Snapshot view.
-
Click the Save button (floppy disk icon).
- Click Overwrite to confirm the process.
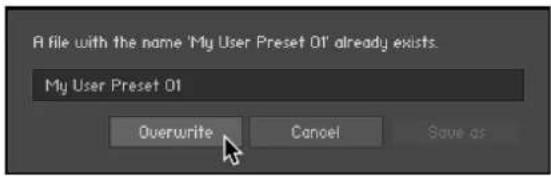
→ Your Snapshot .nksn file is saved to the User Snapshot Library, in replace of the old file.
Deleting a User Snapshot
Snapshots can be deleted using the bin icon in the instrument header. To delete a User Snapshot:
- Click the Snapshot view (camera icon) to open Snapshot view.
- Load the User Snapshot you wish to delete.
- Click the Delete button (bin icon).
- Confirm deletion of the Snapshot by selecting Yes in the dialog box.
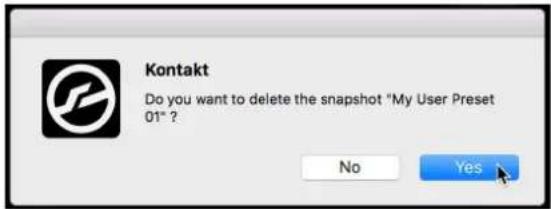
→ The User Snapshot .nksn file is deleted from the User Snapshot Library.
7. Main page
The Main page is the first page that opens when you start Action Woodwinds. On the Main page you can see the current Theme, adjust its basic settings, and select another Theme.
The Main page consists of the following elements and areas:
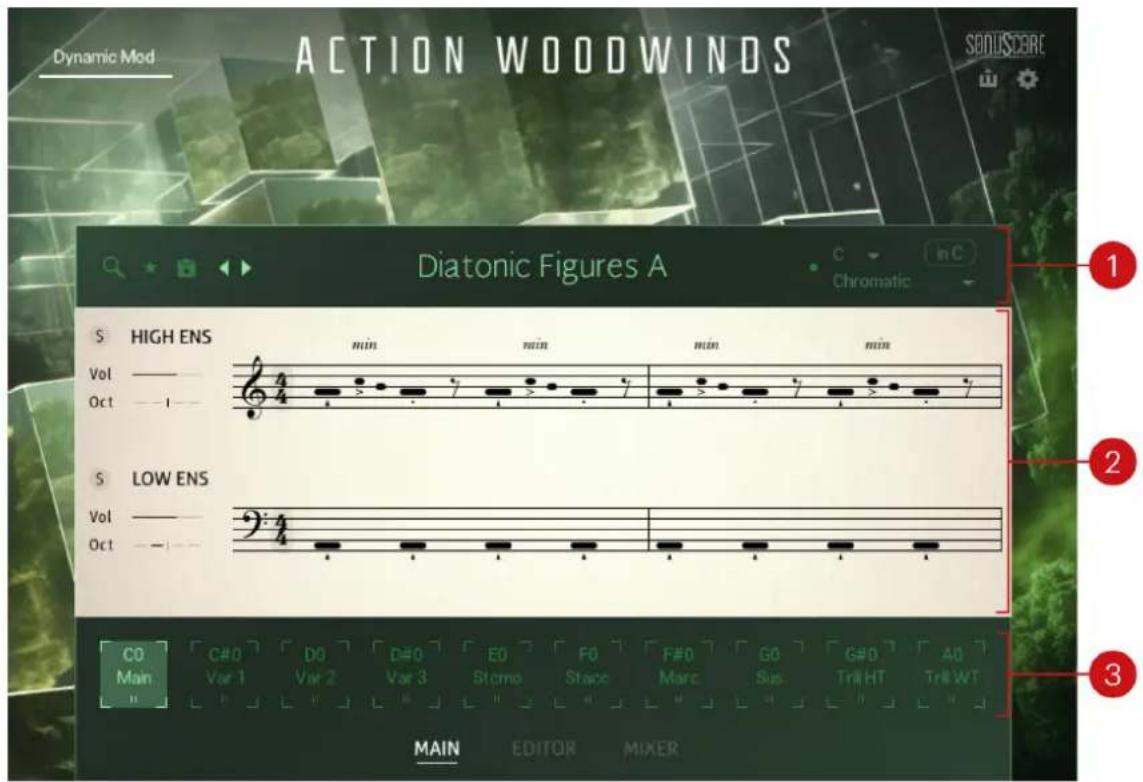
- Theme header: Displays the current Theme, and lets you browse and load available Themes, set the current Theme as Favorite, and save your own Themes. The Theme header also includes the Scaler. For more information, refer to Theme header.
- Phrase Slots: Display the Phrase played by each Ensemble on the selected keyswitch, and let you browse and load other Phrases and adjust basic settings for each Ensemble. For more information, refer to Phrase Slots.
- Keyswitches: Indicate the active keyswitch and let you select another one, which will switch to another pair of Phrases included in the Theme. For more information, refer to Keyswitches.
Themes
A Theme is a set of 10 pairs of Phrases and Articulations for both Ensembles. Each pair includes one Phrase or Articulation for the High Ensemble, and one matching Phrase or Articulation for the Low Ensemble. Each pair is assigned to a different keyswitch, so that you can quickly switch between Phrases and Articulations within the loaded Theme.
Theme header
The Theme header shows the name of the current Theme. It lets you browse and load available Themes, set the current Theme as Favorite, save your own Themes, as well as control the Scaler for the current Theme.

- Browse (magnifying glass icon): Opens the Theme Browser, where you can browse the available Themes for loading.
- Favorite (star icon): Adds the current Theme to the Favorites (the star turns on), or remove it from the Favorites (the star turns off). You can then filter quickly within the Theme Browser to display only your favorite Themes.
- Save (disk icon): Saves the current Theme as User Theme.
- Previous/Next (<> icons): Quickly switch to the previous/next Theme in the Theme list without opening the Theme Browser.
- Theme name: Displays the name of the current Theme. Clicking the Theme name opens the Theme Browser. This is equivalent to clicking the Browse button (magnifying glass) on the left.
- Scaler: Activates and adjusts a scaling engine affecting all Phrases and Articulations in the current Theme.
Theme Browser
The Theme Browser contains filters to help you sort all Themes by different characteristics and quickly find and load the desired Theme.
▶ To open the Theme Browser, click the Theme name at the top of the Main page, or click the little magnifying glass in the top left corner of the page.
The Theme Browser contains the following controls and areas:
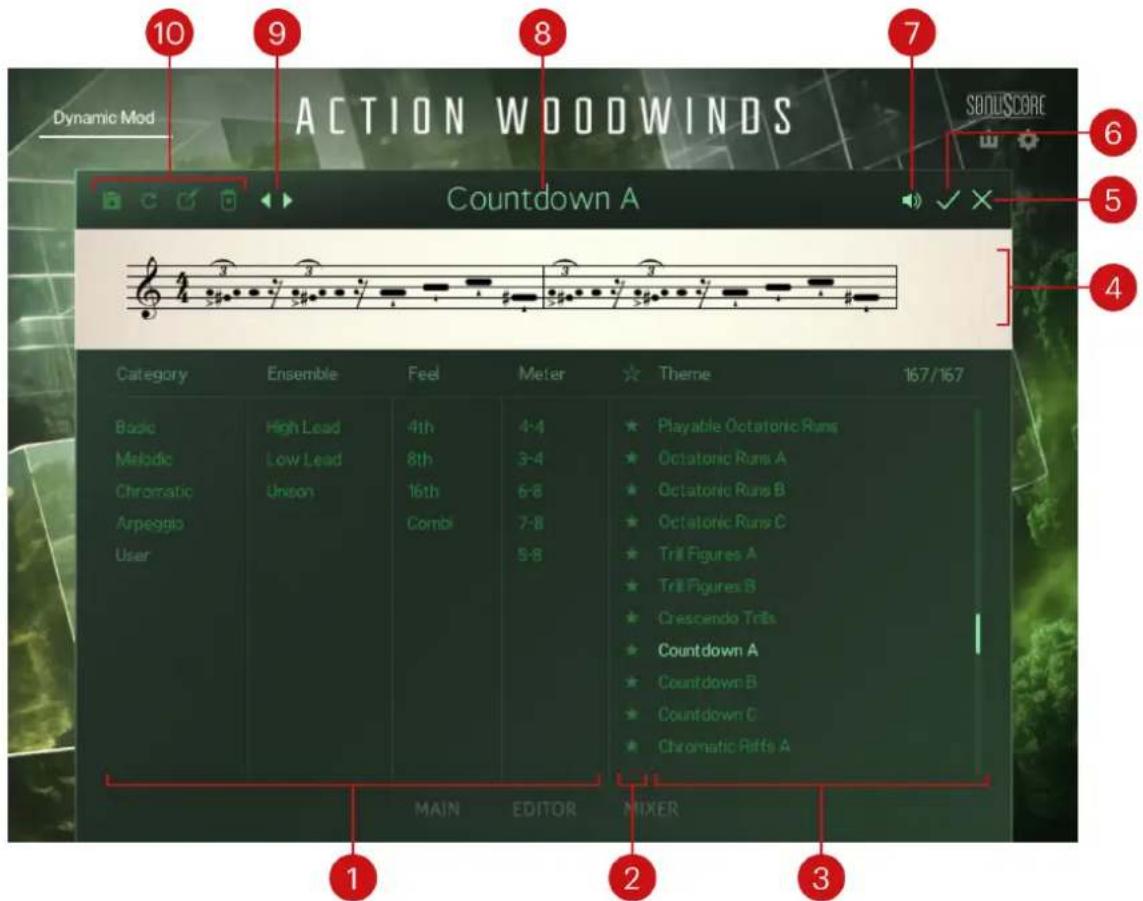
- Tag filter: Displays the tags organized in four columns (Category, Ensemble, Feel, Meter). You can select only one tag in each column simultaneously. For more information, refer to Theme Browser tags.
- Favorites: You can click the star icons to add or remove Themes to/from your Favorites. The star icons are lit for Themes set as Favorites. This way, you can quickly create a custom collection of your most beloved Themes. You can then display only your favorite Themes by clicking the topmost star icon next to the Theme list header. Click the topmost star icon again to display also non-favorite Themes.
- Theme list: Shows the Themes matching the tags selected in the Tag filter on the left. You can click a Theme to load it and try it directly on your keyboard or in your DAW. You can double-click a Theme to load it and close the Browser.
- Phrase display: Represents the main Phrase of the Theme selected in the Theme list, that is, the Phrase assigned to the first keyswitch C0 for the High Ensemble. The Phrase display can help you visually recognize particular Themes when switching between entries from the Theme list.
- Cancel (cross icon): Closes the Theme Browser without changing anything. Your Kontakt Instrument returns to its previous state.
- OK (check mark icon): Keeps the selected Theme loaded and closes the Theme Browser. This is the same as double-clicking the Theme in the Theme list.
- Preview (loudspeaker icon): Switches the Preview function on or off. If Preview is on, when you click a Theme in the Theme list you can hear it in action.
-
Theme name: Displays the name of the Theme selected in the Theme list and temporarily loaded.
-
Previous/Next (<> icons): Quickly switch to the previous/next Theme in the Theme list.
- User Theme tools: Provide controls for saving, importing, editing, and deleting User Themes. For more information, refer to User Themes.
Theme Browser tags
To simplify your search for Themes, the tags are organized into four columns. Only one tag in each column can be selected simultaneously.
| Category | Ensemble | Feel | Meter |
| Basic | High Lead | 4th | 4-4 |
| Melodic | Low Lead | 8th | 3-4 |
| Chromatic | Unison | 16th | 6-8 |
| Arpeggio | Combi | 7-8 | |
| User | 5-8 |
The tags in the Theme Browser
- Category: In general, all Themes in Action Woodwinds are created with five main categories in mind, applicable in different compositional scenarios:
- Basic: Single Pitch Phrases playing rhythmic patterns. Optimized for playing chords.
- Melodic: Melodic Phrases with a tonal center. Optimized for generating melodies out of a single note.
- Chromatic: Melodic Phrases with less strict tonality. Can be used for playing both single notes and chords.
- Arpeggio: Themes based on an arpeggiator. Optimized for playing chords.
- User: Reserved for User Themes.
- Ensemble: Filters the Themes according to their Ensemble emphasis:
- High Lead: The focus in the arrangement is on the High Ensemble.
- Low Lead: The focus in the arrangement is on the Low Ensemble.
-
Unison: Both Ensembles play the same melody.
-
Feel: Allows for searching Themes with a quarter, eighth, or sixteenth note focus.
- Meter: Filters the Themes according to their time signature.
User Themes
User Themes are custom Themes that you or other users have created. Each User Theme is accessible as a single file, making it easy to transfer and share between multiple systems.
You can save User Themes both from the Theme header of the Main page and from the Theme Browser. The Theme Browser also provides dedicated tools to organize your User Themes.
In the Theme Browser, the User tag in the Category column is automatically assigned to all User Themes. You can select this tag to show only User Themes in the Theme list.
User Theme tools
To manage your User Themes, the Theme Browser provides the following tools:
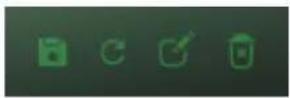
- Save (disk icon): Saves the current state of the loaded Theme as a User Theme. For more information, refer to Saving a User Theme.
- Scan (cycling arrow icon): Imports User Themes. For more information, refer to Importing User Themes.
- Edit (pencil icon): Lets you rename your User Theme and modify its tags. For more information, refer to Editing a User Theme.
- Delete (trash bin icon): Removes the User Theme from the Theme Browser.
A User Theme that has been removed from the Theme Browser using the Delete button (trash bin icon) will not automatically reappear upon the next import using the Scan button (cycling arrow icon). To make it appear again in the Theme Browser, press [option] (Mac) / [Alt] (Windows) + click the Scan button.
Saving a User Theme
To save a User Theme:
- Click the Save button (disk icon) in the Theme header of the Main page or in the User Theme tools of the Theme Browser.
- Enter a new name.
- If you are in the Theme Browser, you can immediately assign tags to your Theme in the Tag filter.
- Click the check mark to save the User Theme, or click the cross to cancel the process.

→ When you click the check mark, the User Theme is saved and is available within the Theme Browser.
User Themes are saved as single .nka files into the User Data/Themes folder under the Action Woodwinds installation directory.
The Action Woodwinds installation directory is located in the content folder defined in Native Access (Preferences panel > File Management page > Content Location field).
Editing a User Theme
You can modify the name and the tags of an existing User Theme as follows:
- Open the Theme Browser.
- Select the desired User Theme in the Theme list.
- Click the Edit button (pencil icon) at the top left of the Theme Browser.
- Modify the Theme name and/or select different tags in the Tag filter.
- Click the check mark to save your changes, or click the cross to cancel the process.

The tag in the Category column cannot be modified: The User tag is automatically assigned to all User Themes.
Importing User Themes
To import User Themes:
- Close the Action Woodwinds instrument in Kontakt or Kontakt Player.
- Copy the .nka files of your choice into the User Data/Themes folder under the Action Woodwinds installation directory.

The Action Woodwinds installation directory is located in the content folder defined in Native Access (Preferences panel > File Management page > Content Location field).
- Open the Action Woodwinds in Kontakt or Kontakt Player.
- Open the Theme Browser.
- Press the Scan button (cycling arrow icon) in the top left corner.
→ The new User Themes are imported from the User Data folder.

Make sure to copy the .nka files in the User Data/Themes folder before you open the Action Woodwinds instrument, otherwise Kontakt may not recognize all files.

Do not delete the --START--.nka file from the User Data/Themes folder, otherwise your User Themes may not be properly recognized.
Scaler
The Scaler deactivates any key that is not in the specified scale. Additionally, it automatically exchanges Modules with equivalent Modules that fit into the specified scale, if available.
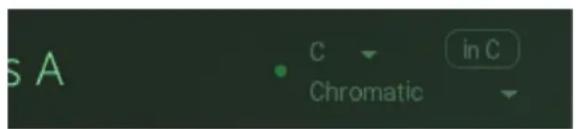
- On/Off switch (little dot): Activates or deactivates the Scaler.
- Root Note menu: Selects the scale's root note.
- Scale Type menu: Selects the scale type.
- in C button: Maps the selected scale onto the white keys of your keyboard with the root note on C.
When the Scaler is active, among the blue trigger keys, the on-screen keyboard in Kontakt and the Light Guide on your Kontrol keyboard show the root notes in violet, while inactive keys are off.

On the on-screen keyboard, the root notes are in violet and the inactive trigger keys are off: Scaler active, E minor scale selected, and in C off

The on-screen keyboard for the same E minor scale, now with in C turned on.
Phrases
A Phrase is a sequence of notes played by the High or Low Ensemble.
Phrase Slots
The Phrase Slots of the Main page represent the two active Phrases: the upper slot shows the Phrase for the High Ensemble, and the lower slot the Phrase for the Low Ensemble. The Phrases currently active depend on the selected keyswitch, which is indicated at the bottom of the page.
On each slot, the area left of the Phrase display provides global controls for the corresponding Ensemble.
Each Phrase Slot contains the following controls:
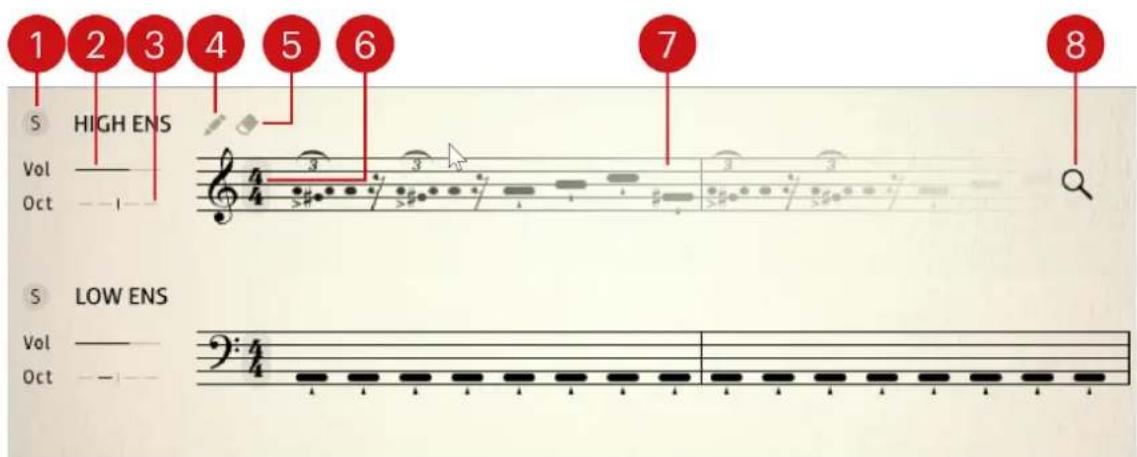
- Solo (S icon): Lets you hear this Ensemble alone (it mutes the other Ensemble). This button is synchronized with its dedicated keyswitch A-1 or B-1 on your keyboard. This button is also available at the top of the Editor and Mixer pages.
-
Vol: Adjusts the volume of the Ensemble. Click + drag left to decrease the volume, and right to increase it.
-
Oct: Transposes the Ensemble by one or two octaves. Click + drag left to transpose downwards, and right to transpose upwards. At the middle position, the Ensemble is not transposed.
- Edit (pencil icon): Opens the Phrase in the Phrase Notation of the Editor page, where you can customize the Phrase. The Edit button is only visible when hovering your mouse over the Phrase display.
- Clear (eraser icon): Removes the Phrase from the Phrase Slot. The Clear button is only visible when hovering your mouse over the Phrase display.
- Time signature: Shows the Phrase's time signature. You can click the value to select another time signature for the Phrase.
- Phrase display: Shows the Phrase content in a score-like representation. The Phrases are notated in treble and bass clefs for the High and Low Ensembles, respectively, and are always depicted using A as the root note. The actual sounding pitch will be based on whatever notes you play on your keyboard. The actual sounding pitch will be based on whatever notes you play on your keyboard. You can click anywhere in the Phrase to open the Phrase Browser and select another Phrase for that Ensemble. This is equivalent to clicking the Browse button (magnifying glass) that appears on the right.
- Browse (magnifying glass icon): Opens the Phrase Browser to select another Phrase for that Ensemble. The Browse button is only visible when hovering your mouse over the Phrase display.
Phrase Browser
The Phrase Browser contains filters to help you sort all Phrases by different characteristics and quickly find and load the desired Phrase.
▶ To open the Phrase Browser for an Ensemble, click anywhere in the Phrase display of its Phrase Slots on the Main page, or click the magnifying glass that appears on the right when hovering over the display.
The Phrase Browser contains the following controls and areas:
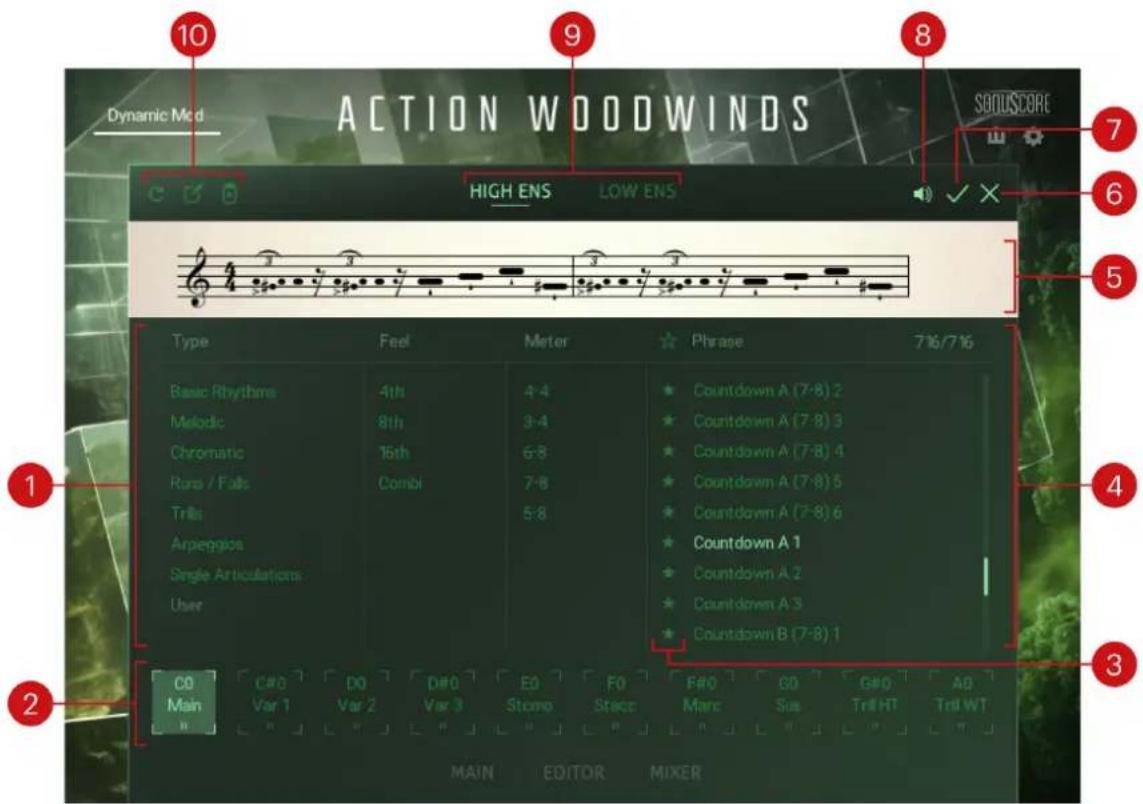
- Tag filter: Displays the tags organized in three columns (Type, Feel, Meter). You can select only one tag in each column simultaneously. For more information, refer to Phrase Browser tags.
- Keyswitches: The selected keyswitch will host the Phrase that you load. You can click various keyswitches to load multiple Phrases into them. For more information, refer to Keyswitches.
- Favorites: You can click the star icons to add or remove Phrases to/from your Favorites. The star icons are lit for Phrases set as Favorites. This way, you can quickly create a custom collection of your most beloved Phrases. You can then display only your favorite Phrases by clicking the topmost star icon next to the Phrase list header. Click the topmost star icon again to display also non-favorite Phrases.
- Phrase list: Shows the Phrases matching the tags selected in the Tag filter on the left. You can click a Phrase to load it and try it directly on your keyboard or in your DAW. You can double-click a Phrase to load it onto the selected keyswitch and close the Browser.
- Phrase display: Represents the Phrase selected in the Phrase list. The Phrase display can help you visually recognize particular Phrases when switching between entries from the Phrase list.
- Cancel (cross icon): Closes the Phrase Browser without changing anything. Your Kontakt Instrument returns to its previous state.
- OK (check mark icon): Keeps the selected Phrase loaded and closes the Phrase Browser. This is the same as double-clicking the Phrase in the Phrase list.
- Preview (loudspeaker icon): Switches the Preview function on or off. If Preview is on, when you click a Phrase in the Phrase list you can hear it in action.
- Ensemble selector: By clicking LOW ENS or HIGH ENS you will browse Phrases for the Low Ensemble or the High Ensemble, respectively. The selected Ensemble is highlighted.
- User Phrase tools: Provide controls for importing, editing, and deleting User Phrases. For more information, refer to User Phrases.
Phrase Browser tags
To simplify your search for Phrases, the tags are organized into three columns. Only one tag in each column can be selected simultaneously.
| Type | Feel | Meter |
| Basic Rhythms | 4th | 4-4 |
| Melodic | 8th | 3-4 |
| Chromatic | 16th | 6-8 |
| Runs / Falls | Combi | 7-8 |
| Trills | 5-8 | |
| Arpeggios | ||
| Single Articulations | ||
| User |
The tags in the Phrase Browser
- Type: In general, Phrases in Action Woodwinds fall under eight different types, applicable in different compositional scenarios. These include:
- Basic Rhythms: Single Pitch Phrases playing rhythmic patterns. Optimized for playing chords.
- Melodic: Melodic Phrases with a tonal center. Optimized for generating melodies out of a single note.
- Chromatic: Melodic Phrases with less strict tonality. Can be used for playing both single notes and chords.
- Runs / Falls: Major or minor, ascending and descending.
- Trills: Phrases with rapid alternation between two adjacent notes, usually a semitone or tone apart.
- Arpeggios: Phrases based on an arpeggiator. Optimized for playing chords.
- Single Articulations: Special Phrases containing a single-note Articulation that can be played freely. For more information, refer to Single Articulations.
- User: Custom Phrases saved by you or other users. For more information, refer to User Phrases.
- Feel: Allows for searching Phrases with a quarter, eighth, or sixteenth note focus.
- Meter: Filters the Phrases according to their time signature.
User Phrases
User Phrases are custom Phrases that you or other users have created. Each User Phrases is accessible as a single file, making it easy to transfer and share between multiple systems.
You can save User Phrases in the Editor page. Once saved, you can organize them using the User Phrase tools in the Phrase Browser.
In the Phrase Browser, the User tag in the Type column is automatically assigned to all User Phrases. You can select this tag to show only User Phrases in the Phrase list.
User Phrase tools
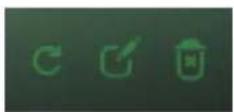
To manage your User Phrases, the Phrase Browser provides the following tools:
-
Scan (cycling arrow icon): Imports User Phrases. For more information, refer to Importing User Phrases.
-
Edit (pencil icon): Lets you rename your User Phrase and modify its tags. For more information, refer to Editing a User Phrase.
-
Delete (trash bin icon): Removes the User Phrase from the Phrase Browser.
A User Phrase that has been removed from the Phrase Browser using the Delete button (trash bin icon) will not automatically reappear upon the next import using the Scan button (cycling arrow icon). To make it appear again in the Phrase Browser, press [option] (Mac) / [Alt] (Windows) + click the Scan button.
You can create User Phrases in the Editor page. For more information, refer to Saving a User Phrase.
Saving a User Phrase
To save a User Phrase:
- Click the Save button (disk icon) in the top left corner of the Editor page.
- Enter a new name.
- Click the check mark to save the User Phrase, or click the cross to cancel the process.

→ When you click the check mark, the User Phrase is saved and becomes available in the Phrase Browser.
User Phrases are saved as single .nka files into the User Data/Phrases folder under the Action Woodwinds installation directory.
The Action Woodwinds installation directory is located in the content folder defined in Native Access (Preferences panel > File Management page > Content Location field).
Editing a User Phrase
You can modify the name and the tags of an existing User Phrase as follows:
- Open the Phrase Browser.
- Select the desired User Phrase in the Phrase list.
- Click the Edit button (pencil icon) at the top left of the Phrase Browser.
- Modify the Phrase name and/or select different tags.
- Click the check mark to save your changes, or click the cross to cancel the process.

The tag in the Type column cannot be modified: The User tag is automatically assigned to all User Phrases.
Importing User Phrases
To import User Phrases:
- Copy the .nka files of your choice into the User Data/Phrases folder under the Action Woodwinds installation directory.

The Action Woodwinds installation directory is located in the content folder defined in Native Access (Preferences panel > File Management page > Content Location field).
- Open the Phrase Browser.
- Press the Scan button (cycling arrow icon) in the top left corner.
→ The new User Phrases are imported from the User Data folder.

Make sure to copy the .nka files in the User Data/Phrases folder before you open the Action Woodwinds instrument, otherwise, Kontakt may not recognize all files.

Do not delete the --START--.nka file from the User Data/Phrases folder, otherwise your User Phrases may not be properly recognized.
Keyswitches
Keyswitches enable you to make quick Phrase or Articulation changes. They are available on your MIDI keyboard as well as in the user interface at the bottom the Main page, the Editor page, and the Phrase Browser.

Keyswitches on the Main page
Each keyswitch shows its key name C0-A0 followed by a term describing the kind of Phrases it activates:
| Type Term Function | ||
| Main Main Keyswitch for the main Phrase pair of the Theme (on C0) | ||
| Variations Var 1–9 Keyswitch for a variation of the main Phrase pair | ||
| Single Articulations | Stacc, Sus, Stcmo, Trill HT, Trill WT, Marc | Keyswitch for a specific Single Articulation, either for both Ensembles or one, leaving the other Ensemble empty |
| Empty - Empty keyswitch | ||
Changing keyswitches
You can change a keyswitch by selecting it and choosing a different Phrase in the Phrase Browser or modifying its Phrase in the Editor page. You can also rearrange your keyswitches by dragging them to the left or right. When you save a User Theme, the keyswitch configuration will be saved alongside the individual Phrase combinations.
Playing with keyswitches
To use a keyswitch and change the Phrase or Articulation, simply trigger the keyswitch before playing the note you want to be affected. Keyswitches can be triggered by pressing the keyswitch (e.g. C0) on your keyboard, entering the key in your DAW, or simply selecting the corresponding keyswitch slot within Action Woodwinds.
If you trigger a keyswitch during a running Phrase, it will be switched instantly, keeping the pulse going. Single Articulations need to be triggered again, as they don't provide a repetitive rhythm on a single pressed key.
Within the Themes provided in Action Woodwinds, the keyswitches behave mostly as follows:
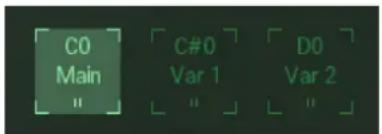
• C0 is the main version of the Theme.
- C#0, D0, and D#0 are often tonal variations of the main version.
- The following keyswitches are usually Single Articulations to play harmonies freely.
Single Articulations
In addition to the Phrases built from recorded Modules and individual notes, Action Woodwinds also offers individual Single Articulations that can be played freely. They are recorded during the same sessions as the Modules, allowing you to switch seamlessly between Phrases and Single Articulations without significant differences in the sound character.
By default, every Theme contains five keyswitch slots for Single Articulations, but they can also be loaded into Phrase Slots on the Main page by selecting the Single Articulations type in the Phrase Browser. This allows you to combine Phrases and Single Articulations on one keyswitch, or combine different Single Articulations between the two Ensembles.
The following Single Articulations are available:
• Staccato
• Staccatissimo
- Marcato
- Sustain
• Half-tone Trills (HT)
• Whole-tone Trills (WT)
Dynamics for Staccato, Staccatissimo, and Marcato are controlled by note velocity, while Sustain, Tremolo, and Trills are controlled by the specified Dynamic Mod control. To improve the overall playability and sound within the Themes, the Single Articulations for the Low Ensemble are automatically transposed by one octave.
As Single Articulations do not make use of any sequencing features, the Editor page only contains one control for them, the 8va button:
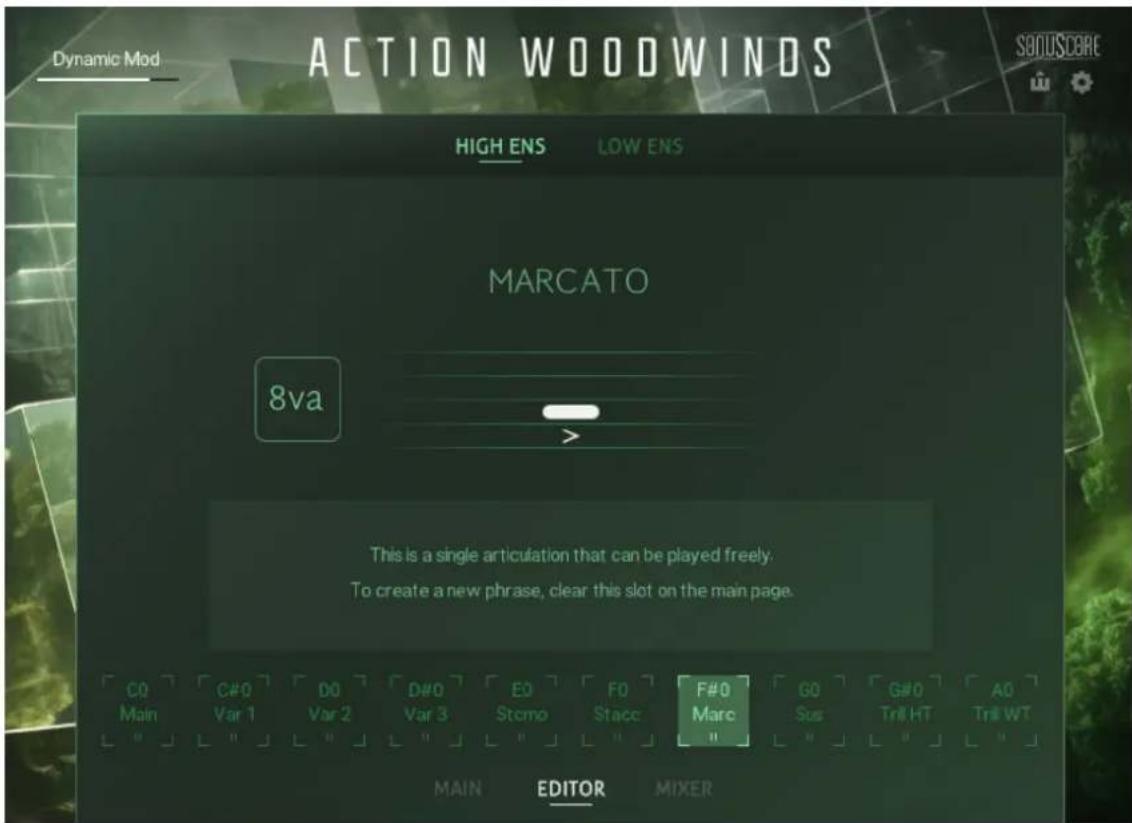
The Marcato Single Articulation in the Editor page
- 8va: Activates or deactivates the Octaver. When the Octaver is active, all notes played by the Ensemble are doubled an octave higher.

If a Single Articulation is loaded and you want to access the default Editor page, you first need to clear the Phrase Slot on the Main page to create a new empty Phrase with access to the default Editor page.
8. Editor page
The Editor page is the heart of Action Woodwinds. Every Phrase you find on the Main page can be modified here. You can freely combine multiple recorded modules to build Phrases with a maximum length of two bars of the current time signature. You can also adjust the time signature and the loop range of the Phrase.
The Editor page contains the following features and controls:
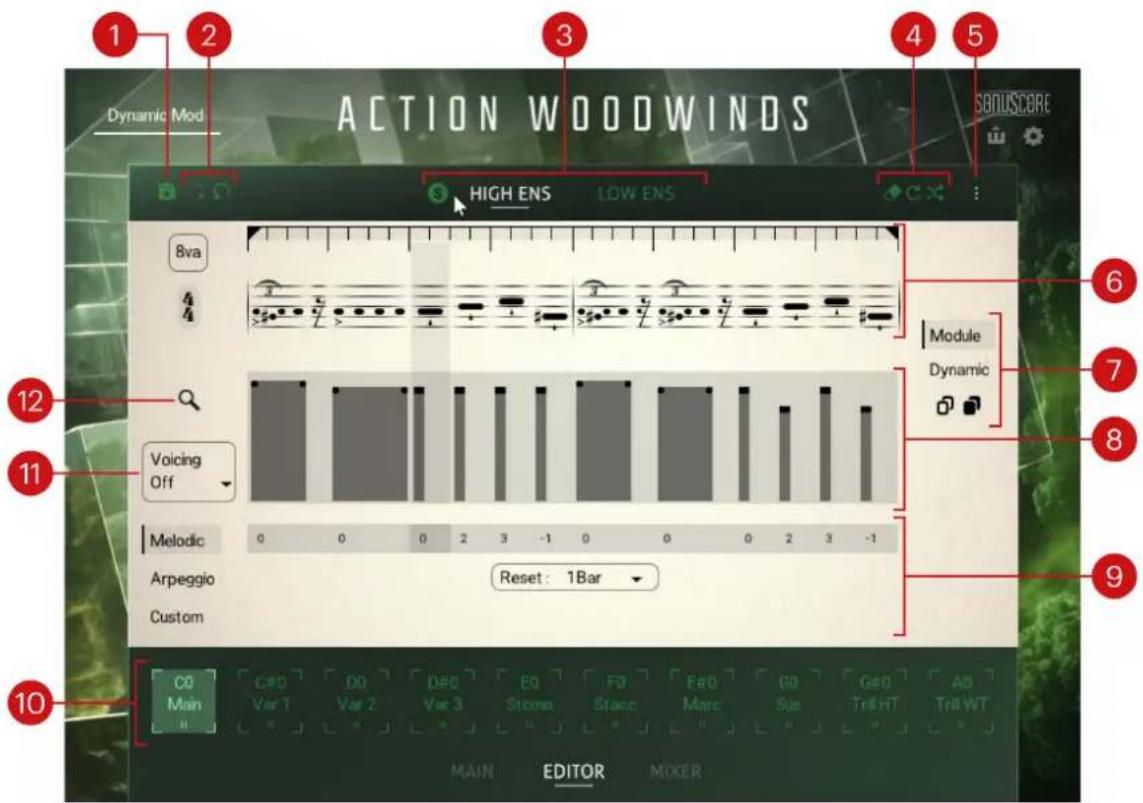
-
Save (disk icon): Saves the current Phrase as User Phrase. For more information, refer to Saving a User Phrase.
-
Undo/Redo: Let you undo/redo your last edits on the Phrase:
- Undo (arrow turning to the left): Cancels your last action in the Editor. The Phrase returns to its previous state. You can click Undo repeatedly to cancel several actions in a row.
- Redo (arrow turning to the right): Performs the last canceled action in the Editor again. After you have canceled an action, the Redo button is available until you perform any new action in the Editor. If you canceled multiple actions, you can click Redo repeatedly to perform some (or all) of them again.
-
Ensemble selector: Switches the Editor between the High and Low Ensembles and let you solo the desired Ensemble. For more information, refer to Ensemble selector.
-
Step Edit tools: Let you apply various edits to the selected Module or to the loop range. For more information, refer to Step Edit tools.
-
Sequencer menu: Allows you to copy/paste the sequencer settings between Ensembles, including the Envelope, Voicing, and Play mode settings. For example, this can be useful to copy arpeggiator settings from one Ensemble to the other, even if they play different Modules.
-
Phrase Notation: Adjusts the sequence of Modules included in the Phrase, the Loop Range, and other Phrase settings. For more information, refer to Phrase Notation.
- Step Copy tools: Lets you copy/paste the selected Module or loop in various manners. For more information, refer to Step Copy tools.
- Envelope: Adjusts the dynamic shape of the modules in your sequence. For more information, refer to Envelope.
- Play modes: Switch the engine between different play modes (Melodic, Arpeggio or Custom). Melodic mode is optimized for playing melodies with single keys. In Arpeggio mode, the engine behaves like a step arpeggiator. Custom mode allows you to program the note played by each Module in your sequence. For more information, refer to Play modes.
- Keyswitches: Indicate the active keyswitch and let you select another one to display and edit its Phrases in the Editor page. For more information, refer to Keyswitches.
- Voicing: Determines which notes of your chord will be taken into account by the engine. For example, when you play a three-note chord, if Top is selected the engine will only play the highest note, and if Lowest 2 is selected the engine will only play the lowest two notes.
- Browse (magnifying glass icon): Opens the Module Browser, where you can browse the available Modules for replacing the selected Module.
Ensemble selector
The Ensemble selector lets you switch the Editor between the High Ensemble and the Low Ensemble. Additionally, you can solo each Ensemble.

HIGH ENS
LOW ENS
- Solo (S): Solos the High Ensemble or Low Ensemble, respectively. When a Solo button is inactive, it only appears when hovering the mouse over the HIGH ENS or LOW ENS selector. When a Solo button is active, it stays visible. Both Solo buttons are mutually exclusive: Activating either button automatically deactivates the other one.
- HIGH ENS: Switches the Editor to the High Ensemble. The selected Ensemble is highlighted and underlined. When selected, adjustments in the Editor only apply to the High Ensemble.
- LOW ENS: Switches the Editor to the Low Ensemble. The selected Ensemble is highlighted and underlined. When selected, adjustments in the Editor only apply to the Low Ensemble.
Phrase Notation
For the notation of the Phrases and Single Articulations, Action Woodwinds provides a hybrid approach. The note's vertical position is displayed within a conventional staff, and its musical length is demonstrated by its horizontal length, similar to a MIDI editor. In addition, breaks and Articulations are displayed with their conventional symbol as well as its expansion. This technique allows for better visualization of the modular approach of Phrases but retains the clarity of traditional notation.
A Phrase is a sequence of Modules. The Phrase Notation shows this Module sequence and lets you change it to your needs.
The Phrase Notation contains the following features:

- Phrase display: Displays the sequence of Modules included in the Phrase. The Phrases are notated in treble and bass clefs for the High and Low Ensembles, respectively, and are depicted using A as the root note. The actual sounding pitch will be based on whatever notes you play on your keyboard. You can click any Module to select it, which is indicated by a darker column background. You can use the Step Copy and Step Edit tools on the selected Module, or double-click the Module to open the Module Browser and replace it with another Module.
- Loop Range: Defines the length of your Phrase. You can modify the Phrase's start and end points by dragging the two loop handles. Everything within the Loop Range will loop when triggered. Regions outside the Loop Range are grayed out. You can click anywhere on the darker bar within the Loop Range to select it (any Module gets deselected) and use the Step Copy and Step Edit tools on the entire Loop Range.
- 8va: Activates or deactivates the Octaver. When the Octaver is active, all notes played by the Ensemble are doubled an octave higher.
- Time Signature: Adjusts the time signature of the Phrase. You can click the value to select another time signature. When selecting a shorter signature than the current setting, the content of the exceeding beats will be cleared.

To improve readability in the Phrase display, very fast Phrases will leave out accidentals. Here, the tonal context is displayed by a small label above (for example, chrom, min or maj).
Step Edit tools
The available Step Edit tools depend on whether you have selected a Module or the Loop Range in the Phrase Notation.
If a Module is selected in the Phrase Notation, the following Step Edit tools are available:
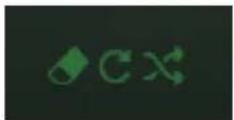
- Delete: Clears the selected Module.
- Repeat: Duplicates the selected Module into the following slot. This is very handy for single notes or short Modules.
- Variate: Inserts a similar Module of the same category. This only works with modules that have variations.
If the Loop Range is selected in the Phrase Notation, the following Step Edit tools are available:
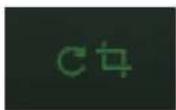
- Repeat Range: Repeats the loop content directly after the loop end marker.
- Crop Loop: Brings the loop content to the beginning of the Phrase and deletes everything outside of the loop.
Step Copy tools
The Step Copy tools allow you to copy the selected Module or the selected loop, and paste it to another position within the current Phrase or into the Phrase on another keyswitch for the same Ensemble. The Module / Phrase and Dynamic buttons let you choose what should be included in the copy/paste process.
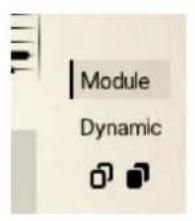
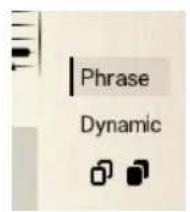
- Copy (transparent icon): Copies the selected Module or loop.
- Paste (black icon): Pastes the copied Module or loop.
- Module (Module selected) or Phrase (loop selected): If activated, the copy will include the particular Module(s) of the source, as set in the Phrase Notation.
- Dynamic: If activated, the copy will include the dynamic shape of the source, as set in the Envelope.
Module Browser
Within the Module Browser, you can navigate through all recorded Modules and place them to the currently selected slot in the Phrase Notation by double-clicking them.
▶ To open the Module Browser, double-click the Module you want to change in the Phrase Notation or click the magnifying glass on the left side of the Editor page.
→ The Module Browser opens and highlights the selected Module and its category.
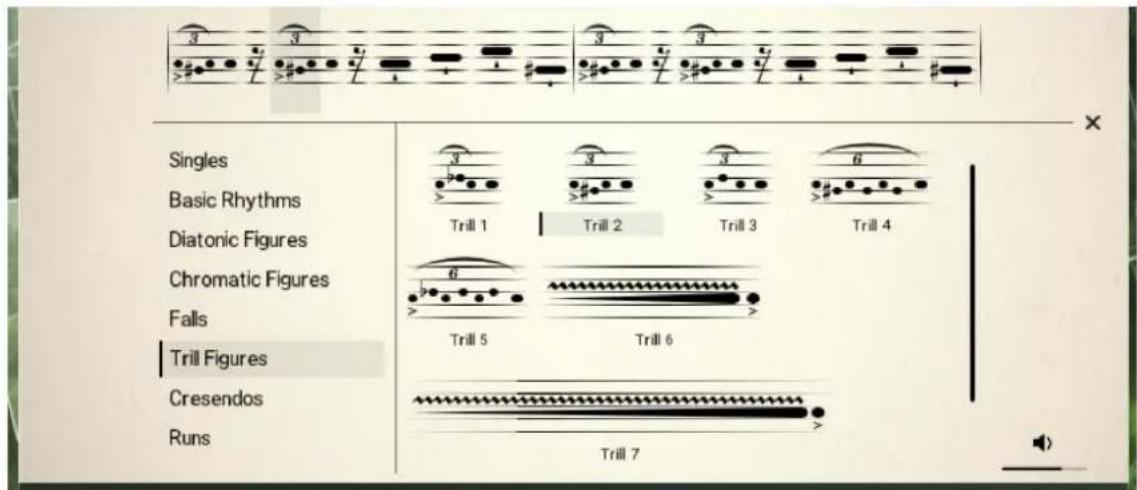
The Module Browser

While the Module Browser is open, you can select another slot in the Phrase Notation or switch to the other Ensemble: The Module Browser will automatically switch to the category and Module corresponding to the newly selected slot.
Selecting and pre-listening Modules
You can select and pre-listen Modules in the Module Browser by simply clicking them. To optimize your pre-listening experience, use the pre-listening tools bottom right of the Module Browser.
natural_image
Simple diagram with a speaker icon and horizontal line, no text or symbols present▶ Click the loudspeaker to activate/deactivate pre-listening.
▶ Click + drag the slider horizontally to adjust the pre-listening volume.
Loading Modules
▶ Double-click a Module to load it into the selected slot in the Phrase.
→ The Module is loaded into the Phrase. The Module Browser stays open and the selection in the Phrase Notation automatically moves to the next slot, allowing you to quickly load a series of Modules.
Module categories
In the left part of the Browser, you can click the desired Module category to display its Modules on the right. The different Module categories include:
| Module category Description |
| Singles Single notes of different playing styles |
| Basic Rhythms Repeated notes on the same pitch |
| Diatonic Figures Note sequences based on diatonic scales |
| Chromatic Figures Note sequences based on chromatic movement |
| Falls Sequences starting on a specific pitch and moving fluently to the root note |
| Trill Figures Sequences involving fast trills |
| Crescendos Crescendos in various styles |
| Runs (High Ensemble only) Major or minor runs up and down |
Module types
Generally, there are three types of Modules:
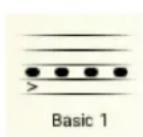
Modules without an emphasized ending note. Mostly with 2/16 or 4/16 length. These Modules can be stringed together without overlapping.
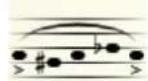
Chromatic 1
Modules with an emphasized ending note. Mostly in a length of 5/16. These Modules are suitable to serve as the ending of a Phrase on a beat. You can also select the ending note and insert another Module, which allows you to string together Modules with ending notes as well.
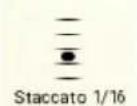
Basic single-note Articulations to insert into the Phrase like staccatos and long notes.
For single-note Modules (Singles category), the Browser has a slightly different layout. In the upper line, you can choose the specific Articulation, and then you can select a specific length to insert it into the Phrase. Long notes that offer the duration of 1 or 2 bars will adjust their length to the current time signature.
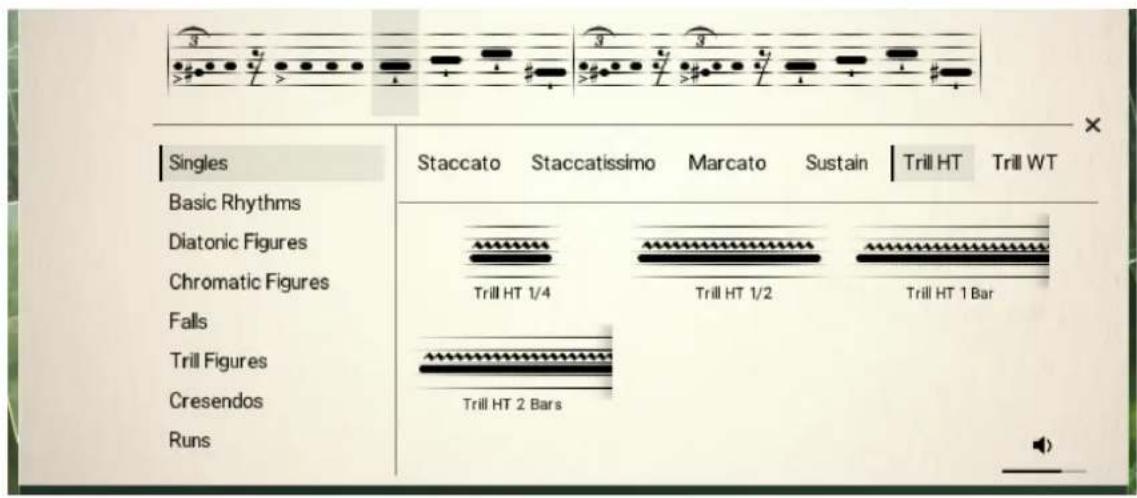
Closing the Module Browser
▶ Click the cross on the right side of the Browser to close the Module Browser without loading anything.
Envelope
The Envelope allows you to set a dynamic shape to Modules. Short single notes like staccatos only have a single handle that can be adjusted, while longer Modules like sustained notes have multiple handles to allow you to give dynamic shapes to these Modules.
▶ Click + drag the mouse up or down to adjust the shapes in the Envelope.
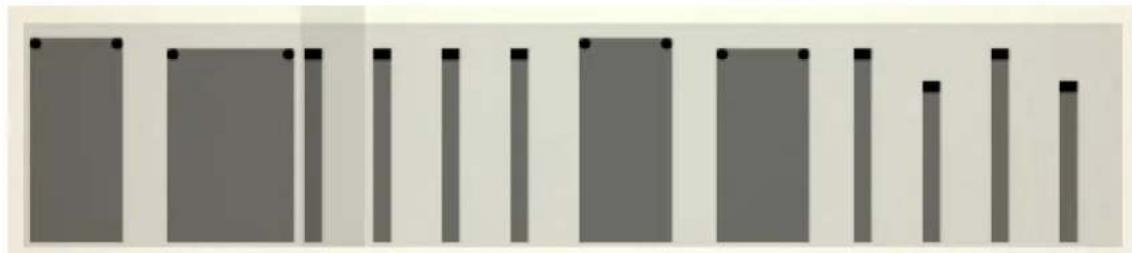
natural_image
Abstract pattern of vertical gray bars on a light background (no text or symbols)The Envelope in the Editor page
Play modes
Action Woodwinds provides three different Play modes: Melodic, Arpeggio, and Custom. Melodic mode is optimized for playing melodies with single keys, Arpeggio mode behaves like a step arpeggiator with multiple notes played at a time, and Custom mode lets you choose for each step which of the depressed keys should be played.
Melodic mode
Melodic mode is optimized for playing melodies with single keys. The pitch of every Module can be adjusted chromatically by clicking + dragging the respective box up and down. The number displayed in the box shows the difference to the root pitch of the Phrase. Drag the numbers up or down to change the melody. The corresponding module will move up and down in the Phrase Notation.

- Reset: Determines the duration after which the engine will reset its pattern.
Arpeggio mode
In Arpeggio mode, Action Woodwinds behaves like a step arpeggiator, with each Module acting as a step. The Arpeggio mode is built to play multiple notes at the same time.

- Pattern: Determines the order in which the Modules will be arpeggiated. All (Chord) will trigger all played notes in the respective rhythm.
- Reset: Determines the duration after which the engine will reset its pattern.
- Skip: Determines whether steps within a rest will be ignored for the note order and the respective pitch will sound at the next active Module.
- Repeat: Repeats every note one or multiple times before moving to the next note.
Custom mode
In Custom mode, you can decide which of the depressed keys will be played by each Module by clicking the corresponding dots in the grid. The dots on the "0" row represent the root note. The rows with positive numbers represent the upper depressed keys followed by their equivalents in the upper octave(s), while the rows with negative numbers represent their inverted equivalents in the lower octave(s).
| Melodic | 4 | ○ | · | · | ○ | · | · | ○ | · | ○ | · | ○ | · | ○ | · | · | ○ | · | · | ○ | · | ○ | · | ○ | · | ○ |
| 3 | ○ | · | · | ○ | · | · | ○ | · | ○ | · | ○ | · | ○ | · | ○ | · | · | ○ | · | · | ○ | · | ○ | · | ● | |
| 2 | ○ | · | · | ○ | · | · | ○ | · | ● | · | ○ | · | ● | · | ○ | · | · | ○ | · | · | ○ | · | ○ | ● | ○ | |
| Arpeggio | 1 | ○ | · | · | ○ | · | · | ○ | · | ● | · | ● | · | ○ | · | ○ | · | · | ● | · | · | ○ | ● | ○ | · | ○ |
| 0 | ● | · | · | ● | · | · | ● | · | ● | · | ○ | · | ○ | · | ● | · | · | ● | · | · | ● | ○ | ● | ● | ○ | |
| Custom | -1 | ○ | · | · | ● | · | · | ○ | · | ○ | · | ○ | · | ● | · | ○ | · | · | ○ | · | · | ○ | · | ○ | · | ○ |
| -2 | ○ | · | · | ○ | · | · | ○ | · | ○ | · | ○ | · | ○ | · | ○ | · | · | ○ | · | · | ○ | · | ○ | · | ○ |
By clicking the numbers in the left column, you can activate or deactivate the corresponding notes for all steps at once.
9. Mixer page
On the Mixer page, you can adjust the overall sound of the Ensembles by mixing signals from different microphone positions and apply effects. Additionally, you can route the signals to individual outputs in Kontakt.
The Mixer page contains the following areas:
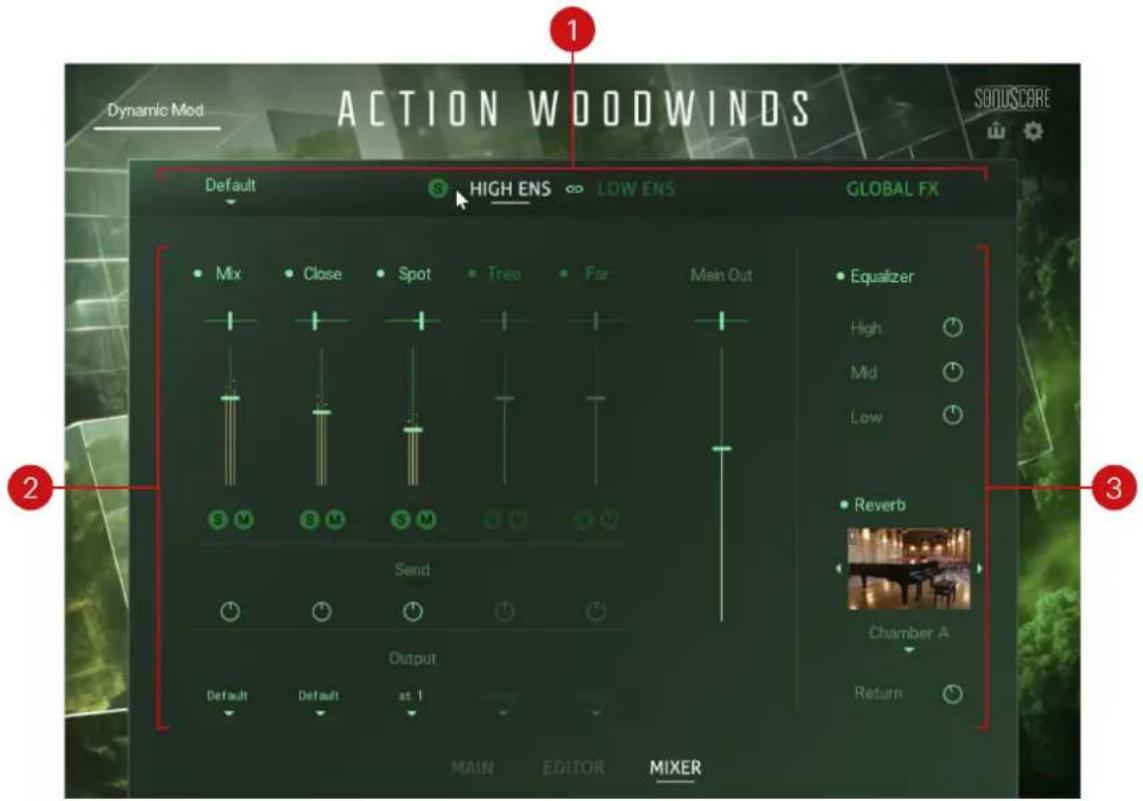
- Ensemble selector: Lets you switch the Mixer between the High Ensemble and the Low Ensemble, and select from a number of Mixer presets. For more information, refer to Ensemble selector.
- Mixer: Lets you mix signals from different microphone positions, and route the signals to individual outputs in Kontakt. For more information, refer to Mixer.
- Global effects: Let you apply the Equalizer to the main output, and select from a number of different spaces for the Reverb effect. For more information, refer to Global Effects.
Ensemble selector
The Ensemble selector enables you to switch the Mixer between the High Ensemble and the Low Ensemble and select from a number of Mixer presets. Additionally, you can solo each Ensemble and activate the Link function that applies edits to both Ensembles.
The Ensemble selector includes the following controls:

- Mixer presets: Selects from a number of Mixer presets that give you quick access to a variety of different mixes, from close and intimate to wide and open.
- Solo (S): Solos the High Ensemble or Low Ensemble, respectively. The Solo button (S) only appears when hovering the mouse over the HIGH ENS or LOW ENS label.
- HIGH ENS: Switches the Mixer to the High Ensemble. When selected, adjustments in the Mixer only apply to the High Ensemble, unless the Link button is activated.
- Link (chain link icon): Links the Mixer controls for the High and the Low Ensemble. When activated, adjustments in the Mixer apply to both the High and Low Ensembles. Previously adjusted controls are not affected by the Link function.
- LOW ENS: Switches the Mixer to the Low Ensemble. When selected, adjustments in the Mixer only apply to the Low Ensemble, unless the Link button is activated.
Mixer
The Mixer enables you to mix signals from different microphone positions and route the signals to individual outputs in Kontakt. Each microphone position has a dedicated microphone channel in the mixer. From each channel, you can also adjust the send level to the Reverb effect in the global effects.

You can reset mixer controls to their default value by holding [command] (macOS) or [Ctrl] (Windows) and clicking them.
The Mixer includes the following controls:
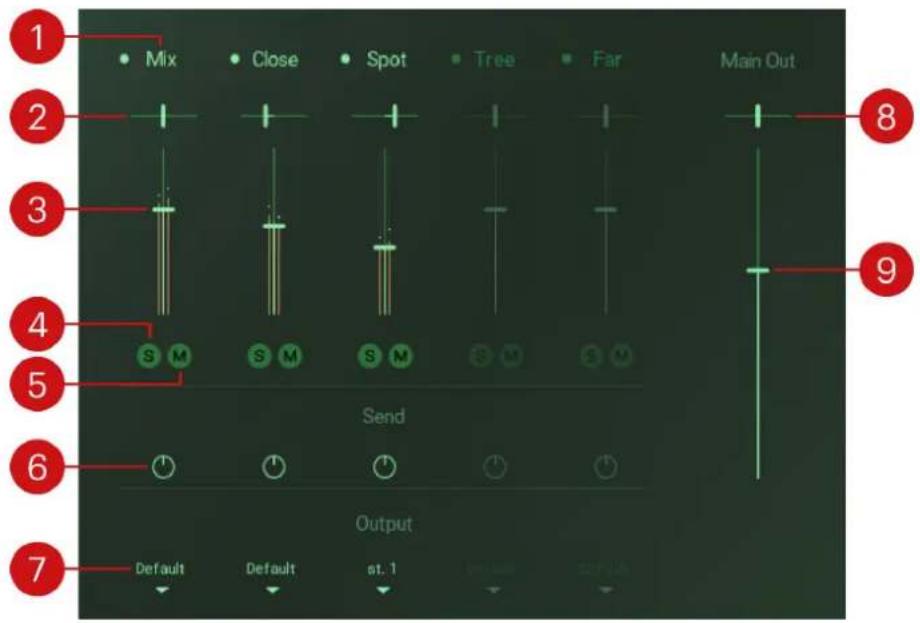
- Channel switch: Activates or deactivates the microphone channel. When activated, the corresponding samples are loaded into the memory. When deactivated, the samples are purged. Deactivated microphone channels are grayed out, however, their controls can still be adjusted.
- Pan: Adjusts the position of the microphone channel in the stereo image.

Setting all Pan controls to center preserves the traditional positioning of instruments in the Ensemble as present in the original recording.
- Level: Adjusts the level of the microphone channel.
- Solo (S): Solos the microphone channel. All other channels are muted. The corresponding samples remain loaded in the memory.
- Mute (M): Mutes the microphone channel. The corresponding samples remain loaded in the memory.
- Send: Adjusts the level of the signal sent from the channel to the Reverb effect in the Global effects. The intensity of the reverb also depends on the Return control in the GLOBAL FX area. For more information, refer to Global Effects.
- Output: Routes the microphone channel to a specific output in Kontakt. When set to Default, the channel is routed to the Mixer's main output, which is the instrument's main output (as defined in the Instrument header in Kontakt). Selecting another entry from the drop-down menu routes the channel directly to the respective output, bypassing the Mixer's main output. You can use this to assign individual outputs to each microphone channel.

If the drop-down menu does not include any additional entries, you can create and assign new outputs in Kontakt's Outputs section. For more information on the Outputs section, refer to the Kontakt manual.

Since the Reverb in the Global effects is always routed to the Mixer's main output (Default), it is recommended to apply reverb in the DAW when using individual outputs for the microphone channels.
- Main Out Pan: Controls the panning for the main output. In the left position, the main output is panned left, and when in the right position the main output is panned right.
- Main Out Level: Controls the main output level of the instrument.
Global Effects
The Global effects enable you to apply the Equalizer to the main output and select from a number of different spaces for the Reverb effect. The Equalizer and the Reverb apply to both the High and Low Ensembles.
The Global effects include the following controls:
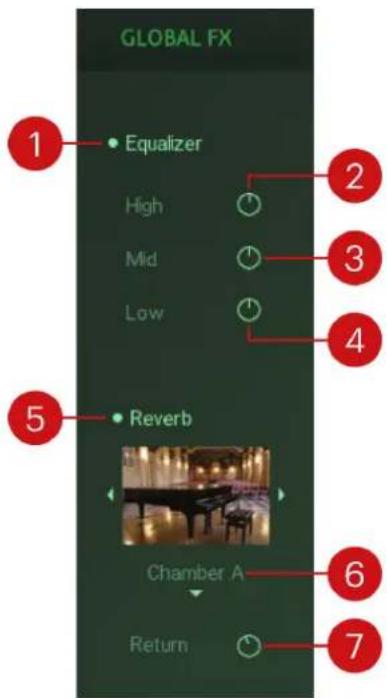
- Equalizer: Activates or deactivates the Equalizer. The Equalizer features three bands High, Mid, and Low that can be adjusted independently.
- High: Adjusts the high-frequency response of the Equalizer. Turning the control to the left attenuates high-frequency content. Turning the control to the right boosts high-frequency content.
- Mid: Adjusts the high-frequency response of the Equalizer. Turning the control to the left attenuates mid-frequency content. Turning the control to the right boosts mid-frequency content.
- Low: Adjusts the high-frequency response of the Equalizer. Turning the control to the left attenuates low-frequency content. Turning the control to the right boosts low-frequency content.
- Reverb: Activates or deactivates the Reverb. The Reverb is based on convolution of impulse responses recorded in real spaces.
- Reverb selector: Selects from a number of differently sized spaces for the Reverb, including rooms, chambers, concert halls, and cathedrals. The image shows a photo of the selected space. You can directly select entries from the drop-down menu, or use the arrow icons next to the image to step through the available entries.
- Return: Adjusts the amount of reverb added to the main output. The intensity of the reverb also depends on the Send controls in the mixer. For more information, refer to Mixer.
10. Settings panel
The Settings panel includes global settings affecting the dynamic modulation, note release time, and tempo of your sequences.
▶ Click the gear icon in the upper right corner of the instrument to open the Settings panel.
The Settings panel contains the following elements:

- Dynamic Mod: Selects the MIDI control mapped to dynamic modulation. By default, it is set to CC 1, which corresponds to the modulation wheel.
- Note Release: Sets the release time after a key is released.
- Tempo: Selects between three tempo ratios 1/2 (half), 1:1 (normal), and 2x (double). The tempo ratio will affect the playback speed of the Phrases relative to the main tempo, which is set by your DAW (or specified in Kontakt or Komplete Kontrol when used as standalone applications).
11. MIDI export
The MIDI export function enables you to record a sequence and export the MIDI data generated by Action Woodwinds to MIDI tracks in your DAW.
To record and export a sequence:
- Open Action Woodwinds in Kontakt running as a plug-in in your DAW.
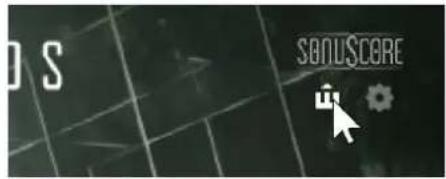
- Click the MIDI Export button in the upper right corner of the user interface.
- Start playback in your DAW.

→ Action Woodwinds is ready to record the MIDI data generated according to the sequence you play.
4. Play a sequence using your MIDI keyboard. Alternatively, you can playback previously recorded MIDI notes from your DAW.

- When you are finished playing the sequence, stop playback in your DAW.

Avoid playing MIDI notes after playback is stopped, otherwise previously recorded data may be lost.
- Drag and drop the arrow icon into your DAW.

→ The MIDI data is exported to your DAW, creating separate regions for the High and Low Ensembles in your DAW.
12. Credits
Concept: Tilman Sillescu
Product Design: Tolga Özdemir
Kontakt Development: Stefan Kemler, Tolga Özdemir, Jonas Meyer, Mathias Vatter
User Interface Design: Efflam Le Bivic, Tolga Özdemir
Product Management: Grant Smith
Quality Assurance and Finalization: Elad Twito
Sound Design: Tilman Sillescu, Simon Schrenk, Jonas Schüsselin, Luka Swoboda, Christian Wirtz, Nicolai Patricio, Matthias Meeh, Jonas Hausotter, Nicoi Dilz, Marit Schmitt, Jasper Hellwig
Documentation: Nicolas Sidi, Jan Ola Korte
Marketing: Rose Rutledge, Samuel Hora, Alastair Oloo, Lucy Crouch, Ohad Ben Moshe, Maik Siemer
- Disclaimer
- Welcome to Action Woodwinds
- Document Conventions
- Installation and setup
- Installing Action Woodwinds using Native Access
- Loading Action Woodwinds in Kontakt
- Action Woodwinds overview
- Playing Action Woodwinds
- Selecting Phrases from the MIDI keyboard
- Controlling the dynamics
- Mapping MIDI controls
- Snapshots
- Snapshots overview
- Loading a Snapshot
- Saving a User Snapshot
- Deleting a User Snapshot
- Main page
- Themes
- Theme header
- Theme Browser
- Theme Browser tags
- User Themes
- User Theme tools
- Saving a User Theme
- Editing a User Theme
- Importing User Themes
- Scaler
- Phrases
- Phrase Slots
- Phrase Browser
- Phrase Browser tags
- User Phrases
- User Phrase tools
- Saving a User Phrase
- Editing a User Phrase
- Importing User Phrases
- Keyswitches
- Changing keyswitches
- Playing with keyswitches
- Single Articulations
- Editor page
- Ensemble selector
- HIGH ENS
- LOW ENS
- Phrase Notation
- Step Edit tools
- Step Copy tools
- Module Browser
- Selecting and pre-listening Modules
- Loading Modules
- Module categories
- Module types
- Closing the Module Browser
- Envelope
- Play modes
- Melodic mode
- Arpeggio mode
- Custom mode
- Mixer page
- Mixer
- Global Effects
- Settings panel
- MIDI export
- Credits
Brand : NATIVE INSTRUMENTS
Model : Action Woodwinds
Category : Logiciel photo/vidéo