
E2 Pro - Vacuum Cleaner LENOVO - Free user manual and instructions
Find the device manual for free E2 Pro LENOVO in PDF.


| Product Type | Stick Vacuum Cleaner |
| Brand | Lenovo |
| Model | E2 Pro |
| Dimensions (L x W x H) | 250 mm x 150 mm x 1100 mm |
| Weight | 2.5 kg |
| Power Supply | Rechargeable Li-ion battery, 22.2 V, 2000 mAh |
| Charging Time | Approximately 4 hours |
| Run Time | Up to 30 minutes |
| Dustbin Capacity | 0.5 L |
| Suction Power | 20 kPa max |
| Filtration System | HEPA filter with washable pre-filter |
| Noise Level | ≤ 75 dB |
| Accessories Included | Crevice tool, dusting brush, upholstery tool, wall mount |
| Main Functions | Dry vacuum cleaning for hard floors, carpets, and upholstery |
| Maintenance | Empty dustbin after each use, wash pre-filter monthly, replace HEPA filter every 6 months |
| Safety Features | Overheat protection, automatic shutoff when battery low |
| Spare Parts Availability | Replacement filters, batteries, and brush rolls available online |
| Warranty | 1 year limited warranty |
| Certifications | CE, RoHS |
Frequently Asked Questions - E2 Pro LENOVO
User questions about E2 Pro LENOVO
0 question about this device. Answer the ones you know or ask your own.
Ask a new question about this device
Download the instructions for your Vacuum Cleaner in PDF format for free! Find your manual E2 Pro - LENOVO and take your electronic device back in hand. On this page are published all the documents necessary for the use of your device. E2 Pro by LENOVO.
USER MANUAL E2 Pro LENOVO
Lenovo Cleaner E2/E2 Pro User Manual

natural_image
Line drawing of a robotic vacuum cleaner with a circular body and side legs, labeled 'Lenovo' on the lid (no text or symbols beyond label)Please read the User Manual before using---Warranty card included, pictures are for reference only.
Safety information
Use Restrictions
- This machine is only used for floor cleaning at home. Please do not use it outdoors (such as an open balcony), non-ground area (such as a sofa), and commercial or industrial environment.
- Do not use the machine in suspended environments without protective fences, such as duplex floors, open balconies, and top of the furniture.
- Do not use the product in an environment where the temperature is above 40^ or below 0^ , or there are liquids and viscous objects on the ground.
- Hang up the ground cable at home before use to avoid dragging the cable when the machine is running.
- Put away the fragile objects and sundries (such as vases and plastic bags) on the ground. Otherwise, the machine may be blocked or a slight collision may cause damage to valuables at home.
- Keep the machine away from people (including children) with physical, mental or sensory impairments.
- Do not allow children to use the machine as a toy. Please keep children and pets away from the machine when the machine is running.
- Keep the cleaning brush at a place that cannot be reached by children.
- Do not place any object (including children and pets) on the stationary or moving machine.
- When the machine is working, keep the hair of humans or pets or fingers far away from the suction port of the machine.
- Do not use the machine to clean burning objects, such as unextinguished cigarette butts.
- Do not use the machine to clean long-haired carpets. Some dark carpets may not be cleaned normally.
- Do not use the machine to vacuum hard or sharp objects, such as decoration waste, glass, and iron nails.
- Please clean or maintain the machine and docking station when the machine is powered off or when the power supply is disconnected.
- Do not use a damp cloth or any liquid to wipe any part of the machine.
- Please follow the instructions in this manual when using the machine. The user should be liable for any loss and injury caused by improper use.
- Do not use the mopping function on the carpet or the top of the furniture.
- Remove the water tank when charging the machine.
- Do not use on total black carpets or floors.
Use Restrictions
- Do not use any third-party batteries, docking stations, or chargers.
- Do not disassemble, repair, or modify the battery or docking station without permission.
- Do not place the docking station near heat sources, such as radiators.
- Do not use a damp cloth or wet hands to wipe or clean the docking station shrapnel.
- Dispose used batteries properly, and send them to professional recycling agencies.
• If the power cord is damaged or broken, stop using it immediately and buy a new one through official channels.
• To transport the machine, ensure that the machine is powered off. It is recommended that you use the original box for packaging. - If you do not use the machine for a long time, power it off and keep it in a dry and cool place. Charge the machine at least once every 3 months to avoid damage to the battery due to excessive discharge.
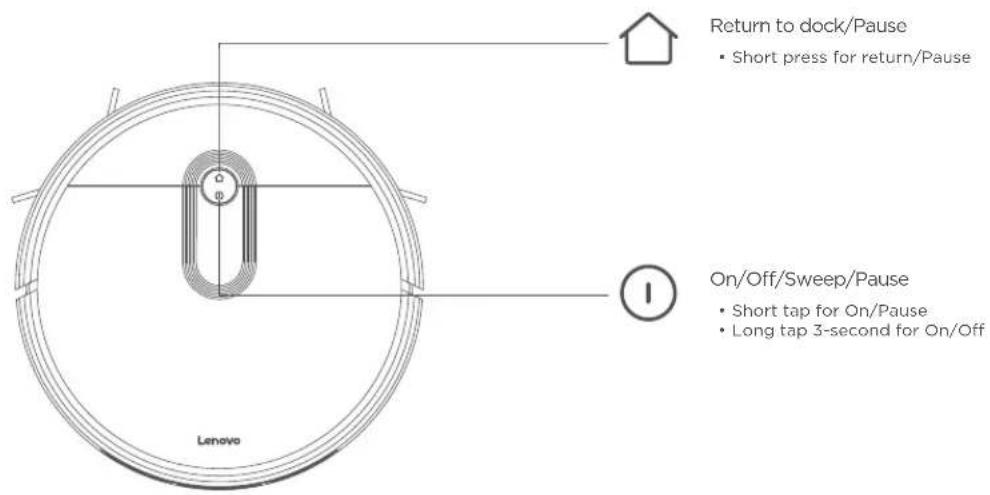
Product
Main machine
Charging Dock
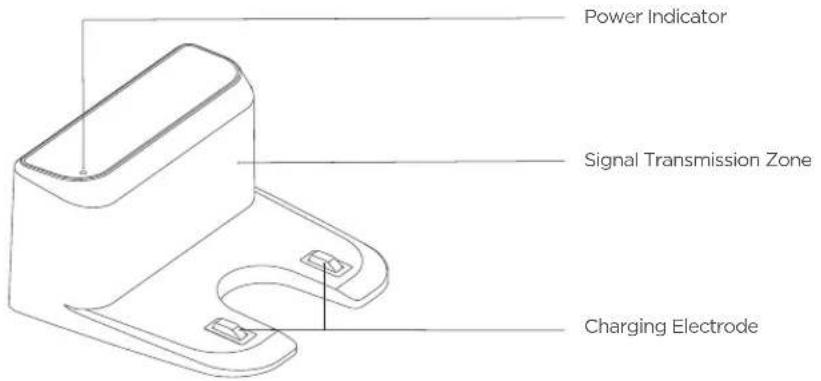
Product
Sensor and Structure
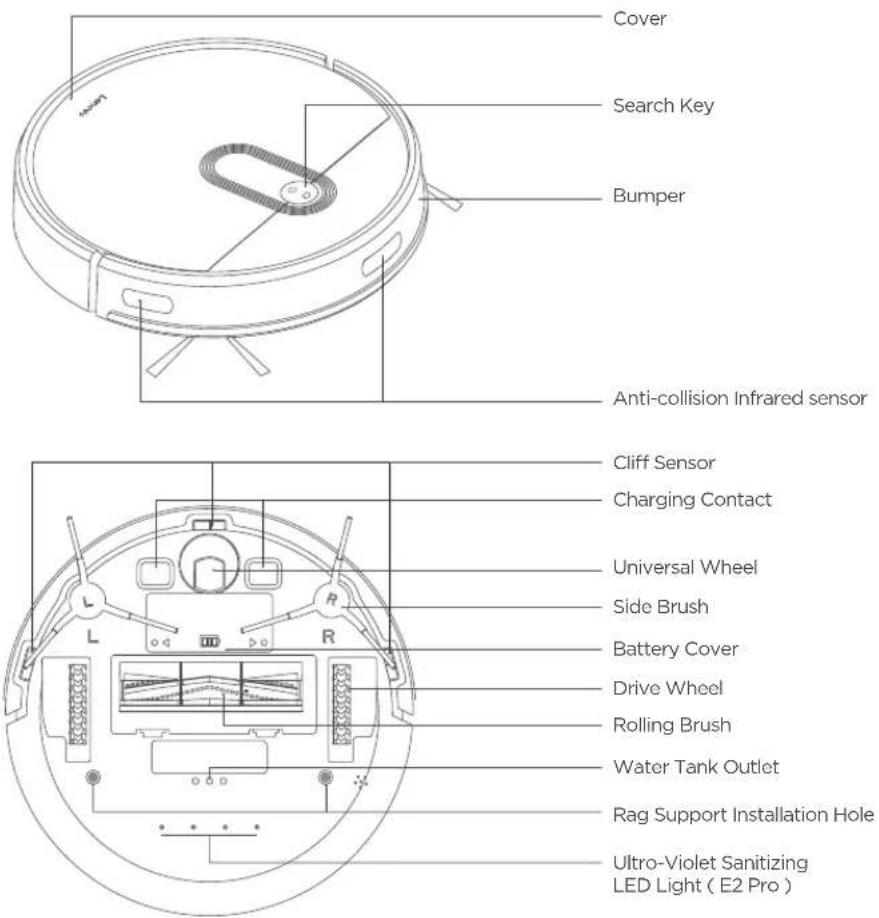
Product
Remote Control (E2 Pro)

Product
Accessories

Charging Dock X1 Electric Water Box X1 Rag Support X1
natural_image
Simple geometric shape with diagonal hatching, no text or symbols present

Rag X 2 HEPA Filter X 2 Adapter X 1
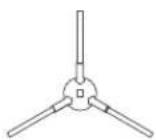
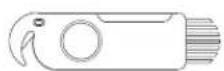


Side Brush Right X 2
Cleaning Brush X1
Controller X1 (E2 Pro) Magnetic Strip X1 (E2 Pro) Side Brush Left X 2
Installation
Precautions

natural_image
Line drawing of a room interior with TV, sofa, coffee table, and lamp (no text or symbols)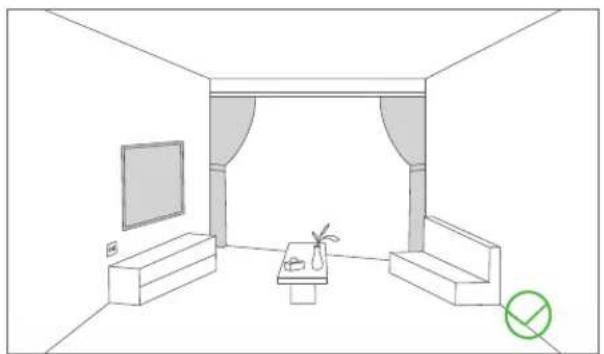
natural_image
Line drawing of a room interior with TV, curtains, and furniture (no text or symbols)Before starting the vacuum cleaner, clean up wires and sundries scattered on the ground, and remove easy-to-fall, fragile, valuable and potentially dangerous items. Avoid being entangled, jammed, dragged, or knocked down by the main unit; otherwise, personal or property damage may be caused.

natural_image
Simple line drawing of a robotic vacuum cleaner and a paint swab with a red X mark, placed on a tiled floor (no text or symbols)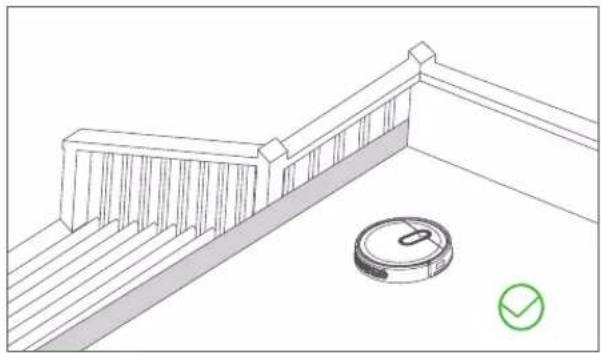
natural_image
Line drawing of a balcony with railing and circular object, no text or symbols presentDo not use the robot to clean liquid. When used in a suspended circumstance,
it shall be protected by
rails to avoid accidental falling or pushing other articles from falling; otherwise, personal or property damage may be caused.
Installation
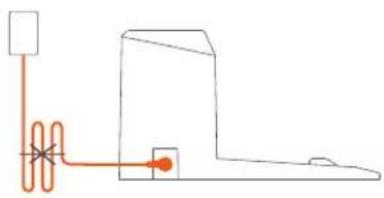
- Connect the power line and keep it in a proper length.
natural_image
Pure electrical circuit lines without any symbols- Do not move the charging dock randomly; avoid direct sunlight on the dock.

natural_image
Simple line drawing of a toilet or sink with a no-smoking symbol (no text or labels)Note: Sunlight may interfere signals of return-for-charging, and then the main unit fails to return back to the charging dock.
- Place the charging dock on a flat ground against the wall; connect to the power supply.

Note: - Ensure a space more than 0.5 m from the left and right of the charging dock and 1.5 m in front of the charging dock. - The power line perpendicular to the ground may be dragged by the main unit, resulting in the dock power-off. - The charging indicator is kept on when electrified.
- Install side brushes Put the left brush (L) and right brush (R) against the letters L and R on the bottom respectively; move down for "click" to finish installation.

Installation
5、Power on and charging
Hold the ① button to power on the machine. When the indicator is on, put the main unit against the charging dock for charging. The voice of "start charging" prompts successful charging.

natural_image
Line drawing of a vacuum cleaner with lid and ventilation slots (no text or symbols)Note: The machine cannot power on in case of insufficient battery. Please place the main unit on the dock to allow automatic power on.
② Install the rag support: Insert the support into the installation hole.

natural_image
Line drawing of a robotic vacuum cleaner with a mesh cover and airflow indicators (no text or symbols)6、Install mopping mode
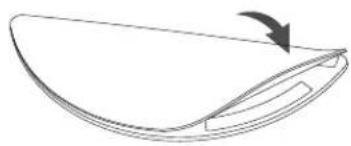
① Install rag: Flatly attach the rag to the rag support
natural_image
Simple line drawing of a curved object with an arrow indicating rotation (no text or symbols)Note: It is suggested to clean the rag once used, to guarantee the cleaning result.

Installation Hole for Rag Support
Installation
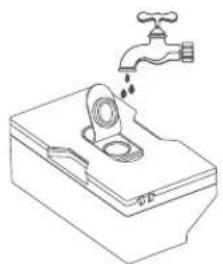
③ Fill the water tank with water. Open the cover, fill water and close the cover.
natural_image
Line drawing of a faucet dispensing liquid into a water tank (no text or symbols)Note: Do not spray and immerse the water tank.
④ Put in the water tank. Bring and put the water tank into the machine. Slightly press it to ensure proper installation. Then cover the machine. Tap ① the button on the main unit to enable the mopping mode.

natural_image
Diagram of a vacuum cleaner with open lid and internal components, showing airflow direction arrows (no text or symbols)7、Use instruction for mopping mode
- For safety purposes, exit the mopping mode in case of charging or out of operation.
- Do not use the mopping function on the carpet.
- It is suggested that the mopping mode should not be enabled unless sweeping is done first, to achieve a better mopping result.
Use Instructions
Power on and off the machine
Tap and hold the Ⓤ button for 3 seconds to power on the machine. Then, the power indicator is on, and the vacuum cleaner enters the standby state. Tap and hold the Ⓤ button for 3 seconds to power off the machine.
Note: The main unit in the charging state cannot be powered off.
Charging
Auto mode: After cleaning, the main unit automatically returns to the dock for charging. Manual mode: In the pause state, press the 🔒 button to activate the "return for charging" mode or use the controller or the smart APP for charging.
Note: If the main unit fails to find the dock, it will automatically return to the starting point. In this case, manually put the main unit back to the dock for charging.
Sweeping/Pause
Once the machine powers on, tap the ⏻ button on the main unit or use the controller or the smart APP to start sweeping.
Note:
•The machine cannot clean liquid.
- If the power is lower than 15%, the machine cannot work. Therefore, charge the machine before sweeping.
- If the power is lower than 15% during sweeping, the machine will automatically return back to the dock for charging.
- Before cleaning, tidy up all kinds of wires on the ground (including the power cord of the dock). Otherwise, the machine may drag the wires while cleaning, which may cause power failures of other electric appliance or damage items or wires.
Virtual wall (optional)
The magnetic strip can be set to separate restricted zones (such as washing rooms and kitchens).

Note: Fix the magnetic strip to the ground to avoid peeling off; otherwise affecting the result of the visual wall.
Use Instructions
Automatic sweeping
Upon power on, the machine plans its sweeping route in a zigzag way and finishes sweeping the whole room in an orderly and efficient manner. Once sweeping ends, the machine will automatically return to the dock for charging (sweeping mode by default).
Specified sweeping
Use the ✝ button on the controller so that the machine will take itself as a center to sweep a round zone with the diameter of 1.2 m. Upon sweeping, the main unit will automatically return to the starting point and stop work.
(The direction key on the smart APP can also be used to manually control the machine to the sweeping position.)


flowchart
graph TD
    A["Start"] --> B{Spiral Path}
    B --> C["Loop Back"]
    C --> D["End"]
Use Instructions
Side sweeping
For indoor sweeping, the machine normally sweeps along a fixed object (such as walls). Once sweeping finishes along all sides, it returns to the charging dock.
Press the button of ☐ on the controller or use the smart APP to quickly enable the side sweeping function.

natural_image
Simple line drawing of a door with an arrow pointing downward and a circular dial on the right (no text or symbols)Scheduled sweeping
Use the smart APP to set the time for sweeping. The main unit will start sweeping automatically at the scheduled time. Upon sweeping, it will return to the dock for charging (7X24h scheduling supported).
Wi-Fi connection
Press the ⏻ and ⏱ buttons at the same time for 3 seconds. The voice of "Wifi reset, ready for EZ mode connection" prompts. The Wi-Fi indicator blinks showing it is connecting. The indicator will be kept on after connection.

DND mode
No voice prompt in DND mode. Use the smart APP to enable or disable the DND mode.
Suction control
Use the smart APP to select the strong, normal and quiet modes (normal by default).
Water volume control
Use the smart APP to select the high, medium and low modes (medium by default).
Use Instructions
Ultra-Violet Sanitizing (E2 Pro)
Ultraviolet sanitizing instructions:

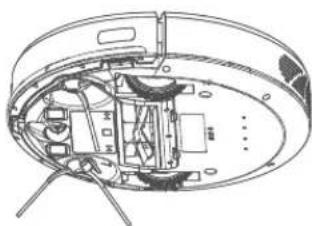
- Open the "LenovoSmart" APP and enter the main interface of the connected "LenovoCleaner E2 Pro" robot. Click the "More" button.

- Find the UVC switch to control the sterilization function of the robot.
natural_image
Technical line drawing of a mechanical assembly with no visible text or symbols- Click the switch to open UV disinfection function.
APP Connection
APP Connection
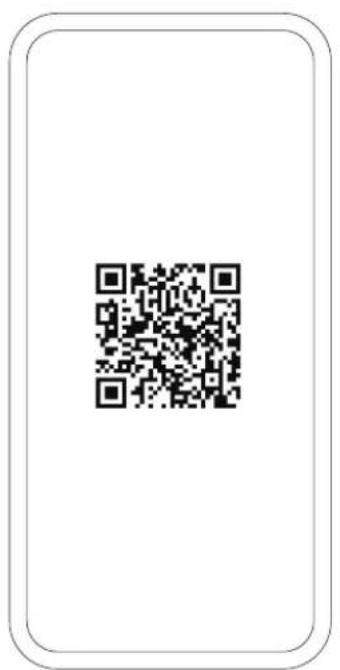
- Download the app from Google Play or Apple App store. You can access the App by scanning the QR codes above. Or search "LenovoSmart" from app store.

- Register and log in the APP.

natural_image
Diagram of a circular device with a central component and labeled 'Lenovo' (no other text or symbols)- Press the ⏻ and ⏱ buttons at the same time for 3 seconds. The voice of "Wifi reset, ready for EZ mode connection" prompts and the Wi-Fi indicator blinks.
APP Connection

- Click "Add Device" or "+" at the upper right corner.

- Select "LenovoCleaner E2/E2 Pro"

- Confirm the indicator blinks.
APP Connection
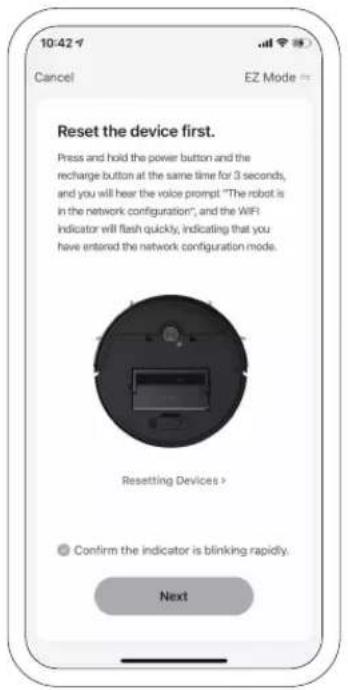
- Connect Wi-Fi, input the password, and then click OK.

- Wait for connection between the mobile and the robot

- Upon connection, set the name of the robot.
Installation
Roller brush (Recommended cleaning frequency: weekly)
- Flip the machine, press the buckle on the roller brush cover, and remove the roller brush cover.

- Use the cleaning brush that comes with the machine to remove the dust in the main brush and the roller brush cavity, and then clean the objects entangled on the roller brush.

natural_image
Simple line drawing of a hand holding a cylindrical object next to a segmented cylindrical object (no text or symbols)- remove the roller brush.

natural_image
Illustration of a hand using a tool to adjust or install electronic components on a circular device (no text or symbols visible)Side brush (Recommended cleaning frequency: weekly)
- Flip the machine, and pull out the side brushes vertically.
-
Remove the entangled hair and dirt, and then reinstall the side brushes.
-
Align the left side brush (L) and right side brush (R) with the letters L and R on the bottom cover, and press the side brushes to reinstall them.

natural_image
Diagram of a circular electronic device with labeled ports and arrows indicating orientation (no text or symbols present)Note: It is recommended that you replace the side brushes every 3 months to ensure the cleaning effect.
Routine Maintenance
Dust box and filter (Recommended cleaning frequency: after each cleaning)
-
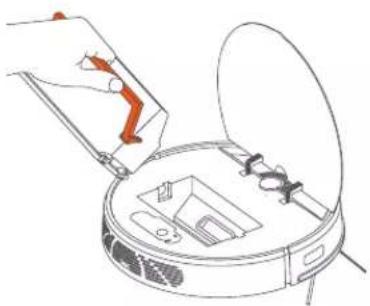
Remove the machine cover, lift the handle of the dust box, and take out the dust box.
-
Press the switch of the dust box, open the dust box, and dump.
natural_image
Line drawing of a vacuum cleaner with open lid and internal components (no text or symbols)
natural_image
Line drawing of hands pouring liquid from a container into a bottle (no text or symbols)Clean the dust box (Recommended cleaning frequency: weekly)
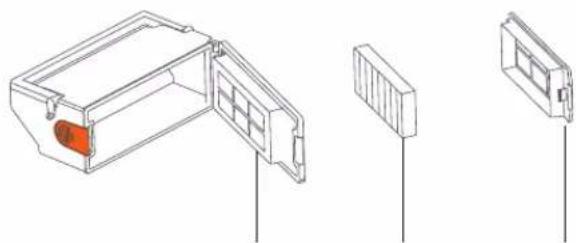
- After the machine is used for a long time, remove the filter gauze and HEPA filter.
- Put the removed prefilter and dust box under the faucet for washing (the HEPA filter cannot be washed by water).
- Remove the water droplets, and dry the filter and dust box thoroughly before use.
natural_image
Technical line drawing of a mechanical component with three views (top, front, side), no text or symbols present.Prefilter HEPA Filter Filter Cover
Note:
- Use clean water for washing, and do not add any detergent.
- Do not use a brush or fingers to clean the filter.
·Dry the filters thoroughly for at least 24 hours - It is recommended that you replace a set of filters every 3 months.
Routine Maintenance
Clean the infrared anti-collision sensor (Recommended cleaning frequency: monthly)

natural_image
Line drawing of a robotic vacuum cleaner with a hand adjusting its lid (no text or symbols)Clean the cliff sensor (Recommended cleaning frequency: monthly)

Clean the charging contact (Recommended cleaning frequency:monthly)


natural_image
Line drawing of a hand holding a small electronic device with two red buttons, connected to a rectangular device (no text or symbols)Routine Maintenance
Clean the signal transmission zone
(Recommended cleaning frequency: monthly)

natural_image
Illustration of a hand pressing down on a red and orange object with a handle (no text or symbols)Battery
The machine is equipped with a high-performance rechargeable lithium battery pack. To maintain battery performance, keep the machine in charging state in daily use.
- If you do not use the machine for a long time, power it off and store it properly. Charge the machine at least once every 3 months to avoid damage to the battery due to excessive discharge.
Upgrade the firmware
Start the mobile app, and enter the firmware upgrade page. After the new firmware is detected, follow the instructions to upgrade the firmware. To upgrade the firmware, the power must be equal to or greater than 50%. It is recommended that you place the machine on the docking station for upgrade.
Parameters
Main unit
| Specification | |
| Product Model | L-VCL0E2 |
| Dimensions 320X320X76mm | |
| Battery 2600 mAh rechargeable lithium battery | |
| Rated voltage 14.4V | == |
| Rated power | 42W |
| Charging time | 300min |
| Dust box capacity | 450ml |
| Water tank capacity | 520ml |
Docking station
| Specification | |
| Dimensions | 158X147X84mm |
| Rated input | 19V --- 0.6A |
| Rated output | 19V --- 0.6A |
Common Problems
| Problem Solution | |
| Failed to power on the machine | ·The battery power is insufficient. Please place the machine on the docking station, and align with the charging electrode. The machine will be automatically powered on.·The ambient temperature is below 0°C or above 40°C. Please use the machine when the ambient temperature is 0°C to 40°C. |
| Failed to charge the machine | ·Move the machine away from the docking station, and check whether the indicator of the docking station is on. Make sure that both ends of the power adapter are properly connected.·The docking station is not in proper contact with the machine. Please clean the docking station shrapnel and the charging contact on the machine, or push the side brush to one side. |
| Failed to return to the docking station | The machine is too far away from the docking station. Try to place the machine near the docking station. |
| Abnormal behavior | Power off the machine and then on again. |
| There is abnormal noise during cleaning. | The roller brush, side brushes, or wheels may be entangled with foreign objects. Please clean them after stopping the machine |
| The cleaning performance is degraded, or ash is dropped. | ·The dust boblocked. Clean or replace the filter.·The roller x is full. Clean the dust box.·The filter is brush is entangled with foreign objects. Clean the roller brush |
| The Wi-Fi network cannot be connected. | ·The Wi-Fi signal is not good. Ensure that the machine is located in a place with good Wi-Fi signals.·The Wi-Fi connection is abnormal. Reset the Wi-Fi settings, download the app of the latest version, and try to connect to the Wi-Fi network again.·The password is incorrect.·This machine supports only the 2.4 GHz band. |
| Scheduled cleaning cannot be carried out. | The power is insufficient. Scheduled cleaning will be started only when the remaining power is 15% or above. |
| Is any power consumed if the machine always stays at the docking station? | The power consumption is extremely low when the machine always stays at the docking station. This helps to keep the battery in the best performance. |
| Is it necessary to charge the battery for 16 hours when the machine is used for the first three times? | The lithium battery does not have a memory effect. It can be used instantly after it is fully charged. There is no need to wait. |
Troubleshooting
| Error Prompt Solution | |
| Error 1: Insert dustbin | Cleaning is triggered when the dust box is taken out. Please reinstall the dust box. |
| Error 2: Put the vacuum on the floor before starting | You may pick up the machine, or the machine is suspended in the air. Please move the machine to a level ground and start again. |
| Error 3: Move the vacuum to a safe area before starting | The cliff sensor is blocked or placed in a high place. Please wipe the cliff sensor window with a soft cloth, and move the machine to a level ground before starting. |
| Error 4: Put the machine flat on the ground before starting | The machine is tilted. Please move the machine to a level ground before starting. |
| Error 5: Front bumper is stuck | The edge or anti-collision sensor is stuck. Please push the pumper left and right to confirm that it is not stuck. |
| Error 6: Battery is low, please recharge | Put the machine on the docking station for charging. |
| Error 7: The vacuum is stuck Please move the machine to an open ground before starting. | |
| Error 8: Wheels are Stuck | The wheels may be stuck or entangled with foreign objects. Please check the wheels and remove the foreign objects. |
| Error 9: Main Brush is Stuck | The roller brush may be stuck or entangled with foreign objects. Please check the roller brush and remove the foreign objects. |
| Error 10: Side brush is stuck | The side brush may be stuck or entangled with foreign objects. Please check the side brush and remove the foreign objects. |
Statement
Lenovo provides this document on an "as is" basis without any express or implied guarantee, including any implied guarantee for marketability and suitability for any specific purpose. Where any applicable laws prohibit the exclusion of any express or implied guarantee in any transaction, the foregoing exclusion may not apply in your case.
Errors may arise despite that we've made every effort to make sure the content contained herein is accurate and complete when preparing this document. We may revise this document on regular basis and such revision will be reflected in the future versions of the document. Lenovo may amend/or change the product and/or process described herein from time to time without any further notice.
The images and illustrations contained herein are for reference only and they may differ from the real product received by you. Some parts, features and functions mentioned herein may only apply to certain series or models and are for reference only. You shall not recognize them as a description of the specification and configuration of the product you purchased. The specification and configuration of your product shall be subject to the transaction evidences (such as Purchase Agreement, invoice and packing list) provided to you. In case of any question, please contact you retailer for verification.
Noting contained herein shall affect or change Lenovo's product guarantee (warranty) policy, or shall it be construed, expressly or implicitly, as a license or warranty of Lenovo's or any third party's intellectual property right.
The technical performance indicators contained herein were obtained in some specific environment. Data obtained under any other operating environment may be significantly different. Some measurements were obtained with the development-oriented system and may differ from those obtained with the general system. If necessary, you shall verify the performance data applicable to the environment where you reside.
Without Lenovo's prior written authorization, no one shall, in any way, reproduce, transcribe, delete or compile all or part of the contents contained herein into any other machine-readable formats, or store them in a retrievable system, or transmit them over a wired or wireless network, or translate them into any other languages.
Trademark
Words and logos indicated below are trademarks owned by companies under Lenovo Group:
Lenovo
Any other companies, products and services mentioned herein may be trademarks or service marks of other companies. @ Companies owned by Lenovo Group. All rights reserved 2021.

LenovoSmart
Pictures are only for information, please take practicality as standard. The products are required to be used in combination with intelligent device applications such as mobile phones, and the applications are subject to other license and service terms. The content available on Internet is not an inherent function of the product and is provided, guaranteed and supported by a third party. Lenovo does not guarantee any service from the third party.
"Lenovo", "Lenovo联想", "联想" and other Lenovo logos are trademarks or registered trademarks of Lenovo (Beijing) Co., Ltd. or their affiliates in mainland China and/or other countries or regions. Other products, trade names and brand names referred to are trademarks or registered trademarks of their respective holders. © 2021 Lenovo (Beijing) Co., Ltd. All rights reserved.
- Lenovo Cleaner E2/E2 Pro User Manual
- Safety information
- Use Restrictions
- Product
- Accessories
- Installation
- Precautions
- 5、Power on and charging
- 6、Install mopping mode
- 7、Use instruction for mopping mode
- Use Instructions
- Power on and off the machine
- Charging
- Sweeping/Pause
- Virtual wall (optional)
- Automatic sweeping
- Specified sweeping
- Side sweeping
- Scheduled sweeping
- Wi-Fi connection
- DND mode
- Suction control
- Water volume control
- Ultra-Violet Sanitizing (E2 Pro)
- APP Connection
- Routine Maintenance
- Battery
- Upgrade the firmware
- Parameters
- Troubleshooting
- Statement
Brand : LENOVO
Model : E2 Pro
Category : Vacuum Cleaner