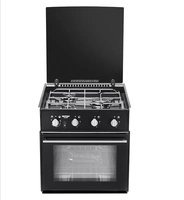
Triplex SOH71 - Cooker THETFORD - Free user manual and instructions
Find the device manual for free Triplex SOH71 THETFORD in PDF.


| Product Type | Gas Cooker with Oven and Grill |
| Brand | Thetford |
| Model | Triplex SOH71 |
| Number of Burners | 3 |
| Fuel Type | LPG (Butane/Propane) |
| Gas Connection | Class 2 (bayonet) or Class 1 (threaded) depending on region |
| Oven Type | Gas oven with flame supervision device |
| Grill | Gas grill |
| Ignition | Manual (match or lighter) or optional automatic ignition |
| Overall Dimensions (W x D x H) | 520 mm x 450 mm x 150 mm (approx.) |
| Weight | 15 kg (approx.) |
| Safety Features | Flame failure device on all burners and oven |
| Energy Efficiency | Class C (typical for gas cookers) |
| Cleaning Instructions | Wipe with damp cloth; avoid abrasive cleaners |
| Maintenance | Check gas connections annually; clean burner caps regularly |
| Spare Parts Availability | Through authorized Thetford service centers |
| Repairability Index | High: many parts replaceable |
| Warranty | 2 years (depending on region) |
| Certifications | CE, EN 30-1-1, EN 30-2-1 |
Frequently Asked Questions - Triplex SOH71 THETFORD
User questions about Triplex SOH71 THETFORD
0 question about this device. Answer the ones you know or ask your own.
Ask a new question about this device
Download the instructions for your Cooker in PDF format for free! Find your manual Triplex SOH71 - THETFORD and take your electronic device back in hand. On this page are published all the documents necessary for the use of your device. Triplex SOH71 by THETFORD.
USER MANUAL Triplex SOH71 THETFORD
PRODUCT GROUP [COOKING APPLIANCES]
PRODUCT CATEGORY [HOBS]
PRODUCT CODE : VARIOUS
WARNING! Before commencing work, disconnect the electricity and turn o the gas.
A
These instrucons are for Theord cookers with electric hotplates. For surface-mounted hobs please refer to page 3. Electric hotplates should only be removed and replaced by a qualified competent person.

natural_image
Interior view of a kitchen appliance with four panes and a circular vent (no text or symbols visible)B
Remove the pan-rest(s) and all the control knobs. Behind the knobs locate and remove the 16/17mm hexagonal nuts from the controls and 2 screws (where applicable).

natural_image
Front view of a stainless steel electric stove with four rotary fans and control knobs (no visible text or symbols)C
On the back edge of the control fascia, remove the 2 screws.

natural_image
Close-up of a hand using a screwdriver to press down a black appliance panel with four circular buttons (no text or symbols visible)D
The control fascia and prole can now be removed. Li up and forward, and carefully remove the spade connecons for the ignition buon and oven light switch, where ed.

natural_image
Interior view of a black electric stove with four fans and exposed wiring (no text or symbols visible)THETFORD
Repair instrucon
PRODUCT GROUP [COOKING APPLIANCES]
PRODUCT CATEGORY [HOBS]
PRODUCT CODE : VARIOUS
WARNING! Before commencing work, disconnect the electricity and turn o the gas.
E
Remove any screws ed to the rear trim and loosen the 2 screws in each hinge, but do not remove.
natural_image
Close-up of a hand using a screwdriver to adjust or install a black gas stove burner (no visible text or symbols)F
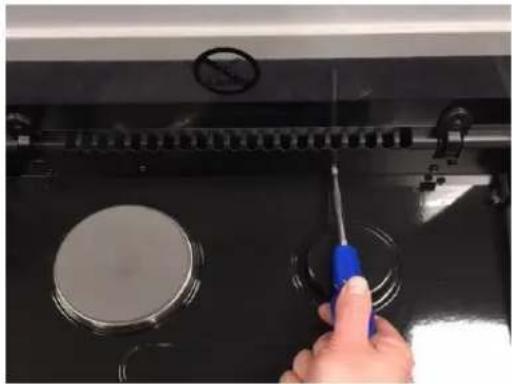
In each black enamel burner cap remove the retaining screw(s).

natural_image
Close-up of a precision machining operation on a workbench, showing a blue tool and circular workpiece (no text or symbols visible)G
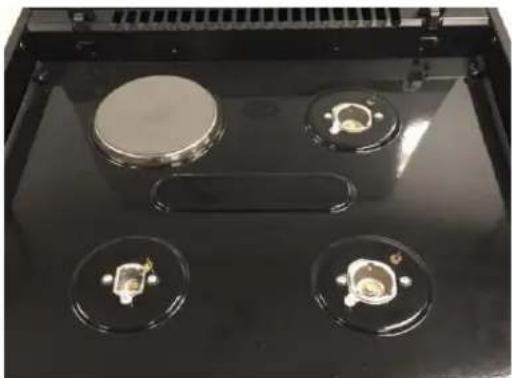
The enamel burner caps and cast burner rings can now be removed. Next remove the screws/retaining studs found beneath the burner rings.
natural_image
Close-up of a black electronic device with four circular components and a central metallic knob (no visible text or symbols)H
Finally, if applicable, remove the 2 screws found in the pan-rest clips that are holding the hob pressing in place.

natural_image
Close-up of a blue screwdriver inserted into a black electronic device with a circular component and a small metallic fixture (no visible text or symbols)THETFORD
Repair instrucon
PRODUCT GROUP [COOKING APPLIANCES]
PRODUCT CATEGORY [HOBS]
PRODUCT CODE : VARIOUS
WARNING! Before commencing work, disconnect the electricity and turn o the gas.
|
The hob pressing can now be raised, giving access to the underside of the hot plate.

natural_image
Interior view of an open electronic device with exposed wiring and components (no visible text or symbols)J
Undo the nut holding the earth strap in place, ensuring that you retain the star lock washer.

natural_image
Close-up of a metallic cylindrical device with internal components and wiring, no visible text or symbolsK
Undo the second nut, if the bracket doesn't release remove the screw in the back le corner from the top side of the pressing. The hotplate will now be released to remove from the underside.

natural_image
Close-up of a metallic cylindrical device with a small rectangular component mounted on a metal frame, no visible text or symbols.L
Take care in removing the hotplate leads. For individual leads take note of the posions of the leads. To reassemble follow these instrucons in reverse order, replacing with a new hotplate. The hotplate is a sealed construcon and has no user-serviceable components.