EXIT: The Sacred Temple (with Jigsaw Puzzles) - Board game Thames & Kosmos - Free user manual and instructions
Find the device manual for free EXIT: The Sacred Temple (with Jigsaw Puzzles) Thames & Kosmos in PDF.


| Product Type | Board Game |
| Series | EXIT: The Sacred Temple |
| Brand | Thames & Kosmos |
| Model | EXIT: The Sacred Temple (with Jigsaw Puzzles) |
| Genre | Cooperative escape room / puzzle game |
| Number of Players | 1 to 4 |
| Recommended Age | 10 years and up |
| Average Playtime | 60 to 180 minutes (depending on clues used) |
| Game Contents | 4 puzzle bags (88 pieces each), 12 riddle documents, 3 strange items, 4 decoder disks, 1 two-piece snap fastener, 1 rulebook with help section |
| Additional Required Items | Writing implements, scissors, watch or stopwatch (or use Kosmos Helper App timer) |
| Power Source | None (board game only) |
| Dimensions (Box) | Approx. 29.5 x 29.5 x 7.5 cm |
| Weight | Approx. 0.9 kg |
| Material | Paper, cardboard, plastic (decoder disks) |
| Cleaning & Maintenance | Wipe gently with a dry cloth; avoid moisture. |
| Safety Warning | Choking hazard - small parts. Not for children under 3 years. |
| Language | English |
| Spare Parts Availability | Contact Thames & Kosmos directly for replacement parts. |
| Warranty | Manufacturer defect; check product packaging for details. |
| Replayability | Single-use only (puzzles and riddles can be solved once). |
Frequently Asked Questions - EXIT: The Sacred Temple (with Jigsaw Puzzles) Thames & Kosmos
User questions about EXIT: The Sacred Temple (with Jigsaw Puzzles) Thames & Kosmos
0 question about this device. Answer the ones you know or ask your own.
Ask a new question about this device
Download the instructions for your Board game in PDF format for free! Find your manual EXIT: The Sacred Temple (with Jigsaw Puzzles) - Thames & Kosmos and take your electronic device back in hand. On this page are published all the documents necessary for the use of your device. EXIT: The Sacred Temple (with Jigsaw Puzzles) by Thames & Kosmos.
USER MANUAL EXIT: The Sacred Temple (with Jigsaw Puzzles) Thames & Kosmos
Download the free Kosmos Helper App!
The Sacred Temple
For 1-4 players ages 10 and up
CAUTION: Do not yet take a closer look at the playing materials (puzzles, riddle documents, etc.)! First, read the rulebook together out loud and carefully follow all its instructions.
What's the game about?
Late again! You race through the corridors of the old university building. Your lecture about Indonesian temple sites was a huge success! But the professor will not be happy about your tardiness. Without knocking, you burst into the Archeology Department office where you are confronted with a chaotic scene: books strewn all over the place, drawers pulled out, chairs knocked over. And no trace of the professor. A glance at the open safe confirms your fears: The rare old book about the hidden temple has been stolen. Just as you are reaching for the phone, you see a note: “Don’t try looking for me!” What’s going on?!
In a panic, you start looking for clues. Everything points to treasure hunters. They seem to have been looking specifically for the historic book. Just then, you find four odd disks wrapped in parchment paper, with a note under them showing coordinates written in your professor's handwriting! In a flash, you decide that you need to get to the hidden temple before the treasure hunters can find it.
You take a chartered flight to a small volcanic island in the middle of the Indian Ocean. From there, the coordinates lead you to a mysterious clearing deep in the jungle. But the treasure hunters have beaten you to it. In the grass, you find a briefcase secured with a purple lock ...
Read through the rulebook carefully, assemble the decoder disk, and take the parchment paper along with the puzzle bag holding the pieces with grayish-blue backs with no pattern. Then start the timer and assemble the pieces to reveal the mysterious clearing. Only if you manage to work together to solve all of the codes in time will you be able to save the professor and stop the treasure hunters!
Game materials
4 Puzzle bags with 88 pieces each
12 Riddle documents
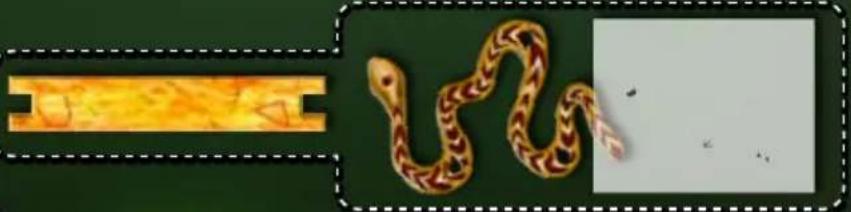
3 Strange items
4 Decoder disks of different sizes
1 Two-piece snap fastener
1 Rulebook — with help and solution section
Each puzzle has a unique back design.

natural_image
Sequence of puzzle pieces showing progressive folding and rearrangement (no text or symbols)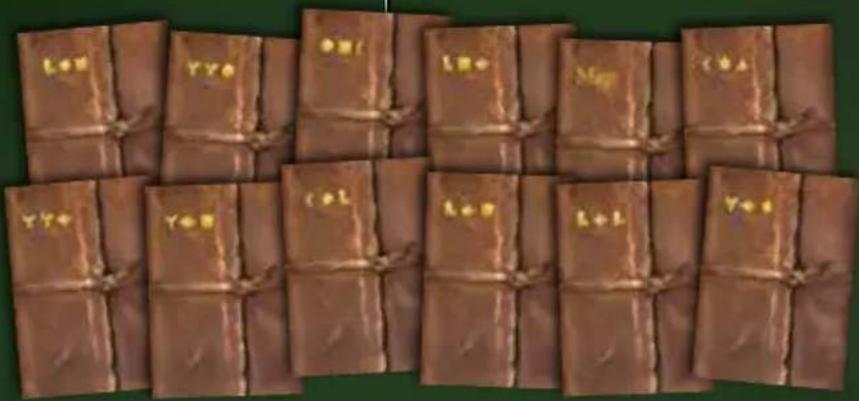
natural_image
Illustration of a coiled snake on a green surface, with no visible text or symbols
natural_image
Circular diagram with a central blue circle and surrounding colored square tiles (no text or symbols)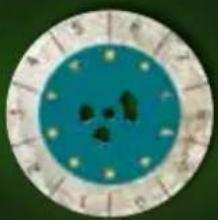
natural_image
Circular diagram with concentric rings and a central blue circle, no text or symbols present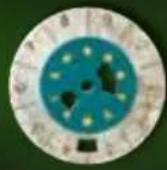
Additionally required game materials
In addition, you will need writing implements (ideally a ball-point pen and a pencil), a pair of scissors, and possibly a sheet of paper for notes. You will also need a watch — ideally, a stopwatch. As an alternative, you can use the digital timer with the atmospheric soundtrack. Just select the game in the Kosmos Helper App and click on the hourglass.
Game setup
Arrange the 12 riddle documents fanned out along the edge of the table with the symbols visible on their front sides. Don't forget: Be sure not to look inside the documents yet!
You can leave the four puzzle bags inside the box for now.
Carefully remove the four decoder disks and the two strange items from the die-cut cardboard. If necessary, use a sharp object to clear the four holes in the snake item. Set the snake aside at the edge of the table along with the other two strange items. You will not need these materials until later in the game.
Assemble the decoder disk
Take the small two-piece snap fastener and insert the part with the depression into the small center hole of the largest decoder disk from behind (1).
Then, in order of size starting with the second-largest disk, place the three other disks on the fastener (2). The numbers on the outer ring of the three disks have to be facing up. Finally, secure the white fastener with the top portion. Press the two parts tightly together until the top one snaps into the depression and you hear a click.
Check to make sure that your decoder disk looks like the two illustrations to the right. Are the wheels easy to turn? If so, set the disk within easy reach at the edge of the table. If not, check to make sure that you assembled the two parts of the snap fastener properly. The two parts should not come apart easily.
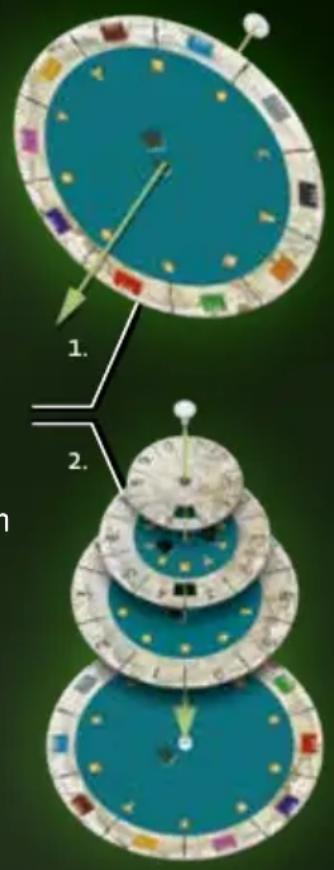
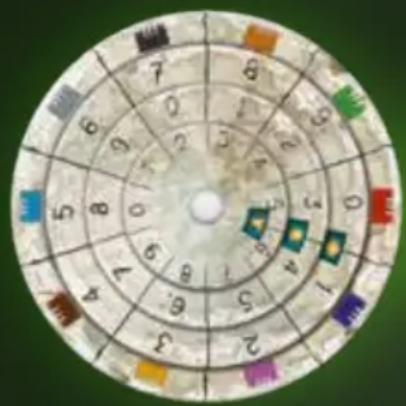
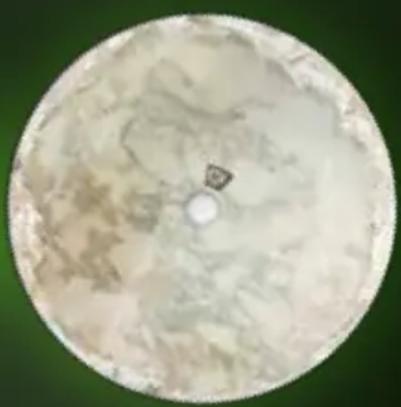
Front side Back side
natural_image
Circular object with a small central square and faint, textured surface against a dark green background (no visible text or symbols)Where is the game board?
This game has no game board! The four jigsaw puzzles, which you will find and assemble one by one during the game, will show you what you need to find in the game and what the locations look like.
You can tell the four puzzles apart by looking at their backs. There are four different patterns:
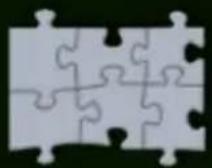
one puzzle with grayish-blue back and no pattern
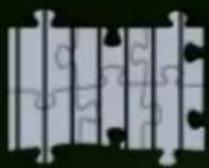
one puzzle with
striped back
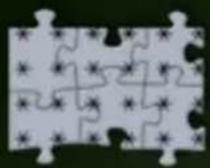
one puzzle with stars on the back
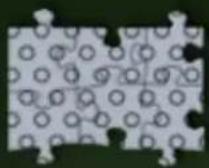
one puzzle with circles on the back
During the course of the game, you will be told exactly which puzzle bag to take from the box and when.
Example: At the start of the game, all you have available to you are the puzzle bag containing pieces with a grayish-blue backs with no pattern, the decoder disk, and the parchment paper.
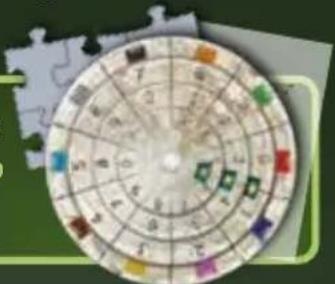
During the game, riddle documents will be added. You are allowed to take and look at a riddle document whenever you have entered a code in the decoder disk and you have been directed to the corresponding riddle document by the symbols that appear there. Sometimes you will be explicitly directed to a riddle document by something you read. When that happens, you are also allowed to take the corresponding riddle document from the edge of the table.
The strange items may likewise only be used when you are explicitly told that you have found them. Until then, leave them at the edge of the table!
Course of play
Your goal is to work together as quickly as possible to find the professor and protect the secret of the temple from the treasure hunters. That would definitely be easier if there weren't riddles all over the place that you have to solve in order to make any progress!
IMPORTANT: To solve the riddles, you can write on, fold, or cut the materials ... All of this is allowed, and sometimes even required. (You can only play the game once — after which you will know all the riddles, and won't need the game materials any longer!)
Solve the riddles in their proper order as you work through the various locations to find the hidden temple. Over and over, you will come across locked objects and doors. They are barred with small colored locks, which can only be opened with a three-digit code.
If you see a riddle, take a close look at the material that you have been told you are allowed to use. The materials may include strange items, riddle documents, individual puzzle pieces, the rulebook and the box. Put your heads together to try to figure out how to solve the riddle and find the correct three-digit code. You will then enter this code into the decoder disk.
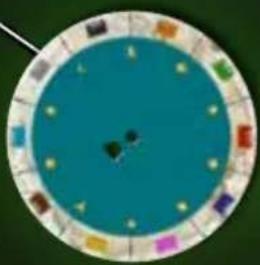
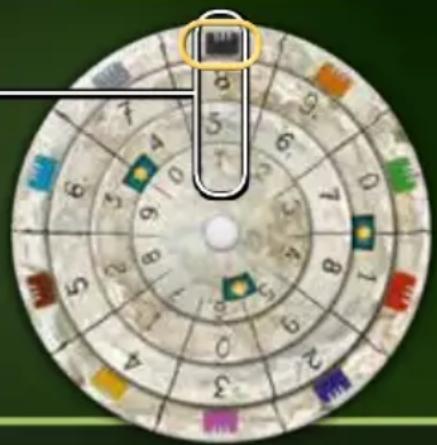
On the outer edge of the disk, there are ten different-colored locks pictured. Each lock stands for one of the codes you are looking for. Pay close attention to which lock is shown on the objects or doors in the puzzle picture! Enter the three-digit number code under this lock on the disk — starting from the outside edge and proceeding toward the center. Then flip the decoder disk over. You will see a picture in the viewing window of the largest wheel on the disk. This will tell you whether the code might be correct.
Example:
You have calculated the code 851 ____ as the solution to the riddle with the black lock. Enter this combination of numbers under the black lock on the decoder disk — starting from the outside and proceeding toward the center. Then, flip the decoder disk over onto its back to check if the code is correct.

natural_image
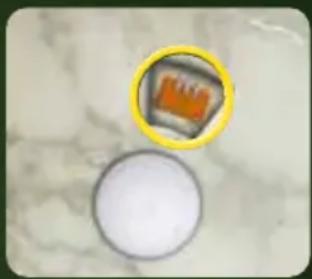
Close-up of a small white object with orange and gray markings, placed on a textured surface (no text or symbols visible)→ Is the code incorrect?
If so, an ✗ or a lock of a DIFFERENT color will appear in the little viewing window on the back side of the decoder disk. Check the lock color and the code on the front side. If that doesn't help, take another look at the riddle and try to come up with a different code.
natural_image
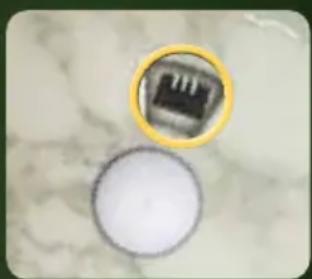
Close-up of a small electronic component with a highlighted circular area, placed on a textured surface (no visible text or symbols)→ Is the code possibly correct?
If so, in the viewing window on the back side of the decoder disk you will see a lock in the SAME color as the lock that you are trying to open.
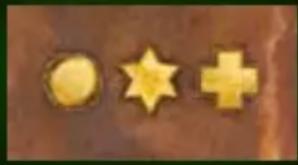
Turn the decoder disk back to its front side. In the three viewing windows on the three smaller wheels of the disk, you will see three symbols. When read from outside in, they will form a very specific sequence. Look for this exact combination of symbols on the riddle documents.
natural_image
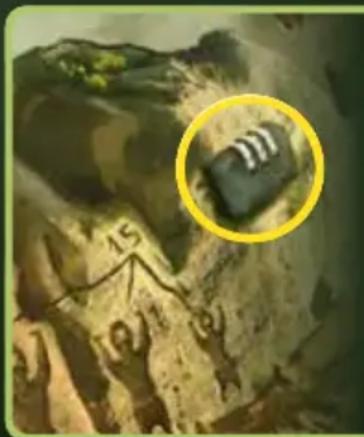
Illustration of a rocky terrain with a circular inset showing a dark object, no visible text or symbolsExample:
You want to open the black lock on the rock. After entering the code under the black lock on the decoder disk and seeing the black lock through the viewing window in the back, you will get t the symbols 🙏⭐⭐ on the front side. Now look for the riddle document with this sequence of symbols.
natural_image
Three yellow star icons on a brown background: a hexagon, a star, and a plus sign (no text or symbols)→ Is the code really correct?
If you find a riddle document with the symbol sequence shown on the decoder disk, the number code is correct. Immediately take the riddle document and look at it. It will tell you how to continue.
→ Is the code actually incorrect?
If you cannot find a riddle document with a matching symbol sequence, re-check the number code sequence and verify that the lock color entered in the decoder disk matches that of the lock to be opened, and also re-check the symbol sequence appearing on the front side against what you see on the riddle documents. If the code is indeed still wrong, take another close look at the riddle to see if you can come up with a different code.

IMPORTANT: You must solve the riddles in order! In other words: You can only take the next riddle document or take the next puzzle bag if you have cracked the previous code or the game tells you that you are allowed to proceed!
Need help?
The game can provide you with assistance if you get stuck. For each code, there are three clues in the corresponding lock color.
Each “1st clue” will provide some useful initial assistance and will tell you what you will need or what you can start doing to find a solution to the corresponding riddle.
The “2nd clue” will give you more concrete assistance in finding a solution to the corresponding riddle.
The “solution” will tell you the approach to take in solving the riddle along with the correct code or the right symbol sequence for the next riddle document.
The green help section starts on the back of this rulebook. Page 1 of that section tells you where you can find which clues. Only examine the clue that you need for the riddle you are trying to solve. You will find a brief set of instructions on page 2 of the help section. (You may want to read this before beginning).
Don't be shy about using the clues if you are stuck with a riddle. If you have used a clue that provided you with NEW information or the solution, enter an X in the box at the bottom right. At the end of the game, count up all the marked clues and solutions, which will contribute to the assessment.
When does the game end?
The game ends when you have solved the last riddle and found the treasure of the hidden temple. A riddle document will tell you this.
Assessment
Assembling the four puzzles and solving all the riddles is a great achievement! If you also want to assess how well you did with the puzzles and riddles, you can take a look at the table below.
When calculating the number of clues used, use the checked boxes in the help section. Only count the ones that provided you with NEW information or solutions!
| No 1-2 3-5 6-10 >10 Clues | Clues | Clues | |||
| < 100 Min. | 10 Stars | 9 Stars | 8 Stars | 6 Stars | 5 Stars |
| < 120 Min. | 9 Stars | 8 Stars | 7 Stars | 5 Stars | 4 Stars |
| < 150 Min. | 8 Stars | 7 Stars | 6 Stars | 4 Stars | 3 Stars |
| < 180 Min. | 7 Stars | 6 Stars | 5 Stars | 3 Stars | 2 Stars |
| ≥ 180 Min. | 6 Stars | 5 Stars | 4 Stars | 2 Stars | 1 Star |
The game begins.
What are you waiting for? You might want to re-read the story on page 1 again to get in the mood. At the start, you will have the decoder disk, the parchment paper, and puzzle bag with the grayish-blue pieces with no design on the back available to you. Start the stopwatch or the timer and start assembling the puzzle pieces into the first picture (the clearing in the jungle).
We hope you have a lot of fun with EXIT: The Sacred Temple!
natural_image
Jigsaw puzzle piece with five pieces arranged in a 2x2 grid (no text or symbols)The authors and Kosmos thank all the test players and rule reviewers.

natural_image
Group photo of three people smiling, no visible text or symbolsThe Authors:
Inka & Markus Brand live with their children Lukas and Emely in Gummersbach, Germany. They have published many children's and family games together and won numerous prizes. Of course, they are avid riddle and escape game fans.
Editing and product management: Katja Ermitsch, Christin Ganasinski
Technical development: Monika Schall, Deryl Tjahja Illustrations: Maximilian Schiller
Cover illustration: Martin Hoffmann
Title graphics and graphic design: Michaela Kienle
EXIT concept: Ralph Querfurth, Sandra Dochtermann
English text editing: Ed Gartin, Ted McGuire
© 2020 Franckh-Kosmos Verlags-GmbH & Co. KG
Pfizerstr. 5–7, 70184 Stuttgart
Tel.: +49 711 2191-0,
Fax: +49 711 2191-199
info@kosmos.de, kosmos.de
Printed in Germany
© 2020 Thames & Kosmos, LLC, Providence, RI, USA
Thames & Kosmos® is a registered
trademark of Thames & Kosmos, LLC. All rights reserved.
Distributed in North America by
Thames & Kosmos, LLC.
Providence, RI 02903.
Phone: 800-587-2872
Web: thamesandkosmos.com
Distributed in United Kingdom by Thames & Kosmos UK LP.
Cranbrook, Kent TN17 3HE.
Phone: 01580 713000
Web: www.thamesandkosmos.co.uk
692877-02-221020

This game is recyclable. Separate the plastic from the paper/cardboard.

ATTENTION! Do not turn the page!
On the back, you will find the certificate and the end of the help and solution section.
The scientific expedition members



natural_image
Blank white image with faint horizontal lines and no visible text, symbols, or markings.
natural_image
Blank white image with no visible text, symbols, or discernible subjecthave on
in

natural_image
Blank white image with no visible text, symbols, or discernible subjectfound the hidden temple and saved the professor from the treasure hunters. Congratulations!
To do it, they required and
Minutes Seconds
They used a total of clues.
This earned them stars in the asse
The coolest riddle was

The trickiest riddle was

If the players decided to save the old clay jug in spite of the temple's collapse, they can mount their group photo here from riddle document 12!
- The Sacred Temple
- What's the game about?
- Game materials
- Additionally required game materials
- Game setup
- Assemble the decoder disk
- Where is the game board?
- Course of play
- Example:
- → Is the code incorrect?
- → Is the code possibly correct?
- → Is the code really correct?
- → Is the code actually incorrect?
- Need help?
- When does the game end?
- Assessment
- The game begins.
- The Authors:
- ATTENTION! Do not turn the page!
Brand : Thames & Kosmos
Model : EXIT: The Sacred Temple (with Jigsaw Puzzles)
Category : Board game