
DMR-EX80S - DVD Recorder PANASONIC - Free user manual and instructions
Find the device manual for free DMR-EX80S PANASONIC in PDF.


| Product Type | DVD Recorder with HDD |
| Brand | Panasonic |
| Model | DMR-EX80S |
| HDD Capacity | 80 GB |
| Recording Media | DVD-RAM, DVD-R, DVD-RW, DVD+R, DVD+RW |
| Playback Media | DVD-Video, DVD-RAM, DVD-R, DVD-RW, DVD+R, DVD+RW, CD, CD-R, CD-RW |
| Video Recording Format | MPEG-2 |
| Audio Recording Format | Dolby Digital |
| TV Tuner | Analog (PAL/SECAM) |
| Inputs | Composite video, S-Video, RF antenna, Audio (L/R) |
| Outputs | Composite video, S-Video, Component video, Audio (L/R), RF modulator |
| Remote Control | Yes, supplied |
| Timer Recording | Up to 8 programs |
| Editing Functions | Title editing, chapter editing, playlist |
| Power Supply | AC 220-240 V, 50 Hz |
| Power Consumption | Approx. 25 W (standby: 0.5 W) |
| Dimensions (W x H x D) | 430 x 48 x 249 mm |
| Weight | 3.5 kg |
| Safety | Class I, auto shutdown |
| Cleaning | Use soft dry cloth; no solvents |
| Repairability | Consult qualified service personnel |
Frequently Asked Questions - DMR-EX80S PANASONIC
User questions about DMR-EX80S PANASONIC
0 question about this device. Answer the ones you know or ask your own.
Ask a new question about this device
Download the instructions for your DVD Recorder in PDF format for free! Find your manual DMR-EX80S - PANASONIC and take your electronic device back in hand. On this page are published all the documents necessary for the use of your device. DMR-EX80S by PANASONIC.
USER MANUAL DMR-EX80S PANASONIC
Operating Instructions
DVD Recorder
Model No. DMR-EX80S
EPG
14 days EPG service for Germany and Austria is available through Astra 19.2° East.



HDMI SD


DV3 Trademark of the DVB Digital Video Broadcasting Project (1991 to 1996) Digital Video Broadcasting Declaration of Conformity No. 4673, 28th March 2007
This unit is equipped with a Common Interface. It can receive encrypted and free-to-air DVB-S services.
This unit has the capability for DVB specifications. But future DVB services cannot be guaranteed.
The tuner in this unit is only compatible with digital satellite broadcasting.
Read the operating instructions, the safety precautions, and the information on setting up the unit on page 3 thoroughly before you connect, operate or adjust any settings on the unit.
Contents
Page Page
Safety Precautions 3 JPEG/TIFF playback from CD/DVD-R 38
Playback of MP3 files 38
Included accessories, Inserting batteries 5 Playback of DivX files 39
Remote Control 6-7
Front panel, Display 8 Recording - TV Guide 40-41
Rear panel 9 Connections
Automatic Setup
| Connection with Scart cable | 10 Timer programming via TV Guide | 41 |
| Connection with Audio/Video cable | 11 |
| Connection with S VIDEO cable |
| Connection to COMPONENT VIDEO OUT | 13 |
| Connection with HDMI cable | 14-15 |
| Connection of external units | 16-17 |
| Connection to the front input DV IN or AV3 | 17 |
Edit Profiles
| Automatic Search, Quick Setup | 18 | Timer programming with the television set | 46 |
SD Cards 21
| Common Interface | 20 |
Screen information
| Service List | 22 | Information about High Speed Copy | 48 |
Recording
| Playback | 24-26 |
| Playback | 24 |
| Functions during playback/PAUSE mode | 25 |
| Functions during PAUSE mode | 26 |
| Delayed playback | 26 |
| Simultaneous recording and playback | 26 |
| Changing the Audio channel | 26 |
FUNCTION MENU
| Information about recording | 27 | Editing Chapters 56 |
| Record | 28 |
| Recording of TV programmes | 28 |
| Changing the recording mode 28 |
| Delayed playback during recording | 28 |
| Direct TV recording with Q Link | 28 |
| Specifying a time as the recording duration | 29 |
| Recording programmes in dual channel sound | 29 |
| Finalize | 29 |
| Manual recording from Camcorder or camera | 29 |
DIRECT NAVIGATOR
| Overview | 30 | Settings for Playback recording | 01 |
| Entering Text, Display properties | 31 |
Landscape view, Portrait view 40
| Select the menu DIRECT NAVIGATOR 32 | HDMI Settings | 07 |
| Other | 08, 07 |
| Select the submenu | 32 |
| Change between the views 32 |
| Delete, Sort (HDD) | 32 |
| Edit titles | 33 |
| Editing chapters | 34 |
| Album View | 35-37 |
| Start Slide Show, Slide Show Setting | 35 |
| Add Picture | 35 |
| Create Album, Edit Album | 36 |
| Copy to HDD, Select Folder | 36 |
| Playback pictures of an Album | 37 |
| Rotate picture, Zoom in/Zoom out | 37 |
| Edit a picture of an Album | 37 |
Display according to topic areas/profile 41
Delete - DELETE Navigator 42
| Copy - COPY Navigator | 43 |
Timer Recording 44
| Programming of Timer Recordings | 44 |
Checking or changing Timer Recordings 45
| Timer programming with the television set | 46 |
| Symbols | 46 |
| Timer Recording via external units | 47 |
Advanced Copy 48-53
| Information about High Speed Copy | 48 |
| Copying from DVD-VIDEO with time control | 49 |
| Copying titles and Playlists | 50-51 |
| Edit the copy list | 51 |
| Copying pictures | 52-53 |
Copy All Pictures 53
| Playlists | 54-56 |
| Creating a Playlist | 54 |
| Launching the Playlists menu | 55 |
| Editing Playlists | 55 |
| Editing Chapters 56 |
Flexible Rec - Flexible recording mode (FR) 57
| DV Auto Rec - Automatic recording from DV IN | 57 |
Setup 58-67
| Tuning | 58-60 |
| Satellite Configuration | 59 |
| Add Transponder / Service | 60 |
| Delete Transponder | 60 |
| Disc | 61 |
| Settings for Playback/Recording | 61 |
| Picture | 62 |
| Sound, Display | 63 |
| Connection | 64-65 |
| HDMI Settings | 64 |
| Others | 66-67 |
| System Update | 67 |
HDD/DVD/Card Management 68-69
| Picture and sound settings | 70-71 |
| Recording formats | 72-73 |
| Information about discs 74 |
| Information on the Hard Disk (HDD) | 75 |
| If you need help | 76-80 |
| Glossary | 81 |
| Folder structures | 82 |
| Specifications | 83 |
| Index | last page |
Safety Precautions
Install this device in a horizontal position.
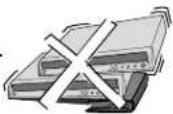
Do not place anything heavy on it.
Keep this away from
high temperatures and avoid changes in temperatures.

Keep away from liquids, humidity and dust.

| DANGER - VISIBLE AND INVISIBLE LASER RADIATION WHEN OPEN. AVOID DIRECT EXPOSURE TO BEAM.FIA 21 CFR/Class III | |
| 注蹤-打开时有可见及不可見激光辐射,避免光束照射。 | |
| 注蹤-ここを働くと可视及び不可將レーザが写出きます。ピームを取り扱り、触れたりないでください。 | |
| CAUTION-CLASS 38 VISIBLE AND INVISIBLE LASER RADIATION WHEN OPEN.AVOID EXPOSURE TO THE BEAM.ECK0295-1/2+Class 38 | |
| ATTENTION-RAYONNEMENT LASER VISIBLE ET INVISIBLE, CLASSE 38, EN CAS D'AVOCUTARE, ESTERN UNI DE POSITION AU FASCEAU. | |
| FORSIGTIGN-SYNIJID ASSEMBLER LASER RADIATION ASSE, NAR LAGET ER ABENT, UNDGA AT BLIVE USDAF FOR STRALEN. | |
| VARO-AVATAIESSA OLET ALTINA LUOKAN 39 NAYVÄJA NA KNYMATONTA LASERSATELYA, VARO ATLISTUMISTA SATELLLE. | |
| VARNING-KLASS 38 SYNJG OCH OSYNJIS LASERSTRALUNG NAR DENNA DEL AR OPPNAD, UNDIVK EXPONERING FOR STRALEN. | |
| VORSICHT-SICHTBARE UND UNSCHBARE LASERSTHA-LUNG KLASSE 38, WENN ABDECKING GEODEMET, NICHT DEM STRAH, AUSSETZEN. | |
| CAUTION-VISIBLE AND INVISIBLE LASER RADIATION WHEN OPEN.AVOID EXPOSURE TO THE BEAM. | |
| ATTENTION-RAYONNEMENT LASER VIBILE ET INVISIBLE EN CAS D'AVUERTURE, EXPOSITION DANGEREUSE AU FASCEAU. | |
| ADVARSEL-SYNJG OG USYNJIS LASERSTRALING VED ABNING, UNDGA VDS-ETTELIE FOR STRALING. | |
| VARO!-AVATAIESSA OLET ALTINA NAYVÄJA NA KNYMATONTA LASERSATELYA, ALASKATTE, SATESSZEN. | |
| VARNING-SYNJG OCH OSYNJIS LASERSTRALING NAR DENNA DEL AR OPPNAD, BETRAKTA EJ STRALEN. | |
| VORSICHT-SICHTBARE UND UNSCHBARE LASERSTRALUNG, WENN ABDECKING GEODEMET, NICHT DEM STRAH, AUSSETZEN. | |
| ADVARSEL-SYNJG OG USYNJIS LASERSTRALING NAR DEXSEL APNES, UNDGA EXPONERING FOR STRALEN.VOL 1.1467 |
Inside of product

Back of product, page 9.

If you see this symbol, read page 9.
The model and serial number of this product can be found on the back of the unit.
Please note them for future reference. Model No. Serial No.
Voltage
Only use power sources complying with the specifications for this device.
AC mains lead protection
Ensure the AC mains lead is connected correctly and not damaged. Poor connection and lead damage can cause fire or electric shock.
Service
Never attempt to repair this unit by yourself. If a problem occurs that is not described in these operating instructions, disconnect the power supply and contact your dealer or an authorised after sales service centre.
The socket outlet shall be installed near the equipment and easily accessible.
The mains plug of the power supply cord shall remain readily operable.
To completely disconnect this apparatus from the AC Mains, disconnect the power supply cord plug from AC receptacle.
This product may receive radio interference caused by mobile telephones during use. If such interference is apparent, please increase separation between the product and the mobile telephone.
WARNING:
TO REDUCE THE RISK OF FIRE, ELECTRIC SHOCK OR PRODUCT DAMAGE,
- DO NOT EXPOSE THIS APPARATUS TO RAIN, MOISTURE, DRIPPING OR SPLASHING AND THAT NO OBJECTS FILLED WITH LIQUIDS, SUCH AS VASES, SHALL BE PLACED ON THE APPARATUS. • USE ONLY THE RECOMMENDED ACCESSORIES.
- DO NOT REMOVE THE COVER (OR BACK); THERE ARE NO USER SERVICEABLE PARTS INSIDE. REFER SERVICING TO QUALIFIED SERVICE PERSONNEL.
CAUTION!
- DO NOT INSTALL OR PLACE THIS UNIT IN A BOOKCASE, BUILT-IN CABINET OR IN ANOTHER CONFINED SPACE. ENSURE THE UNIT IS WELL VENTILATED. TO PREVENT RISK OF ELECTRIC SHOCK OR FIRE HAZARD DUE TO OVERHEATING, ENSURE THAT CURTAINS AND ANY OTHER MATERIALS DO NOT OBSTRUCT THE VENTILATION VENTS.
- DO NOT OBSTRUCT THE UNIT'S VENTILATION OPENINGS WITH NEWSPAPERS, TABLECLOTHS, CURTAINS, AND SIMILAR ITEMS.
- DO NOT PLACE SOURCES OF NAKED FLAMES, SUCH AS LIGHTED CANDLES, ON THE UNIT. • DISPOSE OF BATTERIES IN AN ENVIRONMENTALLY FRIENDLY MANNER.
CAUTION!
THIS PRODUCT UTILIZES A LASER. USE OF CONTROLS OR ADJUSTMENTS OR PERFORMANCE OF PROCEDURES OTHER THAN THOSE SPECIFIED HEREIN MAY RESULT IN HAZARDOUS RADIATION EXPOSURE. DO NOT OPEN COVERS AND DO NOT REPAIR YOURSELF. REFER SERVICING TO QUALIFIED PERSONNEL.
THIS UNIT IS INTENDED FOR USE IN MODERATE CLIMATES.
CAUTION
Danger of explosion if battery is incorrectly replaced. Replace only with the same or equivalent type recommended by the manufacturer. Dispose of used batteries according to the manufacturer's instructions.
Information about the unit
Dear customer
Thank you for your trust and your decision to purchase this top-quality device. Panasonic is one of the leading manufacturers of entertainment electronics devices. We are sure that you will be completely satisfied with this device
Matsushita Electric Industrial Co., Ltd.
http://www.panasonic-europe.com


DVB-S Tuner
This unit is a DVD Recorder with an integrated tuner for receiving digital TV and radio stations broadcast via satellite. The DVD Recorder must be connected to a functional satellite system. Programmes with 5.1 Scannond Seuroproduced in dual-channel sound. Programmes in High Definition cannot be received and recorded.
Common Interface
Slot for a Conditional Access (CA) module for the reception of encrypted stations. For reception of ORF (Austria), you need a corresponding CA module with Smart Card.
TV Guide
The TV Guide gives you a preview of the programmes from up to 50 stations for the next 14 days. It uses an electronic programme guide (EPG) which is broadcast specially for Panasonic units. You can use the data for every programme for Timer programming.
VIERA Link
Permits simple operation of the Panasonic products with VIERA Link HDAVI Control. VIERA Link is a new, characteristic name for the HDAVI Control function. Not all 2007 VIERA Link features are compatible with all 2006 VIERA Link products.

DivX-compatible
DivX files from CD-R/CD-RW and DVD-R can be played back.

SD-drive
This unit supports SD Memory Card, miniSD Card and Multimedia Card.
HDMI (High Definition Multimedia Interface)
Digital audio and video signals are transmitted without data compression in high quality with only one cable. No loss of quality during data transmission.
DV-interface
You can connect your digital camcorder directly to this unit via the DV IN connection. This way it's easy to copy your movies.
Disc formats
This unit supports the following formats
RAM, DVD-V, VCD, CD-R, +R, -R, +RW, -RW(V), -RW(VR), +R DL
Data in the format DivX, MP3 and JPEG/TIFF can be played back from a finalized CD-R, CD-RW or DVD-R.
Pages 72/73 contain a detailed description of the playback and recording format. Discs which cannot be played are on page 73.
The described functions may possibly only be available to a limited extent or not at all, depending on the format being used and the programme structure of the disc predefined by the manufacturer.

DVD-VIDEO with the regional code 2 or ALL can be played with this unit. The code is listed on the backside of the unit. England and Continental Europe: 2
Pursuant to at the directive 2004/108/EC, article 9 (2)
Panasonic Testing Centre
Panasonic Marketing Europe GmbH.
Winsbergring 15, 22525 Hamburg, F.R. Germany
Operating instructions
A DVD-RAM has been used to produce these operating instructions in order to show you all the functions of the unit. Page references are made using the symbol → and the page number.
Information about the unit

Included accessories
| Remote ControlN2QAYB000179 | AC Mains LerJA0043-1C 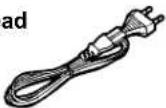 |
BatteriesAA, UM3 or R6  | Audio/Video CableK2KA6B/ |
| Operating Instructions | Guarantee Card |

R6/LR6, AA
Dispose of batteries, packaging material and the unit according to statutory regulations.
They must not be thrown into the household refuse.

Inserting batteries
The batteries last for about a year, depending on how often you use the remote control unit.
- Do not mix old with new batteries, or batteries of different types.
- Only use batteries without any harmful substances (lead, cadmium, mercury).
- Do not use rechargeable type batteries.
- Remove the batteries if the remote control unit will remain unused for longer periods of time.
- Do not heat or expose to flame.
- Do not leave batteries in an automobile exposed to direct sunlight for a long period of time with doors and windows closed.
- Immediately remove used up batteries and replace with batteries of type AA, UM3 or R6.
- Be sure to put in the batteries the right way round + and - . Avoid short circuit.
License information
This product incorporates copyright protection technology that is protected by U.S. patents and other intellectual property rights. Use of this copyright protection technology must be authorized by Macrovision, and is intended for home and other limited consumer uses only unless otherwise authorized by Macrovision. Reverse engineering or disassembly is prohibited.

Dolby Digital
Method of encoding digital signals. The signals are very much compressed to enable recordings of large volumes of data.
Manufactured under license from Dolby Laboratories.
Dolby and the double-D symbol are trademarks of Dolby Laboratories.

DTS (Digital Theater Systems)
Sound system used in cinemas or movie theaters all over the world.
"DTS" and "DTS 2.0 + Digital Care™ are trademarks of DTS, Inc.
MP3 (MPEG Audio Layer 3) An audio compression method that compresses audio to approximately one tenth of its size without any considerable loss of audio quality. MPEG Layer-3 audio decoding technology licensed from Fraunhofer IIS and Thomson Multimedia.

Official DivX Certified™ product.
Plays DivX® 5, DivX® 4, DivX® 3 and DivX VOD video content
(in compliance with DivX Certified technical requirements). DivX, DivX Certified, and associated logos are trademarks of DivX Networks, Inc. and are used under license.

SD logo is a trademark.
miniSD logo is a trademark of SD Card Association.
Portions of this product are protected under copyright law and are provided under license by ARIS/SOLANA/4C.

HDMI, the HDMI logo and High-Definition Multimedia Interface are
trademarks or registered trademarks of HDMI Licensing LLC.

DiSEqC™
EUTELSAT is a trademark of
HDAVI Control™ is a trademark of Matsushita Electric Industrial Co., Ltd.
Remote Control
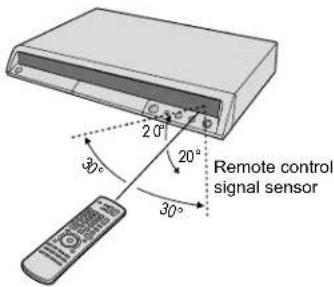

Point the remote control at the unit's sensor. Avoid obstacles in the transmission path. The maximum range of the remote control is 7 m directly in front of the unit. Keep the transmission window and the unit sensor clean.
The procedure can be impaired by direct sunlight or doors of glass cabinets.
Setting up the remote control
If you are using another Panasonic unit at the same location, change the mode of the remote control so that you can operate the units independently of each other.
Set up the remote control for the unit.
- Press FUNCTION MENU
- Select [To Others] with ▲ and confirm with OK.
- Select [Setup] with ▲ and confirm with OK.
- Select [Others] with ▲, then [Remote Control] with ▶, and confirm with OK.
- Select [DVD 1, 2 or 3] with ▲ and confirm with OK.
Apply the selected setting [DVD 1, 2 or 3] to the remote control.
- Press and hold OK and press the appropriate number button 1, 2 or 3 for at least 5 seconds.
- Exit the menu with RETURN.
If the remote control setting does not match that of the unit, DVD 1, 2 or 3 appears on the unit's display.
- Press and hold OK and at the same time press the appropriate number button 1, 2 or 3 for at least 5 seconds.
If you want to operate two units independently of each other using the same remote control, then change the remote control setting.
Child lock
You can lock the buttons of the unit and the remote control.
- Press and hold RETURN and OK until [X HOLD] appears in the display. The unit is now locked.
- To unlock the child lock, repeat the procedure until [X HOLD] disappears.
Operating a television set
Change the remote control code to operate your television set.
- Press and hold the TV on and off switch button.
- Enter the two-digit code for your television set.
| Brand | Code | Brand | Code | Brand | Code | Brand | Code |
| Panasonic | 01/02/03/04 | FUJITSU | 53 | METZ | 05/28 | SALORA | 26 |
| AIWA | 35 | FUNAI | 63/67 | MITSUBISHI | 05/19/20/47 | SAMSUNG | 32/42/43/65/68 |
| AKAI | 27/30 | GOLDSTAR | 05/50/51 | MIVAR | 24 | SANSUI 05 | |
| BEJING | 33 | GOODMANS | 05 | NEC | 36 | SANYO | 21/54/55/56 |
| BEKO | 05/71/72/73/74 | GRADIENTE | 36 | NOBLEX | 33 | SCHNEIDER | 05/29/30 |
| BENQ | 58/59 | GRUNDIG | 09 | NOKIA 25/26/27/60/61 | SEG | 05/69/75/76/77/78 | |
| BP | 09 | HIKONA | 52 | NORDMENDE | 10 | SELECO | 05/25 |
| BRANDT | 10/15 | HITACHI 05/22/23/40/41 | OLEVIA | 45 | SHARP | 18 | |
| BUSH | 05 | INNO HIT 05 | ONWA | 30/39/70 | SIEMENS | 09 | |
| CENTREX | 66 | IRRADIO | 30 | ORION | 05 | SINUDYNE | 05 |
| CHANGHONG | 69 | ITT | 25 | PEONY | 49/69 | SONY | 08 |
| CURTIS | 05 | JINGXING | 49 | PHILCO | 41/48/64 | TCL | 31/33/66/67/69 |
| DAEWOO | 64/65 | JVC | 17/30/39/70 | PHILIPS | 05/06/46 | TELEFUNKEN | 10/11/12/13/14 |
| DESMET | 05 | KDS | 52 | PHONOLA | 05 | TEVION | 52 |
| DUAL | 05 | KOLIN | 45 | PIONEER | 37/38 | TEX ONDA 52 | |
| ELEMIS 05 | KONKA | 62 | PROVIEW | 52 | THOMSON | 10/15/44 | |
| FERGUSON | 10/34 | LG | 05/50/51 | PYE | 05 | TOSHIBA | 16/57 |
| FINLUX | 61 | LOEWE | 07/46 | RADIOLA | 05 | WHITE WESTINGHOUSE 05 | |
| FISHER | 21 | MAG | 52 | SABA | 10 | YAMAHA | 18/41 |
Some television models of the brands listed above (e.g. older Panasonic units) cannot be operated using the remote control.
Switching to AV input on your television
- Press AV.
Switches between TV reception and AV input each time the button is pressed.
Remote Control
The buttons PLAY ▶, GUIDE, DIRECT NAVIGATOR and PROG/CHECK switch the unit on out of the standby mode.

| Red | ChangeView →32Profiles →19TV Guide →40Service List →22 | Green | ChangeView →32Profiles →19TV Guide →40 | CREATE CHAPTERYellow | Create a chapter for the recording 25Profiles 19 →TV Guide 40 →Service List 22→ | MANUAL SKIPBlue | Skip forwards 30seconds 25 →Profiles 19 →TV Guide 40 →Service List 22→ |
| REC | Record 28 → | REC MODE | Recording modeXP, SP, LP, EP →28 | EXT LINK | Timer recording →47 with external recording control | DIRECT TV REC | Direct TV recording on DVD/HDD →28 |
| AUDIO | Select audio channel or soundtrack 26 | F Rec | Flexible Recording 57→ | DISPLAY | Picture and sound settings →70 | TIME SLIP | Time span for skipping playback →25 |





Front panel
1 Standby/on switch0/1Press to switch the unit from on to standby mode or vice versa. In standby mode, the unit is still consuming a small amount of power. Switching this unit into standby mode does not disconnect it from the mains. Standby/on switch0/1Press to switch the unit from on to standby mode or vice versa. In standby mode, the unit is still consuming a small amount of power. Switching this unit into standby mode does not disconnect it from the mains. | 2DV input | 3S VIDEO input AV3 | |
4 AV3 input terminal AV3 input terminal | 5EXT LINKRecording with external recording control. | 6CHChannel select button | 7▲OPEN/CLOSEOpen and close the disc tray. |
8 DRIVE SELECTDrive select HDD/DVD/SD DRIVE SELECTDrive select HDD/DVD/SD | 9■ STOP | 10x1.3▶PlaybackPlayback x1.3 Quick View HDD RAM | 11REC●REC Recording |
Display
| HDDDVDSD | The selected drive is being displayed. | |
| D | Digital channel | EXT-L External-Link: A Timer Recording is being made from an external unit. |
| Current time, recording/playback counter, various messages. | XP, SPLP, EP Recording modeAll on: flexible recording mode → 57 | |
| REC | The selected drive is recording.Flashes shortly before a Timer Recording starts. | Shows Timer standby or Timer Recording. |
| PLAY | The selected drive is playing. | SD The inserted medium is being shown. |
Other messages
PLEASE WAIT Please wait.
DVD 1, 2, 3 Wrong remote control code.
SETUP You are in the Setup menu.
READ Disc is being read.
No READ Disc cannot be read.
FINAL DVD is being finalized.
No DISC No disc has been inserted.
PROTECT Disc is write-protected.
RETURN Cancellation of a function.
OFF0:30 The recording time is set to 30 minutes.
REPEAT Repeat playback is on.
START A function (copying) begins.
COPY Copying is taking place.
GUIDE Loading data for the TV Guide.
SLIDE Slideshow is running.
99PER 99% - copying is nearly finished.
STOP A function has been stopped (copying).
PROG FULL All 32 timer programme positions are full.
UNSUPPORT Disc format is not supported.
UNFORMAT Disc is unformatted.
SLEEP The hard disk is in the SLEEP mode.
SW-DL Software download.
X HOLD Child lock is active.
No FIN Finalization not possible during recording.
HDMI HDMI unit is connected.
Error messages page 76
Rear panel

| 1 | LNB IN = LNB input | 2 | LNB OUT = LNB loop-through output |
| 3 | COMPONENT VIDEO OUT (Progressive/Interlace)Y = Luminance signal (luminance),PB= Chrominance signal (colour difference),PR= Chrominance signal (colour difference) | 4 | AV1 (TV) = 21-pin Scart socketTV connection |
| 5 | AV2 (EXT) = 21-pin Scart socketExternal unit connection |  | Common InterfaceSlot for Conditional Access module |
| 7 | OUT = AUDIO output, right/left channelAV4 IN = AUDIO input, right/left channel | 8 | VIDEO OUT = VIDEO outputVIDEO AV4 IN = VIDEO input |
| 9 | S VIDEO OUT = S VIDEO outputS VIDEO AV4 IN = S VIDEO input | 10 | OPTICAL = Digital audio output |
| 11 | HDMI AV OUT = Digital audio video output | 12 | AC IN~ = Power supplyConnection for the AC mains lead. |
For a conventional tube television, we recommend using the Scart terminal.
You will obtain a high-quality RGB video picture with an RGB compatible television.
If you want to use a Progressive-capable LCD/plasma television or PCD projector, connect it to COMPONENT VIDEO OUT to get a high quality Progressive video picture.
-If you see this symbol-
Information on Disposal for Users of Waste Electrical & Electronic Equipment (private households)

This symbol on the products and/or accompanying documents means that used electrical and electronic products should not be mixed with general household waste.
For proper treatment, recovery and recycling, please take these products to designated collection points, where they will be accepted on a free of charge basis. Alternatively, in some countries you may be able to return your products to your local retailer upon the purchase of an equivalent new product. Disposing of this product correctly will help to save valuable resources and prevent any potential negative effects on human health and the environment which could otherwise arise from inappropriate waste handling.
Please contact your local authority for further details of your nearest designated collection point. Penalties may be applicable for incorrect disposal of this waste, in accordance with national legislation.
For business users in the European Union
If you wish to discard electrical and electronic equipment, please contact your dealer or supplier for further information.
Information on Disposal in other Countries outside the European Union
This symbol is only valid in the European Union.
If you wish to discard this product, please contact your local authorities or dealer and ask for the correct method of disposal.
Connections
Connection with Scart cable

Before connection, turn off all equipment and read the appropriate operating instructions.
Select one of the described connection types A-E.
For this optimum connection type, you will need a fully wired 21-pin Scart cable (not provided).
1 Connect the satellite dish to LNB IN of the DVD Recorder. 2 Connect the AV1(TV) terminal (21-pin Scart socket) of the DVD Recorder to the Scart input of the television. 3 Connect the DVD Recorder and the television to the power supply system.
After completing the above connections, the DVD Recorder proceeds with the Automatic Setup. → 18
Conditional Access module: The size of the Scart terminal prevents the Conditional Access module from being inserted in the slot afterwards. Insert the module before completing the above connections. → 20

For TV sets supporting the Q Link

Direct TV Recording
TV/DVD automatic switch on: Both units are automatically switched on with PLAY, DIRECT NAVIGATOR, GUIDE or PROG/CHECK.
If your TV set is in standby mode, it is switched on automatically with FUNCTION MENU, PLAY or on inserting a disc (not with DVD-RAM, DVD-R, DVD-RW (DVD-Video format) and +R).
DVD automatic switch off: If you switch your TV set off, the DVD Recorder will also be switched off if it is in the STOP mode.
You can also program Timer Recordings using your TV set. → 46
Connections
Connection with Audio/Video cable

Before connection, turn off all equipment and read the appropriate operating instructions.
You can use this frequently used standard connection with the provided accessories.
1 Connect the satellite dish to LNB IN of the DVD Recorder. 2 Connect AUDIO OUT (L/R) and VIDEO OUT of the DVD Recorder with the audio/video input of the television. 3 Connect the DVD Recorder and the television to the power supply system.
After completing the above connections, the DVD Recorder proceeds with the Automatic Setup. → 18
![graph TD A["Antenna cable (not provided)"] --> B["1"] B --> C["2"] C --> D["3"] D --> E["AC mains lead"] C --> F["Audio/Video cable"] F --> G["3"] G --> H["AC mains setup (AC 220 V - 240 V, 50 Hz)"] style A fill:#f9f,stroke:#333 style B fill:#ccf,stroke:#333 style C fill:#cfc,stroke:#333 style D fil…](/content/2026/05/1006397/images/8bfe2a4e249725689bceb2571cb1c7a0694f6a1f6258623c0b4b58ca9d4ac05b.jpg)
Connections
Connection with S VIDEO cable

Before connection, turn off all equipment and read the appropriate operating instructions.
Connection with an S VIDEO cable (not supplied) produces a better quality picture than with an audio/video cable, depending on your television set.
1 Connect the satellite dish to LNB IN of the DVD Recorder. 2 Connect the AUDIO OUT (L/R) of the DVD Recorder with the audio input of the television. 3 Connect the S VIDEO OUT of the DVD Recorder with the S VIDEO input of the television. 4 Connect the DVD Recorder and the television to the power supply system.
After completing the above connections, the DVD Recorder proceeds with the Automatic Setup. → 18

Connections
Connection to COMPONENT VIDEO OUT

Before connection, turn off all equipment and read the appropriate operating instructions.
The COMPONENT VIDEO OUT terminal can be used for Interlace or Progressive output and delivers a clearer picture than the S VIDEO OUT terminal. Connections via these terminals produce the colour difference signals (PB/PR) and the brightness signal (Y) separately. Colours can be reproduced true to the original colour.
1 Connect the satellite dish to LNB IN of the DVD Recorder. 2 Connect the COMPONENT VIDEO OUT terminals (Y, PB, PR) of the DVD Recorder with the COMPONENT VIDEO input of the television. 3 Connect the AUDIO OUT (L/R) of the DVD Recorder with the audio input of the television. 4 Connect the DVD Recorder and the television to the power supply system.
After completing the above connections, the DVD Recorder proceeds with the Automatic Setup. → 18
![graph TD A["Monitor"] -->|4 AC mains lead| B["AC main supply (AC 220 V - 240 V, 50 Hz)"] B -->|4 AC mains lead| C["AC main leads"] C -->|4 AC mains lead| D["Back panel DVD Recorder"] D -->|1 Antenna cable (not provided)| E["Antenna cable"] D -->|2 YUV Component cable| F["Component cable"] D -->|3 Au…](/content/2026/05/1006397/images/1aa13078379d9ec1f7aa0d1736e3f7e1e46772057caea7cadb31d9501f3edd57.jpg)
Televisions with LCD or plasma screen
If your TV supports the progressive process, select the setting [Progressive - On] in the Setup menu. → 64
Conventional televisions
With a conventional television, progressive output can cause the picture to flicker, even if the television is progressive-compatible. Select the setting [Progressive - Off]. → 64
Connections
Connection with HDMI cable

Before connection, turn off all equipment and read the appropriate operating instructions.
The HDMI connection can be used only with units that are compatible with HDMI. Digital audio and video signals are transmitted uncompressed in high quality with only one cable.
1. Connect the satellite dish to LNB IN of the DVD Recorder. 2. Connect the HDMI OUT of the DVD Recorder to the HDMI input of the television. 3. Connect the DVD Recorder and the television to the power supply system.
After completing the above connections, the DVD Recorder proceeds with the Automatic Setup. → 18

If your television only supports dual-channel audio, then an audio signal with 3 or more channels is down-converted, with output through 2 audio channels. It is not always possible to down-convert all discs.
For HDCP compatible units with DVI connection (e.g., PC monitor)
Depending on the unit, it is possible that the picture is not perfectly reproduced with a DVI/HDMI adapter. The audio signal is not transmitted in this case.
HDCP (High Bandwidth Digital Content Protection) is a form of copy protection transmitted via HDMI connections and partly via DVI (Digital Visual Interface). The units must be able to decipher the copy protection to permit playback.
Connections
Connection with HDMI cable


DVD Recorder
Connecting to a Panasonic TV (VIERA) with HDAVI Control
HDAVI Control permits linked operation of the DVD Recorder with a Panasonic TV and other HDAVI Control compatible units.
- Connect the DVD Recorder with an HDMI cable to the television.
- Switch the units on.
- On the television, choose the setting for HDAVI Control.
- On the television, choose the input channel for the DVD Recorder. The input channel must be re-selected every time the connections or settings are changed.
- In the Setup menu under HDMI Settings, choose [VIERA Link - On] and [Digital Audio Output - HDMI and Optical].→ 64
Functions with HDAVI Control
Automatic input changeover
- Press PLAY▶, *FUNCTION MENU, GUIDE, DIRECT NAVIGATOR or PROG/CHECK. The TV and other external units are switched over to the DVD Recorder input channel. This takes a time. You may possibly not see the start of the title.
- Press SKIP ◀◀▶ or SLOW/SEARCH ◀◀▶ to go back to the start of the title. *FUNCTION MENU - Only when the DVD Recorder is switched on.
Automatic ON
- Press PLAY▶, *FUNCTION MENU, GUIDE, DIRECT NAVIGATOR or PROG/CHECK. The television and other external units are switched on together with the DVD Recorder, and adjusted to the DVD Recorder input channel. *FUNCTION MENU - Only when the DVD Recorder is switched on.
Automatic OFF
The DVD Recorder and other external units are switched off together with the television. The unit does not switch off during an on-going Timer Recording, a recording with ●REC, the copying function or while finalizing a disc.
Joint use of HDAVI Control and Q Link functions
To use both functions together, you should also connect a 21-pin Scart cable as well as the HDMI cable.
![graph TD A["VIERA Main Menu"] --> B["VIERA Link"] B --> C["VIERA Link Menu"] C --> D["DVD Recorder"] D --> E["FUNCTION MENU"] E --> F["Playback"] E --> G["Recording"] E --> H["Delete"] E --> I["Copy"] E --> J["To Others"] E --> K["OK"] E --> L["RETURN"]](/content/2026/05/1006397/images/cd8410dce8f010b0f87bb8d5347373c88ad8adcec38c9aab1b6231fe28d43d02.jpg)
Control with the VIERA remote control of the television
Your DVD Recorder is connected with an HDMI cable to a television with the function VIERA Link.
You can operate the DVD Recorder with the remote control of the VIERA television. Use the buttons ▲▼◀▶, OK, RETURN, EXIT, OPTION and the coloured buttons to move around in the menu.
Please also read the operating instructions for your television set.

Navigation in the menus
- Confirm [Control Panel] with OK to launch the navigation menu.

During playback
▲: Pause, ▼: Stop, ◀ Search back, ▶ Search forwards
Playback of a still picture (JPEG)
▼: Stop, ◀: Previous picture, ▶: Next picture
EXIT: Exit the screen.
Connections
Connection of external units
Before connection, turn off all equipment and read the appropriate operating instructions.
Digital amplifier or digital system components
If an amplifier with a Dolby Digital, DTS or MPEG decoder is connected, multi-channel surround sound from a DVD-VIDEO can be played back.
DVD Recorder

Push the jack all the way into the terminal with this side facing up.
- Connect an amplifier with a Dolby Digital, DTS or MPEG decoder.
- Use an optical digital audio cable.
- In the Setup menu Sound, change the Digital Audio Output setting according to your connected digital amplifier. → 63 You cannot use a DTS Digital Surround decoder that is not designed for DVD.
Joint use of HDMI and digital output OPTICAL
If the DVD Recorder is connected to the television set with an HDMI cable and you are using an amplifier at the digital audio output OPTICAL for sound output, in the Setup menu change the setting Digital Audio Output to [Optical Only]. → 64


2.0+Digital Out
Connect this unit to a device with a
DTS decoder in order to be able to play a DVD with this symbol.

This unit can record and playback stereo sound in
Dolby Digital (dual channel). DVD-VIDEO can be played back in multi channel sound.
DVD Recorder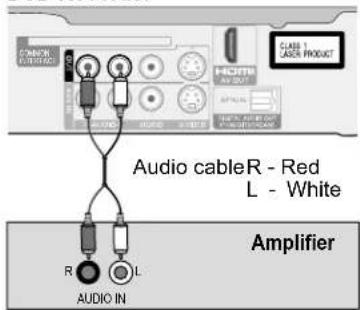
DVD Recorder
Analogue amplifier or analogue system components
To use stereo or Dolby Pro Logic, connect an analogue amplifier or analogue audio component.
- Connect the output AUDIO OUT (R/L) e.g. with a Dolby Pro Logic amplifier.
- Connect the audio cable according to the colour of the connection terminals (R - Red, L - White).
DVD Player, Set Top Box or Videorecorder to AV2(EXT)
Connect another unit to the Scart socket AV2(EXT) of the DVD Recorder. Please read the operating instructions for your external unit.
- Connect the Scart socket AV2(EXT) of the DVD Recorder with the Scart socket of the external unit.
- In the Setup menu, select the settings for the connected unit. → 65
- Press INPUT SELECT several times to select the input AV2 for the external unit.
Second satellite receiver
With the DVD Recorder switched off, you can forward the signal via the LNB OUT terminal. Please read the operating instructions for your satellite receiver.
- Connect LNB IN of the satellite receiver with LNB OUT of the DVD Recorder.
- Switch the Quick Start off. → 66
- Switch the DVD Recorder to Standby.
Connections
Connecting external units
![graph TD A["Television"] --> B["HDMI IN"] B --> C["HDMI OUT"] C --> D["HDMI IN"] D --> E["DVD Recorder"] style A fill:#f9f,stroke:#333 style E fill:#ccf,stroke:#333](/content/2026/05/1006397/images/4dd0f0b58bb51a329f5a15bbfcf3124d9ecbef441148d7b5e3d03b434c10ef5f.jpg)
Before connection, turn off all equipment and read the appropriate operating instructions.
Amplifier or external unit with HDMI cable
- Connect the amplifier or external unit according to the drawing.
- Switch the units on.
- On the television, select the input channel for the DVD Recorder.
If an externally connected unit only supports dual-channel audio, then an audio signal with 3 or more channels is down-converted, with output through 2 audio channels.
It is not always possible to down-convert all discs.
Titles which cannot be down-converted can only be played back via HDMI at an amplifier complying with the HDMI standard Ver. 1.1 (or higher).
For HDCP compatible units with DVI connection (e.g. PC monitor)
Depending on the unit, it is possible that the picture is not perfectly reproduced with a DVI/HDMI adapter. The audio signal is not transmitted in this case.
DVD Recorder
Connection to the front input DV IN
Connect a DV compatible Camcorder to the front input DV IN.
- Connect the DV output of the Camcorder with the DV input of the DVD Recorder, using a DV cable. • After connecting the cables, switch both units on.
- Press INPUT SELECT several times to select the DV input for the external unit.
The DV input of this unit is only intended for DV units. For example, a computer cannot be connected up here. Some DV units do not permit perfect input of the video and audio signal.
The DVD Recorder cannot be controlled via an external unit connected to the DV IN input socket.
Automatic recording from DV IN →57
With S VIDEO and Audio cable
Connection to the front input AV3
If your external unit does not have a DV output, connect it via the front input AV3.
If the audio output of the external unit is mono, connect it to the L/MONO. Both the left and the right channel are recorded.
- Select one of the two connection possibilities for AV3. The connection with S VIDEO and Audio cable (L/R) produces the best quality.
- Press INPUT SELECT several times to select the AV3 input for the external unit.
Manual recording from Camcorder or Camera →29
With Audio/Video cable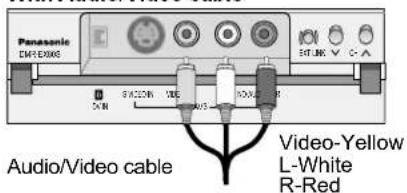

After switching on for the first time, the unit proceeds with automatic satellite and station search.
- Turn the television on and select the input channel corresponding to the connection type you have selected.
- Switch the DVD Recorder on using the Standby/On switch.
- Select the desired country with ▲ and confirm with OK.

The unit offers you the choice between [Automatic Search] and [Quick Setup]. Automatic Search searches for all satellites at all 4 LNBs. All currently available TV and radio stations are saved. Quick Setup searches for Astra 19.2° E at all 4 LNBs. A predefined choice of TV and radio stations is saved.
- Confirm [Automatic Search] with OK or select with ▼ [Quick Setup] and confirm with OK.
If you don't save the satellite, the station data cannot be adopted.

Press RETURN to cancel the automatic search prematurely.
- Confirm [Ja] with OK to save the satellites.

Auto-Setup is followed by the time and clock setting.
If date and time are not transmitted, the menu [Datum / Zeit] appears.
- Change [Zeit] and [Datum] with ▲r 0-9nd.
- Confirm the change with OK. An incorrect date or time affects the programmed recording of television programmes (note summer and winter time).

4 TV Bildschirmformat (TV Aspect)
- Select the desired screen format with ▲ and confirm with OK. Pan & Scan: The picture of a 16:9 film is cut off at the side. Letterbox: Black bars appear at the top and bottom of the picture.
Auto-Setup for your unit is now complete.
- Press FUNCTION MENU to change the menu language to English. [To Others - Setup - Display - Language]
You can now select your favourite stations and store them in the required order in the profiles. Please proceed with the setup for additional LNBs, including station search, under Advanced Setup. →59

Edit Profiles
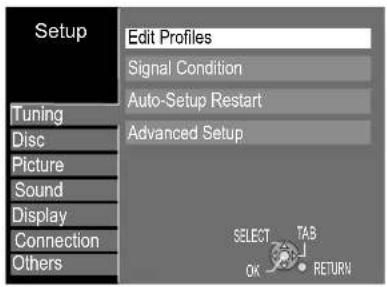

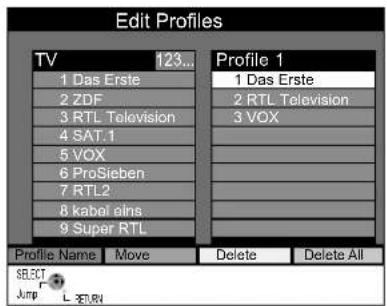

- Press FUNCTION MENU
- Select [To Others] with ▲ and confirm with OK.
- Select [Setup] with ▲ and confirm with OK.
- Select [Edit Profiles] with ▶ and confirm with OK.

You can create four different Profiles where you put together your favourite TV stations.

Sorting Mode
The stations can be sorted in numerical or alphabetical order.
- Press the Red Button to select the desired sorting mode.
- Press PAGE ◇ to scroll backwards or forwards. For alphabetical sorting mode, skip one letter back or forwards with SKIP ◀◀◀◀
Profile Select
- Press the Green Button to select a Profile. Each time you press the button, you call the next Profile.
Add
- Select the required station in the left table with ▲▼
- Press the Yellow Button to adopt the selected station in the Profile. Every station can only be added to the Profile once.
- Press OK to save the Profile.
TV/Radio
- Press the Blue Button. Every time you press the button, you change between [TV - TV encrypted - Radio - Radio encrypted]. Encrypted stations are marked with the key symbol in the corresponding table.
- Press PAGE ◊ to scroll back or forwards. For alphabetic sorting mode, skip one letter back or forwards with SKIP ◀◀◀◀
To edit, change to the right column with ▶.

Profile Name
- Press the Red Button.
- Select the required character with ▲ and confirm with OK.
- Press PAUSE II to delete one letter at a time.
- Use the colour buttons to change between Standard Characters/Other Characters and confirm with OK.
- Press STOP ■ the name is adopted.
Enter a title using the number buttons, e.g. the letter "R"
- Press number 7 to go to the 7th line.
- Press the button 7 twice to mark "R" and confirm with OK.
Move
You can change the order of stations in the selected Profile.
- Select the required station with ▲▼
- Press the Green Button to mark the station. The lettering appears in red.
- Move the station to the required position with ▲▼
- Press the Green Button again to insert the station. After being inserted, the lettering appears in black.
- Press OK to save the Profile.
Delete
- Select the required station with ▲▼
- Press the Yellow Button to delete the station in the Profile.
- Press OK to save the Profile.
Delete All
- Press the Blue Button to delete all stations in the Profile.
- Press OK to save the Profile.
To view programmes from encrypted stations, you need a Conditional Access module together with a valid Smart Card and a subscription with the corresponding Pay TV provider. The Smart Card is inserted in the commercially available Conditional Access Module (CAM). Please read the instructions supplied for the Smart Card and the module.
When connecting the DVD Recorder using the Scart cable, you must insert the module first, because the size of the Scart terminal prevents you from inserting the module afterwards.
The Common Interface supports the modules according to DVB Specification for encryption systems as for example Cryptoworks, Viaccess, Nagravision, Conax or Irdeto.
Insert the Smart Card
- Insert the Smart Card carefully in the Conditional Access module until you can feel a resistance.

Insert the Conditional Access module
- Insert the Conditional Access module carefully into the slot on the back of the DVD Recorder.

Remove the Smart Card
- Press against the middle of the card and pull it straight out.
Remove the module
When connected with the Scart cable, remove the Scart terminal first. Then pull the module straight out of the slot.

Password query
Depending on the card provider, a password may be demanded after inserting the card. This appears also for programmes being broadcast with a movie rating.
- Enter the 4-digit code with the number buttons.
Delete an incorrect number with DELETE.
- Confirm your password with OK.
Other settings on the card, e.g. changing the password, can be adjusted in the Setup menu. →65
Depending on the card, in some cases its use together with this unit may be limited or not possible.
-- SD Memory Card miniSD Card MultimediaCard
8 MB to 2 GB (maximum) Pictures
Use an SD Card for playback and transfer (copying) of pictures taken for example with a Digital Camera. The available memory can deviate from the card capacity. MPEG2 movies can be copied to the hard disk or DVD-RAM. Direct playback of MPEG2 movies from the SD Card is not possible.
Insert the SD Card
Press on the white arrow to open the cover. Push the card in until it locks in the drive.
Remove the SD Card
Press on the middle of the card to release it. Pull it straight out. Close the cover.


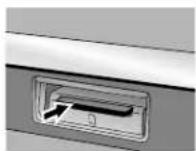

Insert the card with the label up and with the cut off corner on the right.

A miniSD Card must be inserted in the card adapter supplied with the card. Do not touch the contacts on the memory card.
If the card indicator SD on the unit display is flashing, the card is being read from or written to. Do not turn the unit off or remove the card. Such action may result in malfunction or loss of the card's contents.
When the write protection device of the SD Card is activated, you can neither record nor edit or delete the contents of the SD Card.
If the SD Card was formatted with another device, under certain circumstances you may possibly not be able to use it with this unit. In this case, reformat the card with this unit.
All saved data are deleted during formatting!
Keep the memory card out of reach of children to prevent swallowing.
This unit supports SD Memory Cards that are formatted with FAT 12 and FAT 16 systems according to the SD Cards specification.
More information is available on the internet at
http://panasonic.co.jp/pavc/global/cs

Detecting a SD Card
When you insert the SD Card in the SD Card slot, the card is detected automatically.
• To playback pictures, confirm [Album View] with OK. → 35 - To copy, select [Copy Pictures (JPEG)] with ▲ or select [Copy Video (MPEG2)] if saved on the SD Card. → 51 - Confirm with OK.
Service List
In the Service List you can see the current and following programme of all TV and radio stations, including your own Profiles.
The television picture of the selected station is also shown.
- Press LIST.
- Press ▲ to move in the Service List.
- Press PAGE ◇ to scroll backwards and forwards.
- Confirm the selected station with OK. The current and following programme is shown below the preview picture.
- Press OK again, leave the Service List and change to the television programme of the selected station.


Sorting Mode
The stations can be sorted in numerical or alphabetical order.
- Press the Red Button and select the required sorting mode. For alphabetical sorting mode, skip backwards or forwards by a letter with ◀
Profile Select
- Press the Blue Button. In the selected sorting mode, change between: [All Services - TV - Radio - created Profiles]. Encrypted stations are marked with a key symbol in the corresponding table.
Alphabetical sorting of the created Profiles is not possible in the Service List.


Only for stations broadcasting in Multi Video.
Multi Video
- Confirm the corresponding station with OK.
- Press the Yellow Button to change to the Multi Video menu.

The additionally available channels of the selected station are displayed.
- If you confirm the selected channel with OK, the preview picture of the chosen channel appears.
- Press OK again to leave Multi Video and change to the television programme.
Timer Recordings of Multi Video stations always record the main channel.
Service List
Yellow

- Press the Yellow Button to return to the Service List.
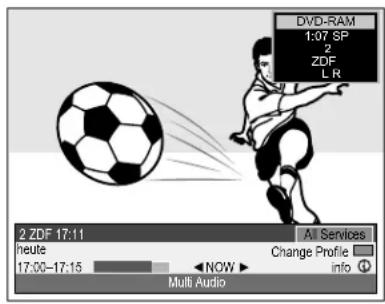
Status displays
Detail information

[Encrypted] is shown yellow if the station cannot be decoded. [Encrypted] is shown white if the Smart Card can decode the station.
Every time you change the digital station, a status display and banner appear briefly. You can change how long they appear for in the Setup menu. →63
- Press i to show the screen information and also to leave the display again. During the function PLAY, REC or REC PLAY, the status display and the detail information appear.
Status displays
1: Current medium 2: Available recording time and selected recording mode. 3: Current station position. 4: Current station 5: Sound mode LR, L, R: the soundtrack can be changed with the AUDIO button. 6: The status of a second drive being used at the same time is displayed.
| REC Record | Fast forward (5 stages) | Rewind (5 stages) |
| PAUSE Pause | Slow motion (5 stages) | Slow-motion rewind (5 stages) |
| PLAY Playback | Play x1.3 Playback x1.3 | Pause playback |
Detail information is only accessible during playback or record. Detail information is not included in the recording.
7: Current time and date 8: Available recording time and recording mode: e.g. 0:50 SP shows 50 minutes in SP mode. 9: Shows the title number, elapsed playback time and recording mode of the title. 10: Shows the title number, elapsed recording time and the recording mode of the title.
Banner
The banner contains information about the current and following programme. It cannot be selected during playback or recording.
- Press ◀ to change between NOW and NEXT.
- Press CHo select the available stations. The television picture of the selected station appears with the corresponding banner.
- Press ▲n the banner to scroll through the available stations. The television picture does not change.
- Press OK to change to the television picture of the chosen station.
1: Programme position and name of the current station. 2: Title and broadcasting time of the current programme. 3: Signal quality of the current station:
No Signal; Bad Signal; No Service → 58
4: The current time. 5: Selected Profile: All Services, TV, Radio, Profiles 1-4 → 19 6: Press the Blue Button to change the Profile. 7: Station is encrypted. 8: Shows the progress of the current programme. 9: The programme is broadcast in Multi Audio. Press DISPLAY. Select the setting [DVB Multi Audio] under Sound. → 71
10: NOW: information about the current programme.
NEXT: information about the following programme.
11: Press to select further information.
Press ▲ to move around in the text box.
On selecting a radio station or if the banner shows [No Signal], [Bad Signal], [Encrypted] when the station cannot be decoded, or if [No Service] appears, the banner cannot disappear and is included in any current recording.
Playback
Insert with label facing upwards. For double sided discs, the label of the side you want to play should be facing upwards.

Insert a Cartridge Disc in the direction of the arrow, label facing upwards.
- Turn the television on and select the corresponding AV channel.
- Turn the DVD Recorder on.
- Press OPEN/CLOSE ▲ on the unit to open the disc tray.
- Place a disc in the disc tray and close it.
It may take some time to read the disc!
RAM -RW(V) +R +R DL +RW If the disc cannot be read because it was written on another unit, the display asks whether to format the disc.
- Select [No] with ▶ and confirm with OK.
Formatting deletes all data saved on the disc. → 68

Select the drive.
Press the button to change between HDD, DVD and SD.

Playback
- Press PLAY▶ to start playback. Playback begins with the last recorded title.
-R -R DL -RW(V) +R +R DL +RW Disc playback stops when a Timer Recording starts.

Stopping playback
- Press STOP ■ The playback is stopped, you can now see the television picture again. - For DVD-V, VCD and CD, press STOP ■ twice to return to the television picture.

Pausing playback
- Press PAUSE II to pause playback. - Press PAUSE II again to resume playback.
Selecting a title with the number buttons
- During the playback, select the required title, chapter or track with the number buttons and confirm with OK.
Direct input via the number buttons
| VCD 5:0515:15 | JPEG, MP3 5:00515:015 | JPEG 5:000515:0015 |
Playback starts automatically
DVD-V VCD
Playback always starts at the beginning of the disc. If the disc has its own disc menu, then it is displayed. Operation of the disc menu depends on the inserted disc.
- For VCD, select the number of the title with the number buttons.
- For DVD-V, select a title with ▲▼◀▶ or with the number buttons and confirm with OK. If ⊙ appears on the screen, the procedure is prevented by the unit or disc.
To see the disc menu again, use the following buttons:
DVD-V: OPTION, VCD: RETURN

Starting playback from the DIRECT NAVIGATOR
The DIRECT NAVIGATOR button can be used to display the menu during playback, recording and in the STOP mode.
- Press DIRECT NAVIGATOR. Use the colour buttons to change between the Title View and Album View.
- Select the required title with ▲ and confirm with OK. Playback starts.
- Press RETURN or EXIT to leave the menu. You can select other pages with SKIP [Previous] or Next].

Status display
DVD-RAM
Play x1.3
L R
Functions during playback

PLAY/x1.3 (Quick View)
HDD RAM
You can increase the playback speed without affecting the sound.
- Press and hold PLAY▶ briefly during playback.
- Press PLAY▶ again to return to normal speed.
With a digital connection, playback is in PCM. →63
Quick View is paused if you press PAUSE II or the playback of a programme begins which was not recorded with Dolby Digital. Quick View does not function during simultaneous recording and playback in XP or FR mode.

Saving the playback position
- Press STOP ■, the unit saves the position.
- Press PLAY▶ to resume playback from the saved position.
• To cancel the function, press STOP ■ several times.
This function is not available if playback was started from DIRECT NAVIGATOR or from Playlists.
SLOW/SEARCH

Fast forward
- Press SLOW/SEARCH Each time the button is pressed, the fast forward speed increases by one stage up to a maximum of five stages. □+R DL-RRW Maximum 3 stages.
- Press PLAY▶ to resume playback. The sound is only output at the first fast forward speed (not DivX). For CD and MP3, the sound is output at all forward speeds.

Dividing a recording into chapters
- Press CREATE CHAPTER. During playback, press ◀SKIP or SKIP ▶ to skip a chapter.

- Press MANUAL SKIP. Playback skips on about 30 seconds.

Not CD, DVD-V, VCD
- Press TIME SLIP. - Press ▲ to select the time span for skipping playback forwards or backwards. Each time the button is pressed, the time span increases or decreases in minute increments. For recordings longer than 10 minutes, press and hold the button for longer to increase or decrease the time span in 10 minute increments. - Press OK to confirm the selected time.
During playback or in PAUSE mode

Skip
- Press SKIP ◀◀◀◀ to skip chapters, titles or pictures. In DVD-R (DivX) and CD (DivX), it is only possible to skip backwards.

Functions in PAUSE mode

Slow-motion playback
Not CD
- Press SLOW/SEARCH. The speed can be controlled in 5 stages. With some disc formats, the PAUSE function is switched on again after 5 minutes.
- Press PLAY▶ to resume normal playback. VCD: Forwards only.

Frame playback. Not CD.
- Press ◀▶. Each time the button is pressed, the next or previous frame is shown.
- Press PLAY▶ to resume normal playback. VCD: Forwards only.
Delayed playback

Playback can be started after a delay while the unit is still recording. At least 2 seconds must have elapsed since starting the recording. This does not affect the recording.
- Press PLAY▶. Playback starts at the beginning of the current recording.
- Press STOP ■ to stop playback.
- To stop the recording, press STOP ■ again after 2 seconds. Stop a Timer Recording using the submenu. →45
Simultaneous recording and playback

You can play a different title during the current recording.
- Press DIRECT NAVIGATOR during recording or Timer Recording. The Title View appears.
- Select a title with ▲ and confirm with OK. Playback of the selected title begins.
- Press STOP ■ to end playback. Playback during recording standby ⊙ does not affect Timer Recordings. Recording begins at the programmed time.
Changing the Audio channel during playback

HDD, RAM, -RW(VR), -R(DivX), CD(DivX), VCD

AUDIO can only be changed in the setting [Rec for High Speed Copy - Off]. →61

DVD-V
- Select Audio or language.
| Maximum number of recordable titles | ||
| HDD | RAM -R -RW(V) -R DL | +R +RW +R DL |
| 500 | 99 | 49 |
With this unit, you can record to DVD-RAM, DVD-R, +R, DVD-RW(V), +RW or HDD. DVD-Video format is used to record to discs. The format is compatible with most DVD players and DVD ROM drives in computers.
-R DL, +R DL: Direct recording is not possible with this unit. Record to HDD and then copy the recording to the disc. → 51
Disc Protection
Protect your recordings from accidental deletion or overwriting.
Activate disc protection for DVD-RAM. → 68
Formatting
RAM -RW(V) +RW +R +R DL
If using an unformatted disc, you must format it before the first recording. → 68
Formatting prepares the media, such as a recordable DVD-RAM, for recording.
All data are irrevocably deleted.
For recording
The recording is saved to free areas on the disc. If there is no more space left on the disc or HDD, you must delete recordings or use a new disc.
Deleting Playlists does not enlarge the memory capacity.
Continuous recording or playback of both sides of a double sided disc is not possible.
After the end of the recording, the unit needs approx. 30 seconds to record data for recording management.
Tracks in 16:9 format can only be recorded on HDD and DVD RAM. On all other media, recordings are made in 4.3 format.
It is not possible to record on a hard disk and on a DVD at the same time.
Recording digital programmes
Digital programmes limited to "one time recording" can only be copied from the hard disk to a CPRM compatible 12 cm DVD-RAM.
After copying, the title is deleted from the hard disk.
The title copied to DVD-RAM cannot be copied again.
Titles in PAL or NTSC format can be displayed on the following TV sets:
| TV type | Disc/HDD | Yes/No |
| Multi system TV | PAL | Yes |
| NTSC | Yes | |
| NTSC-TV | PAL | No |
| NTSC | Yes | |
| PAL-TV | PAL | Yes |
| NTSC | Yes (PAL60) |

NTSC Format
It is not possible to record or copy on a disc in NTSC format if the disc contains recordings in PAL format. An error message appears.
Approximate recording times in hours
| HDD | DVD-RAM(9,4 GB)double-sided | DVD-R(4,7 GB)(160 GB) | DVD-R DL /+R DL(8,5 GB) | |||
| -R DL | +R DL | |||||
| XP | 36 | 1 | 2 | 1 | 1:45 | 1:45 |
| SP | 70 | 2 | 4 | 2 | 3:35 | 3:35 |
| LP | 138 | 4 | 8 | 4 | 7:10 | 7:10 |
| EP (6 hours) | 212 | 6 | 12 | 6 | 10:45 | |
| EP (8 hours) | 284 | 8 | 16 | 8 | 14:20 | |
HDD: Longer recordings are divided into 8 hour segments.
Recording a 90 minute title to a disc with 4.7 GB of storage space.

The FR mode makes optimum use of the available memory capacity. The title is recorded in the best possible quality.
The FR setting is only available for Timer Recordings.
DVD: Insert a disc.
RAM: If you activated write protection, cancel it. →68
HDD: If you want to record a title to hard disk and copy it in High Speed mode at a later date, select [Rec for High Speed Copy - On] in the Setup menu before the recording. →61
Please read the information on High Speed Copy. → 48



Select the drive DVD or HDD before the recording.

Record
- Press ●REC to start a recording.

Pause the recording
- Press PAUSE to pause the recording.
- Press PAUSE again or ● REC to resume recording. The title is not divided.

Stop recording
- Press STOP ■ to stop recording. After the recording is complete, it takes some time for the unit to process the unit control information.

![| Picture quality | Recording duration | |---|---| | XP | 0 | | SP | 0 | | LP | 0 | | EP (6 Hours) | 0 | | EP (8 Hours) | 0 | Standard setting for EP is [EP ( 8Hours )].](/content/2026/05/1006397/images/83c0d660cbc401d578d30b6ddaac8eadd35bf20ad2e2f2d2b3bdd40e2fb792a6.jpg)

Recording of TV programmes
- Select the station with CH or with the number buttons.

- Select the recording mode with REC MODE.

- Press ●REC to start recording. Press STOP ■ to stop recording. If you resume recording with ●REC, a new title will be created.

Changing the recording mode
- Press REC MODE in PAUSE or STOP mode. Each time the button is pressed, you change between SP, LP, EP and XP. The material is recorded as a separate title with each switch.
EP: Select the recording for 6 or 8 hours in the Setup menu. → 61
[RAM] With the [EP (8Hours)] setting, playback on DVD-RAM compatible DVD players may not be possible under certain circumstances. Select [EP (6Hours)].
XP: Select the audio mode [Dolby Digital] or [LPCM] for the recording in the Setup menu. →63

Delayed playback during recording

While recording a programme, you can start playback after a delay. At least 2 seconds must have elapsed since the recording started.
- Press PLAY▶ while recording or during a Timer Recording.
- Press STOP ■ to stop playback.
- To finish the recording, press STOP ■ again after 2 seconds. Stop a Timer Recording in the submenu.
DIRECT TV REC
Direct TV recording with Q Link

You can record a current TV programme directly without needing any other settings.
- Press DIRECT TV REC for 3 seconds. The recording begins.
- Press STOP ■ to stop the recording.

The unit switches off after completing a recording if no function is in progress on the other drive.
Specifying a time as the recording duration
This function is not possible for Timer or Flexible Recordings.
- Press • REC on the unit during recording.
Each time the button is pressed, the recording time changes on the unit display:
OFF 0:30 1:00 1:30 2:00 3:00 4:00 OFF
- Press STOP ■. The recording is paused and the time setting is deleted.
If the channel or recording mode (XP, SP, LP, EP) is changed during a recording pause, the time is deleted.
Recording programmes in dual channel sound
RAM/HDD: Both channels of a programme in dual channel sound are recorded. If you change between the two channels during the recording by pressing AUDIO, this does not affect the recording. You can only change with AUDIO in the setting [Rec for High Speed Copy - Off]. ➔ 61
Other media: Select the soundtrack to be recorded in the Setup menu before the recording.
Use [M1] for the original language or [M2] for another available language. →63.
Recording Multi Audio programmes
Press DISPLAY to select the language or soundtrack to be recorded under [Sound - DVB Multi Audio], before the recording. → 71
Finalize
Finalize the disc so that it can be played on other DVD players. Note: Recording or Editing is not possible after finalizing. This may take up to 4 min.

Press the REC button to start finalize.

Press the OPEN/CLOSE button to exit. This disc cannot be played on other DVD players without finalizing.
-R -RW(V) +R -R DL +R DL
Finalize
A non-finalized disc can only be played back on this DVD Recorder.
- Press OPEN/CLOSE ▲ on the unit to remove the disc. The system will automatically offer you finalization of unfinalized discs.
- Press • REC to start finalization.
- After completing finalization, the disc is ejected automatically. It can now be played on any other DVD unit.
- If you do not want to finalize the disc, press OPEN/CLOSE ▲ again.
Manual recording from Camcorder or Camera
Connect the unit to DV IN.
Select the Audio mode [Stereo 1, Stereo 2 or Mix] in the Setup menu. →63
- Start playback on your external DV unit.
- Press pause at the required starting point.
- Select the DV channel with INPUT SELECT.
- HDD RAM -R -RW(V) +R +RW Select the recording mode with REC MODE.
- Press REC on the DVD Recorder.
- Resume playback on the external DV unit.
- Press STOP ■ to end recording on the DVD Recorder.
- Stop playback on the DV unit.
The recording cannot be paused with PAUSE II.
Programmes are recorded as a title.
HDD RAM A chapter is generated at every picture interruption and a playlist is created.
The unit is connected to an AV input
- Select the drive DVD or HDD with DRIVE SELECT.
- Select the recording mode with REC MODE.
- Select the AV input channel with INPUT SELECT in the STOP mode.
- Start playback on the external unit.
- Press ● REC at the point where you want to start recording.
- Press STOP ■ to stop the recording.
FUNCTION MENU
Overview

You can access the main functions in the FUNCTION MENU.
The menu entries may differ depending on the disc or on the selected drive.
During a recording or Timer Recording, some menus may be greyed out and cannot be selected.
The FUNCTION MENU cannot be selected during playback.
Press STOP to stop the playback.
- Select the drive HDD, DVD or SD with DRIVE SELECT.
- Press FUNCTION MENU.
- Select a menu with ▲ and confirm with OK.
- Select the next page [To Others] with ▲ and confirm with OK.
- Press RETURN to return to [To Others], press EXIT to go back to the TV picture.
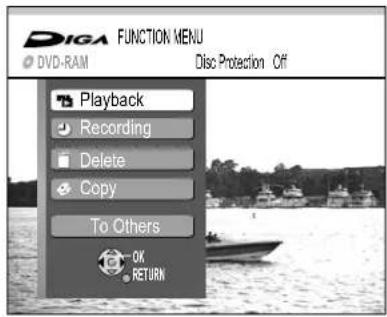
| Playback | Menu DIRECT NAVIGATOR 32 → |
| Recording | Menu TV Guide 40 → |
| Delete | Menu DELETE Navigator 42 → |
| Copy | Menu COPY Navigator 43 → |

| Timer Recording | Timer programming in the Timer Recording menu 44 → |
| Advanced Copy | Menu Advanced Copy 48 → |
| Copy All Pictures | Copy pictures (when using SD Card) 53 → |
| Playlists | Menu Playlists 54 → |
| Flexible Rec | Recording in FR mode 57 → |
| DV Auto Rec | Recording the DV signal →57 |
| Setup | Changing the unit's presetting →58 |
| DVD Management | Formatting and finalizing discs, write protection →68 |
| HDD Management | Formatting and deleting all titles from HDD →68 |
| Card Management | Formatting SD Cards →69 |
Navigation in the menus

TAB: Select submenu with ▲▼◀▶.
SELECT: Select setting or option.
CHANGE: Change the option.
OK: Select or save a setting.
RETURN: to the previous screen / to exit a menu.
FUNCTION MENU
Entering Text
![Red Green Standard Characters Other Characters Enter Name TERRALUNA_ 1 2 3 4 5 6 7 8 9 0 A B C s b c + - - D E F d e f / # G H I g h i # $ a J K L j k l >> M N O m n o [ ] - p Q R S p q r s i / T U V t u v [ } - W X Y Z * x y z / . ? ! * OK RETURN Space](/content/2026/05/1006397/images/dbf7feb67f67b7373716015e95c484ba93d4e74e395882868736a5727c4979db.jpg)
You can give titles to your programmes or discs in the various menus.
Enter a title or disc name
HDD RAM -R -R DL -RW(V) +R +R DL +RW
- Select the required character with ▲ and confirm with OK.
- Press PAUSEII to delete a letter.
- Use the colour buttons to switch between Standard Characters and Other Characters and confirm with OK.
- Press STOP ■ to adopt the name.
Enter a title using the number buttons, e.g. the letter "R"
- Press number 7 to change to the 7th line.
- Press number 7 twice to mark "R" and confirm with OK.

Top menu preview
HDD RAM -R -R DL -RW(V) +R +R DL +RW
In the DIRECT NAVIGATOR, select the setting [Enter Name]: Top Menu Preview also appears. It shows what the title will look like later on.
You can also add spaces, hyphens or dashes.

Working with List Names
In the case of recurring programmes, you can save time entering the title by saving it in the List Names.
Save a disc name or title in List Names
• After entering a title, press SKIP ▶▶I - In the next screen, press ◀ to select [Add] and confirm with OK.
Adopt a disc name or title from the List Names
- Open List Names with SKIP.
- Select the disc name or title with ▲ and ▶ press OK.
- Press STOP ■ to adopt the name/title.
Delete a disc name or title from the List Names
- Open List Names with SKIP
- Select the title or name with ▲ and press OPTION.
- Confirm [Delete Name] with OK.
- In the next screen, press ◀ to select [Delete] and confirm with OK.
Display Properties
DVD HDD

Information on the Properties of a title can be displayed in the various menus.
- Open the corresponding menu with ▲ and confirm with OK.
- Select the required title with ▲▼◀▶
- Press OPTION.
- Select [Properties] with ▲ and confirm with OK. Information on the title such as Date, Name and Time is displayed.
FUNCTION MENU

Playback → DIRECT NAVIGATOR
DVD HDD

You can archive, edit recordings or start playback of a title in the DIRECT NAVIGATOR.
- Press FUNCTION MENU.
- Confirm [Playback] with OK.
- Select a title with ▲▼◀▶
- Press OK to start playback.
Select the submenu
- In the required view, select a title with ▲▼◀▶
- Press OPTION.
- Select the required option with ▲ and confirm with OK.
Changing between Thumbnail Display and Table Display
The standard setting is Thumbnail Display. The view can only be changed in the submenu. The last used view remains saved when the unit is switched off.
Change between Title View and Album View
Use the colour buttons to change between Thumbnail Display/Table Display and Album View. Both views can also be opened using the submenu.
![graph TD A["Title View - Table Display"] --> B["Option"] B --> C["Title View - Thumbnail Display"] C --> D["Green"] D --> E["Red"] E --> F["Album View"] subgraph Table Display G["DIV-RAM Title View"] H["Video Picture"] I["No. Name Date Day Time Name of title"] J["01 ZDF 5.3 MON 17:00 heute"] K["02 E…](/content/2026/05/1006397/images/c7618b4ca4e6853df34bea7a939552d1751dbf7744dca3fe27688ceafff0c30d.jpg)
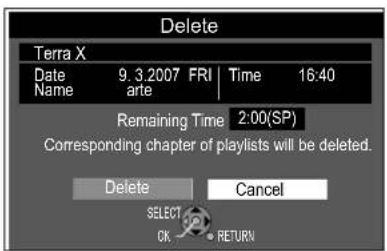
Delete
The title will be deleted and cannot be restored.
- Confirm [Delete] with OK.
- Select [Delete] with ◀ and confirm with OK.
HDD RAM The storage space of a deleted title becomes available for a new recording.
-R -R DL +R +R DL The storage space is not released by deleting titles.
-RW(V) +RW Available recording space increases only when the last recorded title is deleted.
Properties: → 31
Edit: Open other submenus.

Sort: Only HDD
The titles can be sorted according to No., Name, Date, Day, Start Time and Name of title. The sorting option is underlined in the Table Display.
Select the required option with ▲ and confirm with OK.
Editing several elements
Select the desired title with ▲▼◀▶ and press PAUSE II
A check appears. Repeat this process to select other titles.
Press PAUSE II again to clear the selection.
FUNCTION MENU

Playback → DIRECT NAVIGATOR
DVD HDD
| Delete |
| Properties |
| Edit |
| Chapter View |
| Table Display |
| Album View |
Enter Name
Set up Protection
Cancel Protection
Partial Delete
Change Thumbnail
Divide Title
Edit Titles
- Select [Edit] with ▲ and confirm with OK.
- Select the required option in the submenu with ▲ and confirm with OK.
Enter Name: → 31
Set up Protection/Cancel Protection
- Select [Yes] with ◀ and confirm with OK.
HDD RAM +R +R DL +RW

Partial Delete
HDD RAM
Make sure that you really want to delete parts of the recording.
- At the desired start point, confirm [Start] with OK.
- At the desired end point, confirm [End] with OK.
- To conclude deletion, select [Finish] with ▲ and confirm with OK.
- In the next screen, select [Delete] with ◀ and confirm with OK. You exit the menu after deletion.
• To delete other parts, confirm [Next] with OK. - Select [Delete] with ◀ and confirm with OK. Every time after deleting, you can select the next start and end point. • To exit the menu, select [Finish] with ▲ and press OK.
You may not be able to identify a start and end point if they are less than 3 seconds apart or if the recording image is a still picture. The unit switches to PAUSE mode at the end of the title. The available recording time on the disc may remain the same after deletion.

Change Thumbnail Not -RW(VR)
You can select any position in a title as the thumbnail for the Title View.
- Press PLAY▶ to start playback.
- At the position to be displayed as the new thumbnail, confirm [Change] with OK. The selected thumbnail is displayed.
- Confirm [Finish] with OK. The selected thumbnail is shown in the Title View.

Divide Title
HDD RAM
You can divide a selected title. A divided title cannot be joined together again.
- At the position for dividing the title, confirm [Divide] with OK.
- Confirm [Preview] with OK. This is followed by a playback of 10 seconds before to 10 seconds after the dividing point.
- Confirm [Finish] with OK.
- In the next screen, select [Divide] with ◀ and confirm with OK. A short section of the recording right before the dividing point may be lost. The divided title keeps the name of the original title.
You cannot use this function if the resulting sections are extremely short or if you have saved more than 99 titles on DVD-RAM.
You can jump to the beginning/end of a title/chapter with PAUSE II and SKIP ◀◀▶. Find the position for a marker with SKIP ◀◀SLOW/SEARCH , ◀◀▶ TIME SLIP, MANUAL SKIP, ◀◀II ▶ Frame playback or ◀▶. You can jump between set markers with SKIP ◀◀▶▶
Editing several elements ▼ Select the desired title with ▲ and press PAUSE . Ⅱ A check appears. Repeat this process to select other titles. Press PAUSEⅡ again to clear the selection.
FUNCTION MENU

Playback → DIRECT NAVIGATOR


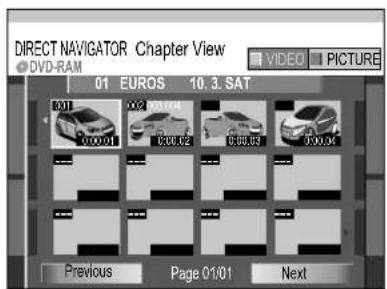
Editing Chapters

- Press FUNCTION MENU.
- Confirm [Playback] with OK.
- Select the required title in the Title View menu with ▲▼◀▶.
- Press OPTION.
- Select Chapter View with ▲▼ and confirm with OK.
- Select the required chapter with ▲▼◀▶.
- Press OPTION.
- In the submenu, select the required option with ▲▼ and confirm with OK.
Delete Chapter
- Select [Delete] with ◀ and confirm with OK.
Create Chapter
Divide the title into chapters. Determine the points where a new chapter is to start. The chapters can be selected later during playback with SKIP ◀◀◀◀.
- Press OK at the position where you want to create the chapter.
- Repeat this step to create additional chapters.
- Select [Exit] with ▼ and confirm with OK. A short section right before the dividing point may be lost.

Combine Chapters
- Select [Combine] with ◀ and confirm with OK. The selected chapter is combined with the following chapter.
Title View: Return to Title View
You can jump to the beginning/end of a title/chapter with PAUSE and SKIP. Find the position for a marker with SKIP, SLOW/SEARCH, TIME SLIP, MANUAL SKIP, Frame playback, or you can jump between set markers with SKIP.
Editing several elements ▼ Select the desired title with ▲▼◀▶ and press PAUSE II. A check appears. Repeat this process to select other titles. Press PAUSE II again to clear the selection.
FUNCTION MENU

Playback → DIRECT NAVIGATOR
DVD HDD SD


Album View
HDD RAM SD
If you have saved pictures in JPEG or TIFF format, these can be played back and edited with the Album View function.
RAM SD Cancel write protection if activated.
Album playback
- Press FUNCTION MENU
- Confirm [Playback] with OK.
- In the menu Title View, press the green button to go to the Album View.
- Select the required album with ▲▼◀▶
- Press PLAY▶ to start playback.
Open the submenu
- Select the required album with ▲▼◀▶
- Press OPTION.
- Select the required option with ▲ and confirm with OK.
Start Slide Show
The pictures of the selected album are shown automatically in succession in the selected Display interval.
- Press STOP ■to stop the Slide Show.
Slide Show Setting
You can determine the display interval for each picture, together with the repeat play of the slide show.
- Select [Display interval] with ◀ for each picture.
- For repeat play of the slide show, select [Repeat Play] with ▲ and change the setting to [On] with ◀.
- Confirm with OK.
Add Pictures
Pictures from other albums are added to the selected album.
- Select [Start] with ◀ and confirm with OK.
1 Select the album with ▲ and confirm with OK.
RAM SD You have created several higher folders (DCIM → 82).
- Press OPTION and confirm [Select Folder] with OK.
- Press ◀ to select the folder you require and confirm with OK.
2 You can copy individual pictures from the album, or the complete album.
Copy Pictures
- Confirm [Copy Pictures] with OK.
- Select the pictures you want to copy with ▲ and confirm with OK.
Copy Album
- Select [Copy Album] with ▲ and confirm with OK.
3 The pictures or the complete Album are copied.
4 To continue copying, select [Yes] with ◀ and confirm with OK.
Repeat steps 1-3.
To end copying, confirm [No] with OK.
Editing several elements
Select the desired title with ▲ and press PAUSE . II
A check appears. Repeat this process to select other titles.
Press PAUSE II again to clear the selection.
FUNCTION MENU

Playback → DIRECT NAVIGATOR
DVD HDD SD
| Start Slide Show |
| Slide Show Setting |
| Add Pictures |
| Create Album |
| Edit Album |
| Copy to HDD |
| Select Folder |
| Title View |


Open the submenus
- Select the required album with ▲▼◀▶
- Press OPTION.
- Select the required option with ▲ and confirm with OK.
Create Album
To create a new Album, there must already be pictures on the disc or SD Card.
Pictures from the selected Album are copied into the new Album.
- Select [Yes] with ◀ and confirm with OK.
1 Select the Album from which you want to copy pictures ▲ and ▶ confirm with .OK
RAM SD You have created several higher folders (DCIM → 82).
- Press OPTION and confirm [Select Folder] with OK.
- Press ◀ to select the folder you require and confirm with OK.
2 You can copy individual pictures from the Album or the complete Album.
Copy Pictures
- Confirm [Copy Pictures] with OK.
- Select the pictures you want to copy with ▲▼a▲▶ confirm with OK.
Copy Album
Select [Copy Album] with ▲ and confirm with OK.
3 The pictures or the complete Album are copied. 4 To continue copying, select [Yes] with ◀ and confirm with OK. Repeat steps 1-3.
To end copying, confirm [No] with OK.
Select [Yes] with ◀ to give the Album a name.
If you select [No], the date is saved as Album Name.
| Start Slide Show |
| Slide Show Setting |
| Add Pictures |
| Create Album |
| Edit Album |
| Copy to HDD |
| Select Folder |
| Title View |
| Enter Album Name |
| Delete Album |
| Set up Protection |
| Cancel Protection |

Edit Album
- Select the required Album with ▲ and press OPTION.
- Select [Edit Album] with ▲ and confirm with OK.
- Select the required option with ▲ and confirm with OK.
Enter Album Name: → 31
Delete Album
The selected Album will be deleted and cannot be restored.
Select [Delete] with ◀ and confirm with OK.
Set up Protection/Cancel Protection
You can set up or cancel protection for Albums.
- Select [Yes] with ◀ and confirm with OK.
Copy to HDD/Copy to DVD-RAM
The pictures of the Album are copied to the hard disk or to DVD-RAM.
- Select [Start] with ◀ and confirm with OK.
Select Folder
RAM SD
If you have created several higher folders (DCIM →82), you can change these with [Select Folder].
- Select the folder to be opened with ◀ and confirm with OK.
Title View: Return to Title View
Editing several elements
Select the desired title with ▲ and press PAUSE .
A check appears. Repeat this process to select other titles.
Press PAUSE II again to clear the selection.
FUNCTION MENU

Playback → DIRECT NAVIGATOR

Playback pictures of an Album
- Press FUNCTION MENU.
- Confirm [Playback] with OK. • In the Title View, use the Green Button to change to Album View.
- Select the required Album with ▲ and confirm with OK.
- In the Picture (JPEG) View, select the required picture with ▲▶. 0 - 9
- Press OK to start playback.
- Press STOP ■ to stop playback.

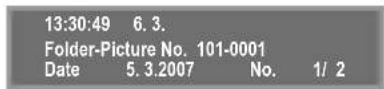
During playback
- Press OPTION.
- Select the required option with ▲ and confirm with OK.
Rotate picture
- Select the required setting with ▲ and confirm with OK.
Zoom in/Zoom out (only available for pictures smaller than 640 x 480 pixels)
- Select [Zoom in] with ▲ and confirm with OK.
- To return to the original size, select [Zoom out] with ▲ and confirm with OK.
Display the picture properties
- During playback, press i twice to open the Display.
- Press i again to close the Display.
- Press RETURN to return to Album View.
Displaying the data can take a relatively long time when playing back TIFF pictures or when there are many files, sessions and/or folders.
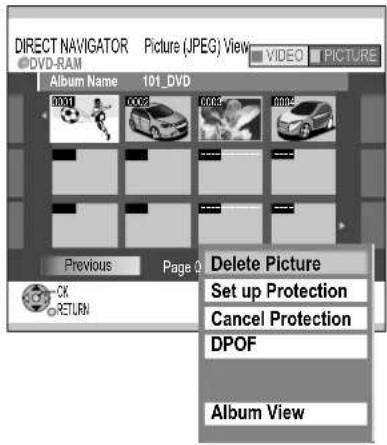
Edit a picture of an Album
- In the Picture (JPEG) View, select the required picture with ▲▶ 0 - 9
- Press OPTION.
- Select the required option with ▲ and confirm with OK.
Delete Picture
The selected picture is deleted and cannot be restored. - Select [Delete] with ◀ and confirm with OK.
Set up Protection/Cancel Protection
You can set up or cancel protection for pictures. - Select [Yes] with ◀ and confirm with OK.
DPOF (Digital Print Order Format)
Determines the number of picture prints in the selected folder. - Select the number with ◀ or the numerical buttons and confirm with OK.
The pictures are marked in the Picture (JPEG) View.
0 resets the setting. Settings adjusted previously with other units are reset.
The print settings (DPOF) made with this unit may not be able to be viewed on other units. If the folder or the files do not comply with the DCF standard or there is not sufficient space on the card, the setting cannot be performed. The DPOF print setting is not included in the copy function.
Album View: Return to Album View.
Editing several elements
Select the desired title with ▲ and press PAUSE.
A check appears. Repeat this process to select other titles.
Press PAUSE again to clear the selection.


CD-R: The disc also contains DivX and/or MP3, as well as JPEG data.
On inserting the disc, the message appears with the preset playback mode.
- Confirm the message with OK.
- Press FUNCTION MENU and confirm [Playback] with OK.
- Select the required file type with ▲▼ and confirm with OK.
- Press DIRECT NAVIGATOR. The Picture (JPEG) View screen appears.
Playback of individual pictures
- Select the required picture with ▲▼◀▶ or 0 - 9 and start playback with OK.
- Stop picture playback with STOP ■ or DIRECT NAVIGATOR.
Open the submenu
- Select [Folder] with ▲.
- Press OPTION.
- Select the required option with ▲▼ and confirm with OK.
Start Slide Show: → 35
Slide Show Setting: → 35
Change folder
- Select [Folder] with ▲ and confirm with OK. The available folders are displayed.
- Select the required folder with ▲▼ and confirm with OK.
You can select a folder directly and open it. Under certain circumstances, it may not be possible to open folders which have not been created with this unit.


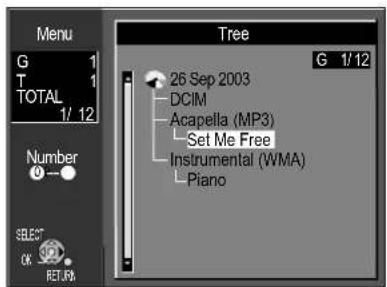
Playback of MP3 files
CD-R: This unit can play MP3 files recorded with a computer. Files are detected as tracks and folders as groups.
"TOTAL" contains all tracks in all groups on the disc.
The disc also contains DivX and/or JPEG data in addition to MP3 data.
After inserting the disc, a message appears with the preset playback mode.
- Confirm the message with OK.
- Press FUNCTION MENU and confirm [Playback] with OK.
- Select the required file type with ▲▼ and confirm with OK.
Start playback.
- Press DIRECT NAVIGATOR to launch the Menu screen.
- Select the required track with ▲▼ or 0-9 and confirm with OK.
Playback continues to the last track of the selected group.
Press STOP ■ to stop playback.
Press DIRECT NAVIGATOR or RETURN to exit the screen.
Browse through the pages with SKIP ◀◀◀. The lists of groups follow one after the other.
Shows the track currently being played.
TOTAL: Selected track number/total quantity of track numbers
G: Group number
No.: Selected group number
T: Track number in the group
Group: Selected group name
Select group
- Press ▶ to change to the Tree menu.
- Select the required group with ▲▼◀▶ and confirm with OK.
The contents of the selected group are displayed.


CD-R DivX (Direct-Video-eXpress) is a format for saving compressed audio and video data. The contents of a DVD (approx. 8 GB) can be saved to a conventional CD-ROM (650 MB) in DivX-Format. DivX files must always be played with the version with which they were compressed, since newer DivX versions are not compatible with older versions.
Start playback
The disc only contains DivX data
- Press PLAY▶.
- Select a title with ▲▼ and confirm with OK. Playback begins.
The disc also contains MP3 and/or JPEG data as well as DivX data
- Confirm the message about the preset play mode with OK.
- Press PLAY▶.
- Select a title with ▲▼ and confirm with OK. Playback begins.
Select folder
- Press ▶ to go to [Folder].
- Select the required folder with ▲▼◀▶ and confirm with OK. The contents of the selected group are displayed.
Repeat playback of DivX titles is not possible.
During playback, you cannot launch titles with the number buttons.
You cannot simultaneously record to HDD and play a disc with DivX data.
A warning appears when a Timer Recording is programmed.
CD-R/CD-RW/DVD-R with DivX, JPEG, MP3 data can only be read.
A disc that only contains DivX, JPEG, MP3 data from a PC can be played. If the disc contains titles in DVD Video Recording Format (VR) and PC data, only the titles in VR format can be played back.
DivX playback with limited playback options

DivX Video on Demand is encrypted for copyright reasons. Register the unit to be able to play encrypted titles. Follow the online instructions during registration.
You will need the registration code of the unit. → 66
After you have played an encrypted title for the first time, a new registration code appears in the DivX Registration menu. Do not use this new registration code to purchase other encrypted titles. If you purchase and play encrypted titles with this second code, the registration for the first code will expire. The titles purchased with the first code can no longer be played.
If you purchase encrypted titles with a registration code that does not belong to this unit, you will not be able to play the contents.
- Press PLAY▶.
- Select a title with ▲▼ and confirm with OK. The number of playback options for this title is displayed. It ends with 0.
- Select [Yes] with ◀▶ and confirm with OK. Playback begins. It is not possible to save a playback position.
During playback, do not press the following buttons:
DVD, STOP ■ SKIP ◀◀▶▶, SLOW/SEARCH ◀◀▶
The number of playback options is reduced by 1 each time.
The TV Guide gives you a 14-day preview for up to 50 stations. It uses the Panasonic EPG (Electronic Programme Guide).
Electronic Programme Guide
Programme data, programme postponements and changes in the broadcasting times are broadcast by the satellite Astra 19.2° East.
In the standard setting, programme updates are set to [On]; this takes place at night. The data can only be downloaded in standby mode. To proceed with an update at another time, change the setting [EPG / Software search period]. → 67 If no EPG data are available, a message appears. The data can be downloaded manually at any time.

Launch the TV Guide
When you launch the TV Guide after connecting up for the first time, the programme data have to be loaded manually with [EPG Update Search Now]. → 67 This takes about 30 minutes.
- Press FUNCTION MENU.
- Select [Recording] with ▲ and confirm with OK.
The programme overview of the TV Guide is displayed.
The programme overview only displays current and future programmes.
Press PAGE ◊ to scroll page by page or the colour buttons to scroll day by day through the programme overview.

You can only return to the actual time of the current date.

The TV Guide appears in the Landscape view when launched for the first time. This shows the programme of all available stations.
In the upper part of the TV Guide there is a time bar divided into 30 minute steps. When you select a programme, the detailed title and the air time appear above the time bar.
- Move around in the TV Guide with ▲▼▶ cursor shows the selected station.
Change to the television picture
- Select the required station with ◀ ▲ and confirm with OK. You can now watch the current television programme.
Change between views
- Press GUIDE. Each time you press the button, you change between Landscape view and Portrait view.

The Portrait view shows the corresponding programme of a station. The station bar is positioned horizontally over the programme overview. The current programme is at the top of the list when you select this function.
- Move around in the TV Guide of the selected station with ▲▼
Change to the television picture
Select the required station with ▲ and confirm with OK. You can now watch the current television programme.
FUNCTION MENU
Recording → TV Guide
DVD HDD

Display according to topic areas (Prog. Type)
If you sort the programme overview according to topic areas, only programmes that match your selection are displayed.
- Press the Yellow button.
- Select the required topic area with ▲ and confirm with OK.
- Press RETURN to return to the TV Guide. The selected topic area is marked pale in the programme display.
The Landscape view greys out all programmes which do not match your selection.
Individual programmes are allocated to topic areas by the broadcasting companies. If the selection is not complete, this is not an error in the unit.
Display according to profile
If you have created profiles, the stations in the TV Guide are displayed according to the corresponding selected sorting mode.
If you select [TV], all received stations of the EPG are displayed.
- Press the Blue button.
- Select the required profile with ▲▼ and confirm with OK.
- Press RETURN to return to the TV Guide.
Wege zum Glück
ZDE Series
10:30-11:15, 45 min.
Additional information about a programme
The broadcasters provide additional information about many programmes. Available information is indicated by i in the title bar. The contents of the information depend on the station and cannot be influenced by the unit.
- Press i to open or close the information.
- Scroll line by line with ▲▼ or section by section with PAGE ◊.

Timer programming via TV Guide
Select the required programme in the Landscape or Portrait view.
- Press OK. The Timer Recording menu appears. The data required for programming have been adopted from the TV Guide.
- Select the required drive HDD or DVD with ▲.
- Press OK to save the programme.
After the message [This programme has been stored.], the TV Guide appears again. The Timer programming is marked with ⏻.
The Timer Recording starts automatically at the selected time.
Checking or changing Timer Recordings: → 45
Enter Name: → 31

Deleting a Timer programming
You can delete a Timer programming in the TV Guide if this has not started yet.
- Select the Timer programming in the TV Guide with ▲▼◀▶ and confirm with OK.
- Confirm [Yes] with OK. The programming is deleted.
Stopping a Timer Recording
- Press STOP ■ during the Timer Recording.
- In the following screen, select [Stop Recording] with ◀ and confirm with OK.
- The recording is stopped and the timer programming deleted.
FUNCTION MENU
Delete → DELETE Navigator
DVD HDD SD
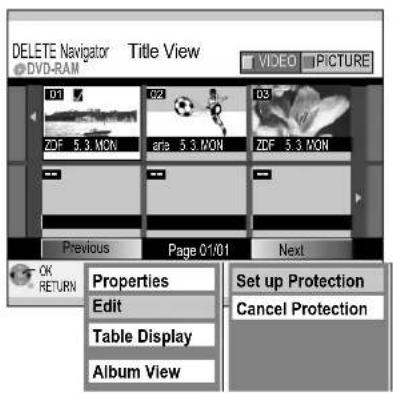
You can delete titles and pictures, protect recordings or cancel the protection. RAM SD Cancel write protection if this has been activated.
- Press FUNCTION MENU
- Select [Delete] with ▲ and confirm with OK.
- Use the colour buttons Green or Red to switch between Title and Album View.
- Select the title or picture in the corresponding menu with ▲▼◀▶
- Confirm with OK.
- Select [Delete] with ◀ and confirm with OK.
Open the submenus
- Select the title with ▲ and press OPTION.
Properties: → 31
Edit: Open another submenu.
Table Display/Thumbnail Display: Switch between both views.
Sort: Only HDD → 32
Set up Protection/Cancel Protection of titles
- Select [Edit] with ▲ and confirm with OK.
- Select the required option with ▲ and confirm with OK.
- Select [Yes] with ◀ and confirm with OK.

Album View/Title View: switch between both views
Delete Album
- Select an album with ▲ and press OPTION.
- Confirm [Delete Album] with OK.
- Select [Delete] with ◀ and confirm with OK.
To delete pictures, confirm the selected album with OK.
- Choose the picture you want to delete with ▲ and confirm with OK.
- Select [Delete] with ◀ and confirm with OK.
Set up Protection/Cancel Protection of Albums
- Select the required option with ▲ and confirm with OK.
- Select [Yes] with ◀ and confirm with OK.
Select Folder
RAM SD
If you have created several higher folders (DCIM→82), you can change these with [Select Folder].
- Select the folder to be opened with ◀ and confirm with OK.
Editing several elements
Select the desired title with ▲▼◀▶ and press PAUSE II.
A check appears. Repeat this process to select other titles.
Press PAUSE II again to clear the selection.
FUNCTION MENU
Copy → COPY Navigator
DVD HDD
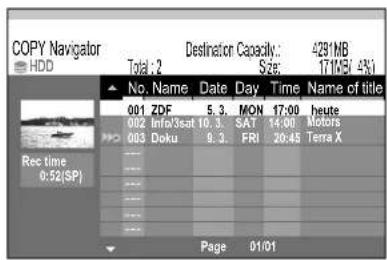
HDD → RAM-R+R -RW(V)-R DL+R DL+RW With this function, you can copy titles recorded in high-speed from HDD to DVD. Media other than RAM are finalized after copying. Before copying, select the settings [Top Menu] or [Title 1]. → 69 The noise generated by copying can be reduced with the setting [DVD Speed for High Speed Copy]. → 61

- Press FUNCTION MENU. - Select [Copy] with ▲▼ and confirm with OK. - Select the title you want to copy with ▲▼ and confirm with OK.
Copy starts in High Speed mode
- Select [Start] with ◀ and confirm with OK. Copying begins. Timer Recording, recording or playback are not possible while copying.
Finalizing
Finalizing begins immediately after copying and ends automatically.
This process cannot be stopped. No additional recording is possible on finalized discs, but they can be played back on other players.
COPY Navigator
Finalizing the disc in progress. It will take approximately 4 min. Cannot stop finalizing.

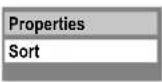
Open the submenu
- Select the required title with ▲▼.
- Press OPTION.
- Select the required option with ▲▼ and confirm with OK.
Properties:→ 31
Sort
The titles can be sorted according to No., Name, Date, Day, Start Time and Name of title. The sorting option is underlined in the COPY Navigator.
- Select the required option with ▲▼ and confirm with OK.

Editing several elements ▼ Select the desired title with ▲▼◀▶ and press PAUSE II. A check appears. Repeat this process to select other titles. Press PAUSE II again to clear the selection.
Programming of Timer Recordings
DVD: Insert a disc.
RAM If you activated write protection, cancel it. → 68
HDD: If you want to record a title to hard disk and copy it in High Speed mode at a later date, select [Rec for High Speed Copy - On] in the Setup menu before the recording. → 61
Please read the information on High Speed Copy. →48
- Press FUNCTION MENU
- Select [To Others] with ▲▼ and confirm with OK.
- Confirm [Timer Recording] with OK.
- Confirm [New Timer Programme] with OK.
- Change to the next entry with ◀▶ and change the setting with ▲▼.


| NameBlue | Select the station.Use the Blue Button to switch between the stored profiles. |
| Date | One-time, daily or weekly programming. |
| Start/Stop | Start time/end of recording. If you press and hold the ▲▼ buttons,the time increases/decreases in 30-minute intervals. You can also use the number buttons for these entries. |
| HDD/DVD | Select the drive. |
| Mode | Recording mode: XP, LP, EP, SP, FR |
| RENEW | For HDD when the date is set to e.g. [SUN - SAT] or [MON - FRI].[ON]: The new recording overwrites the old one.[OFF]: The recordings are made continuously. |
- To enter the title of the recording, select [Programme Name] with ◀ and confirm with OK.
- Enter the required name → 31.
- Press STOP ■ to adopt the name. • After making your changes, save your programming with OK. • To enter other programmes, select [New Timer Programme].
The unit automatically switches to Timer mode at the start time.
One minute before recording starts, REC flashes on the unit display.
A Timer Recording does not start while a disc is being formatted, deleted or finalized. The recording begins afterwards.
If you have programmed the timer programmes one after the other in sequential order, as from the second timer recording:
HDD RAM The first few seconds are not recorded,
-R +R -RW +RW approx. 30 seconds are not recorded.
This unit records with a data compression system (VBR - Variable bit rate). The length of the programmed recordings is adjusted variably to the video data being recorded. It is therefore possible that there will be differences between the displayed and the actual recording time.
PROG/CHECK


Checking or changing Timer Recordings
DVD HDD
Check the settings and correct them if necessary.
- Press PROG/CHECK.
- Select the required Timer programming with ▲ and press OK.
- Select the position that you want to change with ▲▼◀▶ and confirm with OK. Programmes which are just being recorded cannot be changed.
Drive space (DVD/HDD)
| OK The disc has sufficient memory space for the recording. | |
| → (Date) | The available memory space is shown for daily or weekly recordings. |
| ! No disc inserted, disc write protected or not enough memory space. | |
| Reliefnit switches automatically to HDD if the inserted DVD does not have enough memory space for the programmed recording. | |
![Timer Recording Remain HDD 36:40 SP DVD 1:30 SP 9:40:23 5.3 MON No Minute Date Start Stop HDD DVVD Drive space 01 VOX 5.3 MON 14:00 15:00 DVD SP OK 02 ZDF 9.3 FRI 20:45 21:30 DVD SP OK New Timer Programme [Chan. Name] ZDF OK ○ OPT ON ● DELETE □ Time Off RETURN](/content/2026/05/1006397/images/8d6138ea41288236c1e53bc1446652331a27f0bdd685559e9471344ae8d2088d.jpg)


Timer Off/On

For regular e.g. weekly Timer programmings, you can suspend the recording if you want to record another program at the same time. Your Timer programming is retained. You do not have to delete it and reprogramme it again later.
The recording is suspended just once.
- Select the required Timer programming with ▲▼
- Press the Red button to suspend the Timer programming or switch it on.
A Timer programming can also be suspended or switched on using the submenu.
- Select the required Timer programming with ▲▼
- Press OPTION.
- Select [Timer On] or [Timer Off] with ▲ and confirm with OK.
Delete
- Select the required Timer programming with ▲▼
- Press OPTION.
- Select [Delete] and confirm with OK.
Programmes which are just being recorded cannot be deleted. Stop the recording first.
You can also delete a Timer programming with DELETE *.
Stop Recording
You can stop a current Timer Recording.
- Select the current Timer Recording with ▲▼
- Press OPTION.
- Select [Stop Recording] and confirm with OK.
The one-off Timer Recording is finished and thereby deleted.
If you stop a regular Timer Recording (e.g. weekly recording), this is marked as stopped and is not deleted.
Programming for following recordings is retained.
If your television set is equipped with the Q Link function and the possibility of programming with Timer Recording, then you can programme the Timer Recording on your television set.
- Connect the DVD Recorder to the television set with a fully wired 21-pin Scart cable.
- Press DRIVE SELECT on the DVD Recorder to select the drive.
- Switch the DVD Recorder to Standby mode. The television set controls the start and end of the recording.
- Press STOP ■ to stop the recording.
The recording does not start if the DVD Recorder is in Timer or FaxdbjNK's. If several Timer Recordings follow on in quick succession, they are recorded as one title.
Symbols
| The title is currently being recorded. | |
| Shows a Timer programming. | |
| A daily or weekly Timer Recording was stopped.The symbol disappears as soon as the next recording starts. | |
| The title overlaps with other recordings. | |
| HDD/DVD was full. The title could not be recorded. | |
| The programme cannot be played back due to damaged data or cannot be recorded for another reason. | |
| Editing several elements. | |
| The title is write protected. | |
| The programme was copy protected, the title was not recorded. | |
| The title was transferred from DVD to HDD. | |
| Title with restriction for one-time copying. | |
| The title is automatically renewed. | |
| Titles and playlists which can be copied to DVD-R etc. in High Speed mode but not to +R, +R DL, and +RW. | |
| Titles and playlists which can be copied to DVD-R etc. in High Speed mode. | |
| The title is intended for one-time copying and will be deleted after copying. | |
| Titles or playlists with still pictures cannot be overwritten. | |
| The title or playlist was recorded with a TV system other than that currently set for the unit. Titles and playlists with these markings possibly cannot be played back.Switch your TV system to playback these titles/playlist. |
Timer Recording via external units

Settings for external units (EXT LINK)
You control the recording function via an external unit (e.g. a receiver) with EXT LINK. Connect the external unit with a 21-pin Scart cable to the AV2 terminal.
- Press FUNCTION MENU, select [To Others] with ▲▼ and press OK.
- Select [Setup] with ▲ and press OK.
- Select [Connection]▶ with ▲ and [AV2 Settings] with ▲ and press OK.
- Select [Ext Link] with ▲ and confirm with OK.
- Select [Ext Link 1] or [Ext Link 2] with ▲ and confirm with OK.
- Press EXIT to return to the television picture.
Ext Link 1: for digital receivers sending a special recording control signal, e.g. the F.U.N. receiver (TU-DSF41).
Ext Link 2: external recording control for satellite or digital receivers (video signal). The Ext Link 2 cannot be used for an input signal in NTSC format.
Recording programming on the external unit
The Timer Recording is programmed on the external unit. Please read the operating instructions for the external unit.
Switch the DVD Recorder to recording standby
- Select the recording drive DVD or HDD with DRIVE SELECT.
- Press EXT LINK.
Recording standby mode for EXT LINK controlled recordings is activated.
The display shows the selected drive and EXT-L.
The recording begins on receiving an appropriate signal from the connected unit. The selected drive records the video picture for as long as it is being transmitted by the external unit.
The start of the recording may possibly not be recorded correctly.
Switching off recording standby mode
- Press EXT LINK to switch off the recording standby mode. EXT-L disappears from the display.
Prematurely stop recording
- Stop the transfer of the recording signal on the external unit.
- Press EXT LINK to switch off the recording standby mode. EXT-L disappears from the display.
Playback during EXT LINK on the selected drive
- Press DIRECT NAVIGATOR.
- Select the title with ▲ and ▶ press OK. Playback starts.
- Press STOP or DIRECT NAVIGATOR to stop playback.
- Press RETURN or EXIT to leave the DIRECT NAVIGATOR.
Information about High Speed Copy
Copying in High Speed mode allows fast copying of titles, pictures and Playlists.
To copy onto High Speed compatible discs, set the DVD Speed for High Speed Copy setting to [Maximum] or [Normal (Silent)]. →61
If you select a recording mode with higher quality than the original, this does not improve the picture, but it does not make it worse either.
If the disc does not have sufficient memory space, the unit changes to FR mode regardless of the selected recording mode.
You cannot copy in High Speed mode if a title contains many deleted segments.

HDD ◀→ RAM A timer-controlled recording starts even during copying and is always recorded on HDD regardless of the selected drive. Recording and playback are possible while copying in High Speed mode, but with the following exceptions:
- delayed playback is not possible.
- playback of pictures is not possible.
- when copying titles limited to "one time recording", no Playlists can be selected.
- titles with recording restrictions and playlists cannot be copied to the same copy list.
- titles limited to "one time recording" are deleted from the hard disc after copying to CPRM-compatible DVD-RAM.
- Press OK to switch the screen display off. This does not affect copying.
- With ⓘ you can launch information about copying.
HDD → -R *R -RW(V) R DL +R DL +RW If you want to record a title on hard disc and copy it in High Speed mode later on, select [Rec for High Speed Copy - On] in the Setup menu before the recording →61.
If copying in High Speed mode is interrupted, no title is recorded. Even so, disc memory space on DVD-R, DVD-RW(V) or +R is reduced.
HDD → +R +R DL +RW You cannot copy in High Speed mode if titles are longer than 5 hours and were recorded in FR or EP mode.
Displayed by ▶▶.
![graph TD A["Playlist"] --> B["Chapter 1 of title 2"] A --> C["Chapter 3 of title 1"] A --> D["Chapter 2 of title 2"] B --> E["1 new title"] C --> E D --> E](/content/2026/05/1006397/images/9391e0359756dacfd0a043f7ee712c8b587bb8acc3db51a7eaa6b3a7b368ec53.jpg)
Copying Playlists
The various chapters of a Playlist are copied as a title. The Playlist information is not copied.
Playlists cannot be copied if:
- the Playlists consist of titles in different recording modes
- the Playlists consist of several titles in the FR recording mode
- the Playlists contain several audio modes
- the Playlist contains titles limited to "one time recording".
Approximate copying time (at maximum speed)
| HDD | 5x Speed DVD-RAM | 16x Speed 4x Speed DVD-R | Speed 4x Speed 8x Speed DVD-R DL | DVD-RW | +R +R DL | 2,4x Speed | 4x Speed +RW | ||||||||
| Recording mode | Rec time | Required time | Speed | Required time | Speed | Required time | Speed | Required time | Speed | Required time | Speed | Required time | Speed | Required time | Speed |
| XP | 1 Hour | 12:00 min. | 5x | 6:00 min. | 10x | 15:00 min. | 4x | 15:00 min. | 4x | 8:35 min. | 7x | 25:00 min. | 2,4x | 15:00 min. | 4x |
| SP | 6:00 min. | 10x | 2:25 min. | 25x | 7:30 min. | 8x | 7:30 min. | 8x | 4:10 min. | 14x | 12:30 min. | 4,8x | 7:30 min. | 8x | |
| LP | 3:00 min. | 20x | 1:15 min. | 48x | 3:45 min. | 16x | 3:45 min. | 16x | 2:25 min. | 25x | 6:15 min. | 7,2x | 3:45 min. | 16x | |
| EP (6 Hour) | 2:00 min. | 30x | 0:52 min. | 69x | 2:30 min. | 24x | 2:30 min. | 24x | |||||||
| EP (8 Hour) | 1:30 min. | 40x | 0:42 min. | 86x | 1:53 min. | 32x | 1:53 min. | 32x | |||||||
This unit copies a 6x speed DVD-RW with the same speed as a 4x speed DVD-RW, and a 16x speed DVD+R with the same speed as an 8x speed DVD+R.
FUNCTION MENU
To Others Advanced Copy

Copying from DVD-VIDEO with time control

The complete disc can be copied or the copying time can be defined. The titles are copied without chapters.
Nearly all commercially available DVD-VIDEOs have copy protection. The contents of such media cannot be copied with this unit.
- Press FUNCTION MENU in the STOP mode.
- Select [To Others] with ▲ and press OK.
- Select [Advanced Copy] with ▲ and confirm with OK.

1 Copy Direction
- Select [Source] with ▶ and confirm with OK.
- Select DVD with ▲ and confirm with OK. The target drive is recognized automatically.
- Go back to [Copy Direction] with ◀ and select [Copy Mode] with ▼.

2 Copy Mode
- Select [Recording Mode] with ▶ and confirm with OK.
- Select the required recording mode [XP, SP, LP, EP] with ▼ and confirm with OK. The format is recognized automatically.
The High Speed setting is not possible for time-controlled copying.
- Go back to [Copy Mode] with ◀ and select [Copy Time] with ▼.

3 Copy Time
- Select [Time Setting] with ▶ and confirm with OK.
- Select [On] or [Off] with ▲ and confirm with OK. • [On]: Select [Copy Time] with ▼ and confirm with OK.
Use ▲ to change the time setting and confirm with OK.
Select a longer Copy Time. The disc being copied starts at the beginning, including screen saver and title selection.
- [Off]: When Copy Time is switched off, the whole disc is copied if there is enough memory space on the target drive.
- Go back to [Copy Time] with ◀ and select [Start Copying] with ▼.

Start Copying
Start Copying
- Press OK to start copying.
- Select [Yes] with ◀ and confirm with OK. Copying stops at the set time setting.
- To stop copying prematurely, press STOP ■ or hold RETURN for 3 seconds.
When copying a DVD-VIDEO, it is possible that the video and audio quality are not quite the same as the original. Screen displays are also copied.
Cancel All
All adjusted settings or copy lists are deleted!
- Select [Cancel All] with ▲ and confirm with OK.
- Select [Yes] with ◀ and confirm with OK.
FUNCTION MENU
To Others Advanced Copy
![graph TD A["1 Copy Direction"] --> B["2 Copy Mode"] B --> C["3 Create List"] C --> D["Start Copying"]](/content/2026/05/1006397/images/df14d88dcdac33b6511cccc9f6243e2c1f8c2e7efcb3ae9ab48d1899f5020492.jpg)
Copying titles and Playlists
![graph LR A["RAM"] <--> B["HDD +RW"] C["HDD"] --> D["-R -R DL -RW(V) +R +R DL"] E["-RW(VR)"] --> F["HDD"] G["SD"] --> H["HDD RAM"]](/content/2026/05/1006397/images/70dd030f463fc86d50e3bfa3414724d77435ed4a05487a03809bd29bd337f39b.jpg)
Titles and Playlists can be put together in the required sequence in a copy list and copied.
MPEG2 videos cannot be copied from SD Card to HDD in High Speed mode.
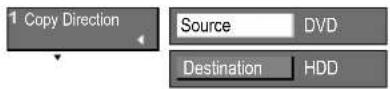
+RW Before copying, select whether a Top Menu is to be created. → 69
- Press FUNCTION MENU
- Select [To Others] with ▲ and press OK.
- Select [Advanced Copy] with ▲ and confirm with OK.
1 Copy Direction
- Select [Source] with ▶ and confirm with OK.
- Select the corresponding source drive with ▲ and confirm with OK.
- Select [Destination] with ▼ and confirm with OK.
- Select the corresponding target drive with ▲ and confirm with OK.
- Go back to [Copy Direction] with ◀ and select [Copy Mode] with ▼

2 Copy Mode
- Select [Recording Mode] with ▶, ▼ and confirm with OK.
- Select the copying speed and confirm with OK.
The High Speed copying speed can only be selected if the corresponding setting has been adjusted in the Setup menu before recording a title →61.
- Go back to [Copy Mode] with ◀ and select [Create List] with ▼

3 Create List
Create a copy list from the titles in [VIDEO] or from the playlists in [Playlists].
- Select [New item] with ▶ and confirm with OK.
- Press the Green Button to change from [VIDEO] to [Playlists]. Press the Red Button to go back to [VIDEO].
- Select the required title or playlist with ▲ and confirm with OK. The title or playlist is transferred to the copy list.
Opening the submenu for VIDEO or Playlists
- Press OPTION.
- Select the required option with ▲ and confirm with OK.
Properties: → 31, Table Display: → 32, Sort: Only HDD → 32
Other View: Change between Playlists and VIDEO.

Editing the copy list
- Select [New item] with ▶ and press OPTION.
Delete All
- Confirm [Delete All] with OK.
- Select [Yes] with ◀ and confirm with OK.
Add
- Select [Add] with ▲ and confirm with OK.
- Select the required title with ▲ and confirm with OK.
Editing several elements
Select the desired title with ▲ and press PAUSE II.
A check appears. Repeat this process to select other titles.
Press PAUSE II again to clear the selection.
FUNCTION MENU
To Others Advanced Copy
DVD HDD SD

Start Copying
Edit the copy list
- Select the required title with ▶, ▲▼ and press OPTION.
- Select the required option with ▲▼ and confirm with OK.
Delete
- Select [Delete] with ▲ and confirm with OK.
- Select [Yes] with ◀ and confirm with OK.
Move
- Select [Move] with ▲ and confirm with OK.
- Select the required position with ▲▼ and confirm with OK.
Start Copying
- Go back to [Create List] with ◀. Select [Start Copying] with ▼ and confirm with OK.
- Select [Yes] with ◀ and confirm with OK.
- To stop copying prematurely, press and hold RETURN for 3 seconds.
- HDD RAM If you want to record or watch television while copying is in process, press OK.
Copying to Dual/Double Layer
-R DL +R DL
Before copying, the titles to be copied are recorded temporarily to the hard disk to prepare them for copying. Make sure that there is enough memory space on the hard disk.

Copy Video (MPEG2)
SD
All videos in MPEG2 format on the SD Card are copied.
• To copy, select [Copy Video (MPEG2)] with ▲▼ and confirm with OK. - Confirm [Start Copying] with OK.
This unit cannot play back MPEG2 videos directly from the SD Card. Copy the MPEG2 videos onto DVD-RAM or HDD first. Videos coded in MPEG2 format which were recorded with a Panasonic SD video camera or another digital video camera can be saved on the hard disk or DVD-RAM. All recordings of any one day are saved as one title.

Finalize
-R +R -RW(V)-R DL +R DL
Media apart from RAM can be finalized after copying and then played back on other DVD players. Before finalizing, select whether playback should begin at the start of the disc or whether a disc menu should be launched ➔ 69. After a disc has been finalized, no more recording is possible.
- Select [Copy&Finalize] with ◀ and confirm with OK. Finalizing begins directly after copying and ends automatically. This procedure cannot be stopped.
- If you do not want to finalize, select [Copy Only] and confirm with OK. -R RW(V) Chapters are produced automatically every 5 mins, +R (approx. every 8 mins) if the disc is finalized after copying. □ □ □ +RW-R AL TIDOLBAN comes a chapter.
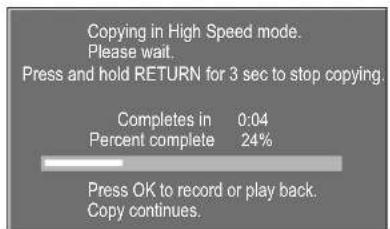
Copying in High Speed mode
-R +R -RW(V)-R DL +R DL
During High Speed recording, only programmes marked with 📄 can be recorded. Copying cannot be started if the size of the copy list takes up more than 100% of the storage space on the target drive.
Transfer chapters when copying in High Speed mode: Yes Transfer chapters when copying in Normal Speed mode: No
FUNCTION MENU
To Others Advanced Copy
DVD HDD SD
![graph TD A["Copy"] --> B["1 Copy Direction"] B --> C["2 Copy Mode"] C --> D["3 Create List"] D --> E["Start Copying"]](/content/2026/05/1006397/images/2389f181e30c590c458181067a03e678f8f17d4fd14e9343f1f8dde18ac5f5c3.jpg)
Copying pictures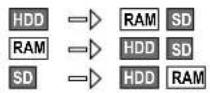
Pictures can be copied with the SD Card.

- Press FUNCTION MENU.
- Select [To Others] with ▲ and press OK.
- Select [Advanced Copy] with ▲ and confirm with OK.
1 Copy Direction
- Select [Source] with ▶ and confirm with OK.
- Select the corresponding source drive with ▲ and confirm with OK.
- Select [Destination] with ▼ and confirm with OK.
- Select the corresponding target drive with ▲ and confirm with OK.
- Go back to [Copy Direction] with ◀ and select [Copy Mode] with ▼

2 Copy Mode
- Select [Format] with ▶ and confirm with OK.
- Select [PICTURE] with ▼ and confirm with OK
- Go back to [Copy Mode] with ◀ and select [Create List] with ▼
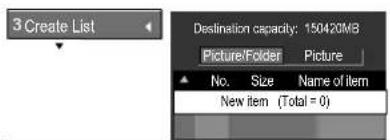
3 Create List
You cannot transfer pictures and folders together in a copy list.
If you have created a copy list, you can no longer switch between Picture and Folder. Delete any existing copy list.

Select Pictures
Picture/Folder Picture
- Select [New item] with ▶ and confirm with OK.
- Select the required picture with ▲ and confirm with OK.
Select pictures from another folder
You cannot transfer pictures from various folders to one copy list.
- Select [New item] with ▶ and confirm with OK.
- Select [Folder] with ▲ and confirm with OK.
- Select the required folder with ▲ and confirm with OK.
- Go back to the pictures with ▼, select the required picture with ▲ and ▶ confirm with OK. The pictures are transferred to the copy list.

Select Folder
Picture/Folder Folder
You can only copy the complete contents of one or several folders.
- Select [New item] with ▶.
- Select [Picture/Folder] with ▲ and confirm with OK.
- Select [Folder] with ▲ and confirm with OK.
- Go back to [New item] with ▼ and confirm with OK.
- Select the required folder with ▲ and confirm with OK. The folder is transferred to the copy list.
Select Folder
RAM SD You have created several higher folders (DCIM → 82).
- Press OPTION and confirm [Select Folder] with OK.
- Select the folder to be opened with ◀ and confirm with OK.
- Select the required folder with ▲ and confirm with OK. The folder is transferred to the copy list.
Editing several elements
Select the desired title with ▲ and press PAUSE.
A check appears. Repeat this process to select other titles.
Press PAUSE II again to clear the selection.
FUNCTION MENU
To Others Advanced Copy
DVD HDD SD

Start Copying
Editing the copy list
- Press OPTION.
- Confirm [New item] with OK or select the required option with ▲ and confirm with OK.
Delete All
- Select [Yes] with ◀ and confirm with OK.
Add
- Select the required title with ▲▼◀▶ and confirm with OK.
Delete
- Select [Delete] with ▲ and confirm with OK.
- Select [Yes] with ◀ and confirm with OK.
Start Copying
- Go back to [Create List] with ◀. Select [Start Copying] with ▼ and confirm with OK.
Copy Pictures
- Select [Folder] with ▲ and confirm with OK. If you do not select a folder, then a New Folder will be created.
- Select the target folder with ▲▼ and confirm with OK.
- Select [Yes] with ◀ and confirm with OK. Copying begins.
Copy Folder
- Select [Yes] with ◀ and confirm with OK. Copying starts, a New Folder is created every time.
To copy other pictures or folders, press RETURN.
To Others → Copy All Pictures
SD
- Press FUNCTION MENU
- Select [To Others] with ▲▼ and press OK.
- Select [Copy All Pictures] with ▲ and confirm with OK.
Copy Pictures (JPEG)
Copy the entire contents of the SD Card to HDD or DVD-RAM.
SD → RAM
- Select the target drive HDD or DVD with ▲▼ and ▶.
- Select [Copy] with ▼ and ◀ and confirm with OK.
- To stop copying prematurely, press and hold RETURN for 3 seconds.
- Press OK to leave the menu or RETURN to go back to Copy All Pictures.
The copied contents of the SD Card are placed behind the already existing folders.
As well as the picture files, all other files are copied to a new folder. Sub folders are not copied.
If there is not enough space on the target drive or the number of copied files/folders exceeds the maximum, then copying is stopped prematurely.

Use this function to edit your movies/recordings made by a recorder or camcorder. You can remove unwanted scenes (e.g. Commercials) or change the sequence.
You can also divide your recordings (titles) into chapters. You can create a Playlist with your favour chapters and edit this later.
If the Playlist contains titles limited to "one time recording", these cannot be copied.
![graph TD A["Source Title: Title1"] --> B["Chapter 1"] A --> C["Chapter 2"] A --> D["Chapter 3"] A --> E["Chapter 4"] F["Source Chapter: Title2"] --> G["Chapter 1 of Title 2"] F --> H["Chapter 3 of Title 1"] F --> I["Chapter 4 of Title 1"] F --> J["Chapter 2 of Title 2"] F --> K["Chapter 1 of Title 1…](/content/2026/05/1006397/images/36d86032921cbc35c4052725c4915fe029a2821a58de1541937f81920e164d92.jpg)


Creating a Playlist HDD RAM
You can create a Playlist from both Source Titles and Source Chapters.
Insert a recorded disc.
RAM If you activated write protection, cancel it. →68
- Press FUNCTION MENU.
- Select [To Others] with ▲▼ and confirm with OK.
- Select [Playlists] with ▲▼ and confirm with OK.
- Select the free field [Create] with ▲ and confirm with OK.
1 Selecting a Source Title
- Select the required Source Title with ◀▶ and press OPTION.
- Confirm [Create Chapter] with OK.
A complete Source Title can be inserted directly into [Chapter in Playlist] with OK.
2 Creating a Source Chapter
- Select the chapter sections with OK. The length of the chapter sections is indicated as a time entry.
- Stop playback with PAUSEIII.
- Search for the position for an exact chapter marking with ◀.
- Select [Finish] with ▼ and confirm with OK.
3 Inserting a Chapter into the Playlist
- Switch from Source Title to Source Chapter with ▼.
- Select a Source Chapter that you want to add to the Playlist with ◀ and confirm with OK.
- Select the position to insert the Source Chapter in Chapters in Playlist with ◀ and confirm with OK.
You cannot choose a position for inserting the first chapter.
To add another chapter, repeat step 3.
Go back to Playlist View with RETURN.
You can also insert a Source Title as chapter in the Playlist.
- Select a Source Title with ▲▼◀▶ and confirm with OK.
- Select the position for inserting the Source Title in the Chapters in Playlist with ◀ and confirm with OK.
Jump to the beginning/end of a title/chapter with PAUSE II and SKIP I◄►►I Locate the position for a marker with SKIP I◄►►, SLOW/SEARCH◄►►, TIME SLIP, MANUAL SKIP,◄►►me playback or .
You can jump between set markers with SKIPI
FUNCTION MENU
To Others → Playlists
Launching the Playlists menu HDD RAM
- Press FUNCTION MENU
- Select [To Others] with ▲ and confirm with OK.
- Select [Playlists] with ▲ and confirm with OK.
Playback
- Select a Playlist with ▲▼ and press OK to start playback.

Opening the submenu HDD RAM
- Select a Playlist with ▲▼◀▶
- Press OPTION.
- Select the required option in the submenu.
Delete
When you proceed with this option, the playlist is deleted and cannot be restored.
The source titles are retained.
- Confirm [Delete] with OK.
- Select [Delete] with ◀ and confirm with OK.
Properties: → 31

Editing Playlists HDD RAM
Edit
- Select [Edit] with ▲ and confirm with OK.
Create
Please read Creating a Playlist.
Copy
- Select [Copy] with ◀ and confirm with OK.
Enter Name → 31
Enter or change the title of the programme. If you enter a long name, it is only partially displayed.

Change Thumbnail
You can select any position in a title as thumbnail for the Playlist View.
- Press PLAY▶ to start playback.
- At the position to be displayed as the new thumbnail, confirm [Change] with OK. The selected thumbnail picture is displayed.
- Confirm [Finish] with OK. The selected thumbnail is added to the Playlist View.
You can jump to the beginning/end of a title/chapter with PAUSE II and SKIP
Find the position for a marker with SKIP ◀SLOW/SEARCH ,
TIME SLIP, MANUAL SKIP, ◀▶ Frame playback or ◀▶.
You can jump between set markers with SKIP.
Editing several elements
Select the desired title with ▲ and press PAUSE.
A check appears. Repeat this process to select other titles.
Press PAUSE II again to clear the selection.
FUNCTION MENU
To Others → Playlists
DVD HDD


Editing Chapters HDD RAM
- Press FUNCTION MENU.
- Select [To Others] with ▲ and confirm with OK.
- Select [Playlists] with ▲ and confirm with OK.
- Select a Playlist in the Playlist View with ▲▼◀▶.
- Press OPTION.
- Select [Chapter View] with ▲ and confirm with OK.
- Select the required chapter with ▲ and press again OPTION
- Select the required option in the submenu with ▲ and confirm with OK.
Add Chapter
You can create a new chapter from the Source Title.
- Select a Source Title with ▲ and press
- Select a Source Chapter with ◀ and confirm with OK. Cancel the process with ▲
- Select the position for inserting the chapter with ◀ and confirm with OK.
- Repeat the steps to add another chapter. Select other Source Titles with ▲
- Press RETURN to exit the menu.
Move Chapter
Select the position to where you want to move the chapter with ▲ and ▶ confirm with OK.
Create Chapter
Divide the title into chapters. Determine the points for starting a new chapter.
The chapters can be selected later during playback with SKIP
Press OK at the point where you want to create the chapter.
Repeat this step to create a chapter at another point.
Select [Finish] with ▼ and confirm with OK.
A short section of the recording immediately before the dividing point may be lost.
Combine Chapters
- Select [Combine] with ◀ and confirm with OK. The selected chapter is combined with the next chapter.
Delete Chapter
- Select [Delete] with ◀ and confirm with OK. The original title is not deleted by deleting the chapter.
Playlist View: Return to Playlist View.
You can jump to the beginning/end of a title/chapter with PAUSE II and SKIP
Find the position for a marker with SKIP ◀SLOW/SEARCH ,
TIME SLIP, MANUAL SKIP, ◀▶ Frame playback or ◀▶.
You can jump between set markers with SKIP
Editing several elements
Select the desired title with ▲ and press PAUSE .
A check appears. Repeat this process to select other titles.
Press PAUSE II again to clear the selection.
FUNCTION MENU
To Others → Flexible Rec
DVD HDD


Displaying the available recording time during recording.
Flexible recording mode (FR)
HDD RAM -R +RW(V) +RW
The unit calculates the best possible recording quality between XP and EP. This is adjusted to the space available on the disc.
This function is not possible during an EXT LINK recording. Recording in FR mode stops when a Timer Recording starts.
- Select the station with CH◇ or the number buttons.
- Press FUNCTION MENU
- Select [To Others] with ▲ and confirm with OK.
- Select [Flexible Rec] with ▲ and confirm with OK.
- Select [Hour] or [Min.] with ◀ and change the recording time with . ▲
- Go back to [Set rec. Time] with ◀
- Select [Start] with ▲ and confirm with OK. Recording begins. • To stop recording prematurely, press STOP ■
The channel or recording mode cannot be changed in PAUSE mode.
Recording on hard disk in FR mode
HDD
Titles recorded in FR mode are recorded so that they will fit exactly on a 4.7 GB disc without needing any further editing.
To Others → DV Auto Rec
DVD HDD


Automatic recording from DV IN
The DVD Recorder detects the Camcorder.
HDD RAM
- Select [Rec to HDD] or [Rec to DVD] with ◀
- Select [Recording] with ◀ and confirm with OK. Copying begins.
The DVD Recorder does not detect the Camcorder.
HDD RAM -R+RRW(V) +RW
- Select the DVD or HDD drive with DRIVE SELECT.
- Set the DV unit to Pause at the required start position.
- Press REC MODE to select the recording mode SP, LP, EP, XP.
- Press FUNCTION MENU.
- Select [To Others] with ▲ and confirm with OK.
- Select [Setup] with ▲ and confirm with OK.
- In the Sound menu, select the setting for [Audio Mode for DV Input]. → 63
- Go back to [To Others] with RETURN and confirm with OK.
- Select [DV Auto Rec] with ▲ and confirm with OK.
- Confirm [Rec] with OK. Recording begins.
Confirm the message at the end of the recording with OK.
- To stop recording prematurely, press STOP. Confirm the following message with OK or RETURN.
The unit cannot record and playback at the same time. Programmes are recorded as titles.
HDD RAM A chapter is generated at every picture interruption and a playlist is created.
The name of the DV unit may possibly not be shown correctly. The date and time display of the DV unit is not recorded.
FUNCTION MENU
To Others → Setup

- Press FUNCTION MENU
- Select [To Others] with ▲ and confirm with OK.
- Select [Setup] with ▲ and confirm with OK.
- Select the submenu with ▲ and change to the settings with ▶
- Select the required setting with ▲ and confirm with OK.
- Select the required option with ▲ and confirm with OK. Follow the menu guide. The unit saves your settings.
- Press RETURN several times to return to [To Others]. With EXIT you go back to the television picture.
Tuning ▶ ▲▼ Settings OK
Edit Profiles: You can find the description of this setting on page 19.

Signal Condition
The display in the Signal Condition menu shows the quality and strength of the selected station, together with satellite and transponder data.
- You can select and check the stations consecutively with CH◇.
Signal Quality - Display red, signal quality below 2: the signal quality is poor, possible disturbance and interruption in pictures and sound.
Display orange, signal quality 2-5: the signal quality is basically adequate, with possible isolated brief disturbance and interruption in pictures and sound.
Display green, signal quality above 5: optimum picture and sound quality.
Signal Strength - The display for signal strength is grey. 0 means 0% signal strength, 10 means 100% signal strength.
The signal strength can also be more than 100% (> 10). The display is then red.
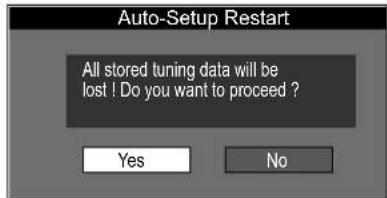
Auto-Setup Restart
After changing location or modifying the satellite system, you can change your settings to the altered reception conditions.
- Select [Yes] with ◀ and confirm with OK. All station settings and all created profiles are deleted.

- Select the required country with ▲ and confirm with OK.
2 Auto-Setup
- Confirm [Automatic Search] with OK or select with ▼ [Quick Setup] and confirm with OK.

Automatic Search Quick Setup
The system searches for all satellites at all 4 LNBs.
- To store the satellites, select [Yes] with ◀ and confirm with OK.
Quick Setup
The system searches for Astra 19.2° E on all 4 LNBs.
A predefined number of TV and radio stations is adopted.
Automatic Search
All available TV and radio stations are adjusted.
3 Auto Clock Setting
Auto-Setup is followed by the date and time settings.
If date and time are not transmitted, adjust these manually.

Auto-Setup Restart
If no stations are found in spite of the stored satellites, check your satellite system and the connections.
- Confirm [Yes] with OK to restart the Auto-Setup.

Tuning ▶ ▲▼ Advanced Setup OK Satellite Configuration OK
In Advanced Setup, you can set up additional satellites and make adjustments to your satellite system.
To receive several satellites with one dish, e.g. Astra 19.2° E and Hot Bird 13° E, you need a Multifeed dish combined with a DiSEqC switch between the receiver of your dish (LNB) and the DVD Recorder.
Your dish must be equipped with two offset universal LNBs.
DiSEqC/LNB
- Select [DiSEqC] with ▶ and confirm with OK.
- Select the required setting with ▲▼ and confirm with OK.
- Select [Number of LNBs] with ▲▼ and confirm with OK.
- Select the required quantity with ▲ and confirm with OK.
- Select [Switching Voltage] with ▲▼ and confirm with OK.

DiSEqC [Auto] [Mini DiSEqC] [DiSEqC] [No]
Auto: Automatic search for LNB and DiSEqC switch.
Mini DiSEqC: 1 to 2 LNBs
DiSEqC: 1 to 4 LNBs
No: Single LNB
Number of LNBs [1] [2] [3] [4]
One LNB is default (LNB A).
You need one LNB for each satellite you want to receive.
Switching Voltage [13 / 18 V] [14 / 19 V]
Voltage for horizontal and vertical polarisation switching.
13 / 18 V: Standard setting
14 / 19 V: The voltage can be increased to 14 / 19 V for long cable distances.
Add Satellite
- Select [Add Satellite] with ▲▼, ▶ and confirm with OK. • To start searching for the satellite receivable with this LNB, confirm [Yes] with OK.
If you are not using a universal LNB, enter the corresponding LNB frequencies for [LNB Freq. Low] and [LNB Freq. High].
LNB Freq. Low [9750 MHz (Universal), 10000 MHz, 10250 MHz]
[10600 MHz, 10750 MHz, ---- MHz (User Def.)]
LNB Freq. High [9750 MHz, 10000 MHz, 10250 MHz,] [10600 MHz (Universal), 10750 MHz, ---- MHz (User Def.)]
The LNB converts the signals from the satellite into a corresponding frequency range for the DVBS receiver. The standard setting for LNB Freq. Low is [9750 MHz (Universal)], for LNB Freq. High: [10600 MHz (Universal)].
• To store this satellite, confirm [Yes] with OK. The search for TV and radio stations begins.

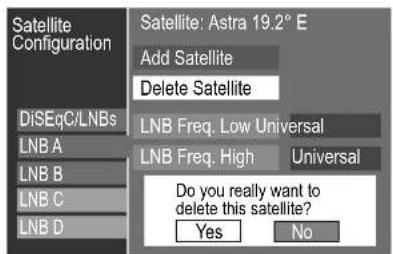
Delete Satellite
- Select the required LNB with ▲▼
- Select [Delete Satellite] with ▶ and confirm with OK. • To delete the satellite, confirm [Yes] with OK. The satellite is deleted. Deleting the satellite and corresponding stations can take some time.
Together with the satellite, the EPG data are also deleted.
FUNCTION MENU
To Others → Setup


Tuning ▶ ▲▼ Advanced Setup OK ▲▼ Add Transponder / Service OK
There are several transponders on one satellite. Each transponder can transmit several TV and radio programmes and data in parallel.
You can obtain the satellite, transponder and programme data from each particular station provider or on the internet.
Add Transponder
- Select the satellite with ▲▼.
- Select [Transponder Frequency] with ▶ and confirm with OK.
- Use the number buttons to enter the required value and confirm with OK.
- Select the next settings with ▼ and confirm with OK.
- Enter the values for [Polarisation], [Symbol Rate] and [FEC] and confirm with OK.
Transponder Frequency [0 MHz] Polarisation [Horizontal] [Vertical]
Polarisation indicates whether the transponder transmits the satellite signal horizontally or vertically.
Symbol Rate [22000, 27500, 28000, 30000 ksym/s] [---- ksym/s (User Def.)]
Data flow transmission rate from the satellite to the dish.
FEC (forward error correction) [Auto] [1/2, 2/3, 3/4, 5/6, 7/8]
The transmitted signal contains redundant data which allows the receiver to detect and correct errors. With the [Auto] setting, the unit selects error correction.
- Select [Add Transponder] with ▼ and confirm with OK. The search for the entered transponder and all its stations begins.
The found transponder is stored.
- Press OK for the message to disappear.
Service Data
If you want to add just one single station of a transponder, first enter the transponder data as described above.
- Select [Service Data] with ▼ and confirm with OK.
- Select [Video PID] with ▶ and confirm with OK.
- Enter the required value with the number buttons and confirm with OK.
- Select the next settings with ▼ and confirm with OK.
- Enter the required values for [Audio PID], [PCR PID] and [AC3 PID] and confirm with OK.
Video PID: Package ID No. for video data.
Audio PID: Package ID No. for audio data, e.g. audio for various languages.
PCR PID: Package ID No. for programme clock reference.
AC3 PID: Package ID No. for Dolby Surround.
The data flow from the satellite consists of many data packages. Each data package has an identification number describing the contents of the package.
- Select [Add Service] with ▼ and confirm with OK. The search for the required station begins.

Tuning ▶ ▲▼ Advanced Setup OK Delete Transponder OK
- Select the satellite with ▲▼.
- Select the transponder frequency with ▶, ▲▼ and confirm with OK.
- Select [Yes] with ◀ and confirm with OK. The transponder is deleted.
Together with the transponder, the EPG data are also deleted.

| Soundtrack | Subtitle | Menus |
| — | Automatic | — |
| English | English | English |
| German | German | German |
| French | French | French |
| Italian | Italian | Italian |
| Spanish | Spanish | Spanish |
| Dutch | Dutch | Dutch |
| Original | — | — |
| Other .... | Other .... | Other .... |

▲▼ Disc ▶ ▲▼ Settings OK ▲▼ Options OK
Settings for Playback
Ratings [8] [1-7] [0]
You can restrict the playback of DVD-VIDEO after entering a password. 8 allows all titles.
1-7 prevents the playback of DVD-VIDEO with the registered security levels. 0 blocks all titles.
Changes the security level
Unlock Recorder: Return to level 8.
Change Password: Change the password.
Change Level: Change the authorization level.
Temporary Unlock: You can temporarily authorise a disc for playback.
The security level is retained if you switch to standby or open the disc tray.
Soundtrack, Subtitle, Menus DVD-V
Select the language for Soundtrack, Subtitle and Menus.
Enter the language code for another language under [Other].
Settings for Recording
Recording time in EP mode [EP (6Hours)] [EP (8Hours)]
Select the maximum number of hours for recording in EP mode.
EP (6Hours): Recording time on a 4.7 GB disc.
EP (8Hours): Recording time on a 4.7 GB disc. Sound quality is poorer.
Rec for High Speed Copy [On] [Off]
On: Enables copying from HDD to a DVD-R, -R DL, +R DL, DVD-RW(V) (DVD-Video Format), +RW or +R in High Speed mode. Titles are saved in 4:3 format. When recording a dual channel sound programme, only the main or only the secondary sound can be recorded. Select the audio type you want to copy under Bilingual Audio Selection [M1 or M2]. → 63
16:9 format programmes (wide picture) are also recorded in 4:3 format.
DVD Speed for High Speed Copy [Maximum] [Normal (Silent)]
When using High Speed compatible DVD-RAM 5x, DVD-R-, +R 8x or +RW 4x discs. In the [Normal (Silent)] setting, this unit generates less noise then in [Maximum]. The time required for copying is doubled.
List of language codes
| Abkhazian | 6566 | Catalan | 6765 |
| Afar | 6565 | Chinese | 9072 |
| Afrikaans | 6570 | Corsican | 6779 |
| Albanian | 8381 | Croatian | 7282 |
| Amharic | 6577 | Czech | 6783 |
| Arabic | 6582 | Danish | 6865 |
| Armenian | 7289 | Dutch | 7876 |
| Assamese | 6583 | English | 6978 |
| Aymara | 6589 | Esperanto | 6979 |
| Azerbaijani | 6590 | Estonian | 6984 |
| Bashkir | 6665 | Faroese | 7079 |
| Basque | 6985 | Fiji | 7074 |
| Bengali, Bangla | 6678 | Finnish | 7073 |
| Bhutani | 6890 | French | 7082 |
| Bihari | 6672 | Frisian | 7089 |
| Breton | 6682 | Galician | 7176 |
| Bulgarian | 6671 | Georgian | 7565 |
| Burmese | 7789 | German | 6869 |
| Byelorussian | 6669 | Greek | 6976 |
| Cambodian | 7577 | Greenlandic | 7576 |
| Guarani | 7178 | Latvian, | Lettish | 7686 | Quechua | 8185 | Tamil |
| Gujarati | 7185 | Lingala | 7678 | Rhaeto-Rom. | 8277 | Tatar | 8484 |
| Hausa | 7265 | Lithuanian | 7684 | Romanian | 8279 | Telugu | 8469 |
| Hebrew | 7387 | Macedonian | 7775 | Russian | 8285 | Thai | 8472 |
| Hindi | 7273 | Malagasy | 7771 | Samoan | 8377 | Tibetan | 6679 |
| Hungarian | 7285 | Malay | 7783 | Sanskrit | 8365 | Tigrinya | 8473 |
| Icelandic | 7383 | Malayalam | 7776 | Scots Gaelic | 7168 | Tonga | 8479 |
| Indonesian | 7378 | Maltese | 7784 | Serbian | 8382 | Turkish | 8482 |
| Interlingua | 7365 | Maori | 7773 | Serbo-Croat. | 8372 | Turkmen | 8475 |
| Irish | 7165 | Marathi | 7782 | Shona | 8378 | Twi | 8487 |
| Italian | 7384 | Moldavian | 7779 | Sindhi | 8368 | Ukrainian | 8575 |
| Japanese | 7465 | Mongolian | 7778 | Singhalese | 8373 | Urdu | 8582 |
| Javanese | 7487 | Nauru | 7865 | Slovak | 8375 | Uzbek | 8590 |
| Kannada | 7578 | Nepali | 7869 | Slovenian | 8376 | Vietnamese | 8673 |
| Kashmiri | 7583 | Norwegian | 7879 | Somali | 8379 | Volapük | 8679 |
| Kazakh | 7575 | Oriya | 7982 | Spanish | 6983 | Welsh | 6789 |
| Kirghiz | 7589 | Pashto, Pushto | 8083 | Sundanese | 8385 | Wolof | 8779 |
| Korean | 7579 | Persian | 7065 | Swahili | 8387 | Xhosa | 8872 |
| Kurdish | 7585 | Polish | 8076 | Swedish | 8386 | Yiddish | 7473 |
| Laotian | 7679 | Portuguese | 8084 | Tagalog | 8476 | Yoruba | 8979 |
| Latin | 7665 | Punjabi | 8065 | Tajik | 8471 | Zulu | 9085 |

Field
Field Frame+ =

▲▼ Picture ▶ ▲▼ Settings OK ▲▼ Options OK
Comb Filter [On] [Off]
On: The picture is clear with rich contours. The setting is always set to [On] if you have selected [TV System - NTSC].
Off: If the picture being recorded is distorted.
Still Mode [Automatic] [Field] [Frame]
Select how the still picture should be displayed.
Field: Select this function if the picture is distorted in the [Automatic] setting.
Frame: Select this function if small text or line structures are not clearly displayed in the [Automatic] setting.
Every frame consists of two fields. Distortion is possible in a frame, but as a rule the picture quality is better than in a field. The field is coarser grained but has no distortion.
Seamless Play [On] [Off] - RW(VR)
Seamless playback of a chapter in a Playlist.
On: The chapters in a Playlist are played seamlessly. This is only possible if the Playlist contains the same audio types. This function is not possible with Quick View. The position of the chapter segments may change slightly.
Off: The boundaries of the chapters in the Playlist are followed exactly, but the picture can still freeze briefly.
FUNCTION MENU
To Others → Setup
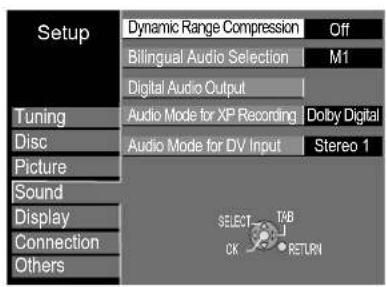

Sound Settings OK Options OK
Dynamic Range Compression DVD-V [On] [Off] (only Dolby Digital)
On: The volume for quiet passages is increased and the volume for loud passages is decreased. The sound can be clearly understood even when the volume is lowered.
Bilingual Audio Selection -R -R DL -RW(V) +R +R DL +RW [M 1] [M 2]
To record programmes broadcast in dual channel sound, you can choose between the original language [M1] or another available language [M2]. If you are copying from another external source, select the soundtrack on the other unit.
Digital Audio Output
Select the corresponding setting if you have connected an external unit to the DIGITAL AUDIO OUT of the DVD Recorder.
PCM Down Conversion [On] [Off]
Select the audio output mode for a sample rate of 96 kHz or 88.2 kHz.
Despite this setting, signals are converted to 48 kHz or 44.1 kHz if they have a sample rate of more than 96 kHz or 88.2 kHz or the disc is copy-protected.
On: The connected unit cannot process signals with a sample rate of 96 kHz or 88.2 kHz. Signals are converted to 48 kHz or 44.1 kHz.
Off: The connected unit can process signals with a sample rate of 96 kHz or 88.2 kHz. Signals are output with 96 kHz or 88.2 kHz.
Dolby Digital, DTS, MPEG [Bitstream] [PCM]
Bitstream: The connected unit can decode the corresponding signal.
PCM: If the connected unit cannot decode the corresponding signal, the setting must be changed to [PCM]. Otherwise, the loud noise can damage your hearing or loudspeakers. Make the necessary changes according to your audio system.
Audio Mode for XP Recording [Dolby Digital] [LPCM]
Choice of audio type when recording in XP mode. The picture quality of LPCM recordings may be poorer than normal recordings in XP mode.
Audio Mode for DV Input -R -R DL -RW[VI] +R +R DL +RW [Stereo 1] [Stereo 2] [Mix]
Choice of audio type when recording from the DV input.
Stereo 1: Original sound. Stereo 2: Voice-over. Mix: Original sound + voice-over.

▲▼ Display ▶ ▲▼ Settings OK ▲▼ Options OK
Language [English] [German]
Select the menu language.
On-Screen Messages [Off] [3, 5, 7, 10 sec.]
Select the display time for screen flashes.
Off: Screen flashes are not shown when changing the station.
FL Display [Bright] [Dim] [Automatic]
Dim: Changes the brightness of the display on the unit.
Automatic: This setting reduces power consumption in standby mode. The display is dark during playback. Press any key to light up the display again. The display goes off when the unit is switched off.

Playback of a film in 16:9 on a conventional TV set (4:3). [Pan & Scan]
The sides are cut off.![PANASONIC DMR-EX80S - FL Display [Bright] [Dim] [Automatic] - 2](/content/2026/05/1006397/images/713e48b05a51395e30d6435de3dfe97f14ebe66b8f3e6355358c3326811e2387.jpg)
[Letterbox] Black bars at the top and bottom.![PANASONIC DMR-EX80S - FL Display [Bright] [Dim] [Automatic] - 3](/content/2026/05/1006397/images/0b88874cc283ca1c8e99f1670024d368558aa276761296ef4c1f553d7ef556c6.jpg)

[4:3] Picture output as original aspect.![PANASONIC DMR-EX80S - FL Display [Bright] [Dim] [Automatic] - 5](/content/2026/05/1006397/images/2f65abbf0429237943c788285f802e31ffe92b7d83b2279fe687a69298063473.jpg)
[16:9] Picture is output with side panels.![PANASONIC DMR-EX80S - FL Display [Bright] [Dim] [Automatic] - 6](/content/2026/05/1006397/images/de3c4b33dbd7bb04dce43715acda8dc838b75a2cecb79a11925c29b2d11227fc.jpg)
▲▼ Connection ▶ ▲▼ Settings OK ▲▼ Options OK
TV Aspect [16:9] [Pan & Scan] [Letterbox]
Select the TV screen format of your television.
Pan & Scan: The sides are cut off.
Letterbox: Black bars appear at the top and bottom of the screen.
Progressive [On] [Off]
On: The signal is displayed in full picture quality using COMPONENT VIDEO OUT.
The AV1 Output cannot be changed over to [RGB 1/2 (without component)]. Select [Video (with component)].
If the unit is connected to the television set using the S VIDEO OUT or the AV1 terminal, the output is in the Interlace process regardless of the settings.
Progressive cannot be selected if the unit is connected with the HDMI cable.
Television picture in the Progressive setting
The Progressive picture format is set to 16:9. DVD-Video can be displayed perfectly with a picture format of 16:9. However, video material with a picture format of 4:3 is stretched to the right and left. If your television can adapt the picture format for Progressive pictures, select the [On] setting.
TV System [PAL] [NTSC]
PAL: The unit is connected to a PAL or multi-system television: programmes recorded with NTSC are played as PAL60.
NTSC: The unit is connected to an NTSC television: programmes recorded with NTSC are played as NTSC.
HDMI Settings
HDMI (High Definition Multimedia Interface) is a digital interface for audio and video. HDMI works without data compression so that there is no quality loss from the system.
HDMI Video Format [576i/480i, 576p/480p, 720p, 1080i] [Automatic]
Select the screen resolution of your connected television set. → 81
Automatic: The system automatically chooses the setting to match the connected unit. This setting normally does not need to be changed. If you are not satisfied with the picture quality, it may help to change this setting.
Only the settings supported by the connected unit can be selected.
Aspect for 4:3 Video [4:3] [16:9]
Select the aspect for playback of a 4:3 video on the connected 16:9 television.
(Only possible if a HDMI resolution of [720p] or [1080i] has been selected.)
Output depends on the television set.
4:3: Picture is output as original aspect.
16:9: Picture output as 16:9 aspect with side panels.
Digital Audio Output [HDMI and Optical] [Optical Only]
HDMI and Optical: Both outputs are activated with an audio signal.
Optical Only: Only the OPTICAL connection is activated with a signal.
VIERA Link [On] [Off]
On: When set to [On], the DVD Recorder can work with connected units.
Off: When HDAVI Control is not being used.
FUNCTION MENU
To Others → Setup

▲▼ Connection ▶ ▲▼ Settings OK ▲▼ Options OK
AV1 Output
[Video (with component)]
[S Video ( with component )]
[RGB 1 ( without component )]
RGB 2 (without component)
Video (with component): Factory default setting.
S Video (with component): Select this setting if your television can receive S Video signals.
RGB 1 (without component): RGB output is available all the time while this unit is on.
RGB 2 (without component): RGB output is available only during playback or on-screen display.
Video (with component) is switched on automatically if the unit is connected via HDMI.

AV2 Settings
Adjust the settings for the connected unit in the following submenus.
AV2 Input
RGB / Video: [RGB] [Video] [S Video]
RGB / Video: Automatically recognized.
RGB, Video, S Video: The input is switched to the selected signal.
Not for NTSC: RGB / Video, S Video, Ext Link 1, Ext Link 2.
Ext Link
[Ext Link1] [Ext Link 2]
External Link 1: For digital receivers sending a special recording control signal, e.g., the F.U.N. receiver (TU-DSF41)
External Link 2: External recording control for satellite or digital receivers (video signal).

Common Interface
The possible settings for your module and your Smart Card are specified as default settings by the card provider and may possibly only be available in one language (English).
- Select the required setting with ▲▼ and confirm with OK.
- Follow the menu guide on the card to adjust settings or make changes.
- Press RETURN to exit the menu.
Please also read the information provided with your module and your Smart Card.


▲▼ Others ▶ ▲▼ Settings OK ▲▼ Options OK
Remote Control [DVD 1] [DVD 2] [DVD 3]
If you are also using another Panasonic unit at the same time, change the mode for the remote control. → 6
Clock
The Time and Date are normally adjusted precisely during the Auto-Setup. However, under certain circumstances it is possible that the DVD Recorder does not automatically adopt the time and date. In this case, you can set time and date manually.
- Set Automatic to [Off] with ▲ and confirm with OK.
- Use ▲ and ▶ to change the Time and Date.
- Confirm the settings with OK.
Activate the automatic time adjustment
The precise time is adjusted automatically if the DVD Recorder is set to a station that transmits a time signal.
- Set Automatic to [On] with ▲ and confirm with OK. Automatic time adjustment now begins.
This DVD Recorder has a 24-clock time setting.
In the case of a power failure, an automatic standby system saves the time for max. 60 minutes. If the Automatic setting has been adjusted to [On], the function checks and corrects the time several times a day. This function only works when the DVD Recorder is in standby mode. This function is not possible in the timer recording mode. Please pay attention to summer and winter time.
In the case of a weak reception signal for example, it is possible that the automatic time adjustment does not work. In this case, the Automatic setting goes to [Off]. Automatic time adjustment is now deactivated.
If the reception signal improves later on, the Automatic setting can be adjusted back to [On] again.
Power Save [On] [Off]
On: Power Save feature in Standby mode. The brightness of the display field cannot be changed in the Power Save mode. The Quick Start is set to [Off]. If you want to connect an external unit via the AV2 Scart terminal, the DVD Recorder must be switched back on from the Standby mode.
Off: The brightness of the display field can be changed.
Quick Start [On] [Off]
When a television is connected via the 21-pin Scart, COMPONENT VIDEO, VIDEO or S VIDEO terminals.
On: The unit switches on from Standby mode in approx. 1 second. In Standby mode, more power is used and Power Save is set to [Off].
DivX Registration
In order to play purchased or borrowed DivX files on this unit, you need the individual DivX code for this unit. The code is displayed here. Please make a note of the code.

▲▼ Others ▶ ▲▼ Settings OK ▲▼ Options OK
System Update
EPG Download in Standby [On] [Off]
On: If the DVD Recorder is in Standby mode, the EPG programme data are updated from the satellite Astra 19.2° E during the adjusted time period and then stored.
Off: Automatic update does not take place.
Software Update in Standby [On] [Off]
On: If the DVD Recorder is in Standby mode, it automatically searches for updated software during the adjusted time period. The unit display shows the software update. If the unit is in recording standby, this does not affect Timer-controlled recordings.
Off: Automatic update does not take place.
Depending on the contents of the update, some of the settings can be reset to the factory defaults. In this case, readjust the settings.
EPG / Software search period [Automatic]
Automatic: The unit searches for current EPG programme data and new software once every 24 hours.
[02:00- 06:00; 06:00- 10:00; 10:00- 14:00; 14:00- 18:00; 18:00- 22:00; 22:00- 02:00]
The search for current EPG programme data and new software starts within the adjusted time period.
Make sure that your unit is in Standby mode during this time.
Software Update Search Now
Start the search for new software manually.
A new software version is announced by a message. Do not switch your unit off during the update. A message shows that the update has finished.
EPG Update Search Now
Start the search for new EPG programme data manually. Do not switch your unit off during the update. A message shows that the update has finished.
Initialize
[Shipping Condition] [Default Settings]
Shipping Condition
All settings, except for the security levels with corresponding password and the time settings, are reset to the factory default settings.
Default Settings
All settings, except for the programmed channels, time, country, language and disc language settings, the security levels with corresponding password and the remote control code, are reset to the factory default settings.
FUNCTION MENU
To Others => HDD Management
HDD
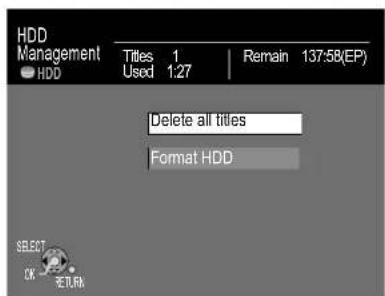
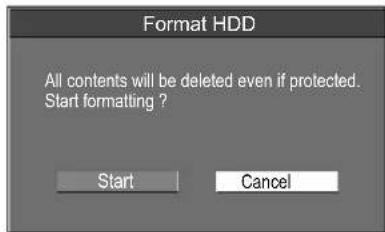
- Press FUNCTION MENU.
- Press [To Others] with ▲▼ and confirm with OK.
- Select [HDD Management] with ▲▼ and confirm with OK.
- Select the required menu with ▲▼ and confirm with OK.
- Press RETURN to return to [To Others] and EXIT to return to the TV picture.
Delete all titles
- Confirm [Delete all titles] with OK.
- In the following screen, select [Yes] with ◀ and confirm with OK.
- In the confirmation prompt, select [Start] with ◀ and confirm with OK.
All titles and playlists are deleted and cannot be restored. Protected titles cannot be deleted.
Format HDD
The formatting process deletes all data from the HDD.
- Select [Yes] with ◀ and confirm with OK.
- Select [Start] with ◀ and confirm with OK.
The formatting process begins. A message appears on completion. - Press OK.
To Others → DVD Management
DVD

RAM If you activated write-protection, cancel it.
- Press FUNCTION MENU
- Select [To Others] with ▲▼ and confirm with OK.
- Select [DVD Management] with ▲▼ and confirm with OK.
- Select the required menu with ▲▼ and confirm with OK.
- Press RETURN to return to [To Others] and EXIT to return to the TV picture.
Disc Name
- Enter the name → 31. The name is displayed in DVD Management.
You cannot name a disc after it has been finalized.
RAM

Disc Protection
With this process, you can activate or cancel write-protection.
- Select [Yes] with ◀ and confirm with OK.
Protection On: the padlock is closed.
- To cancel write-protection, select [Yes] with ◀ and confirm with OK.
Protection Off: the padlock is opened.
Delete all titles
- Confirm [Delete all titles] with OK.
- In the following screen, select [Yes] with ◀ and confirm with OK.
- In the confirmation prompt, select [Start] with ◀ and confirm with OK.
All titles and playlists are deleted and cannot be restored. Protected discs and titles cannot be deleted.
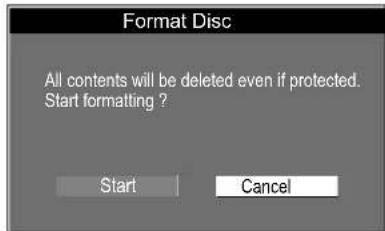
Format Disc
RAM -RW(V) +RW -RW(VR) Only for new discs +R +R DL
Some discs are not formatted. They must be formatted before they can be used in this unit. The formatting process deletes all data from the disc. The menu shows how long the formatting process will probably take.
- Select [Yes] with ◀ and confirm with OK.
- Select [Start] with ◀ and confirm with OK. The formatting process begins.
A message appears on completion.
- Press OK.
Do not unplug the unit while the disc is being formatted or finalized.
Formatting can be cancelled and restarted. The formatting process deletes all data, including the recordings created with this unit.
FUNCTION MENU
To Others → DVD Management


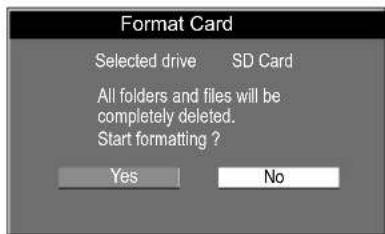
Top Menu
-R +RRW(V) □ -R DL +R DL +RW
Before finalizing the disc, you can select one of 9 different colour schemes for the disc menu.
- Select the corresponding colour scheme with ▲▼ and confirm with OK.
Auto-Play Select
-R -RW(V) +R -R DL +R DL +RW
Before finalizing, you can select whether playback should start from the beginning of the disc or be launched from a disc menu.
- Select [Top Menu] or [Title 1] with ▲▼ and confirm with OK. If [Top Menu] is selected, the disc menu appears first. If [Title 1] is selected, playback begins at the beginning of the disc.
Finalize
-R -RW(V) +R -R DL +R DL
Finalizing turns the discs into DVD-VIDEOs in DVD-Video format. They can be played on all DVD Players that support the DVD-Video format.
- Select [Yes] with ◀ and confirm with OK.
- Select [Start] with ◀ and press OK. Finalizing begins. A message is displayed on completion.
- Press OK
You can only finalize DVDs which were recorded on this unit. You can no longer record on finalized DVDs. A finalized DVD-RW can be recorded again after being reformatted.
Create Top Menu
+RW
With a +RW, you can create a Top Menu.
The created Top Menu can be used for playback on another DVD Player.
- Select [Create Top Menu] with ▲ and confirm with OK.
- In the following menu, select [Yes] with ◀ and confirm with OK.
- Select [Start] with ◀ and confirm with OK. The Top Menu is created.
This procedure concludes with the message: Top Menu was created. Return to DVD Management with OK.
To Others → Card Management

If you activated write protection on the SD Card, cancel it. → 21
- Press FUNCTION MENU.
- Select [To Others] with ▲▼ and confirm with OK.
- Select [Card Management] with ▲▼ and confirm with OK.
- Confirm [Format Card] with OK.
- Press RETURN to return to [To Others] and EXIT to return to the TV picture.
Format Card
The formatting process deletes all data on the SD Card.
- Select [Yes] with ◀ and confirm with OK.
- In the confirmation prompt, select [Start] with ◀ and confirm with OK. The formatting process begins. A message appears on completion.
- Press OK
DISPLAY menus contain information about the disc or unit. With DVD-VIDEOS, you can use the repeat function, change subtitles and the angle, change the picture and sound settings for DVD playback.
Depending on the status of the unit (playback, STOP), there are some entries that cannot be selected or changed.

- Press DISPLAY to launch the menu.
- Press DISPLAY again to exit the menu.
Subtitle, Soundtrack and Angle can only be selected if they were recorded on the disc. With some discs, they can only be changed via the disc menus. For playback of bilingual recordings, "1+1 ch" is displayed.

▲▼ Option ▲▼ Setting
| Soundtrack | Soundtrack languageDVD-V Select the sound and the language. |
| Sound propertiesRAM -R -R DL -RW(V) +R +R DL +RW -RW(VR) The disc sound properties are displayed.LPCM/PPCm/Dolby Digital, DTS und MPEG: signal type ch (channel): number of channels, k (kHz): ample rate b (bit): number of bits,DivX VCD Select the number of the audio channel. | |
| Subtitle | [On] [Off]DVD-V Switch subtitles on/off, select the language.RAM -R -R DL -RW(V) +R +R DL +RW -RW(VR) Only for discs with the Subtitle On/Off setting. The Subtitle On/Off setting cannot be recorded with this unit.VCD Switch subtitles on/off, select the number of the subtitle. |
| Language | ENG: English DAN: Danish THA : ThaiFRA : French POR: Portuguese POL : PolishDEU: German RUS: Russian CES: CzechITA : Italian JPN : Japanese SLK : SlovakESP : Spanish CHI : Chinese HUN: HungarianNLD : Dutch KOR: Korean FIN : FinnishSVE : Swedish MAL: Malay * : OthersNOR: Norwegian VIE : Vietnamese* Others: enter the corresponding language code. ➔ 61 |
| Audio channel | L+R / L / RRAM -RW(VR) VCD DivX Change audio during playback. |
| Source select DivX | [Automatic]: The unit detects whether the DivX content was recorded as full or half picture.[Progressive]: The picture may be blurred, but the overall quality is very good.[Interlace]: Contains only half the information of a full picture (interlace) and the picture quality is poorer. |
| Angle | DVD-V Select another recording angle. |
| PBC | VCD PBC shows whether the playback control menu is on/off. |
Picture and sound settings
Play
SettingOption
| Repeat Play | [On] [Off] This function is only available if the elapsed time is displayed. ► Track ↔ All ↔ Off ← CD VCD ► Title ↔ Chapter ↔ Off ← HDD RAM -R -R DL DVD-V +R +R DL ► Track ↔ Group ↔ Off ← MW(V) -RW(VR) +RW ► Track ↔ Group ↔ Off ← MP3 During playback of a Playlist ► PL (Playlist) ↔ Off ← HDD RAM -RW(VR) If the Video-CD has playback control, select a track in the STOP mode with the number buttons. | |
Picture
▲▼ Option ▲▼ Setting
| Playback NR | [On] [Off] Reduces screen interference. |
| Progressive | [On] [Off] Select [] to activate full picture output.On |
| Transfer | [Progressive - On] Select the corresponding conversion mode for full picture output. PAL output signal [Auto] [Video] [Film] Auto: film and video content is detected and converted accordingly. Video: if problems occur with the [Auto] setting. Film: select Film if the edges of the film look irregular with the [Auto] setting. NTSC output signal [Auto 1] [Auto 2] [Video] Auto 1: film and video content is detected and converted accordingly. Auto 2: films with different picture frequencies are detected and converted accordingly. Video: for interference with the contents of [Auto 1] or [Auto 2]. |
| AV-in NR | [Automatic] [On] [Off] Reduces interference during tape recording. Only for AV1, AV2, AV3 or DV. Automatic: only with picture input from a video cassette. On: Activates noise suppression for the video input. Off: Records the input signal unchanged. |
Sound
▲▼ Option ▲▼ Setting
| DVB Multi Audio | If more than one audio channel is broadcast, you can set the required channel here. |
| V.S.S. | [Natural] [Emphasis] [Off] HDD RAM-R -R DL -RW(V) +R +R DL +RW DVD-V -RW(VR) Surround sound effect with 2 front speakers. Only with Dolby Digital with 2 or more channels. Switch V.S.S. off if this causes problems. V.S.S. does not work with recordings in dual-channel sound. |
| Dialog Enhancer | [On] [Off] HDD RAM-R -R DL -RW(V) +R +R DL +RW DVD-V -RW(VR) DivX Dolby Digital, only with 3 or more channels, including a center channel. The volume is increased to make dialogue easier to understand. |
Other
▲▼ Option ▲▼ Setting
| Position | [1 - 5] Position of the OSD displays on the screen. |
Discs suitable for recording
| Rewritable | Writable | |||||
| RAM | RW + RW | -R +R | -R DL | +R DL | ||
| x2 | x1 | x2.4 | x1 | x2.4 | x4 | x2.4 |
| x3 | x2 | x4 | x4 | x4 | ||
| x5 | x4 | x8^* | x8 | x8 | ||
| x6 | x16 | x16 | ||||
* Playback only.
DVD Video Recording format (VR)
This format enables recording and playback.
Programmes limited to "one time recording" can be recorded to a CPRM-compatible disc.
This unit can be used for recording to CPRM-compatible DVD-RAM.
Playback is only possible with a compatible DVD player. Use a DVD-RAM or HDD (hard disk) to record in DVD Video Recording format.
Suitable data for recording and playback: video and still pictures.
DVD-Video format (V)
This recording format is the standard DVD-VIDEO. Digital programmes limited to "one time recording" cannot be recorded.
To record in DVD-Video format, use DVD-R/-R DL or RW(V).
Suitable data for recording and playback: video
+VR format
Digital programmes limited to "one time recording" cannot be recorded. To record in +VR format, use a +R/+R DL or +RW.
Suitable data for recording and playback: video
 |
Playback and recording discs
DVD-RAM
The DVD-RAM can be compared with the hard disk and can be written up to 100,000 times on average. The disc can be played on DVD-RAM compatible players, recorders and computers. The recording is made in DVD Video Recording format (VR). Movies or parts of movies can be edited and deleted. The deletion of movies releases previously used storage space. The creation of playlists does not take up any additional storage space.
Dual channel sound and 16:9 format are supported in addition to the TIME SLIP function.
 |
DVD-R/+R (Recordable)
DVD-R/+R can only be recorded once. Movies or parts of movies can be deleted during processing, but storage space is still taken up and cannot be used for other movies. Through finalization, the DVD-R/+R becomes a DVD-V which can be played on other units.
| -R |-R DL |+R |+R DL | Finalization On the recording unit | DVDVIDEO |
| The movies can no longer be processed after finalization. | ||
| Recording with this recorder | → | Playback on another unit |
| Recording with another unit | → | Playback on this recorder |
| DVD-RW(V) : DVD-Video format+RW : +VR format | |
| DVD-RW | -RW(V) |
| 4.7 GB 12 cm1.4 GB 8 cmrewritable | |
| +RW | +RW |
| -- | rewritable |
DVD-RW(V)/+RW (Rewritable)
DVD-RW(V)/+RW is rewritable and erasable. You must format it to be able to rewrite it again. Through finalization, the DVD-RW(V) becomes a DVD-V which can be played on other units. A finalized DVD-RW(V) can be reformatted and rewritten. Formatting deletes all data!
A +RW becomes a DVD-V by creating a Top Menu. → 69
| -RW(V) +RW = Finalizing => DVD VIDEO = Formatting => -RW(V) +RWOn the recording unitThe movies can no longer be processed after finalization. | ||
| Recording with this recorder | → | Playback on another unit |
| Recording with another unit | → | Playback on this recorder |
| DVD-R DL: DVD-Video format+R DL : +VR format | ||
 | DVD-R DL8.5 GB 12 cmwritable | -R DL |
| R DL | ||
| +R DL8.5 GB 12 cmwritable | +R DL | |
 | DVD-RW(DVD-VR format)playable only | -RW(VR) |
 | DVD-VIDEOplayable only | DVD-V |
 | ||
 | CDCD-R/RWplayable only | CD |
| -- | ||
 | VIDEO-CDCD-R/RWplayable only | VCD |
Playback and recording discs
DVD-R DL/+R DL (Double Layer DVD / Dual Layer DVD)
The data are saved on two parallel layers. You have more space available. If the laser changes layers during playback, brief image and sound distortions may occur. If there is not enough capacity to record a title on the first layer, the rest is recorded on the

second layer. During the playback of a title recorded on two layers, the unit automatically switches between the layers and plays the title back like a normal title. You cannot record directly on a DVD-R DL/+R DL with this unit. You can record on the hard disc and then copy the recording to the DVD disc. After finalization, these discs can only be played on DVD-R DL/+R DL/+RW compatible players.
Playback discs
A DVD-RW(V) that was recorded on another DVD Recorder is played back in DVD-RW(VR) format by this unit.
Programmes limited to "one time recording" can also be played back. If you format the disc, you can record and playback the disc with this unit in DVD-Video format.
High quality video and music discs.
DivX, music and audio recordings, music in MP3 format, pictures in JPEG and TIFF format.
Music and video recordings.
SVCD in accordance with IEC62107.
You can playback data in DivX, MP3 and JPEG/TIFF format from a finalized CD-R, CD-RW or DVD-R. You must finish the session after the recording. Depending on the recording conditions, there may still be some problems with playback.
Depending on the disc type, the regional code and the recording conditions, in some cases it may not be possible to playback the stated discs.
Additional information can be found on the disc case.
Unplayable discs
- 2.6 GB and 5.2 GB DVD-RAM, 12 cm.
- 3.95 GB and 4.7 GB DVD-R for authoring.
- DVD-AUDIO
- DVD-R recorded in DVD Video Recording format (VR).
- DVD-R (V), DVD-R DL, DVD-RW(V), +R, +R DL recorded on another unit and not finalized.
- Blu-ray, DVD-ROM, +R (8 cm), CD-ROM, CDV, CD-G, Photo-CD, CVD, SACD, MV-Disc, PD, "Chaoj VCD" that are commercially available, including CVD, DVCD and SVCD which are not compliant with IEC62107 etc.
Copy protection
Commercially available DVD-VIDEOs are usually provided with copy protection and cannot be copied.
CPRM (Content Protection for Recordable Media): copy protection for programmes limited to "one-time recording". Programmes broadcast with this copy protection system cannot be recorded on DVD-R or 2.8 GB DVD-RAM. This unit is compatible with the CPRM copy protection system for writable media.

Only play round discs.

Do not touch the recording surface of the disc.
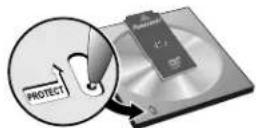
Cartridge write protection
If the surface of a disc is not perfect, recording, playback or processing may be impaired by scratches, dirt, dust or fingerprints. Such impairments may also still occur when the disc is inserted in a cartridge.
Note: only write on the label side of the disc. Use only a soft oil-based felt tip pen. Do not apply stickers or labels to the disc.
Put the disc in its case or cartridge when not in use.
Cartridge Discs RAM
When the write protection device is active, you can neither record to nor process or delete the contents of the disc.
Take 8 cm discs out of the cartridge before using them in this unit.
Cleaning the DVD-RAM
Clean the disc with a special DVD-RAM cleaner (optional) and read the cleaner instructions before use. Stubborn dirt may not be removable so that recording, playback or processing is still impaired even after cleaning. In this case, do not use the disc. Do not use petrol, alcohol, water, cleaning sprays, household cleaners or other solvents.
DVD lens cleaner
Dust and dirt may adhere to the unit's lens over time, making it impossible to record or play discs.
Use the DVD lens cleaner about once every year, depending on frequency of use and the operating environment.
Carefully read the lens cleaner's instructions before use.

Cleaning DVD-VIDEOs, VIDEO-CDs and CDs
Wipe them with a damp and then a dry cloth.
Hard Disk Drive
160 GB
rewritable

The hard disk is only a temporary memory.
Your HDD (Hard disk drive) is a high precision recording unit with a particularly high recording capacity and high recording speed.
The recording is made in DVD Video Recording format (VR).
Films or parts of films can be edited and deleted. Deleting films releases previously used storage space. Creating Playlists does not take up any additional storage space. As well as the TIME SLIP function, dual channel sound and 16:9 format are also supported.
The hard disk automatically goes into the SLEEP mode if no function is selected for longer than 30 minutes and no disc is placed in the drive. An unexpected noise may be caused when switching on and off or during the SLEEP mode. The unit is working normally.
Your hard disk is a short-term memory medium. You should not use it for permanent data storage of recordings. Use your hard disk to view, edit and save recordings on a disc. If you encounter any problems, save the entire contents of your hard disk on another medium (disc). Please take the unit to your customer service. Recordings on a damaged hard disk cannot be rescued.

The unit must not be moved or exposed to vibrations or jolts because otherwise this would damage the hard disk.
Do not disconnect the mains plug during recording or playback. This can cause data loss.
Cigarette smoke, insect spray and other vapours must not penetrate the unit because otherwise this can cause faults.

Do not place the unit on any appliance which gives off heat. Do not place the unit in places where condensation occurs, for example
- rooms with high humidity levels
- in the direct air flow of an air conditioning system
- rooms with great fluctuations in temperature.
Condensation forms as moisture on a cold surface which is exposed to a sudden extreme change in temperature. This condensation can damage the hard disk and other parts inside the unit.
In such cases, do not switch the unit on. Wait for approx. two to three hours for the moisture to evaporate.
When changing the location of the unit,
- switch the unit off. Wait until "BYE" goes off in the display.
- disconnect the mains plug from the terminal.
- do not lift the unit up until the hard disk has stopped completely (after approx. 2 minutes),
because the hard disk runs on for a brief period after switching off.
Panasonic does not assume any liability for direct or indirect problems resulting in the loss of recordings or edited contents (data) and does not guarantee that the recorded or edited contents will work perfectly. This also applies to any repairs to the unit (also refers to parts which are not linked to the hard disk).
No compensation is made for lost recordings or discs which have become defective.
If you need help
| CUSTOMER SERVICE | Should problems occur, please try to resolve them by referring to the error sources described here.If this does not help, please contact your dealer or customer service.Normal disc rotation sounds, atmospheric interference during reception, picture interference during fast forwarding and limited reception of the satellite programmes are not signs of a defective unit. |
| ERROR MESSAGESThe error code H □□, U □□or F□□ appears. | The unit is malfunctioning.The numbers following H, U or F indicate the status of the unit.Switch the unit to Standby mode with 0/1If the unit does not switch to Standby mode, press 0/1r approx. 10 seconds or unplug it for a minute and then plug it back in again.Press 0/1 to switch the unit on. If this does not solve the problem, contact customer service stating the displayed error code. |
| Error code U50 | Short circuit in the satellite input. Check the satellite system.dish |
| Error code U59 | The unit is hot and switches to Standby mode for safety reasons.Wait for about 30 minutes until the message disappears. Place the unit in a well ventilated location. Do not block the vents at the back of the unit. |
| Error code U61 | The unit has found an error during recording or playback of an inserted disc. The unit proceeds with the recovery procedure. This procedure restores the normal operating mode. The unit is not defect. Please wait until the message goes off. |
| Error code U71 | The connected unit is not suitable for connection to HDMI. |
| Error code U72Error code U73 | The HDMI connection is not working perfectly.The HDMI cable is too long. Use cable that is max. 5 m long.The HDMI cable is broken. |
| Error code U88 | A problem occurred during recording or playback of a disc. The unit is not defective, but is performing a restore procedure. Wait until the error message disappears from the display. |
| HARD ERR | The unit is not functioning properly.Switch the unit off and back on again.If this still does not solve the problem, contact customer service. |
| The unit automatically switches to standby. | One of the unit's safety devices may have been activated.Press 0/1b switch the unit on. |
| FUNCTIONUnit not functioning. | Check the connection to the power supply.The unit is in Standby mode for a Timer programming via external units.The display shows EXT-L.47PressEXT LINKto switch off recording standby mode. |
| The disc cannot be ejected. | The unit is currently recording. Stop the recording.With the unit switched off, press STOP■and CH ∧ at the same time on the unit and hold for about 5 seconds. Contact your dealer.The above procedure is not possible if the child protection feature is activated.6Switch the child protection feature off. |
| You have forgotten your security level password. | Select the DVD drive and with the disc tray open, press and holdREC and ▶x1.3 at the same time on the unit for min. 5 seconds. |
| HDDProblems in using the hard disk. | Store the entire contents to another medium (disc).Please contact the customer service with your unit.Recordings on a damaged hard disk cannot be rescued. |
| PICTURENo picture, picture interference. | ▸ Check the connection to the TV, e.g. AV1. 10▸ The Progressive output is activated, but the connected TV is notProgressive-capable. 64▸ Change the settings for the screen aspect of your TV.Menu Setup - Connection - TV Aspect 64▸ Press and hold STOP■ and ▶ x1.3 on the unit at the same time for longer than 5 seconds. The function switches to half picture (Interlace).▸ The [TV System] setting does not match that on the disc. 64▸ In STOP mode, press and hold STOP■ and OPEN/CLOSE▲ on the unit for more than 5 seconds.This switches the unit from PAL to NTSC or vice versa. | →→→→ |
| The picture sometimes appears double when connected to COMPONENT VIDEO OUT. | ▸ Do not connect the DVD Recorder to the television with a HDMI cable.▸ Change the setting for Progressive.Menu Setup - Connection - Progressive - [Off] | →64 |
| The TV picture is distorted at the side. Black bars at top and bottom. | ▸ Change the TV screen aspect.Menu Setup - Connection - TV Aspect 64 | → |
| No on-screen messages. | ▸ Switch the on-screen messages on.Menu Setup - Display - On-Screen Messages - [On]. 63 | → |
| SOUNDNo sound, distorted sound. | ▸ Check the connections. 16▸ If you have connected an amplifier, check the input mode.▸ Switch the V.S.S. function off if it causes problems.Press DISPLAY - Sound - V.S.S. - [Off] 71▸ The sound is not played back if the bitstream signal is being emitted by HDMI AV OUT or OPTICAL DIGITAL AUDIO OUT.▸ Programmes with 5.1 Surround Sound can only be played back in dual channel sound. | →→ |
| It is not possible to hear the required language. | ▸ Select the required language in the disc menu before playback.The language cannot be switched on some discs.▸ For programmes in dual channel sound:Menu Setup - Sound - Bilingual Audio Selection▸ For programmes in Multi Audio, only the available languages can be selected.DISPLAY - Sound - DVB Multi-Audio | →63→71 |
| It is not possible to hear the required audio channel. | ▸ Press AUDIO or DISPLAY during playback, depending on the disc format. | →26 |
| DISPLAYThe display light is too weak | ▸ Adjust the brightness of the unit display.Menu Setup - Display - FL Display | →63 |
| No time"0:00" flashes on the display. | ▸ Adjust the time.Menu Setup - Others - Clock 66 | → |
| "SLEEP" appears on the display. | ▸ If no function has been selected for more than 30 minutes and no disc is inserted in the drive, then "SLEEP" appears on the unit display. | |
| REMOTE CONTROLNo functions. | ▸ An incorrect remote control code has been selected.Menu Setup - Others - Remote Control▸ Point the remote control at the sensor on the unit.▸ The child lock feature is activated.▸ Check the batteries. | →66→6→5 |
| The TV cannot be operated. | ▸ Change the code of the remote control. | →6 |
| PLAYBACKPlayback does not start. | ▸ Check the drive.▸ Insert a disc.▸ The disc is dirty or badly scratched.▸ You inserted a disc which is not suitable for playback.▸ If the security level has been changed for DVD-VIDEO, then playback of the disc or individual titles is not possible. 61▸ The DVD-VIDEO has the wrong regional code. | → |
| No reaction on pressing PLAY. | ▸ ⊙ appears on the screen.The procedure is being prevented by the unit or disc.▸ The child lock feature has been activated. 6 | → |
| No subtitles | ▸ Switch the subtitles on.DISPLAY - Subtitle - [On] 70▸ Not all discs offer subtitles. | → |
| Wrong subtitle language | ▸ Change the subtitle languageMenu Setup - Disc - Settings for Playback - Subtitle▸ In some discs, the language can only be changed in the disc menu. | →61 |
| The angle cannot be changed. | ▸ The angle can only be changed for scenes recorded from different angles. | |
| RECORDINGCannot record. | ▸ Check whether the inserted disc is suitable for recording.▸ The disc is not formatted. Format the disc. 68▸ The write protection device on the cartridge is set to "PROTECT".Cancel the write protection.▸ Cancel the Disc Protection in the DVD Management menu. 68▸ The material you want to record is copy-protected. The number of possible copies is limited for some programmes.▸ It is not possible to record or copy to an NTSC format disc if the disc contains recording in PAL format. | → |
| Some or all recordings are not present. | ▸ If there is a power cut during recording or processing or if the unit is unplugged, the recording cannot be stored. Reformat the disc or use a new disc. 68▸ Not enough storage space on the disc or HDD.▸ The recording time was too short. | → |
| Timer Recording is not working. | ▸ The Timer Programming is defective, different Timer programmes are overlapping. Correct the programming. 45▸ Check the clock setting. 66 | →→ |
| Video and/or audio is not being transmitted from the external unit. | ▸ The external unit has not been connected correctly. 16▸ The right external input channel AV2, AV3, AV4 or DV has not been chosen.▸ ForEXT LINK-controlled recordings, the DVD Recorder has not been set to recording standby. 47 | →→ |
| Timer Recording cannot be stopped from an external unit. | ▸ Stop transmission of the recording signal on the external unit.·PressEXT LINKto switch off recording standby. | →47 |
| DV Auto RecDV Auto Rec does not work. | ▸ Check the connection and the setting of the DV unit.▸ DV Auto Rec cannot start until the pictures of the DV unit are shown on the television.▸ If the time code of the recording on the DV unit are not continuous, then DV Auto Rec may possibly not work.▸ Automatic DV recording is not possible with every DV unit. | →17 |
| COPYINGLoud noises during copying | The rotation noise during High-Speed copying is louder than normal.Change the copying speed. Menu Setup - Disc - Settings for Playback - DVD Speed for High Speed Copy - [Normal (Silent)] 61 |
| Copying in High-Speed Mode is not possible. | Only from HDD to disc.Before recording, adjust to High Speed mode for copying.Menu Setup - Disc - Settings for Playback - Rec for High Speed Copy - [On] 61 |
| Copying takes a long time also in High-Speed mode. | Use a disc which is compatible with High-Speed.Even High-Speed compatible discs sometimes do not permit any recordings at maximum speed. |
| HDMIWhich accessories are required to hear multi-channel Surround Sound? | Playback of a disc with 5.1 Surround Sound on this unit is only possible if it is connected with a HDMI cable or an Optical digital audio cable to an amplifier with integrated decoder.Programmes broadcast by satellite with 5.1 Surround Sound cannot be played back or recorded. |
| Switching on takes longer in spite of Quick Start. | All units connected via HDMI are checked when switching on. This can take some time. |
| No picture on the television. | Check whether the television set and DVD Recorder are connected correctly with the HDMI cable. 14If more than four units are connected with HDMI cables, you possibly may not be able to see a picture. Reduce the number of connected units.Do not connect units via COMPONENT VIDEO OUT and HDMI if your television is not Progressive-capable.Connection to HDMI switches the Progressive setting [On].The television cannot process this signal. |
| TV picture distorted at the sides.Black bars left and right. | Change the TV screen aspect.Menu Setup - Connection - HDMI Settings - [Aspect for 4:3 Video] 64 |
| No sound.Low volume.Audio interference.The required audio type cannot be heard. | The connected amplifier does not support CPPM and the standard HDMI Ver. 1.1.If more than four units are connected with HDMI cables, you possibly may not be able to hear any sound. Reduce the number of connected units.The DVD Recorder is connected with an HDMI cable to television set.Use the digital output OPTICAL as audio output.Change the Digital Audio Output. Menu Setup - Connection - HDMI Setting - Digital Audio Output - [HDMI/Optical] 64If one or several units are connected via HDMI, you may possibly not be able to hear any sound. Choose another type of connection. |
| VIERA LinkVIERA Link does not work. | The VIERA Link setting is switched off.Switch the VIERA Link function on at all connected units.Menu Setup - Connection - HDMI Settings - VIERA Link - [On] 64The HDMI connection has been changed.Check the HDMI connection. Switch all connected units off and on again.Switch the VIERA Link function off and on again at all connected units.After a power cut or if the unit has been unplugged:switch the VIERA Link function off and on again at all connected units. |
| TV GUIDEThe displayed information is wrong or incomplete. | ▸ The broadcasting companies are responsible for the information. Deviations are possible with last-minute changes. |
| No data. | ▸ The satellite dish is not aligned to Astra 19.2° E.▸ EPG Download in Standby was set to [Off].67▸ The automatic time setting is not activated. Note winter and summer time.▸ The unit has been unplugged for a longer period of time. Proceed with a manual EPG Download.Menu Setup - Others - System Update - [EPG Update Search Now]67▸ The signal is too weak or no signal was found.58 |
| No current data in spite of active EPG Download in Standby mode. | ▸ A data download was not possible. Switch the unit to standby overnight. |
| SATELLITE-DISHNo satellite found.Not enough transponders found.No station found. | ▸ Check the satellite dish align it exactly to the position of the satellite.▸ Check that the satellite cable and connections are correctly in position with a firm contact.▸ Check the reception capacity of the satellite dish must be large enough for good reception. There must not be any hindrances in the way which could impair reception, e.g. twigs, leaves, snow.▸ The receiver (LNB) of the satellite dish must be suitable for digital reception. |
| Video or audio interference. | ▸ The reception capacity of the satellite dish not sufficient.▸ Reception is impaired by rain or snow. |
| DVB-SUnusual station sorting. | ▸ This unit has a default station sorting.Use profiles to sort the stations as you want them.19 |
| No teletext. | ▸ This DVD Recorder does not support teletext. |
| After the Auto-Setup, there are no stations in the station list although found stations were displayed. | ▸ An Auto-Setup was started and interrupted. Do another Auto-Setup and let it run through to the end. The data are not stored until then.58 |
| SOFTWARE UPDATEWhen are software updates broadcast? | ▸ The search for new software takes place automatically or at the selected time when the unit is in Standby mode. The software is updated when a new version is found. The unit display shows the software update.To prevent automatic updates, select the setting[Software Update in Standby - Off].67 |
| No more programmes are received after an update. | ▸ Depending on the update contents, some settings can be returned to the original factory setting. Proceed with tuning again with an Auto-Setup Restart.Menu Setup - Tuning - Auto-Setup Restart58 |
Glossary
| Bitstream | Digital multi-channel audio data (e.g. 5.1 channel) before decoding to the individual channels. |
| Brightness signal Y | Analogue video signal showing the brightness levels of the picture, regardless of the colour signal (C) chrominance signal. It permits higher resolution and colour fidelity. |
| Chrominance signal | The signals Red, Green and Blue can be converted into three other signals: luminance signal Y (luminance signal) and 2 chrominance signals PE/PR (colour difference signals) |
| DiSEqCTDigital Satellite Equipment Control is a control system for selecting several LNBs at one input. DiSEqCTIs a registered trademark of EUTELSAT. | |
| DivX (Direct-Video-eXpress) A format for storing compressed audio and video data developed by DivX Networks. It is based on MPEG4, but with far more compact storage to about one tenth of the uncompressed file format with satisfactory quality. | |
| Down conversion | This is the remixing of multi-channel sound to two channels for stereo output. Sound mixing makes sense if you want to playback the 5.1 channel sound of a DVD over your television speakers. However, some discs do not allow sound mixing. In this case, only the two front channels are output. |
| DPOF (Digital Print Order Format) DPOF is the standard format for printing still pictures taken with a digital camera etc. It enables automatic printing in a photo shop or on your own printer. | |
| JPEG (Joint Photographic Experts Group) | A system for compressing or decoding colour still pictures, with only slight losses in picture quality in spite of extensive compression. |
| LNB (Low Noise Block Converter) Reception component of the satellite dish. | |
| LPCM (Linear PCM) | These are uncompressed digital signals similar to those on CDs. LPCM sound can be used when recording in XP mode. |
| Optical digital audio cable | When connecting with this cable, the electronic signals are converted into optical signals for output to the amplifier. |
| PCM (Pulse Code Modulation) | Standard for uncompressed digital audio signals. |
| RGB (Red Green Blue) | RGB values define colours. The colour results from the intensity of the Red, Green and Blue shares in the pixel. |
| Sample rate | When converting a digital signal, the analogue sound signal is sampled at certain time intervals. The number of samples per second is called the sample rate The higher the sample rate the reproduction of the original sound. |
| Screen resolution | 1080i: To generate a half picture, 1080 (1125) alternating picture lines are scanned once in 1/50 seconds in a high definition picture. The TV pictures of 480i (525i) are more than doubled, the picture is far clearer.720p: To generate a full picture, 720 (750) picture lines are scanned once in 1/50 seconds. There is slight flicker in the picture, because the picture lines cannot be scanned alternately. |
| TIFF (Tag Image File Format) | This is a system used for compressing/decoding colour still pictures, a common format for storing high quality images on digital cameras and other devices. |
| Transponder | The signals of a broadcasting station are received by a transponder on a satellite. The transponder converts them to frequencies and sends them to satellite dishes near the ground. A transponder can broadcast several TV and radio programmes or data in parallel. |
Folder structures
![graph TD A["Structure of DVD-RAM"] --> B["JPG"] A --> C["DCIM(*Higher folder)"] A --> D["***XXXXX (Picture folder)"] A --> E["XXXX*JPG"] F["DCIM"] --> G["***XXXXX"] F --> H["XXXX**JPG"] I["*"] --> J["*"]](/content/2026/05/1006397/images/14d1771df6c8e23c47922d628d8685fceda879d99cc6de07bf010abe858cc6ec.jpg)
![graph TD A["Structure of SD Card"] --> B["DCIM (Higher folder)"] A --> C["***XXXXX (Picture folder)"] A --> D["XXXX*JPG"] A --> E["IM-CDPF or IMEXPORT"] A --> F["XXXX*JPG"] A --> G["SD_VIDEO"] G --> H["PRG (MPEG2 folder)"] H --> I["MOV*MOD"] H --> J["MOV*MOI"] H --> K["PRG*PGI"] G --> L["MGR_INFO (M…](/content/2026/05/1006397/images/a5ded22497577707443a8d581161bf12f438c1b9c182f9a38138ac960bb135b9.jpg)
![graph TD A["P0000001.jpg"] --> B["002 Folder"] C["P0000002.jpg"] --> B B --> D["P0000003.jpg"] B --> E["P0000004.jpg"] B --> F["P0000005.jpg"] B --> G["003 Folder"] G --> H["P0000006.jpg"] G --> I["P0000007.jpg"] G --> J["P0000008.jpg"] K["004 Folder"] --> L["P0000010.jpg"] K --> M["P0000011.jpg"] K…](/content/2026/05/1006397/images/ae87f0afe126cde7f2ae736ec7d92cb0fee4c5dd618133d8bab0f59a591cf456.jpg)
![graph TD A["001 (Folder/Group)"] --> B["001 track.mp3 (file/track)"] A --> C["002 track.mp3"] A --> D["003 track.mp3"] E["002 Group"] --> F["001 track.mp3"] E --> G["002 track.mp3"] E --> H["003 track.mp3"] I["003 Group"] --> J["001 track.mp3"] I --> K["002 track.mp3"] I --> L["003 track.mp3"]](/content/2026/05/1006397/images/0b78531d9cce2da938e835997da13ec29d07bc9ddbef32eb7f2b60dc3577e7e3.jpg)
The following folder name can be displayed on this unit: *** Numbers / XXX: Letters A folder in which all numbers are "0" (e.g. DCIM000) cannot be displayed. If a folder or file name was entered with another unit, the name may possibly not be displayed correctly and the data may possibly not be able to be played or edited.
* Folders can be created on other equipment. However, these folders cannot be selected as a copying destination.
JPEG format
This unit can process max. 3000 files/tracks and 300 folders/groups (including the root folder).
Packet writing or Motion JPEG (MJPEG) are not supported.
File format: ISO9660 level 1 or 2 (except for extended formats), JPEG, TIFF (uncompressed RGB chunky format).
Number of pixels: 34x34 to 6144x4096 (sub scanning 4:2:2 or 4:2:0). Thawing time: approx. 3 sec. (6M pixels).
MP3 format
This unit can process max. 3000 files/tracks and 300 folders/groups (including the root folder). The files must have the extension ".mp3" or ".MP3". 3-digit prefixes define the playback sequence. Latin letters and Arabian numbers are shown correctly. Other characters may possibly not be shown correctly.
This unit is compatible with multi-session. It is not compatible with ID3-tags and Packet-writing.
The discs must be ISO9660 level 1 or 2 and Joliet formats.
Compatible compression rate: between 32 kbps and 320 kbps
Compatible sample rate: 16 kHz, 22.05 kHz, 24 kHz, 32 kHz, 44.1 kHz and 48 kHz
DivX format
This unit can process max. 200 files and 300 folders (including the root folder). The files must have the extension ".DIVX", ".divx" or ".AVI", ".avi". The sequence of the files displayed by this unit can differ to other units or computers.
Video Number of streams: up to 1
Codec DIV3, DIV4, DIVX, DV50
Picture size from 32 x 32 to 720 x 576
Pictures per second up to 30 fps
Audio Number of streams: up to 8
Format MP3, MPEG, Dolby Digital
Multi-channel Dolby Digital is possible. MPEG multi-channel sound is converted to 2 channels.
GMC (Global Motion Compensation) is not supported.
SD Card
The data (pictures or MPEG2) on the SD Card must be stored in the depicted folder structure for playback on this unit.
Specifications SD Card drive
SD slot SD memory slot
Still pictures JPEG, TIFF
Compatible media SD Memory Card (incl. mini SD Cards, using a mini SD adapter), Multi Media Card
Format FAT12, FAT16
Picture file format JPEG complying with DCF (Design rule for Camera File system) TIFF (uncompressed RGB chunky), DPOF compatible Sub scanning 4:2:2, 4:2:0
Number of pixels between 34x34 and 6144x4096
Thawing time approx. 3 sec. (6M Pixel)
SD Video MPEG2
MPEG2 Codec (SD Video Entertainment Video Profile)
File format compliant with SD video format
Specifications
| Power supply: AC 220V-240V 50 HzPower consumption: 46 W (approx. 2 W in power save mode) | Dimensions: 430 mm (W) x 58 mm (H) x 329 mm (D)Weight: approx. 4.4 kgOperating temperature: 5°C - 40°COperating humidity: 10% - 80% RH (no condensation) | |
| LASER specification: LASER product of class 1Wavelength: 662 nm for DVD, 780 nm for CLaser performance: No hazardous radiation is emitted with the safety protection. | ||
| Optical pick-up: System with 1 lens, 2 integration units | ||
| Recording formatsDVD-RAMDVD-RDV-RDV-RDV-RDV-RDV-RDV-RDV-RDV-RDV-RDV-RDV-RDV-RDV-RDV-RDV-RDV-RDV-RDV-RDV-RDV-RDV-RDV-RDV-RDV-RDV-RDV-RDV-RDV-RDV-RDV-RDV-RDV-RDV-RDV-RDV-RDV-RDV-RDV-RDV-RDV-RDV-RDV-RDV-RDV-RDV-RDV-RDV-RDV-RDV-RDV-RNVPAV1 SCARTAV2 SCARTAV3 S VIDEO INAV4 INAV4 S VIDEO INOutputAV1 SCARTAV2 SCARTAV2 S VIDEOCOMPONENTVIDEO OUTRecording SystemMPEG2 (Hybrid VBR) | Recording discsDVD-RAM Ver. 2.0Ver. 2.1/3XSPEED DVD-RAM Revision 1.0Ver. 2.2/5XSPEED DVD-RAM Revision 2.0DVD-R for General Ver.2.0for General Ver.2.0/4X SPEED DVD-R Revision 1.0for General Ver.2.x/8X SPEED DVD-R Revision 3.0for General Ver.2.x/16X SPEED DVD-R Revision 6.0DL Ver. 3.0DL Ver. 3.x/4X SPEED DVD-R, DL Revision 1.0DVD-RW Ver. 1.1Ver. 1.x/2X SPEED DVD-RW Revision 1.0Ver. 1.x/4X SPEED DVD-RW Revision 2.0Ver. 1.x/6X SPEED DVD-RW Revision 3.0+R Ver. 1.0, Ver.1.1, Ver.1.2, Ver. 1.3, DL Ver. 1.0+RW Ver. 1.1, Ver. 1.2/4X SPEED | |
| Regional code #2 | HDD 160 GB | |
| Video interfaceInputAV1 SCARTAV2 SCARTAV3 S VIDEO INAV4 INAV4 S VIDEO INOutputAV1 SCARTAV2 SCARTAVEOSVIDEOCOMPONENTVIDEO OUTRecording SystemMPEG2 (Hybrid VBR) | Audio interfaceInput Input impedance: more than10 kOhm.AV1 SCART Standard: 0.5 Vrms;full scale: 2 Vrms at 1 kHzAV2 SCART Standard: 0.5 Vrms;full scale: 2 Vrms at 1 kHzAV3 AUDIO Standard: 0.5 Vrms;full scale: 2 Vrms at 1 kHzAV4 AUDIO Standard: 0.5 Vrms;full scale: 2 Vrms at 1 kHzOutput The output impedance of each output socket is less than 1 kOhm.AV1 SCART Standard: 0.5 Vrms;full scale: 2 Vrms at 1 kHzAV2 SCART Standard: 0.5 Vrms;full scale: 2 Vrms at 1 kHzAUDIO Standard: 0.5 Vrms;full scale: 2 Vrms at 1 kHzOPTICAL Optical connection (PCM; Dolby Digital; DTS; MPEG)Recording SystemDolby Digital 2CH; Linear PCM (XP mode) included recordings from satellite tuner. | |
| TV SystemTunerLNB InputLNB SupplyDiSEqCLNB Output | PAL: 625/50; NTSC: 525/60Receiving frequency: 950-2150 MHzInput level: -65 to -25dBmInput impedance: 75 Ohm, F socket13/18V max. 400 mA14/19V switchableVersion 1.0 or Tone Burst A/B, 22 kHz, 0.65 Vp-pF socket, max. 25V, max. 400 mA | DV Input IEEE1394 Standard (4pin); (PAL/NTSC)HDMI Output Version 1.2a (576i/480i; 576p/480p; 720p; 1080i); 19 pin type Ax1SD Slot SD Memory Card SlotCommon Interface EN 50221 Standard1 Slot (rear panel)Type I and II PC-Card 5V |
Note: Technical data may change without prior notice.
Index
Page Page Page Audio channel 26,29,70 DVD-Video format (V) 72
| Angle 70 | |
| Aspect for 4:3 Video 64 | |
| Audio Mode for DV Input 63 | |
| Audio Mode for XP Recording 63 | |
| Auto-Play Select | 69 |
| Auto-Setup Restart | 58 |
| AV1 (TV) | 9,10 |
| AV1 Output | 65 |
| AV2 (Ext) | 9,16 |
| AV2 Input | 65 |
| AV4 IN 9 | |
| AV-in NR | 71 |
| Banner | 23 |
| Bilingual Audio Selection 63 | |
| Bitstream | 63,81 |
| Brightness signal | 81 |
| Cartridge | 24,74 |
| Changing batteries | 5 |
| Child lock | 6 |
| Chrominance signal | 81 |
| Comb Filter | 62 |
| Common Interface | 20,65 |
| COMPONENT VIDEO OUT | 13,64 |
| Conditional Access Module | 20 |
| Copy Direction | 49,50,52 |
| Copy Mode | 49,50,52 |
| Copy Time | 49 |
| CPRM | 73 |
| Date | 18,66 |
| Default Settings | 67 |
| Delete | |
| - Album | 36,42 |
| - Pictures | 37,42 |
| - Chapter | 34 |
| - Playlists | 55,56 |
| - Profiles | 19 |
| - Partial | 33 |
| - Timer | 41,45 |
| - Title | 32,42 |
| Dialog Enhancer | 71 |
| Digital Audio Output | 63,64 |
| Direct TV Recording | 28 |
| Disc Name | 68 |
| DiSEqC | 59,81 |
| DivX | 81 |
| DivX Registration | 66 |
| Dolby Digital 5,16,63,70 | |
| Double Layer DVD 51,73 | |
| Down Conversion 17,81 | |
| DPOF | 37,81 |
| Drive space | 45 |
| DTS | 5,16,63,70 |
| Dual channel sound | 29 |
| DV IN 4,17 | |
| DVB Multi Audio | 71 |
| DVD Speed for High Speed Copy | 61 |
| DVD Video Recording format (VR) | 72 |
Dynamic Range Compression 63
| Entering Text 31 | |
| EPG 40,67 | |
| Ext Link | 47,65 |
| FEC | 60 |
| Field | 62 |
| Finalize | 29,43,51,69 |
| FL Display | 63 |
| Flexible Recording mode | 57 |
| Formatting | 27,68 |
| Frame | 62 |
| HDCP | 14 |
| HDMI | 4,14,15 |
| HDMI Settings | 64 |
| HDMI Video Format | 64 |
| Initialize | 67 |
| Interlace | 70 |
| JPEG | 35,38,81 |
| Language | 63,70 |
| Language codes | 61 |
| Letterbox | 64 |
| LNB | 59,81 |
| LNB Freq. Low/High | 59 |
| LPCM | 63,81 |
| MANUAL SKIP | 25 |
| MP3 | 38 |
| MPEG | 16,63 |
| NTSC | 27,64,71 |
| On-Screen Messages | 63 |
| OPTICAL | 9,16,64 |
| Optical digital audio cable | 16,81 |
| PAL | 64,71 |
| PBC | 70 |
| PCM | 81 |
| PCM Down Conversion | 63 |
| Playback discs | 73 |
| Playback NR | 71 |
| Playlists | 54 |
| Polarisation | 60 |
| Position | 71 |
| Power Save | 66 |
| Profiles | 19,41,58 |
| Prog. Type | 41 |
| Progressive | 13,64,70,71 |
| Protection | |
| - Album | 36,42 |
| - Cartridge | 74 |
| - Disc 68 | |
| - Pictures | 37 |
| - Recording | 33 |
| - Title | 42 |
| Quick Start 66 |
| Quick View 25 |
Ratings
- Unlock Recorder 61
- Change Password 61
- Change Level 61
- Temporary Unlock 61
| Rec for High Speed Copy | 61 |
| Recording discs | 72 |
| Recording mode | 28 |
| Recording time | 27 |
| Recording time in EP mode | 61 |
| Regional codes | 4 |
| Relief | 45 |
| Remote Control | 6,66 |
| RENEW | 44 |
| Repeat Play | 71 |
| RGB | 81 |
| RGB 1 (without component) | 65 |
| RGB 2 (without component) | 65 |
S VIDEO 9,12
| S Video (with component) | 65 |
| Sample rate | 81 |
| Screen resolution | 81 |
| Seamless Play | 62 |
| Shipping Condition | 67 |
| Signal Condition | 58 |
| Slide Show | 35,38 |
| Smart Card | 20 |
| Sort | 32 |
| Sound properties | 70 |
| Soundtrack | 61,70 |
| Soundtrack language | 70 |
| Source select (DivX) | 70 |
| Still Mode | 62 |
| Subtitle | 61,70 |
| Switching Voltage | 59 |
| Symbol Rate | 60 |
System Update
- EPG Download in Standby 67
- Software Update in Standby 67
- EPG / Software search period 67
- Software Update Search Now 67
- EPG Update Search Now 67
TIFF 35,38,81
Time 18,66 TIME SLIP 25 Top Menu 69 Transfer 71 Transponder 60,81 Transponder Frequency 60 TV Aspect 64 TV Codes 6 TV System 64
V.S.S. 71 Video (with component) 65 Video-, Audio-, PCR-, AC3 PID 60 VIERA Link 15,64
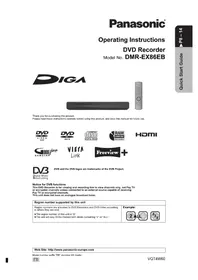
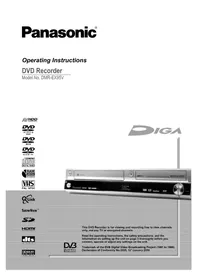
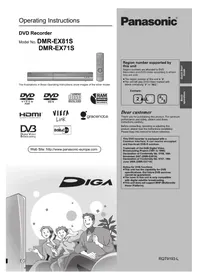
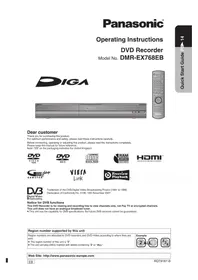
- OPERATING INSTRUCTIONS
- DVD RECORDER
- EPG
- CONTENTS
- SAFETY PRECAUTIONS
- VOLTAGE
- AC MAINS LEAD PROTECTION
- SERVICE
- WARNING
- CAUTION
- INFORMATION ABOUT THE UNIT
- DEAR CUSTOMER
- DVB-S TUNER
- COMMON INTERFACE
- TV GUIDE
- VIERA LINK
- DIVX-COMPATIBLE
- SD-DRIVE
- HDMI (HIGH DEFINITION MULTIMEDIA INTERFACE)
- DV-INTERFACE
- DISC FORMATS
- INSERTING BATTERIES
- LICENSE INFORMATION
- DOLBY DIGITAL
- DTS (DIGITAL THEATER SYSTEMS)
- OFFICIAL DIVX CERTIFIED™ PRODUCT
- SD LOGO IS A TRADEMARK
- HDMI, THE HDMI LOGO AND HIGH-DEFINITION MULTIMEDIA INTERFACE ARE
- DISEQC™
- REMOTE CONTROL
- SETTING UP THE REMOTE CONTROL
- SET UP THE REMOTE CONTROL FOR THE UNIT
- CHILD LOCK
- OPERATING A TELEVISION SET
- SWITCHING TO AV INPUT ON YOUR TELEVISION
- OTHER MESSAGES
- REAR PANEL
- IF YOU SEE THIS SYMBOL
- INFORMATION ON DISPOSAL FOR USERS OF WASTE ELECTRICAL & ELECTRONIC EQUIPMENT (PRIVATE HOUSEHOLDS)
- FOR BUSINESS USERS IN THE EUROPEAN UNION
- INFORMATION ON DISPOSAL IN OTHER COUNTRIES OUTSIDE THE EUROPEAN UNION
- CONNECTIONS
- CONNECTION WITH SCART CABLE
- DIRECT TV RECORDING
- CONNECTION WITH AUDIO/VIDEO CABLE
- CONNECTION WITH S VIDEO CABLE
- CONNECTION TO COMPONENT VIDEO OUT
- TELEVISIONS WITH LCD OR PLASMA SCREEN
- CONVENTIONAL TELEVISIONS
- CONNECTION WITH HDMI CABLE
- CONNECTING TO A PANASONIC TV (VIERA) WITH HDAVI CONTROL
- FUNCTIONS WITH HDAVI CONTROL
- AUTOMATIC INPUT CHANGEOVER
- AUTOMATIC ON
- AUTOMATIC OFF
- JOINT USE OF HDAVI CONTROL AND Q LINK FUNCTIONS
- CONTROL WITH THE VIERA REMOTE CONTROL OF THE TELEVISION
- NAVIGATION IN THE MENUS
- CONNECTION OF EXTERNAL UNITS
- DIGITAL AMPLIFIER OR DIGITAL SYSTEM COMPONENTS
- JOINT USE OF HDMI AND DIGITAL OUTPUT OPTICAL
- ANALOGUE AMPLIFIER OR ANALOGUE SYSTEM COMPONENTS
- DVD PLAYER, SET TOP BOX OR VIDEORECORDER TO AV2(EXT)
- SECOND SATELLITE RECEIVER
- CONNECTING EXTERNAL UNITS
- AMPLIFIER OR EXTERNAL UNIT WITH HDMI CABLE
- CONNECTION TO THE FRONT INPUT DV IN
- CONNECTION TO THE FRONT INPUT AV
- TV BILDSCHIRMFORMAT (TV ASPECT)
- EDIT PROFILES
- SORTING MODE
- PROFILE SELECT
- ADD
- TV/RADIO
- PROFILE NAME
- MOVE
- DELETE
- DELETE ALL
- INSERT THE SMART CARD
- INSERT THE CONDITIONAL ACCESS MODULE
- REMOVE THE SMART CARD
- REMOVE THE MODULE
- PASSWORD QUERY
- INSERT THE SD CARD
- REMOVE THE SD CARD
- DETECTING A SD CARD
- SERVICE LIST
- MULTI VIDEO
- STATUS DISPLAYS
- BANNER
- PLAYBACK
- STOPPING PLAYBACK
- PAUSING PLAYBACK
- SELECTING A TITLE WITH THE NUMBER BUTTONS
- PLAYBACK STARTS AUTOMATICALLY
- STARTING PLAYBACK FROM THE DIRECT NAVIGATOR
- FUNCTIONS DURING PLAYBACK
- PLAY/X1.3 (QUICK VIEW)
- SAVING THE PLAYBACK POSITION
- SLOW/SEARCH
- FAST FORWARD
- DIVIDING A RECORDING INTO CHAPTERS
- DURING PLAYBACK OR IN PAUSE MODE
- SKIP
- FUNCTIONS IN PAUSE MODE
- SLOW-MOTION PLAYBACK
- FRAME PLAYBACK. NOT CD
- DELAYED PLAYBACK
- SIMULTANEOUS RECORDING AND PLAYBACK
- CHANGING THE AUDIO CHANNEL DURING PLAYBACK
- DISC PROTECTION
- FORMATTING
- FOR RECORDING
- RECORDING DIGITAL PROGRAMMES
- NTSC FORMAT
- RECORDING A 90 MINUTE TITLE TO A DISC WITH 4.7 GB OF STORAGE SPACE
- SELECT THE DRIVE DVD OR HDD BEFORE THE RECORDING
- RECORD
- PAUSE THE RECORDING
- STOP RECORDING
- RECORDING OF TV PROGRAMMES
- CHANGING THE RECORDING MODE
- DELAYED PLAYBACK DURING RECORDING
- DIRECT TV REC
- DIRECT TV RECORDING WITH Q LINK
- SPECIFYING A TIME AS THE RECORDING DURATION
- RECORDING PROGRAMMES IN DUAL CHANNEL SOUND
- RECORDING MULTI AUDIO PROGRAMMES
- FINALIZE
- MANUAL RECORDING FROM CAMCORDER OR CAMERA
- FUNCTION MENU
- OVERVIEW
- ENTERING TEXT
- ENTER A TITLE OR DISC NAME
- TOP MENU PREVIEW
- WORKING WITH LIST NAMES
- DISPLAY PROPERTIES
- PLAYBACK → DIRECT NAVIGATOR
- SELECT THE SUBMENU
- CHANGING BETWEEN THUMBNAIL DISPLAY AND TABLE DISPLAY
- CHANGE BETWEEN TITLE VIEW AND ALBUM VIEW
- PROPERTIES: →
- SORT: ONLY HDD
- ENTER NAME
- EDIT TITLES
- SET UP PROTECTION/CANCEL PROTECTION
- PARTIAL DELETE
- CHANGE THUMBNAIL NOT -RW(VR)
- DIVIDE TITLE
- EDITING CHAPTERS
- DELETE CHAPTER
- CREATE CHAPTER
- COMBINE CHAPTERS
- DVD HDD SD
- ALBUM VIEW
- ALBUM PLAYBACK
- OPEN THE SUBMENU
- START SLIDE SHOW
- SLIDE SHOW SETTING
- ADD PICTURES
- COPY PICTURES
- COPY ALBUM
- OPEN THE SUBMENUS
- CREATE ALBUM
- EDIT ALBUM
- DELETE ALBUM
- COPY TO HDD/COPY TO DVD-RAM
- SELECT FOLDER
- PLAYBACK PICTURES OF AN ALBUM
- DURING PLAYBACK
- ROTATE PICTURE
- DISPLAY THE PICTURE PROPERTIES
- EDIT A PICTURE OF AN ALBUM
- DELETE PICTURE
- CHANGE FOLDER
- PLAYBACK OF MP3 FILES
- THE DISC ALSO CONTAINS DIVX AND/OR JPEG DATA IN ADDITION TO MP3 DATA
- START PLAYBACK
- SELECT GROUP
- THE DISC ONLY CONTAINS DIVX DATA
- THE DISC ALSO CONTAINS MP3 AND/OR JPEG DATA AS WELL AS DIVX DATA
- DIVX PLAYBACK WITH LIMITED PLAYBACK OPTIONS
- ELECTRONIC PROGRAMME GUIDE
- LAUNCH THE TV GUIDE
- CHANGE TO THE TELEVISION PICTURE
- CHANGE BETWEEN VIEWS
- RECORDING → TV GUIDE
- DVD HDD
- DISPLAY ACCORDING TO TOPIC AREAS (PROG. TYPE)
- DISPLAY ACCORDING TO PROFILE
- ADDITIONAL INFORMATION ABOUT A PROGRAMME
- TIMER PROGRAMMING VIA TV GUIDE
- DELETING A TIMER PROGRAMMING
- STOPPING A TIMER RECORDING
- DELETE → DELETE NAVIGATOR
- SET UP PROTECTION/CANCEL PROTECTION OF TITLES
- SET UP PROTECTION/CANCEL PROTECTION OF ALBUMS
- COPY → COPY NAVIGATOR
- COPY STARTS IN HIGH SPEED MODE
- FINALIZING
- COPY NAVIGATOR
- PROPERTIES:→
- SORT
- PROGRAMMING OF TIMER RECORDINGS
- CHECKING OR CHANGING TIMER RECORDINGS
- TIMER OFF/ON
- TIMER RECORDING VIA EXTERNAL UNITS
- SETTINGS FOR EXTERNAL UNITS (EXT LINK)
- RECORDING PROGRAMMING ON THE EXTERNAL UNIT
- SWITCH THE DVD RECORDER TO RECORDING STANDBY
- SWITCHING OFF RECORDING STANDBY MODE
- PREMATURELY STOP RECORDING
- PLAYBACK DURING EXT LINK ON THE SELECTED DRIVE
- INFORMATION ABOUT HIGH SPEED COPY
- COPYING PLAYLISTS
- TO OTHERS ADVANCED COPY
- COPYING FROM DVD-VIDEO WITH TIME CONTROL
- COPY DIRECTION
- COPY MODE
- COPY TIME
- START COPYING
- CANCEL ALL
- COPYING TITLES AND PLAYLISTS
- CREATE LIST
- OPENING THE SUBMENU FOR VIDEO OR PLAYLISTS
- EDITING THE COPY LIST
- EDIT THE COPY LIST
- COPYING TO DUAL/DOUBLE LAYER
- COPY VIDEO (MPEG2)
- COPYING IN HIGH SPEED MODE
- SELECT PICTURES
- COPY FOLDER
- TO OTHERS → COPY ALL PICTURES
- COPY PICTURES (JPEG)
- CREATING A PLAYLIST HDD RAM
- SELECTING A SOURCE TITLE
- CREATING A SOURCE CHAPTER
- INSERTING A CHAPTER INTO THE PLAYLIST
- TO OTHERS → PLAYLISTS
- LAUNCHING THE PLAYLISTS MENU HDD RAM
- OPENING THE SUBMENU HDD RAM
- EDITING PLAYLISTS HDD RAM
- EDIT
- CREATE
- COPY
- ENTER NAME →
- CHANGE THUMBNAIL
- EDITING CHAPTERS HDD RAM
- ADD CHAPTER
- MOVE CHAPTER
- TO OTHERS → FLEXIBLE REC
- FLEXIBLE RECORDING MODE (FR)
- RECORDING ON HARD DISK IN FR MODE
- TO OTHERS → DV AUTO REC
- AUTOMATIC RECORDING FROM DV IN
- THE DVD RECORDER DETECTS THE CAMCORDER
- THE DVD RECORDER DOES NOT DETECT THE CAMCORDER
- TO OTHERS → SETUP
- SIGNAL CONDITION
- AUTO-SETUP RESTART
- DISEQC/LNB
- ADD SATELLITE
- DELETE SATELLITE
- TUNING ▶ ▲▼ ADVANCED SETUP OK ▲▼ ADD TRANSPONDER / SERVICE OK
- ADD TRANSPONDER
- TRANSPONDER FREQUENCY [0 MHZ] POLARISATION [HORIZONTAL] [VERTICAL]
- SERVICE DATA
- TUNING ▶ ▲▼ ADVANCED SETUP OK DELETE TRANSPONDER OK
- SETTINGS FOR PLAYBACK
- RATINGS [8] [1-7] [0]
- SETTINGS FOR RECORDING
- COMB FILTER [ON] [OFF]
- STILL MODE [AUTOMATIC] [FIELD] [FRAME]
- SEAMLESS PLAY [ON] [OFF] - RW(VR)
- SOUND SETTINGS OK OPTIONS OK
- DYNAMIC RANGE COMPRESSION DVD-V [ON] [OFF] (ONLY DOLBY DIGITAL)
- BILINGUAL AUDIO SELECTION -R -R DL -RW(V) +R +R DL +RW [M 1] [M 2]
- DIGITAL AUDIO OUTPUT
- PCM DOWN CONVERSION [ON] [OFF]
- DOLBY DIGITAL, DTS, MPEG [BITSTREAM] [PCM]
- AUDIO MODE FOR XP RECORDING [DOLBY DIGITAL] [LPCM]
- AUDIO MODE FOR DV INPUT -R -R DL -RW[VI] +R +R DL +RW [STEREO 1] [STEREO 2] [MIX]
- ▲▼ DISPLAY ▶ ▲▼ SETTINGS OK ▲▼ OPTIONS OK
- LANGUAGE [ENGLISH] [GERMAN]
- ON-SCREEN MESSAGES [OFF] [3, 5, 7, 10 SEC.]
- FL DISPLAY [BRIGHT] [DIM] [AUTOMATIC]
- TV ASPECT [16:9] [PAN & SCAN] [LETTERBOX]
- PROGRESSIVE [ON] [OFF]
- TV SYSTEM [PAL] [NTSC]
- HDMI SETTINGS
- HDMI VIDEO FORMAT [576I/480I, 576P/480P, 720P, 1080I] [AUTOMATIC]
- ASPECT FOR 4:3 VIDEO [4:3] [16:9]
- DIGITAL AUDIO OUTPUT [HDMI AND OPTICAL] [OPTICAL ONLY]
- VIERA LINK [ON] [OFF]
- ▲▼ CONNECTION ▶ ▲▼ SETTINGS OK ▲▼ OPTIONS OK
- AV1 OUTPUT
- AV2 SETTINGS
- AV2 INPUT
- EXT LINK
- REMOTE CONTROL [DVD 1] [DVD 2] [DVD 3]
- CLOCK
- ACTIVATE THE AUTOMATIC TIME ADJUSTMENT
- POWER SAVE [ON] [OFF]
- QUICK START [ON] [OFF]
- DIVX REGISTRATION
- SYSTEM UPDATE
- EPG DOWNLOAD IN STANDBY [ON] [OFF]
- SOFTWARE UPDATE IN STANDBY [ON] [OFF]
- EPG / SOFTWARE SEARCH PERIOD [AUTOMATIC]
- SOFTWARE UPDATE SEARCH NOW
- EPG UPDATE SEARCH NOW
- INITIALIZE
- [SHIPPING CONDITION] [DEFAULT SETTINGS]
- SHIPPING CONDITION
- DEFAULT SETTINGS
- TO OTHERS => HDD MANAGEMENT
- DELETE ALL TITLES
- FORMAT HDD
- TO OTHERS → DVD MANAGEMENT
- DISC NAME
- FORMAT DISC
- TOP MENU
- AUTO-PLAY SELECT
- CREATE TOP MENU
- TO OTHERS → CARD MANAGEMENT
- FORMAT CARD
- ▲▼ OPTION ▲▼ SETTING
- PICTURE AND SOUND SETTINGS
- PLAY
- SETTINGOPTION
- PICTURE
- SOUND
- OTHER
- DVD VIDEO RECORDING FORMAT (VR)
- DVD-VIDEO FORMAT (V)
- VR FORMAT
- PLAYBACK AND RECORDING DISCS
- DVD-RAM
- DVD-R/+R (RECORDABLE)
- DVD-RW(V)/+RW (REWRITABLE)
- DVD-R DL/+R DL (DOUBLE LAYER DVD / DUAL LAYER DVD)
- PLAYBACK DISCS
- UNPLAYABLE DISCS
- COPY PROTECTION
- CARTRIDGE DISCS RAM
- CLEANING THE DVD-RAM
- DVD LENS CLEANER
- CLEANING DVD-VIDEOS, VIDEO-CDS AND CDS
- IF YOU NEED HELP
- GLOSSARY
- FOLDER STRUCTURES
- JPEG FORMAT
- MP3 FORMAT
- DIVX FORMAT
- SD CARD
- SPECIFICATIONS SD CARD DRIVE
- SPECIFICATIONS
- INDEX
- RATINGS
- S VIDEO
- TIFF
Brand : PANASONIC
Model : DMR-EX80S
Category : DVD Recorder