
Traveler3G - Uncategorized AIRLIVE - Free user manual and instructions
Find the device manual for free Traveler3G AIRLIVE in PDF.


| Product Type | 11n 3G Mobile Router with Built-in SIM Card Slot |
| Model | Traveler3G |
| Brand | AirLive |
| Dimensions (W x D x H) | 103 x 78 x 21 mm |
| Package Weight | 470 g |
| Power Supply | DC 5V/1.2A via mini-USB power jack |
| Battery | Li-ion rechargeable (included) |
| Wireless Standards | IEEE 802.11b/g/n (1x1) |
| 3G Support | HSPA/UMTS/EDGE/GPRS |
| SIM Card Slot | Built-in (3G SIM/USIM required) |
| Operating Modes | Router Mode, Modem Mode |
| WAN Connection Types | 3G mobile network or Wi-Fi HotSpot |
| Wireless Security | WEP, WPA-PSK, WPA2-PSK, WPA-PSK/WPA2-PSK mixed |
| Firewall | SPI (Stateful Packet Inspection), DoS Attack Detection |
| Access Control | MAC Address Filtering, URL Blocking, Domain Filter |
| Management | Web-based UI (HTTP), System Log (syslog/email), Firmware Upgrade, Backup/Restore Settings |
| LED Indicators | Power (battery status), 3G Connection, 3G Signal & Roaming Alert, Wi-Fi |
| Operating Temperature | 0°C to 40°C |
| Storage Temperature | -10°C to 70°C |
| Certifications | CE, FCC, RoHS |
| Package Contents | Router unit, USB cable, Power adapter, Li-ion battery, CD with utility |
| Care and Cleaning | Use a soft, dry cloth. Do not use liquid or aerosol cleaners. Keep away from moisture. |
| Spare Parts and Repairability | No user-serviceable parts inside. Contact AirLive support for repairs. |
Frequently Asked Questions - Traveler3G AIRLIVE
User questions about Traveler3G AIRLIVE
0 question about this device. Answer the ones you know or ask your own.
Ask a new question about this device
Download the instructions for your Uncategorized in PDF format for free! Find your manual Traveler3G - AIRLIVE and take your electronic device back in hand. On this page are published all the documents necessary for the use of your device. Traveler3G by AIRLIVE.
USER MANUAL Traveler3G AIRLIVE
11n 3G Mobile Router with Build-in Sim Card Slot
User's Manual

IMPORTANT USAGE INSTRUCTION
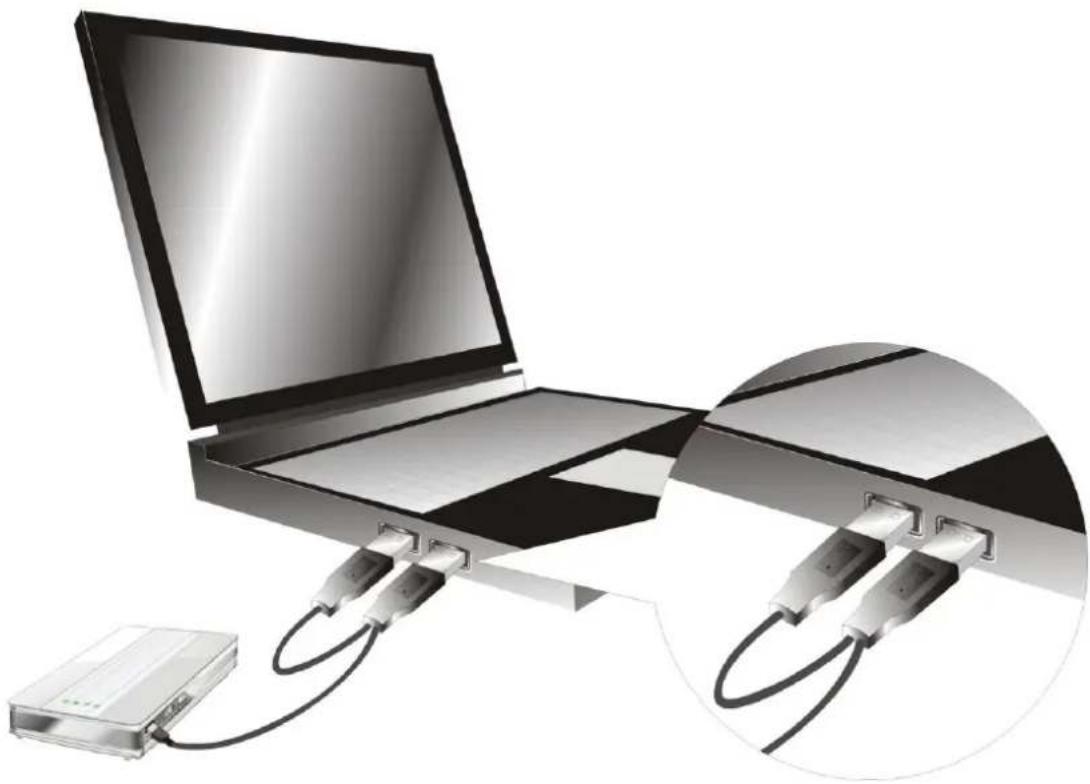
For the convenience of use, this product accepts power from a desktop or a laptop computer. It's mandatory to connect both of two USB connectors at one end of USB supplied power cable to computer at one time. Power supply is not sufficient for the device to operate normally if only one USB connector is inserted into the computer. In this scenario it might cause temporary malfunction on the computer.
natural_image
Illustration of a laptop connected to a USB cable, showing internal wiring and connection points (no text or symbols)Copyright
The contents of this publication may not be reproduced in any part or as a whole, stored, transcribed in an information retrieval system, translated into any language, or transmitted in any form or by any means, mechanical, magnetic, electronic, optical, photocopying, manual, or otherwise, without the prior written permission.
Trademarks
All products, company, brand names are trademarks or registered trademarks of their respective companies. They are used for identification purpose only.
Specifications are subject to be changed without prior notice.
FCC Interference Statement
This equipment has been tested and found to comply with the limits for a Class B digital device pursuant to Part 15 of the FCC Rules. These limits are designed to provide reasonable protection against radio interference in a commercial environment. This equipment can generate, use and radiate radio frequency energy and, if not installed and used in accordance with the instructions in this manual, may cause harmful interference to radio communications. Operation of this equipment in a residential area is likely to cause interference, in which case the user, at his own expense, will be required to take whatever measures are necessary to correct the interference.
CE Declaration of Conformity
This equipment complies with the requirements relating to electromagnetic compatibility, EN 55022/A1 Class B.

Bluetooth®
© 2009 OvisLink Corporation, All Rights Reserved
Table of Contents
1. Introduction ......6
1.1 Package List 7
1.2 Hardware Installation 8
2. Modem Mode....10
2. Getting start....16
2.1. The Router Mode Easy Setup Utility 16
2.2. The Modem Mode Easy Setup Utility.... 29
2.3. The Router mode Easy Setup by Configuring Web Pages 32
3. Making Configuration....44
3.1 Advanced....44
3.1.1 Basic Setting 44
3.1.2 Forwarding Rules 57
3.1.3 Security Setting 63
3.1.4 Advanced Settings 74
3.1.5 TOOL BOX 83
4. Troubleshooting 89
5. Appendix A Spec Summary Table....94
6. Appendix B Licensing information....96
7. Glossary 104
1
Introduction
natural_image
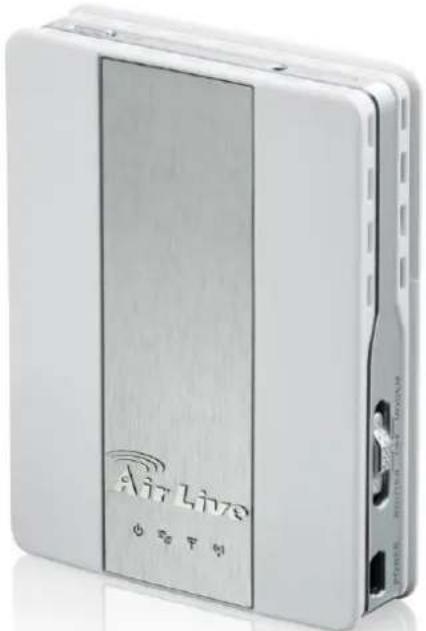
White Airline device with visible branding and ports, no readable text or symbols beyond brandingCongratulations on your purchase of this outstanding Product : Traveler3G M WiFi Mobi-HSPA Router. This product is specifically designed for mobile user who needs to have the Internet access beyond his home and office. It provides a complete solution for Internet surfing and broadband sharing. Instructions for installing and configuring this product can be found in this manual. Before you install and use this product, please read this manual carefully for fully exploiting the functions of this product.
1.1 Package List
| Items | Description | Contents | Quantity |
| 1 | WiFi Mobi-HSPA Router |  | 1 |
| 2 | USB Cable |  | 1 |
| 3 | Power adapter | 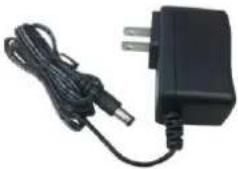 | 1 |
| 4 | Li-ion Battery | 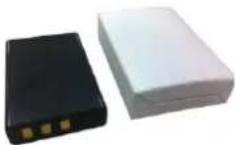 | 1 |
| 5 | CD |  | 1 |
1.2 Hardware Installation
- Hardware Configuration
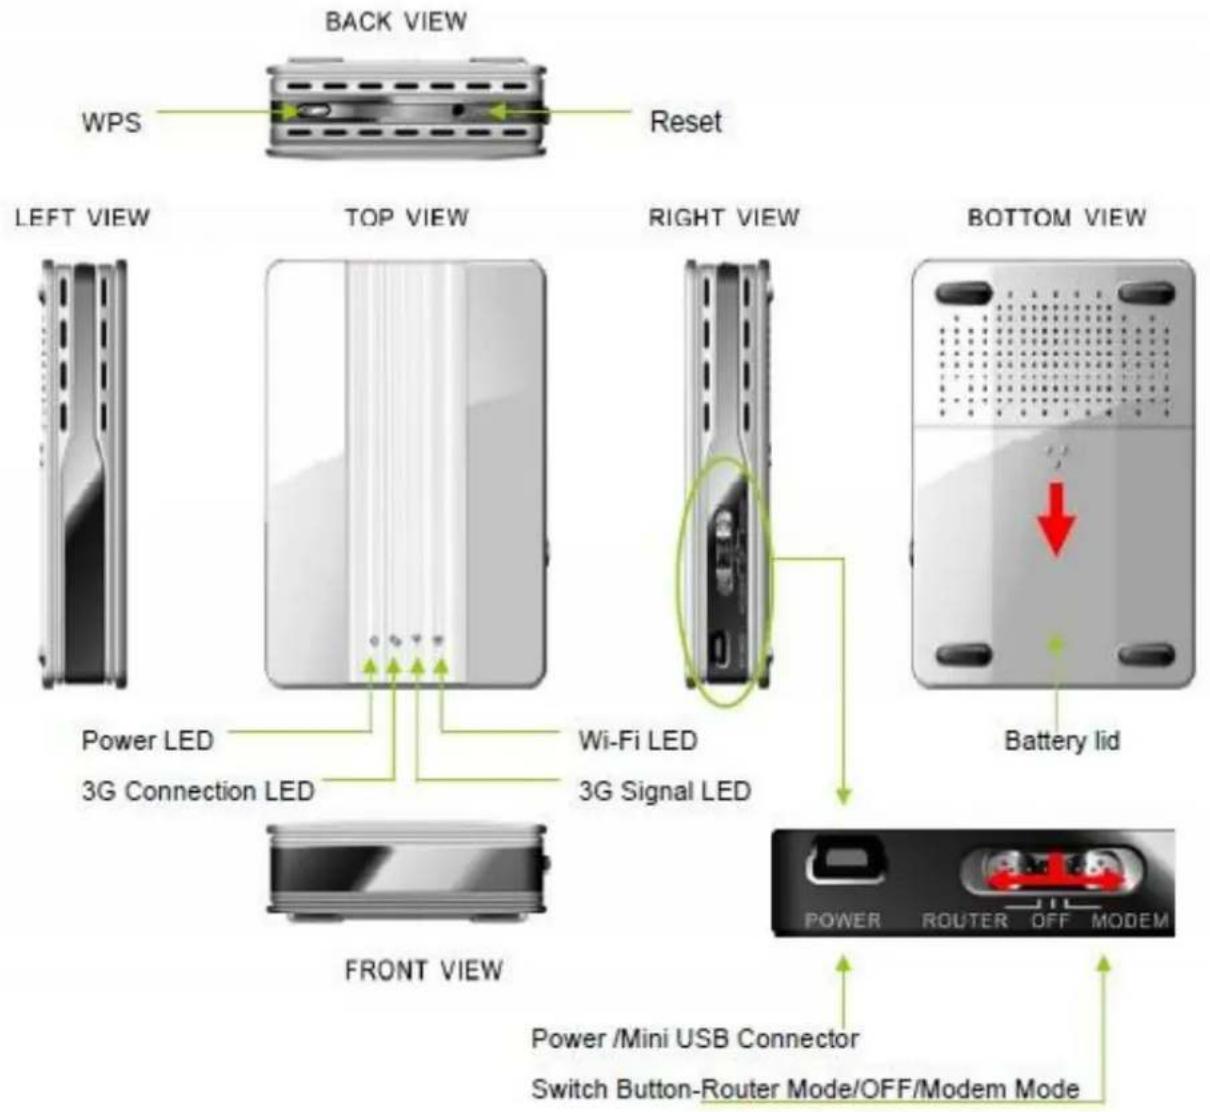
- LED indicators
- Router Mode
| LED color | Description | |
| Power (and Battery Status) | Green | Battery is fully charged |
| Green in flash | Power is provided by battery | |
| Amber | Charging the battery | |
| Red | Battery low | |
| 3G Connection Status | Red | Disconnected |
| Red in flash | Connecting | |
| Amber | EDGE or GPRS connection | |
| Amber in flash | Data access in EDGE or GPRS | |
| Green | UMTS/HSDPA/HSUPA connection | |
| Green in fast flash | Data access in UMTS/HSDPA/HSUPA | |
| 3G Signal & Roaming Alert | Red | Weak Level |
| Red in quick flash | Weak Level and roaming alert | |
| Amber | Middle Level | |
| Amber in quick flash | Middle Level and roaming alert | |
| Green | Strong Level | |
| Green in quick flash | Strong Level and roaming alert | |
| Wi-Fi LED | Green | WLAN is on |
| Green in flash | Data access | |
| Green in fast flash | Device is in WPS mode |
2. Modem Mode
| LED color | Description | |
| Power (and Battery Status) | Green | Modem mode is active |
| 3G Connection Status | N/A | N/A |
| 3G Signal & Roaming Alert | N/A | N/A |
| Wi-Fi | N/A | N/A |
- Installation Steps

DO NOT switch on WiFi Mobi-HSPA Router before performing the installation steps below.
1. Router Mode Steps
Step 1. Turn off the Slide Switch.
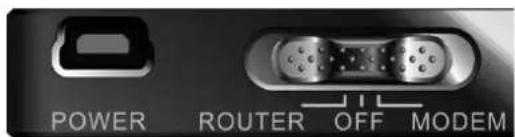
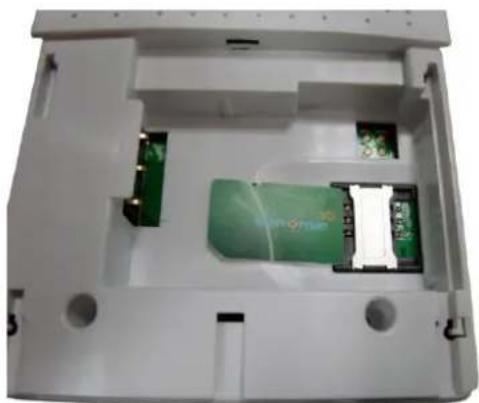
Step2. Insert SIM/USIM
The WiFi Mobi-HSPA Router builds in a HSUPA 3G modem card. Please refer to your service provider for detailed feature information.
natural_image
Interior view of a white plastic enclosure showing internal components and green circuit boards (no text or symbols visible)Notice: a 3G SIM/USIM Card with data services is MUST.
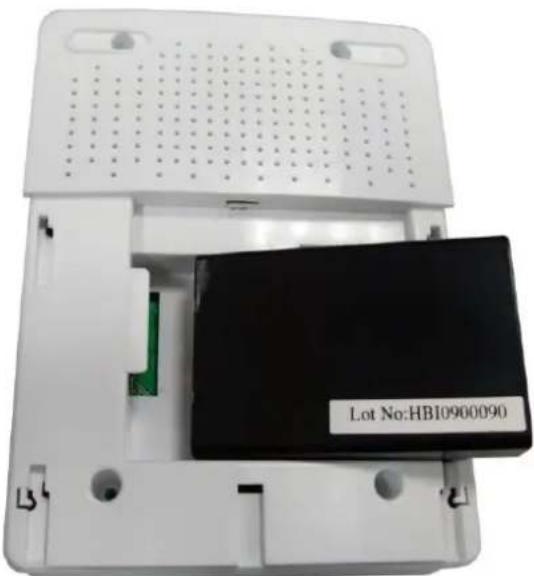
Step 3. Attach the Li-ion battery
natural_image
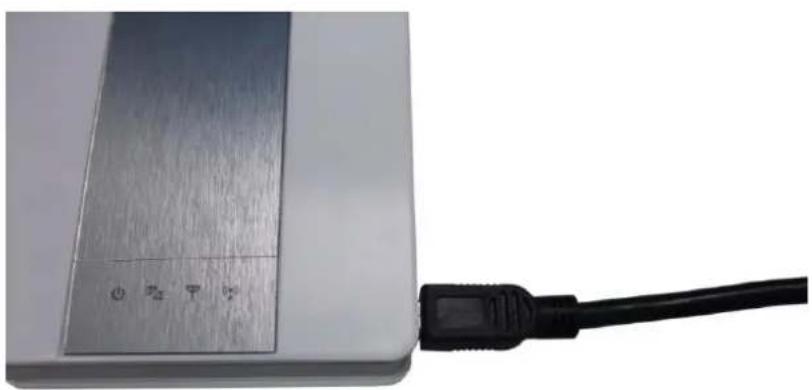
White plastic electronic device casing with a black rectangular component and green indicator light, no visible text or symbols on the main body.Step 4. Insert Mini-USB Power Jack, and connect with the power adapter to the receptor on it.
natural_image
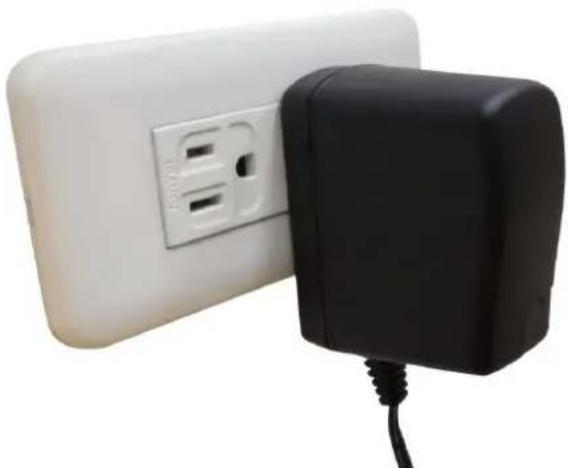
Close-up of a metallic electronic device with a black cable attached to its side (no visible text or symbols)Step 5. Then plug the other end of the power adapter into a wall outlet.
natural_image
White electrical outlet with two power outlets connected to a black compact plug (no text or symbols visible)Step 6. Turn the Slide Switch to Router Mode.
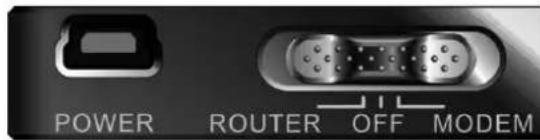

The Power LED will turn ON to indicate that the power has been applied.
2. Modem Mode Steps
Step 1. Turn off the Slide Switch.
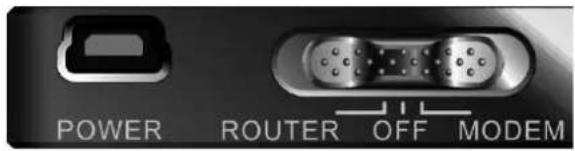
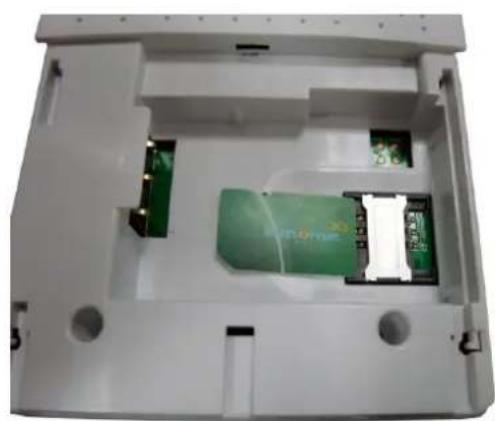
Step2. Insert SIM/USIM
The WiFi Mobi-HSPA Router builds in a HSUPA 3G modem card. Please refer to your service provider for detailed feature information.
Notice: a 3G SIM/USIM Card with data services is MUST.
natural_image
Interior view of a white plastic enclosure with green internal components and mounting holes (no visible text or symbols)Step 3. Insert Mini-USB cable.
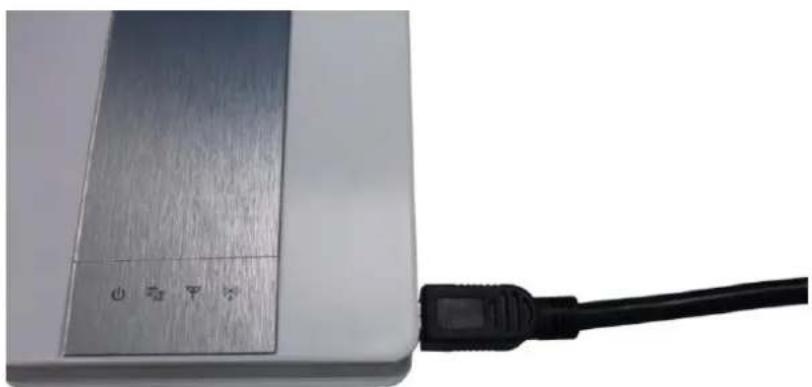
natural_image
Close-up of a metallic electronic device with a black cable attached to its side (no visible text or symbols)Step 4. Then plug the other end of the Mini-USB cable into a PC.
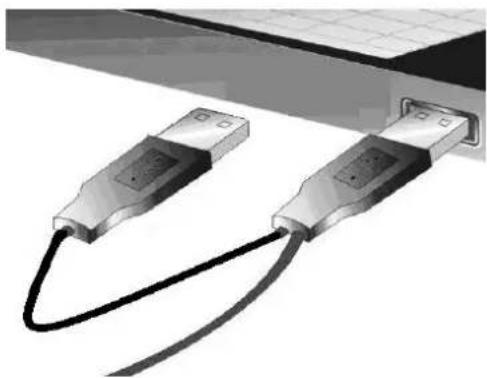
natural_image
Two USB connectors with black cables, connected to a grid-patterned surface (no text or symbols visible)Step 5. Turn the Slide Switch to Modem Mode.
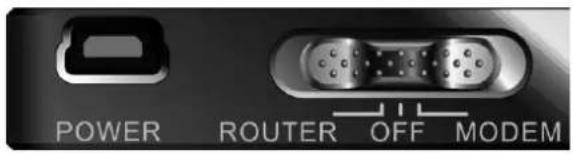
2
Getting start
2.1. The Router Mode Easy Setup Utility
We provide Easy Setup Windows Utilities (Router mode and Modem mode) and Web Wizard to enable you to set up the WiFi Mobi-HSPA Router quickly and easily.

Check the steps below before running the section.
(1) Press WPS button more than 6 seconds on the Router. The Router will reset to default.
(2) Connect to the Router by Wi-Fi. The default SSID is the same as "Mac Address" You can find the "Mac Address" at Machine Label.
(3) Insert CD to CDROM; Click the Easy Setup Utility from CD or Auto Run.
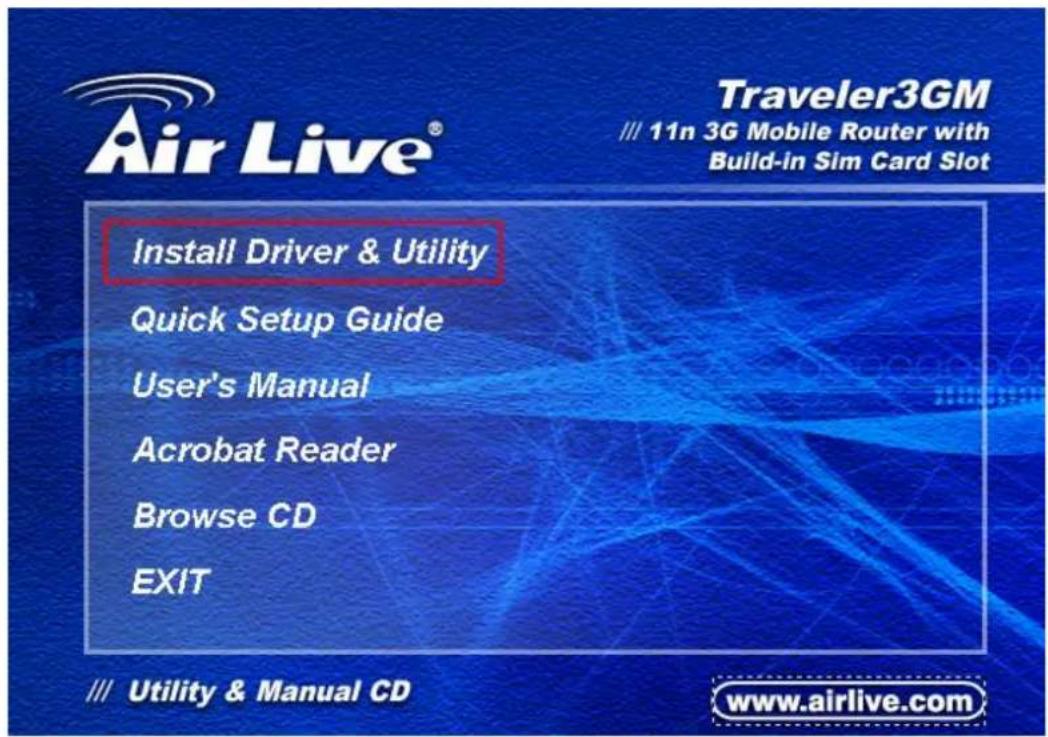
Step 1. You can start to configure the device via the Install Driver & Utility.
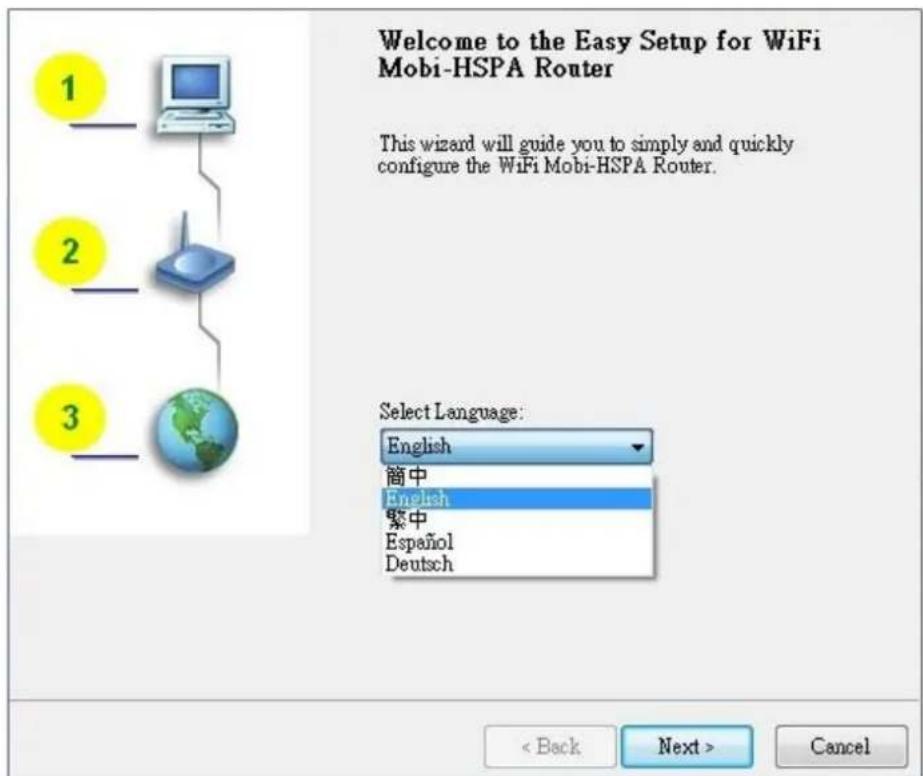
Step 2. Select Language then click "Next" to continue.
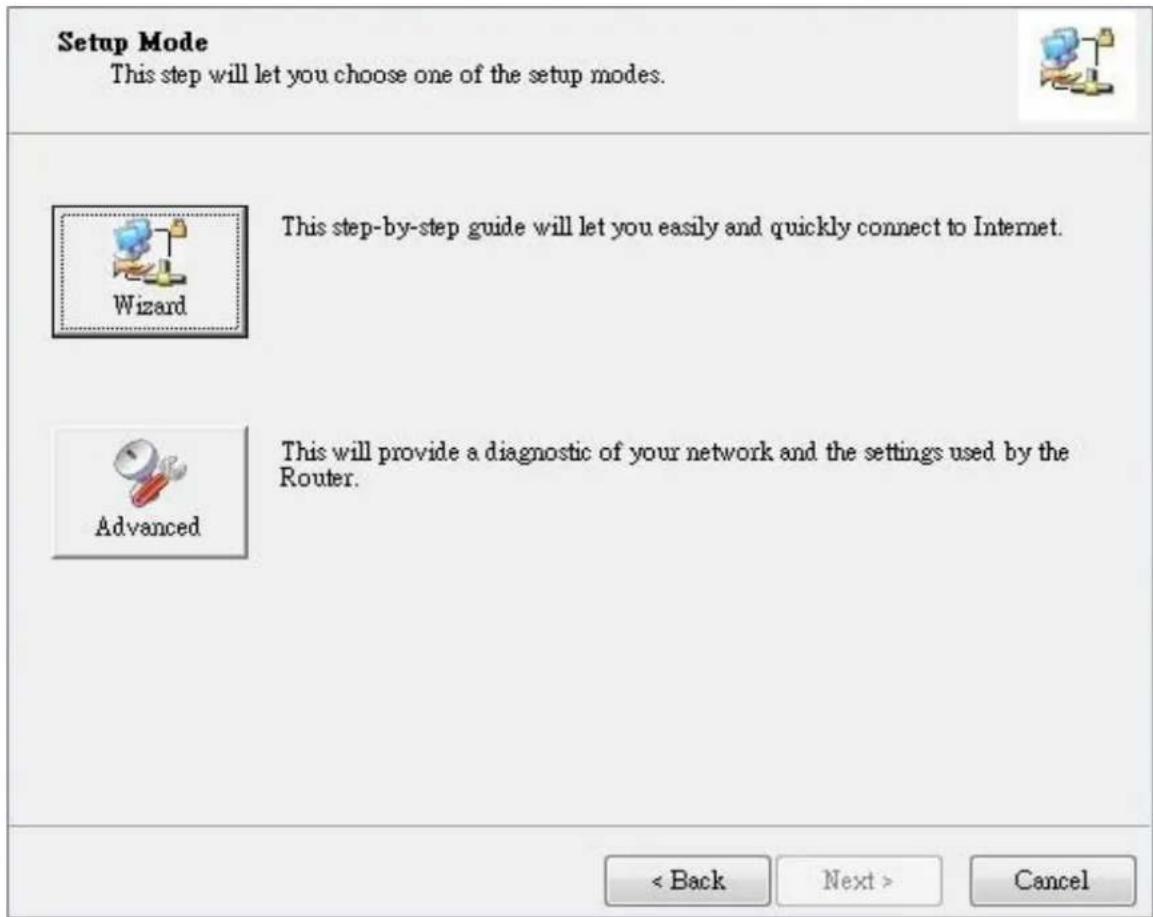
Step 3.
- Please select Wizard mode to run the setup step-by-step to diagnose the network settings of the Router.
- Click the "Wizard" button and click "NEXT" to continue.
Step 4.
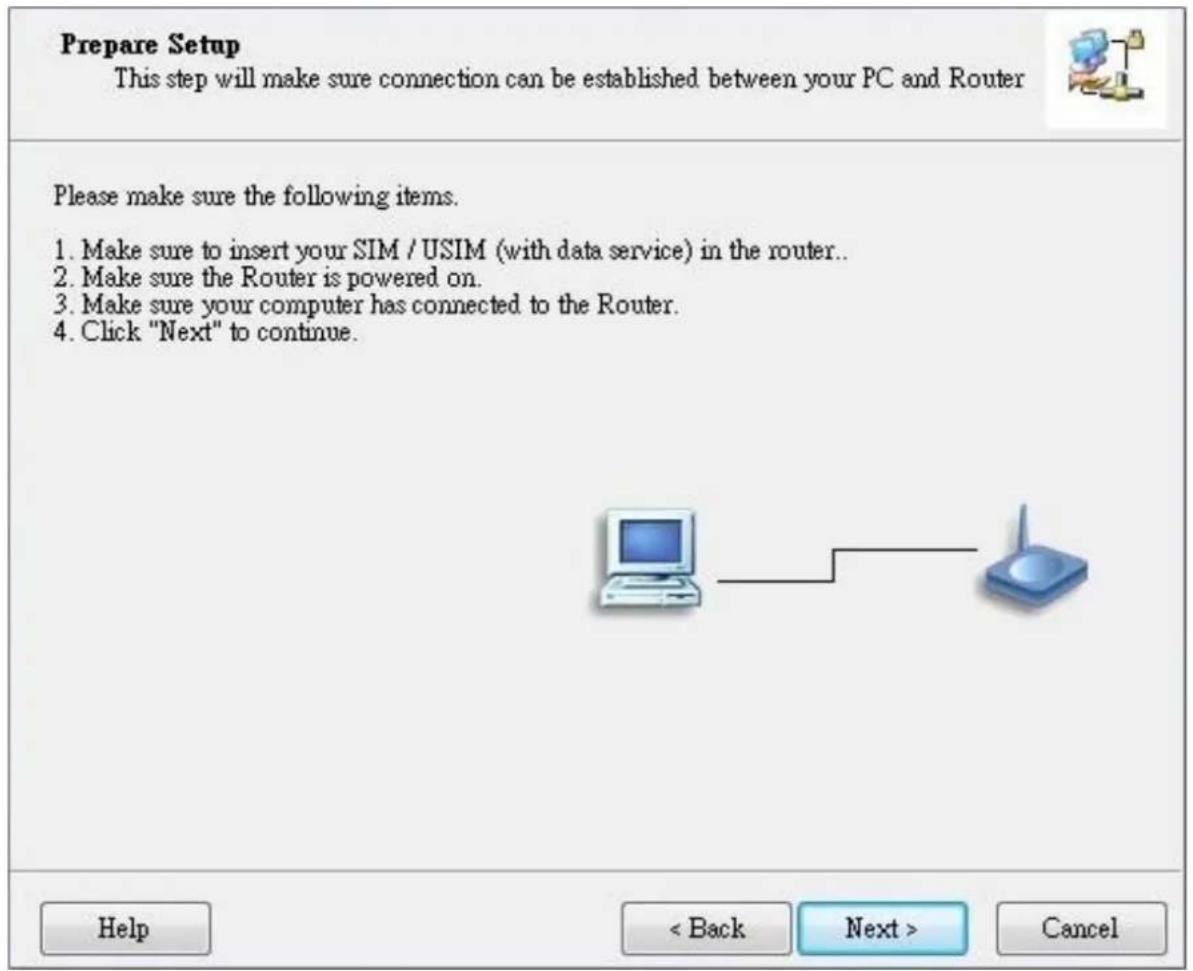
- Make sure to insert your SIM / USIM (with data service) in the router.
- Make sure the Router is powered on.
- Make sure your computer has connected to the Router via WLAN.
- Make sure your computer has an IP address.
- Click "Next" to continue.
Step 5.
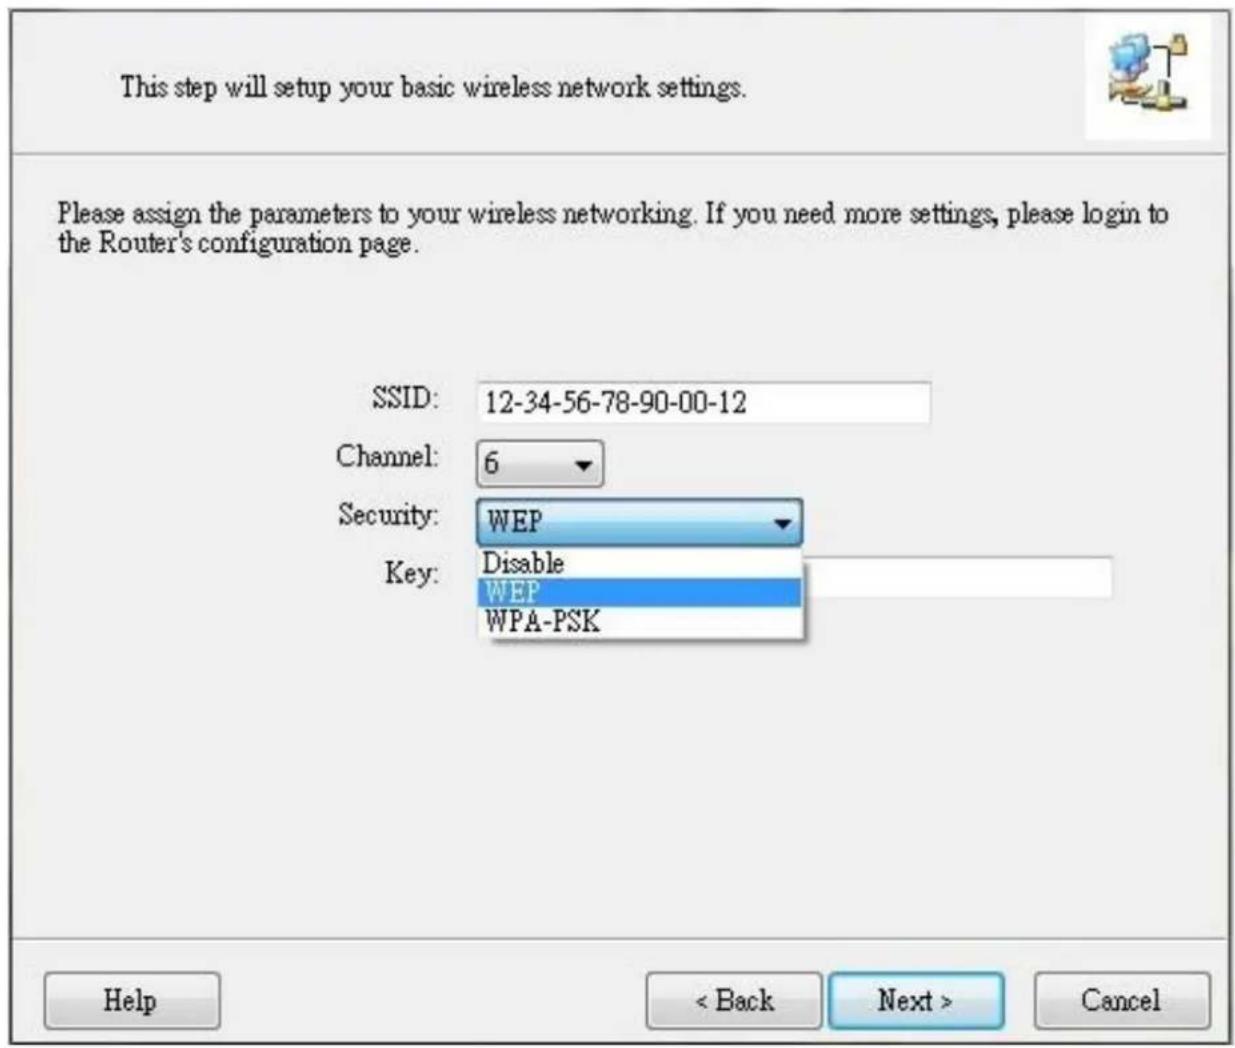
- Key in the SSID, Channel and Security options, for example:
SSID: "12-34-56-78-90-12", Security: WEP
Key: "1234567890".
Default SSID is the same as "Mac Address".
- And then click "Next" to continue.]
Step 6-1.
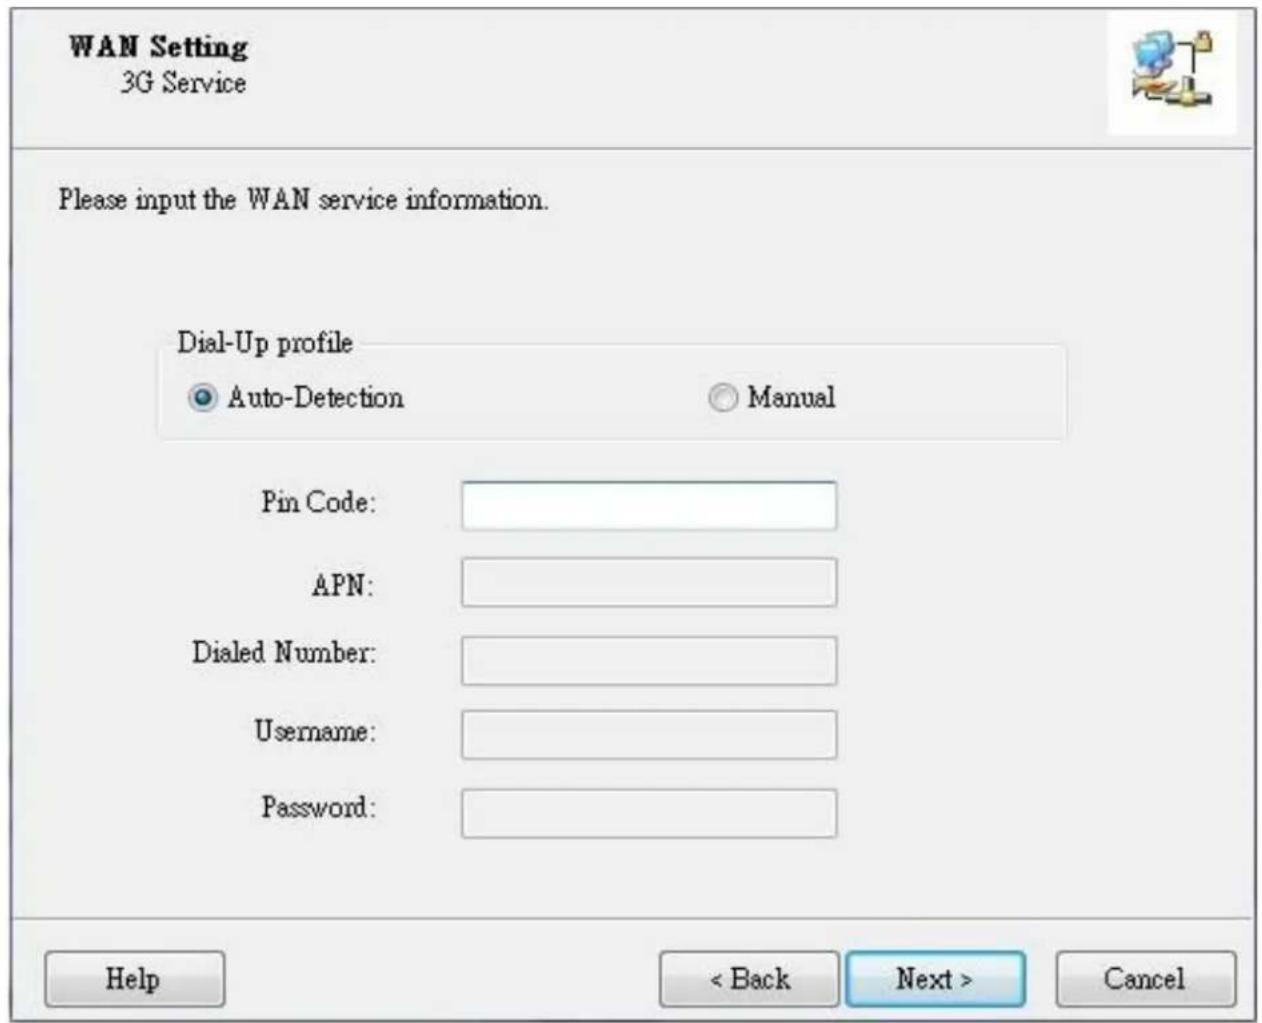
- Select "Auto-Detection", and the Utility will try to detect and configure the required 3G service settings automatically.
- Click "Next" to continue.
※ Default PIN Code is empty, if you have PIN Code, you must enter it. For example "0000". If no, just click "Next" to continue.
Step 6-2.
- Or you can select "Manual" and manually fill in the required 3G service settings provided by your ISP.
- Click "Next" to continue.
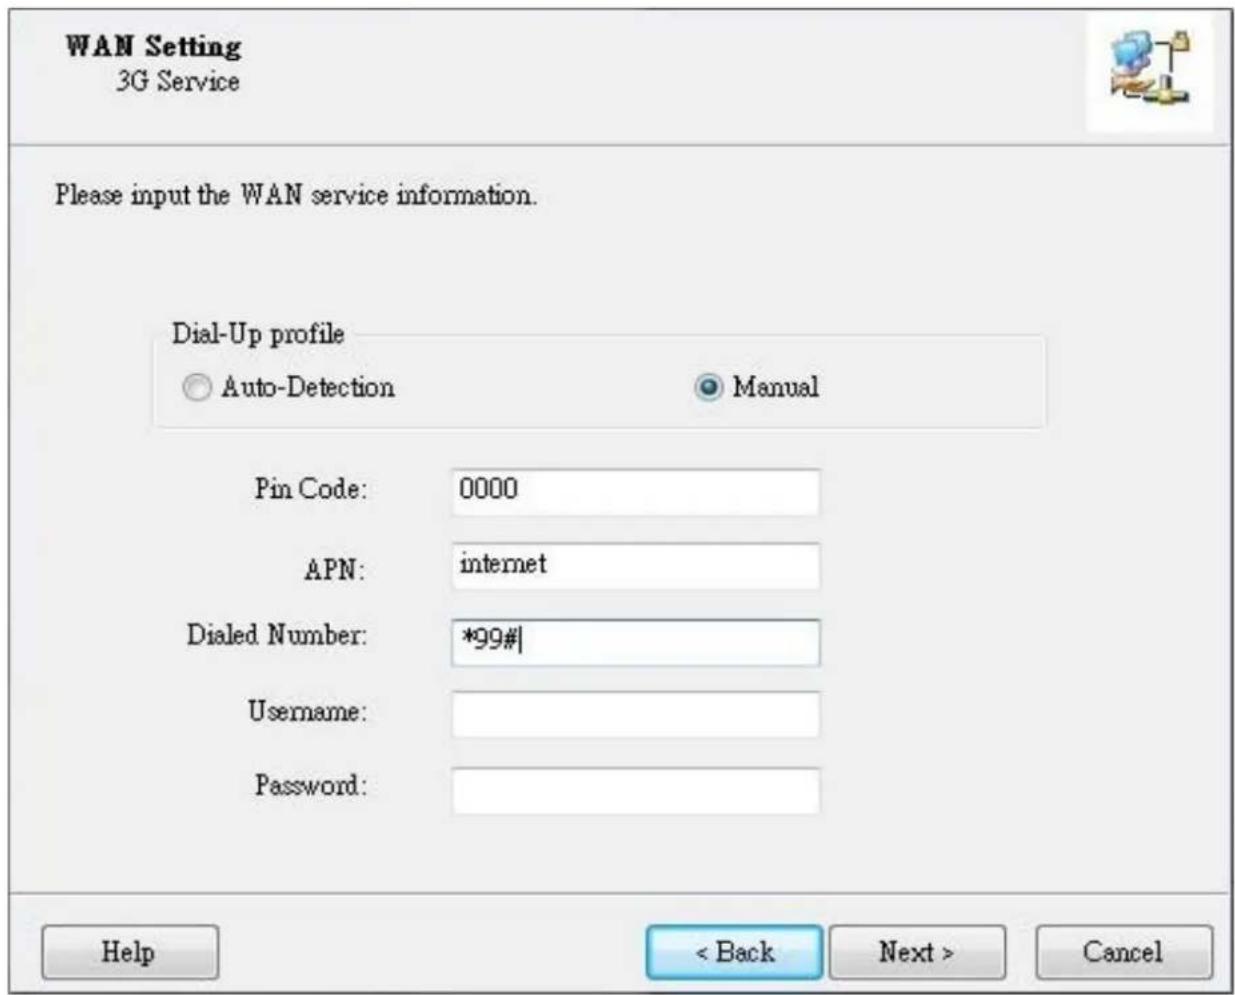
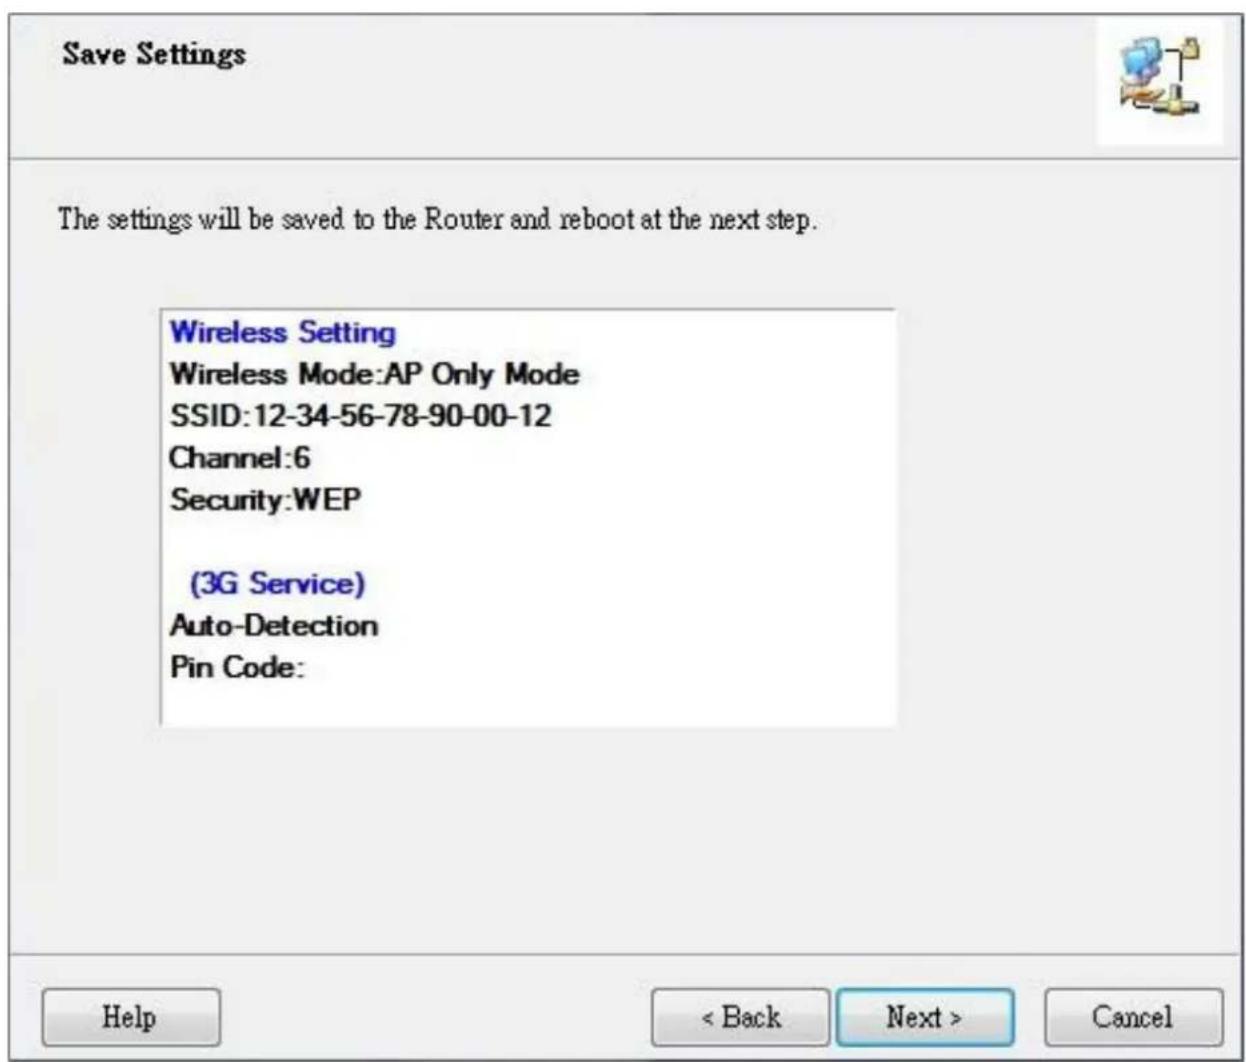
Step 7. Check the settings, and then click the "Next" if the settings are correct.
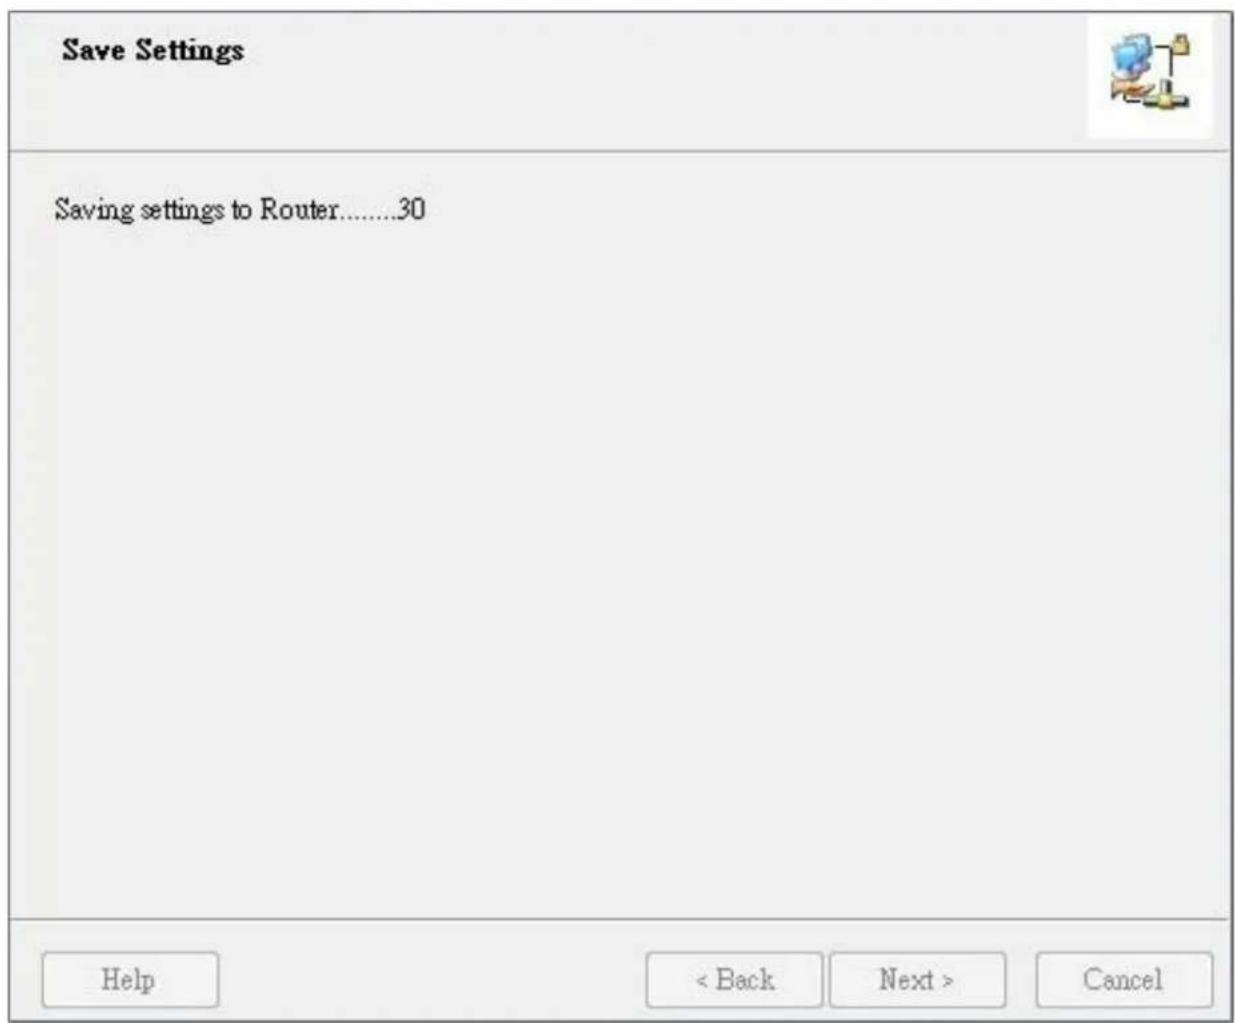
Step 8. The Wi-Fi Mobi-HSPA Router is rebooting to make your entire configuration activated.
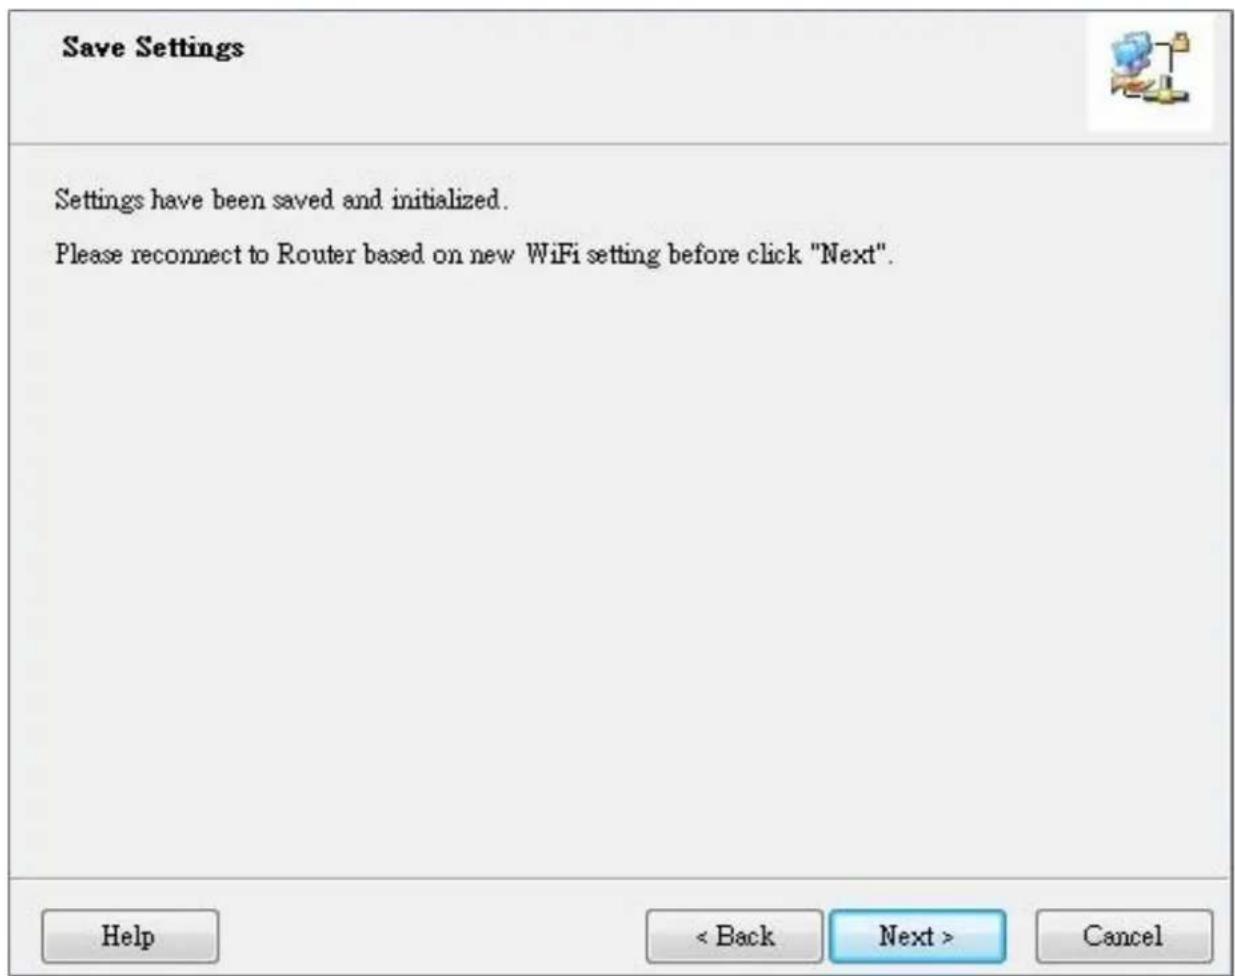
Step 9. Please reconnect to Router before click "Next".
Step 10-1. Click "Next" to test the Internet connection or you can skip test, and then click "Next" to continue.
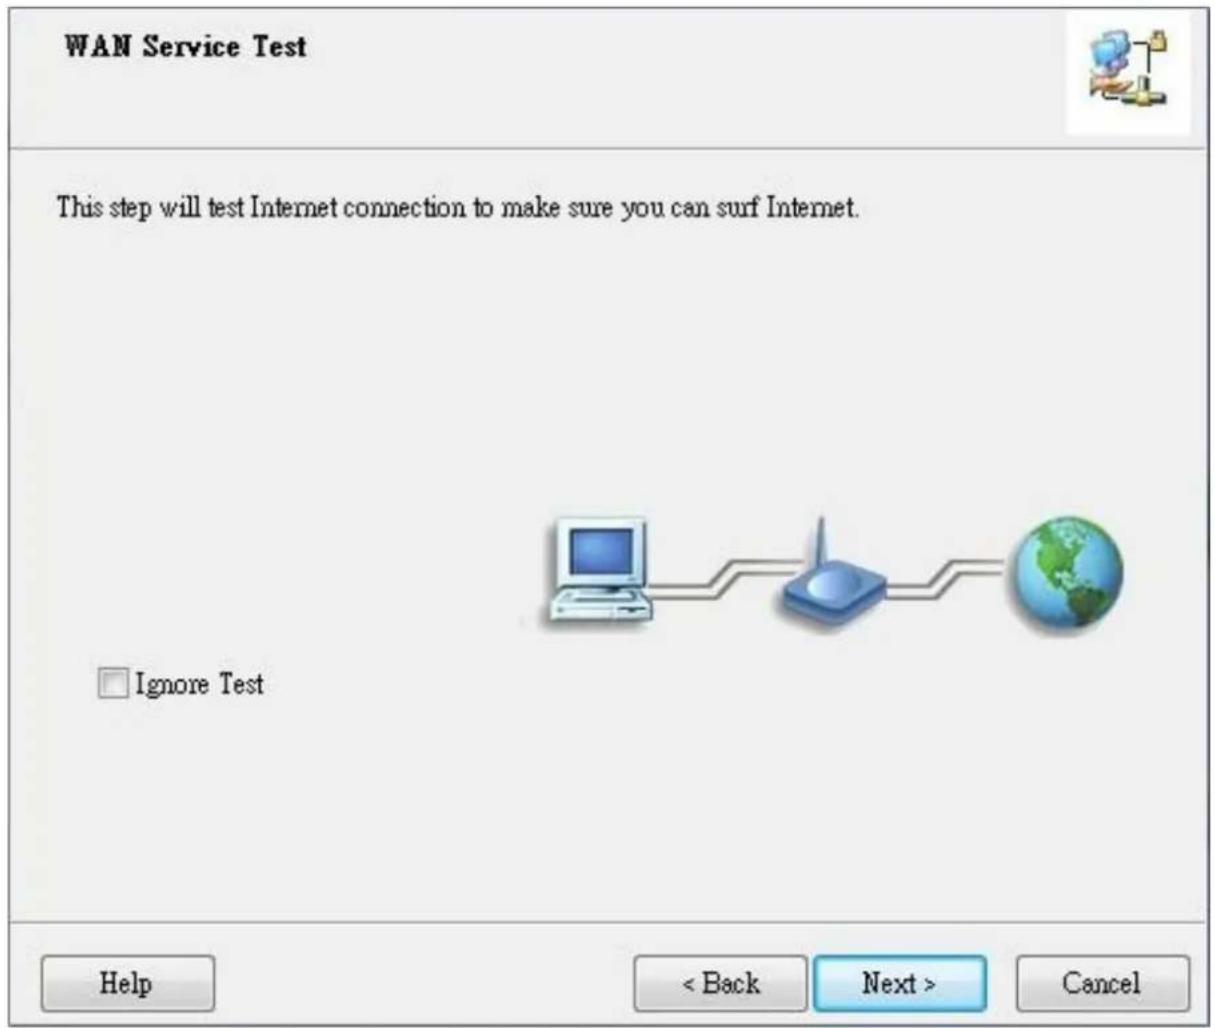
Step 10-2. Test the Internet connection
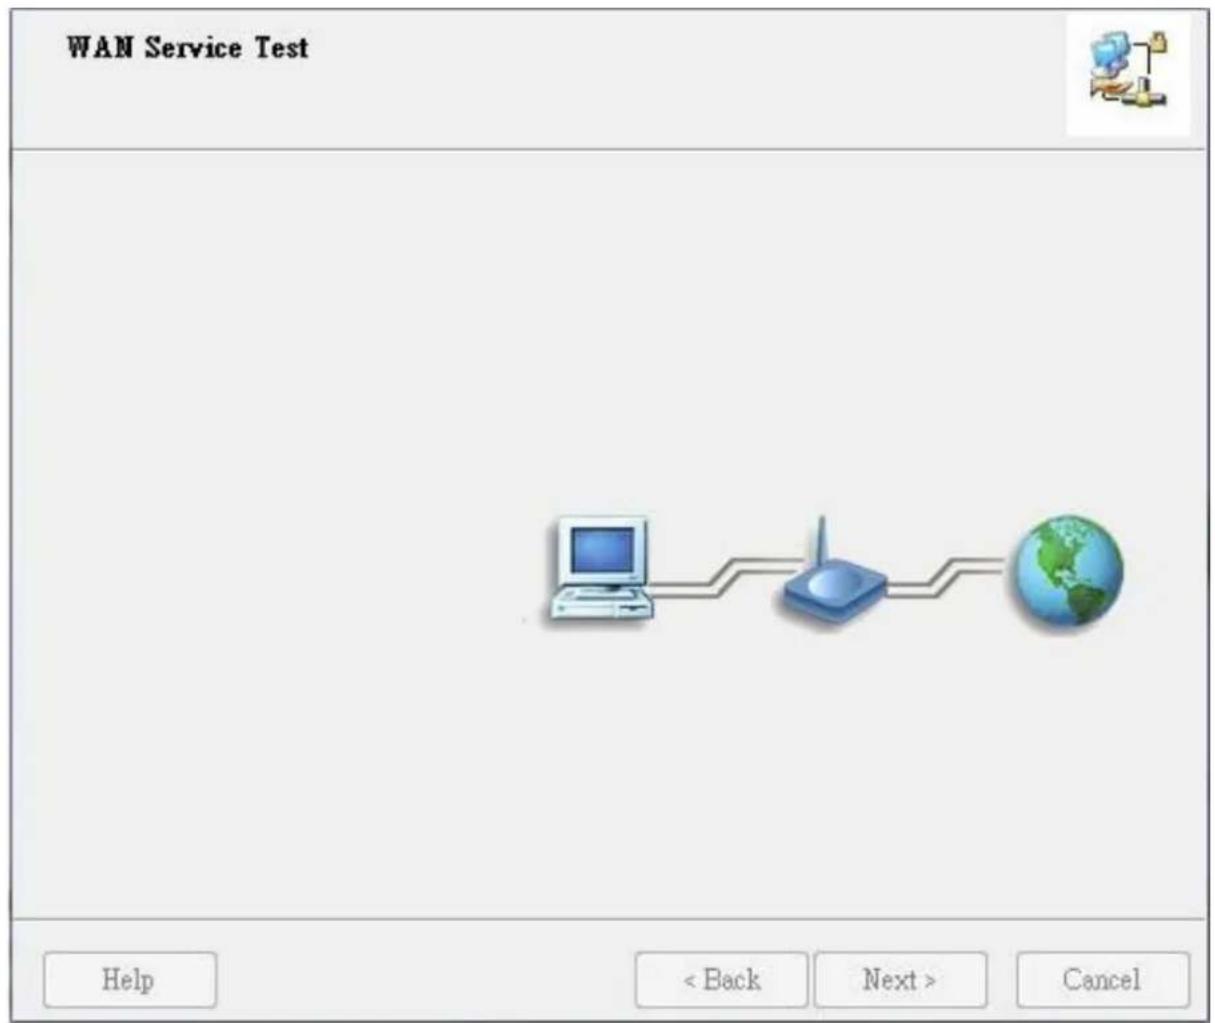
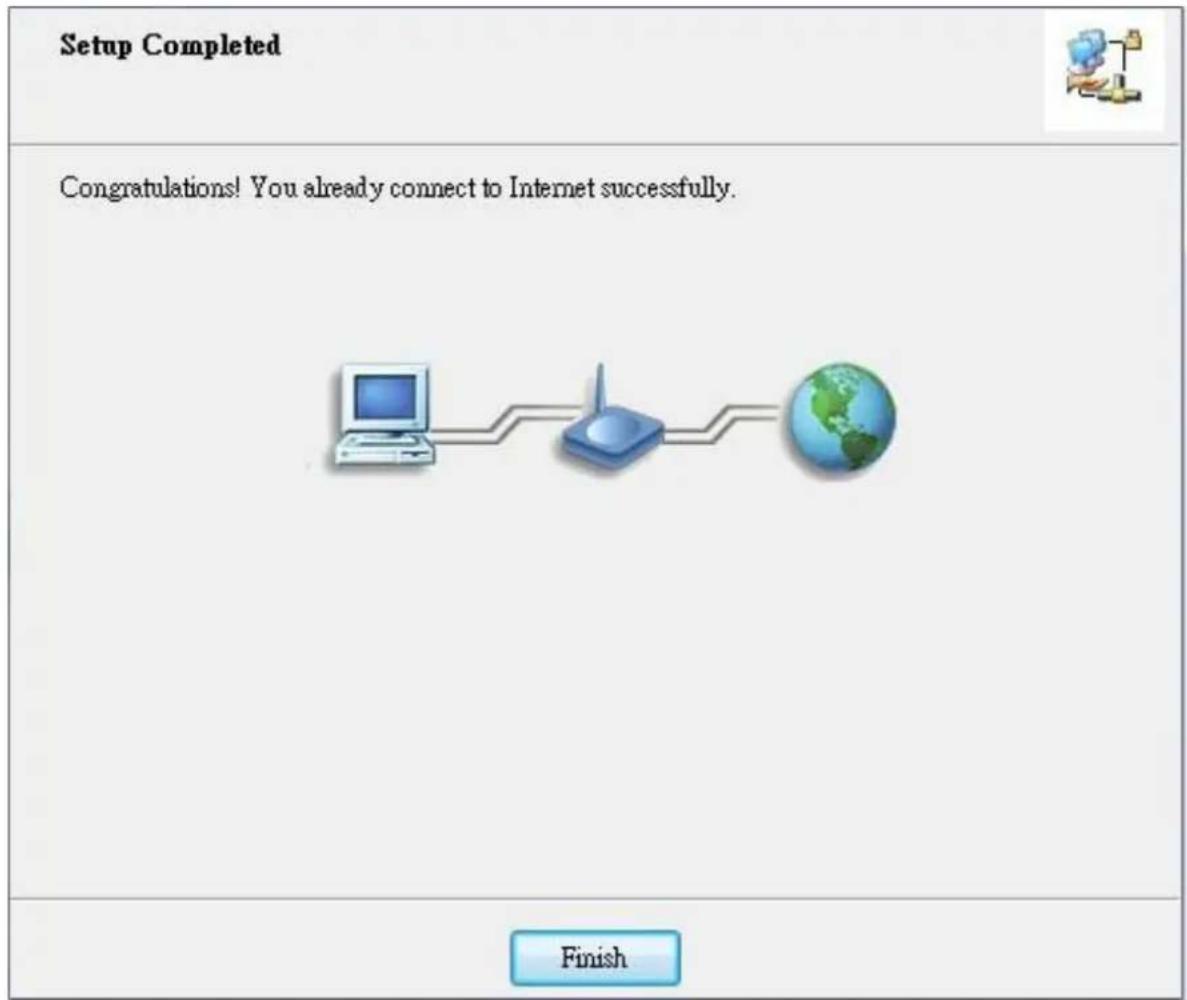
Step 11. Congratulations! Setup is completed.
Now you have already connected to Internet successfully.
2.2. The Modem Mode Easy Setup Utility

Check the steps below before running the section.
(1) Reference the section "Hardware Installation- Modem Mode" first.
※ When you use "Modem Mode" at first time, the utility will auto install to your computer.
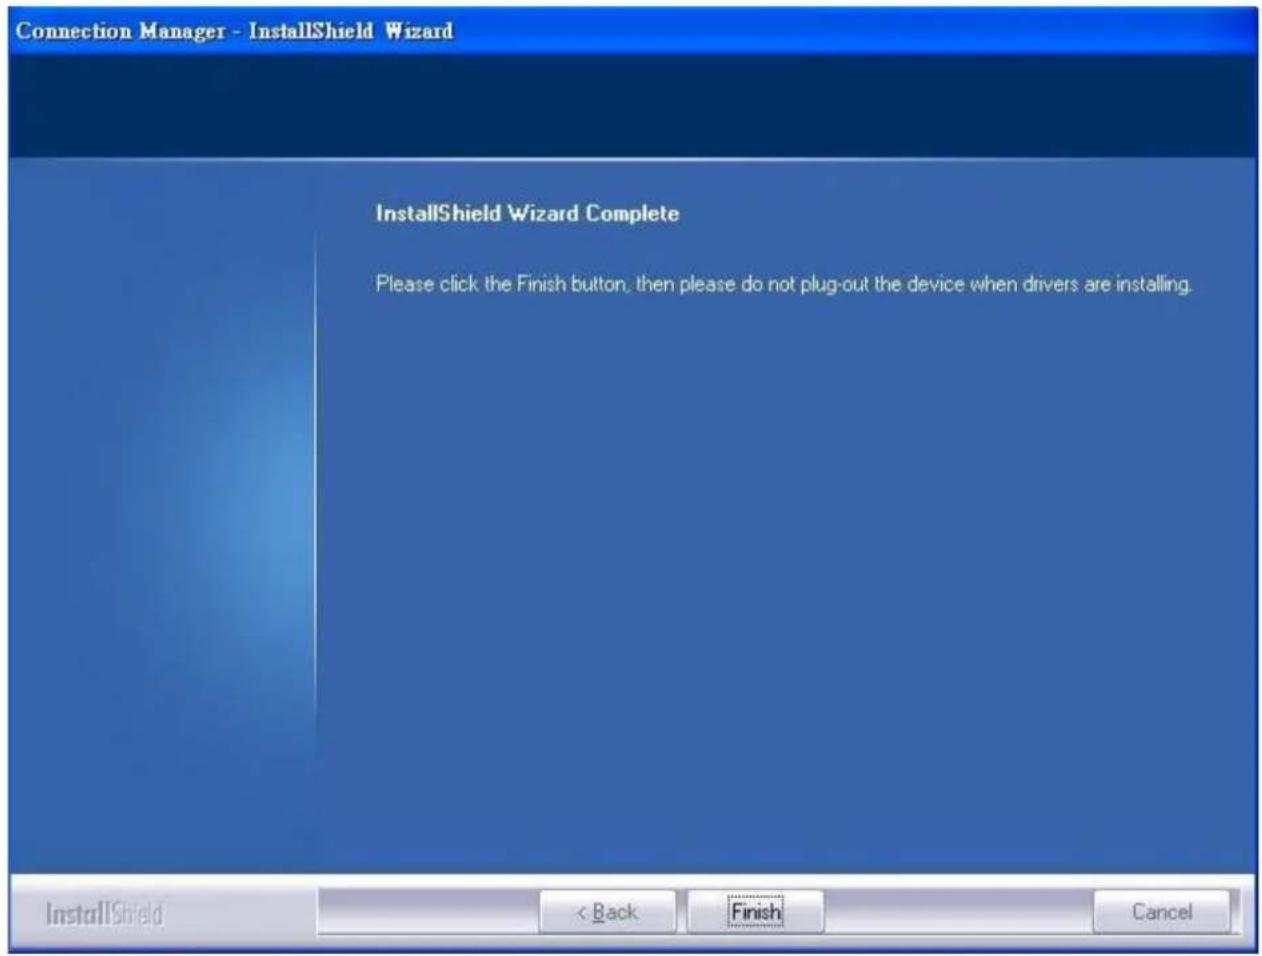
Step 1. Install the Connection Manager.
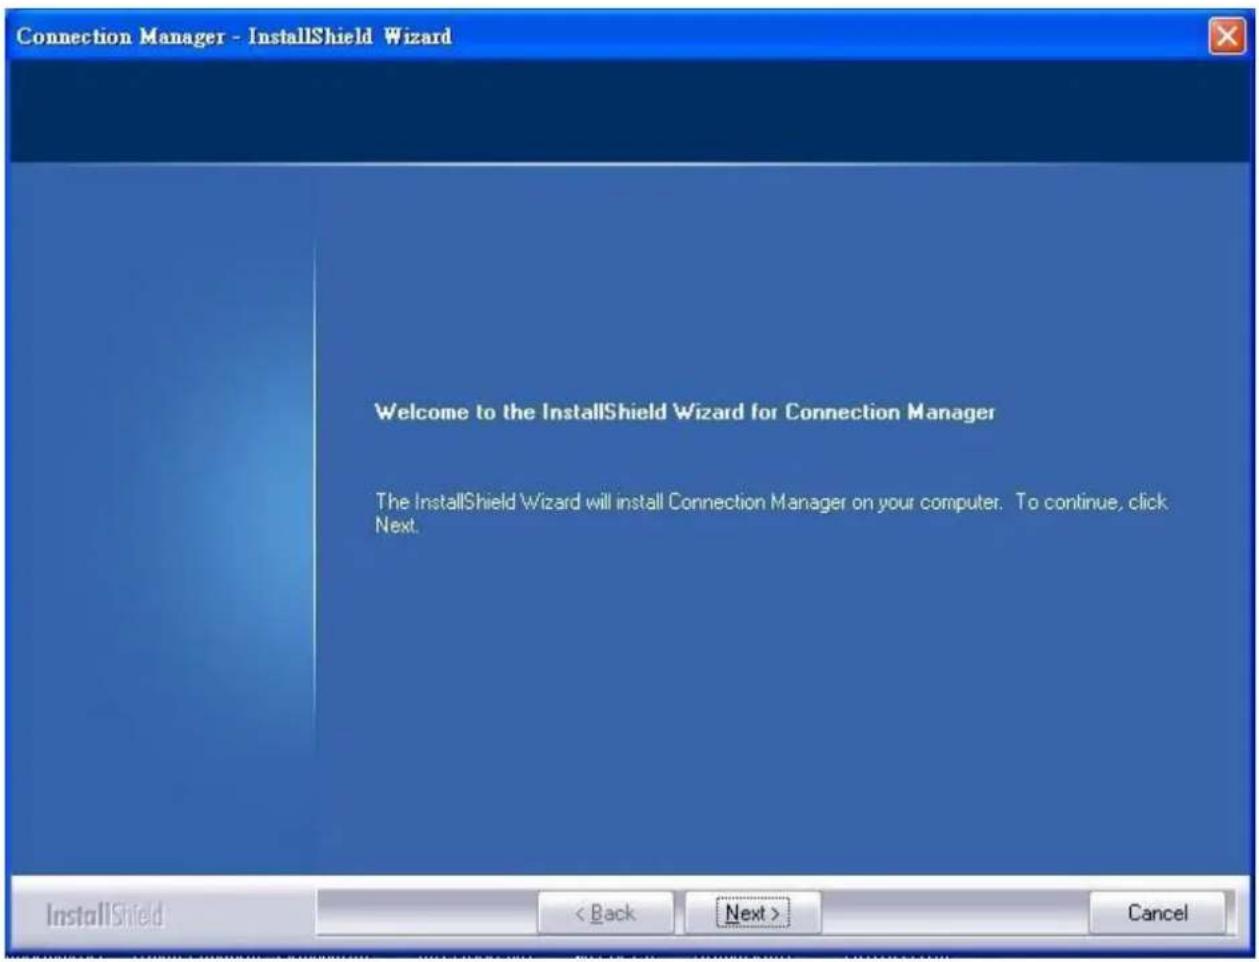
Step 2. Congratulations! Setup is completed.
Now you can run the utility connected to Internet.
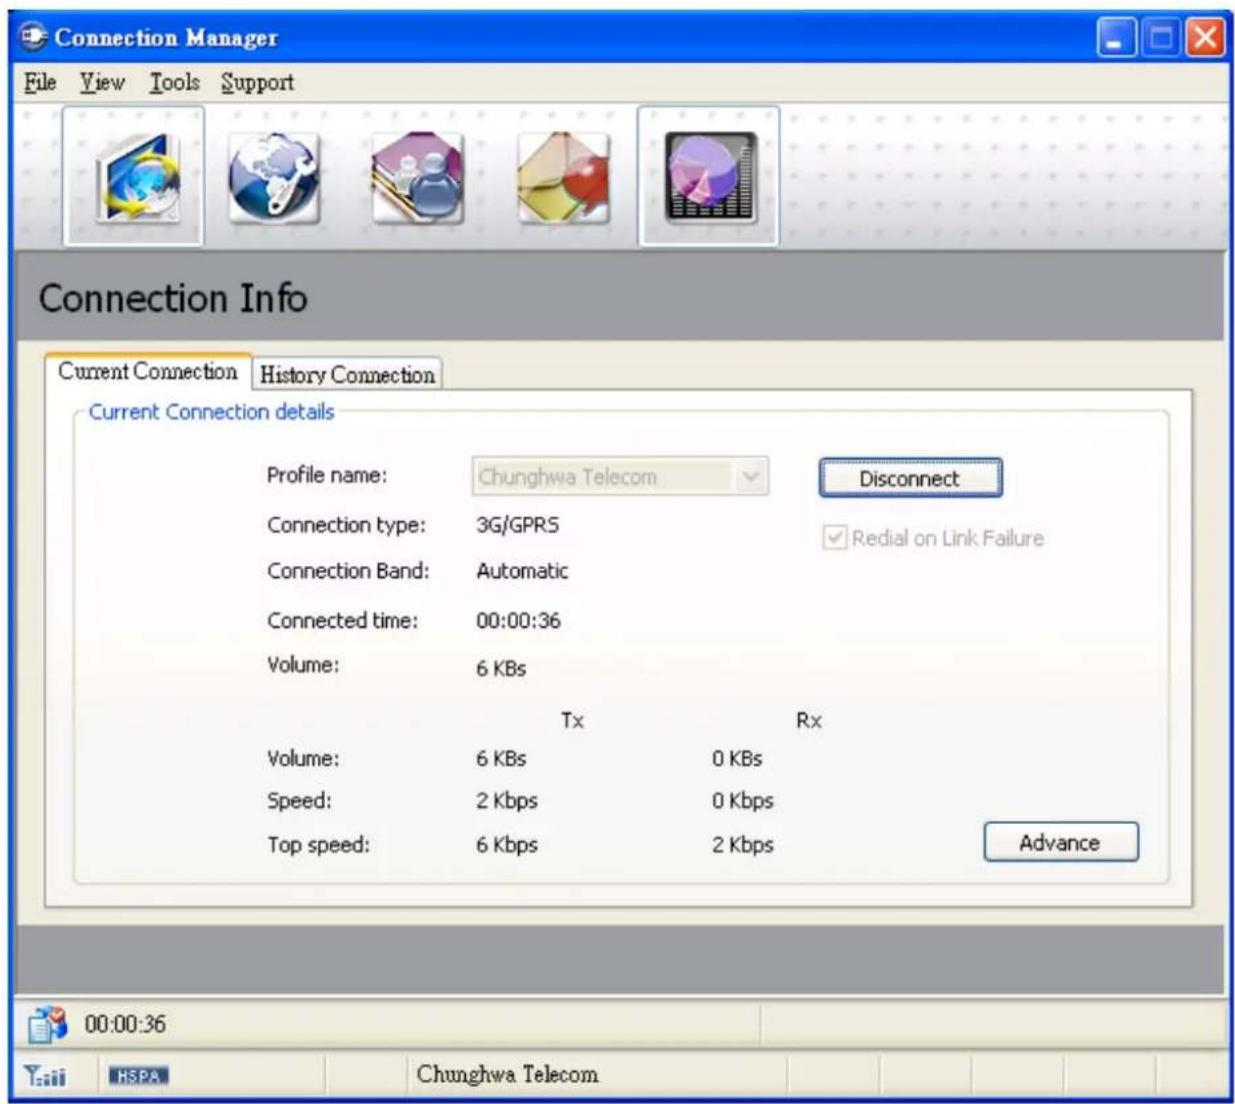
Step 3.
The UI of Connection Manager.
2.3. The Router mode Easy Setup by Configuring Web Pages
You can also browse web UI to configure the device.
- Browse to Activate the Setup Wizard
Step 1. Please type in the IP Address (http://192.168.1.1)

Step 2. Please type "airlive" in the Password and click 'login' button.

Step 3. Select your language.

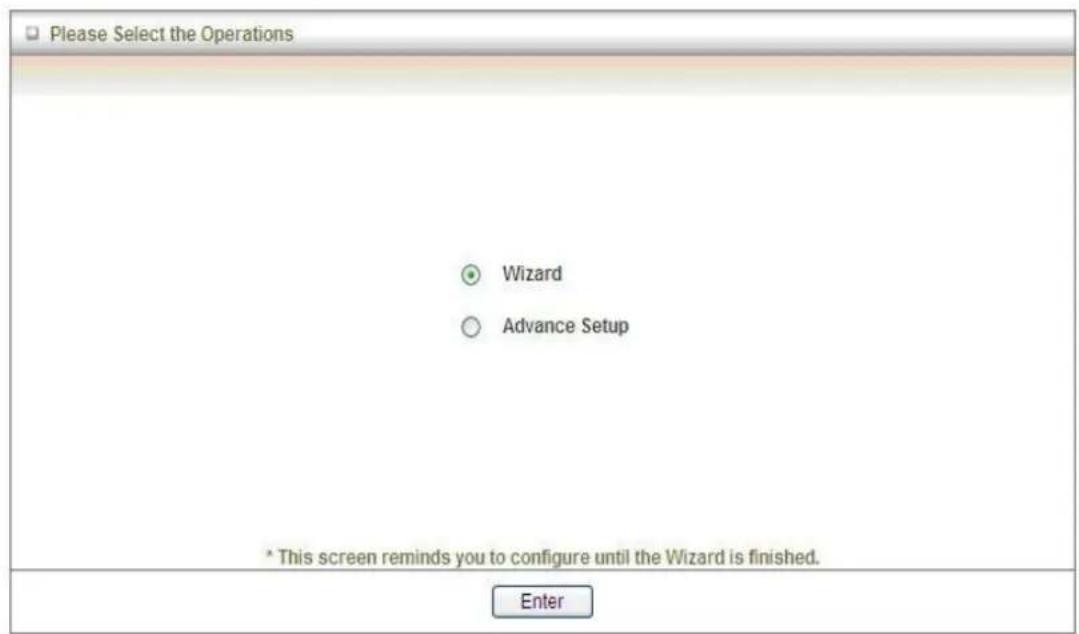
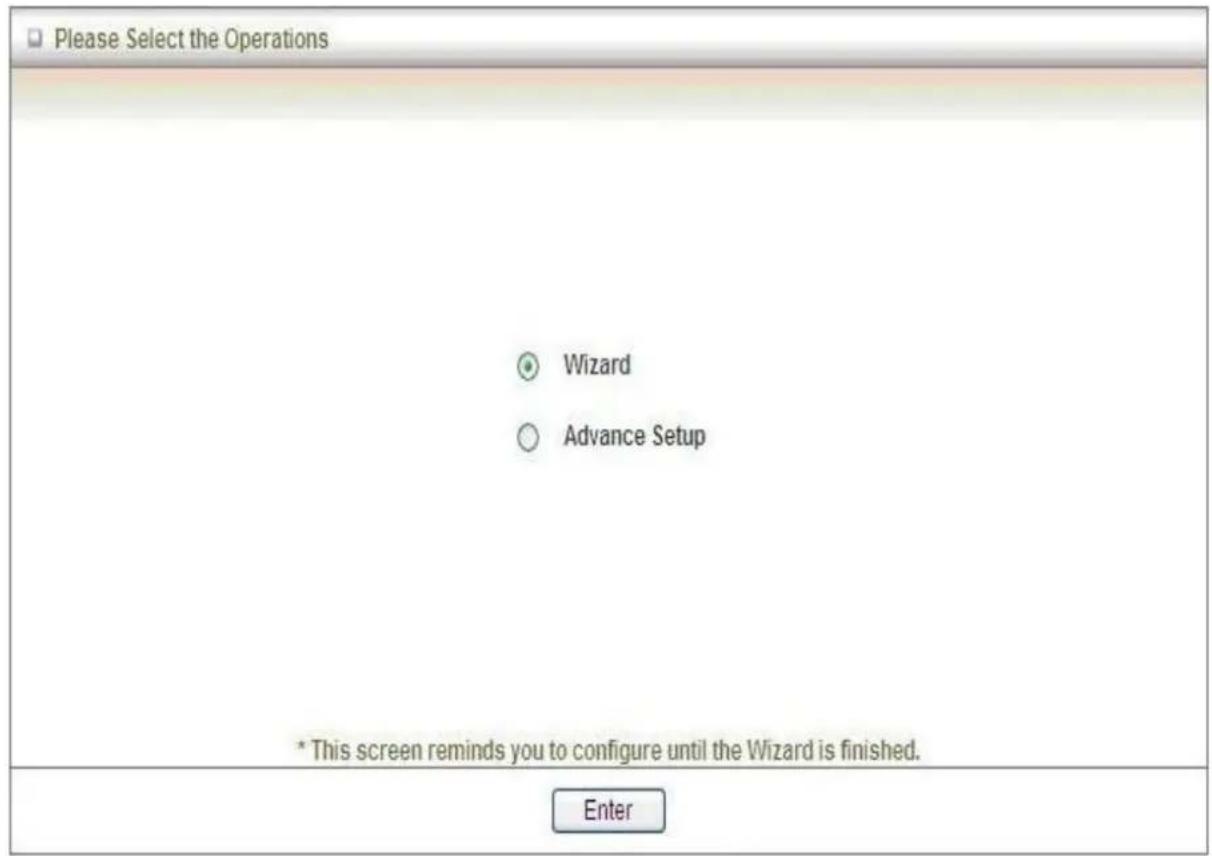
Step 4. Select "Wizard" for basic settings with simple way.
Step 5. Press "Next" to start the Setup Wizard.
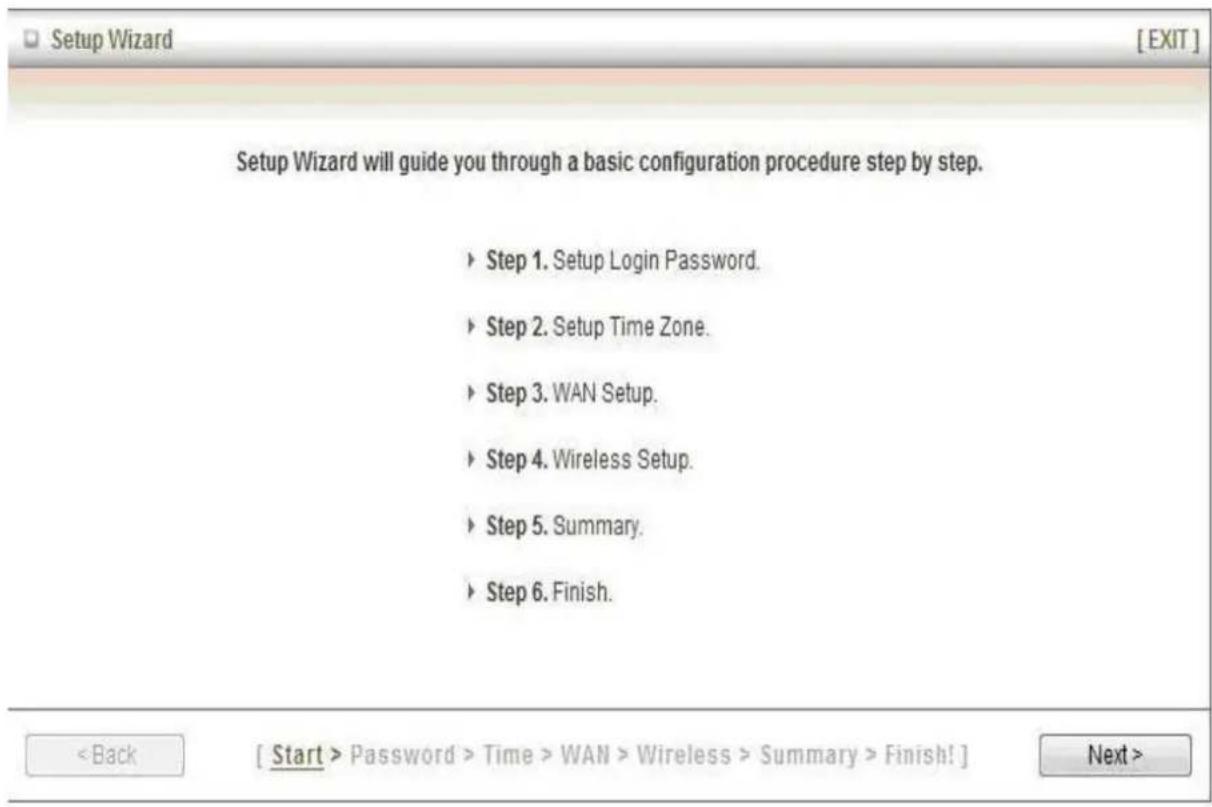
- Configure with the Setup Wizard
Step 1. Change System Password.
Set up your system password.
(Default: admin)
![Setup Wizard - Setup Login Password [EXIT] ► Old Password ► New Password ► Reconfirm < Back [ Start > Password > Time > WAN > Wireless > Summary > Finish! ] Next >](/content/2026/05/1004712/images/d026ea06e8a1d15756241bd1c3d1bf2e8dbef6d1e5648412e086d5538bc8caa4.jpg)
Step 2. Select Time Zone.
![Setup Wizard - Setup Time Zone [EXIT] (GMT+08:00) Beijing, Chongqing, Hong Kong, Urumqi Detect Again < Back [ Start > Password > Time > WAN > Wireless > Summary > Finish! ] Next >](/content/2026/05/1004712/images/585652c1e74e519a3333f74d94c78f934165b80c1c4e13e38a9f74bf6fc8faea.jpg)
Step 3. Select LAN IP Address and Wan Type.
You can select 3G and Wi-Fi HotSpot as the WAN type.
![Setup Wizard - Select WAN Type [EXIT] LAN IP Address 192.168.123.254 WAN Type 3G < Back [ Start > Password > Time > LAN/WAN > Wireless > Summary > Finish! ] Next >](/content/2026/05/1004712/images/a5f2551868b1830c87a53f0f5fbb21aaee96e7ed0f24a67f50efecb4051e0e46.jpg)
Step 4. 3G WAN type
Select "Auto Detection" Dial-up Profile, and the Utility will try to detect and configure the
required 3G service settings automatically. Or you can select "Manual" and manually fill in the required 3G service settings provided by your ISP.
Default PIN Code is empty, if you have PIN Code, you must enter it.
![Setup Wizard - 3G [EXIT] Dial-Up Profile Country Telecom 3G Network APN PIN Code Dialed Number Account Password Auto-Detection Manual Albania Vodafone WCDMA/HSPA (optional) (optional) (optional) (optional) (optional) (optional) [Start > Password > Time > LAN/WAN > Wireless > Summary > Finish!] Next >](/content/2026/05/1004712/images/246e42c3db4ef72f38769585ec6058ac64eccaa1b0f6732e7af206f447ffde29.jpg)
Step 5. Set up your Wireless Network.
Set up your SSID.
![Setup Wizard - Wireless settings [ EXIT ] ► Network ID(SSID) 00-11-22-33-44-26 ► Channel 11 < Back [ Start > Password > Time > LAN/WAN > Wireless > Summary > Finish! ] Next >](/content/2026/05/1004712/images/d8e50ba401a75130ce919d124b4190e1f2fd1cb87415bb2424bcd6f47df793d6.jpg)
Step 6. Set up Wireless Security.
Set up your Authentication and Encryption.
![Setup Wizard - Wireless settings [ EXIT ] Authentication Encryption Auto WEP HEX ▼ 1234567890 HEX ▼ 1234567890 HEX ▼ 1234567890 HEX ▼ 1234567890 < Back [ Start > Password > Time > WAN > Wireless > Summary > Finish! ] Next >](/content/2026/05/1004712/images/66955bc65dd7cad31ccf42e956df7c6bc7edd623ce4998e64018ffdc7d5ff8e2.jpg)
Step 7. Apply your Setting.
Then click Apply Setting.
![[WAN Setting] WAN Type 3G APN internet PIN Code - Dialed Number *99# Account guest Password ***** [ Wireless Setting ] Wireless Enable SSID 00-11-22-33-44-26 Channel 11 Authentication Auto (Open/Shared) Encryption WEP WEP Key 1234567890 < Back [ Start > Password > Time > LAN/WAN > Wireless > Summary > Finish! ] Apply Settings](/content/2026/05/1004712/images/a386e9be9130d371025a849e5a50d35b4b37a8e119990e15b9628a6e3f8e7154.jpg)
Step 8. Click Finish to complete it.
![Setup Wizard - Finish [EXIT] Configuration is Completed. Please click "Finish" to restart the device. Or you can click "Configure Again" to setup the wizard again. Configure Again [ Start > Password > Time > WAN > Wireless > Summary > Finish! ] Finish](/content/2026/05/1004712/images/19382b6806712aa0b5fe7c8a4afe3f452d48966dd650b305bba1483f9d75c7a8.jpg)
3
Making Configuration
3.1 Advanced
3.1.1 Basic Setting
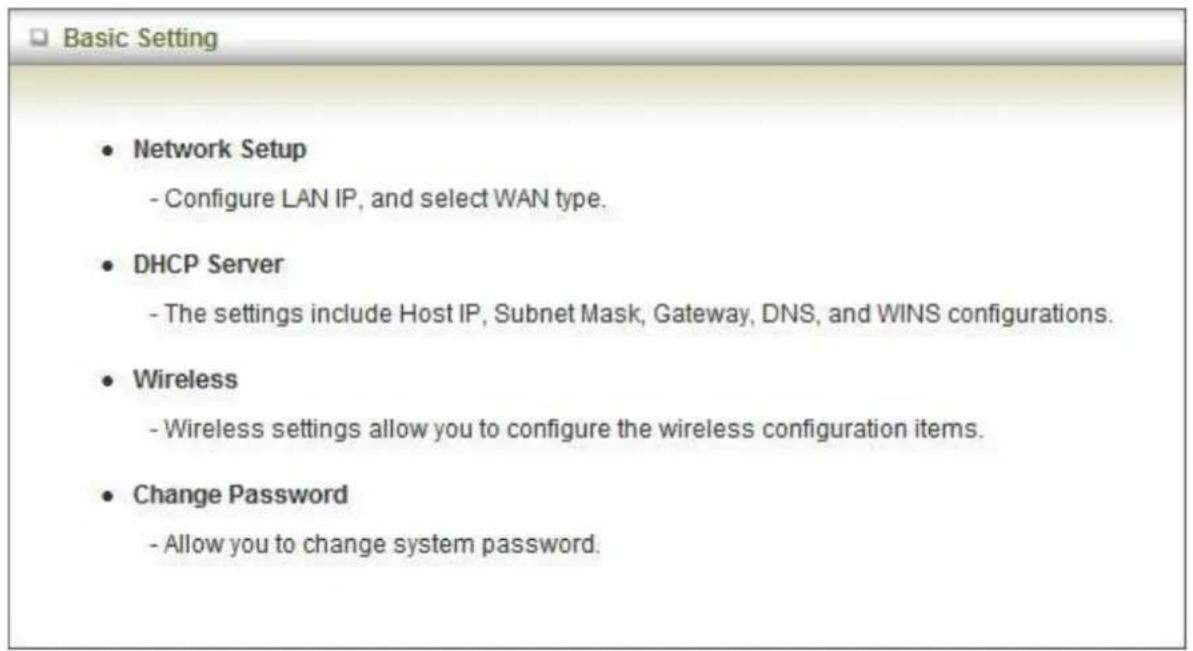
- Network Setup
LAN Setup
| □ LAN Setup | |
| Item | Setting |
| ▶ LAN IP Address | 192.168.123.254 |
| ▶ Subnet Mask | 255.255.255.0 |
(1). LAP IP Address: the local IP address of this device. The computers on your network must use the LAN IP address of your product as their Default Router. You can change it if necessary.
(2). Subnet Mask: insert 255.255.255.0
Internet Setup
This device supports different WAN types of connection for users to connect to remote wireless ISP, such as HSPA-3G or Wi-Fi Hotspot.
| □ LAN Setup | |
| Item | Setting |
| ▶ LAN IP Address | 192.168.123.254 |
| ▶ Subnet Mask | 255.255.255.0 |
| □ Internet Setup [HELP] | |
| ▶ WAN Type | 3G |
| ▶ Dial-Up Profile | Auto-Detection Manual |
| ▶ PIN Code | (optional) |
| ▶ Connection Control | Auto Reconnect (always-on) |
| ▶ Keep Alive | Disable ○ LCP Echo Request ▶ Interval 10 seconds ▶ Max. Failure Time 3 times ○ Ping Remote Host ▶ Host IP ▶ Interval 60 seconds |
3G WAN Types: The WAN fields may not be necessary for your connection. The information on this page will only be used when your service provider requires you to enter a User Name and Password to connect with the 3G network.
Please refer to your documentation or service provider for additional information.
- Dial-Up Profile: Please select Auto-Detection or Manual to continue.
You can Select “Auto-Detection”, and the Utility will try to detect and configure the required 3G service settings automatically. Or you can select “Manual” and manually fill in the required 3G service settings provided by your ISP.
- Country: select your country.
- Telecom: select your telecom.
- 3G Network: select the 3G Network
- APN: Enter the APN for your PC card here.(Optional)
- Pin Code: Enter the Pin Code for your SIM card(Optional)
- Dial-Number: This field should not be altered except when required by your service provider.
- Account: Enter the new User Name for your PC card here, you can contact to your ISP to get it.
- Password: Enter the new Password for your PC card here, you can contact to your ISP to get it.
- Authentication: Choose your authentication.
- Primary DNS: This feature allows you to assign a Primary DNS Server, contact to your ISP to get it.
-
Secondary DNS: This feature allows you to assign a Secondary DNS Server, you can contact to your ISP to get it.
-
Connection Control: There are 3 modes to select:
Connect-on-demand: The device will link up with ISP when the clients send outgoing packets.
Auto Reconnect (Always-on): The device will link with ISP until the connection is established.
Manually: The device will not make the link until someone clicks the Connect-button in the Status-page.
- Keep Alive: you can diagnose your connection by it.
![Internet Setup [WAN Type] Wi-Fi HotSpot Wi-Fi HotSpot Search](/content/2026/05/1004712/images/f155acbfa12ba9a1a56357ea20447ab0eba92ea5e0d908562c819010f1b83d63.jpg)
Wi-Fi HotSpot Types: This WAN type allows you to share one Wi-Fi Hotspot account with your friends or colleagues. Local clients connect to this device via Wi-Fi connection, and surfing Internet by connecting to remote Wi-Fi Hotspot. Just follow a few steps below to connect to remote Wi-Fi HotSpot.
Note. If choosing Wi-Fi HotSpot WAN type, the wireless channel of WLAN will be set to as same as wireless channel of remote Wi-Fi HotSpot.
Step 1: Click "Wi-Fi HotSpot" Search" button to search any available Wi-Fi Hotspot or Wi-Fi AP (Access Point) in your environment.
![Internet Setup [WAN Type] Wi-Fi HotSpot Wi-Fi HotSpot Search](/content/2026/05/1004712/images/03cdf3bae3d86a39afd78476cfa8c46c14381533f19a48c4c6b0dfd6fb00703c.jpg)
Step 2: After finish searching, it will list all available Wi-Fi APs in your environment. You can select one of the lists to start to connect, or press "Refresh" button to search again.
![Internet Setup [ HELP ] WAN Type Wi-Fi HotSpot ▼ Wireless AP List Select SSID BSSID Channel Mode Security Singnal Strength WISP-1 00:50:18:00:07:f0 6 B/G/N mixed Open(None) 65% aaron2 00:50:18:00:0f:fe 1 B/G Mixed Open(None) 39% Refresh Select Cancel](/content/2026/05/1004712/images/deed52f88a25de291601efb093368a4479c459d996102d3ced0b2fcde353da07.jpg)
Step 3: Click "Save" button to save settings after selecting. There will be a field here for you to input encryption key if remote Wi-Fi Hotspot or Wi-Fi AP requires.
![Internet Setup [WAN Type] Wi-Fi HotSpot ▼ WISP Name(ESSID) WISP-1 Wireless Channel 6 Security OPEN (None) Save Choose other Wi-Fi HotSpot](/content/2026/05/1004712/images/6f5dec73b80efe0944fa66e9638d107390e6706fd88ef867874d6a05937ea3d7.jpg)
Step 4: Click "Reboot" button to restart device to take new settings effective.
![Internet Setup [WAN Type] Wi-Fi HotSpot ▼ WISP Name(ESSID) WISP-1 Wireless Channel 6 Security OPEN (None) Save Choose other Wi-Fi HotSpot Reboot Saved! The change doesn't take effect until router is rebooted.](/content/2026/05/1004712/images/9519705ac8426871c3ccd89d3b8f0abe6ab66c20551d46aca9ccb157ce1ce787.jpg)
- DHCP Server
| DHCP Server [HELP] | |
| Item | Setting |
| DHCP Server | Disable Enable |
| IP Pool Starting Address | 100 |
| IP Pool Ending Address | 200 |
| Lease Time | 86400 Seconds |
| Domain Name | |
| Save Undo More... Clients List... Fixed Mapping... | |
Press "More..." for more options,
- DHCP Server: Choose either Disable or Enable
- Lease Time: DHCP lease time to the DHCP client
- IP Pool Starting/Ending Address: Whenever there is a request, the DHCP server will automatically allocate an unused IP address from the IP address pool to the requesting computer. You must specify the starting / ending address of the IP address pool
- Domain Name: Optional, this information will be passed to the client
- Primary DNS/Secondary DNS: Optional, This feature allows you to assign a DNS Servers
- Primary WINS/Secondary WINS: Optional, this feature allows you to assign a WINS Servers
- Router: Optional, Router Address would be the IP address of an alternate Router.
This function enables you to assign another Router to your PC, when DHCP server offers an IP to your PC.
Click on "Save" to store your setting or click "Undo" to give up
DHCP Clients List
The list of DHCP clients shows here.
| DHCP Clients List | |||||
| IP Address | Host Name | MAC Address | Type | Lease Time | Select |
| 192.168.123.100 | 1 | 00-20-ED-66-97-23 | Wired | 23:15:10 | |
| 192.168.123.101 | 2 | 00-1D-FD-7C-2D-58 | Wired | 23:23:09 | |
| 192.168.123.102 | 12 | 00-11-F6-7E-00-01 | Wired | 23:44:45 | |
| Delete Back Refresh Fixed Mapping | |||||
DHCP Fixed Mapping
The DHCP Server will reserve the special IP for special MAC address, shows below.
| DHCP clients -- select one --Copy to ID -- | |||
| ID | MAC Address | IP Address | Enable |
| 1 | |||
| 2 | |||
| 3 | |||
| 4 | |||
| 5 | |||
| 6 | |||
| 7 | |||
| 8 | |||
| 9 | |||
| 10 | |||
| << Previous Next >> Save Undo Back | |||
- Wireless Settings
![Wireless Setting [HELP] Item Setting ► Network ID(SSID) CDM531AM-18 ► SSID Broadcast ○ Enable ○ Disable ► Channel 11 ► Wireless Mode B/G/N mixed ► Authentication Open ► Encryption ■ WEP ● WEP Key 1 HEX ▼ 1234567890 ○ WEP Key 2 HEX ▼ 1234567890 ○ WEP Key 3 HEX ▼ 1234567890 ○ WEP Key 4 HEX ▼ 1234567890 Save Undo WPS Setup... Wireless Client List...](/content/2026/05/1004712/images/c6b7fc7b3c6721031c8d527718729dd12a978e08817729bad0e1a40aae3985a0.jpg)
Wireless settings allow you to set the wireless configuration items.
- Wireless Operation Mode: Choose AP mode or Client mode. The factory default setting is AP mode.
- Network ID (SSID): Network ID is used for identifying the Wireless LAN (WLAN). Client stations can roam freely over this product and other Access Points that have the same Network ID. (The factory setting is “default”)
- SSID Broadcast: The router will broadcast beacons that have some information, including SSID so that wireless clients can know how many AP devices by scanning function in the network. Therefore, this function is disabled; the wireless clients can not find the device from beacons.
- Channel: The radio channel number. The permissible channels depend on the Regulatory Domain.
The factory setting is channel 11.
- Wireless Mode: Choose B/G Mixed, B only, G only, and N only, G/N Mixed or B/G/N mixed. The factory default setting is B/G/N mixed.
- Authentication mode: You may select from nine kinds of authentication to secure your wireless network: Open, Shared, Auto, WPA-PSK, WPA2-PSK, and WPA-PSK/WPA2-PSK.
Open
Open system authentication simply consists of two communications. The first is an authentication request by the client that contains the station ID (typically the MAC address). This is followed by an authentication response from the AP/router containing a success or failure message. An example of when a failure may occur is if the client's MAC address is explicitly excluded in the AP/router configuration.
Shared
Shared key authentication relies on the fact that both stations taking part in the authentication process have the same "shared" key or passphrase. The shared key is manually set on both the client station and the AP/router. Three types of shared key authentication are available today for home or small office WLAN environments.
Auto
The AP will Select the Open or Shared by the client's request automatically.
WPA-PSK
Select Encryption and Pre-share Key Mode
If you select HEX, you have to fill in 64 hexadecimal (0, 1, 2...8, 9, A, B...F) digits.
If you select ASCII, the length of pre-share key is from 8 to 63.
Fill in the key, Ex 12345678
WPA-PSK2
WPA-PSK2 user AES and TKIP for Same the encryption, the others are same the WPA-PSK.
WPA-PSK/WPA-PSK2
Another encryption options for WPA-PSK-TKIP and WPA-PSK2-AES, the others are same the WPA-PSK.
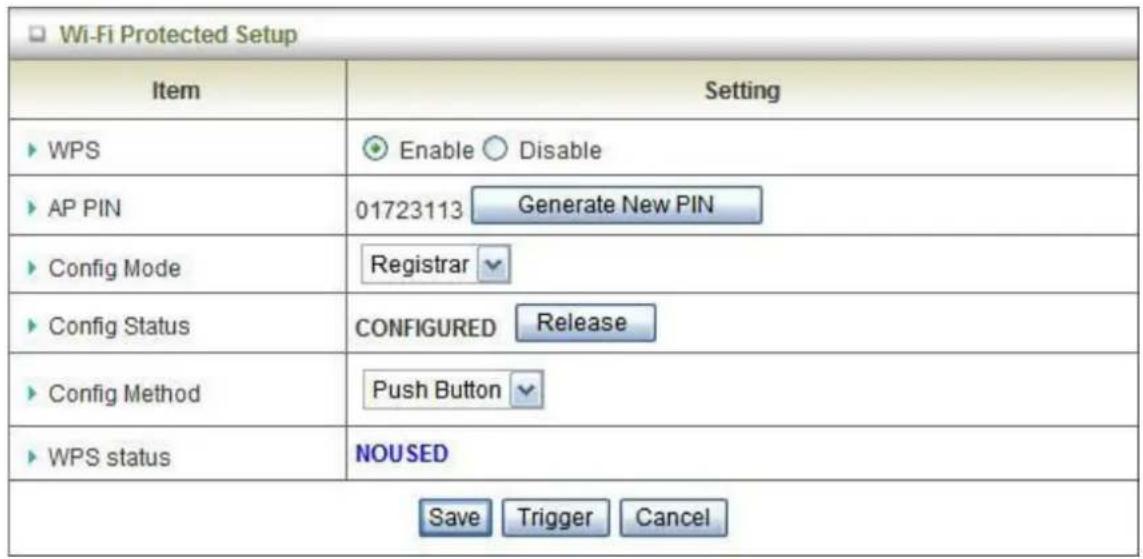
WPS (Wi-Fi Protection Setup)
WPS is Wi-Fi Protection Setup which is similar to WCN-NET and offers safe and easy way in Wireless Connection.
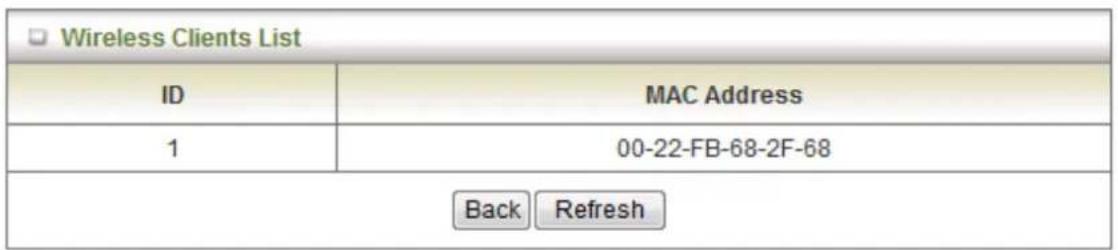
Wireless Client List
The list of wireless client is shows here.
- Change Password
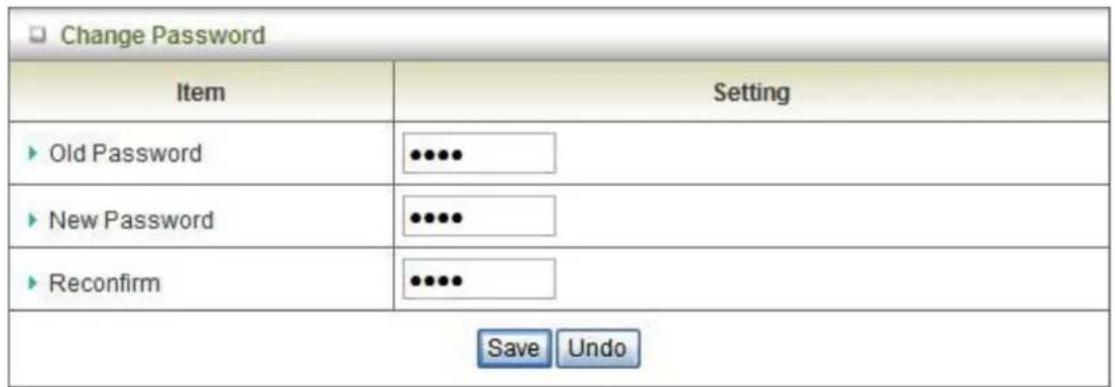
You can change Password here. We strongly recommend you to change the system password for security reason.
Click on "Save" to store your setting or "Undo" to give up
3.1.2 Forwarding Rules
FORWARDING RULES
- Virtual Server
- Allows others to access WWW, FTP, and other services on your LAN.
• Special Application - This configuration allows some applications to connect, and work with the NAT router.
- Miscellaneous
- IP Address of DMZ Host: Allows a computer to be exposed to unrestricted 2-way communication. Note that, this feature should be used only when needed.
- UPnP Setting: If you enable UPnP function, the router will work with UPnP devices/softwares.
- Virtual Server
![Virtual Server [ HELP ] Well known services -- select one -- ▼ Copy to ID -- ID Service Ports Server IP Enable Use Rule# 1 (0) Always ▼ 2 (0) Always ▼ 3 (0) Always ▼ 4 (0) Always ▼ 5 (0) Always ▼ 6 (0) Always ▼ 7 (0) Always ▼ 8 (0) Always ▼ 9 (0) Always ▼ 10 (0) Always ▼ Save Undo](/content/2026/05/1004712/images/4170b049d6341a2194ad400ae77c29498d0639a49cbffe9acf3b0823a4bad895.jpg)
This product's NAT firewall filters out unrecognized packets to protect your Intranet, so all hosts behind this product are invisible to the outside world. If you wish, you can make some of them accessible by enabling the Virtual Server Mapping.
A virtual server is defined as a Service Port, and all requests to this port will be redirected to the computer specified by the Server IP. Virtual Server can work with Scheduling Rules, and give user more flexibility on Access control. For Detail, please refer to Scheduling Rule.
For example, if you have an FTP server (port 21) at 192.168.123.1, a Web server (port 80) at 192.168.123.2, and a VPN server at 192.168.123.6, then you need to specify the following virtual server mapping table:
| Service Port | Server IP | Enable |
| 21 | 192.168.123.1 | V |
| 80 | 192.168.123.2 | V |
| 1723 | 192.168.123.6 | V |
Click on "Save" to store what you just select or "Undo" to give up
- Special AP
![Special Applications [HELP] Popular applications -- select one -- ▼ Copy to ID -- ID Trigger Incoming Ports Enable 1 ______________________________ 2 ______________________________ 3 ______________________________ 4 ______________________________ 5 ______________________________ 6 ______________________________ 7 ______________________________ 8 ______________________________ Save Undo](/content/2026/05/1004712/images/00796898a4976d66f95c167b886ec82617aedc5c0e1c5e8e1b2b42f068322cf5.jpg)
Some applications require multiple connections, like Internet games, Video conferencing, Internet telephony, etc. Because of the firewall function, these applications cannot work with a pure NAT router. The Special Applications feature allows some of these applications to work with this product. If the mechanism of Special Applications fails to make an application work, try setting your computer as the DMZ host instead.
Trigger: the outbound port number issued by the application.
Incoming Ports: when the trigger packet is detected, the inbound packets sent to the specified port numbers are allowed to pass through the firewall.
This product provides some predefined settings.
- Select your application and
- Click "Copy to" to add the predefined setting to your list.
Note! At any given time, only one PC can use each Special Application tunnel.
Click on "Save" to store what you just select or "Undo" to give up
- Miscellaneous
![Miscellaneous Items [HELP] Item Setting Enable ► IP Address of DMZ Host ► UPnP setting Save Undo](/content/2026/05/1004712/images/71d5783ef0d422ca32040a694db0dbe2af7d0046156be7a68ee27a8ea3d94192.jpg)
1. IP Address of DMZ Host
DMZ (Demilitarized Zone) Host is a host without the protection of firewall. It allows a computer to be exposed to unrestricted 2-way communication for Internet games, Video conferencing, Internet telephony and other special applications.
2. UPnP Setting
The device also supports this function. If the OS supports this function enable it, like Windows XP. When the user gets IP from Device and will see icon as below:
Click on "Save" to store what you just select or "Undo" to give up
3.1.3 Security Setting
SECURITY SETTING
- Packet Filters
- Allows you to control access to a network by analyzing the incoming and outgoing packets and letting them pass or halting them based on the IP address of the source and destination.
- Domain Filters
- Let you prevent users under this device from accessing specific URLs.
- URL Blocking
- URL Blocking will block LAN computers to connect to pre-defined websites.
• MAC Address Control
- MAC Address Control allows you to assign different access right for different users and to assign a specific IP address to a certain MAC address.
- Miscellaneous
- Remote Administrator Host: In general, only Intranet user can browse the built-in web pages to perform administration task. This feature enables you to perform administration task from remote host.
- Administrator Time-out: The amount of time of inactivity before the device will automatically close the Administrator session. Set this to zero to disable it.
- Discard PING from WAN side: When this feature is enabled, hosts on the WAN cannot ping the Device.
- Packet Filters
![Outbound Packet Filter [ HELP ] Item Setting ▶ Outbound Packet Filter Enable ● Allow all to pass except those match the following rules. ○ Deny all to pass except those match the following rules. ID Source IP Destination IP : Ports Enable Use rule# 1 (0) Always ▼ 2 (0) Always ▼ 3 (0) Always ▼ 4 (0) Always ▼ 5 (0) Always ▼ 6 (0) Always ▼ 7 (0) Always ▼ 8 (0) Always ▼ Save Undo Inbound Filter MAC Level](/content/2026/05/1004712/images/b4d74703e9308cacdf729168f91f3a4a360cf62b63a7f62f5323e407d58e290a.jpg)
Packet Filter includes both outbound filter and inbound filter. And they have same way to setting.
Packet Filter enables you to control what packets are allowed to pass the router. Outbound filter applies on all outbound packets. However, inbound filter applies on packets that destined to Virtual Servers or DMZ host only. You can select one of the two filtering policies:
- Allow all to pass except those match the specified rules
- Deny all to pass except those match the specified rules
You can specify 8 rules for each direction: inbound or outbound. For each rule, you can define the following:
- Source IP address
- Source port
- Destination IP address
- Destination port
- Protocol: TCP or UDP or both.
- Use Rule#
For source or destination IP address, you can define a single IP address (4.3.2.1) or a range of IP addresses (4.3.2.1-4.3.2.254). An empty implies all IP addresses.
For source or destination port, you can define a single port (80) or a range of ports (1000-1999). Add prefix "T" or "U" to specify TCP or UDP protocol. For example, T80, U53, U2000-2999, No prefix indicates both TCP and UDP are defined. An empty implies all port addresses. Packet Filter can work with Scheduling Rules, and give user more flexibility on Access control. For Detail, please refer to Scheduling Rule.
Each rule can be enabled or disabled individually.
Click on "Save" to store your setting or "Undo" to give up
- Domain Filters
| Domain Filter [HELP] | |||
| Item | Setting | ||
| Domain Filter | Enable | ||
| Log DNS Query | Enable | ||
| Privilege IP Addresses Range | From To | ||
| ID | Domain Suffix | Action | Enable |
| 1 | Drop Log | □ | |
| 2 | Drop Log | □ | |
| 3 | Drop Log | □ | |
| 4 | Drop Log | □ | |
| 5 | Drop Log | □ | |
| 6 | Drop Log | □ | |
| 7 | Drop Log | □ | |
| 8 | Drop Log | □ | |
| 9 | Drop Log | □ | |
| 10 | *(all others) | Drop Log | - |
| Save Undo | |||
Let you prevent users under this device from accessing specific URLs.
1. Domain Filter Enable:
Check if you want to enable Domain Filter.
2. Log DNS Query:
Check if you want to log the action when someone accesses the specific URLs.
Traveler3G M User's Manual
3. Privilege IP Address Range:
Setting a group of hosts and privilege these hosts to access network without restriction.
4. Domain Suffix
A suffix of URL can be restricted, for example, ".com", "xxx.com".
5. Action
When someone is accessing the URL met the domain-suffix, what kind of action you want.
Check drop to block the access. Check "log" to log these access.
6. Enable
Check to enable each rule.
Click on "Save" to store what you just select or "Undo" to give up
- URL Blocking
| URL Blocking [HELP] | |||
| Item | Setting | ||
| URL Blocking | Enable | ||
| ID | URL | Enable | |
| 1 | ☐ | ||
| 2 | ☐ | ||
| 3 | ☐ | ||
| 4 | ☐ | ||
| 5 | ☐ | ||
| 6 | ☐ | ||
| 7 | ☐ | ||
| 8 | ☐ | ||
| 9 | ☐ | ||
| 10 | ☐ | ||
| Save Undo | |||
URL Blocking will block LAN computers to connect with pre-define Websites. The major difference between “Domain filter” and “URL Blocking” is Domain filter require user to input suffix (like .com or .org, etc), while URL Blocking require user to input a keyword only. In other words, Domain filter can block specific website, while URL Blocking can block hundreds of websites by simply a keyword.
1. URL Blocking Enable
Check if you want to enable URL Blocking.
2. URL
If any part of the Website's URL matches the pre-defined word, the connection will be blocked.
For example, you can use pre-defined word "sex" to block all websites if their URLs contain pre-defined word "sex".
3. Enable
Check to enable each rule.
Click on "Save" to store your setting or "Undo" to give up
- MAC Control
| MAC Address Control [HELP] | ||||
| Item | Setting | |||
| MAC Address Control | Enable | |||
| Connection control | Wireless and wired clients with C checked can connect to this device; and allow unspecified MAC addresses to connect. | |||
| Association control | Wireless clients with A checked can associate to the wireless LAN; and allow unspecified MAC addresses to associate. | |||
| DHCP clients - select one - Copy to ID - | ||||
| ID | MAC Address | IP Address | C | A |
| 1 | □ | □ | ||
| 2 | □ | □ | ||
| 3 | □ | □ | ||
| 4 | □ | □ | ||
| 5 | □ | □ | ||
MAC Address Control allows you to assign different access right for different users and to assign a specific IP address to a certain MAC address.
1. MAC Address Control
Check "Enable" to enable the "MAC Address Control". All of the settings in this page will take effect only when "Enable" is checked.
2. Connection control
Check "Connection control" to enable the controlling of which wired and wireless clients can connect with this device. If a client is denied to connect with this device, it means the client can't access to the Internet either. Choose "allow" or "deny" to allow or deny the clients, whose MAC addresses are not in the "Control table" (please see below), to connect with this device.
3. Association control
Check "Association control" to enable the controlling of which wireless client can associate to the wireless LAN. If a client is denied to associate to the wireless LAN, it means the client can't send or receive any data via this device. Choose "allow" or "deny" to allow or deny the clients, whose MAC addresses are not in the "Control table", to associate to the Wireless LAN
Click "Save" to store your setting or "Undo" to give up
- Miscellaneous
![Miscellaneous Items [ HELP ] Item Setting Enable ► Administrator Time-out 300 seconds (0 to disable) ► Remote Administrator Host : Port / : □ ► Discard PING from WAN side □ ► DoS Attack Detection □ Save Undo](/content/2026/05/1004712/images/9c2b5ff8746f904d0f39d820f1e7cacb94929d8e0754d844fed83718adc7f167.jpg)
1. Administrator Time-out
The time of no activity to logout automatically, you may set it to zero to disable this feature.
2. Remote Administrator Host/Port
In general, only Intranet user can browse the built-in web pages to perform administration task. This feature enables you to perform administration task from remote host. If this feature is enabled, only the specified IP address can perform remote administration. If the specified IP address is 0.0.0.0, any host can connect with this product to perform administration task. You can use subnet mask bits "/nn" notation to specified a group of trusted IP addresses for example, "10.1.2.0/24".
NOTE: When Remote Administration is enabled, the web server port will be shifted to 80. You can change web server port to other port, too.
3. Discard PING from WAN side
When this feature is enabled, any host on the WAN cannot ping this product.
4. DoS Attack Detection
When this feature is enabled, the router will detect and log the DoS attack comes from the Internet. Currently, the router can detect the following DoS attack: SYN Attack, WinNuke, Port Scan, Ping of Death, Land Attack etc.
Click on "Save" to store your setting or "Undo" to give up
3.1.4 Advanced Settings
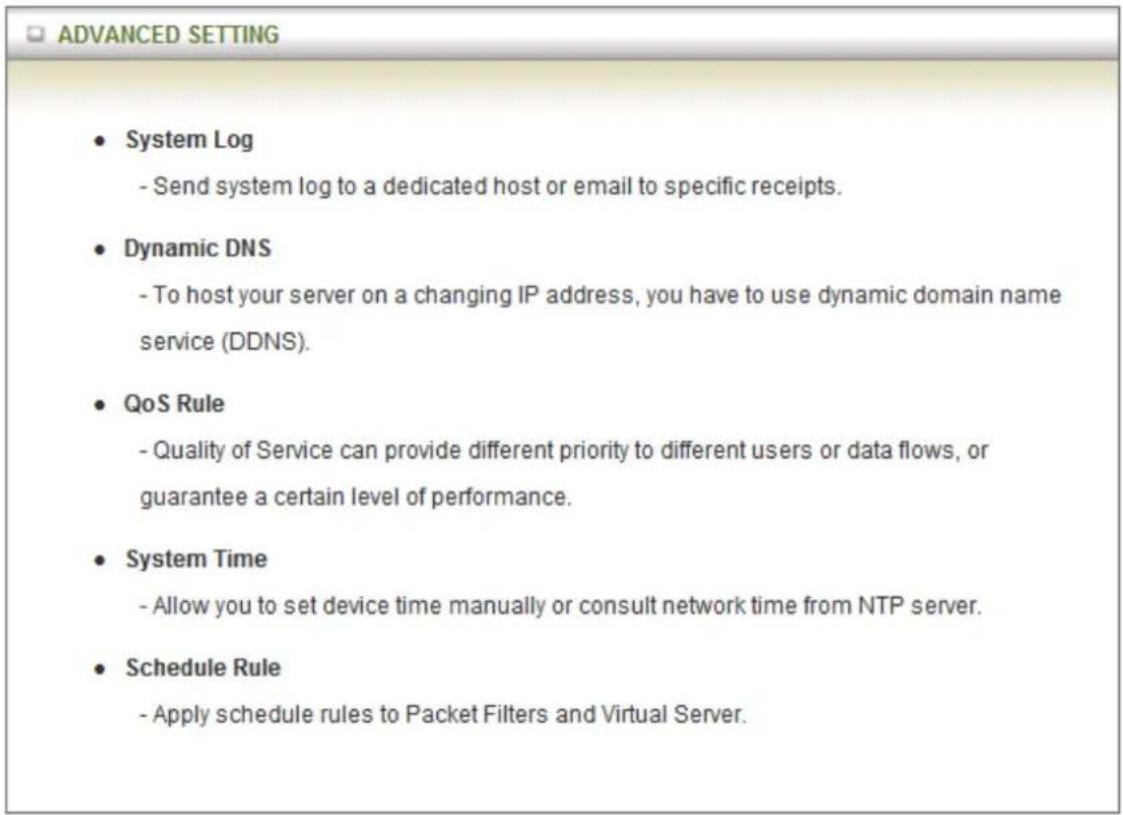
- Status
| System Time [Modify] | ||||
| Item | Status | |||
| System Time | Thu, 01 Jan 2009 02:50:36 +0000 | |||
| Dynamic DNS [Modify] | ||||
| Item | Status | |||
| DDNS | Disable | |||
| Provider | - | |||
| QoS [Modify] | ||||
| Item | Status | |||
| QoS Control | Disable | |||
| Local Client | Remote Host | Service | Priority | Working Time |
- System Log
| System Log [HELP] | ||
| Item | Setting | Enable |
| IP address for syslogd | ||
| Setting of Email alert | ||
| SMTP Server: port | ||
| SMTP Username | ||
| SMTP Password | ||
| E-mail addresses | ||
| E-mail subject | ||
| Save UndoView Log... Email Log Now | ||
This page supports two methods to export system logs to specific destination by means of syslog (UDP) and SMTP (TCP). The items you have to setup including:
IP Address for Syslogd
Host IP of destination where sys log will be sent to.
Check Enable to enable this function.
Setting of Email alert
Check if you want to enable Email alert (send syslog via email).
Check Enable to enable this function.
SMTP Server IP and Port
Input the SMTP server IP and port, which are connected with ':' If you do not specify port number, the default value is 25.
For example, "mail.your_url.com" or "192.168.1.100:26".
SMTP Username and password
Input a user account and password for the SMTP server.
E-mail address
The recipients who will receive these logs, you can assign more than 1 recipient, using ';' or ',' to separate these email addresses.
E-mail Subject
The subject of email alert, this setting is optional.
View Log...
Reference the section Toolbox ->System Info.
Click on "Save" to store your setting or "Undo" to give up
- Dynamic DNS
![Dynamic DNS [HELP] Item Setting ► DDNS ● Disable ○ Enable ► Provider DynDNS.org(Dynamic) ▼ ► Host Name ► Username / E-mail ► Password / Key Save Undo](/content/2026/05/1004712/images/c5e4a5103432dd234d25b24778f5d16922626555ce61309f420b28f230518541.jpg)
o host your server on a changing IP address, you have to use dynamic domain name service (DDNS). So that anyone wishing to reach your host only needs to know the name of it. Dynamic DNS will map the name of your host to your current IP address, which changes each time you connect your Internet service provider.
Before you enable Dynamic DNS, you need to register an account on one of these Dynamic DNS servers that we list in provider field.
To enable Dynamic DNS click the check box next to Enable in the DDNS field.
Next you can enter the appropriate information about your Dynamic DNS Server.
You have to define:
Provider
Host Name
Username/E-mail
Password/Key
You will get this information when you register an account on a Dynamic DNS server.
Click on "Save" to store what you just select or "Undo" to give up
• QoS
| QoS Rule | |||||
| Item | Setting | ||||
| QoS Control | Enable | ||||
| Bandwidth of Upstream | kbps (Kilobits per second) | ||||
| ID | Local IP:Ports | Remote IP:Ports | QoS Priority | Enable | Use rule# |
| 1 | : | : | High ▼ | □ | (0) Always ▼ |
| 2 | : | : | High ▼ | □ | (0) Always ▼ |
| 3 | : | : | High ▼ | □ | (0) Always ▼ |
| 4 | : | : | High ▼ | □ | (0) Always ▼ |
| 5 | : | : | High ▼ | □ | (0) Always ▼ |
| 6 | : | : | High ▼ | □ | (0) Always ▼ |
| 7 | : | : | High ▼ | □ | (0) Always ▼ |
| 8 | : | : | High ▼ | □ | (0) Always ▼ |
Provide different priority to different users or data flows, or guarantee a certain level of performance.
1. Enable
This Item enables QoS function or not.
2. Bandwidth of Upstream
Set the limitation of upstream speed.
3. Local: IP
Define the Local IP address of packets here.
4. Local: Ports
Define the Local port of the packets in this field.
5. Remote: IP
Define the Remote IP address of packets here.
6. Remote: Ports
Define the Remote port of the packets in this field.
7. QoS Priority
This defines the priority level of the current Policy Configuration. Packets associated with this policy will be serviced based upon the priority level set. For critical applications High or Normal levels are recommended. For non-critical applications select a Low level.
8. User Rule#
The QoS item can work with Scheduling Rule number#. Please reference the section "schedule".
Click on "Save" to store what you just select or "Undo" to give up
- System Time
![System Time [ HELP ] Item Setting ▶ Time Zone * Not yet configured! The default is GMT+00:00 ▶ Auto-Synchronization ✓ Enable Time Server (RFC-868): Auto Save Undo Sync with Time Server Sync with my PC (undefined December 17, 2009 16:57:02)](/content/2026/05/1004712/images/19832a573f58a7b0277f2e4660bab6426f5d25c723dde20477de9b71baccd248.jpg)
Time Zone
Select a time zone where this device locates.
Select the "Enable" item to enable this function.
Time Server
Select a NTP time server to consult UTC time
Sync with Time Server
Select if you want to set Date and Time by NTP Protocol.
Sync with my PC
Select if you want to set Date and Time using PC's Date and Time
Click on "Save" to store your setting or "Undo" to give up.
- Schedule Rule
| Schedule Rule [HELP] | ||
| Item | Setting | |
| Schedule | Enable | |
| Rule# | Rule Name | Action |
| 1 | New Add | |
| 2 | New Add | |
| 3 | New Add | |
| 4 | New Add | |
| 5 | New Add | |
| 6 | New Add | |
| 7 | New Add | |
| 8 | New Add | |
| 9 | New Add | |
| 10 | New Add | |
| <<Previous Next>> Save Add New Rule... | ||
You can set the schedule time to decide which service will be turned on or off.
Select the "Enable" item. Press "Add New Rule" You can write a rule name and set which day and what time to schedule from "Start Time" to "End Time". The following example configure "ftp time" as everyday 14:10 to 16:20
Click on "Save" to store what you just select.
3.1.5 TOOL BOX
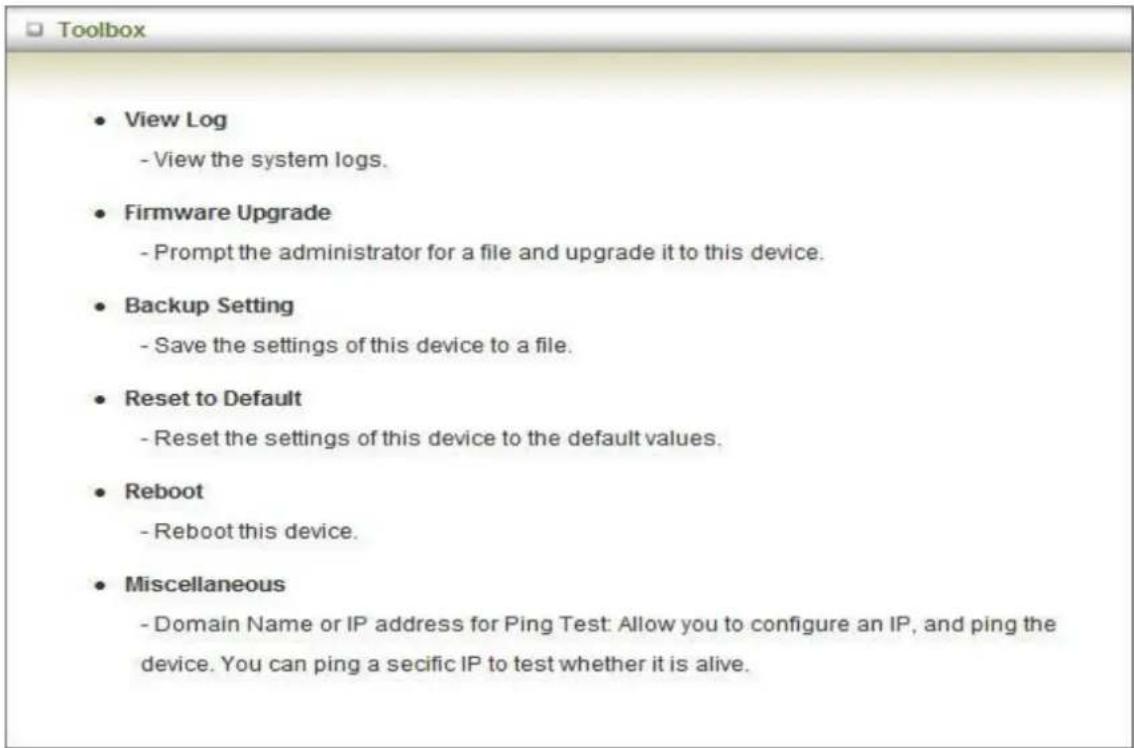
- System Info
| System Information | |
| Item | Setting |
| WAN Type | 3G |
| Display time | Thu, 01 Jan 2009 01:23:41 +0000 |
| System Log | |
| Time | Log |
| Dec 31 23:59:59 | kernel: klogd started: BusyBox v1.3.2 (2009-12-15 16:18:21 CST) |
| Jan 1 00:00:07 | udhcpd[1441]: udhcpd (v0.9.9-pre) started |
| Jan 1 00:00:07 | udhcpd[1441]: Unable to open Var/run/udhcpd.leases for reading |
| Jan 1 00:00:07 | commander: handle_rbydom: rbydom_enable = 0 |
| Jan 1 00:00:07 | init: Starting pid 1484, console /dev/ttyS1: '/bin/ash' |
| Jan 1 00:00:08 | commander: STOP LOCAL_WANTYPE_3G |
You can view the System Information and System log, and download/clear the System log, in this page.
- Firmware Upgrade
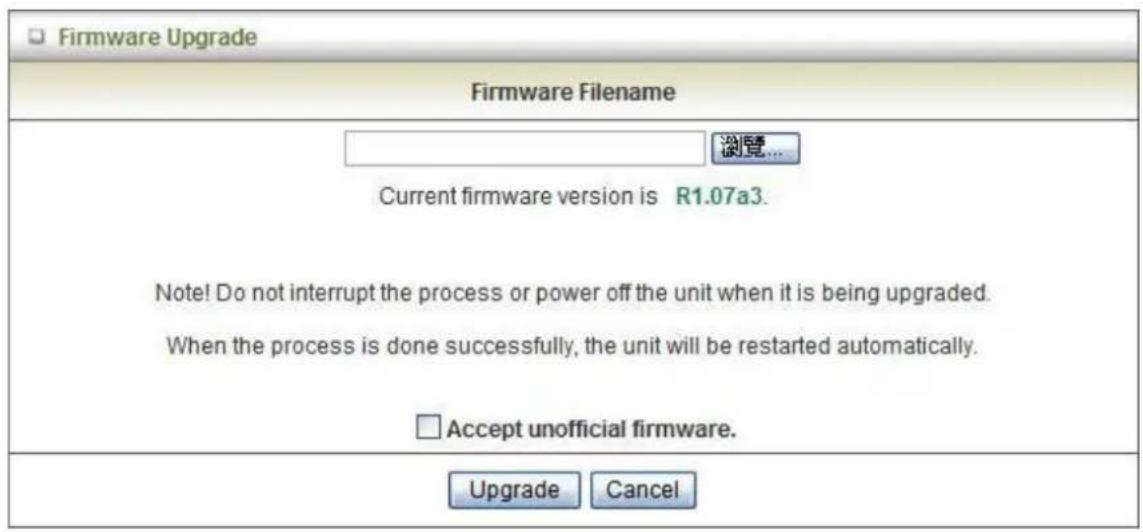
You can upgrade firmware by clicking "Upgrade" button.
- Backup Setting
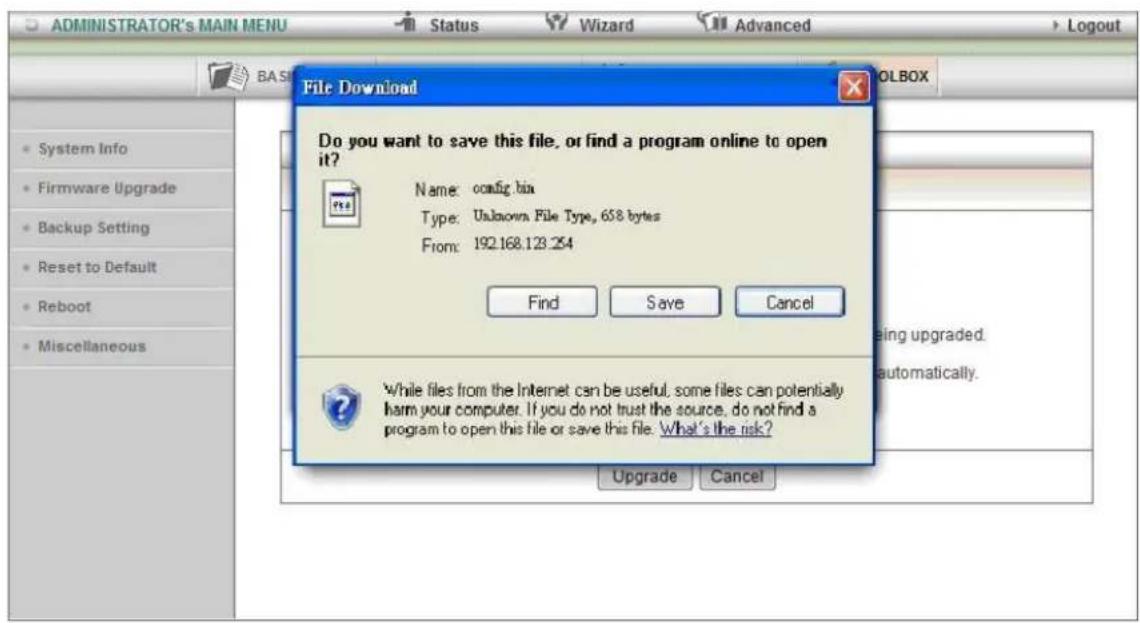
You can backup your settings by clicking the "Backup Setting" button and save it as a bin file. Once you want to restore these settings, please click Firmware Upgrade button and use the bin file you saved.
- Reset to Default
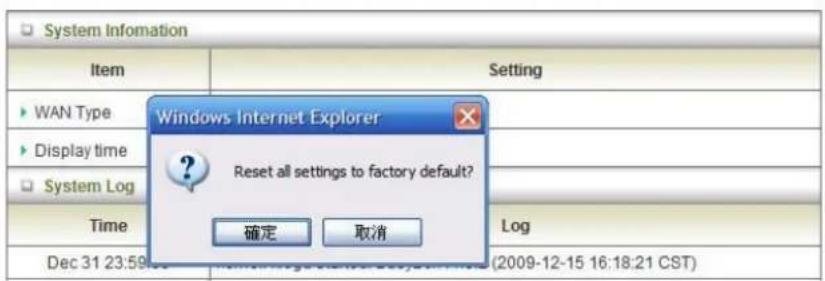
You can also reset this product to factory default by clicking the Reset to default button.
- Reboot
![System Information Item Setting WAN Type Display time System Log Time Windows Internet Explorer Reboot right now? 確定 取消 Log Dec 31 23:59:58 3.2 (2009-12-15 16:18:21 CST) Jan 1 00:00:06 udhcpd[1441]: udhcpd (v0.9.9-pre) started](/content/2026/05/1004712/images/fafd724d297634867e36d1f9bea48c1da100bc5e8249e6e99c3431d635e52450.jpg)
You can also reboot this it by clicking the Reboot button.
- Miscellaneous
![Miscellaneous Items [ HELP ] Item Setting ► Domain Name or IP address for Ping Test Ping ► Power Saving in Battery Mode ✓ Enable Save Undo](/content/2026/05/1004712/images/60a25c88a049ac85c745eecc7c13fe48ece00986607b1dc1caf5438b24e71849.jpg)
Domain Name or IP address for Ping Test
Allow you to configure an IP, and ping the device. You can ping a specific IP to test whether it is alive.
Power Saving in Battery Mode
Allow you to enable or disable the power saving mode when you use the Battery.
4
Troubleshooting
This Chapter provides solutions to problems for the installation and operation of the WiFi Mobi-HSPA Router. You can refer to the following if you are having problems.
1 Why can't I configure the router even the WiFi is connecting?
Do a Ping test to make sure that the WiFi Mobi-HSPA Router is responding. Note: It is recommended that you use an Ethernet connection to configure it
Go to Start > Run.
1. Type cmd.
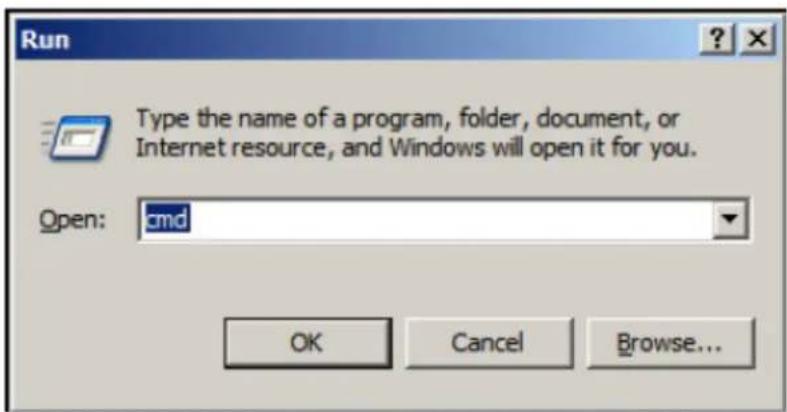
2. Press OK.
- Type ipconfig to get the IP of default Router.
- Type "ping 192.168.1.1". Assure that you ping the correct IP Address assigned to the WiFi Mobi-HSPA Router. It will show four replies if you ping correctly.
| Pinging 192.168.123.254 with 32 bytes of data: | |||
| Reply from 192.168.123.254: bytes=32 time<1ms TTL=64 | |||
| Reply from 192.168.123.254: bytes=32 time<1ms TTL=64 | |||
| Reply from 192.168.123.254: bytes=32 time<1ms TTL=64 | |||
| Reply from 192.168.123.254:bytes=32 time<1ms TTL=64 |
Ensure that your Ethernet Adapter is working, and that all network drivers are installed properly. Network adapter names will vary depending on your specific adapter. The installation steps listed below are applicable for all network adapters.
- Go to Start > Right click on "My Computer" > Properties.
- Select the Hardware Tab.
- Click Device Manager.
- Double-click on "Network Adapters".
- Right-click on Wireless Card bus Adapter or your specific network adapter.
- Select Properties to ensure that all drivers are installed properly.
- Look under Device Status to see if the device is working properly.
- Click "OK".
2 Problems with 3G connection?
A.What can I do if the 3G connection is failed by Auto detection?
Maybe the device can't recognize your ISP automatically. Please select "Manual" mode, and filling in dial-up settings manually.
B.What can I do if my country and ISP are not in the list?
Please choose "Others" item from the list, and filling in dial-up settings manually.
C.What can I do if my 3G connection is failed even the dongle is plugged?
Please check the following items:
I. Make sure you have inserted a validated SIM card in the 3G data card, and the subscription from ISP is still available
II. If you activate PIN code check feature in SIM card, making sure the PIN code you fill in dial-up page is correct
III. Checking with your ISP to see all dial-up settings are correct
IV. Make sure 3G signal from your ISP is available in your environment
D. What can I do if my router can't recognize my 3G data card even it is plugged?
There might be compatibility issue with some certain 3G cards. Please check the latest compatibility list to see if your 3G card is already supported.
E. What should I insert in APN, PIN Code, Account, Password, Primary DNS, and Secondary DNS?
The device will show this information after you choose country and Telcom. You can also check these values with your ISP.
F. Which 3G network should I select?
It depends on what service your ISP provide. Please check your ISP to know this information.
G. Why my 3G connection is keep dropping?
Please check 3G signal strength from your ISP in your environment is above middle level.
3 Something wrong with the wireless connection?
A. Can't setup a wireless connection?
I. Ensure that the SSID and the encryption settings are exactly the same to the Clients.
II. Move the WiFi Mobi-HSPA Router and the wireless client into the same room, and then test the wireless connection.
III. Disable all security settings such as WEP, and MAC Address Control.
IV. Turn off the WiFi Mobi-HSPA Router and the client, then restart it and then turn on the client again.
V. Ensure that the LEDs are indicating normally. If no, make sure that the AC power and Ethernet cables are firmly connected.
VI. Ensure that the IP Address, subnet mask, Router and DNS settings are correctly entered for the network.
VII. If you are using other wireless device, home security systems or ceiling fans, lights in your home, your wireless connection may degrade dramatically. Keep your product away from electrical devices that generate RF noise such as microwaves, monitors, electric motors...
B. What can I do if my wireless client cannot access the Internet?
I. Out of range: Put the router closer to your client.
II. Wrong SSID or Encryption Key: Check the SSID or Encryption setting.
III. Connect with wrong AP: Ensure that the client is connected with the correct Access Point.
i. Right-click on the Local Area Connection icon in the taskbar.
ii. Select View Available Wireless Networks in Wireless Configure.
Ensure you have selected the correct available network.
iii. Reset the WiFi Mobi-HSPA Router to default setting
C. Why does my wireless connection keep dropping?
I. Antenna Orientation.
i. Try different antenna orientations for the WiFi Mobi-HSPA Router.
ii. Try to keep the antenna at least 6 inches away from the wall or other objects.
II. Try changing the channel on the WiFi Mobi-HSPA Router, and your Access Point and Wireless adapter to a different channel to avoid interference.
III. Keep your product away from electrical devices that generate RF noise, like microwaves, monitors, electric motors, etc.
4 What to do if I forgot my encryption key?
- Go back to advanced setting to set up your Encryption key again.
- Reset the WiFi Mobi-HSPA Router to default setting
5 How to reset to default?
- Ensure the WiFi Mobi-HSPA Router is powered on
- Find the Reset button on the right side
- Press the Reset button for 8 seconds and then release.
- After the WiFi Mobi-HSPA Router reboots, it has back to the factory default settings.
5
Appendix A Spec
Summary Table
| Device Interface | TRAVELER3GM | |
| Wireless WAN | Build in HSPA modem or Wi-Fi HotSpot | 1 |
| Antenna | PIFA internal antennas | 1 |
| WPS/Reset Button | For WPS connection / Reset router setting to factory default | 1 |
| LED Indication | Power / WiFi(WPS) / 3G Connection / 3G Signal | • |
| Slide Switch | Slide Switch (Router Mode/Power Off/Modem Mode) | 1 |
| Power Jack | mini-usb Power Jack, DC 5V/1.2A | 1 |
| Wireless LAN (WiFi) | ||
| Standard | IEEE 802.11b/g/n (1x1) compliance | • |
| SSID | SSID broadcast or in stealth mode | • |
| Channel | Auto-selection, manually | • |
| Security | WEP, WPA-PSK, WPA2-PSK | • |
| WPS | WPS (Wi-Fi Protected Setup) | • |
| Functionality | ||
| Wireless WAN | PPP (for HSUPA) | • |
| Wi-Fi HotSpot | • | |
| Modem Mode | The device can be a mini-usb 3G dongle | • |
| WAN Connection | Auto-reconnect, dial-on-demand, manually | • |
| SPI Firewall | IP/Service filter, URL blocking, MAC control | • |
| DoS Protection | DoS (Deny of Service) detection and protection | • |
| Management | Syslog | • |
| Administration | Web-based UI, remote login, backup/restore setting | • |
| Environment & Certification | ||
| Package Information | Device dimension (mm) | 103*78*21 |
| Package dimension (mm) | 213*140*67 | |
| Package weight (g) | 470 | |
| Operation Temp. | Temp.: 0~40oC, Humidity 10%~90% non-condensing | ● |
| Storage Temp. | Temp.: -10~70oC, Humidity: 0~95% non-condensing | ● |
| EMI Certification | CE/FCC | ● |
| RoHS | RoHS compliance | ● |
*Specifications are subject to change without prior notice.
6
Appendix B Licensing information
This product includes copyrighted third-party software licensed under the terms of the GNU General Public License. Please refer to the GNU General Public License below to check the detailed terms of this license.
The following parts of this product are subject to the GNU GPL, and those software packages are copyright by their respective authors.
Linux-2.6.21 system kernel
busybox - V1.3.2
BridgeUtil - bridge-utils-1.1.tar.gz
DHCP20175 - svn://busybox.net/trunk/udhcp Revision = 20175
DNRD - V2.17
IPRoute2 - http://developer.osdl.org/dev/iproute2 iproute2-2.6.11-050330
WirelessTool - wireless_tools.28.tar.gz
ZebraRouting - zebra-0.95.tar.gz
Availability of source code
Please visit our web site or contact us to obtain more information.
GNU GENERAL PUBLIC LICENSE
Version 2, June 1991
Copyright (C) 1989, 1991 Free Software Foundation, Inc. 59 Temple Place, Suite 330, Boston, MA 02111-1307 USA
Everyone is permitted to copy and distribute verbatim copies of this license document, but changing it is not allowed.
Preamble
The licenses for most software are designed to take away your freedom to share and change it. By contrast, the GNU General Public License is intended to guarantee your freedom to share and change free software--to make sure the software is free for all its users. This General Public License applies to most of the Free Software Foundation's software and to any other program whose authors commit to using it. (Some other Free Software Foundation software is covered by the GNU Library General Public License instead.) You can apply it to your programs, too.
When we speak of free software, we are referring to freedom, not price. Our General Public Licenses are designed to make sure that you have the freedom to distribute copies of free software (and charge for this service if you wish), that you receive source code or can get it if you want it, that you can change the software or use pieces of it in new free programs; and that you know you can do these things.
To protect your rights, we need to make restrictions that forbid anyone to deny you these rights or to ask you to surrender the rights. These restrictions translate to certain responsibilities for you if you distribute copies of the software, or if you modify it.
For example, if you distribute copies of such a program, whether gratis or for a fee, you must give the recipients all the rights that you have. You must make sure that they, too, receive or can get the source code. And you must show them these terms so they know their rights.
We protect your rights with two steps: (1) copyright the software, and (2) offer you this license which gives you legal permission to copy, distribute and/or modify the software.
Also, for each author's protection and ours, we want to make certain that everyone understands that there is no warranty for this free software. If the software is modified by someone else and passed on, we want its recipients to know that what they have is not the original, so that any problems introduced by others will not reflect on the original authors' reputations.
Finally, any free program is threatened constantly by software patents. We wish to avoid the danger that redistributors of a free program will individually obtain patent licenses, in effect making the program proprietary. To prevent this, we have made it clear that any patent must be licensed for everyone's free use or not licensed at all.
The precise terms and conditions for copying, distribution and modification follow.
GNU GENERAL PUBLIC LICENSE
TERMS AND CONDITIONS FOR COPYING, DISTRIBUTION AND MODIFICATION
- This License applies to any program or other work which contains a notice placed by the copyright holder saying it may be distributed under the terms of this General Public License. The "Program", below, refers to any such program or work, and a "work based on the Program" means either the Program or any derivative work under copyright law: that is to say, a work containing the Program or a portion of it, either verbatim or with modifications and/or translated into another language. (Hereinafter, translation is included without limitation in the term "modification".) Each licensee is addressed as "you".
Activities other than copying, distribution and modification are not covered by this License; they are outside its scope. The act of running the Program is not restricted, and the output from the Program is covered only if its contents constitute a work based on the Program (independent of having been made by running the Program). Whether that is true depends on what the Program does.
- You may copy and distribute verbatim copies of the Program's source code as you receive it, in any medium, provided that you conspicuously and appropriately publish on each copy an appropriate copyright notice and disclaimer of warranty; keep intact all the notices that refer to this License and to the absence of any
warranty; and give any other recipients of the Program a copy of this License along with the Program.
You may charge a fee for the physical act of transferring a copy, and you may at your option offer warranty protection in exchange for a fee.
- You may modify your copy or copies of the Program or any portion of it, thus forming a work based on the Program, and copy and distribute such modifications or work under the terms of Section 1 above, provided that you also meet all of these conditions:
a) You must cause the modified files to carry prominent notices stating that you changed the files and the date of any change.
b) You must cause any work that you distribute or publish, that in whole or in part contains or is derived from the Program or any part thereof, to be licensed as a whole at no charge to all third parties under the terms of this License.
c) If the modified program normally reads commands interactively when run, you must cause it, when started running for such interactive use in the most ordinary way, to print or display an announcement including an appropriate copyright notice and a notice that there is no warranty (or else, saying that you provide a warranty) and that users may redistribute the program under these conditions, and telling the user how to view a copy of this License. (Exception: if the Program itself is interactive but does not normally print such an announcement, your work based on the Program is not required to print an announcement.)
These requirements apply to the modified work as a whole. If identifiable sections of that work are not derived from the Program, and can be reasonably considered independent and separate works in themselves, then this License, and its terms, do not apply to those sections when you distribute them as separate works. But when you distribute the same sections as part of a whole which is a work based on the Program, the distribution of the whole must be on the terms of this License, whose permissions for other licensees extend to the entire whole, and thus to each and every part regardless of who wrote it.
Thus, it is not the intent of this section to claim rights or contest your rights to work written entirely by you; rather, the intent is to exercise the right to control the distribution of derivative or collective works based on the Program.
In addition, mere aggregation of another work not based on the Program with the Program (or with a work based on the Program) on a volume of a storage or distribution medium does not bring the other work under the scope of this License.
- You may copy and distribute the Program (or a work based on it, under Section 2) in object code or executable form under the terms of Sections 1 and 2 above provided that you also do one of the following:
a) Accompany it with the complete corresponding machine-readable source code, which must be distributed under the terms of Sections 1 and 2 above on a medium customarily used for software interchange; or,
b) Accompany it with a written offer, valid for at least three years, to give any third party, for a charge no more than your cost of physically performing source distribution, a complete machine-readable copy of the corresponding source code, to be distributed under the terms of Sections 1 and 2 above on a medium customarily used for software interchange; or,
c) Accompany it with the information you received as to the offer to distribute corresponding source code. (This alternative is allowed only for noncommercial distribution and only if you received the program in object code or executable form with such an offer, in accord with Subsection b above.)
The source code for a work means the preferred form of the work for making modifications to it. For an executable work, complete source code means all the source code for all modules it contains, plus any associated interface definition files, plus the scripts used to control compilation and installation of the executable. However, as a special exception, the source code distributed need not include anything that is normally distributed (in either source or binary form) with the major components (compiler, kernel, and so on) of the operating system on which the executable runs, unless that component itself accompanies the executable.
If distribution of executable or object code is made by offering access to copy from a designated place, then offering equivalent access to copy the source code from the same place counts as distribution of the source code, even though third parties are not compelled to copy the source along with the object code.
- You may not copy, modify, sublicense, or distribute the Program except as expressly provided under this License. Any attempt otherwise to copy, modify, sublicense or distribute the Program is void, and will automatically terminate your rights under this License. However, parties who have received copies, or rights, from you under this License will not have their licenses terminated so long as such
parties remain in full compliance.
-
You are not required to accept this License, since you have not signed it. However, nothing else grants you permission to modify or distribute the Program or its derivative works. These actions are prohibited by law if you do not accept this License. Therefore, by modifying or distributing the Program (or any work based on the Program), you indicate your acceptance of this License to do so, and all its terms and conditions for copying, distributing or modifying the Program or works based on it.
-
Each time you redistribute the Program (or any work based on the Program), the recipient automatically receives a license from the original licensor to copy, distribute or modify the Program subject to these terms and conditions. You may not impose any further restrictions on the recipients' exercise of the rights granted herein. You are not responsible for enforcing compliance by third parties to this License.
-
If, as a consequence of a court judgment or allegation of patent infringement or for any other reason (not limited to patent issues), conditions are imposed on you (whether by court order, agreement or otherwise) that contradict the conditions of this License, they do not excuse you from the conditions of this License. If you cannot distribute so as to satisfy simultaneously your obligations under this License and any other pertinent obligations, then as a consequence you may not distribute the Program at all. For example, if a patent license would not permit royalty-free redistribution of the Program by all those who receive copies directly or indirectly through you, then the only way you could satisfy both it and this License would be to refrain entirely from distribution of the Program.
If any portion of this section is held invalid or unenforceable under any particular circumstance, the balance of the section is intended to apply and the section as a whole is intended to apply in other circumstances.
It is not the purpose of this section to induce you to infringe any patents or other property right claims or to contest validity of any such claims; this section has the sole purpose of protecting the integrity of the free software distribution system, which is implemented by public license practices. Many people have made generous contributions to the wide range of software distributed through that system in reliance on consistent application of that system; it is up to the author/donor to decide if he or she is willing to distribute software through any other system and a licensee cannot impose that choice.
This section is intended to make thoroughly clear what is believed to be a consequence of the rest of this License.
-
If the distribution and/or use of the Program is restricted in certain countries either by patents or by copyrighted interfaces, the original copyright holder who places the Program under this License may add an explicit geographical distribution limitation excluding those countries, so that distribution is permitted only in or among countries not thus excluded. In such case, this License incorporates the limitation as if written in the body of this License.
-
The Free Software Foundation may publish revised and/or new versions of the General Public License from time to time. Such new versions will be similar in spirit to the present version, but may differ in detail to address new problems or concerns.
Each version is given a distinguishing version number. If the Program specifies a version number of this License which applies to it and "any later version", you have the option of following the terms and conditions either of that version or of any later version published by the Free Software Foundation. If the Program does not specify a version number of this License, you may choose any version ever published by the Free Software Foundation.
- If you wish to incorporate parts of the Program into other free programs whose distribution conditions are different, write to the author to ask for permission. For software which is copyrighted by the Free Software Foundation, write to the Free Software Foundation; we sometimes make exceptions for this. Our decision will be guided by the two goals of preserving the free status of all derivatives of our free software and of promoting the sharing and reuse of software generally.
NO WARRANTY
- BECAUSE THE PROGRAM IS LICENSED FREE OF CHARGE, THERE IS NO WARRANTY FOR THE PROGRAM, TO THE EXTENT PERMITTED BY APPLICABLE LAW. EXCEPT WHEN OTHERWISE STATED IN WRITING THE COPYRIGHT HOLDERS AND/OR OTHER PARTIES PROVIDE THE PROGRAM "AS IS" WITHOUT WARRANTY OF ANY KIND, EITHER EXPRESSED OR IMPLIED, INCLUDING, BUT NOT LIMITED TO, THE IMPLIED WARRANTIES OF MERCHANTABILITY AND FITN
ESS FOR A PARTICULAR PURPOSE. THE ENTIRE RISK AS TO THE QUALITY
AND PERFORMANCE OF THE PROGRAM IS WITH YOU. SHOULD THE PROGRAM PROVE DEFECTIVE, YOU ASSUME THE COST OF ALL NECESSARY SERVICING, REPAIR OR CORRECTION.
- IN NO EVENT UNLESS REQUIRED BY APPLICABLE LAW OR AGREED TO IN WRITING WILL ANY COPYRIGHT HOLDER, OR ANY OTHER PARTY WHO MAY MODIFY AND/OR REDISTRIBUTE THE PROGRAM AS PERMITTED ABOVE, BE LIABLE TO YOU FOR DAMAGES, INCLUDING ANY GENERAL, SPECIAL, INCIDENTAL OR CONSEQUENTIAL DAMAGES ARISING OUT OF THE USE OR INABILITY TO USE THE PROGRAM (INCLUDING BUT NOT LIMITED TO LOSS OF DATA OR DATA BEING RENDERED INACCURATE OR LOSSES SUSTAINED BY YOU OR THIRD PARTIES OR A FAILURE OF THE PROGRAM TO OPERATE WITH ANY OTHER PROGRAMS), EVEN IF SUCH HOLDER OR OTHER PARTY HAS BEEN ADVISED OF THE POSSIBILITY OF SUCH DAMAGES.
7
Glossary
The wireless network glossary contains explanation or information about common terms used in wireless networking products. Some of information in this glossary might be outdated, please use with caution.
802.11a
An IEEE specification for wireless networking that operates in the 5 GHz frequency range (5.15 GHz to 5.850 GHz) with a maximum of 54Mbps data transfer rate. The 5GHz frequency band is not as crowded as the 2.4GHz band. In addition, the 802.11a have 12 non-overlapping channels, comparing to 802.11b/g's 3 non-overlapping channels. This means the possibility to build larger non-interfering networks. However, the 802.11a deliver shorter distance at the same output power when comparing to 802.11g.
802.11b
International standard for wireless networking that operates in the 2.4GHz frequency band (2.4 GHz to 2.4835 GHz) and provides a throughput up to 11 Mbps.
802.11d
Also known as “Global Roaming”. 802.11d is a standard for use in countries where systems using other standards in the 802.11 family are not allowed to operate.
802.11e
The IEEE QoS standard for prioritizing traffic of the VoIP and multimedia applications. The WMM is based on a subset of the 802.11e.
802.11g
A standard provides a throughput up to 54 Mbps using OFDM technology. It also operates in the 2.4GHz frequency band as 802.11b. 802.11g devices are backward compatible with 802.11b devices.
802.11h
This IEEE standard defines the TPC (transmission power control) and DFS (dynamic frequency selection) required to operate WiFi devices in 5GHz for EU.
802.11i
The IEEE standard for wireless security, 802.11i standard includes TKIP, CCMP, and AES encryption to improve wireless security. It is also known as WPA2.
802.11n
802.11n is a recent amendment which improves upon the previous 802.11 standards by adding multiple-input multiple-output (MIMO) and many other newer features. The IEEE has approved the amendment and it was published in October 2009. Enterprises, however, have already begun migrating to 802.11n networks based on the Wi-Fi Alliance's certification of products conforming to a 2007 draft of the 802.11n proposal. 802.11n provides a throughput up to 300Mbps using OFDM technology.
802.3ad
802.3ad is an IEEE standard for bonding or aggregating multiple Ethernet ports into one virtual port (also known as trunking) to increase the bandwidth.
802.3af
This is the PoE (Power over Ethernet) standard by IEEE committee. 803.af uses 48V POE standard that can deliver up to 100 meter distance over Ethernet cable.
802.1d STP
Spanning Tree Protocol. It is an algorithm to prevent network from forming. The STP protocol allows network to provide a redundant link in the event of a link failure. It is advised to turn on this option for multi-link bridge network.
802.1Q Tag VLAN
In 802.1Q VLAN, the VLAN information is written into the Ethernet packet itself.
Each packet carries a VLAN ID (called Tag) as it traveled across the network.
Therefore, the VLAN configuration can be configured across multiple switches. In 802.1Q spec, possible 4096 VLAN ID can be created. Although for some devices, they can only view in frames of 256 ID at a time.
802.1x
802.1x is a security standard for wired and wireless LANs. In the 802.1x parlance, there are usually supplicants (client), authenticator (switch or AP), and
authentication server (radius server) in the network. When a supplicants request a service, the authenticator will pass the request and wait for the authentication server to grant access and register accounting. The 802.1x is the most widely used method of authentication by WISP.
Ad-hoc
A Peer-to-Peer wireless network. An Ad-hoc wireless network do not use wireless AP or router as the central hub of the network. Instead, wireless client are connected directly to each other. The disadvantage of Adhoc network is the lack of wired interface to Internet connections. It is not recommended for network more than 2 nodes.
Access Point (AP)
The central hub of a wireless LAN network. Access Points have one or more Ethernet ports that can connect devices (such as Internet connection) for sharing. Multi-function Access Point can also function as an Ethernet client, wireless bridge, or repeat signals from other AP. Access Points typically have more wireless functions comparing to wireless routers.
ACK Timeout
Acknowledgement Timeout Windows. When a packet is sent out from one wireless station to the other, it will waits for an Acknowledgement frame from the remote station. The station will only wait for a certain amount of time; this time is called the ACK timeout. If the ACK is NOT received within that timeout period then the packet will be re-transmitted resulting in reduced throughput. If the ACK setting is too high then throughput will be lost due to waiting for the ACK Window to timeout on lost packets. If the ACK setting is too low then the ACK window will have expired and the returning packet will be dropped, greatly lowering throughput. By having the ability to adjust the ACK setting we can effectively optimize the throughput over long distance links. This is especially true for 802.11a and 802.11g networks. Setting the correct ACK timeout value needs to consider 3 factors: distance, AP response time, and interference.
Bandwidth Management
Bandwidth Management controls the transmission speed of a port, user, IP address, and application. Router can use bandwidth control to limit the Internet connection speed of individual IP or Application. It can also guarantee the speed of certain special application or privileged IP address - a crucial feature of QoS (Quality of Service) function.
Bootloader
Bootloader is the under layering program that will start at the power-up before the device loads firmware. It is similar to BIOS on a personal computer. When a firmware crashed, you might be able to recover your device from bootloader.
Bridge
A product that connects 2 different networks that uses the same protocol. Wireless bridges are commonly used to link network across remote buildings. For wireless application, there are 2 types of Bridges. WDS Bridge can be used in Point-to-Point or Point-to-Multipoint topology. Bridge Infrastructure works with AP mode to form a star topology.
Cable and Connector Loss
During wireless design and deployment, it is important to factor in the cable and connector loss. Cable and connector loss will reduce the output power and receiver sensitivity of the radio at connector end. The longer the cable length is, the more the cable loss. Cable loss should be subtracted from the total output power during distance calculation. For example, if the cable and connector loss is 3dBm and the output power is 20dBm; the output power at the cable end is only 17dBm.
Client
Client means a network device or utility that receives service from host or server. A client device means end user device such as wireless cards or wireless CPE.
CPE Devices
CPE stands for Customer Premises Equipment. A CPE is a device installed on the end user's side to receive network services. For example, on an ADSL network, the ADSL modem/router on the subscriber's home is the CPE device. Wireless CPE means a complete Wireless (usually an AP with built-in Antenna) that receives wireless broadband access from the WISP. The opposite of CPE is CO.
CTS
Clear To Send. A signal sent by a device to indicate that it is ready to receive data.
DDNS
Dynamic Domain Name System. An algorithm that allows the use of dynamic IP address for hosting Internet Server. A DDNS service provides each user account with a domain name. A router with DDNS capability has a built-in DDNS client that updates the IP address information to DDNS service provider whenever there is a change. Therefore, users can build website or other Internet servers even if they don't have fixed IP connection.
DHCP
Dynamic Hosting Configuration Protocol. A protocol that enables a server to dynamically assign IP addresses. When DHCP is used, whenever a computer logs onto the network, it automatically gets an IP address assigned to it by DHCP server. A DHCP server can either be a designated PC on the network or another network device, such as a router.
DMZ
Demilitarized Zone. When a router opens a DMZ port to an internal network device, it opens all the TCP/UDP service ports to this particular device. The feature is used commonly for setting up H.323 VoIP or Multi-Media servers.
DNS
A program that translates URLs to IP addresses by accessing a database maintained on a collection of Internet servers.
Domain Name
The unique name that identifies an Internet site. Domain Names always have 2 or more parts, separated by dots. In www.airlive.com, the "airlive.com" is the domain name.
DoS Attack
Denial of Service. A type of network attack that floods the network with useless traffic. Many DoS attacks, such as the Ping of Death and Teardrop attacks, exploit limitations in the TCP/IP protocols.
Encryption
Encoding data to prevent it from being read by unauthorized people. The common wireless encryption schemes are WEP, WPA, and WPA2.
ESSID (SSID)
The identification name of an 802.11 wireless network. Since wireless network has no physical boundary liked wired Ethernet network, wireless LAN needs an identifier to distinguish one network from the other. Wireless clients must know the SSID in order to associate with a WLAN network. Hide SSID feature disable SSID broadcast, so users must know the correct SSID in order to join a wireless network.
Firewall
A system that secures a network and prevents access by unauthorized users.
Firewalls can be software, router, or gateway. Firewalls can prevent unrestricted access into a network, as well as restricting data from flowing out of a network.
Firmware
The program that runs inside embedded device such as router or AP. Many network devices are firmware upgradeable through web interface or utility program.
FTP
File Transfer Protocol. A standard protocol for sending files between computers over a TCP/IP network and the Internet.
Fragment Threshold
Frame Size larger than this will be divided into smaller fragment. If there are interferences in your area, lower this value can improve the performance. If there are not, keep this parameter at higher value. The default size is 2346. You can try 1500, 1000, or 500 when there are interference around your network.
Full Duplex
The ability of a networking device to receive and transmit data simultaneously. In wireless environment, this is usually done with 2 or more radios doing load balancing.
Gateway
In the global Internet network, the gateways are core routers that connect networks in different IP subnet together. In a LAN environment with an IP sharing router, the gateway is the router. In an office environment, gateway typically is a multi-function device that integrates NAT, firewall, bandwidth management, and other security functions.
Hotspot
A place where you can access Wi-Fi service. The term hotspot has two meanings in wireless deployment. One is the wireless infrastructure deployment, the other is the Internet access billing system. In a hotspot system, a service provider typically need an authentication and account system for billing purposes, and a wireless AP network to provide access for customers.
IGMP Snooping
Internet Group Management Protocol (IGMP) is a Layer 3 protocol to report IP multicast memberships to neighboring multicast switches and routers. IGMP snooping is a feature that allows an Ethernet switch to "listen in" on the IGMP conversation between hosts and routers. A switch support IGMP snooping has the possibility to avoid multicast traffic being treated as broadcast traffic; therefore, reducing the overall traffic on the network.
Infrastructure Mode
A wireless network that is built around one or more access points to provide wireless clients access to wired LAN / Internet service. The opposite of Infrastructure mode is Ad-hoc mode.
IP address
IP (Internet Protocol) is a layer-3 network protocol that is the basis of all Internet communication. An IP address is 32-bit number that identifies each sender or receiver of information that is sent across the Internet. An IP address has two parts: an identifier of a particular network on the Internet and an identifier of the particular device (which can be a server or a workstation) within that network. The new IPv6 specification supports 128-bit IP address format.
IPsec
IP Security. A set of protocols developed by the IETF to support secure exchange of packets at the IP layer. IPsec has been deployed widely to implement Virtual Private Networks (VPNs). IPsec supports two encryption modes: Transport and Tunnel. Transport mode encrypts only the data of each packet, but leaves the header untouched. The more secure Tunnel mode encrypts both the header and the payload. On the receiving side, an IPSec-compliant device decrypts each packet.
LACP (802.3ad) Trunking
The 802.3ad Link Aggregation standard defines how to combine the several Ethernet ports into one high-bandwidth port to increase the transmission speed. It is also known as port trunking. Both device must set the trunking feature to work.
MAC (Media Access Control)
MAC address provides layer-2 identification for Networking Devices. Each Ethernet device has its own unique address. The first 6 digits are unique for each manufacturer. When a network device have MAC access control feature, only the devices with the approved MAC address can connect with the network.
Mbps (Megabits per Second)
One million bits per second; a unit of measurement for data transmission
MESH
Mesh is an outdoor wireless technology that uses Spanning Tree Protocol (STP) and Wireless Distribution system to achieve self-forming, self-healing, and self-configuring outdoor network. MESH network are able to take the shortest path to a destination that does not have to be in the line of site.
MIMO (Multi-Input-Multi-Output)
A Smart Antenna technology designed to increase the coverage and performance of a WLAN network. In a MIMO device, 2 or more antennas are used to increase the receiver sensitivity and to focus available power at intended Rx.
NAT (Network Address Translation)
A network algorithm used by Routers to enables several PCs to share single IP address provided by the ISP. The IP that a router gets from the ISP side is called Real IP, the IP assigned to PC under the NAT environment is called Private IP.
Node
A network connection end point, typically a computer.
Packet
A unit of data sent over a network.
Passphrase
Used much like a password, a passphrase simplifies the WEP encryption process by automatically generating the WEP encryption keys for the company products.
POE (Power over Ethernet)
A standard to deliver both power and data through one single Ethernet cable (UTP/STP). It allows network device to be installed far away from power source. A PoE system typically compose of 2 main component: DC Injector (Base Unit) and Splitter(Terminal Unit). The DC injector combines the power and data, and the splitter separates the data and power back. A PoE Access Point or CPE has the splitter built-in to the device. The IEEE 802.3af is a POE spec that uses 48 volt to deliver power up to 100 meter distance.
Port
This word has 2 different meaning for networking.
The hardware connection point on a computer or networking device used for plugging in a cable or an adapter.
The virtual connection point through which a computer uses a specific application on a server.
PPPoE
Point-to- Point Protocol over Ethernet. PPPoE relies on two widely accepted standards: PPP and Ethernet. PPPoE is a specification for connecting the users on an Ethernet to the Internet through a common broadband medium, such as a single DSL line, wireless device or cable modem.
PPTP
Point-to-Point Tunneling Protocol: A VPN protocol developed by PPTP Forum. With PPTP, users can dial in to their corporate network via the Internet. If users require data encryption when using the Windows PPTP client, the remote VPN server must support MPPE (Microsoft Point-To-Point Encryption Protocol) encryption. PPTP is also used by some ISP for user authentication, particularly when pairing with legacy Alcatel / Thomson ADSL modem.
Preamble Type
Preamble are sent with each wireless packet transmit for transmission status. Use the long preamble type for better compatibility. Use the short preamble type for better performance
Rate Control
Ethernet switches' function to control the upstream and downstream speed of an individual port. Rate Control management uses "Flow Control" to limit the speed of a port. Therefore, the Ethernet adapter must also have the flow control enabled. One way to force the adapter's flow control on is to set a port to half-duplex mode.
RADIUS (Remote Authentication Dial-In User Service)
An authentication and accounting system used by many Internet Service Providers (ISPs). When you dial in to the ISP, you must enter your username and password. This information is passed to a RADIUS server, which checks that the information is correct, and then authorizes access to the ISP system. Radius typically uses port 1812 and port 1813 for authentication and accounting port. Though not an official standard, the RADIUS specification is maintained by a working group of the IETF.
Receiver Sensitivity
Receiver sensitivity means how sensitive is the radio for receiving signal. In general, the slower the transmission speed, the more sensitive the radio is. The unit for Receiver Sensitivity is in dB; the lower the absolute value is, the higher the signal strength. For example, -50dB is higher than -80dB.
RJ-45
Standard connectors for Twisted Pair copper cable used in Ethernet networks. Although they look similar to standard RJ-11 telephone connectors, RJ-45 connectors can have up to eight wires, whereas telephone connectors have only four.
Router
An IP sharing router is a device that allows multiple PCs to share one single broadband connection using NAT technology. A wireless router is a device that combines the functions of wireless Access Point and the IP sharing router.
RSSI
Receiver Sensitivity Index. RSSI is a value to show the Receiver Sensitivity of the remote wireless device. In general, remote APs with stronger signal will display higher RSSI values. For RSSI value, the smaller the absolute value is, the stronger the signal. For example, “-50db” has stronger signal than “-80dB”. For outdoor connection, signal stronger than -60dB is considered as a good connection.
RTS
Request To Send. A packet sent when a computer has data to transmit. The computer will wait for a CTS (Clear To Send) message before sending data.
RTS Threshold
RTS (Request to Send). The RTS/CTS(clear to send) packet will be send before a frame if the packet frame is larger than this value. Lower this value can improve the performance if there are many clients in your network. You can try 1500, 1000 or 500 when there are many clients in your AP's network.
SNMP (Simple Network Management Protocol)
A set of protocols for managing complex networks. The SNMP network contains 3 key elements: managed devices, agents, and network-management systems (NMSs). Managed devices are network devices that content SNMP agents. SNMP agents are programs that reside SNMP capable device's firmware to provide SNMP configuration service. The NMS typically is a PC based software such as HP Openview that can view and manage SNMP network device remotely.
SSH
Developed by SSH Communications Security Ltd., Secure Shell is a program to log into another computer over a network, to execute commands in a remote machine, and to move files from one machine to another. It provides strong authentication and secure communications over insecure channels. It is a replacement for rlogin, rsh, rcp, and rdist.
SSL
Secure Sockets Layer. It is a popular encryption scheme used by many online retail and banking sites to protect the financial integrity of transactions. When an SSL session begins, the server sends its public key to the browser. The browser then sends a randomly generated secret key back to the server in order to have a secret key exchange for that session. SSL VPN is also known as Web VPN. The HTTPS and SSH management interface use SSL for data encryption.
Subnet Mask
An address code mask that determines the size of the network. An IP subnet are determined by performing a BIT-wise AND operation between the IP address and the subnet mask. By changing the subnet mask, you can change the scope and size of a network.
Subnetwork or Subnet
Found in larger networks, these smaller networks are used to simplify addressing between numerous computers. Subnets connect to the central network through a router, hub or gateway. Each individual wireless LAN will probably use the same subnet for all the local computers it talks to.
Super A
Super A is an Atheros proprietary turbo mode to increase speed over standard 802.11a mode. It adds Bursting and Compression to increase the speed. If you live in countries that prohibit the channel binding technology (i.e. Europe), you should choose “Super-A without Turbo) if you need more speed than 11a mode
TCP
A layer-4 protocol used along with the IP to send data between computers over the Internet. While IP takes care of handling the actual delivery of the data, TCP takes care of keeping track of the packets that a message is divided into for efficient routing through the Internet.
Turbo A
Turbo A is an Atheros proprietary turbo mode to increase speed over standard 802.11a mode. It uses channel binding technology to increase speed. There are 2 types of Turbo A modes: Dynamic Turbo and Static Turbo. In Dynamic Turbo, the channel binding will be used only if necessary. In Static Turbo, the channel binding is always on. This protocol may be combined with Super-A model to increase the performance even more. The used of channel binding might be prohibited in EU countries.
TX Output Power
Transmit Output Power. The TX output power means the transmission output power of the radio. Normally, the TX output power level limit for 2.4GHz 11g/b is 20dBm at the antenna end. The output power limit for 5GHz 802.11a is 30dBm at the antenna end.
UDP (User Datagram Protocol)
A layer-4 network protocol for transmitting data which does not require acknowledgement from the recipient of the data.
Upgrade
To replace existing software or firmware with a newer version.
Upload
To send a file to the Internet or network device.
URL (Uniform Resource Locator)
The address of a file located on the Internet.
VPN (Virtual Private Network)
A type of technology designed to increase the security of information transferred over the Internet. VPN creates a private encrypted tunnel from the end user's computer, through the local wireless network, through the Internet, all the way to the corporate network.
Walled Garden
On the Internet, a walled garden refers to a browsing environment that controls the information and Web sites the user is able to access. This is a popular method used by ISPs in order to keep the user navigating only specific areas of the Web
WAN (Wide Area Network)
A communication system of connecting PCs and other computing devices across a large local, regional, national or international geographic area. A WAN port on the network device means the port (or wireless connection) that is connected to the Internet side of the network topology.
WEP (Wired Equivalent Privacy)
A wireless encryption protocol. WEP is available in 40-bit (64-bit), 108-bit (128-bit) or 152-bit (Atheros proprietary) encryption modes.
WPA (Wi-Fi Protected Access)
It is an encryption standard proposed by WiFi for advance protection by utilizing a password key (TKIP) or certificate. It is more secure than WEP encryption. The WPA-PSK utilizes pre-share key for encryption/authentication.
WPA2 (Wi-Fi Protected Access 2)
WPA2 is also known as 802.11i. It improves on the WPA security with CCMP and AES encryption. The WPA2 is backward compatible with WPA. WPA2-PSK utilizes pre-share key for encryption/authentication.
Wi-Fi (Wireless Fidelity)
An interoperability certification for wireless local area network (LAN) products based on the IEEE 802.11 standards. The governing body for Wi-Fi is called Wi-Fi Alliance (also known as WECA).
WiMAX (Worldwide Interoperability for Microwave Access)
A Wireless Metropolitan Network technology that complies with IEEE 802.16 and ETSI Hiperman standards. The original 802.16 standard call for operating frequency of 10 to 66Ghz spectrum. The 802.16a amendment extends the original standard into spectrum between 2 and 11 Ghz. 802.16d increase data rates to between 40 and 70 Mbps/s and add support for MIMO antennas, QoS, and multiple polling technologies. 802.16e adds mobility features, narrower bandwidth (a max of 5 mhz), slower speed and smaller antennas. Mobility is allowed up to 40 mph.
WDS (Wireless Distribution System)
WDS defines how multiple wireless Access Point or Wireless Router can connect together to form one single wireless network without using wired uplinks. WDS associate each other by MAC address, each device
WLAN (Wireless Local Area Network)
A type of local-area network that uses high-frequency radio waves rather than wires to communicate between nodes. The most popular standard for WLAN is the 802.11 standards.
WMM (Wi-Fi Multimedia)
WMM is a standard to prioritize traffic for multimedia applications. The WMM prioritize traffic\ on Voice-over-IP (VoIP), audio, video, and streaming media as well as traditional IP data over the AP.
WMS (Wireless Management System)
An utility program to manage multiple wireless AP/Bridges.

- IMPORTANT USAGE INSTRUCTION
- Copyright
- Trademarks
- FCC Interference Statement
- CE Declaration of Conformity
- Table of Contents
- Introduction ......6
- Modem Mode....10
- Getting start....16
- Making Configuration....44
- Troubleshooting 89
- Appendix A Spec Summary Table....94
- Appendix B Licensing information....96
- Glossary 104
- 1
- Introduction
- Package List
- Hardware Installation
- - LED indicators
- Modem Mode
- - Installation Steps
- Router Mode Steps
- Step2. Insert SIM/USIM
- Step 3. Attach the Li-ion battery
- Modem Mode Steps
- Step 3. Insert Mini-USB cable.
- 2
- Getting start
- The Router Mode Easy Setup Utility
- Step 3.
- Step 4.
- Step 5.
- Step 6-1.
- Step 6-2.
- Step 9. Please reconnect to Router before click "Next".
- Step 10-2. Test the Internet connection
- Step 11. Congratulations! Setup is completed.
- The Modem Mode Easy Setup Utility
- Step 1. Install the Connection Manager.
- Step 2. Congratulations! Setup is completed.
- The Router mode Easy Setup by Configuring Web Pages
- - Browse to Activate the Setup Wizard
- Step 3. Select your language.
- Step 4. Select "Wizard" for basic settings with simple way.
- Step 5. Press "Next" to start the Setup Wizard.
- - Configure with the Setup Wizard
- Step 1. Change System Password.
- Step 2. Select Time Zone.
- Step 3. Select LAN IP Address and Wan Type.
- Step 4. 3G WAN type
- Step 5. Set up your Wireless Network.
- Step 6. Set up Wireless Security.
- Step 7. Apply your Setting.
- Step 8. Click Finish to complete it.
- 3
- Making Configuration
- Advanced
- Basic Setting
- - Network Setup
- LAN Setup
- Internet Setup
- - DHCP Server
- DHCP Clients List
- DHCP Fixed Mapping
- - Wireless Settings
- Open
- Shared
- Auto
- WPA-PSK
- WPA-PSK2
- WPA-PSK/WPA-PSK2
- WPS (Wi-Fi Protection Setup)
- Wireless Client List
- - Change Password
- Forwarding Rules
- FORWARDING RULES
- - Virtual Server
- - Special AP
- Click on "Save" to store what you just select or "Undo" to give up
- - Miscellaneous
- IP Address of DMZ Host
- UPnP Setting
- Security Setting
- SECURITY SETTING
- - Packet Filters
- - Domain Filters
- - URL Blocking
- • MAC Address Control
- Domain Filter Enable:
- Log DNS Query:
- Privilege IP Address Range:
- Domain Suffix
- Action
- Enable
- URL Blocking Enable
- URL
- Enable
- - MAC Control
- MAC Address Control
- Connection control
- Association control
- Administrator Time-out
- Remote Administrator Host/Port
- Discard PING from WAN side
- DoS Attack Detection
- Advanced Settings
- - Status
- - System Log
- IP Address for Syslogd
- Setting of Email alert
- SMTP Server IP and Port
- SMTP Username and password
- E-mail address
- E-mail Subject
- View Log...
- Click on "Save" to store your setting or "Undo" to give up
- - Dynamic DNS
- • QoS
- Enable
- Bandwidth of Upstream
- Local: IP
- Local: Ports
- Remote: IP
- Remote: Ports
- QoS Priority
- User Rule#
- Time Zone
- Time Server
- Sync with Time Server
- Sync with my PC
- - Schedule Rule
- TOOL BOX
- - System Info
- - Firmware Upgrade
- - Backup Setting
- - Reset to Default
- - Reboot
- Domain Name or IP address for Ping Test
- Power Saving in Battery Mode
- 4
- Troubleshooting
- Why can't I configure the router even the WiFi is connecting?
- Go to Start > Run.
- Type cmd.
- Press OK.
- Problems with 3G connection?
- C.What can I do if my 3G connection is failed even the dongle is plugged?
- What can I do if my router can't recognize my 3G data card even it is plugged?
- What should I insert in APN, PIN Code, Account, Password, Primary DNS, and Secondary DNS?
- Which 3G network should I select?
- Why my 3G connection is keep dropping?
- Something wrong with the wireless connection?
- Can't setup a wireless connection?
- What can I do if my wireless client cannot access the Internet?
- Why does my wireless connection keep dropping?
- What to do if I forgot my encryption key?
- How to reset to default?
- 5
- Appendix A Spec
- Summary Table
- 6
- Appendix B Licensing information
- GNU GENERAL PUBLIC LICENSE
- Preamble
- TERMS AND CONDITIONS FOR COPYING, DISTRIBUTION AND MODIFICATION
- NO WARRANTY
- 7
- Glossary
- 802.11a
- 802.11b
- 802.11d
- 802.11e
- 802.11g
- 802.11h
- 802.11i
- 802.11n
- 802.3ad
- 802.3af
- 802.1d STP
- 802.1Q Tag VLAN
- 802.1x
- Ad-hoc
- Access Point (AP)
- ACK Timeout
- Bandwidth Management
- Bootloader
- Bridge
- Cable and Connector Loss
- Client
- CPE Devices
- CTS
- DDNS
- DHCP
- DMZ
- DNS
- Domain Name
- DoS Attack
- Encryption
- ESSID (SSID)
- Firewall
- Firmware
- FTP
- Fragment Threshold
- Full Duplex
- Gateway
- Hotspot
- IGMP Snooping
- Infrastructure Mode
- IP address
- IPsec
- LACP (802.3ad) Trunking
- MAC (Media Access Control)
- MESH
- MIMO (Multi-Input-Multi-Output)
- NAT (Network Address Translation)
- Node
- Packet
- Passphrase
- POE (Power over Ethernet)
- Port
- PPPoE
- PPTP
- Preamble Type
- Rate Control
- RADIUS (Remote Authentication Dial-In User Service)
- Receiver Sensitivity
- RJ-45
- Router
- RSSI
- RTS
- RTS Threshold
- SNMP (Simple Network Management Protocol)
- SSH
- SSL
- Subnet Mask
- Subnetwork or Subnet
- Super A
- TCP
- Turbo A
- TX Output Power
- UDP (User Datagram Protocol)
- Upgrade
- Upload
- URL (Uniform Resource Locator)
- VPN (Virtual Private Network)
- Walled Garden
- WAN (Wide Area Network)
- WEP (Wired Equivalent Privacy)
- WPA (Wi-Fi Protected Access)
- WPA2 (Wi-Fi Protected Access 2)
- Wi-Fi (Wireless Fidelity)
- WiMAX (Worldwide Interoperability for Microwave Access)
- WDS (Wireless Distribution System)
- WLAN (Wireless Local Area Network)
- WMM (Wi-Fi Multimedia)
- WMS (Wireless Management System)
Brand : AIRLIVE
Model : Traveler3G
Category : Uncategorized