
JSK-420 FightStick - Game controller Gembird - Free user manual and instructions
Find the device manual for free JSK-420 FightStick Gembird in PDF.


| Product Type | Arcade Fight Stick Controller |
| Brand | Gembird |
| Model | JSK-420 FightStick |
| Dimensions (approx.) | 300 x 200 x 100 mm |
| Weight (approx.) | 1.5 kg |
| Color | Black |
| Material | Plastic casing |
| Power Supply | USB powered (5V DC) |
| Connection Type | Wired USB 2.0 |
| Compatible Platforms | PC (Windows XP/Vista/7/8/10), PlayStation 3 |
| Number of Buttons | 8 action buttons + start, select, home |
| Joystick Type | 8-way digital joystick |
| Turbo Function | Yes (adjustable speed) |
| Cable Length | 2.0 m |
| LED Indicators | Power and turbo status |
| Package Contents | Controller, user manual |
| Maintenance & Cleaning | Wipe with a soft dry cloth; do not use liquids |
| Safety Warning | Not suitable for children under 3 years due to small parts |
| Spare Parts Availability | Contact manufacturer for parts |
| Repairability | Not user-serviceable; refer to qualified technician |
Frequently Asked Questions - JSK-420 FightStick Gembird
User questions about JSK-420 FightStick Gembird
0 question about this device. Answer the ones you know or ask your own.
Ask a new question about this device
Download the instructions for your Game controller in PDF format for free! Find your manual JSK-420 FightStick - Gembird and take your electronic device back in hand. On this page are published all the documents necessary for the use of your device. JSK-420 FightStick by Gembird.
USER MANUAL JSK-420 FightStick Gembird
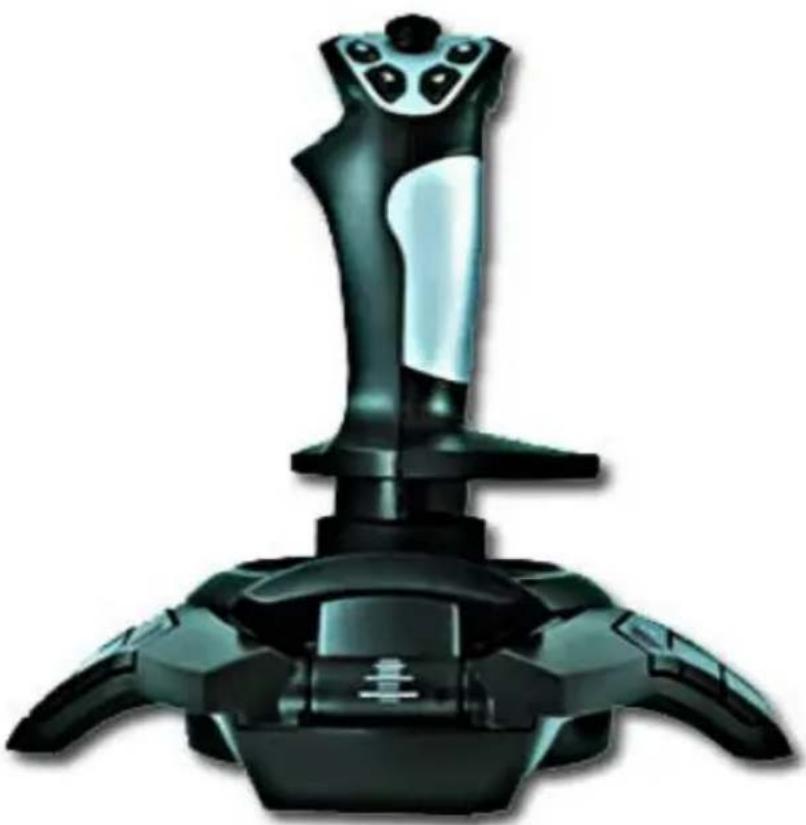
JSK-420 FightStick™ USB interface vibration
feedback 3D joystick
USER MANUAL

GEMBIRD®
natural_image
Black game controller with multiple spoked buttons and a lever (no text or symbols visible)Disclaimer
• We spared no efforts to make sure that the information in this manual is correct and complete. However no liability is accepted for any errors or omissions. Gembird Electronics reserves the right to change the specifications of the hardware and software described in this manual without prior notice.
- No part of this manual may be reproduced, transmitted or translated in any language in any form, by any means, without the prior written permission of Gembird Electronics Ltd.
• Gembird Electronics makes no warranties for damages resulting from corrupted or lost data due to a mistaken operation or malfunction of the product, the software, personal computers or peripheral devices.
Gembird® is a registered trademark of Gembird Europe bv.
Other names or products not mentioned above may be registered trademarks or trademarks of their respective owners.
Copyright © 2010 Gembird Europe bv. All rights reserved
Features
• 8-way HAT-switch
• 12 user programmable buttons
- Rotating handle
- Throttle control
- Comfortable grip
- Vibration
• USB v. 2.0 interface
Specifications
• USB 1.1 and USB 2.0 compatible
- Windows® XP/Vista/Windows 7
- DirectX v.7.0 and higher
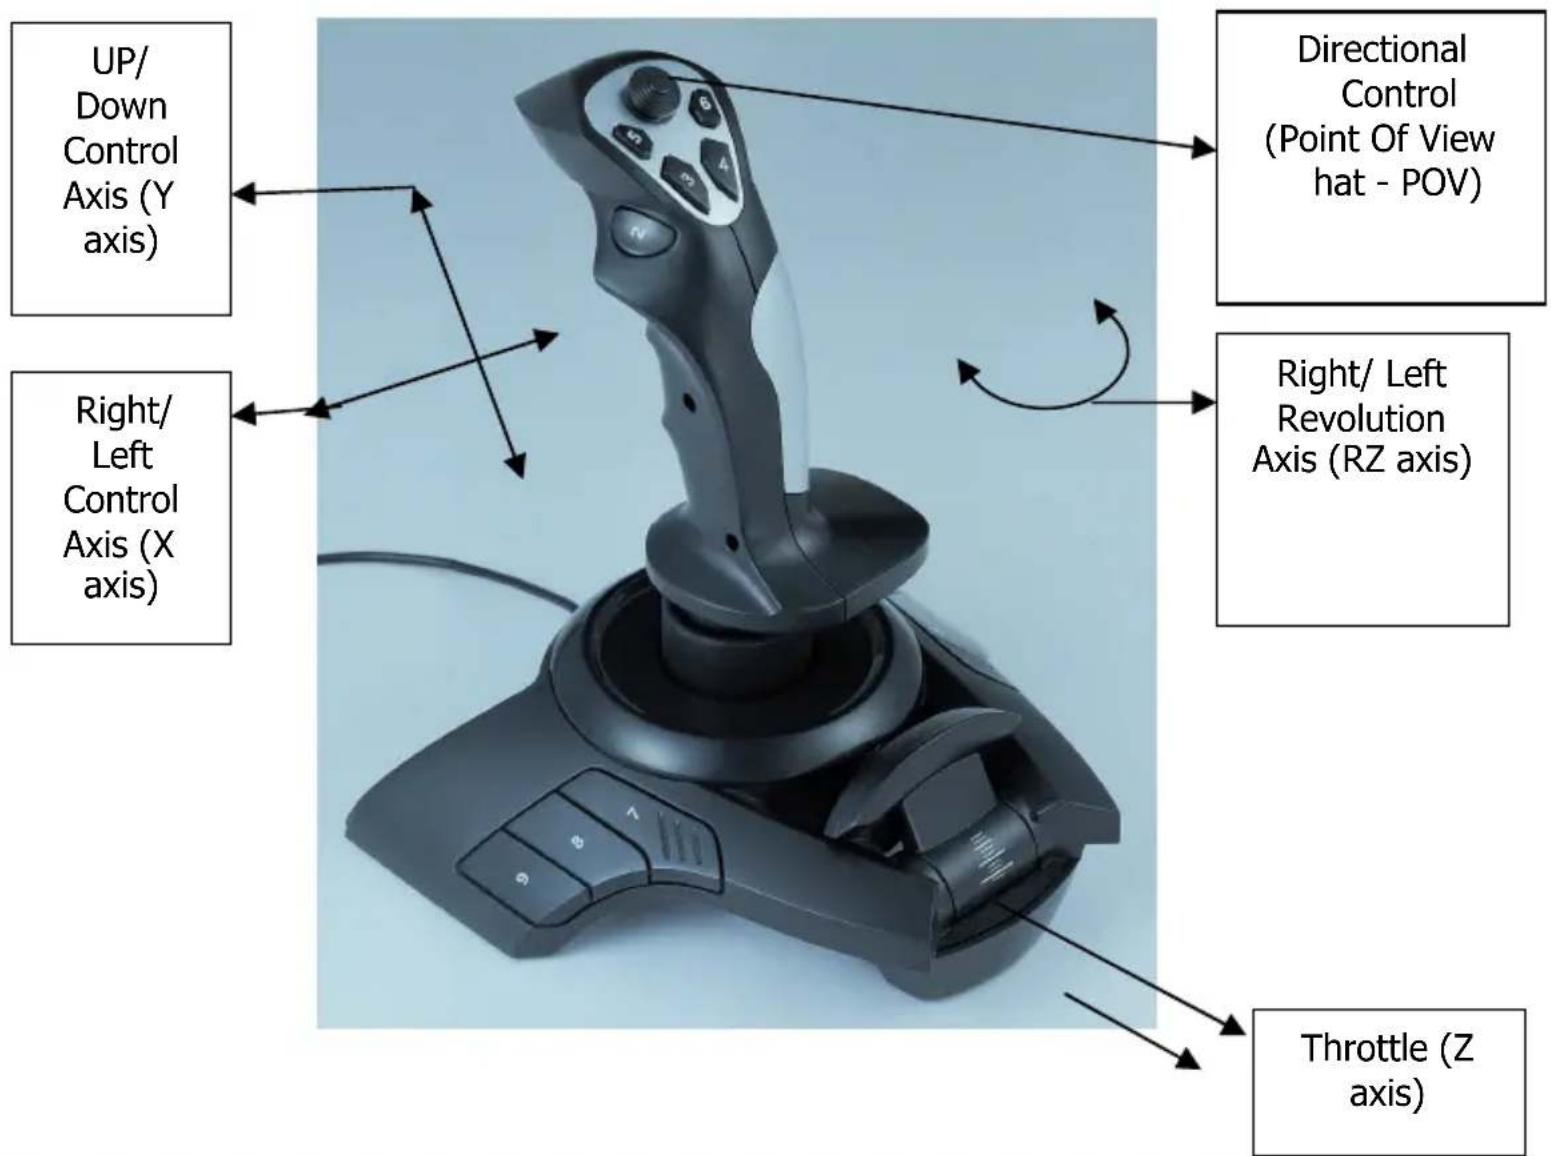
Buttons and controls definition
Software installation
- Insert CD with software into your computer CD(DVD)-ROM drive. Setup software should start automatically (if by any reason it does not start, launch “Setup” from your CD). Continue the installation until it is finished (it might take some time).
- Insert the joystick into your PC USB port. PC will recognize the joystick as "USB ALL-IN-ONE GAME CONTROLLER".
FightStick™ joystick test
- Choose Start→Control Panel→Game Controllers ("Gaming options" under some Windows).
- Select the FightStick™ joystick from the list and choose "Properties" button to enter the Function Test page:
a) Press each of the 12 joystick buttons in turn, make sure the corresponding button on the test page is highlighted.
b) Enter into “Turbo” mode by pressing the “Turbo” button on the joystick. In this mode all the 12 buttons will generate much faster response. Push and hold any of the 12 buttons, the corresponding button image on the test page should flash very fast. Press “Clear” button or press “Turbo” button again to exit the turbo mode.
c) Move the joystick forward, backward, leftward or rightward, the cursor inside the “X-axis/Y-axis” rectangle on the test page should move correspondingly (during the test, you can adjust sensitivity using the options on the screen).
d) Slide the throttle or rotate the joystick to the left and to the right, the cursor of "RZ/Z axis" on the test page should move correspondingly.
e) Move the POV in different directions to make sure that both the 4 buttons and 8 directions all work.
- Adjustment for joystick calibration:
If during any of the above-mentioned test procedures, the cursor does not return to the center position, click “Adjustment” button for calibration.
- Key Map Setting test:
a) Click the "Keymap" button to enter the settings window.
b) This function can be helpful if you want to assign some joystick buttons the function of the other buttons. For example, if you want to let the joystick button 3 to work as button 5, click “Set” on the screen in front of the button 3, then press button 5 on the joystick.
c) Click the "Set" button in front of the joystick button to be defined and afterwards try pressing the newly-defined button on the joystick.
d) Having finished the test, you can save or clear the chosen settings.
- Keyboard Map setting test:
a) Click the "Keyboard map" button to enter the settings window;
b) This function can be helpful if you want to use the joystick buttons to emulate some keyboard keystrokes. For example, if you want to let the
joystick button 7 to work as F5 keystroke on your keyboard, click "Set" button on the screen in front of the button 7, you will see a dialogue box, then press F5 on the keyboard and Enter to confirm the choice.
c) Click the "Set" button in front of the joystick button to be defined and afterwards try pressing the newly-defined button on the joystick. This should have the same effect as pressing the keys of your keyboard.
d) Having finished the test, you can save or clear the chosen settings.
- Motor test: Choose the menu page “Vibration test” to enter the vibration motor test page. Click the “Manual” button, then move joystick forward, backward or leftward by hand, the motor should vibrate. During the test, vibration intensity and speed can be adjusted. You can also click “Auto” button to test the vibration automatically.
Troubleshooting
| Problem description | Proposed solution |
| Software and hardware do not work after the installation | Check the joystick connection with the PC USB portCheck your DirectX version.Version 7.0 or higher is required.Try to reboot your PC. |
| Having started the game, some analog axes do not work or operate erratically | Check whether the joystick is properly calibrated (Note: in the inactive joystick state all the axis cursors should be positioned in the center). |
| There is no vibration | Check your DirectX version. Version 7.0 or higher is required. |
| No driver is found after joystick is connected to the USB port | Most probably caused by problems during installation or software conflicts with some other existing drivers. Check if any devices in Device manager (Control panel -> System -> Hardware tab -> Device manager) were not recognized (they will be shown with exclamation mark “!” before them). Delete these devices, reinstall software driver and connect the joystick again. |
EC Declaration of Conformity
We hereby certify that the following product complies with all the relevant
Safety Requirements of § 4 EMVG and of the Directives 2006/95/EC; 93/68/EEC and 2004/108/EC.
Applicant :
Gembird Europe BV
Wittevrouwen 56,
1358CD, Almere, The Netherlands
Equipment :
Computer parts
Model Nos. :
JSK-420
Product description :
JSK-420 FightStick 3D joystick USB Interface
European standards:
EN55022:2006; EN55024:1998+A1:2001+A2:2003; EN61000_3.2:2000+
A2:2005; EN61000-3-3:1995+A1:2001+A2:2005;
The following manufacturer/WITHIN Europe is responsible for this declaration:
Gembird Europe BV
Wittevrouwen 56, 1358CD, Almere, The Netherlands
Tel: +31-(0)36-5211588. Fax: +31-(0)36-5347835
Director
Authorized signature
| WARRANTY CONDITIONS | GARANTIE BEDINGUNGEN | GARANTIE VOORWAARDEN |
| The warranty period is 36 months and begins with the sale to the end user. The receipt must clearly list the date of purchase and the type of device. In addition, the receipt must be machine printed. Keep the purchase receipt for the entire warranty period since it is required for all warranty claims. During the warranty period all defects shall be adjusted of replaced at the manufacturer's expense, either by repairing of replacing the defective part or the entire device. Work carried out under warranty does neither extend the warranty period nor does it start a new warranty period. The manufacturer reserves the right to void any warranty claim for damages or defects due to misuse, abuse or external impact (falling down, impact, ingress of water, dust, contamination or break). Wearing parts (e.g. rechargeable batteries) are excluded from warranty. Upon receipt of the RMA goods, Gembird Europe B.V. reserves the right to choose between replacement of defective goods or issuing a credit note. The credit note amount will always be calculated on the basis of the current market value of the defective products. | Die Garantie beträgt 36 Monate ab Verkaufsdatum an den Endverbraucher. Das Kaufdatum und der Gerätetyp sind durch eine maschinell erstellte Kaufquittung zu belegen. Bitte bewahren Sie Ihren Kaufbeleg daher für die Dauer der Garantie auf, da er Voraussetzung für eine eventuelle Reklamation ist. Innerhalb der Garantiezeit werden alle Mängel, wahlweise durch den Hersteller entweder durch Instandsetzung, Austausch mangelhafter Teile oder im Austausch, behoben. Die Ausführung der Garantieleistung bewirkt weder eine Verlängerung noch einen Neubeginn der Garantiezeit. Eine Garantieleistung entfällt für Schäden oder Mängel die durch unsachgemäße Handhabung oder durch äußere Einwirkung (Sturz, Schlag, Wasser, Staub, Verschmutzung oder Bruch) herbeigeführt wurden. Verschleißteile (z.B. Akkus) sind von der Garantie ausgenommen. | De garantietermijn bedraagt 36 maanden en gaat in op de aankoopdatum van het product door de eindgebruiker. Op de aankoopbon moeten de aankoopdatum en productomschrijving duidelijk vermeld staan. Gelieve de aankoopbon de gehele garantieperiode te bewaren, deze is ten alle tijden benodigd voor alle garantie aanspraken. Tijdens de garantieperiode zullen alle gebreken verholpen of vervangen worden door de fabrikant d.m.v. reparatie, omruiling van het defecte onderdeel of het gehele apparaat. Aanspraken tijdens de garantieperiode leiden niet tot verlenging hiervan. Garantieaanspraak vervalt bij schade of gebreken die ontstaan zijn door oneigenlijk gebruik, misbruik of invloeden van buitenaf (vallen, stoten, water, stof, vuil of breken). Slijtagegevoelige onderdelen (b.v. batterijen) zijn uitgesloten van garantie. Bij ontvangst van de RMA goederen behoudt Gembird zich het recht om te kiezen tussen vervanging van de defecte waren of het uitgeven van een kreditnota. Het bedrag van de kreditnota zal altijd gecalculeerd zijn op basis van de huidige marktprijs voor het defecte produkt. |
| Gembird Europe B.V.Wittevrouwen 561358CD AlmereThe Netherlandswww.gembird.nl/supportsupport@gmb.nlTel. +31 (0)900 4362473€ 0,15 p/m inside The NetherlandsMobile costs not included | Gembird Deutschland GmbHOverweg 2759494 SoestDeutschlandwww.gembird.de/supportsupport@gembird.deTel. +49-180 5-436247€0,14 aus dem deutschen Festnetz.Mobilfunkpreise können abweichen | Gembird Europe B.V.Wittevrouwen 561358CD AlmereThe Netherlandswww.gembird.nl/supportsupport@gmb.nlTel. +31 (0)900 4362473€ 0,15 p/m binnen NederlandExclusief mobiele telefoonkosten |
ГАРАНТИЙНЫЙ ТАЛОН
Brand : Gembird
Model : JSK-420 FightStick
Category : Game controller