
PWA818R - Air conditioner Philco - Free user manual and instructions
Find the device manual for free PWA818R Philco in PDF.


| Product Type | Portable Air Conditioner |
| Brand | Philco |
| Model | PWA818R |
| Cooling Capacity | 8,000 BTU (approx.) |
| Room Coverage | Up to 300 sq ft |
| Energy Efficiency | EER 10.0 (approx.) |
| Power Supply | 115V / 60Hz |
| Dimensions (W x D x H) | 18.5 x 12.5 x 30 inches |
| Weight | 65 lbs |
| Modes | Cool, Fan, Dehumidify |
| Fan Speeds | 2 (High, Low) |
| Remote Control | Yes (with batteries) |
| Timer | 1-24 hours |
| Filter | Washable mesh filter |
| Noise Level | 52 dB (approx.) |
| Drainage | Continuous or manual drain |
| Window Kit Included | Yes (exhaust hose and window bracket) |
| Refrigerant | R-410A |
| Safety Features | Overheat protection, auto restart |
| Maintenance | Clean filter every 2 weeks |
| Spare Parts Available | Yes (remote, filter, hose) |
| Repairability Index | 7/10 (estimated) |
Frequently Asked Questions - PWA818R Philco
User questions about PWA818R Philco
0 question about this device. Answer the ones you know or ask your own.
Ask a new question about this device
Download the instructions for your Air conditioner in PDF format for free! Find your manual PWA818R - Philco and take your electronic device back in hand. On this page are published all the documents necessary for the use of your device. PWA818R by Philco.
USER MANUAL PWA818R Philco
Window Type Room Air Conditioner
User Manual

natural_image
Black-and-white photo of large icebergs floating on calm water under cloudy sky (no text or symbols)PHILCO®

Remote Control Model:
PWA807R, PWA809R
PWA812R, PWA818R
Mechanical Model:
PWA807M, PWA809M
PWA812M, PWA818M
PWA824M,,
CONTENTS
Our design is based on the best efficiency and the lowest noise operation and it can keep the room comfortable. Please read this operating manual carefully before operating the unit and keep it for consultation.
Structur c mechanism and Installation
Function 1
Operating condition 2
Power requirement 2
Installation 3
Notes for installation 6
Operation procedure
7Part identification
7 Air direction adjustment
Main switch operation procedure (Applicable to Mechanical Models ONLY) 8
(Applicable to Remote Control Models ONLY) 9Operation of wireless remote cont
51Operation tips
Care and maintenance
| 61Caution | |
| 71Care and maintenance | |
| 81Trouble shooting guide | |
| 91After service |
Please read this operating manual carefully before operating the unit .....
The figures in this manual may be different with the material objects, please refer to the material objects for reference.

Function
Introduction

Window type room air conditioners can regulate the room temperature and dry the room. It is convenient for your work, study and life. It can be widely used in residence, shop, hotel, office, library and laboratory, and so on.
| Cooling in summer | Dehumidifying in rainy or humid season |
In hot summer, Air conditioner can cool down the room air by transferring heat out. | Without reducing the room temp., air conditioner can dehumidify and make the room air dry and comfortable. |
| Heating in winter(Only for heat unit) | Exchange fresh air |
In cold winter, Air conditioner can heat up room air. | Open storm door to keep the fresh air in the room. |
- Operating Condition
- Please operate air conditioner in the correct conditions as following.
| COOL mode operation | DRY mode operation |
| Outdoor temperature should be in range of 18°C to 43°C, otherwise it is possible for air conditioner to breakdown.Room humidity should be lower than 90%. Otherwise, it is possible for air conditioner to dew at air conditioner surface and even drop water after running for so much time. But this is normal. | Outdoor temperature should be in range of 18°C to 43°C, otherwise it is possible for air conditioner to breakdown. |
Power requirement
 | Rated voltage and voltage range: 230V 10%* The electric components will be damaged when the voltage is too high. If the voltage is too low, the compressor will vibrate violently to damage the refrigerant system and easily cause the compressor and electric components not work. |  |
 | The ground must be connected.* Special socket must be used. Furthermore, the socket and wiring must conform to the wiring regulations. And the earthing method must be reliable.* In fixed circuit, there must be electricity leakage protection switch of enough power capacity and air switch with enough space. |  |
| Earth wire To ensure the reliable earthing, please do not connect earth wire to the following places: | ||
Water pipe  | ||
- Installation
Installation precaution:
Window type conditioner is so valuable and the improper installation of it will cause a lot of damage! Please associate the professional technician to install the unit and don't install it by yourself. Otherwise, we are not responsible for the damage like this.

natural_image
Illustration of a delivery person handing over packages to a child, with a truck and boxes in the background (no text or symbols)Location:
• The condensation water must be drained away conveniently.
• Install air conditioner unit far away from TV set or radio etc. to avoid disturbing video or voice.
- In salt and coastal area or place where is near thermal springs and polluted by sulphurous gas, or other special areas, please contact the seller before use.
- Avoid a place where is possible for inflammable gas to leak out.
- Avoid other heat sources or direct sun light.
- Avoid a place where is easy for children to touch.
- Don't use the unit in the immediate surroundings of a laundry, a bath, a shower or a swimming pool.
- For window type air conditioner with remote control, install in a location where is strong electromagnetic disturbance, you should contact the seller in advance to avoid the malfunction in use.
How to install:
- Choose a location where there are no any obstacle surrounding the unit, and the plug is accessible.
• Prepare the installation hole slightly bigger than unit size. - Choose the installation space according to the following diagram.
The indoor distance from obstructions should be 300mm (above), 1500mm (below), 500mm (left), 500mm (right) and 1500mm (front).
The outdoor distance from obstructions should be over 150mm (above, left, right) and over 500mm (back). Please refer to the drawing below.

Installation procedure:
1) Remove the sticker from the front panel.
2) Put the unit into the installation hole.
- When installing the unit, it should be slanted down to the back to avoid the enlargement of noise or vibration. (Slant between 6-10mm.) (Shown at right figure.)
- The installation place should be strong enough to avoid the enlargement of noise or vibration.
3) Fill up sews in the cabinet with sponge or foam.
Installation assistance:
- Use iron support
The installation hole should be strong enough to support the air conditioner. If it cannot, iron support has to be used outdoors.
Iron support should be fixed on the building (Shown at right figure.)
- Use sunshade board
Air conditioner should avoid anything to be dropped into it and avoid direct sunshine. If there is no cover on it, you should contact the seller for installing the sunshade board. When installing the sunshade board, don't let it block the air inlet at the side grille.


Drain water for one style:
To get the maximum cooling efficiency, the air conditioner is designed to splash the condensate on the condenser coil.
If the splashing sound annoys you, you can provide an outside drain by using the following procedure, which may however cause a small loss of performance.
- There is a drainage outlet at the back of the unit.
- Remove cover from the drainage outlet, and then connect drainage joint to it with screw.
- Connect the drain hose to the outlet.
Note:
Drain hose or tubing can be purchased locally
to satisfy your particular needs.

Drain water for another style:
To get the maximum cooling efficiency, the air conditioner is designed to splash the condensation water on the condenser coil.
To the cooling only unit, If the splashing sound annoys you, you can provide an outside drain by using the follo-wing procedure, which may however cause a small loss of performance.
- Slide out the chassis from the cabinet.
- Remove the rubber plug from the body base plate.
- Install the drain pan to the corner of the cabinet with 2 screws.
- Connect the drain hose to the outlet on the drain pan bottom.
- Slide the chassis into its original place in the cabinet.

Note:
- Drain pan and drain hose must be installed before using reverse cycle models.
- Drain hose or tubing can be purchased locally to satisfy your particular needs.
Notes for installation
Remove
Before removing air conditioner to the other place, you should contact the seller firstly.
Then it must be done under the direction of the professional technician. In addition, the charge of this must be paid.

natural_image
Cartoon illustration of a smiling truck with a face and wheels, no text or symbols presentNoise
• Install in a location where is firm enough to avoid the enlargement of noise and vibration.
- Don't put anything in front of the outlet of outdoor unit to avoid increasing noise.
- Be sure that hot air or noise will not inconvenience neighbors.
- Please contact the seller as soon as there is strange noise during operation.
- Please use the safety support.

Electric wiring
- Must connect with ground reliably.
- The exclusive circuit must be used. But removable socket can't be used because poor contact of it can cause over heat or fire.
- Don't pull the power cord strongly.
- In fixed circuit, there must be electricity leakage protection switch and leakage current is less than 30mA.

- Connecting method between air conditioners and power cord and interconnecting methods of each individual element with one another should accord with wiring diagram on the unit.
• The air conditioner should be installed in accordance with national wiring regulation.
- An all-pole disconnection switch having a contact separation of at least 3mm in all poles should be connected in fixed wiring
• Air switch (thermal-magnetic breaker) should be installed in the circuit.
- If the supply cord is damaged, it must be replaced by the manufacturer or your dealer or a qualified person to avoid a hazard.
- All The electrical work must be done according to the local wiring regulations.
Parts identification
Mechanical Model
Panel outlook picture, just for reference, please take the real unit as standard.
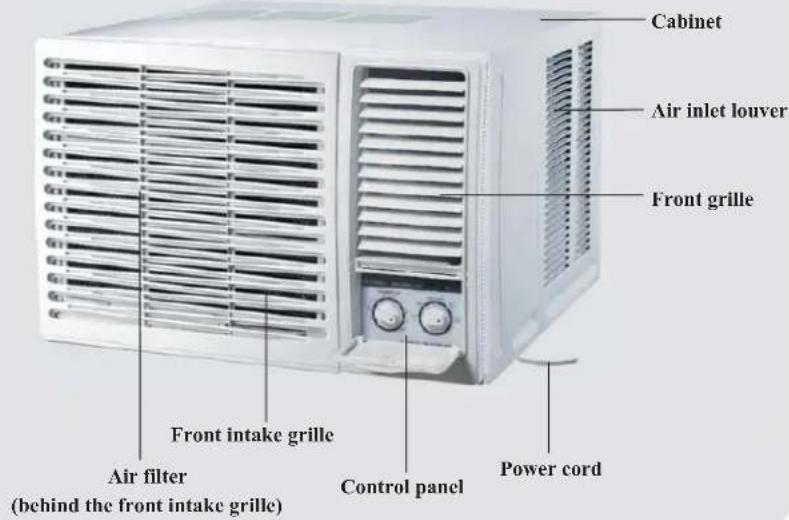
Remote Control Model
Panel outlook picture, just for reference, please take the real unit as standard.

Air direction adjustment
Vertical airflow direction vane
(Airflow direction adjustment up and down).
The vertical airflow direction vane is controlled by positioning the vane to discharge the air upwards, downwards or straight out.

natural_image
Diagram showing a hand pointing at a vertical panel with an arrow indicating rotation (no text or symbols present)- Main switch operation procedure (Applicable to Mechanical Models ONLY)

radar
THERMOSTAT | Label | Value | |---|---| | 1 | 5 | | 2 | 6 | | 3 | 4 | | 4 | 5 | | 5 | 6 | | 6 | 7 | | 7 | 8 | | 8 | 9 | | 9 | 10 | COOLER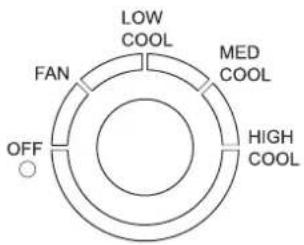
1.Main Control Knob
Set to Low Cool, Med Cool or High Cool as desired (FAN setting operates the fan only.)
CAUTION: If the main control knob is turned off changed to a fan setting from a cooling operation setting,
WAIT at least 3 minutes before resetting to cooling operation.
2. Thermostat control Knob
Set the thermostat control knob to your desired setting(Usually 6-7 is recommended). If the room temperature is not as desired after a reasonable period, turn the thermostat. When the thermostat control knob is set to 10, moisture may freeze onto evaporator fins and turn the thermostat control knob counter clockwise. This will quickly defrost the evaporator fins so that normal cooling can be resumed.

3. Air Swing Switch
(Airflow direction adjustment Side-to Side)
To obtain a fix airflow direction, set the air swing switch to "ON" for the vanes to swing from side to side until the desired flow direction is reached, then switch it to "OFF".
For continuous side-to-side air circulation, set the air swing switch to "ON".
Operation of wireless remote control (Applicable to Remote Control Models ONLY)
Name and function of wireless remote control
Note:
- Besure that there are no obstructions between receiver and remote controller; Don't drop or throw the remote control; Don't let any liquid in the remote control and put the remote control directly under the sunlight or any place where is very hot.

Name and function of wireless remote control
Note: ● This wireless remote control is universal, and it could be used for many units, some buttons of this control which are not available to this unit will not be described below.
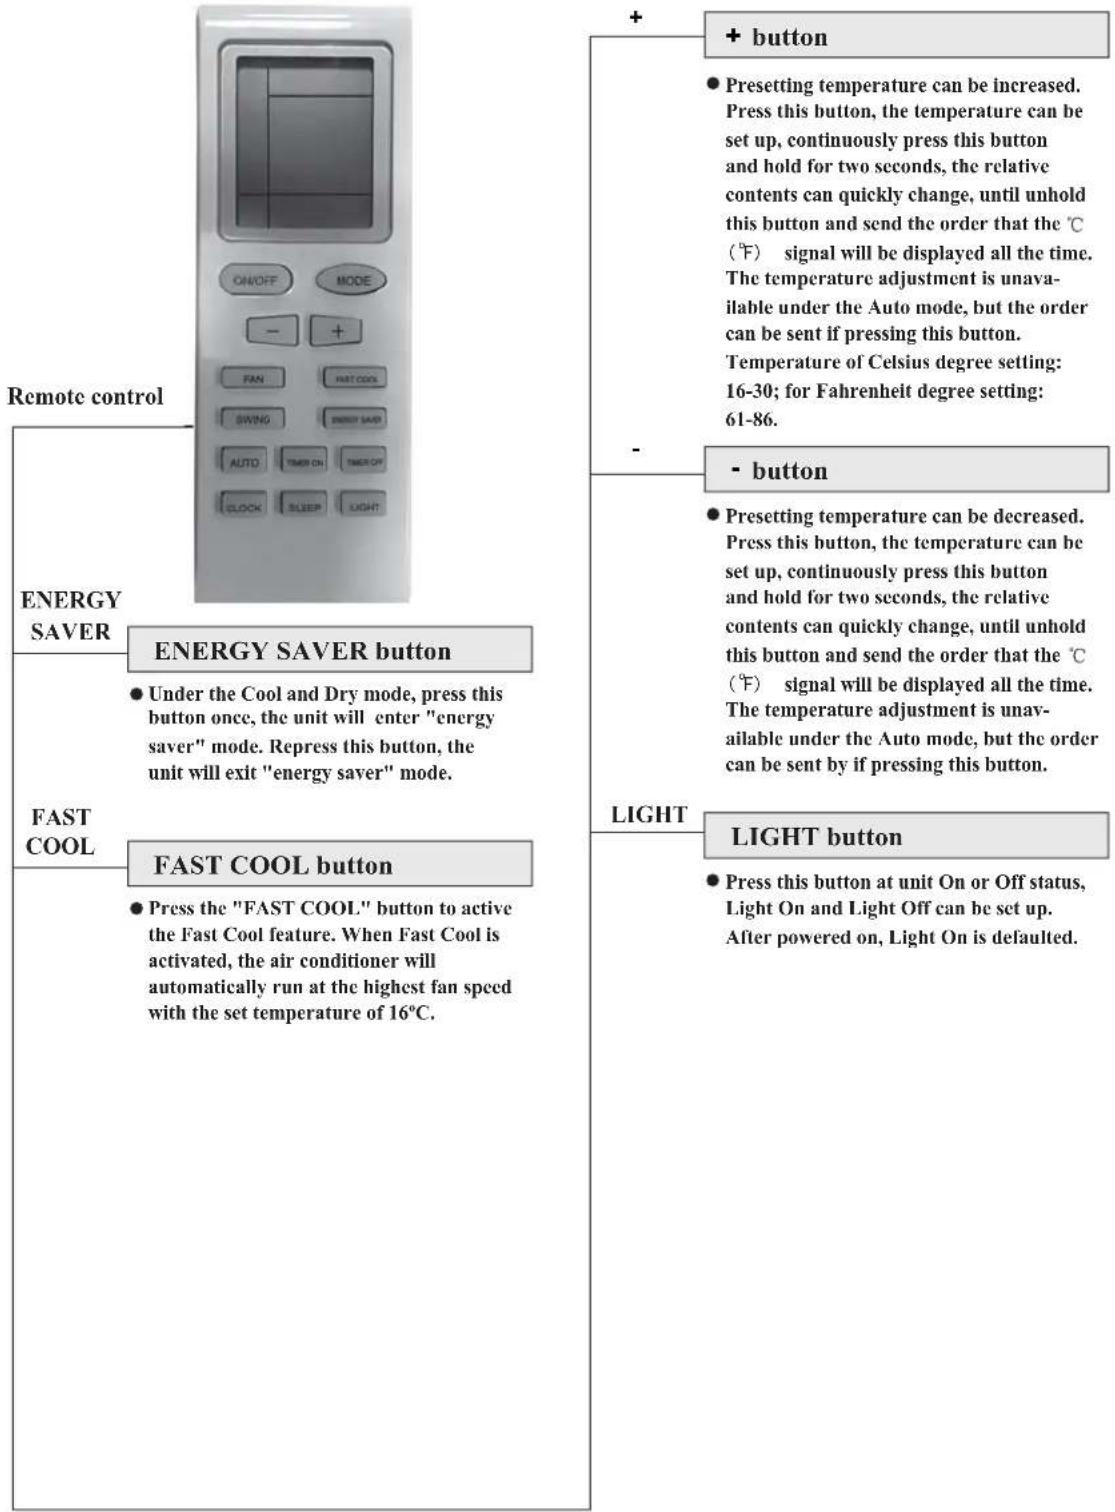

Name and function of wireless remote control
Note:
- This wireless remote control is universal, and it could be used for many units, some buttons of this control which are not available to this unit will not be described below.
Remote control

SWING
SWING BUTTON
- When it is pressed, the louvers start to rotate automatically and stop when repressed.
TIMER ON
TIMER ON BUTTON
- At unit off, press Timer On button, "HOUR ON" will blink and display, signal ⏻ will be concealed, in the timer on setting. During 5 seconds blinking, the value can be adjusted by pressing + or - button, every press of this button, 0.5 hour will be increased or decreased, but continuously press the + or - button, 2 seconds later, the value will be changed quickly, 0.5 hour will be increased in every 0.25 second automatically by the remote controller. During blinking, press the Timer On button to confirm the time. After Timer On set up, when repressing the Timer On button, the Timer On setting will be canceled. After powered on, no Timer is defaulted, signal "HOUR ON (OFF)" will not display, and only the clock is displayed. After the timer reached, the relative contents with Timer will conceal. Before setting the Timer, please adult the clock to the current actual time.
TIMER OFF
TIMER OFF BUTTON
- At unit on, press Timer Off button to enter into Timer Off setting. The method of setting is the same as for TIMER ON.
Guide for operation- general operation
- After powered on, press ON/OFF button, the unit will start to run. (Note: When it is powered on the guide louver of main unit will close automatically.)
- Press MODE button, select desired running mode.
- Pressing +or - button, to set the desired temperature (It is unnecessary to set the temp. at AUTO mode.)
- Pressing FAN button, set fan speed, can select AUTO FAN, LOW, MID and HIGH.
- Pressing SWING button, to select the swing.
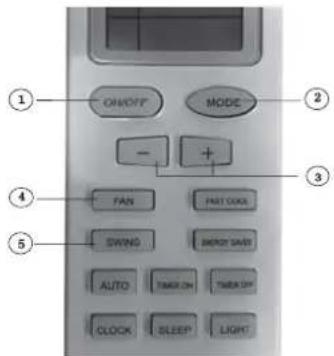
Guide for operation- Optional operation
- Press SLEEP button, to set sleep.
- Press TIMER ON and TIMER OFF button, can set the scheduled timer on or timer off.
- Press LIGHT button, to control the on and off of the displaying part of the unit (This function ay be not available for some units).
- Press ENERGY SAVER button, can realize the ON and OFF of ENERGY SAVER function.

Introduction for special function
★ About AUTO RUN
When AUTO RUN mode is selected, the setting temperature will not be displayed on the LCD, the unit will be in accordance with the room temp. automatically to select the suitable running method and to make ambient comfortable.
★ About lock
Press +and - buttons simultaneously to lock or unlock the keyboard. If the remote controller is locked, the icon 📄 will be displayed on it, in which case, press any button, the mark will flicker for three times. If the keyboard is unlocked, the mark will disappear.
★ About switch between Fahrenheit and Centigrade
Under status of unit off, press MODE and - buttons simultaneously to switch °C and °F
■ Changing batteries and notices
- Slightly to press the place with ☑, along the arrowhead direction to push the back cover of wireless remote control. (As show in figure)
- Take out the old batteries. (As show in figure)
- Insert two new AAA1.5V dry batteries, and pay attention to the polarity. (As show in figure)
- Attach the back cover of wireless remote control. (As show in figure)
★NOTE:
- When changing the batteries, do not use the old or different batteries, otherwise, it can cause the malfunction of the wireless remote control.
- If the wireless remote control will not be used for a long time, please take them out, and don't let the leakage liquid damage the wireless remote control.
● The operation should be in its receiving range. - It should be placed at where is 1m away from the TV set or stereo sound sets.
- If the wireless remote control can not operate normally, please take them out, after 30s later and reinsert, if they cannot normally run, please change them.

Sketch map for changing batteries
Remote control panel
Note:
If wireless remote controller is lost, open the surface panel and operate manually.

1 POWER BUTTON
Operation starts when pressing this button, and stops when pressing this button again.
2 SWING BUTTON
Activate the automatic air swing function.
3 FAN SPEED BUTTON
Select the fan speed HIGH, MID, LOW and AUTO in sequence.
4 TEMP/TIMER BUTTON
Press the ▲ keypad to increase the set (operating) temperature of the unit, and Press the ▼ keypad to decrease the set (operating) temperature of the unit. The temperature setting range is from 16\~30°C
Press the ▲ keypad also to increase the selected time in 1 hour increments, and Press the ▼ keypad to decrease the selected time in 1 hour decrements. The time setting range is from 0\~24 hours.
5 SIGNAL RECEIVER
6 MODE BUTTON
Select the operation mode, or AUTO, COOL, FAN, DRY.
7 FILTER BUTTON
This feature is a reminder to clean the Air Filter (See Care and Cleaning) for more efficient operation and cooling. The LED (light) will illuminate after 250 hours of operation. To reset after cleaning the filter, press the "Check Filter" button and the light will go off.
VENTILATION LEVER
natural_image
Pure electrical circuit lines without any symbolsWhen the slider at the:

-"OPEN" position, the ventilation door opens to allow air, smoke or odors to be expelled from the room.
When the slider at the:

-"CLOSE" position, the ventilation door is closed and the air will be circulated inside the room and conditioned.
Ventilation Lever
Operation Tips
Operation for comfort and economy
Do not overcool the room
temperature. This is not good for health and wastes electricity.
Keep blind or curtains closed.
Do not let sunshine enter the room directly when the air condition is in operation.
Keep the room temp. uniform.
Adjust the vertical and horizontal airflow direction to ensure a uniform temperature in the room. Air can't be discharged to the direction of air-in.


natural_image
Cartoon illustration of a smiling computer monitor with a hand pointing at a window, no text or symbols present
natural_image
Cartoon illustration of a smiling computer character holding a document with arrows pointing downward (no text or symbols)Make sure that the doors and windows are tightly closed. Avoid opening doors and windows as much as possible to keep air conditioning in the room.
Clean the air filter regularly.
Blockages in the air filter reduce dehumidifying effects. Clean the air filter at least once every two weeks.
Ventilate the room occasionally.
Since windows are kept closed, it is a good idea to open them and ventilate the room now and then. When starting the unit, curtains or windows should be closed to prevent the heat/cool leakage.

natural_image
Cartoon illustration of a person pointing at a door with a computer monitor, no text or symbols present
natural_image
Cartoon illustration of a smiling toothpaste being brushed with a griddle (no text or symbols)
natural_image
Simple line drawing of a person standing near a window with curtains (no text or symbols)Caution
Operations for safety and health
1) The plug must be accessible after the appliance is positioned.
2) Do not use this appliance in the laundry.
3) If the power cord is damaged, it must be replaced by the manufacture or its service agent in void of hazard.
- Do not pull out the power cord.
-
Damage to the cord may result in serious electric shocks.
-
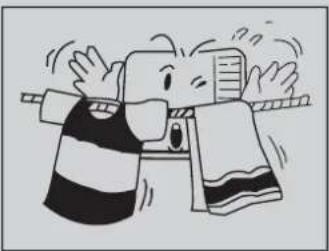
Do not use the air conditioner for other purposes except for cooling the room.
- Do not use the air conditioner for other purposes such as drying clothes, preserving foods, or cultivating vegetables.

natural_image
Illustration of a hand using a power plug to test a fuse, with a switch and a device nearby (no text or symbols)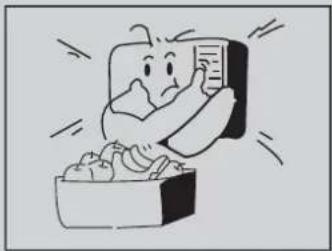
natural_image
Cartoon illustration of a sad character holding a document while standing on a box (no text or symbols present)- Do not block the air intake and outlet vents
This causes lowered performance and irregular operation. - Do not insert sticks or other objects into these vents as it is dangerous to touch the electric components and the fan.
natural_image
Cartoon illustration of a person in striped shirt and holding a tool, with expressive motion lines (no text or symbols)Select the most appropriate temperature.
Pay attention to adjust the temperature to suit the conditions.
Rooms occupied by infants, the elderly, or the sick should be kept at an appropriate temperature.
Do not use heating apparatuses in the vicinity. The air conditioner's plastic parts will melt if exposed to excessive heat.
Avoid exposing the body directly to a continuous unidirectional air flow for long periods.
This is not recommended for health reason.

natural_image
Illustration of a child sleeping on a bed with a thermometer above, no text or symbols present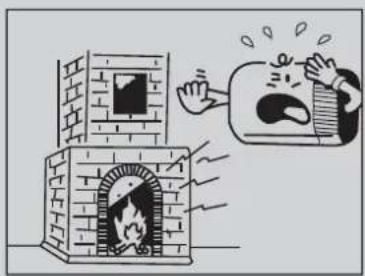
natural_image
Cartoon illustration of a person exiting a brick chamber with a thought bubble showing a crying face (no text or symbols present)
natural_image
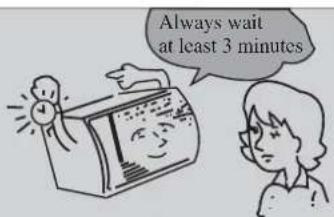
Cartoon illustration of a person reacting to a distressed computer monitor (no text or symbols present)Always wait at least 3 minutes before switching the air conditioner on again after you have switched it off during cooling or heating.
- Care and maintenance
Always turn off the air conditioner and main power supply before cleaning to ensure safety.
Cleaning unit
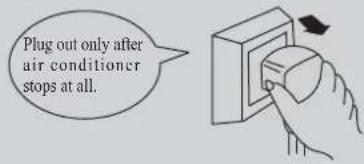
- Cut power off before cleaning.
- Use soft cloth when cleaning cabinet.
If the cabinet is very dirty, dip cloth into warm water below 40°C, dry the cloth and then rub off the dirt.

- Don't use gas, benzene, solvent, wash, chemical solvent, etc. for cleaning.

natural_image
Illustration of a battery with a cross symbol crossed out, next to a stack of paper and a briefcase (no text or symbols present)- Do not splash water directly into indoor
unit, in which there are microcomputer and circuit plate, they must not be drenched with water.

Air filter
The air filter behind the intake grille should be washed at least once every two weeks or as often as it needs cleaning.
How to clean the air filter:
- To remove the air intake grille, grasp the tab on the filter and pull to take out.

- Vacuum the filter on the dusty side to remove light dust.

Vacuum cleaner
- Wash the filter, cleaner side up under gently flowing water to wash out accumulated dust and lint.

- If the filter is very dirty, use a mild household detergent in the wash water.
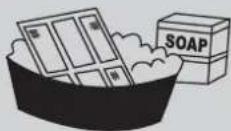
Let the filter dry thoroughly before reinstalling it. If necessary, please ask the professional personnel to clean it.
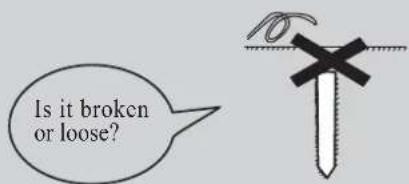
* Check earth wire
* Check if air inlet and outlet of outdoor unit are blocked or not.
- Trouble shooting guide
Please check the following items before asking for repair, it saves your time and money.
| Fault phenomenon Trouble-shooting | ||
| Air conditioner dose not operate at all. |  | * Is there a power failure?* Is the plug out?* Is power fuse or switch off?* Whether the voltage is too high or too low? |
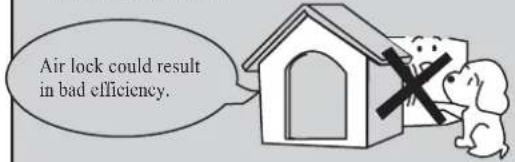
| Cool or heat efficiency is not good. | 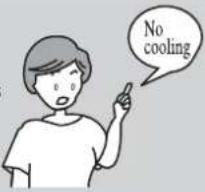 | * Is air inlet or outlet locking?* Is there any other heat/cool source in room?* Are air filters dirty very much?* Is indoor fan speed set at LOW?* Maybe the room is too hot/cool when the unit is started. |
| Foggy air flows out. | 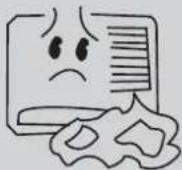 | * At COOL mode operation, sometimes there is foggy air flowing out of indoor unit, this is because the room humid air has been cooling rapidly.* The unit is normal while the indoor outlet is sending out some odor, because the inlet air may be mixed with the smell of furniture and smoke. |
| The air conditioner operation is noisy. |  | * For a noise that sounds like water flowing:This is the sound of frecon flowing inside the air conditioner unit.* For a noise that sounds like a shower:This is the sound of the dehumidifying water being processed inside the air conditioner unit. |
| It seems that condensation is leaking from air conditioner. | * Condensation occurs when the airflow from the air conditioner cools the warm room air. | |
| Air conditioner dose not operate for about 3 minutes when restart. | * This is to protect the mechanism.* Wait about three minutes and operation will begin. | |
Immediately stop all operations and plug out, please contact your dealer in the following situations.
*Operation starts or stops abnormally;
*Power fuse or switch often breaks;
*Carelessly splash water or something into air conditioner;
*Electrical lines are much hot or lines cover breaks;
*Other strange situations.
After service
- If your air conditioner has the questions of quality or anything else, please contact the service center of Philco.

natural_image
Snow-covered forest landscape with multiple evergreen trees and a hazy slope (no text or symbols visible)- PHILCO®
- CONTENTS
- Function
- Introduction
- - Operating Condition
- Power requirement
- - Installation
- Installation precaution:
- Location:
- How to install:
- Installation procedure:
- Installation assistance:
- Drain water for one style:
- Drain water for another style:
- Note:
- Notes for installation
- Remove
- Noise
- Electric wiring
- Parts identification
- Air direction adjustment
- Vertical airflow direction vane
- - Main switch operation procedure (Applicable to Mechanical Models ONLY)
- 1.Main Control Knob
- Thermostat control Knob
- Air Swing Switch
- (Airflow direction adjustment Side-to Side)
- Name and function of wireless remote control
- SWING
- SWING BUTTON
- TIMER ON
- TIMER ON BUTTON
- TIMER OFF
- TIMER OFF BUTTON
- Guide for operation- general operation
- Guide for operation- Optional operation
- Introduction for special function
- ★ About AUTO RUN
- ★ About lock
- ★ About switch between Fahrenheit and Centigrade
- ■ Changing batteries and notices
- ★NOTE:
- Remote control panel
- VENTILATION LEVER
- When the slider at the:
- Operation Tips
- Do not overcool the room
- Keep blind or curtains closed.
- Keep the room temp. uniform.
- Clean the air filter regularly.
- Ventilate the room occasionally.
- Caution
- Operations for safety and health
- - Care and maintenance
- Cleaning unit
- - Trouble shooting guide
- Immediately stop all operations and plug out, please contact your dealer in the following situations.
- After service
Brand : Philco
Model : PWA818R
Category : Air conditioner