
OVC100 - Controller OSD Audio - Free user manual and instructions
Find the device manual for free OVC100 OSD Audio in PDF.


| Product Type | Audio Volume Controller |
| Model | OVC100 |
| Brand | OSD Audio |
| Power Handling | 100 Watts RMS |
| Impedance | 8 Ohms |
| Frequency Response | 20 Hz - 20 kHz |
| Attenuation Steps | 12 steps with detent |
| Connector Type | Spring-loaded speaker terminals |
| Mounting Type | Single-gang wall box |
| Dimensions (H x W x D) | 4.5 x 2.8 x 1.5 inches |
| Weight | 0.2 lbs |
| Operating Voltage | Passive, no power required |
| Material | ABS plastic with white finish |
| Compatibility | Works with most 8-ohm speakers |
| Includes | Knob, faceplate, mounting screws, wire nuts |
| Maintenance | Wipe with dry cloth; avoid liquids |
| Safety | Use within rated power; turn off amplifier before wiring |
| Spare Parts | Knob and faceplate available separately |
| Repairability | Designed for easy replacement; no user-serviceable parts inside |
| Certification | CE, RoHS |
Frequently Asked Questions - OVC100 OSD Audio
User questions about OVC100 OSD Audio
0 question about this device. Answer the ones you know or ask your own.
Ask a new question about this device
Download the instructions for your Controller in PDF format for free! Find your manual OVC100 - OSD Audio and take your electronic device back in hand. On this page are published all the documents necessary for the use of your device. OVC100 by OSD Audio.
USER MANUAL OVC100 OSD Audio
Installation Instructions
Step 1: Determine and set impedance with match switch
- Count the total number of 8 ohm and 4 ohm speakers you are connecting to.
- Determine if the amplifier can support an 8 ohm or 4 ohm speaker load. You should be able to find the information in your amplifier or receivers owner's manual.
- Determine the correct impedance match switch setting using the chart below (See Fig. 2)
- Set the impedance match jumper on all the volume controls in the system to the same position (1/2X, 4X, or 8X). (See Fig. 1.)
Figure 1 Impedance Setting
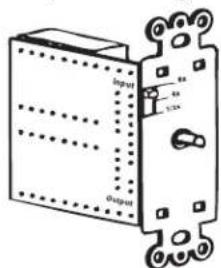
Figure 2 Impedance Chart
| No. of 8 ohm pairs | 1-2 | 3-4 | 5-8 |
| Switch Settings | 1/2x | 4x | 8x |
OSD Audio does not recommend installing more than 8 volume controls in parallel. OSD audio also does not recommend installing more than two 8 Ohm speakers per channel on each volume control without additional impedance protection.
Setting the impedance match switch higher than 1X yield less power per pair of speakers. For example: an amplifier rated at 80 Watts per channel RMS into 8 ohms is to be used for 8 pairs of speakers. In order to accommodate 8 pair of 8 ohms speakers, an 8 impedance match setting must be used, therefore, this will limit to power to 10 watts for each speaker pair, or 1/8th of the amplifier's power. (See Fig. 2)
Step 2: Mounting the enclosure
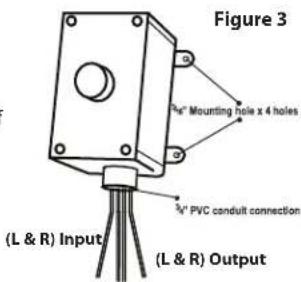
- If conduit is to be used, run the necessary wiring up through the conduit and into the opening at the base of the enclosure.
- Mount the enclosure onto the PVC conduit using the applicable adhesive material
- Use the 4 holes in the back sides of the unit to secure the enclosure to a stationary object or wall. (See Fig. 3.)
Warranty & Repair
All OSD Audio speaker products have (5) year Limited Warranty against defects in materials and workmanship. Proof of purchase must accompany all claims. During the warranty period OSD will replace any defective part and correct any defect in workmanship without charge for either parts or labor.
OSD Audio may replace returned speakers with a product of equal value and performance. In such cases, some modifications to the mounting may be necessary and are not OSD's responsibility. For this warranty to apply, the unit must be installed and used according to its written instructions. If necessary, repairs must be performed by OSD. The unit must be returned to OSD at the owner's expense and with prior written permission. Accidental damage and shipping damage are not considered defects, nor is damaged resulting from abuse or from servicing performed by an agency or person not specifically authorized in writing by OSD.
OSD Audio sells products only through authorized dealers and distributors to ensure that customers obtain proper support and service. Any OSD product purchased from an unauthorized dealer or other source, including retailers, mail over dealers and online sellers will not be honored or serviced under existing OSD warranty policy. Any sale of product by an unauthorized source or other manner not authorized by OSD shall void the warranty on the applicable product.
Damage to or destruction of components due to application of excessive power voids the warranty on those parts. In these cases, repairs will be made on the basis of the retail value of the parts and labor. To return for repairs, you must email customer service at RMA@osdaudio.com for a Returned Merchandise Authorization (RMA) number# then the unit must be shipped to OSD at the owner's expense, along with a note explaining the nature of service required. Be sure to pack the speaker(s) in a corrugated container with at least 3 inches of resilient material to protect the unit from damage in transit.
This Warranty Does Not Cover:
Damage caused by abuse, accident, misuse, negligence, or improper operation (installation) • Any products that have been altered or modified • Any product whose identifying number of decal, serial #, etc. has been altered, defaced or removed • Normal wear and maintenance.
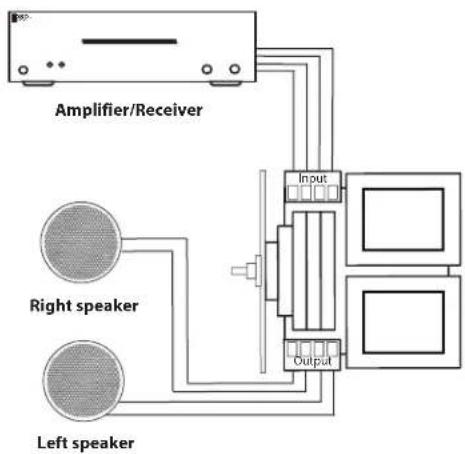
Step 3: Wiring
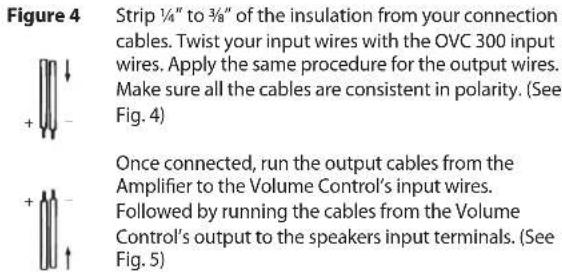
Figure 5 Wiring Diagram
flowchart
graph TD
    A["Amplifier/Receiver"] --> B["Input"]
    C["Right speaker"] --> B
    D["Left speaker"] --> B
    B --> E["Output"]
    style A fill:#f9f,stroke:#333
    style C fill:#ccf,stroke:#333
    style D fill:#cfc,stroke:#333
Step 4: Install volume control in the enclosure
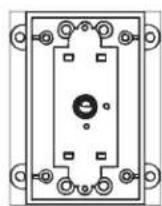
1) Place the volume control into the enclosure
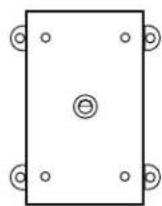
2) Place the cover plate over the enclosure. Make sure the plastic rubber gasket is in place behind the cover plate
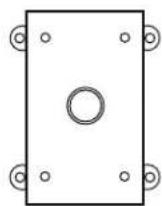
3) Place the control knob onto the volume control past
Technical Specifications
Audio Power Handling: 100 Watts Continuous (RMS)/300 Watts Maximum
Frequency Response: 20Hz - 20kHz
Total Attenuation: 42dB Maximum
Wiring requirement: 14 - 16 gauge wire, input and output (separate): two separate 2 - conductor speaker wires, or one 4 - conductor speaker wire.
Mounting: May be mounted on wall or via PVC conduit
Impedance Matching: 1/2X, 4X & 8X
Unit Dimensions: 3"W x 5½"H x 4"D
Control: Up to 2 speakers
Warranty: 5 Years
Brand : OSD Audio
Model : OVC100
Category : Controller