
MW20F52 - DVD player TOSHIBA - Free user manual and instructions
Find the device manual for free MW20F52 TOSHIBA in PDF.


| Product Type | DVD Player |
| Brand | Toshiba |
| Model | MW20F52 |
| Power Supply | AC 120V, 60Hz |
| Power Consumption | 12W |
| Dimensions (W x H x D) | 430 x 45 x 250 mm |
| Weight | 2.2 kg |
| Disc Compatibility | DVD, DVD-R, DVD-RW, CD, CD-R, CD-RW, MP3, JPEG |
| Video Outputs | Composite, S-Video, Component (YUV) |
| Audio Outputs | Stereo RCA, Coaxial, Optical |
| Progressive Scan | Yes (480p) |
| Dolby Digital Decoding | Yes |
| DTS Compatible | Yes |
| Remote Control | Included (with batteries) |
| Playback Features | Zoom, Repeat, A-B Repeat, Program Play |
| Parental Control | Yes (multi-level) |
| Laser Safety | Class 1 Laser Product |
| Maintenance | Clean lens with soft dry cloth |
| Included Accessories | Remote Control, AV Cable, User Manual |
Frequently Asked Questions - MW20F52 TOSHIBA
User questions about MW20F52 TOSHIBA
0 question about this device. Answer the ones you know or ask your own.
Ask a new question about this device
Download the instructions for your DVD player in PDF format for free! Find your manual MW20F52 - TOSHIBA and take your electronic device back in hand. On this page are published all the documents necessary for the use of your device. MW20F52 by TOSHIBA.
USER MANUAL MW20F52 TOSHIBA
natural_image
Illustration of a vintage desktop computer with monitor, ports, and status bar (no text or symbols)Illustration of MW20F52
Introduction
2
Connections
13
Basic setup
19
TV operation
24
Playback (VCR)
34
Recording (VCR)
39
Other functions (VCR)
43
Basic playback (DVD)
45
Advanced playback (DVD)
48
Function setup (DVD)
60
Others
66
Dear Customer,
Thank you for purchasing this Toshiba TV. This manual will help you use the many exciting features of your new TV. Before operating the TV, please read this manual completely, and keep it nearby for future reference.
Safety Precautions
WARNING
TO REDUCE THE RISK OF FIRE OR ELECTRIC SHOCK, DO NOT EXPOSE THIS APPLIANCE TO RAIN OR MOISTURE.


The lightning symbol in the triangle tells you that the voltage inside this product may be strong enough to cause an electric shock. DO NOT TRY TO SERVICE THIS PRODUCT YOURSELF.

The exclamation mark in the triangle tells you that important operating and maintenance instructions follow this symbol.
CAUTION: To reduce the risk of electric shock, do not use the polarized plug with an extension cord, receptacle, or other outlet unless the blades can be inserted completely to prevent blade exposure.
NOTE TO CATV INSTALLERS
This is a reminder to call the CATV system installer's attention to Article 820-40 of the NEC, which provides guidelines for proper grounding and, in particular, specifies that the cable ground shall be connected to the grounding system of the building, as close to the point of cable entry as practical. For additional antenna grounding information, see items 25 and 26 on page 4.
NOTICE OF POSSIBLE ADVERSE EFFECTS ON TV PICTURE DISPLAY
If a fixed (non-moving) pattern or image remains on the TV screen for extended periods of time, the image can become permanently ingrained in the cathode ray tube(s) of the TV and cause subtle but permanent ghost images. This type of damage is NOT COVERED BY YOUR WARRANTY. See page 4 for details.
It Makes A Difference Where Your TV Stands

Congratulations on your purchase! As you enjoy your new TV, keep these safety tips in mind:
The Issue
□If you are like most consumers, you have a TV in your home. Many homes, in fact, have more than one TV.
☐The home theater entertainment experience is a growing trend, and larger TVs are popular purchases; however, they are not always supported on the proper TV stands.
☐ Sometimes TVs are improperly secured or inappropriately situated on dressers, bookcases, shelves, desks, audio speakers, chests, or carts. As a result, TVs may fall over, causing unnecessary injury.
Toshiba Cares!
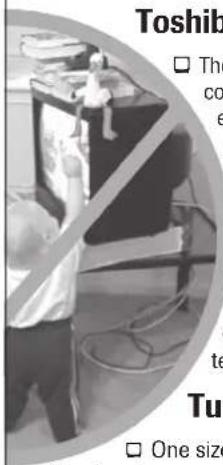
☐ The consumer electronics industry is committed to making home entertainment enjoyable and safe.
The Consumer Electronics Association formed the Home Entertainment Support Safety Committee, comprised of TV and consumer electronics furniture manufacturers, to advocate children's safety and educate consumers and their families about television safety.
Tune Into Safety
☐ One size does NOT fit all! Use appropriate furniture large enough to support the weight of your TV (and other electronic components).
☐ Use appropriate angle braces, straps, and anchors to secure your furniture to the wall (but never screw anything directly into the TV).
□ Carefully read and understand the other enclosed instructions for proper use of this product.
☐ Do not allow children to climb on or play with furniture and TVs.
□ Avoid placing any item on top of your TV (such as a VCR, remote control, or toy) that a curious child may reach for.
Remember that children can become excited while watching a program and can potentially push or pull a TV over.
☐ Share our safety message about this hidden hazard of the home with your family and friends. Thank you!


2500 Wilson Blvd. Arlington, VA 22201 U.S.A. Tel. 703-907-7600 Fax 703-907-7690 www.CE.org
CEA is the Sponsor, Producer and Manager of the International CES®
IMPORTANT SAFEGUARDS
Important Safety Instructions
1) Read these instructions.
2) Keep these instructions.
3) Heed all warnings.
4) Follow all instructions.

5) Do not use this apparatus near water.
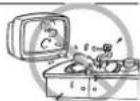
6) Clean only with a dry cloth.
7) Do not block any ventilation openings. Install in accordance with the manufacturer's instructions.

8) Do not install near any heat sources such as radiators, heat registers, stoves, or other apparatus (including amplifiers) that produce heat.

9) Do not defeat the safety purpose of the polarized or grounding type plug. A polarized plug has two blades with one wider than the other. A grounding type plug has two blades and a third grounding
prong. The wide blade or the third prong are provided for your safety. If the provided plug does not fit into your outlet, consult an electrician for replacement of the obsolete outlet.
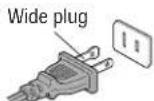
10) Protect the power cord from being walked on or pinched, particularly at plugs, convenience receptacles, and the point where it exits the apparatus.

11) Only use attachments/accessories specified by the manufacturer.
12) Use only with the cart, stand, tripod, bracket, or table specified by the manufacturer, or sold with the apparatus. When a cart is used, use caution when moving the cart/apparatus combination to avoid injury from tip-over

13) Unplug this apparatus during lightning storms or when unused for long periods of time.

14) Refer all servicing to qualified service personnel.
Servicing is required when the apparatus has been damaged in any way, such as power supply cord or plug is damaged, liquid has been spilled or objects have fallen into the apparatus, the apparatus has been exposed to rain or moisture, does not operate normally, or has been dropped.

15)

CAUTION: To reduce the risk of electric shock, do not use the polarized plug with an extension cord, receptacle, or other outlet unless the blades can be inserted completely to prevent blade exposure.
Installation, Care, and Service Installation
Follow these recommendations and precautions and heed all warnings when installing your TV:
16) Never modify this equipment. Changes or modifications may void: a) the warranty, and b) the user's authority to operate this equipment under the rules of the Federal Communications Commission.
17) DANGER: RISK OF SERIOUS PERSONAL INJURY, DEATH, OR EQUIPMENT
DAMAGE! Never place the TV on an unstable cart, stand, or table. The TV may fall, causing serious personal injury, death, or serious damage to the TV.

18) Never place or store the TV in direct sunlight; hot, humid areas; areas subject to excessive dust or vibration or locations with temperatures at or below 41°F (5°C).
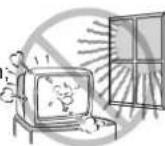
19) Always place the TV on the floor or a sturdy, level, stable surface that can support the weight of the unit.

20) Never place items such as vases, aquariums, or candles on top of the TV.

21) Never block or cover the slots or openings in the TV cabinet back, bottom, and sides. Never place the TV:
• on a bed, sofa, rug, or similar surface;
•too close to drapes, curtains, or walls; or
- in a confined space such as a bookcase, built-in cabinet, or any other place with poor ventilation.
The slots and openings are provided to protect the TV from overheating and to help maintain reliable operation of the TV.
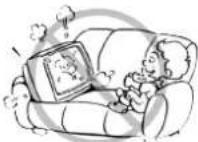
22) Never allow anything to rest on or roll over the power cord, and never place the TV where the power cord is subject to wear or abuse.

23) Never overload wall outlets and extension cords.

IMPORTANT SAFEGUARDS S
24) Always operate this equipment from a 120V AC, 60 Hz power source only.

25) Always make sure the antenna system is properly grounded to provide adequate protection against voltage surges and built-up static charges (see Section 810 of the National Electric Code).
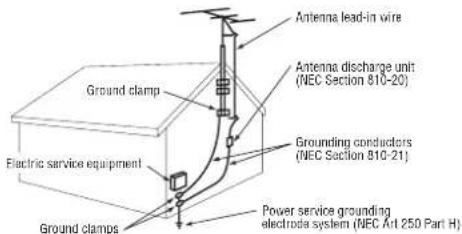
26) DANGER: RISK OF SERIOUS
PERSONAL INJURY OR DEATH!
Use extreme care to make sure you are never in a position where your body (or any item you are in contact with, such as a ladder or screwdriver) can accidentally touch overhead power lines. Never locate the antenna near overhead power lines or other electrical circuits.
- Never attempt to install any of the following during lightning activity:
a) an antenna system; or b) cables, wires, or any home theater component connected to an antenna or phone system.
Care
For better performance and safer operation of your TOSHIBA TV, follow these recommendations and precautions:
27) Always sit approximately 10–25 feet away from the TV and as directly in front of it as possible. The picture can appear dull if you sit too far to the left or right of the TV, or if sunlight or room lights reflect on the screen. Turn the TV off to check for reflections on the screen, and then remove the source of reflections while viewing the TV.
28) Always unplug the TV before cleaning. Never use liquid or aerosol cleaners.
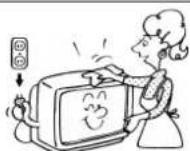
29) WARNING: RISK OF ELECTRIC SHOCK!
Never spill liquids or push objects of any kind into the TV cabinet slots.
30) [This item applies to projection TVs only.] If the air temperature rises suddenly (for example, when the TV is first delivered), condensation may form on the lenses. This can make the picture appear distorted or the color appear faded. If this happens, turn off the TV for 6 to 7 hours to allow the condensation to evaporate.
31) F or added protection of your TV from lightning and power surges, always unplug the power cord and disconnect the antenna from the TV if you leave the TV unattended or unused for long periods of time.
32) During normal use, the TV may make occasional snapping or popping sounds. This is normal, especially when the unit is being turned on or off. If these sounds become frequent or continuous, unplug the power cord and contact a Toshiba Authorized Series

33) Possible Adverse Effects on TV Picture Display If a fixed (non-moving) pattern or image remains on the TV screen for extended periods of time, the image can become permanently ingrained in the cathode ray tube(s) of the TV and cause subtle but permanent ghost images. This type of damage is NOT COVERED BY YOUR WARRANTY.
Never leave the TV on for extended periods of time while it is displaying the following images or formats:
- Fixed Images, including but not limited to PIP/POP windows, closed captions, video game patterns, TV station logos, stock tickers, and websites. - Special Formats that do not use the entire screen, including but not limited to widescreen or letterbox format media viewed on a 4:3 aspect ratio display (with gray or black bars at the top and bottom of the screen); or 4:3 aspect ratio format media viewed on a widescreen/16:9 aspect ratio display (with gray or black bars on the left and right sides of the screen).
Service
34) WARNING: RISK OF ELECTRIC SHOCK! Never attempt TV yourself. Opening an
removing the covers may expose you to dangerous voltage or other hazards. Refer all servicing to a Toshiba Authorized Service Center.

35) If you have the TV serviced:
- Ask the service technician to use only replacement parts specified by the manufacturer.
- Upon completion of service, ask the service technician to perform routine safety checks to determine that the TV is in safe operating condition.
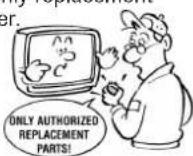
36) When the TV reaches the end of its useful life, ask a qualified service technician to properly dispose of the TV. Improper disposal may result in a picture tube implosion and possible personal injury.
SAFETY PRECAUTION/ Power source
WARNING: This equipment has been tested and found to comply with the limits for a Class B digital device, pursuant to Part 15 of the FCC Rules. These limits are designed to provide reasonable protection against harmful interference in a residential installation. This equipment generates, uses and can radiate radio frequency energy and, if not installed and used in accordance with the instructions, may cause harmful interference to radio communications. However, there is no guarantee that interference will not occur in a particular installation. If this equipment does cause harmful interference to radio or television reception, which can be determined by turning the equipment off and on, the user is encouraged to try to correct the interference by one or more of the following measures:
- Reorient or relocate the receiving antenna.
- Increase the distance between the equipment and receiver.
- Connect the equipment into an outlet on a circuit different from that to which the receiver is connected.
- Consult the dealer or an experienced radio/TV technician for help.
CAUTION: Changes or modifications not expressly approved by the party responsible for compliance with the FCC (Federal Communications Commission) Rules could void the user's authority to operate this equipment.
CAUTION:
THIS DIGITAL VIDEO PLAYER EMPLOYS A LASER SYSTEM.
TO ENSURE PROPER USE OF THIS PRODUCT, PLEASE READ THIS OWNER'S MANUAL CAREFULLY AND RETAIN FOR FUTURE REFERENCE, SHOULD THE UNIT REQUIRE MAINTENANCE, CONTACT AN AUTHORIZED SERVICE LOCATION.
USE OF CONTROLS, ADJUSTMENTS OR THE PERFORMANCE OF PROCEDURES OTHER THAN THOSE SPECIFIED HEREIN MAY RESULT IN HAZARDOUS RADIATION EXPOSURE.
TO PREVENT DIRECT EXPOSURE TO LASER BEAM, DO NOT TRY TO OPEN THE ENCLOSURE. VISIBLE LASER RADIATION MAY BE PRESENT WHEN THE ENCLOSURE IS OPENED. DO NOT STARE INTO BEAM.
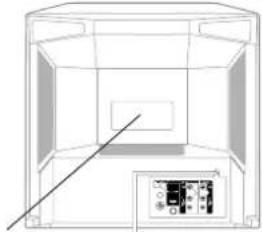
Location of the required Marking
The rating sheet and the safety caution are on the rear of the unit.
natural_image
Technical line drawing of a 3D enclosure or enclosure with internal components and a diagonal line (no text or symbols)CERTIFICATION: COMPLIES WITH FDA RADIATION PERFORMANCE STANDARDS, 21 CFR SUBCHAPTER J.
WARNING: This product contains a laser beam. Do not attempt to stare at the beam through the DVD disc tray or the ventilation openings. Staring directly at the beam may cause permanent damage to your eyesight.
IMPORTANT RECYCLING INFORMATION
This product uses both Cathode Ray Tube (CRT) and other components that contain lead. In your community there might be regulations that require you to dispose these materials properly under environmental considerations. Please contact your local authorities, or the Electronic Industries Alliance (http://www.eiae.org) for disposal or recycling information.
Power source
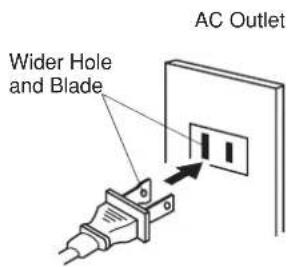
Polarized AC Cord Plug (One blade is wider than the other.)
TO USE AC POWER SOURCE
Use the AC polarized line cord provided for operation on AC. Insert the AC cord plug into a standard 120V 60Hz polarized AC outlet.
Notes:
- Never connect the AC line cord plug to other than the specified voltage (120V 60Hz). Use the attached power cord only.
- If the polarized AC cord does not fit into a non-polarized AC outlet, do not attempt to file or cut the blade. It is the user's responsibility to have an electrician replace the obsolete outlet.
- If you cause a static discharge when touching the unit and the unit fails to function, simply unplug the unit from the AC outlet and plug it back in. The unit should return to normal operation.
- If the AC cord plug is plugged in for the first time, wait for approx. 5 seconds before pressing the POWER button.
Precautions
Notes on handling
■ When shipping the unit, the original shipping carton and packing materials come in handy. For maximum protection, repack the unit as it was originally packed at the factory.
■ Do not use volatile liquids, such as insect spray, near the unit. Do not leave rubber or plastic products in contact with the unit for a long time. They will leave marks on the finish.
■ The top and rear panels of the unit may become warm after a long period of use. This is not a malfunction.
■ When the unit is not in use, be sure to remove the disc and the video cassette turn off the power.
If you do not use the unit for a long period, the unit may not function properly in the future. Turn on and use the unit occasionally.
Notes on locating
■ Place the unit on a level surface. Do not use it on a shaky or unstable surface such as a wobbling table or inclined stand. The loaded disc or the video tape may come off the proper position and cause damage to the unit.
■ When you place this unit near a TV, radio, or VCR, the playback picture may become poor and the sound may be distorted. In this case, place the unit away from the TV, radio or VCR.
Notes on cleaning
Use a soft, dry cloth for cleaning.
- For stubborn dirt, Do not use any type of solvent, such as thinner and benzine, as they may damage the surface of the unit.
- If you use a chemical saturated cloth to clean the unit, follow that product's instructions.
Notes on moisture condensation
Moisture condensation damages the unit. Please read the following carefully.
Moisture condensation occurs, for example, when you pour a cold drink into a glass on a warm day. Drops of water form on the outside of the glass. In the same way, moisture may condense on the head drum or the optical pick-up lens inside this unit, one of the most crucial internal parts of the unit.

■ Moisture condensation occurs during the following cases.
- When you bring the unit directly from a cold place to a warm place.
- When you use the unit in a room where you just turned on the heater, or a place where the cold wind from the air conditioner directly hits the unit.
- In summer, when you use the unit in a hot and humid place just after you move the unit from an air conditioned room.
● When you use the unit in a humid place.

■ Do not use the unit when moisture condensation may occur.
If you use the unit in such a situation, it may damage discs and internal parts. Remove the disc or the video tape, connect the power cord of the unit to the wall outlet, turn on the unit, and leave it for two or three hours. After two or three hours, the unit will have warmed up and evaporated any moisture. Keep the unit connected to the wall outlet and moisture condensation will seldom occur.


ntents
Introduction
IMPORTANT SAFEGUARDS 3
SAFETY PRECAUTIONS 5
Power source 5
Precautions 6
Contents 7
Notes and Information 8
Identification of controls 10
Connections
Antenna connections.... 13
Cable TV connections 14
Connecting to optional equipment.... 15
Connecting to a USB Storage Device 18
Basic setup
Starting setup 19
Clock setting.... 20
Setting the language 23
TV/VCR operation status 23
TV operation
TV operation.... 24
Closed captions.... 26
To memorize channels 27
Setting the V-Chip 28
To set the on timer 30
To set the off timer 31
Picture control adjustment.... 32
Adjusting the picture preference 32
Sound control adjustment 33
Stereo and Second Audio Program (SAP) ..... 33
Playback (VCR)
Loading and unloading a cassette tape ..... 34
Cassette tape playback 35
Special playback 36
Convenient function 37
Recording (VCR)
Recording a TV program 39
One-touch Timer Recording (OTR) 40
Timer recording 41
Other functions (VCR)
Duplicating a video tape 43
Recording a DVD/CD disc 44
Basic playback (DVD)
Playing a disc 45
Advanced playback (DVD)
Zooming 48
Locating desired scene 48
Repeat playback.... 49
A-B Repeat playback.... 49
Program playback 50
Random playback....50
Changing angles 51
Title selection 51
DVD menu....51
Changing soundtrack language 52
Subtitles 52
Disc status.... 53
To turn off the PBC 53
MP3/WMA/JPEG/DivX® and Audio CD
operation 54
Function setup (DVD)
Customizing the function settings 60
Temporary disabling of rating level by
DVD disc 65
Others
Language code list 66
Reception disturbances.... 67
Troubleshooting 68
Specifications 70
Limited United States Warranty 71
Notes and Information
On handling discs
● Do not touch the playback side of the disc.


Playback side
● Do not attach paper or tape to discs.


On cleaning discs
● Fingerprints and dust on the disc cause picture and sound deterioration. Wipe the disc from the center outwards with a soft cloth. Always keep the disc clean.

- Do not use any type of solvent such as thinner, benzine, commercially available cleaners or antistatic spray for vinyl LPs. It may damage the disc.
On storing discs
- Do not store discs in a place subject to direct sunlight or near heat sources.
- Do not store discs in places subject to moisture and dust such as a bathroom or near a humidifier.
● Store discs vertically in a case. Stacking or placing objects on discs outside of their case may cause warping.
On Video CDs
This DVD supports Video CDs equipped with the PBC (Version 2.0) function. (PBC is the abbreviation of Playback Control.) You can enjoy two playback variations depending on types of discs.
• Video CD not equipped with PBC function (Version 1.1)
Sound and movie can be played on this DVD in the same way as an audio CD.
• Video CD equipped with PBC function (Version 2.0)
In addition to operation of a Video CD not equipped with the PBC function, you can enjoy playback of interactive software with search function by using the menu displayed on the TV screen (Menu Playback). Some of the functions described in this owner's manual may not work with some discs.
Structure of disc contents
Normally, DVD video discs are divided into titles, and the titles are sub-divided into chapters. Video CDs and Audio CDs are divided into tracks.
DVD video disc

Video CD/Audio CD
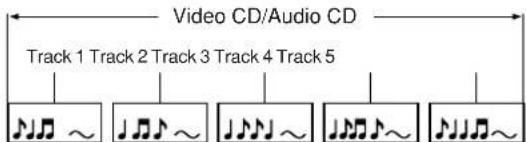
Each title, chapter or track is assigned a number, which is called "title number", "chapter number" or "track number" respectively. There may be discs that do not have these numbers.
Notes on region numbers
The region number of this unit is 1. If region numbers, which stand for their playable area, are printed on your DVD video disc and you do not find 📄 or 📄, disc playback will not be allowed by the player. (In this case, the unit will display a message on-screen.)
Notes on copyright
The unauthorized recording, use, distribution, or revision of copyrighted materials including, without limitation, television programs, videotapes, and DVDs, is prohibited under the Copyright Laws of the United States and other countries, and may subject you to civil and criminal liability.
This product incorporates copyright protection technology that is protected by method claims of certain U.S. patents and other intellectual property rights owned by Macrovision Corporation and other rights owners. Use of this copyright protection technology must be authorized by Macrovision Corporation, and is intended for home and other limited viewing uses only unless otherwise authorized by Macrovision Corporation. Reverse engineering or disassembly is prohibited.
About this owner's manual
This owner's manual explains the basic instructions of this unit. Some DVD video discs are produced in a manner that allows specific or limited operation during playback. As such, the unit may not respond to all operating commands. This is not a defect in the unit. Refer to instruction notes of discs.
The following symbol may appear on the TV screen during operation.

It means that the operation is not permitted by the unit or the disc.
For example, sometimes it is unable to stop the playback of copyright message of the disc when the STOP (■) button is pressed. Alternatively, this symbol may also indicate that the feature is not available for the disc.
USB Port Information
The USB port can be connected to USB storage devices (USB memory, memory card readers, [external USB hard drives, external USB optical drives], MP3 and WMA music players, and certain cameras with USB connectivity) that comply with the standards for the USB Mass Storage Class of USB compatible equipment. Because there are a broad variety of such devices, some functions of your storage device may not operate properly with the TV or it may not operate at all with the TV.
From the USB port, this TV is designed to display compatible JPEG, WMA, MP3 and DivX® data files. DivX VOD content and WMA content protected by DRM (digital rights management) is not supported for storage devices connected to the USB port.
Proper function may depend upon having the proper version of firmware installed on your storage device, and may further depend upon memory capacity and the connection status. The USB port has been tested and found to operate with test samples of the equipment listed below. You may find that versions of this equipment available to you do not operate properly for all functions or at all. The USB port can only be connected to USB storage devices (USB memory, memory card readers, [external USB hard drives, external USB optical drives], MP3 and WMA music players, and certain cameras with USB connectivity) that comply with the standards for the USB Mass Storage Class of USB compatible equipment.
Please refer to "Connecting to a USB Storage Device" ^18 for details and certain important precautions on connecting a USB storage device to this TV.
| Equipment | ModelsBrand | |
| Memory Card Reader | San Disk | SDDR-89 |
| ZIO | CM-28100 | |
| GE | HO97949 | |
| Digital Camera | Nikon | COOLPIX P2 |
| FUJIFILM | FinePix A345 | |
| USB Memory | Lexar | JDA1GB-275 |
| San Disk | SDCZ2-512-A10 | |
| PNY | PFD01GU20RF | |
| MP3 Player | SAMSUNG | YP-T7Z |
| Sony | NW-E507 | |
| RCA | RD2780 |
playable discs
This unit can play the following discs.
| Disc Mark | Contents | Disc Size | Maximum playback time | |
| DVD video discs |   | Audio + Video (moving pictures) | 12 cm | Approx. 4 hours (single sided disc) |
| Approx. 8 hours (double sided disc) | ||||
| 8 cm | Approx. 80 minutes (single sided disc) | |||
| Approx. 160 minutes (double sided disc) | ||||
| Video CDs |  | Audio + Video (moving pictures) | 12 cm | Approx. 74 minutes (single sided disc) |
| 8 cm | Approx. 20 minutes (single sided disc) | |||
| Audio CDs |  | Audio | 12 cm | Approx. 74 minutes (single sided disc) |
| 8 cm | Approx. 20 minutes (single sided disc) | |||
| The following discs are also available.● DVD-R/RW discs of DVD video format● CD-R/CD-RW discs of CD-DA, Video CD, MP3, WMA, JPEG or DivX® format● Kodak picture CD and FUJICOLOR CD format Some of these discs may be incompatible. | ||||
- Y ou cannot play discs other than those listed above.
- Y ou cannot play discs of DVD-RAM, DVD-ROM, Photo CD, etc., or non standardized discs even if they may be labeled as above.
- Some CD-R/RWs cannot be played back depending on the recording conditions.
- This unit uses the NTSC color system, and cannot play DVD video discs recorded in any other color system (PAL, SECAM, etc.).
Because of problems and errors that can occur during the creation of DVD software and/or the manufacture of DVD discs, Toshiba cannot guarantee that this player will play every feature of every DVD bearing the DVD logo. As one of the creators of DVD technology, Toshiba DVD players are manufactured using the highest standards of quality, and as a result, such incompatibilities are rare. If you happen to experience any difficulty playing a DVD on a Toshiba DVD player, please feel free to call our Contact listed in "How to Obtain Warranty Service" (see back cover page).
DVD is a trademark of DVD Format/Logo Licensing Corporation.
Identification of controls
See the page in □ for details.
This owner's manual uses the illustrations of MW20F52. MW24F52 has some differences in appearance
from the illustrations. Example: Model MW24F52 has a door on the front panel.
Front panel

Model MW24F52 has a door on the front panel. Please open it to access the *PHONES jack and the *AUDIO (L/R)/VIDEO IN (LINE IN 2) jacks.
Rear panel
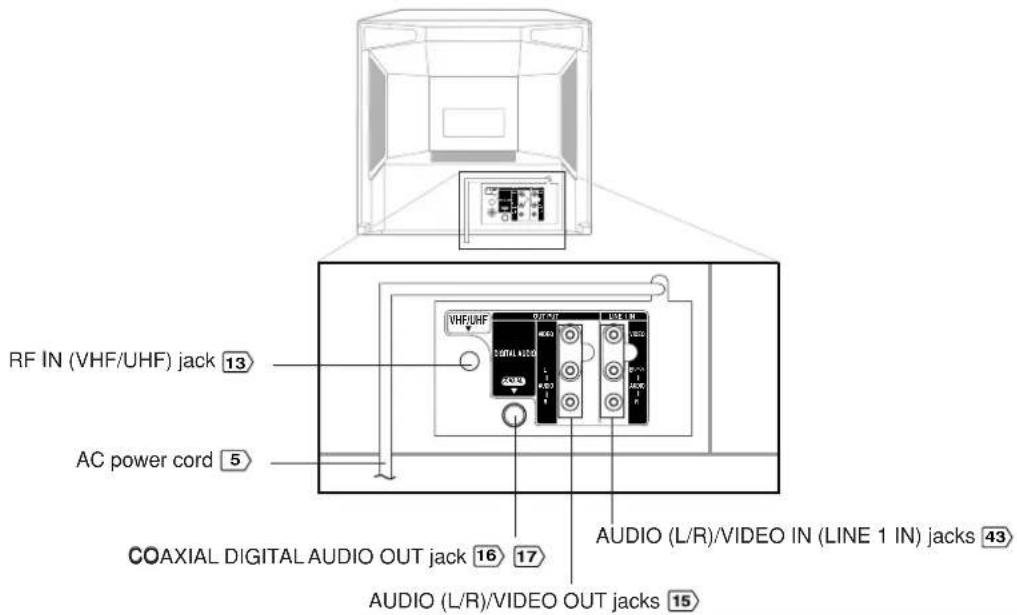
Remote control
The instructions in this manual describe the function on the remote control. See the page in for details.

Identification of controls (Continued)
Inserting batteries
1 Open the battery compartment cover in the direction of the arrow.
2 Install two "R03/AAA" batteries (supplied), paying attention to the polarity diagram in the battery compartment.
3 Replace the compartment cover.

natural_image
Diagram of a mechanical component with an arrow indicating direction (no text or symbols)
natural_image
Diagram of a battery with two batteries and an open circuit board, showing charge distribution (no text or symbols)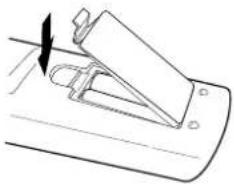
natural_image
Diagram of a mechanical component with an arrow indicating direction (no text or symbols)Caution:
Never throw batteries into a fire.
Notes:
- Be sure to use AAA size batteries.
- Dispose of batteries in a designated disposal area.
- Batteries should always be disposed of with the environment in mind. Always dispose of batteries in accordance with applicable laws and regulations.
- If the remote control does not operate correctly, or if the operating range becomes reduced, replace batteries with new ones.
- When necessary to replace batteries in the remote control, always replace both batteries with new ones. Never mix battery types or use new and used batteries in combination.
• Always remove batteries from remote control if they are dead or if the remote control is not to be used for an extended period of time. This will prevent battery acid from leaking into the battery compartment.
Remote control basics
- Press POWER to turn the unit on or off.
- Select your desired operating mode (TV/VCR or DVD) using TV/VCR or DVD.
- T ap CH or Yo move through the channels one channel at a time.
- The Direction buttons ( ▲/▼/) are also used to navigate on-screen menu system.
- You can directly access specific channels using Direct channel selection buttons.
- Press POWER to turn the unit on or off.
- Select your desired operating mode (TV/VCR or DVD) using TV/VCR or DVD.
- T ap CH or Yo move through the channels one channel at a time.
- The Direction buttons (▲/▼/) are also used to navigate on-screen menu system.
- You can directly access specific channels using Direct channel selection buttons.
Operation:
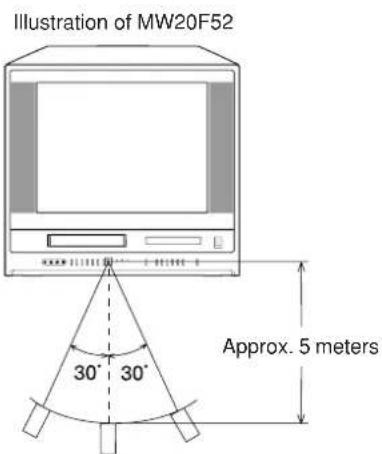
- Aim the remote control at the remote sensor and press control buttons to operate.
- Operate the remote control within 30^ angle on either side of the remote sensor, up to a distance of approx. 5 meters.
Antenna connections
If you are using an indoor or outdoor antenna, follow the instructions below that correspond to your antenna system. If you are using a cable TV service (CABLE), see page 14 for Cable TV connections.
Combination VHF/UHF antenna (Single 75 ohm cable or 300 ohm twin-lead wire)

Connect the 75 ohm cable from the combination VHF/UHF antenna to the antenna jack.
If your combination VHF/UHF antenna has a 300 ohm twin-lead wire, the use of the 300-75 ohm matching transformer may be necessary.
Combination VHF/UHF antenna (Separate VHF and UHF 300 ohm twin-lead wires)

Connect the UHF 300 ohm twin-lead wire to the combiner (not supplied). Connect the VHF 300 ohm twin-lead wire to the 300-75 ohm matching transformer. Attach the transformer to the combiner, then attach the combiner to the antenna jack.
Separate VHF/UHF antennas (75 ohm VHF cable and 300 ohm UHF twin-lead wires)
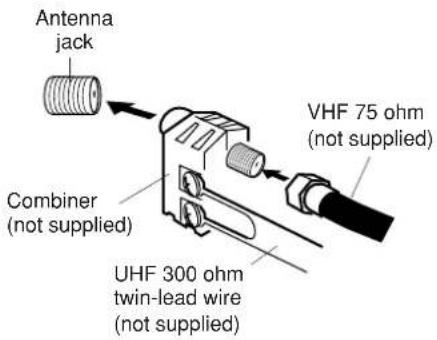
Connect the VHF 75 ohm cable and UHF 300 ohm twin-lead wire to the combiner (not supplied). Attach the combiner to the antenna jack.

Cable TV connections
This unit has an extended tuning range and can tune most cable channels without using a Cable TV converter box. Some cable companies offer "premium pay channels" in which the signal is scrambled. Descrambling these signals for normal viewing requires the use of a descrambler device which is generally provided by the cable company.
For subscribers to basic cable TV service
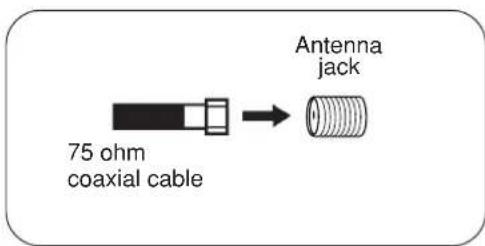
For basic cable service not requiring a converter/descrambler box, connect the Cable TV 75 ohm coaxial cable directly to the Antenna jack on the back of the unit.
For subscribers to scrambled cable TV service
If you subscribe to a cable TV service which requires the use of a converter/descrambler box, connect the incoming 75 ohm coaxial cable to the converter/descrambler box. Using another 75 ohm coaxial cable, connect the output jack of the converter/descrambler box to the antenna jack on the unit. Follow the connections shown below. Set the unit to the output channel of the converter/descrambler box (usually channel 3 or 4) and use the converter/descrambler box to select channels.

flowchart
graph LR
    A["Incoming 75 ohm Cable TV"] --> B["Converter/descrambler"]
    B --> C["75 ohm cable to the unit"]
    C --> D["Antenna jack"]
For subscribers to unscrambled basic cable TV service with scrambled premium channels
If you subscribe to a cable TV service in which basic channels are unscrambled and premium channels require the use of a converter/descrambler box, you may wish to use a signal splitter and an A/B Switch box (available from the cable company or an electronics supply store). Follow the connections shown below. With the switch in the "B" position, you can directly tune any nonscrambled channels on your unit. With the switch in the "A" position, tune your unit to the output of the converter/descrambler box (usually channel 3 or 4) and use the converter/descrambler box to tune scrambled channels.

flowchart
graph LR
    A["Incoming 75 ohm Cable TV"] --> B["Splitter"]
    B --> C["Converter/descrambler"]
    C --> D["A/B switch"]
    D --> E["75 ohm cable to the unit"]
    E --> F["Antenna jack"]
Connecting to optional equipment
Before connecting the unit to other equipment, be sure to turn off the power and unplug all of the equipment from the wall outlet before making any connections. You can enjoy the camcorder or high quality dynamic sounds of DVD video discs or audio CDs by connecting the unit to optional audio equipment.
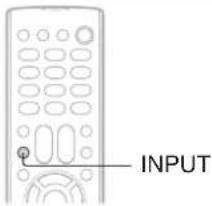
Using the audio/video inputs
Press INPUT repeatedly to select the desired mode.
"LINE1", "LINE2" or TV channel will display on the screen for 4 seconds.

flowchart
graph LR
    A["TV Channel LINE1\n(Back)"] --> B["LINE2\n(Front)"]

Note: This key will not operate in DVD mode.
Connecting to a camcorder
To playback from the camcorder, connect the camcorder to the unit as shown.

Signal flow

Model MW24F51 has a door on the front panel. Please open it to access the PHONES jack and the AUDIO (L/R)/VIDEO IN (LINE IN 2) jacks.
Connecting to an audio system
Connect the unit to your audio system.

To audio inputs of the amplifier

connecting to optional equipment (Continued)
You can enjoy high quality dynamic sounds by connecting the unit to optional audio equipment.
• This section uses the following reference mark.
: Front speaker : Rear speaker : Sub woofer
☐ : Center speaker → : Signal flow
Connecting to an amplifier equipped with a Dolby Digital decoder
Dolby Digital
Dolby Digital is the surround sound technology used in theaters showing the latest movies, and is now available to reproduce this realistic effect in the home. You can enjoy motion picture and live concert DVD video discs with this dynamic realistic sound by connecting the unit to a 6 channel amplifier equipped with a Dolby Digital decoder or Dolby Digital processor. If you have a Dolby Surround Pro Logic decoder, you will obtain the full benefit of Pro Logic from the same DVD movies that provide full 5.1-channel Dolby Digital soundtracks, as well as from titles with the Dolby Surround mark.

flowchart
graph TD
    A["Amplifier equipped with a Dolby Digital decoder"] --> B["To COAXIAL type digital audio input"]
    B --> C["75 Ω coaxial cable (not supplied)"]
    C --> D["To COAXIAL DIGITAL AUDIO OUT"]
    D --> E["Use DVD video discs encoded via the Dolby Digital recording system."]
    style A fill:#f9f,stroke:#333
    style E fill:#ccf,stroke:#333
Connecting to an amplifier equipped with Dolby Surround Pro Logic
Dolby Surround Pro Logic
You can enjoy the dynamic realistic sound of Dolby Surround Pro Logic by connecting an amplifier and speaker system (right and left front speakers, a center speaker, and one or two rear speakers).
■With an amplifier equipped with Dolby Digital
Connect the equipment the same way as described in "Connecting to an amplifier equipped with a Dolby Digital decoder." Refer to that amplifier's owner's manual and set the amplifier so that you can enjoy Dolby Surround Pro Logic sound.
■With an amplifier not equipped with Dolby Digital Connect the equipment as follows.
- This connection is only suitable for Video CDs and Audio CDs.

flowchart
graph TD
    A["Input"] --> B["Amplifier equipped with Dolby Surround Pro Logic"]
    C["Input"] --> B
    D["Input"] --> B
    B --> E["To audio input"]
    B --> F["To AUDIO (L/R) OUT"]
    F --> G["Output sound from rear speakers will be monaural even if you connect two rear speakers."]
    F --> H["Audio cable (not supplied)"]
Connecting to an amplifier equipped with a DTS decoder
Digital Theater Systems (DTS)
DTS is a high quality surround technology used in theaters and now available for home use, on DVD video discs or audio CDs. If you have a DTS decoder or processor, you can obtain the full benefit of 5.1 channel DTS encoded sound tracks on DVD video discs or audio CDs.

flowchart
graph TD
    A["Amplifier equipped with a DTS decoder"] --> B["To COAXIAL type digital audio input"]
    B --> C["75 Ω coaxial cable (not supplied)"]
    C --> D["To COAXIAL DIGITAL AUDIO OUT"]
    D --> E[""DTS" and "DTS Digital Out" are trademarks of Digital Theater Systems, Inc."]
Connecting to an amplifier equipped with a MPEG audio decoder
MPEG2 sound
You can enjoy motion picture and live concert DVD video discs with dynamic realistic sound by connecting an amplifier equipped with an MPEG2 audio decoder or MPEG2 audio processor.

- Use DVD video discs encoded via the Dolby Digital recording system.
Connecting to an amplifier equipped with a digital audio input
2 channel digital stereo
You can enjoy the dynamic sound of 2 channel digital stereo by connecting an amplifier equipped with a digital audio input and speaker system (right and left front speakers).

Notes:
- DO NOT connect the COAXIAL DIGITAL AUDIO OUT jack of the unit to the AC-3 RF input of a Dolby Digital Receiver. This input on your A/V Receiver is reserved for Laserdisc use only and is incompatible with the COAXIAL DIGITAL AUDIO OUT jack of the unit.
- Connect the COAXIAL DIGITAL AUDIO OUT jack of the unit to the "COAXIAL" input of a Receiver or Processor.
- Refer to the owner's manual of the connected equipment as well.
- When you connect the unit to other equipment, be sure to turn off the power and unplug all of the equipment from the wall outlet before making any connections.
- The output sound of the unit has a wide dynamic range. Be sure to adjust the receiver's volume to a moderate listening level. Otherwise, the speakers may be damaged by a sudden high volume sound.
- Turn off the amplifier before you connect or disconnect the unit's power cord. If you leave the amplifier's power on, the speakers may be damaged.

connecting to a USB Storage Device
This unit can be used to read JPEG, WMA, MP3 and DivX ^® data for any memory card reader/writer or digital camera that accepts USB Mass Storage Class.
For devices that are compatible with the unit's USB port, please refer to page 9.
Note:
Some USB storage device or USB cable may not be able to connect to the USB port of the TV because the shape of the USB connector is not compatible with the USB port of the TV. In that case, please use a USB extension cable (not supplied).
Connecting to a USB Storage Device

Notes:
To be read by the TV, compatible files must comply with the naming and directory requirements described on 54.
The following procedures should be followed when connecting and disconnecting any USB storage device to the TV or inserting or removing any memory card from any memory reader connected to the USB port of the TV:
- Do not connect or disconnect the USB storage device, or insert or remove any memory card from any memory reader, music player or camera connected to the USB port of the TV unless the TV is off or in DISC mode 56.
- Do not connect or disconnect the TV's power cord while any USB storage device is connected to the TV. This restriction applies no matter what the operating mode of the TV.
- Review the instructions for your USB storage device and comply with them in using the device with the TV.
- Do not connect other USB devices (keyboards, printers, or any other non-USB Mass Storage Class device) to the USB port. Doing so may damage the TV or the USB device.
- Do not attempt to use a USB hub. Only one USB storage device may be connected to the TV at once.
Failure to comply with these directions may result in data loss or in damage to the USB storage device or the memory card.
IMPORTANT: BECAUSE OF THE RISK OF DATA LOSS OR DAMAGE WHEN USING THIS DEVICE, WE RECOMMEND THAT YOU BACK UP ANY FILES THAT WILL BE USED WITH THIS DEVICE. IT IS YOUR RESPONSIBILITY TO COMPLY WITH APPLICABLE COPYRIGHT LAWS IN USING THIS DEVICE (INCLUDING MAKING BACK UP COPIES).
Basic setup
Starting setup
The STARTING SETUP function makes installing your unit easily. It leads you the Language selection, TV/CABLE selection and auto channel memory automatically.
IMPORTANT: Make sure that the antenna or cable TV system connection is made!
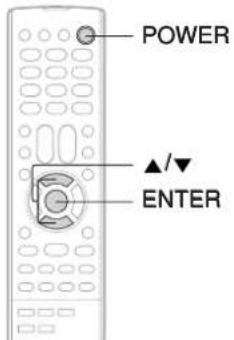
Starting setup
1 Press POWER.
The starting setup function begins and the Language setup menu appears on the screen. Press ▲ or ▼ to select your desired language, then press ENTER.


LANGUAGE/IDIOMA/LANGUE
ENGLISH ESPAÑOL FRANCAIS
<▲/▼/ENTER>
2 Press ▲ or ▶ select "TV" or "CABLE", then press ENTER.
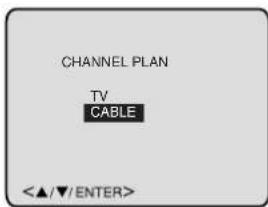
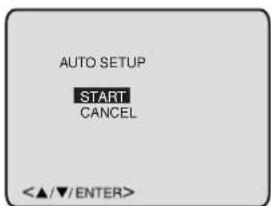
3 Press ▲ or ▼ to select "START", then press ENTER.
If you select "CANCEL" and press ENTER, the STARTING SETUP stops and changes to the TV screen.

4 Now the "AUTO CH MEMORY" and "AUTO CLOCK" starts.
After the starting setup is completed, the TV channel appears on the screen.
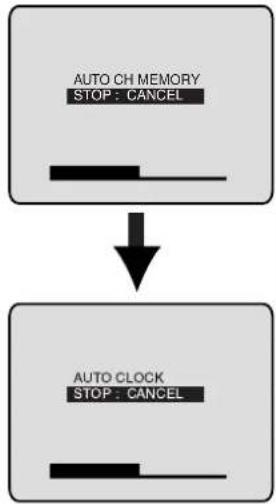
flowchart
graph TD
    A["AUTO CH MEMORY STOP: CANCEL"] --> B["↓"]
    B --> C["AUTO CLOCK STOP: CANCEL"]
Notes:
- The starting setup function will work only when you press POWER for the first time.
- In "AUTO CLOCK" setting, it may take more than 10 minutes to read the EDS signal for one channel, which has only "Time of day" or "Local time zone".

ock setting
The auto clock function will automatically set the built-in clock (Month, Day, Year and Time) when the unit is connected to an antenna or cable system and it is turned off. As the unit searches for a receivable station in your area and it receives a broadcast signal for auto clock, the auto clock needs several minutes to set itself.
Auto clock setting
Preparation:
- Connect the antenna or cable system.
- If you use a cable box, turn it on.
- Plug the AC power cord to the AC outlet.
1
Make sure the unit is turned off.
- If you press POWER, the Auto Clock set is not effective.
2
Wait at least three minutes and press POWER.


- Depending on the reception condition, it may take approx. thirty minutes.
• The POWER indicator will light.
3
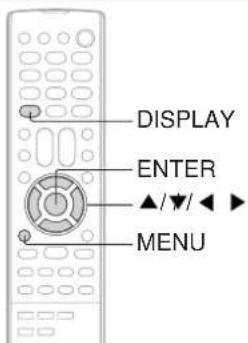
Press TV/VCR to select TV/VCR mode. Then press DISPLAY to check the clock on the screen.


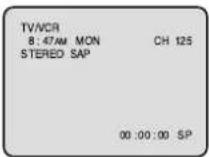
4
If the clock is not set, check the antenna condition. The Auto clock may not function properly if the reception condition is not good.
Auto clock adjustment
The Auto clock adjustment will be performed at 12:00 PM everyday if you turn off the unit.
- If you use a cable box and you want Auto Clock adjustment to be performed, the cable box must be left on.
- The Auto Clock adjustment is not effective when there is a difference of more than 5 minutes exists between the built-in clock time and the actual time.
To set auto clock to OFF
When shipped from factory the AUTO CLOCK is set to "ON". But if you do not want auto clock set (Adjustment):
1
Press MENU, then press ◀ or to select option.


2
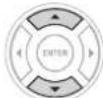
Press ▲or ☑ select "AUTO CLOCK".

3
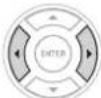
Press ◀ or ▶ to select "OFF".

4
Press MENU repeatedly until the menu screen is cleared.

- When the AUTO CLOCK is set to "OFF", the Auto Clock adjustment does not function.
- Set the clock manually 22.
Notes:
- If the unit does not operate properly, or No key operation (by the unit and/or the remote control): Static electricity, etc., may affect the player's operation. Disconnect the AC power cord once, then connect it again.
- The TV section has its own menu and also DVD section has its own menu 60.
- If no buttons are pressed for more than 60 seconds, the TV/VCR menu screen will return to normal TV operation automatically.

To set standard time
In the rare event that you live within broadcast range of two stations in two different time zones, the unit may recognize the wrong station for the auto clock set.
To correct the situation:
1 Press MENU, then press ◄ or ▶ select option.


2 Press ▲ or ▼ to select "STANDARD TIME", then press ▶.
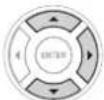
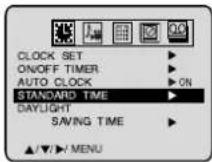
3 Press ▲▼to select your time zone, then press ENTER.

ATLANTIC : GMT-4hours
EASTERN : GMT-5hours
CENTRAL : GMT-6hours
MOUNTAIN : GMT-7hours
(GMT: Greenwich Mean Time)
4 Press MENU repeatedly until the menu screen is cleared.

Note:
Tobe able to select the standard time, the clock must first be set by "AUTO CLOCK" once.
To set daylight saving time
You can set the daylight saving time automatically or manually.
1 Press MENU, then press ▶opr ▶ selectect option.


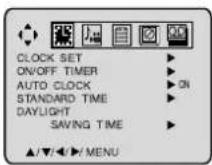
2 Press ▲ or ▼ select "DAYLIGHT SAVING TIME", then press ▶.


3 Press ▲ or ▶ select one of the options, then press ENTER.


ON: for manual setting (forward one hour)
OFF: for manual setting (back one hour)
AUTO: for automatic setting (read EDS in the signal)
When you want to set the daylight saving time manually, on the first Sunday in April you set to "ON", and on the last Sunday in October you set to "OFF".
4 Press MENU repeatedly until the menu screen is cleared.

Notes:
- When shipped from factory, the DAYLIGHT SAVING TIME is set to "AUTO" position.
- When the clock is not set, daylight saving time setting is not available.
- When there is no daylight saving time in your area, always select "OFF" position in step 3.
Basic setup

ock setting (Continued)
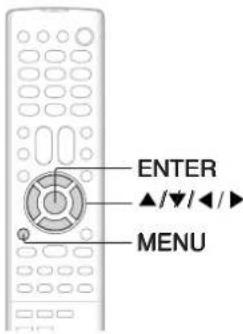
Manual clock setting
You must set the date and time manually for timer recordings, ON/OFF timer and daylight saving time if the auto clock process did not set them correctly.
EXAMPLE: Setting the clock to "8:30 AM", 25th. (SAT) March, 2006.
1


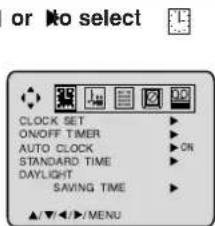
2
Press ▲ or ▼ select "CLOCK SET", then press ▶.


3
Press ◀ or ▶ to set the month, then press ▼.

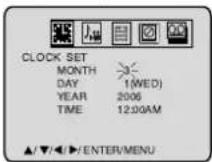
4
Set the day, year and time as in step 3, then press ENTER.


5
After setting the clock, date and time starts functioning automatically.
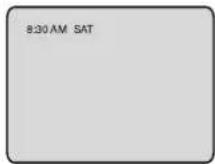

To make corrections any time during the process
Press ▲or repeatedly until the item you want not to change blinks, then set the item again.
Notes:
• After a power failure or disconnection of the power, the timer settings will be lost. In this case, reset the present time.
- When you set the minute, you can change in 10-minutes step by holding down ◀ or . ►
Setting the language/TV/VCR operation status
Setting the language
This unit can display the on screen language in English, Spanish or French.

2 Press ▲ or to select "LANGUAGE/IDIOMA/LANGUE", then press ▶.


3 Press ▲ or ▶ select the desired language: English (ENGLISH), Spanish (ESPAÑOL) or French (FRANCAIS), then press ENTER.


4 Press MENU repeatedly until the menu screen is cleared.

TV/VCR operation status
Press DISPLAY to display the information on the screen. To cancel the display, press DISPLAY again.
While watching TV

While operating a tape

TV operation
TV operation
TV operation
1 To turn on the unit, press POWER. The Power indicator will light.
- Every time you turn on the TV, the unit starts from TV/VCR mode. When you use TV/VCR after DVD operation, press TV/VCR.


2 Adjust the volume level by pressing VOL+ or -. The volume level will be indicated on the screen by green bars. As the volume level increases, so do the number of bars. If the volume decreases, the number of green bars also decreases.


3 Set the TV/CABLE selection to the appropriate position 27.
TV - VHF/UHF channels CABLE - Cable TV channels
4 Press Direct channel selection buttons (0–9) to select the channel.
TV mode direct channel selection
When the TV/CABLE selection is in the TV position, all channels can be instantly selected by using two buttons. (for example, to select channel
2, press "0", then "2". If you press only "2", channel selection will be delayed for a few seconds.) For channels 10 and above, press the 2 digits in order.
CH 02
CABLE mode direct channel selection
When the TV/CABLE selection is in the CABLE position, channels can be selected as follows: TO SELECT CABLE TV CHANNELS:
1-9: Press "0" twice, then 1-9 as needed. Example, to select channel 2, press "002".
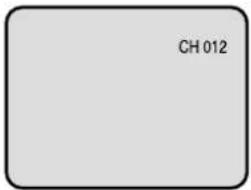
10-12: Press "0", then the remaining 2 digits. Example, to select channel 12, press "012".
13-99: Press the 2 digits in order. Example, to select channel 36, press "36".
100-125: Press the 3 digits in order. Example, to select channel 120, press "120".
NOTE FOR CHANNELS 1-12: If only 1 or 2 buttons are pressed, the corresponding channel will be selected in 2 seconds.
| TV | Cable TV |
| VHF2-13 | VHF2-13 |
| UHF14-69 | STD/HRC/IRC14-36(A) (W)37-59(AA) (WW)60-85(AAA) (ZZZ)86-94(86) (94)95-99(A-5) (A-1)100-125(100) (125)01(5A) |
Notes:
- If a channel with no broadcast is selected, the sound will automatically be muted.
- If a station being viewed stops broadcasting, the TV will automatically shut itself off after 15 minutes.

■ CHANNEL UP/DOWN
Press and release CH or . The channel automatically stops at the next channel set into memory. For proper operation, before selecting channels, they should be set into the memory. See page 27 "To memorize channels".

■ CHANNEL RETURN
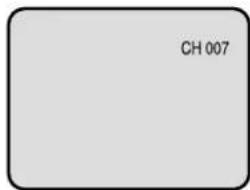
This button allows you to go back to the last channel selected by pressing CH RTN. Press CH RTN again to return to the last channel you were watching.

MUTE
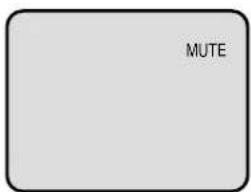
Press MUTE to switch off the sound. The unit's sound will be silenced and "MUTE" will appear briefly on the screen. The sound can be switched back on by pressing this button again or one of VOL +/-


SLEEP
To set the unit to turn off after a preset amount of time, press SLEEP on the remote control. The clock will count down 10 minutes for each press of SLEEP (120, 110, ...10, 0). After the sleep time is programmed, the display will appear briefly every ten minutes to remind you that the sleep timer is operating. To confirm the sleep timer setting, press SLEEP and the remaining time will be displayed for a few seconds. To cancel the sleep timer, press SLEEP repeatedly until the display turns to 0.


■ HEADPHONES
Insert a stereo headphones (not supplied) with a 1/8" mini plug into the PHONES jack on the front panel. If you connect headphones, the sound from TV speakers is muted.
Model MW24F52 has a door on the front panel. Please open it to access the PHONES jack and the AUDIO (L/R)/VIDEO IN (LINE IN 2) jacks.


osed captions
WHAT IS CLOSED CAPTIONING?
This television has the capability to decode and display closed captioned television programs. Closed captioning will display text on the screen for hearing impaired viewers or it will translate and display text in another language.

CLOSED CAPTION
Closed captions
Captions: This closed caption mode will display text on the screen in English or another language (depending on the setting of the closed captions CH 1/2).
Generally, closed captions in English are transmitted on captions channel 1 and closed captions in other languages are transmitted on captions channel 2.
Text: The text closed caption mode will usually fill the screen with a programming schedule or other information. After selecting a closed caption mode, it will stay in effect until it is changed, even if the channel is changed.
If the captions signal is lost due to a commercial or a break in the signal, the captions will reappear when the signal is received again. If the channels are changed, the captions will be delayed approximately 10 seconds. The captions will appear in places on the screen where they will least interfere with the picture, usually on the bottom of the screen. News programs will usually show three-line closed captions which scroll onto the screen.
Most other shows provide two or three lined captions placed near the character who is speaking so the viewer can follow the dialogue. Words in italics or underlined describe titles, words in foreign languages or words requiring emphasis. Words that are sung usually appear enclosed by musical notes.
For television programs broadcasting with closed captions, look in your TV guide for the closed captions symbol (CC).
TO VIEW CLOSED CAPTIONS
Press CLOSED CAPTION to switch between normal TV and the two closed caption modes (captions and full screen text). Closed captioning will display text on the screen for hearing impaired viewers.

CAPTION CH 1
Notes:
- When selecting closed captions, the captioning will be delayed approximately 10 seconds.
- If no caption signal is received, no captions will appear, but the television will remain in the caption mode.
- Misspellings or unusual characters may occasionally appear during closed captioning. This is normal with closed captioning, especially with live programs. This is because during live programs, captions are also entered live. These transmissions do not allow time for editing.
- When captions are being displayed, on-screen displays, such as volume and mute may not be seen or may interfere with closed captions.
- Some cable systems and copy protection systems may interfere with the closed captioned signal.
- If using an indoor antenna or if TV reception is very poor, the closed caption decoder may not appear or may appear with strange characters or misspelled words. In this case, adjust the antenna for better reception or use an outdoor antenna.
NOTICE OF POSSIBLE ADVERSE EFFECTS ON TV PICTURE DISPLAY
Avoid displaying stationary images on your TV screen for extended periods of time. Fixed (non-moving) patterns or images (including but not limited to PIP/POP windows, closed captions, video game patterns, TV station logos, stock tickers, websites, and special formats that do not use the entire screen) can become permanently ingrained in the cathode ray tube(s) of the TV and cause subtle but permanent ghost images. This type of damage is NOT COVERED BY YOUR WARRANTY. See item 33 on page 4.
To memorize channels
This unit is equipped with a channel memory feature which allows channels to skip up or down to the next channel set into memory, skipping over unwanted channels. Before selecting channels, they must be programmed into the unit's memory. In addition to normal VHF and UHF channels, this unit can receive up to 113 cable TV channels. To use this unit with an antenna, set the TV/CABLE selection to the TV position. When shipped from the factory, this selection is in the CABLE position.

TV/CABLE selection

Press MENU in the TV mode, then press ◄ or ▶ to select ☐ option.


Press ▲ or t▼ select "TV/CABLE".


Press ◀ or ▶ to select "TV" or "CABLE".
TV - VHF/UHF channels CABLE - Cable TV channels


Press MENU repeatedly until the menu screen is cleared.

Cable TV chart
The chart below is typical of many cable system channel allocations.
| Number on this TVCorresponding Cable TV channel | 14A | 15B | 16C | 17D | 18E | 19F | 20G | 21H | 22I | ||||||||
| 23J | 24K | 25L | 26M | 27N | 28O | 29P | 30Q | 31R | 32S | 33T | 34U | 35V | 36W | 37AA | 38BB | 39CC | 40DD |
| 41EE | 42FF | 43GG | 44HH | 45II | 46JJ | 47KK | 48LL | 49MM | 50NN | 51OO | 52PP | 53QQ | 54RR | 55SS | 56TT | 57UU | 58VV |
| 59WW | 60AAA | 61BBB | 62CCC | 63DDD | 64EEE | 65FFF | 66GGG | 67HH | 68III | 69JJJ | 70KKK | 71LLL | 72MMM | 73NNN | 74OOO | 75PPP | 76QQQ |
| 77RRR | 78SSS | 79TTT | 80UUU | 81VVV | 82WWW | 83XXX | 84YYY | 85ZZZ | 8686 | 8787 | 8888 | 8990 | 9091 | 9192 | 9293 | 9394 | |
| 95A-5 | 96A-4 | 97A-3 | 98A-2 | 99A-1 | 100100 | 101102 | 102103 | 103104 | 104104 | 105105 | 106106 | 107107 | 108108 | 109109 | 110110 | 111111 | 112112 |
| 113113 | 114114 | 115115 | 116116 | 117117 | 118118 | 119120 | 120121 | 121122 | 122122 | 123123 | 124124 | 125125 | 01 | ||||
Automatic memory tuning
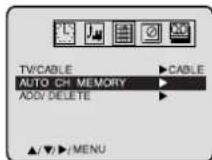
Press ▲ or to select the "AUTO CH MEMORY", then press ▶.
The TV will begin memorizing all the channels available in your area.
To ADD/DELETE channels
1 Press ▲ or press ▶.
t▼ select "ADD/DELETE", then
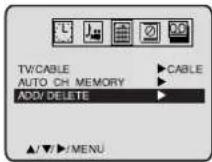
2
Select the desired channel to be added or deleted using Direct channel selection buttons (0–9) or ▲/▼.


3
Press ◄ or ▶ select "ADD" or "DELETE", whichever function you want to perform.


Note:
You cannot select ☐ option if you set the channel to "LINE1" or "LINE2".
Setting the V-Chip
An age limitation can be set to forbid children to watch programs according to "TV RATING" and "MOVIE RATING" level set. To use the V-Chip function, you must register a password.
Notes:
- If you forget the password, you cannot set the V-Chip.
- To avoid forgetting the password, write it down and keep in the safe place.
To register password
1
Press MENU, then press option.

to select


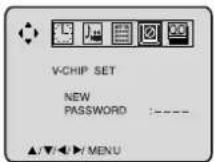
2
Press ▲ or ▶ select "PASSWORD".

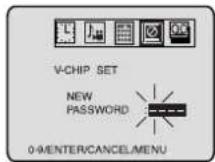
3
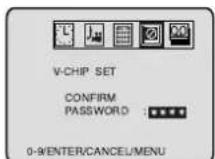
Enter the password (4 digits) using Number buttons (0–9), then press ENTER.
- If you put a wrong number, press CANCEL.

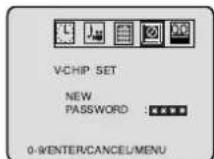

"*appears instead of the number."

4
Enter the same password again using Number buttons (0–9) for safety, then press ENTER.

Now the password was registered and V-Chip setting menu will appear on the display.

To change password
1
In the V-CHIP menu, press ▲ or ▶ to select "CHANGE PASSWORD", then press ▶.

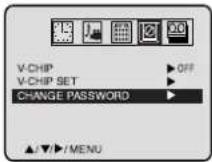
2
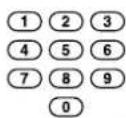
Enter the new password using Number buttons (0–9), then press ENTER.


3
Enter the same password again using Number buttons (0–9) for safety, then press ENTER.



4
Press MENU repeatedly until the menu screen is cleared.


To set the V-Chip
1 In the V-CHIP menu, press ▲ or ▼ select "V-CHIP SET", then press ▶.


2 Press ▲ or ▼ to select "TV RATING", then press ◀ or ▶ to display the desired setting. After setting, press ENTER.
OFF : TV RATING is not set
TV-Y : All children
TV-Y7: 7 years old and above
TV-G: General audience
TV-PG : Parental guidance
TV-14: 14 years old and above
TV-MA: 17 years old and above


When you select TV- Y7, TV-PG, TV-14 or TV-MA, press DISPLAY to show the contained rating. Press ▲/▼/ ◀to select the desired item you want.

3 Press ▲ or ▶ to select "MOVIE RATING".


4 Press ◄ or ▶ select desired rating. After setting, press ENTER.


OFF: MOVIE RATING is not set
G : All ages
PG: Parental guidance
PG-13 : Parental guidance
less than 13 years old
R : Under 17 years old Parental guidance suggested
NC-17: 17 years old and above
X : Adult only
5 Press ▲ or ▼ to select "V-CHIP".

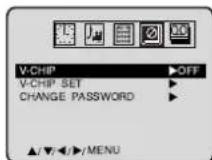
6 Press or ▶ to display "ON". Now your settings were set into the memory.


7 Press MENU repeatedly until the menu screen is cleared.

To use after the TV is protected
When the program applied to the V-Chip setting is received, enter the password, then press ENTER. Protection can be canceled.
Note:
The V-Chip function is activated only on programs that have the rating signal.
TV operation
To set the on timer
This feature allows you to have the unit automatically turn on at a predetermined time. If you program the ON TIMER once, the unit will turn on the programmed day (daily/weekly) at the same time to the same channel.
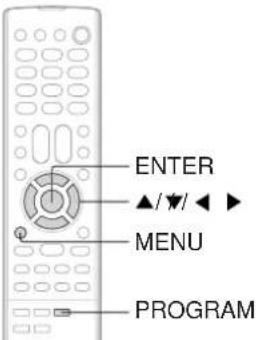
To set the on timer
EXAMPLE: Turning on the TV to channel 12 at 7:00 AM, MONDAY-FRIDAY.
1
Press MENU. Press ◀ or ▶ to select 🔊 option.

You can also select ON/OFF TIMER by pressing PROGRAM twice.

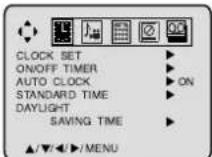
2
Press ▲ or ▶ select "ON/OFF TIMER", then press ▶.

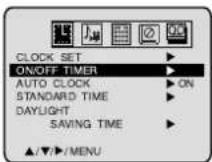
3
Press ▲ or ▶ select "ON TIMER", then press ▶.
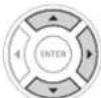

4
Press ◀ or to set the desired hour, then press ▼.
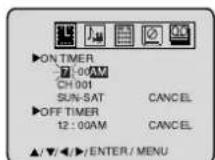
5 Set the desired minute, channel and daily or weekly timer date as in step 4.

6
Press ◀ or ▶ to select "SET", then press ENTER.
Now the ON TIMER is set.


7
Press MENU repeatedly until the menu screen is cleared.

Notes:
- The unit will automatically turn off approximately 1 hour later after the ON TIMER turns on if no OFF TIMER has been set. To continue watching the TV, press any button to cancel the one hour automatic shut off.
- T o cancel the ON TIMER, follow above steps 1\~5, then press ◀ or ▶ to select "CANCEL". Press MENU repeatedly until the menu screen is cleared.
- After setting the ON TIMER, "OFF TIMER" will be highlighted. If you wish to set the OFF TIMER, press then follow the steps 4\~6 on page 31.
- If you want to correct the digits while setting, press ▲r ▼ until the item you want to correct, then press ◀r to correct the desired setting.
To set the off timer
This feature allows you to have the unit turn off automatically at a predetermined time. If you program the OFF TIMER once, the unit will automatically turn off at the same time everyday.

To set the off timer
EXAMPLE: Turning off the TV at 11:30 PM.
1
Press MENU. Press ◀ or ▶ to select 🔒 option.
You can also select ON/OFF TIMER by pressing PROGRAM twice.


2
Press ▲ or ▼ select "ON/OFF TIMER", then press ▶.

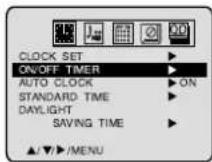
3
Press ▲ or ▼ select "OFF TIMER", then press ▶.
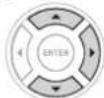

4
Press ◀ or ▶ to set the desired hour, then press ▼.

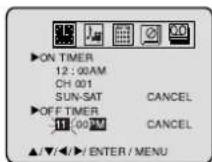
5
Press ◀ or ▶ to set the desired minute, then press ▼.


6
Press ◀ or ▶ to select "SET".
Now the OFF TIMER is set.

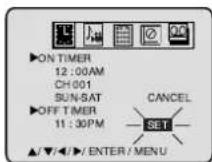
7
Press MENU repeatedly until the menu screen is cleared.

Notes:
• To cancel the OFF TIMER function:
To cancel OFF TIMER, follow above steps 1\~5, press ◀r ▶ to select "CANCEL". Press MENU repeatedly until the menu screen is cleared.
• To confirm the ON/OFF TIMER:
Press PROGRAM twice to indicate the programs on the screen.
Picture control adjustment/
Adjusting the picture preference
Picture controls are factory preset but you can adjust them individually as follows:
And also you can select four picture modes—Standard, Sports, Movie, and Memory—as described in the following table:
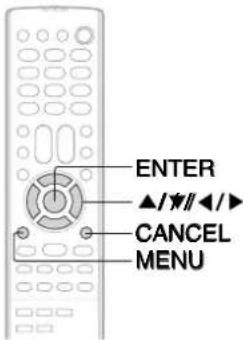
Picture control adjustment Adjusting the picture preference
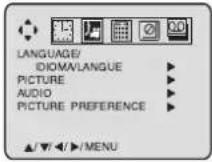
1
Press MENU, then press or to select option.


2
Press ▲ or to select "PICTURE", then press ▶.

3
Press ▲ or ▶ select the item you want to adjust, then press ◀ or ▶o adjust the setting.

Selection
BRIGHTNESS
CONTRAST
COLOR
TINT
SHARPNESS
Pressing
darker
lower
paler
reddish
softer
lighter
higher
deeper
greenish
sharper
Note:
The CONTRAST default setting is set to maximum (+32) at the factory.
4
After your desired setting press MENU repeatedly until the menu screen is cleared.

■To return all adjustments to the factory preset levels
Press CANCEL while making picture adjustments.
1
Press MENU, then press ◄ or ▶ select option.


2
Press ▲ or to select "PICTURE PREFERENCE", then press ▶.


3
Press ▲ or to select the desired picture mode, then press ENTER.

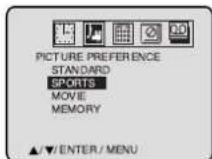
Mode Picture quality
STANDARD Standard picture quality (factory-set)
SPORTS Bright and dynamic picture (factory-set)
MOVIE Movie-like picture setting (factory-set)
MEMORY Your personal preferences (set by you; see "Picture control adjustment" as left)
4
After your desired setting press MENU repeatedly until the menu screen is cleared.

Sound control adjustment/
Stereo and Second Audio Program (SAP)
Sound controls are factory preset but you can adjust them individually as follows:
The unit is equipped with a feature known as multi-channel TV sound or MTS. MTS broadcasts greatly enhance TV viewing by bringing you programs with high fidelity stereo sound.
MTS also provides an extra channel called the Second Audio Program or SAP which broadcasters can use to transmit a second language for bilingual transmission or for other purposes.

AUDIO SELECT
▲/▼/◄/►
CANCEL
MENU
Sound control adjustment


3 Press ▲ or ▶ select the item you want to adjust, then press ◀ or ▶ to adjust the setting.


BASS: Press ◀ or ▶ to adjust the bass sound. TREBLE: Press ◀ or ▶ to adjust the treble sound. BALANCE: Press ◀ or ▶ to obtain an equal sound level from both speakers.
SURROUND: Press ◀ or ▶ to select "ON" or "OFF". ON: The dynamic presence and sound created offers a thoroughly enjoyable listening experience. OFF: Normal sound.
STABLE SOUND : Press ◀ or ▶ to select "ON" or "OFF". ON: The Stable Sound feature limits the highest volume level to prevent extreme changes in volume when the signal source is changed. OFF: Normal sound. SAP : Press ◀ or ▶ to select "ON" or "OFF". ON: SAP is available. OFF: SAP is not available.
4 After the desired setting is adjusted, press MENU repeatedly until the menu screen is cleared.

■ To return BASS/TREBLE/BALANCE control adjustments to the factory preset levels
Press CANCEL while making sound adjustments.
Listening to stereo sound
When the TV is turned on or a channel selection is made, the "STEREO" will appear on the screen. This means that Stereo broadcasting is available. You can enjoy stereo sound from the left and right speakers.
- When mono broadcasting is received, no indication is displayed.
- If the broadcast signal is not strong enough or clear stereo sound is not available, press AUDIO SELECT to change to mono sound. The noise should be eliminated. Press it again to return to the stereo sound.

Listening to SAP (Second Audio Program)
When the TV is turned on or a channel selection is made, "SAP" will appear on the screen. This means that the Second Audio Program broadcasting is available.
STEREO SAP
CH 013
To select desired sound
Press AUDIO SELECT to select the desired sound.


| Broadcast | SAP setting | Audio display |
| MONO | OFF | MONO |
| ON | MONO | |
| STEREO | OFF | STEREO←MONO |
| ON | STEREO←MONO | |
| MONO+SAP | OFF | MONO |
| ON | SAP | |
| STEREO+SAP | OFF | STEREO←MONO |
| ON | SAP |
Loading and unloading a cassette tape
Use only video cassette tapes marked VHS
Loading
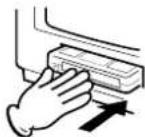
Push the center of the tape until it is automatically inserted.

Insert the cassette tape with its labeled side facing up and the erase prevention tab positioned at your left. An inverted cassette tape cannot be inserted.


Automatic power ON
When you insert a cassette tape, the unit power will turn ON automatically.
Automatic playback
When loading a cassette tape without an erase prevention tab, playback will start automatically.
Unloading
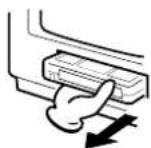
1 Press STOP/EJECT on the front panel or EJECT on the remote control.

natural_image
Blank gray rectangle with a small black triangle symbol in the top-right corner (no text or labels)2 Remove the cassette tape.
Automatic tape eject
This unit will automatically rewind the tape when the tape has ended. And when the tape is rewinded to its beginning, the cassette tape will be ejected automatically.
Notes:
• Always eject the tape when not in use.
- The cassette tape can be ejected even if the POWER is "OFF".
To prevent accidental erasure
To prevent accidental erasure
Remove the erase prevention tab with a screwdriver.
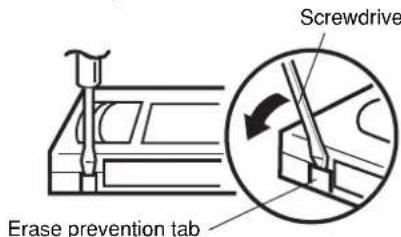
To record again
Cover the hole with a piece of adhesive tape.

Tape speed and maximum recording time
| Tape Speed | Video cassette tape | ||||
| T-160 T-120 | T-90 T-60 T-30 | ||||
| SP (Standard Play) | 2-2/3 hours 2 hours | 1 hour 30 minutes | |||
| SLP (Super Long Play) | 8 hours 6 hours | 4-1/2 hours 3 hours | 1-1/2 hours | ||

Cassette tape playback
Toplay a prerecorded tape.


Playback
1
Load a prerecorded tape:
(When loading a cassette tape without the erase prevention tab, playback will start automatically).
2
To start playback:
Press PLAY on the front panel or on the remote.
Playback will start. "▶ will appear on the screen for about 4 seconds.


To stop playback:
Press STOP/EJECT once on the front panel or press STOP on the remote. The tape will stop but remain fully loaded and ready to play.
"■ will appear on the screen for about 4 seconds.


Rewind or forward the tape
Stop the playback or recording with STOP.
To rewind the tape:
Press REW on the front panel or press REV on the remote.


To forward the tape:
Press FF on the front panel or press FF on the remote.

To stop the tape-winding, press STOP. To switch to play-back directly (without STOP), press PLAY.
■ Forward/Reverse picture search mode
When the tape is being winded, you can switch to picture search mode (see page 36). To do this, press REV or FF again and hold it down. The unit will resume the tape winding as soon as the button is released.
Notes:
- If you play a prerecorded tape after the DVD playback, you must set the unit to TV/VCR mode using the TV/VCR button.
- This unit selects the playback tape speed SP or SLP automatically.
- When you select the TV/VCR mode during DVD playback, DVD playback will change to the still mode, and after 5 minutes it will change to the resuming playback mode automatically.
Playback (VCR)
Special playback
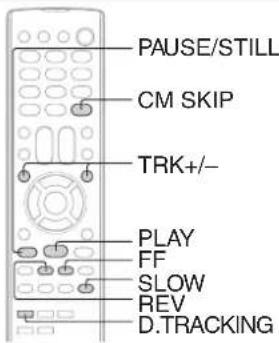
Picture search
Reverse picture search function
Press REV once or twice during the playback.
Forward picture search function
Press FF once or twice during the playback. To return to playback, press PLAY.
SPEED SEARCH TIMES
| TAPE SPEED | PICTURE SEARCH SPEED | |
| PRESS ONCE | PRESS TWICE | |
| SP (Standard Play) | 3 X | 5 X |
| SLP (Super Long Play) | 9 X | 15 X |
Still picture
Press PAUSE/ STILL during playback.
To resume normal playback, press PLAY or PAUSE/STILL. If the still picture jitters excessively, press TRK + / - to stabilize the still picture.
Slow motion
During playback press SLOW.
To return to playback, press PLAY.
■ Slow tracking and vertical lock adjustment
If noise bars appear in the picture during slow motion, press the TRK + / - to reduce the noise bars.
Frame by frame picture
Press PAUSE/ STILL during playback.
Press SLOW one by one. The picture advances frame by frame.
To return to playback, press PLAY or PAUSE/ STILL.
CM skip
Press CM SKIP during playback. The unit will search forward through approximately 30 seconds of the tape (e.g. unwanted commercial time) for each press of CM SKIP (maximum six presses) and then resume normal playback.
For example : 1 press: 30 seconds of tape
2 press: 60 seconds of tape
3 press: 90 seconds of tape
Digital tracking controls
When a tape is played, the Digital Auto Tracking system automatically adjusts the tracking to obtain the best possible picture. If noise bars appear during playback, adjust the tracking manually as follows:
- Press TRK +/– to obtain the best possible picture. "MANUAL TRACK" will appear for 4 seconds on the screen. To resume automatic tracking, press D.TRACKING. "DIGITAL TRACK" will appear for 4 seconds on the screen.


Notes:
- "SP" is more appropriate as less noise appeared during search and still playback for tape recorded in SP.
- The audio output is muted during PICTURE SEARCH, STILL, FRAME ADVANCE and SLOW MOTION.
- During picture search mode there will be noise bars which are caused by the system.
- The Special Playback will automatically change to playback after approx. 5 minutes to protect the video tape against excessive wear.

nvenient function

Repeat playback
The entire video tape will be played until its end. The tape will automatically rewind to the beginning and the playback will be repeated.
Using the real time tape counter
The on-screen real time tape counter shows the tape running time in hours, minutes and seconds. You can easily determine how long the tape has been running or how much time is left on the tape.
1 Press MENU, then press ▶opt ▶select option.


2 Press ▲ or ▼ select "AUTO REPEAT".

3 Press ◀ or ▶ to select "ON" or "OFF". If "ON" is selected, the playb


4 Press MENU repeatedly until the menu screen is cleared.

If you press DISPLAY, "will appear on the screen 23.
5 To start the playback, press PLAY.

The playback will be repeated endlessly.
1 Press DISPLAY.


2 Press COUNTER RESET to set the counter to "00:00:00".

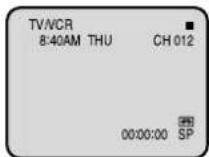
3 Begin Playback or Recording to start the tape, the counter will display the elapsed time.


4 When you wish to make the counter disappear, press DISPLAY once again.

■ To cancel repeat mode:
In step 3 above, press ◀ or ▶ to select "OFF" position. Press MENU repeatedly until the menu screen is cleared. The repeat function is canceled automatically when the unit is switched off.
Playback (VCR)

convenient function (Continued)

Zero return function
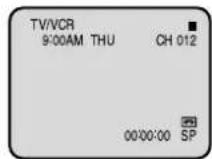
The zero return function provides a convenient method of rapidly returning to the starting point of recording or playback. The starting point can be indexed for any location on the tape by pressing COUNTER RESET and ZERO RETURN.
1
Press DISPLAY.


Before playback or recording, press COUNTER RESET to set the counter to "00:00:00".
2


Begin playback or recording.
3


4
Press STOP.

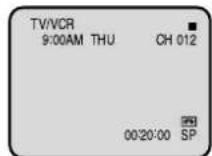
Press ZERO RETURN. The tape will rewind and automatically stop at the "00:00:00" position.
5

Video head cleaning
■ Video head clogging
The video heads are the means by which the unit reads the picture from the tape during playback. In the unlikely event that the heads become dirty enough to be clogged, no picture will be played back. This can easily be determined if, during playback of a known good tape, there is good sound, but no picture (picture is extremely snowy). If this is the case, the unit need to check and clean by the qualified service personnel.

Good Picture
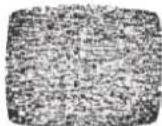
Snowy Picture
■ Video head cleaning
Video head cleaning is needed when the playback picture becomes unclear. This signifies that the heads are getting dirty and can occur when playing poor quality or damaged tapes. If the heads require cleaning, use a equivalent high quality chemical non-abrasive (wet) head cleaning tape or have them cleaned professionally. If playing a head cleaning tape in the unit once does not improve the picture, play it several times before requesting service.
Notes:
• DO NOT ATTEMPT TO CLEAN THE VIDEO HEADS OR SERVICE THE UNIT BY REMOVING THE REAR COVER.
• Video heads may eventually wear out and should be replaced when they fail to produce clear pictures.
- To help prevent video head clogging, use only good quality VHS tapes. Discard worn out tapes.
Recording (VCR)

Recording a TV program
Recording and viewing the same TV program.

Recording a TV program
1 Load a cassette tape with the erase prevention tab intact.

The unit will automatically turn on.
2 Press SPEED to select the desired tape speed SP or SLP.
The tape counter and SP or SLP will appear on the screen for about 4 seconds.

00:00:00 SP
3 Select "TV" or "CABLE" to the appropriate position 27.
TV - VHF/UHF channels CABLE - Cable TV channels
4 Press Direct channel selection (0–9) or CH ∧ ∨ to select the channel to be recorded.


CH 110
5 Press REC.
"● will appear on the screen for about 4 seconds and the REC/OTR indicator on the front panel will light.


Notes:
- If power is switched off during recording, the TV and the DVD sections go off and the VCR continues to record. Press the STOP button to halt the recording and turn off the VCR.
• The unit channel cannot be changed during recording. - If you record the TV program after the DVD playback, you must set the unit to TV/VCR mode using the TV/VCR button.
To stop recording
Press STOP to stop recording.
"■ will appear on screen for about 4 seconds.


To stop recording temporarily
Press PAUSE/STILL to avoid recording unwanted material.
“II” will appear on the screen and the REC/OTR indicator will blink on and off. Press PAUSE/ STILL or REC to continue the recording.


Note:
The pause function will be released after 5 minutes to prevent damage to the tape or the unit. The unit will change to the STOP mode.
■ Auto Rewind feature
This VCR will automatically rewind the tape when the tape has ended (except during OTR and timer recording). It will also eject the tape.
Note:
If the erase prevention tab is removed, the tape will eject when REC button is pressed for recording.
The unauthorized recording, use, distribution, or revision of television programs, videotapes, DVDs and other materials, is prohibited under the Copyright Laws of the United States and other countries, and may subject you to civil and/or criminal liability.

ne-touch Timer Recording (OTR)
The One-touch timer recording feature provides a simple and convenient way to make a timed recording.

One-touch timer recording (OTR)
Example: One-touch timer recording for 30 minutes.
1
Load a cassette tape with the erase prevention tab intact.
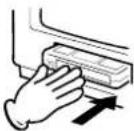
The unit will automatically turn on.
2
Press SPEED to select the desired tape speed SP or SLP.
The tape counter and SP or SLP will appear on the screen for about 4 seconds.

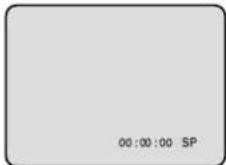
3
Set "TV" or "CABLE" option to the appropriate position 27.
TV - VHF/UHF channels CABLE - Cable TV channels
4
Press Direct channel selection (0–9) or CH ∧ ∨ to select the channel to be recorded.


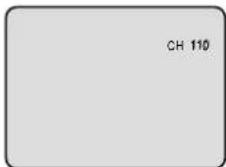
5
Press REC to begin recording. Press the button again to stop recording after 30 minutes. Each additional press of REC will increase recording time as shown below, up to a maximum of 6 hours. "OTR" will appear on the screen.
| Press | Recording time | Press | Recording time |
| once | NORMAL REC | 6 times | 3:00 |
| twice | 0:30 | 7 times | 4:00 |
| 3 times | 1:00 | 8 times | 5:00 |
| 4 times | 1:30 | 9 times | 6:00 |
| 5 times | 2:00 | 10 times | NORMAL REC |


To cancel OTR
Press STOP.


will appear on screen for about 4 seconds.
Notes:
- If you wish to watch the DVD playback during the recording or the OTR, press DVD to change to DVD mode and perform the DVD playback 45.
• The channel cannot be changed during recording.
The unauthorized recording, use, distribution, or revision of television programs, videotapes, DVDs and other materials, is prohibited under the Copyright Laws of the United States and other countries, and may subject you to civil and/or criminal liability.
Timer recording
Timer recording can be programmed on-screen with the remote control. The built-in timer allows automatic unattended recording of up to 8 programs within 1 month.

Timer recording
Preparation:
- Press TV/VCR to select the TV/VCR mode.
- Load a cassette tape with the erase prevention tab intact.
- Check the time and date are correct 22.
Example:
Program a timer recording for 23rd day, channel 125 (Cable TV), 7:00 - 9:30 PM (Tape speed : SLP).

Press MENU, then press ◄ or option.
t▶ select


Press ▲port to select MEMEREGISE DE then press ▶.

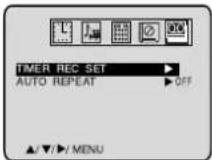

Press ▲ or ▼ select one of the program line, then press ENTER.

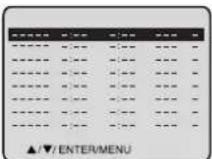

Press ◀ or ▶ to select the date, then press ▼

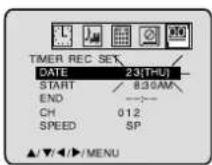
The unauthorized recording, use, distribution, or revision of television programs, videotapes, DVDs and other materials, is prohibited under the Copyright Laws of the United States and other countries, and may subject you to civil and/or criminal liability.
5
Set the start time, end time, channel and tape speed as in step 4. Then press ENTER.

Notes:
- Press ▲ to move cursor backward for correction.
- To record from external source set the channel to "L1" or "L2".

6
To set the timer for another program, repeat steps 3 to 5 to set another program.
7
Press TIMER REC. The TIMER REC Indicator will light. The Timer is programmed, when the programmed time is reached, the recording is automatically started.

TIMER REC To cancel timer recording, press the button again and TIMER REC indicator will go out.
Notes:
- The VCR section cannot be used while the TIMER REC indicator is lit. If you want to use the VCR operation, press TIMER REC to deactivate the timer.
- When the clock is not set, you cannot select "TIMER REC". In this case, set the clock (see pages 20\~22).
- After a power failure or disconnection of the power plug, all programmed recording setting and time display will be lost upon resumption of power. In this case, reset the clock (see pages 20\~22) and reprogram any timer recordings.
- If you want to correct the digits while setting, press ▲r ▼ until the item you want to correct, then press ◀ or ▶ to correct the desired setting.
- If programming is performed without a tape in the unit, or with a tape without an erase prevention tab, the Timer Recording is not possible. If a tape without an erase prevention tab is in the unit, the tape will be ejected.
Timer recording (Continued)

To set daily/weekly timer
Weekly (e.g. WKL-TUE: each Tuesday) or daily (e.g. MON-SAT: Monday to Saturday) Timer recording
Follow the procedure of timer recording on page 41. At picture 4 press ◀ or ▶ repeatedly until the desired setting appears. Then press ENTER.
When you press ◀repeatedly, the indicator at DATE will change as follows, in this case the day is Friday.

flowchart
graph TD
    A["The current day (Friday) SUN-SAT (Sunday to Saturday)"] --> B["MON-SAT (Monday to Saturday)"]
    B --> C["MON-FRI (Monday to Friday)"]
    D["One month later minus one day"] --> A
    E["WKL-WED WKL-THU (Weekly Wednesday)"] --> D
    F["Weekly Wednesday"] --> E
If the programs overlap another
Do not overlap timer programs as portions of the conflicting programs will be lost. The first recording time has priority over the next recording time as shown in the diagram below.
If you set up many timer recording programs at the same start time, the priority will be the top program in the timer recording list.

flowchart
graph TD
    A["Program 1"] --> B["8:00"]
    C["Program 2"] --> D["9:00"]
    E["Program 3"] --> F["10:00"]
    G["Recording Control Settings"] --> H["Prog.1"]
    I["Deleted Parts"] --> J["Prog.2 Prog.3"]
    K["Non Recorded Portion Parts"] --> L["Prog.2 Prog.3"]
Notes:
- The daily/weekly recording can be made continuously until the recording is canceled or the tape reaches the end.
- During timer recording the automatic rewinding mechanism does not function.
- You can correct or cancel the programmed setting in program confirm mode.
To confirm the settings
Press PROGRAM once. The TV screen displays the timer program list. Press PROGRAM again. The TV screen displays the ON/OFF timer setting.

Press PROGRAM 3 times. The menu screen is cleared.
(twice)(once)


To cancel a program
Press PROGRAM once. The TV screen displays the timer program list.
Press ▲ or ▼ to select the unnecessary program, and press CANCEL to cancel the program.


The unauthorized recording, use, distribution, or revision of television programs, videotapes, DVDs and other materials, is prohibited under the Copyright Laws of the United States and other countries, and may subject you to civil and/or criminal liability.
Other functions (VCR)
Duplicating a video tape
If you connect the unit to another VCR or Camcorder, you can duplicate a previously recorded tape. Make all connections before turning on the power.

Duplicating a video tape
Preparation:
- Press TV/VCR to select the TV/VCR mode.
- Load a cassette tape with the erase prevention tab intact.
- Load a previously recorded tape into the playback VCR or Camcorder.
1 Press SPEED to select the desired tape speed SP or SLP.

It is recommended to set the Speed to the SP mode on the recording VCR for best results.
2 Press INPUT once or twice to select AUDIO/VIDEO input position.
"LINE1" or "LINE2" will appear on the screen.


LINE1: on the rear panel LINE2: on the front panel
3 Press REC.

4 Press PLAY on the playback VCR or camcorder.
5 Press STOP when you finish after duplicating.

The unauthorized recording, use, distribution, or revision of television programs, videotapes, DVDs and other materials, is prohibited under the Copyright Laws of the United States and other countries, and may subject you to civil and/or criminal liability.
Connection with second video recorder
- Select "LINE1" on step 2.

Connection with Camcorder
- Select "LINE2" on step 2.
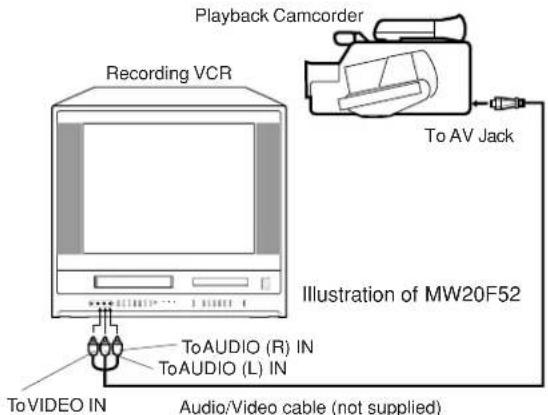
For duplicating a previously recorded tape from a camcorder, follow the camcorder manufacturer's instructions. A typical camcorder dubbing hookup is shown above.
Recording a DVD/CD disc
You can record disc material in DVD, Audio CD, etc. onto a video tape with this unit.

Duplicating a DVD or CD disc
Preparation:
- Press TV/VCR to select the TV/VCR mode.
- Load a cassette tape with the erase prevention tab intact.
- Load a DVD/CD disc.
1 Press SPEED to select the desired tape speed SP or SLP.

2 Press DVD to select the DVD mode.

3 Press PLAY to start playback.

4 Press REC to start recording. The unit will change

5 Press STOP when you finish recording. If you wish to stop a DVD/CD d
If you wish to stop a DVD/CD disc, press DVD to change the DVD mode, then press STOP.
Notes:
- Y ou may not record the beginning of the disc, so start to playback the disc, then start to record.
- Y ou cannot record the disc with copy guard function. "DISC IS COPY PROTECTED" will show up on the TV screen for approx. 4 seconds.
- Do not insert the media card during the duplicating. In this case, a card material is duplicated onto a video tape.
The unauthorized recording, use, distribution, or revision of television programs, videotapes, DVDs and other materials, is prohibited under the Copyright Laws of the United States and other countries, and may subject you to civil and/or criminal liability.
Basic playback (DVD)
Playing a disc
This section shows you the basics on how to play a disc.
CAUTION
Keep your fingers well clear of the disc tray as it is closing. Neglecting to do so may cause serious personal injury.


Basic playback
Preparations:
- Insert the AC cord plug into a standard 120V 60Hz polarized AC outlet. If the AC cord plug is plugged in for the first time, you need to set "Starting setup" [19].
- When connecting to other equipment, turn power off.
1 Press POWER on the unit or on the remote control to turn on the unit.
The Power indicator will light.
- Every time you press POWER, the TV/VCR/DVD starts from TV mode.
- When using an amplifier, switch on the amplifier.


Press DVD to select DVD mode.
The DVD startup screen will appear on the screen. "Reading" display will change to "No Disc". (If DVD disc
has already loaded, play-back will start automatically.)


3 Press OPEN/CLOSE.

The disc tray opens.

4 Place the disc on the disc tray.

natural_image
Illustration of a hand pressing down on a circular object on a base, with no visible text or symbols.With the playback side down
- There are two different disc sizes. Place the disc in the correct guide on the disc tray. If the disc is out of the guide, it may damage the disc and cause the unit to malfunction.
- Do not place a disc which is unplayable on the disc tray.
5 Press OPEN/CLOSE or PLAY.


The disc tray closes automatically. On the TV-screen, “▲ changes to “Reading” and then playback commences.


- A menu screen will appear on the TV screen, if the disc has a menu feature. Press ▲/▼ or ◀/▶ to select title, then press ENTER. Title is selected and play commences.
6 Press STOP to end playback.

■ Resuming facility
- The unit records the stopped point, depending on the disc. "appears on the screen. Press PLAY to resume playback (from the scene point).
- If you press STOP again or unload the disc ("■" appears on the screen.), the unit will clear the stopped point.
■ To start playback in the stop mode Press PLAY.

Note:
If the unit does not operate properly:
Static electricity, etc., may affect the player's operation. Disconnect the AC power cord once, then connect it again.
Playing a disc (Continued)

Basic playback
■ To pause playback (still mode)
Press PAUSE/ STILL during playback.

To resume normal playback, press PLAY.
• The sound is muted during still mode.
■ To stop playback
Press STOP.

■ To remove the disc
Press OPEN/CLOSE.

Remove the disc after the disc tray opens completely.

Be sure to press OPEN/CLOSE to close the disc tray after you remove the disc.
Notes:
- If a non-compatible disc is loaded, "Incorrect Disc", "Region Code Error" or "Parental Error" will appear on the TV screen according to the type of loaded disc. In this case, check your disc again (see pages 9 and 64).
• Some discs may take a minute or so to start playback. - When you set a single-faced disc label downwards (ie. the wrong way up) and press OPEN/CLOSE or PLAY on the unit, "Reading" will appear on the display for a few minutes and then "Incorrect Disc" will continue to be displayed.
- Some discs may not work the resuming facility.
- Resuming cannot function when you play a PBC-featured Video CD while the PBC is on. To turn off the PBC, see page 53.
- Some playback operations of DVDs may be intentionally fixed by software producers. Since this unit plays DVDs according to the disc contents the software producers designed, some playback features may not be available. Also refer to the instructions supplied with the DVDs.
- Do not move the unit during playback. Doing so may damage the disc.
- Use OPEN/CLOSE to open and close the disc tray. Do not push the disc tray while it is moving. Doing so may cause the unit to malfunction.
- Do not push up on the disc tray or put any objects other than discs on the disc tray. Doing so may cause the unit to malfunction.
- In many instances, a menu screen will appear after playback of a movie is completed. Prolonged display of an on-screen menu may damage your television set, permanently etching that image onto its screen. To avoid this, be sure to press POWER on your remote control once the movie is completed.
- There may be a slight delay between the button is pressed and the function activates.
■ To obtain a higher quality picture
Occasionally, some picture noise is not usually visible on the TV screen during a normal broadcast while playing a DVD video disc. It is because due to high resolution pictures on these discs which include a lot of information. The amount of noise depends on the TV you use with this unit. You should generally reduce the sharpness adjustment on your TV when viewing DVD video discs.
■ About DVD VCD CD USB
The DVD/CD/CD USB Icons on the heading bar show the playable discs for the function described under that heading.
DVD : You can use this function with DVD video discs.
vcd : You can use this function with Video CDs.
cd : You can use this function with Audio CDs and CD-R/RW CDs.
USB : You can use this function with USB Mass Storage.


Playing in fast reverse or fast forward directions
Press REV or FF during playback.


REV: Fast reverse playback FF: Fast forward playback
Each time you press REV or FF, the playback speed changes.
■ To resume normal playback Press PLAY.

Notes:
- The unit mutes sound and subtitles during reverse and forward scan of DVD/VCD video discs. However, the unit plays sound during fast forward or fast reverse play of audio CDs.
• The playback speed may differ depending on the disc.

Playing frame by frame
Press PAUSE/ STILL during still playback.

Each time you press PAUSE/ STILL, the picture advances one frame.
■ To resume normal playback Press PLAY.

Note:
The sound is muted during frame by frame playback.

Playing in slow-motion
Press SLOW during playback.

Each time you press the button, the slow-motion speed changes.
■ To resume normal playback Press PLAY.

Note:
The sound is muted during slow-motion playback.

Locating a chapter or track
Press SKIP for repeatedly to display the chapter or track number you want.
Playback starts from the selected chapter or track.

To locate succeeding chapters or tracks.

Playback starts from the beginning of the current chapter or track. When you press twice in quick successions, playback starts from the beginning of the preceding chapter or track.
Note:
Press and hold SKIP on the unit during playback to play forward or in reverse. Afterwards, each time you press and hold SKIP, the playback speed will change.
Notes:
- A prohibition symbol "X" may appear at the upper right of the screen. This symbol means either the feature you tried is not available on the disc, or the unit cannot access the feature at this time. This does not indicate a problem with the unit.
- The unit is capable of holding a still video image or On screen display image on your television screen indefinitely. If you leave the still video image or On screen display image displayed on your TV for an extended period of time, you risk permanent damage to your television screen. Projection televisions are very susceptible.
Advanced playback (DVD)
Zooming/Locating desired scene


Zooming
This unit will allow you to zoom in on the frame image. You can then make selections by switching the position of the frame.
1
Press ZOOM during playback.

The center part of the image will be zoomed in.
Each press of ZOOM will change the ZOOM Q1 (x 1.3), Q(x 1.5) and 3 Q (x 2.0).

2
Press ▲/▼t#view a different part of the frame.

You may move the frame from the center position to UP, DOWN, LEFT or RIGHT direction.
3
In the zoom mode, press ZOOM repeatedly to return to a 1:1 view (Off).

Notes:
- Y ou can select the Pause, Slow or Search playback in the zoom mode.
- Some discs may not respond to zoom feature.

Locating desired scene
Use the title, chapter and time recorded on the DVD disc to locate the desired point to play back. In the case of VCD/CD disc, time and track are used to locate the desired point to play back.
To check the title, chapter and time, press DISPLAY.
1
Press JUMP during playback or stop mode.

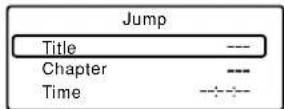
- “T ime” only works in playback or resume stop mode.
2
Press ▲ or to select the "Time", "Title" or "Chapter".

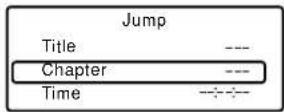
3
Press Number buttons (0–9) to change the number.


- If you input a wrong number, press CANCEL.
• Refer to the package supplied with the disc to check the numbers.
4
Press ENTER. Playback starts.

- When you change the title, playback starts from Chapter 1 of the selected title.
- Some discs may not work in the above operation.
Notes:
- In case of the Audio CD and Video-CD, only Track and Time can be selected.
- In case of the Video-CD playback with PBC, the JUMP does not work. To turn off PBC, see page 53.
Repeat playback/A-B Repeat playback
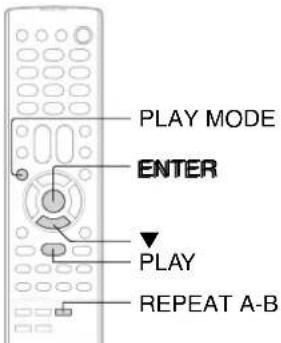

Repeat playback
1
Press PLAY MODE during playback or stop mode.

2
[DVD]
Press ENTER to select "Chapter" or "Title".

The unit automatically starts repeat playback after finishing the current title or chapter.

[Video CD]
Press ▼ to select "Repeat".
Press ENTER to select "Track" or "All".
The unit automatically starts repeat playback after finishing the current track.

- If you set the repeat mode during stop mode, press PLAY to start Repeat playback.
[Audio CD and MP3/WMA CD]
Please see "Repeat playback (CD/USB)"58.
3
Press PLAY MODE again to make the screen disappear.
■ To resume normal playback
Select Repeat: "Off" in step 2.
Notes:
• Some discs may not work with the repeat operation.
- In case of Video CD with PBC, repeat functions are prohibited during playback.

A-B Repeat playback
A-B repeat playback allows you to repeat material between two selected points.
1
Press REPEAT A-B during playback.

The start point is selected.

2
Press REPEAT A-B again.

The end point is selected. Playback starts at the point that you selected. Playback stops at the end point, returns to Point A automatically, then starts again.

■ To resume normal playback
Press REPEAT A-B again.

Off" appears on the screen.
Notes:
- In A-B Repeat mode, subtitles near the A or B locations may not be displayed.
- You cannot set the A-B Repeat for the scenes that include multiple angles.
- A-B Repeat playback does not work when Repeat playback is activated.
- You may not be able to set A-B Repeat, during certain scenes of the DVD, MP3/WMA/JPEG CD.
• A-B Repeat does not work with an interactive DVD.
• A-B Repeat is prohibited when PBC is on.
Program playback/Random playback
You can arrange the playback order of tracks or files on the disc. And the unit can also select tracks or files at random and playback them. These feature works for Video CD.
For Audio CD and MP3/WMA CD, please see "Random playback (CD/USB)"
58 and "Program playback (CD/USB)" 59.

VCD Program playback
1 Press PLAY MODE in the stop mode. TRK- Play Mode

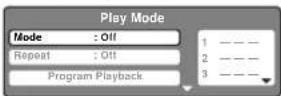
2 Press or to select "Mode", then press ENTER to select "Program".

3 Press ◀/▶ to select the right column, then use Number buttons (0–9) to input the track numbers. To program others, press ▲/▼ to select the programming position, then use Number buttons (0–9) to input the track numbers.

• To program others, repeat step 3.
- If you input a wrong number, press CANCEL.


0

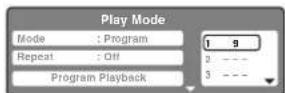
4 Press ◀/▶ to return to the left column, then press ▲/▼ to select the "Program Playback" and press ENTER.
The programs you selected will start to playback in the order.
- To resume normal playback, select Mode: "Off" in step 2.

■ To change the program
- Select Mode to "Program" (as step 2), press ◀/▶ to select the right column, then press ▲/▼ to select the track/file number you want to change, then press CANCEL.
- Press Number buttons (0–9) to overwrite the new track/file number.
■ To clear the program one by one
Select Mode to "Program", press ◀/▶ to select the right column, then press ▲/▼ to select the track/file number. Then press CANCEL.
■ To clear all the programs
In the left column, press ▲/▼ to select "Clear Program". Then press ENTER.
Notes:
- In playing back the Video CD with PBC, you cannot set Program playback.
- The program is canceled when you open the disc tray or turn the power off.
VCD Random playback
1 Press PLAY MODE during playback or stop mode.

2 Press ▲/▼ to select "Mode", then press ENTER to select "Random".

Stop mode

Playback mode

3 Press PLAY. PLAY

The Random Playback will start.
- If you set "Random" during playback mode, Random playback will begin after the track/file that is currently being played has ended.
- To resume normal playback, select Mode: "Off" in step 2.
Note:
In playing back the Video CD with PBC, you cannot set Random playback.
Changing angles/Title selection/DVD menu

DVD Changing angles
When playing back a disc recorded with multi-angle facility, you can change the angle that you are viewing the scene from.

Press ANGLE during playback.

The current angle will appear.

Press ANGLE repeatedly until the desired angle is selected.

Note:
Depending on the DVD, you may not be able to change the angles even if multi-angles are recorded on the DVD.
DVD Title selection
Two or more titles are recorded on some discs. If the title menu is recorded on the disc, you can select the desired title.

Press TOP MENU during playback.

Title menu appears on the screen.

Press ▲▼to select the desired title.


Press ENTER or PLAY.
The playback of the selected title will start.

Note:
Depending on the DVD, you may not be able to select the title. Depending on the DVD, a "title menu" may simply be called a "menu" or "title" in the instructions supplied with the disc.

DVD menu
Some DVDs allow you to select the disc contents using the menu.
When you play back these DVDs, you can select the subtitle language and sound-track language, etc. using the menu.

Press DVD MENU during playback.

The DVD menu appears on the screen.
- Press DVD MENU again to resume playback at the scene when you pressed DVD MENU.

Press ▲▼toselect the desired item.


Press ENTER.

The menu continues to another screen. Repeat steps 2 and 3 to set the item completely.
Note:
Depending on the DVD, you may not be able to resume playback from the scene point when you pressed DVD MENU.
Advanced playback (DVD)
Changing soundtrack language/Subtitles


Changing soundtrack language
You can select the language when you play a multilingual disc.
1
Press AUDIO SELECT during playback.
The current soundtrack language will appear.
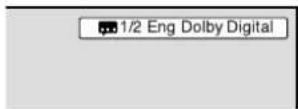
2
Press AUDIO SELECT repeatedly until the desired language is selected.
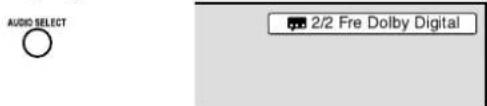
- The on screen display will disappear after a few seconds.
In case of Video CD playback
Audio type changes as follows each time you press AUDIO SELECT.

flowchart
graph LR
    LR1["LR"] --> LR2["L"]
    LR2 --> LR3["R"]

Subtitles
When playing back a disc recorded with subtitles, you can select the subtitle language or turn the subtitle off.
1
Press SUBTITLE repeatedly during playback until your desired language appears.

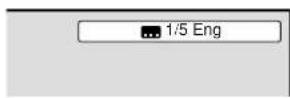
2
To turn off the subtitle, press SUBTITLE until "Off" appears.


• The on screen display will disappear after a few seconds.
Notes:
- Depending on the DVD, you may not be able to change subtitles, or to turn subtitles on or off.
- While playing a DVD, the subtitle may change when you open or close the disc tray.
• In some cases, a selected subtitle language may not be changed immediately.
Notes:
- If the desired language is not heard after pressing the button several times, the language is not recorded on the disc.
- Changing soundtrack language is canceled when you open the disc tray. The initial default language or available language will be heard if the disc is played back again.
- If you select DTS in playing DTS-encoded disc, no sound will be heard from the unit's speakers.

sc status/To turn off the PBC
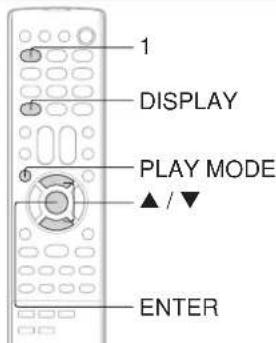

Disc status
With each press of DISPLAY, the status of the disc will appear on the screen and change as follows. To cancel the display, press DISPLAY again.

DVD
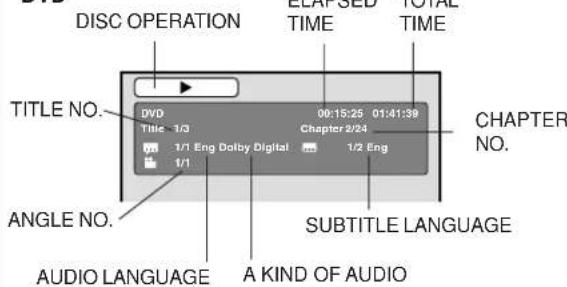
Video CD


To turn off the PBC

Press PLAY MODE in the stop mode.


Press ▲ to select "Mode", then press ENTER to select "Off".


Press PLAY MODE again to make the screen disappear.
■ To turn on the PBC
Follow the above steps 1\~2, then press ENTER repeatedly until "PBC" appear.
Note:
You can also turn off the PBC by pressing number button 1 and ENTER in the stop mode.
MP3/WMA/JPEG/DivX® and Audio CD operation
This player can play back the MP3/WMA/JPEG/DivX®-data which has been recorded on CD-R/RW or USB Mass Storage. Audio CD also can be played back. To produce the MP3/WMA/JPEG/DivX®-data, you need a Windows-PC with CD-RW drive or USB memory device and a MP3/WMA/JPEG/DivX®-encoding Software (not supplied). The Apple-HFS-System cannot be played.
Note:
This unit requires discs/recordings to meet certain technical standards in order to achieve optimal playback quality. There are many different types of recordable disc formats (including CD-R containing MP3/WMA files). Not all recordable discs will operate or produce optimal playback quality. The technical criteria set forth in this owner's manual are meant only as a guide. Use of CD-RW for MP3 files is not recommended. You must obtain any required permission from copyright owners to download or use copyrighted content. Toshiba cannot and does not grant such permission.
MP3/WMA/JPEG/DivX® - data information
Limitations on MP3/WMA/JPEG/DivX® playback
- MP3/WMA/JPEG/DivX ^ CD/USB Mass Storage are standardized by ISO9660, its file name must include following extensions; ".mp3", ".wma", ".jpg", ".div", ".divx", ".avi".
- MP3/WMA/JPEG/DivX ^06 CD/USB Mass Storage must be correspond to the ISO standardized files.
- This unit can read 600 files per disc. If one directory has more than 600 files, it reads up to 600 files, the remaining files will be omitted. (In case of USB Mass Storage, this limitation becomes 2,000 files).
- The unit is able to recognize up to a maximum of 50 directories per disc or USB Mass Storage.
- MP3/WMA/JPEG/DivX ^® CDs/USB Mass Storage cannot be used for the purpose of recording on this unit.
- If the CD/USB Mass Storage has both CDA audio tracks and MP3/WMA/JPEG/DivX ^ files, only the CDA audio tracks will be played.
- It may take more than one minute for this unit to read MP3/WMA/JPEG/DivX ^® files depending on its structure.
- Music recorded by "Joliet Recording Specification" can be played back.
- The music files recorded by "Hierarchical File System" (HFS) cannot be played.
Limitations on displaying of the file name.
- The maximum number for display is 15 characters. Long file names will be condensed.
• A v ailable characters for display are the following:
capital or small alphabets of A through Z, numbers of 0 through 9, and _ (under score). - Other characters than those above are replaced in hyphen.
To play back MP3/WMA/JPEG/DivX® CD/USB Mass Storage in the recorded order.
- Use MP3/WMA/JPEG/DivX ^® software that records data alphabetically or numerically.
- Insert two or three digit number in the head of file name. (ex. "01" "02" or "001" "002").
- Refrain from making too many sub-folders.
- Some MP3/WMA/JPEG/DivX ^ CDs/USB Mass Storage cannot be played back depending on the recording conditions.
- The CD-R/RW or USB Mass Storage that has no music data or non MP3/WMA/JPEG/DivX ^ files cannot be played back.
CAUTION:
Standard sampling frequency, and the bit rate:
MP3
MPEG-1 Audio
32kHz, 44.1kHz, 48kHz
32kbps \~ 320kbps (constant bit rate or variable bit rate)
The recommend recording setting for a high-quality sound is 44.1kHz of sampling frequency and 128kbps of constant bit rate.
WMA
WMA version 7 and 8
32kHz/48kbps, 44.1kHz/48kbps\~192kbps, 48kHz/128kbps\~192kbps
The file recorded by mono, 48kHz, 48 kbps is not available to this unit.
DivX ^® video
DivX® version: DivX® 3, 4, 5, and 6 (specifically 3.1.1, 4.1.2, 5.0.2, 5.0.5, 5.1.1, 5.2.1, 6.0 at Home Theater profile).
Audio format: MPEG1 Layer2 (MP2), MPEG1 Layer3 (MP3)
Sampling frequencies: 32kHz, 44.1kHz, 48kHz
Bit rate: 32kbps \~ 320kbps
Resolution: Max 720 x 576 (at 25fps), Max 720 x 480 (at 30fps)
Microsoft, Windows Media, and Windows Logo are either or registered trademarks or trademarks of Microsoft Corporation in the United States and/or other countries.
DivX, DivX Certified, and associated logos are trade marks of DivX, Inc. and are used under license.


Loading media
1 [MP3/WMA/JPEG/DivX® CD, Audio CD] Place a MP3/WMA/JPEG/DivX® CD or an Audio CD onto the disc tray, then press OPEN/CLOSE. [USB Mass Storage] Connect USB Mass Storage to the USB port on the front of the unit (see page 18).

2 Press DVD/USB to display the media selection window. Press ◀ or ▶ to select the DISC mode or the USB mode, then press ENTER.


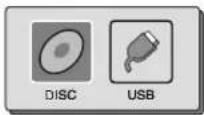
You cannot select the mode if DISC/USB media is not inserted.
3 A file browser screen will be appear on the screen.
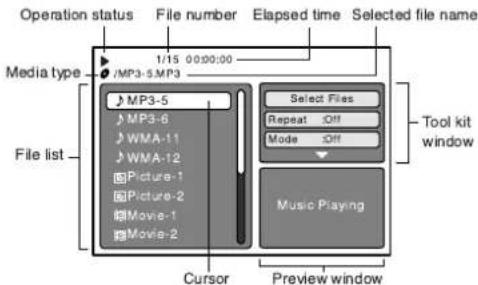
Media type
: CD-R/RW or Audio CD
: USB Mass Storage
File type
♪ : Indicates Music file (Audio/MP3/WMA)
: Indicates Picture file (JPEG)
: Indicates Movie file (DivX®video)
- In case the current directory includes 9 files or more, press ▲ or ▼ to scroll in the file list.
- To see contents in folder, select the folder and then press ENTER. To return to the upstairs directory, select "Go Up ..." then press ENTER.
- In case of a CD/USB Mass Storage containing a mixture of MP3, WMA, JPEG and DivX® files, the files are played back by selecting them from the file browser.

MP3/WMA and Audio CD playback
1 In the file browser, press ▲/▼ to select the desired file.


When PLAY is pressed after displaying file browser, or when the disc tray is closed by pressing PLAY, playback begins automatically starting from the first file. In this case, if the first file is an MP3/WMA file, only MP3/WMA files are played back in order. If the first file is a JPEG file, the first JPEG file is played back. If the first file is a DivX ^® file, the first DivX ^® file is played back. If there is no file at a root directory, playback does not begin automatically.
Press ENTER.
The selected file starts playing back.
Press STOP to end playback.

- The unit records the stopped point. " Appears on the screen. Press PLAY to resume playback (from the scene point).
- If you press STOP again or unload the disc, the unit will clear the stopped point.
Notes:
- MP3 or WMA file on the Kodak Picture CD is not recognized on this unit.
- During MP3/WMA/JPEG-Playback, you cannot use JUMP and A-B Repeat functions.
- You can use Repeat (Track or All), Random functions and Program playback for MP3/WMA/JPEG/DivX®-Playback 58, 59.
■ Select Files
The file type to make it display in the file browser can be chosen.
- Press ◀ or ▶ to highlight "Select Files" at right column in the file browser.
- Press ENTER, then press ▲ or ▼ to select file type from the list (Music, Picture or Movie).
- Press ENTER to add/remove check mark. Checked file type will be displayed in the file browser.
- Press RETURN to save the setting.
MP3/WMA/JPEG/DivX® and Audio CD operation (Continued)

natural_image
Pure electrical circuit lines without any symbolsZOOM
DVD MENU

PLAY
STOP
SKIP
PAUSE/ STILL
ANGLE
TOP MENU

JPEG playback
1 In the file browser, press ▲/▼ to select the desired JPEG file. To display a thumbnail list, press DVD MENU. Press ◀/► or ▲/▼ to select the desired file. (To return to a file browser, press TOP MENU.)


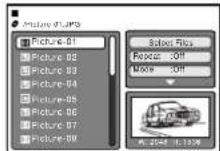
When PLAY is pressed after displaying the file browser, or when the disc tray is closed by pressing PLAY, playback begins automatically starting from the first file. In this case, if the first file is a JPEG file, the first JPEG file is played back. If the first file is a DivX ^ file, the first DivX ^ file is played back. If the first file is an MP3/WMA file, only MP3/WMA files are played back in order. If there is no file at a root directory, playback does not begin automatically.

Press ENTER. The selected picture appears on the screen.


Rotating an image
You can rotate an image by 90 degrees by pressing ANGLE during playback of the image.


screen.
Zooming an image
Zoom function also can be used in viewing JPEG files. Press ZOOM (See "Zooming" 48).

Press STOP to end playback.

The file browser appears on the screen. If you want to watch the other file, repeat steps 1 \~ 2.

Slide show playback
The slide show enables you to view pictures (files) one after another automatically.
Preparation:
Set "JPEG Interval" setting to "5 Seconds", "10 Seconds" or "15 Seconds" 63.

Select your desired starting file for the slide show in the step 1 as left.

Press ENTER or PLAY to start slide show from the selected file.

- If you press PAUSE/ STILL during the slide show, the slide show stops temporary. " II " appears briefly on the picture.
If the picture appears upside down or sideways, press ANGLE repeatedly until it's right side up.
Press PLAY or SKIP ▶ again to resume the slide show. - When the slide show playback finished, the file list appears.
- To stop the slide show, press STOP. The file list appears.
Note:
During JPEG playback, you cannot use Jump and A-B Repeat functions.

DivX® playback
1
Press ▲/▼ to select desired DivX® file.
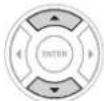
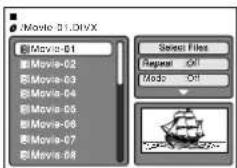
When PLAY has been pressed after displaying the file browser, or when the disc tray has been closed after pressing PLAY, playback begins automatically starting from the first file. In this case, if the first file is a JPEG file, the first JPEG file is played back. If the first file is a DivX ^® file, the first DivX ^® file is played back. If the first file is an MP3/WMA file, only MP3/WMA file are played back in order. If there is no file at a root directory, playback does not begin automatically.
2
Press ENTER or PLAY. The selected DivX ^® movie will be played back on the screen.


3
Press STOP to end playback.

The file browser appears on the screen. If you want to watch the other file, repeat steps 1 \~ 2.

natural_image
Diagram of a remote control panel with labeled buttons and circular indicators (no text or symbols)

Playing DivX® VOD content
DivX® VOD content is protected by DRM (Digital Rights Management) system. This restricts playback of content to specific registered devices.
If the incorrect DRM file is loaded, "Authorization Error This player is not authorized to play this video." will appear on the screen.
When you attempt to play DivX® VOD, the number of plays is limited and the right the screen. If you wish to p

- If the number of plays goes over the limit, then "Rental Expired" will be displayed, in this case the file will not be played.
Notes:
- In order to play DivX® VOD content on this unit, you first need to register the unit with registration code. See page 64.
- This unit cannot playback the DivX ^® VOD content on the USB Mass Strage.
Advanced playback (DVD)
MP3/WMA/JPEG/DivX® and Audio CD operation (Continued)

CD USB Repeat playback (CD/USB) Random playback (CD/USB)
1 In the file browser, press ◀/▶ or ▲/▼ to select "Repeat" during stop mode.
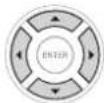
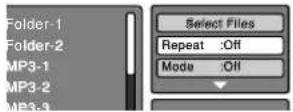
2 Press ENTER to select "Track" or "All".


3 Press PLAY.

The unit automatically starts repeat playback after finishing the current track.
1 In the file browser, press ◀/▶ or ▲/▼ to select "Mode" during stop mode.


2 Press ENTER to select "Random".


3 Press PLAY. PLAY

The Random playback will start.
■ To resume normal playback
Select Repeat: "Off" in step 2.
■ To resume normal playback
Select Mode : "Off" in step 2.
Notes:
- The program is canceled when you open the disc tray or turn the power off.
- In case of Audio CD, the function of A-B Repeat also can be used. See "A-B Repeat playback" 49.
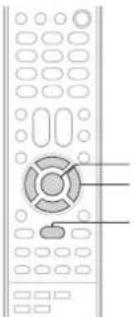
natural_image
Diagram of a remote control panel with circular buttons and a central rotary knob (no text or symbols)ENTER

PLAY

Program playback (CD/USB)
1 In the file browser, press ◀/► or ▲/▼ to select "Edit Mode", then press ENTER.

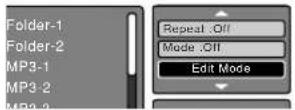
When "Edit Mode" is black color, you can mark the files which you want to add into Program list.
2 Press ◀/▶ or ▲/▼ to select file you want to add into the program list.

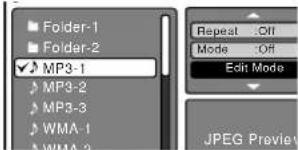
Press ENTER. Selected file was marked.
Repeat this procedure to select the other files.
3 Press ◀/▶ or ▲/▼ to select "Add To Program". Then press ENTER. All marked files are added into the program list.
When you finish store all files which you want into the Program list, press "Edit Mode" again to release edit mode.
4 Press ◀/▶ or ▲/▼ to select "Program View", then press ENTER. Program View shows only the programmed files that you have added in Step 2.
Program View


Browser View
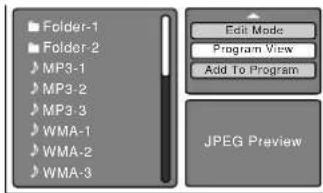
5 In the Program View, press PLAY. The files start to playback in programmed order that were added by you.
To remove file from program list
In the Edit Mode, switch to Program View. Select file you want to remove, then press ENTER. Select "Clear Program" and press ENTER. Marked file is removed from program list.

Customizing the function settings
You can change the default settings to customize performance to your preference.
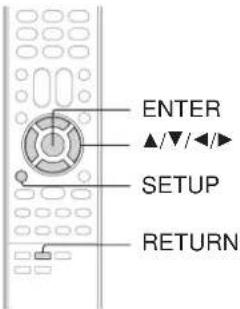

Setting procedure
1
Press SETUP during stop mode.

The following on-screen display appears.
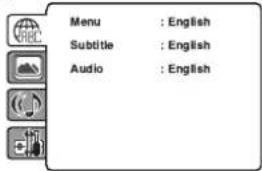
2
Press ▲ or ▼ to select the desired section, then press ◀ or ▶.


3
First option will be highlighted. Press ▲ or ▼ to select the desired option.


4
Then press ▶ or ENTER. The selectable setting will appear.
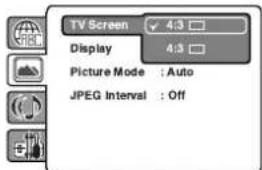
5
Change the selection using ▲ or ▼, by referring to the corresponding pages 62\~64. Press ENTER to save the setting.

- Repeat steps 3 and 5 to change other settings.
• To select another operation, go back to step 2 by pressing repeatedly.
6
To clear SETUP screen press SETUP or RETURN.


Setting details
| Section | Option | Details | Page |
 | Menu Subtitle Audio | To select the language of “Menu”, “Subtitle” and “Audio” if more than one language are available on the disc. | 62 |
 | TV Screen | To select a picture size according to the aspect ratio of your TV. | 62 |
| Display | To turn on or de-activate the operational status display on the screen. | 62 | |
| Picture Mode | To select a preferred picture mode from “Video”, “Film” or “Auto”. | 63 | |
| JPEG Interval | To select a preferred setting for the slide show playback. | 63 | |
 | DRC | To select On or Off for DRC (Dynamic Range Control). | 63 |
 | Parental | To select a preferred parental level for the parental setting. | 64 |
| Password | Input 4-digit password to set the parental level. | ||
| DivX(R) VOD | To display your 8-character registration code. |
Function setup (DVD)

Customizing the function settings (Continued)
Setting details


Menu : English Subtitle : English Audio : English
■ Menu, Subtitle, Audio
You can select the language of "Menu", "Subtitle" and "Audio" if more than one languages are recorded onto the disc.
English, Francais, Espanol:
The selected language will be heard or seen.
Other:
Other language can be selected (see the "Language code list" on page 66).
Original: (Audio)
The unit will select the first-priority language of each disc.
Off: (Subtitle)
Subtitles do not appear.
Notes:
- If the selected language is not recorded on the disc, the first-priority language is selected.
- If you want to change the OSD language, you can perform it by TV MENU (see page 23).

You have the following screen sizes to choose from:
4:3 □ Letter box:
Select this mode when connecting to a conventional TV. When playing back a wide screen-DVD disc, it displays the wide picture with black bands at the top and bottom of screen.
4:3 □ Pan scan:
It displays the wide picture on the whole screen with left and right edges automatically cut off.
Press OPEN/CLOSE to view in the selected screen size.
■ Display
On screen display can be switched on or off when you press the buttons.
On: On screen displays appear when you press the buttons (factory setting).
Off: On screen displays do not appear when you press any buttons.
Picture Mode
There are two types of source content in pictures recorded in DVD video discs: film content (pictures recorded from films at 24 frames per second) and video content (video signals recorded at 30 frames per second). Make this selection according to the type of content being viewed.
Auto: Select this position normally.
The DVD player automatically detects source content, film or video, of playback source, and converts that signal in the progressive output format in an appropriate method.
Film: The DVD player converts film content pictures in the progressive output format appropriately. Suitable for playback of film content pictures. The progressive output feature will be most effective under this selection.
Video: The DVD player filters video signal, and converts it in the progressive output format appropriately. Suitable for playback of video content pictures.
Note:
Depending on the disc, pictures may be cut off or doubled. In this case, select "Video".
JPEG Interval
You can continuously play back all JPEG files automatically.
After the setting below, start playing the disc on which JPEG files have been recorded.
Off:
Plays back one file at a time.
5 Seconds:
Plays back images in the form of a slide show at 5 second intervals.
10 Seconds:
Plays back images in the form of a slide show at 10 second intervals.
15 Seconds:
Plays back images in the form of a slide show in 15 second intervals.

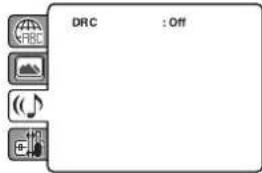
DRC
DRC (Dynamic Range Control) enables you to control the dynamic range so as to achieve a suitable sound for your equipment.
On: Loud sound such as explosion or similar is toned down slightly when played back. This makes it suitable for when it is connected to a stereo.
Off: It plays back at the recording level on the disc.
Notes:
- This function works only during playback of Dolby Digital recorded discs.
- The level of Dynamic Range Reduction may differ depending on DVD video disc.

Customizing the function settings (Continued)
Setting details
Parental : Off
Password : Change
DivX(R) VOD : Display
■ Parental control setting
Some discs are specified not suitable for children. Such discs can be limited not to play back with the unit.
1) Press ▲ or ▼ to select "Parental", then press ENTER. "Enter Password" screen will appear. 2) Press "0000" using Number buttons (0–9). (Please note, this is pre-setting password of this unit). Then press ENTER. The parental level list will appear.
- Level Off: The parental control setting does not function.
• Level 8: All DVD software can be played back.
• Level 1: DVD software for adults cannot be played back.
3) Press ▲ or ▼ to select from the level 1 to level 8. The limitation will be more severe as the level number is lower. Then press ENTER.
4) Press OPEN/CLOSE to activate Parental control setting.
Notes:
- Depending on the discs, the unit cannot limit playback.
- Some discs may not be encoded with specific rating level information though its disc jacket says "adult." For those discs, the age restriction will not work.
- The password is required every time when you change the parental level.
- If you input a wrong number, press CANCEL.
■ Set the new password
1) Press ▲ or ▼ to select "Password", then press ENTER. "Enter Current Password" screen will appear.
2) Press Number buttons (0–9) to input the current password (If the password has not been set yet after you purchase this unit, it is "0000").
3) Then press ENTER. "Enter New Password" screen will appear. Press Number buttons (0–9) to input the new password.
4) Press ENTER. Now your new password has been set. Be sure to remember this number!
If you forget the password...
1) Press OPEN/CLOSE to open the disc tray.
2) Remove the disc.
3) Press OPEN/CLOSE again to close the disc tray. "No Disc" appears on the screen.
4) While holding 7 down on the remote control and then press STOP on the front panel. "Password Clear" appears on the screen. Now the password has been returned to the initial value ("0000").
DivX® VOD
In order to play DivX® VOD (Video On Demand) content on this unit, you first need to register the unit with your DivX® VOD content provider. You do this by generating a DivX® VOD registration code, which you submit to your provider.
Press ▲ or ▼ to select "DivX(R) VOD". Then press ENTER. Your 8-character registration code is displayed. Make a note of the code as you will need it when you register with a DivX® VOD provider. Then press ENTER.
Note:
If each setup (pages 62\~64) has been completed, the unit can always be worked under the same conditions (especially with DVD discs).
Each setup will be retained in the memory even if you turn the power off.
Temporary disabling of rating level by DVD disc
Depending on the DVD disc, the disc may try to temporarily cancel the rating level that you have set.
It is up to you to decide whether to cancel the rating level or not.

(DVD) Temporary disabling of rating level by DVD disc
1 Load a DVD disc and press PLAY or OPEN/CLOSE on the unit 45.

natural_image
Illustration of a hand pressing a circular object on a base, with motion arrows indicating direction (no text or symbols)2 If the DVD disc has been designed to temporarily cancel the Rating level, the screen which follows the "Reading" screen will change, depending on which disc is played. If you select "YES" with the ENTER key, password input screen will then appear.
3 Enter the password with Number buttons (0–9). Then press ENTER.

To exit from the entry, press RETURN.

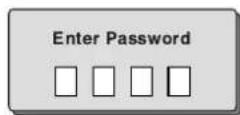
4 Playback will commence if the entered password was correct.
Note:
This temporary cancellation of rating level will be kept until the disc is ejected.
When the disc is ejected, the original rating level will be set again automatically.
Language code list
Enter the appropriate code number for the initial settings "Menu", "Subtitle" and/or "Audio" 62.
| Language Name Code | Language Name Code | Language Name Code | Language Name Code | ||||
| Abkhazian 1112 Fiji 1620 Lingala 2224 Singhalese 2919 | |||||||
| Afar | 1111 | Finnish | 1619 | Lithuanian | 2230 | Slovak | 2921 |
| Afrikaans | 1116 | French | 1628 | Macedonian | 2321 | Slovenian | 2922 |
| Albanian 2927 Frisian 1635 Malagasy 2317 Somali 2925 | |||||||
| Amharic | 1123 | Galician | 1722 | Malay | 2329 | Spanish | 1529 |
| Arabic | 1128 | Georgian | 2111 | Malayalam | 2322 | Sundanese | 2931 |
| Armenian | 1835 | German | 1415 | Maltese | 2330 | Swahili | 2933 |
| Assamese | 1129 | Greek | 1522 | Maori | 2319 | Swedish | 2932 |
| Aymara | 1135 | Greenlandic | 2122 | Marathi | 2328 | Tagalog | 3022 |
| Azerbaijani | 1136 | Guarani | 1724 | Moldavian | 2325 | Tajik | 3017 |
| Bashkir | 1211 | Gujarati | 1731 | Mongolian | 2324 | Tamil | 3011 |
| Basque | 1531 | Hausa | 1811 | Nauru | 2411 | Tatar | 3030 |
| Bengali; Bangla | 1224 | Hebrew | 1933 | Nepali | 2415 | Telugu | 3015 |
| Bhutani | 1436 | Hindi | 1819 | Norwegian | 2425 | Thai | 3018 |
| Bihari | 1218 | Hungarian | 1831 | Oriya | 2528 | Tibetan | 1225 |
| Breton | 1228 | Icelandic | 1929 | Panjabi | 2611 | Tigrinya | 3019 |
| Bulgarian | 1217 | Indonesian | 1924 | Pashto, Pushto | 2629 | Tonga | 3025 |
| Burmese | 2335 | Interlingua | 1911 | Persian | 1611 | Turkish | 3028 |
| Byelorussian | 1215 | Irish | 1711 | Polish | 2622 | Turkmen | 3021 |
| Cambodian | 2123 | Italian | 1930 | Portuguese | 2630 | Twi | 3033 |
| Catalan | 1311 | Japanese | 2011 | Quechua | 2731 | Ukrainian | 3121 |
| Chinese | 3618 | Javanese 2033 | Rhaeto-Romance | 2823 Urdu | 3128 | ||
| Corsican | 1325 | Kannada | 2124 | Romanian | 2825 | Uzbek | 3136 |
| Croatian | 1828 | Kashmiri | 2129 | Russian | 2831 | Vietnamese | 3219 |
| Czech | 1329 | Kazakh | 2121 | Samoan | 2923 | Volapük | 3225 |
| Danish | 1411 | Kirghiz | 2135 | Sanskrit | 2911 | Welsh | 1335 |
| Dutch | 2422 | Korean | 2125 | Scots Gaelic | 1714 | Wolof | 3325 |
| English | 1524 | Kurdish | 2131 | Serbian | 2928 | Xhosa | 3418 |
| Esperanto | 1525 | Laothian | 2225 | Serbo-Croatian | 2918 | Yiddish | 2019 |
| Estonian | 1530 | Latin | 2211 | Shona | 2924 | Yoruba | 3525 |
| Faroese | 1625 | Latvian, Lettish | 2232 | Sindhi | 2914 | Zulu | 3631 |
Reception disturbances
Most types of television interference can be remedied by adjusting the height and position of the VHF/UHF antenna. Outdoor antennas are recommended for best results. The most common types of television interference are shown below. If one of these symptoms appear when the unit is connected to a Cable TV system, the disturbance may be caused by the local Cable TV company broadcast.
IGNITION
Black spots or horizontal streaks may appear, the picture may flutter or drift. Usually caused by interference from automobile ignition systems, neon lamps or AC powered tools and appliances such as drills or hair dryers.

natural_image
Black-and-white portrait of a smiling person with curly hair (no visible text or symbols)GHOSTS
Ghosts are caused by the television signal following two paths. One is the direct path and the other is reflected by tall buildings, hills or other large objects. Changing the direction or position of the antenna may improve the reception.

natural_image
Black-and-white portrait of a person with curly hair (no visible text or symbols)SNOW
If the unit is located far from the TV station, in a fringe reception area where the signal is weak, small dots may appear in the picture. If the signal is extremely weak, the installation of a larger external antenna may be necessary.

natural_image
Grayscale abstract image with indistinct dark shapes on a speckled background (no text or symbols)RADIO FREQUENCY INTERFERENCE (RFI)
Caused by two-way radios, this type of interference produces moving ripples or diagonal streaks in the picture. Some cases may cause a loss of contrast in the picture. Changing the direction and position of the antenna or installing an RFI filter may improve the picture.
natural_image
Silhouette of a person with dark hair against a striped background (no text or symbols)PICTURE SIZE VARIATION
A slight picture size variation is normal when you adjust the CONTRAST or BRIGHTNESS settings.

natural_image
Portrait of a smiling woman with curly hair and a ponytail (no text or symbols visible)CARE AND MAINTENANCE
To prevent fire or shock hazard, disconnect the unit from the power source before cleaning. The finish on the cabinet may be cleaned with mild soap and a soft, damp cloth and cared for as other furniture. Use caution when cleaning or wiping the plastic parts.
Troubleshooting
Check the following guide for the possible cause of a problem before contacting service.
| SYMPTOMS CAUSE | POSSIBLE SOLUTIONS | PAGE | |
| POWER | |||
| No power. | The AC power cord is not connected. | Connect the AC power cord to the AC outlet. | 5 |
| Although the power is on, the unit does not operate. | Cassette or disc is not inserted. | Insert a video cassette or disc. | 34, 45 |
| The TIMER REC button is pressed. | Press the TIMER REC button to cancel timer recording. | 41 | |
| TV BROADCAST RECEPTION | |||
| Poor or no picture. | TV station experiencing problems. | Try another channel. | 24 |
| Picture control is not adjusted. | Check picture control adjustments. | 32 | |
| Possible local interference. | Check for source of reception disturbance. | 67 | |
| Antenna (CABLE) connector is not connected or possible local interference. | Check CABLE connection or VHF/UHF antenna, reposition or rotate antenna. | 13, 14 | |
| Poor or no color. | TV station experiencing problems. | Try another channel. | 24 |
| Picture control is not adjusted. | Check picture control adjustments. | 32 | |
| Possible local interference. | Check for source of reception disturbance. | 67 | |
| Antenna (CABLE) connector is not connected or possible local interference. | Check CABLE connection or VHF/UHF antenna, reposition or rotate antenna. | 13, 14 | |
| TV station experiencing problems. | Try another channel. | 24 | |
| Picture wobbles or drifts. | Antenna (CABLE) connector is not connected or possible local interference. | Check CABLE connection or VHF/UHF antenna, reposition or rotate antenna. | 13, 14 |
| Cable TV channel is scrambled. | Try another channel. | 24 | |
| No CATV reception. | CABLE connector is not connected. | Check all CABLE connections. | 14 |
| TV/CABLE selection is set to the TV position. | Set the selection to the CABLE position. | 27 | |
| Cable TV service interrupted. | Contact your Cable TV company. | - | |
| No reception above channel 13. | TV/CABLE selection is not set to the appropriate position. | Make sure selection is in the appropriate position. | 27 |
| UHF antenna is not connected. | Check UHF antenna. | 13 | |
| Poor or no sound. | TV station experiencing problems. | Try another channel. | 24 |
| Antenna (CABLE) connector is not connected or possible local interference. | Check CABLE connection or VHF/UHF antenna, reposition or rotate antenna. | 13, 14 | |
| Possible local interference. | Check for source of reception disturbance. | 67 | |
| The MUTE button is pressed. | Press the MUTE button to cancel mute function. | 25 | |
| TV shuts off. | TV station stopped broadcasting. | Tune new channel. | 24 |
| Sleep timer is set. | Set Sleep Timer to "0". | 25 | |
| Closed caption is not activated. | TV station experiencing problems or program tuned is not closed captions. | Try another channel. | 24 |
| TV signal is weak. | Check CABLE connection of VHF/UHF antenna, reposition or rotate antenna. | 13, 14 | |
| The CLOSED CAPTION button is not pressed. | Press the CLOSED CAPTION button to turn on the closed caption. | 26 | |
| VCR | |||
| TV recording does not work. | The video cassette's erase prevention tab is broken off. | Place a piece of adhesive tape over the hole. | 34 |
| Timer recording does not work. | The time is not set correctly. | Reset the present time. | 21, 22 |
| The recording start/end time is not set correctly. | Reset the start/end time. | 41 | |
| The TIMER REC button is not pressed (the TIMER REC indicator is not lit). | Press the TIMER REC button (the TIMER REC indicator is lit). | 41 | |
| Noise bars appear on the screen. | Tape is old or worn. | Replace the tape. | - |
| Tracking adjustment is beyond range of automatic tracking circuit. | Adjust tracking manually using the TRK +/- buttons on the remote control. | 36 | |
| Video heads are dirty. | Clean the video heads. | 38 | |
| DVD | |||
| The playback picture has occasional distortion. | The disc is dirty. | Eject the disc and clean it. | 8 |
| It is in fast forward or fast reverse playback. | Some times a small amount of picture distortion may appear. This is not a malfunction. | - | |
| The unit does not start playback. | No disc is inserted. | Insert a disc. | 45 |
| An unplayable disc is inserted. | Insert a playable disc (Check the disc type and color system). | 9 | |
| The disc is placed upside down. | Place the disc with the playback side down. | 45 | |
| The disc is not placed within the guide. | Place the disc correctly inside the guide on the disc tray. | 45 | |
| The parental lock function is set. | Cancel the parental lock function or change the parental lock level. | 64, 65 | |
| Playback does not follow the course of the disc's program. | It is in the mode of repeat playback, memory playback, etc. | These operations may prevent a proper progress of the contents. | - |
| “X appears on the screen. | The function is prohibited with the unit or the disc. | - | 9 |
| REMOTE CONTROL | |||
| Remote control does not operate. | The remote control is not aimed at the sensor. | Aim the remote control at the remote sensor. | 12 |
| Distance is too far or too much light in the room. | Operate within 5 m or reduce the light of the room. | 12 | |
| There is an obstacle in the path of the beam. | Clear the path of the beam. | 12 | |
| The batteries are weak. | Replace the batteries. | 12 | |
| The batteries are not inserted correctly. | Insert correctly. | 12 | |
Others
Specifications
| MW20F52 | MW24F52 | |
| General | ||
| Power supply | AC 120 V 60 Hz | |
| Power consumptionOperation:Stand by: | 110 W 135 W | |
| 4 W | ||
| Picture tube | 20 in. (508 mm) diagonal* 24 in. (600 mm) diagonal* | |
| Speaker | 1-13/16 x 3-7/8 inches (46 x 99 mm), 8 Ω x 2 | |
| Audio output power | 2.5 W + 2.5 W | |
| Weight | 59.5 lbs (27 kg) 79.4 lbs (36 kg) | |
| DimensionsWidth:Height:Depth: | 22-9/16 inches (573 mm) 25-13/16 inches (655 mm)20-3/8 inches (517 mm) 22-13/16 inches (580 mm)18-15/16 inches (481 mm) 18-5/8 inches (472.5 mm) | |
| Tuner | 181 channel freq. synthesizedVHF 2-13UHF 14-69CATV 125 Channels | |
| Antenna input | UHF/VHF: 75 Ω coaxial | |
| Color system | NTSC | |
| Video head | 4 Rotary heads | |
| Audio track | Hi-Fi sound - 2 Tracks / MONO sound - 1 Track | |
| Hi-Fi frequency response | 20 Hz to 20 kHz | |
| Hi-Fi dynamic range | More than 90 dB | |
| F.FWD/REWtime at 25°C (77°F) | Approx. 1 minute and 48 seconds (with T-120 cassette tape) | |
| Applicable disc | DVD (12 cm, 8 cm), CD (12 cm, 8 cm) | |
| Frequency range | DVD: 4 Hz-22 kHz, CD: 4 Hz-20 kHz | |
| Operating conditions | Temperature: 5°C-40°C (41°F-104°F), Operating status: Horizontal | |
| Input/Output | ||
| Video input | 1.0 V (p-p), 75 Ω, negative sync., pin jack x 2 | |
| Video output | 1.0 V (p-p), 75 Ω, negative sync., pin jack x 1 | |
| Audio input | -8 dBm, 50 kΩ, negative sync., pin jack (L/R) x 2 | |
| Audio output | -8 dBm, 1 kΩ, negative sync., pin jack (L/R) x 1 | |
| Audio output(DIGITAL COAXIAL) | 0.5 V (p-p), 75 Ω, pin jack x 1 | |
| Supplied accessories | ||
| Remote control (WC-SBU2) ...... 1 | ||
| Batteries (R03/AAA) ...... 2 | ||
| 300-75 Ω matching transformer ...... 1 | ||
* Screen size is approximate.
- This model complies with the above specifications.
- Designs and specifications are subject to change without notice.
- This model may not be compatible with features and/or specifications that may be added in the future.
Limited United States Warranty
for CRT-based TV/DVD Combinations, TV/VCR Combinations, and TV/DVD/VCR Combinations, 25" and Smaller ("TV Combination(s)")
Toshiba America Consumer Products, L.L.C. ("TACP") makes the following limited warranties to original consumers in the United States. THESE LIMITED WARRANTIES EXTEND TO THE ORIGINAL CONSUMER PURCHASER OR ANY PERSON RECEIVING THIS TV COMBINATION AS A GIFT FROM THE ORIGINAL CONSUMER PURCHASER AND TO NO OTHER PURCHASER OR TRANSFEREE.
TV COMBINATIONS PURCHASED IN THE U.S.A. AND USED ANYWHERE OUTSIDE OF THE U.S.A., INCLUDING, WITHOUT LIMITATION, CANADA AND MEXICO, ARE NOT COVERED BY THESE WARRANTIES.
TV COMBINATIONS PURCHASED ANYWHERE OUTSIDE OF THE U.S.A., INCLUDING, WITHOUT LIMITATION, CANADA AND MEXICO, AND USED IN THE U.S.A., ARE NOT COVERED BY THESE WARRANTIES.
Limited Ninety (90) Day Warranty on Labor
TACP warrants this TV Combination and its parts against defects in materials or workmanship for a period of ninety (90) days after the date of original retail purchase. DURING THIS PERIOD, TACP WILL, AT TACP'S OPTION, REPAIR OR REPLACE A DEFECTIVE PART WITH A NEW OR REFURBISHED PART WITHOUT CHARGE TO YOU FOR PARTS OR LABOR.
Limited One (1) Year Warranty on Parts
TACP further warrants the parts in this TV Combination against defects in materials or workmanship for a period of one (1) year after the date of original retail purchase. DURING THIS PERIOD, TACP WILL, AT TACP'S OPTION, REPAIR OR REPLACE A DEFECTIVE PART WITH A NEW OR REFURBISHED PART WITHOUT CHARGE TO YOU FOR THE PART, PROVIDED THAT IF A DEFECTIVE PART IS REPAIRED OR REPLACED AFTER NINETY (90) DAYS AFTER THE DATE OF ORIGINAL RETAIL PURCHASE, YOU MUST PAY ALL LABOR CHARGES IN CONNECTION WITH THE REPAIR OR REPLACEMENT THEREOF.
Limited Two (2) Year Warranty on Picture Tube
TACP further warrants the picture tube in this TV Combination against defects in materials or workmanship for a period of two (2) years after the date of original retail purchase. DURING THIS PERIOD, TACP WILL, AT TACP'S OPTION, REPAIR OR REPLACE A DEFECTIVE PICTURE TUBE WITH A NEW OR REFURBISHED PICTURE TUBE WITHOUT CHARGE TO YOU, PROVIDED THAT IF A DEFECTIVE PICTURE TUBE IS REPAIRED OR REPLACED AFTER NINETY (90) DAYS AFTER THE DATE OF ORIGINAL RETAIL PURCHASE, YOU MUST PAY ALL LABOR CHARGES IN CONNECTION WITH THE REPAIR OR REPLACEMENT THEREOF.
Rental Units
The warranty for TV Combination rental units begins on the date of the first rental or thirty (30) days after the date of shipment to the rental firm, whichever comes first.
Limited Warranty for Commercial Units
TACP warrants TV Combinations that are sold and used for commercial purposes as follows: all parts are warranted against defects in materials or workmanship for a period of ninety (90) after the date of original retail purchase. DURING THIS PERIOD, TACP WILL, AT TACP'S OPTION, REPAIR OR REPLACE A DEFECTIVE PART WITH A NEW OR REFURBISHED PART WITHOUT CHARGE TO YOU.
Owner's Manual and Product Registration Card
Read this owner's manual thoroughly before operating this TV Combination.
Complete and mail the enclosed product registration card or register your TV Combination online at www.tacp.toshiba.com/service as soon as possible. By registering your TV Combination you will enable TACP to bring you new products specifically designed to meet your needs and help us to contact you in the unlikely event a safety notification is required under the U.S. Consumer Product Safety Act. Failure to complete and return the product registration card does not diminish your warranty rights.
Your Responsibility
THE ABOVE WARRANTIES ARE SUBJECT TO THE FOLLOWING CONDITIONS:
(1) You must retain your original bill of sale or provide other proof of purchase.
(2) All warranty servicing of this TV Combination must be performed by an Authorized TACP Service Station.
(3) The warranties from TACP are effective only if this TV Combination is purchased and operated in the Continental U.S.A. or Puerto Rico.
(4) Labor service charges for set installation, setup, adjustment of customer controls, and installation or repair of antenna systems are not covered by this warranty. Reception problems caused by inadequate antenna systems, misaligned satellite dishes, cable television distribution, VCRs, DVD players/recorders, personal computer level IEEE-1394 devices, and any other connected signal source device are your responsibility.
(5) Warranties extend only to defects in materials or workmanship as limited above, and do not extend to any TV Combination or parts that have been lost or discarded by you or to damage to the TV Combination or parts caused by fires, misuse, accident, Acts of God (such as lightning or fluctuations in electric power), improper installation, improper maintenance, or use in violation of instructions furnished by TACP; use or malfunction through simultaneous use of this TV Combination and connected equipment; or to units that have been modified or had the serial number removed, altered, defaced, or rendered illegible.
How to Obtain Warranty Service
If, after following all of the operating instructions in this manual and reviewing the section entitled "Troubleshooting," you find that service is needed:
(1) To find the nearest TACP Authorized Service Station, visit TACP's website at www.tacp.toshiba.com/service or contact TACP's Consumer Solution Center toll free at 1-800-631-3811.
(2) You must present your original bill of sale or other proof of purchase to the TACP Authorized Service Station. You must deliver the entire TV Combination to a TACP Authorized Service Station. You must pay for all transportation and insurance charges for the TV Combination to and from the TACP Authorized Service Station.
For additional information, visit TACP's website: www.tacp.toshiba.com
ALL WARRANTIES IMPLIED BY THE LAW OF ANY STATE OF THE U.S.A., INCLUDING THE IMPLIED WARRANTIES OF MERCHANTABILITY AND FITNESS FOR A PARTICULAR PURPOSE, ARE EXPRESSLY LIMITED TO THE DURATION OF THE LIMITED WARRANTIES SET FORTH ABOVE. WITH THE EXCEPTION OF ANY WARRANTIES IMPLIED BY THE LAW OF ANY STATE OF THE U.S.A. AS HEREBY LIMITED, THE FOREGOING WARRANTY IS EXCLUSIVE AND IN LIEU OF ALL OTHER WARRANTIES, GUARANTEES, AGREEMENTS, AND SIMILAR OBLIGATIONS OF TACP WITH RESPECT TO THE REPAIR OR REPLACEMENT OF ANY PARTS. IN NO EVENT SHALL TACP BE LIABLE FOR CONSEQUENTIAL OR INCIDENTAL DAMAGES (INCLUDING, BUT NOT LIMITED TO, LOST PROFITS, BUSINESS INTERRUPTION, OR MODIFICATION OR ERASURE OF RECORDED DATA CAUSED BY USE, MISUSE OR INABILITY TO USE THIS TV COMBINATION).
No person, agent, distributor, dealer, or company is authorized to change, modify, or extend the terms of these warranties in any manner whatsoever. The time within which an action must be commenced to enforce any obligation of TACP arising under the warranty or under any statute or law of the United States or any state thereof is hereby limited to ninety (90) days from the date you discover, or should have discovered, the defect. This limitation does not apply to implied warranties arising under the law of any state of the U.S.A.
THIS WARRANTY GIVES YOU SPECIFIC LEGAL RIGHTS AND YOU MAY ALSO HAVE OTHER RIGHTS WHICH MAY VARY FROM STATE TO STATE IN THE U.S.A. SOME STATES OF THE U.S.A. DO NOT ALLOW LIMITATIONS ON THE DURATION OF AN IMPLIED WARRANTY, WHEN AN ACTION MAY BE BROUGHT, OR THE EXCLUSION OR LIMITATION OF INCIDENTAL OR CONSEQUENTIAL DAMAGES. THEREFORE, THE ABOVE PROVISIONS MAY NOT APPLY TO YOU UNDER SUCH CIRCUMSTANCES.
TOSHIBA
TOSHIBA AMERICA CONSUMER PRODUCTS, L.L.C.


- Dear Customer,
- Safety Precautions
- WARNING
- NOTE TO CATV INSTALLERS
- NOTICE OF POSSIBLE ADVERSE EFFECTS ON TV PICTURE DISPLAY
- It Makes A Difference Where Your TV Stands
- The Issue
- Toshiba Cares!
- Tune Into Safety
- IMPORTANT SAFEGUARDS
- Important Safety Instructions
- Installation, Care, and Service Installation
- IMPORTANT SAFEGUARDS S
- 26) DANGER: RISK OF SERIOUS
- PERSONAL INJURY OR DEATH!
- Care
- 29) WARNING: RISK OF ELECTRIC SHOCK!
- Service
- SAFETY PRECAUTION/ Power source
- CAUTION:
- Location of the required Marking
- IMPORTANT RECYCLING INFORMATION
- Power source
- TO USE AC POWER SOURCE
- Notes:
- Precautions
- Notes on handling
- Notes on locating
- Notes on cleaning
- Notes on moisture condensation
- ntents
- Introduction
- Connections
- Basic setup
- TV operation
- Playback (VCR)
- Recording (VCR)
- Other functions (VCR)
- Basic playback (DVD)
- Advanced playback (DVD)
- Function setup (DVD)
- Others
- Notes and Information
- On handling discs
- On cleaning discs
- On storing discs
- On Video CDs
- Structure of disc contents
- Notes on region numbers
- Notes on copyright
- About this owner's manual
- USB Port Information
- playable discs
- Identification of controls
- Remote control
- Identification of controls (Continued)
- Inserting batteries
- Remote control basics
- Operation:
- Antenna connections
- Combination VHF/UHF antenna (Single 75 ohm cable or 300 ohm twin-lead wire)
- Combination VHF/UHF antenna (Separate VHF and UHF 300 ohm twin-lead wires)
- Separate VHF/UHF antennas (75 ohm VHF cable and 300 ohm UHF twin-lead wires)
- Cable TV connections
- For subscribers to basic cable TV service
- For subscribers to scrambled cable TV service
- For subscribers to unscrambled basic cable TV service with scrambled premium channels
- Connecting to optional equipment
- Using the audio/video inputs
- Connecting to a camcorder
- Connecting to an audio system
- connecting to optional equipment (Continued)
- Connecting to an amplifier equipped with a Dolby Digital decoder
- Dolby Digital
- Connecting to an amplifier equipped with Dolby Surround Pro Logic
- Dolby Surround Pro Logic
- Connecting to an amplifier equipped with a DTS decoder
- Digital Theater Systems (DTS)
- Connecting to an amplifier equipped with a MPEG audio decoder
- MPEG2 sound
- Connecting to an amplifier equipped with a digital audio input
- channel digital stereo
- connecting to a USB Storage Device
- Note:
- Starting setup
- Press POWER.
- Press ▲ or ▶ select "TV" or "CABLE", then press ENTER.
- Press ▲ or ▼ to select "START", then press ENTER.
- Now the "AUTO CH MEMORY" and "AUTO CLOCK" starts.
- ock setting
- Auto clock setting
- Preparation:
- 1
- Make sure the unit is turned off.
- 2
- Wait at least three minutes and press POWER.
- 3
- Press TV/VCR to select TV/VCR mode. Then press DISPLAY to check the clock on the screen.
- 4
- Auto clock adjustment
- The Auto clock adjustment will be performed at 12:00 PM everyday if you turn off the unit.
- To set auto clock to OFF
- Press MENU, then press ◀ or to select option.
- Press ▲or ☑ select "AUTO CLOCK".
- Press ◀ or ▶ to select "OFF".
- Press MENU repeatedly until the menu screen is cleared.
- To set standard time
- To set daylight saving time
- ock setting (Continued)
- Manual clock setting
- Setting the language/TV/VCR operation status
- Setting the language
- TV/VCR operation status
- ■ CHANNEL UP/DOWN
- ■ CHANNEL RETURN
- MUTE
- SLEEP
- ■ HEADPHONES
- osed captions
- WHAT IS CLOSED CAPTIONING?
- Closed captions
- TO VIEW CLOSED CAPTIONS
- To memorize channels
- TV/CABLE selection
- Cable TV chart
- Automatic memory tuning
- To ADD/DELETE channels
- Setting the V-Chip
- To register password
- To change password
- To set the V-Chip
- To set the on timer
- To set the off timer
- Picture control adjustment/
- Adjusting the picture preference
- Picture control adjustment Adjusting the picture preference
- Selection
- Pressing
- Mode Picture quality
- Sound control adjustment/
- Stereo and Second Audio Program (SAP)
- Sound control adjustment
- Listening to stereo sound
- Listening to SAP (Second Audio Program)
- To select desired sound
- Loading and unloading a cassette tape
- Loading
- Unloading
- To prevent accidental erasure
- Tape speed and maximum recording time
- Cassette tape playback
- Playback
- Rewind or forward the tape
- Special playback
- Picture search
- Reverse picture search function
- Forward picture search function
- Still picture
- Slow motion
- Frame by frame picture
- CM skip
- Digital tracking controls
- nvenient function
- Repeat playback
- Using the real time tape counter
- Press MENU, then press ▶opt ▶select option.
- Press ▲ or ▼ select "AUTO REPEAT".
- Press ◀ or ▶ to select "ON" or "OFF". If "ON" is selected, the playb
- Press MENU repeatedly until the menu screen is cleared.
- To start the playback, press PLAY.
- Press DISPLAY.
- Press COUNTER RESET to set the counter to "00:00:00".
- Begin Playback or Recording to start the tape, the counter will display the elapsed time.
- When you wish to make the counter disappear, press DISPLAY once again.
- ■ To cancel repeat mode:
- convenient function (Continued)
- Zero return function
- Video head cleaning
- ■ Video head clogging
- ■ Video head cleaning
- Recording a TV program
- To stop recording
- To stop recording temporarily
- ■ Auto Rewind feature
- ne-touch Timer Recording (OTR)
- One-touch timer recording (OTR)
- To cancel OTR
- Timer recording
- Example:
- 5
- 6
- 7
- Timer recording (Continued)
- To set daily/weekly timer
- If the programs overlap another
- To confirm the settings
- To cancel a program
- Duplicating a video tape
- Press SPEED to select the desired tape speed SP or SLP.
- Press INPUT once or twice to select AUDIO/VIDEO input position.
- Press REC.
- Press PLAY on the playback VCR or camcorder.
- Press STOP when you finish after duplicating.
- Connection with second video recorder
- Connection with Camcorder
- Recording a DVD/CD disc
- Duplicating a DVD or CD disc
- Playing a disc
- CAUTION
- Basic playback
- Preparations:
- Press POWER on the unit or on the remote control to turn on the unit.
- Press DVD to select DVD mode.
- Press OPEN/CLOSE.
- Place the disc on the disc tray.
- Press OPEN/CLOSE or PLAY.
- Press STOP to end playback.
- ■ Resuming facility
- ■ To start playback in the stop mode Press PLAY.
- Playing a disc (Continued)
- ■ To pause playback (still mode)
- ■ To stop playback
- ■ To remove the disc
- ■ To obtain a higher quality picture
- ■ About DVD VCD CD USB
- Playing in fast reverse or fast forward directions
- Press REV or FF during playback.
- ■ To resume normal playback Press PLAY.
- Playing frame by frame
- Press PAUSE/ STILL during still playback.
- Playing in slow-motion
- Press SLOW during playback.
- Locating a chapter or track
- Press SKIP for repeatedly to display the chapter or track number you want.
- Zooming/Locating desired scene
- Zooming
- Press ZOOM during playback.
- Locating desired scene
- Repeat playback/A-B Repeat playback
- ■ To resume normal playback
- A-B Repeat playback
- Program playback/Random playback
- VCD Program playback
- VCD Random playback
- Changing angles/Title selection/DVD menu
- DVD Changing angles
- DVD Title selection
- DVD menu
- Changing soundtrack language/Subtitles
- Changing soundtrack language
- Press AUDIO SELECT during playback.
- Press AUDIO SELECT repeatedly until the desired language is selected.
- In case of Video CD playback
- Subtitles
- Press SUBTITLE repeatedly during playback until your desired language appears.
- To turn off the subtitle, press SUBTITLE until "Off" appears.
- sc status/To turn off the PBC
- Disc status
- To turn off the PBC
- ■ To turn on the PBC
- MP3/WMA/JPEG/DivX® and Audio CD operation
- MP3/WMA/JPEG/DivX® - data information
- Limitations on MP3/WMA/JPEG/DivX® playback
- Limitations on displaying of the file name.
- To play back MP3/WMA/JPEG/DivX® CD/USB Mass Storage in the recorded order.
- Standard sampling frequency, and the bit rate:
- MP3
- WMA
- DivX ® video
- Loading media
- MP3/WMA and Audio CD playback
- ■ Select Files
- MP3/WMA/JPEG/DivX® and Audio CD operation (Continued)
- JPEG playback
- Rotating an image
- Zooming an image
- Press STOP to end playback.
- Slide show playback
- DivX® playback
- Playing DivX® VOD content
- CD USB Repeat playback (CD/USB) Random playback (CD/USB)
- Program playback (CD/USB)
- To remove file from program list
- Customizing the function settings
- Setting procedure
- Customizing the function settings (Continued)
- Setting details
- ■ Menu, Subtitle, Audio
- English, Francais, Espanol:
- Other:
- Original: (Audio)
- Off: (Subtitle)
- 4:3 □ Letter box:
- 4:3 □ Pan scan:
- ■ Display
- Picture Mode
- JPEG Interval
- Off:
- Seconds:
- Seconds:
- Seconds:
- DRC
- ■ Parental control setting
- ■ Set the new password
- If you forget the password...
- DivX® VOD
- Temporary disabling of rating level by DVD disc
- (DVD) Temporary disabling of rating level by DVD disc
- Language code list
- Reception disturbances
- IGNITION
- GHOSTS
- SNOW
- RADIO FREQUENCY INTERFERENCE (RFI)
- PICTURE SIZE VARIATION
- CARE AND MAINTENANCE
- Troubleshooting
- Specifications
- Limited United States Warranty
- Rental Units
- Limited Warranty for Commercial Units
- Owner's Manual and Product Registration Card
- Your Responsibility
- THE ABOVE WARRANTIES ARE SUBJECT TO THE FOLLOWING CONDITIONS:
- How to Obtain Warranty Service
- TOSHIBA
Brand : TOSHIBA
Model : MW20F52
Category : DVD player