
EC-UBLB - Hard Drive Sabrent - Free user manual and instructions
Find the device manual for free EC-UBLB Sabrent in PDF.


| Product Type | External Hard Drive Enclosure |
| Brand | Sabrent |
| Model | EC-UBLB |
| Compatible Drive | 2.5-inch SATA I/II/III HDD/SSD |
| Interface | USB 3.0 (USB 2.0/1.1 compatible) |
| Data Transfer Rate | Up to 5 Gbps (USB 3.0), 6 Gbps (SATA III) |
| UASP Support | Yes (with compatible host) |
| Dimensions (W x H x D) | 130 mm x 80 mm x 15 mm (5.1 x 3.1 x 0.6 in) |
| Weight | 80 g (2.8 oz) |
| Power Supply | USB bus-powered (no external adapter required) |
| Material | Aluminum (with plastic end caps) |
| LED Indicator | Power/activity (blue) |
| Operating Temperature | 0°C to 70°C (32°F to 158°F) |
| Storage Temperature | -20°C to 80°C (-4°F to 176°F) |
| Operating System Support | Windows, macOS, Linux, Chrome OS, Android (with OTG) |
| Functions | External storage, backup, data transfer, gaming storage |
| Care Instructions | Keep dry, avoid dust, disconnect safely before removal |
| Safety | Over-current protection, short-circuit protection |
| Spare Parts / Repairability | Enclosure only; drive user-replaceable; no user-serviceable parts |
| Package Contents | Enclosure, USB 3.0 cable, screwdriver, screws, manual |
Frequently Asked Questions - EC-UBLB Sabrent
User questions about EC-UBLB Sabrent
0 question about this device. Answer the ones you know or ask your own.
Ask a new question about this device
Download the instructions for your Hard Drive in PDF format for free! Find your manual EC-UBLB - Sabrent and take your electronic device back in hand. On this page are published all the documents necessary for the use of your device. EC-UBLB by Sabrent.
USER MANUAL EC-UBLB Sabrent
SABRENT Connecting Differently™
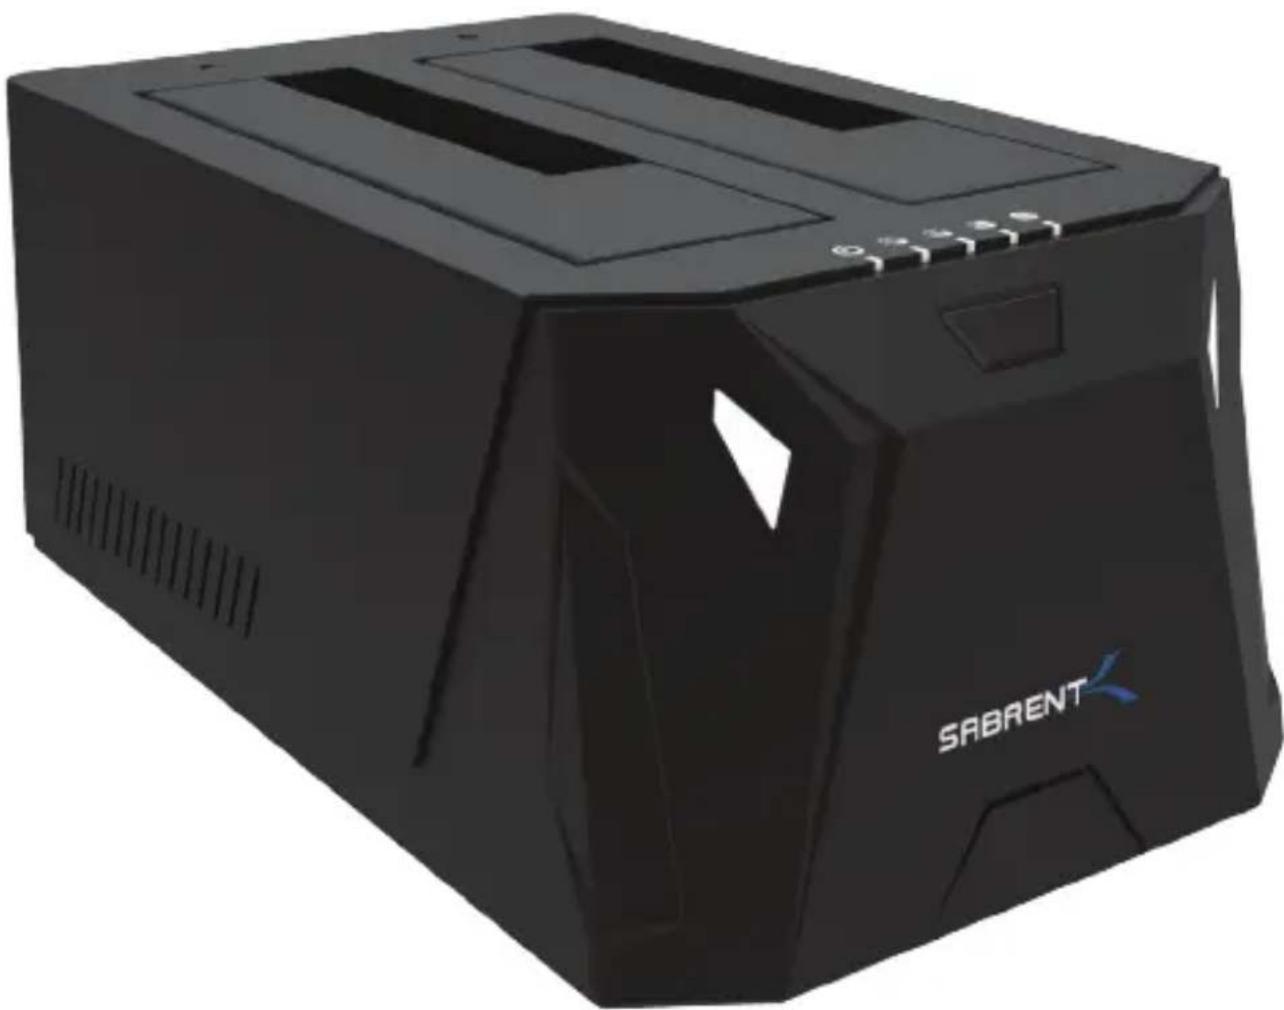
USB TYPE-C SATA 2.5" & 3.5" DUAL BAY HARD DRIVE DOCKING STATION
natural_image
Black SABRENT device with ventilation slots and a logo, no visible text or symbols on the device itself.EC-CH2B / USER MANUAL
SABRENT
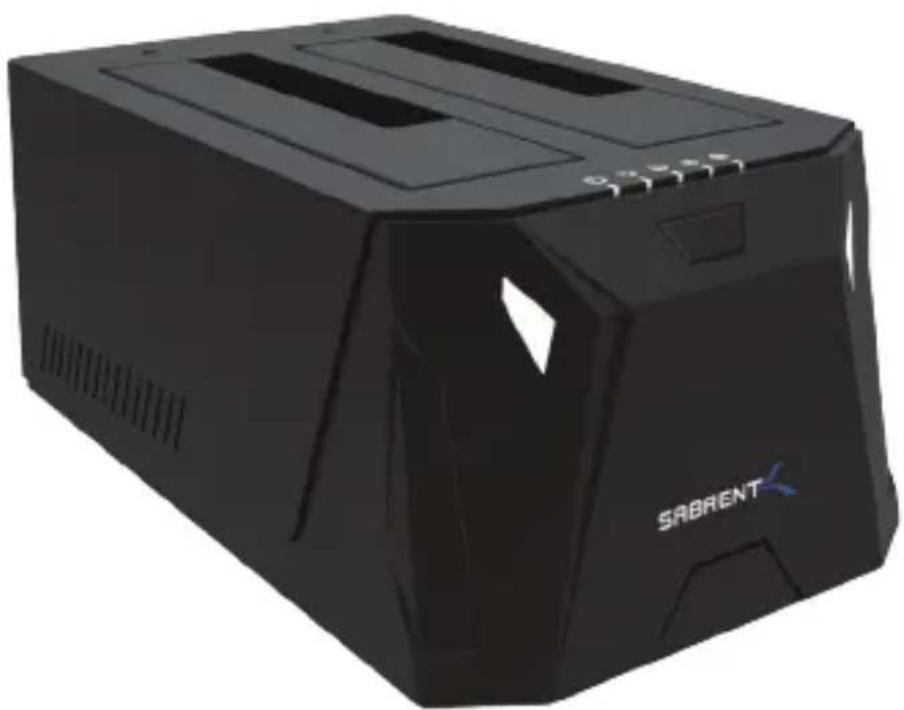
With a Sabrent EC-CH2B SATA Docking Station you can easily Hot-Swap 2.5"/3.5" SATA Hard Drives when connected to your Desktop or Notebook. As a Standalone Duplicator Dock it can be used to duplicate/clone an existing hard drive without connecting to a computer.
REVIEW/LED INDICATOR
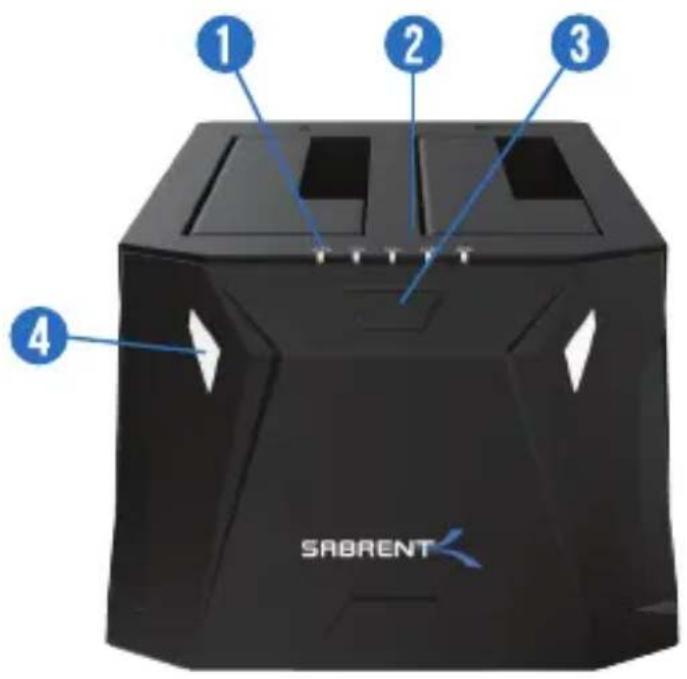
1 - POWER LED
2 - CLONE STATUS
3 - CLONE BUTTON
4 - HARD DRIVE LED INDICATOR
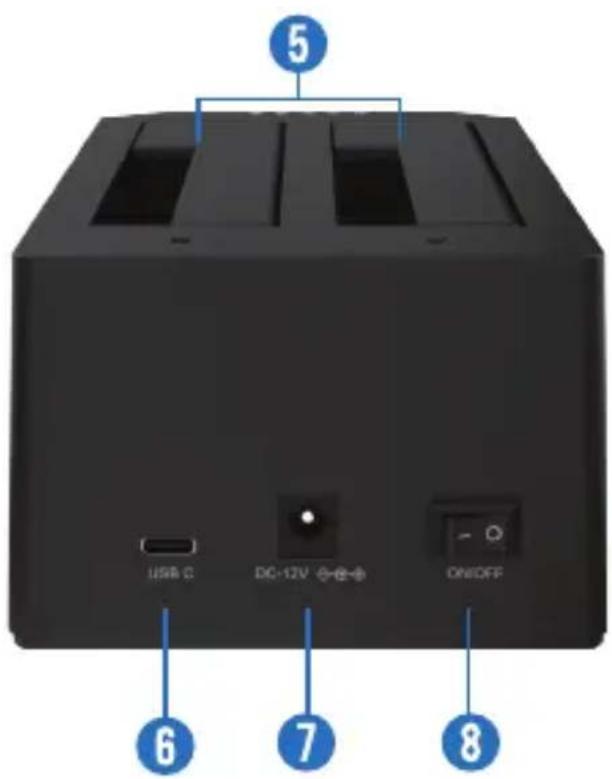
5 - HARD DRIVE BAYS
6 - USB TYPE-C PORT
7 - DC-IN JACK
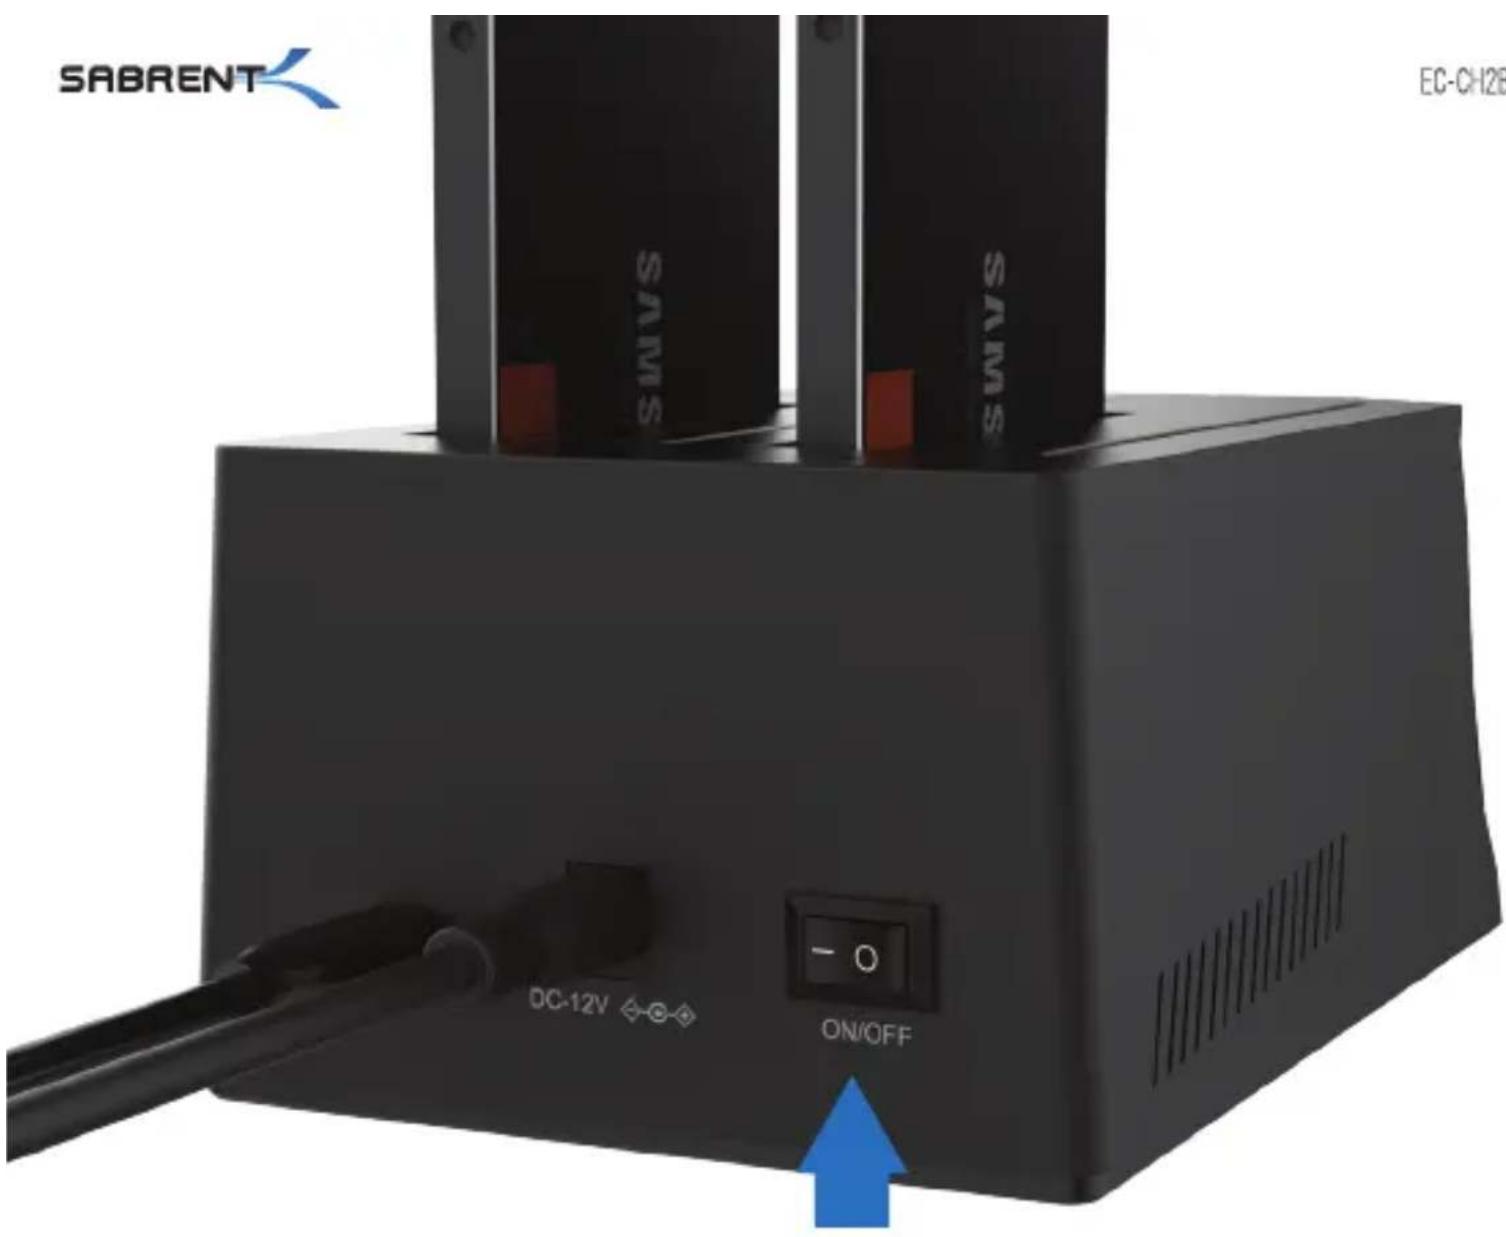
8 - POWER SWITCH
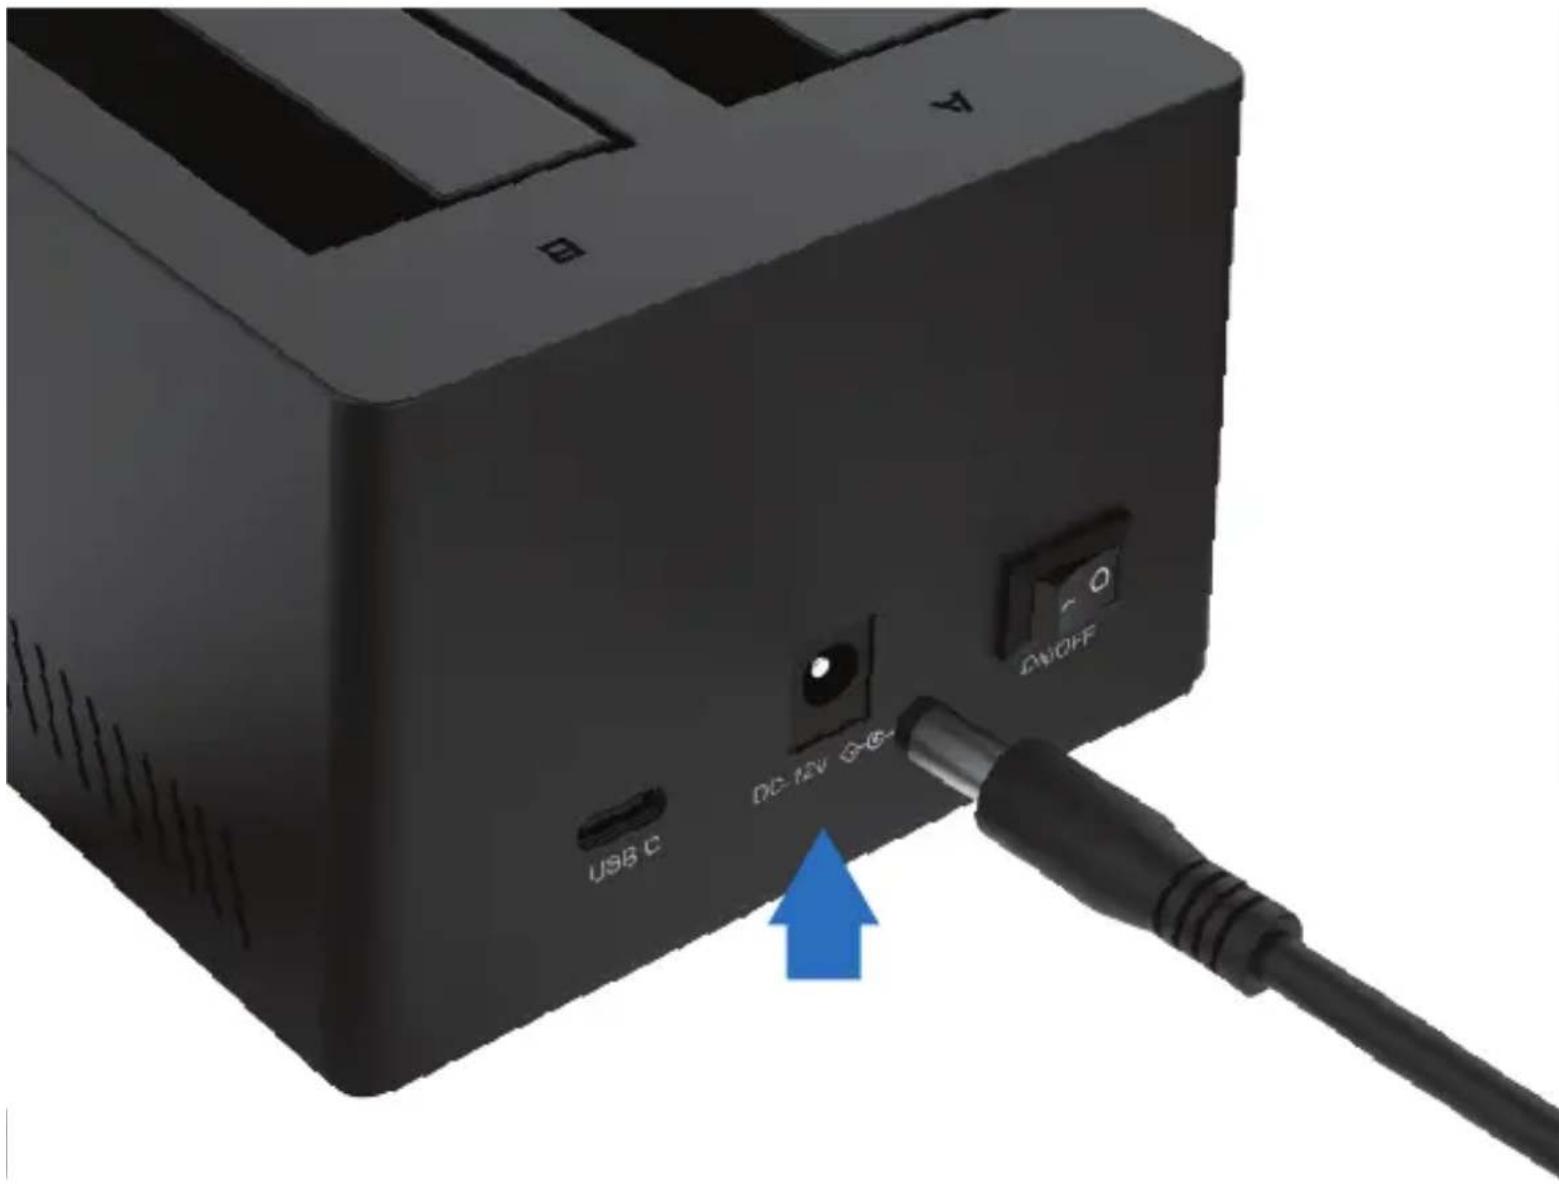
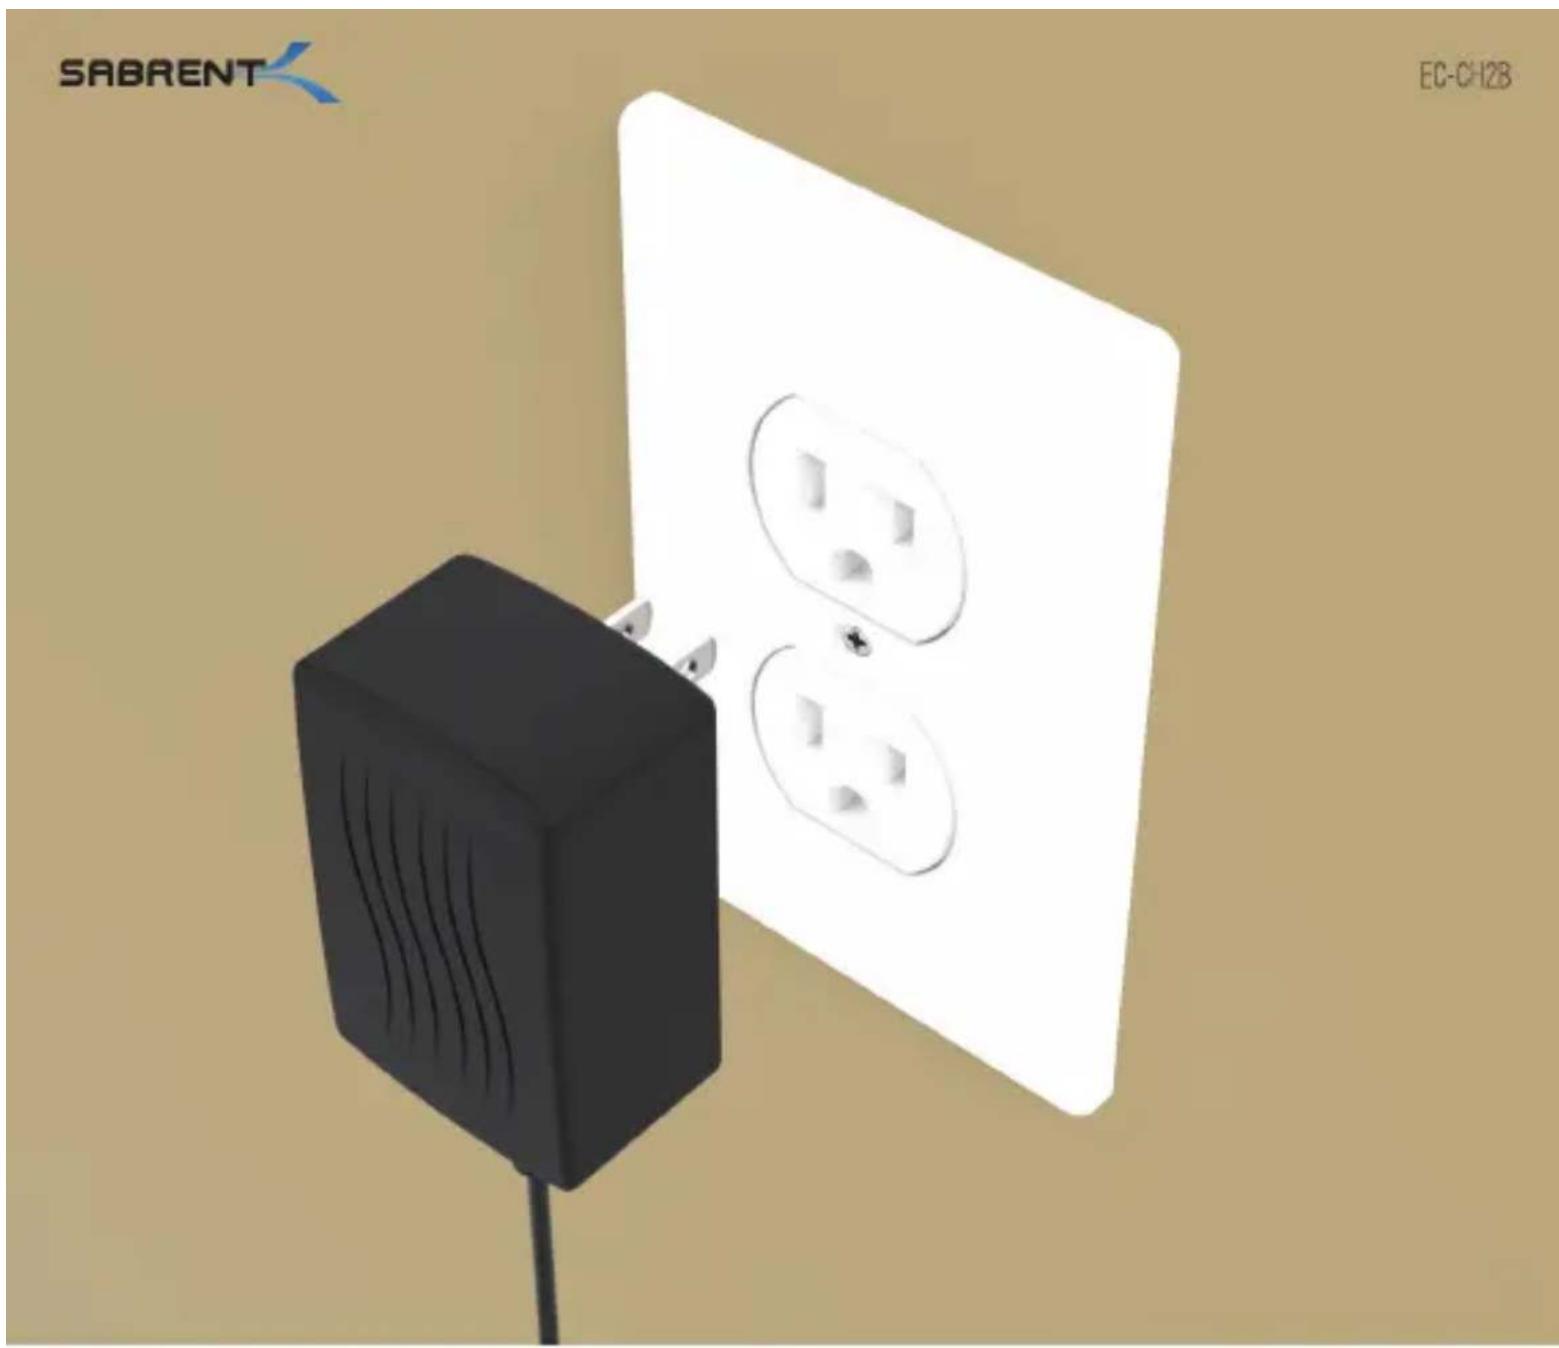
Connect the power adapter to the back of the dock
natural_image
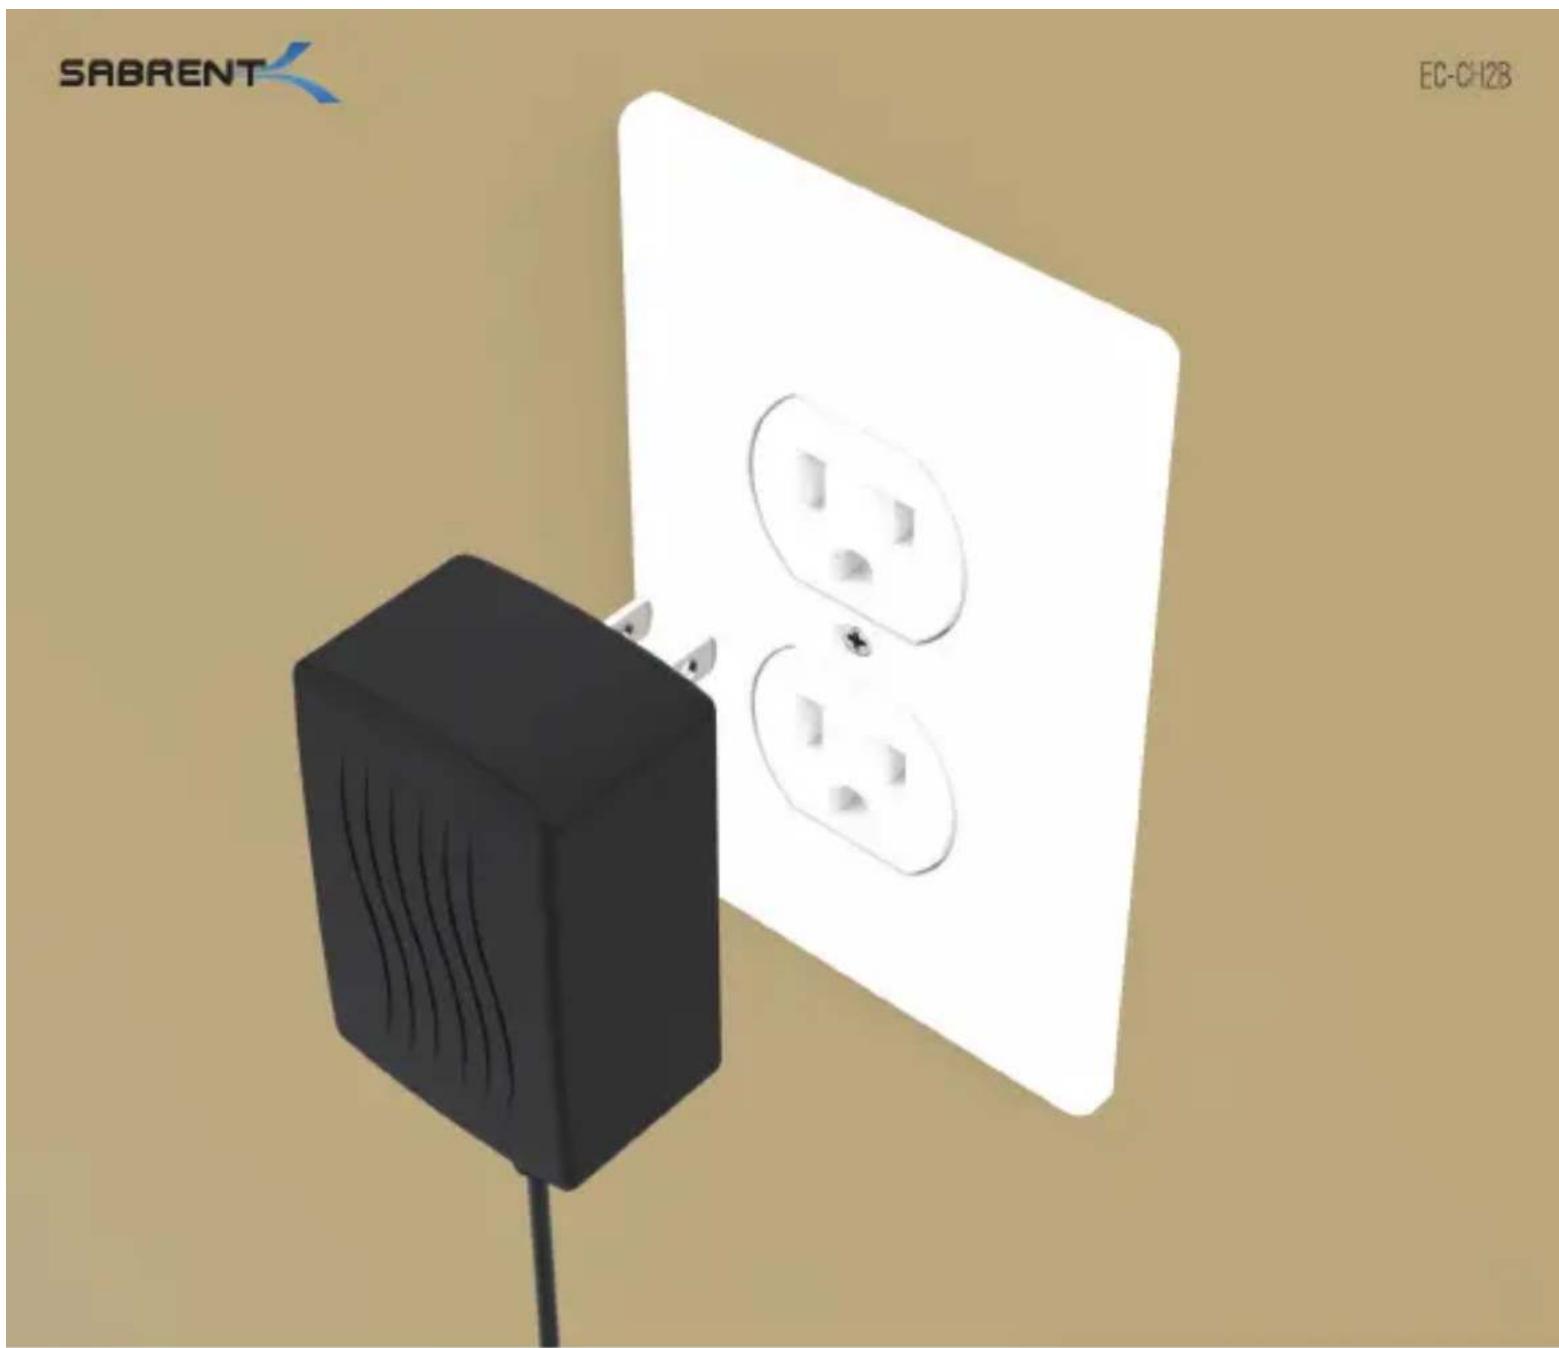
3D rendering of a black power outlet connected to a white wall with two socket outlets (no text or symbols on the main subject)Connect the power adapter to a power outlet
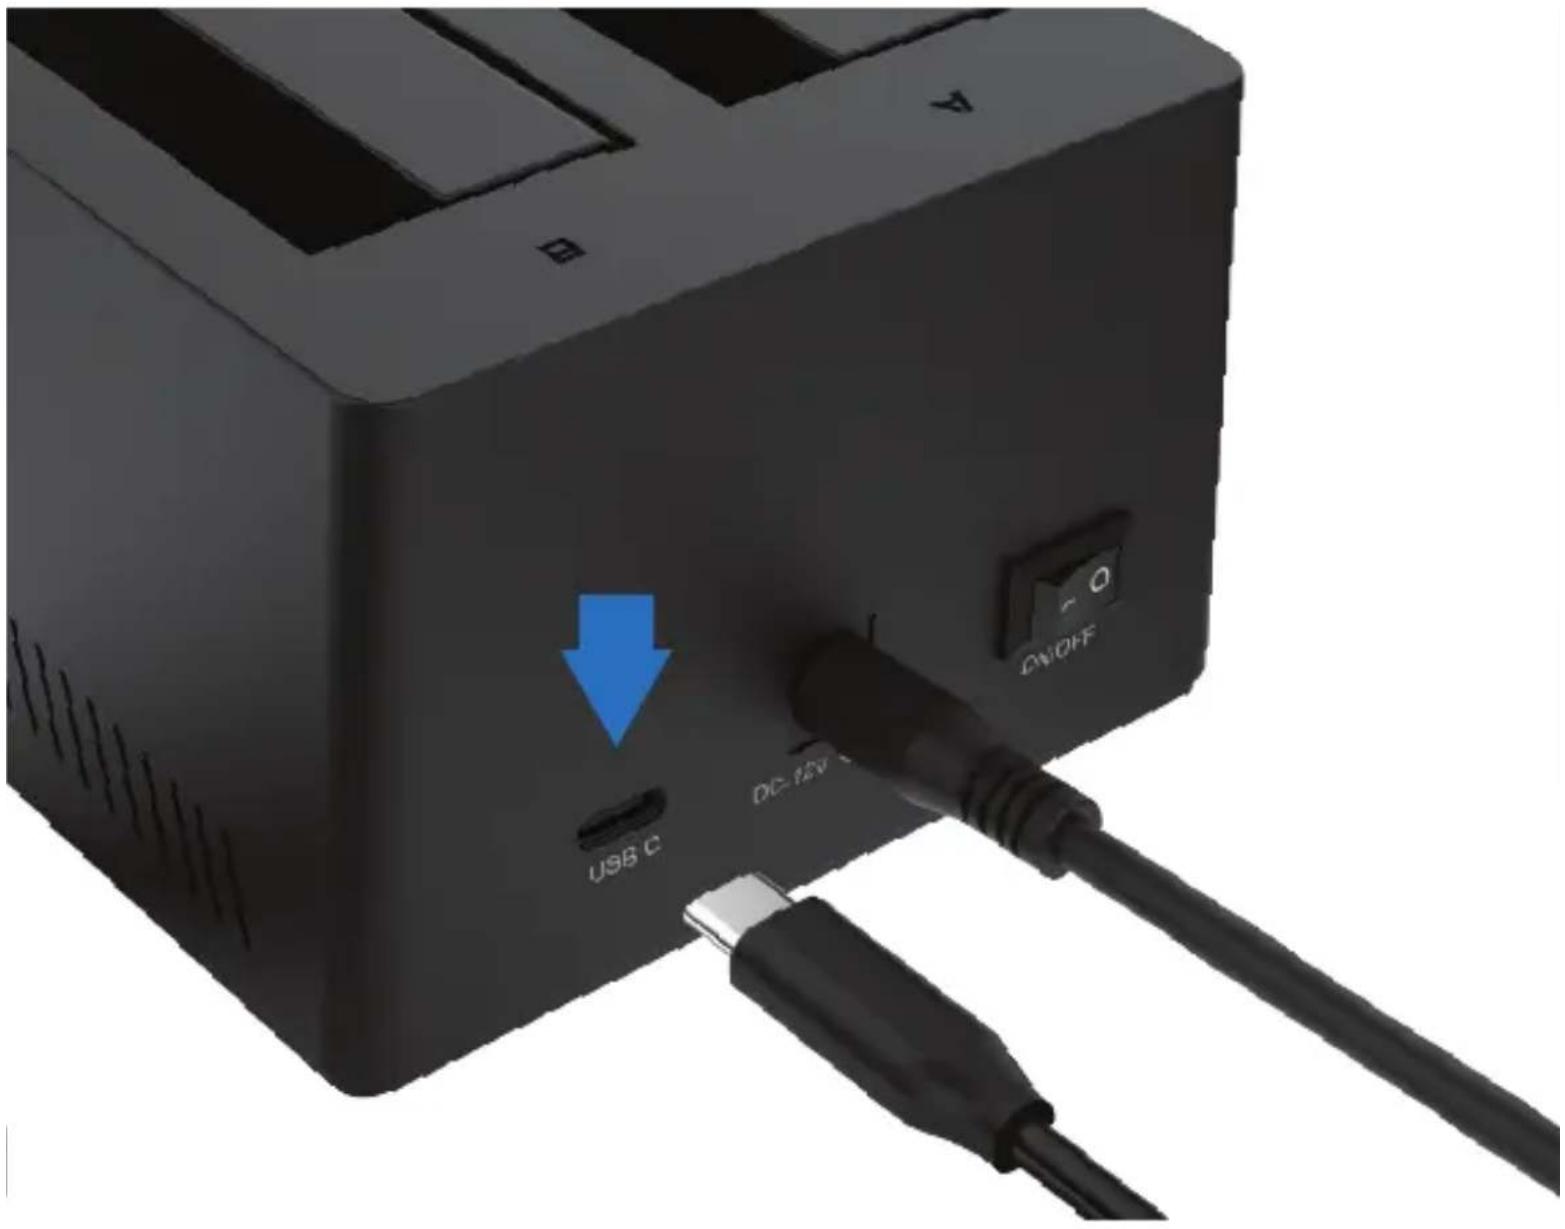
Connect the USB cable to the back of the dock
natural_image
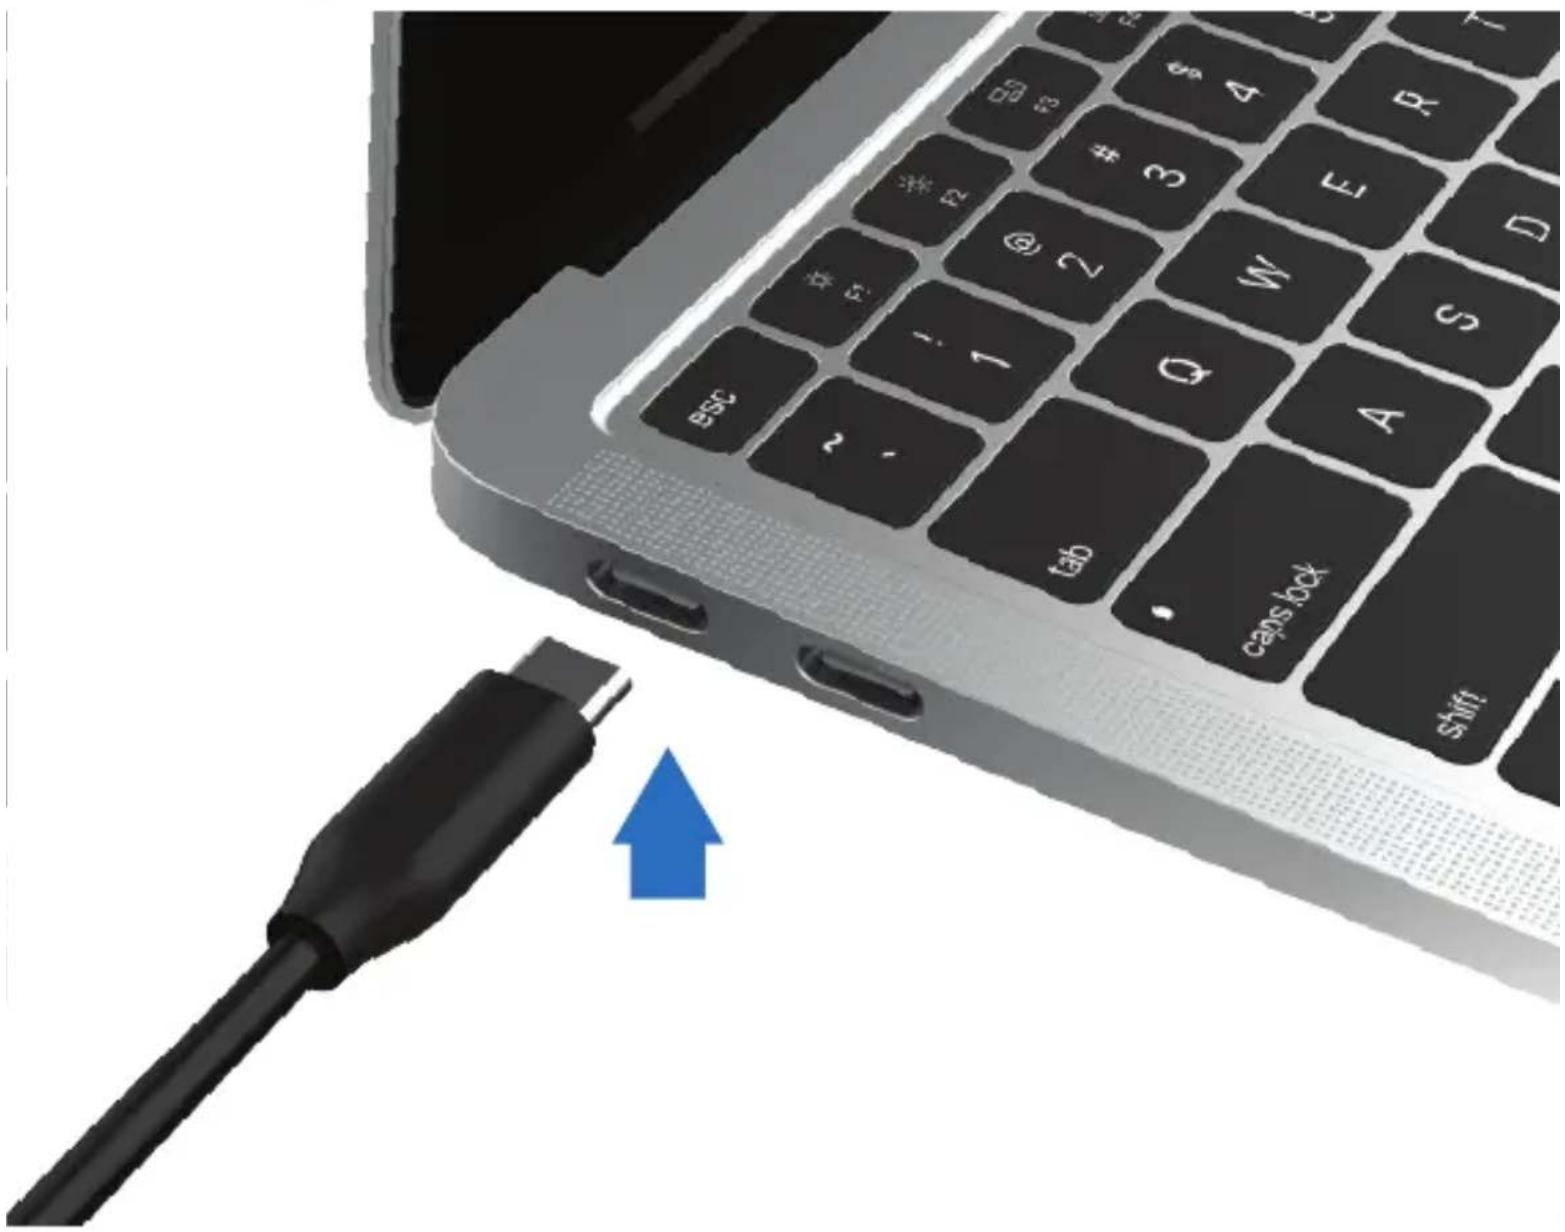
Close-up of a laptop keyboard with a USB cable inserted, showing the keyboard key and port labels (no readable text beyond standard font)Connect the other end of the USB cable to your computer USB port
natural_image
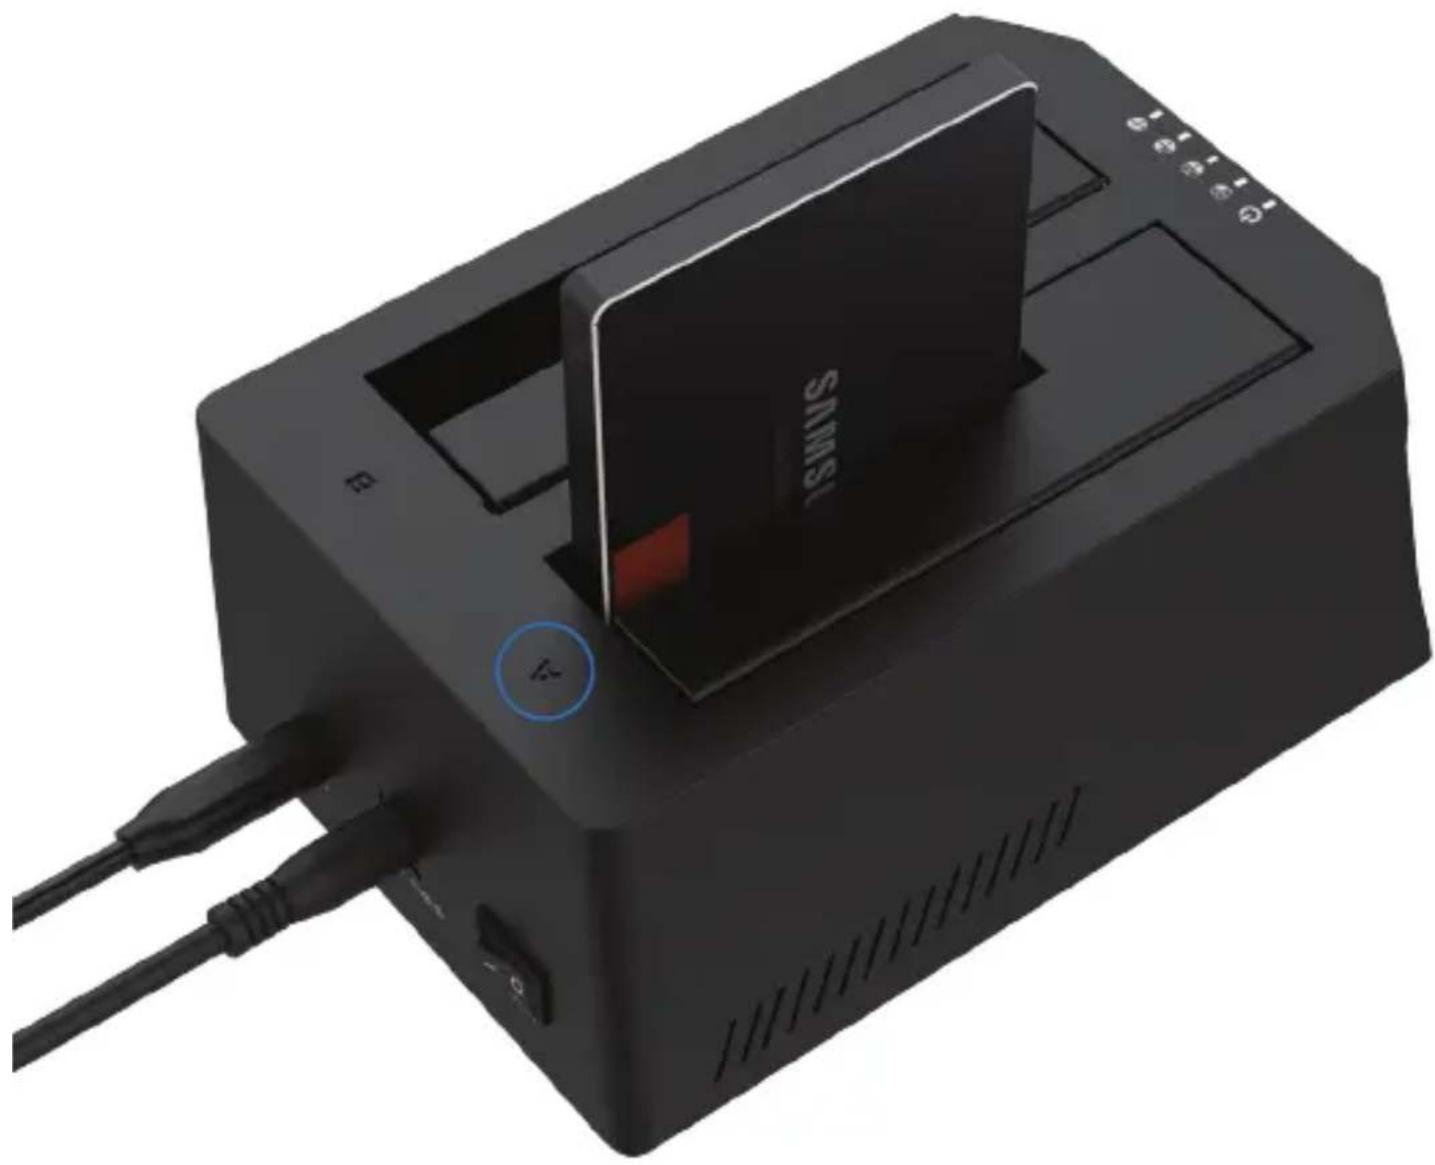
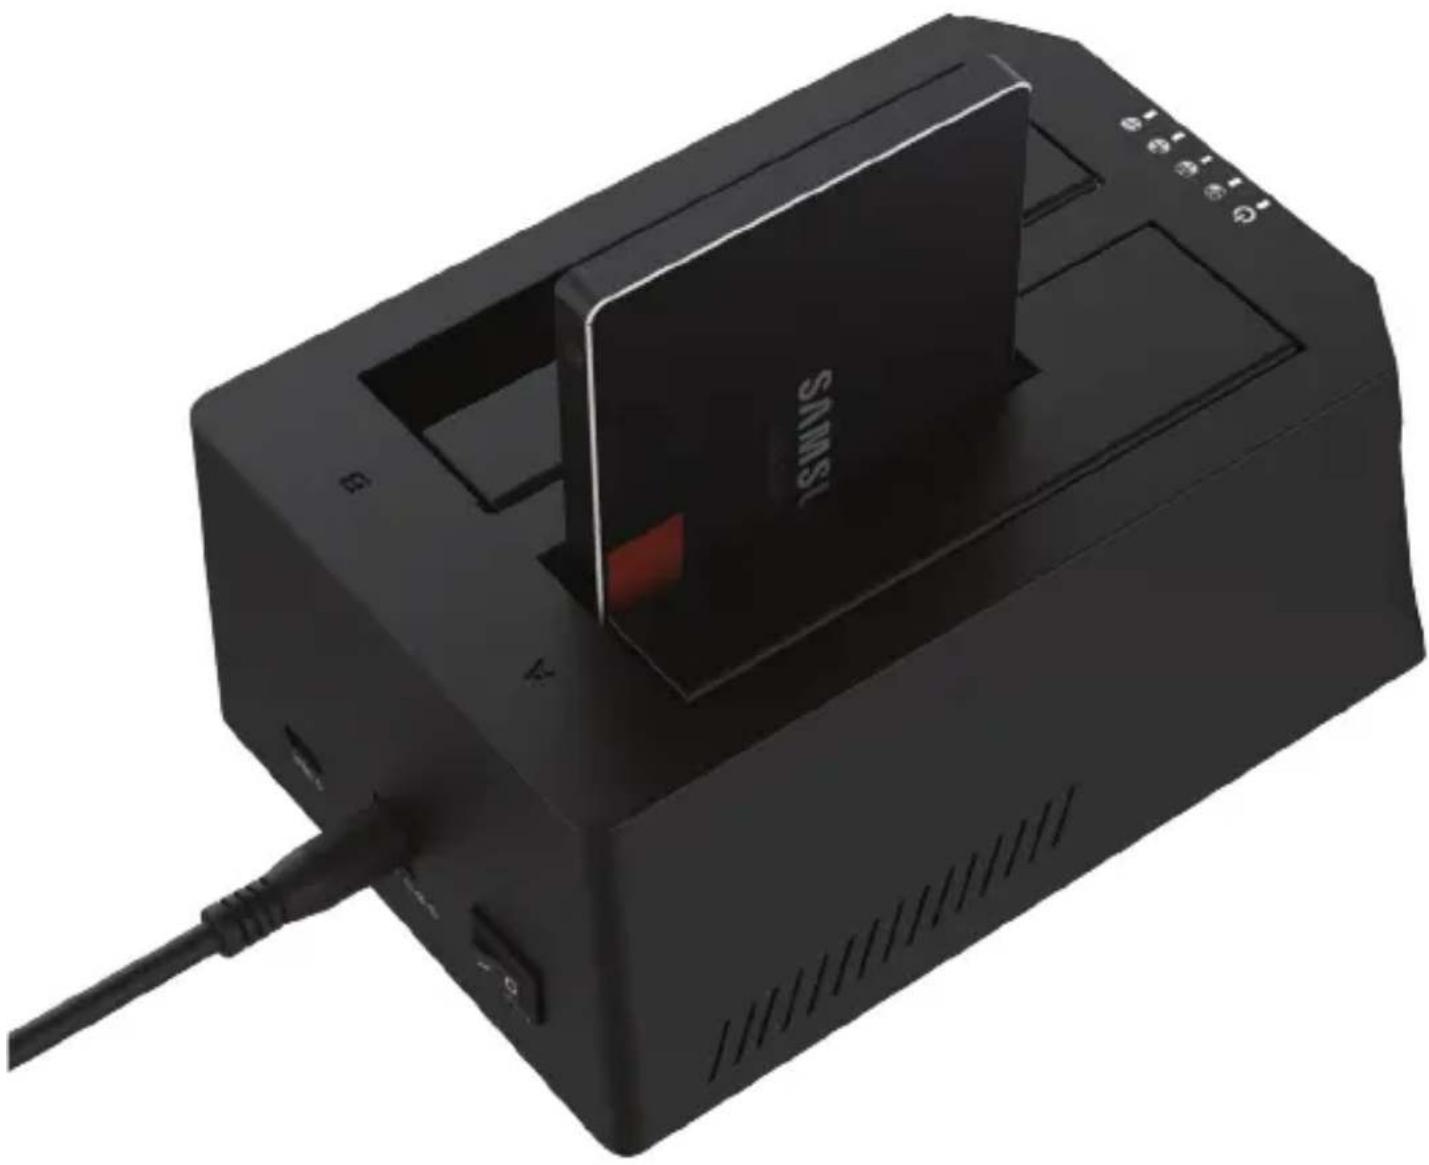
3D rendering of a black Siemens industrial device with cable and power connector (no visible text or symbols)Insert your hard drive into the Hard Drive Bay A
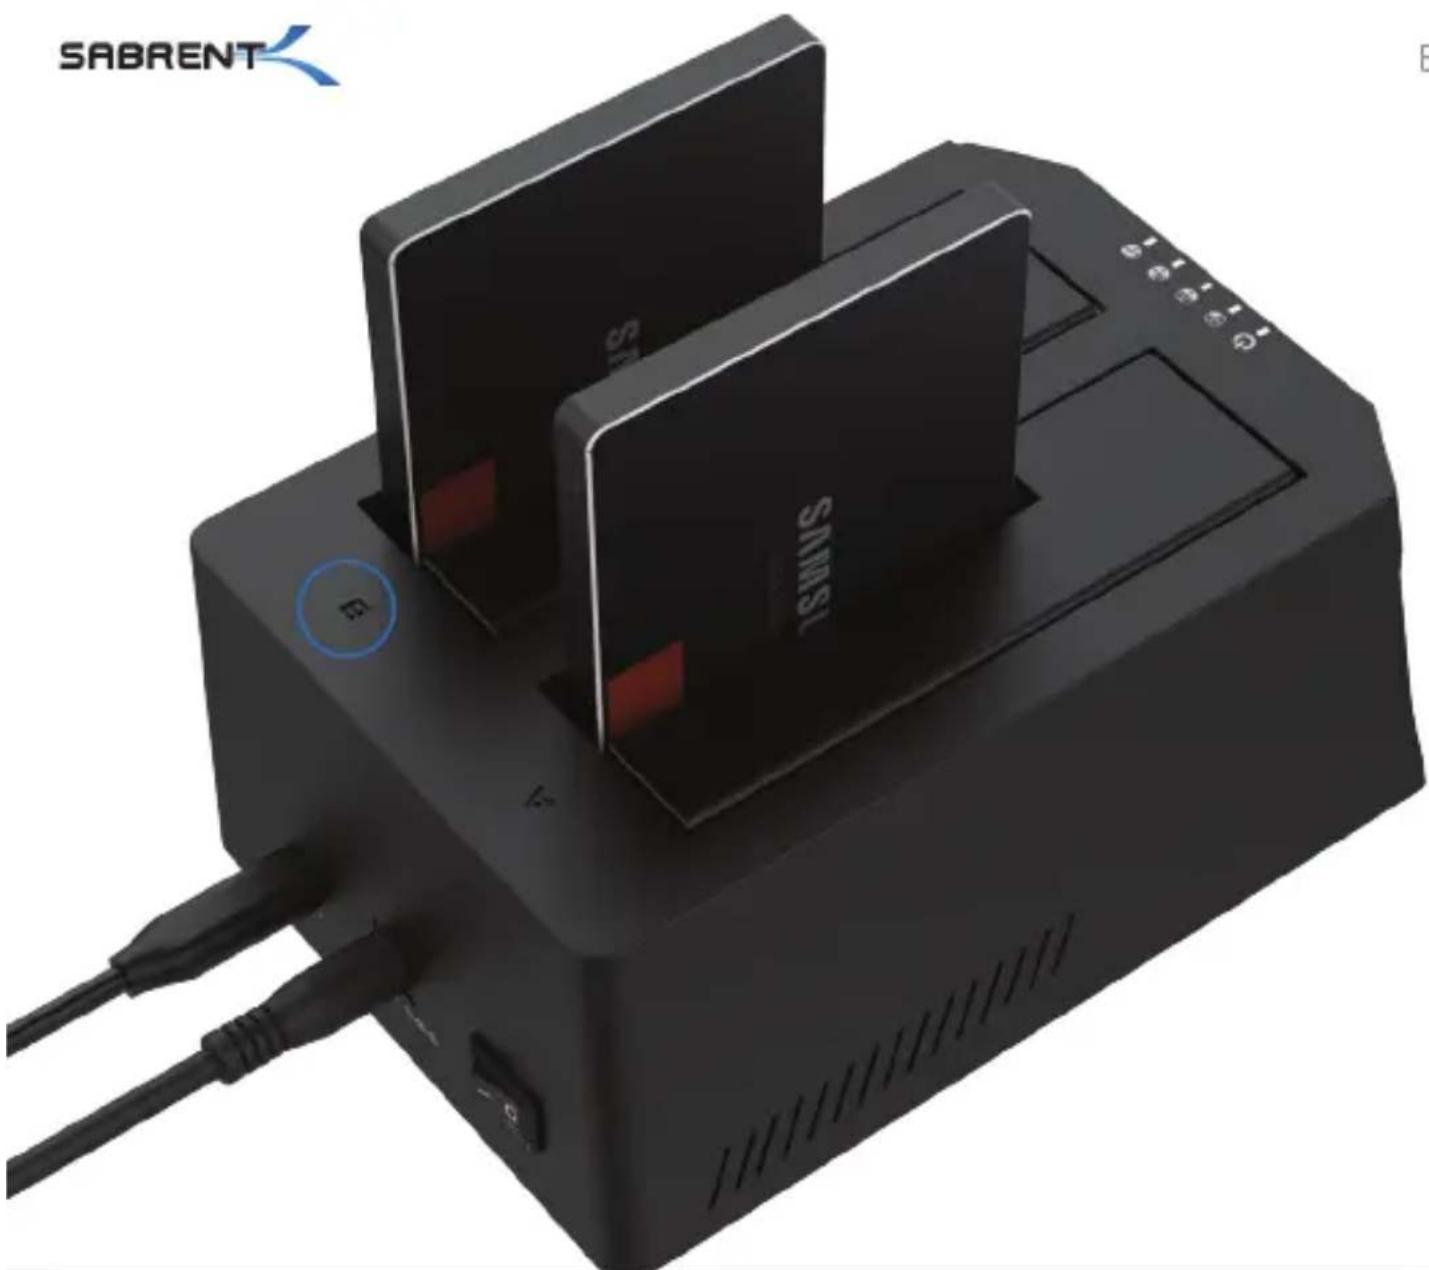
natural_image
3D rendering of a black SABRENT device with two SIMSI chips and connected cables (no readable text or symbols)NOTE: PLEASE DO NOT REMOVE YOUR HARD DRIVE OR INSERT A NEW ONE WHILE THE OTHER HARD DRIVE IS IN USE
When using a second hard drive, insert it into Hard Drive Bay B
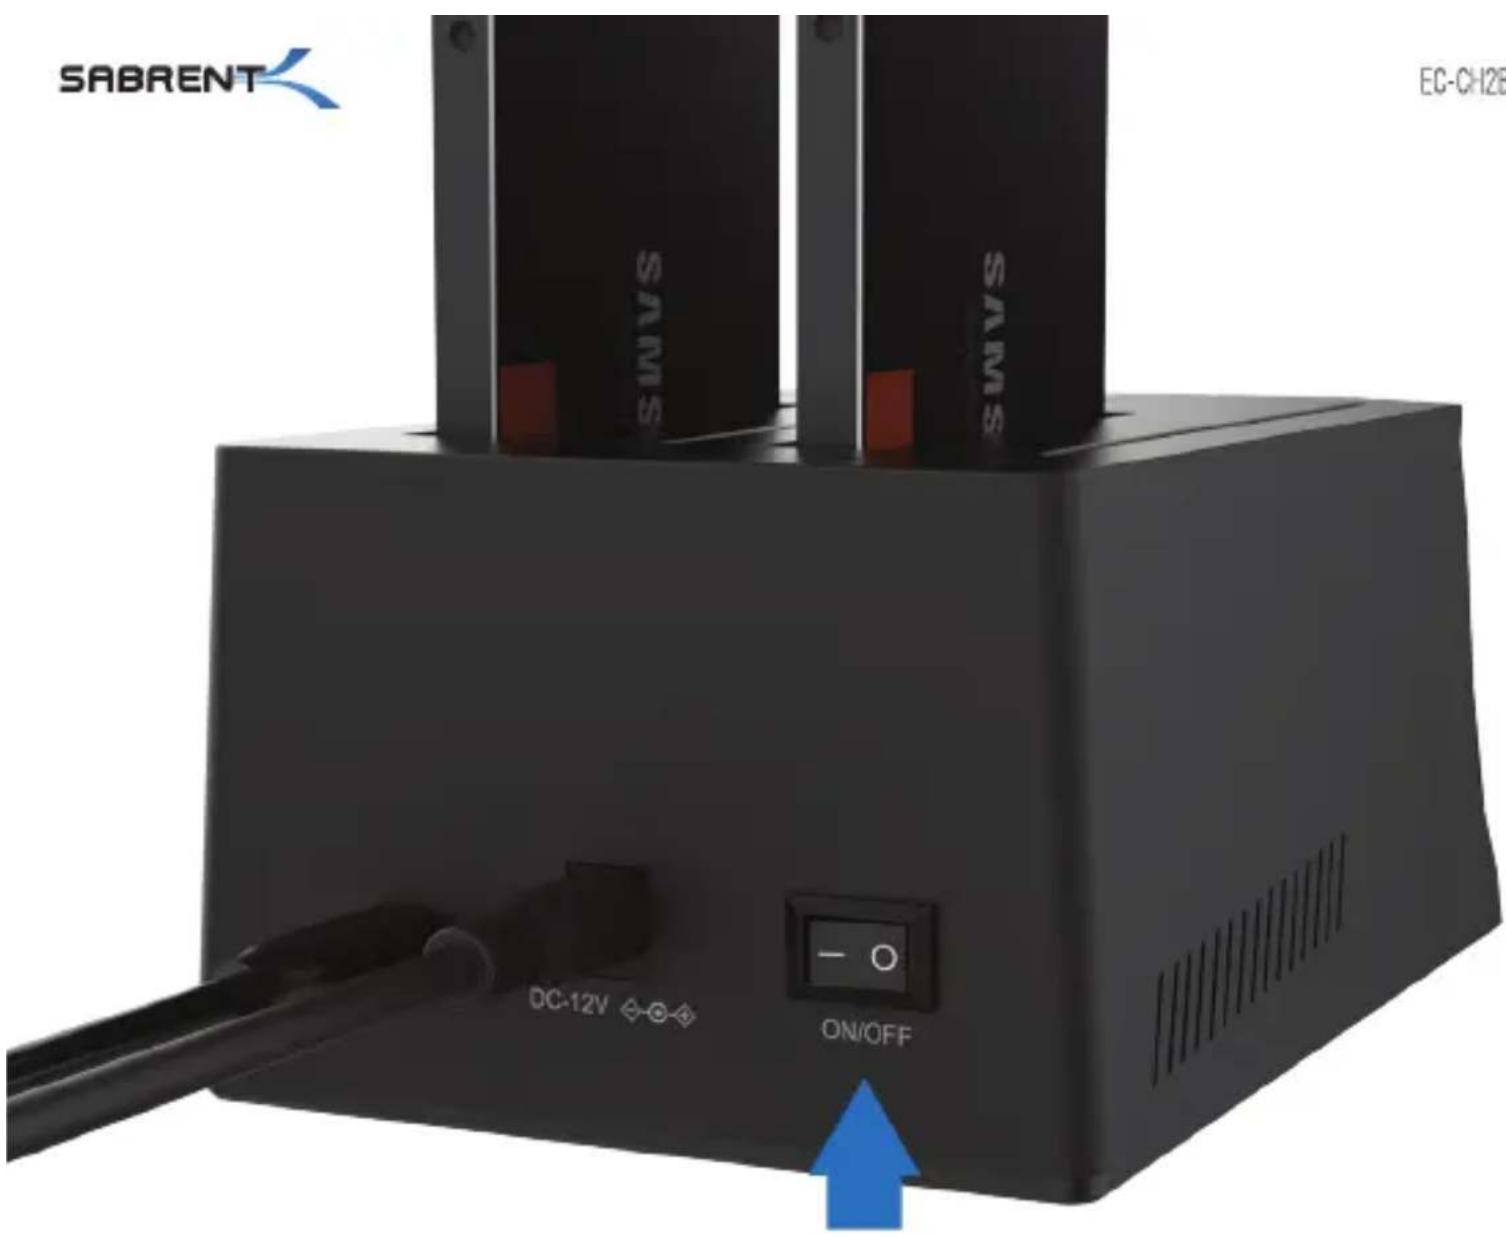
Press the Power Switch to ON
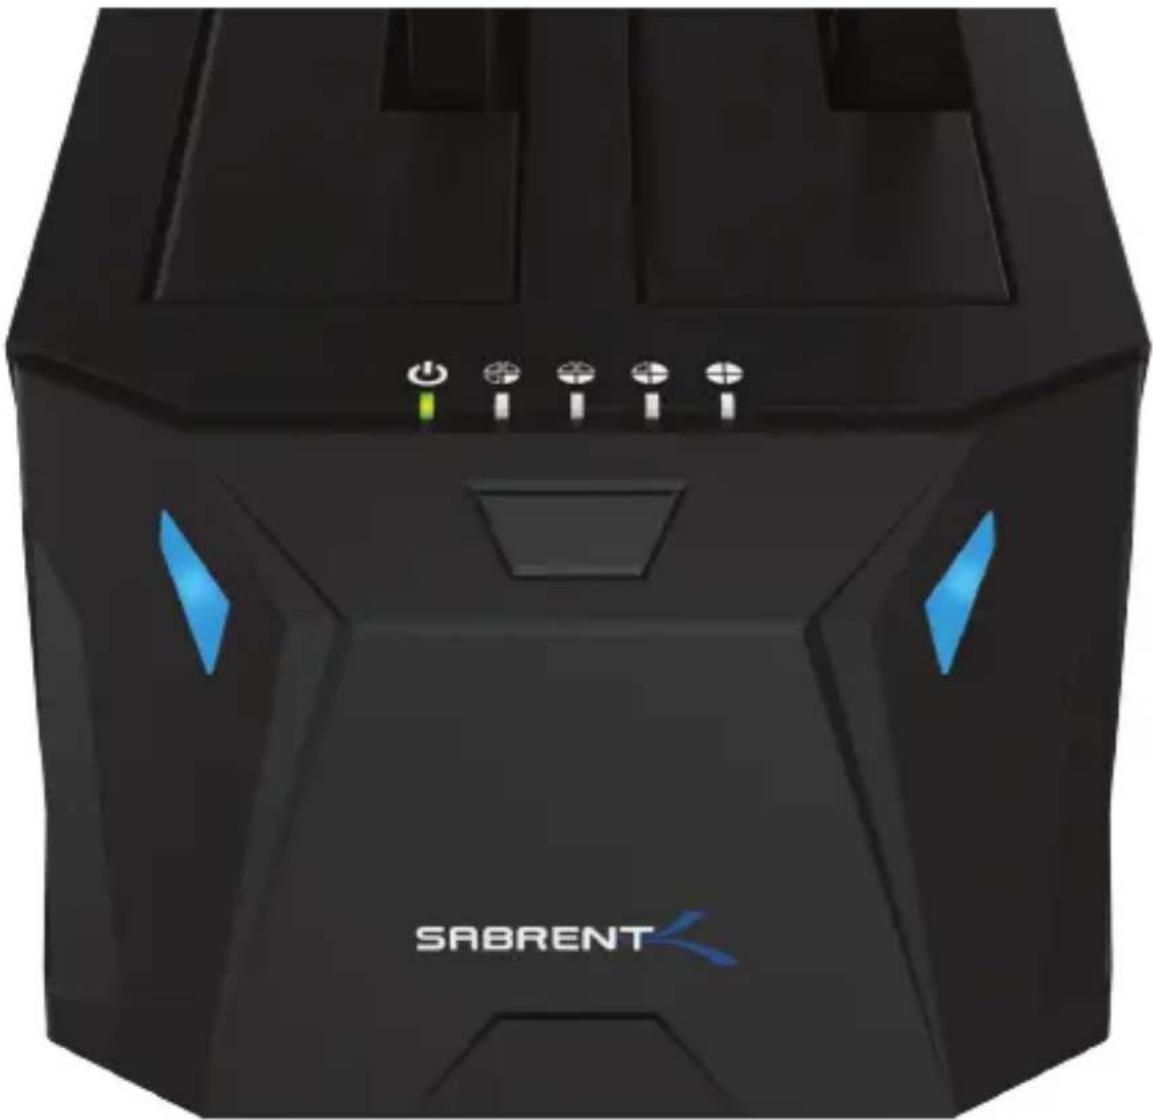
natural_image
Black SABRENT device with blue LED indicators and control buttons (no readable text or symbols beyond branding)NOTE: PLEASE DO NOT REMOVE YOUR HARD DRIVE WHILE IN USE
You should get Blue LEDs on HDD A and HDD B when using both drive bays. You should also get a Green LED on the Power Indicator
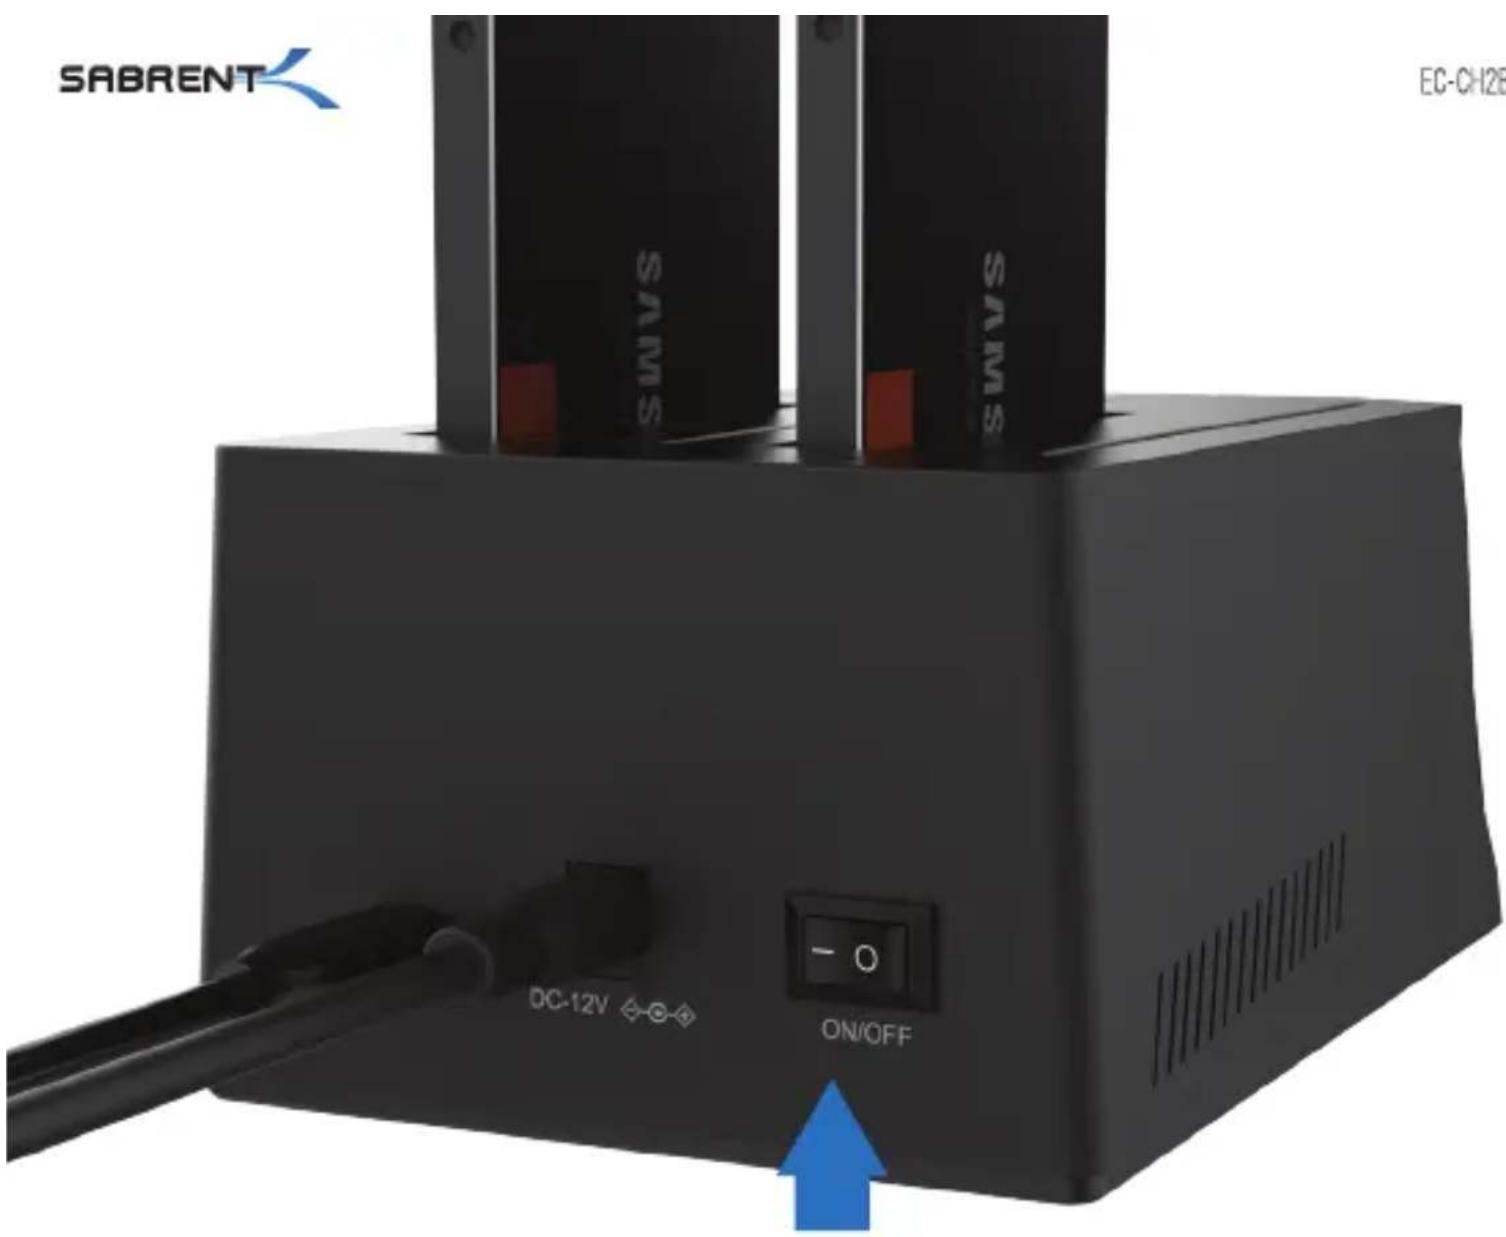
When not in use, press the Power Switch to OFF
WINDOWS PC HARD DRIVE WITH DATA/FILES
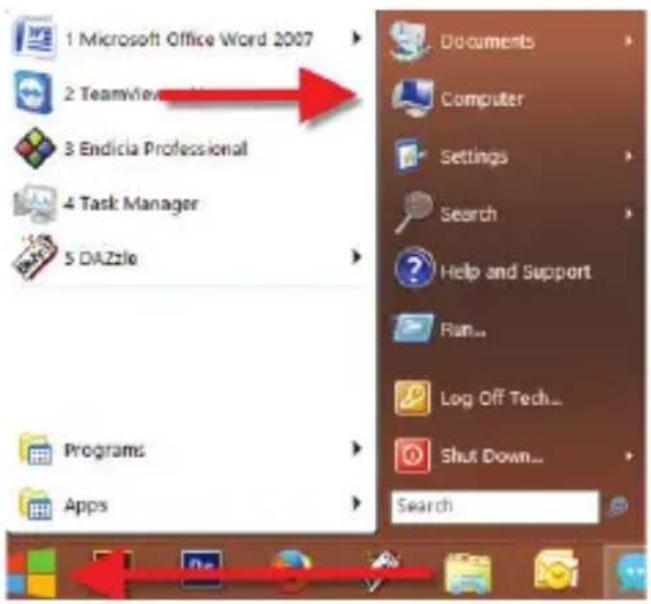
Click on the Start Icon located on the bottom left of the screen and then click on Computer
Note:
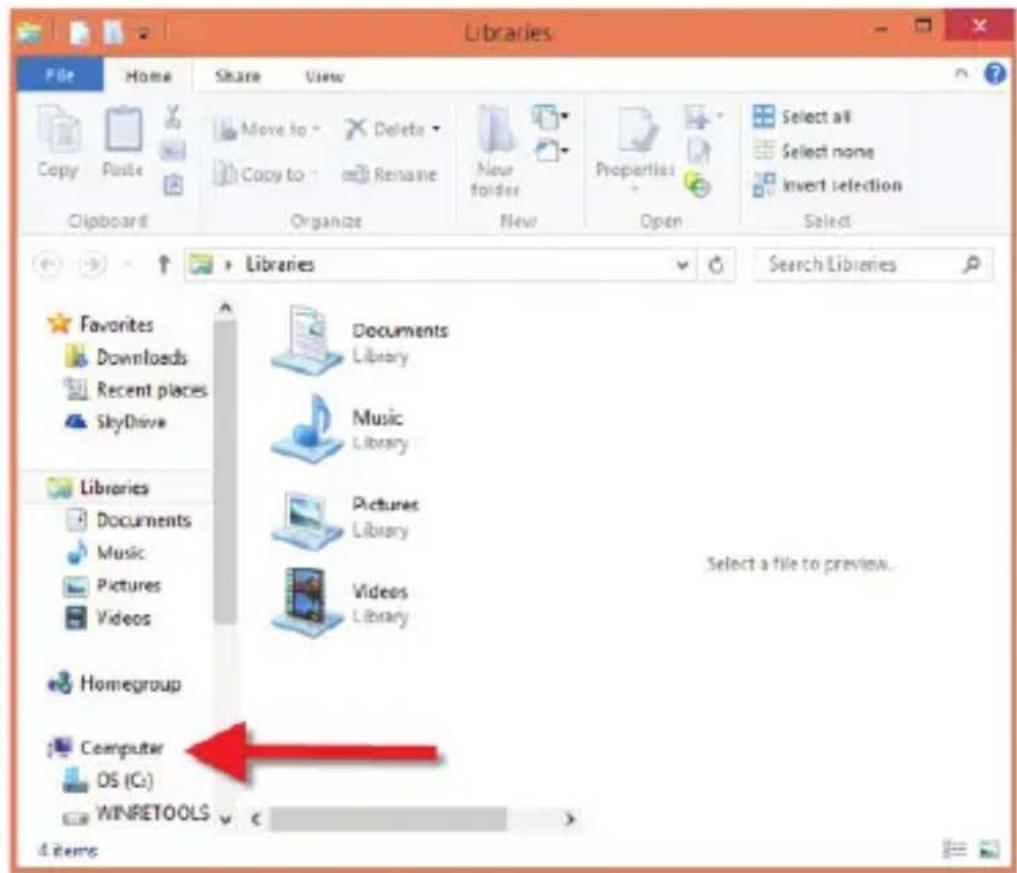
You can also click on the File Explorer Icon and then click on This PC or Computer

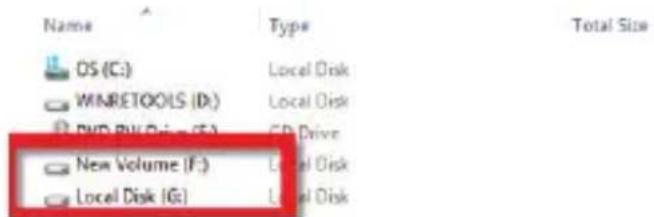
You should get a new drive letter every time you insert a hard drive with data/files
WINDOWS PC NEW HARD DRIVE SETUP (HARD DRIVE WITH NO DATA/FILES)
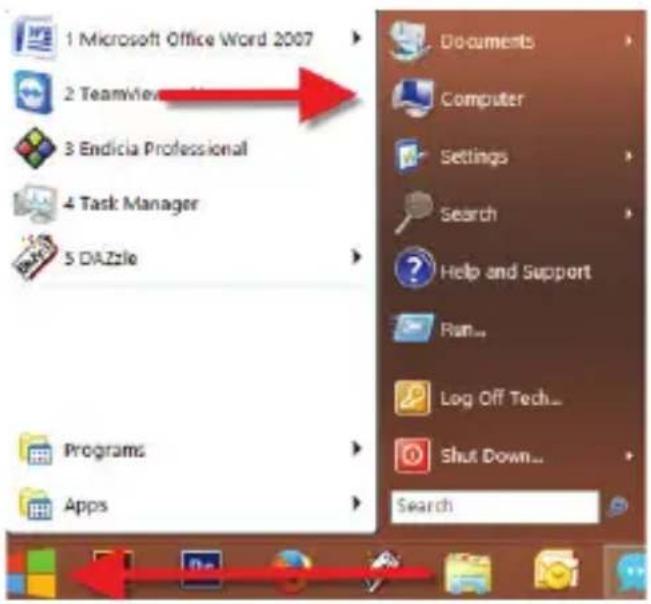
Click on the Start Icon located on the bottom left of the screen and then RIGHT click on Computer
Note:
You can also click on the File Explorer Icon and then click on This PC or Computer

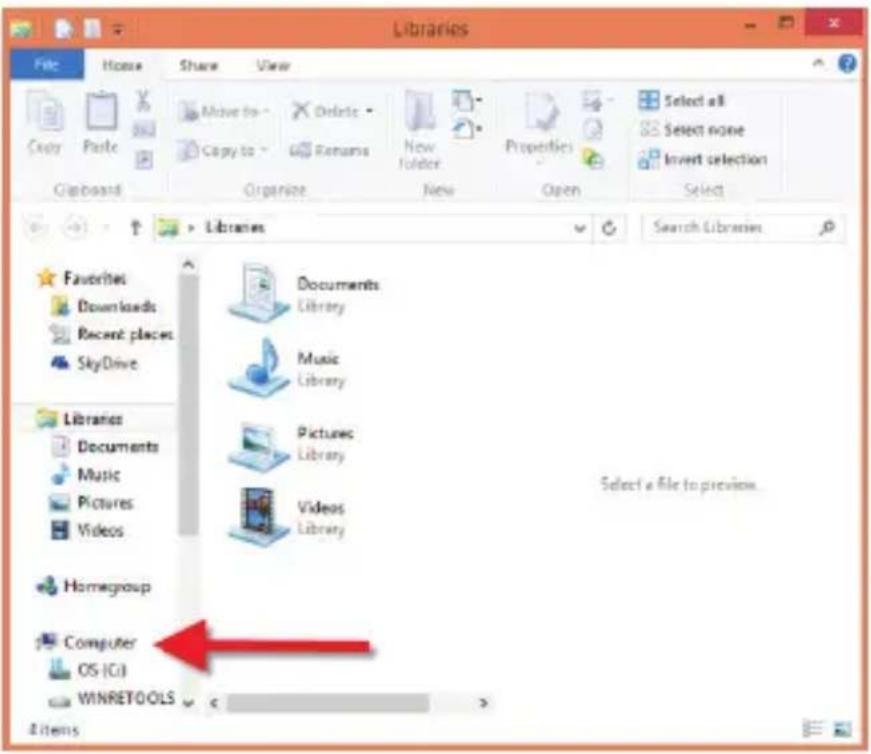
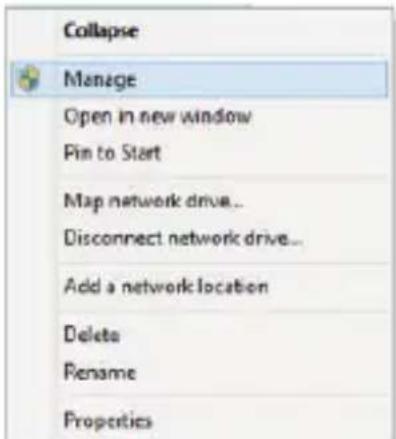
Click on Manage
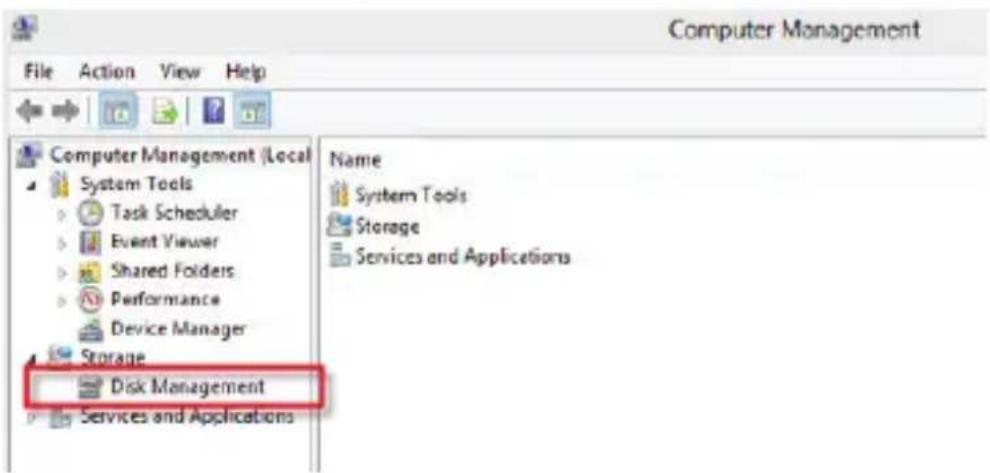
Click on Disk Management
Note: Disk 0 should be your internal hard drive Disk 1 should be your external hard drive but SETUPS MAY DIFFER RIGHT click on Unallocated and click on New Simple Volume
| Disk 0 | |
| Basic 465.76 GB Online | (C:) 195.32 GB NTFS Healthy (System, Boot, Page File) |
| Disk 1 | |
| Basic 465.76 GB Online | 465.76 GB Unallocated |
| CD-ROM 0 DVD (F:) | |
| No Media |
Go through the Setup Wizard to assign a drive letter
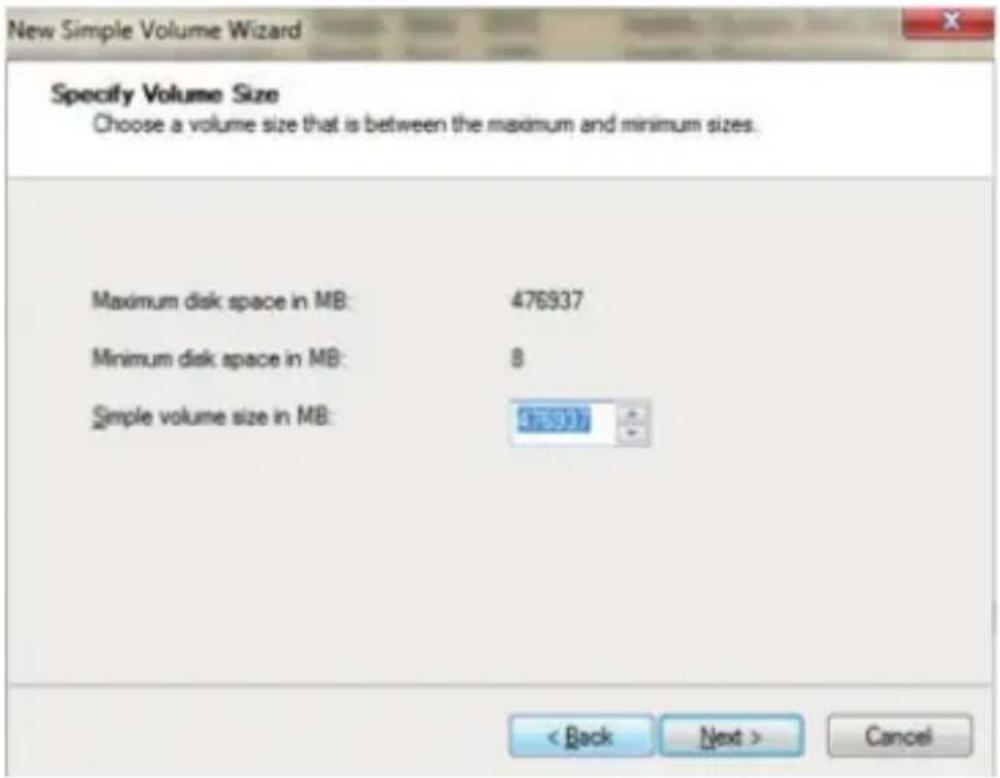
MAC OS HARD DRIVE WITH DATA/FILES
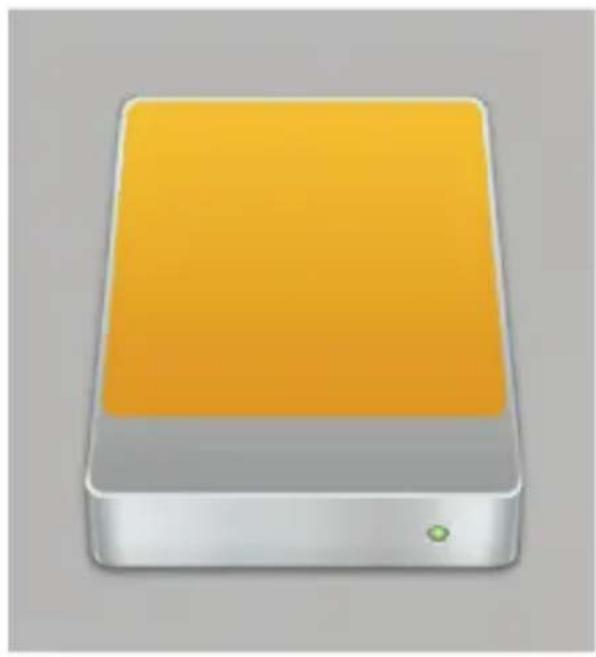
A new Icon should pop up on your main screen each time you insert a hard drive with DATA/Files
natural_image
Illustration of a gray server with a yellow top and indicator lights (no text or symbols)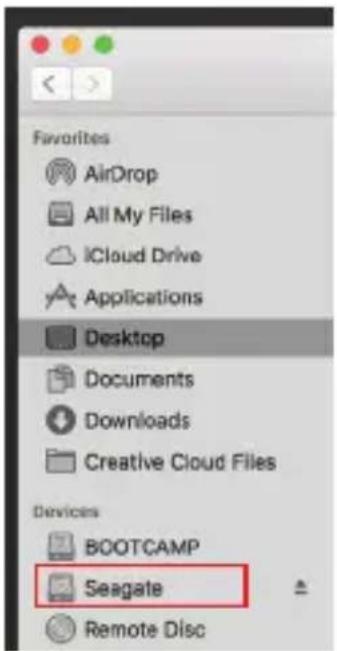
Click on the Icon to view your hard drive
Note: You can also click on the Finder icon and select your hard drive under Devices
MAC OS NEW HARD DRIVE SETUP (HARD DRIVE WITH NO DATA/FILES)
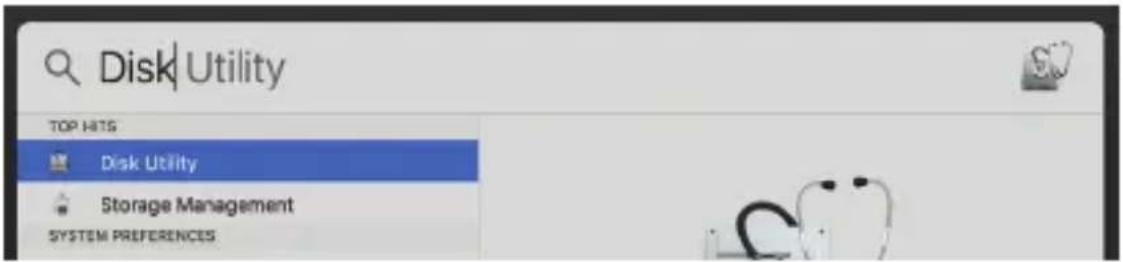
Click on the Search Icon on your toolbar

Type in Disk Utility and click on it
Click the icon for your external hard drive located in the sidebar on the left Click on the Erase tab at the top of the window
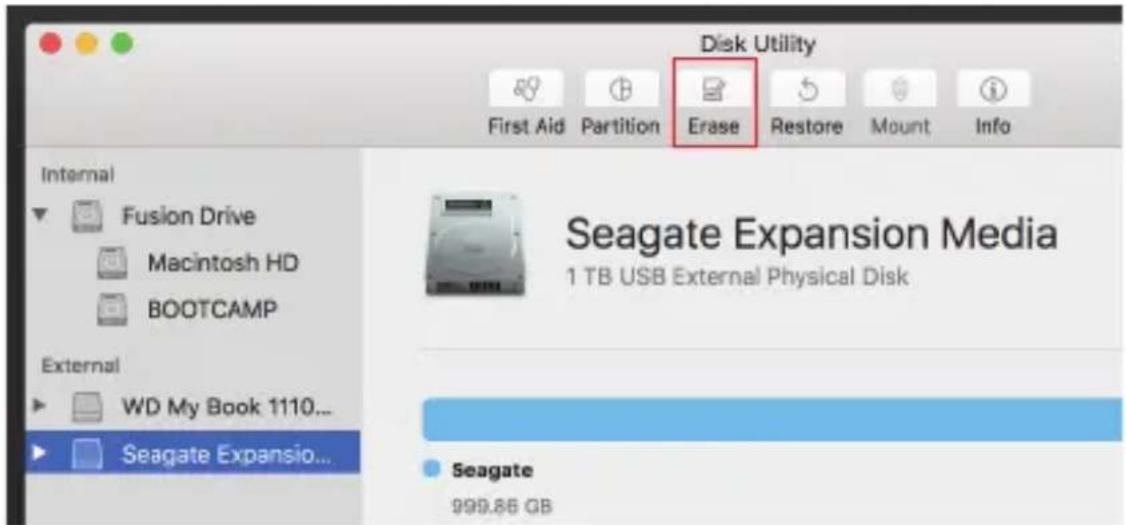
Select the volume format you want and give it a name
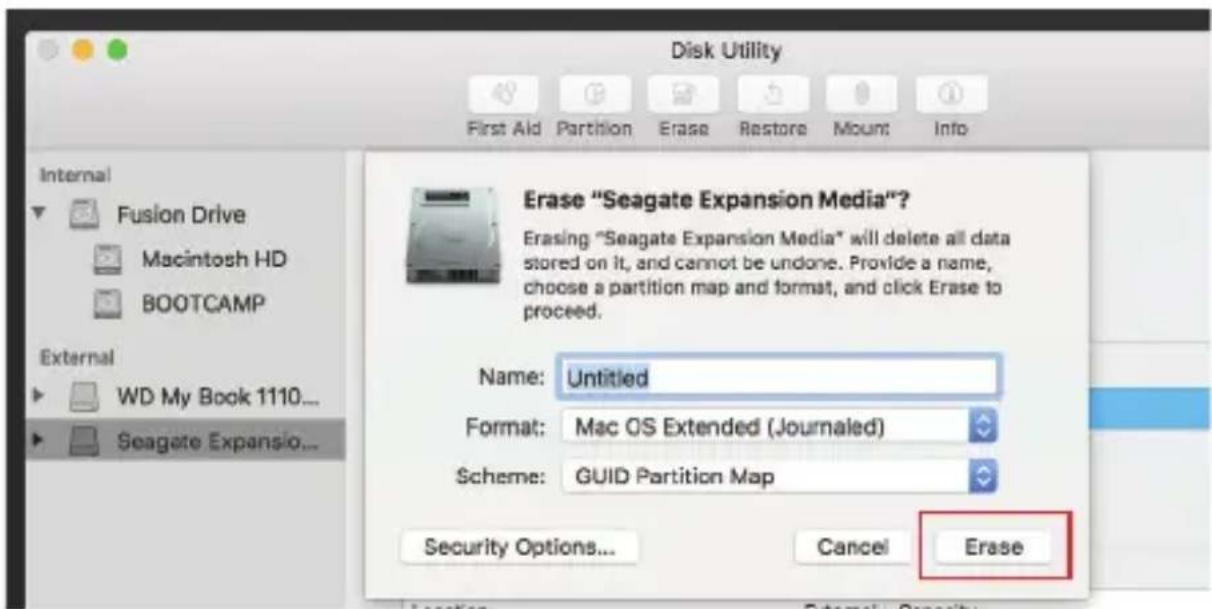
Click on Erase
NOTES
- Please do not remove your hard drive while hard drive is being accessed.
- The dock will automatically go into sleep mode if the connection is left idle for more than 30 minutes.
- Accessing the hard drive will automatically cancel sleep mode and power back up the hard drive.
TROUBLESHOOTING/SUPPORT
Power LED does not come on?
- Make sure that you have a tight connection between the power adapter and dock.
- Try it on a different power outlet.
HDD LED does not come on?
• Re-seat the hard drive into the bay.
- Swap the hard drive out with a spare.
Computer does not recognize the hard drive?
- Make sure that you have a tight connection between the dock and 3.0 cable.
- Try the USB cable on a different USB port on your computer.
- New hard drives must be setup, please review new hard drive setup for your OS.
- Swap the hard drive out with a spare.
Please contact our Technical Support team if issues continue
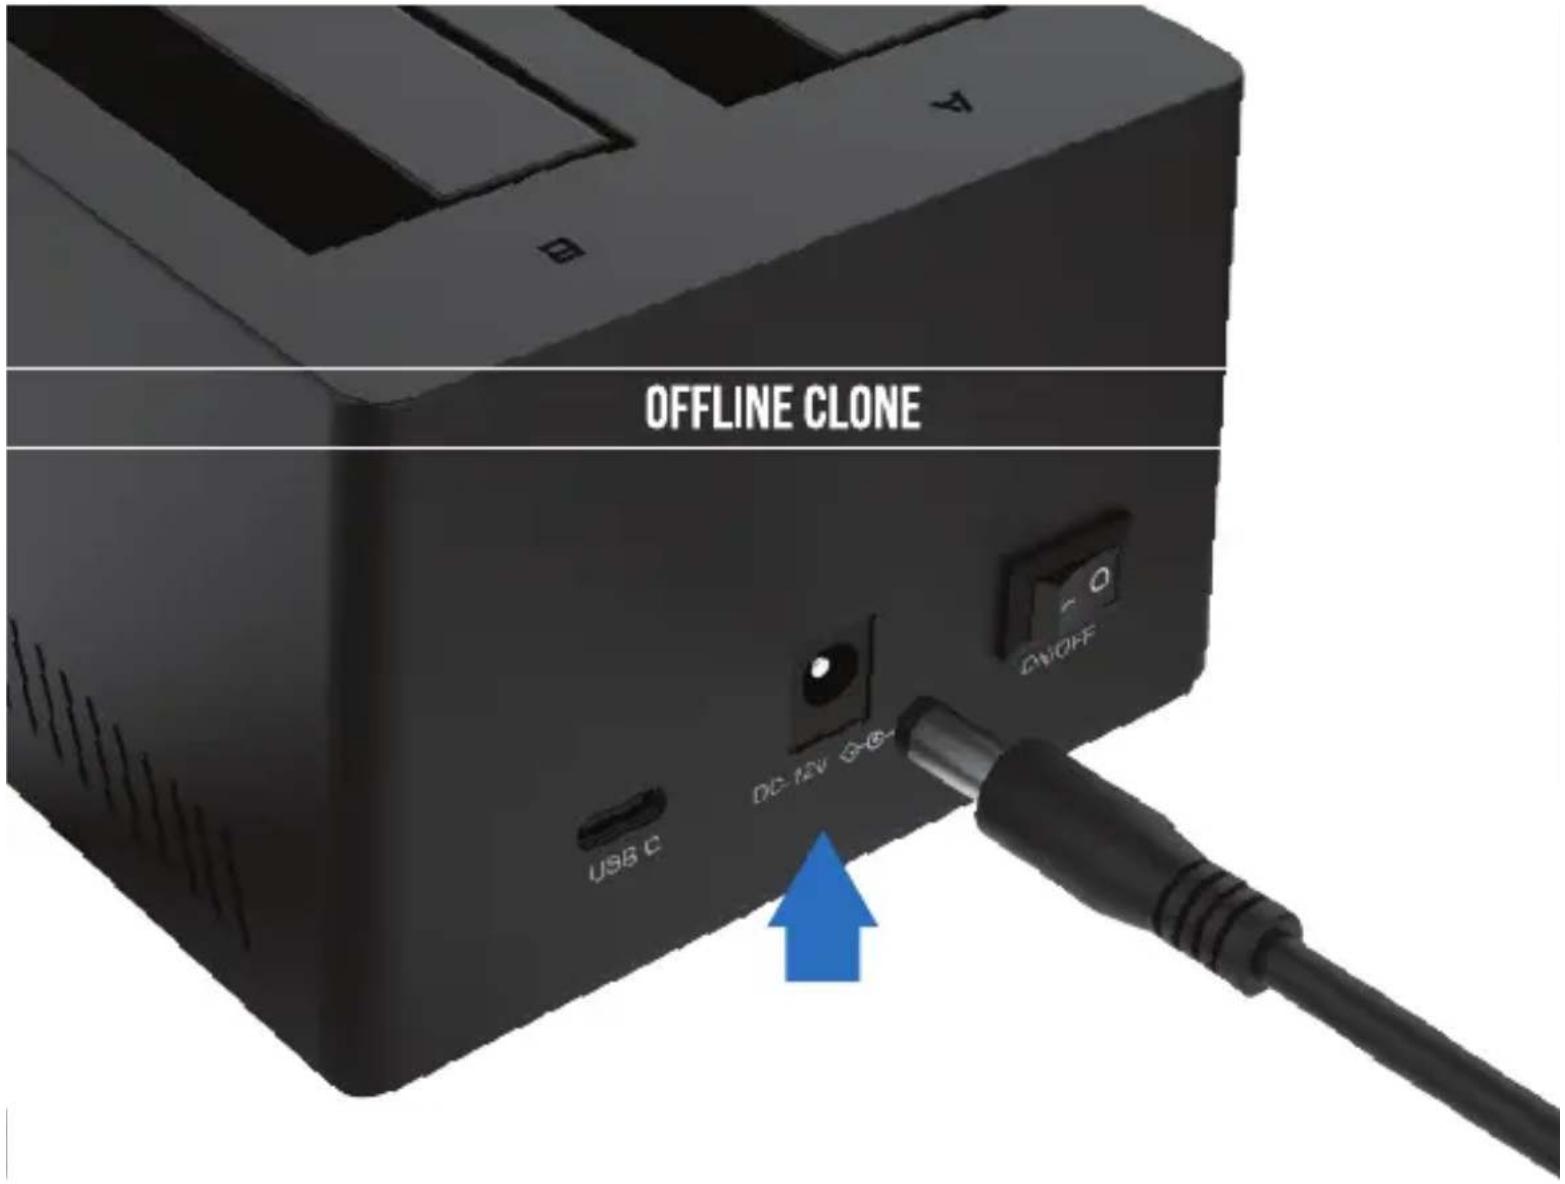
Connect the power adapter to the back of the dock
natural_image
3D rendering of a black power plug connected to a white wall with two socket outlets (no text or symbols on the main components)Connect the power adapter to a power outlet
natural_image
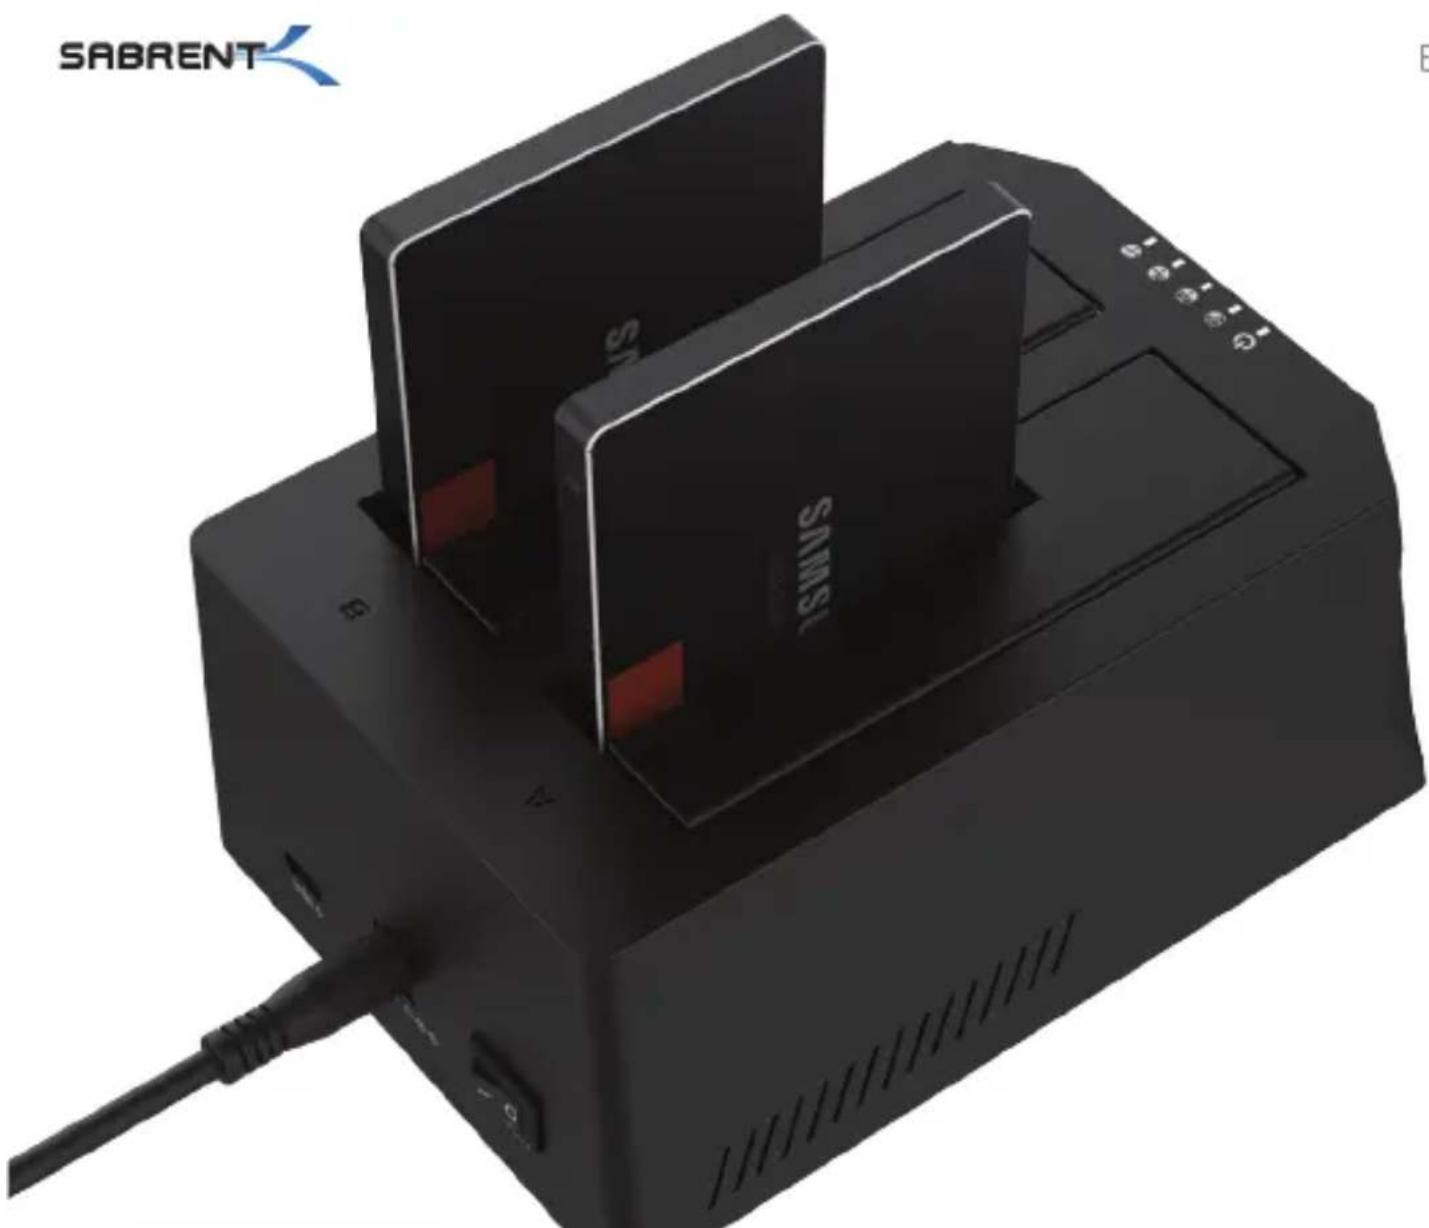
Black Siemens 3.24 RAM controller with cable and indicator lights (no visible text or symbols on body)Insert your Source hard drive into HDD A
natural_image
Black SABRENT 3D printer with two SIMSU memory drives and a cable connector (no visible text or symbols on main body)NOTE: THE CAPACITY OF YOUR TARGET HDD B MUST BE EQUAL OR GREATER WHEN COMPARED TO YOUR SOURCE HDD A YOU CAN'T CLONE INTO A HARD DRIVE WITH LESS CAPACITY
Insert your Target hard drive in HDD B
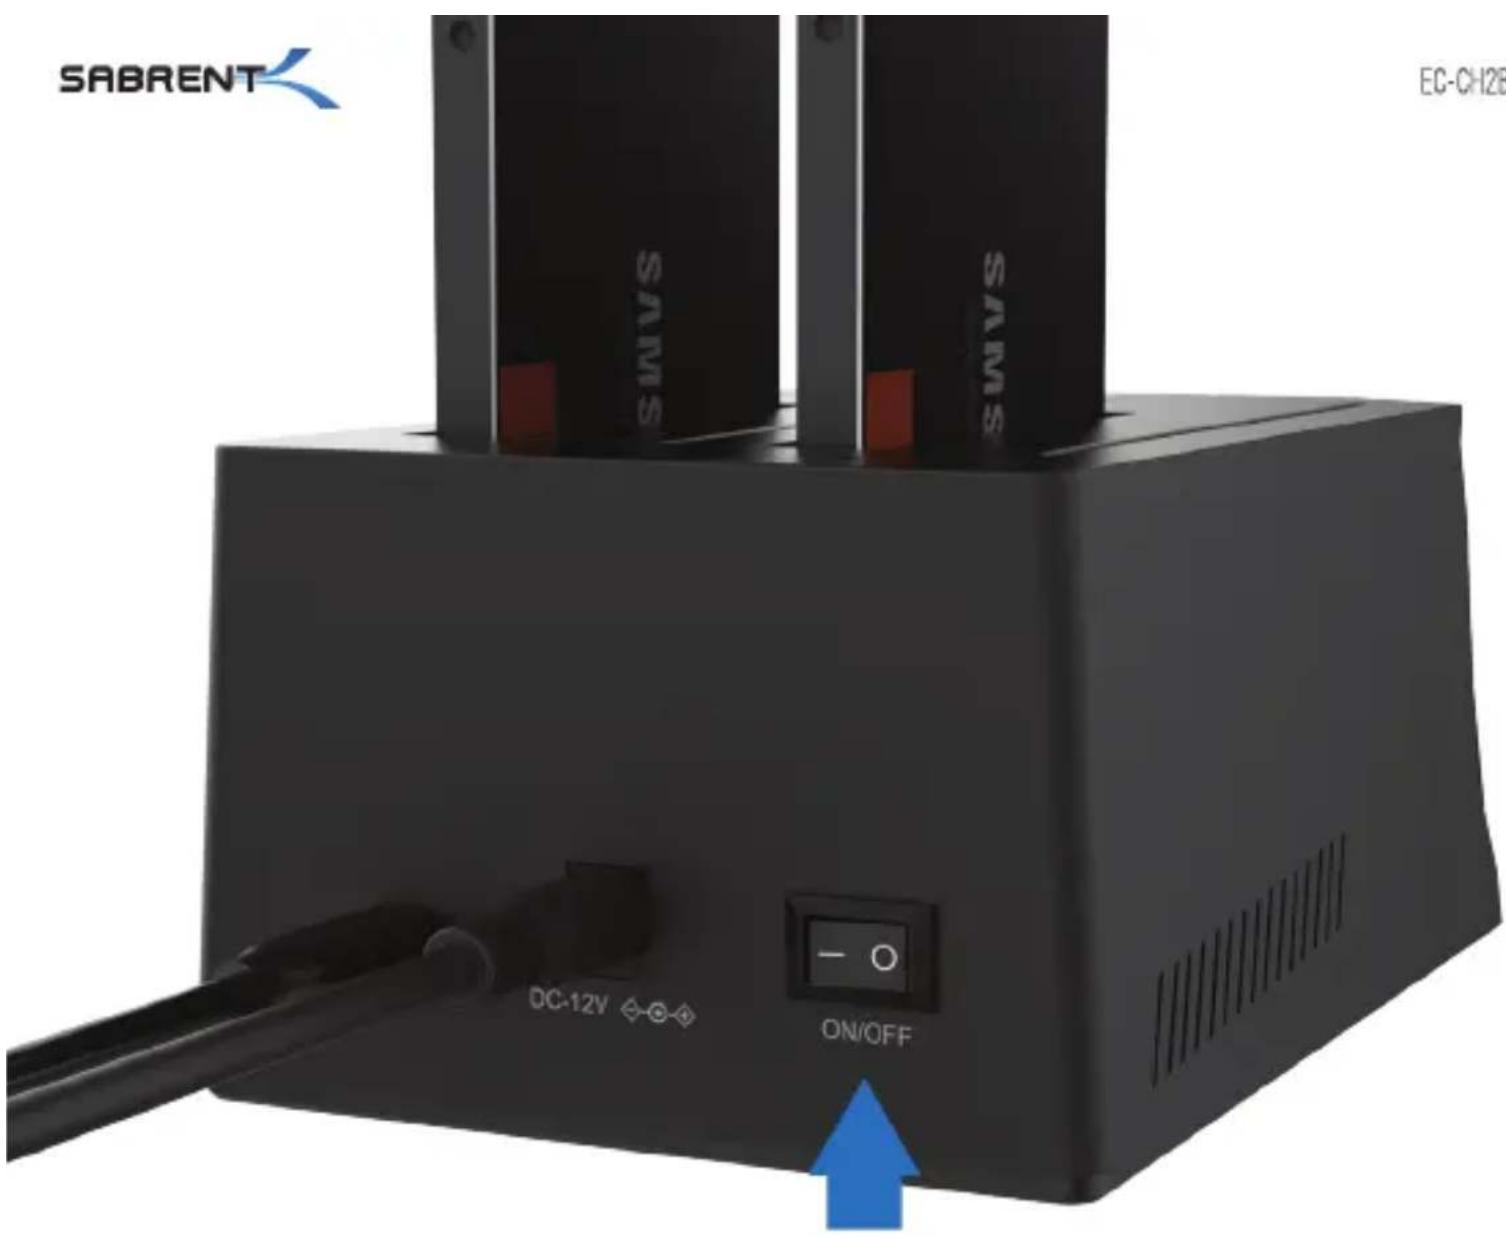
Press the Power Switch to ON
natural_image
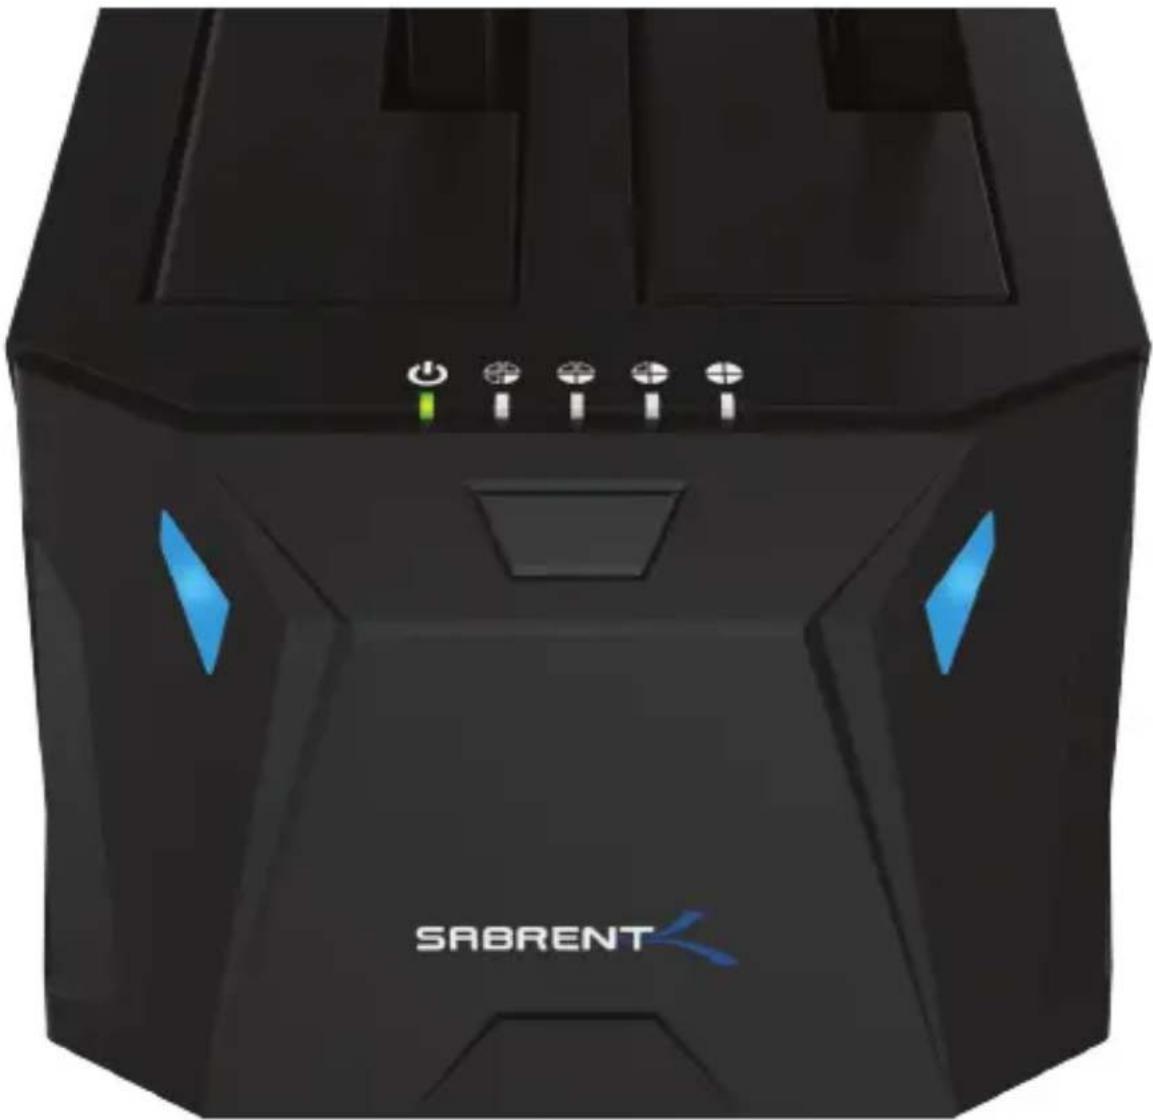
Black SABRENT device with blue LED indicators and control buttons (no readable text or symbols beyond branding)NOTE: PLEASE DO NOT REMOVE YOUR HARD DRIVE WHILE IN USE
You should get Blue LEDs on HDD A and HDD B You should also get a Green LED on the Power Indicator
NOTE: PLEASE DO NOT REMOVE YOUR HARD DRIVE WHILE IN USE
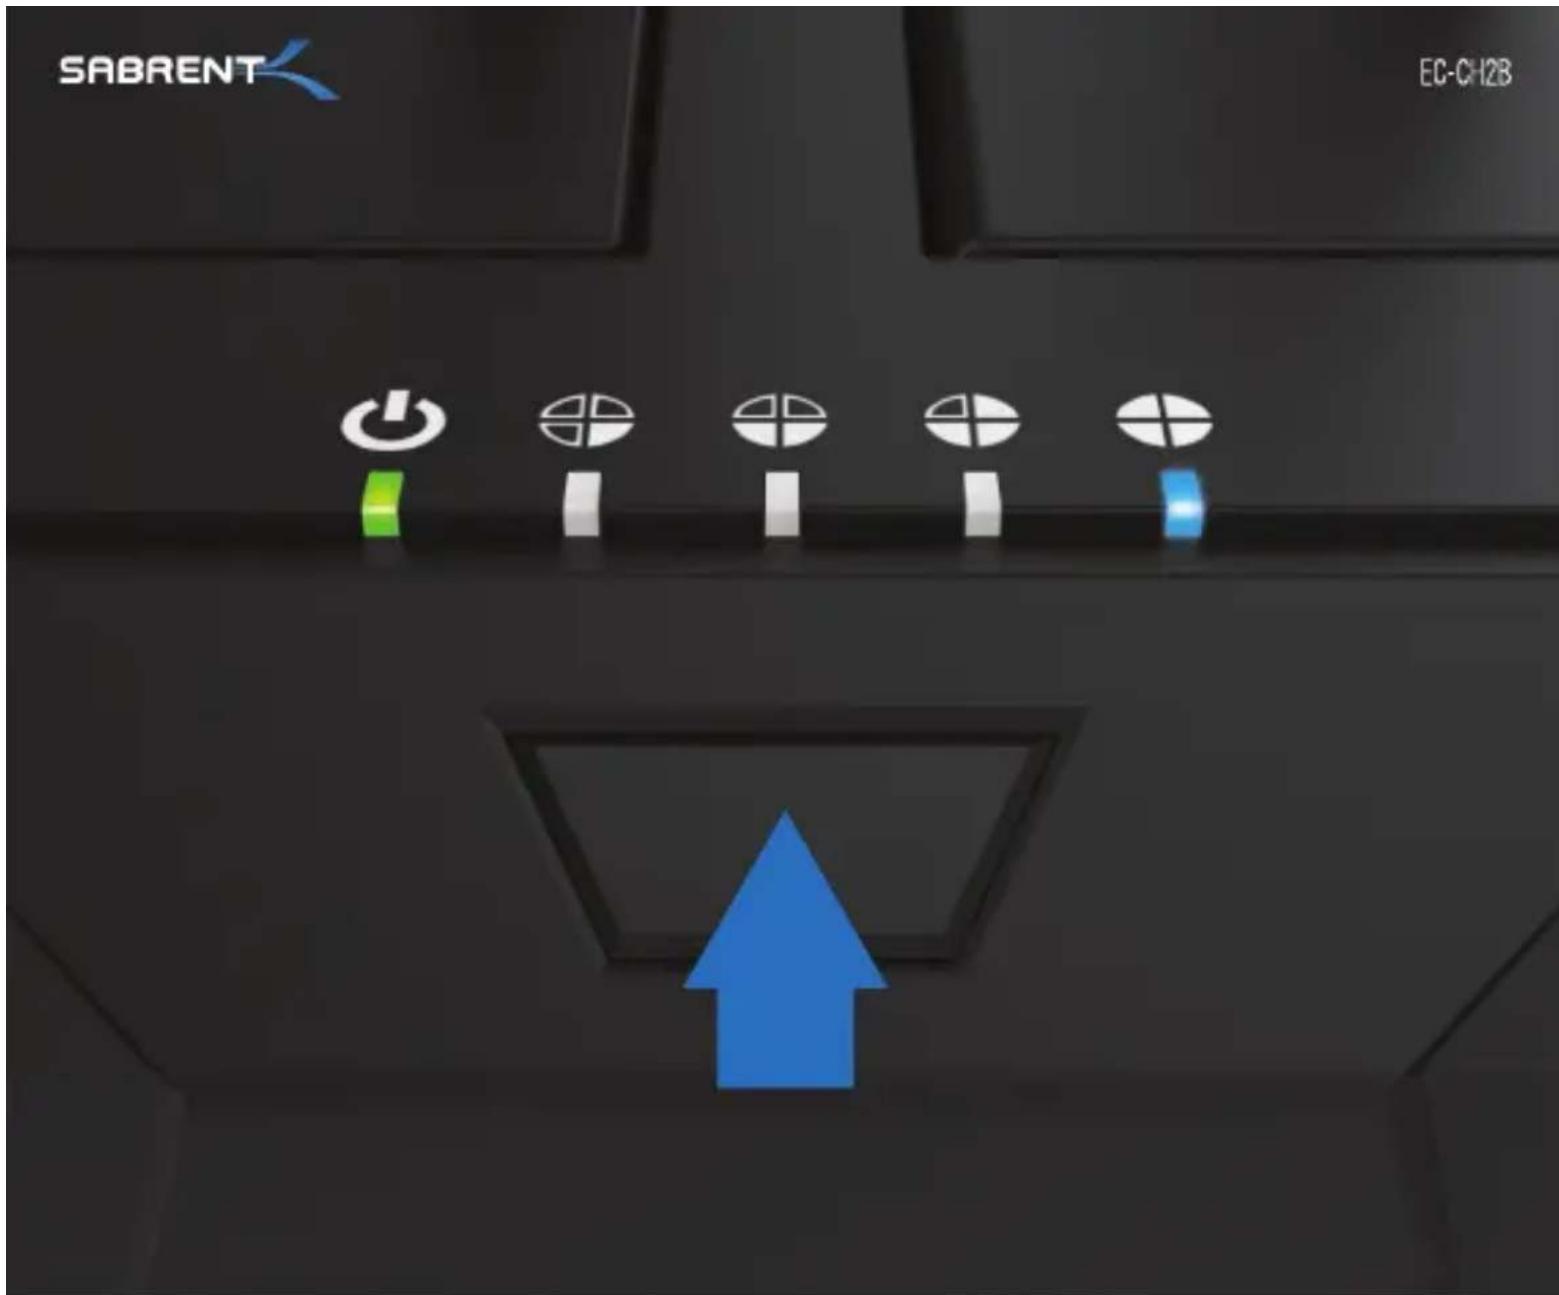
Hold Down the Offline Clone Button and release when you see a Blue LED illuminate in the Status LED Indicator
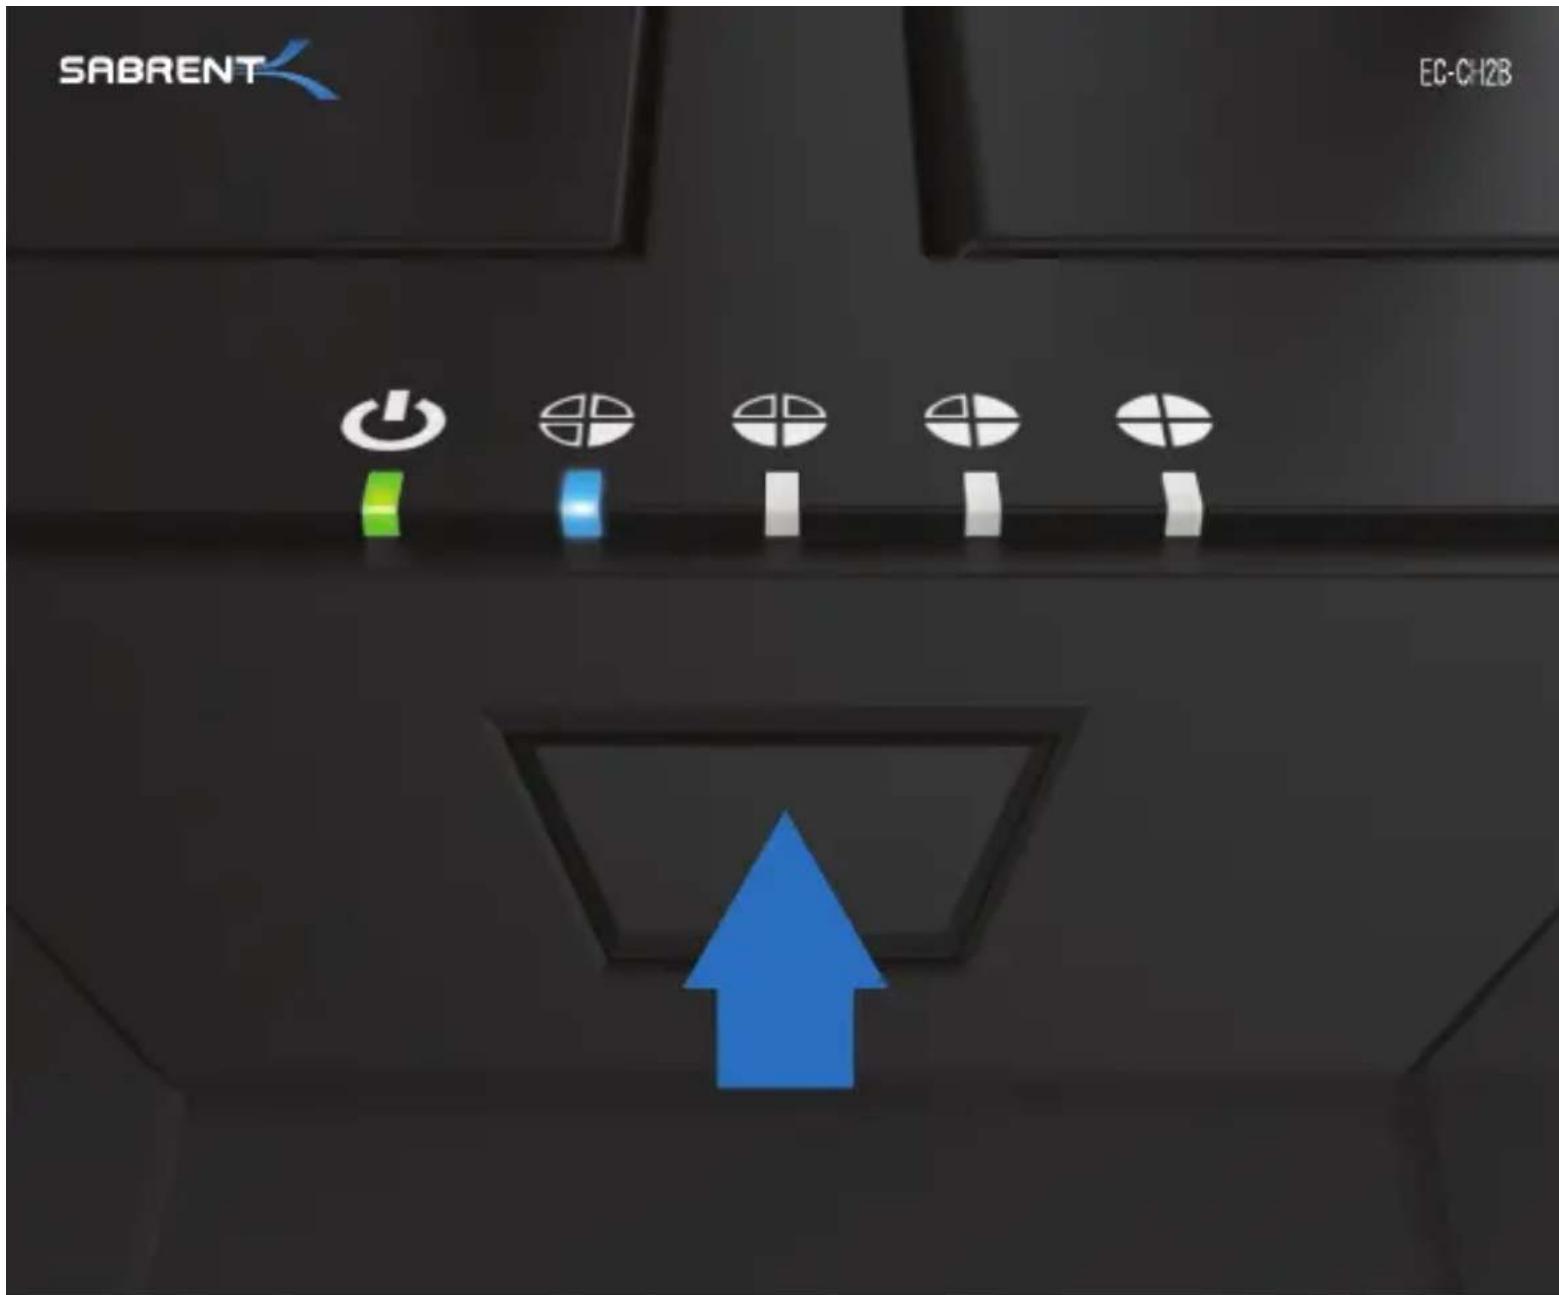
NOTE: THE OFFLINE CLONE OPERATION WILL START WHEN A BLUE LED IN THE STATUS LED INDICATOR BEGINS TO FLASH
Then quickly press the Offline Clone Button
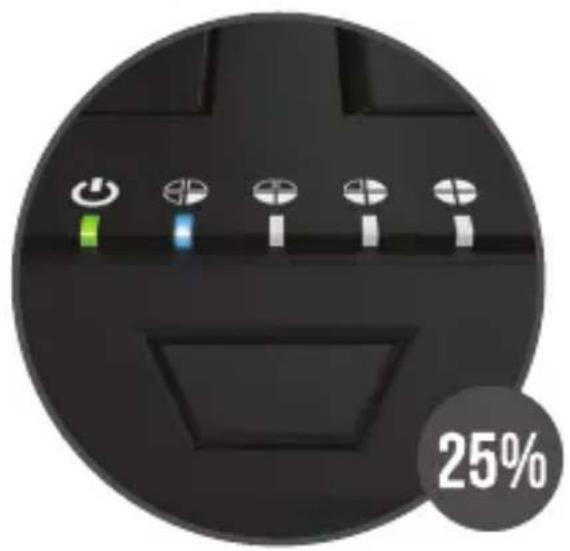
natural_image
Close-up of a black circular device control panel with five switches and a 25% indicator (no text or symbols on the device itself)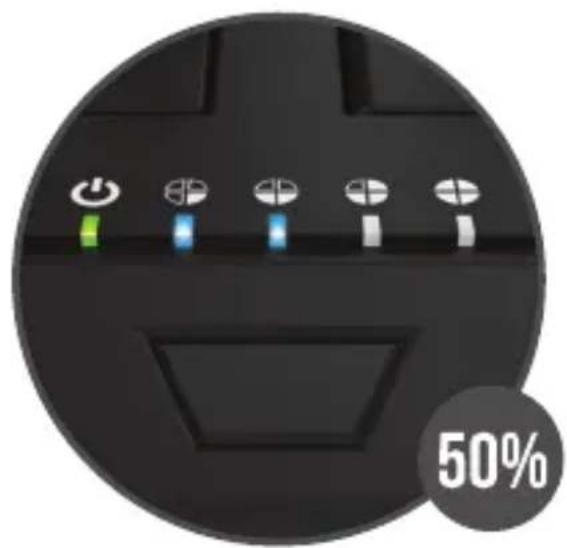
natural_image
Close-up of a black circular device with five indicator lights and a 50% label (no readable text or symbols beyond the label)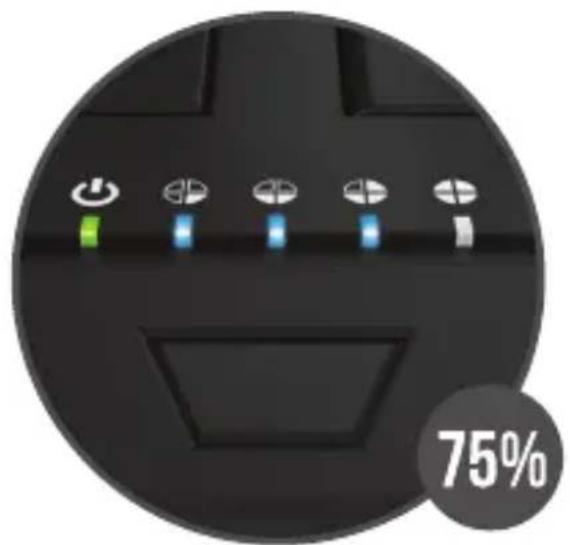
natural_image
Close-up of a black circular device with five indicator lights and a 75% label (no readable text or symbols beyond the percentage value)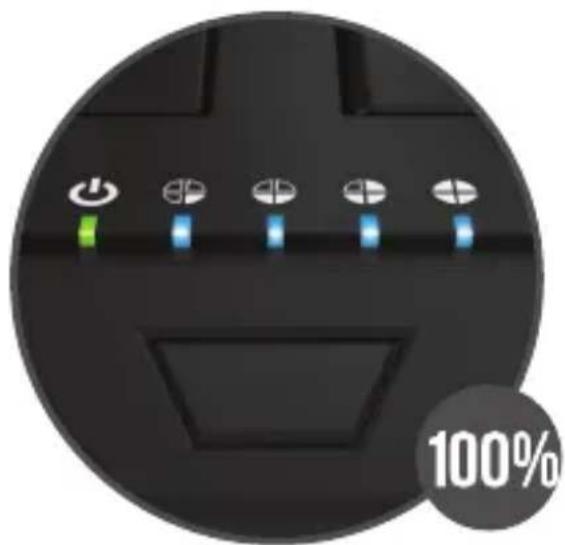
natural_image
Close-up of a black remote control panel with five indicator lights and a 100% label (no readable text or symbols beyond the indicator)WHEN COMPLETED YOU WILL GET SOLID BLUE LEDS ON ALL THE STATUS LED INDICATORS
A new LED will turn solid Blue in the Status LED Indicator with each LED representing 25% completion
Power off the dock and remove your hard drives
NOTES
- All data in HDD B will be deleted once offline clone starts.
• We highly recommend backing up all your data first before you clone your hard drive. - Hard drive with bad sectors might not clone. Simply replace it with a new hard drive.
- If the capacity for HDD B is bigger than HDD A, the capacity remaining in HDD B upon completion of the offline clone will show up as Unallocated. Go into Disk Management on Windows/Disk Utility on Mac and allocate the remaining capacity.
natural_image
Black SABRENT device with ventilation slots and front panel (no visible text or symbols on body)TROUBLESHOOTING/SUPPORT
Power LED does not come on?
• Make sure that you have a tight connection between the power adapter and dock.
• Try it on a different power outlet.
HDD LED does not come on/ turns off during offline clone?
• Re-seat the hard drive into the bay.
• Try it on the second HDD bay
- Swap the hard drive out with a spare.
Cloning process will not start?
• Power off the dock, re-seat drives, power backup and try again.
- Check if the capacity of HDD B is larger or equivalent to that of HDD A.
Capacity means the actual space that can be used, instead of the one marked on the product. For example, the actual capacity of a disk marked 1000GB or 1TB might only be 930GB. The actual capacity of a hard drive is usually different from that on its label.
- You can check the actual capacity of a hard drive in Windows Disk Management/ Mac Disk Utility.
Please contact our Technical Support Team for additional troubleshooting
SABRENT
WWW.SABRENT.COM

- SABRENT Connecting Differently™
- USB TYPE-C SATA 2.5" & 3.5" DUAL BAY HARD DRIVE DOCKING STATION
- SABRENT
- WINDOWS PC HARD DRIVE WITH DATA/FILES
- Click on the Start Icon located on the bottom left of the screen and then click on Computer
- Note:
- WINDOWS PC NEW HARD DRIVE SETUP (HARD DRIVE WITH NO DATA/FILES)
- Click on the Start Icon located on the bottom left of the screen and then RIGHT click on Computer
- Click on Manage
- Go through the Setup Wizard to assign a drive letter
- MAC OS HARD DRIVE WITH DATA/FILES
- MAC OS NEW HARD DRIVE SETUP (HARD DRIVE WITH NO DATA/FILES)
- Select the volume format you want and give it a name
- NOTES
- TROUBLESHOOTING/SUPPORT
- Power LED does not come on?
- HDD LED does not come on?
- Computer does not recognize the hard drive?
- Then quickly press the Offline Clone Button
- HDD LED does not come on/ turns off during offline clone?
- Cloning process will not start?
- Please contact our Technical Support Team for additional troubleshooting
Brand : Sabrent
Model : EC-UBLB
Category : Hard Drive