
FSMT52336DXDS - Küchenmaschine BEKO - Kostenlose Bedienungsanleitung
Finden Sie kostenlos die Bedienungsanleitung des Geräts FSMT52336DXDS BEKO als PDF.


| Produkttyp | Küchenmaschine |
| Marke | Beko |
| Modell | FSMT52336DXDS |
| Abmessungen (B x T x H) | ca. 30 x 25 x 35 cm |
| Gewicht | ca. 5,5 kg |
| Leistung | 1200 W |
| Spannung / Frequenz | 220–240 V / 50–60 Hz |
| Schüsselvolumen | 4,5 Liter |
| Hauptfunktionen | Rühren, Kneten, Mixen, Zerkleinern, Emulgieren |
| Zubehör | Knethaken, Schneebesen, Rührbesen, Mixbecher |
| Geschwindigkeitsstufen | 6 Stufen + Pulse |
| Gehäusematerial | Edelstahl / Kunststoff |
| Schüsselmaterial | Edelstahl |
| Reinigung | Zubehör spülmaschinengeeignet; Gehäuse mit feuchtem Tuch reinigen |
| Sicherheit | Überhitzungsschutz, rutschfeste Saugfüße, Ein-/Ausschalter |
| Ersatzteile / Reparierbarkeit | Ersatzteile über Beko Kundendienst erhältlich; Reparaturanleitung in der Bedienungsanleitung |
| Kabellänge | ca. 1,2 m |
| Garantie | 2 Jahre gesetzliche Gewährleistung |
Häufig gestellte Fragen - FSMT52336DXDS BEKO
Benutzerfragen zu FSMT52336DXDS BEKO
0 Frage zu diesem Gerät. Beantworten Sie die, die Sie kennen, oder stellen Sie Ihre eigene.
Eine neue Frage zu diesem Gerät stellen
Laden Sie die Anleitung für Ihr Küchenmaschine kostenlos im PDF-Format! Finden Sie Ihr Handbuch FSMT52336DXDS - BEKO und nehmen Sie Ihr elektronisches Gerät wieder in die Hand. Auf dieser Seite sind alle Dokumente veröffentlicht, die für die Verwendung Ihres Geräts notwendig sind. FSMT52336DXDS von der Marke BEKO.
BEDIENUNGSANLEITUNG FSMT52336DXDS BEKO
Oven
User manual

natural_image
Simple line drawing of a kitchen oven with three circular tops (no text or symbols)FSMT52336DXDS
Please read this user manual first!
Dear Customer,
Thank you for purchasing this Beko product. We hope that you get the best results from your product which has been manufactured with high quality and state-of-the-art technology. Therefore, please read this entire user manual and all other accompanying documents carefully before using the product and keep it as a reference for future use. If you handover the product to someone else, give the user manual as well. Follow all warnings and information in the user manual.
Remember that this user manual is also applicable for several other models. Differences between models will be identified in the manual.
Explanation of symbols
Throughout this user manual the following symbols are used:

Important information or useful hints about usage.

Warning of hazardous situations with regard to life and property.
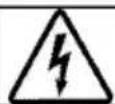
Warning of electric shock.

Warning of risk of fire.
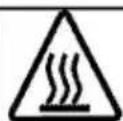
Warning of hot surfaces.
Arçelik A.Ş.
Karaağaç caddesi No:2-6
34445 Süflüce/Istanbul/TURKEY
Made in TURKEY
CE
This product was manufactured using the latest technology in environmentally friendly conditions.
1 Important instructions and warnings for safety and environment 4
General safety 4
Safety when working with gas....4
Electrical safety 5
Product safety 6
Intended use 9
Safety for children....9
Disposing of the old product....10
Package information 10
2 General information 11
Overview....11
Package contents 12
Technical specifications 13
Injector table 13
3 Installation 14
Before installation....14
Installation and connection 15
Gas conversion....17
Future Transportation....18
4 Preparation 19
Tips for saving energy....19
Initial use....19
Time setting 19
First cleaning of the appliance 19
Initial heating....20
5 How to use the hob 21
General information about cooking 21
Using the hobs....21
6 How to operate the oven 22
General information on baking, roasting and grilling22
How to operate the electric oven 22
Operating modes.... 23
Using the oven clock 23
Cooking times table.... 26
How to operate the grill.... 27
Cooking times table for grilling 27
7 Maintenance and care 28
General information....28
Cleaning the hob....28
Cleaning the control panel 28
Cleaning the oven 28
Removing the oven door 29
Removing the door inner glass 29
Replacing the oven lamp.... 31
8 Troubleshooting 32
1 Important instructions and warnings for safety and environment
This section contains safety instructions that will help protect from risk of personal injury or property damage. Failure to follow these instructions shall void any warranty.
General safety
- This appliance can be used by children aged from 8 years and above and persons with reduced physical, sensory or mental capabilities or lack of experience and knowledge if they have been given supervision or instruction concerning use of the appliance in a safe way and understand the hazards involved.
Children shall not play with the appliance. Cleaning and user maintenance shall not be made by children without supervision.
- The appliance is not to be used by persons (including children) with reduced physical, sensory or mental capabilities, or lack of experience and knowledge, unless they have been given supervision or instruction. Children should be supervised and ensure they do not play with the appliance
- If the product is handed over to someone else for personal use or second-hand use purposes, the
user manual, product labels and other relevant documents and parts should be also given.
- Never place the product on a carpet-covered floor. Otherwise, lack of airflow beneath the product will cause electrical parts to overheat. This will cause problems with your product.
- Installation and repair procedures must always be performed by Authorized Service Agents. The manufacturer shall not be held responsible for damages arising from procedures carried out by unauthorized persons which may also void the warranty. Before installation, read the instructions carefully.
- Do not operate the product if it is defective or has any visible damage.
- Ensure that the product function knobs are switched off after every use.
Safety when working with gas
- Any works on gas equipment and systems may only be carried out by authorised qualified persons who are Gas Safe registered.
- Prior to the installation, ensure that the local distribution conditions (nature of the gas and
gas pressure) and the adjustment of the appliance are compatible.
- This appliance is not connected to a combustion products or evacuation device. It shall be installed and connected in accordance with current installation regulations. Particular attention shall be given to the relevant requirements regarding ventilation; See Before installation, page 14
- The use of gas cooking appliance results in the production of heat and moisture in the room in which it is installed. Ensure that the kitchen is well ventilated: keep natural ventilation holes open or install a mechanical ventilation device (mechanical extractor hood). Prolonged intensive use of the appliance may call for additional ventilation, for example increasing the level of the mechanical ventilation where present.
- Gas appliances and systems must be regularly checked for proper functioning. Regulator, hose and its clamp must be checked regularly and replaced within the periods recommended by its manufacturer or when necessary.
- Clean the gas burners regularly. The flames should be blue and burn evenly.
- Good combustion is required in gas appliances. In case of incomplete combustion, carbon monoxide (CO) might develop. Carbon monoxide is a colourless, odourless and very toxic gas, which has a lethal effect even in very small doses. - Request information about gas emergency telephone numbers and safety measures in case of gas smell from you local gas provider.
What to do when you smell gas
- Do not use open flame or do not smoke. Do not operate any electrical buttons (e.g. lamp button, door bell and etc.) Do not use fixed or mobile phones. Risk of explosion and toxication!
- Open doors and windows.
- Turn off all valves on gas appliances and gas meter at the main control valve, unless it's in a confined space or cellar.
- Check all tubes and connections for tightness. If you still smell gas leave the property.
- Warn the neighbours.
- Call the fire-brigade. Use a telephone outside the house.
- Do not re-enter the property until you are told it is safe to do so.
Electrical safety
- If the product has a failure, it should not be operated unless it
is repaired by an Authorized Service Agent. There is the risk of electric shock!
- Only connect the product to a grounded outlet/line with the voltage and protection as specified in the “Technical specifications”. Have the grounding installation made by a qualified electrician while using the product with or without a transformer. Our company shall not be liable for any problems arising due to the product not being earthed in accordance with the local regulations.
- Never wash the product by spreading or pouring water onto it! There is the risk of electric shock!
- Never touch the plug with wet hands! Never unplug by pulling on the cable, always pull out by holding the plug.
- The product must be disconnected during installation, maintenance, cleaning and repairing procedures.
- If the power connection cable for the product is damaged, it must be replaced by the manufacturer, its service agent or similarly qualified persons in order to avoid a hazard.
- The appliance must be installed so that it can be completely disconnected from the mains
supply. The separation must be provided by a switch built into the fixed electrical installation, according to construction regulations.
- Rear surface of the oven gets hot when it is in use. Make sure that the gas/electrical connection does not contact the rear surface; otherwise, connections can get damaged.
- Do not trap the mains cable between the oven door and frame and do not route it over hot surfaces. Otherwise, cable insulation may melt and cause fire as a result of short circuit.
- Any work on electrical equipment and systems should only be carried out by authorized and qualified persons.
- In case of any damage, switch off the product and disconnect it from the mains. To do this, turn off the fuse at home.
• Make sure that fuse rating is compatible with the product.
Product safety
- WARNING: The appliance and its accessible parts become hot during use. Care should be taken to avoid touching heating elements. Children less than 8 years of age shall be kept away unless continuously supervised.
- Never use the product when your judgment or coordination is impaired by the use of alcohol and/or drugs.
- Be careful when using alcoholic drinks in your dishes. Alcohol evaporates at high temperatures and may cause fire since it can ignite when it comes into contact with hot surfaces.
- Food Poisoning Hazard: Do not let food sit in oven for more than 1 hour before or after cooking. Doing so can result in food poisoning or sickness.
- Do not place any flammable materials close to the product as the sides may become hot during use.
- During use the appliances becomes hot. Care should be taken to avoid touching heating elements inside the oven.
- Keep all ventilation slots clear of obstructions.
- Do not heat closed tins and glass jars in the oven. The pressure that would build-up in the tin/jar may cause it to burst.
- Do not place baking trays, dishes or aluminium foil directly onto the bottom of the oven. The heat accumulation might damage the bottom of the oven.
- Do not use harsh abrasive cleaners or sharp metal scrapers
to clean the oven door glass since they can scratch the surface, which may result in shattering of the glass.
- Do not use steam cleaners to clean the appliance as this may cause an electric shock.
- (Varies depending on the product model.)
Placing the wire shelf and tray onto the wire racks properly It is important to place the wire shelf and/or tray onto the rack properly. Slide the wire shelf or tray between 2 rails and make sure that it is balanced before placing food on it (Please see the following figure).

natural_image
Close-up of a white metal grate with parallel slats, no text or symbols visible

Intended use
- This product is designed for domestic use. Commercial use will void the guarantee. - This appliance is for cooking purposes only. It must not be used for other purposes, for example room heating. - This product should not be used for warming the plates under the grill, drying towels, dish cloths etc. by hanging them on the oven door handles. This product should also not be used for room heating purposes. - The manufacturer shall not be liable for any damage caused by improper use or handling errors. - The oven can be used for defrosting, baking, roasting and grilling food.Safety for children
- WARNING: Accessible parts may become hot during use. Young children should be kept away. - The packaging materials will be dangerous for children. Keep the packaging materials away from children. Please dispose of all parts of the packaging according to environmental standards. - Electrical and/or gas products are dangerous to children. Keep children away from the product when it is operating and do not allow them to play with the product. - Do not place any items above the appliance that children may reach for. - When the door is open, do not load any heavy object on it and do not allow children to sit on it. It may overturn or door hinges may get damaged.Child lock
(This feature is optional. It may not exist on your product.) The cooker has child lock system on the oven door. To open the oven door, pull the plastic button slightly up and pull the door handle. When close the door, child lock will be locked itself. Disposing of the old product Compliance with the WEEE Directive and Disposing of the Waste Product:
 This product complies with EU WEEE Directive (2012/19/EU). This product bears a classification symbol for waste electrical and electronic equipment (WEEE). This product has been manufactured with high quality parts and materials which can be reused and are suitable for recycling. Do not dispose of the waste product with normal domestic and other wastes at the end of its service life. Take it to the collection center for the recycling of electrical and electronic equipment. Please consult your local authorities to learn about these collection centers.Compliance with RoHS Directive:
The product you have purchased complies with EU RoHS Directive (2011/65/EU). It does not contain harmful and prohibited materials specified in the Directive.Package information
\- Packaging materials of the product are manufactured from recyclable materials in accordance with our National Environment Regulations. Do not dispose of the packaging materials together with the domestic or other wastes. Take them to the packaging material collection points designated by the local authorities.2 General information
Overview   1 Front door 2 Handle 3 Lower part 4 Tray 5 Wire shelf 6 Control panel 7 Burner plate 8 Top lid 9 Fan motor (behind steel plate) 10 Lamp 11 Grill heating element 12 Shelf positions  1 Function knob 2 Normal burner Rear left 3 Rapid burner Front left 4 Digital timer 5 Auxiliary burner Front right 6 Normal burner Rear right 7 Thermostat lamp 8 Thermostat knobPackage contents
 Accessories supplied can vary depending on the product model. Not every accessory described in the user manual may exist on your product.1. User manual
2. Oven tray
Used for pastries, frozen foods and big roasts. natural_image
Exterior view of a square baking tray with a mesh pattern (no text or symbols)3. Wire Shelf
Used for roasting and for placing the food to be baked, roasted or cooked in casserole dishes to the desired rack. natural_image
Isometric line drawing of a rectangular metal grate or rack structure (no text or symbols)natural_image
Line drawing of a rectangular metal grate with horizontal slats and two side handles (no text or symbols)4. Placing the wire shelf and tray onto the telescopic racks properly
(This feature is optional. It may not exist on your product.) Telescopic racks allow you to install and remove the trays and wire shelf easily. When using the tray and wire shelf with telescopic racks, make sure that the pins at the rear section of the telescopic rack stands against the edges of the wire shelf and tray. natural_image
Close-up of a mechanical component with internal structural lines and a circular inset (no visible text or symbols)natural_image
Close-up of a metal rod with a magnified inset showing internal structure (no text or symbols)5. Rotisserie chicken
Used to grill meat, poultry and fish evenly from all sides. • Fix the food to be grilled to the turn spit with the forks. - Place the turn spit frame into the oven by aligning it with the turn spit driver. - Insert the sharp edge of the turn spit into the turn spit driver and place the turn spit onto the turn spit frame. - Remove the spit handle while grilling.  1 Turn spit frame 2 Plastic handle \* 3 Fork \* (Varies depending on the product model.) Technical specifications| GENERAL | |
| External dimensions (height / width / depth) | 850 mm/500 mm/600 mm |
| Voltage / frequency | 220-240 V ~ 50 Hz |
| Total power consumption | 2.1 kW |
| Fuse | 10 A |
| Cable type / section | min.H05VV-FG 3 x 1 mm^2 |
| Category of gas product | Kat II 2ELs3B/P |
| Gas type / pressure | 2E (G20)/20 mbar |
| Total gas consumption | 7.9 kW |
| Converting the gas type / pressure^§ | 2Ls (G2.350)/13 mbar |
| - optional | 3B/P (G30)/37 mbar |
| HOB | |
| Burners | |
| Rear left | Normal burner |
| Power | 2 kW |
| Front left | Rapid burner |
| Power | 2.9 W |
| Front right | Auxiliary burner |
| Power | 1 kW |
| Rear right | Normal burner |
| Power | 2 kW |
| OVEN/GRILL | |
| Main oven | Multifunction oven |
| Inner lamp | 15-25 W |
| Grill power consumption | 1.6 kW |
Basics: Information on the energy label of electrical ovens is given in accordance with the EN 60350-1 / IEC 60350-1 standard. Those values are determined under standard load with bottom-top heater or fan assisted heating (if any) functions.
Energy efficiency class is determined in accordance with the following prioritization depending on whether the relevant functions exist on the product or not. 1-Cooking with eco-fan, 2-Turbo slow cooking, 3-Turbo cooking, 4-Fan assisted bottom/top heating, 5-Top and bottom heating.  Technical specifications may be changed without prior notice to improve the quality of the product.  Figures in this manual are schematic and may not exactly match your product.  Values stated on the product labels or in the documentation accompanying it are obtained in laboratory conditions in accordance with relevant standards. Depending on operational and environmental conditions of the product, these values may vary. Injector table| Position hob zone | 2 kWRear left | 2.9 WFront left | 1 kWFront right | 2 kWRear right |
| Gas type / Gas pressure | ||||
| 2E (G20)/20 mbar | 103 | 115 | 72 | 103 |
| 3B/P (G30)/37 mbar | 66 | 80 | 47 | 66 |
| 2Ls(G2.350)/13mbar | 131 | 165 | 95 | 131 |
3 Installation
Product must be installed by a qualified person in accordance with the regulations in force. The manufacturer shall not be held responsible for damages arising from procedures carried out by unauthorized persons which may also void the warranty.  Preparation of location and electrical and gas installation for the product is under customer's responsibility. DANGER:
The product must be installed in accordance with all local gas and/or electrical regulations. DANGER:
Prior to installation, visually check if the product has any defects on it. If so, do not have it installed. Damaged products cause risks for your safety.Before installation
To ensure that critical air gaps are maintained under the appliance, we recommend that this appliance is mounted on a solid base and that the feet do not sink into any carpet or soft flooring. The kitchen floor must be able to carry the weight of the appliance plus the additional weight of cookware and bakeware and food. If the range is placed on a base, measures have to be taken to prevent the appliance slipping from the base. The appliances must not be installed behind a decorative door in order to avoid overheating.  - It can be used with cabinets on either side but in order to have a minimum distance of 400mm above hotplate level allow a side clearance of 65mm between the appliance and any wall, partition or tall cupboard. - It can also be used in a free standing position. Allow a minimum distance of 750 mm above the hob surface. - (\*) If a cooker hood is to be installed above the cooker, refer to cooker hood manufacturer' instructions regarding installation height (min 650 mm). - The appliance corresponds to device class 1, i.e. it may be placed with the rear and one side to kitchen walls, kitchen furniture or equipment of any size. The kitchen furniture or equipment on the other side may only be of the same size or smaller. - Any kitchen furniture next to the appliance must be heat-resistant (100 °C min.).Safety chain
The appliance must be secured against overbalancing by using the supplied two safety chains on your oven. Fasten hook (1) by using a proper peg to the kitchen wall (6) and connect safety chain (3) to the hook via the locking mechanism (2).  1 Stability hook 2 Locking mechanism 3 Safety chain (supplied and mounted to oven) 4 Firmliy fix chain to cooker rear 5 Rear of cooker 6 Kitchen wall  Stability chain to be as short as practicable to avoid oven tilting forward and diagonal to avoid oven side tilting. Cooker stability chain for cookers not designed with bracket engagement slot.Room ventilation
All rooms require an openable window, or equivalent, and some rooms will require a permanent vent as well. The air for combustion is taken from the room air and the exhaust gases are emitted directly into the room. Good ventilation is essential for safe operation of your appliance.Rooms with doors and/or windows which open directly to the outer environment
The doors and/or windows that open directly to the outer environment must have a total ventilation opening of the dimensions specified in the table below which is based on the total gas power of the appliance (total gas power consumption of the appliance is shown in the technical specification table of this user manual). If the doors and/or windows do not have a total ventilation opening corresponding to the total gas consumption of the appliance as specified in the table below, then there must definitely be an additional fixed ventilation opening in the room to ensure that the total minimum ventilation requirements for the total gas consumption of the appliance is achieved. The fixed ventilation opening can include openings for existing airbricks, extraction hood ducting opening dimension etc.| Total gas consumption (kW) | min. Ventilation opening ( cm^2 ) |
| 0-2 | 100 |
| 2-3 | 120 |
| 3-4 | 175 |
| 4-6 | 300 |
| 6-8 | 400 |
| 8-10 | 500 |
| 10-11.5 | 600 |
| 11.5-13 | 700 |
| 13-15.5 | 800 |
| 15.5-17 | 900 |
| 17-19 | 1000 |
| 19-24 | 1250 |
Rooms that do not have openable doors and/or windows that open directly to the outer environment
If the room where the appliance is installed does not have a door and/or a window that opens directly to the outer environment, other products shall be sought that definitely provide a fixed nonadjustable and non-closable ventilation opening which meets the total minimum ventilation opening requirements for the total gas consumption of the appliance as indicated in the above table. Also the appropriate building regulations advise should be followed. Where a room or internal space contains more than one gas appliance, additional ventilation area shall be provided on top of the requirement given in the table above. Size of additional ventilation area shall be appropriate to regulations of other gas appliances. There should also be a minimum clearance of 10mm on the bottom edge of the door that opens to the inner environment in the room where the appliance is installed. You must ensure that items such as carpets and other floorcoverings etc., do not affect the clearance when the door is closed. The cooker may be located in a kitchen, kitchen/diner or a bed-sitting room, but not in a room containing a bath or a shower. The cooker must not be installed in a bed-siting room of less than 20m ^3 . Do not install this appliance in a room below ground level unless it is open to ground level on at least one side.Installation and connection
Product can only be installed and connected in accordance with the statutory installation rules.  Do not install the product next to refrigerators or freezers. The heat emitted by the product will increase the energy consumption of cooling appliances. • Carry the product with at least two persons. - Product must be placed directly on the floor. It must not be placed onto a base or a pedestal.  Do not use the door and/or handle to carry or move the product. The door, handle or hinges get damaged.Electrical connection
Connect the product to a grounded outlet/line protected by a fuse of suitable capacity as stated in the "Technical specifications" table. Have the grounding installation made by a qualified electrician while using the product with or without a transformer. Our company shall not be liable for any damages that will arise due to using the product without a grounding installation in accordance with the local regulations. DANGER:
The product must be connected to the mains supply only by an authorised and qualified person. The product's warranty period starts only after correct installation. Manufacturer shall not be held responsible for damages arising from procedures carried out by unauthorised persons. DANGER:
The power cable must not be clamped, bent or trapped or come into contact with hot parts of the product. A damaged power cable must be replaced by a qualified electrician. Otherwise, there is risk of electric shock, short circuit or fire! The mains supply data must correspond to the data specified on the type label of the product. The rating plate is either seen when the door or the lower cover is opened or it is located at the rear wall of the unit depending on the unit type. Power cable of your product must comply with the values in "Technical specifications" table.  Power cable plug must be within easy reach after installation (do not route it above the hob). DANGER:
Before starting any work on the electrical installation, disconnect the product from the mains supply. There is the risk of electric shock! Connect the power cable into the socket.Gas connection
DANGER:
Product can be connected to gas supply system only by an authorised and qualified person or technician with licence. Risk of explosion or toxication due to unprofessional repairs! Manufacturer shall not be held responsible for damages arising from procedures carried out by unauthorised or unlicensed persons. DANGER:
Before starting any work on the gas installation, disconnect the gas supply. There is the risk of explosion! \- Gas adjustment conditions and values are stated on labels (or ion type label).  Your product is equipped for natural gas (NG). \- Natural gas installation must be prepared before installing the product. \- There must be a pipe (Piping advised to be buyed from a licensed installer), must comply with local gas standard, at the outlet of the installation for the natural gas connection of your product and the tip of this pipe must be closed with a blind plug. Service Representative will remove the blind plug during connection and connect your product by means of a straight connection device (coupling). • Make sure that the natural gas valve is readily accessible. \- If you need to use your product later with a different type of gas, you must consult the Authorised Service Agent for the related conversion procedure. DANGER:
The gas hose must not be clamped, bent or trapped or come into contact with hot parts of the product. There is the risk of explosion due to damaged gas hose. \- Push the product towards the kitchen wall. • Adjusting the feet of oven Vibrations during use may cause cooking vessels to move. This dangerous situation can be avoided if the product is level and balanced. For your own safety please ensure the product is level by adjusting the four feet at the bottom by turning left or right and align level with the work top.For products with cooling fan (It may not exist on your product.)
 1 Cooling fan 2 Control panel 3 Door The cooling fan cools both the control panel and the front of the appliance.  Cooling fan continues to run for up to 20-30 minutes (approx.) even after the oven is turned off.Final check
1. Check electrical functions. 2. Open gas supply. 3. Check gas installations for secure fitting and tightness. 4. Ignite burners and check appearance of the flame.  Flame must be blue and have a regular shape. If the flame is yellowish, check if the burner cap is seated securely or clean the burner.Gas conversion
DANGER:
Before starting any work on the gas installation, disconnect the gas supply. There is the risk of explosion! In order to change your appliance's gas type, change all injectors and make flame adjustment for all valves at reduced flow rate position.Exchange of injector for the burners
1. Take off burner cap and burner body. 2. Unscrew injectors by turning the counterclockwise. 3. Fit new injectors. 4. Check all connections for secure fitting and tightness.  New injectors have their position marked on their packing or injector table on Injector table, page 13 can be referred to.  ((Varies depending on the product model.)) On some hob burners, the injector is covered with a metal piece. This metal cover must be removed for injector replacement.  1 Flame failure device (model dependant) 2 Spark plug 3 Injector 4 Burner  Unless there is an abnormal condition, do not attempt to remove the gas burner taps. You must call an Authorised service agent or technician with licence if it is necessary to change the taps.Reduced gas flow rate setting for hob taps
1. Ignite the burner that is to be adjusted and turn the knob to the reduced position. 2. Remove the knob from the gas tap. 3. Use an appropriately sized screwdriver to adjust the flow rate adjustment screw. For LPG (Butane - Propane) turn the screw clockwise. For the natural gas, you should turn the screw counter-clockwise once. » The normal length of a straight flame in the reduced position should be 6-7 mm. 4. If the flame is higher than the desired position, turn the screw clockwise. If it is smaller turn anticlockwise. 5. For the last control, bring the burner both to high-flame and reduced positions and check whether the flame is on or off. Depending on the type of gas tap used in your appliance the adjustment screw position may vary.  1 Flow rate adjustment screw  1 Flow rate adjustment screw  If the gas type of the unit is changed, then the rating plate that shows the gas type of the unit must also be changed.Future Transportation
- Keep the product's original carton and transport the product in it. Follow the instructions on the carton. If you do not have the original carton, pack the product in bubble wrap or thick cardboard and tape it securely. - To prevent the wire grill and tray inside the oven from damaging the oven door, place a strip of cardboard onto the inside of the oven door that lines up with the position of the trays. Tape the oven door to the side walls. - Secure the caps and pan supports with adhesive tape. - Do not use the door or handle to lift or move the product.  Do not place any objects onto the product and move it in upright position.  Check the general appearance of your product for any damages that might have occurred during transportation.4 Preparation
Tips for saving energy
The following information will help you to use your appliance in an ecological way, and to save energy: - Use dark coloured or enamel coated cookware in the oven since the heat transmission will be better. - While cooking your dishes, perform a preheating operation if it is advised in the user manual or cooking instructions. - Do not open the door of the oven frequently during cooking. - Try to cook more than one dish in the oven at the same time whenever possible. You can cook by placing two cooking vessels onto the wire shelf. - Cook more than one dish one after another. The oven will already be hot. - You can save energy by switching off your oven a few minutes before the end of the cooking time. Do not open the oven door. • Defrost frozen dishes before cooking them. - Use pots/pans with cover for cooking. If there is no cover, energy consumption may increase 4 times. - Select the burner which is suitable for the bottom size of the pot to be used. Always select the correct pot size for your dishes. Larger pots require more energy.Initial use Time setting
 While making any adjustment, related symbols will flash on the display. Press +/— keys to set the time of the day after the oven is energized for the first time.  For touch control models, touch :≡ first and then use + / — to set the time of the day. Confirm the setting by touching ⏻ symbol and wait for 4 seconds without touching any keys to confirm.  1 Adjustment key 2 Keylock symbol 3 Clock symbol 4 Alarm volume symbol 5 Eco mode symbol 6 Plus key 7 Minus key 8 Time slice symbol 9 Alarm symbol 10 End of Cooking Time symbol 11 Cooking Time symbol 12 Program key  If the initial time is not set, clock will run starting from 12:00 and Ⓛ symbol will be displayed. The symbol will disappear once the time is set.  Current time settings are canceled in case of power failure. It needs to be readjusted.First cleaning of the appliance
 The surface might get damaged by some detergents or cleaning materials. Do not use aggressive detergents, cleaning powders/creams or any sharp objects during cleaning. Do not use harsh abrasive cleaners or sharp metal scrapers to clean the oven door glass since they can scratch the surface, which may result in shattering of the glass. 1. Remove all packaging materials. 2. Wipe the surfaces of the appliance with a damp cloth or sponge and dry with a cloth.Initial heating
Heat up the product for about 30 minutes and then switch it off. Thus, any production residues or layers will be burnt off and removed. WARNING
Hot surfaces cause burns! Product may be hot when it is in use. Never touch the hot burners, inner sections of the oven, heaters and etc. Keep children away. Always use heat resistant oven gloves when putting in or removing dishes into/from the hot oven.Electric oven
1. Take all baking trays and the wire grill out of the oven. 2. Close the oven door. 3. Select Static position. 4. Select the highest oven power; See How to operate the electric oven, page 22. 5. Operate the oven for about 30 minutes. 6. Turn off your oven; See How to operate the electric oven, page 22Grill oven
1. Take all baking trays and the wire grill out of the oven. 2. Close the oven door. 3. Select the highest grill power; see How to operate the grill, page 27. 4. Operate the grill about 30 minutes. 5. Turn off your grill; see How to operate the grill, page 27  Smoke and smell may emit for a couple of hours during the initial operation. This is quite normal. Ensure that the room is well ventilated to remove the smoke and smell. Avoid directly inhaling the smoke and the smell that emits.5 How to use the hob
General information about cooking
 Never fill the pan with oil more than one third of it. Do not leave the hob unattended when heating oil. Overheated oils bring risk of fire. Never attempt to extinguish a possible fire with water! When oil catches fire, cover it with a fire blanket or damp cloth. Turn off the hob if it is safe to do so and call the fire department. - Before frying foods, always dry them well and gently place into the hot oil. Ensure complete thawing of frozen foods before frying. • Do not cover the vessel you use when heating oil. - Place the pans and saucepans in a manner so that their handles are not over the hob to prevent heating of the handles. Do not place unbalanced and easily tilting vessels on the hob. - Do not place empty vessels and saucepans on cooking zones that are switched on. They might get damaged. - Operating a cooking zone without a vessel or saucepan on it will cause damage to the product. Turn off the cooking zones after the cooking is complete. - As the surface of the product can be hot, do not put plastic and aluminum vessels on it. Such vessels should not be used to keep foods either. • Use flat bottomed saucepans or vessels only. - Put appropriate amount of food in saucepans and pans. Thus, you will not have to make any unnecessary cleaning by preventing the dishes from overflowing. Do not put covers of saucepans or pans on cooking zones. Place the saucepans in a manner so that they are centered on the cooking zone. When you want to move the saucepan onto another cooking zone, lift and place it onto the cooking zone you want instead of sliding it.Gas cooking
\- Size of the vessel and the flame must match each other. Adjust the gas flames so that they will not extend the bottom of the vessel and center the vessel on saucepan carrier.Using the hobs
 1 Normal burner 18-20 cm 2 Rapid burner 22-24 cm 3 Auxiliary burner 12-18 cm 4 Normal burner 18-20 cm is list of advised diameter of pots to be used on related burners. Large flame symbol indicates the highest cooking power and small flame symbol indicates the lowest cooking power. In turned off position (top), gas is not supplied to the burners.Igniting the gas burners
1. Keep burner knob pressed. 2. Turn it counter clockwise to large flame symbol. » Gas is ignited with the spark created. 3. Adjust it to the desired cooking power.Turning off the gas burners
Turn the knob to off (upper) position.Gas shut off safety system (in models with thermic component)
natural_image
3D rendering of a circular mechanical component with a flat top and side connectors (no text or symbols visible)1. Gas shut off safety
- Push the knob inwards and turn it counter clockwise to ignite. • After the gas ignites, keep the knob pressed for 3-5 seconds more to engage the safety system. - If the gas does not ignite after you press and release the knob, repeat the same procedure by keeping the knob pressed for 15 seconds. DANGER:
Release the button if the burner is not ignited within 15 seconds. Wait at least 1 minute before trying again. There is the risk of gas accumulation and explosion!6 How to operate the oven
General information on baking, roasting and grilling
WARNING
Hot surfaces cause burns! Product may be hot when it is in use. Never touch the hot burners, inner sections of the oven, heaters and etc. Keep children away. Always use heat resistant oven gloves when putting in or removing dishes into/from the hot oven. DANGER:
Be careful when opening the oven door as steam may escape. Exiting steam can scald your hands, face and/or eyes.Tips for baking
- Use non-sticky coated appropriate metal plates or aluminum vessels or heat-resistant silicone moulds. • Make best use of the space on the rack. - Place the baking mould in the middle of the shelf. - Select the correct rack position before turning the oven or grill on. Do not change the rack position when the oven is hot. - Keep the oven door closed.Tips for roasting
- Treating whole chicken, turkey and large piece of meat with dressings such as lemon juice and black pepper before cooking will increase the cooking performance. - It takes about 15 to 30 minutes longer to roast meat with bones when compared to roasting the same size of meat without bones. • Each centimeter of meat thickness requires approximately 4 to 5 minutes of cooking time. - Let meat rest in the oven for about 10 minutes after the cooking time is over. The juice is better distributed all over the roast and does not run out when the meat is cut. - Fish should be placed on the middle or lower rack in a heat-resistant plate.Tips for grilling
When meat, fish and poultry are grilled, they quickly get brown, have a nice crust and do not get dry. Flat pieces, meat skewers and sausages are particularly suited for grilling as are vegetables with high water content such as tomatoes and onions. - Distribute the pieces to be grilled on the wire shelf or in the baking tray with wire shelf in such a way that the space covered does not exceed the size of the heater. - Slide the wire shelf or baking tray with grill into the desired level in the oven. If you are grilling on the wire shelf, slide the baking tray to the lower rack to collect fats. Add some water in the tray for easy cleaning.  Foods that are not suitable for grilling carry the risk of fire. Only grill food which is suitable for intensive grilling heat. Do not place the food too far in the back of the grill. This is the hottest area and fatty food may catch fire.How to operate the electric oven
Select temperature and operating mode
 1 Function knob 2 Thermostat knob 1. Set the Function knob to the desired operating mode. 2. Set the Temperature knob to the desired temperature. » Oven heats up to the adjusted temperature and maintains it. During heating, temperature lamp stays on.Switching off the electric oven
Turn the function knob and temperature knob to off (upper) position.Rack positions (For models with wire shelf)
It is important to place the wire shelf onto the side rack correctly. Wire shelf must be inserted between the side racks as illustrated in the figure. Do not let the wire shelf stand against the rear wall of the oven. Slide your wire shelf to the front section of the rack and settle it with the help of the door in order to obtain a good grill performance. Operating modes
The order of operating modes shown here may be different from the arrangement on your product.Top and bottom heating
 Top and bottom heating are in operation. Food is heated simultaneously from the top and bottom. For example, it is suitable for cakes, pastries, or cakes and casseroles in baking moulds. Cook with one tray only.Bottom heating
 Only bottom heating is in operation. It is suitable for pizza and for subsequent browning of food from the bottom.  This function must be used for easy steam cleaning as well.Fan supported bottom/top heating
 Top heating, bottom heating plus fan (in the rear wall) are in operation. Hot air is evenly distributed throughout the oven rapidly by means of the fan. Cook with one tray only.Operating with fan
 The oven is not heated. Only the fan (in the rear wall) is in operation. Suitable for thawing frozen granular food slowly at room temperature and cooling down the cooked food.Fan Heating
 [EMPTY]  Warm air heated by the rear heater is evenly distributed throughout the oven rapidly by means of the fan. It is suitable for cooking your meals in different rack levels and preheating is not required in most cases. Suitable for cooking with multi trays. This function must be used for easy steam cleaning as well."3D" function
 Top heating, bottom heating and fan assisted heating (in the rear wall) are in operation. Food is cooked evenly and quickly all around. Cook with one tray only.Grill+Fan
 Grilling effect is not as strong as in Full Grill - Put small or medium-sized portions in correct shelf position under the grill heater for grilling. • Set the desired temperature. • Turn the food after half of the grilling time.Full grill with turnspit
 Full grill and turnspit are in operation. It is suitable for grilling and making rotisserie with large pieces of meat.Using the oven clock
 1 Adjustment key 2 Keylock symbol 3 Clock symbol 4 Alarm volume symbol 5 Eco mode symbol 6 Plus key 7 Minus key 8 Time slice symbol 9 Alarm symbol 10 End of Cooking Time symbol 11 Cooking Time symbol 12 Program key| i | Maximum time that can be set for end of cooking is 5 hours 59 minutes. Program will be cancelled in case of power failure. You must reprogram the oven. |
| i | While making any setting, related symbols will flash on the display. You must wait for a short time for the settings to take effect. |
| i | If no cooking setting is made, time of the day cannot be set. |
| i | Remaining time will be displayed if cooking time is set when the cooking starts. |
Cooking by setting the cooking time;
You can set the oven so that it will stop at the end of the specified time by setting the cooking time on the timer. 1. Select the function for cooking. 2. Touch ⏻ until |→| symbol appears on display for cooking time. 3. Set the cooking time with + / - keys. » » After the cooking time is set, |→| symbol and the time slice will appear on display continuously. 4. Place the dish into the oven and set the temperature with temperature knob. Cooking will start. » Cooking time starts to count down on display when cooking starts and all parts of time slice symbol is lit. The set cooking time is divided into 4 equal parts and when the time of each parts ends, the symbol of that parts turns off. So you can understand the ratio of remaining cooking time to total cooking time easily.Setting the the end of cooking time to a later time;
After setting the cooking time on the timer, you can set the end of cooking time to a later time. 1. Select the function for cooking. 2. Touch ⚙ until |→| symbol appears on display for cooking time. 3. Set the cooking time with + / - keys. »» Once the Cooking Time is set, |→| symbol will appear on display continuously. 4. Touch Ⓤ until → symbol appears on display for the end of cooking time. 5. Press + /— keys to set the end of cooking time. » After the cooking time is set, |→| symbol plus →| symbol and the time slice will appear on display continuously. Once the cooking starts, →| symbol disappears. 6. Place the dish into the oven and set the temperature with temperature knob. Cooking will start. » Oven timer calculates the startup time by deducting the cooking time from the end of cooking time you have set. Selected operating mode is activated when the startup time of cooking has come and the oven is heated up to the set temperature. It maintains this temperature until the end of cooking time. » Cooking time starts to count down on display when cooking starts and all parts of time slice symbol is lit. The set cooking time is divided into 4 equal parts and when the time of each parts ends, the symbol of that parts turns off. So you can understand the ratio of remaining cooking time to total cooking time easily. 7. After the cooking process is completed, "End" appears on the displayed and the timer gives an audio warning. 8. Audio warning sounds for 2 minutes. To stop the audio warning, just press any key. Audio warning will be silenced and current time will be displayed. Activating the keylock
You can prevent oven from being intervened with by activating the key lock function. 1. Touch: ≡ until 🔒 symbol appears on display. » "OFF" will appear on the display. 2. Press + to activate the key lock. » Once the key lock is activated, "On" appears on the display and the 🔒 symbol remains lit.  Oven keys are not functional when the key lock is activated. Key lock will not be cancelled in case of power failure.To deactivate the keylock
1. Touch ≡ until 🔒 symbol appears on display. » "On" will appear on the display. 2. Disable the key lock by pressing the - key. » "OFF" will be displayed once the keylock is deactivated.Setting the alarm clock
You can use the timer of the product for any warning or reminder apart from the cooking program. The alarm clock has no influence on the functions of the oven. It is only used as a warning. For example, this is useful when you want to turn food in the oven at a certain point of time. Timer will give an audio warning at the end of the set time. 1. Touch Ⓤ until △ symbol appears on display.  Maximum alarm time can be 23 hours and 59 minutes. 2. Set the alarm duration by using + / - keys.  Function keys for alarm tone, time of day, display brightness and temperature keys should be at 0 (OFF) position. » △ symbol will remain lit and the alarm time will appear on the display once the alarm time is set. 3. At the end of the alarm time, △ symbol starts flashing and the audio warning is heard.Turning off the alarm
1. Audio warning sounds for 2 minutes. To stop the audio warning, just press any key. » Audio warning will be silenced and current time will be displayed.Cancelling the alarm;
1. Touch ⏻ until △ symbol appears on display in order to cancel the alarm. 2. Press and hold — key until "00:00" is displayed.  Alarm time will be displayed. If the alarm time and cooking time are set concurrently, shortest time will be displayed.Changing alarm tone
1. Touch ≡ until ◀ symbol appears on display. 2. Adjust the desired alarm tone with + / - keys. 3. The tone you have set will be activated in a short time. » Selected alarm tone will appear as "b-01", "b-02" or "b-03" on the display.Changing the time of the day
To change the time of the day you have previously set: 1. Touch: ≡ until Ⓛ symbol appears on display. 2. Set the time of the day with +/— keys. 3. The time you have set will be activated in a short time.Economy mode
You can save energy with economy mode while cooking by setting cooking time in the oven. This mode completes the cooking with the inner temperature of the oven by switching off the heaters before the end of cooking time.Setting the economy mode
1. Touch ⚫ symbol until eco symbol appears on display. » "OFF" will appear on the display. 2. Enable economy mode by touching + key. » Once the economy mode is activated, "On" appears on the display and the eco symbol remains lit.Disabling economy mode
1. Touch :≡ symbol until eco symbol appears on display. » "On" will appear on the display. 2. Disable economy mode by touching ■ key. » "Off" will be displayed once the eco mode is deactivated.Setting the screen brightness
(This feature is optional. It may not exist on your product.) 1. Touch ≡ until d-01 or d-02 or d-03 appears on display for display brightness. 2. Set the desired brightness with +/— keys. » The time you have set will be activated in a short time.Cooking times table
 The timings in this chart are meant as a guide. Timings may vary due to temperature of food, thickness, type and your own preference of cooking.Baking and roasting
 1st rack of the oven is the bottom rack.| Dish | Cooking level number | Rack position | Temperature (°C) | Cooking time (approx. in min.) | |
| Cakes in tray* | One level | 3 | 175 | 30 ... 45 | |
| Cakes in mould* | One level | 2 | 175 | 30 ... 50 | |
| Cakes in cooking paper* | One level | 3 | 160 ... 170 | 25 ... 30 | |
| Sponge cake* | One level | 3 | 180 ... 200 | 10 ... 20 | |
| Cookies* | One level | 3 | 160 ... 170 | 20 ... 30 | |
| Dough pastry* | One level | 3 | 200 | 20 ... 30 | |
| Rich pastry* | One level | 3 | 190 | 20 ... 35 | |
| Leaven* | One level | 3 | 190 | 20 ... 40 | |
| Lasagna* | One level | 2 | 180 | 25 ... 45 | |
| Pizza* | One level | 1 | 200 | 10 ... 20 | |
| Beef steak (whole) / Roast | One level | 2 | 25 min. 220, then 180 ... 190 | 80 ... 100 | |
| Leg of Lamb (casserole) | One level | 2 | 25 min. 220, then 190 | 70 ... 90 | |
| Roasted chicken | One level | 2 | 15 min. 250/max, then 190 | 55 ... 65 | |
| One level | 2 | 15 min. 220, then 180 ... 190 | 50 ... 65 | ||
| Turkey (Sliced) | One level | 3 | 25 min. 220, then 190 | 70 ... 120 | |
| One level | 2 | 25 min. 220, then 180 ... 190 | 60 ... 100 | ||
| Fish | One level | 3 | 200 | 20 ... 30 | |
| One level | 3 | 200 | 20 ... 25 | ||
| When cooking with 2 trays at the same time, place the deeper tray on the upper rack and the other one on the lower rack. *It is suggested to perform preheating for all foods. | |||||
Tips for baking cake
- If the cake is too dry, increase the temperature by 10^ C and decrease the cooking time. - If the cake is wet, use less liquid or lower the temperature by 10^ C. - If the cake is too dark on top, place it on a lower rack, lower the temperature and increase the cooking time. - If cooked well on the inside but sticky on the outside use less liquid, lower the temperature and increase the cooking time.Tips for baking pastry
- If the pastry is too dry, increase the temperature by 10°C and decrease the cooking time. Dampen the layers of dough with a sauce composed of milk, oil, egg and yoghurt. - If the pastry takes too long to bake, pay care that the thickness of the pastry you have prepared does not exceed the depth of the tray. • If the upper side of the pastry gets browned, but the lower part is not cooked, make sure that the amount of sauce you have used for the pastry is not too much at the bottom of the pastry. Try to scatter the sauce equally between the dough layers and on the top of pastry for an even browning.  Cook the pastry in accordance with the mode and temperature given in the cooking table. If the bottom part is still not browned enough, place it on one lower rack next time.Tips for cooking vegetables
- If the vegetable dish runs out of juice and gets too dry, cook it in a pan with a lid instead of a tray. Closed vessels will preserve the juice of the dish. - If a vegetable dish does not get cooked, boil the vegetables beforehand or prepare them like canned food and put in the oven.How to operate the grill
WARNING
Close oven door during grilling. Hot surfaces may cause burns!Switching on the grill
1. Tum the Function knob to the desired grill symbol. 2. Then, select the desired grilling temperature. 3. If required, perform a preheating of about 5 minutes. » Temperature light turns on.Switching off the grill
1. Turn the Function knob to Off (top) position.  Foods that are not suitable for grilling carry the risk of fire. Only grill food which is suitable for intensive grilling heat. Do not place the food too far in the back of the grill. This is the hottest area and fatty food may catch fire.Turnspit function
When grill function is selected, turnspit motor will start turning.  The turnspit motor works with the grill function. Once the grill function is operated, the grill heater cuts in and out intermittently. Therefore, while the grill heater is enabled, the turnspit motor runs and when it is disabled the turnspit motor stops likewise. This is not a fault. • After selecting the Grill function, skewer the meat or chicken onto the spit by means of the fork (3).Cooking times table for grilling
Grilling with electric grill| Food | Insertion level | Grilling time (approx.) |
| Fish | 4...5 | 20...25 min.# |
| Sliced chicken | 4...5 | 25...35 min. |
| Lamb chops | 4...5 | 20...25 min. |
| Roast beef | 4...5 | 25...30 min.# |
| Veal chops | 4...5 | 25...30 min.# |
| Toast bread | 4 | 1...2 min. |
| #depending on thickness | ||
Maintenance and care
General information
Service life of the product will extend and the possibility of problems will decrease if the product is cleaned at regular intervals. DANGER:
Disconnect the product from mains supply before starting maintenance and cleaning works. There is the risk of electric shock! DANGER:
Allow the product to cool down before you clean it. Hot surfaces may cause burns! - Clean the product thoroughly after each use. In this way it will be possible to remove cooking residues more easily, thus avoiding these from burning the next time the appliance is used. - No special cleaning agents are required for cleaning the product. Use warm water with washing liquid, a soft cloth or sponge to clean the product and wipe it with a dry cloth. - Always ensure any excess liquid is thoroughly wiped off after cleaning and any spillage is immediately wiped dry. - Do not use cleaning agents that contain acid or chloride to clean the stainless or inox surfaces and the handle. Use a soft cloth with a liquid detergent (not abrasive) to wipe those parts clean, paying attention to sweep in one direction. - (This feature is optional. It may not exist on your product.) Do not use solid metal scrapers or abrasive cleaning materials to clean the glass cover. Glass surface can get damaged.  The surface might get damaged by some detergents or cleaning materials. Do not use aggressive detergents, cleaning powders/creams or any sharp objects during cleaning. Do not use harsh abrasive cleaners or sharp metal scrapers to clean the oven door glass since they can scratch the surface, which may result in shattering of the glass.  Do not use steam cleaners to clean the appliance as this may cause an electric shock.Cleaning the hob
Gas hobs
1. Remove and clean the saucepan carriers and burner caps. 2. Clean the hob. 3. Install the burner caps and make sure that they are seated correctly. 4. When installing the upper grills, pay attention to place the saucepan carriers so that the burners are centered.Cleaning the control panel
Clean the control panel and knobs with a damp cloth and wipe them dry.  Do not remove the control buttons/knobs to clean the control panel. Control panel may get damaged!Cleaning the oven
To clean the side wall
(This feature is optional. It may not exist on your product.) 1. Remove the front section of the side rack by pulling it in the opposite direction of the side wall. 2. Remove the side rack completely by pulling it towards you. Catalytic walls
(This feature is optional. It may not exist on your product.) The inner side walls (A) and/or the rear wall (B) of your product may be coated with catalytic enamel. Catalytic walls have a light matte colour and a porous surface. Catalytic walls of the oven should not be cleaned. Porous surfaces of the catalytic walls are automatically cleaned by absorbing and converting the spilled oil (steam and carbon dioxide). natural_image
Two technical diagrams labeled A and B showing internal components with grid lines and a hexagonal pattern (no text or symbols beyond labels)Easy Steam Cleaning
It ensures easy cleaning because the dirt (having waited not for too long) is softened with the steam that forms inside the oven and the water drops condensing on the inner surfaces of the oven. 1. Remove all accessories inside the oven. 2. Pour 500 ml of water into the oven tray and place the tray at the 2nd rack of the oven. natural_image
Illustration of a computer monitor with a stylized screen and fan (no text or symbols)Clean oven door
To clean the oven door, use warm water with washing liquid, a soft cloth or sponge to clean the product and wipe it with a dry cloth.  Don't use any harsh abrasive cleaners or sharp metal scrapers for cleaning the oven door. They could scratch the surface and destroy the glass.  Front door inner glass is coated to easy clean material. Do not use any harsh abrasive cleaners, hard metal scrapers, scouring pads or bleach to clean front door inner glass as they may scratch the surface. This may destroy the coating material.Removing the oven door
1. Open the front door (1). 2. Open the clips at the hinge housing (2) on the right and left hand sides of the front door by pressing them down as illustrated in the figure.  1 Front door 2 Hinge 3 Oven natural_image
Technical diagram of a mechanical joint or bracket with a curved arrow indicating rotation (no text or symbols present)Removing the door inner glass
(This feature is optional. It may not exist on your product.) The inner glass panel of the oven door can be removed for cleaning. Open the oven door. natural_image
Technical diagram showing two views of a mechanical component with numbered parts (1, 2, 3) and directional arrows indicating features (no text or symbols present)natural_image
Diagram of a rectangular electronic component with a grid pattern and a downward arrow indicating force or direction (no text or symbols)natural_image
Mechanical assembly diagram showing a bracket with four numbered components and directional arrows indicating motion (no text or symbols present)natural_image
3D mechanical component diagram showing a bracket and mounting edge with an arrow indicating direction (no text or symbols)Replacing the oven lamp
 | DANGER:Before replacing the oven lamp, make sure that the product is disconnected from mains and cooled down in order to avoid the risk of an electrical shock.Hot surfaces may cause burns! |
| The oven lamp is a special electric light bulb that can resist up to 300 °C. SeeTechnical specifications, page 13 for details. Oven lamps can be obtained from Authorised Service Agents or technician with licence. | |
| Position of lamp might vary from the figure. | |
| The lamp used in this appliance is not suitable for household room illumination. The intended purpose of this lamp is to assist the user to see foodstuffs. | |
| The lamps used in this appliance have to withstand extreme physical conditions such as temperatures above 50 °C. |
If your oven is equipped with a round lamp:
1. Disconnect the product from mains. 2. Turn the glass cover counter clockwise to remove it. natural_image
Close-up of hands operating a mechanical component with a circular part inserted (no visible text or symbols)natural_image
Mechanical diagram showing two stages of a rotating component, labeled A and B, with no visible text or symbols.8 Troubleshooting
Oven emits steam when it is in use
\- It is normal that steam escapes during operation. >>> This is not a fault.Product emits metal noises while heating and cooling.
\- When the metal parts are heated, they may expand and cause noise. >>> This is not a fault.Product does not operate.
- The mains fuse is defective or has tripped. >>> Check fuses in the fuse box. If necessary, replace or reset them. • Product is not plugged into the (grounded) socket. >>> Check the plug connection.Oven light does not work.
- Oven lamp is defective. >>> Replace oven lamp. - Power is cut. >>> Check if there is power. Check the fuses in the fuse box. If necessary, replace or reset the fuses.Oven does not heat.
- Function and/or Temperature are not set. >>> Set the function and the temperature with the Function and/or Temperature knob/key. - In models equipped with a timer, the timer is not adjusted. >>> Adjust the time. (In products with microwave oven, timer controls only microwave oven.) - Power is cut. >>> Check if there is power. Check the fuses in the fuse box. If necessary, replace or reset the fuses.There is no ignition spark.
• No current. >>> Check fuses in the fuse box. • Time is not set. >>> Set the time.There is no gas.
• Main gas valve is closed. >>> Open gas valve. • Gas pipe is bent. >>> Install gas pipe properly.Burners are not burning properly or at all.
- Burners are dirty. >>> Clean burner components. - Burners are wet. >>> Dry the burner components. • Burner cap is not mounted safely. >>> Mount the burner cap properly. • Gas valve is closed. >>> Open gas valve. • Gas cylinder is empty (when using LPG). >>> Replace gas cylinder.(In models with timer) Clock display is blinking or clock symbol is on.
\- A previous power outage has occurred. >>> Adjust the time / Switch of the product and switch it on again.  Consult the Authorised Service Agent or technician with licence or the dealer where you have purchased the product if you can not remedy the trouble although you have implemented the instructions in this section. Never attempt to repair a defective product yourself.Piekarnik
Instrukcja użytkowania
Prosimy najpierw przeczytać tę instrukcję obsługi!
Drogi Kliencie, Dziękujemy za wybór wyrobu firmy Beko. Mamy nadzieję, że wyrób ten, wyprodukowany zgodnie z najwyższymi wymogami jakościowymi i według najnowszej technologii, służyć Ci będzie jak najlepiej. Prosimy zatem przed użyciem tego wyrobu uważnie przeczytać całą tę instrukcję obsługi i wszystkie inne dostarczone z nim dokumenty i zachować je do wglądu w przyszłości. Jeśli przekażesz ten wyrób komuś innemu, oddajcie mu także tę instrukcję. Przestrzegaj wszelkich ostrzeżeń i informacji z tej instrukcji. Pamiętaj, że niniejsza instrukcja użytkowania może odnosić się także do kilku innych modeli. Różnice pomiędzy modelami wskazano w niniejszej instrukcji.Objaśnienie symboli
W niniejszej instrukcji użytkowania stosuje się następujące symbole:  Ważna informacja lub przydatna wskazówka dot. użytkowania  Ostrzeżenie przed zagrożeniem dla życia i mienia.  Ostrzeżenie przed porażeniem elektrycznym.  Ostrzeżenie przed zagrożeniem pożarem.  Ostrzeżenie przed gorącymi powierzchniami.  Niniejsze urządzenie jest zgodne z następującymi Dyrektywami Unii Europejskiej: \- 2006/95/WE LVD (Niskie Napięcia) \- 2004/108/WE EMC (Kompatybilność Elektromagnetyczna) Importer: Beko S.A. Ul. Puławska 366, 02-819 Warszawa, www.beko.pl1 Ważne instrukcje i ostrzeżenia dotyczące bezpieczeństwa i ochrony środowiska 4
Ogólne zasady bezpieczeństwa....4 Bezpieczeństwo przy pracy z gazem......5 Bezpieczeństwo elektryczne......6 Zasady zachowania bezpieczeństwa przy użytkowaniu tego wyrobu....7 Zamierzone przeznaczenie....9 Bezpieczeństwo dzieci....9 Stare urządzenia....10 Pozbywanie się materiałów opakowaniowych......102 Informacje ogólne 11
Opis urządzenia....11 Zawartość opakowania....12 Dane techniczne....13 Tabela wtryskiwacza 133 Instalacja 14
Przed zainstalowaniem....14 Instalacja i przyłączenie....15 Zmiana rodzaju gazu....17 Przyszły transport....184 Przygotowanie 19
Jak oszczędzać energię....19 Pierwszy raz....19 Ustawianie czasu....19 Pierwsze czyszczenie 19 Podgrzewanie wstępne....195 Jak używać płyty kuchennej 21
Ogólne informacje o gotowaniu 21 Użytkowanie płyt kuchennych.... 216 Jak obsługiwać piekarnik 23
Ogólne informacje o pieczeniu ciast i mięs oraz o grillowaniu. 23 Jak obsługiwać piekarnik elektryczny.... 23 Tryby pracy.... 24 Korzystanie z zegara piekarnika.... 24 Tabela czasów pieczenia 27 Jak obsługiwać grill.... 28 Tabela czasów pieczenia przy grillowaniu.... 287 Czyszczenie i konserwacja 29
Informacje ogólne.... 29 Oczyszczenie płyty.... 29 Czyszczenie panelu sterowania 29 Czyszczenie piekarnika 29 Przenoszenie drzwiczek piekarnika.... 30 Wyjmowanie szyby w drzwiczkach.... 31 Wymiana lampki w piekarniku.... 328 Rozwiązywanie problemów 33
1 Ważne instrukcje i ostrzeżenia dotyczące bezpieczeństwa i ochrony środowiska
W rozdziale tym zawarto instrukcje zachowania bezpieczeństwa, które pomogą uniknąć zagrożenia obrażeniem lub szkodą. Nieprzestrzeganie tych instrukcji spowoduje unieważnienie wszelkich gwarancji.Ogólne zasady bezpieczeństwa
\- Urządzenie może być używane przez dzieci w wieku 8 lat i starsze oraz osoby o ograniczonych zdolnościach fizycznych, czuciowych lub umysłowych, lub nieumiejętne i niedoświadczone, jeśli są pod nadzorem lub poinstruowano je w sprawach użytkowania tego urządzenia w sposób bezpieczny i rozumieją związane z tym zagrożenia. Dzieci nie powinny bawić się tym urządzeniem. Dzieciom bez nadzoru nie należy powierzać czyszczenia ani konserwacji. \- Urządzenie może być używane przez osoby (w tym dzieci) niepełnosprawne fizycznie, psychicznie lub umysłowo, a także przez osoby bez doświadczenia lub wiedzy w zakresie obsługi urządzenia wyłącznie pod nadzorem lub po uprzednim poinstruowaniu w zakresie bezpiecznego korzystania z urządzenia. Należy dopilnować, aby dzieci nie bawiły się tym urządzeniem. \- W razie przekazania produktu innej osobie do użytku osobistego lub do celów związanych z wykorzystaniem używanego produktu należy przekazać go wraz z podręcznikiem użytkownika, etykietami produktu i innymi stosownymi dokumentami i elementami. \- Nie wolno ustawiać tego urządzenia na podłodze pokrytej wykładziną dywanową. W przeciwnym razie brak przepływu powietrza pod urządzeniem spowoduje przegrzanie jego części elektrycznych. Może to spowodować problemy. \- Instalacje i naprawy musi zawsze wykonywać autoryzowany pracownik serwisowy. Producent nie odpowiada za szkody wynikłe z instalacji i napraw wykonywanych przez osoby nieupoważnione i może z tego powodu unieważnić gwarancję. Przed instalacją uważnie przeczytaj tę instrukcję. \- Nie wolno uruchamiać tego wyrobu, jeśli jeśli jest niesprawny lub widocznie uszkodzony. \- Po każdym użyciu sprawdź, czy wyłączone zostały pokrętła funkcjonalne.Bezpieczeństwo przy pracy z gazem
- Wszelkie prace na urządzeniach i instalacjach gazowych może prowadzić wyłącznie autoryzowany i kwalifikowany personel. - Przed instalacją należy upewnić się, że warunki w miejscowej sieci rozdzielczej (rodzaj i ciśnienia gazu) są kompatybilne z ustawieniami urządzenia. - Urządzenie to nie jest przyłączone do systemu usuwania produktów spalania. Należy je zainstalować i przyłączyć zgodnie z obowiązującymi przepisami instalacyjnymi. Szczególną uwagę należy zwrócić na odnośne wymogi dotyczące wentylacji; Patrz Przed zainstalowaniem, strona 14 \- Skutkiem użytkowania kuchenki gazowej jest ciepło, wilgoć oraz produkty spalania w pomieszczeniu, w którym ją zainstalowano. Należy zapewnić dobre przewietrzanie kuchni, zwłaszcza w czasie użytkowania kuchenki: utrzymywać naturalne otwory drożne lub zainstalować wentylator mechaniczny (okap z wyciągiem mechanicznym). Długotrwałe intensywne użytkowanie tego urządzenia może wymagać dodatkowej wentylacji, np. poprzez zwiększenie poziomu wentylacji mechanicznej tam, gdzie jest obecna. - Prawidłowe funkcjonowanie urządzeń i systemów gazowych trzeba regularnie kontrolować. Regulator, crevo i njegova stezaljka se moraju redovno proveravati i zameniti u vremenskom roku preporučenom od strane proizvođača ili kada je potrebno. - Regularnie czyść palniki gazowe. Płomienie powinny być błękitne i powinny palić się równo. - W urządzeniach gazowych potrzeba dobrego spalania. W razie niecałkowietego spalania może powstawac tlenek węgla (CO). Tlenek węgla jest bezbarwnym, bezwonnym i bardzo trującym gazem o skutkach śmiertelnych nawet w bardzo małych dawkach. - Poproś miejscowego dostawcę gazu o informację o telefonach alarmowych służb gazowych i środkach bezpieczeństwa na wypadek ulatniania się gazu.Co robić, gdy poczuje się zapach gazu
\- Nie używaj otwartego ognia i nie pal tytoniu. Nie używaj żadnych przełączników elektrycznych (np. wyłącznika światła, czy dzwonka u drzwi itd.). Nie używaj telefonu stacjonarnego ani komórkowego. Zagrożenie wybuchem i zatruciem! - Zamknij wszystkie zawory na urządzeniu gazowym i gazomierzach. - Otwórz drzwi i okna. - Sprawdź szczelność wszystkich rur i połączeń. Jeśli nadal czuć gaz, wyjdź z mieszkania. - Ostrzeż sąsiadów. - Wezwij straż pożarną. Użyj telefonu poza domem. - Nie wracajcie na teren nieruchomości, dopóki nie zostanie zapewnione bezpieczeństwo.Bezpieczeństwo elektryczne
- W razie awarii tego urządzenia nie należy go używać do czasu naprawy przez autoryzowany serwis. Grozi to porażeniem elektrycznym! - Piekarnik ten można podłaczyć tylko do gniazdka z uziemieniem o napięciu i z zabezpieczeniem jakie podano w "Danych technicznych. Zleć wykonanie instalacji uziemienia wykwalifikowanemu elektrykowi, niezależnie od tego, czy używasz transformatora do zasilania. Firma nasza nie ponosi odpowiedzialności za jakiekolwiek problemy wynikające z braku uziemienia tego piekarnika zgodnie z miejscowymi przepisami. - Nie wolno myć piekarnika rozlewając nań wodę! Grozi to porażeniem elektrycznym! - Nie wolno dotykać wtyczki mokrymi dłońmi. Nie wolno wyciągać wtyczki ciągnąc za przewód, należy ją wyciągnij chwytając za nią samą. - Piekarnik ten trzeba odłączyć od zasilania na czas instalacji, konserwacji, czyszczenia i napraw. - Aby uniknąć zagrożenie w przypadku uszkodzenia przewodu zasilającego, musi go wymienić producent, punkt serwisowy lub osoba o podobnych kwalifikacjach. - Piekarnik należy tak zainstalować, aby można było go całkowicie odłączyć od sieci. Odłączenie to należy zapewnić albo poprzez wyjęcie wtyczki z gniazdka, albo wyłączenie wyłącznika, w który wyposażona jest domowa instalacja elektryczna, zgodnie z przepisami budowlanymi. - Tylna powierzchnia piekarnika nagrzewa się w trakcie jego pracy. Upewnij się, że przyłącze gazowe/elektryczne nie dotyka tej tylnej powierzchni; w przeciwnym razie może ono ulec uszkodzeniu. - Przewód zasilający nie może się zakleszczyć między drzwiczkami i ramą piekarnika, a także nie można go prowadzić przez gorące powierzchnie. W przeciwnym wypadku izolacja przewodów może się topić i w rezultacie może nastąpić zwarcie. - Wszelkie prace na układach i urządzeniach elektrycznych wykonywać może tylko upoważniony i wykwalifikowany personel. - W razie jakiejkolwiek awarii wyłącz wyrób i odłącz go od sieci zasilającej. W tym celu wyłącz bezpiecznik zabezpieczający instalację domową. - Upewnij się, że prąd bezpiecznika jest odpowiedni dla tego wyrobu.Zasady zachowania bezpieczeństwa przy użytkowaniu tego wyrobu
- OSTRZEŻENIE: Podczas użytkowania urządzenie i jego części są gorące. Nie dotykać nagrzanych części. Dzieci poniżej 8 lat mogą przebywać w pobliżu urządzenia wyłącznie pod nadzorem osób dorosłych. - Nigdy nie wolno używać tego wyrobu w stanie zakłócenia oceny sytuacji lub koordynacji przez konsumpcję alkoholu i/lub innych środków odmieniających świadomość. - Zachowaj ostrożność, jeśli w potrawach stosuje się napoje alkoholowe. W wysokiej temperaturze alkohol paruje i może się zapalić po zetknięciu z gorącymi powierzchniami. - Nie umieszczaj żadnych materiałów łatwopalnych w pobliżu tego wyrobu, ponieważ jego boki mogą bardzo się nagrzewać przy pracy. - W trakcie użytkowania piekarnik nagrzewa się. Należy zachować ostrożność i nie dotykać elementów grzejnych wewnątrz piekarnika. - Należy dbać, aby żaden otwór wentylacyjny nie był zakryty. - Nie podgrzewaj w piekarniku zamkniętych puszek ani szklanych słoików. Ciśnienie, które wytworzy sie w takiej puszce/słoiku, może je rozsadzić. - Nie umieszczaj foremek do pieczenia, naczyń ani folii aluminiowej bezpośrednio na dnia piekarnika. Nagromadzenie ciepła mogłoby zniszczyć dno piekarnika. - 'Do czyszczenia szyby w drzwiczkach piekarnika nie należy używać szorstkich środków czyszczących ani ostrych skrobaków metalowych, ponieważ mogą one zarysować powierzchnię, co może doprowadzić do popękania szyby.'" - Do czyszczenia tego urządzenia nie używaj urządzeń parowych, ponieważ może to spowodować porażenie prądem. \- (Różnią się zależnie od modelu piekarnika.) Właściwe umieszczanie rusztu i foremki na stelażach Właściwe umieszczanie na stelażu rusztu i/lub tacki na ociekający tłuszcz jest niezwykle ważne. Wsuń ruszt lub tackę na ociekający tłuszcz pomiędzy dwie szyny i zanim umieścisz na nim potrawę upewnij się, że jest wypoziomowany (patrz następująca ilustracja).  \- Nie używaj tego wyrobu z wyjątk lub popękaną szybą w przednich drzwiczkach. \- Uchwyt na drzwiach piekarnika nie służy do suszenia ręczników. Przy otwartych drzwiczkach i załączonej funkcji grillowania nie wieszać na niej ręczników, rękawic, ani podobnych wyrobów tekstylnych. \- Do wkładania i wyjmowania potraw z gorącego piekarnika zawsze zakładaj odporne na wysokie temperatury rękawice. \- Wyłóż naczynie do pieczenia, lub akcesorium z piekarnika (tackę, ruszt druciany, itp.), papierem do pieczenia, włóż do niego potrawę i wstaw je do wstępnie nagrzanego piekarnika. Utnij nadmiar papieru wystający z naczynia lub akcesorium, aby zapobiec ryzyku dotknięcia elementów grzejnych piekarnika. Nie wolno używać papieru do pieczenia w temperaturze roboczej większej niż wskazana dla tego papieru. Nie wykładaj papierem bezpośrednio dna piekarnika. \- OSTRZEŻENIE: Przed wymianą lampy upewnij się, że piekarnik jest wyłączony, aby uniknąć zagrożenia porażeniem prądem elektrycznym. \- Nie zamykaj pokrywy, zanim płyta nie ostygnie wystarczająco. Przed otwarciem pokrywy należy ją wytrzeć do sucha, aby woda nie przedostała się do tylnych i wewnętrznych części piekarnika. Pokrywa szklana może popękać, gdy zostanie nagrzana. Zgasić wszystkie palniki przed opuszczeniem pokrywy. - Aby uniknąć przegrzania, urządzenia nie należy umieszczać za dekoracyjnymi drzwiami. - Urządzenie należy ustawić bezpośrednio na podłodze. Nie może ono stać na podstawie ani cokole. - OSTRZEŻENIE: Gotowania na kuchence w tłuszczu lub oleju bez dozoru może być niebezpieczne i może doprowadzić do pożaru. NIE próbuj gasić ognia wodą, ale wyłącz kuchenkę, a następnie stłum płomień, np. pokrywką lub kocem gaśniczym. - UWAGA: Gotowanie należy nadzorować. Krótkie gotowanie należy stale nadzorować. - OSTRZEŻENIE: Zagrożenie pożarowe: Nie stawiaj niczego na powierzchniach do gotowania. Aby uniknąć zagrożenia pożarem przy użytkowaniu tej kuchenki; - Upewnij się, że wtyczka pasuje do gniazdka i nie powoduje iskrzenia. - Nie należy używać uszkodzonych ani uciętych przewodów, ani przedłużaczy, a tylko oryginalnego przewodu zasilającego. - Upewnij się, że gniazdko, do którego włączona jest kuchenka jest suche. - Upewnij się, że przyłącze gazu zainstalowany jest tak, że nie powoduje wycieku gazu.Zamierzone przeznaczenie
\- Wyrób ten przeznaczony jest do użytku domowego. Nie dopuszcza sie użytkowania komercyjnego. \- Urządzenie to służy wyłącznie do pieczenia potraw. Nie wolno używać go do innych celów, na przykład do ogrzewania pomieszczeń." \- Urządzenia tego nie należy używać do podgrzewania talerzy pod grillem, suszenia ręczników, ścierek do naczyń, itp. na uchwytach, ani do celów suszenia lub ogrzewania. \- Producent nie odpowiada za szkody spowodowane niewłaściwym użytkowaniem tego wyrobu lub obchodzeniem się z nim. \- Piekarnik można używać do rozmrażania, smażenie, pieczenia i grillowania potraw.Bezpieczeństwo dzieci
- OSTRZEŻENIE: Dostępne części mogą się nagrzewać podczas użytkowania. Małe dzieci należy trzymać z dala od kuchenki. - Materiały opakowaniowe mogą być niebezpieczne dla dzieci. Trzymać materiały opakowaniowe z dala od dzieci. Prosimy pozbyć się całego opakowania zgodnie z normami ochrony środowiska. - Urządzenia elektryczne i/lub gazowe są niebezpieczne dla dzieci. W trakcie pracy tego produktu nie dopuszczać do przebywania dzieci w jego pobliżu ani do zabawy. - Nie stawiaj na tym urządzeniu żadnych przedmiotów, po które mogłyby sięgać dzieci. - Gdy drzwiczki są otwartenie obciążać ich żadnymi ciężkimi przedmiotami i nie pozwalać dzieciom siadać na nich. Piekarnik może się przewrócić, lub mogą się uszkodzić zawiasy drzwiczek.Blokada dostępu dzieci
(Ta funkcja jest dostępna opcjonalnie. Może ona nie wchodzić w zakres wyposażenia zakupionego produktu). Kuchenka ta wyposażona jest w system blokady dostępu dzieci w drzwiczkach piekarnika. Aby otworzyć piekarnik lekko wcisnąć plastikowy przycisk i pociągnąć za klamkę w drzwiczkach. Przy zamykaniu drzwiczek blokada dostępu dzieci zamknie się samoczynnie. Stare urządzenia
Zgodność z dyrektywą WEEE i usuwanie odpadów:
 Niniejszy wyrób jest zgodny z dyrektywą Parlamentu Europejskiego i Rady (2012/19/WE). Wyrób ten oznaczony jest symbolem klasyfikacji zużytych urządzeń elektrycznych i elektronicznych (WEEE). Wyrób ten wykonano z części i materiałów wysokiej jakości, które mogą być odzyskane i użyte jako surowce wtórne. Po zakończeniu użytkowania nie należy pozbywać się go razem z innymi odpadkami domowymi. Należy przekazać go do punktu zbiórki urządzeń elektrycznych i elektronicznych na surowce wtórne. Aby dowiedzieć się, gdzie jest najbliższy taki punkt, prosimy skonsultować się z władzami lokalnymi. Odpowiednie postępowanie ze zużytym sprzętem zapobiega potencjalnym konsekwencjom dla środowiska naturalnego i ludzkiego zdrowia.Zgodność z dyrektywą RoHS:
Niniejszy wyrób jest zgodny z dyrektywą Parlamentu Europejskiego i Rady RoHS (Ograniczenie użycia substancji niebezpiecznych) (2011/65/WE). Nie zawiera szkodliwych i zakazanych materiałów, podanych w tej dyrektywie.Pozbywanie się materiałów opakowaniowych
\- Materiały opakowaniowe są niebezpieczne dla dzieci. Należy trzymać je w bezpiecznym miejscu, niedostępne dla dzieci. Opakowanie tego wyrobu wyprodukowano z surowców wtórnych. Należy odpowiednio się ich pozbywać i sortować je zgodnie z instrukcjami gospodarki surowcami wtórnymi. Nie należy ich wyrzucać razem ze zwykłymi odpadkami domowymi.2 Informacje ogólne
Opis urządzenia   1 Drzwiczki przednie 2 Uchwyt 3 Część dolna 4 Tacka 5 Półka druciana 6 Panel sterowania 7 Płyta grzejnika 8 Pokrywa górna 9 Silnik wentylatora (za płytą stalową) 10 Lampka 11 Element grzejny grilla 12 Pozycje półki  1 Pokrętło wyboru funkcji 2 Palnik normalny Tylny lewy 3 Palnik szybki Przedni lewy 4 Czasomierz cyfrowy 5 Palnik pomocniczy Przedni prawy 6 Palnik normalny Tylny prawy 7 Lampka termostatu 8 Pokrętło termostatuZawartość opakowania
 Dostarczane akcesoria różnią się zależnie od modelu wyrobu. Niektóre z akcesoriów opisanych w instrukcji obsługi mogą nie być dostarczane razem z tym modelem produktu.1. Instrukcja użytkowania
2. Blacha do pieczenia
Służy do pieczenia ciast, mrożonek i dużych porcji pieczeni. natural_image
Exterior view of a square baking tray with a mesh pattern (no text or symbols)3. Półka druciana
Służy do pieczenia oraz do ustawiania potraw do smażenia, pieczenia lub gotowania w naczyniach do zapiekanek na wybranej półce. natural_image
Line drawing of a rectangular metal grate with slats (no text or symbols)natural_image
Line drawing of a grid-patterned rectangular object with two side handles (no text or symbols)4. Właściwe umieszczanie półki drucianej i foremki na stelażach teleskopowych (Ta funkcja jest dostępna opcjonalnie. Może ona nie wchodzić w zakres wyposażenia zakupionego produktu).
Teleskopowe stelaże pozwalają na łatwe zakładanie i zdejmowanie foremek oraz rusztu. Podczas używania foremki i rusztu ze stelażem teleskopowym, muszą być do nich dosunięte kołki znajdujące się z tyłu stelaża teleskopowego, przy krawędziach rusztu i foremki. natural_image
Close-up of a mechanical component with internal channels and a central shaft (no visible text or symbols)natural_image
Close-up of a metal structure with a magnified inset showing a detail (no text or symbols visible)5. Pieczeń z kurczaka
Służy do grillowania mięsa, drobiu oraz ryb ze wszystkich stron. - Potrawę do grillowania nałów na widelce rozna obrotowego. - Do piekarnika wstaw ramę rożna obrotowego na wysokości jego napędu. - Wsuń szpikulec rożna obrotowego w napęd i nałów go na ramę rożna obrotowego. • Do grillowania należy zdjąć uchwyt.  1 Rama rożna obrotowego 2 Uchwyt plastikowy \* 3 Widelec \* (Różnią się zależnie od modelu piekarnika.) Dane techniczne| DANE OGÓLNE | |
| Wymiary zewnętrzne (wys /szer./głęb.) | 850 mm/500 mm/600 mm |
| Napięcie/częstotliwość | 220-240 V ~ 50 Hz |
| Łączne zużycie energii el. | 2.1 kW |
| Bezpiecznik | 10 A |
| Typ/ przekrój przewodu | min.H05W-FG 3 x 1 mm^2 |
| Kategoria wyrobu gazowego | Kat II 2ELs3B/P |
| Typ/ciśnienia gazu | 2E (G20)/20 mbar |
| Łączne zużycie gazu | 7.9 kW |
| Konwersja na typ/ciśnienie gazu^S | 2Ls (G2.350)/13 mbar |
| - opcjonalna | 3B/P (G30)/37 mbar |
| PŁYTA KUCHENNA | |
| Palniki | |
| Tylny lewy | Palnik normalny |
| Moc | 2 kW |
| Przedni lewy | Palnik szybki |
| Moc | 2.9 W |
| Przedni prawy | Palnik pomocniczy |
| Moc | 1 kW |
| Tylny prawy | Palnik normalny |
| Moc | 2 kW |
| PIEKARNIK/GRILL | |
| Piekarnik główny | Piekarnik wielofunkcyjny |
| Oświetlenie wewnętrzne | 15-25 W |
| Zużycie energii el. przez grill. | 1.6 kW |
| Pozycja strefy płyty kuchennej | 2 kW Tylny lewy | 2.9 W Przedni lewy | 1 kW Przedni prawy | 2 kW Tylny prawy |
| Typ/ciśnienia gazu | ||||
| 2E (G20)/20 mbar | 103 | 115 | 72 | 103 |
| 3B/P (G30)/37 mbar | 66 | 80 | 47 | 66 |
| 2Ls (G2.350)/13mbar | 131 | 165 | 95 | 131 |
3 Instalacja
Produkt musi zostać zainstalowany przez wykwalifikowaną osobę i zgodnie z obowiązującymi przepisami. W przeciwnym gwarancja zostanie unieważniona. Producent nie odpowiada za szkody wynikłe z instalacji i napraw wykonywanych przez osoby nieupoważnione i może z tego powodu unieważnić gwarancję. Przed zainstalowaniem
Aby zapewnić zachowanie odpowiedniego odstępu na przepływ powietrza pod tym wyrobem zalecamy zamontowanie go na solidnej podstawie, której nożki nie zagłębiają się w dywan lub wykładzinę dywanową. Podłoga kuchni musi unieść masę urządzenia plus dodatkowy ciężar naczyń i żywności.  \- Można go używać razem z szafkami po obu stronach, ale należy zachować minimalny odstęp 40 cm ponad poziomem płyty grzewczej zachowaj boczny odstęp 6,5 cm pomiędzy tym urządzeniem a ścianą, ścianką działową lub wysoką szafką kuchenną. - Można go także używać w pozycji wolnostojącej. Zachowaj minimalny odstęp 750 mm ponad powierzchnią płyty kuchennej. (\*) Jeśli nad kuchenką ma być zainstalowany wyciąg, sprawdź wysokość instalacji w instrukcji wytwórcy wyciągu (min. 650 mm). - Urządzenie te odpowiada klasie 1, tzn. można je ustawić tyłem i jednym bokiem do ścian kuchni, mebli kuchennych, czy urządzeń dowolnych rozmiarów. Meble lub sprzęty kuchenne po drugiej stronie nie mogą być większe. - Sąsiadujące z urządzeniem meble kuchenne muszą być odporne na wysoką temperaturę (co najmniej do 100 °C).Łańcuch bezpieczeństwa
Urządzenie to należy zabezpieczyć przed przewróceniem mocując je dwoma łańcuchami bezpieczeństwa dostarczonymi wraz z piekamikiem. Umocuj hak (1) używając odpowiedniego kołka wbitego w ścianę kuchni (6) i bezpiecznie zaczep łańcuch bezpieczeństwa (3) o hak, wykorzystując mechanizm blokady (2).  1 Hak stabilizujący 2 Mechanizm blokady 3 łańcuch bezpieczeństwa 4 Mono przytwierdź łańcuch do tyłu piekarnika. 5 Tyl piekarnika 6 Ściana kuchni  łańcuch stabilizujący musi być jak najkrótszy, aby uniemożliwić przechylanie się piekarnika w przód. Przechylom bocznym zapobiega łańcuch poprzeczny. Łańcuch stabilizujący kuchenki bez otworu na zaczep uchwytu.Wentylacja pomieszczenia
Wszystkie pomieszczenia powinny być wyposażone w okno, które można otwierać (lub podobne rozwiązanie). W przypadku niektórych pomieszczeń konieczny może być również stały otwór wentylacyjny. Powietrze do spalania jest pobierane z pomieszczenia, a produkty spalania ulatniają się bezpośrednio do pomieszczenia. Dobra wentylacja jest niezwykle ważna dla bezpiecznego użytkowania produktu.Pomieszczenia z drzwiami i/lub oknami otwieranymi bezpośrednio na zewnątrz budynku
Drzwi i/lub okna otwierane bezpośrednio na zewnątrz budynku muszą tworzyć otwór wentylacyjny o łącznych wymiarach określonych w poniższej tabeli stworzonej na podstawie całkowitej mocy gazowej urządzenia (całkowite zużycie mocy gazowej urządzenia przedstawiono w tabeli specyfikacji technicznych w niniejszej instrukcji obsługi). Jeśli drzwi i/lub okna nie zapewniają łącznego otworu wentylacyjnego odpowiadającego całkowitemu zużyciu gazu przez urządzenie zgodnie z poniższą tabelą, wówczas należy stworzyć dodatkowy stały otwór wentylacyjny w pomieszczeniu, aby zapewnić osiągnięcie minimalnych wymagań dotyczących łącznej wentylacji dla całkowitego zużycia gazu przez urządzenie. Stały otwór wentylacyjny może obejmować wymiary otworów istniejących pustaków, otworu kanału wyciągowego okapu itp.| Całkowite zużycie gazu (kW) | Minimalny otwór wentylacyjny ( cm^2 ) |
| 0-2 | 100 |
| 2-3 | 120 |
| 3-4 | 175 |
| 4-6 | 300 |
| 6-8 | 400 |
| 8-10 | 500 |
| 10-11,5 | 600 |
| 11,5-13 | 700 |
| 13-15,5 | 800 |
| 15,5-17 | 900 |
| 17-19 | 1000 |
| 19-24 | 1250 |
Pomieszczenia bez drzwi i/lub okien otwieranych bezpośrednio na zewnątrz budynku
Jeśli pomieszczenie, w którym urządzenie jest instalowane, nie jest wyposażone w drzwi i/lub okna otwierające się bezpośrednio na zewnątrz budynku, należy znaleźć inne produkty zapewniające stały, nieregulowany i niezamykany otwór wentylacyjny zgodny z łącznymi minimalnymi wymaganiami stawianymi otworom wentylacyjnym dla całkowitego zużycia gazu przez urządzenie wskazanymi w powyższej tabeli. Należy również przestrzegać odpowiednich przepisów budowlanych. W przypadku, gdy pomieszczenie lub przestrzeń wewnętrzną wyposażono w więcej niż jedno urządzenie gazowe, należy zapewnić dodatkową przestrzeń wentylacyjną ponad tą wymaganą w powyższej tabeli. Wielkość dodatkowego obszaru wentylacyjnego powinna odpowiadać regulacjom dotyczącym pozostałych urządzeń gazowych. Prześwit pod dolną krawędzią drzwi prowadzących z pomieszczenia, w którym zainstalowano urządzenie do innych pomieszczeń wewnątrz budynku powinien wynosić co najmniej 10 mm. Należy się upewnić, że elementy takie jak dywany, wykładziny podłogowe itp. nie mają wpływu na ten prześwit, gdy drzwi są zamknięte. Kuchenkę można umieścić w kuchni, jadalni lub w pokoju dziennym pełniącym również funkcję sypialni, ale nie w pomieszczeniu wyposażonym w wannę lub prysznic. Kuchenki nie wolno instalować w pokoju dziennym pełniącym również funkcję sypialni o kubaturze mniejszej niż 20 m³. Urządzenia nie wolno instalować w pomieszczeniach znajdujących się poniżej poziomu gruntu, chyba że są one otwarte na poziomie gruntu co najmniej z jednej strony.Instalacja i przyłączenie
Urządzenie to można instalować i przyłączać wyłącznie zgodnie z obowiązującymi zasadmai instalowania.  Nie instaluj tego urządzenia w pobliżu lodówek lub zamrażarek. Wydzielane z tego piekarnika ciepło może zwiększyć zużycie energii przez urządzenia chłodzące. - Urządzenie nosić muszą przynajmniej dwie osoby. - Urządzenie trzeba ustawić bezpośrednio na podłodze. Nie może stać na podstawie ani cokole.  Nie podnoś piekarnika za drzwiczki ani za klamkę. Drzwiczki, uchwyt lub zawiasy mogą się uszkodzić.Przyłączenie elektryczne
Przyłącz ten wyrób do uziemionego gniazdka/obwodu zabezpieczonego bezpiecznikiem o odpowiedniej specyfikacji podanej w tabeli „Dane techniczne”. Zleć wykonanie instalacji uziemienia wykwalifikowanemu elektrykowi, niezależnie od tego, czy używasz transformatora do zasilania. Firma nasza nie odpowiada za żadne szkody wynikłe z użytkowania tego wyrobu bez uziemienia, zgodnie z przepisami miejscowymi. ZAGROŻENIE:
Wyrób ten musi był przyłączony do sieci elektrycznej przez osobę upoważnioną i wykwalifikowaną. Gwarancja na ten wyrób obowiązuje dopiero po jego prawidłowym zainstalowaniu. Producent nie odpowiada za szkody wynikłe z instalacji i napraw wykonywanych przez osoby nieupoważnione. ZAGROŻENIE:
Przewodu zasilającego nie można klamrować, zginać i przyciskać, ani stykać z gorącymi częściami urządzenia. Przewody uszkodzone wymieniać może tylko wykwalifikowany elektryk. Zagrożenie porażeniem elektrycznym, zwarciem lub pożarem z powodu niefachowej instalacji! Parametry zasilania muszą odpowiadać danym podanym na tabliczce znamionowej urządzenia. Tabliczkę znamionową albo widać przy otwartych drzwiczkach dolnej pokrywy, albo umieszczona jest na tylnej scianie, zależnie od typu urządzenia. Przewód zasilający ten wyrób musi odpowiadać parametrom podanym w tabeli "Dane techniczne".  Wtyczka przewodu zasilająca musi był łatwo dostępna po zainstalowaniu (nie prowadzić przewodu ponad płytą kuchenną). ZAGROŻENIE:
Przed podjęciem jakichkolwiek prac przy instalacji elektrycznej, odłącz to urządzenie od zasilania. Grozi to porażeniem elektrycznym! Włóż wtyczkę przewodu zasilającego do gniazdka.Złącze gazowe
ZAGROŻENIE:
Wyrób ten musi był przyłączony do sieci gazowej przez osobę uprawnioną i wykwalifikowaną. Zagrożenie wybuchem lub zatruciem na skutek niefachowej naprawy. Producent nie odpowiada za szkody wynikłe z instalacji i napraw wykonywanych przez osoby nieupoważnione. ZAGROŻENIE:
Przed podjęciem jakichkolwiek prac przy instalacji gazowej, należy odciąć zasilanie gazem. Istnieje groźba wybuchu! \- Warunki i wartości zasilania w gaz podane są na etykietach (lub tabliczce znamionowej).  Produkt jest przeznaczony do gazu ziemnego (GZ). - Przez zainstalowaniem tego wyrobu trzeba przygotoweać instalację gazu ziemnego. - Na wyjściu z instalacji przyłącza gazu ziemnego do tego wyrobu musi być giętka rura, a jej końcówka musi być zamknięta wtyczką. Przy przyłączaniu pracownik serwisu wyjmie zatyczkę i przyłączy urządzenie za pomocą prostego złącza (mufy). - Upewnij się, że jest łatwy dostęp do zaworu gazu ziemnego. - Jeśli później zechcesz używać tego urządzenia zasilając go innego typu gazem, musisz skonsultowac się z upoważnionym serwisem w sprawie odnośnej procedury konwersji. ZAGROŻENIE:
Przewodu gazu nie można klamrować, zginać i przyciskać, ani stykać z gorącymi częściami urządzenia. Istnieje groźba wybuchu z powodu uszkodzenia przewodu. • Przysuń wyrób do ściany kuchni. • Ustawianie nóżek piekarnika Drgania w trakcie pracy mogą powodować przesuwanie się naczyń. Yej niebezpiecznej sytuacji można uniknąć poziomując i równoważąc wyrób. Dla własnego bezpieczeństwa upewnij się, że wyrób stoi prosto nastawiając cztery nóżki na spodzie obracając je w lewo lub prawo i wyrównaj poziom z blatem kuchennym.Piekarniki z wentylatorem chłodzącym (Może ona nie wchodzić w zakres wyposażenia zakupionego produktu).
 1 Wentylator chłodzący 2 Panel sterowania 3 Drzwiczki Wbudowany wentylator chłodzący chłodzi zarówno szafkę do zabudowy, jak i przód urządzenia.  Wentylator chłodzący nadal pracuje przez 20 - 30 minut nawet po wyłączeniu piekarnika.Ostateczne sprawdzenie
1. Sprawdź funkcje elektryczne. 2. Otwórz zasilanie gazem. 3. Sprawdź bezpieczeństwo pasowania i szczelność instalacji gazowych. 4. Zapal palniki i sprawdź wygląd płomienia.  Ogień musi być niebieski i mieć kształt regularny. Jeśli płomienie żółcieją, sprawdź, czy kołpak palnika pewnie siedzi albo oczyść palnik.Zmiana rodzaju gazu
ZAGROŻENIE:
Przed podjęciem jakichkolwiek prac przy instalacji gazowej, należy odciąć zasilanie gazem. Istnieje groźba wybuchu! Aby zmienić typ gazu zasilającego to urządzenie wymienia sie wszystkie wtryski i reguluje płomień na wszystkich zaworach przy ograniczonym przepływie gazu.Wymiana wtrysków do palników
1. Zdejmij kołpak palnika i wyjmij korpus palnika. 2. Odkręć wtryski przekręcając je w lewo. 3. Załóż nowe wtryski. 4. Sprawdź bezpieczeństwo pasowania i szczelność wszystkich połączeń.  Pozycje nowych wtrysków są zaznaczone na ich opakowaniu lub w odpowiedniej tabeli, Tabela wtryskiwacza, strona 13 do której należy zawsze sięgać.  ((Różnią się zależnie od modelu piekarnika.)) W niektórych palnikach na płycie kuchennej wtrysk jest nakryty metalową pokrywą. W przypadku wymiany wtrysku tę pokrywę należy zdjęć.  1 Czujnik zaniku płomienia (zależnie od modelu) 2 Świeca zapłonowa 3 Wtrysk 4 Palnik  O ile nie zachodzą warunki nienormalne, nie staraj się wyjąć kurków gazowych palników. Jeśli trzeba wymienić te kurki, należy wezwać autoryzowany serwis.Ustawienie kurków płyty na ograniczony strumień gazu
1. Zapal palnik, który ma być ustawiany i obróć pokrętło do pozycji niskiego płomienia. 2. Zdejmij pokrętło z kurka gazu. 3. Do ustawiania śruby regulacji przepływu należy używać śrubokręta o odpowiednim rozmiarze. Dla gazu płynnego (butan/propan) należy raz obrócić tę śrubę w prawo. Dla gazu ziemnego należy raz obrócić tę śrubę w lewo. » Normalna długość wyprostowanego płomienia w stanie ograniczenia wynosi 6-7 mm. 4. Jeśli płomień sięga wyżej, niż należy, obróć śrubę zgodnie z ruchem wskazówek zegara. Jeśli jest zbyt mały, obróć ją w lewo. 5. Na koniec kontroli ustaw palnik na płomień wysoki a potem na zredukowany i sprawdź, czy płomień utrzymuje się. Pozycja śruby regulacyjnej może się różnić, zależnie od typu kurka gazowego zastosowanego w danym urządzeniu.  1 Śruba regulacji przepływu  1 Śruba regulacji przepływu  Jeśli zmieniono rodzaj gazu zasilającego urządzenie, wówczas trzeba także zmienić tabliczkę znamionową, gdzie rodzaj gazu jest podany.Przyszły transport
- Zachowaj oryginalne pudło kartonowe na piekarnik i transportuj go w nim. Przestrzegaj instrukcji na pudle. Jeśli nie masz oryginalnego pudła, zapakuj piekarnik w folię bąbelkową lub gruba tekturę i zabezpiecz taśmą klejącą. - Aby zapobiec uszkodzeniu drzwiczek przez ruszt druciany i tackę z wnętrza piekarnika włóż do jego środka pasek tektury, równo z pozycją tacek. Drzwiczki piekarnika zabezpiecz taśmą klejącą do ścian bocznych. - Zabezpiecz tasmą klejąca kołpaki i podstawki od garnki. - Nie podnos piekarnika za drzwiczki ani za klamkę.  Nie stawiaj na nim żadnych przedmiotów i przemieszczaj go w pozycji pionowej.  Sprawdzaj, czy piekarnik nie uległ w transporcie widocznym uszkodzeniom.4 Przygotowanie
Jak oszczędzać energię
Następujące wskazówki pomogą użytkować urządzenie w sposób ekologiczny oraz energooszczędny. - Używaj naczyń w ciemnych barwach lub emaliowanych, co poprawi przepływ ciepła. - Gotując potrawy wykonuj operacje podgrzewania, jeśli zaleca się ją w instrukcji obsługi lub przepisie gotowania. - Nie otwieraj zbyt często drzwiczek w trakcie gotowania. - O ile to możliwe staraj się gotować w piekarniku więcej niż jedną potrawę na raz. Można gotować w dwóch naczyniach obok siebie na ruszcie. - Gotuj potrawy po kolei. Piekarnik będzie już gorący. - Można oszczędzić energię wyłączając piekarnik na kilka minut przed upływem czasu gotowania. Nie otwieraj drzwiczek piekarnika. • Rozmrażaj mrożonki przed gotowaniem. - Do gotowania używaj garnków/rondli z pokrywkami. Gotowanie bez pokrywki może czterokrotnie zwiększyć pobór prądu. - Gotuj na palniku o średnicy odpowiadającej średnicy garnka. Zawsze wybieraj garnki o rozmiarze odpowiednim do potrawy. Większe garnki zużywają więcej prądu.Pierwszy raz
Ustawianie czasu
 Przy każdej regulacji na wyświetlaczu migać będą odnośne symbole. Naciskaj przyciski +/—, abynastawić godzinę, o której piekarnik zostanie załączony po raz pierwszy.  W przypadku modeli ze sterowaniem dotykowym najpierw dotknij ≡, a następnie za pomocą + / — ustaw godzinę. Potwierdź ustawienie, dotykając symbolu ⓘ i poczekaj 4 sekundy, nie dotykając żadnych klawiszy, aby potwierdzić.  1 Klawisz regulacji 2 Symbol blokady klawiszy 3 Symbol zegara 4 Symbol głośności alarmu 5 Symbol trybu oszczędnego Eco 6 Klawisz plus 7 Klawisz minus 8 Symbol wykresu czasu 9 Symbol alarmu 10 Symbol końca gotowania 11 Symbol czasu gotowania 12 Klawisz programu  Jeśli nie ustawiono godziny początkowej, zegar zacznie działać poczynając od godziny 12:00 i wyświetli się symbol 📁. Symbol ten zniknie po ustawieniu godziny.  W przypadku zaniku zasilania ustawienia bieżącej godziny zostają skasowane. Trzeba je ustawić na nowo.Pierwsze czyszczenie
 Pewne detergenty lub środki czyszczące mogą uszkodzić powierzchnię. Nie używaj agresywnych detergentów, proszku/mleczka do czyszczenia, ani żadnych ostrych przedmiotów. 1. Usuń wszystkie materiały opakowaniowe. 2. Wytrzyj powierzchnie wyrobu wilgotną ściereczką lub gąbką i wytrzyj do sucha ściereczką.Podgrzewanie wstępne
Nagrzewaj urządzenie przez ok. 30 minut, a potem je wyłącz. Przed pierwszym użyciem należy wypalić wszelkie pozostałości po produkcji i warstwy ochronne. OSTRZEŻENIE
Można się poparzyć od gorących powierzchni! Urządzenie to nagrzewa się podczas pracy. Nie dotykaj gorących palników, wewnętrznych sekcji piekarnika, elementów grzejnych itp. Zakaz zbliżania się dzieci! Do wkładania i wyjmowania potraw z gorącego piekarnika zawsze zakładaj odporne na wysokie temperatury rękawice.Piekarnik elektryczny
1. Wyjmij z piekamika wszystkie foremki do pieczenia i ruszt. 2. Zamknij drzwiczki piekarnika. 3. Wybierz pozycję „Static" (Statyczne) 4. Wybierz najwyższą moc grilla; patrz Jak obsługiwać piekarnik elektryczny, strona 23. 5. Niech piekarnik pracuje przez ok. 30 minut. 6. Wyłącz piekarnik; patrz Jak obsługiwać piekarnik elektryczny, strona 23Piekarnik z grillem
1. Wyjmij z piekarnika wszystkie foremki do pieczenia i ruszt. 2. Zamknij drzwiczki piekarnika. 3. Wybierz najwyższą moc grilla; patrz Jak obsługiwać grill, strona 28. 4. Niech piekarnik pracuje przez ok. 30 minut. 5. Wyłącz grill; patrz Jak obsługiwać grill, strona 28  W trakcie pierwszego uruchomienia przez parę godzin mogą się wydzielać dym i zapach. Jest to całkiem normalne. Zadbaj o dobrą wentylację kuchni i pozbędź się dymu i zapachu. Nie wdychać bezpośrednio powstającego dymu i zapachu.5 Jak używać płyty kuchennej
Ogólne informacje o gotowaniu
 Nigdy nie wolno napełniać rondla olejem powyżej jednej-trzeciej jego pojemności. Podczas podgrzewania oleju nie wolno pozostawiać płyty bez nadzoru. Przegrzany olej może zapalić się. Nigdy nie wolno gasić ognia woda! Gdy olej się zapali, natychmiast przykryć go kocem gaśniczym lub wilgotną szmatą. Gdy już będzie to bezpieczne należy wyłączyć kuchenkę i zadzwonić po straż pożarną. - Przed smażeniem potrawy zawsze dokładnie ją osusz, a potem delikatnie ją położ na gorącym oleju. Przed smażeniem mrozonek upewnij się, że całkowicie odtajały. - Nie przykrywaj naczynia, w którym podgrzewasz olej. - Patelnie i rondle ustawiaj tak, aby ich trzonki nie były nad płytą, co zapobiegnie ich nagrzeweaniu się. Nie stawiaj na płycie naczyń niewyważonych i takich, które łatwo mogę się przechylić. - Nie stawiaj pustych naczyń an garnków na załączonych strefach gotowania. Mogą się uszkodzić. - Załączenie strefy gotowania, na której nie stoi zadno naczynie ani garnek, może uszkodzić ten wyrób. Po zakończeniu gotowania wyłącz strefy gotowania. - Ponieważ powierzchnia tego wyrobu może być gorąca, nie stawiaj na niej naczyń plastikowych ani aluminiowych. W naczyniach takich także nie należy przechowywać żywności. - Używaj tylko garnków i naczyń z płaskim dnem. - Do garnków i patelni wkładaj odpowiednie ilosci żywności. Tym samym zapobiegasz oprzelaniu suie zawartosci naczynia, a więc unikasz niepotrzebnego czyszczenia. Nie kładź pokrywek garnków ani patelni na strefach gotoweania. Garnki ustawiaj w środku strefy gotoweania. Aby przenieść gamek do innej strefy gotowania, podnieś go i postaw w tej strefie zamiast go przesuwać.Gotowanie na gazie
\- Rozmiar naczynia musi odpowiadać wielkosci płomienia. Nastaw płomień gazu tak, aby nie wystawał poza dno naczynia i ustaw naczynie w śroku podstawki pod nie.Użytkowanie płyt kuchennych
 1 Palnik normalny 18-20 cm 2 Palnik szybki 22-24 cm 3 Palnik pomocniczy 12-18 cm 4 Palnik normalny 18-20 cm to wykaz zalecanych średnic garnków do użytku na odnośnych palnikach. Symbol dużego płomienia oznacza największą moc gotowania, symbol małego płomienia zaś oznacza moc najmniejszą. W pozycji wyłączonej (górnej) gaz nie dopływa do palników.Zapalanie palników gazowych
1. Wciśnij i przytrzymaj pokrętło palnika. 2. Obróć je w lewo, do symbolu dużego płomienia. » Gaz zapala się od wywołanej iskry. 3. Nastaw wymaganą moc gotowania.Wyłączanie palników gazowych
Obróć pokrętło strefy utrzymywania w cieple w pozycję wyłączoną (górną).System bezpiecznego odcinania dopływu gazu (w modelach z elementem termicznym)
natural_image
3D rendering of a circular mechanical component with a labeled dimension '1' (no text or symbols on the part itself)ZAGROŻENIE:
Jeśli w ciągu 15 sekund nie dojdzie do zapłonu gazu, zwolnij przycisk. Odczekaj co najmniej 1 minutę, zanim ponowisz próbę. Istnieje grożba akumulacji gazu i wybuchu!6 Jak obsługiwać piekarnik
Ogólne informacje o pieczeniu ciast i mięs oraz o grillowaniu.
OSTRZEŻENIE
Można się poparzyć od gorących powierzchni! Urządzenie to nagrzewa się podczas pracy. Nie dotykaj gorących palników, wewnętrznych sekcji piekarnika, elementów grzejnych itp. Zakaz zbliżania się dzieci! Do wkładania i wyjmowania potraw z gorącego piekarnika zawsze zakładaj odporne na wysokie temperatury rękawice. ZAGROŻENIE:
Otwierając drzwiczki piekarnika zachowaj ostrożność, bo może ulotnić się z niego para. Taka ulatniająca się para może poparzyć dłonie, twarz i oczy.Wskazówki do pieczenia ciasta
- Używaj stosownych naczyń metalowych z powłokami nieprzylegającymi, pojemników aluminiowych, lub żaroodpornych form silikonowych. • Rób najlepszy użytek z miejsca na półce. • Foremkę do pieczenia stawiaj w środku półki. - Prze załączeniem piekarnika lub grilla wybierz właściwą pozycję półki. Nie zmieniaj pozycji półki, gdy kuchenka jest gorąca. • Zamknij drzwiczki piekarnika i nie otwieraj ich.Wskazówki do pieczenia mięsa
- Przyprawienie całych kurcząt, indyków i dużych porcji mięsa, np. sokiem z cytryny ;in czarnym pieprzem przed pieczeniem podniesie jego wydajność. - Pieczenia mięsa z kością trwa ok. 15 - 30 minut dłużej niż pieczenie takiego samego kawałka bez kości. - Na upieczenie jednego centymetra grubości mięsa potrzeba ok. 4 do 5 minut. - Po zakończeniu pieczenia pozostaw pieczeń w piekarniku na ok. 10 minut. Soki lepiej rozchodzą się po całej pieczeni i nie wyciekają przy jej krojeniu. - Ryby należy piec na półce środkowej lub dolnej na żaroodpornym talerzu.Wskazówki do grillowania
Mięso, ryby i drób szybciej rumienia się, gdy się je grilluje, zachowują miłą kruchość i nie wysychają. Do grillowania szczególnie nadają się płaskie kawałki, nadziane na szpikulec szaszłyki i kiełbaski, a także warzywa o znacznej zawartości wody, takie jak pomidory i cebule. - Rozłoż kawałki mięsa do grillowania na ruszcie drucianym lub w foremce do pieczenia z rusztem drucianym w taki sposób, aby pokryta nimi powierzchnia nie wystawała poza grzałkę. - Wsuń ten ruszt druciany lub foremkę do pieczenia z rusztem na wybrany poziom w piekarniku. Jeśli grillujesz na ruszcie drucianym, na dolną półkę wsuń foremkę do pieczenia na kapiący tłuszcz. Aby łatwiej oczyścić to naczynie z tłuszczu wlej do niego trochę wody.  Żywność nie nadająca się do grillowania stwarza zagrożenie pożarowe. Do grillowania używaj wyłącznie żywności, która nadaje się do przyrządzania w wysokich temperaturach. Nie wkładaj żywności do grilla zbyt głęboko. Tam jest najgoręcej i tłusta żywność może się zapalić.Jak obsługiwać piekarnik elektryczny Wybieranie temperatury i trybu pracy
 1 Pokrętło wyboru funkcji 2 Pokrętło termostatu 1. Nastaw pokrętło Function [Funkcja] na wybrany tryb pracy. 2. Nastaw pokrętło Temperature na wybraną temperaturę. » Piekarnik nagrzewa się do nastawionej temperatury i utrzymuje ją. W trakcie nagrzewania lampka temperatury pozostaje zapalona.Wyłączanie piekarnika elektrycznego
Przekręć pokrętła funkcji i temperatury w górne pozycje „off” ("wył.).Pozycje stelażu (modele z rusztem drucianym)
Ważne jest, aby prawidłowo umieszczać ruszt druciany na półce drucianej. Ruszt druciany trzeba wsadzić pomiędzy półki druciane jak pokazano na rysunku. Ruszt druciany nie może opierać się o tylną ścianę piekarnika. Aby poprawić wydajność grillowania, przesuń ruszt druciany do przedniej sekcji stelażu i ustal go przy pomocy drzwiczek. Tryby pracy
Podana tutaj kolejność trybów pracy może różnić się od ich układu dla tego urządzenia.Grzałki górna i dolna
 Grzałki góma i dolna działają. Żywność nagrzewana jest równocześnie od góry i od dołu. Na przykład, nadaje się do ciasta, ciasteczek oraz ciasta i zapiekanek w foremkach do pieczenia. Piecz w jednej tylko blasze.Grzałka dolna
 Pracuje tylko grzałka dolna. Nie nadaje się do pizzy ani do rumienienie potrawy od spodu po upieczeniu. Funkcja tej trzeba także używać do łatwego czyszczenia parą. Grzanie dolne/górne z termoobiegiem
 Działają grzałki górna i dolna plus wentylator (w ścianie tylnej). Wentylator szybko równomiernie rozprowadza gorące powietrze po całym piekarniku. Piecz w jednej tylko blasze.Praca z wentylatorem.
 Piekarnik nie jest nagrzewany. Pracuje tylko wentylator (w ścianie tylnej). Nadaje się od powolnego odtajania mrożonek ziamistych w temperaturze pokojowej lub studzenia potraw gotowanych.Termoobieg
 [EMPTY]  Gorące powietrze nagrzane grzałką tylną jest bardzo szybko równomiernie rozprowadzane w całym piekarniku przez wentylator. Jest to przydatne do gotowania potraw na różnych poziomach półek i w większości przypadków nie potrzeba wstępnego podgrzewania. Nadaje się do pieczenia w kilku blachach na raz. Funkcja tej trzeba także używać do łatwego czyszczenia parą.Funkcja "3D"
 Działają grzałki górna i dolna i nagrzewanie z termoobiegiem (w ścianie tylnej). Potrawy pieką się równomiernie i szybko rumienia. Piecz w jednej tylko blasze.Grill+termoobieg
 Efekt grillowania nie jest tak mocny, jak przy Full Grill. - Do grillowania położ małe lub średnie porcje na odpowiednio ustawionej półce pod grzałką grilla. • Nastawianie wybranej temperatury - Obróć potrawę po upływie połowy czasu grillowania.Full grill z rożnem obrotowym
 Działają Full Grill i rożen obrotowy. Nadaje się do grillowania i pieczenia dużych porcji mięsaKorzystanie z zegara piekarnika
 1 Klawisz regulacji 2 Symbol blokady klawiszy 3 Symbol zegara 4 Symbol głośności alarmu 5 Symbol trybu oszczędnego Eco 6 Klawisz plus 7 Klawisz minus 8 Symbol wykresu czasu 9 Symbol alarmu 10 Symbol końca gotowania 11 Symbol czasu gotowania 12 Klawisz programu| Najdłuższy czas, na który można nastawić koniec procesu gotowania, to 5 godziny, 59 minut.W razie przerwy w zasilaniu program kasuje się. Trzeba zaprogramować piekarnik od nowa. | |
| Przy ustawianiu każdej wartości na wyświetlaczu migać będą odnośne symbole.Trzeba odczekać chwilę, aż ustawienia zaczną działać. | |
| Jeśli nie nastawi się żadnych ustawień pieczenia, nie można ustawić godziny. | |
| Jeśli na początku pieczenia ustawiono czas jego trwania, wyświetl się czas pozostały. |
Pieczenie o nastawionej godzinie:
Nastawiając na czasomierzu czas trwania pieczenia można tak ustawić piekarnik, aby wyłączyć się po jego upływie. 1. Wybierz funkcję do pieczenia. 2. Dotykaj Ⓤ, aż na wyświetlaczu pojawi się symbol I→I, aby ustawić czas pieczenia. 3. Czas trwania pieczenia nastawia się przyciskami + / - » » Po nastawieniu czasu trwania pieczenia na wyświetlaczu na stałe pojawi się symbol |→| oraz wycinek czasu. 4. Wstaw naczynie do piekarnika i pokrętłem temperatury nastaw temperaturę. Rozpocznie się pieczenie. » Odliczenie czasu pieczenia na wyświetlaczu rozpoczyna się wraz z jego rozpoczęciem i zapalają się wszystkie części wycinka czasu Ustawiony czas pieczenia podzielony jest na cztery równe części, a po upływie czasu każdej części jej symbol gaśnie. Można więc łatwo śledzić upływ czasu pieczenia w stosunku do całkowitego czasu jego trwania.Ustawianie zakończenie pieczenia na późniejszą godzinę:
Po ustawieniu na czasomierzu czasu trwania pieczenia można ustawić poźniejszą godzinę zakończenia pieczenia. 1. Wybierz funkcję do pieczenia. 2. Dotykaj ⓣ, aż na wyświetlaczu pojawi się symbol I→I, aby ustawić czas pieczenia. 3. Ustaw czas trwania pieczenia przyciskami + / -. » » Po ustawieniu czas trwania pieczenia na wyświetlaczu na stałe pojawi się symbol |→|. 4. Dotykaj Ⓤ, aż na wyświetlaczu pojawi się symbol →l, oznaczający koniec czasu pieczenia. 5. Ustaw godzinę zakończenia pieczenia przyciskami + / - » Po nastawieniu godziny zakończenia pieczenia na wyświetlaczu na stałe pojawia się symbole |→| oraz →|, a także wycinek czasu. Gdy zacznie się pieczenie, zniknie symbol →|. 6. Wstaw naczynie do piekarnika i pokrętłem temperatury nastaw temperaturę. Rozpocznie się pieczenie. » Czasomierz piekarnika oblicza godzinę rozpoczęcia pieczenia odejmując czas trwania pieczenia od nastawionej godziny jego zakończenia. Wybrany tryb pracy uruchamia się gdy nadejdzie godzina rozpoczęcia pieczenia i piekarnik nagrzewa się do nastawionej temperatury. Utrzymuje tę temperaturę przez cały czas pieczenia. » Odliczenie czasu pieczenia na wyświetlaczu rozpoczyna się wraz z jego rozpoczęciem i zapalają się wszystkie części wycinka czasu Ustawiony czas pieczenia podzielony jest na cztery równe części, a po upływie czasu każdej części jej symbol gaśnie. Można więc łatwo śledzić upływ czasu pieczenia w stosunku do całkowitego czasu jego trwania. 7. Po zakończeniu pieczenia na wyświetlaczu pojawia się "End", a czasomierz wydaje dźwiekowy sygnał ostrzegawczy. 8. Dźwięk alarmu rozlega się przez 2 minuty. Aby wyłączyć alarm, wystarczy nacisnąć dowolny przycisk. Alarm ucichnie i wyświetli się bieżąca godzina.  Po naciśnięciu dowolnego przycisku na końcu dźwiekowego sygnału ostrzegawczego, piekarnik ponownie się załączy. Obróć pokrętło temperatury i pokrętło funkcji w pozycję "0" (wył.), aby wyłączyć piekarnik zapobiegając jego ponownemu załączeniu na konierc sygnału ostrzegawczego.Aktywacja blokady przycisków
Uruchamiając funkcję blokady przycisków, można zapobiec zmianom w ustawieniach piekarnika. 1. Dotykaj: ≡, aż na wyświetlaczu pojawi się symbol 🔒. » Na wyświetlaczu pojawi się „OFF” [WYŁ]. 2. Naciśnij +, aby aktywować blokadę przycisków. » Po włączeniu blokady przycisków na wyświetlaczu pojawi się „On” [Zał.], a symbol ⏻ będzie się nadal świecił.  Po załączeniu blokady przycisków przyciski piekarnika nie działają. W razie przerwy w zasilaniu blokada przycisków nie kasuje się.W celu wyłączenia blokady dotknij przycisku
1. Dotykaj: ≡, aż na wyświetlaczu pojawi się symbol 🔒. » Na wyświetlaczu pojawi się „On” [Zał.]. 2. Wyłącz blokadę przycisków, naciskając klawisz ■. » Po wyłączeniu blokady wyświetli się "OFF" [WYŁ].Ustawianie alarmu czasowego
Poza programowaniem pieczenia zegara w piekarniku można użyć do nastawiania dowolnych ostrzeżeń lub przypomnień. Alarm czasowy nie wpływa na inne funkcje piekarnika. Używa sie go tylko do ostrzegania. Na przykład przydaje się, gdy chce się obrócić potrawę w piekarniku o określonej godzinie. Po upływie nastawionego czasu odezwie się alarm dźwiękowy. 1. Dotykaj Ⓛ, aż na wyświetlaczu pojawi się symbol ♠.  Najdłuższy czas alarmu to 23 godziny i 59 minut. 2. Ustaw alarm, korzystając z klawiszy + / - .  Przyciski funkcyjne dźwięku alarmu, godziny dnia, jasności wyświetlacza i temperatury powinny być ustawione na 0 (OFF) (WYŁ.). » Symbol △ będzie się nadal świecił, a gdy ustawi się godzinę alarmu, pojawi się na wyświetlaczu. 3. Po upływie czasu alarmu symbol ⬆ zaczyna migać i odzywa się sygnał alarmowy.Wyłączanie alarmu
1. Dźwięk alarmu rozlega się przez 2 minuty. Aby wyłączyć alarm, wystarczy nacisnąć dowolny przycisk. » Alarm ucichnie i wyświetli się bieżąca godzina.Anulowanie alarmu
1. Aby wyłączyć alarm, dotykaj ⓞ, aż na wyświetlaczu pojawi się symbol ♠. 2. Naciśnij i przytrzymaj klawisz —, aż wyświetli się „00:00”.  Wyświetli się czas alarmu. Jeśli równocześnie nastawi się czas alarmu i czas pieczenia, wyświetli się krótszy z nich.Zmiana dźwięku alarmu
1. Dotykaj ≡, aż na wyświetlaczu pojawi się symbol ◀). 2. Ustaw głośność aalarmu przyciskami + / - 3. Za krótką chwilę odezwie się dźwięk alarmu o nastawionej głośności. » Wybrane dźwięki alarmy wyświetłą się na ekranie jako b-01, b-02 lub b-03.Zmiana bieżącej godziny
Aby zmienić poprzednie ustawienie godziny: 1. Dotykaj: ≡, aż na wyświetlaczu pojawi się symbol ⓣ. 2. Godzinę nastawia się przyciskami + /—. 3. Za krótką chwilę wyświetl się nastawiona godzina.Tryb oszczędny
W trybie ekonomicznym można oszczędzać energię przy pieczeniu przez czas ustawiony w piekarniku. W trybie tym pieczenie kończy się przy utrzymaniu temperatury wewnątrz piekarnika przez wyłączenie grzałek przed końcem pieczenia.Nastawienie trybu ekonomicznego.
1. Dotykaj symbolu ≡, aż na wyświetlaczu pojawi się symbol eco. » Na wyświetlaczu pojawi się „OFF” [WYŁ]. 2. Załcz tryb ekonomiczny dotykając przycisku +. » Po załączeniu blokady przycisków na wyświetlaczu pojawi się "On", a symbol eco pali się nadal.Wyłaczanie trybu ekonomicznego.
1. Dotykaj symbolu:≡, aż na wyświetlaczu pojawi się symbol eco. » Na wyświetlaczu pojawi się „On” [Zał.]. 2. Tryb ekonomiczny wyłącza się dotknięciem przycisku ■. » Po wyłączeniu blokady przycisków wyświetl się "Off" [Wył.].Ustawianie jasności ekranu
(Ta funkcja jest dostępna opcjonalnie. Może ona nie wchodzić w zakres wyposażenia zakupionego produktu). 1. Dotykaj ≡ aż na wyświetlaczu pojawi się d-01, d-02 lub d-03 jako miara jasności wyświetlacza. 2. Nastaw jasność przyciskami + /—. » Po krótkiej chwili wyświetli się nastawiona godzina. Tabela czasów pieczenia| i | Podane w tabeli czasy są tylko orientacyjne. Mogą się różnic, zależnie od rodzaju żywności, grubości, rodzaju i preferencji kulinarnych. |
| i | Pierwsza półka w piekarniku to półka dolna. |
| Potrawa | Liczba blach | Pozycja półki | Temperatura (°C) | Czas pieczenia(ok., w min.) | |
| Ciasto w foremce* | Jedna blacha | 3 | 175 | 30 ... 45 | |
| Ciasto w foremce* | Jedna blacha | 2 | 175 | 30 ... 50 | |
| Ciasta w papierze* | Jedna blacha | 3 | 160 ... 170 | 25 ... 30 | |
| Ciasto biszkoptowe* | Jedna blacha | 3 | 180 ... 200 | 10 ... 20 | |
| Ciasteczka* | Jedna blacha | 3 | 160 ... 170 | 20 ... 30 | |
| Ciasto* | Jedna blacha | 3 | 200 | 20 ... 30 | |
| Ciasto zdobne* | Jedna blacha | 3 | 190 | 20 ... 35 | |
| Ciasto na zaczynie* | Jedna blacha | 3 | 190 | 20 ... 40 | |
| Lazania* | Jedna blacha | 2 | 180 | 25 ... 45 | |
| Pizza* | Jedna blacha | 1 | 200 | 10 ... 20 | |
| Stek wolowy/pieczeń wolowa | Jedna blacha | 2 | 25 min. 220,następnie 180 ...190 | 80 ... 100 | |
| Udziec jagnięcy(zapiekanka) | Jedna blacha | 2 | 25 min. 220,następnie 190 | 70 ... 90 | |
| Pieczone kurczęta | Jedna blacha | 2 | 15 min. 250/max,następnie 190 | 55 ... 65 | |
| Jedna blacha | 2 | 15 min. 220,następnie 180 ...190 | 50 ... 65 | ||
| Indyk (w plastrach) | Jedna blacha | 3 | 25 min. 220,następnie 190 | 70 ... 120 | |
| Jedna blacha | 2 | 25 min. 220,następnie 180 ...190 | 60 ... 100 | ||
| Ryby | Jedna blacha | 3 | 200 | 20 ... 30 | |
| Jedna blacha | 3 | 200 | 20 ... 25 | ||
| Przy pieczeniu równocześnie w dwóch blachach, głębszą blachę stawła się na półce górnej, a blachę płytszą na dolnej.*Sugeruje się, aby wstępne nagrzewanie stosować przy wszystkich potrawach. | |||||
Wskazówki do pieczenia ciasta
- Jeśli ciasto jest zbyt suche, zwiększ temperaturę o ok. 10 i skróć czas pieczenia. - Jeśli ciasto jest wilgotne, użyj mniej płynu lub obniż temperaturę o 10°C. - Jeśli ciasto jest zbyt ciemne z góry, umieść je na dolnej półce, obniż temperaturę i przedłuż czas pieczenia. - Jeśli jest dobrze wypieczone wewnątrz, ale klei się na zewnątrz, użyj mniej płynu, obniż temperaturę i przedłuż czas pieczenia.Wskazówki przy pieczeniu ciasta
- Jeśli ciasto jest zbyt suche, zwiększ temperaturę o ok. 10 i skróć czas pieczenia. Nawilż warstwy ciasta sosem złożonym z mleka, oleju, jajka i jogurtu. - Jeśli pieczenie ciasta trwa zbyt długo, sprawdź czy grubość przygotowanego ciasta nie przekracza głębokości blachy. \- Jeśli góra ciasta brązowieje, ale dolna część nie jest upieczona, sprawdź, czy na dnie ciasta nie ma zbyt wiele użytego dom pieczenia sosu. Aby ciasto brązowiało równomiernie postaraj się rozprowadzić sos równo pomiędzy warstwami i górą ciasta.  Piecz ciasto zgodnie z trybem i temperaturą podanymi w tabeli gotowania. Jeśli dół nadal nie dość się zabrazowił, następnym razem umieść ciasto na dolnej półce.Wskazówki przy gotowaniu jarzyn
- Jeśli potrawa warzywna puszcza soki i zbytnio wysycha, gotuj ja w gamku z pokrywką zamiast blachy. Zamknięte naczynia zatrzymują sok z potrawy. - Jeśli potrawa warzywna nie udusiła się, najpierw ugotuj te warzywa lub przegotuj je jak potrawę z puszki i wsadź do piekarnika.Jak obsługiwać grill
OSTRZEŻENIE
Zamykaj drzwiczki na czas grillowania. 'Można się poparzyć od gorących powierzchni!Załączanie grilla
1. Obróć pokrętło Function [Funkcja] wybranego do symbolu grilla. 2. Następnie nastaw wybraną temperaturę grillowania. 3. W razie potrzeby nagrzewaj grill przez ok. 5 minut. » Zapali się lampka temperatury.Wyłączania grilla
1. Obróć pokrętło Function [Funkcja] do górnej pozycji "Off" ("wył.").  Żywność nie nadająca się do grillowania stwarza zagrożenie pożarowe. Do grillowania używaj wyłącznie żywności, która nadaje się do przyrządzania w wysokich temperaturach. Nie wkładaj żywności do grilla zbyt głęboko. Tam jest najgoręcej i tłusta żywność może się zapalić.Funkcja Turnspit [Rożno obrotowe]
Gdy wybrano funkcję grilla, silnik rożna obrotowego zacznie się obracać.  Praca silnika rożna uzależniona jest od funkcji grilla. Przy włączonej funkcji grilla grzałka grilla na zmianę włącza się i wyłącza. Gdy grzałka grilla jest włączona, silnik rożna pracuje, a gdy grzałka się wyłącza, silnik się zatrzymuje. Nie oznacza to awarii. - Po wybraniu funkcji Grill, przy pomocy widelca nadziej mięso lub kurczaki na rozno. - Wsadź rozno w jego gniazdo w silniku obrotowym umiesczonym w tylnej ściance piekarnika. Wsadź rozno w ramę. • Wstaw ramę w odpowiednią półkę w piekarniku. - Na jednej z półek poniżej ustaw tackę do zbierania tłuszczu. Aby łatwiej było ją potem oczyścić, nalej do tacki trochę wody. - Nie zapomnij zdjąć z rozna plastykowego uchwytu. ((Różnią się zależnie od modelu piekarnika.)) - Po ukończeniu pieczenia założ ten plastykowy uchwyt i wyjmij potrawę z piekarnika. ((Różnią się zależnie od modelu piekarnika.))  1 Rama rożna obrotowego 2 Uchwyt plastikowy \* 3 Widelec \* (Różnią się zależnie od modelu piekarnika.)Tabela czasów pieczenia przy grillowaniu
Grillowanie na grillu elektrycznym
| Potrawa | Poziom | Czas grillowania |
| Ryby | 4...5 | 20...25 min. * |
| Sznycle z kurczaka | 4...5 | 25...35 min. |
| Kotlety jagniece | 4...5 | 20...25 min. |
| Pieczeń wolowa | 4...5 | 25...30 min. * |
| Kotlety cielece | 4...5 | 25...30 min. * |
| Opiekanie chleba | 4 | 1...2 min. |
| * zależnie od grubości | ||
7 Czyszczenie i konserwacja
Informacje ogólne
Okres użytkowania tego wyrobu przedłuży się, a problemy stana się rzadsze, jeśli wyrób ten czyści się w regularnych odstępach czasu. ZAGROŻENIE:
Przed konserwacją i czyszczeniem, odłącz piekarnik od sieci. Grozi to porażeniem elektrycznym! ZAGROŻENIE:
Przed czyszczeniem piekarnika odczekaj, aż ostygnie. Można się poparzyć od gorących powierzchni! - Po każdym użyciu dokładnie oczyść ten wyrób. Dzięki temu łatwiej będzie usuwać pozostałości pieczenia, unikając tym samym ich zapalenia się na następnym użyciem piekarnika. - Do jego czyszczenia nie potrzeba żadnych specjalnych środków czyszczących. Wyrób ten czyści się miękką ściereczką lub gąbką i ciepłą wodą z mydłem w płynie, i wyciera suchą ściereczką. - Pamiętaj, aby zawsze starannie wycierać nadmiar płynu po czyszczeniu i natychmiast wycierać wszystko, co się rozleje. - Do czyszczenia powierzchni i klamki ze stali nierdzewnej nie używaj środków czyszczących zawierających kwas lub chlorek. Części te wyciera się do czysta miękką ściereczką z detergentem w płynie (nie w proszku), najlepiej ruchami w tym samym kierunku. - (Ta funkcja jest dostępna opcjonalnie. Może ona nie wchodzić w zakres wyposażenia zakupionego produktu). Do czyszczenia szklanej pokrywy nie używaj skroObaczek do metalu ani szorstkich środków czyszczących. Można tak uszkodzić powierzchnię szklaną.  Pewne detergenty lub środki czyszczące mogą uszkodzić powierzchnię. Nie używaj agresywnych detergentów, proszku/mleczka do czyszczenia, ani żadnych ostrych przedmiotów.  Do czyszczenia tego urządzenia nie używaj urządzeń parowych, ponieważ może to spowodować porażenie prądem.Oczyszczenie płyty
Płyty gazowe
1. Wyjmij i oczyść podstawki pod garnki i kołpaki palników. 2. Oczyć płytę. 3. Założ kołpaki na palniki i upewnij się, że leżą na nich jak należy. 4. Przy instalowaniu górnych grilli zwróć uwagę, na takie umieszczenie podstawek, aby palniki były w ich środku.Czyszczenie panelu sterowania
Panel sterowania i pokrętła czyści się wilgotną ściereczką i wyciera do sucha.  Nie zdejmuj przycisków/pokręteł do czyszczenia panelu sterowania. Możesz uszkodzić panel sterowania!Czyszczenie piekarnika
Aby oczyścić ścianę boczną
(Ta funkcja jest dostępna opcjonalnie. Może ona nie wchodzić w zakres wyposażenia zakupionego produktu). 1. Wyjmij przednią sekcję stelaża bocznego wyciągając go w przeciwnym kierunku do ściany bocznej. 2. Całkiem wyjmij stelaż ciągnąc go do siebie. Ściany katalityczne
(Ta funkcja jest dostępna opcjonalnie. Może ona nie wchodzić w zakres wyposażenia zakupionego produktu). Wewnętrzna strona bocznych ścian (A) i tylnej ściany (B) urządzenia może być pokryta emalią katalityczną. Ściany pokryte emalią katalityczną mają jasny, matowy kolor i porowatą powierzchnię. Nie należy ich czyścić. Porowata powierzchnia takich ścian czyści się sama, pochłaniając i przekształcając odpryski tłuszczu w parę i dwutlenek węgla. natural_image
Two technical diagrams showing internal components labeled A and B, with no readable text or symbols beyond labels.Łatwe czyszczenie parą
Zapewnia łatwe czyszczenie, ponieważ brud (który nie czekał zbyt długo) mięknie pod wpływem wytwarzanej wewnątrz piekarnika pary, a krople wody skraplają się na jego wewnętrznych powierzchniach. 1. Wyjmij z piekarnika wszystkie akcesoria. 2. Włać 500 ml do tacy piekarnika i umieścić tacę na drugim ruszcie piekarnika. natural_image
Illustration of a laptop with a glass lens and paper airplane, no text or symbols presentCzyszczenie drzwiczek piekarnika
Drzwiczki piekarnia czyści się miękką ściereczką lub gąbką i ciepłą wodą z mydłem w płynie, i wyciera suchą ściereczką.  Do czyszczenia drzwiczek piekarnika nie używaj żadnych szorstkich środków czyszczących ani skrobaczek metalowych. Mogą porysować powierzchnię i zniszczyć szybę.  Szyba w drzwiczkach przednich powleczona jest łatwym do czyszczenia materiałem. Nie używaj ostrych iszorstkich środków czyszczących, twardych skrobaczek metalowych, ani myjek czy wybielaczy do czyszczenia szyby w drzwiczkach przednich, ponieważ mogą porysować jej powierzchnię. Może to uszkodzić powłokę.Przenoszenie drzwiczek piekarnika.
1. Otwórz drzwiczki przednie (1). 2. Otwórz zacisk w obudowie zawiasu (2) po prawej i lewej stronach drzwiczek przednich przyciskając je ku dołowi, jak pokazano na rysunku.  1 Drzwiczki przednie 2 Zawias 3 Piekarnik natural_image
Technical diagram of a mechanical joint or bracket with a curved arrow indicating rotation (no text or symbols present)Wyjmowanie szyby w drzwiczkach
(Ta funkcja jest dostępna opcjonalnie. Może ona nie wchodzić w zakres wyposażenia zakupionego produktu). Szklaną szybę z drzwiczek piekarnika można wyjąć do czyszczenia. Otwórz drzwiczki. natural_image
Close-up of a mechanical component with two arrows pointing to features, no visible text or symbolsnatural_image
Pure diagram of a rectangular component with a grid pattern and a downward arrow, no text or symbols present.natural_image
3D mechanical assembly diagram showing a bracket with four numbered components and directional arrows indicating assembly or alignment (no text or symbols present)natural_image
3D mechanical assembly diagram showing a bracket with an arrow indicating force or direction (no text or symbols)Wymiana lampki w piekarniku
ZAGROŻENIE:
Aby uniknąć zagrożenia porażeniem elektrycznym, zanim wymienisz lampkę upewnij się, że piekarnik jest odłączony od sieci zasilającej i że ostygł. Można się poparzyć od gorących powierzchni!  Lampka w piekarniku to specjalna żarówka odporna na temperatury do 300 °C. Patrz Dane techniczne, strona 13, w których podano szczegóły. Lampki do piekarnika można nabyć u autoryzowanego przedstawiciela serwisu.  Lampka może być umieszczona gdzie indziej niż na rysunku.  Żarówka używana w tym urządzeniu nie jest odpowiednia do oświetlania pomieszczeń domowych. Zgodnie z przeznaczeniem żarówka ta służy do oświetlania żywności.  Żarówki używane w tym urządzeniu muszą wytrzymać ekstremalne warunki fizyczne, jak temperatury powyżej 50°C.Jeśli w piekarniku jest lampka okrągła:
1. Odłącz piekarnik od sieci zasilającej. 2. Odkręć szklaną pokrywę, przekręcając ją w lewo, aby ją zdjąć. natural_image
Close-up of a hand holding a circular component next to a mechanical component (no visible text or symbols)natural_image
Mechanical component with rotational arrow indicating motion (no text or symbols)natural_image
Mechanical component with a shaft and housing, showing an arrow indicating direction (no text or symbols)8 Rozwiązywanie problemów
W czasie pracy piekarnik wydziela pare
\- Ulatnianie sie pary w trakcie pracy jest normalnym zjawiskiem. >>> To nie jest awaria.Przy nagrzewaniu i studzeniu urządzenia słychać metaliczne odgłosy.
\- Podgrzewane części metalowe mogą się rozszerzać i wydawać dźwięki. >>> To nie jest awaria.Produkt nie działa.
- Bezpiecznik uszkodzony lub zadział. >>> Sprawdź bezpieczniki w skrzynce bezpiecznikowej. W razie potrzeby wymień je lub załącz. - Piekarnik nie jest przyłączony do (uziemionego) gniazdka. >>> Sprawdź kontakt wtyczki.Nie świeci lampka w piekarniku.
- Lampka w piekarniku jest uszkodzona. >>> Wymień lampkę w piekarniku. - Brak zasilania. >>> Sprawdź, czy jest prąd Sprawdź bezpiecznik w skrzynce bezpiecznikowej. W razie potrzeby wymień je lub załącz.Piecyk nie grzeje.
- Pokrętło funkcji i/lub temperatury nie są ustawione >>> Ustaw funkcję i temperaturę pokrętłami/klawiszami funkcji i/lub temperatury. - W modelach z programatorem czasowym, nie nastawiono programatora >>> Nastaw zegar. (W produktach z piekarnikiem mikrofalowym, regulator czasowy steruje tylko piekarnikiem mikrofalowym.) - Brak zasilania. >>> Sprawdź, czy jest prąd Sprawdź bezpiecznik w skrzynce bezpiecznikowej. W razie potrzeby wymień je lub załącz.Nie zapala się iskra zapłonowa.
- Nie ma prądu. >>> Sprawdź bezpiecznik w skrzynce bezpiecznikowej. - Nie nastawiono czasu. >>> Nastaw czasomierz.Nie ma gazu.
• Zamknięty jest kurek zasilania z sieci gazowej. >>> Odkręć kurek dopływu gazu. - Przewód doprowadzania gazu jest zagięty. >>> Prawidłowo zamontuj przewód doprowadzania gazu.Palniki pala się nierówno albo wcale.
• Palniki są brudne. >>> Oczyć elementy palników. • Palniki są mokre. >>> Osusz elementy palników. - Kołpak palnika nie trzyma się mocno. >>> Prawidłowo założ elementy palnika. • Zamknięty jest kurek zasilania z sieci gazowej. >>> Odkręć kurek dopływu gazu. - Butła z gazem jest pusta (w przypadku zasilania gazem LPG) >>> Wymień butłę z gazem.(W modelach z programatorem czasowym) Wyświetlacz zegara miga lub pali się symbol zegara.
\- Poprzednio nastąpił zanik zasilania. >>> Nastaw zegar/ Wyłącz piekarnik i ponownie załącz go.  Jeśli pomimo postępowania według instrukcji z tego rozdziału problem pozostaje, skonsultuj się z autoryzowanym agentem serwisowym lub sprzedawcą piekarnika. Nie próbuj samemu naprawiać zepsutego piekarnika.
- Oven
- User manual
- Please read this user manual first!
- Explanation of symbols
- CE
- Important instructions and warnings for safety and environment 4
- General information 11
- Installation 14
- Preparation 19
- How to use the hob 21
- How to operate the oven 22
- Maintenance and care 28
- Troubleshooting 32
- Important instructions and warnings for safety and environment
- General safety
- Safety when working with gas
- What to do when you smell gas
- Electrical safety
- Product safety
- Intended use
- Safety for children
- Child lock
- Disposing of the old product Compliance with the WEEE Directive and Disposing of the Waste Product:
- Compliance with RoHS Directive:
- Package information
- General information
- Package contents
- User manual
- Oven tray
- Wire Shelf
- Placing the wire shelf and tray onto the telescopic racks properly
- Rotisserie chicken
- Basics: Information on the energy label of electrical ovens is given in accordance with the EN 60350-1 / IEC 60350-1 standard. Those values are determined under standard load with bottom-top heater or fan assisted heating (if any) functions.
- Installation
- DANGER:
- Before installation
- Safety chain
- Room ventilation
- Rooms with doors and/or windows which open directly to the outer environment
- Rooms that do not have openable doors and/or windows that open directly to the outer environment
- Installation and connection
- Electrical connection
- Gas connection
- For products with cooling fan (It may not exist on your product.)
- Final check
- Gas conversion
- Exchange of injector for the burners
- Reduced gas flow rate setting for hob taps
- Future Transportation
- Preparation
- Tips for saving energy
- Initial use Time setting
- First cleaning of the appliance
- Initial heating
- WARNING
- Electric oven
- Grill oven
- How to use the hob
- General information about cooking
- Gas cooking
- Using the hobs
- Igniting the gas burners
- Turning off the gas burners
- Gas shut off safety system (in models with thermic component)
- Gas shut off safety
- How to operate the oven
- General information on baking, roasting and grilling
- Tips for baking
- Tips for roasting
- Tips for grilling
- How to operate the electric oven
- Select temperature and operating mode
- Switching off the electric oven
- Rack positions (For models with wire shelf)
- Operating modes
- Top and bottom heating
- Bottom heating
- Fan supported bottom/top heating
- Operating with fan
- Fan Heating
- "3D" function
- Grill+Fan
- Full grill with turnspit
- Using the oven clock
- Cooking by setting the cooking time;
- Setting the the end of cooking time to a later time;
- Activating the keylock
- To deactivate the keylock
- Setting the alarm clock
- Turning off the alarm
- Cancelling the alarm;
- Changing alarm tone
- Changing the time of the day
- Economy mode
- Setting the economy mode
- Disabling economy mode
- Setting the screen brightness
- Cooking times table
- Baking and roasting
- Tips for baking cake
- Tips for baking pastry
- Tips for cooking vegetables
- How to operate the grill
- Switching on the grill
- Switching off the grill
- Turnspit function
- Cooking times table for grilling
- Maintenance and care
- General information
- Cleaning the hob
- Gas hobs
- Cleaning the control panel
- Cleaning the oven
- To clean the side wall
- Catalytic walls
- Easy Steam Cleaning
- Clean oven door
- Removing the oven door
- Removing the door inner glass
- Replacing the oven lamp
- If your oven is equipped with a round lamp:
- Troubleshooting
- Oven emits steam when it is in use
- Product emits metal noises while heating and cooling.
- Product does not operate.
- Oven light does not work.
- Oven does not heat.
- There is no ignition spark.
- There is no gas.
- Burners are not burning properly or at all.
- (In models with timer) Clock display is blinking or clock symbol is on.
- Piekarnik
- Instrukcja użytkowania
- Prosimy najpierw przeczytać tę instrukcję obsługi!
- Objaśnienie symboli
- Ważne instrukcje i ostrzeżenia dotyczące bezpieczeństwa i ochrony środowiska 4
- Informacje ogólne 11
- Instalacja 14
- Przygotowanie 19
- Jak używać płyty kuchennej 21
- Jak obsługiwać piekarnik 23
- Czyszczenie i konserwacja 29
- Rozwiązywanie problemów 33
- Ważne instrukcje i ostrzeżenia dotyczące bezpieczeństwa i ochrony środowiska
- Ogólne zasady bezpieczeństwa
- Bezpieczeństwo przy pracy z gazem
- Co robić, gdy poczuje się zapach gazu
- Bezpieczeństwo elektryczne
- Zasady zachowania bezpieczeństwa przy użytkowaniu tego wyrobu
- Zamierzone przeznaczenie
- Bezpieczeństwo dzieci
- Blokada dostępu dzieci
- Stare urządzenia
- Zgodność z dyrektywą WEEE i usuwanie odpadów:
- Zgodność z dyrektywą RoHS:
- Pozbywanie się materiałów opakowaniowych
- Informacje ogólne
- Zawartość opakowania
- Instrukcja użytkowania
- Blacha do pieczenia
- Półka druciana
- Właściwe umieszczanie półki drucianej i foremki na stelażach teleskopowych (Ta funkcja jest dostępna opcjonalnie. Może ona nie wchodzić w zakres wyposażenia zakupionego produktu).
- Pieczeń z kurczaka
- Instalacja
- Przed zainstalowaniem
- Łańcuch bezpieczeństwa
- Wentylacja pomieszczenia
- Pomieszczenia z drzwiami i/lub oknami otwieranymi bezpośrednio na zewnątrz budynku
- Pomieszczenia bez drzwi i/lub okien otwieranych bezpośrednio na zewnątrz budynku
- Instalacja i przyłączenie
- Przyłączenie elektryczne
- ZAGROŻENIE:
- Złącze gazowe
- Piekarniki z wentylatorem chłodzącym (Może ona nie wchodzić w zakres wyposażenia zakupionego produktu).
- Ostateczne sprawdzenie
- Zmiana rodzaju gazu
- Wymiana wtrysków do palników
- Ustawienie kurków płyty na ograniczony strumień gazu
- Przyszły transport
- Przygotowanie
- Jak oszczędzać energię
- Pierwszy raz
- Ustawianie czasu
- Pierwsze czyszczenie
- Podgrzewanie wstępne
- OSTRZEŻENIE
- Piekarnik elektryczny
- Piekarnik z grillem
- Jak używać płyty kuchennej
- Ogólne informacje o gotowaniu
- Gotowanie na gazie
- Użytkowanie płyt kuchennych
- Zapalanie palników gazowych
- Wyłączanie palników gazowych
- System bezpiecznego odcinania dopływu gazu (w modelach z elementem termicznym)
- Jak obsługiwać piekarnik
- Ogólne informacje o pieczeniu ciast i mięs oraz o grillowaniu.
- Wskazówki do pieczenia ciasta
- Wskazówki do pieczenia mięsa
- Wskazówki do grillowania
- Jak obsługiwać piekarnik elektryczny Wybieranie temperatury i trybu pracy
- Wyłączanie piekarnika elektrycznego
- Pozycje stelażu (modele z rusztem drucianym)
- Tryby pracy
- Grzałki górna i dolna
- Grzałka dolna
- Grzanie dolne/górne z termoobiegiem
- Praca z wentylatorem.
- Termoobieg
- Funkcja "3D"
- Grill+termoobieg
- Full grill z rożnem obrotowym
- Korzystanie z zegara piekarnika
- Pieczenie o nastawionej godzinie:
- Ustawianie zakończenie pieczenia na późniejszą godzinę:
- Aktywacja blokady przycisków
- W celu wyłączenia blokady dotknij przycisku
- Ustawianie alarmu czasowego
- Wyłączanie alarmu
- Anulowanie alarmu
- Zmiana dźwięku alarmu
- Zmiana bieżącej godziny
- Tryb oszczędny
- Nastawienie trybu ekonomicznego.
- Wyłaczanie trybu ekonomicznego.
- Ustawianie jasności ekranu
- Wskazówki przy pieczeniu ciasta
- Wskazówki przy gotowaniu jarzyn
- Jak obsługiwać grill
- Załączanie grilla
- Wyłączania grilla
- Funkcja Turnspit [Rożno obrotowe]
- Tabela czasów pieczenia przy grillowaniu
- Grillowanie na grillu elektrycznym
- Czyszczenie i konserwacja
- Informacje ogólne
- Oczyszczenie płyty
- Płyty gazowe
- Czyszczenie panelu sterowania
- Czyszczenie piekarnika
- Aby oczyścić ścianę boczną
- Ściany katalityczne
- Łatwe czyszczenie parą
- Czyszczenie drzwiczek piekarnika
- Przenoszenie drzwiczek piekarnika.
- Wyjmowanie szyby w drzwiczkach
- Wymiana lampki w piekarniku
- Jeśli w piekarniku jest lampka okrągła:
- Rozwiązywanie problemów
- W czasie pracy piekarnik wydziela pare
- Przy nagrzewaniu i studzeniu urządzenia słychać metaliczne odgłosy.
- Produkt nie działa.
- Nie świeci lampka w piekarniku.
- Piecyk nie grzeje.
- Nie zapala się iskra zapłonowa.
- Nie ma gazu.
- Palniki pala się nierówno albo wcale.
- (W modelach z programatorem czasowym) Wyświetlacz zegara miga lub pali się symbol zegara.
Marke : BEKO
Modell : FSMT52336DXDS
Kategorie : Küchenmaschine