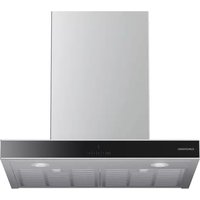
GDK 57000 BXB - Dunstabzugshaube GRUNDIG - Kostenlose Bedienungsanleitung
Finden Sie kostenlos die Bedienungsanleitung des Geräts GDK 57000 BXB GRUNDIG als PDF.


| Produkttyp | Dunstabzugshaube (Umluft- und Abluftbetrieb) |
| Marke / Modell | Grundig GDK 57000 BXB |
| Abmessungen (H/B/T) | min. 760 mm – max. 915 mm / 598 mm / 490 mm |
| Gewicht | ca. 12 kg (geschätzt) |
| Spannung / Frequenz | 220–240 V; 50/60 Hz |
| Anschlusswert | max. 100 W |
| Sicherung | 3 A |
| Bedienung | Touch-Control mit 3 Stufen + Booster |
| Max. Absaugleistung | 680 m³/h |
| Durchmesser Luftauslass | 120–150 mm |
| Beleuchtung | LED-Lampe (austauschbar durch den Benutzer) |
| Filter | Aluminiumfettfilter (spülmaschinengeeignet) + optional Aktivkohlefilter |
| Filterwechselintervall Aktivkohle | alle 4 Monate |
| Filterreinigung Aluminium | monatlich in handelsüblichem Reinigungsmittel oder Geschirrspüler |
| Filtervollanzeige | nach 100 Betriebsstunden |
| Automatik-Abschaltung | ja, nach 20 Minuten (Auto-Off-Modus) |
| Intensivstufe (Booster) | 10 Minuten bei maximaler Leistung |
| Luftfilter-Modus (Umluft) | 10 Min. Betrieb, 50 Min. Pause, bis zu 24 Stunden |
| Mindestabstand zur Kochstelle | 650 mm |
| Installation | Abluft- oder Umluftbetrieb möglich (Kamin optional) |
| Lieferumfang | Wandanschluss, Luftleitkomponente, Kaminanschlussadapter, Rückschlagklappen, Gebrauchsanweisung |
Häufig gestellte Fragen - GDK 57000 BXB GRUNDIG
Benutzerfragen zu GDK 57000 BXB GRUNDIG
0 Frage zu diesem Gerät. Beantworten Sie die, die Sie kennen, oder stellen Sie Ihre eigene.
Eine neue Frage zu diesem Gerät stellen
Laden Sie die Anleitung für Ihr Dunstabzugshaube kostenlos im PDF-Format! Finden Sie Ihr Handbuch GDK 57000 BXB - GRUNDIG und nehmen Sie Ihr elektronisches Gerät wieder in die Hand. Auf dieser Seite sind alle Dokumente veröffentlicht, die für die Verwendung Ihres Geräts notwendig sind. GDK 57000 BXB von der Marke GRUNDIG.
BEDIENUNGSANLEITUNG GDK 57000 BXB GRUNDIG
GRUNDIG
Cooker hood
User Manual
Afzuigkap
Gebruikershandleiding

natural_image
Simple line drawing of a chimney emitting steam (no text or symbols)GDK 57000 BXB
EN / NL
185.7305.41/R.AB/15.11.2019
7702384114
Please read this user manual first!
Dear Customer,
Thank you for purchasing this Grundig product. We hope that you get the best results from your product which has been manufactured with high quality and state-of-the-art technology. Therefore, please read this entire user manual and all other accompanying documents carefully before using the product and keep it as a reference for future use. If you handover the product to someone else, give the user manual as well. Follow all warnings and information in the user manual.
Remember that this user manual is also applicable for several other models. Differences between models will be identified in the manual.
Explanation of symbols
Throughout this user manual the following symbols are used:

Important information or useful hints about usage.

Warning of hazardous situations with regard to life and property.

Warning of electric shock.

Warning of risk of fire.

Warning of hot surfaces.
CE
TABLE OF CONTENTS
1 Important instructions and warnings for safety and environment 4
General safety......4
Electrical safety....5
Product safety....5
Intended use....6
Children's safety......7
Disposing of the old product......7
Package information....7
2 General information 8
Overview......8
Scope of delivery 9
Technical specifications....9
3 Installation 10
Installation....10
Future transportation......16
4 Operating the hood 17
5 Maintenance and care 19
General information 19
Replacing the lamp 20
6 Troubleshooting 21
1 Important instructions and warnings for safety and environment
This section contains safety instructions that will help protect from risk of personal injury or property damage. Failure to follow these instructions shall void any warranty.
General safety
- This appliance can be used by children aged from 8 years and above and persons with reduced physical, sensory or mental capabilities or lack of experience and knowledge if they have been given supervision or instruction concerning use of the appliance in a safe way and understand the hazards involved. Children shall not play with the appliance. Cleaning and user maintenance shall not be made by children without supervision.
- Risk of Toxicating! While the appliance is operating, air in the entire house is sucked. If adequate ventilation is not provided, waste and toxic gasses which are released as a result of burning will be drawn back into the house through chimney draught. Do not operate the appliance together with sources that may emit toxic gasses and create air draught
(wood, gas, oil, and coal stoves, water heaters, kettles, etc.).
• Always have the authorized persons check the adequacy of ventilation and chimney draught in your building.
- The appliance is not intended for use by persons (including children) with reduced physical, sensory or mental capabilities, or lack of experience and knowledge, unless they have been given supervised or instruction concerning use of the appliance by a responsible person for their safely. Young children should be supervised to ensure that they do not play with the appliance. Cleaning and user maintenance procedures should not be performed by the children unless they are under supervision.
• Always have the installation and repair procedures performed by Authorised Service Agent. Manufacturer shall not be held responsible for damages arising from procedures carried out by unauthorised persons.
- Do not operate the appliance if it is defective or has any visible damage.
• Make sure that the appliance is switched off after every use.
- If the product is handed over to someone else for personal use or second-hand use purposes, the user manual, product labels and other relevant documents and parts should be also given.
- Appliance must be installed by a qualified person in accordance with the regulations in force. Otherwise, the warranty shall become void.
Electrical safety
- To get your product ready for use, firstly you must have installation place and electric wiring prepared. Later, you may call Authorised Service nearest to you.
- If it has a failure, the product should not be operated without being repaired by the Authorised Service Agent. There is the risk of electric shock!
- Never connect the hood before installation is completed.
- Never touch the plug with wet hands! Do not unplug by pulling from the cable; always hold by the plug to unplug.
- Product must be disconnected from the mains during installation, maintenance, cleaning and repair procedures.
-
If the supply cord is damaged, it must be replaced by the manufacturer or its service agent or a similarly qualified person in order to avoid a hazard.
-
Never connect power cable near to the hobs. If melted down, cable may lead to fire.
- Any work on electrical equipment and systems may only be carried out by authorised and qualified persons.
- In case of any damage, switch off the product and disconnect it from the mains. To do this, turn off the fuse at home.
• Make sure that fuse current is compatible with the product. - Never wash down the product with water! There is the risk of electric shock!
Product safety
- The height between the lower surface of the hood and upper surface of the hob should not be less than 650 mm.
- Never touch the hood's lamp after they operated for a long time. Hot lamps may burn your hands.
- Never operate the product without oil filter. Never remove filters when the product is in use.
- Avoid big flames beneath the product. Otherwise, particles on oil filter may flame up and cause fire.
- Turn on the hobs after placing pans or pots on. Otherwise, rising temperature may deform certain parts of your product.
-
Turn off the hobs before taking away pans or pots.
-
Avoid inflammable materials under the hood.
- Do not expose the product to open flames beneath it. It can cause oils accumulated in the filter to catch fire. Do not operate the product without filter.
- Never leave the cooker unattended when frying foods, the oil may flame up and boiled oil may cause fire. Thus, be careful about cloths and curtains.
- If the hood is not periodically and properly cleaned, this may cause burning risk on your hood.
- For refreshing the kitchen's air from cooking smells and steams, please turn on your hood for 15 minutes more after cooking or frying has ended.
- There shall be adequate ventilation of the room when the range hood is used at the same time as appliances burning gas or other fuels. (Not applicable to appliances that only discharge the air back into the room)
- In the environment where the hood is being used, the exhaust of fuel oil or gas devices such as room heater must be absolutely insulated or device must be hermetical type.
- If there is a fuel oil or gas device in the environment, the room must be ventilated sufficiently.
- When a non-electrically operated device is concurrently
used in the environment together with the hood, the negative pressure in the room must be maximum 0.4 mbar to avoid the hood's returning other device's exhaust into the room.
- Never connect the hood to the chimneys used for heaters, waste gas or with rising flames. Observe authorities' regulations on the draining of output air.
- When connecting to the chimney, use 120-mm diameter pipes. Pipe connection must be as short as possible with fewer bends.
- Do not hang easily flammable and combustible materials on hood handles.
- Our company shall never be responsible for the problems arising from the use against the warnings above.
- There is a risk of fire if cleaning is not carried out in accordance with the instructions.
- Do not flambé under the range hood.
- Caution: Accessible parts may become hot when used with a cooking appliance.
- You are recommended to clean your filter once a month in normal use.
Intended use
This product is designed for domestic use. Commercial use is not admissible.
The manufacturer shall not be liable for any damage caused by improper use or handling.
Children's safety
- Keep children away from the product when it is operating and do not allow them to play with the product.
- Packaging materials are dangerous to children. Keep the packaging materials in a place where children cannot reach and sort and discard them in accordance with the waste disposal directives.
- Electrical products are dangerous to children. Keep children away from the product when it is operating and do not allow them to play with the product.
Disposing of the old product Compliance with the WEEE Directive and Disposing of the Waste Product:

This product complies with EU WEEE Directive (2012/19/EU). This product bears a classification symbol for waste electrical and electronic equipment (WEEE).
This product has been manufactured with high quality parts and materials which can be reused and are suitable for recycling. Do not dispose of the waste product with normal domestic and other wastes at the end of its service life. Take it to the collection center for the recycling of electrical and electronic equipment. Please consult your local authorities to learn about these collection centers.
Compliance with RoHS Directive:
The product you have purchased complies with EU RoHS Directive (2011/65/EU). It does not contain harmful and prohibited materials specified in the Directive.
Package information
- Packaging materials of the product are manufactured from recyclable materials in accordance with our National Environment Regulations. Do not dispose of the packaging materials together with the domestic or other wastes. Take them to the packaging material collection points designated by the local authorities.
2 General information
Overview

1 Hood body
2 Control panel
3 Aluminum filter lock
4 Aluminum filter
5 Lamp
Scope of delivery

Accessories supplied can vary depending on the appliance model. Not every accessory described in the user manual may exist on your appliance.
- User manual
- Wall connector

natural_image
Metal plate with two circular holes, no text or symbols visible- Air directing component

natural_image
3D rendered mechanical component with no visible text or symbols- Chimney connection adapter

natural_image
3D rendered image of a mechanical pipe fitting (no text or symbols visible)- Valves to prevent reverse air flow

natural_image
3D rendered image of a cylindrical object with a textured surface and a central slot (no text or symbols)Technical specifications
| External dimensions (height/width/depth) | min. 760 mm max. 915 mm/598 mm/490 mm |
| Voltage/frequency | 220-240 V ; 50/60 Hz |
| Control | 3 level + 1 Booster |
| Suction power | 680 m3/h |
| Total power consumption | max. 100 W |
| Fuse | 3 A |
| Air outlet pipe diameter | 120-150 mm |

Technical specifications may be changed without prior notice to improve the quality of the product.

Figures in this manual are schematic and may not exactly match the product.

Values stated on the markings of the product or in other printed documents supplied with the product are obtained under laboratory conditions as per relevant standards.
Depending on operational and environmental conditions of the product, these values may vary.

Installation
Refer to the nearest Authorised Service Agent for installation of the product. Make sure that the electric installations are in place before calling the Authorised Service Agent to have the product ready for operation. If not, call a qualified electrician and fitter to have the required arrangements made.

Preparation of location and electrical installation for the product is under customer's responsibility.

DANGER:
The product must be installed in accordance with all local electrical regulations.

DANGER:
Prior to installation, visually check if the product has any defects on it. If so, do not have it installed. Damaged products cause risks for your safety.

DANGER:
Warning: Failure to install the screws or fixing device in accordance with the instructions may result in electrical hazards.
Installation

* min.
There should be a minimum clearance of 650 mm between the top surface of the hob and the bottom surface of the hood. The air to be extracted via the hood should not be connected to a chimney that is used by other appliances that use gas or other fuels. (It does not apply to devices that only blow the air back into the room)
The regulations on air exhaust should be followed.
Electrical connection
Manufactured with 2-track power cable, this device must be connected to the mains by an electrical switch with at least 3mm clearance between bipolar contact leads. Have the electrical
connections done by a qualified electrician.
• Install your appliance so that you can reach the power connection (plug, outlet) easily after installation.
Installing the hood

Measurements are in mm.
The following provides necessary information to prepare the location for hood installation. The hood must be installed above the central axis of the cooking appliance. There should be a minimum clearance of 650 mm between the top surface of the hob and the bottom surface of the hood. Please apply the following steps for the hood's installation.

- Centering the cooking appliance, draw an axis line that has the 11/EN
same height as that of the figure above. Then, taking this axis line as reference and according to the measurements above, drill 7 holes whose sizes are in compliance with the fittings provided with the product.
- Insert the plastic plugs which are given with the packaging into these holes. Check if chimney connectors correspond to those holes or not.

natural_image
Diagram of a rectangular panel with two horizontal bars and circular holes, no text or symbols present- As shown in the figure above, fix the wall fittings to their corresponding holes using the two fixing screws provided with the accessories.
- For electronic models, fix the electronic mainboard into its housing with 4 screws as shown in the figure below.

natural_image
Industrial machine with a close-up inset showing internal components (no visible text or symbols)- Fix the hood to the wall by centering it through the A holes. Remove the aluminum filters of the hood. On the inside, fix the back plate of the hood through the B hole using a screw as shown in the figure below. Make sure that the hood is parallel to the counter when fixing.

- As shown in the figure below, place the cover (C) -that prevents reversed air flow- to the chimney outlet.

natural_image
3D mechanical assembly diagram showing a presser with a component labeled 'C' mounted on a base platform (no text or symbols beyond label)- For chimney connection usage: In chimney connection installation, the absorbed air will pass through the aluminium filters and will be expelled to the outside through the connection pipe.

natural_image
3D mechanical assembly diagram showing a base with a central component labeled 'D', mounted on a platform (no text or symbols beyond label)When this connection position is used, chimney connection adapter D is placed on part C as shown in the figure above.

D chimney connection adaptor will only be used when the chimney connection pipe's diameter is 120mm. If your chimney connection pipe's diameter is 150mm, you will not need to use chimney connection adaptor D and therefore you will need to connect one end of the chimney connection pipe E directly onto cover C.
- Connect one end of the chimney connection pipe E to the chimney connection adapter and place the other end to the chimney. You can obtain the chimney connection pipe E from the authorized service or from the market

natural_image
3D mechanical assembly diagram showing a cylindrical component with a base and load, mounted on a rectangular base (no text or symbols)You should make sure that the chimney connection pipes used are made of fireproof plastic material. When using flexible connection pipe, it should be considered that sharp corners and sudden contractions
will have a negative impact on air suction.
The hood must never be connected to a chimney to which another device was already connected.

Connection pipe should not be larger than 120 mm; otherwise, proper chimney connection will be prevented.
9. Internal circulation (Use with carbon filter)
In the position of internal circulation, the air absorbed from the environment will go through aluminium filters and carbon filters, where the smell is eliminated, and pass through air directing component, it is finally sent back to the environment through the ventilation grills on the side of the chimney piece.

natural_image
Four mechanical component cutouts shown from different angles (no text or symbols visible)Assemble the air directing component, that is provided as two separate parts, as shown in the figure.
Follow the steps below for use without chimney. You can obtain the chimney connection pipe E and connection elements F from the authorised service provider or from the market.

natural_image
Diagram of a rectangular panel with three horizontal bars and circular holes, no text or symbols present
natural_image
3D mechanical assembly diagram showing a presser pressing a component on a base platform, with no visible text or symbols.

natural_image
3D diagram of a mechanical assembly with labeled components F, D, and C, no readable text or symbols present.


- Remove aluminum filters as shown below.

natural_image
Illustration of a hand holding a flatboard with a digital display (no text or symbols visible)- Install the carbon filter as per the following figure.

Re-install aluminum filters.
12. Installation of chimney
To install the upper chimney, place its upper corners onto the upper wall connector and use the screws to fix the chimney to the wall connector as shown in the figure below.

natural_image
3D mechanical assembly diagram showing a cylindrical component mounted on a base plate, with no visible text or symbols.To install lower chimney, stretch the chimney by pulling slightly from both sides and secure it onto upper chimney's slots as shown in the figure above.

natural_image
3D mechanical assembly diagram showing a cylindrical component mounted on a base plate, with no visible text or symbols.Fix it to the hood through the two holes on the lower corners of the lower chimney.
You may use the hood in two ways:
1-Chimney-connected use
The steam is expelled via chimney pipe which is secured to the connection ring on the hood. Diameter of chimney pipe should be equal to connection ring. To allow the air easily going out of the room in horizontal arrangements, the pipe should be slightly tilted upwards (approximately 10°).

If the carbon filter is installed on your hood, remove it when using the hood with the chimney.
2- Use with no chimney connection Air is filtered through carbon filter and returned to the room. Carbon filter is used when there is no
chimney in the house or when it is impossible to install a chimney pipe.
• Install the carbon filter as described in the installation section.
Future transportation
- Keep the product's original carton and transport the product in it. Follow the instructions on the carton. If you do not have the original carton, pack the product in bubble wrap or thick cardboard and tape it securely.

Do not place any objects onto the product and move it in upright position.

Check the general appearance of your product for any damages that might have occurred during transportation.
4 Operating the hood
Hood is equipped with a motor with various speed settings.
For a better performance, we advise you to use low speeds in normal conditions, and high speeds when smell and vapors are intensified.

1 On/off button / Speed1
2 Speed2
3 Speed3 / Booster
4 Function key
5 Lamp key
6 Display

Auto off symbol
Booster symbol
Filter full warning symbol
Air filter mode symbol
Operating the hood
- To turn on the hood, touch the on/off key.
- To change the speed, touch Speed2 and Speed 3 keys.
» Speed level of the hood shall be displayed.

Do not touch both keys simultaneously. If touched, higher speed will be activated.

Appliance operates for a maximum of 6 hours when no key is touched while it is operated.
Auto off mode
- Touch the function key when the appliance is operated at a certain speed. Auto off mode will be activated and ⏻ symbol is displayed.
- Appliance shall be turned off automatically after operating for 20 minutes at the set level.

Auto off mode is canceled when any level key other than the lamp key is pressed.
Activating intense ventilation mode (Booster)
Touch the speed3 key for more than two seconds. Intense ventilation mode will be activated and P and symbol shall be displayed, and the appliance will be active for maximum 10 minutes. After 10 minutes, it will continue to operate in Speed 3 position.
During intense ventilation, if any of the speed keys is touched then the operation will continue in that speed level.
Turning off the hood
- Touch on the Off key when the hood is operating in a certain speed.
» When the hood is being turned off, "0" is flashed on the display for 8 seconds while motor is being stopped. This is not an error.
Operating the lamp
- Touch the lamp key to turn on the lamp.
Turning off the lamp
- Touch the lamp key again to turn off the lamp.

Off key does not turn off the lamp, it only stops operation of the hood.
Air filter mode
- Touch the function key when the appliance is not operated at any speed.
» Air filter mode will be activated and C and ⚙ symbol is displayed.
- Air filter mode will operate for 10 minutes at speed 1 level and then stops for 50 minutes within 1 hour. If the air filter mod will not turned off, it will continue to operate for 10 minutes and stops 50 minutes for each each hour during 24 hours.

You can utilize air filter mode to remove odor found in-house in long term using low speed.
Turning off the air filter mode
- Turn off the air filtering mode by touching any speed key or touching the off key while the air filtering mode is active.

While the air filter mode is active, when you turn on and off the appliance at any speed level, air filter mode shall not be remembered.

While the air filter mode is active, the program will be canceled if there is a blackout.
Filter full warning
After every 100 hours operation, F symbol and the set level flashes in turn on the display. Also, symbol appears on display. Clean your filter. Filter full warning will not reset automatically after cleaning. Filter full warning may be reset by pressing function and speed3 buttons for 3 seconds simultaneously.

When the hood gave filter full warning, the warning will not be reset if there is a blackout.
5 Maintenance and care
General information
Service life of the product will extend and frequent problems will decrease if the product is cleaned at regular intervals.

DANGER:
Disconnect the product from mains supply before starting maintenance and cleaning works.
There is the risk of electric shock!
- Clean the product thoroughly after each use. In this way it will be possible to remove cooking residues more easily, thus avoiding these from burning the next time the appliance is used.
- No special cleaning agents are required for cleaning the product. Use warm water with washing liquid, a soft cloth or sponge to clean the product and wipe it with a dry cloth.
- Do not use cleaning agents that contain acid or chloride to clean the stainless or inox surfaces and the handle. Use a soft cloth with a liquid detergent (not abrasive) to wipe those parts clean, paying attention to sweep in one direction.

The surface might get damaged by some detergents or cleaning materials.
Do not use aggressive detergents, cleaning powders/creams or any sharp objects during cleaning.

Do not use steam cleaners for cleaning.
Aluminum filter
This filter captures oil particles in the air. You are recommended to clean your filter once a month in normal use. Please firstly remove aluminum filters for this process. Wash the filters in liquid-detergent water and install them after drying. Aluminum filters might change colour in time due to washing. This is normal and you don't need to replace the filter.

natural_image
Illustration of a hand reaching toward a tilted rectangular panel with a '1000' label on the top (no other text or symbols)
You can also wash aluminum filters in dishwasher.
Removing aluminum filters
- Push aluminum filter lock forward.
- Slightly lower the filter and pull forth. Otherwise, you may bend the filter.
- After washing, reverse the steps above to re-install the aluminum filter.
Carbon filter (Use without chimney)

Carbon filter should never be washed.
It should be replaced once every 4 months in normal use. You may obtain carbon filters from the Authorised Service.
Fitting the carbon filter
- Remove aluminum filters
- After the filters are removed, insert the side with flexible-short tips of the carbon filter which provided with the product, into the slot A of the hood in direction 1.

- Insert the long-hard tips found on the other side of the carbon filter into the slot B in direction 2.
- Ensure that both ends of the carbon filter are secured firmly.
Replacing the lamp

DANGER:
Before replacing the lamp, make sure that the product is disconnected from mains in order to avoid the risk of an electrical shock. If hot, let the lamp cool down. Hot surfaces may cause burns!

The hood lamp in this product can be changed by the user.

For the specifications of the lamp, see Technical specifications, page 9. Oven lamps can be obtained from Authorised Service Agents.

Position of lamp might vary from the figure.

The lamp used in this appliance is not suitable for household room illumination. The intended purpose of this lamp is to assist the user to see foodstuffs.
- Remove the lamp pressing it towards its seat in clockwise direction (1) and then remove turning it in counterclockwise direction (2).

- Insert the new lamp turning it in clockwise direction.
- A "click" will be heard when the lamp is secured in its place.
6 Troubleshooting
Product does not operate.
- The mains fuse is defective or has tripped. → → → Check fuses in the fuse box. If necessary, replace or reset them.
- Product is not plugged into the socket. → → Check the plug connection.
- Speed button might not be set. → → → Press the required speed button.
- Power is cut. → → → Check if there is power. Check the fuses in the fuse box. If necessary, replace or reset the fuses.
Hood light does not work.
- Hood lamp is defective. → → → Replace the hood lamp.
- Power is cut. → → → Check if there is power. Check the fuses in the fuse box. If necessary, replace or reset the fuses.

Consult the Authorised Service Agent or the dealer where you have purchased the product if you cannot remedy the trouble although you have implemented the instructions in this section. Never attempt to repair a defective product yourself.
GRUNDIG
Afzuigkap
Gebruikershandleiding

natural_image
Simple line drawing of a chimney emitting steam (no text or symbols)NL
Gelieve eerst deze gebruikershandleiding te lezen!
Beste klant,
Dank u voor het aankopen van een Grundig-product. We hopen dat u de beste resultaten verkrijgt uit uw product, dat vervaardigd is met de allernieuwste technologie van hoge kwaliteit. Lees daarom deze volledige
gebruikershandleiding en alle andere bijgevoegde documenten zorgvuldig door voordat u het product in gebruik neemt en houd deze ter referentie voor toekomstig gebruik. Als u het product aan iemand anders overdraagt, voeg daar dan de gebruikershandleiding ook bij. Volg alle waarschuwingen en informatie in deze gebruikershandleiding op.
Vergeet niet dat deze gebruikershandleiding ook van toepassing kan zijn op verschillende andere modellen. De verschillen tussen de modellen zijn duidelijk aangegeven in de handleiding.
Verklaring van symbolen
In deze gebruikershandleiding worden de volgende symbolen gebruikt:
| Belangrijke informatie of nuttige aanwijzingen over het gebruik. | |
| Waarschuwing voor levensgevaarlijke situaties en schade aan eigendommen. | |
| Waarschuwing voor een elektrische schok. | |
| Waarschuwing voor brandgevaar. | |
| Waarschuwing voor hete oppervlakken. |
INHOUDSOPGAVE
1 Belangrijke instructies en waarschuwingen voor veiligheid en milieu 4
Algemene veiligheid....4
Elektrische veiligheid....5
Productveiligheid......6
Bedoeld gebruik 8
Veiligheid van kinderen......8
Het oude product afvoeren .....9
Verpakkingsmateriaal afvoeren ....9
2 Algemene informatie 10
Overzicht 10
Afleveringsomvang......11
Technische specificaties......11
3 Installatie 12
Installatie 12
Toekomstig transport......18
4 De afzuigkap bedienen 20
5 Onderhoud en verzorging 22
Algemene informatie......22
De lamp vervangen....23
6 Problemen oplossen 25
1 Belangrijke instructies en waarschuwingen voor veiligheid en milieu
Dit gedeelte bevat veiligheidsvoorschriften die helpen persoonlijk letsel of schade aan eigendommen te voorkomen. Het niet opvolgen van deze instructies laat alle garantie vervallen.
Algemene veiligheid
- Dit apparaat kan worden gebruikt door kinderen vanaf 8 jaar en personen met verzwakte fysieke, zintuiglijke of mentale toestand, of met een gebrek aan ervaring en kennis, als deze onder toezicht staan of instructies zijn gegeven betreffende het veilige gebruik van het apparaat en op de hoogte zijn van de betrokken gevaren.
Laat kinderen niet met het apparaat spelen. Reiniging en gebruikersonderhoud dienen niet zonder toezicht door kinderen uitgevoerd te worden.
- Vergiftigingsgevaar! Als het apparaat in werking is, wordt uit het hele huis lucht afgezogen. Indien er niet voor juiste ventilatie wordt gezorgd, worden afvoergassen en giftige gassen die vrijkomen door verbranding terug in huis gevoerd door trek van de schoorsteen. Gebruik het apparaat niet samen met bronnen die giftige gassen kunnen uitstoten en trek veroorzaken (hout-, gas-, olie-, kolenkachels, heetwatertoestellen, ketels, enz.).
- Laat een erkende persoon altijd de geschiktheid van de ventilatie en de trek van de schoorsteen bij u in het gebouw controleren.
- Dit apparaat is niet bedoeld voor gebruik door personen (kinderen inbegrepen) in verzwakte fysieke, zintuiglijke of mentale toestand, of met
een gebrek aan ervaring en kennis, tenzij ze toezicht of instructies kregen betreffende
Kinderen moeten onder toezicht staan om ervoor te zorgen dat ze niet spelen met het apparaat.
Procedures voor reiniging en gebruikersonderhoud mogen niet door kinderen worden uitgevoerd, mits ze onder toezicht staan.
- Laat de installatie en reparatiewerkzaamheden altijd uitvoeren door een bevoegde serviceagent. De fabrikant is niet aansprakelijk voor schade die voortvloeit uit werkzaamheden door onbevoegde personen.
- Gebruik het apparaat niet als het defect is of zichtbare schade vertoont.
• Zorg ervoor dat het apparaat na ieder gebruik altijd uitgeschakeld wordt.
- Indien het product voor persoonlijk of tweedehands gebruik aan iemand anders wordt overgedragen, dienen de gebruikershandleiding,
productetiketten en andere relevante documenten en onderdelen ook te worden overhandigd.
- Apparaat dient geïnstalleerd te worden door een bekwaam persoon in overeenstemming met de van kracht zijnde voorschriften. Anders kan de garantie komen te vervallen.
Elektrische veiligheid
- Om uw product gereed voor gebruik te maken, moet u eerst de installatieplek en de elektrische bedrading voorbereiden. Daarna kunt u de bevoegde servicedienst bij u in de buurt bellen.
- Indien het product een defect heeft, moet het niet in gebruik worden genomen zonder dat het gerepareerd is door een bevoegde servicedienst. Er is kans op elektrische schokken!
- Steek nooit de stekker van de afzuigkap in het
stopcontact voordat de installatie is voltooid.
- Raak de stekker nooit met natte handen aan! Trek nooit aan het snoer, maar aan de stekker om het apparaat uit het stopcontact te verwijderen.
- Het product moet van het elektriciteitsnet afgesloten zijn tijdens installatie, onderhoud, reiniging en reparatiewerk.
- Als het voedingskabel beschadigd is, moet deze worden vervangen door de producent, door zijn onderhoudsdienst of door een gelijkaardige bevoegde persoon om gevaar te voorkomen.
- Sluit de stroomkabel nooit dichtbij de kookplaat aan. Als de kabel smelt, kan het brand veroorzaken.
- Werk aan elektrische apparatuur of systemen mag uitsluitend worden uitgevoerd door bevoegde en gekwalificeerde personen.
- Zet in geval van schade het product uit en sluit het af van het elektriciteitsnet.
Trek hiervoor thuis de zekering uit.
- Zorg ervoor dat de stroomwaarde van de zekering compatibel is met het product. - Spoel het product nooit af met water! Er is kans op elektrische schokken!
Productveiligheid
- De hoogte tussen de laagste oppervlak van de afzuigkap en het hoogste gedeelte van de kookplaat mag niet minder zijn dan 650 mm.
- Raak de lamp van de afzuigkap nooit aan nadat deze gedurende lange tijd heeft gewerkt. Hete lampen kunnen uw handen branden.
- Laat het product nooit werken zonder oliefilter. Verwijder de filters nooit als het product in gebruik is.
- Voorkom hoge vlammen onder het product. Anders kunnen deeltjes op het oliefilter in brand vliegen en brand veroorzaken.
- Zet de kookplaat aan nadat u er een pan op heeft gezet.
Anders kan de oplopende temperatuur bepaalde delen van uw product misvormen.
- Zet de kookplaat uit voordat u de pan eraf neemt.
- Voorkom ontvlambare materialen onder de afzuigkap.
- Stel het product niet bloot aan open vlammen onder de kap. Het kan opgehoopt vet in het filter in brand laten vliegen. Laat het product niet werken zonder filter.
- Laat het kooktoestel nooit onbeheerd achter bij het frituren van eten; de olie kan ontvlammen en kokende olie kan brand veroorzaken. Wees ook voorzichtig met stoffen en gordijnen.
- Als de afzuigkap niet regelmatig en juist wordt gereinigd, kan dit brandgevaar opleveren.
- Om de keuken te ontdoen van kookgeurtjes en - stoom, houdt u de nadat u heeft gekookt of gebakken
de afzuigkap nog 15 minuten aan.
- De ruimte waar de afzuigkap wordt geplaatst moet voldoende ventilatie hebben als deze wordt gebruikt naast andere apparaten die gas of andere brandstoffen verbranden. (Niet van toepassing op apparaten die de lucht alleen) terug in de ruimte afvoeren).
- In de omgeving waar de afzuigkap wordt gebruikt, moet de uitlaat van olie- of gasapparaten, zoals verwarming, absoluut geïsoleerd zijn of het apparaat moet van een hermetisch type zijn.
- Als er zich een olie- of gasapparaat in de omgeving bevindt, moet de ruimte voldoende worden geventileerd.
- Als een niet-elektrisch apparaat gelijktijdig met de afzuigkap in de omgeving wordt gebruikt, mag de negatieve druk in de ruimte maximaal 0,4 mbar zijn om te voorkomen dat vanuit de afzuigkap de uitlaatgassen
van het andere apparaat terug in de ruimte komen.
- Sluit de afzuigkap nooit aan op schoorstenen die voor verwarmingen of rookgas worden gebruikt of die opgaande vlammen bevatten. Respecteer de voorschriften van de autoriteiten over de afvoer van afvallucht.
- Gebruik bij de aansluiting van de schoorsteen pijpen met een doorsnee van 120 mm. De pijpaansluiting moet zo kort mogelijk zijn met zo min mogelijk buigingen.
- Hang geen makkelijk ontvlambare en brandbare materialen aan de handgrepen van de afzuigkap.
- Ons bedrijf is nooit aansprakelijk voor problemen die voortkomen uit het gebruik zonder naleving van bovenstaande waarschuwingen.
- Er bestaat brandgevaar als de reiniging niet volgens de instructies wordt uitgevoerd.
- Flambeer niet onder de afzuigkap.
- Opgelet: Toegankelijke onderdelen kunnen tijdens gebruik met een kookapparaat heet worden.
- U wordt aangeraden uw filter bij normaal gebruik eenmaal per maand te reinigen.
Bedoeld gebruik
Dit product is bedoeld voor huishoudelijk gebruik.
Commercieel gebruik is niet toegestaan.
De fabrikant is niet aansprakelijk voor schade veroorzaakt door foutief gebruik of bediening.
Veiligheid van kinderen
- Houd kinderen bij het product vandaan als het in gebruik is en sta niet toe dat ze ermee spelen.
- Verpakkingsmateriaal is gevaarlijk voor kinderen. Bewaar het verpakkingsmateriaal op een plek buiten het bereik van kinderen en sorteer en verwijder het overeenkomstig de
richtlijnen voor de afvoer van afval.
- Elektrische producten zijn gevaarlijk voor kinderen. Houd kinderen bij het product vandaan als het in gebruik is en sta niet toe dat ze ermee spelen.
Het oude product afvoeren Voldoet aan de WEEE-richtlijn en de richtlijnen voor afvoeren van het restproduct:

Dit product voldoet aan de EU- richtlijn WEEE (2012/19/EU). Dit product is voorzien van een classificatiesymbool voor afvalsortering van elektrische en elektronische apparatuur (WEEE). Dit product werd vervaardigd uit onderdelen en materialen van hoge kwaliteit die hergebruikt kunnen worden en geschikt zijn voor recycling. Gooi het restproduct aan het einde van zijn levensduur niet weg bij normaal huishoudelijk of ander afval. Breng het naar het verzamelpunt voor recycling van elektrische en elektronische apparatuur. Raadpleeg uw plaatselijke autoriteiten om te weten waar u deze verzamelpunten aantreft.
Voldoet aan RoHS-richtlijn:
Het door u aangekochte product voldoet aan de EU-richtlijn RoHS (2011/65/EU). Het bevat geen schadelijke en verboden materialen die in deze richtlijn zijn opgenomen.
Verpakkingsmateriaal afvoeren
- Verpakkingsmateriaal is gevaarlijk voor kinderen. Houd verpakkingsmateriaal op een veilige plek buiten het bereik van kinderen. Verpakkingsmateriaal van het product wordt vervaardigd van recyclebaar materiaal. Voer het netjes af en sorteer het overeenkomstig de regels voor recyclebaar afval. Werp het niet weg bij het normale huisafval.
2 Algemene informatie
Overzicht

1 Behuizing afzuigkap
2 Bedieningspaneel
3 Aluminium filtervergrendeling
4 Aluminium filter
5 Lamp
Afleveringsomvang

De bijgeleverde accessoires kunnen variëren, afhankelijk van het apparaatmodel. Het is mogelijk dat uw apparaat niet alle accessoires bevat die in de gebruikershandleiding worden beschreven.
- Gebruikershandleiding
- Verbindingsstuk voor de wand

natural_image
Metal plate with hexagonal grid pattern and two mounting holes (no text or symbols)- Onderdeel voor de luchtstroom

natural_image
3D rendered mechanical component with no visible text or symbols- Adapter voor schoorsteenaansluiting

natural_image
3D rendered image of a mechanical pipe fitting (no text or symbols visible)- Kleppen die terugkomende luchtstroom voorkomen

natural_image
3D rendered object resembling a cylindrical container with a curved top and side gap (no text or symbols)Technische specificaties
| Buitenste afmetingen (hoogte/breedte/diepte) | min. 760 mm max. 915 mm/598 mm/490 mm |
| Elektrische spanning / frequentie | 220-240 V ; 50/60 Hz |
| Bediening | 3 niveau + 1 Booster |
| Afzuigvermogen | 680 m3/h |
| Totaal stroomverbruik | max. 100 W |
| Zekering | 3 A |
| Diameter luchtuitlaatpijp | 120-150 mm |

De technische specificaties mogen zonder voorafgaande kennisgeving gewijzigd worden om de productkwaliteit te verbeteren.

De afbeeldingen in deze handleiding zijn schematisch en komen mogelijk niet exact overeen met het product.

Waarden aangegeven op de aantekeningen van het product of in andere gedrukte documenten geleverd bij het product worden verkregen onder laboratoriumcondities volgens relevante standaarden. Deze waarden kunnen schommelen afhankelijk van de werkings- en omgevingsomstandigheden van het product.

Installatie
Schakel de dichtstbijzijnde bevoegde serviceagent in voor de installatie van het product. Zorg ervoor dat de elektriciteitsvoorzieningen aanwezig zijn voordat u contact opneemt met de bevoegde serviceagent, zodat het product gebruiksklaar is. Indien dit niet het geval is, neem dan een bevoegd elektricien en gasfitter in de arm om de vereiste maatregelen te nemen.

De voorbereiding van de locatie en de elektriciteitsinstallatie voor het product vallen onder de verantwoordelijkheid van de klant.

GEVAAR:
Het product moet overeenkomstig de lokale elektriciteitsvoorschriften aangesloten worden.

GEVAAR:
Controleer vóór installatie van het product of het zichtbare gebreken heeft. Zo ja, laat het dan niet installeren. Beschadigde producten vormen een gevaar voor uw veiligheid.

GEVAAR:
Waarschuwing: Het niet volgens de instructies installeren van de schroeven of het bevestigingsapparaat kan elektrische gevaren tot gevolg hebben.
Installatie

* min.
Tussen het bovenste oppervlak van de kookplaat en de onderkant van de afzuigkap moet er zich een afstand van minimaal 650 mm bevinden.
De lucht die via de afzuigkap wordt afgezogen mag niet worden aangesloten op een schoorsteen die wordt gebruikt door apparaten die op gas of andere brandstoffen werken. (niet van toepassing op
apparaten die de lucht alleen terug in de ruimte afvoeren) De voorschriften inzake luchtafzuiging dienen te worden nageleefd.
Elektrische aansluiting
Vervaardigd met een 2-sporige stroomkabel moet dit apparaat met minstens 3 mm afstand tussen de bipolaire contacten worden aangesloten op de stroom. Laat de elektrische aansluiting uitvoeren door een erkend elektricien.
- Installeer uw apparaat dusdanig dat u na de installatie de stroomaansluiting (stekker, stopcontact) eenvoudig kunt bereiken.
De afzuigkap installeren

Alle afmetingen zijn in mm.
Hierna volgt informatie die nodig is om de installatieplaats van de afzuigkap voor te bereiden. De afzuigkap moet worden geïnstalleerd boven het middelpunt van het kooktoestel. Tussen het bovenste oppervlak van de kookplaat en de onderkant van de afzuigkap moet er zich een afstand van minimaal 650 mm bevinden. Voer de volgende stappen uit voor installatie van de afzuigkap.

-
Om het kooktoestel te centreren tekent u een aslijn die dezelfde hoogte heeft als de bovenstaande afbeelding. Boor dan, met deze aslijn als referentie en volgens de bovenstaande afmetingen, 7 gaten met een afmeting die overeenkomt met de bevestigingen die met het product zijn meegeleverd.
-
Doe de kunststof pluggen die zijn meegeleverd in deze gaten. Controleer of de aansluitstukken van de schoorsteen wel of niet met deze gaten overeenkomen.

natural_image
Diagram of a mechanical assembly with two parallel strips mounted on a rectangular plate, showing alignment and mounting points (no text or symbols)-
Bevestig de wandbevestigingen op hun overeenstemmende gaten met de twee bevestigingsschroeven die met de accessoires zijn meegeleverd. Zie bovenstaande afbeelding.
-
Bevestig voor elektronische modellen de elektronische printplaat in zijn behuizing met 4 schroeven. Zie onderstaande afbeelding.

natural_image
Technical illustration of a mechanical device with an inset close-up showing a component detail (no text or symbols present)- Bevestig de afzuigkap aan de wand door deze te centreren met de gaten A. Verwijder de aluminium filters uit de afzuigkap. Bevestig aan de binnenkant de achterplaat van de
afzuigkap met gat B en gebruik daarvoor een schroef zoals in onderstaande afbeelding wordt getoond. Zorg ervoor dat de afzuigkap bij bevestiging parallel loopt aan het aanrechtblad.

- Plaats de dekplaat (C) die de terugslag van de luchtstroom voorkomt, op de schoorsteenuitgang. Zie onderstaande afbeelding.

natural_image
3D mechanical assembly diagram showing a presser labeled 'C' mounted on a base platform, enclosed in a rectangular frame (no text or symbols beyond label)- Voor gebruik met schoorsteenaansluiting:
In installatie met schoorsteenaansluiting wordt de opgenomen lucht door de aluminium filters geleid en door de aansluitpijp naar buiten geblazen.

natural_image
3D mechanical assembly diagram showing a base with a component labeled 'D' and a vertical structure, enclosed in a rectangular frame (no text or symbols beyond label)Bij gebruik van deze aansluitingmethode wordt de aansluitadapter voor de schoorsteen D op deel C geplaatst. Zie bovenstaande afbeelding.

De aansluitadapter voor de schoorsteen D wordt alleen gebruikt als de pijpdiameter van de schoorsteenaansluiting 120 mm is. Als de pijpdiameter van de schoorsteenaansluiting 150 mm is, heeft u de aansluitadapter voor de schoorsteen D niet nodig en moet u een uiteinde van de aansluitpijp van de schoorsteen E direct op afdekplaat C aansluiten.
- Sluit een uiteinde van de aansluitpijp van de schoorsteen E op de aansluitadapter voor de 15/NL
schoorsteen E en plaats het andere uiteinde op de schoorsteen. U kunt een aansluitpijp van de schoorsteen E krijgen bij de erkende servicedienst of in een winkel

natural_image
3D mechanical assembly diagram showing a cylindrical component with a downward force arrow, mounted on a base platform (no text or symbols)U moet ervoor zorgen dat d aansluitpijpen voor de schoorsteen vervaardigd zijn uit brandveilig kunststof materiaal. Bij gebruik van een flexibele aansluitpijp moet er rekening mee worden gehouden dat scherpe hoeken en plotselinge samentrekking een negatieve invloed heeft op de luchtafzuiging. De afzuigkap mag nooit worden aangesloten op een schoorsteen waar al een ander apparaat op is aangesloten.

Aansluitpijp mag niet groter zijn dan 120 mm; anders zal de schoorsteen niet goed kunnen worden aangesloten.
9. Interne circulatie (gebruik met koolstofffilter)
Bij interne circulatie gaat de lucht die uit de omgeving wordt
opgenomen door aluminium en koolstoffilters. Hier wordt de geur verwijderd en wordt de lucht door een
luchtrichtingscomponent geleid. Daarna wordt de lucht door de ventilatieroosters aan de zijkant van het schoorsteendeel terug in de ruimte geblazen.

natural_image
Four mechanical component cutouts shown from different angles (no text or symbols visible)Monteer het
luchtrichtingscomponent, dat bestaat uit twee afzonderlijke onderdelen, zoals getoond in de afbeelding.
Volg onderstaande stappen voor gebruik zonder schoorsteen. U kunt een aansluitpijp van de schoorsteen E en de aansluitelementen F krijgen bij de erkende servicedienst of in een winkel.

natural_image
Diagram of a rectangular panel with two horizontal bars and circular holes, no text or symbols present


natural_image
3D mechanical assembly diagram showing a presser with labeled components (F, C) and a base platform, no text or symbols present.
- Verwijder de aluminium filters zoals hieronder aangegeven.

natural_image
Illustration of a hand holding a transparent panel with a ruler, placed on a surface (no text or symbols visible)11.Installeer het koolstofffilter zoals in de volgende afbeelding wordt getoond.

Plaats de aluminium filters terug.
- Installatie van de schoorsteen Plaats om de bovenste schoorsteen te installeren de bovenste hoeken ervan op het bovenste wandaansluitstuk en gebruik de schroeven om de schoorsteen op het wandaansluitstuk te bevestigen. Zie onderstaande afbeelding.

natural_image
3D mechanical assembly diagram showing a cylindrical component mounted on a base plate, with no visible text or symbols.Om de onderste schoorsteen te installeren, rekt u de schoorsteen enigszins uit door deze aan beide zijden uit te trekken en deze over de sleuven van de bovenste schoorsteen te bevestigen, zoals in de bovenstaande afbeelding.

natural_image
3D diagram of a mechanical assembly with a cylindrical component mounted on a base, shown without any text or symbols.Bevestig hem op de afzuigkap door de twee gaten in de onderste hoeken van de onderste schoorsteen.
U kunt uw afzuigkap op twee manieren gebruiken:
1- Gebruik met schoorsteenaansluiting
De stoom wordt verdreven via de schoorsteenpijp die aan de aansluitring op de afzuigkap is bevestigd. De doorsnee van de schoorsteenpijp moet gelijk zijn aan de aansluitring. Om gemakkelijke luchtafvoer vanuit de ruimte in horizontale stand mogelijk te maken, moet de pijp enigszins oplopend worden geplaatst (ongeveer 10°).

Indien uw afzuigkap een koolstofffilter geïnstalleerd heeft, dient u deze te verwijderen als u de afzuigkap met de schoorsteen gebruikt.
2- Gebruik zonder schoorsteenaansluiting
De lucht wordt gefilterd door het koolstofffilter en teruggebracht in de ruimte. Het koolstofffilter wordt gebruikt als er in huis geen schoorsteen beschikbaar is of als het niet mogelijk is een schoorsteenpijp te installeren.
- Installeer het koolstofffilter zoals omschreven in de installatiesectie.
Toekomstig transport
- Bewaar de originele doos van het product en vervoer het product daarin. Volg de aanwijzingen op de doos. Als u de originele doos niet hebt, verpak het product dan in
luchtkussenfolie of dik karton en tape het goed vast.

Plaats geen voorwerpen op het product en verplaats het rechtopstaand.

Controleer globaal het uiterlijk van uw product op eventuele schade die tijdens het transport werd veroorzaakt.
4 De afzuigkap bedienen
De afzuigkap is uitgerust met een motor met diverse snelheden. Voor een beter resultaat adviseren wij u onder normale omstandigheden lage snelheden te gebruiken en hoge snelheden bij intensieve geuren en dampen.

1 Aan/uit-knop / Snelheid1
2 Snelheid2
3 Snelheid3 / Booster
4 Functietoets
5 Verlichtingstoets
6 Display

Symbool automatische uitschakeling
Boostersymbool

Waarschuwingssymbool voor vol filter

Symbool voor luchtfiltermodus
De afzuigkap bedienen
- Druk op de aan/uit-knop om de afzuigkap in te schakelen.
- Druk op knoppen Snelheid 2 en Snelheid 3 om de snelheid te veranderen.
» Het snelheidsniveau van de afzuigkap wordt weergegeven.

Raak beide knoppen niet gelijktijdig aan. Als u dit toch doet, wordt de hoogste snelheid geactiveerd.

Het apparaat werkt maximaal 6 uur als er tijdens de werking geen knop wordt ingedrukt.
Automatische uitschakelmodus
- Druk op de functieknop terwijl het apparaat op een bepaalde snelheid werkt. De automatische uitschakelmodus wordt geactiveerd en het symbool wordt weergegeven.
- Het apparaat wordt na 20 minuten werken op het ingestelde niveau automatisch uitgeschakeld.

De automatische uitschakelmodus wordt geannuleerd als een willekeurige niveauknop, behalve de verlichtingsknop, wordt ingedrukt.
Activeren van de intensieve ventilatiemodus (Booster)
Houd de knop voor Snelheid 3 meer dan twee seconden ingedrukt. De intensieve ventilatiemodus wordt geactiveerd en P en het symbool worden weergegeven. Het apparaat is gedurende maximaal 10 minuten actief. Na 10 minuten gaat de werking verder op Snelheid 3. Als tijdens intensieve ventilatie een van de snelheidsknoppen wordt
ingedrukt, gaat de werking verder op die snelheid.
De afzuigkap uitschakelen
- Druk op de Uit-knop als de afzuigkap op een bepaalde snelheid werkt.
» Als de afzuigkap wordt uitgeschakeld, knippert gedurende 8 seconden "0" op het display terwijl de motor stopt met draaien. Dit is geen fout.
De lamp bedienen
- Toets op de verlichtingsknop om de verlichting aan te zetten.
De lamp uitzetten
- Druk nogmaals op de verlichtingsknop om de lamp uit te zetten.

De aan/uit-knop zet de verlichting niet uit. Deze stopt alleen de werking van de afzuigkap.
Luchtfiltermodus
- Druk op de functieknop terwijl het apparaat op geen enkele snelheid werkt.
» De luchtfiltermodus wordt geactiveerd en C en het symbool worden weergegeven.
- De luchtfiltermodus zal gedurende 10 minuten op snelheid 1 werken en dan binnen 1 uur 50 minuten stoppen. Als de luchtfiltermodus niet uitgeschakeld wordt, blijft deze gedurende 24 uur ieder uur 10 minuten werken en 50 minuten stoppen.

U kunt de luchtfiltermodus gebruiken om langere tijd op lage snelheid geuren in huis te verwijderen.
De luchtfiltermodus uitschakelen
- Schakel de luchtfiltermodus uit door op elke willekeurige snelheidsknop of de uit-knop te drukken terwijl de luchtfiltermodus actief is.

Indien de luchtfiltermodus actief is, zal bij het aan- en uitzetten van het apparaat op elke willekeurige snelheid de luchtfiltermodus niet worden onthouden.

Indien de luchtfiltermodus actief is, wordt deze geannuleerd als er zich een stroomonderbreking voordoet.
Waarschuwing voor vol filter
Na iedere 100 uur werkzaam zijn, gaan het F-symbool en het ingestelde niveau in het display knipperen. Ook verschijnt symbool

op het scherm. Reinig het filter.
De waarschuwing voor vol filter wordt niet automatisch gereset na de reiniging.
De waarschuwing voor vol filter kan worden gereset door de functie- en Snelheid3-knop gedurende 3 seconden gelijktijdig in te drukken.

Als de afzuigkap een vol filter-waarschuwing gaf, wordt de waarschuwing bij een stroomstoring niet gereset.
5 Onderhoud en verzorging
Algemene informatie
De levensduur van het product zal worden verlengd en er zullen minder vaak problemen zijn als het product regelmatig wordt gereinigd.

GEVAAR:
Sluit het product van de stroom af voor te beginnen met onderhoudsen reinigingswerk.
Er is kans op elektrische schokken!
- Reinig het product grondig na ieder gebruik. Zo kunt u kookresten gemakkelijker verwijderen, en voorkomt u dat ze verbranden als u het apparaat de volgende keer gebruikt.
- Er zijn geen speciale reinigingsmiddelen vereist om het product te reinigen. Gebruik warm water met wasvloeistof, een zachte doek of spons voor het reinigen van het product en een droge doek om het te drogen.
- Gebruik voor het reinigen van roestvrijstalen oppervlakken en de handgreep geen reinigingsmiddelen die zuur of chloride bevatten. Gebruik een zachte doek met een vloeibaar detergent (niet-schurend) om deze onderdelen schoon te vegen, en let erop dat u in één richting veegt.

Het oppervlak kan beschadigd geraken door sommige detergenten of reinigingsmaterialen. Gebruik geen agressieve detergenten, reinigingspoeder/melk of scherpe voorwerpen tijdens het reinigen.

Gebruik geen stoomreinigers om schoon te maken.
Aluminium filter
Dit filter vangt oliedeeltjes in de lucht op. U wordt aangeraden uw filter bij normaal gebruik eenmaal per maand te reinigen. Verwijder voor dit proces eerst de aluminium filters. Reinig de filters in water met vloeibaar reinigingsmiddel en plaats ze terug na droging. Aluminium filters kunnen door het wassen met de tijd van kleur veranderen. Dit is normaal en u hoeft het filter niet te vervangen.

natural_image
Illustration of a hand holding a small object above a tilted rectangular panel (no text or symbols visible)
U kunt de aluminium filters ook in de vaatwasmachine reinigen.
Aluminium filters verwijderen
- Duw de aluminium filtervergrendeling naar voren.
- Laat het filter enigszins naar beneden en trek naar voren. Anders kan u het filter buigen.
- Draai de handelingen na de reiniging om om het aluminium filter terug te plaatsen.
Koolstofffilter (gebruik zonder schoorsteen)

Het koolstofffilter mag nooit gewassen worden.
Het moet bij normaal gebruik iedere 4 maanden vervangen worden. U kunt koolstoffilters verkrijgen bij uw erkende servicedienst.
Het koolstofffilter plaatsen
- Verwijder de aluminium filters
- Nadat de filters zijn verwijderd, steekt u de kant met de flexibele korte uiteinden van het koolstofffilter, die met het product zijn meegeleverd, in de sleuf A van de afzuigkap in richting 1.


-
Steek de harde lange uiteinden die zich aan de andere kant van het koolstofffilter bevinden in de sleuf B in richting 2.
-
Zorg dat beide uiteinden van het koolstofffilter goed vastzitten.
De lamp vervangen

GEVAAR:
Zorg voordat u de lamp vervangt dat het product afgesloten is van het elektriciteitsnet om het risico op een elektrische schok te vermijden. Laat de lamp afkoelen als deze heet is. Hete oppervlakken kunnen brandwonden veroorzaken!

Kijk voor specificaties van de lamp Technische specificaties, pagina 11. Ovenlampen kunnen worden verkregen bij de bevoegde serviceagenten.

De positie van de lamp kan afwijken van de afbeelding.

De lamp die in dit apparaat wordt gebruikt, is niet geschikt voor huishoudelijke kamerverlichting. Het bedoeld gebruik van deze lamp is de gebruiker te helpen levensmiddelen te laten waarnemen.
- Verwijder de lamp door deze met de richting van de klok mee in
zijn behuizing te duwen (1) en verwijder deze door hem tegen de klok in te draaien (2).

- Plaats de nieuwe lamp door deze met de richting van de klok mee te draaien.
- U hoort een "klik" als de lamp goed op zijn plek zit.

De kaplamp in dit product kan door de gebruiker worden gewijzigd.
6 Problemen oplossen
Het product werkt niet.
- De hoofdzekering is defect of doorgeslagen. → → → Controleer zekeringen in de zekeringenkast. Vervang of reset deze indien nodig.
- De stekker van het product zit niet in het stopcontact. → → → Controleer de plugkoppeling.
- Snelhedenknop is mogelijk niet ingesteld. → → Druk de gewenste snelhedenknop in.
- De stroom is afgesloten. → → → Controleer of er stroom is. Controleer de zekeringen in de zekeringenkast. Vervang of reset de zekeringen indien nodig.
Afzuigkapverlichting werkt niet.
- Afzuigkapverlichting is defect. → → → Vervang de afzuigkaplamp.
- De stroom is afgesloten. → → → Controleer of er stroom is. Controleer de zekeringen in de zekeringenkast. Vervang of reset de zekeringen indien nodig.

Raadpleeg de bevoegde serviceagent of de dealer waarbij u het product hebt gekocht als u, ondanks het doorvoeren van de aanwijzingen in dit gedeelte, het probleem niet kunt oplossen. Probeer nooit om een product met gebreken zelf te repareren.


- GRUNDIG
- Cooker hood
- Afzuigkap
- Please read this user manual first!
- Explanation of symbols
- TABLE OF CONTENTS
- Important instructions and warnings for safety and environment 4
- General information 8
- Installation 10
- Operating the hood 17
- Maintenance and care 19
- Troubleshooting 21
- Important instructions and warnings for safety and environment
- General safety
- Electrical safety
- Product safety
- Intended use
- Children's safety
- Disposing of the old product Compliance with the WEEE Directive and Disposing of the Waste Product:
- Compliance with RoHS Directive:
- Package information
- General information
- Scope of delivery
- Installation
- DANGER:
- Electrical connection
- Installing the hood
- Internal circulation (Use with carbon filter)
- Installation of chimney
- You may use the hood in two ways:
- 1-Chimney-connected use
- Future transportation
- Operating the hood
- Operating the hood
- Auto off mode
- Activating intense ventilation mode (Booster)
- Turning off the hood
- Operating the lamp
- Turning off the lamp
- Air filter mode
- Turning off the air filter mode
- Filter full warning
- Maintenance and care
- General information
- Aluminum filter
- Removing aluminum filters
- Carbon filter (Use without chimney)
- Fitting the carbon filter
- Replacing the lamp
- Troubleshooting
- Product does not operate.
- Hood light does not work.
- Gelieve eerst deze gebruikershandleiding te lezen!
- Verklaring van symbolen
- INHOUDSOPGAVE
- Belangrijke instructies en waarschuwingen voor veiligheid en milieu 4
- Algemene informatie 10
- Installatie 12
- De afzuigkap bedienen 20
- Onderhoud en verzorging 22
- Problemen oplossen 25
- Belangrijke instructies en waarschuwingen voor veiligheid en milieu
- Algemene veiligheid
- Elektrische veiligheid
- Productveiligheid
- Bedoeld gebruik
- Veiligheid van kinderen
- Het oude product afvoeren Voldoet aan de WEEE-richtlijn en de richtlijnen voor afvoeren van het restproduct:
- Voldoet aan RoHS-richtlijn:
- Verpakkingsmateriaal afvoeren
- Algemene informatie
- Afleveringsomvang
- Installatie
- GEVAAR:
- Elektrische aansluiting
- De afzuigkap installeren
- Interne circulatie (gebruik met koolstofffilter)
- U kunt uw afzuigkap op twee manieren gebruiken:
- 1- Gebruik met schoorsteenaansluiting
- 2- Gebruik zonder schoorsteenaansluiting
- Toekomstig transport
- De afzuigkap bedienen
- De afzuigkap bedienen
- Automatische uitschakelmodus
- Activeren van de intensieve ventilatiemodus (Booster)
- De afzuigkap uitschakelen
- De lamp bedienen
- De lamp uitzetten
- Luchtfiltermodus
- De luchtfiltermodus uitschakelen
- Waarschuwing voor vol filter
- Onderhoud en verzorging
- Algemene informatie
- Aluminium filter
- Aluminium filters verwijderen
- Koolstofffilter (gebruik zonder schoorsteen)
- Het koolstofffilter plaatsen
- De lamp vervangen
- Problemen oplossen
- Het product werkt niet.
- Afzuigkapverlichting werkt niet.
Marke : GRUNDIG
Modell : GDK 57000 BXB
Kategorie : Dunstabzugshaube