
Adjustable Backstretcher - Massagegerät VirtuFit - Kostenlose Bedienungsanleitung
Finden Sie kostenlos die Bedienungsanleitung des Geräts Adjustable Backstretcher VirtuFit als PDF.


| Produkttyp | Verstellbarer Rückenstrecker |
| Marke | VirtuFit |
| Modell | Adjustable Backstretcher |
| Kategorie | Massagegerät |
| Abmessungen (ca.) | 40 x 30 x 10 cm (gefaltet) |
| Gewicht | 1,5 kg |
| Material | Schaumstoff und Kunststoff |
| Verstellbare Positionen | 3 Stufen |
| Anwendungsbereich | Lendenwirbelsäule und Rückenmuskulatur |
| Zweck | Dehnung und Entspannung des Rückens |
| Reinigung | Mit feuchtem Tuch abwischen; nicht eintauchen |
| Sicherheitshinweise | Nur bestimmungsgemäß verwenden; bei Schmerzen Arzt aufsuchen |
| Ersatzteile | Nicht separat erhältlich |
| Reparierbarkeit | Nicht reparierbar; bei Defekt Gerät ersetzen |
| Hersteller | VirtuFit |
| Garantie | 2 Jahre |
Häufig gestellte Fragen - Adjustable Backstretcher VirtuFit
Benutzerfragen zu Adjustable Backstretcher VirtuFit
0 Frage zu diesem Gerät. Beantworten Sie die, die Sie kennen, oder stellen Sie Ihre eigene.
Eine neue Frage zu diesem Gerät stellen
Laden Sie die Anleitung für Ihr Massagegerät kostenlos im PDF-Format! Finden Sie Ihr Handbuch Adjustable Backstretcher - VirtuFit und nehmen Sie Ihr elektronisches Gerät wieder in die Hand. Auf dieser Seite sind alle Dokumente veröffentlicht, die für die Verwendung Ihres Geräts notwendig sind. Adjustable Backstretcher von der Marke VirtuFit.
BEDIENUNGSANLEITUNG Adjustable Backstretcher VirtuFit
virtufit
Adjustable Backstretcher
User manual
natural_image
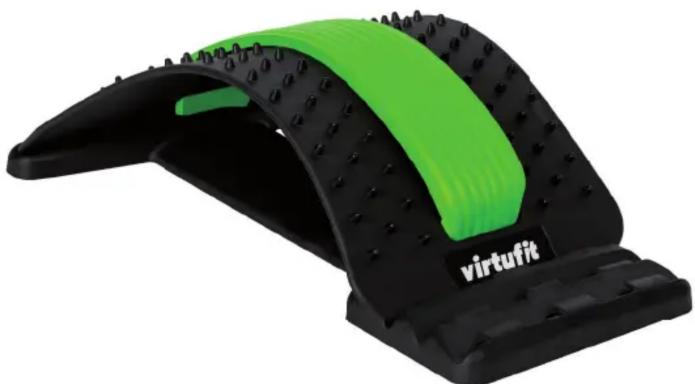
Black and green virtual reality brush tool with textured grip, labeled 'virtufit' (no other text or symbols)INSTRUCTION
natural_image
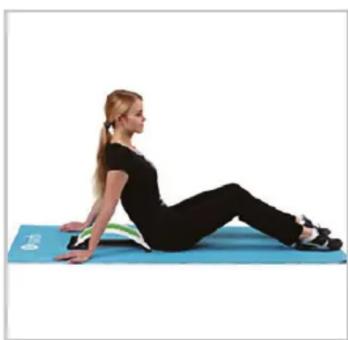
Woman performing a seated exercise on a blue mat (no text or symbols visible)Sit with your back to the arch. Slowly lie back and support with your back against the arch and your knees bent. The wide end of the device should be positioned close to the base of your spine so that the arch support supports your lumbar portion of the back. Try to center your spine in the trench. It's designed to rock your spine and provide extra comfort.
TIP! A pillow can be placed under the head for extra comfort.
STRETCH POSITIONS

natural_image
Two sequential images showing a person performing a prone exercise on a blue mat (no text or symbols visible)Simple stretch position: Relax as much as possible and breathe normally. Bend your knees and rest your arms calmly at your sides. This position provides the least amount of stretch and is easiest to complete at the beginning. If a greater stretch is desired, proceed to the following positions.
Moderate stretch position: Raise your arms over your head and shoulders and rest them on the floor as best you can for extra stretch. Over time it will get easier and you may be able to fully extend your arms while resting your elbows comfortably on the floor.
ROLLOFF AND RECOVER

natural_image
Two-panel image showing a woman performing a glute bridge exercise on a yoga mat, with no visible text or symbols.Roll onto your side and get out of the seat back. Gradually sit up and rest for 30 seconds before standing up. You have just had a good stretch and you will have to allow your blood to flow slowly back from your head and to your heart, or you may feel dizzy.
Maximum stretch position: Fully extend your arms and legs as shown in the photo, remove the pillow from under your head to experience maximum amount of stretch. Feel your back, shoulder, chest, and abs stretch. Concentrate on relaxation as much as possible.
ASSEMBLY

natural_image
Person kneeling on a blue mat holding a white card with a green stripe, next to a black foot (no text or symbols visible)FIG 1 FIG 3
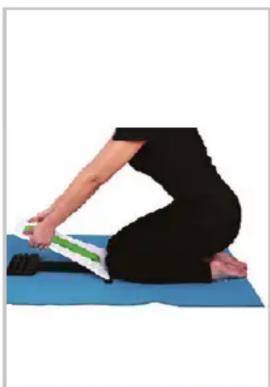
For easy arch adjustments, bend the arch as shown in FIG 1.
Lay the base and support it on a pinned mat, rug, or rug with the wide ends closest to you.
natural_image
Person performing a seated exercise on a blue mat, holding a green object (no text or symbols visible)Secure the wide end of the base against your knees. Slide the wide end of the support arch into the single slot on the wide end of the base (FIG 3).
natural_image
Person performing a yoga or stretching exercise on a blue mat (no text or symbols visible)FIG 2 FIG 4
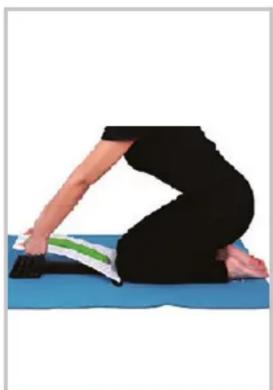
Position your hands as shown in the photo for easy arc adjustment.
NOTE! Thumbs rest on the top of the support arch and fingers can be placed underneath (FIG 2).

natural_image
Person performing a yoga pose on a blue mat, no text or symbols visiblePress your thumbs down and gently slide the narrow end of the support arch into level 1 position from the base (FIG 4).
Marke : VirtuFit
Modell : Adjustable Backstretcher
Kategorie : Massagegerät